

10 Great Apps to Turn Funny Animated Images Into Comics for 2024
10 Great Apps to Turn Funny Animated Images Into Comics
10 Great Apps for Turning Funny Animated Images into Comics
An easy yet powerful editor
Numerous effects to choose from
Detailed tutorials provided by the official channel
There are several apps available that can let you create interesting funny animated images, cartoons, and comics by adding speech bubbles, animations, and other effects.
In this article
01 [Top apps to turn pictures into cartoons](#Part 1)
02 [Best Alternative to Cartoon Apps- Wondershare Filmorapro](#Part 2)
03 [Key Takeaways](#Part 3)
Part 1 Top apps to turn pictures into cartoons
To add some fun elements to your regular images and make them even more interesting you can convert them into cartoons and comics. The task of conversion can seem to be difficult and tricky but with the availability of several apps and programs, you can achieve the desired results in just a few clicks.
With multiple options available, you are bound to get confused while selecting an app. Helping you with the same, we have shortlisted the top 10 apps in the category as below.
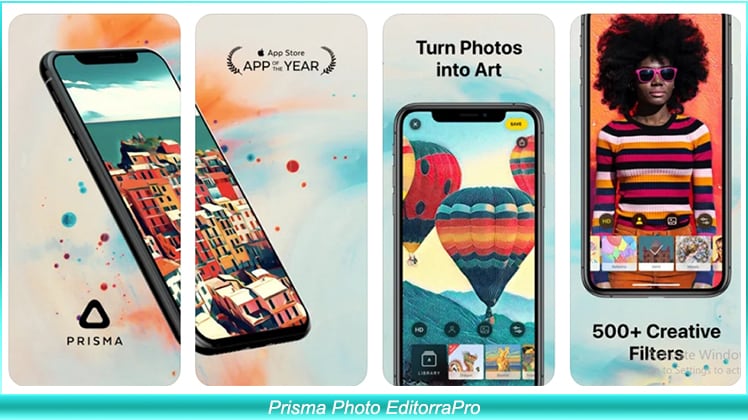
01 Prisma Photo Editor
Available for download on Android and iOS devices this is an excellent photo editing app that comes with over 300 art filters and animations. You can quickly convert your images into funny and interesting cartoons using the app in no time. Additionally, several image parameters like sharpness, exposure, brightness, and others can also be adjusted as needed.
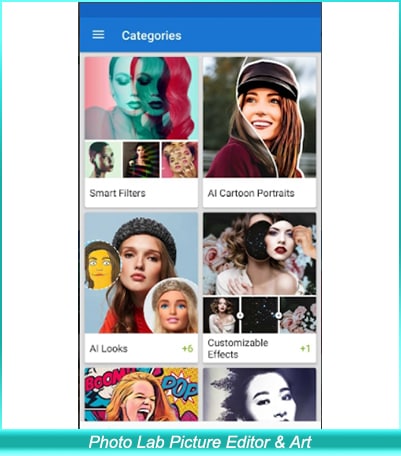
02 Photo Lab Picture Editor
This is free to use app on the Google Play Store with the IAP option. With a 4.6 high rating, the app is simple to use and offers more than 900 funny and stylish effects that can be added to your images. You can choose from photo montages, animations, filters, and other effects that match your requirements. You can even add photo frames to make your image look impressive. Create professional-looking cartoons in no time using this wonderful app.
03 MomentCam Cartoons & Stickers
This free app on Google Play Store with a 4 rating is just perfect for creating interesting cartoons and emoticons using images. The process is simple and quick where you just need to add the image and create its personalized avatar. Interesting background can also be added to further enhance the cartoon. The app also gives you the option to share the created cartoon on social media sites.

04 ToonMe
Create cartoons using your selfies and other images on your phone in just a few clicks using this high-rated app on Google Play Store. The AI of the app allows the creation of interesting full-body cartoons as well as vector portrait templates. Multiple layouts and designs are also available to choose from. The interface is simple and the app is also available for download Apple Play Store.

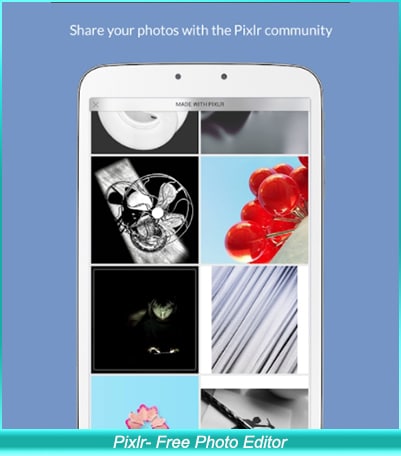
05 Pixlr- Free Photo Editor
This is a widely used image editing app that is simple and free to use. A wide range of image editing features and filters are available with the app including cartoon filters that will let you unleash your creativity and design impressive cartoons and other images. Also available for iOS devices the app also facilitates sharing the created images over social media and emails. Additional features include auto-fix, double exposure, adjusting image tone, and others.
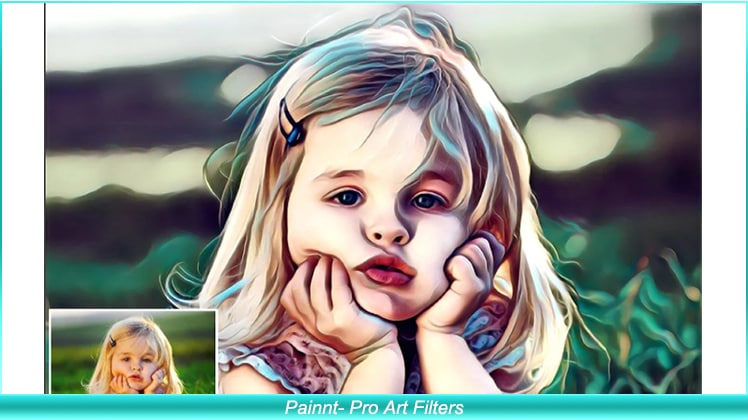
06 Painnt- Pro Art Filters
This feature-packed app on Google Store lets you create professional-looking art pieces from the images using filters and animations. With more than 1000 filters in several categories including cartoons, classical, abstract, and others you can have a creation of your choice. App uses AI and also has an option for preview and fine-tuning. You can even share your creations with the app community and over social networking sites.
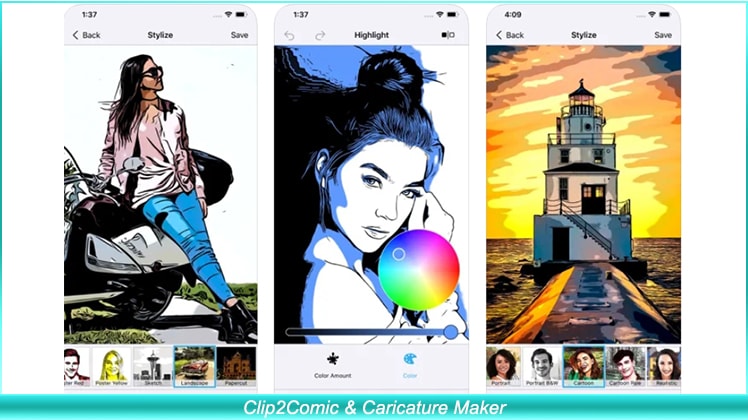
07 Clip2Comic & Caricature Maker
This is among the best app for iPhone users that allows creating funny and interesting cartoons, caricatures, and other artwork using images. Several other editing tools and filters are also available that support customizing high-quality and high-resolution images. Additionally, the app also supports editing the videos and converting them into animated clippings. The deformation filter further makes your creation look funny and interesting.
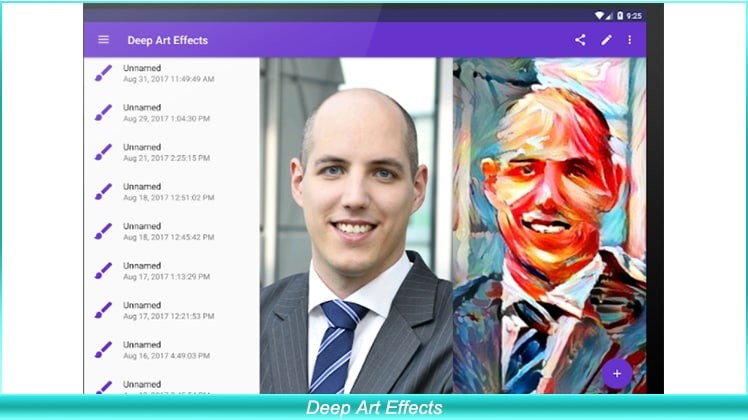
08 Deep Art Effects
This free app for Android and iOS devices comes with more than 100 effects and filters of different types including cartoon-based. Using the AI of the app, you can create impressive artwork in HD resolution. The app supports fast image processing and also supports sharing the artwork with the community. A paid premium version of the app is also available that has no ads, watermark, allows creating own filters, and has additional features.
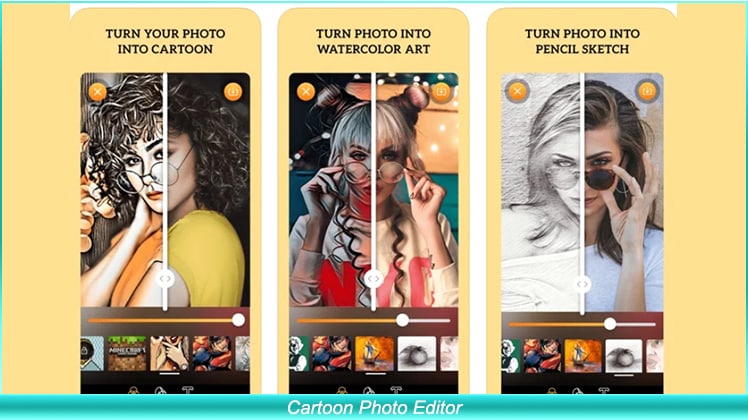
09 Cartoon Photo Editor
This free app for iOS devices will let you turn your images into cartoons like a pro. The app comes with more than 15 cartoon filters to choose from and you can even choose the art style as a retro cartoon, Minecraft, and others. The images from the device can be added to the app or you can even capture one using the camera. The created cartoons can also be shared over social media sites using the app. The pro-paid version offers additional features and functions.
10 Comica- Comics and cartoon maker
As the name suggests, this is a comics and cartoon creating an app on Google Play Store. This lightweight app is free to use and comes with legit-looking effects and allows adding speech balloons. You can even create your memes using the app and take your creativity to a new level.

Key Takeaways from This Episode
● Check out the images on your smartphone or system that can be used for creating interesting cartoons.
● Analyze multiple apps and programs that can let you add cartoon and comic effects to your selected images.
● Finalize the tool that offers the best features, is simple to use, and can quickly convert your images to funny animated images and cartoons with added functionalities.
There are several apps available that can let you create interesting funny animated images, cartoons, and comics by adding speech bubbles, animations, and other effects.
In this article
01 [Top apps to turn pictures into cartoons](#Part 1)
02 [Best Alternative to Cartoon Apps- Wondershare Filmorapro](#Part 2)
03 [Key Takeaways](#Part 3)
Part 1 Top apps to turn pictures into cartoons
To add some fun elements to your regular images and make them even more interesting you can convert them into cartoons and comics. The task of conversion can seem to be difficult and tricky but with the availability of several apps and programs, you can achieve the desired results in just a few clicks.
With multiple options available, you are bound to get confused while selecting an app. Helping you with the same, we have shortlisted the top 10 apps in the category as below.
01 Prisma Photo Editor
Available for download on Android and iOS devices this is an excellent photo editing app that comes with over 300 art filters and animations. You can quickly convert your images into funny and interesting cartoons using the app in no time. Additionally, several image parameters like sharpness, exposure, brightness, and others can also be adjusted as needed.
02 Photo Lab Picture Editor
This is free to use app on the Google Play Store with the IAP option. With a 4.6 high rating, the app is simple to use and offers more than 900 funny and stylish effects that can be added to your images. You can choose from photo montages, animations, filters, and other effects that match your requirements. You can even add photo frames to make your image look impressive. Create professional-looking cartoons in no time using this wonderful app.
03 MomentCam Cartoons & Stickers
This free app on Google Play Store with a 4 rating is just perfect for creating interesting cartoons and emoticons using images. The process is simple and quick where you just need to add the image and create its personalized avatar. Interesting background can also be added to further enhance the cartoon. The app also gives you the option to share the created cartoon on social media sites.
04 ToonMe
Create cartoons using your selfies and other images on your phone in just a few clicks using this high-rated app on Google Play Store. The AI of the app allows the creation of interesting full-body cartoons as well as vector portrait templates. Multiple layouts and designs are also available to choose from. The interface is simple and the app is also available for download Apple Play Store.
05 Pixlr- Free Photo Editor
This is a widely used image editing app that is simple and free to use. A wide range of image editing features and filters are available with the app including cartoon filters that will let you unleash your creativity and design impressive cartoons and other images. Also available for iOS devices the app also facilitates sharing the created images over social media and emails. Additional features include auto-fix, double exposure, adjusting image tone, and others.
06 Painnt- Pro Art Filters
This feature-packed app on Google Store lets you create professional-looking art pieces from the images using filters and animations. With more than 1000 filters in several categories including cartoons, classical, abstract, and others you can have a creation of your choice. App uses AI and also has an option for preview and fine-tuning. You can even share your creations with the app community and over social networking sites.
07 Clip2Comic & Caricature Maker
This is among the best app for iPhone users that allows creating funny and interesting cartoons, caricatures, and other artwork using images. Several other editing tools and filters are also available that support customizing high-quality and high-resolution images. Additionally, the app also supports editing the videos and converting them into animated clippings. The deformation filter further makes your creation look funny and interesting.
08 Deep Art Effects
This free app for Android and iOS devices comes with more than 100 effects and filters of different types including cartoon-based. Using the AI of the app, you can create impressive artwork in HD resolution. The app supports fast image processing and also supports sharing the artwork with the community. A paid premium version of the app is also available that has no ads, watermark, allows creating own filters, and has additional features.
09 Cartoon Photo Editor
This free app for iOS devices will let you turn your images into cartoons like a pro. The app comes with more than 15 cartoon filters to choose from and you can even choose the art style as a retro cartoon, Minecraft, and others. The images from the device can be added to the app or you can even capture one using the camera. The created cartoons can also be shared over social media sites using the app. The pro-paid version offers additional features and functions.
10 Comica- Comics and cartoon maker
As the name suggests, this is a comics and cartoon creating an app on Google Play Store. This lightweight app is free to use and comes with legit-looking effects and allows adding speech balloons. You can even create your memes using the app and take your creativity to a new level.
Key Takeaways from This Episode
● Check out the images on your smartphone or system that can be used for creating interesting cartoons.
● Analyze multiple apps and programs that can let you add cartoon and comic effects to your selected images.
● Finalize the tool that offers the best features, is simple to use, and can quickly convert your images to funny animated images and cartoons with added functionalities.
Best Guide for Beginners on 2D Animation Making
Best Guide for Beginners on 2D Animation Making
An easy yet powerful editor
Numerous effects to choose from
Detailed tutorials provided by the official channel
Often called traditional animation, 2D animation making mostly syncs with vector graphics via computer software. The aim is to create animated images useful in websites, advertisements, films, or computer games.
Furthermore, the 2D animation-making process includes creating storyboards, characters, and backgrounds in 2D space. Objects in 2D animation move up, down, right, and left, but not towards or away from the camera, such as in the 3D animation.
In this article
01 [Is 2D Animation Easy & How Do You Learn It?](#Part 1)
02 [The 5 Principles of Animation](#Part 2)
03 [3 Reasons to Create Animated Videos](#Part 3)
04 [5 Essential Tips for Your 2D Animation Making](#Part 4)
Part 1 Is 2D Animation Easy & How Do You Learn It?
In 2020, the video became the #1 form of media for content strategy, overtaking infographics and blogs. Undoubtedly, the power of video marketing and animated videos offer a creative, unique, and sometimes more effective way to explain a concept or tell a story.
We asked Yakkety Yak Video Producer and animator extraordinaire Sean Froelich to give us his top 2D animation tips for beginners or tell us how they can be made accessible. So, with his comments, here we’ve described all the content you need for this section and how you can learn the 2D animation making the easy way!
First, let’s look at the difference between different kinds of animation and answer the question: “What is 2D animation?”
You’re probably much more familiar with this animation style than you think. This work involves drawing 2D objects and characters within a flat space. Everything you draw only has a height and width but no depth (which would make it 3D).
So how do you get flat characters and objects to move? Here, the artist would move from the page or screen to specialist 2D animation software to sequence the individual images.
Classic Disney movies are good examples of creating 2D animation for the big screen, but it’s not only in cinema that you can find this sort of project. You might hear people asking, “is 2D animation dead?” but it’s still widely used for commercials, corporate marketing, advertising, video games, and more.
The best way to learn 2D animation making is through courses and tutorials and taking inspiration from real-time scenarios.
If you have already started learning but aren’t getting the progress you want, they are an excellent guide to get you back on the right track.
Fact Check:
A good animation includes various elements: Acting, Image Composition, Physics, film-making, body language, character design, world-building, and much more.
Even professionals use step-by-step workflows, so they don’t have to think about everything.
If even they can’t do it, why should you, as a beginner, overwhelm yourself? The best you can do is to tackle one challenge after the other.
● Deliberately practice single aspects of animation.
● Get feedback from mentors and other artists.
● Increase the difficulty step by step.
Part 2 The 5 Principles of Animation
Animators follow a list of strict principles to create the most inspiring projects. And, these five basic principles stand above the rest as the most significant ones. Your animation will look wooden and fall flat if you ignore these fundamental principles of making 2D animation video memorable.
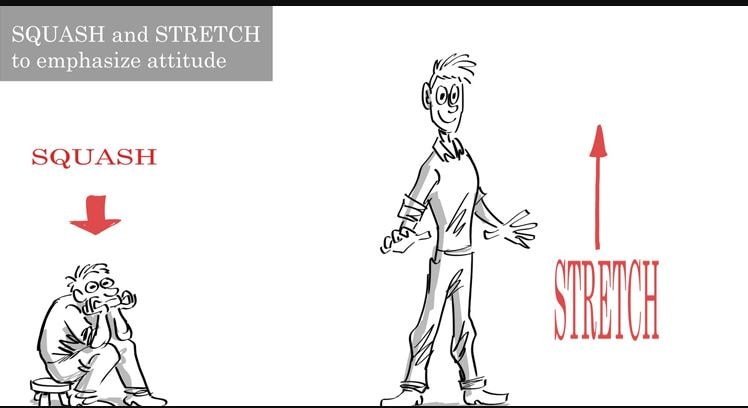
01Squash and stretch
Squash and stretch give weight and authenticity to an object. For example, imagine a rubber ball bouncing on the ground. It squashes as it hits the ground and comes back up after it stretches. On the other hand, a metal ball would barely stretch or squash.
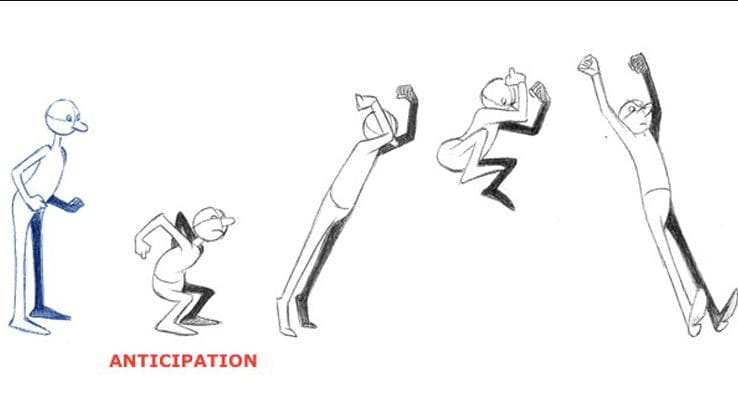
02Anticipation
Anticipation is one of the essential 2D animation-making principles to give animations a sense of grounding. For example, you must position your body to help you move before heading up from the chair. It would be unrealistic to get up without using your arms to help push your body up. This is why anticipation is crucial to consider.
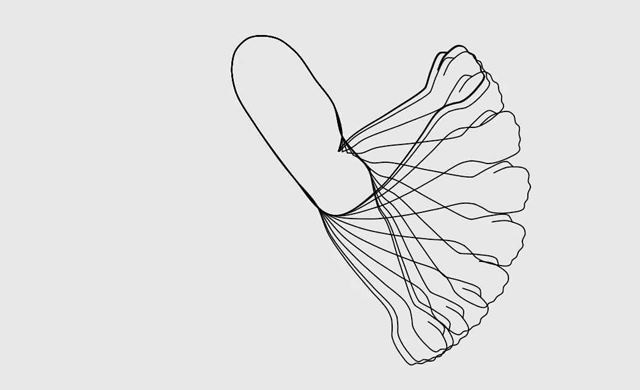
03Ease in ease out
Imagine the swinging pendulum of a clock. It slows down on each side before increasing the speed. This swinging from side to side would be the quickest in the middle and naturally slow down on each side. This is the essential aspect of easing in and out. It further moves to feel more natural.
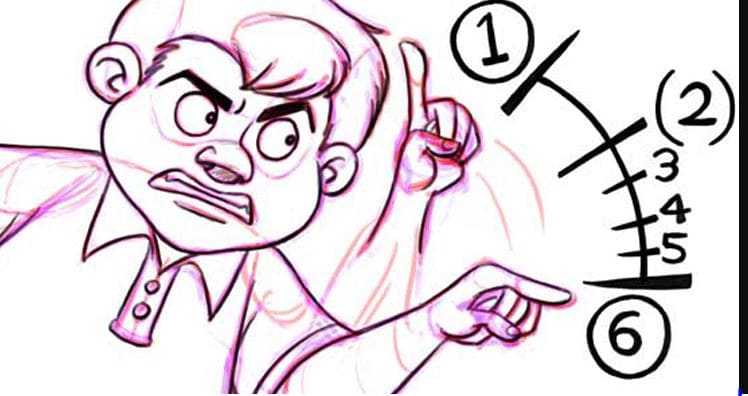
04Timing
The quantity of drawings for a given action will vary based on the movements. Fast movements get less drawing while complex and slow movements need more. Timing will give believability to your characters’ movements and objects.
05Solid Drawing
Without any practice of solid drawing, an animator cannot use it effectively animate. On the other hand, with the concept of solid drawing, the animator understands the object’s dimensions in 3D space. Therefore, depth, volume, and weight can convey to the necessary movement.
Part 2 3 Reasons to Create Animated Videos
We can describe a list of 5 reasons to use animation for business.
01It is fun
Your animation doesn’t need to be accurate or realistic. The main objective of using it in business or even cartoons is to instill entertainment and fun. It’s an ideal way to catch customers’ attention instead of strictly for marketing.
02Lasting impression
The animated videos for business leave a lasting impression on the current and new customers. Yet, you must be clear about using animation to convey your business creatively. A story too dragged from the business purpose may not be ideal for making a lasting impression.
So, convey the values you inject into a particular product so that the potential customers get attracted by the information they get from it.
03Boosts conversion rate
Due to the beautiful aspect of business animation videos, the customer is likely to finish the action expected by the brand. Therefore, more than half the visited customers will likely stay on the website with animated content instead of getting high bounce-off rates.
So, you should explain the merits of your product or service to the user in the business’s animated videos. Please add CTA at the end of the video.
Part 4 5 Essential Tips for Your 2D Animation Making
The decision to excel in 2D animation making could be a tricky task even if you are aware of its significance, as mentioned above, of animation. However, knowing the importance won’t get you on the right path without any implementation efforts.
You must implement the right strategies and know the essential factors before making animated videos for business. So, let’s discuss those points!
01Budget
The budget is the best factor because you can’t do anything without having money. So, you need to invest a fair amount or invest in decent 2D animation software for beginners. Yet, animation for business doesn’t demand a budget like creating a Pixar movie in millions. For instance, Wondershare Filmora will cost you around $156 per year, less than spending millions in outsourcing video animation work. Yet, it also depends on the style and job of business values you want to incorporate in the animation. You have to outsource if it is expert-level work!
02Brand Positioning
Consider your brand positioning! While 2D animation making, viewers tend to remember more about the brand values. They must know your identity as a brand and the whole industry.
It will allow for incorporating some brand positioning before deciding to make animation videos for business. You can check the brand’s overview from the customer’s point of view. Then, you can instill the presentation according to your business type, whether B2B or B2C, afterward.
03Target Audience
The 2D animation making also holds about the target audience, but it doesn’t mean making videos only for them necessarily. The first question is why you are creating such a video. There could be various reasons, such as attaining new customers, educating the current customers, or raising the awareness of a latest brand or a product.
04Market
You must be aware of the ideas to market your videos before even beginning the 2D animation making. The market can be Instagram, YouTube, or any other social media handle to get a high presence of a potential audience. Moreover, the video should not be too pushy.
05Do Your Research in Advance
Research is a natural starter of all the video production processes, regardless of the objective of a video. You are required to know everything there is to know about a service or a product your animated video is about to execute and plan the video’s production from beginning to end.
You should decide if the 2D animated video is a good option for the product you’re promoting since a live-action video.
Powerful Video Editor Allows You Make Wonderful Animated Videos
Animation maker Wondershare Filmora Video Editor is ideal for you looking to make stunning animated videos. It is also the best alternative to Adobe Premiere Pro or Adobe After Effects.
Key Features of Filmora
● It includes every primary and advanced editing option, including unlimited tracks, automatic stabilization, preset transitions, advanced editing, and an inbuilt screen recorder.
● Customized animations can help insert video clips and make them fascinating with a unique signature style.
● The Filmora comes with a pack of audio editing options, including an audio compressor, automatic audio sync, audio transitions, noise reduction, etc.
● Each video can be color corrected and set to high-quality video presets with control settings, auto-correction, color wheels, and scopes.
● You have a great option to use different effects such as lights & flares, texts & tiles, masking, warp & distort, etc.
For Win 7 or later (64-bit)
For macOS 10.12 or later
● Key Takeaways from This Episode →
● A guide to 2D animation making
● Five principles of 2D animation making
● Three reasons to create 2D animated videos
● Five top tips for 2D animation making
Often called traditional animation, 2D animation making mostly syncs with vector graphics via computer software. The aim is to create animated images useful in websites, advertisements, films, or computer games.
Furthermore, the 2D animation-making process includes creating storyboards, characters, and backgrounds in 2D space. Objects in 2D animation move up, down, right, and left, but not towards or away from the camera, such as in the 3D animation.
In this article
01 [Is 2D Animation Easy & How Do You Learn It?](#Part 1)
02 [The 5 Principles of Animation](#Part 2)
03 [3 Reasons to Create Animated Videos](#Part 3)
04 [5 Essential Tips for Your 2D Animation Making](#Part 4)
Part 1 Is 2D Animation Easy & How Do You Learn It?
In 2020, the video became the #1 form of media for content strategy, overtaking infographics and blogs. Undoubtedly, the power of video marketing and animated videos offer a creative, unique, and sometimes more effective way to explain a concept or tell a story.
We asked Yakkety Yak Video Producer and animator extraordinaire Sean Froelich to give us his top 2D animation tips for beginners or tell us how they can be made accessible. So, with his comments, here we’ve described all the content you need for this section and how you can learn the 2D animation making the easy way!
First, let’s look at the difference between different kinds of animation and answer the question: “What is 2D animation?”
You’re probably much more familiar with this animation style than you think. This work involves drawing 2D objects and characters within a flat space. Everything you draw only has a height and width but no depth (which would make it 3D).
So how do you get flat characters and objects to move? Here, the artist would move from the page or screen to specialist 2D animation software to sequence the individual images.
Classic Disney movies are good examples of creating 2D animation for the big screen, but it’s not only in cinema that you can find this sort of project. You might hear people asking, “is 2D animation dead?” but it’s still widely used for commercials, corporate marketing, advertising, video games, and more.
The best way to learn 2D animation making is through courses and tutorials and taking inspiration from real-time scenarios.
If you have already started learning but aren’t getting the progress you want, they are an excellent guide to get you back on the right track.
Fact Check:
A good animation includes various elements: Acting, Image Composition, Physics, film-making, body language, character design, world-building, and much more.
Even professionals use step-by-step workflows, so they don’t have to think about everything.
If even they can’t do it, why should you, as a beginner, overwhelm yourself? The best you can do is to tackle one challenge after the other.
● Deliberately practice single aspects of animation.
● Get feedback from mentors and other artists.
● Increase the difficulty step by step.
Part 2 The 5 Principles of Animation
Animators follow a list of strict principles to create the most inspiring projects. And, these five basic principles stand above the rest as the most significant ones. Your animation will look wooden and fall flat if you ignore these fundamental principles of making 2D animation video memorable.
01Squash and stretch
Squash and stretch give weight and authenticity to an object. For example, imagine a rubber ball bouncing on the ground. It squashes as it hits the ground and comes back up after it stretches. On the other hand, a metal ball would barely stretch or squash.
02Anticipation
Anticipation is one of the essential 2D animation-making principles to give animations a sense of grounding. For example, you must position your body to help you move before heading up from the chair. It would be unrealistic to get up without using your arms to help push your body up. This is why anticipation is crucial to consider.
03Ease in ease out
Imagine the swinging pendulum of a clock. It slows down on each side before increasing the speed. This swinging from side to side would be the quickest in the middle and naturally slow down on each side. This is the essential aspect of easing in and out. It further moves to feel more natural.
04Timing
The quantity of drawings for a given action will vary based on the movements. Fast movements get less drawing while complex and slow movements need more. Timing will give believability to your characters’ movements and objects.
05Solid Drawing
Without any practice of solid drawing, an animator cannot use it effectively animate. On the other hand, with the concept of solid drawing, the animator understands the object’s dimensions in 3D space. Therefore, depth, volume, and weight can convey to the necessary movement.
Part 2 3 Reasons to Create Animated Videos
We can describe a list of 5 reasons to use animation for business.
01It is fun
Your animation doesn’t need to be accurate or realistic. The main objective of using it in business or even cartoons is to instill entertainment and fun. It’s an ideal way to catch customers’ attention instead of strictly for marketing.
02Lasting impression
The animated videos for business leave a lasting impression on the current and new customers. Yet, you must be clear about using animation to convey your business creatively. A story too dragged from the business purpose may not be ideal for making a lasting impression.
So, convey the values you inject into a particular product so that the potential customers get attracted by the information they get from it.
03Boosts conversion rate
Due to the beautiful aspect of business animation videos, the customer is likely to finish the action expected by the brand. Therefore, more than half the visited customers will likely stay on the website with animated content instead of getting high bounce-off rates.
So, you should explain the merits of your product or service to the user in the business’s animated videos. Please add CTA at the end of the video.
Part 4 5 Essential Tips for Your 2D Animation Making
The decision to excel in 2D animation making could be a tricky task even if you are aware of its significance, as mentioned above, of animation. However, knowing the importance won’t get you on the right path without any implementation efforts.
You must implement the right strategies and know the essential factors before making animated videos for business. So, let’s discuss those points!
01Budget
The budget is the best factor because you can’t do anything without having money. So, you need to invest a fair amount or invest in decent 2D animation software for beginners. Yet, animation for business doesn’t demand a budget like creating a Pixar movie in millions. For instance, Wondershare Filmora will cost you around $156 per year, less than spending millions in outsourcing video animation work. Yet, it also depends on the style and job of business values you want to incorporate in the animation. You have to outsource if it is expert-level work!
02Brand Positioning
Consider your brand positioning! While 2D animation making, viewers tend to remember more about the brand values. They must know your identity as a brand and the whole industry.
It will allow for incorporating some brand positioning before deciding to make animation videos for business. You can check the brand’s overview from the customer’s point of view. Then, you can instill the presentation according to your business type, whether B2B or B2C, afterward.
03Target Audience
The 2D animation making also holds about the target audience, but it doesn’t mean making videos only for them necessarily. The first question is why you are creating such a video. There could be various reasons, such as attaining new customers, educating the current customers, or raising the awareness of a latest brand or a product.
04Market
You must be aware of the ideas to market your videos before even beginning the 2D animation making. The market can be Instagram, YouTube, or any other social media handle to get a high presence of a potential audience. Moreover, the video should not be too pushy.
05Do Your Research in Advance
Research is a natural starter of all the video production processes, regardless of the objective of a video. You are required to know everything there is to know about a service or a product your animated video is about to execute and plan the video’s production from beginning to end.
You should decide if the 2D animated video is a good option for the product you’re promoting since a live-action video.
Powerful Video Editor Allows You Make Wonderful Animated Videos
Animation maker Wondershare Filmora Video Editor is ideal for you looking to make stunning animated videos. It is also the best alternative to Adobe Premiere Pro or Adobe After Effects.
Key Features of Filmora
● It includes every primary and advanced editing option, including unlimited tracks, automatic stabilization, preset transitions, advanced editing, and an inbuilt screen recorder.
● Customized animations can help insert video clips and make them fascinating with a unique signature style.
● The Filmora comes with a pack of audio editing options, including an audio compressor, automatic audio sync, audio transitions, noise reduction, etc.
● Each video can be color corrected and set to high-quality video presets with control settings, auto-correction, color wheels, and scopes.
● You have a great option to use different effects such as lights & flares, texts & tiles, masking, warp & distort, etc.
For Win 7 or later (64-bit)
For macOS 10.12 or later
● Key Takeaways from This Episode →
● A guide to 2D animation making
● Five principles of 2D animation making
● Three reasons to create 2D animated videos
● Five top tips for 2D animation making
Best 10 Video to GIF Converters: Top Picks
Best 10 Video to GIF Converters: Top Picks
An easy yet powerful editor
Numerous effects to choose from
Detailed tutorials provided by the official channel
Having trouble converting your videos to GIF? Browse the top 10 converters to sort this out!
In this article
01 [Why GIFs are Widely Used and Popular?](#Part 1)
02 [Top 10 Ways to Turn Video into GIF](#Part 2)
Part 1 Why GIFs are Widely Used and Popular?
If you take a poll on the watch preference of GIF versus videos, most of votes you get would be in favor of watching GIFs. There are obvious reasons to the fact that anyone would prefer watching a GIF over a video, irrespective of its length. Some major ones that make it quite annoying to watch videos include the following:
● To begin with, you need to turn the video on and off, depending on your choice of watching a video or surfing through stories and feeds, failing which you get to hear additional sounds through your feed from the already running video. You further need to stop the music or go for a volume control in case you are not interested to watch the video.
● Most of the videos you run turn up to be irrelevant or uninteresting through the middle, but you don’t have a choice to make bit adjustments. If however possible, the method is not quite convenient. You may need to visit a different site in case you run a video that is not integrated with webpage of your searched content, wait for the portal’s interface to load or watch an advertisement.
● GIFs, on the other hand, do not require pausing or turning off, and run automatically. You also don’t need to mute any sounds. These ensure to-the-point message delivery and don’t divert your attention from the primary content you visit the webpage for.
Owing to the above, most of us are now much interested to convert videos to GIFs for an exact, impactful and to the point content creation and sharing. See through the next sections of this article to learn about the best video to GIF conversion tools and software.
Part 1 Top 10 Ways to Turn Video into GIF
Considering the credibility of GIFs, you may often require to convert your long videos into short and content specific GIFs. Given below are the 10 best methods to cater to the need of video to GIF conversion:
01Filmora
Wondershare Filmora Video Editor is one among the most popular and easy methods to convert videos to GIFs. It is compatible with almost all common video formats and is loaded with a plethora of exciting effects and editing tools. Take the following steps to create GIFs from videos using this application:
Wondershare Filmora
Get started easily with Filmora’s powerful performance, intuitive interface, and countless effects Try It Free Try It Free Learn More >


Step 1: Import Your Video
Launch Filmora and import your desired video in the app’s welcome window. To do this, click on ‘New Project’ followed by ‘Import’ option from the drop down menu to add your video to the Filmora.

Step 2: Timeline Dragging
Add your video to the app’s timeline using the ‘Drag and Drop’ method. You can also extract video frames by taking screenshots and merge these images into your GIF from the media library.

Step 3: Explore Your Editing Skills
You can now edit the imported video in the timeline using a range of interesting effects. Crop, trim, split or make speed adjustments to give your video a catchy look.

Step 4: Include Messages
Try adding texts and supplementary elements to deliver impactful messages through your creation.

Step 5: It’s Time to Share!
Click ‘Export’ to save your GIF to your device. You are now ready to post your work in your social communities to get the most deserved attention of your peers!

02YouTube to GIF
This one is a simple and user-friendly video to GIF converter. You can convert videos to GIFs from your PC or other online platforms with this converter. The converter allows you to play with a variety of editing effects to make your creation more interesting. All you need to do is the following:
● In the video URL bar, type ‘gif’ after ‘www.’ and you will be redirected to converter’s working window. Set the GIF time interval or apply specific effects using the tools from the panel in the left of the working window.


● To set the video time frame, highlight it in the video timeline. Set the desired interval using the ‘Start Time’ and ‘End Time’ options.

● To add a new visual effect, select it from the menu. Below the video timeline, a row of parameters will get displayed. Set the effect parameters to make desired changes.
● Click ‘Create GIF’. In the ‘Settings’ menu, you can rename and add tags to your creation and even make it private.

● That’s it! You can download your GIF now. You may get a converter purchase offer for enabling advanced features. While most users prefer sticking to the free version, it is up to you whether to decline or accept the purchase offer.
● The ‘Download’ feature is exclusive to registered users. However, if you don’t prefer creating an account, just open the GIF download link in a separate tab’s ‘Direct Link’ row. Alternatively, you can replace ‘gif’ with ‘conv’ in the video URL bar and choose ‘Convert to GIF’. However, this process may take some extra minutes.

03Giphy GIF Maker
This is an editing tool that you can use to convert video to GIF online. This one is a reliable converter tool with a user-cohesive interface. It is a simple video editor that is available to you for free. All you need to do is mentioned below:
Step 1: Load your Video
Go to the official app website and paste your desired video link in the search bar. Your video gets uploaded to the app’s editor screen. Specify the time frame and check out your GIF’s preview.

Step 2: Let’s Go Editing!
Select ‘Continue to Decorate’ to edit your GIF with texts, effects, frames and filters. You can even go for a straight upload if your video doesn’t require customization.

Step 3: Time to Share!
Select ‘Continue to Upload’ and add required tags. Tap ‘Upload to Giphy’ to make a social media post or add it to the app’s website through a specific share code.
04Wondershare TunesGo
This is an effective video to GIF creator tool, loaded with extensive features. You can use this application to convert videos, live photos and multiple snaps into interesting GIFs. TunesGo gives you the freedom to edit your work in your own style with a variety of effects. Here’s what you need to do:

Step 1: Launch TunesGo
Download, install and launch the app into your PC. You may be asked for a device connection setup, but you can skip that in case GIF creation is your only requirement.

Step 2: Upload your Video
In the app’s welcome screen, navigate to ‘Toolbox’ at the top. From the drop down interface, choose ‘GIF Maker’. In the new window that pops-up next, click on ‘Add’ to upload the desired video to the app from your PC.

Step 3: Let’s Create!
Set the required time frame for your GIF in the app’s timeline and tap the ‘Create GIF’ button to start the conversion process. On completion, your work gets automatically saved in the ‘Pictures’ folder in your PC. You can also customize your target location.

05Vimeo
Vimeo is also a quick, 3-stepvideo to GIF converter. However, you need to have a Vimeo account to take up the conversion process. This is an easy and hassle free GIF creator, that adheres to your creation needs within minutes. Here’s what you need to do:
Step 1: Upload Your Video
Log in to your Vimeo account. In the opening window, select ’Upload’ from the toolbar at the top. ‘Drag and Drop’ or click ‘Choose Files’ to upload the desired video from your device.

Step 2: Create Your GIF
After you are done uploading the video, select ‘Create a GIF’ from the sidebar at the left. You will be directed to the GIF Editor window. Select a loop section from the video and set a time frame of maximum 6 seconds in the video timeline. Now click ‘Create GIF’.


Step 3: Export Your Creation
Your GIF is ready to download and share. You can also embed your GIF by generating embed codes for specific platforms.
06 Adobe Photoshop
This one is one f the most popular editing applications you can use to make GIF out of video. It’s simple and user-friendly interface does not require you to possess a Photoshop mastery for the conversion purpose. Here’s what you need to follow:
Step 1: Search Your Video
Find a video of your choice from a desired platform. In case you want a YouTube video, add ‘ss’ prior to the video’s service name in YouTube’s URL bar.
STEP 2: Edit Your Video
Use any preferable video splitters and editors to crop, trim and add interesting effects to your video and set a maximum time frame of 3 seconds.
Step 3: Create GIF
Open your edited video in Adobe Photoshop and tap ‘File Import-Video frames into layers’.

Step 4: Adjust Settings
Make required setting adjustments and click on ‘File-Save for Web’. Try adjusting image resolution and color range if your file size exceeds 10 MB.

Step 5: Save Your Work
In the ’Files’ tab at the top, select ‘Save’ and choose the ‘.gif’ extension in the ‘File Type’ dialog box to save your creation to your PC.
07Convertio
This converter provides a simple, 3-step process to create GIF from video. Either use it as a browser extension or download it from Google Chrome Webstore. Take the following steps to convert videos to GIF online.
● Upload your desired video to the service timeline. You can either choose files directly or ‘Drag and Drop’ them from your device.
● Select ‘Convert’ to make GIF from your uploaded video.
● Tap ‘Download’ to save your creation.

You can use this service to make different format conversions. However, this converter does not allow you to edit or add effects your GIF.
08MakeAGif
You can use this tool as a GIF video maker online to create, exchange and share GIFs on different platforms. Additionally, you also get the flexibility to use already saved images in your device to add them to your GIF. The app’s basic version allows you to create GIFs without watermarks. To add watermarks, you will need an account on the app. To convert videos to GIFs using this tool, you should take the following steps:
Step 1: Upload Your Video
In the app’s welcome screen, click on ‘Video to GIF’ and upload a desired video in the editor timeline. Add effects and make speed and time frame adjustments. When satisfied, tap ‘Continue to Publishing’.

Step 2: Add Names and Tags
In the publishing window, give a suitable name and add required tags to your edited video to make it easily identifiable. When you are done, click on ‘Create a GIF’ from the bottom right.

Step 3: Ready to Share!
You can now share your created GIF across social media platforms.

09Adobe Premiere
Similar to Adobe Photoshop, Adobe Premiere too is quite a preferred application for creating GIFs from videos. This is a simple, quick and free application that converts your videos to GIFs in a span of few minutes. Here’s what you need to do to go about the process:

Step 1: Edit your Video
Add a video of your choice in the Adobe Premiere timeline and play with your editing creativity to add desired effects and filters to it. Make sure to set requisite time frames to your edit.

Step 2: Prepare an Export
Click into the app’s video timeline, and prepare a file export using the following path:
File> Export> Media

Step 3: Settings Adjustments
In the Media Export window, navigate to the ‘Format’ tab. From the drop down menu, choose ‘Animated GIF’. Here, you can add your gif file, select its target destination and adjust the required settings.

Step 4: Export Your Work
Click ‘Export’ to share your creation on social media or click on ‘Queue’ to send your GIF to a specific media encoder.

1010. Movavi Video Converter
This is one of the latest video converter software you can rely on to make GIF from video files. This software allows you to create top quality animated GIFs and is compatible with a variety of video formats. Using this converter, you can create amazing GIFs in 5 quick steps: here’s what you need to follow:
Step 1: Download and Install the Software
To begin, download the converter software from its official site and adhere to the user instructions to install the same in your system.
Step 2: Upload Your Video
In the software’s opening window, click on ‘Add Media’ followed by ‘Add Video’ and select a desired video from your system to upload on the Movavi video timeline.

Step 3: Trim Your Video
Select ‘Edit’ from the right of your video file. In the editing window, specify the initial cut of the video by displacing the marker to the desired point. Click on ‘Scissors’ to add multiple cut points to your video. You can even drag the cut points around the editor timeline. Choose the unvented sections and click ‘Trash Can’. When the result satisfies you, click ‘Done’.

Step 4: Choose a Conversion Format
Navigate to the ‘Images’ tab and select ‘GIF’ and set an adequate size for the GIF. Here, you can adjust quality, frame size and rate and resize method using the ‘Cogwheel’ tool.

Step 5: Let’s Get Converting!
Tap ‘Convert’ and wait for the conversion to finish. You will be automatically directed to the folder where your converted files get saved.

● Key Takeaways from This Episode →
● GIFs are short, to the point and convenient to access, providing exact and impactful message delivery.
● The software market is flooded with a variety of editing tools to convert your dull videos to catchy GIFs.
● Filmora is a quick and smart editing tool that envisages your GIF creating experience with a range of exciting features.
Having trouble converting your videos to GIF? Browse the top 10 converters to sort this out!
In this article
01 [Why GIFs are Widely Used and Popular?](#Part 1)
02 [Top 10 Ways to Turn Video into GIF](#Part 2)
Part 1 Why GIFs are Widely Used and Popular?
If you take a poll on the watch preference of GIF versus videos, most of votes you get would be in favor of watching GIFs. There are obvious reasons to the fact that anyone would prefer watching a GIF over a video, irrespective of its length. Some major ones that make it quite annoying to watch videos include the following:
● To begin with, you need to turn the video on and off, depending on your choice of watching a video or surfing through stories and feeds, failing which you get to hear additional sounds through your feed from the already running video. You further need to stop the music or go for a volume control in case you are not interested to watch the video.
● Most of the videos you run turn up to be irrelevant or uninteresting through the middle, but you don’t have a choice to make bit adjustments. If however possible, the method is not quite convenient. You may need to visit a different site in case you run a video that is not integrated with webpage of your searched content, wait for the portal’s interface to load or watch an advertisement.
● GIFs, on the other hand, do not require pausing or turning off, and run automatically. You also don’t need to mute any sounds. These ensure to-the-point message delivery and don’t divert your attention from the primary content you visit the webpage for.
Owing to the above, most of us are now much interested to convert videos to GIFs for an exact, impactful and to the point content creation and sharing. See through the next sections of this article to learn about the best video to GIF conversion tools and software.
Part 1 Top 10 Ways to Turn Video into GIF
Considering the credibility of GIFs, you may often require to convert your long videos into short and content specific GIFs. Given below are the 10 best methods to cater to the need of video to GIF conversion:
01Filmora
Wondershare Filmora Video Editor is one among the most popular and easy methods to convert videos to GIFs. It is compatible with almost all common video formats and is loaded with a plethora of exciting effects and editing tools. Take the following steps to create GIFs from videos using this application:
Wondershare Filmora
Get started easily with Filmora’s powerful performance, intuitive interface, and countless effects Try It Free Try It Free Learn More >
Step 1: Import Your Video
Launch Filmora and import your desired video in the app’s welcome window. To do this, click on ‘New Project’ followed by ‘Import’ option from the drop down menu to add your video to the Filmora.
Step 2: Timeline Dragging
Add your video to the app’s timeline using the ‘Drag and Drop’ method. You can also extract video frames by taking screenshots and merge these images into your GIF from the media library.
Step 3: Explore Your Editing Skills
You can now edit the imported video in the timeline using a range of interesting effects. Crop, trim, split or make speed adjustments to give your video a catchy look.
Step 4: Include Messages
Try adding texts and supplementary elements to deliver impactful messages through your creation.
Step 5: It’s Time to Share!
Click ‘Export’ to save your GIF to your device. You are now ready to post your work in your social communities to get the most deserved attention of your peers!
02YouTube to GIF
This one is a simple and user-friendly video to GIF converter. You can convert videos to GIFs from your PC or other online platforms with this converter. The converter allows you to play with a variety of editing effects to make your creation more interesting. All you need to do is the following:
● In the video URL bar, type ‘gif’ after ‘www.’ and you will be redirected to converter’s working window. Set the GIF time interval or apply specific effects using the tools from the panel in the left of the working window.
● To set the video time frame, highlight it in the video timeline. Set the desired interval using the ‘Start Time’ and ‘End Time’ options.
● To add a new visual effect, select it from the menu. Below the video timeline, a row of parameters will get displayed. Set the effect parameters to make desired changes.
● Click ‘Create GIF’. In the ‘Settings’ menu, you can rename and add tags to your creation and even make it private.
● That’s it! You can download your GIF now. You may get a converter purchase offer for enabling advanced features. While most users prefer sticking to the free version, it is up to you whether to decline or accept the purchase offer.
● The ‘Download’ feature is exclusive to registered users. However, if you don’t prefer creating an account, just open the GIF download link in a separate tab’s ‘Direct Link’ row. Alternatively, you can replace ‘gif’ with ‘conv’ in the video URL bar and choose ‘Convert to GIF’. However, this process may take some extra minutes.
03Giphy GIF Maker
This is an editing tool that you can use to convert video to GIF online. This one is a reliable converter tool with a user-cohesive interface. It is a simple video editor that is available to you for free. All you need to do is mentioned below:
Step 1: Load your Video
Go to the official app website and paste your desired video link in the search bar. Your video gets uploaded to the app’s editor screen. Specify the time frame and check out your GIF’s preview.
Step 2: Let’s Go Editing!
Select ‘Continue to Decorate’ to edit your GIF with texts, effects, frames and filters. You can even go for a straight upload if your video doesn’t require customization.
Step 3: Time to Share!
Select ‘Continue to Upload’ and add required tags. Tap ‘Upload to Giphy’ to make a social media post or add it to the app’s website through a specific share code.
04Wondershare TunesGo
This is an effective video to GIF creator tool, loaded with extensive features. You can use this application to convert videos, live photos and multiple snaps into interesting GIFs. TunesGo gives you the freedom to edit your work in your own style with a variety of effects. Here’s what you need to do:
Step 1: Launch TunesGo
Download, install and launch the app into your PC. You may be asked for a device connection setup, but you can skip that in case GIF creation is your only requirement.
Step 2: Upload your Video
In the app’s welcome screen, navigate to ‘Toolbox’ at the top. From the drop down interface, choose ‘GIF Maker’. In the new window that pops-up next, click on ‘Add’ to upload the desired video to the app from your PC.
Step 3: Let’s Create!
Set the required time frame for your GIF in the app’s timeline and tap the ‘Create GIF’ button to start the conversion process. On completion, your work gets automatically saved in the ‘Pictures’ folder in your PC. You can also customize your target location.
05Vimeo
Vimeo is also a quick, 3-stepvideo to GIF converter. However, you need to have a Vimeo account to take up the conversion process. This is an easy and hassle free GIF creator, that adheres to your creation needs within minutes. Here’s what you need to do:
Step 1: Upload Your Video
Log in to your Vimeo account. In the opening window, select ’Upload’ from the toolbar at the top. ‘Drag and Drop’ or click ‘Choose Files’ to upload the desired video from your device.
Step 2: Create Your GIF
After you are done uploading the video, select ‘Create a GIF’ from the sidebar at the left. You will be directed to the GIF Editor window. Select a loop section from the video and set a time frame of maximum 6 seconds in the video timeline. Now click ‘Create GIF’.
Step 3: Export Your Creation
Your GIF is ready to download and share. You can also embed your GIF by generating embed codes for specific platforms.
06 Adobe Photoshop
This one is one f the most popular editing applications you can use to make GIF out of video. It’s simple and user-friendly interface does not require you to possess a Photoshop mastery for the conversion purpose. Here’s what you need to follow:
Step 1: Search Your Video
Find a video of your choice from a desired platform. In case you want a YouTube video, add ‘ss’ prior to the video’s service name in YouTube’s URL bar.
STEP 2: Edit Your Video
Use any preferable video splitters and editors to crop, trim and add interesting effects to your video and set a maximum time frame of 3 seconds.
Step 3: Create GIF
Open your edited video in Adobe Photoshop and tap ‘File Import-Video frames into layers’.
Step 4: Adjust Settings
Make required setting adjustments and click on ‘File-Save for Web’. Try adjusting image resolution and color range if your file size exceeds 10 MB.
Step 5: Save Your Work
In the ’Files’ tab at the top, select ‘Save’ and choose the ‘.gif’ extension in the ‘File Type’ dialog box to save your creation to your PC.
07Convertio
This converter provides a simple, 3-step process to create GIF from video. Either use it as a browser extension or download it from Google Chrome Webstore. Take the following steps to convert videos to GIF online.
● Upload your desired video to the service timeline. You can either choose files directly or ‘Drag and Drop’ them from your device.
● Select ‘Convert’ to make GIF from your uploaded video.
● Tap ‘Download’ to save your creation.
You can use this service to make different format conversions. However, this converter does not allow you to edit or add effects your GIF.
08MakeAGif
You can use this tool as a GIF video maker online to create, exchange and share GIFs on different platforms. Additionally, you also get the flexibility to use already saved images in your device to add them to your GIF. The app’s basic version allows you to create GIFs without watermarks. To add watermarks, you will need an account on the app. To convert videos to GIFs using this tool, you should take the following steps:
Step 1: Upload Your Video
In the app’s welcome screen, click on ‘Video to GIF’ and upload a desired video in the editor timeline. Add effects and make speed and time frame adjustments. When satisfied, tap ‘Continue to Publishing’.
Step 2: Add Names and Tags
In the publishing window, give a suitable name and add required tags to your edited video to make it easily identifiable. When you are done, click on ‘Create a GIF’ from the bottom right.
Step 3: Ready to Share!
You can now share your created GIF across social media platforms.
09Adobe Premiere
Similar to Adobe Photoshop, Adobe Premiere too is quite a preferred application for creating GIFs from videos. This is a simple, quick and free application that converts your videos to GIFs in a span of few minutes. Here’s what you need to do to go about the process:
Step 1: Edit your Video
Add a video of your choice in the Adobe Premiere timeline and play with your editing creativity to add desired effects and filters to it. Make sure to set requisite time frames to your edit.
Step 2: Prepare an Export
Click into the app’s video timeline, and prepare a file export using the following path:
File> Export> Media
Step 3: Settings Adjustments
In the Media Export window, navigate to the ‘Format’ tab. From the drop down menu, choose ‘Animated GIF’. Here, you can add your gif file, select its target destination and adjust the required settings.
Step 4: Export Your Work
Click ‘Export’ to share your creation on social media or click on ‘Queue’ to send your GIF to a specific media encoder.
1010. Movavi Video Converter
This is one of the latest video converter software you can rely on to make GIF from video files. This software allows you to create top quality animated GIFs and is compatible with a variety of video formats. Using this converter, you can create amazing GIFs in 5 quick steps: here’s what you need to follow:
Step 1: Download and Install the Software
To begin, download the converter software from its official site and adhere to the user instructions to install the same in your system.
Step 2: Upload Your Video
In the software’s opening window, click on ‘Add Media’ followed by ‘Add Video’ and select a desired video from your system to upload on the Movavi video timeline.
Step 3: Trim Your Video
Select ‘Edit’ from the right of your video file. In the editing window, specify the initial cut of the video by displacing the marker to the desired point. Click on ‘Scissors’ to add multiple cut points to your video. You can even drag the cut points around the editor timeline. Choose the unvented sections and click ‘Trash Can’. When the result satisfies you, click ‘Done’.
Step 4: Choose a Conversion Format
Navigate to the ‘Images’ tab and select ‘GIF’ and set an adequate size for the GIF. Here, you can adjust quality, frame size and rate and resize method using the ‘Cogwheel’ tool.
Step 5: Let’s Get Converting!
Tap ‘Convert’ and wait for the conversion to finish. You will be automatically directed to the folder where your converted files get saved.
● Key Takeaways from This Episode →
● GIFs are short, to the point and convenient to access, providing exact and impactful message delivery.
● The software market is flooded with a variety of editing tools to convert your dull videos to catchy GIFs.
● Filmora is a quick and smart editing tool that envisages your GIF creating experience with a range of exciting features.
How to Make GIF Instagram
How to Make GIF Instagram | Quick Tips
An easy yet powerful editor
Numerous effects to choose from
Detailed tutorials provided by the official channel
Creating gif for Instagram to make stories engaging in easy steps. Making Instagram stories by converting gif to video to attract more people.
In this article
01 [10 Best Instagram Gifs for Your Stories](#Part 1)
02 [How to Create a GIF for Instagram](#Part 2)
03 [How to Convert GIF to Video for Instagram](#Part 3)
Part 1 10 Best Instagram Gifs for Your Stories
All of you might know that GIF is also known as Graphics Interchange Format. It was created for the first time in the year 1987. With it you can decrease the size of photos and short animated images. With this kind of technology a gif instagram can also be made with the greatest ease. The GIF instagram story is a fun oriented task that all of you will appreciate in the long run. Here you can even add animated stickers and paste them to your story. With this way you can also make more stickers by changing their size in the long way. Instagram logo gif can also be made easily by following some keywords to get the desired gif over Instagram.
So, to make an Instagram story more happening some of the top gif galleries are:
01Bohemian
As the name suggests, the gif are Bohemian themed. Those who love to add some cute Bohemian things and pictures in gif style; they can type Bohemian on the search bar and choose the best one to make an Instagram story Bohemian themed. Colorful flowers, star, dream catcher, cute girl and days name are available in the said gif style.
02Chicayeye
Various gifs available at this keyword are warm colors themed. They make any Instagram story pleasing with simple yet beautiful color combinations. With matching color combinations of pictures and words, instagram stories can be made more interesting.
03Kindcomments
The name itself indicates, there will be a lot of quotes or sayings. Those who are fond of posting some beautiful and engaging quotes on social media accounts, they will definitely love to add gif from Kindcomments.
04Scarletpin

It is seen that food lovers always post their story when they have a lunch or dinner. Making people know what new they are having at a place through Instagram stories seems to be very interesting. So, for those SCARLETPIN has a wide collection of food gifs. It has bright and colorful pictures of food to make the stories more interesting.
05Gladdest
Adorable gif for insta can make any Instagram story look so sweet and engaging. So, when you need a soft tone gif with a lot of sayings, stars, flowers, a piece of cake and music, then type Gladdest at your search result and get some vintage styles gif that make your Instagram story adorable. This will make people to shower love and hearts at your story.
06Hanmade
A lot of gif in instagram that seems to be written with hands can be searched through “handmade”. It has some adorable pink and cute designs. Days and the months are written in some amazing style. An Instagram story can be made attractive by including some heart gif and sayings gif. Those who wish to add some cute stories on Christmas day, they can even get some cute wishes gif in it.
07Hygge
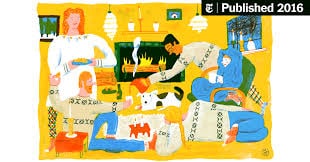
Season’s gif are most common gifs that are included in any Instagram story by the social media users. The most lovable season is the winters where the users have a lot of stuff to include in the story. Looking for winter’s gif for story? Then type Hygge at your search results. ???It will show various gif for a mood of coziness. One can find cozy mugs, stars, snowman, and seasonal stickers to make interesting story over Instagram.
08Vipapier
Some users look for a place where they can get most of the best instagram gifs for their Instagram stories. From sayings to cute pictures of hearts, flowers and stars all can be taken from Vipapier. The best thing is that it has muted color scheme and paint gif that can be applied anywhere in the background of the text. So, search Vipapier over the search results of Instagram and add one that fits in your space.
09LINE & LINES

This is a simple yet very good gif available to make text in the Instgaram look amazing and stylish. One can underline something or write something interesting in break up to give the text a new look. So, various lines can be seen at LINE & LINES to include the same in the Instagram stories.
10Square & Rectangle
Basic shapes are loved by every Instagram user who updates their stories every day. The reason is that they give a new and cool look to any picture. So, if you need basic shape, then ‘square’ or ‘rectangle’ are great way to make your new post look different and impress your followers. They are simple to create and can be added as background theme for the pictures of videos.
Part 2 How to Create a GIF for Instagram
Posting an Instagram GIF is easy using an application for both iPhone and Android. So, let’s see one by one how to make gifs for instagram and post the same on the Instagram stories. To begin with:
01How to Post an Instagram GIF Using App for iPhone
When you are in need to post Gifs to instagram story then you have to take some essential steps. These steps have been taken by GIPHY as well as from GIF stickers that you can add to your content at social media sites like Instagram.
● Install the Giphy app on your iPhone and open it.
● Look for the desired GIF which you want to include in your story on GIPHY.
● Click on the paper-airplane icon located under the GIF.
● Tap the Instagram button. A permission screen will open asking for giving permission for access to open Instagram.
● After giving permission, the selected GIF will open inside Instagram. Select Feed to post the selected GIF to your Instagram feed. This will be a new post over the Instagram.
● In case you need to edit of add filters, you can go with that by moving on to Next.
● Further tap next again to add caption and hash tags if required.
● After creation of GIF post is over, tap Share.
Here you will get more benefits like increasing and decreasing the size of images. Instagram story gif is an issue that is to be done for every kind of need and all the Instagram stories. By good fortune GIPHY has many tons of GIFs that can be selected for this kind of conditions. You just need a special kind of flair when you are making texts for your GIF interface. Even then you have to adopt gif instagram story aesthetic so that your task of doing any promotion on social media sites could become an easy one.
02How to Post an Instagram GIF Using App for Android
Gif can be posted easily using GIPHY Cam for Android. Here you can even open the app of instagram media with the help of an android. The simple steps are:
Save the GIF to the Download folder which you want to share to the Instagram.
Tap to the camera roll after opening GIPHY CAM.
Choose the GIF and move to the next button.
Let the GIF convert and then go to Instagram and share.
Part 3 How to Convert GIF to Video for Instagram
A gif can be converted into video by using various applications. Converting Gif by adding some filter, light effects and sound into video make it more attractive for Instagram stories. One can try Filmora to convert gif to video for instagram in just simple steps.
01** Wondershare Filmora Video Editor

Wondershare Filmora - Best Video Editor for Mac/Windows
5,481,435 people have downloaded it.
Build unique custom animations without breaking a sweat.
Focus on creating epic stories and leave the details to Filmora’s auto features.
Start a creative adventure with drag & drop effects and endless possibilities.
Filmora simplifies advanced features to save you time and effort.
Filmora cuts out repetition so you can move on to your next creative breakthrough.
There are many applications and web tools that offer to convert beautiful gifs to videos and sharing the same over Instagram stories. Filmora V11 is one of the best video editor applications which assist the users to convert gif to video with minimal effort. It is a user-friendly tool that has media editing features. It allows the users to enhance their video with wide variety of sound, light effects, and beautiful gifs and share them to their Instagram stories.
For creating video or converting gifs to video, Filmora V11 can be used. It makes easy for the beginners to convert gift into videos in a few simple steps. Filmora V11 app is required to be installed on the system and media files can be imported there. The best thing is that it supports most of the video formats such as MP4, AVI, H261, FLV, MKV, 3GP, MOV, MPEG, VOB, RMVB, M4V, TS, M2TS, WMV, ASF and many more. To customize gifs and then converting it to video, the Filmora Meme maker can be used. Templates and captions are also found at the application.
02Steps to convert GIF to video for Instagram
● The first step is to download the application Filmora at your computer and open it. Choose the GIF file from the Filmora file.
● Do the necessary editing. This including adding some text, colors and effects to the gif.
● After adding all the effects and editing, tap to create a video from it. Export the same in MP4 format and save it over the mobile. The application will convert the gift into video and is ready for uploading.
● At last in the uploading process, open the Instagram application, select the video from the gallery.
● Captions or description can be added and then uploaded.
● Key Takeaways from This Episode →
● Instagram story gifs are concerned with mainstream creation for graphics interchange format. With these formats you can make the best and interesting story. So, to make gif, maximum use of GIPHY can be made to make your work look to be the best promotional one. Some of the best gifs can be searched by tapping keywords like Bohemian, Hanmade, LINE & LINES and Square & Rectangle
● Posting gif can be understood in just simple steps. If you desire to know how to create gifs for instagram, then you can explore various applications for both iPhone and Android. You may even search well on your GIF and then select the desired gif that can be added well to your instagram story.
● Instagram stories can be made more attractive by converting gif into videos. The same can be done with ease with some user friendly and high tech applications. Filmora can be the best software application for doing the magic over Instagram stories. It can be used to turn gif into videos or videos to gif. So, give your creativity a new height with some good application and impress your followers.
Creating gif for Instagram to make stories engaging in easy steps. Making Instagram stories by converting gif to video to attract more people.
In this article
01 [10 Best Instagram Gifs for Your Stories](#Part 1)
02 [How to Create a GIF for Instagram](#Part 2)
03 [How to Convert GIF to Video for Instagram](#Part 3)
Part 1 10 Best Instagram Gifs for Your Stories
All of you might know that GIF is also known as Graphics Interchange Format. It was created for the first time in the year 1987. With it you can decrease the size of photos and short animated images. With this kind of technology a gif instagram can also be made with the greatest ease. The GIF instagram story is a fun oriented task that all of you will appreciate in the long run. Here you can even add animated stickers and paste them to your story. With this way you can also make more stickers by changing their size in the long way. Instagram logo gif can also be made easily by following some keywords to get the desired gif over Instagram.
So, to make an Instagram story more happening some of the top gif galleries are:
01Bohemian
As the name suggests, the gif are Bohemian themed. Those who love to add some cute Bohemian things and pictures in gif style; they can type Bohemian on the search bar and choose the best one to make an Instagram story Bohemian themed. Colorful flowers, star, dream catcher, cute girl and days name are available in the said gif style.
02Chicayeye
Various gifs available at this keyword are warm colors themed. They make any Instagram story pleasing with simple yet beautiful color combinations. With matching color combinations of pictures and words, instagram stories can be made more interesting.
03Kindcomments
The name itself indicates, there will be a lot of quotes or sayings. Those who are fond of posting some beautiful and engaging quotes on social media accounts, they will definitely love to add gif from Kindcomments.
04Scarletpin
It is seen that food lovers always post their story when they have a lunch or dinner. Making people know what new they are having at a place through Instagram stories seems to be very interesting. So, for those SCARLETPIN has a wide collection of food gifs. It has bright and colorful pictures of food to make the stories more interesting.
05Gladdest
Adorable gif for insta can make any Instagram story look so sweet and engaging. So, when you need a soft tone gif with a lot of sayings, stars, flowers, a piece of cake and music, then type Gladdest at your search result and get some vintage styles gif that make your Instagram story adorable. This will make people to shower love and hearts at your story.
06Hanmade
A lot of gif in instagram that seems to be written with hands can be searched through “handmade”. It has some adorable pink and cute designs. Days and the months are written in some amazing style. An Instagram story can be made attractive by including some heart gif and sayings gif. Those who wish to add some cute stories on Christmas day, they can even get some cute wishes gif in it.
07Hygge
Season’s gif are most common gifs that are included in any Instagram story by the social media users. The most lovable season is the winters where the users have a lot of stuff to include in the story. Looking for winter’s gif for story? Then type Hygge at your search results. ???It will show various gif for a mood of coziness. One can find cozy mugs, stars, snowman, and seasonal stickers to make interesting story over Instagram.
08Vipapier
Some users look for a place where they can get most of the best instagram gifs for their Instagram stories. From sayings to cute pictures of hearts, flowers and stars all can be taken from Vipapier. The best thing is that it has muted color scheme and paint gif that can be applied anywhere in the background of the text. So, search Vipapier over the search results of Instagram and add one that fits in your space.
09LINE & LINES
This is a simple yet very good gif available to make text in the Instgaram look amazing and stylish. One can underline something or write something interesting in break up to give the text a new look. So, various lines can be seen at LINE & LINES to include the same in the Instagram stories.
10Square & Rectangle
Basic shapes are loved by every Instagram user who updates their stories every day. The reason is that they give a new and cool look to any picture. So, if you need basic shape, then ‘square’ or ‘rectangle’ are great way to make your new post look different and impress your followers. They are simple to create and can be added as background theme for the pictures of videos.
Part 2 How to Create a GIF for Instagram
Posting an Instagram GIF is easy using an application for both iPhone and Android. So, let’s see one by one how to make gifs for instagram and post the same on the Instagram stories. To begin with:
01How to Post an Instagram GIF Using App for iPhone
When you are in need to post Gifs to instagram story then you have to take some essential steps. These steps have been taken by GIPHY as well as from GIF stickers that you can add to your content at social media sites like Instagram.
● Install the Giphy app on your iPhone and open it.
● Look for the desired GIF which you want to include in your story on GIPHY.
● Click on the paper-airplane icon located under the GIF.
● Tap the Instagram button. A permission screen will open asking for giving permission for access to open Instagram.
● After giving permission, the selected GIF will open inside Instagram. Select Feed to post the selected GIF to your Instagram feed. This will be a new post over the Instagram.
● In case you need to edit of add filters, you can go with that by moving on to Next.
● Further tap next again to add caption and hash tags if required.
● After creation of GIF post is over, tap Share.
Here you will get more benefits like increasing and decreasing the size of images. Instagram story gif is an issue that is to be done for every kind of need and all the Instagram stories. By good fortune GIPHY has many tons of GIFs that can be selected for this kind of conditions. You just need a special kind of flair when you are making texts for your GIF interface. Even then you have to adopt gif instagram story aesthetic so that your task of doing any promotion on social media sites could become an easy one.
02How to Post an Instagram GIF Using App for Android
Gif can be posted easily using GIPHY Cam for Android. Here you can even open the app of instagram media with the help of an android. The simple steps are:
Save the GIF to the Download folder which you want to share to the Instagram.
Tap to the camera roll after opening GIPHY CAM.
Choose the GIF and move to the next button.
Let the GIF convert and then go to Instagram and share.
Part 3 How to Convert GIF to Video for Instagram
A gif can be converted into video by using various applications. Converting Gif by adding some filter, light effects and sound into video make it more attractive for Instagram stories. One can try Filmora to convert gif to video for instagram in just simple steps.
01** Wondershare Filmora Video Editor
Wondershare Filmora - Best Video Editor for Mac/Windows
5,481,435 people have downloaded it.
Build unique custom animations without breaking a sweat.
Focus on creating epic stories and leave the details to Filmora’s auto features.
Start a creative adventure with drag & drop effects and endless possibilities.
Filmora simplifies advanced features to save you time and effort.
Filmora cuts out repetition so you can move on to your next creative breakthrough.
There are many applications and web tools that offer to convert beautiful gifs to videos and sharing the same over Instagram stories. Filmora V11 is one of the best video editor applications which assist the users to convert gif to video with minimal effort. It is a user-friendly tool that has media editing features. It allows the users to enhance their video with wide variety of sound, light effects, and beautiful gifs and share them to their Instagram stories.
For creating video or converting gifs to video, Filmora V11 can be used. It makes easy for the beginners to convert gift into videos in a few simple steps. Filmora V11 app is required to be installed on the system and media files can be imported there. The best thing is that it supports most of the video formats such as MP4, AVI, H261, FLV, MKV, 3GP, MOV, MPEG, VOB, RMVB, M4V, TS, M2TS, WMV, ASF and many more. To customize gifs and then converting it to video, the Filmora Meme maker can be used. Templates and captions are also found at the application.
02Steps to convert GIF to video for Instagram
● The first step is to download the application Filmora at your computer and open it. Choose the GIF file from the Filmora file.
● Do the necessary editing. This including adding some text, colors and effects to the gif.
● After adding all the effects and editing, tap to create a video from it. Export the same in MP4 format and save it over the mobile. The application will convert the gift into video and is ready for uploading.
● At last in the uploading process, open the Instagram application, select the video from the gallery.
● Captions or description can be added and then uploaded.
● Key Takeaways from This Episode →
● Instagram story gifs are concerned with mainstream creation for graphics interchange format. With these formats you can make the best and interesting story. So, to make gif, maximum use of GIPHY can be made to make your work look to be the best promotional one. Some of the best gifs can be searched by tapping keywords like Bohemian, Hanmade, LINE & LINES and Square & Rectangle
● Posting gif can be understood in just simple steps. If you desire to know how to create gifs for instagram, then you can explore various applications for both iPhone and Android. You may even search well on your GIF and then select the desired gif that can be added well to your instagram story.
● Instagram stories can be made more attractive by converting gif into videos. The same can be done with ease with some user friendly and high tech applications. Filmora can be the best software application for doing the magic over Instagram stories. It can be used to turn gif into videos or videos to gif. So, give your creativity a new height with some good application and impress your followers.
Best 10 Photo Animator Templates
What’s the Best 10 Photo Animator Templates That Bring Your Images to Life?
An easy yet powerful editor
Numerous effects to choose from
Detailed tutorials provided by the official channel
Using free 3d motion graphics, we can animate the image and bring it back to life.
Using a 3d animation photo maker online we can animate any image using a template and bring it back to life. This must have gotten you excited? We are as excited as you are as we give you an overview of 3d photo animation online.
In this article
01 [What is 3D Image Animate?](#Part 1)
02 [What is 3D Photo Motion?](#Part 2)
03 [How to Create 3D Animations from a Single Still Image?](#Part 3)
Part 1 What is 3D Image Animate?
3D Image Animate is making a moving scene using just a simple image. It is quite a complicated process and requires high technical skills to achieve a moving animation out of a still image. For your convenience, here we list some of the examples that will make you understand what 3D Image Animate is.
01Resuscitate a Person or Object
This first 3D Image Animate example depicts turning a real-life still image of a person and making him move out of that still image. Sounds absurd, right? Well, just look at this example below.
02Pan View of Car
This next example shows a still image of a car is turned into a moving scene as if the camera person is shooting a pan view of a parked Car.
03Dispersing Elements
Here is another amazing 3D Photo Animate example for you. In this one, you’ll get to see an image that is stacked with several elements, fruits, and veggies (in this case), which get dispersed out of the canvas. Go ahead check it out.
Part 2 What is 3D Photo Motion?
3D photo motion is basically a contemporary technology that helps us to bring life into the pictures. In simple words, using 3D photo motion and animation tools we can make still images into moving ones. 3D animation photo maker online offers you several motion templates. You can apply any of the available motion templates to a still image and make it animated. 3D photo motion helps convert 2D images to life like moving 3D images. This can be useful when working with a project that deals with many still images. By using animation on still images, the project can become more attractive and hence has a higher chance of getting liked!
Part 3 How to Create 3D Animations from a Single Still Image?
01Simple steps to create 3d animations from a single still image
When it comes to animation, Adobe is recognized as one of the best tools. Animation with Adobe is one of the most convenient ways of animation. Here is how you can convert any 2D image to a 3D animated image using adobe. For those of you who are used to animating with adobe, it must be simple to follow the few steps listed below:
● Firstly, you need to convert the 2D layers of the still image to 3D postcards (planes that possess 3D properties). In case the layer you are starting with is a text layer, any transparency will be retained.
● Now to convert the object into 3D, wrap the 2D layer around any 3D object such as cube, cone, or sphere. Choose the shape that suits your layer.
● Next, you need to create a 3D mesh from greyscale information in a 2D image.
● Now you need to simulate a metalworking technique called “Repousse”. By doing so, you will be extruding a 2D object in a 3D space
● Next, you need to build a 3D volume from any multi-frame file like DICOM. Photoshop automatically converts the individual slices of the file into a 3D object that can be manipulated in 3D space from any angle. Furthermore, if you wish to optimize the display, you can also apply any 3D volume render effects.
02Best 10 Photo Animator Templates to Bring Your Images to Life
3D motion photo animator
The first tool on the list of 3d photo animators onlineis an excellent tool called 3D motion photo Animator. The tool helps to split landscape shots into numerous panels depending on the distance of the object from the camera. Furthermore, the plug-in also adds a soft parallax movement into the layers, giving the final image a beautiful 3D effect. The tool also has several editing options and a wide range of lens flare. The animator tool allows you to tweak the weather by using the weather effect options available in the tool.
3D photo animator
This 3d animation photo maker online takes the hype of the parallax effect in animation to a whole different level. The animator allows you to add parallax effects to any still image to make it appear 3 dimensional. Moreover, you can also add depth to the animated image to enhance the 3 dimensional effects and make it appear more realistic.
Live photo animation
Live photo animation is another seamless tool that offers free 3d motion graphics. The tool which is mainly meant for animation gives you the ability to mask the object and a keyframe from vivid natural movements. Once the subject and the background have been isolated and processed, they work independently from each other. This means that, due to independent operation, live photo animation becomes even more realistic since the subject can be animated without affecting the background. The tool also has cool zooming and 3D tracking effects.
Easy 3D face photo Animator
Most tools for 3d photo animation online fail to make the image look completely 3 dimensional. Even after the animation is performed, the people and the objects continue to look 2 dimensional. However easy 3D face photo Animator solves the problem. Using this tool, you can individually animate a face and make it 3 dimensional. It uses several panels to recreate the effect that’d be provided by a video recorder.
Live photo Animator
Looking for an animating tool to animate still images and transform them into stunning videos like action pictures? Live photo Animator is just the perfect tool for you then. The tool has a simple interface and helps generate realistic 3d action images. The plug-in works on the principle of duplicating action elements in an image. These action images include water, dust, fire, and other different kinds of moving objects in an image.
Photo Animator tool
The photo Animator tool kit is a great tool to generate animated 3D images. This quick time-saving tool is your go-to tool for photo effects and zooming. Moreover, the pack also consists of 50 preset animation templates that you can choose from. All you need to do is drag and drop the still images into the tool, and then you need to select the template that you’d like to apply to the image. The tool then processes the image and animates it to convert the still image into a 3d one.
Media animator
Think of smooth and seamless media transitions? Media animator is the perfect tool for you. This software offers a set of seamless and dynamically animated media transitions. The smooth transition effects make the images produced by this tool perfect for using the 3D animations in your official presentations and slideshows.
3D photo Animator
Have an attractive image that you wish to enhance by using animation? Here’s a simple software that can help you add a touch of flair to any simple image. The software has amazing 3d animation powers. When you zoom on the images produced by the software, the entire perspective changes, and the image looks entirely 3D.
Particular photo animation
The animating tool is the best for those who wish to finish animation quickly. The software has an amazing and stylish way of making slideshows. The tool has several templates that concentrate on the particular motion.
Key Takeaways from This Episode
● 3d animation is one of the most budding fields these days. It makes our photos life-like and brings back real life memories.
● Using 3D animation, still images are brought back to life and memories from years back are revived.
● We looked at a few of the best tools for animating an image and converting them to 3D. 3D images can also help make your project reports and presentations much more attractive and earn you the extra edge over your colleagues.
● We recommend you to try a few of these cool tools and get your hands dirty with animation today Try It Free
Using free 3d motion graphics, we can animate the image and bring it back to life.
Using a 3d animation photo maker online we can animate any image using a template and bring it back to life. This must have gotten you excited? We are as excited as you are as we give you an overview of 3d photo animation online.
In this article
01 [What is 3D Image Animate?](#Part 1)
02 [What is 3D Photo Motion?](#Part 2)
03 [How to Create 3D Animations from a Single Still Image?](#Part 3)
Part 1 What is 3D Image Animate?
3D Image Animate is making a moving scene using just a simple image. It is quite a complicated process and requires high technical skills to achieve a moving animation out of a still image. For your convenience, here we list some of the examples that will make you understand what 3D Image Animate is.
01Resuscitate a Person or Object
This first 3D Image Animate example depicts turning a real-life still image of a person and making him move out of that still image. Sounds absurd, right? Well, just look at this example below.
02Pan View of Car
This next example shows a still image of a car is turned into a moving scene as if the camera person is shooting a pan view of a parked Car.
03Dispersing Elements
Here is another amazing 3D Photo Animate example for you. In this one, you’ll get to see an image that is stacked with several elements, fruits, and veggies (in this case), which get dispersed out of the canvas. Go ahead check it out.
Part 2 What is 3D Photo Motion?
3D photo motion is basically a contemporary technology that helps us to bring life into the pictures. In simple words, using 3D photo motion and animation tools we can make still images into moving ones. 3D animation photo maker online offers you several motion templates. You can apply any of the available motion templates to a still image and make it animated. 3D photo motion helps convert 2D images to life like moving 3D images. This can be useful when working with a project that deals with many still images. By using animation on still images, the project can become more attractive and hence has a higher chance of getting liked!
Part 3 How to Create 3D Animations from a Single Still Image?
01Simple steps to create 3d animations from a single still image
When it comes to animation, Adobe is recognized as one of the best tools. Animation with Adobe is one of the most convenient ways of animation. Here is how you can convert any 2D image to a 3D animated image using adobe. For those of you who are used to animating with adobe, it must be simple to follow the few steps listed below:
● Firstly, you need to convert the 2D layers of the still image to 3D postcards (planes that possess 3D properties). In case the layer you are starting with is a text layer, any transparency will be retained.
● Now to convert the object into 3D, wrap the 2D layer around any 3D object such as cube, cone, or sphere. Choose the shape that suits your layer.
● Next, you need to create a 3D mesh from greyscale information in a 2D image.
● Now you need to simulate a metalworking technique called “Repousse”. By doing so, you will be extruding a 2D object in a 3D space
● Next, you need to build a 3D volume from any multi-frame file like DICOM. Photoshop automatically converts the individual slices of the file into a 3D object that can be manipulated in 3D space from any angle. Furthermore, if you wish to optimize the display, you can also apply any 3D volume render effects.
02Best 10 Photo Animator Templates to Bring Your Images to Life
3D motion photo animator
The first tool on the list of 3d photo animators onlineis an excellent tool called 3D motion photo Animator. The tool helps to split landscape shots into numerous panels depending on the distance of the object from the camera. Furthermore, the plug-in also adds a soft parallax movement into the layers, giving the final image a beautiful 3D effect. The tool also has several editing options and a wide range of lens flare. The animator tool allows you to tweak the weather by using the weather effect options available in the tool.
3D photo animator
This 3d animation photo maker online takes the hype of the parallax effect in animation to a whole different level. The animator allows you to add parallax effects to any still image to make it appear 3 dimensional. Moreover, you can also add depth to the animated image to enhance the 3 dimensional effects and make it appear more realistic.
Live photo animation
Live photo animation is another seamless tool that offers free 3d motion graphics. The tool which is mainly meant for animation gives you the ability to mask the object and a keyframe from vivid natural movements. Once the subject and the background have been isolated and processed, they work independently from each other. This means that, due to independent operation, live photo animation becomes even more realistic since the subject can be animated without affecting the background. The tool also has cool zooming and 3D tracking effects.
Easy 3D face photo Animator
Most tools for 3d photo animation online fail to make the image look completely 3 dimensional. Even after the animation is performed, the people and the objects continue to look 2 dimensional. However easy 3D face photo Animator solves the problem. Using this tool, you can individually animate a face and make it 3 dimensional. It uses several panels to recreate the effect that’d be provided by a video recorder.
Live photo Animator
Looking for an animating tool to animate still images and transform them into stunning videos like action pictures? Live photo Animator is just the perfect tool for you then. The tool has a simple interface and helps generate realistic 3d action images. The plug-in works on the principle of duplicating action elements in an image. These action images include water, dust, fire, and other different kinds of moving objects in an image.
Photo Animator tool
The photo Animator tool kit is a great tool to generate animated 3D images. This quick time-saving tool is your go-to tool for photo effects and zooming. Moreover, the pack also consists of 50 preset animation templates that you can choose from. All you need to do is drag and drop the still images into the tool, and then you need to select the template that you’d like to apply to the image. The tool then processes the image and animates it to convert the still image into a 3d one.
Media animator
Think of smooth and seamless media transitions? Media animator is the perfect tool for you. This software offers a set of seamless and dynamically animated media transitions. The smooth transition effects make the images produced by this tool perfect for using the 3D animations in your official presentations and slideshows.
3D photo Animator
Have an attractive image that you wish to enhance by using animation? Here’s a simple software that can help you add a touch of flair to any simple image. The software has amazing 3d animation powers. When you zoom on the images produced by the software, the entire perspective changes, and the image looks entirely 3D.
Particular photo animation
The animating tool is the best for those who wish to finish animation quickly. The software has an amazing and stylish way of making slideshows. The tool has several templates that concentrate on the particular motion.
Key Takeaways from This Episode
● 3d animation is one of the most budding fields these days. It makes our photos life-like and brings back real life memories.
● Using 3D animation, still images are brought back to life and memories from years back are revived.
● We looked at a few of the best tools for animating an image and converting them to 3D. 3D images can also help make your project reports and presentations much more attractive and earn you the extra edge over your colleagues.
● We recommend you to try a few of these cool tools and get your hands dirty with animation today!
The Best 10 Sketch Animation Video Makers
The Best 10 Sketch Animation Video Makers
An easy yet powerful editor
Numerous effects to choose from
Detailed tutorials provided by the official channel
Sketch animation has been in style for a very long time, and there is no doubt that it is a time-consuming process. But the sketch animation maker available these days helps us a lot. Are you aware of all these? Do you know how these are helping us currently?
Don’t worry if you are unaware because here we are discussing the same in detail and will help you to get the best tool for the same too. Let’s get started!
In this article
01 [What is a Sketch Animation?](#Part 1)
02 [How to Create Sketch Animation Videos with 10 Best Software](#Part 2)
03 [How to Make Sketch Animations](#Part 3)
Part 1 What is a Sketch Animation?
A sketch animation is a series of sketches that bring an idea to life. The drawings are usually rough and not perfect, but they are enough to tell a story. Sketch animations are used for many purposes, from advertising to product design. They can be used as a way to show a process or a product design in an easy-to-understand way.
Sketch animations can also be used for marketing purposes, such as explaining the features of a new product or promoting it with humour or through storytelling.
But to be someone who knows how to create the best sketches or videos, one needs to try their hands on the best sketch animation video maker too. One cannot achieve the desired results unless and until they are aware of a tool.
Part 2 How to Create Sketch Animation Videos with Best Software
In this section, we are discussing the best software to help you with Sketchup animation easily. All this software will cater to your needs for creating the best animations seamlessly. These are as follows:
01Animaker
Animaker is the most famous name in the list of software when you are looking for a whiteboard sketch animation maker. It features a drag and drop animation option, helping you to create the content easily. It is a suitable tool for professionals and beginners alike. It also offers thousands of templates that can be customised as per the needs of the user. You can simply utilise the stock videos and photos for better results.

Pros:
● Easy to use.
● The results are delivered quickly.
● It is suitable for professionals and beginners alike.
Cons:
● Some users complain about its interface.
● Sometimes video creation takes a lot of time.
02Renderforest video maker
Renderforest video maker is the best platform for all those who are looking to create sketch animation and other videos. It provides a free plan, and the same is available limitlessly for users. It features thousands of stock clips and a library of music tracks for creating the content seamlessly.

Pros:
● Easy to use.
● Different features are integrated.
● Impressive interface.
Cons:
● complaint about the content’s quality
03Powtoon
Powtoon is among the best visual communication platforms available, helping in creating short videos with animation. It features professionally designed templates along with some additional tools, including clips, audio, characters, and so on, which a user can utilize while creating the animation video. It comes up with paid and free options, and users can utilize any of them.

Pros:
● Easy to use.
● Templates are innovative.
● It makes engaging content.
Cons:
● Some find it difficult to use.
04Vyond
Vyond is among the best sketch animation makers and offers a free trial to all users. This is especially true for professionals with all the skills. Some pre-built templates are also there to help users create the content seamlessly. It features royalty-free music along with some stock characters that can be utilised in the content.

Pros:
● Good video creation tool.
● Many functions are integrated.
● One can upload content directly and get the animation.
Cons:
● Not for beginners,
05Keyshot
Keyshot is the best sketch animation software available these days. It features file formats along with some photorealistic rendering. The outcome created with it appears to be a real animation, and users can also add on some interactive visual studio. It also comes with a free trial, so users can use it and analyse whether they want to go for the paid version or not.

Pros:
● Innovative interface
● Support for two different extensions of models.
● A library of materials and textures is available.
Cons:
● Utilizing all the features seems to be difficult.
063ds Max Design
3ds Max design is the best sketch animation software for users when they are looking to create sketch animations. The best part is that it offers realistic animation behaviour along with all the sophisticated particle effects. There are certain third-party extensions that are available that a user can integrate for better results.

Pros:
● Third-party extensions are available.
● Realistic animation behaviour
● Procedural tools are available.
Cons:
● Beginners find it difficult to use.
07Moovly
Moovly is a cloud-based software with a drag and drop interface. Whenever you are looking to create sketch animations, this tool will help you out with it. It also has millions of free stock images and other content available, helping in creating the content as a user requires.

Pros:
● Simple to use
● Innovative interface
● Limitless features
Cons:
● The interface appears to be buggy sometimes.
08Harmony
Harmony is also among the best reproduction animation software available, which is helpful in creating the content with special lighting, shading, and special effects. There are certain options and features available to help in creating the content with the texture and sound management options. It comes in free and paid versions, and the free trial version will help users analyse whether they want to go for it or not.

Pros:
● Easy to use.
● Clean interface.
● Bugs free.
Cons:
● Beginners find it difficult to use.
09Modo
Modo is the best modeling, rendering, texturing, and sketch animation software available. Whenever you are looking for a sketch animation maker, this tool will definitely hit the top. The navigation through the software is really very easy, and users can get the outcome immediately as they want.

Pros:
● Navigation throughout is easy.
● The interface is innovative.
● by 7 community is available to help in case of issues
Cons:
● Outcome delivered bit lately.
10Cinema 4D
Cinema is among the software available for sketch animation that has an innovative interface along with some additional features. It comes with object tracking and some cartoon styling features that help users get the outcome they want. A free trial option is also integrated for convenience.

Pros:
● Easy to use.
● Additional layouts are integrated.
● Mouse shortcuts are easy to use.
Cons:
● Beginners find it difficult to use.
Part 3 How to Make Sketch Animations
Well, when it comes to making sketch animations, users are confused about the steps that they need to follow for the same. Well, do know that the steps are very simple to follow and one can easily complete the task with a few steps. The steps needed to be followed are:
01Step 1 Write and record the script
Writing and recording the script is the primary step a user needs to follow. It is helpful in analyzing where to start and how they want the animation sketch to come out. Get the organizational structures available and then integrate them according to the recorded script.
02Step 2 Create a storyboard
Get the storyboard or, say, the sketch animation maker like Filmora, available and start keeping the recorded stuff over the same in the best manner possible. After implementing the changes, test the same.
03Step 3 Draw it out
After managing all the things, it is integral to sketch the same. The tools are integrated into the software like Filmora, helping you to put things accordingly. You can also do the customizations required if required.
04Step 4 Scanning and editing
Now you need to scan the complete content and do any editing required. This part is among the most crucial ones because, after finalizing the outcome, you will not be able to do the editing. However, if you want to do the editing, you need to repeat the entire process. Check things out mindfully.
05Step 5 Play Filmora once more
When you are done editing the images and creating the sketch animation, put them on Filmora for the final results.
Wondershare Filmora Video Editor is one of the efficient tools available for users to create sketch animated videos easily. This tool has all the advanced features integrated, making the task easy to achieve. Also, it features a customization option, helping users to add on or extract things or effects easily and rapidly.
Wondershare Filmora
Get started easily with Filmora’s powerful performance, intuitive interface, and countless effects Try It Free Try It Free Learn More >
● Key Takeaways from This Episode →
● Sketch animation is a new art form used for many purposes.
● Filmora is one of the best sketch animation video makers.
● Sketch animsation tools are best for us for creating the desired outcome.
Sketch animation has been in style for a very long time, and there is no doubt that it is a time-consuming process. But the sketch animation maker available these days helps us a lot. Are you aware of all these? Do you know how these are helping us currently?
Don’t worry if you are unaware because here we are discussing the same in detail and will help you to get the best tool for the same too. Let’s get started!
In this article
01 [What is a Sketch Animation?](#Part 1)
02 [How to Create Sketch Animation Videos with 10 Best Software](#Part 2)
03 [How to Make Sketch Animations](#Part 3)
Part 1 What is a Sketch Animation?
A sketch animation is a series of sketches that bring an idea to life. The drawings are usually rough and not perfect, but they are enough to tell a story. Sketch animations are used for many purposes, from advertising to product design. They can be used as a way to show a process or a product design in an easy-to-understand way.
Sketch animations can also be used for marketing purposes, such as explaining the features of a new product or promoting it with humour or through storytelling.
But to be someone who knows how to create the best sketches or videos, one needs to try their hands on the best sketch animation video maker too. One cannot achieve the desired results unless and until they are aware of a tool.
Part 2 How to Create Sketch Animation Videos with Best Software
In this section, we are discussing the best software to help you with Sketchup animation easily. All this software will cater to your needs for creating the best animations seamlessly. These are as follows:
01Animaker
Animaker is the most famous name in the list of software when you are looking for a whiteboard sketch animation maker. It features a drag and drop animation option, helping you to create the content easily. It is a suitable tool for professionals and beginners alike. It also offers thousands of templates that can be customised as per the needs of the user. You can simply utilise the stock videos and photos for better results.
Pros:
● Easy to use.
● The results are delivered quickly.
● It is suitable for professionals and beginners alike.
Cons:
● Some users complain about its interface.
● Sometimes video creation takes a lot of time.
02Renderforest video maker
Renderforest video maker is the best platform for all those who are looking to create sketch animation and other videos. It provides a free plan, and the same is available limitlessly for users. It features thousands of stock clips and a library of music tracks for creating the content seamlessly.
Pros:
● Easy to use.
● Different features are integrated.
● Impressive interface.
Cons:
● complaint about the content’s quality
03Powtoon
Powtoon is among the best visual communication platforms available, helping in creating short videos with animation. It features professionally designed templates along with some additional tools, including clips, audio, characters, and so on, which a user can utilize while creating the animation video. It comes up with paid and free options, and users can utilize any of them.
Pros:
● Easy to use.
● Templates are innovative.
● It makes engaging content.
Cons:
● Some find it difficult to use.
04Vyond
Vyond is among the best sketch animation makers and offers a free trial to all users. This is especially true for professionals with all the skills. Some pre-built templates are also there to help users create the content seamlessly. It features royalty-free music along with some stock characters that can be utilised in the content.
Pros:
● Good video creation tool.
● Many functions are integrated.
● One can upload content directly and get the animation.
Cons:
● Not for beginners,
05Keyshot
Keyshot is the best sketch animation software available these days. It features file formats along with some photorealistic rendering. The outcome created with it appears to be a real animation, and users can also add on some interactive visual studio. It also comes with a free trial, so users can use it and analyse whether they want to go for the paid version or not.
Pros:
● Innovative interface
● Support for two different extensions of models.
● A library of materials and textures is available.
Cons:
● Utilizing all the features seems to be difficult.
063ds Max Design
3ds Max design is the best sketch animation software for users when they are looking to create sketch animations. The best part is that it offers realistic animation behaviour along with all the sophisticated particle effects. There are certain third-party extensions that are available that a user can integrate for better results.
Pros:
● Third-party extensions are available.
● Realistic animation behaviour
● Procedural tools are available.
Cons:
● Beginners find it difficult to use.
07Moovly
Moovly is a cloud-based software with a drag and drop interface. Whenever you are looking to create sketch animations, this tool will help you out with it. It also has millions of free stock images and other content available, helping in creating the content as a user requires.
Pros:
● Simple to use
● Innovative interface
● Limitless features
Cons:
● The interface appears to be buggy sometimes.
08Harmony
Harmony is also among the best reproduction animation software available, which is helpful in creating the content with special lighting, shading, and special effects. There are certain options and features available to help in creating the content with the texture and sound management options. It comes in free and paid versions, and the free trial version will help users analyse whether they want to go for it or not.
Pros:
● Easy to use.
● Clean interface.
● Bugs free.
Cons:
● Beginners find it difficult to use.
09Modo
Modo is the best modeling, rendering, texturing, and sketch animation software available. Whenever you are looking for a sketch animation maker, this tool will definitely hit the top. The navigation through the software is really very easy, and users can get the outcome immediately as they want.
Pros:
● Navigation throughout is easy.
● The interface is innovative.
● by 7 community is available to help in case of issues
Cons:
● Outcome delivered bit lately.
10Cinema 4D
Cinema is among the software available for sketch animation that has an innovative interface along with some additional features. It comes with object tracking and some cartoon styling features that help users get the outcome they want. A free trial option is also integrated for convenience.
Pros:
● Easy to use.
● Additional layouts are integrated.
● Mouse shortcuts are easy to use.
Cons:
● Beginners find it difficult to use.
Part 3 How to Make Sketch Animations
Well, when it comes to making sketch animations, users are confused about the steps that they need to follow for the same. Well, do know that the steps are very simple to follow and one can easily complete the task with a few steps. The steps needed to be followed are:
01Step 1 Write and record the script
Writing and recording the script is the primary step a user needs to follow. It is helpful in analyzing where to start and how they want the animation sketch to come out. Get the organizational structures available and then integrate them according to the recorded script.
02Step 2 Create a storyboard
Get the storyboard or, say, the sketch animation maker like Filmora, available and start keeping the recorded stuff over the same in the best manner possible. After implementing the changes, test the same.
03Step 3 Draw it out
After managing all the things, it is integral to sketch the same. The tools are integrated into the software like Filmora, helping you to put things accordingly. You can also do the customizations required if required.
04Step 4 Scanning and editing
Now you need to scan the complete content and do any editing required. This part is among the most crucial ones because, after finalizing the outcome, you will not be able to do the editing. However, if you want to do the editing, you need to repeat the entire process. Check things out mindfully.
05Step 5 Play Filmora once more
When you are done editing the images and creating the sketch animation, put them on Filmora for the final results.
Wondershare Filmora Video Editor is one of the efficient tools available for users to create sketch animated videos easily. This tool has all the advanced features integrated, making the task easy to achieve. Also, it features a customization option, helping users to add on or extract things or effects easily and rapidly.
Wondershare Filmora
Get started easily with Filmora’s powerful performance, intuitive interface, and countless effects Try It Free Try It Free Learn More >
● Key Takeaways from This Episode →
● Sketch animation is a new art form used for many purposes.
● Filmora is one of the best sketch animation video makers.
● Sketch animsation tools are best for us for creating the desired outcome.
How to Create Your Own Avatar Free
How to Create Your Own Avatar Free
An easy yet powerful editor
Numerous effects to choose from
Detailed tutorials provided by the official channel
As a profile image, you can use your Facebook avatar. You can choose from a range of faces, hairstyles, and costumes for your avatar.
This article will help in creating your own avatar app and let you understand how to make your own my little pony avatar.
In this article
01 [Avatar Maker Tutorial | Create your Avatar for Free](#Part 1)
02 [5 Apps to Build Your Avatar](#Part 2)
Part 1 Avatar Maker Tutorial | Create your Avatar for Free
Adobe Creative Cloud Express is an online tool to make your own avatars for free. With Adobe, you can create a handcrafted avatar to match your personality for your social media profiles, YouTube videos, and so much more. Adobe lets you think out of the box, easy as choosing a template and sharing. Let us discuss the steps to create your own avatar for free using Adobe.
![]()
01Step 1: Start with Inspiration
You can never start from an empty canvas; there are several templates available you can choose any one of them by browsing with color, aesthetic, mood, and many other categories to have an idea of creating an avatar. Once you find a suitable graphic, you can click or tap on it starts editing as a document in the editor.
![]()
02Step 2: Remix
You can customize your avatar templates in a variety of ways. Change the font and copy. Substitute your photos for the imagery. Alternatively, you can use Creative Cloud Express to search through thousands of free pictures. Design your own by spending as little time as you wish.
![]()
03Step 3: Amplify Up the Flair
You can be as creative as you can by adding flair and personality to your projects with design assets. Add animated text and GIF to your project in one tap. They have cleared all the other technical issues to focus on your style and message.
![]()
04Step 4: Resize
The days where you have to remember the dimension of the image are gone. Once you have selected the design, you can modify and resize using the Auto magical resize available feature. Duplicate the project, select “Hit Resize,” and choose the platform to adapt it, and our AI will take care of the rest. Enjoy sharing it on other media.
[Well, this feature is a premium feature, so if you wish to access it, you need to do a subscription.]
![]()
05Step 5: Save and Share
Once you have applied all your creativity to your project, click on the “Publish” button and share your creations. Creative Cloud saves your project in your profile so that you can revisit and edit your projects whenever required.
Explore these professional templates to make your own avatar-free. Browse for themes like logos, icons, personalized fonts, and other elements to create an authentic look.
![]()
Part 2 5 Apps to Build Your Avatars
Having your avatar as your profile picture is freaking excellent and fun. There are many apps to create your avatars; let’s discuss some of them.
01Boo App–3D Avatar Emoji
Boo creates 3D characters that look similar to you within minutes. There are plenty of outfit options that can be customized separately for your styles to match your daily fashion. With this app, make your own avatars for free.
Highlights
●It offers a ton of features like skin tones, hair colors, eye colors, and hairstyles
●It assists in making your own my little pony avatar to give a unique style.
●New items are updated regularly.
Limits
●Limited color options
●Background glitch
●Sometimes after clicking the color option, it gets changed.
Review/Ratings
It has a rating of about 4.4 and many good reviews from users.
02Faceq
This application provides multiple facial features and an extensive trendy wardrobe. Even the tiniest characteristics on the face, such as beauty marks, facial hair, and brows, are essential. Hair accessories to make you own my little pony avatar. It looks as beautiful as when you apply your creativity to the maximum level.
Highlights
●Inclusive of many tabs for obvious face form, hairdo, and attire.
●Add more life to your avatars like text bubbles, hand gestures, etc.
●Multiple facial features
Limits
●Limited makeup options
●More dressing options expected
●Some slogans may be inappropriate
Ratings/Review
It has a rating of 3.1
03 SuperMe
This application is mainly for girls, and it offers 1000+ facial expressions and more materials. You can create and share animated videos of your avatars with the world and chat with people to make new friends. You can use this application to create my animated avatar.
Highlights
●There are 100 animations facilities where you can randomly apply by a simple handshake.
●A straightforward procedure to use.
●Multiple Facial expressions.
Limits
●You need to buy coins. It would be good if available for free.
●Primarily for girls
●The limitation of this application is that the language is still in its original language (Chinese).
Ratings/Review
This app has a rating of about 4
04Zmoji
Zmoji, a personal emoji creator, enables chatting with multiple versions of yours, and thus this way, you can make your own my little pony avatar. There are many unique features introduced to create a more appropriate.
Highlights
●It has a simple interface.
●It allows you to build a vivid cartoon avatar that matches your style quickly.
●It has Emoji Keyboard, which will enable you to send emojis directly from your keyboard in iMessage and third-party apps.
Limits
●The app also requires a subscription for some activities, which is disappointing.
●The subscription cost is high.
Ratings/Reviews
This app has a review of about 4.6
05Wondershare ** Wondershare Filmora Video Editor
To create my animated avatar, you can choose Wondershare Wondershare Filmora Video Editor . It is something magical that allows you to do anything with your photo. Of course, including changing to an avatar or a cartoon character. In this journal, you will see many different ways to make your own avatar for free, but Wondershare Filmora Video Editor offers to be all. It contains many templates, font styles, animation effects, wardrobes, and what less. Wondershare Filmora Video Editor is easier to use; with a few steps, you can create an avatar representing you more accurately than any other software could do.
It just goes with creating layers, liquefying, smoothening and additional features. And simply, you can share it to any social media directly from the software. Wondershare Wondershare Filmora Video Editor is mainly used to create my animated avatar.
Highlights
●Simple and easy interface.
●User friendly
●Multitude of features
Limits
●Advanced version need a subscription
Reviews
4.4 as per user reviews
For Win 7 or later (64-bit)
For macOS 10.12 or later
● Key Takeaways from This Episode →
● Understanding Adobe Creative Cloud Express
● Five different Apps used in creating my animated avatar
● Compared to all other online tools and programs, Wondershare Wondershare Filmora Video Editor is superior.
Also read:
- New 2024 Approved How-To Guide Make Animation Characters with the Best Animated Character Creators
- New In 2024, Apps to Animate Still Pictures
- Updated In 2024, Some Must-Know Useful Lego Animation Ideas
- Updated Whats Music Video GIF & How to Add Music to Your GIF Files
- Know All About Animated Business Logos and the Best Tools to Create One
- Updated 2024 Approved Create Animated Social Media Posts in Canva
- Is Blender 2D Animation As Awesome As 3D for 2024
- Learn How to Do Funny Cartoon Drawings
- New In 2024, 10 Top Memorable Japanese Cat Cartoons
- Updated Ways to Master to Find 10 Best Free Animated Text Generator for 2024
- Updated 2024 Approved How to Find 3D Animation Studio
- New 2024 Approved Beginners Guide for Learning 3D Animation
- New 2024 Approved Best Websites to Download Animated GIFs for Free
- 12 Animation Video Maker That Can Triple Conversion Rates
- 2024 Approved Ways to Create Animated Clipart in PowerPoint
- Updated 2024 Approved 5 Best Adobe Animate Courses & Classes
- In 2024, The Secret Sauce for Making GIF Instagram Story More Stunning
- New How to Obtain and Create Animated GIF Icons Like a Pro for 2024
- Updated In 2024, Ways You Can Master to Find 10 Best Free Animated Text Generator
- New In 2024, Secret Shortcut to Adobe Animate Character Tutorial
- In 2024, 12 Dubbed Anime Websites to Watch for Free
- Updated Amazing Techniques of Motion Graphics in Premiere Pro for 2024
- New 2024 Approved 5 Recommended Websites for Text GIF Maker
- Updated How to Make 3D Cartoon of Yourself for 2024
- 5 Free Animated Gif Sources You Must Check for 2024
- New 2024 Approved Ways to Create an Adobe Collage
- New 2024 Approved How to Make a GIF in Photoshop
- Updated 2024 Approved 5 Must Try Ways to Add and Send GIF in Text Message on Android
- New 2024 Approved Top 12 2D Animation Studios All Should Check Out
- New 2024 Approved Have You Seen the Facebook Cartoon App Everyones Using Lately
- Updated In-Depth Study of Cartoon Painting Starts
- 2024 Approved Adobe Animate Text Effects Skills That You Need to Know
- Updated In 2024, 6 Types of Animation You May Like
- In 2024, Best 10 Video to GIF Converters Top Picks
- 5 Websites with Animated Logos That Catch Your Eyes
- DP Animation Maker Tutorial for Finding The Best Animated Profile Picture Maker
- Updated 2024 Approved The Only Guide to Make 2D Rigging Clear to You
- 2024 Approved Best 15 Instant Classics Animated Cartoon Movies
- Top 15 2D Animation Software Free That Worth to Try
- How to Send and Add Snapchat GIFs 100 in Easy Way for 2024
- 2024 Approved Learn How to Make Your Characters Interactive in Unity Animation Rigging
- What Does Enter PUK Code Mean And Why Did The Sim Get PUK Blocked On Huawei P60 Device
- In 2024, Top 6 Apps/Services to Trace Any Apple iPhone 13 Pro Location By Mobile Number | Dr.fone
- In 2024, Why Your WhatsApp Live Location is Not Updating and How to Fix on your Realme Narzo N55 | Dr.fone
- In 2024, 5 Easy Ways to Copy Contacts from Samsung Galaxy M54 5G to iPhone 14 and 15 | Dr.fone
- In 2024, 7 Top Ways To Resolve Apple ID Not Active Issue For iPhone 12 Pro | Dr.fone
- Easy steps to recover deleted photos from Lava Storm 5G.
- How to Make Animated Explainer Videos for 2024
- A Detailed VPNa Fake GPS Location Free Review On Honor X8b | Dr.fone
- In 2024, Complete Guide on Unlocking iPhone 6s Plus with a Broken Screen?
- How to Find iSpoofer Pro Activation Key On ZTE Nubia Flip 5G? | Dr.fone
- Thinking About Changing Your Netflix Region Without a VPN On Samsung Galaxy S23 Tactical Edition? | Dr.fone
- Realme 11 Pro Camera Not Working Unexpected Error? Fix It Now | Dr.fone
- Want to Uninstall Google Play Service from Asus ROG Phone 8 Pro? Here is How | Dr.fone
- Updated 2024 Approved What Is an AI Presentation Maker?
- Fix App Not Available in Your Country Play Store Problem on Samsung Galaxy XCover 6 Pro Tactical Edition | Dr.fone
- In 2024, The Updated Method to Bypass Xiaomi 14 Pro FRP
- Preparation to Beat Giovani in Pokemon Go For Tecno Pova 5 Pro | Dr.fone
- How to Cast Apple iPhone 12 mini to Chromecast? | Dr.fone
- Complete Tutorial for Samsung Galaxy A24 Hard Reset | Dr.fone
- A Guide Honor Play 40C Wireless and Wired Screen Mirroring | Dr.fone
- Title: 10 Great Apps to Turn Funny Animated Images Into Comics for 2024
- Author: Elon
- Created at : 2024-06-23 02:09:34
- Updated at : 2024-06-24 02:09:34
- Link: https://animation-videos.techidaily.com/10-great-apps-to-turn-funny-animated-images-into-comics-for-2024/
- License: This work is licensed under CC BY-NC-SA 4.0.
