
:max_bytes(150000):strip_icc():format(webp)/TwitterVideoDownload-5b605aaac9e77c002c3a42f3.jpg)
10 Top Tools to Make Pic Collage for Windows
10 Top Tools to Make Pic Collage for Windows
10 Best Tools to Make Pic Collage for Windows
An easy yet powerful editor
Numerous effects to choose from
Detailed tutorials provided by the official channel
Collages are a great way to assemble all your favorite pictures in one place. You can share these collages with your friends, relatives, and dear ones or can also use them for posting on social media sites and other online platforms. Though creating a collage may sound simple, a lot of considerations need to be taken for creating an interesting and eye-catchy collage, and for this, a help of a professional tool can be taken. In the following parts of the topic, you can learn about the best tools for photo collage Windows 10 and other OS.

In the following parts of the topic, you can learn about the best tools for photo collage Windows 10 and other OS.
In this article
01 [Top 10 Pic Collage for Windows Tools](#Part 1)
02 [The Best Tool to Get Stock Images for Creating Collages](#Part 2)
Part 1 Top 10 Pic Collage for Windows Tools
Checkout the best collage for Windows below.
01PhotoPad Photo Editing Software
This is a complete photo editing tool supporting an array of features including the creation of a photo collage. This software from NCH software can let you add the desired images manually and also support using the auto grid to add an unlimited number of pictures. The tool also lets you choose the collage orientation size and set the background as needed.
Pros:
● Create collage Windows manually or automatically.
● Allows adding a background color, image, or from the available background options.
● Spacing and corners between the images can be selected.
● The size of the tool is small.
Cons:
● Stickers and filters to individual images cannot be added.
● Cannot choose a custom collage size.

02PhotoScapeX
Available for download on Windows 10 and higher versions this is another widely used photo editing tool that can also let you create collages manually as well as automatically. Multiple frames are available that can be selected as desired and there are additional features like adding filters, and also edit them in multiple ways.
Pros:
● Allows creating collage manually and automatically.
● Multiple editing tools for customization like filters, crop, zoom, doodle, and more.
● Picture alignment can be done in 3 modes- vertical, horizontal, and tile.
● Option to change and customize image size, spacing, margin, and others.
Cons:
● Limited photos can be added.
● The size of the tool is large in comparison to other tools.

03Phototastic Collage
This is free to use Windows-based tool that can create impressive collages in no time. Multiple designs, frames, and other options are available to create a customized collage as needed.
Pros:
● Multiple customization options are available for creating the desired collage.
● User-friendly and simple interface.
● An array of templates is available.
Cons:
● The free version has limited features.
● Limitation to the number of images that can be added.
● Ads in the app.

04PicCollage
Unleash your creativity by creating an interesting collage using this excellent collage-making app. There are multiple templates and customization options supports.
Pros
● Create collage manually or automatically
● The earlier created collage can be edited.
● Allows creating a collage in 3 options- grid, template, freestyle.
Cons
● Watermark on the created collage.
● The image size cannot be customized.

05Collage Maker-Photo Grid and Montage
Using this free Windows tool, you can create an interesting photo collage or a free-styled montage as needed. A wide range of layouts and templates are available that can be further customized to get the desired collage.
Pros:
● Free Windows software.
● Come with multiple filters, layout, and editing tools.
● The user interface is easy.
● Preview option available.
Cons:
● Performance glitches due to bugs.
● Custom collage size cannot be set.
● Watermark on the collage.

06Fotor
If you are looking for a simple and basic collage-making tool, Fotor is the right choice. Collage in the grid, freestyle, and photo-stitch style can be created and basic customization features are supported.
Pros:
● Simple to use tool that is apt for beginners.
● Border can be changed from a solid color to a background.
Cons:
● Customization options are limited.
● Border and the image size cannot be changed.

07El Collagero
Just like its name, this is an interesting Windows-based tool for creating a collage of your choice. A wide range of options for customization is available that can let you edit the images, choose a template and then also edit the file.
Pros:
● A wide range of templates and designs for collages is available.
● Allows adding text, symbols, and other elements.
● Created collage can be shared on social media sites.
Cons:
● In comparison to other professional tools, the functions are limited.

08Atlantas Photo Collage Studio
This Windows-based tool will let you create collages of all types and for all occasions. You can choose from over 100 templates that best match your collage theme and image content.
Pros:
● More than 100 templates for collage designs are available.
● The size of the layout can be changed.
● Multiple editing and customization options are supported like zoom, opacity selection, and more.
Cons:
● Limitation of adding 45 images.
● For the advanced functions, need to subscribe to the paid version.

09PhotoJoiner
Using this Windows tool, pick up your favorite images and turn them into a beautiful collage with customized design and style.
Pros:
● A simple and basic tool for creating a collage.
● Created collage can be saved or shared to the social media site.
● Change the order of the images, margins, and other aspects.
Cons
● Collage templates are limited.
● Advanced features are missing.

1010. Blend Photo
To create a collage of images with a blending effect, this is the right tool to use. Available for download on the Windows system this tool lets you create collages telling interesting stories.
Pros:
● Simple and easy collage-making tool.
● Add blending effect to your collages.
● Over 50 custom shapes for image cropping are available along with the option for free-hand cropping.
● Multiple filters can be added.
Cons:
● Limited Editing and customization options.

Part 2 The Best Tool to Get Stock Images for Creating Collages
Several times, the captured and stored images may not fit in the collage theme you wish to create and, in such situations, you can use the stock images available online at several sites. One of the best tools where you can check out the images in different categories is Wondershare Filmora. This versatile software from Wondershare Filmora Video Editor is an advanced video editing tool that also has a huge collection of stock media including images.
Additionally, the split-screen feature of the software can be used for creating a video collage. Available for Windows and Mac systems, Wondershare Filmora will look after all your advanced video editing and customized requirements.

Wondershare Filmora - Best Video Editor for Mac/Windows
5,481,435 people have downloaded it.
Build unique custom animations without breaking a sweat.
Focus on creating epic stories and leave the details to Filmora’s auto features.
Start a creative adventure with drag & drop effects and endless possibilities.
Filmora simplifies advanced features to save you time and effort.
Filmora cuts out repetition so you can move on to your next creative breakthrough.
● Key Takeaways from This Episode →
● Collage-making tools help in creating an interesting and eye-catchy collage in a hassle-free manner.
●Several Windows-based tools are available for quick download.
●Wondershare Filmora is a great software to find a collection of stock images in different categories.
Collages are a great way to assemble all your favorite pictures in one place. You can share these collages with your friends, relatives, and dear ones or can also use them for posting on social media sites and other online platforms. Though creating a collage may sound simple, a lot of considerations need to be taken for creating an interesting and eye-catchy collage, and for this, a help of a professional tool can be taken. In the following parts of the topic, you can learn about the best tools for photo collage Windows 10 and other OS.
In the following parts of the topic, you can learn about the best tools for photo collage Windows 10 and other OS.
In this article
01 [Top 10 Pic Collage for Windows Tools](#Part 1)
02 [The Best Tool to Get Stock Images for Creating Collages](#Part 2)
Part 1 Top 10 Pic Collage for Windows Tools
Checkout the best collage for Windows below.
01PhotoPad Photo Editing Software
This is a complete photo editing tool supporting an array of features including the creation of a photo collage. This software from NCH software can let you add the desired images manually and also support using the auto grid to add an unlimited number of pictures. The tool also lets you choose the collage orientation size and set the background as needed.
Pros:
● Create collage Windows manually or automatically.
● Allows adding a background color, image, or from the available background options.
● Spacing and corners between the images can be selected.
● The size of the tool is small.
Cons:
● Stickers and filters to individual images cannot be added.
● Cannot choose a custom collage size.
02PhotoScapeX
Available for download on Windows 10 and higher versions this is another widely used photo editing tool that can also let you create collages manually as well as automatically. Multiple frames are available that can be selected as desired and there are additional features like adding filters, and also edit them in multiple ways.
Pros:
● Allows creating collage manually and automatically.
● Multiple editing tools for customization like filters, crop, zoom, doodle, and more.
● Picture alignment can be done in 3 modes- vertical, horizontal, and tile.
● Option to change and customize image size, spacing, margin, and others.
Cons:
● Limited photos can be added.
● The size of the tool is large in comparison to other tools.
03Phototastic Collage
This is free to use Windows-based tool that can create impressive collages in no time. Multiple designs, frames, and other options are available to create a customized collage as needed.
Pros:
● Multiple customization options are available for creating the desired collage.
● User-friendly and simple interface.
● An array of templates is available.
Cons:
● The free version has limited features.
● Limitation to the number of images that can be added.
● Ads in the app.
04PicCollage
Unleash your creativity by creating an interesting collage using this excellent collage-making app. There are multiple templates and customization options supports.
Pros
● Create collage manually or automatically
● The earlier created collage can be edited.
● Allows creating a collage in 3 options- grid, template, freestyle.
Cons
● Watermark on the created collage.
● The image size cannot be customized.
05Collage Maker-Photo Grid and Montage
Using this free Windows tool, you can create an interesting photo collage or a free-styled montage as needed. A wide range of layouts and templates are available that can be further customized to get the desired collage.
Pros:
● Free Windows software.
● Come with multiple filters, layout, and editing tools.
● The user interface is easy.
● Preview option available.
Cons:
● Performance glitches due to bugs.
● Custom collage size cannot be set.
● Watermark on the collage.
06Fotor
If you are looking for a simple and basic collage-making tool, Fotor is the right choice. Collage in the grid, freestyle, and photo-stitch style can be created and basic customization features are supported.
Pros:
● Simple to use tool that is apt for beginners.
● Border can be changed from a solid color to a background.
Cons:
● Customization options are limited.
● Border and the image size cannot be changed.
07El Collagero
Just like its name, this is an interesting Windows-based tool for creating a collage of your choice. A wide range of options for customization is available that can let you edit the images, choose a template and then also edit the file.
Pros:
● A wide range of templates and designs for collages is available.
● Allows adding text, symbols, and other elements.
● Created collage can be shared on social media sites.
Cons:
● In comparison to other professional tools, the functions are limited.
08Atlantas Photo Collage Studio
This Windows-based tool will let you create collages of all types and for all occasions. You can choose from over 100 templates that best match your collage theme and image content.
Pros:
● More than 100 templates for collage designs are available.
● The size of the layout can be changed.
● Multiple editing and customization options are supported like zoom, opacity selection, and more.
Cons:
● Limitation of adding 45 images.
● For the advanced functions, need to subscribe to the paid version.
09PhotoJoiner
Using this Windows tool, pick up your favorite images and turn them into a beautiful collage with customized design and style.
Pros:
● A simple and basic tool for creating a collage.
● Created collage can be saved or shared to the social media site.
● Change the order of the images, margins, and other aspects.
Cons
● Collage templates are limited.
● Advanced features are missing.
1010. Blend Photo
To create a collage of images with a blending effect, this is the right tool to use. Available for download on the Windows system this tool lets you create collages telling interesting stories.
Pros:
● Simple and easy collage-making tool.
● Add blending effect to your collages.
● Over 50 custom shapes for image cropping are available along with the option for free-hand cropping.
● Multiple filters can be added.
Cons:
● Limited Editing and customization options.
Part 2 The Best Tool to Get Stock Images for Creating Collages
Several times, the captured and stored images may not fit in the collage theme you wish to create and, in such situations, you can use the stock images available online at several sites. One of the best tools where you can check out the images in different categories is Wondershare Filmora. This versatile software from Wondershare Filmora Video Editor is an advanced video editing tool that also has a huge collection of stock media including images.
Additionally, the split-screen feature of the software can be used for creating a video collage. Available for Windows and Mac systems, Wondershare Filmora will look after all your advanced video editing and customized requirements.
Wondershare Filmora - Best Video Editor for Mac/Windows
5,481,435 people have downloaded it.
Build unique custom animations without breaking a sweat.
Focus on creating epic stories and leave the details to Filmora’s auto features.
Start a creative adventure with drag & drop effects and endless possibilities.
Filmora simplifies advanced features to save you time and effort.
Filmora cuts out repetition so you can move on to your next creative breakthrough.
● Key Takeaways from This Episode →
● Collage-making tools help in creating an interesting and eye-catchy collage in a hassle-free manner.
●Several Windows-based tools are available for quick download.
●Wondershare Filmora is a great software to find a collection of stock images in different categories.
Best GIF to Video Converters
Best GIF to Video Converters

Shanoon Cox
Mar 27, 2024• Proven solutions
GIF files are gaining more popularity these days but still, the strange fact is that some social media sites do not offer support to GIF file format. One of the biggest examples of such platforms is Instagram. But, if you are a real fun lover then this simple issue cannot stop you from uploading interesting animations or videos over the internet. As Instagram does not support GIF images so why not to get them converted to simple video files and then update an entertaining sequence for your audience. That’s really a great idea.
You may also like: How to Upload GIF to Instagram >>
It is much easier to convert GIF images into many popular video file formats like AVI or MOV etc and then can be further shared on YouTube , Instagram and many other sites. So if you are ready to get started with this adventure then keep reading this article. Here you will find details about the best GIF to video converter tools that are popular among professionals as well as beginners.
Best GIF to Video Converters
Desktop Solutions to Converting GIF to Video
1. Wondershare Filmora
One of the best recommendations for your GIF to Video conversion needs is Wondershare Filmora due to its user-friendly interface. This tool works fine on Mac as well as the Windows platform and extends support to all popular video file formats like WMV, MP4 and MKV etc.
Key Features:
- Filmora offers a wide range of editing features like aspect ratio, speed, trim, merge, rotate and crop adjustments.
- Users can also add music to videos to make them more appealing.
- Possesses so many special effects along with text and title editing options.
- Files can be easily exported to iPhone, Android-like devices.
- It allows easy sharing of media on social media sites like Dailymotion, Vimeo, and YouTube, etc.
However, if you want to make a GIF online, Filmora meme maker is your ultimate solution. It helps you make images, GIFs and video memes directly without watermark. It is totally FREE to use and no signup. You can change text size, color, and position to create a caption when you are editing. Filmora meme maker supports converting GIF to video. Just with a few clicks, your GIF is done . Try it now!
 Download Mac Version ](https://tools.techidaily.com/wondershare/filmora/download/ )
2. Converter Lite
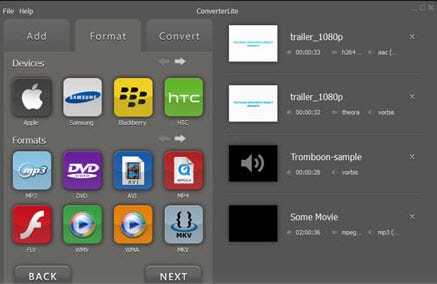
Key Features: Converter Lite extends support to numerous image and video file formats.
- Videos can be easily converted to animated GIFs and vice versa.
- The conversion process can be carried with impressive animation and effects additions.
- The frame rate can be defined by users.
How to Use?
- Import your desired GIF image.
- Select format for the destination file.
- Hit the Convert option.
Pros:
- Users can define the frame rate as per need.
- Provides huge options for the selection of input/ output file formats.
Cons:
- It leaves a watermark on output files.
3. Amazing GIF to Video Converter
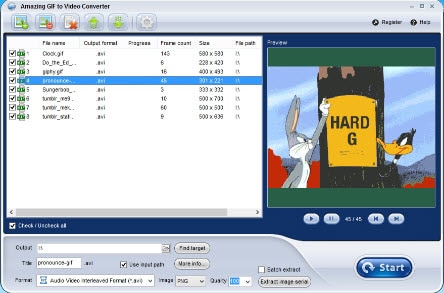
Key Features:
- It assists in the fast conversion of videos to GIF formats and the best part is that users can also clip video files to get their desired end results.
- It generates a preview of the edited file before initiating the actual conversion process.
- The converted animated GIF files can be easily shared on other platforms.
How to Use?
- First of all, users need to upload their GIF images to the software platform.
- Generate a preview of all frames.
- Now adjust your output file parameters to avail customized results.
- Choose your output file format and define the destination.
- Initiate the conversion process.
Pros:
- It extends support to all popular video file formats.
- The interactive interface makes it easier to operate even for beginners.
Cons:
- Reviewers do not rate its performance up to the mark.
4. Movavi Video Converter

Key Features: This tool supports a wide range of editing functions like trim, rotate, crop, etc.
- It can handle multiple media file formats like SWF, MOV, MKV, 3GP, MP4, WAV and FLV, etc.
- Movavi can be used to create captions and watermarks on videos. Marketers find it very useful.
- The most amazing thing to know is that this tool works perfectly on a wide range of devices like Xbox, iPhone, iPad, Sony PlayStation as well as on Android devices.
How to Use?
- Get your files imported on the Movavi timeline.
- Choose your desired output file format and adjust settings accordingly.
- Get your files converted immediately.
Pros:
- User-friendly interface.
- Instant conversion.
Cons:
- It cannot process copy-protected versions of media files or DVDs.
Smartphone App Solutions to Convert GIF to Video
1. GIFShare – iPhone
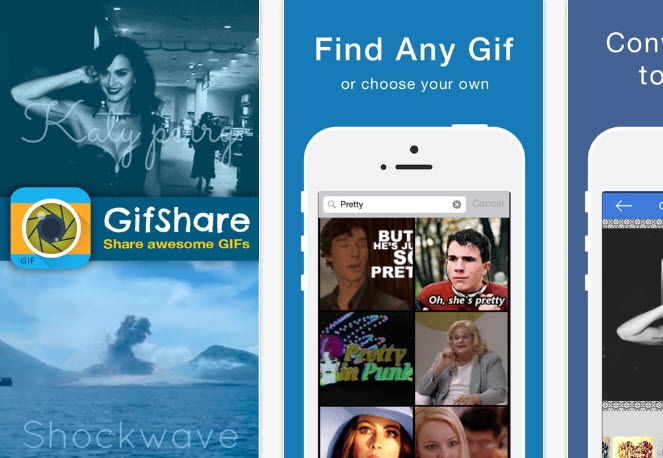
It can be used to convert GIFs into videos and then share them immediately on social media platforms. With GIFShare, you can easily keep your Instagram page updated with all new GIF converted videos.
How to Use?
- Upload your GIF files to the software platform; you can get them from camera roll or from GIFShare.
- Make desired editing on background and speed etc parameters.
- Get it converted with customized size level.
- Upload outputs directly to Instagram.
2. Gifaroo - Android
Here is one more interactive tool that allows users to directly upload GIF converted to Instagram. There are so many customization filters, effects, and background editing options; users can also alter captions with different colors and font styles.
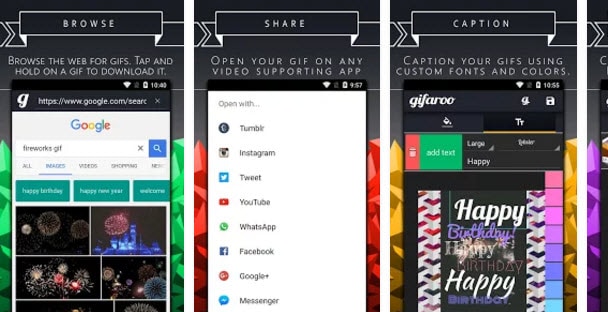
How to Use?
- Start browsing some interesting GIF animations on your Gifaroo app directly.
- Bring the desired one to the editing platform with a single tap.
3. GifVid
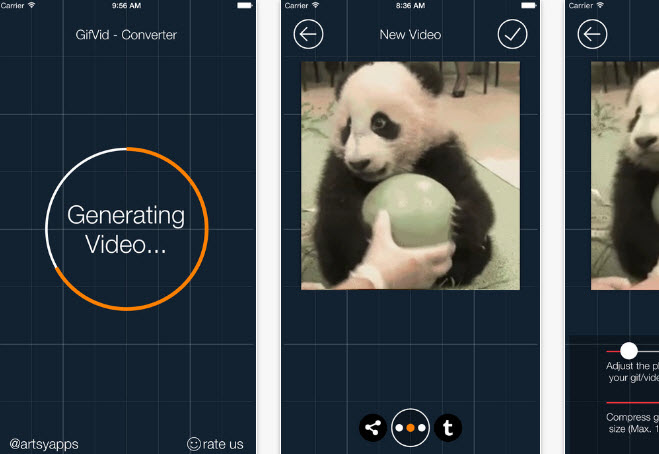
With GifVid you can convert simple videos into GIF animations and collection of GIFs can be turned back to videos with different file formats. Once your file gets converted then you can easily share them on Tumblr, Imgur, iMessage, etc.
Key Features: GifVid is designed with a straight forward and user-friendly design.
- Various editing options.
- This tool can be used in multiple languages.
- Supported Platform: Works on iOS devices like iPad and iPhones.
- Developer: It was developed by Artsy Apps.
Online GIF to Video Converters
1. GIFtovideo.com
Due to the impressive user interface, advanced editing options, and fast conversion rate, this tool is kept at first positing with higher user ratings. It can easily process uploaded video files as well as URL based links hence you can enjoy full flexibility on your portable as well as desktop devices.
Key Features: Beginners can easily handle its intuitive interface.
- The simple layout makes editing tasks much easier and conversion can be completed within very little time.
- Supported Platform: It works on Window platform with an active internet connection.
- Developer: This tool is owned and developed by Studio September that is a popular software developer company at Deutsch.
2. Cloud Convert
On Cloud Convert, users can easily process all popular video file formats to generate high-quality outcomes. It is not just limited to MP4 rather can support all professional-level media extensions. If you wish to make editing with few specific settings like codec adjustments then Cloud Convert can assist you better. If you want to access full feature version then you can get registered to this converter tool as paid users are able to avail more facilities.
Key Features: Cloud Convert can process any video file format with ease so you can bring any desired file to its timeline.
- Here you will get more freedom for customization settings of all converted videos.
- Supported Platforms: This tool is compatible with Windows only and users need to get their device connected to a high-speed internet connection to avail the best services.
- Developer: This tool is designed and maintained y a Germany based company, Lunaweb Ltd.
3. GIF2MP4
Here is one more easy to use yet feature-rich converter tool that can easily process your collection of GIF images to generate an MP4 video as an output. As the name indicates, this tool is intentionally designed for assisting users to get their GIF files converted with MP4 video file extension. There are numerous features hidden inside this online converter tool but once you start working over it your will be able to do awesome creativity with each editing project.
Key Features: It offers fast one-way conversion from GIF to MP4 video files.
- Simple and intuitive design.
- Supported Platforms: Mac and Window but the device must be connected to the internet for its operation.
- Developer: This tool is designed by trubo@zelnet.ru .
Read More to Get: the ultimate guide on How to Convert GIF to Video on your laptop or phone.
If you want to make GIF quickly, Filmora will offer you an online solution for making a GIF. Filmora meme maker can help you make images, GIFs and video memes directly without watermark. It is totally FREE and no signup. You can change text size, color, and position to create a caption.
Frequently Asked Questions About GIF to Video Converters
1. Can You Convert A GIF to Video?
The file format of all GIF files can be changed, but only if you have access to a GIF to Video converter. These apps allow you to choose the video file format to which a GIF file is going to be converted, so you can choose to turn a GIF into an MP4, AVI, or any other popular video file format.
Converting a GIF to a video can be useful if you want to post a GIF to Instagram or some other social media platform that doesn’t offer support for GIF files.
2. How to Save A GIF As A Video from An iPhone?
You must install one of the GIF creator apps for iOS before you can start converting GIFs to videos from your iPhone. Once you go through the installation process, you should launch the app you installed and import a GIF you want to turn into a video into the app. You can then edit the GIF if you want, and then proceed to export it. During the process of exporting a GIF, you should choose one of the available video file formats such as MP4 or MOV and your GIF will be converted into a video.
Shanoon Cox
Shanoon Cox is a writer and a lover of all things video.
Follow @Shanoon Cox
Shanoon Cox
Mar 27, 2024• Proven solutions
GIF files are gaining more popularity these days but still, the strange fact is that some social media sites do not offer support to GIF file format. One of the biggest examples of such platforms is Instagram. But, if you are a real fun lover then this simple issue cannot stop you from uploading interesting animations or videos over the internet. As Instagram does not support GIF images so why not to get them converted to simple video files and then update an entertaining sequence for your audience. That’s really a great idea.
You may also like: How to Upload GIF to Instagram >>
It is much easier to convert GIF images into many popular video file formats like AVI or MOV etc and then can be further shared on YouTube , Instagram and many other sites. So if you are ready to get started with this adventure then keep reading this article. Here you will find details about the best GIF to video converter tools that are popular among professionals as well as beginners.
Best GIF to Video Converters
Desktop Solutions to Converting GIF to Video
1. Wondershare Filmora
One of the best recommendations for your GIF to Video conversion needs is Wondershare Filmora due to its user-friendly interface. This tool works fine on Mac as well as the Windows platform and extends support to all popular video file formats like WMV, MP4 and MKV etc.
Key Features:
- Filmora offers a wide range of editing features like aspect ratio, speed, trim, merge, rotate and crop adjustments.
- Users can also add music to videos to make them more appealing.
- Possesses so many special effects along with text and title editing options.
- Files can be easily exported to iPhone, Android-like devices.
- It allows easy sharing of media on social media sites like Dailymotion, Vimeo, and YouTube, etc.
However, if you want to make a GIF online, Filmora meme maker is your ultimate solution. It helps you make images, GIFs and video memes directly without watermark. It is totally FREE to use and no signup. You can change text size, color, and position to create a caption when you are editing. Filmora meme maker supports converting GIF to video. Just with a few clicks, your GIF is done . Try it now!
Download Mac Version ](https://tools.techidaily.com/wondershare/filmora/download/ )
2. Converter Lite
Key Features: Converter Lite extends support to numerous image and video file formats.
- Videos can be easily converted to animated GIFs and vice versa.
- The conversion process can be carried with impressive animation and effects additions.
- The frame rate can be defined by users.
How to Use?
- Import your desired GIF image.
- Select format for the destination file.
- Hit the Convert option.
Pros:
- Users can define the frame rate as per need.
- Provides huge options for the selection of input/ output file formats.
Cons:
- It leaves a watermark on output files.
3. Amazing GIF to Video Converter
Key Features:
- It assists in the fast conversion of videos to GIF formats and the best part is that users can also clip video files to get their desired end results.
- It generates a preview of the edited file before initiating the actual conversion process.
- The converted animated GIF files can be easily shared on other platforms.
How to Use?
- First of all, users need to upload their GIF images to the software platform.
- Generate a preview of all frames.
- Now adjust your output file parameters to avail customized results.
- Choose your output file format and define the destination.
- Initiate the conversion process.
Pros:
- It extends support to all popular video file formats.
- The interactive interface makes it easier to operate even for beginners.
Cons:
- Reviewers do not rate its performance up to the mark.
4. Movavi Video Converter
Key Features: This tool supports a wide range of editing functions like trim, rotate, crop, etc.
- It can handle multiple media file formats like SWF, MOV, MKV, 3GP, MP4, WAV and FLV, etc.
- Movavi can be used to create captions and watermarks on videos. Marketers find it very useful.
- The most amazing thing to know is that this tool works perfectly on a wide range of devices like Xbox, iPhone, iPad, Sony PlayStation as well as on Android devices.
How to Use?
- Get your files imported on the Movavi timeline.
- Choose your desired output file format and adjust settings accordingly.
- Get your files converted immediately.
Pros:
- User-friendly interface.
- Instant conversion.
Cons:
- It cannot process copy-protected versions of media files or DVDs.
Smartphone App Solutions to Convert GIF to Video
1. GIFShare – iPhone
It can be used to convert GIFs into videos and then share them immediately on social media platforms. With GIFShare, you can easily keep your Instagram page updated with all new GIF converted videos.
How to Use?
- Upload your GIF files to the software platform; you can get them from camera roll or from GIFShare.
- Make desired editing on background and speed etc parameters.
- Get it converted with customized size level.
- Upload outputs directly to Instagram.
2. Gifaroo - Android
Here is one more interactive tool that allows users to directly upload GIF converted to Instagram. There are so many customization filters, effects, and background editing options; users can also alter captions with different colors and font styles.
How to Use?
- Start browsing some interesting GIF animations on your Gifaroo app directly.
- Bring the desired one to the editing platform with a single tap.
3. GifVid
With GifVid you can convert simple videos into GIF animations and collection of GIFs can be turned back to videos with different file formats. Once your file gets converted then you can easily share them on Tumblr, Imgur, iMessage, etc.
Key Features: GifVid is designed with a straight forward and user-friendly design.
- Various editing options.
- This tool can be used in multiple languages.
- Supported Platform: Works on iOS devices like iPad and iPhones.
- Developer: It was developed by Artsy Apps.
Online GIF to Video Converters
1. GIFtovideo.com
Due to the impressive user interface, advanced editing options, and fast conversion rate, this tool is kept at first positing with higher user ratings. It can easily process uploaded video files as well as URL based links hence you can enjoy full flexibility on your portable as well as desktop devices.
Key Features: Beginners can easily handle its intuitive interface.
- The simple layout makes editing tasks much easier and conversion can be completed within very little time.
- Supported Platform: It works on Window platform with an active internet connection.
- Developer: This tool is owned and developed by Studio September that is a popular software developer company at Deutsch.
2. Cloud Convert
On Cloud Convert, users can easily process all popular video file formats to generate high-quality outcomes. It is not just limited to MP4 rather can support all professional-level media extensions. If you wish to make editing with few specific settings like codec adjustments then Cloud Convert can assist you better. If you want to access full feature version then you can get registered to this converter tool as paid users are able to avail more facilities.
Key Features: Cloud Convert can process any video file format with ease so you can bring any desired file to its timeline.
- Here you will get more freedom for customization settings of all converted videos.
- Supported Platforms: This tool is compatible with Windows only and users need to get their device connected to a high-speed internet connection to avail the best services.
- Developer: This tool is designed and maintained y a Germany based company, Lunaweb Ltd.
3. GIF2MP4
Here is one more easy to use yet feature-rich converter tool that can easily process your collection of GIF images to generate an MP4 video as an output. As the name indicates, this tool is intentionally designed for assisting users to get their GIF files converted with MP4 video file extension. There are numerous features hidden inside this online converter tool but once you start working over it your will be able to do awesome creativity with each editing project.
Key Features: It offers fast one-way conversion from GIF to MP4 video files.
- Simple and intuitive design.
- Supported Platforms: Mac and Window but the device must be connected to the internet for its operation.
- Developer: This tool is designed by trubo@zelnet.ru .
Read More to Get: the ultimate guide on How to Convert GIF to Video on your laptop or phone.
If you want to make GIF quickly, Filmora will offer you an online solution for making a GIF. Filmora meme maker can help you make images, GIFs and video memes directly without watermark. It is totally FREE and no signup. You can change text size, color, and position to create a caption.
Frequently Asked Questions About GIF to Video Converters
1. Can You Convert A GIF to Video?
The file format of all GIF files can be changed, but only if you have access to a GIF to Video converter. These apps allow you to choose the video file format to which a GIF file is going to be converted, so you can choose to turn a GIF into an MP4, AVI, or any other popular video file format.
Converting a GIF to a video can be useful if you want to post a GIF to Instagram or some other social media platform that doesn’t offer support for GIF files.
2. How to Save A GIF As A Video from An iPhone?
You must install one of the GIF creator apps for iOS before you can start converting GIFs to videos from your iPhone. Once you go through the installation process, you should launch the app you installed and import a GIF you want to turn into a video into the app. You can then edit the GIF if you want, and then proceed to export it. During the process of exporting a GIF, you should choose one of the available video file formats such as MP4 or MOV and your GIF will be converted into a video.
Shanoon Cox
Shanoon Cox is a writer and a lover of all things video.
Follow @Shanoon Cox
Ways to Create Animated Clipart in PowerPoint
How To Create Animated Clipart in PowerPoint
An easy yet powerful editor
Numerous effects to choose from
Detailed tutorials provided by the official channel
Clipart is a special type of graphic art. There are pre-made images that are used to illustrate all sorts of things.

The use of animated clipart is increasing day by day. Here, we will discuss the steps of creating animated clipart for PowerPoint.
In this article
01 [What is Moving Clipart Called?](#Part 1)
02 [Where Can I Find Free Animated Clipart?](#Part 2)
03 [How Do You Add an Animated Clipart to a Slide?](#Part 3)
Part 1 What is Moving Clipart Called?
The moving clipart is basically called animated clipart or Animated Gifs. These are easy and quick ways to present contents that are dynamic, especially on Web pages. The sizes of these files are small compared to the other alternatives for creating dynamic content like Flash and Java. If you would like to learn more about video animation , you can watch this tutorial:
For Win 7 or later (64-bit)
For macOS 10.12 or later
These are several images that are encoded in GIF or Graphic interchange format. This contains a number of frames or images within a single file and can be described by the graphic control extension of its own.

Part 2 Where Can I Find Free Animated Clipart?
We all love to use different types of images to express ourselves. However, the process of finding out better quality, copyright > free and also high > resolution free images a really tough task. To make sure that you can find the right one for you, you can go through some really amazing image resources.
These image resources have a huge collection of CCO or Creative Commons licensed and high > quality pictures to meet your different types of needs. Also, keep in mind to check on to the page that is licensed before using any clipart or animated clip art for copyright infringement.
01 Upsplash

Unsplash is a special site that was launched in the year 2013. This site posts ten photos that are handpicked every ten days. These photos are free of charge. As categorized under CCO, this site offers high > quality resolution images that can add beauty as well as credibility to your work.
02 Pixabay

Pixabay was launched in the year 2016 and has 550,000 free illustrations, photos, and vectors. It is equipped with a search engine that is versatile and can easily customize and broaden the search. Thus, this can offer you accurate results regarding your searches.
If you wish to use high > quality public domain pictures or animated clip art, this site can be your perfect option.
03 Public Domain

This website known as Public Domain has a collection of various high > quality pictures, images, and vectors that you can easily use for your animated videos. Especially, vectors are available here in a big number.
04 Openclipart

Though there are many websites where you can get clip arts, very few of them can provide clip arts of excellent quality. This website known as Openclipart is a reliable source of 11,000 designed clip arts that you can easily use in your animation videos.
05 Bing

Bing is no doubt an extensive search engine that can work similarly to Google. Bing has a special filter that has a large number of superior quality public domain images, vectors, clip arts, and illustrations to amaze you.
06 Photopin

As Photopin has millions of free images, many bloggers prefer to use this for their blog posts. However, Photopin does not come under the CCO license. So, you can use their images but you need to add a link to their website.
07 Pond5 creative

Pond5 is the largest online marketplace of the world for royalty–free stock music has now released the creative common category for media with the target to make it easily accessible to their users.
This site offers not only some superior quality free images, but you can also find some special characters, effects, vectors, sounds, animated clip art, 3D models, and many more. You just have to use the filter showing “Public domain only” to get those free licensed images.
08 Clker.com

Clker is mainly used for clip arts. You can easily get numerous clip arts of different sizes without any charges. This is an amazing source of free graphics, vectors, illustrations, etc. Moreover, this site is also licensed under CCO.
Part 3 How Do You Add an Animated Clipart to a Slide?

You can easily add animated clip art or GIF into the Google slides, to make your creation more visually attractive. To do this task you can choose multiple methods, but the easiest of them is using a GIF URL.
Here is the complete process of how to add a GIF to Google slides using a URL.
01 How to add a GIF to Google Slides using a URL

Step 1Open Your Presentation
Firstly, you need to go to slides.google.com and then open your presentation, or you can also create a new one.
Step 2Choose GIF That You Want to Insert
Click the slide that you want to insert the GIF onto in the sidebar located on the left side.
Step 3Image
In the top toolbar, just select “Insert”, then the “Image” option. After that, select “By URL”.
Step 4Paste URL
Just paste the URL into that box.
Step 5Insert
After that, the GIF will pop up, at that time just click on “Insert”.
02 Can you animate objects in PowerPoint?

How to add animations to the pictures, shapes, texts in a PowerPoint presentation?
Step 1Select the Text
First of all, you have to select the text or object that you wish to animate.
Step 2Select “Animations”
Next, Select “Animations” and choose an animation.
Step 3Choose “Effect Options”
Just choose “Effect Options” and select an effect.
How to manage effects and animations?
● With Previous
You can play an animation simultaneously as the previous animation in you the sequence.
● After previous
You can start an animation right after the previous ones starts.
● On click
You can start an animation or move the animated clip art while you click a slide.
● Delay
You may add time before an effect starts to run.
● Duration
You can also shorten or lengthen an effect.
How to change the order of animations?
● Move the option you desire Later
You can make an animation happen later in the sequence.
● Move the option you desire earlier
You can make an animation appear earlier in the sequence.
How to add animation to the grouped objects?
● Step 1
You need to press “Ctrl” and select the objects you want.
● Step 2
Select “Format> Group> Group” to group those objects or texts.
● Step 3
Select “Animations” and choose an animation.
03 How to Add Animated Clipart in Powerpoint?

Here is the detailed process for you.
Step 1Choose a Clip art image
You need to select the desired image. You can either select an image from the default option in PowerPoint showing Office clipart or you can search for images online or insert your own collection of photos.
Step 2Select an animation effect
You have to go to the “Animation “ tab and click on the option that shows “Add Animation”. From that drop-down menu, you will get several animation effects to animate your static image and create your animated clipart for PowerPoint.
Step 3Choose among different effects
PowerPoint offers animation effects of different types, like motion paths, entrance effects, entrance effects and emphasis effects.
Step 4Bringing transition effects
After creating animated clipart, you can also choose a transition effect to offer a special look to your presentation. In this case, when the slide is revealed this transition effect can easily complement your animation.
04 How Do I Make an Animated Video in Powerpoint?
When you wish to create an animated video for PowerPoint, you can do this easily. The steps are:
Step 1Insert the video into a slide
Insert the video into a slide and then click on “Insert “and select the option “Video”.
Click on the video and align it to the right position and size. Open “Animation Pane”.
Step 2Create a speech bubble
It is not necessary to interrupt your video while inserting an animation. So, it’s important to create a speech bubble.
Click “Shapes” and choose between different arrows, shapes, flow charts, that you can insert into the video.
Step 3Select “Animation Pane”
Click on the speech bubble. Go to “Animations” and select “Animation Pane”.
The animations can be inserted from the “Entrance” area.
Step 4Choose “Inbox”
Click on the speech bubble and choose “Inbox” and then “Fly-In”. The effects will appear in the area of the animation.
By moving the animation on this you can select the time when the animation will appear in the video.
Step 5Play the video
Right-click on “Start With Previous” to allow the animation to start and move.
The speech bubble will appear in the video after just 30 seconds, so move the animation until 30 sec. If you wish to stop the video in just 30 sec, click on the video and add “Play”.
Step 6Move the animation
Click right and choose the “Start With Previous” option. Move the animation to 0 seconds. Add “Pause”.
Click on “Add Animation” and then “Pause”. Then click right and choose “Start With Previous Again”. Move the animation to 30 sec as you need to stop the video from there. You can change the length by inserting the animation “Pause” again.
Step 7Run the video
Click right and select “Start With Previous”. While the continuation of the video, if you want the speech bubble to disappear, click on the bubble and on “Add Animation” and then “Exit” and choose “Fly Out”.
Click right and choose “Start With Previous “again. Move the animation to 60 seconds, as the video will start to run there.
Clipart is a special type of graphic art. There are pre-made images that are used to illustrate all sorts of things.
The use of animated clipart is increasing day by day. Here, we will discuss the steps of creating animated clipart for PowerPoint.
In this article
01 [What is Moving Clipart Called?](#Part 1)
02 [Where Can I Find Free Animated Clipart?](#Part 2)
03 [How Do You Add an Animated Clipart to a Slide?](#Part 3)
Part 1 What is Moving Clipart Called?
The moving clipart is basically called animated clipart or Animated Gifs. These are easy and quick ways to present contents that are dynamic, especially on Web pages. The sizes of these files are small compared to the other alternatives for creating dynamic content like Flash and Java. If you would like to learn more about video animation , you can watch this tutorial:
For Win 7 or later (64-bit)
For macOS 10.12 or later
These are several images that are encoded in GIF or Graphic interchange format. This contains a number of frames or images within a single file and can be described by the graphic control extension of its own.
Part 2 Where Can I Find Free Animated Clipart?
We all love to use different types of images to express ourselves. However, the process of finding out better quality, copyright > free and also high > resolution free images a really tough task. To make sure that you can find the right one for you, you can go through some really amazing image resources.
These image resources have a huge collection of CCO or Creative Commons licensed and high > quality pictures to meet your different types of needs. Also, keep in mind to check on to the page that is licensed before using any clipart or animated clip art for copyright infringement.
01 Upsplash
Unsplash is a special site that was launched in the year 2013. This site posts ten photos that are handpicked every ten days. These photos are free of charge. As categorized under CCO, this site offers high > quality resolution images that can add beauty as well as credibility to your work.
02 Pixabay
Pixabay was launched in the year 2016 and has 550,000 free illustrations, photos, and vectors. It is equipped with a search engine that is versatile and can easily customize and broaden the search. Thus, this can offer you accurate results regarding your searches.
If you wish to use high > quality public domain pictures or animated clip art, this site can be your perfect option.
03 Public Domain
This website known as Public Domain has a collection of various high > quality pictures, images, and vectors that you can easily use for your animated videos. Especially, vectors are available here in a big number.
04 Openclipart
Though there are many websites where you can get clip arts, very few of them can provide clip arts of excellent quality. This website known as Openclipart is a reliable source of 11,000 designed clip arts that you can easily use in your animation videos.
05 Bing
Bing is no doubt an extensive search engine that can work similarly to Google. Bing has a special filter that has a large number of superior quality public domain images, vectors, clip arts, and illustrations to amaze you.
06 Photopin
As Photopin has millions of free images, many bloggers prefer to use this for their blog posts. However, Photopin does not come under the CCO license. So, you can use their images but you need to add a link to their website.
07 Pond5 creative
Pond5 is the largest online marketplace of the world for royalty–free stock music has now released the creative common category for media with the target to make it easily accessible to their users.
This site offers not only some superior quality free images, but you can also find some special characters, effects, vectors, sounds, animated clip art, 3D models, and many more. You just have to use the filter showing “Public domain only” to get those free licensed images.
08 Clker.com
Clker is mainly used for clip arts. You can easily get numerous clip arts of different sizes without any charges. This is an amazing source of free graphics, vectors, illustrations, etc. Moreover, this site is also licensed under CCO.
Part 3 How Do You Add an Animated Clipart to a Slide?
You can easily add animated clip art or GIF into the Google slides, to make your creation more visually attractive. To do this task you can choose multiple methods, but the easiest of them is using a GIF URL.
Here is the complete process of how to add a GIF to Google slides using a URL.
01 How to add a GIF to Google Slides using a URL
Step 1Open Your Presentation
Firstly, you need to go to slides.google.com and then open your presentation, or you can also create a new one.
Step 2Choose GIF That You Want to Insert
Click the slide that you want to insert the GIF onto in the sidebar located on the left side.
Step 3Image
In the top toolbar, just select “Insert”, then the “Image” option. After that, select “By URL”.
Step 4Paste URL
Just paste the URL into that box.
Step 5Insert
After that, the GIF will pop up, at that time just click on “Insert”.
02 Can you animate objects in PowerPoint?
How to add animations to the pictures, shapes, texts in a PowerPoint presentation?
Step 1Select the Text
First of all, you have to select the text or object that you wish to animate.
Step 2Select “Animations”
Next, Select “Animations” and choose an animation.
Step 3Choose “Effect Options”
Just choose “Effect Options” and select an effect.
How to manage effects and animations?
● With Previous
You can play an animation simultaneously as the previous animation in you the sequence.
● After previous
You can start an animation right after the previous ones starts.
● On click
You can start an animation or move the animated clip art while you click a slide.
● Delay
You may add time before an effect starts to run.
● Duration
You can also shorten or lengthen an effect.
How to change the order of animations?
● Move the option you desire Later
You can make an animation happen later in the sequence.
● Move the option you desire earlier
You can make an animation appear earlier in the sequence.
How to add animation to the grouped objects?
● Step 1
You need to press “Ctrl” and select the objects you want.
● Step 2
Select “Format> Group> Group” to group those objects or texts.
● Step 3
Select “Animations” and choose an animation.
03 How to Add Animated Clipart in Powerpoint?
Here is the detailed process for you.
Step 1Choose a Clip art image
You need to select the desired image. You can either select an image from the default option in PowerPoint showing Office clipart or you can search for images online or insert your own collection of photos.
Step 2Select an animation effect
You have to go to the “Animation “ tab and click on the option that shows “Add Animation”. From that drop-down menu, you will get several animation effects to animate your static image and create your animated clipart for PowerPoint.
Step 3Choose among different effects
PowerPoint offers animation effects of different types, like motion paths, entrance effects, entrance effects and emphasis effects.
Step 4Bringing transition effects
After creating animated clipart, you can also choose a transition effect to offer a special look to your presentation. In this case, when the slide is revealed this transition effect can easily complement your animation.
04 How Do I Make an Animated Video in Powerpoint?
When you wish to create an animated video for PowerPoint, you can do this easily. The steps are:
Step 1Insert the video into a slide
Insert the video into a slide and then click on “Insert “and select the option “Video”.
Click on the video and align it to the right position and size. Open “Animation Pane”.
Step 2Create a speech bubble
It is not necessary to interrupt your video while inserting an animation. So, it’s important to create a speech bubble.
Click “Shapes” and choose between different arrows, shapes, flow charts, that you can insert into the video.
Step 3Select “Animation Pane”
Click on the speech bubble. Go to “Animations” and select “Animation Pane”.
The animations can be inserted from the “Entrance” area.
Step 4Choose “Inbox”
Click on the speech bubble and choose “Inbox” and then “Fly-In”. The effects will appear in the area of the animation.
By moving the animation on this you can select the time when the animation will appear in the video.
Step 5Play the video
Right-click on “Start With Previous” to allow the animation to start and move.
The speech bubble will appear in the video after just 30 seconds, so move the animation until 30 sec. If you wish to stop the video in just 30 sec, click on the video and add “Play”.
Step 6Move the animation
Click right and choose the “Start With Previous” option. Move the animation to 0 seconds. Add “Pause”.
Click on “Add Animation” and then “Pause”. Then click right and choose “Start With Previous Again”. Move the animation to 30 sec as you need to stop the video from there. You can change the length by inserting the animation “Pause” again.
Step 7Run the video
Click right and select “Start With Previous”. While the continuation of the video, if you want the speech bubble to disappear, click on the bubble and on “Add Animation” and then “Exit” and choose “Fly Out”.
Click right and choose “Start With Previous “again. Move the animation to 60 seconds, as the video will start to run there.
How to Make a Video a Live Photo
How to Make a Video a Live Photo [2022]
An easy yet powerful editor
Numerous effects to choose from
Detailed tutorials provided by the official channel
Looking forward to turn your videos into live photos? Stay tuned to know how!
In this article
01 [How to Save Live Photos as a Video on iPhone/Ipad/Ipod](#Part 1)
02 [How to Turn a Video Into a Live Photo on iOS/Android](#Part 2)
Part 1 How to Save Live Photos as a Video on iPhone/Ipad/Ipod
Live photos are an amazing utility that allow you to save images as short moving snaps. Creating live photos is among the latest spunk of trendsetter stories, whether shared on social media platforms or created and saved just for fun, these definitely sound and look exciting, but that’s just one among the many things you can experiment on live photos.
Creating live photos takes you to a world of exciting features where you can explore your creativity in a number of ways, one of the easiest being turning live photos to videos. This comes handy when you need to share your live photos on platforms that do not have the compatibility to run live photos. If you are an iPhone user and wish to try your hands on experimenting with live photos, see through the following section of this article to learn how to turn live photo into video:
01Save as Video
Step 1: Launch the Photos App
In your iPhone, launch the ‘Photos’ app and navigate to ‘Albums’. All your live photos are present in the ‘Live Photos’ album.
Step 2: Format Selection
In latest versions (iOS 13v and above), you get a direct ‘Save as Video’ option in the ‘Photos’ application. Just click on that, and your live photo will be instantly saved in your iPhone gallery as a video. Here’s how you can use this feature:
● In the ‘Photos’ application, go to the ‘Live Photos’ album to select and open a desired live photo that you wish to convert to a video.
● Click on the ‘Share’ icon.

● Select ‘Save as Video’ from the drop down menu that displays sharing options.

Your created video will be saved in the ‘Photos’ application, next to the live photo you chose to turn into a video.
02iOS Shortcuts
This is a quicker way to save your live photos as videos in your iPhone. To use this feature, you first need to save the ‘Convert LivePhotos to Video’ shortcut in the ‘Shortcuts App’ gallery of your iPhone. You can do this by opening in your iOS internet browser.
Before using the above link, make sure to enable the ‘Allow Untrusted Shortcuts’ feature in your iPhone settings. You can do this as explained below:
● Reach to the ‘Settings’ application of your iPhone.
● Tap on ‘Shortcuts’ from the app’s welcome screen.
● Enable ‘Allow Untrusted Shortcuts’ with a toggle.

Having done that, here’s what you need to follow:
● Open the ‘Shortcuts’ application in your iOS device and tap the ‘Convert LivePhotos to Video’ shortcut.

● The ‘Live Photos’ album of your device opens up. Make a desired selection.

Your converted video gets automatically saved in the ‘Camera Roll’ folder of the ‘Photos’ application. Open the ‘Recents’ album to view your creation.
Part 2 How to Turn a Video Into a Live Photo on iOS/Android
Converting live photos to videos is fine, but going the other way round is all the more exciting and fun! You can even use these converted live photos as live screen wallpapers for your iOS and Android devices. If you are motivated to take up the excitement, look through the following methods to turn video into live photo:
01iOS Devices
Being an iOS user, you can choose among the following tools to convert video to live photo in your iPad, iPod or iPhone:
● Wondershare Filmora
Wondershare Filmora Video Editor is currently leading the software market among converter utilities that cater to various media conversion needs. This one is a free, smart, quick and convenient conversion tool that assures you of a hassle free video to live photo conversion in just a few clicks. What’s more interesting is, you don’t need to limit yourself with sticking to some particular video format, as Filmora conveniently supports almost all common ones.
Wondershare Filmora
Get started easily with Filmora’s powerful performance, intuitive interface, and countless effects!
Try It Free Try It Free Try It Free Learn More >

● IntoLive
This one is a third party application that allows you to convert videos into live photos, quickly and conveniently. This tool works well with devices having iOS 12.0 and later versions. All you have to do is follow the steps mentioned below:
Step 1:
Download the ‘IntoLive’ application from the Apple App Store.

Step 2:
Launch the same on your iOS device and grant the permission to access its ‘Photos’ Album.

Step 3:
In the ‘Videos’ section, choose the desired video that you wish to turn into a live photo.

Step 4:
An editor window will open up. Here, you can edit (cut, crop, trim, etc.) and add desired effects or filters to your selected video. Click on ‘Make’ at the top right when you finish the editing process.

Step 5:
If you have the paid version of the app, you can take up multiple repeats of your live photo; else you can use the free version with no repeats.

Step 6:
Once you are satisfied with the result, click on ‘Save Live Photo’. This will save your created live photo in your device’s gallery.

02VideoToLive
This is a free converter you can choose to turn video into live photo. This is a quite popular tool among iPhone users worldwide and is suitable for iOS versions 11.2 and later. You also have the liberty to share your created live photos on social media with this converter. Take the following steps to begin the conversion process:

Step 1:
Download the application from the Apple App Store and launch it on your iOS device.
Step 2:
Choose a video from your device gallery to convert it into a live photo.
Step 3:
In the video editor screen, crop the video to the preferred section that has to be converted into live photo. You can add video frames to your edited clip from the upper section of the editor screen.
Step 4:
Click on ‘Convert’ at the top right corner to initiate the conversion process.
03Android Devices
Live photos are undoubtedly known to add spark to your cherished moments, but the notch that puts these off with Android devices is that you can enjoy live photos on these devices only as live wallpapers.
Being an iPhone exclusive utility, Android devices lack the flexibility to capture live images. However, you can see them move on being set as live screen wallpapers. A handy alternative to this is converting a turn video into live photo and use it as live wallpaper. Here’s how you can take up the conversion process:
● TurnLive- Live Wallpaper
This one is a convenient, third party tool that lets you turn video into live photo in just a few quick steps. You can either use this application for free, or upgrade to the paid version to enjoy its premium features. To make amazing live photos from videos using this tool, you need to take up the steps given below:

Step 1: App Installation
To begin, visit the Google Playstore in your Android device and download the TurnLive- Live Wallpaper application. Next, you need install and launch the app in your device and accept its terms of service.
Step 2: Select a Video
Once you are done, click on the ‘Live Photo’ icon in the bottom of the app’s opening screen to reach the video selection page. Here, you need to choose ‘Video to Live Wallpaper’ option and grant the required app permissions to access your device’s camera and gallery. Select a desired video from the ones saved in your device and click ‘Done’ at the top right.
Step 3: Edit Your Video
You will now get directed to the app’s editor window, where you need to trim the selected video within a time frame of 1-5 seconds. To do this, select a cover frame within the clip and click ‘Next’. You can now use the video slider at the bottom to trim the clip. Adding suitable video effects and filters is also possible with this tool.
Step 4: It’s Almost Done!
When you finish editing, click ‘Next’ and choose the number of repeats for the created live photo. Wait for the conversion to finish and click on ‘My Wallpapers’ to view your creation.
Step 5: Download Your Live Photo!
Click ‘Download’ and tap ‘Clear’ in the app’s prompt message to remove your device’s current screen wallpaper. Next, allow the app to access your system settings. Once this finishes, tap ‘Clear’ again to download your creation. You will now get directed to a black screen tagged ‘DayTime LWP’. Click on ‘Set Wallpaper’ in this screen to make your live photo, the current wallpaper of your Android device.
● Video Live Wallpaper
This is another free app that you can use to your videos into amazing live photos in just 4 quick steps. All you need to do is explained in the following steps:
Step 1: download the Application
Download the Video Live Wallpaper application in your Android device from Google Playstore and proceed for its installation and launch.

Step 2: Select Your Video
In the app’s opening screen, click ‘Choose Video’ and grant app permissions to access your device’s media. Browse your video gallery to select a desired video that you wish to convert into a live photo.

Step 3: Edit Your Video
You will now get directed to the app’s editor screen. Here, you can explore your editing creativity to edit the selected video. Once you are happy, click the picture icon at the top right corner.

Step 4: Your Live Wallpaper is Ready!
To set the created live photo as your device screen wallpaper, select ‘Set as Wallpaper’ at the bottom right.

● Key Takeaways from This Episode →
● From cherishing moments to sharing them on social media, live photos can do it all.
● Being an iPhone exclusive utility, you need to create these from videos to enjoy them on other platforms and devices.
● Filmora is the best video to live photo converters, available as an easy, quick and convenient conversion tool.
Looking forward to turn your videos into live photos? Stay tuned to know how!
In this article
01 [How to Save Live Photos as a Video on iPhone/Ipad/Ipod](#Part 1)
02 [How to Turn a Video Into a Live Photo on iOS/Android](#Part 2)
Part 1 How to Save Live Photos as a Video on iPhone/Ipad/Ipod
Live photos are an amazing utility that allow you to save images as short moving snaps. Creating live photos is among the latest spunk of trendsetter stories, whether shared on social media platforms or created and saved just for fun, these definitely sound and look exciting, but that’s just one among the many things you can experiment on live photos.
Creating live photos takes you to a world of exciting features where you can explore your creativity in a number of ways, one of the easiest being turning live photos to videos. This comes handy when you need to share your live photos on platforms that do not have the compatibility to run live photos. If you are an iPhone user and wish to try your hands on experimenting with live photos, see through the following section of this article to learn how to turn live photo into video:
01Save as Video
Step 1: Launch the Photos App
In your iPhone, launch the ‘Photos’ app and navigate to ‘Albums’. All your live photos are present in the ‘Live Photos’ album.
Step 2: Format Selection
In latest versions (iOS 13v and above), you get a direct ‘Save as Video’ option in the ‘Photos’ application. Just click on that, and your live photo will be instantly saved in your iPhone gallery as a video. Here’s how you can use this feature:
● In the ‘Photos’ application, go to the ‘Live Photos’ album to select and open a desired live photo that you wish to convert to a video.
● Click on the ‘Share’ icon.
● Select ‘Save as Video’ from the drop down menu that displays sharing options.
Your created video will be saved in the ‘Photos’ application, next to the live photo you chose to turn into a video.
02iOS Shortcuts
This is a quicker way to save your live photos as videos in your iPhone. To use this feature, you first need to save the ‘Convert LivePhotos to Video’ shortcut in the ‘Shortcuts App’ gallery of your iPhone. You can do this by opening in your iOS internet browser.
Before using the above link, make sure to enable the ‘Allow Untrusted Shortcuts’ feature in your iPhone settings. You can do this as explained below:
● Reach to the ‘Settings’ application of your iPhone.
● Tap on ‘Shortcuts’ from the app’s welcome screen.
● Enable ‘Allow Untrusted Shortcuts’ with a toggle.
Having done that, here’s what you need to follow:
● Open the ‘Shortcuts’ application in your iOS device and tap the ‘Convert LivePhotos to Video’ shortcut.
● The ‘Live Photos’ album of your device opens up. Make a desired selection.
Your converted video gets automatically saved in the ‘Camera Roll’ folder of the ‘Photos’ application. Open the ‘Recents’ album to view your creation.
Part 2 How to Turn a Video Into a Live Photo on iOS/Android
Converting live photos to videos is fine, but going the other way round is all the more exciting and fun! You can even use these converted live photos as live screen wallpapers for your iOS and Android devices. If you are motivated to take up the excitement, look through the following methods to turn video into live photo:
01iOS Devices
Being an iOS user, you can choose among the following tools to convert video to live photo in your iPad, iPod or iPhone:
● Wondershare Filmora
Wondershare Filmora Video Editor is currently leading the software market among converter utilities that cater to various media conversion needs. This one is a free, smart, quick and convenient conversion tool that assures you of a hassle free video to live photo conversion in just a few clicks. What’s more interesting is, you don’t need to limit yourself with sticking to some particular video format, as Filmora conveniently supports almost all common ones.
Wondershare Filmora
Get started easily with Filmora’s powerful performance, intuitive interface, and countless effects!
Try It Free Try It Free Try It Free Learn More >
● IntoLive
This one is a third party application that allows you to convert videos into live photos, quickly and conveniently. This tool works well with devices having iOS 12.0 and later versions. All you have to do is follow the steps mentioned below:
Step 1:
Download the ‘IntoLive’ application from the Apple App Store.
Step 2:
Launch the same on your iOS device and grant the permission to access its ‘Photos’ Album.
Step 3:
In the ‘Videos’ section, choose the desired video that you wish to turn into a live photo.
Step 4:
An editor window will open up. Here, you can edit (cut, crop, trim, etc.) and add desired effects or filters to your selected video. Click on ‘Make’ at the top right when you finish the editing process.
Step 5:
If you have the paid version of the app, you can take up multiple repeats of your live photo; else you can use the free version with no repeats.
Step 6:
Once you are satisfied with the result, click on ‘Save Live Photo’. This will save your created live photo in your device’s gallery.
02VideoToLive
This is a free converter you can choose to turn video into live photo. This is a quite popular tool among iPhone users worldwide and is suitable for iOS versions 11.2 and later. You also have the liberty to share your created live photos on social media with this converter. Take the following steps to begin the conversion process:
Step 1:
Download the application from the Apple App Store and launch it on your iOS device.
Step 2:
Choose a video from your device gallery to convert it into a live photo.
Step 3:
In the video editor screen, crop the video to the preferred section that has to be converted into live photo. You can add video frames to your edited clip from the upper section of the editor screen.
Step 4:
Click on ‘Convert’ at the top right corner to initiate the conversion process.
03Android Devices
Live photos are undoubtedly known to add spark to your cherished moments, but the notch that puts these off with Android devices is that you can enjoy live photos on these devices only as live wallpapers.
Being an iPhone exclusive utility, Android devices lack the flexibility to capture live images. However, you can see them move on being set as live screen wallpapers. A handy alternative to this is converting a turn video into live photo and use it as live wallpaper. Here’s how you can take up the conversion process:
● TurnLive- Live Wallpaper
This one is a convenient, third party tool that lets you turn video into live photo in just a few quick steps. You can either use this application for free, or upgrade to the paid version to enjoy its premium features. To make amazing live photos from videos using this tool, you need to take up the steps given below:
Step 1: App Installation
To begin, visit the Google Playstore in your Android device and download the TurnLive- Live Wallpaper application. Next, you need install and launch the app in your device and accept its terms of service.
Step 2: Select a Video
Once you are done, click on the ‘Live Photo’ icon in the bottom of the app’s opening screen to reach the video selection page. Here, you need to choose ‘Video to Live Wallpaper’ option and grant the required app permissions to access your device’s camera and gallery. Select a desired video from the ones saved in your device and click ‘Done’ at the top right.
Step 3: Edit Your Video
You will now get directed to the app’s editor window, where you need to trim the selected video within a time frame of 1-5 seconds. To do this, select a cover frame within the clip and click ‘Next’. You can now use the video slider at the bottom to trim the clip. Adding suitable video effects and filters is also possible with this tool.
Step 4: It’s Almost Done!
When you finish editing, click ‘Next’ and choose the number of repeats for the created live photo. Wait for the conversion to finish and click on ‘My Wallpapers’ to view your creation.
Step 5: Download Your Live Photo!
Click ‘Download’ and tap ‘Clear’ in the app’s prompt message to remove your device’s current screen wallpaper. Next, allow the app to access your system settings. Once this finishes, tap ‘Clear’ again to download your creation. You will now get directed to a black screen tagged ‘DayTime LWP’. Click on ‘Set Wallpaper’ in this screen to make your live photo, the current wallpaper of your Android device.
● Video Live Wallpaper
This is another free app that you can use to your videos into amazing live photos in just 4 quick steps. All you need to do is explained in the following steps:
Step 1: download the Application
Download the Video Live Wallpaper application in your Android device from Google Playstore and proceed for its installation and launch.
Step 2: Select Your Video
In the app’s opening screen, click ‘Choose Video’ and grant app permissions to access your device’s media. Browse your video gallery to select a desired video that you wish to convert into a live photo.
Step 3: Edit Your Video
You will now get directed to the app’s editor screen. Here, you can explore your editing creativity to edit the selected video. Once you are happy, click the picture icon at the top right corner.
Step 4: Your Live Wallpaper is Ready!
To set the created live photo as your device screen wallpaper, select ‘Set as Wallpaper’ at the bottom right.
● Key Takeaways from This Episode →
● From cherishing moments to sharing them on social media, live photos can do it all.
● Being an iPhone exclusive utility, you need to create these from videos to enjoy them on other platforms and devices.
● Filmora is the best video to live photo converters, available as an easy, quick and convenient conversion tool.
What’s Rigging Animation and Why It Matters
What’s Rigging Animation and Why It Matters
An easy yet powerful editor
Numerous effects to choose from
Detailed tutorials provided by the official channel
Today there is a lot pre-made skeletons you can use and reuse as many times as you want, making only a few minor adjustments to the base design. If your creativity is sparking like firecrackers, then a rig can make it look more defined and/or realistic.
Not convinced? Let’s talk more about Rigging Animation.
In this article
01 [What is Rigging Animation](#Part 1)
02 [The Ultimate Collection for Free Maya Rigs [2022]](#Part 2)
Part 1 What is Rigging Animation
01Why Your Animators Need to Know How to Rig
Walk into any professional animation studio toady, you would notice unfamiliar skeleton figures in at least one of the screens.
This is called skeleton animation and is a major technique used in creating animated models that give us that 36vibe of the character in movies. It helps animators in controlling its movement just like a puppet. Hidden call back to the Matrix.
What you see in most movies or games, are characters and models who supported by a network of digital mechanical skeletons all rigged to move in a certain way.
02How Does Rigging Work?
The process of rigging is usually the second step in a long line of other methods applied after creating a model.
There is a series of interdependent bones that need to be constructed which is representation of the skeletal structure which is the basic goal in rigging animation.
With the right digital animation software you can reposition, repurpose and scale these bones in more ways than one.
The next step would involve recording the different movements of these bones on a timeline. This part of the process is called keyframing in animation.
These simple steps are actually more intricate than they actually are. Each movement acts as trigger to another set of movements like how the shoulder bone is connected to the forearm of our body.
This movement of the model becomes even more realistic once its weight scale has been determined. Painting weight can be considered to be the most unnerving challenge in the entire process.
Which is where Inverse Kinematics can help in making things 5easier by just reversing forward kinematic movements.
All of these aspects of rigging makes it possible to help animation mimic real life movements.
03How is Rigging Used?
Rigging is a technique which has only started gaining more prominence in recent times due to how crucial it is to the gaming and animation movie industry.
Not only is it used on characters but all mechanical objects in animations can also be rigged. With the help of a computerized program physicality is added to the bone structure and is recorded through a series of frames. These recording are then played back.
There are other applications to the and modelling process which goes beyond the entertainment industry such as giving virtual medical demonstrations or modeling a product.
This entire process can get much more repetitive and complex when it comes to rigging something as dynamic as the human face.
04Intro to Rigging Software
You might already be aware by now that there are some major animation software on the market that can provide you with just about every tool you need to make jaw dropping rigger animations.
Software like Blender, Cinema 4D, Maya and Houdini employs fantastic Skeletal Animation and digital motion capturing techniques. They open the doors to more realistic animations that can be used to create far more interactive and personalized digital worlds.
Maya and 3Ds Max is used to do real time animation rigging and is considered by most to be the industry standard by most animators.
Blender on the other hand is a free to use software. Though not quite as strong as Maya, it is an open source software which is equipped with everything you need to rig and animate models.
You can import completed animated files onto game engines and all types of other applications. The most common format for importing animated files is .fbx.
Part 2 The Ultimate Collection for Free Maya Rigs [2022]
01How’s Maya Rigs?
To tell the truth, every year you have spent on learning animation would come into great use in making your imagination come to life. Maya is probably the one software which gives you credit for just knowing it.
Maya has several levels of features you need to practice before you can call yourself a Maya master.
The best way to get your hands practiced on animating on Maya is by becoming well versed with all the stats and proportions while working with rigs. You would surely need to get your hands on high quality rig packages that makes the learning experience even more worth it.
With time, you would get better at understanding of the specifics of building a structure you would be showing in the final result. However getting stuck with the wrong type of rig can end up making your animating experience counterintuitive.
Here is a list of Maya Rigs you can start on right away;
02Best Free Maya Rigs of 2022
● Basic Rigs

Understanding the Basic Functionality of inanimate objects is a clear place to start in animation rigging. It helps you get a strong grasp over animation principals like bouncing a ball, before moving on to more challenging rigging packages.
● Ultimate Rigs
As you keep trying out different basic rigging functionalities, you eventually would need an ultimate rigging pack which is a complete set of all basic rigs. It is a great option to download and have this as a backup.
● Flour Sack
The Flour Sack free Rig is old school trainer pack. It simplifies your understanding character emotions by applying posing and adding weight to an object with a whimsical undefined structure.
● Wall E

If you are easily familiar with this character then you should remember how beautifully Wall-E was able express himself. It certainly is a step up on your journey to improving motion capture techniques. Try making your own Dreamworks style animation with Filmora from Wondershare where you can pair your animations with a few amazing film editing tools.
● JuiceBox
Another favored animation teaching prop is the Juice Box. It follows similar principals like the Flour Sack but the straw adds a different dimension to it. This is where an animator can try out more ways to get creative without a simple straw getting in their way.
● The Walking Egg
An egg shaped mechanical quadruped robot who has the ability to contract its legs into its body. Its legs are probably its best feature since it is lockable at then joints. A fun part of this robot is that its screen eyes can turn into guns.
● Cartoon Chameleon
This chameleon has all basic body and facial functions needed by a quadruped. It is a funny whimsical character similar to ‘Pasacal’ from the movie “Tangled” which you can play with. Its tongue is a special feature although you may need to work on its control.
● Judy Hopps
Time to master the art of animating emotions and Judy with her amazing big round eyes can easily be adjusted with the help of floating controllers. The dynamic features of this rig has micro facial controls which you practice with.
● Roboter 2.0.1
Interested in Robots? Try playing with this humanoid figure but be warned that it might not feel as easy to replicate natural human body motion. It might take some practice but you can try taking on the initial steps by practicing on a robot rig. At least you can excuse any minor imperfections.
● Bony and Beefy
The next challenge would be to master this incredibly advanced rig. There are various different body specifications which you will need to be familiar with. This rig gives you a fair advantage by already toggling all visibility controls.
● Key Takeaways from This Episode →
● Rigging is a fantastic way to learn the foundations of animations and how it all ties into the final result. It involves creating skeletal animations of bones that share parental relationship with each other; one bone moves an entire set. You can record these movements and then play them over timeline.
● You can practice rigging with both simple and advanced animations. Complex rigging structures like facial features may require separate project of its own. There are various rigging software like Blender and Maya which provides you with everything you need to carry out a successful rigging process.
● Get started with rigging animation by practicing on free Maya Rigs. Find out which rig suits you best according to your skills level.
Today there is a lot pre-made skeletons you can use and reuse as many times as you want, making only a few minor adjustments to the base design. If your creativity is sparking like firecrackers, then a rig can make it look more defined and/or realistic.
Not convinced? Let’s talk more about Rigging Animation.
In this article
01 [What is Rigging Animation](#Part 1)
02 [The Ultimate Collection for Free Maya Rigs [2022]](#Part 2)
Part 1 What is Rigging Animation
01Why Your Animators Need to Know How to Rig
Walk into any professional animation studio toady, you would notice unfamiliar skeleton figures in at least one of the screens.
This is called skeleton animation and is a major technique used in creating animated models that give us that 36vibe of the character in movies. It helps animators in controlling its movement just like a puppet. Hidden call back to the Matrix.
What you see in most movies or games, are characters and models who supported by a network of digital mechanical skeletons all rigged to move in a certain way.
02How Does Rigging Work?
The process of rigging is usually the second step in a long line of other methods applied after creating a model.
There is a series of interdependent bones that need to be constructed which is representation of the skeletal structure which is the basic goal in rigging animation.
With the right digital animation software you can reposition, repurpose and scale these bones in more ways than one.
The next step would involve recording the different movements of these bones on a timeline. This part of the process is called keyframing in animation.
These simple steps are actually more intricate than they actually are. Each movement acts as trigger to another set of movements like how the shoulder bone is connected to the forearm of our body.
This movement of the model becomes even more realistic once its weight scale has been determined. Painting weight can be considered to be the most unnerving challenge in the entire process.
Which is where Inverse Kinematics can help in making things 5easier by just reversing forward kinematic movements.
All of these aspects of rigging makes it possible to help animation mimic real life movements.
03How is Rigging Used?
Rigging is a technique which has only started gaining more prominence in recent times due to how crucial it is to the gaming and animation movie industry.
Not only is it used on characters but all mechanical objects in animations can also be rigged. With the help of a computerized program physicality is added to the bone structure and is recorded through a series of frames. These recording are then played back.
There are other applications to the and modelling process which goes beyond the entertainment industry such as giving virtual medical demonstrations or modeling a product.
This entire process can get much more repetitive and complex when it comes to rigging something as dynamic as the human face.
04Intro to Rigging Software
You might already be aware by now that there are some major animation software on the market that can provide you with just about every tool you need to make jaw dropping rigger animations.
Software like Blender, Cinema 4D, Maya and Houdini employs fantastic Skeletal Animation and digital motion capturing techniques. They open the doors to more realistic animations that can be used to create far more interactive and personalized digital worlds.
Maya and 3Ds Max is used to do real time animation rigging and is considered by most to be the industry standard by most animators.
Blender on the other hand is a free to use software. Though not quite as strong as Maya, it is an open source software which is equipped with everything you need to rig and animate models.
You can import completed animated files onto game engines and all types of other applications. The most common format for importing animated files is .fbx.
Part 2 The Ultimate Collection for Free Maya Rigs [2022]
01How’s Maya Rigs?
To tell the truth, every year you have spent on learning animation would come into great use in making your imagination come to life. Maya is probably the one software which gives you credit for just knowing it.
Maya has several levels of features you need to practice before you can call yourself a Maya master.
The best way to get your hands practiced on animating on Maya is by becoming well versed with all the stats and proportions while working with rigs. You would surely need to get your hands on high quality rig packages that makes the learning experience even more worth it.
With time, you would get better at understanding of the specifics of building a structure you would be showing in the final result. However getting stuck with the wrong type of rig can end up making your animating experience counterintuitive.
Here is a list of Maya Rigs you can start on right away;
02Best Free Maya Rigs of 2022
● Basic Rigs
Understanding the Basic Functionality of inanimate objects is a clear place to start in animation rigging. It helps you get a strong grasp over animation principals like bouncing a ball, before moving on to more challenging rigging packages.
● Ultimate Rigs
As you keep trying out different basic rigging functionalities, you eventually would need an ultimate rigging pack which is a complete set of all basic rigs. It is a great option to download and have this as a backup.
● Flour Sack
The Flour Sack free Rig is old school trainer pack. It simplifies your understanding character emotions by applying posing and adding weight to an object with a whimsical undefined structure.
● Wall E
If you are easily familiar with this character then you should remember how beautifully Wall-E was able express himself. It certainly is a step up on your journey to improving motion capture techniques. Try making your own Dreamworks style animation with Filmora from Wondershare where you can pair your animations with a few amazing film editing tools.
● JuiceBox
Another favored animation teaching prop is the Juice Box. It follows similar principals like the Flour Sack but the straw adds a different dimension to it. This is where an animator can try out more ways to get creative without a simple straw getting in their way.
● The Walking Egg
An egg shaped mechanical quadruped robot who has the ability to contract its legs into its body. Its legs are probably its best feature since it is lockable at then joints. A fun part of this robot is that its screen eyes can turn into guns.
● Cartoon Chameleon
This chameleon has all basic body and facial functions needed by a quadruped. It is a funny whimsical character similar to ‘Pasacal’ from the movie “Tangled” which you can play with. Its tongue is a special feature although you may need to work on its control.
● Judy Hopps
Time to master the art of animating emotions and Judy with her amazing big round eyes can easily be adjusted with the help of floating controllers. The dynamic features of this rig has micro facial controls which you practice with.
● Roboter 2.0.1
Interested in Robots? Try playing with this humanoid figure but be warned that it might not feel as easy to replicate natural human body motion. It might take some practice but you can try taking on the initial steps by practicing on a robot rig. At least you can excuse any minor imperfections.
● Bony and Beefy
The next challenge would be to master this incredibly advanced rig. There are various different body specifications which you will need to be familiar with. This rig gives you a fair advantage by already toggling all visibility controls.
● Key Takeaways from This Episode →
● Rigging is a fantastic way to learn the foundations of animations and how it all ties into the final result. It involves creating skeletal animations of bones that share parental relationship with each other; one bone moves an entire set. You can record these movements and then play them over timeline.
● You can practice rigging with both simple and advanced animations. Complex rigging structures like facial features may require separate project of its own. There are various rigging software like Blender and Maya which provides you with everything you need to carry out a successful rigging process.
● Get started with rigging animation by practicing on free Maya Rigs. Find out which rig suits you best according to your skills level.
10 Amazing Whiteboard Animation Video Examples You Need to Bookmark
10 Amazing Whiteboard Animation Video Examples You Need to Bookmark in 2022
An easy yet powerful editor
Numerous effects to choose from
Detailed tutorials provided by the official channel
When it comes to making videos, you can also do it by drawing videos. You can illustrate your art of drawing by videos. You need to know the steps of doing the best whiteboard animation.
It is a process in which an author draws a drawing physically and shows it using a story using whiteboard animation.
In this article
01 [What Is Whiteboard Animation?](#Part 1)
02 [Reasons to Use Whiteboard Animation Videos ](#Part 2)
03 [Prime Factors That Make Up an Excellent Whiteboard Video](#Part 3)
04 [10 Best Whiteboard Animation Examples to inspire You](#Part 4)
Part 1 What Is Whiteboard Animation?

Whiteboard animation is a video style where the viewer is static but digitally animated images get drawn on the white screen. The illustrations are amid a narration that walks the audience through the story by the sketches. These animations are simple to understand, but they make us engaging all of a sudden.
The authors generally use time-lapse and stop motion animation to liven hand-drawn illustrations while converting drawing into video. YouTube is a standard platform for it. The earliest videos made using whiteboard animation were way back in 20on YouTube. For experimental purposes until developing into a storytelling device, focusing entirely on narratives and academic explanations.
There is absolute confidence that video marketing has exploded within the last decade, with whiteboard animation video-free accessibility becoming a vital aspect of any successful marketing plan. Everyone has jumped on the video bandwagon. Thus, it is no surprise that customers are fourfold more fascinated by watching videos of a couple of products instead of reading about one.Top of FormBottom of Form
Part 2 Reasons to Use Whiteboard Animation Videos
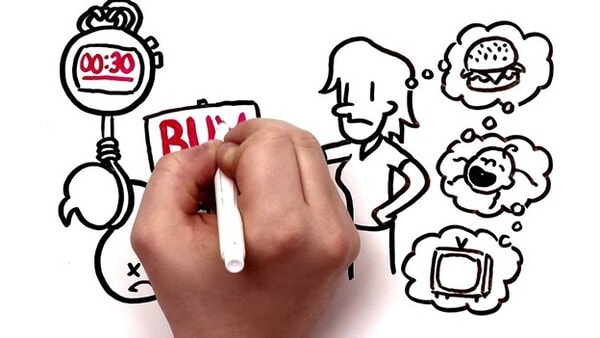
Videos are undoubtedly the only productive ways to market your products and services. In all types of animations forms, whiteboard animation videos are almost at the top. It can be a way of product or service within the excellent way through whiteboard animation videos.
Here are some valid reasons to use whiteboard animation videos for your brand’s informative and crucial success.
01Artworks simplify complex concepts
Visual concepts can allow you to learn a fancy concept quickly. Whiteboard animation videos are suitable animation videos for this idea. For instance, a before and after effect shown in an exceeding whiteboard animation video on substance abuse or weight reduction can inform you quite a bit of textual information. The result of a specific habit or a condition is presented in an easy-to-understand way.
02You can use the sense of humor to represent a topic
If you want to add humor in your video presentation, whiteboard animation is one of the most effective ways to urge laughs. Amateur actors will be awkward and annoying after they try and be funny on camera, but in whiteboard animation’s laid-back visual style, it can communicate humor flawlessly.
03Can be easily distributed
An animated video is shareable. Whiteboard animation videos are affordable and easily shareable to anybody across the world! These videos can go quickly through an email or link to a YouTube account. The world as a whole can realize your offerings, and your video has the best possibility of doing magic every hour per day. In this way, you’ll be able to reach a wider audience spread around the world.
04Captivating sketches made by the artist
Watching an animation video is fantastic. As the artist uses the pen to form interesting characters in step with the changing backgrounds and environments, the viewers get interested in the video and watch the story unfold before them. What interests them is determining the subsequent set of situations because the story progresses. Slowly, the illustrations presented within the video bring the characters in the environment to life. Subsequently at that stage, your audience wants to determine more and more stuff.
05Sound information put in an entertaining way
Whiteboard animation videos are comprehensible and are full of helpful information to assist your audience know your products and services. With a median length of 3-5 minutes, whiteboard animation videos are full of important stuff your viewers desire to learn. A good animation video of this kind lets your audience concentrate on what you’re presenting and assists them to engage along with your video.
Part 3 Prime Factors That Make Up an Excellent Whiteboard Video
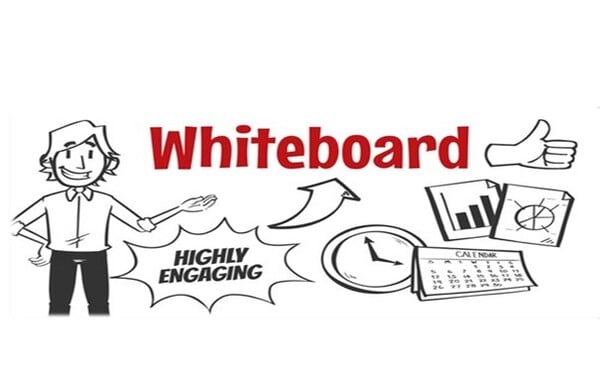
There are a few vital components to consider to form a fantastic whiteboard video.
● Content Quality: One critical figure is the quality of the drawings. An excellent quality whiteboard video should be well-composed, with parcels of detail and attention to the point.
● Animation Movement: Your movement should be dark and white with a clear voice. The voiceover must be fresh, clear, and effectively caught on over diverting foundation sounds. It ought to moreover be clear and straightforward to get it.
● Clear Drawing Hand: Your drawing hand should be as clear and precise as conceivable.
Underneath are other fundamental components of a successful whiteboard activity.
● Storyboard: After the primary organizes, you ought to make a storyboard. Typically comparative to a comedian strip, the storyboard clarifies visual aspects of your video. The storyboard should incorporate all the activities and scenes that take place within the video. It is additionally valuable for visualizing the story and making it more viable. After this step, sending your video to YouTube may be an incredible way to convey your creation.
● Energized Characters: An animated character will include identity in the video, as they will be recognizable to the gathering of people. Energized characters have a lock-in approach and a human touch. The characters ought to be an agent of your target group of onlookers.
A hand-drawn activity is one way to form your whiteboard video locks in and memorable. A locks storyline is additionally vital. The movement ought to be clear, essential, and entertaining.
A fabulous script is the establishment of a fantastic whiteboard video. A great script traces the objectives of the video, makes a compelling story, and joins the brand colors within the video. Whereas whiteboard activity can be an excellent medium for informative purposes, it is still great to join the brand’s colors into the video to donate a particular feel.
Part 4 Best Whiteboard Animation Examples to inspire You
Now that we know what whiteboard enlivened recordings are and the variables that make them effective, let’s look at our choice for the best whiteboard liveliness illustrations. You can discover, learn from, and utilize as a layout for your claim vivified whiteboard video generation.
01DC HomeBuzz

Category: Genuine Bequest Whiteboard Activity Example DC HomeBuzz may be a superb illustration of a whiteboard enlivened video illustration that centers on exhibiting their interesting esteem suggestion to pick up client footing. Their level charge full-service show is precisely that. When coupled with quick and smooth activity and a persuading script described in a fresh and clear voice, this is what makes this an incredible whiteboard activity example.
02Where Good Ideas Come From
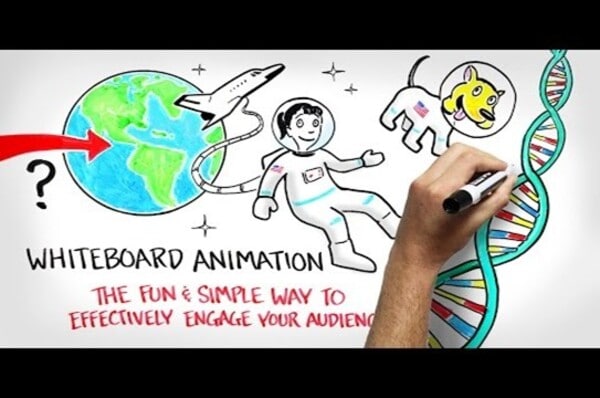
Category: Instruction Whiteboard Movement Example. If you’re looking to induce a firm thought of how to require complex thinking and convey it to your target gathering of people with supreme effortlessness utilizing both the script and the visual prompts, at that point, this video could be a remarkable asset for you. The video does an excellent work of showing its message in locks in and precious stone clear way for the group of onlookers to retain data, which is fundamental for any client to be changed over into a sale.
03Elevations Credit union

Category: Fund Industry Whiteboard Activity Example In movement, it’s significant to keep things light and breezy, and some of the time indeed amusing to create beyond any doubt your watchers feel like their time is worth the watch. This video may be a prime illustration of an energized video that adds a bit of humor through its visual encounter inside an industry that’s, for the most part, considered boring. Take a book out of their page to coordinate a bit of humor into your recordings for expanded engagement and tall chances of social offers.
0423 and ½ Hours
Category: Healthcare Whiteboard Activity Example. While these recordings are a rule for informative and address purposes, they are an extraordinary illustration of how to guarantee that complex data can streamline utilizing enlivened whiteboard recordings. With the assistance of drawings and physical representation, it can turn bland substance into simple to observe lessons or recordings, notwithstanding the subject’s nature. The challenge is to be imaginative within the production and scripting preparation, and this energized video illustration appears fair to the good imagination.
05Coca-cola 2020
Conversation approximately includes esteem to the community with the assistance of an informative video. Being one of the greatest brands in the world, the Coca-Cola substance activity video grandstands all the correct qualities of an animated whiteboard video. This video could be a perfect case of natural substance and activity collaboration from scripting to activity fashion and voiceover quality. Take a page from Coca-Cola’s book to create a whiteboard video that’s clear and tastefully satisfying to observe.
06ESPN – Marshawn Lynch Interview

Pressed with excitement, education, and limited-time esteem, this energized video by ESPN is one of the leading within the sports category. Its silly delineation of the interview drawing the consideration of the group of onlookers and a script made around the interest of the group of onlookers, making it an awesome in general production.
07Weird Al Yankovich
Usually, a commendable enlivened whiteboard video that packs a parcel of data in a brief time outline. It is imperative in most cases to keep your video as short as conceivable, based on the kind of item and benefit you’re talking approximately. Smooth movement, a great script highlighting a USP, and superb general message quality, put this video on our list.
08Oracle Warehouse Management Cloud Solutions

Category: IT Whiteboard Liveliness Example An incredible item intro video within the whiteboard activity fashion grandstands Oracle’s stockroom administration arrangement control. This video makes our list for its effortlessness and fundamental approach to whiteboard animation. Sometimes aiming to favor can end up as well, and remaining straightforward and classy can deliver extraordinary comes about, and that’s what this video is all almost.
09Banner
No item is boring. The clarification and introduction of things make them sound and come over as dull. Need to form beyond any doubt your item isn’t one of those boring showing up ones? At that point, check out how Standard positions itself as a value-intensive, easy-to-use, and locks-in arrangement that guarantees that at each minute of the video, the client is learning something unused to keep them snared until the end.
10Socratic Investment

If you need to memorize how to condense tons of data, this whiteboard liveliness illustration will give you extraordinary motivation to do so. Socratic Ventures, the video presents its whole trade setup, framework, and administration without overpowering the viewers. With a straightforward script and supporting restricted whiteboard activity, this video makes it to our list for its negligible, however successful approach.
To note that, while exploring different examples for whiteboard animation video examples, must be acknowledged by the tremendous supports and services provided by some online tools such as Filmora, Videoscribe whiteboard animation, and whiteboard animation After Effects template free to download.
The Best Whiteboard Animation Video Software:
Wondershare Filmora Video Editor is free whiteboard animation video software that gives users a brand new way of empowering their storytelling. This innovative video editing software comes with top-notch features that permit users to create professional-looking whiteboard animation videos with compositing, motion graphics, tricks, color correction tools, and more. It is both powerful and straightforward to find out the Quality of the Substance.
For Win 7 or later (64-bit)
For macOS 10.12 or later
● Key Takeaways from This Episode →
● What is meant by Whiteboard animation or whiteboard animation videos
● Different examples of best whiteboard animation videos to explain the techniques
● Factors that make up an excellent video.
● Further, the article has explained in detail about whiteboard animation videos with different examples to clarify how it looks, and some websites may help you lead more about whiteboard animation videos. The most important question answered above is how to make videos ideally at Filmora. I hope your queries are unambiguous after reading this post.
When it comes to making videos, you can also do it by drawing videos. You can illustrate your art of drawing by videos. You need to know the steps of doing the best whiteboard animation.
It is a process in which an author draws a drawing physically and shows it using a story using whiteboard animation.
In this article
01 [What Is Whiteboard Animation?](#Part 1)
02 [Reasons to Use Whiteboard Animation Videos ](#Part 2)
03 [Prime Factors That Make Up an Excellent Whiteboard Video](#Part 3)
04 [10 Best Whiteboard Animation Examples to inspire You](#Part 4)
Part 1 What Is Whiteboard Animation?
Whiteboard animation is a video style where the viewer is static but digitally animated images get drawn on the white screen. The illustrations are amid a narration that walks the audience through the story by the sketches. These animations are simple to understand, but they make us engaging all of a sudden.
The authors generally use time-lapse and stop motion animation to liven hand-drawn illustrations while converting drawing into video. YouTube is a standard platform for it. The earliest videos made using whiteboard animation were way back in 20on YouTube. For experimental purposes until developing into a storytelling device, focusing entirely on narratives and academic explanations.
There is absolute confidence that video marketing has exploded within the last decade, with whiteboard animation video-free accessibility becoming a vital aspect of any successful marketing plan. Everyone has jumped on the video bandwagon. Thus, it is no surprise that customers are fourfold more fascinated by watching videos of a couple of products instead of reading about one.Top of FormBottom of Form
Part 2 Reasons to Use Whiteboard Animation Videos
Videos are undoubtedly the only productive ways to market your products and services. In all types of animations forms, whiteboard animation videos are almost at the top. It can be a way of product or service within the excellent way through whiteboard animation videos.
Here are some valid reasons to use whiteboard animation videos for your brand’s informative and crucial success.
01Artworks simplify complex concepts
Visual concepts can allow you to learn a fancy concept quickly. Whiteboard animation videos are suitable animation videos for this idea. For instance, a before and after effect shown in an exceeding whiteboard animation video on substance abuse or weight reduction can inform you quite a bit of textual information. The result of a specific habit or a condition is presented in an easy-to-understand way.
02You can use the sense of humor to represent a topic
If you want to add humor in your video presentation, whiteboard animation is one of the most effective ways to urge laughs. Amateur actors will be awkward and annoying after they try and be funny on camera, but in whiteboard animation’s laid-back visual style, it can communicate humor flawlessly.
03Can be easily distributed
An animated video is shareable. Whiteboard animation videos are affordable and easily shareable to anybody across the world! These videos can go quickly through an email or link to a YouTube account. The world as a whole can realize your offerings, and your video has the best possibility of doing magic every hour per day. In this way, you’ll be able to reach a wider audience spread around the world.
04Captivating sketches made by the artist
Watching an animation video is fantastic. As the artist uses the pen to form interesting characters in step with the changing backgrounds and environments, the viewers get interested in the video and watch the story unfold before them. What interests them is determining the subsequent set of situations because the story progresses. Slowly, the illustrations presented within the video bring the characters in the environment to life. Subsequently at that stage, your audience wants to determine more and more stuff.
05Sound information put in an entertaining way
Whiteboard animation videos are comprehensible and are full of helpful information to assist your audience know your products and services. With a median length of 3-5 minutes, whiteboard animation videos are full of important stuff your viewers desire to learn. A good animation video of this kind lets your audience concentrate on what you’re presenting and assists them to engage along with your video.
Part 3 Prime Factors That Make Up an Excellent Whiteboard Video
There are a few vital components to consider to form a fantastic whiteboard video.
● Content Quality: One critical figure is the quality of the drawings. An excellent quality whiteboard video should be well-composed, with parcels of detail and attention to the point.
● Animation Movement: Your movement should be dark and white with a clear voice. The voiceover must be fresh, clear, and effectively caught on over diverting foundation sounds. It ought to moreover be clear and straightforward to get it.
● Clear Drawing Hand: Your drawing hand should be as clear and precise as conceivable.
Underneath are other fundamental components of a successful whiteboard activity.
● Storyboard: After the primary organizes, you ought to make a storyboard. Typically comparative to a comedian strip, the storyboard clarifies visual aspects of your video. The storyboard should incorporate all the activities and scenes that take place within the video. It is additionally valuable for visualizing the story and making it more viable. After this step, sending your video to YouTube may be an incredible way to convey your creation.
● Energized Characters: An animated character will include identity in the video, as they will be recognizable to the gathering of people. Energized characters have a lock-in approach and a human touch. The characters ought to be an agent of your target group of onlookers.
A hand-drawn activity is one way to form your whiteboard video locks in and memorable. A locks storyline is additionally vital. The movement ought to be clear, essential, and entertaining.
A fabulous script is the establishment of a fantastic whiteboard video. A great script traces the objectives of the video, makes a compelling story, and joins the brand colors within the video. Whereas whiteboard activity can be an excellent medium for informative purposes, it is still great to join the brand’s colors into the video to donate a particular feel.
Part 4 Best Whiteboard Animation Examples to inspire You
Now that we know what whiteboard enlivened recordings are and the variables that make them effective, let’s look at our choice for the best whiteboard liveliness illustrations. You can discover, learn from, and utilize as a layout for your claim vivified whiteboard video generation.
01DC HomeBuzz
Category: Genuine Bequest Whiteboard Activity Example DC HomeBuzz may be a superb illustration of a whiteboard enlivened video illustration that centers on exhibiting their interesting esteem suggestion to pick up client footing. Their level charge full-service show is precisely that. When coupled with quick and smooth activity and a persuading script described in a fresh and clear voice, this is what makes this an incredible whiteboard activity example.
02Where Good Ideas Come From
Category: Instruction Whiteboard Movement Example. If you’re looking to induce a firm thought of how to require complex thinking and convey it to your target gathering of people with supreme effortlessness utilizing both the script and the visual prompts, at that point, this video could be a remarkable asset for you. The video does an excellent work of showing its message in locks in and precious stone clear way for the group of onlookers to retain data, which is fundamental for any client to be changed over into a sale.
03Elevations Credit union
Category: Fund Industry Whiteboard Activity Example In movement, it’s significant to keep things light and breezy, and some of the time indeed amusing to create beyond any doubt your watchers feel like their time is worth the watch. This video may be a prime illustration of an energized video that adds a bit of humor through its visual encounter inside an industry that’s, for the most part, considered boring. Take a book out of their page to coordinate a bit of humor into your recordings for expanded engagement and tall chances of social offers.
0423 and ½ Hours
Category: Healthcare Whiteboard Activity Example. While these recordings are a rule for informative and address purposes, they are an extraordinary illustration of how to guarantee that complex data can streamline utilizing enlivened whiteboard recordings. With the assistance of drawings and physical representation, it can turn bland substance into simple to observe lessons or recordings, notwithstanding the subject’s nature. The challenge is to be imaginative within the production and scripting preparation, and this energized video illustration appears fair to the good imagination.
05Coca-cola 2020
Conversation approximately includes esteem to the community with the assistance of an informative video. Being one of the greatest brands in the world, the Coca-Cola substance activity video grandstands all the correct qualities of an animated whiteboard video. This video could be a perfect case of natural substance and activity collaboration from scripting to activity fashion and voiceover quality. Take a page from Coca-Cola’s book to create a whiteboard video that’s clear and tastefully satisfying to observe.
06ESPN – Marshawn Lynch Interview
Pressed with excitement, education, and limited-time esteem, this energized video by ESPN is one of the leading within the sports category. Its silly delineation of the interview drawing the consideration of the group of onlookers and a script made around the interest of the group of onlookers, making it an awesome in general production.
07Weird Al Yankovich
Usually, a commendable enlivened whiteboard video that packs a parcel of data in a brief time outline. It is imperative in most cases to keep your video as short as conceivable, based on the kind of item and benefit you’re talking approximately. Smooth movement, a great script highlighting a USP, and superb general message quality, put this video on our list.
08Oracle Warehouse Management Cloud Solutions
Category: IT Whiteboard Liveliness Example An incredible item intro video within the whiteboard activity fashion grandstands Oracle’s stockroom administration arrangement control. This video makes our list for its effortlessness and fundamental approach to whiteboard animation. Sometimes aiming to favor can end up as well, and remaining straightforward and classy can deliver extraordinary comes about, and that’s what this video is all almost.
09Banner
No item is boring. The clarification and introduction of things make them sound and come over as dull. Need to form beyond any doubt your item isn’t one of those boring showing up ones? At that point, check out how Standard positions itself as a value-intensive, easy-to-use, and locks-in arrangement that guarantees that at each minute of the video, the client is learning something unused to keep them snared until the end.
10Socratic Investment
If you need to memorize how to condense tons of data, this whiteboard liveliness illustration will give you extraordinary motivation to do so. Socratic Ventures, the video presents its whole trade setup, framework, and administration without overpowering the viewers. With a straightforward script and supporting restricted whiteboard activity, this video makes it to our list for its negligible, however successful approach.
To note that, while exploring different examples for whiteboard animation video examples, must be acknowledged by the tremendous supports and services provided by some online tools such as Filmora, Videoscribe whiteboard animation, and whiteboard animation After Effects template free to download.
The Best Whiteboard Animation Video Software:
Wondershare Filmora Video Editor is free whiteboard animation video software that gives users a brand new way of empowering their storytelling. This innovative video editing software comes with top-notch features that permit users to create professional-looking whiteboard animation videos with compositing, motion graphics, tricks, color correction tools, and more. It is both powerful and straightforward to find out the Quality of the Substance.
For Win 7 or later (64-bit)
For macOS 10.12 or later
● Key Takeaways from This Episode →
● What is meant by Whiteboard animation or whiteboard animation videos
● Different examples of best whiteboard animation videos to explain the techniques
● Factors that make up an excellent video.
● Further, the article has explained in detail about whiteboard animation videos with different examples to clarify how it looks, and some websites may help you lead more about whiteboard animation videos. The most important question answered above is how to make videos ideally at Filmora. I hope your queries are unambiguous after reading this post.
Learn How to Do Funny Cartoon Drawings
The Art of Comics - Learn How to Do Funny Cartoon Drawings
An easy yet powerful editor
Numerous effects to choose from
Detailed tutorials provided by the official channel
Whether you want to use a simple short video or an accessible online lesson, you will find everything that you need to learn how to create comic cartoon drawing on this website. This website article contains all the tutorials you need, ranging from your favorite wild animals, places, objects, farm animals, characters, vehicles, and food.

Do not forget that practicing is the key to success, so don’t hesitate to try several drawing lessons to help you improve your abilities. Start today to learn how to draw funny cartoons online at your own pace and comfort with this step-by-step tutorial.
In this article
01 [How to Draw Funny Cartoon Faces](#Part 1)
02 [How to Draw Your Own Cartoon Character](#Part 2)
Part 1 How to Draw Funny Cartoon Faces
Drawing funny faces in cartoons is very easy compared to other drawing styles or drawing complete parts of the comic. All that is need is practice and experiment with different combinations of shapes. This article will guide on how to draw funny cartoon faces of various types using six other steps:
Step 1: To begin, you need to first draw the face outline by drawing the following;
● Any Perfect type of round shape like a circle.
● Any pear shapes
● An upside-down triangle
● A quadrilateral like a trapezium, a square, or any of your choice

Step 2: To draw the nose in the middle of the face, draw somewhere any of the following;
● A round shape that is bulgy
● A U-shape
● A V-shape
● A small dash.

Step 3: Next is that you draw two round shapes for the eyes, and each of them should have a smaller round or dot (for the pupil), which is above the nose. This eye can be in the shape of any of the following;
● Two large circles
● An ovals
● A curvy “M,” like the one you can see in the “McDonalds” logo.

Step 4: You can draw the mouth just below the nose and draw any of the shapes from the list given below. In addition, to make the mouth funnier, you should then add teeth by either drawing a small square sticking out inside the mouth from the upper side, at the roof of the mouth, or a straight horizontal line which is across the mouth and several vertical lines used to form a grid having two rows and many columns.
● A U-shaped curve that is large
● A triangle like a right-angled one which is most preferred
● A circle or an oval shape
● A rectangle shapes
● A straight line shapes

Step 5: You can add any other “extra fittings” such as the ears (in cartoons, ears generally considered to be ‘extra’), wrinkles, collar, hat, hair, etc.

Step 6: Finally, your cartoon face drawing is ready! You can also add different colors to the picture with different funky shades to make it attractive.

Part 2 How to Draw Your Own Cartoon Character
Are you bored? Why not take up a pencil and draw your cartoon comic drawing character? Note that drawing will be a relief from boredom, and it also helps your creativity fly very high.
However, you can easily add some colors and designs or even animate your cartoon character using this free software known as Filmora. Wondershare Filmora Video Editor is the best software to make you cartoon your picture or animate your cartoon characters with tons of filters and effects and its keyframing feature, which allows this with ease.
For Win 7 or later (64-bit)
For macOS 10.12 or later
Read this article on how to draw the perfect cartoon character yourself:
Step 1: The first is to have an idea of what you want to draw, i.e., the picture you want to draw. You can pick any character to draw from your favorite website or WeeWorld.com.
● First, you draw the face but make sure you don’t add a nose but do a black outline.
● Next, you can draw the other features but make sure you don’t use colored pencils. Only use your main writing utensil.
● Then, remember to use your imagination to add the clothes and hairstyle.
● Finally, you can delete any unwanted lines and color with artist utensils, such as crayons, paintbrushes, colored pencils, etc. Also, remember that you can add some detail to your character to make it pop out and be beautiful.

Step 2: Now you have officially made your cartoon, how does it feel?

Step 3: Next, you want to go back and draw again, but this time, not an imitation.

Step 4: Pick up a new piece of paper to be used to draw another character. But this time, you need to change the features. You can decide to make the eyes bigger, neon skin, and maybe crazy hair. You can try clothes that you would love to wear, or ones you wish you could get. Also, try to change the size around to make the features look different and add a nose, and then you can finally color your creation.

Step 5: Now, you can compare the two drawings to notice the difference. You will realize that one is an imitation while the other is all you! Now, you can grab a new piece of notebook paper.

Step 6: Next is that you begin to jot down different ideas. For example, you may want to draw a cute little puppy or a cute baby. Sometimes you can decide that your cartoon could be about a talking apple or something different.

Step 7: Grab another piece of paper and draw any other character you can imagine. You can try using a Sharpie marker for the outline by carefully tracing the pencil. Then you can erase any stray marks on the piece of paper. Next, you can also use any writing utensils like markers, crayons, colored pencils, pastels, or even paint, as it also works well.

Step 8: You can grab your notebook sheet again and then jot down any idea of a comic series. Also, make a plot or funny lines that you could use or any other characters.

Step 9: Next, you fold the blank sheet of paper and make it into about four lines. And then you can draw your main character by just using a pencil first.

Step 10: You can then draw the other characters and all the basic outlines in the drawing.

Step 11: Next is that you can draw the furniture and background, such as trees or anything else, to beautify your drawing.

Step 12: You can go back and add details and outline with Sharpie or black marker and delete any stray marks. You can also color if wanted.

Step 13: Next is for you to add dialogue and actively work with your character drawing.

Step 14: Finally, and there you have it. Congratulation! You now have your perfect, awesome, beautiful, and YOUR cartoon.

● Ending Thoughts →
● This article explained all you need to know about learning how to do funny cartoon drawings very quickly. You can also use these methods to create funny cat cartoon drawings or any other drawing you want for cat lovers.
● However, you can decide to animate your graphic using the best software to carry it out quickly, i.e., Filmora.
Whether you want to use a simple short video or an accessible online lesson, you will find everything that you need to learn how to create comic cartoon drawing on this website. This website article contains all the tutorials you need, ranging from your favorite wild animals, places, objects, farm animals, characters, vehicles, and food.
Do not forget that practicing is the key to success, so don’t hesitate to try several drawing lessons to help you improve your abilities. Start today to learn how to draw funny cartoons online at your own pace and comfort with this step-by-step tutorial.
In this article
01 [How to Draw Funny Cartoon Faces](#Part 1)
02 [How to Draw Your Own Cartoon Character](#Part 2)
Part 1 How to Draw Funny Cartoon Faces
Drawing funny faces in cartoons is very easy compared to other drawing styles or drawing complete parts of the comic. All that is need is practice and experiment with different combinations of shapes. This article will guide on how to draw funny cartoon faces of various types using six other steps:
Step 1: To begin, you need to first draw the face outline by drawing the following;
● Any Perfect type of round shape like a circle.
● Any pear shapes
● An upside-down triangle
● A quadrilateral like a trapezium, a square, or any of your choice
Step 2: To draw the nose in the middle of the face, draw somewhere any of the following;
● A round shape that is bulgy
● A U-shape
● A V-shape
● A small dash.
Step 3: Next is that you draw two round shapes for the eyes, and each of them should have a smaller round or dot (for the pupil), which is above the nose. This eye can be in the shape of any of the following;
● Two large circles
● An ovals
● A curvy “M,” like the one you can see in the “McDonalds” logo.
Step 4: You can draw the mouth just below the nose and draw any of the shapes from the list given below. In addition, to make the mouth funnier, you should then add teeth by either drawing a small square sticking out inside the mouth from the upper side, at the roof of the mouth, or a straight horizontal line which is across the mouth and several vertical lines used to form a grid having two rows and many columns.
● A U-shaped curve that is large
● A triangle like a right-angled one which is most preferred
● A circle or an oval shape
● A rectangle shapes
● A straight line shapes
Step 5: You can add any other “extra fittings” such as the ears (in cartoons, ears generally considered to be ‘extra’), wrinkles, collar, hat, hair, etc.
Step 6: Finally, your cartoon face drawing is ready! You can also add different colors to the picture with different funky shades to make it attractive.
Part 2 How to Draw Your Own Cartoon Character
Are you bored? Why not take up a pencil and draw your cartoon comic drawing character? Note that drawing will be a relief from boredom, and it also helps your creativity fly very high.
However, you can easily add some colors and designs or even animate your cartoon character using this free software known as Filmora. Wondershare Filmora Video Editor is the best software to make you cartoon your picture or animate your cartoon characters with tons of filters and effects and its keyframing feature, which allows this with ease.
For Win 7 or later (64-bit)
For macOS 10.12 or later
Read this article on how to draw the perfect cartoon character yourself:
Step 1: The first is to have an idea of what you want to draw, i.e., the picture you want to draw. You can pick any character to draw from your favorite website or WeeWorld.com.
● First, you draw the face but make sure you don’t add a nose but do a black outline.
● Next, you can draw the other features but make sure you don’t use colored pencils. Only use your main writing utensil.
● Then, remember to use your imagination to add the clothes and hairstyle.
● Finally, you can delete any unwanted lines and color with artist utensils, such as crayons, paintbrushes, colored pencils, etc. Also, remember that you can add some detail to your character to make it pop out and be beautiful.
Step 2: Now you have officially made your cartoon, how does it feel?
Step 3: Next, you want to go back and draw again, but this time, not an imitation.
Step 4: Pick up a new piece of paper to be used to draw another character. But this time, you need to change the features. You can decide to make the eyes bigger, neon skin, and maybe crazy hair. You can try clothes that you would love to wear, or ones you wish you could get. Also, try to change the size around to make the features look different and add a nose, and then you can finally color your creation.
Step 5: Now, you can compare the two drawings to notice the difference. You will realize that one is an imitation while the other is all you! Now, you can grab a new piece of notebook paper.
Step 6: Next is that you begin to jot down different ideas. For example, you may want to draw a cute little puppy or a cute baby. Sometimes you can decide that your cartoon could be about a talking apple or something different.
Step 7: Grab another piece of paper and draw any other character you can imagine. You can try using a Sharpie marker for the outline by carefully tracing the pencil. Then you can erase any stray marks on the piece of paper. Next, you can also use any writing utensils like markers, crayons, colored pencils, pastels, or even paint, as it also works well.
Step 8: You can grab your notebook sheet again and then jot down any idea of a comic series. Also, make a plot or funny lines that you could use or any other characters.
Step 9: Next, you fold the blank sheet of paper and make it into about four lines. And then you can draw your main character by just using a pencil first.
Step 10: You can then draw the other characters and all the basic outlines in the drawing.
Step 11: Next is that you can draw the furniture and background, such as trees or anything else, to beautify your drawing.
Step 12: You can go back and add details and outline with Sharpie or black marker and delete any stray marks. You can also color if wanted.
Step 13: Next is for you to add dialogue and actively work with your character drawing.
Step 14: Finally, and there you have it. Congratulation! You now have your perfect, awesome, beautiful, and YOUR cartoon.
● Ending Thoughts →
● This article explained all you need to know about learning how to do funny cartoon drawings very quickly. You can also use these methods to create funny cat cartoon drawings or any other drawing you want for cat lovers.
● However, you can decide to animate your graphic using the best software to carry it out quickly, i.e., Filmora.
Also read:
- Updated In 2024, Tips for Canva Animated Elements
- New Great Guide for Beginners on 2D Animation Making for 2024
- New Ways to Create an Adobe Collage
- New In 2024, 10 Stunning Stop Motion Movies You Should Not Miss
- Updated 10 Popular Cartoon Characters That You Wont Want to Miss
- Updated 10 Cartoon Characters That Should Top Your List
- New 2024 Approved Before You Learn 3D Animation Things You Should Know
- Updated Thousands Already Found 15 Best Sites to Watch Cartoons Online Free And So Can You
- New Convert Animated GIF From Video for 2024
- Updated Ways to Stop Animation From Looping in Unity
- Beginners Guide for Learning 3D Animation
- Updated The Best 20 Motion Graphics Companies & Studios
- Updated 10 Best Photoshop Cartoon Effects For Creatives for 2024
- In 2024, How to Make a Video a Live Photo
- New How to Make Your Characters Interactive in Unity Animation Rigging for 2024
- Updated How to Make GIF Stickers for WhatsApp 100 The Easy Way
- New In 2024, The Secret Sauce for Making GIF Instagram Story More Stunning
- Updated 6 Proven Ways to Dub Anime for Anime Voice Actor for 2024
- New 2024 Approved 12 Animated Slideshow PowerPoint Templates and Tools to Make Them
- Updated 2024 Approved 10 Amazing Whiteboard Animation Video Examples You Need to Bookmark
- Updated Tips to Create Animated Social Media Posts in Canva for 2024
- New Top 7 Animated GIF Text Makers
- In 2024, How to Fake GPS on Android without Mock Location For your Infinix Smart 7 HD | Dr.fone
- In 2024, Apple ID Locked for Security Reasons From iPhone SE (2020)? Find the Best Solution Here
- Device unlock Red Magic 8S Pro+
- How to Flash Dead HTC U23 Pro Safely | Dr.fone
- 3 Ways to Track HTC U23 without Them Knowing | Dr.fone
- Bricked Your Samsung Galaxy S24? Heres A Full Solution | Dr.fone
- Top 12 Prominent Realme GT Neo 5 SE Fingerprint Not Working Solutions
- 3uTools Virtual Location Not Working On Vivo Y200? Fix Now | Dr.fone
- 2024 Approved A Comprehensive List of The Top SpongeBob Voice Generators
- In 2024, How To Pause Life360 Location Sharing For Poco X6 | Dr.fone
- What is the best Pokemon for pokemon pvp ranking On Apple iPhone 6? | Dr.fone
- How to Cast Infinix GT 10 Pro Screen to PC Using WiFi | Dr.fone
- In 2024, How I Transferred Messages from Vivo Y36i to iPhone 12/XS (Max) in Seconds | Dr.fone
- 4 Most-Known Ways to Find Someone on Tinder For Itel P55T by Name | Dr.fone
- Motorola Moto G14 Messages Recovery - Recover Deleted Messages from Motorola Moto G14
- How to Bypass FRP on Samsung Galaxy S24+?
- In 2024, 6 Ways To Transfer Contacts From Vivo Y100i to iPhone | Dr.fone
- Hacks to do pokemon go trainer battles For Meizu 21 | Dr.fone
- Prank Your Friends! Easy Ways to Fake and Share Google Maps Location On Motorola Moto G14 | Dr.fone
- Title: 10 Top Tools to Make Pic Collage for Windows
- Author: Elon
- Created at : 2024-05-19 03:04:25
- Updated at : 2024-05-20 03:04:25
- Link: https://animation-videos.techidaily.com/10-top-tools-to-make-pic-collage-for-windows/
- License: This work is licensed under CC BY-NC-SA 4.0.
