

12 Animated Slideshow PowerPoint Templates
12 Animated Slideshow PowerPoint Templates
Animated Slideshow Powerpoint Templates and Tool to Make Them
An easy yet powerful editor
Numerous effects to choose from
Detailed tutorials provided by the official channel
If you are passionate about uplifting your graphic design skills with stunning animated slideshow creation, read here about the best PowerPoint templates!
In this article
01 [12 Cool Animated Slideshow PowerPoint Templates](#Part 1)
02 [5 Tools to Make Stunning Animated Slideshow PowerPoint](#Part 2)
Part 1 12 Cool Animated Slideshow PowerPoint Templates
Slideshows are an already appealing media of content presentation, which when supplemented with animated backgrounds, are bound to captivate attention. Considering the underlying reason, it should be noted that animated slideshows offer a more vivid and lively presentation of information, as compared to their static counterparts. Animated slideshows have the additional advantage of presenting the content in the exact and accurate tone that suits the grasping capability of the audience.
Talking of feasible solutions for creating high end animated slide show presentations, the software market has a diverse range of alternatives to choose from. However, Microsoft PowerPoint is a graphic presentation tool that almost everyone is familiar with. Limiting our discussion to the same, there are a diversity of animated slideshow PowerPoint templates, like that of Evanto Elements and GraphicRiver to design professionally outstanding animated slideshows.
If you are keen on trying hands at adding that extra spunk your ordinarily boring static presentations, spare time to read the following section of this article, which incorporates the features, utilities and merits of the top 12 design templates in GraphicRiver for creating animated slideshows in PowerPoint with utmost ease and within a quick time span:
01Parallax Ultimate PowerPoint Animated Template
Choosing this animated presentation template to design your slideshow projects will supplement tour creations with the most amazing parallax effect, including an additional list of tempting and trendy editing features, like, limitless color choices, high definition video resolution, master slide presentations, modern, elegant, fully animated, company oriented slides, with object animations and parallax transitions, 16:9 wide screen aspect ratio, handmade infographics and much more.

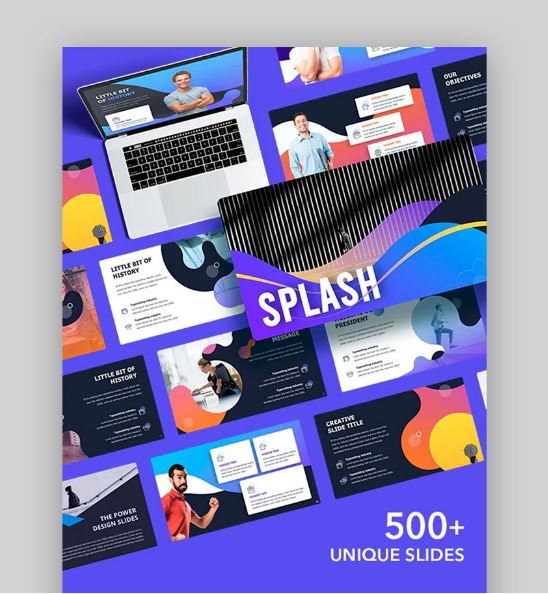
02Splash Animated PPT
This one is an excellent animated template to create elegant animated slideshow presentations that will make your design creativity stand out of the crowd. Working with the template entitles you of a matchless, professional quality slideshow animation PowerPoint project on account some exclusive features, like those of high definition screen resolution and widescreen image aspect ratio, light and dark presentation backgrounds etc.
Mentioning some additional credibility of using the template for creating animated slideshows, you get to access as many as 500 selected slides, vector line and social media icons, uniquely styled image masks, calendars and vector maps.
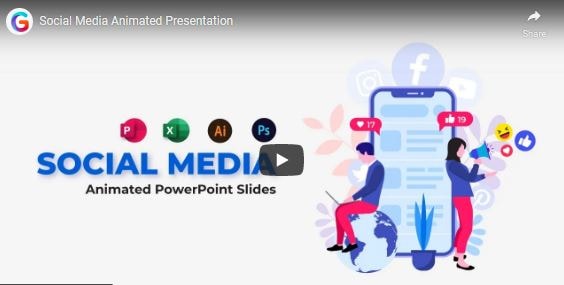
03Social Media Animated PowerPoint Templates
If your working constraints require an extensive use of social media information, consider using tis interactive PowerPoint template for designing social media compatible, premium quality, professional slideshows with animated graphics. Working with the template, you will get a complementary access to a pool of exciting slideshow features.
Talking of the specific utilities of the animated slideshow maker template, you can choose from over 50 slide layouts, light and dark backgrounds themes, enjoy a seamless, drag and drop workflow and easily edit grouped elements, along with modifying infographic elements in Excel sheets.
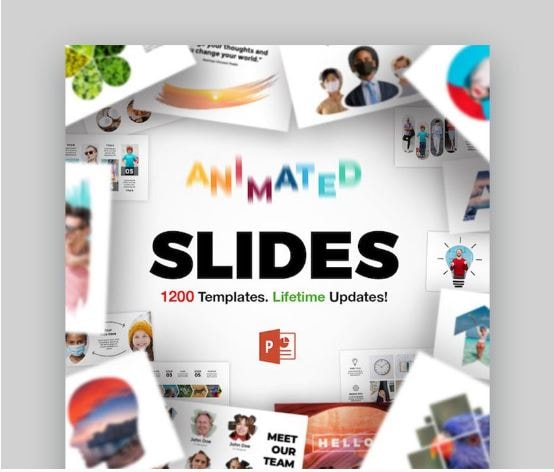
04Animated Slides Bundle for PowerPoint Presentation
This one is an interactive GraphicRiver PowerPoint animation slideshow maker template, which you can work with for a delivery of high end and illustrative animated slideshow presentations. The template facilitates its users with a diversity of graphic customization features, like that of visual transitions, custom reveals and objectified motions to your presentation slides, points and images.
The template promises you of a stunning, high quality and compelling slideshow output with an elegant presentation outlook. The template has a variety of inbuilt slide layouts, is easy to use and comes to you absolutely free of cost.
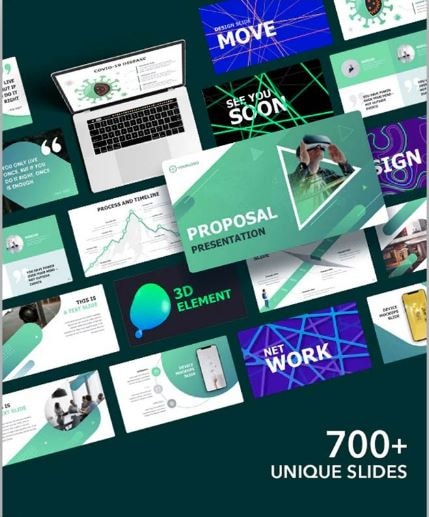
05Proposal PowerPoint Animated
If you are about to deliver a dynamic business presentation, consider working with this graphic tool to create your animoto slideshow in PowerPoint. Proposal PowerPoint Animated is an interactive animation template, designed exclusively for adhering to the concern of business centered content delivery.
You can create captivating motion stories with the conveniently editable slides and high end animated graphics of this PowerPoint template, thus ensuring a high pitched information conveyance to your target audience.
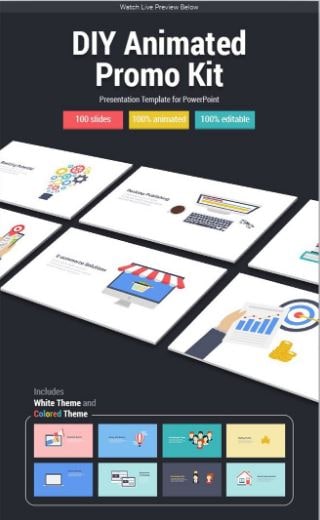
06DIY Animated PPT Promo Kit
Looking for the most feasible PowerPoint animated slideshow templates for slideshow creation generally refers to a time consuming web search. If you are a creativity freak and want to escape the aforesaid hustle, try hands at working with the DIY Animated PPT Promo Kit to create a customized animated slideshow template of your own.
Talking about the utilities, this interactive slideshow presentation kit is packed with a lot of professional features that are sufficient to give a hype to your normal quality slideshows and allows you to work with over 100 entirely customizable slides in 2 variable color schemes.
07Pitch Deck Animated Bundle
Using a pitch deck strategy is a common way of attracting fund credibility for your business for an appreciable revenue growth, which is often put to the additional use of addressing potential workers of the company on the latter’s crucial success factors. When working towards either of the purposes, using the aforesaid software bundle is a smart choice to showcase the exact content concerning your overall business concept to the target audience.
This one is preferably the best pitch deck template you could ever get. Though there is an appealing set of market choices, it is always an impressive decision to select the cream from the curd for ensuring high end results.
08Massive X Presentation Template for PowerPoint
When having a desire to access the credibility of slideshow templates though user reviews, this animated PowerPoint template is sure winner. Packed with an extensive library of over 960 exceptional slides in dark and light background themes, along with 20 preset color schemes, this graphic template is an absolute favorite of creative designers across the globe.
Choosing the template for catering to your animation centered slideshow creation needs opens a diversity of audio-visual customization features with an entirely free access and an easy to use working interface.

09Imperial Multipurpose PowerPoint Template
Living up to its name, this one is a multi-functional, free animated slideshow template that allows you to choose the perfect color scheme for your brand from more than 100 shade varieties, thus ensuring a high end transition flexibility. Prefer using this template to add a visual highlight to your slideshow presentations with a diversity of icons and customized animations.
If you have invested enough time looking for the best PowerPoint animation slideshow creator utility, end your search with the Imperial Multipurpose template that is available to you without asking for a penny from your pocket and welcomes you with the most interactive working environment.
10Minimal PowerPoint
The aforesaid slideshow template for creating animated presentations is a fundamental and clean graphic creation utility that comes with a wide range of more than 500 different sides and convenient to use drag and drop placeholders for seamless content inclusion. Additional features of the template consist of inbuilt calendars, charts, graphs and customized illustration components, suitable for a diverse set of industries.
This one is an interactive style PowerPoint animoto slideshow maker template that works best to infuse data and animation graphics together. You can use this graphic design tool without a second thought for delivering quality content with a cohesive slideshow presentation, of course without having to worry about any cost constraints.
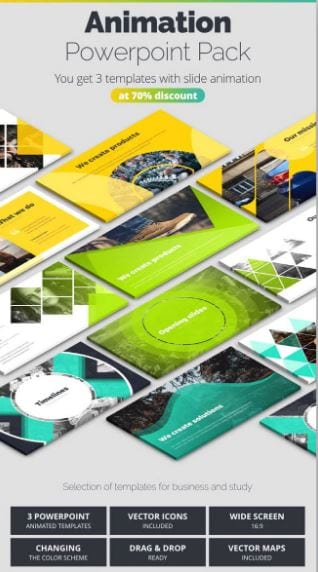
11PowerPoint Animated Pro Pack- With Animated Slides
Using this animation slideshow template for your business presentations facilitates you with a series of interactive graphic modules within professionally compatible slides. You can use this high end template package to supplement your presentations with high quality animated motion diagrams.
Other appealing features of the package include a huge set of conveniently editable slides, with an extensive variety of PowerPoint compatible motion transitions, animations and many more surplus features to add the right amount of spark to your professional animated slideshow presentations.
12Wow Slides for PowerPoint
If you are yet to reach to the perfect animated slideshow creator solution, consider sparing a thought about this wonderful PowerPoint template to cater to your animation design concerns. Available to you with a decent set of over 24 inbuilt color themes, this one is a perfect choice for working on webinar slides, business presentations and pitch decks.
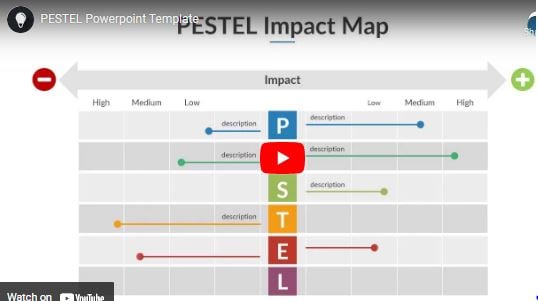
Apart from elegantly beautiful collection of animations, you will find this slideshow template package to be a storehouse of elusive and explanatory charts, graphs, maps and icon packs, which you can use to add relevant statistical content to your presentations or give an enhanced and organized look to your slideshow project.
Part 2 5 Tools to Make Stunning Animated Slideshow PowerPoint
Having discussed about the most amazing animation slideshow templates for PowerPoint, let us now extend our talk to learn about some of the most preferred graphic tools to create high end and professionally expressive and stunning animation centered slideshow presentations in PowerPoint, considering the fact that such presentations are an important part of the ongoing business trends, which you should be aware of.
The following section presents a detailed discussion on the features, best application utilities, market reviews and usage guidelines of the top 5 animated slideshow creator tools:
01**Wondershare Filmora Video Editor **
For Win 7 or later (64-bit)
For macOS 10.12 or later
This one is possibly the best and an all in one software package that promises to address almost all of your graphic editing needs in the most affordable manner. Talking of the specific utility of creating animated slideshow presentations, Wondershare Filmora is dedicated towards delivering high end motion graphic slideshows of matchless professional excellence.
The tool is best in making audio infused, animated photo slideshows that are apt for comprehensive graphic proposals for top rated business projects. About the software’s pricing requirements, you can avail a free usage of the tool for free in its trial version for 7 days, following which, working with the tool will demand paid monthly and annual subscriptions of $9.99 and $19.99 respectively.
Pros
● Working with the tool, you are entitled to use a plethora of audio-visual effects and filters to enhance your presentations.
● The tool’s feature rich library has everything to design animated slideshows with high resolution output quality.
● The tool is known to support almost all popular audio, video and image file formats.
Cons
● The tool has a limited variety of fine-tuned utilities for effect tweaking.
● The features of chapter authoring and DVD menu are absent.
● Working with the tool, you may encounter occasional software crashes.
User’s Guide to Create Animated Slideshows in Wondershare Filmora
Having understood the basic functionalities and exceptional features of Filmora’s Animated Slideshow creator tool, let us see through the following section to get familiar to the knowhow of using the same for designing animation top rated slideshow presentations in a stepwise procedure:
Step 1: Download and Install the Software
Before getting though with the creation process, initiate a download of the slideshow creator program from the latter’s official website to any of your preferred Windows or iOS compatible devices.
Step 2: Add Your Images and Videos
Creating a slideshow presentation may require a set of multiple image and video files to the program’s graphic creator timeline. It is recommended to add your selections of the aforesaid files to a single folder before launching the software in your system.
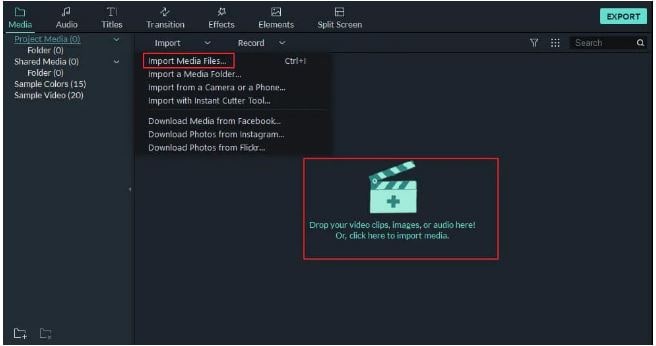
Once you have finished making your selections, launch the program to reach its welcome interface, were you need to navigate and click on the ‘Media’ tab in the top toolbar. From the task options that appear, click on ‘Import a Media’. Next, you will be asked to browse through your device locations and choose the folder that contains your previously selected files to be used in the presentation you are about to create.
When you have found the required folder, tap on ‘OK’ to import the same to the new slideshow project in the Filmora timeline. All your selected files will be visible here after a successful import.
Step 3: Timeline Positioning of Media Files
Before working on the task of positioning the imported media files on the app’s timeline, navigate to the ‘File’ menu and choose the ‘Preferences’ option. As soon as the respective window pops up, reach to the ‘Editing’ tab at the top and select ‘Photo Placement’ from the drop down menu that follows.
In case your selected images do not have a matching aspect ratio with the program’s preset values, choose the ‘Crop to Fit’ option for removing the additional black bars from the selected images. For the requirement of adding camera pan and zoom movements to your images, select the ‘Pan & Zoom’ option in the ‘Preferences’ settings.
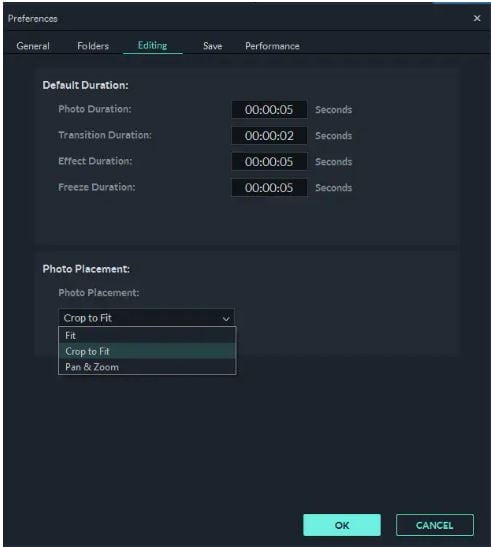
You can proceed to change the preset play durations of images, effects and transitions in the ‘Editing’ window itself. As an alternative you can adhere to the same task in the program’s timeline by dragging any one end of the media files in an outward or inward direction. The ‘Crop to Fit’ option may not give an affordable size in some cases where the images are set in a vertical 9:16 aspect ratio. Choose the ‘Fit’ option to set this issue straight.
When you have finished making all the aforesaid adjustments, navigate to the Media panel again for adding the selected image files to the software’s timeline. Proceed with selecting a file and dragging and dropping the same at the desired position within the timeline. Continue repeating the process till all the images have been placed at their respective locations, and in the exact order of appearance in the slideshow. This should be followed by adjusting the image play durations using any one of the previously described methods.
Step 4: Escape Hard Cuts With Image Transitions
Hard cuts among different slides of a presentation break the flow of the slideshow. To escape this cringe, consider using a smooth transition effect within the slides of your project. To do this, navigate to the ‘Transitions’ tab in the top toolbar of Filmora’s project window and select a desired one from over 100 choices of customizable transitions.
You can now drop these transitions in the timeline at the exact intersection point of two image files. Avoid using the same transition for every hard cut to escape monotony. You can instead choose different transitions for each slide while observing its appearance in the clip.
After you are done with applying transitions to each slide, double click on a particular transition to open its ‘Transition Setting Window’ either for presetting the transition play duration or to choose a desired transition mode. You can also prefer a direct customization of the transition duration in the project timeline through a right or left dragging of any of its ends.
Step 5: Uplift Your Slideshow Colors With Overlays and Filters
Navigate to the top toolbar and hit the ‘Effects’ tab to choose from a diversity of visual effects that can be added to the slideshow images to supplement them with an increased vibrancy through color desaturation. These effects in the program’s library are categorized into classes of Overlays and Filters, with further subcategories of Sepia Tone, Light Leaks and Lomography and many more.
To apply these effects, just select and add them into a timeline track above the clip you wish to add the overlay or filter to. When you have applied the effects, observe the overall clip appearance in the ‘Preview Panel’. Double click on a particular effect to fine-tune the latter’s settings.
Step 6: Supplement Your Slides With Motion Graphic Elements
While motion graphics will undoubtedly enhance your animated slideshows, adding them to your presentation is purely optional, since most professional projects do not need a motion graphic element to escalate their presentation outlook. If, however, you choose to work on making these a part of your animated slideshow, Filmora lets you do that in its ‘Elements’ tab.
There is a plethora of motion graphic templates that you can select and add to the project timeline for a quick and vibrant upgrade of your presentation slides, but, at the same time, it becomes important to take care of the visual outlook and the underlying reason of creating the slideshow before you decide on adding these elements to your project.
Step 7: Create Voiceovers and Record Soundtracks for Your Slideshow
Narration is a smart way to captivate the target audience within your slideshow, whether though a self-delivery or a recorded voiceover. If you decide on the second option, you can conveniently use the Filmora Slideshow Creator program to add voiceovers and soundtracks to your presentation.
To adhere to the purpose, navigate to the top toolbar and click on the ‘Media’ tab. From the options that appear, tap on the ‘Record’ menu that drops down, followed by selecting the ‘Record Voiceover’ option. As soon as the ‘Record Audio’ prompt pops up, select your desired microphone to be used in the recording process and click on the ‘Record’ button.
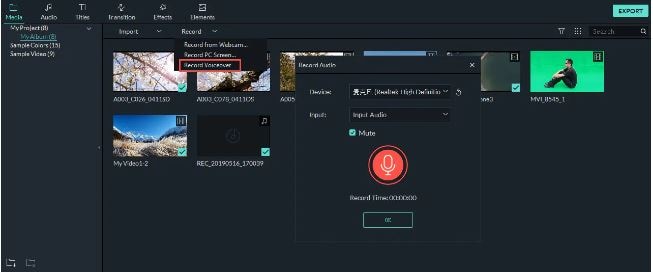
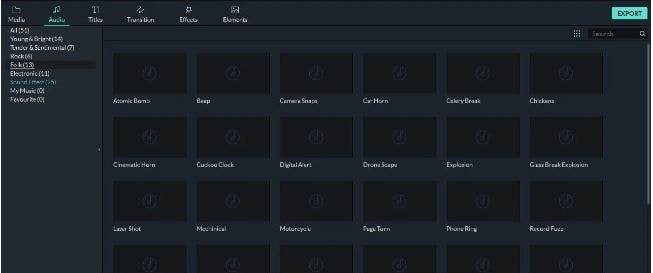
The recording that you have just created will appear in the ‘Media’ tab beside your all other imported audio-visual and image files, and you can add the same to any desired file with utmost ease. The Filmora library further allows you with a free access to its huge inventory of sound and audio effects. To apply these effects to your project, navigate to the ‘Audio’ tab and browse through impressive music categories, like, Young & Bright, Rock, Electronic, etc., to select the best matching audio for your slideshow.
When you have made your selections, add all of them to the slideshow’s audio track in the project timeline and make suitable adjustments to their play durations.
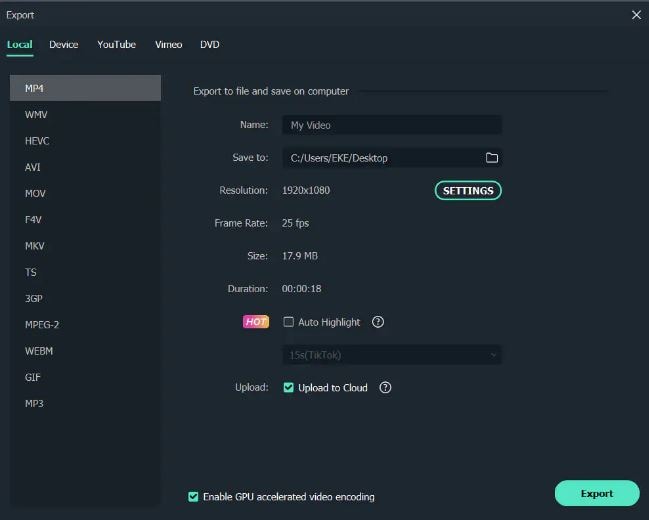
Step 8: Export Your Creation
When your satisfied with your efforts till here, you have indeed created a wonderful animated slideshow presentation that should be exported to relevant platforms. Navigate to the ‘Export’ tab at the top right corner of the project timeline and click on the same. As soon as the utility window appears, choose a preferred file format, set a desired output resolution and fame rate for your presentation, followed by making a direct export of the same to your Vimeo or YouTube accounts.
The slideshow rendering time on different platforms may vary in cohesion with the specific presentation lengths, with larger file requiring a considerably longer time to get rendered than the smaller ones. It is advisable to limit the output file size within 500 MB for a quick rendering process.
02Canva
This one is an online animation slideshow creation tool that could certainly be your best choice to design high end professional presentations. Facilitating you with over 100 different slide design layouts, the tool additionally grants you the liberty to add your own images to the presentation being created, or even select suitable alternatives from Canva’s extensive image stack that has over 1 million apposite images to choose from.
You can make the best use of Canva to create promotional presentations to add extra emphasis on the brand of your company and product brand, which a compatible to a diverse variety of professional platforms for information sharing.
As far as the cost constraints of the tool are concerned, you get to access a free version of the tool for working on slideshow presentations for individual or small business units, while the graphics design needs of large scale professional corporations are suitably addressed by the utility’s Canva for Work version, which is equipped with high end team coordinated features with a 30-day free trial, along with monthly and annual subscription of $ 12.95 and $ 119.4 respectively.
Pros
● The tool allows you to add elusive texts, filters, fonts and images to the animated slides of your business presentation.
● Working with the tool, you can drag and drop an extensive variety of elements within your slideshow.
● Canva further allows you to create, upload and save the logo of your brand.
Cons
● The tool’s customer support is not quite welcoming.
● You need to add your phone number within the tool’s customer support interface for getting the required help.
● The tool’s working interface is somewhat confusing.
User’s Guide to Create Animated Slideshows in Canva
Let us see browse through the detailed, step by step process to quickly create amazing animated slideshow presentations using the Canva graphic design tool in the following section:
Step 1: Download and Install Canva
Visit the official site of the tool for a free download of the Canva slideshow creator software in any suitable iOS or Windows compatible desktops, laptops and PC systems.
Step 2: Choose Your Task
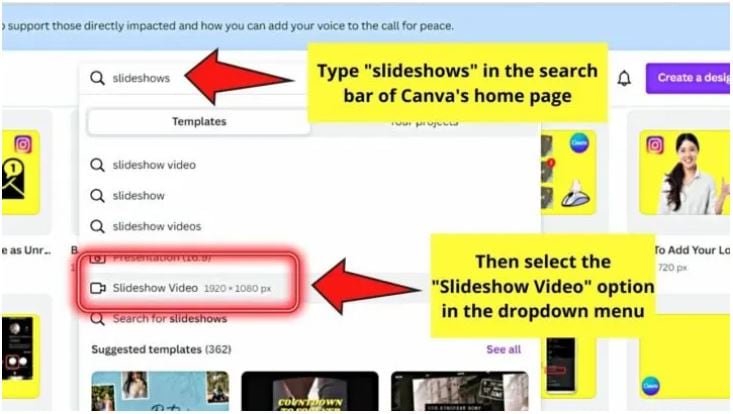
Undertake a launch of the downloaded program to reach the latter’s welcome page. Here, you need to navigate to the search bar at the top and type a keyword to select your task. For creating slideshow presentations, enter ‘Slideshow’ in the search tab.
In the drop down menu that follows, a list of the closest matching alternatives of your keyword will appear. Select ‘Slideshow Videos’ from the same.
Step 3: Select a Template
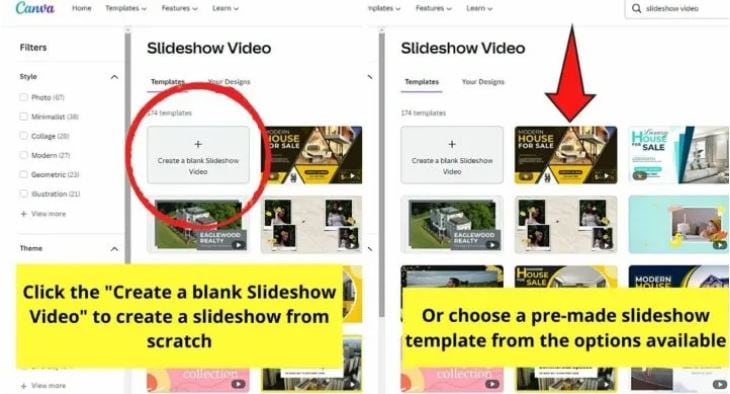
The completion of Step 2 will take you to the program’s template library, where you can either work with creating a presentation of your own by clicking on the ‘Create a Blank Sideshow Video’ option, or choose any one from the finest collection of in built slideshow templates from the Canva library.
Step 4: Customize Your Template
After selecting the template, you will reach Canva’s slideshow editor page. Here you can customize your slideshow as per your preferences. To begin with, replace the preset images in the template with your selected ones.
You can either choose a set of images from the program’s inbuilt photo gallery or select the same from your device. Navigate to the ‘Tools Panel’ in the left and click on ‘Photos’ to work with the first method, or tap ‘Uploads’ in that very panel to apply the second.
When you have made your choice, click on ‘Upload Media’ to bring your selections to the tool’s editor timeline. This should be followed by dragging and dropping the images at appropriate places within the template.

Step 5: Crop the Images
Double click on any image and drag it sideways to crop the same within your preferred aspect ratio. When you are happy with the changes, click on ‘Done’ to apply them. You can additionally, customize the images with a variety of available effects at this stage.
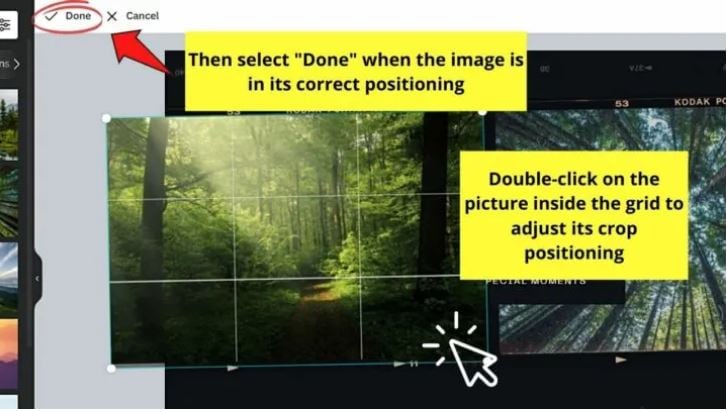
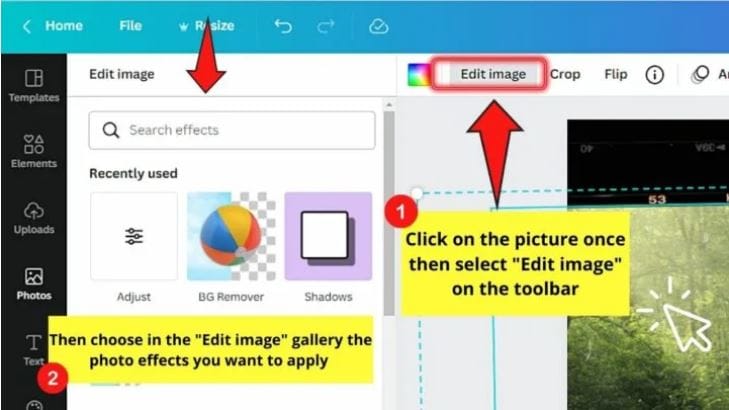
To proceed with the aforesaid process, choose the image you want to customize and select ‘Edit Image’ from the dropdown that appears. You will be directed to the ‘Edit Image Gallery’, where you can select the effect you want to complement your image with.
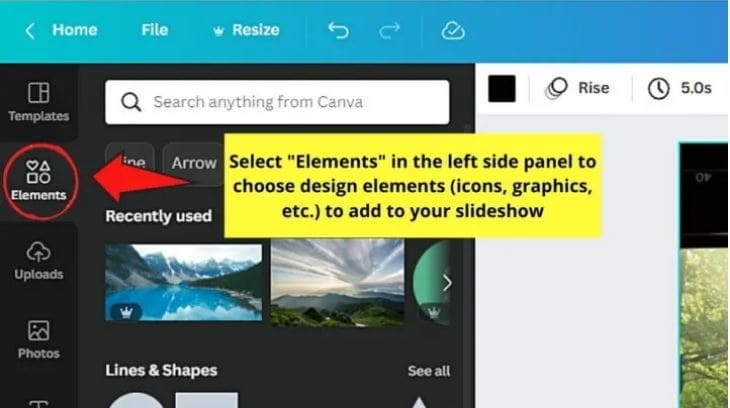
Step 6: Add Other Design Elements
Tap on ‘Elements’ in the ‘Tools Panel’ at the left to select a suitable component from a range of stickers, icons, illustrations and charts to add to your slideshow according to its creation theme.
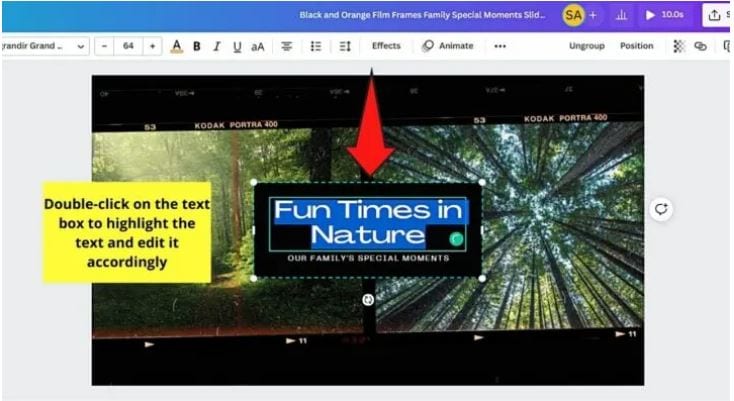
Step 7: Customize the Text
The template has some pre-written text, which you can change by double clicking inside the text boxes to highlight the already written text and edit the same as per your requirement. Press ‘T’ on your system’s keyboard for adding extra text boxes. You can also visit the ‘Editor Toolbar’ work with a variety of text formatting options, like, font size, style and color.
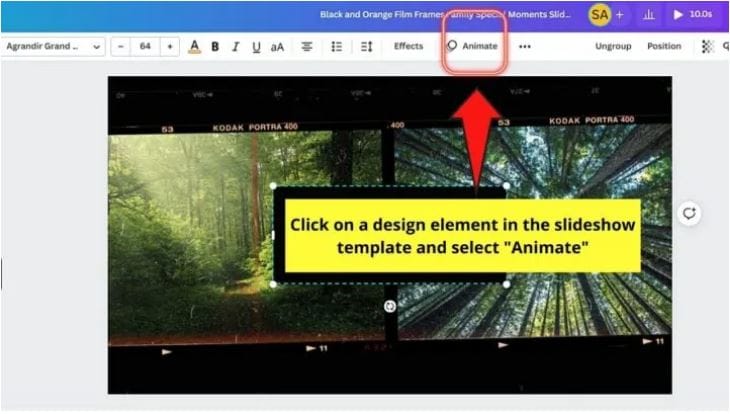
Step 8: Include Suitable Animations
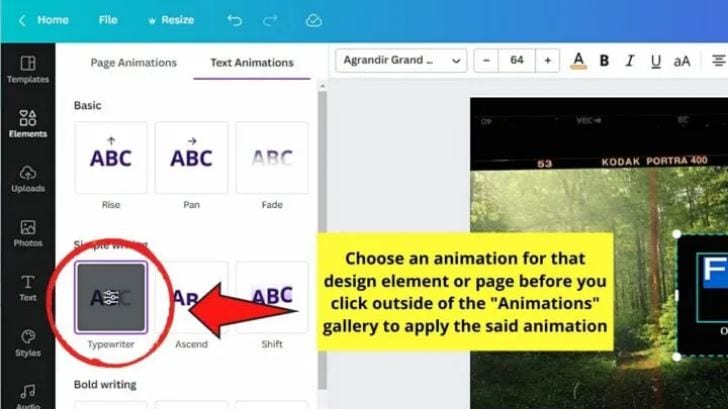
To supplement your slideshow with stunning animations, select the image, element or text you wish to animate, followed by pressing the ‘Animate’ button. You will reach the ‘Animations Gallery’ for a selection of the desired text or page animation you want to add.
Once you have finalized your choice, click outside the gallery to apply your selected animation.
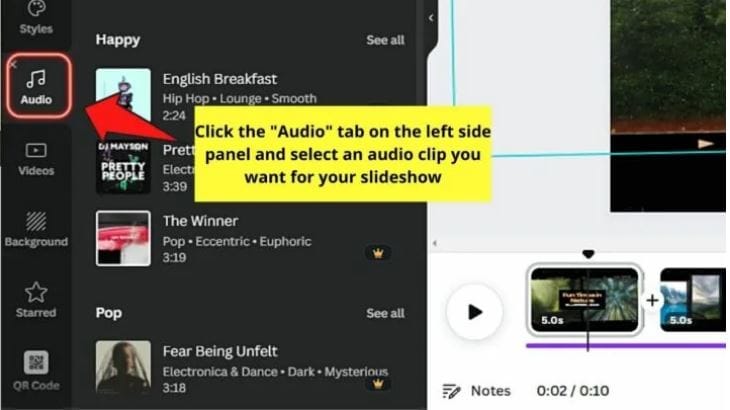
Step 9: Add the Perfect Sound
To uplift your presentation with an appealing music, navigate to the ‘Tools Panel’ at the left of the editor window and tap on ‘Audio’. A gallery of music clips will get displayed. Choose the one that best suits the theme of your animated presentation.
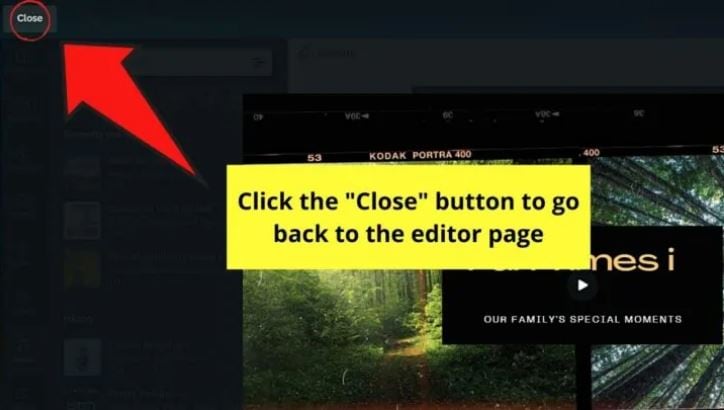
Step 10: Preview Your Creation
When you are done with creating the presentation, watch how it looks by navigating to the ‘Menu Bar’ at the top and clicking on the ‘Play’ button. When you have finished, click on ‘Close’ to reach the editor window.

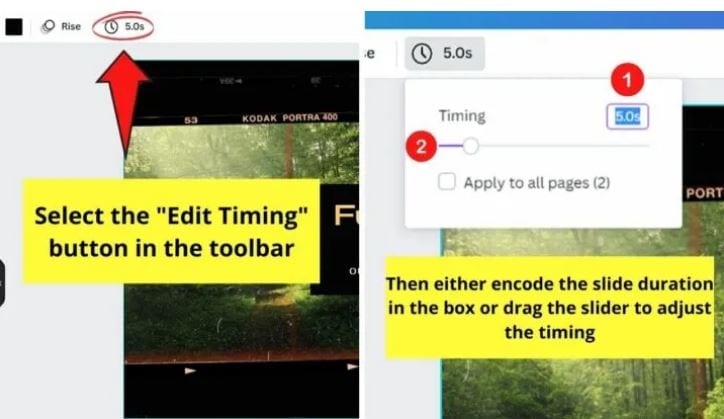
Step 11: Set the Play Duration
To adjust the play duration of any slide, select it and navigate to the toolbar at the top left corner.
Click on ‘Edit Timing’ in the same and make suitable adjustments either by encoding the required number of seconds or dragging the duration slider.
Step 12: Time to Download and Share!
Prefer previewing the slides one again to take a final look at your presentation. If you are happy with your work, navigate to and tap ‘Download’, followed by selecting the file type to save your creation locally to your device.
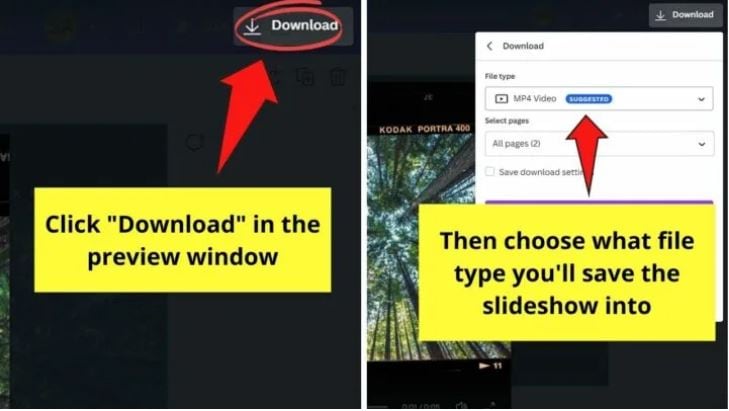
It is recommended to choose the ‘MP4 Video’ file format for saving audio enabled presentations. In case you want the background music to be included, either choose the ‘GIF’ format or download the slideshow as a PowerPoint presentation.
For a direct share of the animated slideshow, navigate to the ‘Menu Bar’ at the top and click on ‘Share’, followed by ‘All Options’ and lastly, tap ‘Present’.
03Keynote
This one is affordably the most convenient presentation tools if you are a user of iOS devices, and is a world class utility to create animated slideshow presentations. You can work with this tool to add an extra element of practicality to the otherwise customary business oriented animation slideshows with a diversity of effects, filters and transitions. The software is an ultimate best in adhering to real-time and remote event collaboration concerns of employees.
Concerning the pricing requirements, you can work with this slideshow creator tool for free if your usage concerns are restricted to a personal need. In an otherwise case, you can prefer buying the latter for a monthly investment of $ 99 and $ 299, respectively for business and enterprise based concerns.
Pros
● The Keynote program allows you a real-time, remote and revised access to the slideshow presentation.
● The program’s creator library is a storehouse of the most elegant and expressive slideshow templates and themes.
● The application greets you with a responsive and non-messy interface, with a decluttered toolbar.
Cons
● The program offers you a limited number of options to export your creations.
● You cannot work with the application on a Windows compatible device.
● If you are a regular PowerPoint user, working with the tool will require you a comprehensive learning of the usage pattern.
User’s Guide to Create Animated Slideshows in Keynote
Moving ahead with the discussion, let us understand the process of creating an animated slideshow presentation in Keynote though a step by step guide in the following section:
Step 1: Download the Keynote Slideshow Creator Tool
Start with initiating a free download of the tool from the official Apple website through your login credentials and proceed to install the same in your iOS device.
Step 2: Select a Presentation Theme
To start working on your slideshow presentation, you will require to choose a suitable theme. To do this, open the tool by clicking on its icon in the Launchpad, Applications folder or the Dock. The ‘Theme Chooser’ window pops up. In case this doesn’t happen, navigate to the bottom left corner of the screen and tap ‘New Document’.
In the ‘Theme Chooser’, you can either see through different categories or tap ‘All Themes’ to select the one you like. When you have found your preferred theme, open it by double clicking on the same.
You may either use the preset slide layout of the selected theme or use a different one by navigating to and clicking on ‘Format’ tab at the right side of the screen. You can now add your specific content in the presentation through adding new slides, text and images.
Click on the ‘+’ symbol in the theme toolbar to add a new slide followed by choosing its layout, double click inside the placeholder text to edit the same or drag and drop an image from your device gallery or the internet to replace the preset one in the template.
Step 3: Supplement Your Presentation With Objects
Proceed to add different slideshow objects in your creation by navigating to the ‘Object Toolbar’ at the top and selecting tables, charts, shapes, text boxes, comments, etc., that you wish to add in your presentation.
You can further make changes in the color, shadow and border of the object to improvise its appearance, or prefer applying a preset object style to enhance the overall object look to bring it in line with the slideshow theme. To do this, select the object and you will see its formatting options in the sidebar at the right. Click on the ‘Format Toolbar’ if the sidebar does not appear.
You can additionally, add layers to the slide objects, change their size or nest them within a shape or text box and link objects to switch to a new slide, open a related web page or email message.
Step 4: Add Audio-Visual Elements
Try adding suitable media elements to your creation by dragging a video or music file from your system either to a media placeholder or just anywhere within the slide. You can alternatively tap on the ‘Media’ icon in the top toolbar and choose ‘Music’ or ‘Movies’ from the dropdown that appears, followed by dragging the file with the previously explained method.
To add a soundtrack to the presentation, click on the ‘Soundtrack’ icon in the toolbar at the top, followed by clicking on the ‘Audio’ tab in the sidebar that appears. Next, tap the ‘+’ icon to select specific songs or playlists you want to add in the soundtrack.
Step 5: Add Stunning Animations
Start with selecting a slide to add the animation effect in the ‘Slide Navigator’. The ‘Animate’ sidebar appears, where you need to select the ‘Add an Effect’ option. Scroll down to view and choose a desired transition.
You can see a preview of the selected transition being played, with the slide navigator displaying a blue mark at the right corner of the slide to indicate the addition of a transition.
To change a previously selected transition, navigate to the sidebar at the top and tap ‘Change’ to select a new one. You can further, use the sidebar options to set the direction and transition play duration.
Step 6: Playing Your Slideshow
When satisfied with your effort, you can prefer playing the presentation, either in full screen or in a single window. If you choose to play in full screen, navigate to the ‘Play’ menu, click on the same and select ‘Full Screen’, followed by choosing the desired slide from where you wish the presentation to start in the slide navigator.
If you want to play the slideshow in a window, select a preferred slide in the slide navigator, go to the ‘Play’ menu at the top, click on the ‘Play’ tab, followed by choosing the ‘In Window’ option. The presentation will now start with the selected slide being played in one window and the presenter in the other.
In either of the above slideshow playing modes, press ‘Esc’ from your system’s keyboard to end the presentation playing process.
Step 7: Collaborating With Others
Working with the Keynote Slideshow Creator, you can collaborate with others to invite people to view and edit your presentation. To give a presentation access, you can either share a web link for a public access, or invite certain people having registered Apple credentials to view your creation. You can even give editing permissions to selected viewers or allow them to invite other people to collaborate.
04Powtoon
This one is a useful tool to create interactive business presentations for brand promotion and company recognition. Talking about the specific features of the tool, you can work with the utility to design an attractive logo for your company, import data and charts to your presentation, make adjustments in the color schemes of the slideshow, initiate infographic building and organize your slideshow into several sections.
The tool works best towards educating potential customers and clients about your company’s mainstream work profile and business. Sticking to the terms of utility pricing, you can begin with taking a free demo of the tool to access its credibility in cohesion with your specific needs. Following this, you can avail a monthly paid subscription of Powtoon, which has a price range of $ 19 to $ 59, according to the type and extent of features you choose to avail.
Pros
● You can add the details of your brand in the most expressive and appealing manner with the tool’s manifold design features.
● You can work with hundreds of preset slide designs to quickly create professionally sound animated slideshows.
● The tool is excellent in catering to your diverse slideshow design needs, when working for a large scale organizational setup.
Cons
● The tool is not a smart choice for individual or small scale business setups.
● The extensive variety of features results in a bit confusing and messy working interface.
● You can add a limited number of users to the monthly subscription plan of the tool.
User’s Guide to Create Animated Slideshows in Powtoon
For a better insight on how to create animated slideshows in Powtoon, let us go through the stepwise tutorial of the process in the following section:
Step 1: Launch the Online Tool
Visit the Powtoon official website to open the slideshow designer tool in any of your favorite internet browsers.
Powtoon Official Site Link: https://www.powtoon.com/index/
Step 2: Script Your Presentation
Start with creating a preset content for every slide of your presentation, based on the reason behind creating the slideshow, type and style of content presentation and so on.
Step 2: Add a Cohesive Background Music
You can complement your presentation with the perfect background music from the Powtoon library, from the web or even create your own voiceover recording through any preferred online text-to-voice recorder tool to voice the contents of your presentation. When you are done, upload your recording to the Powtoon editor to proceed with adding visual content to the presentation.
Step 3: Divide Your Presentation Slides
You can now add images, text and animations to your project in line with your presentation script. Choose suitable images from your device or from the web, add short, impactful texts and stunning animations from the Powtoon’s library to level up the appearance of your slideshow.
Step 4: Include Design Elements
Try adding additional elements like, graphics, background themes, animation styles, props, color schemes and other relevant characteristics to the slides.
Step 5: Time Your Presentation
In the last step, use the Powtoon timeline to set the sequence and time of appearance of different elements in each of your presentation slides. You can also hear the voiceover in the slideshow background to ensure the synchronization between the audio play and visual content appearance within the presentation.
05Visme
This one is a top grade cloud based professional tool for creating animated slideshow presentations with an affordably high visual credibility. Equipped with a drag and drop design workflow, the tool works effectively towards delivering intuitive and engaging animated slideshows for effective communication of business ideas and top rated brand promotion strategies.
The best usage of the tool lies in the creation of business presentations that are aimed at ensuring company oriented image collection and brand consistency. Talking of the tool’s pricing constraints, a single user subscription of the utility would cost you $ 20 on a monthly basis, which increases to $ 60 per month for a 3-user package.
It is a smart choice to take a free live demonstration of the tool to get a comprehensive understanding of the latter’s working technology.
Pros
● Extensive variety of colors, images and logos to complement your business presentations with elusive design elements.
● Promotes a viable consistency among multiple employee presentations
● The tool comes with an in built analytic system that keeps a track of the viewers of your slideshow presentations.
Cons
● The tool lacks some essential elements of slideshow design.
● The design features are mostly generic and do not cater to intense creation needs.
● The tool lacks a free trial facility.
User’s Guide to Create Animated Slideshows in Visme
In the following section is presented a stepwise procedure to create stunning animated slideshows in Visme with high end professional excellence and in the quickest time span:
Step 1: Download and Install the Program
Navigate to the official website of the Visme Slideshow Creator program to download and install the same in any of your preferred MacOs or Windows supported devices.
Visme Official Download Link: https://visme.co/blog/
Step 2: Start a New Project
You will need to create a Visme account to start working on the slideshow creation process. When you have created one, navigate to and click the ‘Create New Visme’ option in the tool’s opening screen to open a new project and assign a suitable name to it.
Step 3: Choose a Template
in the new project window that appears, click on ‘Presentations’ option at the top to see a library of slideshow templates being displayed. You can either, select a template from the library to edit or start an entirely new creation of your own.
Step 4: Make Color Schemes and Background Selections
To proceed with the selection of slide backgrounds and color schemes, you can either choose an exact color by entering its RGB code in the ‘Edit Colors’ option, or choose one from Google web pages using the ‘Chrome Eye Dropper’ tool.
Step 5: Add Shapes and Icons
You can supplement your slideshow with suitable design elements, like icons and shapes. All you need to do is navigate to the ‘Tools Panel’ in the left, click on the ‘All Shapes’ symbol and type a related keyword in the search bar to get a list of matching shapes to choose from.
Step 6: Insert and Format Text
You can now proceed with adding suitable text, titles and subtitles to the presentation slides. Again, visit the ‘Tools Panel’, tap the ‘T’ icon and click on ‘Add a Title’. A text box will be created within the slide, where you can add the required text. You can also format the same from the ‘Format Toolbar’ that gets displayed above the inserted text box.
Step 7: Add Photographic Slides
To include image slides, start with inserting a new slide in the presentation, flowed by once again navigating to the ‘Tools Panel’ in the left and clicking on the ‘Background’ icon. Choose a suitable color scheme and again, click on the ‘Images’ symbol in the ‘Tools Panel’. Here you can select any suitable image from the library that gets displayed.
Step 8: Link Your Slides
Link the sequential slides of your presentation with any suitable indicator, such as an arrow, so that clicking on the same takes the viewer to the successive slide. You can alternatively create ‘Hotspots’ to link the slides together.
Step 9: Publish and Share Your Presentation
When the final result makes you happy, navigate to the ‘Publish’ tab just above your slide window to open the presentation publishing interface. Here, you can choose from the options of a direct share, a site or blog embed or a local download of the presentation to your device.
● Ending Thoughts →
● Animated slideshow presentations land among the most trending ways to ensure a precise and engaging content delivery.
● The software market is packed with a diverse range of impressive slideshow creator tools with the most amazing features.
● When making your choice of the perfect animated slideshow designer tools, the Wondershare Filmora Slideshow Creator program is indeed a smart pick.
If you are passionate about uplifting your graphic design skills with stunning animated slideshow creation, read here about the best PowerPoint templates!
In this article
01 [12 Cool Animated Slideshow PowerPoint Templates](#Part 1)
02 [5 Tools to Make Stunning Animated Slideshow PowerPoint](#Part 2)
Part 1 12 Cool Animated Slideshow PowerPoint Templates
Slideshows are an already appealing media of content presentation, which when supplemented with animated backgrounds, are bound to captivate attention. Considering the underlying reason, it should be noted that animated slideshows offer a more vivid and lively presentation of information, as compared to their static counterparts. Animated slideshows have the additional advantage of presenting the content in the exact and accurate tone that suits the grasping capability of the audience.
Talking of feasible solutions for creating high end animated slide show presentations, the software market has a diverse range of alternatives to choose from. However, Microsoft PowerPoint is a graphic presentation tool that almost everyone is familiar with. Limiting our discussion to the same, there are a diversity of animated slideshow PowerPoint templates, like that of Evanto Elements and GraphicRiver to design professionally outstanding animated slideshows.
If you are keen on trying hands at adding that extra spunk your ordinarily boring static presentations, spare time to read the following section of this article, which incorporates the features, utilities and merits of the top 12 design templates in GraphicRiver for creating animated slideshows in PowerPoint with utmost ease and within a quick time span:
01Parallax Ultimate PowerPoint Animated Template
Choosing this animated presentation template to design your slideshow projects will supplement tour creations with the most amazing parallax effect, including an additional list of tempting and trendy editing features, like, limitless color choices, high definition video resolution, master slide presentations, modern, elegant, fully animated, company oriented slides, with object animations and parallax transitions, 16:9 wide screen aspect ratio, handmade infographics and much more.
02Splash Animated PPT
This one is an excellent animated template to create elegant animated slideshow presentations that will make your design creativity stand out of the crowd. Working with the template entitles you of a matchless, professional quality slideshow animation PowerPoint project on account some exclusive features, like those of high definition screen resolution and widescreen image aspect ratio, light and dark presentation backgrounds etc.
Mentioning some additional credibility of using the template for creating animated slideshows, you get to access as many as 500 selected slides, vector line and social media icons, uniquely styled image masks, calendars and vector maps.
03Social Media Animated PowerPoint Templates
If your working constraints require an extensive use of social media information, consider using tis interactive PowerPoint template for designing social media compatible, premium quality, professional slideshows with animated graphics. Working with the template, you will get a complementary access to a pool of exciting slideshow features.
Talking of the specific utilities of the animated slideshow maker template, you can choose from over 50 slide layouts, light and dark backgrounds themes, enjoy a seamless, drag and drop workflow and easily edit grouped elements, along with modifying infographic elements in Excel sheets.
04Animated Slides Bundle for PowerPoint Presentation
This one is an interactive GraphicRiver PowerPoint animation slideshow maker template, which you can work with for a delivery of high end and illustrative animated slideshow presentations. The template facilitates its users with a diversity of graphic customization features, like that of visual transitions, custom reveals and objectified motions to your presentation slides, points and images.
The template promises you of a stunning, high quality and compelling slideshow output with an elegant presentation outlook. The template has a variety of inbuilt slide layouts, is easy to use and comes to you absolutely free of cost.
05Proposal PowerPoint Animated
If you are about to deliver a dynamic business presentation, consider working with this graphic tool to create your animoto slideshow in PowerPoint. Proposal PowerPoint Animated is an interactive animation template, designed exclusively for adhering to the concern of business centered content delivery.
You can create captivating motion stories with the conveniently editable slides and high end animated graphics of this PowerPoint template, thus ensuring a high pitched information conveyance to your target audience.
06DIY Animated PPT Promo Kit
Looking for the most feasible PowerPoint animated slideshow templates for slideshow creation generally refers to a time consuming web search. If you are a creativity freak and want to escape the aforesaid hustle, try hands at working with the DIY Animated PPT Promo Kit to create a customized animated slideshow template of your own.
Talking about the utilities, this interactive slideshow presentation kit is packed with a lot of professional features that are sufficient to give a hype to your normal quality slideshows and allows you to work with over 100 entirely customizable slides in 2 variable color schemes.
07Pitch Deck Animated Bundle
Using a pitch deck strategy is a common way of attracting fund credibility for your business for an appreciable revenue growth, which is often put to the additional use of addressing potential workers of the company on the latter’s crucial success factors. When working towards either of the purposes, using the aforesaid software bundle is a smart choice to showcase the exact content concerning your overall business concept to the target audience.
This one is preferably the best pitch deck template you could ever get. Though there is an appealing set of market choices, it is always an impressive decision to select the cream from the curd for ensuring high end results.
08Massive X Presentation Template for PowerPoint
When having a desire to access the credibility of slideshow templates though user reviews, this animated PowerPoint template is sure winner. Packed with an extensive library of over 960 exceptional slides in dark and light background themes, along with 20 preset color schemes, this graphic template is an absolute favorite of creative designers across the globe.
Choosing the template for catering to your animation centered slideshow creation needs opens a diversity of audio-visual customization features with an entirely free access and an easy to use working interface.
09Imperial Multipurpose PowerPoint Template
Living up to its name, this one is a multi-functional, free animated slideshow template that allows you to choose the perfect color scheme for your brand from more than 100 shade varieties, thus ensuring a high end transition flexibility. Prefer using this template to add a visual highlight to your slideshow presentations with a diversity of icons and customized animations.
If you have invested enough time looking for the best PowerPoint animation slideshow creator utility, end your search with the Imperial Multipurpose template that is available to you without asking for a penny from your pocket and welcomes you with the most interactive working environment.
10Minimal PowerPoint
The aforesaid slideshow template for creating animated presentations is a fundamental and clean graphic creation utility that comes with a wide range of more than 500 different sides and convenient to use drag and drop placeholders for seamless content inclusion. Additional features of the template consist of inbuilt calendars, charts, graphs and customized illustration components, suitable for a diverse set of industries.
This one is an interactive style PowerPoint animoto slideshow maker template that works best to infuse data and animation graphics together. You can use this graphic design tool without a second thought for delivering quality content with a cohesive slideshow presentation, of course without having to worry about any cost constraints.
11PowerPoint Animated Pro Pack- With Animated Slides
Using this animation slideshow template for your business presentations facilitates you with a series of interactive graphic modules within professionally compatible slides. You can use this high end template package to supplement your presentations with high quality animated motion diagrams.
Other appealing features of the package include a huge set of conveniently editable slides, with an extensive variety of PowerPoint compatible motion transitions, animations and many more surplus features to add the right amount of spark to your professional animated slideshow presentations.
12Wow Slides for PowerPoint
If you are yet to reach to the perfect animated slideshow creator solution, consider sparing a thought about this wonderful PowerPoint template to cater to your animation design concerns. Available to you with a decent set of over 24 inbuilt color themes, this one is a perfect choice for working on webinar slides, business presentations and pitch decks.
Apart from elegantly beautiful collection of animations, you will find this slideshow template package to be a storehouse of elusive and explanatory charts, graphs, maps and icon packs, which you can use to add relevant statistical content to your presentations or give an enhanced and organized look to your slideshow project.
Part 2 5 Tools to Make Stunning Animated Slideshow PowerPoint
Having discussed about the most amazing animation slideshow templates for PowerPoint, let us now extend our talk to learn about some of the most preferred graphic tools to create high end and professionally expressive and stunning animation centered slideshow presentations in PowerPoint, considering the fact that such presentations are an important part of the ongoing business trends, which you should be aware of.
The following section presents a detailed discussion on the features, best application utilities, market reviews and usage guidelines of the top 5 animated slideshow creator tools:
01**Wondershare Filmora Video Editor **
For Win 7 or later (64-bit)
For macOS 10.12 or later
This one is possibly the best and an all in one software package that promises to address almost all of your graphic editing needs in the most affordable manner. Talking of the specific utility of creating animated slideshow presentations, Wondershare Filmora is dedicated towards delivering high end motion graphic slideshows of matchless professional excellence.
The tool is best in making audio infused, animated photo slideshows that are apt for comprehensive graphic proposals for top rated business projects. About the software’s pricing requirements, you can avail a free usage of the tool for free in its trial version for 7 days, following which, working with the tool will demand paid monthly and annual subscriptions of $9.99 and $19.99 respectively.
Pros
● Working with the tool, you are entitled to use a plethora of audio-visual effects and filters to enhance your presentations.
● The tool’s feature rich library has everything to design animated slideshows with high resolution output quality.
● The tool is known to support almost all popular audio, video and image file formats.
Cons
● The tool has a limited variety of fine-tuned utilities for effect tweaking.
● The features of chapter authoring and DVD menu are absent.
● Working with the tool, you may encounter occasional software crashes.
User’s Guide to Create Animated Slideshows in Wondershare Filmora
Having understood the basic functionalities and exceptional features of Filmora’s Animated Slideshow creator tool, let us see through the following section to get familiar to the knowhow of using the same for designing animation top rated slideshow presentations in a stepwise procedure:
Step 1: Download and Install the Software
Before getting though with the creation process, initiate a download of the slideshow creator program from the latter’s official website to any of your preferred Windows or iOS compatible devices.
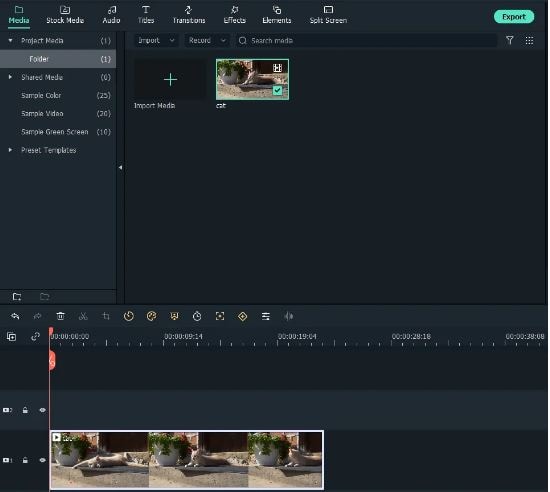
Step 2: Add Your Images and Videos
Creating a slideshow presentation may require a set of multiple image and video files to the program’s graphic creator timeline. It is recommended to add your selections of the aforesaid files to a single folder before launching the software in your system.
Once you have finished making your selections, launch the program to reach its welcome interface, were you need to navigate and click on the ‘Media’ tab in the top toolbar. From the task options that appear, click on ‘Import a Media’. Next, you will be asked to browse through your device locations and choose the folder that contains your previously selected files to be used in the presentation you are about to create.
When you have found the required folder, tap on ‘OK’ to import the same to the new slideshow project in the Filmora timeline. All your selected files will be visible here after a successful import.
Step 3: Timeline Positioning of Media Files
Before working on the task of positioning the imported media files on the app’s timeline, navigate to the ‘File’ menu and choose the ‘Preferences’ option. As soon as the respective window pops up, reach to the ‘Editing’ tab at the top and select ‘Photo Placement’ from the drop down menu that follows.
In case your selected images do not have a matching aspect ratio with the program’s preset values, choose the ‘Crop to Fit’ option for removing the additional black bars from the selected images. For the requirement of adding camera pan and zoom movements to your images, select the ‘Pan & Zoom’ option in the ‘Preferences’ settings.
You can proceed to change the preset play durations of images, effects and transitions in the ‘Editing’ window itself. As an alternative you can adhere to the same task in the program’s timeline by dragging any one end of the media files in an outward or inward direction. The ‘Crop to Fit’ option may not give an affordable size in some cases where the images are set in a vertical 9:16 aspect ratio. Choose the ‘Fit’ option to set this issue straight.
When you have finished making all the aforesaid adjustments, navigate to the Media panel again for adding the selected image files to the software’s timeline. Proceed with selecting a file and dragging and dropping the same at the desired position within the timeline. Continue repeating the process till all the images have been placed at their respective locations, and in the exact order of appearance in the slideshow. This should be followed by adjusting the image play durations using any one of the previously described methods.
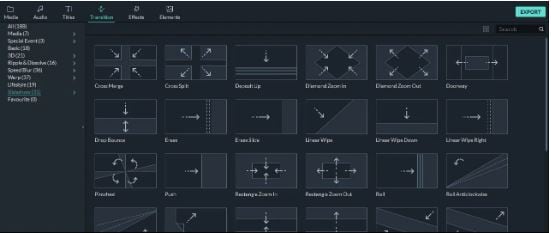
Step 4: Escape Hard Cuts With Image Transitions
Hard cuts among different slides of a presentation break the flow of the slideshow. To escape this cringe, consider using a smooth transition effect within the slides of your project. To do this, navigate to the ‘Transitions’ tab in the top toolbar of Filmora’s project window and select a desired one from over 100 choices of customizable transitions.
You can now drop these transitions in the timeline at the exact intersection point of two image files. Avoid using the same transition for every hard cut to escape monotony. You can instead choose different transitions for each slide while observing its appearance in the clip.
After you are done with applying transitions to each slide, double click on a particular transition to open its ‘Transition Setting Window’ either for presetting the transition play duration or to choose a desired transition mode. You can also prefer a direct customization of the transition duration in the project timeline through a right or left dragging of any of its ends.
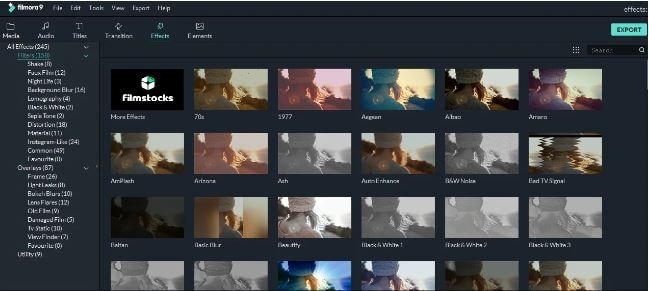
Step 5: Uplift Your Slideshow Colors With Overlays and Filters
Navigate to the top toolbar and hit the ‘Effects’ tab to choose from a diversity of visual effects that can be added to the slideshow images to supplement them with an increased vibrancy through color desaturation. These effects in the program’s library are categorized into classes of Overlays and Filters, with further subcategories of Sepia Tone, Light Leaks and Lomography and many more.
To apply these effects, just select and add them into a timeline track above the clip you wish to add the overlay or filter to. When you have applied the effects, observe the overall clip appearance in the ‘Preview Panel’. Double click on a particular effect to fine-tune the latter’s settings.
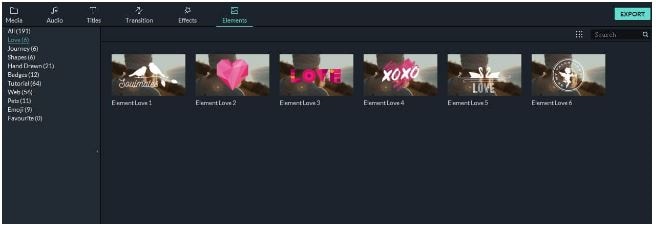
Step 6: Supplement Your Slides With Motion Graphic Elements
While motion graphics will undoubtedly enhance your animated slideshows, adding them to your presentation is purely optional, since most professional projects do not need a motion graphic element to escalate their presentation outlook. If, however, you choose to work on making these a part of your animated slideshow, Filmora lets you do that in its ‘Elements’ tab.
There is a plethora of motion graphic templates that you can select and add to the project timeline for a quick and vibrant upgrade of your presentation slides, but, at the same time, it becomes important to take care of the visual outlook and the underlying reason of creating the slideshow before you decide on adding these elements to your project.
Step 7: Create Voiceovers and Record Soundtracks for Your Slideshow
Narration is a smart way to captivate the target audience within your slideshow, whether though a self-delivery or a recorded voiceover. If you decide on the second option, you can conveniently use the Filmora Slideshow Creator program to add voiceovers and soundtracks to your presentation.
To adhere to the purpose, navigate to the top toolbar and click on the ‘Media’ tab. From the options that appear, tap on the ‘Record’ menu that drops down, followed by selecting the ‘Record Voiceover’ option. As soon as the ‘Record Audio’ prompt pops up, select your desired microphone to be used in the recording process and click on the ‘Record’ button.
The recording that you have just created will appear in the ‘Media’ tab beside your all other imported audio-visual and image files, and you can add the same to any desired file with utmost ease. The Filmora library further allows you with a free access to its huge inventory of sound and audio effects. To apply these effects to your project, navigate to the ‘Audio’ tab and browse through impressive music categories, like, Young & Bright, Rock, Electronic, etc., to select the best matching audio for your slideshow.
When you have made your selections, add all of them to the slideshow’s audio track in the project timeline and make suitable adjustments to their play durations.
Step 8: Export Your Creation
When your satisfied with your efforts till here, you have indeed created a wonderful animated slideshow presentation that should be exported to relevant platforms. Navigate to the ‘Export’ tab at the top right corner of the project timeline and click on the same. As soon as the utility window appears, choose a preferred file format, set a desired output resolution and fame rate for your presentation, followed by making a direct export of the same to your Vimeo or YouTube accounts.
The slideshow rendering time on different platforms may vary in cohesion with the specific presentation lengths, with larger file requiring a considerably longer time to get rendered than the smaller ones. It is advisable to limit the output file size within 500 MB for a quick rendering process.
02Canva
This one is an online animation slideshow creation tool that could certainly be your best choice to design high end professional presentations. Facilitating you with over 100 different slide design layouts, the tool additionally grants you the liberty to add your own images to the presentation being created, or even select suitable alternatives from Canva’s extensive image stack that has over 1 million apposite images to choose from.
You can make the best use of Canva to create promotional presentations to add extra emphasis on the brand of your company and product brand, which a compatible to a diverse variety of professional platforms for information sharing.
As far as the cost constraints of the tool are concerned, you get to access a free version of the tool for working on slideshow presentations for individual or small business units, while the graphics design needs of large scale professional corporations are suitably addressed by the utility’s Canva for Work version, which is equipped with high end team coordinated features with a 30-day free trial, along with monthly and annual subscription of $ 12.95 and $ 119.4 respectively.
Pros
● The tool allows you to add elusive texts, filters, fonts and images to the animated slides of your business presentation.
● Working with the tool, you can drag and drop an extensive variety of elements within your slideshow.
● Canva further allows you to create, upload and save the logo of your brand.
Cons
● The tool’s customer support is not quite welcoming.
● You need to add your phone number within the tool’s customer support interface for getting the required help.
● The tool’s working interface is somewhat confusing.
User’s Guide to Create Animated Slideshows in Canva
Let us see browse through the detailed, step by step process to quickly create amazing animated slideshow presentations using the Canva graphic design tool in the following section:
Step 1: Download and Install Canva
Visit the official site of the tool for a free download of the Canva slideshow creator software in any suitable iOS or Windows compatible desktops, laptops and PC systems.
Step 2: Choose Your Task
Undertake a launch of the downloaded program to reach the latter’s welcome page. Here, you need to navigate to the search bar at the top and type a keyword to select your task. For creating slideshow presentations, enter ‘Slideshow’ in the search tab.
In the drop down menu that follows, a list of the closest matching alternatives of your keyword will appear. Select ‘Slideshow Videos’ from the same.
Step 3: Select a Template
The completion of Step 2 will take you to the program’s template library, where you can either work with creating a presentation of your own by clicking on the ‘Create a Blank Sideshow Video’ option, or choose any one from the finest collection of in built slideshow templates from the Canva library.
Step 4: Customize Your Template
After selecting the template, you will reach Canva’s slideshow editor page. Here you can customize your slideshow as per your preferences. To begin with, replace the preset images in the template with your selected ones.
You can either choose a set of images from the program’s inbuilt photo gallery or select the same from your device. Navigate to the ‘Tools Panel’ in the left and click on ‘Photos’ to work with the first method, or tap ‘Uploads’ in that very panel to apply the second.
When you have made your choice, click on ‘Upload Media’ to bring your selections to the tool’s editor timeline. This should be followed by dragging and dropping the images at appropriate places within the template.
Step 5: Crop the Images
Double click on any image and drag it sideways to crop the same within your preferred aspect ratio. When you are happy with the changes, click on ‘Done’ to apply them. You can additionally, customize the images with a variety of available effects at this stage.
To proceed with the aforesaid process, choose the image you want to customize and select ‘Edit Image’ from the dropdown that appears. You will be directed to the ‘Edit Image Gallery’, where you can select the effect you want to complement your image with.
Step 6: Add Other Design Elements
Tap on ‘Elements’ in the ‘Tools Panel’ at the left to select a suitable component from a range of stickers, icons, illustrations and charts to add to your slideshow according to its creation theme.
Step 7: Customize the Text
The template has some pre-written text, which you can change by double clicking inside the text boxes to highlight the already written text and edit the same as per your requirement. Press ‘T’ on your system’s keyboard for adding extra text boxes. You can also visit the ‘Editor Toolbar’ work with a variety of text formatting options, like, font size, style and color.
Step 8: Include Suitable Animations
To supplement your slideshow with stunning animations, select the image, element or text you wish to animate, followed by pressing the ‘Animate’ button. You will reach the ‘Animations Gallery’ for a selection of the desired text or page animation you want to add.
Once you have finalized your choice, click outside the gallery to apply your selected animation.
Step 9: Add the Perfect Sound
To uplift your presentation with an appealing music, navigate to the ‘Tools Panel’ at the left of the editor window and tap on ‘Audio’. A gallery of music clips will get displayed. Choose the one that best suits the theme of your animated presentation.
Step 10: Preview Your Creation
When you are done with creating the presentation, watch how it looks by navigating to the ‘Menu Bar’ at the top and clicking on the ‘Play’ button. When you have finished, click on ‘Close’ to reach the editor window.
Step 11: Set the Play Duration
To adjust the play duration of any slide, select it and navigate to the toolbar at the top left corner.
Click on ‘Edit Timing’ in the same and make suitable adjustments either by encoding the required number of seconds or dragging the duration slider.
Step 12: Time to Download and Share!
Prefer previewing the slides one again to take a final look at your presentation. If you are happy with your work, navigate to and tap ‘Download’, followed by selecting the file type to save your creation locally to your device.
It is recommended to choose the ‘MP4 Video’ file format for saving audio enabled presentations. In case you want the background music to be included, either choose the ‘GIF’ format or download the slideshow as a PowerPoint presentation.
For a direct share of the animated slideshow, navigate to the ‘Menu Bar’ at the top and click on ‘Share’, followed by ‘All Options’ and lastly, tap ‘Present’.
03Keynote
This one is affordably the most convenient presentation tools if you are a user of iOS devices, and is a world class utility to create animated slideshow presentations. You can work with this tool to add an extra element of practicality to the otherwise customary business oriented animation slideshows with a diversity of effects, filters and transitions. The software is an ultimate best in adhering to real-time and remote event collaboration concerns of employees.
Concerning the pricing requirements, you can work with this slideshow creator tool for free if your usage concerns are restricted to a personal need. In an otherwise case, you can prefer buying the latter for a monthly investment of $ 99 and $ 299, respectively for business and enterprise based concerns.
Pros
● The Keynote program allows you a real-time, remote and revised access to the slideshow presentation.
● The program’s creator library is a storehouse of the most elegant and expressive slideshow templates and themes.
● The application greets you with a responsive and non-messy interface, with a decluttered toolbar.
Cons
● The program offers you a limited number of options to export your creations.
● You cannot work with the application on a Windows compatible device.
● If you are a regular PowerPoint user, working with the tool will require you a comprehensive learning of the usage pattern.
User’s Guide to Create Animated Slideshows in Keynote
Moving ahead with the discussion, let us understand the process of creating an animated slideshow presentation in Keynote though a step by step guide in the following section:
Step 1: Download the Keynote Slideshow Creator Tool
Start with initiating a free download of the tool from the official Apple website through your login credentials and proceed to install the same in your iOS device.
Step 2: Select a Presentation Theme
To start working on your slideshow presentation, you will require to choose a suitable theme. To do this, open the tool by clicking on its icon in the Launchpad, Applications folder or the Dock. The ‘Theme Chooser’ window pops up. In case this doesn’t happen, navigate to the bottom left corner of the screen and tap ‘New Document’.
In the ‘Theme Chooser’, you can either see through different categories or tap ‘All Themes’ to select the one you like. When you have found your preferred theme, open it by double clicking on the same.
You may either use the preset slide layout of the selected theme or use a different one by navigating to and clicking on ‘Format’ tab at the right side of the screen. You can now add your specific content in the presentation through adding new slides, text and images.
Click on the ‘+’ symbol in the theme toolbar to add a new slide followed by choosing its layout, double click inside the placeholder text to edit the same or drag and drop an image from your device gallery or the internet to replace the preset one in the template.
Step 3: Supplement Your Presentation With Objects
Proceed to add different slideshow objects in your creation by navigating to the ‘Object Toolbar’ at the top and selecting tables, charts, shapes, text boxes, comments, etc., that you wish to add in your presentation.
You can further make changes in the color, shadow and border of the object to improvise its appearance, or prefer applying a preset object style to enhance the overall object look to bring it in line with the slideshow theme. To do this, select the object and you will see its formatting options in the sidebar at the right. Click on the ‘Format Toolbar’ if the sidebar does not appear.
You can additionally, add layers to the slide objects, change their size or nest them within a shape or text box and link objects to switch to a new slide, open a related web page or email message.
Step 4: Add Audio-Visual Elements
Try adding suitable media elements to your creation by dragging a video or music file from your system either to a media placeholder or just anywhere within the slide. You can alternatively tap on the ‘Media’ icon in the top toolbar and choose ‘Music’ or ‘Movies’ from the dropdown that appears, followed by dragging the file with the previously explained method.
To add a soundtrack to the presentation, click on the ‘Soundtrack’ icon in the toolbar at the top, followed by clicking on the ‘Audio’ tab in the sidebar that appears. Next, tap the ‘+’ icon to select specific songs or playlists you want to add in the soundtrack.
Step 5: Add Stunning Animations
Start with selecting a slide to add the animation effect in the ‘Slide Navigator’. The ‘Animate’ sidebar appears, where you need to select the ‘Add an Effect’ option. Scroll down to view and choose a desired transition.
You can see a preview of the selected transition being played, with the slide navigator displaying a blue mark at the right corner of the slide to indicate the addition of a transition.
To change a previously selected transition, navigate to the sidebar at the top and tap ‘Change’ to select a new one. You can further, use the sidebar options to set the direction and transition play duration.
Step 6: Playing Your Slideshow
When satisfied with your effort, you can prefer playing the presentation, either in full screen or in a single window. If you choose to play in full screen, navigate to the ‘Play’ menu, click on the same and select ‘Full Screen’, followed by choosing the desired slide from where you wish the presentation to start in the slide navigator.
If you want to play the slideshow in a window, select a preferred slide in the slide navigator, go to the ‘Play’ menu at the top, click on the ‘Play’ tab, followed by choosing the ‘In Window’ option. The presentation will now start with the selected slide being played in one window and the presenter in the other.
In either of the above slideshow playing modes, press ‘Esc’ from your system’s keyboard to end the presentation playing process.
Step 7: Collaborating With Others
Working with the Keynote Slideshow Creator, you can collaborate with others to invite people to view and edit your presentation. To give a presentation access, you can either share a web link for a public access, or invite certain people having registered Apple credentials to view your creation. You can even give editing permissions to selected viewers or allow them to invite other people to collaborate.
04Powtoon
This one is a useful tool to create interactive business presentations for brand promotion and company recognition. Talking about the specific features of the tool, you can work with the utility to design an attractive logo for your company, import data and charts to your presentation, make adjustments in the color schemes of the slideshow, initiate infographic building and organize your slideshow into several sections.
The tool works best towards educating potential customers and clients about your company’s mainstream work profile and business. Sticking to the terms of utility pricing, you can begin with taking a free demo of the tool to access its credibility in cohesion with your specific needs. Following this, you can avail a monthly paid subscription of Powtoon, which has a price range of $ 19 to $ 59, according to the type and extent of features you choose to avail.
Pros
● You can add the details of your brand in the most expressive and appealing manner with the tool’s manifold design features.
● You can work with hundreds of preset slide designs to quickly create professionally sound animated slideshows.
● The tool is excellent in catering to your diverse slideshow design needs, when working for a large scale organizational setup.
Cons
● The tool is not a smart choice for individual or small scale business setups.
● The extensive variety of features results in a bit confusing and messy working interface.
● You can add a limited number of users to the monthly subscription plan of the tool.
User’s Guide to Create Animated Slideshows in Powtoon
For a better insight on how to create animated slideshows in Powtoon, let us go through the stepwise tutorial of the process in the following section:
Step 1: Launch the Online Tool
Visit the Powtoon official website to open the slideshow designer tool in any of your favorite internet browsers.
Powtoon Official Site Link: https://www.powtoon.com/index/
Step 2: Script Your Presentation
Start with creating a preset content for every slide of your presentation, based on the reason behind creating the slideshow, type and style of content presentation and so on.
Step 2: Add a Cohesive Background Music
You can complement your presentation with the perfect background music from the Powtoon library, from the web or even create your own voiceover recording through any preferred online text-to-voice recorder tool to voice the contents of your presentation. When you are done, upload your recording to the Powtoon editor to proceed with adding visual content to the presentation.
Step 3: Divide Your Presentation Slides
You can now add images, text and animations to your project in line with your presentation script. Choose suitable images from your device or from the web, add short, impactful texts and stunning animations from the Powtoon’s library to level up the appearance of your slideshow.
Step 4: Include Design Elements
Try adding additional elements like, graphics, background themes, animation styles, props, color schemes and other relevant characteristics to the slides.
Step 5: Time Your Presentation
In the last step, use the Powtoon timeline to set the sequence and time of appearance of different elements in each of your presentation slides. You can also hear the voiceover in the slideshow background to ensure the synchronization between the audio play and visual content appearance within the presentation.
05Visme
This one is a top grade cloud based professional tool for creating animated slideshow presentations with an affordably high visual credibility. Equipped with a drag and drop design workflow, the tool works effectively towards delivering intuitive and engaging animated slideshows for effective communication of business ideas and top rated brand promotion strategies.
The best usage of the tool lies in the creation of business presentations that are aimed at ensuring company oriented image collection and brand consistency. Talking of the tool’s pricing constraints, a single user subscription of the utility would cost you $ 20 on a monthly basis, which increases to $ 60 per month for a 3-user package.
It is a smart choice to take a free live demonstration of the tool to get a comprehensive understanding of the latter’s working technology.
Pros
● Extensive variety of colors, images and logos to complement your business presentations with elusive design elements.
● Promotes a viable consistency among multiple employee presentations
● The tool comes with an in built analytic system that keeps a track of the viewers of your slideshow presentations.
Cons
● The tool lacks some essential elements of slideshow design.
● The design features are mostly generic and do not cater to intense creation needs.
● The tool lacks a free trial facility.
User’s Guide to Create Animated Slideshows in Visme
In the following section is presented a stepwise procedure to create stunning animated slideshows in Visme with high end professional excellence and in the quickest time span:
Step 1: Download and Install the Program
Navigate to the official website of the Visme Slideshow Creator program to download and install the same in any of your preferred MacOs or Windows supported devices.
Visme Official Download Link: https://visme.co/blog/
Step 2: Start a New Project
You will need to create a Visme account to start working on the slideshow creation process. When you have created one, navigate to and click the ‘Create New Visme’ option in the tool’s opening screen to open a new project and assign a suitable name to it.
Step 3: Choose a Template
in the new project window that appears, click on ‘Presentations’ option at the top to see a library of slideshow templates being displayed. You can either, select a template from the library to edit or start an entirely new creation of your own.
Step 4: Make Color Schemes and Background Selections
To proceed with the selection of slide backgrounds and color schemes, you can either choose an exact color by entering its RGB code in the ‘Edit Colors’ option, or choose one from Google web pages using the ‘Chrome Eye Dropper’ tool.
Step 5: Add Shapes and Icons
You can supplement your slideshow with suitable design elements, like icons and shapes. All you need to do is navigate to the ‘Tools Panel’ in the left, click on the ‘All Shapes’ symbol and type a related keyword in the search bar to get a list of matching shapes to choose from.
Step 6: Insert and Format Text
You can now proceed with adding suitable text, titles and subtitles to the presentation slides. Again, visit the ‘Tools Panel’, tap the ‘T’ icon and click on ‘Add a Title’. A text box will be created within the slide, where you can add the required text. You can also format the same from the ‘Format Toolbar’ that gets displayed above the inserted text box.
Step 7: Add Photographic Slides
To include image slides, start with inserting a new slide in the presentation, flowed by once again navigating to the ‘Tools Panel’ in the left and clicking on the ‘Background’ icon. Choose a suitable color scheme and again, click on the ‘Images’ symbol in the ‘Tools Panel’. Here you can select any suitable image from the library that gets displayed.
Step 8: Link Your Slides
Link the sequential slides of your presentation with any suitable indicator, such as an arrow, so that clicking on the same takes the viewer to the successive slide. You can alternatively create ‘Hotspots’ to link the slides together.
Step 9: Publish and Share Your Presentation
When the final result makes you happy, navigate to the ‘Publish’ tab just above your slide window to open the presentation publishing interface. Here, you can choose from the options of a direct share, a site or blog embed or a local download of the presentation to your device.
● Ending Thoughts →
● Animated slideshow presentations land among the most trending ways to ensure a precise and engaging content delivery.
● The software market is packed with a diverse range of impressive slideshow creator tools with the most amazing features.
● When making your choice of the perfect animated slideshow designer tools, the Wondershare Filmora Slideshow Creator program is indeed a smart pick.
If you are passionate about uplifting your graphic design skills with stunning animated slideshow creation, read here about the best PowerPoint templates!
In this article
01 [12 Cool Animated Slideshow PowerPoint Templates](#Part 1)
02 [5 Tools to Make Stunning Animated Slideshow PowerPoint](#Part 2)
Part 1 12 Cool Animated Slideshow PowerPoint Templates
Slideshows are an already appealing media of content presentation, which when supplemented with animated backgrounds, are bound to captivate attention. Considering the underlying reason, it should be noted that animated slideshows offer a more vivid and lively presentation of information, as compared to their static counterparts. Animated slideshows have the additional advantage of presenting the content in the exact and accurate tone that suits the grasping capability of the audience.
Talking of feasible solutions for creating high end animated slide show presentations, the software market has a diverse range of alternatives to choose from. However, Microsoft PowerPoint is a graphic presentation tool that almost everyone is familiar with. Limiting our discussion to the same, there are a diversity of animated slideshow PowerPoint templates, like that of Evanto Elements and GraphicRiver to design professionally outstanding animated slideshows.
If you are keen on trying hands at adding that extra spunk your ordinarily boring static presentations, spare time to read the following section of this article, which incorporates the features, utilities and merits of the top 12 design templates in GraphicRiver for creating animated slideshows in PowerPoint with utmost ease and within a quick time span:
01Parallax Ultimate PowerPoint Animated Template
Choosing this animated presentation template to design your slideshow projects will supplement tour creations with the most amazing parallax effect, including an additional list of tempting and trendy editing features, like, limitless color choices, high definition video resolution, master slide presentations, modern, elegant, fully animated, company oriented slides, with object animations and parallax transitions, 16:9 wide screen aspect ratio, handmade infographics and much more.
02Splash Animated PPT
This one is an excellent animated template to create elegant animated slideshow presentations that will make your design creativity stand out of the crowd. Working with the template entitles you of a matchless, professional quality slideshow animation PowerPoint project on account some exclusive features, like those of high definition screen resolution and widescreen image aspect ratio, light and dark presentation backgrounds etc.
Mentioning some additional credibility of using the template for creating animated slideshows, you get to access as many as 500 selected slides, vector line and social media icons, uniquely styled image masks, calendars and vector maps.
03Social Media Animated PowerPoint Templates
If your working constraints require an extensive use of social media information, consider using tis interactive PowerPoint template for designing social media compatible, premium quality, professional slideshows with animated graphics. Working with the template, you will get a complementary access to a pool of exciting slideshow features.
Talking of the specific utilities of the animated slideshow maker template, you can choose from over 50 slide layouts, light and dark backgrounds themes, enjoy a seamless, drag and drop workflow and easily edit grouped elements, along with modifying infographic elements in Excel sheets.
04Animated Slides Bundle for PowerPoint Presentation
This one is an interactive GraphicRiver PowerPoint animation slideshow maker template, which you can work with for a delivery of high end and illustrative animated slideshow presentations. The template facilitates its users with a diversity of graphic customization features, like that of visual transitions, custom reveals and objectified motions to your presentation slides, points and images.
The template promises you of a stunning, high quality and compelling slideshow output with an elegant presentation outlook. The template has a variety of inbuilt slide layouts, is easy to use and comes to you absolutely free of cost.
05Proposal PowerPoint Animated
If you are about to deliver a dynamic business presentation, consider working with this graphic tool to create your animoto slideshow in PowerPoint. Proposal PowerPoint Animated is an interactive animation template, designed exclusively for adhering to the concern of business centered content delivery.
You can create captivating motion stories with the conveniently editable slides and high end animated graphics of this PowerPoint template, thus ensuring a high pitched information conveyance to your target audience.
06DIY Animated PPT Promo Kit
Looking for the most feasible PowerPoint animated slideshow templates for slideshow creation generally refers to a time consuming web search. If you are a creativity freak and want to escape the aforesaid hustle, try hands at working with the DIY Animated PPT Promo Kit to create a customized animated slideshow template of your own.
Talking about the utilities, this interactive slideshow presentation kit is packed with a lot of professional features that are sufficient to give a hype to your normal quality slideshows and allows you to work with over 100 entirely customizable slides in 2 variable color schemes.
07Pitch Deck Animated Bundle
Using a pitch deck strategy is a common way of attracting fund credibility for your business for an appreciable revenue growth, which is often put to the additional use of addressing potential workers of the company on the latter’s crucial success factors. When working towards either of the purposes, using the aforesaid software bundle is a smart choice to showcase the exact content concerning your overall business concept to the target audience.
This one is preferably the best pitch deck template you could ever get. Though there is an appealing set of market choices, it is always an impressive decision to select the cream from the curd for ensuring high end results.
08Massive X Presentation Template for PowerPoint
When having a desire to access the credibility of slideshow templates though user reviews, this animated PowerPoint template is sure winner. Packed with an extensive library of over 960 exceptional slides in dark and light background themes, along with 20 preset color schemes, this graphic template is an absolute favorite of creative designers across the globe.
Choosing the template for catering to your animation centered slideshow creation needs opens a diversity of audio-visual customization features with an entirely free access and an easy to use working interface.
09Imperial Multipurpose PowerPoint Template
Living up to its name, this one is a multi-functional, free animated slideshow template that allows you to choose the perfect color scheme for your brand from more than 100 shade varieties, thus ensuring a high end transition flexibility. Prefer using this template to add a visual highlight to your slideshow presentations with a diversity of icons and customized animations.
If you have invested enough time looking for the best PowerPoint animation slideshow creator utility, end your search with the Imperial Multipurpose template that is available to you without asking for a penny from your pocket and welcomes you with the most interactive working environment.
10Minimal PowerPoint
The aforesaid slideshow template for creating animated presentations is a fundamental and clean graphic creation utility that comes with a wide range of more than 500 different sides and convenient to use drag and drop placeholders for seamless content inclusion. Additional features of the template consist of inbuilt calendars, charts, graphs and customized illustration components, suitable for a diverse set of industries.
This one is an interactive style PowerPoint animoto slideshow maker template that works best to infuse data and animation graphics together. You can use this graphic design tool without a second thought for delivering quality content with a cohesive slideshow presentation, of course without having to worry about any cost constraints.
11PowerPoint Animated Pro Pack- With Animated Slides
Using this animation slideshow template for your business presentations facilitates you with a series of interactive graphic modules within professionally compatible slides. You can use this high end template package to supplement your presentations with high quality animated motion diagrams.
Other appealing features of the package include a huge set of conveniently editable slides, with an extensive variety of PowerPoint compatible motion transitions, animations and many more surplus features to add the right amount of spark to your professional animated slideshow presentations.
12Wow Slides for PowerPoint
If you are yet to reach to the perfect animated slideshow creator solution, consider sparing a thought about this wonderful PowerPoint template to cater to your animation design concerns. Available to you with a decent set of over 24 inbuilt color themes, this one is a perfect choice for working on webinar slides, business presentations and pitch decks.
Apart from elegantly beautiful collection of animations, you will find this slideshow template package to be a storehouse of elusive and explanatory charts, graphs, maps and icon packs, which you can use to add relevant statistical content to your presentations or give an enhanced and organized look to your slideshow project.
Part 2 5 Tools to Make Stunning Animated Slideshow PowerPoint
Having discussed about the most amazing animation slideshow templates for PowerPoint, let us now extend our talk to learn about some of the most preferred graphic tools to create high end and professionally expressive and stunning animation centered slideshow presentations in PowerPoint, considering the fact that such presentations are an important part of the ongoing business trends, which you should be aware of.
The following section presents a detailed discussion on the features, best application utilities, market reviews and usage guidelines of the top 5 animated slideshow creator tools:
01**Wondershare Filmora Video Editor **
For Win 7 or later (64-bit)
For macOS 10.12 or later
This one is possibly the best and an all in one software package that promises to address almost all of your graphic editing needs in the most affordable manner. Talking of the specific utility of creating animated slideshow presentations, Wondershare Filmora is dedicated towards delivering high end motion graphic slideshows of matchless professional excellence.
The tool is best in making audio infused, animated photo slideshows that are apt for comprehensive graphic proposals for top rated business projects. About the software’s pricing requirements, you can avail a free usage of the tool for free in its trial version for 7 days, following which, working with the tool will demand paid monthly and annual subscriptions of $9.99 and $19.99 respectively.
Pros
● Working with the tool, you are entitled to use a plethora of audio-visual effects and filters to enhance your presentations.
● The tool’s feature rich library has everything to design animated slideshows with high resolution output quality.
● The tool is known to support almost all popular audio, video and image file formats.
Cons
● The tool has a limited variety of fine-tuned utilities for effect tweaking.
● The features of chapter authoring and DVD menu are absent.
● Working with the tool, you may encounter occasional software crashes.
User’s Guide to Create Animated Slideshows in Wondershare Filmora
Having understood the basic functionalities and exceptional features of Filmora’s Animated Slideshow creator tool, let us see through the following section to get familiar to the knowhow of using the same for designing animation top rated slideshow presentations in a stepwise procedure:
Step 1: Download and Install the Software
Before getting though with the creation process, initiate a download of the slideshow creator program from the latter’s official website to any of your preferred Windows or iOS compatible devices.
Step 2: Add Your Images and Videos
Creating a slideshow presentation may require a set of multiple image and video files to the program’s graphic creator timeline. It is recommended to add your selections of the aforesaid files to a single folder before launching the software in your system.
Once you have finished making your selections, launch the program to reach its welcome interface, were you need to navigate and click on the ‘Media’ tab in the top toolbar. From the task options that appear, click on ‘Import a Media’. Next, you will be asked to browse through your device locations and choose the folder that contains your previously selected files to be used in the presentation you are about to create.
When you have found the required folder, tap on ‘OK’ to import the same to the new slideshow project in the Filmora timeline. All your selected files will be visible here after a successful import.
Step 3: Timeline Positioning of Media Files
Before working on the task of positioning the imported media files on the app’s timeline, navigate to the ‘File’ menu and choose the ‘Preferences’ option. As soon as the respective window pops up, reach to the ‘Editing’ tab at the top and select ‘Photo Placement’ from the drop down menu that follows.
In case your selected images do not have a matching aspect ratio with the program’s preset values, choose the ‘Crop to Fit’ option for removing the additional black bars from the selected images. For the requirement of adding camera pan and zoom movements to your images, select the ‘Pan & Zoom’ option in the ‘Preferences’ settings.
You can proceed to change the preset play durations of images, effects and transitions in the ‘Editing’ window itself. As an alternative you can adhere to the same task in the program’s timeline by dragging any one end of the media files in an outward or inward direction. The ‘Crop to Fit’ option may not give an affordable size in some cases where the images are set in a vertical 9:16 aspect ratio. Choose the ‘Fit’ option to set this issue straight.
When you have finished making all the aforesaid adjustments, navigate to the Media panel again for adding the selected image files to the software’s timeline. Proceed with selecting a file and dragging and dropping the same at the desired position within the timeline. Continue repeating the process till all the images have been placed at their respective locations, and in the exact order of appearance in the slideshow. This should be followed by adjusting the image play durations using any one of the previously described methods.
Step 4: Escape Hard Cuts With Image Transitions
Hard cuts among different slides of a presentation break the flow of the slideshow. To escape this cringe, consider using a smooth transition effect within the slides of your project. To do this, navigate to the ‘Transitions’ tab in the top toolbar of Filmora’s project window and select a desired one from over 100 choices of customizable transitions.
You can now drop these transitions in the timeline at the exact intersection point of two image files. Avoid using the same transition for every hard cut to escape monotony. You can instead choose different transitions for each slide while observing its appearance in the clip.
After you are done with applying transitions to each slide, double click on a particular transition to open its ‘Transition Setting Window’ either for presetting the transition play duration or to choose a desired transition mode. You can also prefer a direct customization of the transition duration in the project timeline through a right or left dragging of any of its ends.
Step 5: Uplift Your Slideshow Colors With Overlays and Filters
Navigate to the top toolbar and hit the ‘Effects’ tab to choose from a diversity of visual effects that can be added to the slideshow images to supplement them with an increased vibrancy through color desaturation. These effects in the program’s library are categorized into classes of Overlays and Filters, with further subcategories of Sepia Tone, Light Leaks and Lomography and many more.
To apply these effects, just select and add them into a timeline track above the clip you wish to add the overlay or filter to. When you have applied the effects, observe the overall clip appearance in the ‘Preview Panel’. Double click on a particular effect to fine-tune the latter’s settings.
Step 6: Supplement Your Slides With Motion Graphic Elements
While motion graphics will undoubtedly enhance your animated slideshows, adding them to your presentation is purely optional, since most professional projects do not need a motion graphic element to escalate their presentation outlook. If, however, you choose to work on making these a part of your animated slideshow, Filmora lets you do that in its ‘Elements’ tab.
There is a plethora of motion graphic templates that you can select and add to the project timeline for a quick and vibrant upgrade of your presentation slides, but, at the same time, it becomes important to take care of the visual outlook and the underlying reason of creating the slideshow before you decide on adding these elements to your project.
Step 7: Create Voiceovers and Record Soundtracks for Your Slideshow
Narration is a smart way to captivate the target audience within your slideshow, whether though a self-delivery or a recorded voiceover. If you decide on the second option, you can conveniently use the Filmora Slideshow Creator program to add voiceovers and soundtracks to your presentation.
To adhere to the purpose, navigate to the top toolbar and click on the ‘Media’ tab. From the options that appear, tap on the ‘Record’ menu that drops down, followed by selecting the ‘Record Voiceover’ option. As soon as the ‘Record Audio’ prompt pops up, select your desired microphone to be used in the recording process and click on the ‘Record’ button.
The recording that you have just created will appear in the ‘Media’ tab beside your all other imported audio-visual and image files, and you can add the same to any desired file with utmost ease. The Filmora library further allows you with a free access to its huge inventory of sound and audio effects. To apply these effects to your project, navigate to the ‘Audio’ tab and browse through impressive music categories, like, Young & Bright, Rock, Electronic, etc., to select the best matching audio for your slideshow.
When you have made your selections, add all of them to the slideshow’s audio track in the project timeline and make suitable adjustments to their play durations.
Step 8: Export Your Creation
When your satisfied with your efforts till here, you have indeed created a wonderful animated slideshow presentation that should be exported to relevant platforms. Navigate to the ‘Export’ tab at the top right corner of the project timeline and click on the same. As soon as the utility window appears, choose a preferred file format, set a desired output resolution and fame rate for your presentation, followed by making a direct export of the same to your Vimeo or YouTube accounts.
The slideshow rendering time on different platforms may vary in cohesion with the specific presentation lengths, with larger file requiring a considerably longer time to get rendered than the smaller ones. It is advisable to limit the output file size within 500 MB for a quick rendering process.
02Canva
This one is an online animation slideshow creation tool that could certainly be your best choice to design high end professional presentations. Facilitating you with over 100 different slide design layouts, the tool additionally grants you the liberty to add your own images to the presentation being created, or even select suitable alternatives from Canva’s extensive image stack that has over 1 million apposite images to choose from.
You can make the best use of Canva to create promotional presentations to add extra emphasis on the brand of your company and product brand, which a compatible to a diverse variety of professional platforms for information sharing.
As far as the cost constraints of the tool are concerned, you get to access a free version of the tool for working on slideshow presentations for individual or small business units, while the graphics design needs of large scale professional corporations are suitably addressed by the utility’s Canva for Work version, which is equipped with high end team coordinated features with a 30-day free trial, along with monthly and annual subscription of $ 12.95 and $ 119.4 respectively.
Pros
● The tool allows you to add elusive texts, filters, fonts and images to the animated slides of your business presentation.
● Working with the tool, you can drag and drop an extensive variety of elements within your slideshow.
● Canva further allows you to create, upload and save the logo of your brand.
Cons
● The tool’s customer support is not quite welcoming.
● You need to add your phone number within the tool’s customer support interface for getting the required help.
● The tool’s working interface is somewhat confusing.
User’s Guide to Create Animated Slideshows in Canva
Let us see browse through the detailed, step by step process to quickly create amazing animated slideshow presentations using the Canva graphic design tool in the following section:
Step 1: Download and Install Canva
Visit the official site of the tool for a free download of the Canva slideshow creator software in any suitable iOS or Windows compatible desktops, laptops and PC systems.
Step 2: Choose Your Task
Undertake a launch of the downloaded program to reach the latter’s welcome page. Here, you need to navigate to the search bar at the top and type a keyword to select your task. For creating slideshow presentations, enter ‘Slideshow’ in the search tab.
In the drop down menu that follows, a list of the closest matching alternatives of your keyword will appear. Select ‘Slideshow Videos’ from the same.
Step 3: Select a Template
The completion of Step 2 will take you to the program’s template library, where you can either work with creating a presentation of your own by clicking on the ‘Create a Blank Sideshow Video’ option, or choose any one from the finest collection of in built slideshow templates from the Canva library.
Step 4: Customize Your Template
After selecting the template, you will reach Canva’s slideshow editor page. Here you can customize your slideshow as per your preferences. To begin with, replace the preset images in the template with your selected ones.
You can either choose a set of images from the program’s inbuilt photo gallery or select the same from your device. Navigate to the ‘Tools Panel’ in the left and click on ‘Photos’ to work with the first method, or tap ‘Uploads’ in that very panel to apply the second.
When you have made your choice, click on ‘Upload Media’ to bring your selections to the tool’s editor timeline. This should be followed by dragging and dropping the images at appropriate places within the template.
Step 5: Crop the Images
Double click on any image and drag it sideways to crop the same within your preferred aspect ratio. When you are happy with the changes, click on ‘Done’ to apply them. You can additionally, customize the images with a variety of available effects at this stage.
To proceed with the aforesaid process, choose the image you want to customize and select ‘Edit Image’ from the dropdown that appears. You will be directed to the ‘Edit Image Gallery’, where you can select the effect you want to complement your image with.
Step 6: Add Other Design Elements
Tap on ‘Elements’ in the ‘Tools Panel’ at the left to select a suitable component from a range of stickers, icons, illustrations and charts to add to your slideshow according to its creation theme.
Step 7: Customize the Text
The template has some pre-written text, which you can change by double clicking inside the text boxes to highlight the already written text and edit the same as per your requirement. Press ‘T’ on your system’s keyboard for adding extra text boxes. You can also visit the ‘Editor Toolbar’ work with a variety of text formatting options, like, font size, style and color.
Step 8: Include Suitable Animations
To supplement your slideshow with stunning animations, select the image, element or text you wish to animate, followed by pressing the ‘Animate’ button. You will reach the ‘Animations Gallery’ for a selection of the desired text or page animation you want to add.
Once you have finalized your choice, click outside the gallery to apply your selected animation.
Step 9: Add the Perfect Sound
To uplift your presentation with an appealing music, navigate to the ‘Tools Panel’ at the left of the editor window and tap on ‘Audio’. A gallery of music clips will get displayed. Choose the one that best suits the theme of your animated presentation.
Step 10: Preview Your Creation
When you are done with creating the presentation, watch how it looks by navigating to the ‘Menu Bar’ at the top and clicking on the ‘Play’ button. When you have finished, click on ‘Close’ to reach the editor window.
Step 11: Set the Play Duration
To adjust the play duration of any slide, select it and navigate to the toolbar at the top left corner.
Click on ‘Edit Timing’ in the same and make suitable adjustments either by encoding the required number of seconds or dragging the duration slider.
Step 12: Time to Download and Share!
Prefer previewing the slides one again to take a final look at your presentation. If you are happy with your work, navigate to and tap ‘Download’, followed by selecting the file type to save your creation locally to your device.
It is recommended to choose the ‘MP4 Video’ file format for saving audio enabled presentations. In case you want the background music to be included, either choose the ‘GIF’ format or download the slideshow as a PowerPoint presentation.
For a direct share of the animated slideshow, navigate to the ‘Menu Bar’ at the top and click on ‘Share’, followed by ‘All Options’ and lastly, tap ‘Present’.
03Keynote
This one is affordably the most convenient presentation tools if you are a user of iOS devices, and is a world class utility to create animated slideshow presentations. You can work with this tool to add an extra element of practicality to the otherwise customary business oriented animation slideshows with a diversity of effects, filters and transitions. The software is an ultimate best in adhering to real-time and remote event collaboration concerns of employees.
Concerning the pricing requirements, you can work with this slideshow creator tool for free if your usage concerns are restricted to a personal need. In an otherwise case, you can prefer buying the latter for a monthly investment of $ 99 and $ 299, respectively for business and enterprise based concerns.
Pros
● The Keynote program allows you a real-time, remote and revised access to the slideshow presentation.
● The program’s creator library is a storehouse of the most elegant and expressive slideshow templates and themes.
● The application greets you with a responsive and non-messy interface, with a decluttered toolbar.
Cons
● The program offers you a limited number of options to export your creations.
● You cannot work with the application on a Windows compatible device.
● If you are a regular PowerPoint user, working with the tool will require you a comprehensive learning of the usage pattern.
User’s Guide to Create Animated Slideshows in Keynote
Moving ahead with the discussion, let us understand the process of creating an animated slideshow presentation in Keynote though a step by step guide in the following section:
Step 1: Download the Keynote Slideshow Creator Tool
Start with initiating a free download of the tool from the official Apple website through your login credentials and proceed to install the same in your iOS device.
Step 2: Select a Presentation Theme
To start working on your slideshow presentation, you will require to choose a suitable theme. To do this, open the tool by clicking on its icon in the Launchpad, Applications folder or the Dock. The ‘Theme Chooser’ window pops up. In case this doesn’t happen, navigate to the bottom left corner of the screen and tap ‘New Document’.
In the ‘Theme Chooser’, you can either see through different categories or tap ‘All Themes’ to select the one you like. When you have found your preferred theme, open it by double clicking on the same.
You may either use the preset slide layout of the selected theme or use a different one by navigating to and clicking on ‘Format’ tab at the right side of the screen. You can now add your specific content in the presentation through adding new slides, text and images.
Click on the ‘+’ symbol in the theme toolbar to add a new slide followed by choosing its layout, double click inside the placeholder text to edit the same or drag and drop an image from your device gallery or the internet to replace the preset one in the template.
Step 3: Supplement Your Presentation With Objects
Proceed to add different slideshow objects in your creation by navigating to the ‘Object Toolbar’ at the top and selecting tables, charts, shapes, text boxes, comments, etc., that you wish to add in your presentation.
You can further make changes in the color, shadow and border of the object to improvise its appearance, or prefer applying a preset object style to enhance the overall object look to bring it in line with the slideshow theme. To do this, select the object and you will see its formatting options in the sidebar at the right. Click on the ‘Format Toolbar’ if the sidebar does not appear.
You can additionally, add layers to the slide objects, change their size or nest them within a shape or text box and link objects to switch to a new slide, open a related web page or email message.
Step 4: Add Audio-Visual Elements
Try adding suitable media elements to your creation by dragging a video or music file from your system either to a media placeholder or just anywhere within the slide. You can alternatively tap on the ‘Media’ icon in the top toolbar and choose ‘Music’ or ‘Movies’ from the dropdown that appears, followed by dragging the file with the previously explained method.
To add a soundtrack to the presentation, click on the ‘Soundtrack’ icon in the toolbar at the top, followed by clicking on the ‘Audio’ tab in the sidebar that appears. Next, tap the ‘+’ icon to select specific songs or playlists you want to add in the soundtrack.
Step 5: Add Stunning Animations
Start with selecting a slide to add the animation effect in the ‘Slide Navigator’. The ‘Animate’ sidebar appears, where you need to select the ‘Add an Effect’ option. Scroll down to view and choose a desired transition.
You can see a preview of the selected transition being played, with the slide navigator displaying a blue mark at the right corner of the slide to indicate the addition of a transition.
To change a previously selected transition, navigate to the sidebar at the top and tap ‘Change’ to select a new one. You can further, use the sidebar options to set the direction and transition play duration.
Step 6: Playing Your Slideshow
When satisfied with your effort, you can prefer playing the presentation, either in full screen or in a single window. If you choose to play in full screen, navigate to the ‘Play’ menu, click on the same and select ‘Full Screen’, followed by choosing the desired slide from where you wish the presentation to start in the slide navigator.
If you want to play the slideshow in a window, select a preferred slide in the slide navigator, go to the ‘Play’ menu at the top, click on the ‘Play’ tab, followed by choosing the ‘In Window’ option. The presentation will now start with the selected slide being played in one window and the presenter in the other.
In either of the above slideshow playing modes, press ‘Esc’ from your system’s keyboard to end the presentation playing process.
Step 7: Collaborating With Others
Working with the Keynote Slideshow Creator, you can collaborate with others to invite people to view and edit your presentation. To give a presentation access, you can either share a web link for a public access, or invite certain people having registered Apple credentials to view your creation. You can even give editing permissions to selected viewers or allow them to invite other people to collaborate.
04Powtoon
This one is a useful tool to create interactive business presentations for brand promotion and company recognition. Talking about the specific features of the tool, you can work with the utility to design an attractive logo for your company, import data and charts to your presentation, make adjustments in the color schemes of the slideshow, initiate infographic building and organize your slideshow into several sections.
The tool works best towards educating potential customers and clients about your company’s mainstream work profile and business. Sticking to the terms of utility pricing, you can begin with taking a free demo of the tool to access its credibility in cohesion with your specific needs. Following this, you can avail a monthly paid subscription of Powtoon, which has a price range of $ 19 to $ 59, according to the type and extent of features you choose to avail.
Pros
● You can add the details of your brand in the most expressive and appealing manner with the tool’s manifold design features.
● You can work with hundreds of preset slide designs to quickly create professionally sound animated slideshows.
● The tool is excellent in catering to your diverse slideshow design needs, when working for a large scale organizational setup.
Cons
● The tool is not a smart choice for individual or small scale business setups.
● The extensive variety of features results in a bit confusing and messy working interface.
● You can add a limited number of users to the monthly subscription plan of the tool.
User’s Guide to Create Animated Slideshows in Powtoon
For a better insight on how to create animated slideshows in Powtoon, let us go through the stepwise tutorial of the process in the following section:
Step 1: Launch the Online Tool
Visit the Powtoon official website to open the slideshow designer tool in any of your favorite internet browsers.
Powtoon Official Site Link: https://www.powtoon.com/index/
Step 2: Script Your Presentation
Start with creating a preset content for every slide of your presentation, based on the reason behind creating the slideshow, type and style of content presentation and so on.
Step 2: Add a Cohesive Background Music
You can complement your presentation with the perfect background music from the Powtoon library, from the web or even create your own voiceover recording through any preferred online text-to-voice recorder tool to voice the contents of your presentation. When you are done, upload your recording to the Powtoon editor to proceed with adding visual content to the presentation.
Step 3: Divide Your Presentation Slides
You can now add images, text and animations to your project in line with your presentation script. Choose suitable images from your device or from the web, add short, impactful texts and stunning animations from the Powtoon’s library to level up the appearance of your slideshow.
Step 4: Include Design Elements
Try adding additional elements like, graphics, background themes, animation styles, props, color schemes and other relevant characteristics to the slides.
Step 5: Time Your Presentation
In the last step, use the Powtoon timeline to set the sequence and time of appearance of different elements in each of your presentation slides. You can also hear the voiceover in the slideshow background to ensure the synchronization between the audio play and visual content appearance within the presentation.
05Visme
This one is a top grade cloud based professional tool for creating animated slideshow presentations with an affordably high visual credibility. Equipped with a drag and drop design workflow, the tool works effectively towards delivering intuitive and engaging animated slideshows for effective communication of business ideas and top rated brand promotion strategies.
The best usage of the tool lies in the creation of business presentations that are aimed at ensuring company oriented image collection and brand consistency. Talking of the tool’s pricing constraints, a single user subscription of the utility would cost you $ 20 on a monthly basis, which increases to $ 60 per month for a 3-user package.
It is a smart choice to take a free live demonstration of the tool to get a comprehensive understanding of the latter’s working technology.
Pros
● Extensive variety of colors, images and logos to complement your business presentations with elusive design elements.
● Promotes a viable consistency among multiple employee presentations
● The tool comes with an in built analytic system that keeps a track of the viewers of your slideshow presentations.
Cons
● The tool lacks some essential elements of slideshow design.
● The design features are mostly generic and do not cater to intense creation needs.
● The tool lacks a free trial facility.
User’s Guide to Create Animated Slideshows in Visme
In the following section is presented a stepwise procedure to create stunning animated slideshows in Visme with high end professional excellence and in the quickest time span:
Step 1: Download and Install the Program
Navigate to the official website of the Visme Slideshow Creator program to download and install the same in any of your preferred MacOs or Windows supported devices.
Visme Official Download Link: https://visme.co/blog/
Step 2: Start a New Project
You will need to create a Visme account to start working on the slideshow creation process. When you have created one, navigate to and click the ‘Create New Visme’ option in the tool’s opening screen to open a new project and assign a suitable name to it.
Step 3: Choose a Template
in the new project window that appears, click on ‘Presentations’ option at the top to see a library of slideshow templates being displayed. You can either, select a template from the library to edit or start an entirely new creation of your own.
Step 4: Make Color Schemes and Background Selections
To proceed with the selection of slide backgrounds and color schemes, you can either choose an exact color by entering its RGB code in the ‘Edit Colors’ option, or choose one from Google web pages using the ‘Chrome Eye Dropper’ tool.
Step 5: Add Shapes and Icons
You can supplement your slideshow with suitable design elements, like icons and shapes. All you need to do is navigate to the ‘Tools Panel’ in the left, click on the ‘All Shapes’ symbol and type a related keyword in the search bar to get a list of matching shapes to choose from.
Step 6: Insert and Format Text
You can now proceed with adding suitable text, titles and subtitles to the presentation slides. Again, visit the ‘Tools Panel’, tap the ‘T’ icon and click on ‘Add a Title’. A text box will be created within the slide, where you can add the required text. You can also format the same from the ‘Format Toolbar’ that gets displayed above the inserted text box.
Step 7: Add Photographic Slides
To include image slides, start with inserting a new slide in the presentation, flowed by once again navigating to the ‘Tools Panel’ in the left and clicking on the ‘Background’ icon. Choose a suitable color scheme and again, click on the ‘Images’ symbol in the ‘Tools Panel’. Here you can select any suitable image from the library that gets displayed.
Step 8: Link Your Slides
Link the sequential slides of your presentation with any suitable indicator, such as an arrow, so that clicking on the same takes the viewer to the successive slide. You can alternatively create ‘Hotspots’ to link the slides together.
Step 9: Publish and Share Your Presentation
When the final result makes you happy, navigate to the ‘Publish’ tab just above your slide window to open the presentation publishing interface. Here, you can choose from the options of a direct share, a site or blog embed or a local download of the presentation to your device.
● Ending Thoughts →
● Animated slideshow presentations land among the most trending ways to ensure a precise and engaging content delivery.
● The software market is packed with a diverse range of impressive slideshow creator tools with the most amazing features.
● When making your choice of the perfect animated slideshow designer tools, the Wondershare Filmora Slideshow Creator program is indeed a smart pick.
Animated Business Logos and Tools to Create
Know All About Animated Business Logos and the Best Tools to Create One
An easy yet powerful editor
Numerous effects to choose from
Detailed tutorials provided by the official channel
Just like people, brands and businesses also have their own identities.
If you too want to reap the benefits of an animated business logo, creating an impressive one is important and to get the task done, there are several software and other tools available.
In this article
01 [About animated business logos and how they can help in the growth of the business?](#Part 1)
02 [Tips for making an effective animated business logo](#Part 2)
03 [Types of animated business logo makers](#Part 3)
04 [The best tool to create an animated business logo effortlessly- Wondershare Filmora](#Part 4)
Part 1 About Animated Business Logos and How They Can Help in the Growth of the Business?
An animated logo is a logo that has rich motion graphics. These logos are catchy and get the instant attention of the viewers. A well-created animated business logo not only gives a professional look but also helps in creating awareness about the brand, supports the story of the brand, and enhances visual appearance.
There are several ways in which an animated business logo can be used for the growth of the business. Summarized below are some of the major ones.
01Use animated logos at the start or the end of the videos
An animated logo creates a lasting impression and thus including then in the marketing videos at the starting or the end helps in the business growth. These logos can be added to the videos that are created for internal communication as well as for the public.
02Using animated logos for e-commerce
If your business is related to products, then adding animated logos to the product movies will make them look interesting.
03Use animated logos for YouTube videos
If you are using YouTube videos for your business promotion, ensure to add the animated logos for branding as it makes the videos look different from the other regular ones and thus creates an interest among the viewers.
04Using animated logos for YouTube ads
Using these motion graphic logos as short YouTube ads will work as an effective way for promoting the business and for their growth as well.
05Use animated logos for the films on your website
If you are making videos for your business websites as introduction videos or explainer videos, using animated logos adds a professional and dynamic touch.
06Using animated logos for social media sites
The number of users on social media sites is increasing every day and thus promoting your business on these sites helps you reach a wider audience. So, if you too are planning a video campaign on Facebook, Twitter, Instagram, and other sites use animated logos in the newsfeed.
Part 2 Tips for making an effective an animated business logo
The below-listed tips can help you create an impressive and interesting animated logo for your business.
● Create short animated logos: Animated logos should be short and convey the meaning and purpose of your business and brand. A long video can be boring and the target audience can lose interest and thus they have to be short, immersive, and impactful.
● Create an impression: Create an animated logo that can create a positive impression. Your animated logo needs to match the style of your business and get the interest of the viewers.
● Use the correct animation style: Several animation styles can be used for creating your business logo like 2D, 3D, traditional, and more. Different designs leave a different impact among the viewers and create a different understanding of the brand. Thus, while using the animation style, choose the one that matches your business style.
Part 3 Types of animated business logo makers
If you are looking for created animated logos, there is no dearth of tools. The majority of the editing and animated software can help you get the task done. There is several online and desktop software available using which you can either add your own logo and make an animated version of it or can design an animation from the scratch.
The choice of the tool selection depends on your budget and the features required. Some of the popularly used tools that can be considered are as below.
Popularly Used Tools →
● Renderforest
● Adobe Spark
● Logo Maker Plus
● Animaker
● Viddyoze
Popularly Used Tools →
● Offeo
● Canva
● Design Free Logo
● Tube Arsenal
● MotionDen
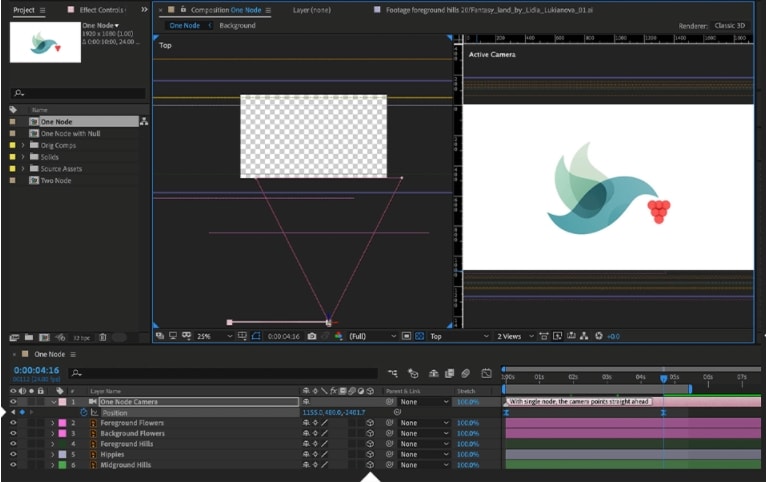
Part 4 The best tool to create an animated business logo effortlessly- Wondershare Filmora
To create animated logos effortlessly and use the best features Wondershare Filmora is an excellent choice. This desktop software can be quickly downloaded and installed on your Windows and Mac after which it can be used for multitasking like editing, creating animations, logos, and much more. The interface is simple and user-friendly which makes the program popular among all user types.
Wondershare Filmora
Power Up Your Story with Filmora. Professional video editing is made easy.
Key features of the software:
● Allows creating different types of animations including animated business logos.
● Allows creating 2D and 3D animated logos.
● Allows creating logos using keyframing for better customization.
● Multiple effects can be added like titles, tiles, warp, masking, distort, lights, flares, and more.
● To further enhance the overall looks of your animation the software offers better control over the colors and other parameters through tools like color wheels, auto-correction, scopes, and more.
● Audio controls are also offered through features like audio compression, audio noise correction, audio sync, transitions, and more.
● Compatible with all the latest Windows and Mac.
Key Takeaways from This Episode
● Animated business logos are an important aspect of any business promotion and marketing strategy.
● An impressive animated logo can help a business grow in several ways and several factors should be considered while creating an animated logo.
● Different types of desktop and online tools for animated business logos are present.
● Wondershare Filmora works as the best animation logo that can create impressive animated logos in no time.


Just like people, brands and businesses also have their own identities.
If you too want to reap the benefits of an animated business logo, creating an impressive one is important and to get the task done, there are several software and other tools available.
In this article
01 [About animated business logos and how they can help in the growth of the business?](#Part 1)
02 [Tips for making an effective animated business logo](#Part 2)
03 [Types of animated business logo makers](#Part 3)
04 [The best tool to create an animated business logo effortlessly- Wondershare Filmora](#Part 4)
Part 1 About Animated Business Logos and How They Can Help in the Growth of the Business?
An animated logo is a logo that has rich motion graphics. These logos are catchy and get the instant attention of the viewers. A well-created animated business logo not only gives a professional look but also helps in creating awareness about the brand, supports the story of the brand, and enhances visual appearance.
There are several ways in which an animated business logo can be used for the growth of the business. Summarized below are some of the major ones.
01Use animated logos at the start or the end of the videos
An animated logo creates a lasting impression and thus including then in the marketing videos at the starting or the end helps in the business growth. These logos can be added to the videos that are created for internal communication as well as for the public.
02Using animated logos for e-commerce
If your business is related to products, then adding animated logos to the product movies will make them look interesting.
03Use animated logos for YouTube videos
If you are using YouTube videos for your business promotion, ensure to add the animated logos for branding as it makes the videos look different from the other regular ones and thus creates an interest among the viewers.
04Using animated logos for YouTube ads
Using these motion graphic logos as short YouTube ads will work as an effective way for promoting the business and for their growth as well.
05Use animated logos for the films on your website
If you are making videos for your business websites as introduction videos or explainer videos, using animated logos adds a professional and dynamic touch.
06Using animated logos for social media sites
The number of users on social media sites is increasing every day and thus promoting your business on these sites helps you reach a wider audience. So, if you too are planning a video campaign on Facebook, Twitter, Instagram, and other sites use animated logos in the newsfeed.
Part 2 Tips for making an effective an animated business logo
The below-listed tips can help you create an impressive and interesting animated logo for your business.
● Create short animated logos: Animated logos should be short and convey the meaning and purpose of your business and brand. A long video can be boring and the target audience can lose interest and thus they have to be short, immersive, and impactful.
● Create an impression: Create an animated logo that can create a positive impression. Your animated logo needs to match the style of your business and get the interest of the viewers.
● Use the correct animation style: Several animation styles can be used for creating your business logo like 2D, 3D, traditional, and more. Different designs leave a different impact among the viewers and create a different understanding of the brand. Thus, while using the animation style, choose the one that matches your business style.
Part 3 Types of animated business logo makers
If you are looking for created animated logos, there is no dearth of tools. The majority of the editing and animated software can help you get the task done. There is several online and desktop software available using which you can either add your own logo and make an animated version of it or can design an animation from the scratch.
The choice of the tool selection depends on your budget and the features required. Some of the popularly used tools that can be considered are as below.
Popularly Used Tools →
● Renderforest
● Adobe Spark
● Logo Maker Plus
● Animaker
● Viddyoze
Popularly Used Tools →
● Offeo
● Canva
● Design Free Logo
● Tube Arsenal
● MotionDen
Part 4 The best tool to create an animated business logo effortlessly- Wondershare Filmora
To create animated logos effortlessly and use the best features Wondershare Filmora is an excellent choice. This desktop software can be quickly downloaded and installed on your Windows and Mac after which it can be used for multitasking like editing, creating animations, logos, and much more. The interface is simple and user-friendly which makes the program popular among all user types.
Wondershare Filmora
Power Up Your Story with Filmora. Professional video editing is made easy.
Key features of the software:
● Allows creating different types of animations including animated business logos.
● Allows creating 2D and 3D animated logos.
● Allows creating logos using keyframing for better customization.
● Multiple effects can be added like titles, tiles, warp, masking, distort, lights, flares, and more.
● To further enhance the overall looks of your animation the software offers better control over the colors and other parameters through tools like color wheels, auto-correction, scopes, and more.
● Audio controls are also offered through features like audio compression, audio noise correction, audio sync, transitions, and more.
● Compatible with all the latest Windows and Mac.
Key Takeaways from This Episode
● Animated business logos are an important aspect of any business promotion and marketing strategy.
● An impressive animated logo can help a business grow in several ways and several factors should be considered while creating an animated logo.
● Different types of desktop and online tools for animated business logos are present.
● Wondershare Filmora works as the best animation logo that can create impressive animated logos in no time.
10 Realistic Cartoon Characters You Would Run Away From if You Met in Real Life
10 Realistic Cartoon Characters You Would Run Away From if You Met in Real Life
An easy yet powerful editor
Numerous effects to choose from
Detailed tutorials provided by the official channel
Remember watching a cartoon reality show on the Cartoon Network? We all grew up watching cartoons. Cartoons are an unforgettable part of our childhood. But have you ever wondered what would your favorite cartoon characters look like in real life? Many cartoon characters like Popeye, Sponge Bob, Mickey Mouse, etc. look funny in their 2D images. Watching them do funny things and their funny expressions have always been fun.
But with the advancement in technology and the passage of time, we have some digital artists like Tatiana and Miguel Vasquez, who have recreated your famous cartoon characters into 3D. They have given them a realistic look that will scare you. These realistic cartoon faces will blow your mind.
In this article
01 [What’s a Realistic Cartoon?](#Part 1)
02 [10 Realistic Cartoon Characters You Would Run Away From If You Met In Real Life](#Part 2)
03 [How Do Cartoon Characters Reimagined As Realistic 3D Animation](#Part 3)
Part 1 What’s Realistic Cartoon?
Before moving towards the list of realistic cartoon characters, you must first know what a realistic cartoon is. As we all know, any animated drawing or illustration is a cartoon, it can either be non-realistic or semi-realistic. Earlier artists used to draw these cartoon characters on paper, but now technology has evolved.
With the introduction of different AI tools, many digital artists have recreated 3D versions of your favorite cartoon characters. These 3D versions of different cartoons are known as realistic cartoons. This can be done easily with help of AI technology and Digital Software.
Part 2 Realistic Cartoon Characters You Would Run Away From If You Met In Real Life
Have you ever thought how would your favorite cartoon character sponge bob looks like in real life? We will show you realistic versions of your favorite cartoon characters. Stay tuned for great fun waiting for you in this article!
01Sponge Bob (Sponge Bob Square Pants)
Sponge Bob Square Pants is an animated series full of fun and comedy. This show currently runs on Nickelodeon. Sponge Bob is a yellow-colored sea sponge and the main protagonist of the show. He is a cook at a restaurant named Krusty Krab. He often goes on adventures with his best friend Patrick Star. He mainly focuses on and aims at getting a boat-driving license from Mr. Puff’s boating school.
Have a look at the 3D recreation of this funny creature.

02Sid the Sloth (Ice Age)
Ice Age is one of the most popular animated series that revolves around the lives of a mammoth, tiger, sloth, and a scrat. A scrat is a combination of a squirrel and a rat. This series became so popular among the children that it was even nominated for an Oscar award.
It has a character called Sid. He is an abandoned sloth. His mother left him for some good to happen with him during the migration. His character in the entire series exhibits a friendly and carefree nature. Sometimes, he also acts as dumb and naïve.
Look at the funny recreation of this dumb-witted character. Does this recreation scare you?

03Mr. Krabs (Sponge Bob Square Pants)
Sponge Bob Square Pants is one of the cartoons that have many different and funny-looking creatures. Mr. Krabs is one of those characters. He is a money-minded and miserly creature. He is the owner of the Krusty Krab fast food restaurant, where Sponge Bob works as a cook. He has a teenage daughter named Pearl and he can do anything to see her happy. He exhibits romantic feelings for Mrs. Puff.
Does this funny creature from the Sponge Bob series look funny in real life too?

04Patrick Star (Sponge Bob Square Pants)
Patrick Star is again a character from the cartoon show Sponge Bob Square Pants. He is the best friend of the main protagonist Sponge Bob, who lives 2 houses away from Sponge Bob’s house. He is a lazy, fat, and stupid pink-colored starfish. His character makes the show funnier and more interesting for kids.
How would you react when you will see this funny creature from Sponge Bob in real life? His 3D recreation seems a bit scary like a monster in real life.
05Plankton (Sponge Bob Square Pants)
Plankton was once the best friend of Mr. Krabs but now they both share a rivalry bond. He is married to Karen and owns a fast food restaurant named Chum Bucket Restaurant in competition with Mr. Krabs’ Restaurant. He plays the antagonist character in the series. His restaurant doesn’t work as successfully as Krusty Krab Restaurant. In rivalry, he often comes up with different plans and tricks to outwit Mr. Krabs and steal the secret recipe of his famous Krabby Patty Burger, but never succeeds.
Have a look at the 3D recreation of this funny character from the series.
06Homer (The Simpsons)
The Simpsons is an animated series that revolves around the life of an American family. The Simpson family has five members named Homer, Marge, Bart, Lisa, and Maggie. Homer Simpson is the main character of this series. He lives in Springfield and is employed as a Safety Inspector at Springfield Nuclear Power Plant. He is married to Marge and is the father of three children – Bart, Lisa, and Maggie. The series depicts a strong bond of love and care for each other in the family.
Have a look at this realistic 3D recreation of Homer Simpson.

07Bugs Bunny (Looney Tunes)
Looney Tunes is entertaining people of all ages due to its great and funny characters. Bugs Bunny is one of our favorite characters from the animated cartoon show Looney Tunes. He is the main protagonist and the most popular character of the series. Kids love him the most because of his mischievous acts in the show. He looks too funny with a mouth filled with carrots and wearing funny costumes. This unique character has a great fan following all over the world.
The 3D recreation of this famous cartoon character is funny and scary at the same time.
08Sally (The Nightmare Before Christmas)
As the name suggests, The Nightmare Before Christmas is an American dark fantasy animated movie. This animated movie has received great financial success and appreciation for its wonderful characters and music.
Sally is a shy ragdoll created by a scientist Doctor Finkelstein. She secretly loves Jack – the main Protagonist of the movie. She tells him not to mix the preparation of Christmas with the Halloween party.
Look at her realistic 3D recreation by Tatiana, popularly known as TatiMoons.

09Stitch (Lilo and Stitch)
Lilo and Stitch is also an animated American movie. It is a science fiction and comedy movie that attracts the interest of people of all age groups. The story of this animated movie revolves around the two main characters named Lilo and Stitch. Lilo is a 7-year old orphan girl whose parents died in a car accident. She has a pet named Stitch.
The original name of Stitch is Experiment 626. He was illegally created by a scientist Jumba Jokiba through a genetic experiment. Lilo adopts him thinking that he is an innocent creature, she doesn’t know about his birth and origin.
Have a look at this realistic 3D recreation of Stitch’s character. Isn’t it scary?

10 Popeye (Popeye – The Sailor Man)
Popeye – The Sailor Man is another famous cartoon series. Popeye is the main protagonist of this series. He has a girlfriend named Olive Oyl. This series depicts the love triangle between Popeye, Olive, and Bluto. He is an uneducated sailor man who gets energy by eating spinach. He often comes up with non-realistic solutions to different problems and helps the police by investigating different cases. He has a versatile tobacco smoking pipe that sometimes acts as a whistle, and he even intakes the spinach through his pipe.
In the cartoon films, he looks funny, but this 3D recreation of his character is a bit scary.

Part 2 How Do Cartoon Characters Reimagined As Realistic 3D Animation
Nowadays, it has become easier to create and turn your imagination into a cartoon character with different online 3D animators. This makes storytelling easier and funny and it is a great way to engage children. Out of all the 3D animation tools, Filmora will assist you to create the best 3D version of your favorite cartoon character.
Filmora has various smart features that help you to turn any image into realistic 3D animation. You can create great animations using Wondershare Filmora Video Editor within a couple of hours. It offers you many different features that help in convenient customization.
● Ending Thoughts →
● Being a cartoon lover, we hope that you would have liked the 3D recreation of your favorite cartoons. Some of these 3D recreations are so scary that you would just run away from them in real life and some look like real monster cartoons.
● AI combined with digital software like Filmora makes it easier to create these 3D versions of famous cartoon characters.
● With Filmora, you don’t need to spend hours sketching cartoon characters on paper. You can easily create great and realistic animations digitally.
Remember watching a cartoon reality show on the Cartoon Network? We all grew up watching cartoons. Cartoons are an unforgettable part of our childhood. But have you ever wondered what would your favorite cartoon characters look like in real life? Many cartoon characters like Popeye, Sponge Bob, Mickey Mouse, etc. look funny in their 2D images. Watching them do funny things and their funny expressions have always been fun.
But with the advancement in technology and the passage of time, we have some digital artists like Tatiana and Miguel Vasquez, who have recreated your famous cartoon characters into 3D. They have given them a realistic look that will scare you. These realistic cartoon faces will blow your mind.
In this article
01 [What’s a Realistic Cartoon?](#Part 1)
02 [10 Realistic Cartoon Characters You Would Run Away From If You Met In Real Life](#Part 2)
03 [How Do Cartoon Characters Reimagined As Realistic 3D Animation](#Part 3)
Part 1 What’s Realistic Cartoon?
Before moving towards the list of realistic cartoon characters, you must first know what a realistic cartoon is. As we all know, any animated drawing or illustration is a cartoon, it can either be non-realistic or semi-realistic. Earlier artists used to draw these cartoon characters on paper, but now technology has evolved.
With the introduction of different AI tools, many digital artists have recreated 3D versions of your favorite cartoon characters. These 3D versions of different cartoons are known as realistic cartoons. This can be done easily with help of AI technology and Digital Software.
Part 2 Realistic Cartoon Characters You Would Run Away From If You Met In Real Life
Have you ever thought how would your favorite cartoon character sponge bob looks like in real life? We will show you realistic versions of your favorite cartoon characters. Stay tuned for great fun waiting for you in this article!
01Sponge Bob (Sponge Bob Square Pants)
Sponge Bob Square Pants is an animated series full of fun and comedy. This show currently runs on Nickelodeon. Sponge Bob is a yellow-colored sea sponge and the main protagonist of the show. He is a cook at a restaurant named Krusty Krab. He often goes on adventures with his best friend Patrick Star. He mainly focuses on and aims at getting a boat-driving license from Mr. Puff’s boating school.
Have a look at the 3D recreation of this funny creature.
02Sid the Sloth (Ice Age)
Ice Age is one of the most popular animated series that revolves around the lives of a mammoth, tiger, sloth, and a scrat. A scrat is a combination of a squirrel and a rat. This series became so popular among the children that it was even nominated for an Oscar award.
It has a character called Sid. He is an abandoned sloth. His mother left him for some good to happen with him during the migration. His character in the entire series exhibits a friendly and carefree nature. Sometimes, he also acts as dumb and naïve.
Look at the funny recreation of this dumb-witted character. Does this recreation scare you?
03Mr. Krabs (Sponge Bob Square Pants)
Sponge Bob Square Pants is one of the cartoons that have many different and funny-looking creatures. Mr. Krabs is one of those characters. He is a money-minded and miserly creature. He is the owner of the Krusty Krab fast food restaurant, where Sponge Bob works as a cook. He has a teenage daughter named Pearl and he can do anything to see her happy. He exhibits romantic feelings for Mrs. Puff.
Does this funny creature from the Sponge Bob series look funny in real life too?
04Patrick Star (Sponge Bob Square Pants)
Patrick Star is again a character from the cartoon show Sponge Bob Square Pants. He is the best friend of the main protagonist Sponge Bob, who lives 2 houses away from Sponge Bob’s house. He is a lazy, fat, and stupid pink-colored starfish. His character makes the show funnier and more interesting for kids.
How would you react when you will see this funny creature from Sponge Bob in real life? His 3D recreation seems a bit scary like a monster in real life.
05Plankton (Sponge Bob Square Pants)
Plankton was once the best friend of Mr. Krabs but now they both share a rivalry bond. He is married to Karen and owns a fast food restaurant named Chum Bucket Restaurant in competition with Mr. Krabs’ Restaurant. He plays the antagonist character in the series. His restaurant doesn’t work as successfully as Krusty Krab Restaurant. In rivalry, he often comes up with different plans and tricks to outwit Mr. Krabs and steal the secret recipe of his famous Krabby Patty Burger, but never succeeds.
Have a look at the 3D recreation of this funny character from the series.
06Homer (The Simpsons)
The Simpsons is an animated series that revolves around the life of an American family. The Simpson family has five members named Homer, Marge, Bart, Lisa, and Maggie. Homer Simpson is the main character of this series. He lives in Springfield and is employed as a Safety Inspector at Springfield Nuclear Power Plant. He is married to Marge and is the father of three children – Bart, Lisa, and Maggie. The series depicts a strong bond of love and care for each other in the family.
Have a look at this realistic 3D recreation of Homer Simpson.
07Bugs Bunny (Looney Tunes)
Looney Tunes is entertaining people of all ages due to its great and funny characters. Bugs Bunny is one of our favorite characters from the animated cartoon show Looney Tunes. He is the main protagonist and the most popular character of the series. Kids love him the most because of his mischievous acts in the show. He looks too funny with a mouth filled with carrots and wearing funny costumes. This unique character has a great fan following all over the world.
The 3D recreation of this famous cartoon character is funny and scary at the same time.
08Sally (The Nightmare Before Christmas)
As the name suggests, The Nightmare Before Christmas is an American dark fantasy animated movie. This animated movie has received great financial success and appreciation for its wonderful characters and music.
Sally is a shy ragdoll created by a scientist Doctor Finkelstein. She secretly loves Jack – the main Protagonist of the movie. She tells him not to mix the preparation of Christmas with the Halloween party.
Look at her realistic 3D recreation by Tatiana, popularly known as TatiMoons.
09Stitch (Lilo and Stitch)
Lilo and Stitch is also an animated American movie. It is a science fiction and comedy movie that attracts the interest of people of all age groups. The story of this animated movie revolves around the two main characters named Lilo and Stitch. Lilo is a 7-year old orphan girl whose parents died in a car accident. She has a pet named Stitch.
The original name of Stitch is Experiment 626. He was illegally created by a scientist Jumba Jokiba through a genetic experiment. Lilo adopts him thinking that he is an innocent creature, she doesn’t know about his birth and origin.
Have a look at this realistic 3D recreation of Stitch’s character. Isn’t it scary?
10 Popeye (Popeye – The Sailor Man)
Popeye – The Sailor Man is another famous cartoon series. Popeye is the main protagonist of this series. He has a girlfriend named Olive Oyl. This series depicts the love triangle between Popeye, Olive, and Bluto. He is an uneducated sailor man who gets energy by eating spinach. He often comes up with non-realistic solutions to different problems and helps the police by investigating different cases. He has a versatile tobacco smoking pipe that sometimes acts as a whistle, and he even intakes the spinach through his pipe.
In the cartoon films, he looks funny, but this 3D recreation of his character is a bit scary.
Part 2 How Do Cartoon Characters Reimagined As Realistic 3D Animation
Nowadays, it has become easier to create and turn your imagination into a cartoon character with different online 3D animators. This makes storytelling easier and funny and it is a great way to engage children. Out of all the 3D animation tools, Filmora will assist you to create the best 3D version of your favorite cartoon character.
Filmora has various smart features that help you to turn any image into realistic 3D animation. You can create great animations using Wondershare Filmora Video Editor within a couple of hours. It offers you many different features that help in convenient customization.
● Ending Thoughts →
● Being a cartoon lover, we hope that you would have liked the 3D recreation of your favorite cartoons. Some of these 3D recreations are so scary that you would just run away from them in real life and some look like real monster cartoons.
● AI combined with digital software like Filmora makes it easier to create these 3D versions of famous cartoon characters.
● With Filmora, you don’t need to spend hours sketching cartoon characters on paper. You can easily create great and realistic animations digitally.
How to Make a Video a Live Photo 2023
How to Make a Video a Live Photo [2022]
An easy yet powerful editor
Numerous effects to choose from
Detailed tutorials provided by the official channel
Looking forward to turn your videos into live photos? Stay tuned to know how!
In this article
01 [How to Save Live Photos as a Video on iPhone/Ipad/Ipod](#Part 1)
02 [How to Turn a Video Into a Live Photo on iOS/Android](#Part 2)
Part 1 How to Save Live Photos as a Video on iPhone/Ipad/Ipod
Live photos are an amazing utility that allow you to save images as short moving snaps. Creating live photos is among the latest spunk of trendsetter stories, whether shared on social media platforms or created and saved just for fun, these definitely sound and look exciting, but that’s just one among the many things you can experiment on live photos.
Creating live photos takes you to a world of exciting features where you can explore your creativity in a number of ways, one of the easiest being turning live photos to videos. This comes handy when you need to share your live photos on platforms that do not have the compatibility to run live photos. If you are an iPhone user and wish to try your hands on experimenting with live photos, see through the following section of this article to learn how to turn live photo into video:
01Save as Video
Step 1: Launch the Photos App
In your iPhone, launch the ‘Photos’ app and navigate to ‘Albums’. All your live photos are present in the ‘Live Photos’ album.
Step 2: Format Selection
In latest versions (iOS 13v and above), you get a direct ‘Save as Video’ option in the ‘Photos’ application. Just click on that, and your live photo will be instantly saved in your iPhone gallery as a video. Here’s how you can use this feature:
● In the ‘Photos’ application, go to the ‘Live Photos’ album to select and open a desired live photo that you wish to convert to a video.
● Click on the ‘Share’ icon.

● Select ‘Save as Video’ from the drop down menu that displays sharing options.

Your created video will be saved in the ‘Photos’ application, next to the live photo you chose to turn into a video.
02iOS Shortcuts
This is a quicker way to save your live photos as videos in your iPhone. To use this feature, you first need to save the ‘Convert LivePhotos to Video’ shortcut in the ‘Shortcuts App’ gallery of your iPhone. You can do this by opening in your iOS internet browser.
Before using the above link, make sure to enable the ‘Allow Untrusted Shortcuts’ feature in your iPhone settings. You can do this as explained below:
● Reach to the ‘Settings’ application of your iPhone.
● Tap on ‘Shortcuts’ from the app’s welcome screen.
● Enable ‘Allow Untrusted Shortcuts’ with a toggle.

Having done that, here’s what you need to follow:
● Open the ‘Shortcuts’ application in your iOS device and tap the ‘Convert LivePhotos to Video’ shortcut.

● The ‘Live Photos’ album of your device opens up. Make a desired selection.

Your converted video gets automatically saved in the ‘Camera Roll’ folder of the ‘Photos’ application. Open the ‘Recents’ album to view your creation.
Part 2 How to Turn a Video Into a Live Photo on iOS/Android
Converting live photos to videos is fine, but going the other way round is all the more exciting and fun! You can even use these converted live photos as live screen wallpapers for your iOS and Android devices. If you are motivated to take up the excitement, look through the following methods to turn video into live photo:
01iOS Devices
Being an iOS user, you can choose among the following tools to convert video to live photo in your iPad, iPod or iPhone:
● Wondershare Filmora
Wondershare Filmora Video Editor is currently leading the software market among converter utilities that cater to various media conversion needs. This one is a free, smart, quick and convenient conversion tool that assures you of a hassle free video to live photo conversion in just a few clicks. What’s more interesting is, you don’t need to limit yourself with sticking to some particular video format, as Filmora conveniently supports almost all common ones.
Wondershare Filmora
Get started easily with Filmora’s powerful performance, intuitive interface, and countless effects!
Try It Free Try It Free Try It Free Learn More >

● IntoLive
This one is a third party application that allows you to convert videos into live photos, quickly and conveniently. This tool works well with devices having iOS 12.0 and later versions. All you have to do is follow the steps mentioned below:
Step 1:
Download the ‘IntoLive’ application from the Apple App Store.

Step 2:
Launch the same on your iOS device and grant the permission to access its ‘Photos’ Album.

Step 3:
In the ‘Videos’ section, choose the desired video that you wish to turn into a live photo.

Step 4:
An editor window will open up. Here, you can edit (cut, crop, trim, etc.) and add desired effects or filters to your selected video. Click on ‘Make’ at the top right when you finish the editing process.

Step 5:
If you have the paid version of the app, you can take up multiple repeats of your live photo; else you can use the free version with no repeats.

Step 6:
Once you are satisfied with the result, click on ‘Save Live Photo’. This will save your created live photo in your device’s gallery.

02VideoToLive
This is a free converter you can choose to turn video into live photo. This is a quite popular tool among iPhone users worldwide and is suitable for iOS versions 11.2 and later. You also have the liberty to share your created live photos on social media with this converter. Take the following steps to begin the conversion process:

Step 1:
Download the application from the Apple App Store and launch it on your iOS device.
Step 2:
Choose a video from your device gallery to convert it into a live photo.
Step 3:
In the video editor screen, crop the video to the preferred section that has to be converted into live photo. You can add video frames to your edited clip from the upper section of the editor screen.
Step 4:
Click on ‘Convert’ at the top right corner to initiate the conversion process.
03Android Devices
Live photos are undoubtedly known to add spark to your cherished moments, but the notch that puts these off with Android devices is that you can enjoy live photos on these devices only as live wallpapers.
Being an iPhone exclusive utility, Android devices lack the flexibility to capture live images. However, you can see them move on being set as live screen wallpapers. A handy alternative to this is converting a turn video into live photo and use it as live wallpaper. Here’s how you can take up the conversion process:
● TurnLive- Live Wallpaper
This one is a convenient, third party tool that lets you turn video into live photo in just a few quick steps. You can either use this application for free, or upgrade to the paid version to enjoy its premium features. To make amazing live photos from videos using this tool, you need to take up the steps given below:

Step 1: App Installation
To begin, visit the Google Playstore in your Android device and download the TurnLive- Live Wallpaper application. Next, you need install and launch the app in your device and accept its terms of service.
Step 2: Select a Video
Once you are done, click on the ‘Live Photo’ icon in the bottom of the app’s opening screen to reach the video selection page. Here, you need to choose ‘Video to Live Wallpaper’ option and grant the required app permissions to access your device’s camera and gallery. Select a desired video from the ones saved in your device and click ‘Done’ at the top right.
Step 3: Edit Your Video
You will now get directed to the app’s editor window, where you need to trim the selected video within a time frame of 1-5 seconds. To do this, select a cover frame within the clip and click ‘Next’. You can now use the video slider at the bottom to trim the clip. Adding suitable video effects and filters is also possible with this tool.
Step 4: It’s Almost Done!
When you finish editing, click ‘Next’ and choose the number of repeats for the created live photo. Wait for the conversion to finish and click on ‘My Wallpapers’ to view your creation.
Step 5: Download Your Live Photo!
Click ‘Download’ and tap ‘Clear’ in the app’s prompt message to remove your device’s current screen wallpaper. Next, allow the app to access your system settings. Once this finishes, tap ‘Clear’ again to download your creation. You will now get directed to a black screen tagged ‘DayTime LWP’. Click on ‘Set Wallpaper’ in this screen to make your live photo, the current wallpaper of your Android device.
● Video Live Wallpaper
This is another free app that you can use to your videos into amazing live photos in just 4 quick steps. All you need to do is explained in the following steps:
Step 1: download the Application
Download the Video Live Wallpaper application in your Android device from Google Playstore and proceed for its installation and launch.

Step 2: Select Your Video
In the app’s opening screen, click ‘Choose Video’ and grant app permissions to access your device’s media. Browse your video gallery to select a desired video that you wish to convert into a live photo.

Step 3: Edit Your Video
You will now get directed to the app’s editor screen. Here, you can explore your editing creativity to edit the selected video. Once you are happy, click the picture icon at the top right corner.

Step 4: Your Live Wallpaper is Ready!
To set the created live photo as your device screen wallpaper, select ‘Set as Wallpaper’ at the bottom right.

● Key Takeaways from This Episode →
● From cherishing moments to sharing them on social media, live photos can do it all.
● Being an iPhone exclusive utility, you need to create these from videos to enjoy them on other platforms and devices.
● Filmora is the best video to live photo converters, available as an easy, quick and convenient conversion tool.
Looking forward to turn your videos into live photos? Stay tuned to know how!
In this article
01 [How to Save Live Photos as a Video on iPhone/Ipad/Ipod](#Part 1)
02 [How to Turn a Video Into a Live Photo on iOS/Android](#Part 2)
Part 1 How to Save Live Photos as a Video on iPhone/Ipad/Ipod
Live photos are an amazing utility that allow you to save images as short moving snaps. Creating live photos is among the latest spunk of trendsetter stories, whether shared on social media platforms or created and saved just for fun, these definitely sound and look exciting, but that’s just one among the many things you can experiment on live photos.
Creating live photos takes you to a world of exciting features where you can explore your creativity in a number of ways, one of the easiest being turning live photos to videos. This comes handy when you need to share your live photos on platforms that do not have the compatibility to run live photos. If you are an iPhone user and wish to try your hands on experimenting with live photos, see through the following section of this article to learn how to turn live photo into video:
01Save as Video
Step 1: Launch the Photos App
In your iPhone, launch the ‘Photos’ app and navigate to ‘Albums’. All your live photos are present in the ‘Live Photos’ album.
Step 2: Format Selection
In latest versions (iOS 13v and above), you get a direct ‘Save as Video’ option in the ‘Photos’ application. Just click on that, and your live photo will be instantly saved in your iPhone gallery as a video. Here’s how you can use this feature:
● In the ‘Photos’ application, go to the ‘Live Photos’ album to select and open a desired live photo that you wish to convert to a video.
● Click on the ‘Share’ icon.
● Select ‘Save as Video’ from the drop down menu that displays sharing options.
Your created video will be saved in the ‘Photos’ application, next to the live photo you chose to turn into a video.
02iOS Shortcuts
This is a quicker way to save your live photos as videos in your iPhone. To use this feature, you first need to save the ‘Convert LivePhotos to Video’ shortcut in the ‘Shortcuts App’ gallery of your iPhone. You can do this by opening in your iOS internet browser.
Before using the above link, make sure to enable the ‘Allow Untrusted Shortcuts’ feature in your iPhone settings. You can do this as explained below:
● Reach to the ‘Settings’ application of your iPhone.
● Tap on ‘Shortcuts’ from the app’s welcome screen.
● Enable ‘Allow Untrusted Shortcuts’ with a toggle.
Having done that, here’s what you need to follow:
● Open the ‘Shortcuts’ application in your iOS device and tap the ‘Convert LivePhotos to Video’ shortcut.
● The ‘Live Photos’ album of your device opens up. Make a desired selection.
Your converted video gets automatically saved in the ‘Camera Roll’ folder of the ‘Photos’ application. Open the ‘Recents’ album to view your creation.
Part 2 How to Turn a Video Into a Live Photo on iOS/Android
Converting live photos to videos is fine, but going the other way round is all the more exciting and fun! You can even use these converted live photos as live screen wallpapers for your iOS and Android devices. If you are motivated to take up the excitement, look through the following methods to turn video into live photo:
01iOS Devices
Being an iOS user, you can choose among the following tools to convert video to live photo in your iPad, iPod or iPhone:
● Wondershare Filmora
Wondershare Filmora Video Editor is currently leading the software market among converter utilities that cater to various media conversion needs. This one is a free, smart, quick and convenient conversion tool that assures you of a hassle free video to live photo conversion in just a few clicks. What’s more interesting is, you don’t need to limit yourself with sticking to some particular video format, as Filmora conveniently supports almost all common ones.
Wondershare Filmora
Get started easily with Filmora’s powerful performance, intuitive interface, and countless effects!
Try It Free Try It Free Try It Free Learn More >
● IntoLive
This one is a third party application that allows you to convert videos into live photos, quickly and conveniently. This tool works well with devices having iOS 12.0 and later versions. All you have to do is follow the steps mentioned below:
Step 1:
Download the ‘IntoLive’ application from the Apple App Store.
Step 2:
Launch the same on your iOS device and grant the permission to access its ‘Photos’ Album.
Step 3:
In the ‘Videos’ section, choose the desired video that you wish to turn into a live photo.
Step 4:
An editor window will open up. Here, you can edit (cut, crop, trim, etc.) and add desired effects or filters to your selected video. Click on ‘Make’ at the top right when you finish the editing process.
Step 5:
If you have the paid version of the app, you can take up multiple repeats of your live photo; else you can use the free version with no repeats.
Step 6:
Once you are satisfied with the result, click on ‘Save Live Photo’. This will save your created live photo in your device’s gallery.
02VideoToLive
This is a free converter you can choose to turn video into live photo. This is a quite popular tool among iPhone users worldwide and is suitable for iOS versions 11.2 and later. You also have the liberty to share your created live photos on social media with this converter. Take the following steps to begin the conversion process:
Step 1:
Download the application from the Apple App Store and launch it on your iOS device.
Step 2:
Choose a video from your device gallery to convert it into a live photo.
Step 3:
In the video editor screen, crop the video to the preferred section that has to be converted into live photo. You can add video frames to your edited clip from the upper section of the editor screen.
Step 4:
Click on ‘Convert’ at the top right corner to initiate the conversion process.
03Android Devices
Live photos are undoubtedly known to add spark to your cherished moments, but the notch that puts these off with Android devices is that you can enjoy live photos on these devices only as live wallpapers.
Being an iPhone exclusive utility, Android devices lack the flexibility to capture live images. However, you can see them move on being set as live screen wallpapers. A handy alternative to this is converting a turn video into live photo and use it as live wallpaper. Here’s how you can take up the conversion process:
● TurnLive- Live Wallpaper
This one is a convenient, third party tool that lets you turn video into live photo in just a few quick steps. You can either use this application for free, or upgrade to the paid version to enjoy its premium features. To make amazing live photos from videos using this tool, you need to take up the steps given below:
Step 1: App Installation
To begin, visit the Google Playstore in your Android device and download the TurnLive- Live Wallpaper application. Next, you need install and launch the app in your device and accept its terms of service.
Step 2: Select a Video
Once you are done, click on the ‘Live Photo’ icon in the bottom of the app’s opening screen to reach the video selection page. Here, you need to choose ‘Video to Live Wallpaper’ option and grant the required app permissions to access your device’s camera and gallery. Select a desired video from the ones saved in your device and click ‘Done’ at the top right.
Step 3: Edit Your Video
You will now get directed to the app’s editor window, where you need to trim the selected video within a time frame of 1-5 seconds. To do this, select a cover frame within the clip and click ‘Next’. You can now use the video slider at the bottom to trim the clip. Adding suitable video effects and filters is also possible with this tool.
Step 4: It’s Almost Done!
When you finish editing, click ‘Next’ and choose the number of repeats for the created live photo. Wait for the conversion to finish and click on ‘My Wallpapers’ to view your creation.
Step 5: Download Your Live Photo!
Click ‘Download’ and tap ‘Clear’ in the app’s prompt message to remove your device’s current screen wallpaper. Next, allow the app to access your system settings. Once this finishes, tap ‘Clear’ again to download your creation. You will now get directed to a black screen tagged ‘DayTime LWP’. Click on ‘Set Wallpaper’ in this screen to make your live photo, the current wallpaper of your Android device.
● Video Live Wallpaper
This is another free app that you can use to your videos into amazing live photos in just 4 quick steps. All you need to do is explained in the following steps:
Step 1: download the Application
Download the Video Live Wallpaper application in your Android device from Google Playstore and proceed for its installation and launch.
Step 2: Select Your Video
In the app’s opening screen, click ‘Choose Video’ and grant app permissions to access your device’s media. Browse your video gallery to select a desired video that you wish to convert into a live photo.
Step 3: Edit Your Video
You will now get directed to the app’s editor screen. Here, you can explore your editing creativity to edit the selected video. Once you are happy, click the picture icon at the top right corner.
Step 4: Your Live Wallpaper is Ready!
To set the created live photo as your device screen wallpaper, select ‘Set as Wallpaper’ at the bottom right.
● Key Takeaways from This Episode →
● From cherishing moments to sharing them on social media, live photos can do it all.
● Being an iPhone exclusive utility, you need to create these from videos to enjoy them on other platforms and devices.
● Filmora is the best video to live photo converters, available as an easy, quick and convenient conversion tool.
Top 10 Best and Fast Ways to Turn Image Into Gif
[Top 10] Best and Fast Ways to Turn Image into Gif
An easy yet powerful editor
Numerous effects to choose from
Detailed tutorials provided by the official channel
There are in fact ways to turn an image into GIF easily We’ll be showing off a couple of some of the easier ways below, including in-depth tutorials of some of the best methods so that you will no longer have to be troubled.
These tutorials, of course, will focus on teaching you how to create GIF from photos If that’s something you’re interested in, continue reading
In this article
01 [Why GIF?](#Part 1)
02 [How to Add an Image to a GIF?](#Part 2)
Part 1 Why GIF?
Before we move on to the tutorials, let’s do a brief account on GIF files We’ve also answered some of the more common questions regarding using a GIF image maker below for your edification
But, first: Why GIF? Well, it all comes down to what you’re looking for A lot of people use GIF files to create animated icons that they can use for their accounts. Some just genuinely want to create a GIF file that they can share with their friends and families (either for a laugh or something else) GIF files are a convenient vessel for doing this because they have a lot of flexibility and are accepted by most platforms
01Why Gif from My Images Are Blurry?
One of the biggest issues people tend to have when turning an image into GIF is that they come out of the process with a blurry end-product. No one wants that But, how are you supposed to avoid it? Well, it all depends on the tool that you’re using and your initial picture For the former, it’s best to review the upload requirements of your chosen GIF maker to get a better end result. For the latter, it’s best to pick a good, high-quality GIF creator for a better outcome
02There Are Jaggy Strokes Around Gif?
Another issue that you might suffer from while trying to create GIFs from photos is jaggy or raggedy strokes around the GIF when converted. These occur often with GIF makers that support transparency If you find these happening to you, adjust the transparency settings to get rid of the white pixel outline around your converted GIF.
Part 2 How to Add an Image to a GIF?
Now it’s finally time for the tutorials that we promised at the beginning of this article These tutorials will range from online to software solutions — so that you can get a clear idea of what you can expect from all these different GIF makers. To be more specific, we’ll be demonstrating with an online images to GIF converter, how to create animated GIF photoshop, and how to easily turn any image into GIF with the photo GIF creator, Wondershare Filmora Video Editor.
01Image to GIF: How to Turn Photos into Animated GIFs
For our first tutorial, we’re going to be demonstrating how to create GIF from photos with an online photo GIF creator More specifically, we’ll be demonstrating with Loading.IO, which is an online tool that you can use to create animated icons for your profiles or on your video content It comes with several animation options and other settings that you can use to quickly create GIFs from photos
**Step 1: Go to Loading.IO
Of course, we start off this tutorial by opening the GIF maker. In this case, since the tool is hosted online, that’s as easy as opening the link that we’ve provided below It will take you directly to the online GIF creator.
URL: https://loading.io/animation/icon/

**Step 2: Upload Photo
Once on-site, it’s time to upload the photo that you want to turn into a GIF As this is an icon creator, you should pick a photo with the proper parameters
To upload your icon for animating, select the ‘Upload’ button and browse your computer or your Google Drive for the image in question.

**Step 3: Choose animation Style
Next, choose how you want the uploaded photo to be animated Loading.IO offers a couple of animations that you can choose from Including the ‘beat’ animation, which is what we choose for our example

**Step 4: Adjust Settings
This step is technically optional, as there are default settings already prepared if you have no other specifications for your image-turned GIF. But, if you want, you can adjust certain settings for a better outcome
For example, you can speed up the animation with the ‘Speed’ slider. Or, you can increase the number of times the GIF loops by adjusting the ‘Repeat’ slider. Test out a couple of settings to get the best result

**Step 5: Download as GIF
To wrap things up, it’s time to download your finished animation Loading.IO gives several options for this. But, of course, in our case, we choose to ‘Download As: GIF’

02How to Make an Animated GIF in Photoshop [Tutorial]
For the next tutorial, we’ll be showing you how to use Photoshop to create and edit an animated GIF This process is fairly lengthy and is not recommended for beginners. But, it is a very professional method of creating an animated GIF — one that will allow you to control every step of the process (which may be exactly what you want)
**Step 1: Import Images into an Image Stack
First, starting on a new product, upload the images that you want to turn into a GIF into a photoshop ‘Image Stack’. This can be done by clicking the ‘File’ tab and selecting the ‘Scripts > Load Files into Stack…’ option
Afterward, a pop-up window will appear where you will be prompted to browse your computer for the aforementioned images Click ‘OK’ when done

**Step 2: Organize Layers
Check the ‘Layers’ panel for the images that you uploaded and organize them based on how you want them to appear for your animated GIF

**Step 3: (Optional) Import Video
If you want to work on a video to turn into a GIF instead, you can do such by selecting the ‘File’ tab and clicking on the ‘Import > Video Frames to Layers…’ option. This will get you to the same place shown in Step 2
Note: Just be careful that you do not transfer an image that is too long Photoshop may not be able to properly break it down, if so.

**Step 4: Open Timeline Then Create Frame Animation
Next, in order to start working on your animation, open the Timeline Window This can be done by clicking the ‘Window’ tab and selecting ‘Timeline’
With the ‘Timeline’ Window now open, select the ‘Create Frame Animation’ option to begin working

**Step 5: Make Frame from Layers
In order to transfer your uploaded images from the ‘Layers’ panel to your timeline, select the ‘Menu’ option on the top-right hand corner of the ‘Timeline’ window and select the ‘Make Frames From Layers’ option

**Step 6: Preview Animation and Adjust as Needed
To preview your animation, click the ‘Play’ button This is the best time to check that your frames have been organized correctly If they are not, you can adjust them by dragging and dropping them on the timeline.
OR, you can use the ‘Reverse Frames’ option if your animation has been completely flipped around

**Step 7: Create an Animation Loop
In order to be a proper looped GIF, the animation should repeat endlessly You can make sure of this by changing the ‘Repeat’ option to ‘Forever’ (as is shown in the image below).

**Step 8: Export Finished Animation to Gif
In order to finish turning your image into GIF, you’ll need to export it in the proper format This is possible by selecting the ‘File’ tab and then clicking the ‘Export > Save for Web (Legacy)…’ option
A pop-up window should appear where you can control export settings Do so in order to ensure that you have the best outcome

03How To Make an Animated GIF in Wondershare Filmora Video Editor (Fast & Easy)
For Win 7 or later (64-bit)
For macOS 10.12 or later
For our last tutorial, we’ll be showing you how to make an animated GIF with the use of Wondershare Wondershare Filmora Video Editor . Filmora is a video editor, one that is used by professionals all over to produce high-quality content And, of course, as a video editor, it works just as well as a GIF maker. One that you can use to create images into a GIF easily
**Step 1: Launch Filmora
First, download and install Filmora If you want to follow along with this demonstration, you can Wondershare offers a FREE trial where you can test out all of the software’s functions before making a commitment

Step 2: Upload Video to Turn into GIF
For this next step, we do something akin to what we did earlier with Photoshop. And that is to upload images or a video to fit into a timeline
This process is started by first uploading images, which you can do by clicking the ‘File’ tab and selecting the ‘Import Media > Import Media Files’ option

**Step 3: Drag Media to Timeline
With Filmora, the ‘Timeline’ window is already open Also, you won’t have to do anything complicated to get your media onto the said timeline. Just drag and drop it from the Media library (as is shown in the image below).

**Step 4: Edit or Adjust GIF
Before moving forward, you should take this chance to make adjustments to the media that you uploaded into your timeline There are many things that you can do at this stage so feel free to experiment
For our example, we cut down the video that we uploaded by using the ‘Trim’ option (which you can find by right-clicking on video media).

**Step 5: Export into GIF
Finally, to finish us off, we export our finished GIF This can be done by selecting the ‘Export’ tab and then clicking the ‘Create Video’ option A pop-up window will appear where you can adjust export settings

● Key Takeaways from This Episode →
● GIFs are fun and easy-to-share content It’s accepted by most platforms and can even be used to create professional, animated icons to be added to video content
● The process of turning an image into a GIF can be a bit tricky. But, don’t worry, so long as you start with high-quality media and use a reliable Photo-GIF Creator, then you should be fine
● If you’re struggling with turning your images into GIFs, check out one of the tutorials that we’ve offered We specifically chose the three GIF creators that we demonstrated to offer multiple methods that you can choose from
There are in fact ways to turn an image into GIF easily We’ll be showing off a couple of some of the easier ways below, including in-depth tutorials of some of the best methods so that you will no longer have to be troubled.
These tutorials, of course, will focus on teaching you how to create GIF from photos If that’s something you’re interested in, continue reading
In this article
01 [Why GIF?](#Part 1)
02 [How to Add an Image to a GIF?](#Part 2)
Part 1 Why GIF?
Before we move on to the tutorials, let’s do a brief account on GIF files We’ve also answered some of the more common questions regarding using a GIF image maker below for your edification
But, first: Why GIF? Well, it all comes down to what you’re looking for A lot of people use GIF files to create animated icons that they can use for their accounts. Some just genuinely want to create a GIF file that they can share with their friends and families (either for a laugh or something else) GIF files are a convenient vessel for doing this because they have a lot of flexibility and are accepted by most platforms
01Why Gif from My Images Are Blurry?
One of the biggest issues people tend to have when turning an image into GIF is that they come out of the process with a blurry end-product. No one wants that But, how are you supposed to avoid it? Well, it all depends on the tool that you’re using and your initial picture For the former, it’s best to review the upload requirements of your chosen GIF maker to get a better end result. For the latter, it’s best to pick a good, high-quality GIF creator for a better outcome
02There Are Jaggy Strokes Around Gif?
Another issue that you might suffer from while trying to create GIFs from photos is jaggy or raggedy strokes around the GIF when converted. These occur often with GIF makers that support transparency If you find these happening to you, adjust the transparency settings to get rid of the white pixel outline around your converted GIF.
Part 2 How to Add an Image to a GIF?
Now it’s finally time for the tutorials that we promised at the beginning of this article These tutorials will range from online to software solutions — so that you can get a clear idea of what you can expect from all these different GIF makers. To be more specific, we’ll be demonstrating with an online images to GIF converter, how to create animated GIF photoshop, and how to easily turn any image into GIF with the photo GIF creator, Wondershare Filmora Video Editor.
01Image to GIF: How to Turn Photos into Animated GIFs
For our first tutorial, we’re going to be demonstrating how to create GIF from photos with an online photo GIF creator More specifically, we’ll be demonstrating with Loading.IO, which is an online tool that you can use to create animated icons for your profiles or on your video content It comes with several animation options and other settings that you can use to quickly create GIFs from photos
**Step 1: Go to Loading.IO
Of course, we start off this tutorial by opening the GIF maker. In this case, since the tool is hosted online, that’s as easy as opening the link that we’ve provided below It will take you directly to the online GIF creator.
URL: https://loading.io/animation/icon/
**Step 2: Upload Photo
Once on-site, it’s time to upload the photo that you want to turn into a GIF As this is an icon creator, you should pick a photo with the proper parameters
To upload your icon for animating, select the ‘Upload’ button and browse your computer or your Google Drive for the image in question.
**Step 3: Choose animation Style
Next, choose how you want the uploaded photo to be animated Loading.IO offers a couple of animations that you can choose from Including the ‘beat’ animation, which is what we choose for our example
**Step 4: Adjust Settings
This step is technically optional, as there are default settings already prepared if you have no other specifications for your image-turned GIF. But, if you want, you can adjust certain settings for a better outcome
For example, you can speed up the animation with the ‘Speed’ slider. Or, you can increase the number of times the GIF loops by adjusting the ‘Repeat’ slider. Test out a couple of settings to get the best result
**Step 5: Download as GIF
To wrap things up, it’s time to download your finished animation Loading.IO gives several options for this. But, of course, in our case, we choose to ‘Download As: GIF’
02How to Make an Animated GIF in Photoshop [Tutorial]
For the next tutorial, we’ll be showing you how to use Photoshop to create and edit an animated GIF This process is fairly lengthy and is not recommended for beginners. But, it is a very professional method of creating an animated GIF — one that will allow you to control every step of the process (which may be exactly what you want)
**Step 1: Import Images into an Image Stack
First, starting on a new product, upload the images that you want to turn into a GIF into a photoshop ‘Image Stack’. This can be done by clicking the ‘File’ tab and selecting the ‘Scripts > Load Files into Stack…’ option
Afterward, a pop-up window will appear where you will be prompted to browse your computer for the aforementioned images Click ‘OK’ when done
**Step 2: Organize Layers
Check the ‘Layers’ panel for the images that you uploaded and organize them based on how you want them to appear for your animated GIF
**Step 3: (Optional) Import Video
If you want to work on a video to turn into a GIF instead, you can do such by selecting the ‘File’ tab and clicking on the ‘Import > Video Frames to Layers…’ option. This will get you to the same place shown in Step 2
Note: Just be careful that you do not transfer an image that is too long Photoshop may not be able to properly break it down, if so.
**Step 4: Open Timeline Then Create Frame Animation
Next, in order to start working on your animation, open the Timeline Window This can be done by clicking the ‘Window’ tab and selecting ‘Timeline’
With the ‘Timeline’ Window now open, select the ‘Create Frame Animation’ option to begin working
**Step 5: Make Frame from Layers
In order to transfer your uploaded images from the ‘Layers’ panel to your timeline, select the ‘Menu’ option on the top-right hand corner of the ‘Timeline’ window and select the ‘Make Frames From Layers’ option
**Step 6: Preview Animation and Adjust as Needed
To preview your animation, click the ‘Play’ button This is the best time to check that your frames have been organized correctly If they are not, you can adjust them by dragging and dropping them on the timeline.
OR, you can use the ‘Reverse Frames’ option if your animation has been completely flipped around
**Step 7: Create an Animation Loop
In order to be a proper looped GIF, the animation should repeat endlessly You can make sure of this by changing the ‘Repeat’ option to ‘Forever’ (as is shown in the image below).
**Step 8: Export Finished Animation to Gif
In order to finish turning your image into GIF, you’ll need to export it in the proper format This is possible by selecting the ‘File’ tab and then clicking the ‘Export > Save for Web (Legacy)…’ option
A pop-up window should appear where you can control export settings Do so in order to ensure that you have the best outcome
03How To Make an Animated GIF in Wondershare Filmora Video Editor (Fast & Easy)
For Win 7 or later (64-bit)
For macOS 10.12 or later
For our last tutorial, we’ll be showing you how to make an animated GIF with the use of Wondershare Wondershare Filmora Video Editor . Filmora is a video editor, one that is used by professionals all over to produce high-quality content And, of course, as a video editor, it works just as well as a GIF maker. One that you can use to create images into a GIF easily
**Step 1: Launch Filmora
First, download and install Filmora If you want to follow along with this demonstration, you can Wondershare offers a FREE trial where you can test out all of the software’s functions before making a commitment
Step 2: Upload Video to Turn into GIF
For this next step, we do something akin to what we did earlier with Photoshop. And that is to upload images or a video to fit into a timeline
This process is started by first uploading images, which you can do by clicking the ‘File’ tab and selecting the ‘Import Media > Import Media Files’ option
**Step 3: Drag Media to Timeline
With Filmora, the ‘Timeline’ window is already open Also, you won’t have to do anything complicated to get your media onto the said timeline. Just drag and drop it from the Media library (as is shown in the image below).
**Step 4: Edit or Adjust GIF
Before moving forward, you should take this chance to make adjustments to the media that you uploaded into your timeline There are many things that you can do at this stage so feel free to experiment
For our example, we cut down the video that we uploaded by using the ‘Trim’ option (which you can find by right-clicking on video media).
**Step 5: Export into GIF
Finally, to finish us off, we export our finished GIF This can be done by selecting the ‘Export’ tab and then clicking the ‘Create Video’ option A pop-up window will appear where you can adjust export settings
● Key Takeaways from This Episode →
● GIFs are fun and easy-to-share content It’s accepted by most platforms and can even be used to create professional, animated icons to be added to video content
● The process of turning an image into a GIF can be a bit tricky. But, don’t worry, so long as you start with high-quality media and use a reliable Photo-GIF Creator, then you should be fine
● If you’re struggling with turning your images into GIFs, check out one of the tutorials that we’ve offered We specifically chose the three GIF creators that we demonstrated to offer multiple methods that you can choose from
Learn All About Lip-Syncing in Animation
Learn all about Lip-Syncing in Animation
An easy yet powerful editor
Numerous effects to choose from
Detailed tutorials provided by the official channel
Lip syncing is one of the important parts of animations that need to be done perfectly. As children we have all enjoyed the special way in which Donald Duck or Mickey Mouse used to talk in cartoons, this is all because of the perfect lip-syncing.

Lip-sync animation tutorial are available that can assist you with the task.
In this article
01 [What is lip-syncing and its importance in animations?](#Part 1)
02 [Key factors to consider while lip-syncing in animations.](#Part 2)
03 [Best software for lip-syncing animations.](#Part 3)
04 [Best all-in-one video editing software for creating impressive animations.](#Part 4)
Part 1 What is Lip-syncing and Its Importance in Animations
In the simplest terms, lip-syncing can be termed as the process and way in which the sound is synchronized to the characters in animation. It is lip-syncing which brings life to the characters and makes them look talking. The process of lip-syncing in animations includes the dialogues and the mouth charts. The dialogues are broken into the phonetic syllables and the frames required for these syllables are then accessed.
Animations are moving and talking images and liveliness come from the dialogues that they speak. So, to make these talks appear real, flawless lip-syncing is very important.
Part 2 Key Factors to Consider While Lip-syncing in Animations
To make the lip-syncing in your animation look perfect several factors need to be taken care of. Some of these important ones are enlisted below.
01 Perfect Match of the Keyframes
The keyframes for the shapes of the words phrase by phrase needs to be perfect to make it look right. The right lip sync will have the correct timings from the mouth open to the mouth close.
02 Adding Body Language
To make the characters in your animations look real and lively, adding gestures and body language will play a huge role. Moreover, lip-syncing along with facial expressions will add to the overall richness of the animations.
03 Watch Yourself or Record Sample Videos
To get the correct lip-syncing for your animations, you can first try and practice by using a mirror or recording some trial videos. In these videos, you can speak and observe the jaw motion.
04 Use Blending
The technique of blending can also be used where the focus is on the most important shape of the mouth rather than each syllable. These shapes can then be blended and used in different ways and combinations.
05 Emphasize Eyes
Eyes need special focus as they can be used for expressing several emotions. Especially during the close-up shots in animations, a person looks at the eyes before the rest of the face.
06 Use the Apt Voice
No matter how perfectly the lip-syncing is done, it will not look good if the voice does not match the characters in your animations. So, make sure to select the voice that matches the looks and the personality of your characters.
Part 3 Best Software for Lip-syncing Animations
Lip sync in animations has become an easier and hassle-free task thanks to the advanced technology and several software and programs available. These 2D and 3D animation-supported tools allow syncing the mouth of the animated character with the dialogues and audio tracks. A few widely used tools for the task are enlisted below.
01 Anime Studio
This is a Windows and Mac-based professional software that supports multiple advanced functions like bone-rigging, automatic image tracing, integrated lip-synching, motion tracking, 3D shape design, character wizard, and many more. Using the vector-based tools of the software, you can add drawings and images for creating customized characters. There is a built-in character wizard that can be used for quick drawing and rigging the characters from the starting. Anime Studio allows recording the sound clip and then these can be synced to the animated characters. Several pre-set props, scenes, videos, stock audio, and characters are also available to choose from.

02 DAZ Studio
This is free-to-use software that can create impressive animations using multiple advanced features. The simple interface and functioning of the software make it apt even for users who have no prior experience in animations. The lip-sync feature of the software can be used to add audio to the created animations. Additional functions include morphing, adjusting different camera angles, plug-ins with advanced capabilities, and more.

03 Crazy Talk
To create impressive animations and add lip-syncing this is one of the popularly used tools. Quick to download, the software allows adding images and pictures to the tool, and then the head, mouth, and eye movement can be added along with lip-synced audio for creating impressive animations. The built-in timeline of the software offers you complete control over the animations, audio, and other parameters. Detailed customization options are supported including the teeth in the mouth of the character. The software is available for Windows and Mac systems.

04 Toon Boom Studio
To help you create rich animations for movies, games, learning, social media sites and any other purpose this is an apt tool to use. The software has a basic version for beginners while an advanced version for professionals. You can import media files in an array of formats like AI, JPEG, TGA, GIF, and others to create animations of your choice. Audio files in WAV, AIFF, and MP3 formats can be added to the created animations and the lip-sync analyzer tool can be used for that perfect syncing. Additional features include zoom-in, zoom-out, skeleton effect, support to the 3D background, multiple formats for exporting files, and more.

05 Crazy Talk Animator
This 2D animation tool can be used for creating rich animations by adding motion and different effects to your images. You can also create landscapes and scenes to further enhance the overall clip. Lip-sync to the animations is supported by the tool and you can even create marks for facial expression and use them to morph. Several tutorials and web resources are available for a better understanding of the tool and its functioning.

Adobe is also a good tool for all types of animation requirements and you can also check the adobe animate lip sync tutorial for your lip-syncing task.
Key Takeaways from This Episode
● Lip-syncing is an important and inevitable part of animations. Lip-syncing brings richness and liveliness to the clips.
● An array of tools and software are available that can help you effortlessly lip-sync animations.
● or all types of video editing needs and for creating animations, Wondershare Filmora works as an excellent all-in-one software.
Lip syncing is one of the important parts of animations that need to be done perfectly. As children we have all enjoyed the special way in which Donald Duck or Mickey Mouse used to talk in cartoons, this is all because of the perfect lip-syncing.
Lip-sync animation tutorial are available that can assist you with the task.
In this article
01 [What is lip-syncing and its importance in animations?](#Part 1)
02 [Key factors to consider while lip-syncing in animations.](#Part 2)
03 [Best software for lip-syncing animations.](#Part 3)
04 [Best all-in-one video editing software for creating impressive animations.](#Part 4)
Part 1 What is Lip-syncing and Its Importance in Animations
In the simplest terms, lip-syncing can be termed as the process and way in which the sound is synchronized to the characters in animation. It is lip-syncing which brings life to the characters and makes them look talking. The process of lip-syncing in animations includes the dialogues and the mouth charts. The dialogues are broken into the phonetic syllables and the frames required for these syllables are then accessed.
Animations are moving and talking images and liveliness come from the dialogues that they speak. So, to make these talks appear real, flawless lip-syncing is very important.
Part 2 Key Factors to Consider While Lip-syncing in Animations
To make the lip-syncing in your animation look perfect several factors need to be taken care of. Some of these important ones are enlisted below.
01 Perfect Match of the Keyframes
The keyframes for the shapes of the words phrase by phrase needs to be perfect to make it look right. The right lip sync will have the correct timings from the mouth open to the mouth close.
02 Adding Body Language
To make the characters in your animations look real and lively, adding gestures and body language will play a huge role. Moreover, lip-syncing along with facial expressions will add to the overall richness of the animations.
03 Watch Yourself or Record Sample Videos
To get the correct lip-syncing for your animations, you can first try and practice by using a mirror or recording some trial videos. In these videos, you can speak and observe the jaw motion.
04 Use Blending
The technique of blending can also be used where the focus is on the most important shape of the mouth rather than each syllable. These shapes can then be blended and used in different ways and combinations.
05 Emphasize Eyes
Eyes need special focus as they can be used for expressing several emotions. Especially during the close-up shots in animations, a person looks at the eyes before the rest of the face.
06 Use the Apt Voice
No matter how perfectly the lip-syncing is done, it will not look good if the voice does not match the characters in your animations. So, make sure to select the voice that matches the looks and the personality of your characters.
Part 3 Best Software for Lip-syncing Animations
Lip sync in animations has become an easier and hassle-free task thanks to the advanced technology and several software and programs available. These 2D and 3D animation-supported tools allow syncing the mouth of the animated character with the dialogues and audio tracks. A few widely used tools for the task are enlisted below.
01 Anime Studio
This is a Windows and Mac-based professional software that supports multiple advanced functions like bone-rigging, automatic image tracing, integrated lip-synching, motion tracking, 3D shape design, character wizard, and many more. Using the vector-based tools of the software, you can add drawings and images for creating customized characters. There is a built-in character wizard that can be used for quick drawing and rigging the characters from the starting. Anime Studio allows recording the sound clip and then these can be synced to the animated characters. Several pre-set props, scenes, videos, stock audio, and characters are also available to choose from.
02 DAZ Studio
This is free-to-use software that can create impressive animations using multiple advanced features. The simple interface and functioning of the software make it apt even for users who have no prior experience in animations. The lip-sync feature of the software can be used to add audio to the created animations. Additional functions include morphing, adjusting different camera angles, plug-ins with advanced capabilities, and more.
03 Crazy Talk
To create impressive animations and add lip-syncing this is one of the popularly used tools. Quick to download, the software allows adding images and pictures to the tool, and then the head, mouth, and eye movement can be added along with lip-synced audio for creating impressive animations. The built-in timeline of the software offers you complete control over the animations, audio, and other parameters. Detailed customization options are supported including the teeth in the mouth of the character. The software is available for Windows and Mac systems.
04 Toon Boom Studio
To help you create rich animations for movies, games, learning, social media sites and any other purpose this is an apt tool to use. The software has a basic version for beginners while an advanced version for professionals. You can import media files in an array of formats like AI, JPEG, TGA, GIF, and others to create animations of your choice. Audio files in WAV, AIFF, and MP3 formats can be added to the created animations and the lip-sync analyzer tool can be used for that perfect syncing. Additional features include zoom-in, zoom-out, skeleton effect, support to the 3D background, multiple formats for exporting files, and more.
05 Crazy Talk Animator
This 2D animation tool can be used for creating rich animations by adding motion and different effects to your images. You can also create landscapes and scenes to further enhance the overall clip. Lip-sync to the animations is supported by the tool and you can even create marks for facial expression and use them to morph. Several tutorials and web resources are available for a better understanding of the tool and its functioning.
Adobe is also a good tool for all types of animation requirements and you can also check the adobe animate lip sync tutorial for your lip-syncing task.
Key Takeaways from This Episode
● Lip-syncing is an important and inevitable part of animations. Lip-syncing brings richness and liveliness to the clips.
● An array of tools and software are available that can help you effortlessly lip-sync animations.
● or all types of video editing needs and for creating animations, Wondershare Filmora works as an excellent all-in-one software.
12 Top Stop Motion Studios Worth Recommending
12 Best Stop Motion Studios Worth Recommending
An easy yet powerful editor
Numerous effects to choose from
Detailed tutorials provided by the official channel
Since people are getting more aware of innovative and creative ideas, the tools like stop motion studio are also emerging. This tool or software, or you can call an app, is mainly concerned with animation and is recognized to create very magical outputs.
This guide will teach what to consider about the Stop Motion Studio, how it works, and a deep look at animation movies to realize the magic of such tools on a broader scale. So, let’s start the article on stop motion studio Pro without any further ado.
In this article
01 [What is Stop Motion Studio and How Does It Work?](#Part 1)
02 [How to Use Stop Motion Studio on PC?](#Part 2)
03 [A Roster of 12 Best Stop-Motion Companies](#Part 3)
04 [How To Make A Stop Motion Video Super Easily?](#Part 4)
Part 1 What is Stop Motion Studio and How Does It Work?
Like the name, stop motion studio creates compelling stop-action movies. It is a terrific app with a whole set of unique features used mainly to turn images and audio into videos in an exciting way that is a fun process for everyone. The app is for Android and iOS. The app is a breeze to use with the camera since it’s operable through smartphones.
However, the students are highly reputed and engaged with this app. They are known to create educational videos over the platform, useful for presentations, etc. Yet, the benefits can also apply to teachers, and in fact, everyone out there.
Now, it’s time to look at the working procedure of stop motion studio pro. To begin with, you have to download the app over your operating system primarily. You can start the project right away after the installation. It’s optional to Sign Up on the app, but you will need it in the future to unlock certain features. The app consists of a simple user interface with a big plus icon that will directly take you to the capture and editing panel. After clicking the picture, a video will be available, which you can play or edit via features such as adding audio, adding effects, cutting sections, and more.
Once you finish the project, you can export and share stop motion studio on Android and other devices.
Part 2 How to Use Stop Motion Studio on PC?
Now, let’s look at the guide on using stop motion studio pro on a PC that generally uses stop motion studio on Windows or stop motion studio on Mac.
We can use stop motion studio online on both the Windows and Mac operating systems but given below is a guide of using the tool on Mac OS.
1. Set up your equipment
To get started, connect your DSLR camera with the PC.
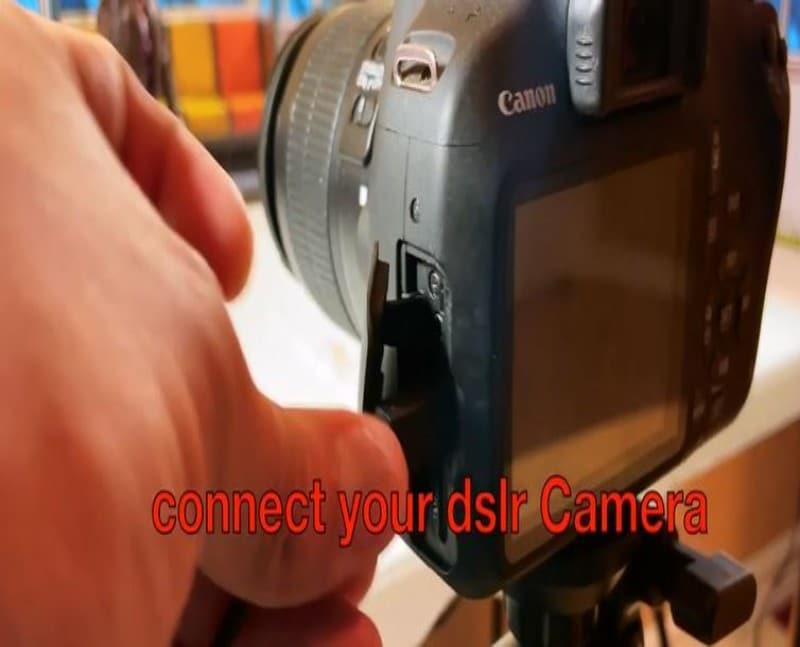
2. Open Stop Motion software
Now, download, and launch the Stop Motion Studio for Mac. Open the software and name your project after double-clicking the New Movie tab.
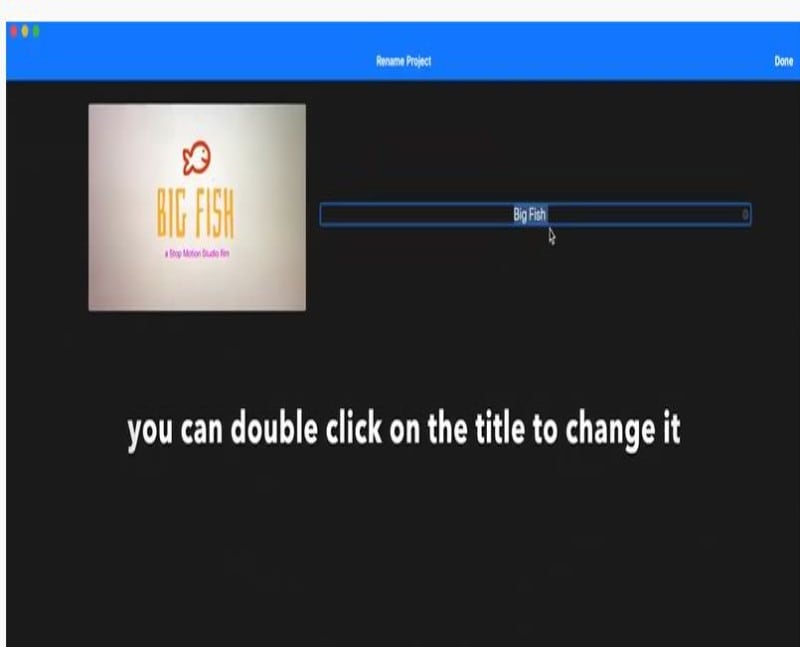
Here, you can organize your projects by name, date, or duration.
3. Connect the camera to your software
To connect the DSLR camera to the software, click the lines icon and check for the name of your camera, which should display here.
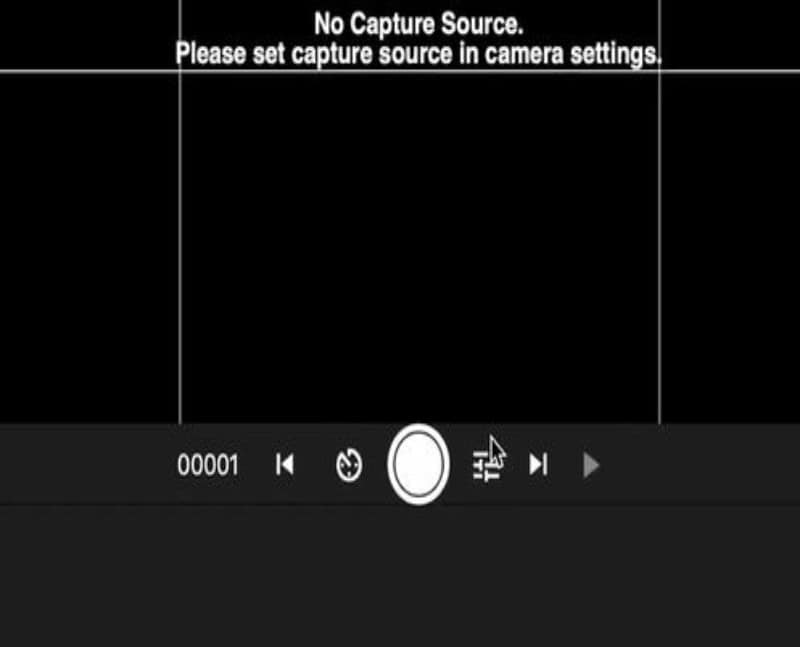
After you click your camera option, the camera will get connected.
4. Proceed with the basic settings.
As shown below, our setting will take this dot three steps back.
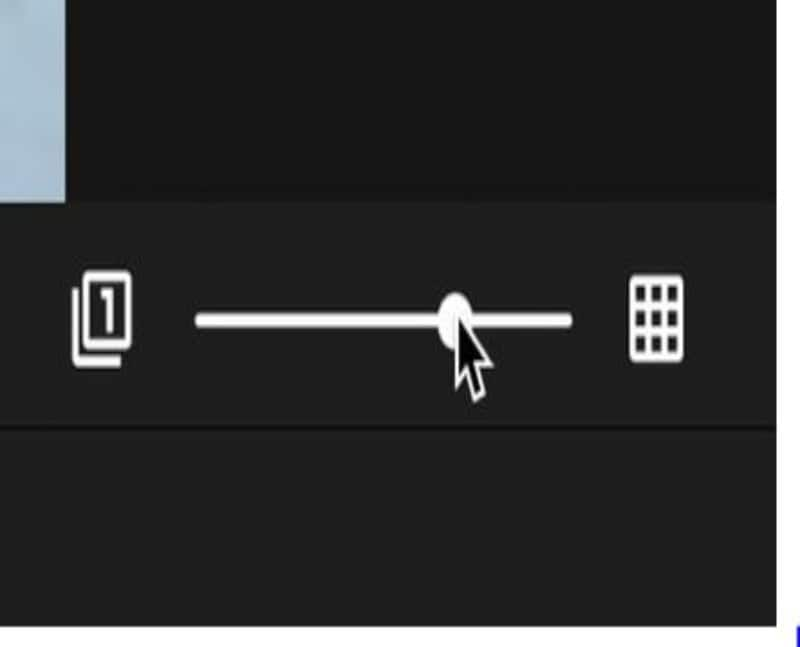
5. Capture images
The big red button will capture the shots, and there’s an option along its side to time the shots.
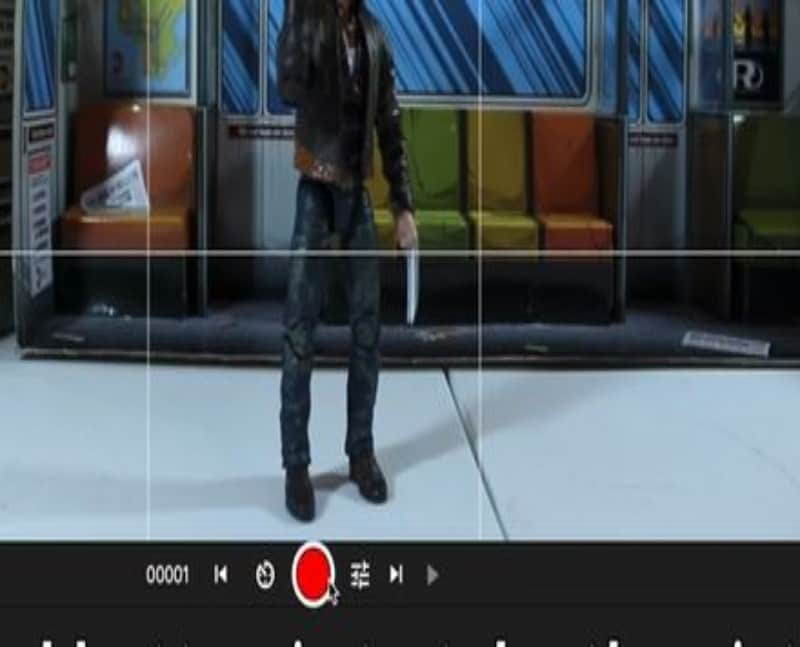
Here, you can also explore settings to proceed with. For example, you can change the texture, ISO, shutter speed, aperture, green screen, blue screen, etc. You can also rotate or flip the images from here. And, there are lots for the list goes on.
6. Start shooting.
It would help if you pressed Enter key on your PC to start shooting the images. Then, after clicking pictures, you can click the + icon and get features as follows.
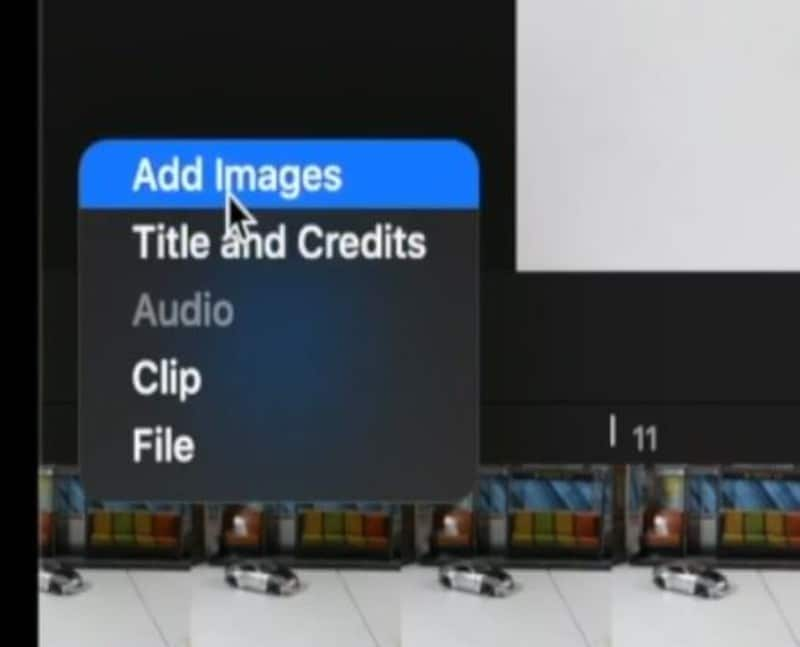
You can record your audio and change the frame rate of images as per your requirements.
7. Export project
Finally, hit the Export icon on the top-right corner to export the project and get the following features.
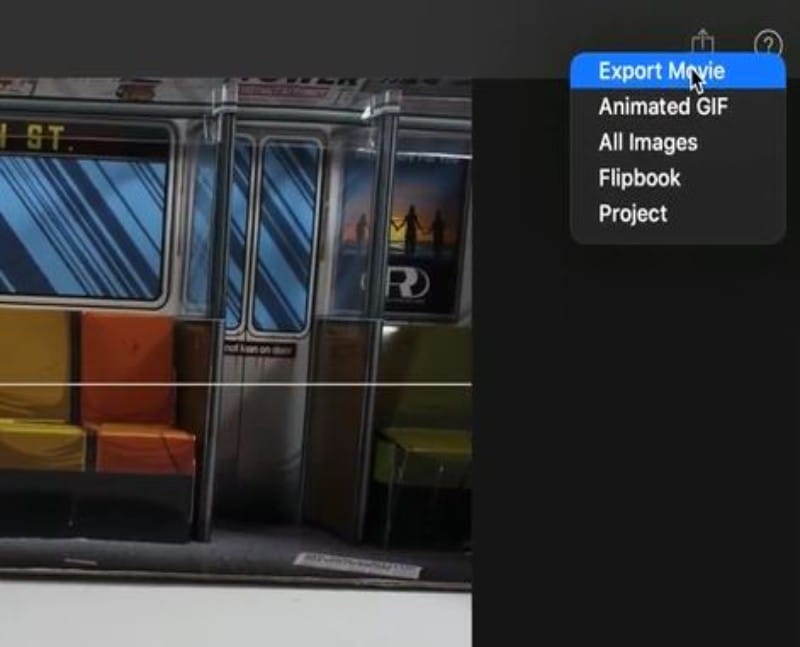
So, wasn’t it an easy stop motion studio on PC?
Part 3 A Roster of Best Stop-Motion Studio Movies
Since the start of the first half of the 20th century, the animation industry has grown drastically. Understanding market needs, a highly aware knowledge base, and consistent innovative ideas allow such movies to grow exponentially. And, it’s our luck to have such companies in our era that are a great source of entertainment in this chaotic generation.
This section will look at the top 12 stop-motion animation studio movies by the recognized stop motion animation companies with their critical specs, including the ideal vital specs. So, let’s begin with the magic below.
01A Town Called Panic (2009)

Rotten Tomatoes Score: 81%
Critics Consensus: A Town called Panic is an endlessly creative, raucous, animated romp with an adult and quirky sense of humor.
Starring: Jeanne Balibar, Stephane Aubier, Nicolas Buyer, Veronique Dumont
Directed by: Vincent Patar, Stephane Aubier
Synopsis: The film revolves around Indian (Bruce Ellison) and Cowboy (Stephane Aubier), where they plan to create a barbeque pit for their friend’s birthday, Horse (Vincent Patar). The accidental purchase delivery of million bricks than the intended deconstructs their house—also, the attempts to rebuild drop when their walls get continually stolen. The trio then travels to the Earth’s center with a determination to track down the thieves. They also discovered the culprits, who are a group of mad scientists.
022 - Consuming Spirits (2012)
Rotten Tomatoes Score: 89%
Critics Consensus: Not available yet.
Starring: Nancy Andrews, Chris Harris, Robert Levy, Chris Sullivan
Directed by: Chris Sullivan
Synopsis: Three residents (Chris Sullivan, Nancy Andrews, Robert Levy) of a small town live interconnected, sad lives.
03The Boxtrolls (2014)
Rotten Tomatoes Score: 81%
Critics Consensus: The Boxtrolls is a visual splendor and enough offbeat wit, yet it’s far from Laika’s best offerings. It still provides a healthy dose of all-age entertainment.
Starring: Elle Fanning, Ben Kingsley, Toni Collete, Isaac Hempstead-Wright
Directed by: Anthony Stacchi, Graham Annable
Synopsis: The movie leads to saving the Box trolley from extermination. It began with the Eggs (Isaac Hempstead-Wright), an orphan living under the community of mischievous and quirky creatures. These creatures have inhabited a cavern below the city of Cheesebridge. Eggs decided to go above the ground when villainous Archibald Snatcher (Ben Kingsley) made a plan to get rid of these pretty harmless beings. When Eggs went above the ground, he met and befriended feisty Winnifred (Elle Fanning). Together, they made a daring plan to save the Boxtrolls.
04The Year Without a Santa Claus (2006)
Rotten Tomatoes Score: 90%
Critics Consensus: No worries and fear. Mrs. Claus spreads all her cheers in the movie, presenting a holiday classic full of unforgettable characters and songs that are true to the Christmas spirit.
Starring: Chris Jattan, Ethan Suplee, Eddie Griffin, John Goodman
Directed by: Ron Underwood
Synopsis: Here, two elves try to save Christmas after John Goodman, a disgruntled Saint Nick, decided to take the year off.
05Fantastic Planet (1930)
Rotten Tomatoes Score: 91%
Critics Consensus: The movie is an animated epic that transforms into a surreal, fantastic, lovely, and graceful.
Starring: Mark Gruner, Marvin Miller, Hal Smith, Barry Bostwick
Directed by: Rene Laloux
Synopsis: The animated tale displays a relationship between small human-like Oms and their large creatures, blue-skinned oppressors, the Draags, also the rulers of planet Ygam. All thanks to the young female Draag, when an Om boy gets educated, the hierarchy of Draags keeping the Oms as illiterate pets have also shifted. This weakens the Draags control over Oms rebellion. So will they now co-exist or destroy each other?
06The Burton’s Corpse Bride (2005)
Rotten Tomatoes Score: 84%
Critics Consensus: The Burton’s Corpse Bride is a visually imaginative, bitter-sweet, whimsical macabre movie expected from Tim Burton.
Starring: Helena Bonham Carter, Johny Depp, Tracey Ullman, Emily Watson
Directed by: Tim Burton, Mike Johnson
Synopsis: A marriage was arranged for Victor and Victoria by their families. Victor is pretty nervous though they both like each other. Victor went to practice the lines to utter to Victoria in the forest where his intended arm of Victoria as a tree’s branch led him to the land of the dead. The land belongs to Emily, a dead creature, and now she wants to marry Victor. Victor must get rid of her and go to Victoria before marrying a villainous Barkis Bittern.
07The Pirates. Band of Misfits (2012)
Rotten Tomatoes Score: 86%
Critics Consensus: The Pirates showcases some skillfully animated fares with modern cinema’s smartness. However, the movie may not appropriately scale the customary delights of Aardman.
Starring: Martin Freeman, Imelda Staunton, David Tennant, Hugh Grant.
Directed by: Peter Lord
Synopsis: An enthusiastic pirate captain sails the high seas accompanied by his ragtag crew and dreams of becoming the year’s pirate by beating his rivals. The journey takes him through the exotic shores of Blood Island to the foggy streets of Victorian London. They also battle with a clever queen along the way and join forces with a scientist named Charles Darwin.
08James And The Giant Peach (1996)

Rotten Tomatoes Score: 91%
Critics Consensus: The dynamic and arresting visuals, light as air story, and offbeat details make this stop motion studio movie solid family entertainment.
Starring: Joanna Lumley, Paul Terry, Miriam Margolyes, Pete Postlethwaite
Directed by: Henry Selick
Synopsis: This children’s tale featuring live-action and stop motion animation takes through the adventures of James, an orphaned young British boy. He is forced to live with cruel aunts where he finds a way to hide his existence when he discovers a giant peach. He rolls it into the sea and sails for New York accompanied by friendly insects.
09Missing Link (2019)
Rotten Tomatoes Score: 88%
Critics Consensus: It’s a beautifully animated triumph for Laika with plenty of heart, lots of humor, and even a little food thought.
Starring: Zach Galifianakis, Zoe Saldana, Hugh Jackman, David Walliams
Directed by: Chris Butler
Synopsis: Mr. Link, an 8-feet furry creature after being tired of living a solitary life in the Pacific Northwest, recruits a fearless explorer to guide him on a journey of the fabled valley of Shangri-La. The trio encounters their share of peril as they travel to far extremities of the world and adventurer Adelina Fortnight. They learn the family that one always expects in their companionship through all this.
10Mary and Max (2009)
Rotten Tomatoes Score: 95%
Critics Consensus: Mary and Max is a startlingly inventive and lovingly crafted animation whose technical craft equals emotional resonance.
Starring: Philip Seymour Hoffman, Eric Bana, Barry Humphries, Toni Collette
Directed by: Adam Elliot
Synopsis: A Jewish man and a lonely Australian girl developed an unlikely friendship in New York through letters.
11The Little Prince (2015)
Rotten Tomatoes Score: 93%
Critics Consensus: Again, a faithful and beautiful made stop animation studio movie that sticks to the spirit of its classic source material. It is a family-friendly treat that throws thrilling visuals with a satisfying story.
Starring: Rachel McAdams, James Franco, Marion Cottilard, Jeff Bridges
Directed by: Mark Osborne
Synopsis: The Aviator introduces a girl to a world where she learns that human connections matter the most and where she rediscovered her childhood as well. It’s only with the heart that one can see rightly and can be seen as essential what is invisible to the eyes otherwise.
12Alice (1989)
Rotten Tomatoes Score: 95%
Critics Consensus: No consensus yet.
Starring: Kristyna Kohoutova
Directed by: Jan Svankmajeru
Synopsis: In a classic children’s book by Lewis Carroll, Alice follows her stuffed rabbit via a portal inside her dresser to be whisked away to Wonderland. While the Mad Hatter, White Rabbit, and Cheshire Cat are still present, the bizarre characters and familiar magical world have undergone an unsettling transformation.
Here, we end our discussion on the best picks by stop motion animation companies. Of course, you can always refer to such fantastic pieces to take inspiration from.
Part 4 How To Make A Stop Motion Video Super Easily?
Once done with the production stage, it is time to transition to post-production. Here, your stop motion animation will get its final posture. You need to place all the images you wish to include in the video’s final cut into a folder and arrange them the same way as they should appear in the video. Even though Wondershare Filmora Video Editor provides powerful video editing tools that enable you to improve the colors in the footage you are syncing with, it is best to edit your photos via dedicated photo editing software.
For Win 7 or later (64-bit)
For macOS 10.12 or later
Afterward, you should go and launch Filmora, do a new project and add the folder to Filmora’s Media tab. Moreover, you should also import all audio files you would like to use in your project before doing any actual editing. When finished, head over to the File tab, and choose the Preferences option.
Once the option pops up on the screen, hit the Edit tab to set the max duration of a image in a video you’re making.
The value you insert into the Photo Duration box is based upon the number of frames your video contains. Filmora doesn’t let you minimize a project’s frame rate below 23.97fps. Thus, if you want your animation to have frames per second, you need to set the value of the Photo Duration to 00:00:04.
You can then add your media assets to the timeline, hit the Play button to preview the results, and export the video from Filmora if you like the results.
Image Name: stop-motion-studio-14
Image Alt: stop motion video Wondershare Filmora
● Key Takeaways from This Episode →
● The concept and working on stop motion studio pro
● Top Stop Motion Animation Movies
● How to create a stop-animation studio via Wondershare Filmora
Since people are getting more aware of innovative and creative ideas, the tools like stop motion studio are also emerging. This tool or software, or you can call an app, is mainly concerned with animation and is recognized to create very magical outputs.
This guide will teach what to consider about the Stop Motion Studio, how it works, and a deep look at animation movies to realize the magic of such tools on a broader scale. So, let’s start the article on stop motion studio Pro without any further ado.
In this article
01 [What is Stop Motion Studio and How Does It Work?](#Part 1)
02 [How to Use Stop Motion Studio on PC?](#Part 2)
03 [A Roster of 12 Best Stop-Motion Companies](#Part 3)
04 [How To Make A Stop Motion Video Super Easily?](#Part 4)
Part 1 What is Stop Motion Studio and How Does It Work?
Like the name, stop motion studio creates compelling stop-action movies. It is a terrific app with a whole set of unique features used mainly to turn images and audio into videos in an exciting way that is a fun process for everyone. The app is for Android and iOS. The app is a breeze to use with the camera since it’s operable through smartphones.
However, the students are highly reputed and engaged with this app. They are known to create educational videos over the platform, useful for presentations, etc. Yet, the benefits can also apply to teachers, and in fact, everyone out there.
Now, it’s time to look at the working procedure of stop motion studio pro. To begin with, you have to download the app over your operating system primarily. You can start the project right away after the installation. It’s optional to Sign Up on the app, but you will need it in the future to unlock certain features. The app consists of a simple user interface with a big plus icon that will directly take you to the capture and editing panel. After clicking the picture, a video will be available, which you can play or edit via features such as adding audio, adding effects, cutting sections, and more.
Once you finish the project, you can export and share stop motion studio on Android and other devices.
Part 2 How to Use Stop Motion Studio on PC?
Now, let’s look at the guide on using stop motion studio pro on a PC that generally uses stop motion studio on Windows or stop motion studio on Mac.
We can use stop motion studio online on both the Windows and Mac operating systems but given below is a guide of using the tool on Mac OS.
1. Set up your equipment
To get started, connect your DSLR camera with the PC.
2. Open Stop Motion software
Now, download, and launch the Stop Motion Studio for Mac. Open the software and name your project after double-clicking the New Movie tab.
Here, you can organize your projects by name, date, or duration.
3. Connect the camera to your software
To connect the DSLR camera to the software, click the lines icon and check for the name of your camera, which should display here.
After you click your camera option, the camera will get connected.
4. Proceed with the basic settings.
As shown below, our setting will take this dot three steps back.
5. Capture images
The big red button will capture the shots, and there’s an option along its side to time the shots.
Here, you can also explore settings to proceed with. For example, you can change the texture, ISO, shutter speed, aperture, green screen, blue screen, etc. You can also rotate or flip the images from here. And, there are lots for the list goes on.
6. Start shooting.
It would help if you pressed Enter key on your PC to start shooting the images. Then, after clicking pictures, you can click the + icon and get features as follows.
You can record your audio and change the frame rate of images as per your requirements.
7. Export project
Finally, hit the Export icon on the top-right corner to export the project and get the following features.
So, wasn’t it an easy stop motion studio on PC?
Part 3 A Roster of Best Stop-Motion Studio Movies
Since the start of the first half of the 20th century, the animation industry has grown drastically. Understanding market needs, a highly aware knowledge base, and consistent innovative ideas allow such movies to grow exponentially. And, it’s our luck to have such companies in our era that are a great source of entertainment in this chaotic generation.
This section will look at the top 12 stop-motion animation studio movies by the recognized stop motion animation companies with their critical specs, including the ideal vital specs. So, let’s begin with the magic below.
01A Town Called Panic (2009)
Rotten Tomatoes Score: 81%
Critics Consensus: A Town called Panic is an endlessly creative, raucous, animated romp with an adult and quirky sense of humor.
Starring: Jeanne Balibar, Stephane Aubier, Nicolas Buyer, Veronique Dumont
Directed by: Vincent Patar, Stephane Aubier
Synopsis: The film revolves around Indian (Bruce Ellison) and Cowboy (Stephane Aubier), where they plan to create a barbeque pit for their friend’s birthday, Horse (Vincent Patar). The accidental purchase delivery of million bricks than the intended deconstructs their house—also, the attempts to rebuild drop when their walls get continually stolen. The trio then travels to the Earth’s center with a determination to track down the thieves. They also discovered the culprits, who are a group of mad scientists.
022 - Consuming Spirits (2012)
Rotten Tomatoes Score: 89%
Critics Consensus: Not available yet.
Starring: Nancy Andrews, Chris Harris, Robert Levy, Chris Sullivan
Directed by: Chris Sullivan
Synopsis: Three residents (Chris Sullivan, Nancy Andrews, Robert Levy) of a small town live interconnected, sad lives.
03The Boxtrolls (2014)
Rotten Tomatoes Score: 81%
Critics Consensus: The Boxtrolls is a visual splendor and enough offbeat wit, yet it’s far from Laika’s best offerings. It still provides a healthy dose of all-age entertainment.
Starring: Elle Fanning, Ben Kingsley, Toni Collete, Isaac Hempstead-Wright
Directed by: Anthony Stacchi, Graham Annable
Synopsis: The movie leads to saving the Box trolley from extermination. It began with the Eggs (Isaac Hempstead-Wright), an orphan living under the community of mischievous and quirky creatures. These creatures have inhabited a cavern below the city of Cheesebridge. Eggs decided to go above the ground when villainous Archibald Snatcher (Ben Kingsley) made a plan to get rid of these pretty harmless beings. When Eggs went above the ground, he met and befriended feisty Winnifred (Elle Fanning). Together, they made a daring plan to save the Boxtrolls.
04The Year Without a Santa Claus (2006)
Rotten Tomatoes Score: 90%
Critics Consensus: No worries and fear. Mrs. Claus spreads all her cheers in the movie, presenting a holiday classic full of unforgettable characters and songs that are true to the Christmas spirit.
Starring: Chris Jattan, Ethan Suplee, Eddie Griffin, John Goodman
Directed by: Ron Underwood
Synopsis: Here, two elves try to save Christmas after John Goodman, a disgruntled Saint Nick, decided to take the year off.
05Fantastic Planet (1930)
Rotten Tomatoes Score: 91%
Critics Consensus: The movie is an animated epic that transforms into a surreal, fantastic, lovely, and graceful.
Starring: Mark Gruner, Marvin Miller, Hal Smith, Barry Bostwick
Directed by: Rene Laloux
Synopsis: The animated tale displays a relationship between small human-like Oms and their large creatures, blue-skinned oppressors, the Draags, also the rulers of planet Ygam. All thanks to the young female Draag, when an Om boy gets educated, the hierarchy of Draags keeping the Oms as illiterate pets have also shifted. This weakens the Draags control over Oms rebellion. So will they now co-exist or destroy each other?
06The Burton’s Corpse Bride (2005)
Rotten Tomatoes Score: 84%
Critics Consensus: The Burton’s Corpse Bride is a visually imaginative, bitter-sweet, whimsical macabre movie expected from Tim Burton.
Starring: Helena Bonham Carter, Johny Depp, Tracey Ullman, Emily Watson
Directed by: Tim Burton, Mike Johnson
Synopsis: A marriage was arranged for Victor and Victoria by their families. Victor is pretty nervous though they both like each other. Victor went to practice the lines to utter to Victoria in the forest where his intended arm of Victoria as a tree’s branch led him to the land of the dead. The land belongs to Emily, a dead creature, and now she wants to marry Victor. Victor must get rid of her and go to Victoria before marrying a villainous Barkis Bittern.
07The Pirates. Band of Misfits (2012)
Rotten Tomatoes Score: 86%
Critics Consensus: The Pirates showcases some skillfully animated fares with modern cinema’s smartness. However, the movie may not appropriately scale the customary delights of Aardman.
Starring: Martin Freeman, Imelda Staunton, David Tennant, Hugh Grant.
Directed by: Peter Lord
Synopsis: An enthusiastic pirate captain sails the high seas accompanied by his ragtag crew and dreams of becoming the year’s pirate by beating his rivals. The journey takes him through the exotic shores of Blood Island to the foggy streets of Victorian London. They also battle with a clever queen along the way and join forces with a scientist named Charles Darwin.
08James And The Giant Peach (1996)
Rotten Tomatoes Score: 91%
Critics Consensus: The dynamic and arresting visuals, light as air story, and offbeat details make this stop motion studio movie solid family entertainment.
Starring: Joanna Lumley, Paul Terry, Miriam Margolyes, Pete Postlethwaite
Directed by: Henry Selick
Synopsis: This children’s tale featuring live-action and stop motion animation takes through the adventures of James, an orphaned young British boy. He is forced to live with cruel aunts where he finds a way to hide his existence when he discovers a giant peach. He rolls it into the sea and sails for New York accompanied by friendly insects.
09Missing Link (2019)
Rotten Tomatoes Score: 88%
Critics Consensus: It’s a beautifully animated triumph for Laika with plenty of heart, lots of humor, and even a little food thought.
Starring: Zach Galifianakis, Zoe Saldana, Hugh Jackman, David Walliams
Directed by: Chris Butler
Synopsis: Mr. Link, an 8-feet furry creature after being tired of living a solitary life in the Pacific Northwest, recruits a fearless explorer to guide him on a journey of the fabled valley of Shangri-La. The trio encounters their share of peril as they travel to far extremities of the world and adventurer Adelina Fortnight. They learn the family that one always expects in their companionship through all this.
10Mary and Max (2009)
Rotten Tomatoes Score: 95%
Critics Consensus: Mary and Max is a startlingly inventive and lovingly crafted animation whose technical craft equals emotional resonance.
Starring: Philip Seymour Hoffman, Eric Bana, Barry Humphries, Toni Collette
Directed by: Adam Elliot
Synopsis: A Jewish man and a lonely Australian girl developed an unlikely friendship in New York through letters.
11The Little Prince (2015)
Rotten Tomatoes Score: 93%
Critics Consensus: Again, a faithful and beautiful made stop animation studio movie that sticks to the spirit of its classic source material. It is a family-friendly treat that throws thrilling visuals with a satisfying story.
Starring: Rachel McAdams, James Franco, Marion Cottilard, Jeff Bridges
Directed by: Mark Osborne
Synopsis: The Aviator introduces a girl to a world where she learns that human connections matter the most and where she rediscovered her childhood as well. It’s only with the heart that one can see rightly and can be seen as essential what is invisible to the eyes otherwise.
12Alice (1989)
Rotten Tomatoes Score: 95%
Critics Consensus: No consensus yet.
Starring: Kristyna Kohoutova
Directed by: Jan Svankmajeru
Synopsis: In a classic children’s book by Lewis Carroll, Alice follows her stuffed rabbit via a portal inside her dresser to be whisked away to Wonderland. While the Mad Hatter, White Rabbit, and Cheshire Cat are still present, the bizarre characters and familiar magical world have undergone an unsettling transformation.
Here, we end our discussion on the best picks by stop motion animation companies. Of course, you can always refer to such fantastic pieces to take inspiration from.
Part 4 How To Make A Stop Motion Video Super Easily?
Once done with the production stage, it is time to transition to post-production. Here, your stop motion animation will get its final posture. You need to place all the images you wish to include in the video’s final cut into a folder and arrange them the same way as they should appear in the video. Even though Wondershare Filmora Video Editor provides powerful video editing tools that enable you to improve the colors in the footage you are syncing with, it is best to edit your photos via dedicated photo editing software.
For Win 7 or later (64-bit)
For macOS 10.12 or later
Afterward, you should go and launch Filmora, do a new project and add the folder to Filmora’s Media tab. Moreover, you should also import all audio files you would like to use in your project before doing any actual editing. When finished, head over to the File tab, and choose the Preferences option.
Once the option pops up on the screen, hit the Edit tab to set the max duration of a image in a video you’re making.
The value you insert into the Photo Duration box is based upon the number of frames your video contains. Filmora doesn’t let you minimize a project’s frame rate below 23.97fps. Thus, if you want your animation to have frames per second, you need to set the value of the Photo Duration to 00:00:04.
You can then add your media assets to the timeline, hit the Play button to preview the results, and export the video from Filmora if you like the results.
Image Name: stop-motion-studio-14
Image Alt: stop motion video Wondershare Filmora
● Key Takeaways from This Episode →
● The concept and working on stop motion studio pro
● Top Stop Motion Animation Movies
● How to create a stop-animation studio via Wondershare Filmora
Also read:
- Updated 2024 Approved Animated Collage Maker Tips
- New Top 4 Websites to Get Anime Footage for Free
- New 2024 Approved How To Learn Cartoon Sketch Drawing— Pencil Sketch for Beginners
- New How to Draw A Skeleton Cartoon – A Step by Step Guide for 2024
- 10 Cartoon Character Makers to Create Animated Characters
- 2024 Approved How to Create an Animated Sticky Navbar
- 2024 Approved Top 10 Best Photo to Animation Converters
- Updated Top 10 Apps to Enhance Your Instagram Story Slideshow for 2024
- New In 2024, Handy Tip From Adobe Animate Rigging Tutorial for All Learners
- Updated How to Make GIF Instagram
- How to Animate Picture Online Without Learning From Scratch for 2024
- New How to Create Free Photo Collage Frame in Minutes?
- In 2024, Creative Ways to Create iPhone Text GIF
- How to Cartoonize Photo Photoshop in Simple Steps
- In 2024, 8 Best Motion Graphics Online Tools for Your Inspiration
- 2024 Approved How to Make 3D Cartoon of Yourself
- Updated In 2024, 5 Free Animated Gif Sources You Must Check
- New 2024 Approved Top 3 Ways to Create Gif with Great 3D Gif Maker
- Updated In 2024, FREE Best Anime Streaming Sites to Download Anime
- Updated 2024 Approved Tips for GIF to Animated PNG
- Updated In 2024, How to Learn Cartoon Characters Sketch Quickly
- 2024 Approved 5 Recommended Websites for Text GIF Maker
- Updated In 2024, Apps to Animate Still Pictures
- Top 8 Anime Name & Title Generators Online-Get Cool Anime Names
- Updated Best 10 Apps to Enhance Your Instagram Story Slideshow
- Updated 2024 Approved Animate Your Photo Online with These Awesome Tools
- Updated Best 10 Photo Animator Templates for 2024
- New In 2024, Tips for GIF to Animated PNG You Should Know
- Updated 5 Websites with Animated Logos That Can Catch Your Eyes for 2024
- Updated Uncensored Top 10 + Free Streaming Sites
- New Best GIF to Video Converters for 2024
- New 2024 Approved How to Become a Motion Graphic Designer
- New In 2024, Adobe Animate CC Everything You Need to Know
- In 2024, Best 15 Anime Fonts-Find Your Favorite One
- Updated In 2024, How to Send and Add Snapchat GIFs 100 in Easy Way
- In 2024, Complete Guide to Send Gif WhatsApp on Android
- Updated How to Make a GIF in Photoshop
- Updated 5 Photoshop Alternatives to Animate Logo
- New Best Guide for Beginners on 2D Animation Making
- 2024 Approved A Beginners Guide to Explain What 3D Animation Is
- New 12+ Stunning Instagram GIF Stickers for 2024
- New Techniques on Making After Effects 2D Animation for 2024
- New 2024 Approved Top 10 Animated DP for WhatsApp
- Updated How to Make Whiteboard Animation Videos
- New Top 7 Best Animated Lyric Video Software for FREE
- Ready to Animate Game Character From Scratch?
- New What Is A GIF
- Best 12 Illusion Gifs Top Picks for 2024
- 12 Captivating Websites with Triggered Animate on Scroll Examples for 2024
- In 2024, Process of Screen Sharing Infinix Zero 5G 2023 Turbo to PC- Detailed Steps | Dr.fone
- How to Unlock Apple iPhone 6s, Apples New iPhone | Dr.fone
- Top 10 Telegram Spy Tools On Vivo V29e for Parents | Dr.fone
- In 2024, Easiest Guide How to Clone Xiaomi Redmi K70E Phone? | Dr.fone
- Can I Bypass a Forgotten Phone Password Of Itel P55+?
- Find My App Troubleshooting No Location Found vs. Location Not Available & How to Fix Them On Apple iPhone 8 | Dr.fone
- Unlock Your Boost Mobile Apple iPhone 14 Pro Max Before the Plan Expires
- How to Transfer Text Messages from Samsung Galaxy A14 4G to New Phone | Dr.fone
- In 2024, Does find my friends work on HTC U23 | Dr.fone
- In 2024, How to Unlock iPhone 6 Plus Passcode Screen? | Dr.fone
- Does Meizu 21 Have Find My Friends? | Dr.fone
- In 2024, Top 10 Best Spy Watches For your Xiaomi Redmi Note 12 4G | Dr.fone
- In 2024, Android to Apple How To Transfer Photos From Infinix Smart 7 HD to iPad Easily | Dr.fone
- Updated 2024 Approved Exploring The Best Text-to-Speech Online Tools To Use
- Dose Life360 Notify Me When Someone Checks My Location On Honor V Purse? | Dr.fone
- How to get the dragon scale and evolution-enabled pokemon On Samsung Galaxy Z Fold 5? | Dr.fone
- New In 2024, Exploring Key Components and Creation Process of AI Face Generators
- How To Repair Apple iPhone XS Max iOS? | Dr.fone
- What To Do if Your Xiaomi Redmi K70 Pro Auto Does Not Work | Dr.fone
- In 2024, 11 Best Location Changers for Honor X50i+ | Dr.fone
- How to retrieve erased videos from Xiaomi Redmi 12 5G
- In 2024, Unlock Vivo T2 5G Phone Password Without Factory Reset Full Guide Here
- In 2024, Troubleshooting Error Connecting to the Apple ID Server From Apple iPhone 6 Plus
- In 2024, Easy Guide to Tecno Spark 20C FRP Bypass With Best Methods
- New 2024 Approved Chrome Video Translators Top 5 Video Translation Chrome Extensions
- How to Unlock iPhone 12 without Passcode
- Top Apps and Online Tools To Track Poco M6 Pro 5G Phone With/Without IMEI Number
- Which is the Best Fake GPS Joystick App On Infinix Smart 8 Plus? | Dr.fone
- Can I recover permanently deleted photos from Infinix
- In 2024, CatchEmAll Celebrate National Pokémon Day with Virtual Location On Nokia G310 | Dr.fone
- Easy steps to recover deleted videos from HTC U23 Pro
- In 2024, How Do You Remove Restricted Mode on Apple iPhone XR
- In 2024, How Can I Catch the Regional Pokémon without Traveling On Samsung Galaxy S21 FE 5G (2023) | Dr.fone
- Easy steps to recover deleted photos from Oppo A38.
- The way to get back lost call history from Motorola Moto G14
- In 2024, Reasons why Pokémon GPS does not Work On Apple iPhone XR? | Dr.fone
- 4 Most-Known Ways to Find Someone on Tinder For Honor X9b by Name | Dr.fone
- Top 10 Asus Android SIM Unlock APK
- How to Use Phone Clone to Migrate Your Vivo Y36 Data? | Dr.fone
- How to remove Honor X50i PIN
- Easily Unlock Your Motorola Moto G Stylus 5G (2023) Device SIM
- In 2024, Is pgsharp legal when you are playing pokemon On Apple iPhone SE (2020)? | Dr.fone
- Fix Oppo Reno 11F 5G Android System Webview Crash 2024 Issue | Dr.fone
- Why Your WhatsApp Location is Not Updating and How to Fix On Oppo K11 5G | Dr.fone
- The Magnificent Art of Pokemon Go Streaming On Nubia Red Magic 9 Pro+? | Dr.fone
- How To Transfer Data From iPhone 13 mini To Other iPhone 12 devices? | Dr.fone
- Title: 12 Animated Slideshow PowerPoint Templates
- Author: Elon
- Created at : 2024-06-08 05:07:41
- Updated at : 2024-06-09 05:07:41
- Link: https://animation-videos.techidaily.com/12-animated-slideshow-powerpoint-templates/
- License: This work is licensed under CC BY-NC-SA 4.0.
