
:max_bytes(150000):strip_icc():format(webp)/dts-play-fi-lifestyle-aaa-5a4c211daad52b00366a3575.jpg)
15 Horror Animes That Will Trigger a Heart Attack for 2024
15 Horror Animes That Will Trigger a Heart Attack
15 Horror Animes That Will Trigger a Heart Attack

Shanoon Cox
Mar 27, 2024• Proven solutions
Horror anime is a sub-genre of anime series. It is based on scary stories, often featuring bloody and grotesque scenes, not for the faint of heart—the horror anime series range from emotional murder mysteries to violent paranormal thrillers.
People who like to experience the thrill of a good scare generally prefer watching horror anime series. The best horror anime can actually terrify you, and many people enjoy being scared. Since there are a lot of scary anime series on the web, you might have trouble finding the best horror anime to pass your weekend. If that’s the case, dive right in and get prepared to be scared.
Best 15 Horror Animes of All Time
Here, we have picked out some of the best horror anime series of all time that are definitely going to creep you out. Test your bravery and watch a terrifying horror anime from our list.
1. Monster
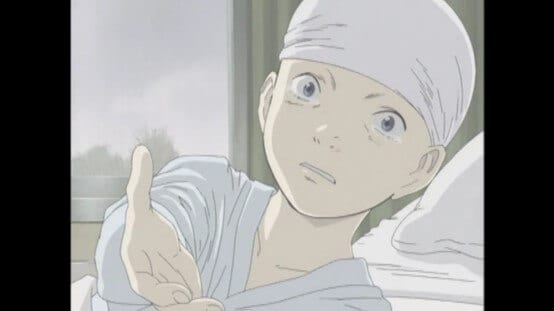
Monster is a horror anime series based on a popular Manga by Naoki Urasawa. It is an impressive thriller based on a top-notch brain surgeon working in a hospital. The young surgeon is faced with an ethical dilemma when forced to abandon the surgery of a boy to save a mayor’s life. But Dr. Tenma chooses to save the boy. This scary anime unfolds as Tenma, at the pinnacle of his medical career, is haunted by a series of death that involves the boy he saved all those years ago. This is the best horror anime series featuring a psychopath’s killing streak.
 </p
</p
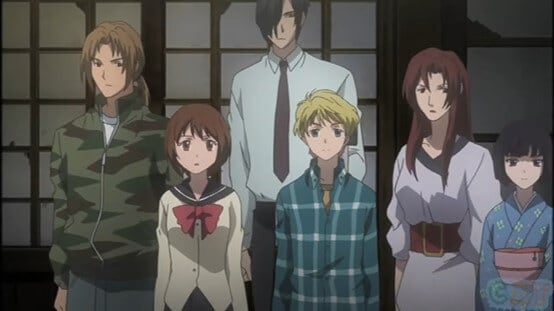
2. Hell Girl
This horror anime series revolves around the subject of hate, revenge, and vengeance. With every new episode of this horror anime, you will witness a new story. The plot is unique and based on supernatural powers. Through a mysterious website, people are able to exact revenge on their tormentors, but there is always a price to pay. In the list of the best horror anime series, Hell Girl takes the lead due to thrilling scenes with the fusion of emotional storylines. As opposed to many horror anime series, this one isn’t very gory, but it portrays horror through the plot, showing the evil side of humans.
 </p
</p
3. Corpse Party
A very gruesome and horror anime is Corpse Party. This horror anime series is based on just 4 episodes, all of which are filled with terror. As the students of Kisaragi Academy perform a ritual on the grounds of their school, they are taken into another dimension where they end up in the Heavenly Host Elementary whose students and staff were murdered years ago. The terrifying ghosts and gory corpses in this scary anime are enough to terrify anyone. It is short and action-packed, guaranteeing that every scene is full of terror.
 </p
</p
4. Another
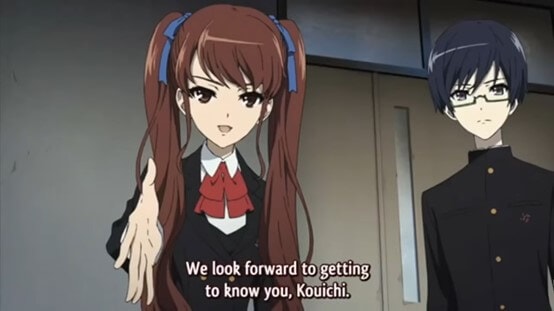
Another is the best horror anime series with terrifying deaths, much like seen in the movie’ Final Destination’. As the death curse takes the lives of the students of a class, the protagonist, a newly transferred student Kouichi, and a girl with an eye patch must get to the bottom of this. The horror anime slowly unravels scary truths about the incident that resulted in the death of Mei Misaki. Together, Kouichi and Mei try to dig out the root of the problem. Every scene is packed with suspense and horror, keep viewers scared and glued to the screens.
 </p
</p
5. Shiki
Based on the hot topic of vampires, this horror anime takes vampire stories to the next level. Shiki is an excellent scary movie with a twisting plot that follows the lives of the villagers facing the vampire curse. As the dead rise, a young doctor takes it upon himself to uncover the reality. This chilling yet adventurous horror anime is an amazing watch with a great storyline that is gripping and suspenseful, all at the same time.
 </p
</p
6. The Promised Neverland
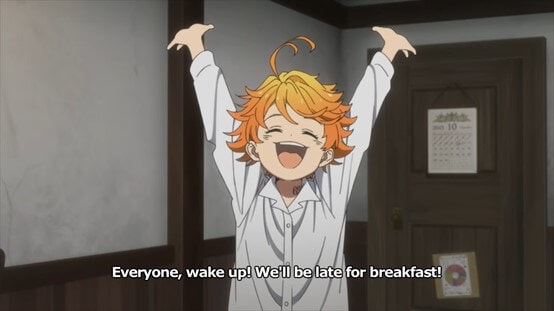
This horror anime has a very emotional plot. The kids of Grace Field House Orphanage are very happy and content until one day, some of them break the most important rule. When the kids go out of the orphanage, they discover the truth and the sinister future awaiting them. From cheerful kids to responsible, brave kids, this is the best horror anime that keeps the viewers glued to the screens. As the kids try to escape their deadly fate, will they be able to go free or end up becoming demon food?
 </p
</p
7. Parasyte: The Maxim
As the name suggests, this horror anime series is based on a parasite that takes over human hosts. In this horror anime, the parasite is an alien species. However, this anime revolves around the protagonist, whose hand is taken over by Migi, also an alien. But as the other parasites go on a deadly streak, opening their heads and eating any human that stands in their way, the boy and Migi try to fight them off. This is a very compelling yet gory and scary anime showing gruesome murders and action scenes to keep you on edge at all times.
 </p
</p
8. Perfect Blue
Perfect Blue has been categorized as one of the best horror anime based on reality. This is an epic psychological thriller with scenes that are mind-bending. As a pop singer switches her career to become an actress, an obsessed stalker becomes a nightmare for her. She is exposed, and every move she makes is being watched. Mysterious murders start surrounding her, and she starts losing her mind. The lines between delusion and reality are blurred. This horror anime is also an excellent suspense thriller that will keep you guessing what the next move will be.
 </p
</p
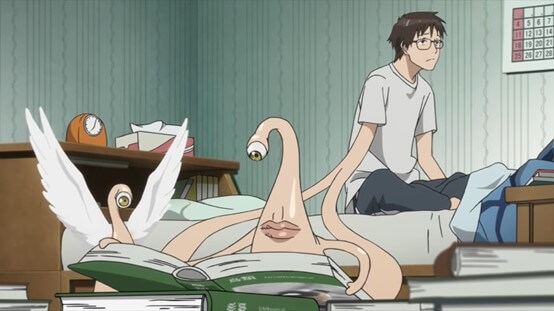
9. Mononoke
Mononoke has a unique visual appeal as it is themed on old Japanese culture with vibrant animations. The protagonist, commonly known as the ‘Medicine Seller,’ goes around feudal Japan looking for evil, known as Mononoke. Somehow, the medicine seller has a special power and a sword to slay the evil. But the twist is that the medicine seller must first learn the details about the Mononoke. Unless he discovers its true form and reason, he cannot have the sword to end it. This horror anime unfolds in a very thrilling manner as the protagonist uncovers the evil and saves feudal Japan.
 </p
</p
10. Tokyo Ghoul
One of the greatest horror anime series ever, Tokyo Ghoul features an amazing storyline. When the college student Ken falls victim to his ghoul date, he is saved by doctors. But, his rebirth is as a hybrid of humans and ghouls. This horror anime series is not for the faint-hearted as it shows grotesque scenes of body horror as the ghouls devour human flesh. However, Tokyo Ghoul also portrays how Ken is forced to control his flesh-eating desires. Would the hybrid lean more towards his human trait or the evil side? We recommend watching this very scary anime to find out how Ken survives as a hybrid and does he give in to his ghoul nature?
 </p
</p
11. Elfen Lied
This horror anime is about a mutant human born, Lucy. The extremely powerful mutant, Diclonius, is being experimented upon when one day she has had enough. As she finally breaks free of captivity, it results in a huge bloodbath and a terrifying battle. With time, Lucy tries to adjust to the world. Given her dual personality, it is hard to hide her true nature. This horror anime series is packed with bloody scenes and violence, yet it also displays moments of emotional attachments and friendships when Lucy’s adorable personality is dominant.
 </p
</p
12. Ghost Hunt
As can be guessed by the name, this horror anime series is based on ghost hunting. It doesn’t involve many bloody or gory scenes, but it definitely has terrifying scenes. A group of adventurous people teamed up with the psychic research facility are investigating the paranormal activities in a building when they are faced with horrifying paranormal beings. This is a story about finding out the truth, sticking together, and making it out of the building alive. This isn’t the most horror anime on the list, but it does give very scary and creepy vibes as the team stumbles upon deadly beings.
 </p
</p
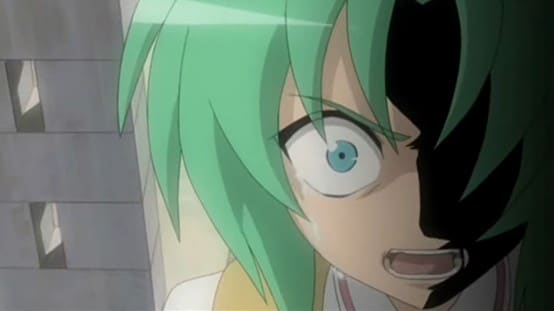
13. Higurashi When They Cry
The start of this horror anime is unlike any other. One might think it is a cheerful school drama, but it’s actually the best horror anime based on a murder mystery. The students in a rural village start killing each other in grotesque ways, and there are even scenes of torture and bloody violence. The viewer must figure out what suddenly took over the village to cause such gruesome murders. If you are looking for a good scare, this horror anime will be your best pick with its thriller-packed scenes. Are the murderers possessed, or is it something else? Watch this scary anime if you have the guts and find out.
 </p
</p
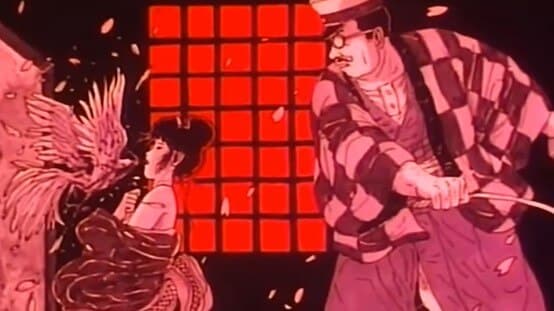
14. Shoujo Tsubaki
Shoujo Tsubaki is an adult horror anime that revolves around the life of an orphan girl. Midori is tricked by a circus master to join his show, but a horrifying future awaits her. She is raped and abused continually and is about to give up when a magician joins the club. As she sees a ray of hope, will she be able to escape her horrid fate? With a heart-wrenching storyline, this horror anime is a great watch to feel the chills of being alone and tortured.
 </p
</p
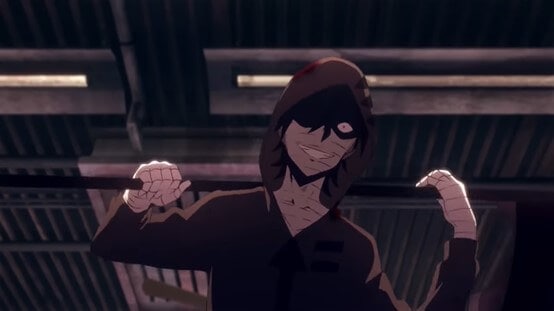
15. Angels of Death
The Angels of Death is a very intriguing horror anime that shows an amnesiac girl awaking in the basement of an abandoned building. As she tries to escape the building, she is met with psychotic killers and crazy people on each floor. However, Rachel and the serial killer Zack strike up a relationship in which Zack promises to kill her if she helps him escape the building. This scary anime certainly has some bone-chilling and gory scenes to get you creeped out.
 </p
</p
Bonus Tip-The Best Anime Movie Recorder-Wondershare Filmora
Wondershare Filmora is a powerful video editor that is perfect for both beginners and professional editors. It has tons of editing tools that are fully customizable and also offer presets to help users quickly add professional-grade cinematic effects to their videos.
With Filmora, it is easy to apply motion tracking, color grading, motion blur, green screen effect, and much more. The creative possibilities at Filmora are endless. And most of these tools are very intuitive to use. Better yet, Filmora allows users to share their videos directly to social media.
In addition, you can also use Filmora to record your favorite horror anime, make edits, add captions, and share with your friends. You can record your screen and adjust advanced settings that will allow you to set a timer, select the screen size, audio source, and much more. You can also select whether you want to display the cursor and choose its color. With a Hot Key, you can stop recording instantly, and the file will be immediately saved to your PC.
After recording, you can make further edits to the video by adding captions or special effects to enhance it. In short, with Filmora, you can record with ease and make wonderful edits to the video.


Are Horror Animes Really Horrifying?
The horror anime series are hand-drawn illustrations, and it is quite possible to portray supernatural, horrifying, and unusual creatures with ease. From our list, you will see that among the best horror anime series, most of them feature otherworldly creatures that are both terrifying and creepy to look at.
In addition, the extremely graphic nature of a scary anime further adds to its ability to scare viewers. Violence, bloodbath, and cannibalism is a common theme in majority of the scary anime series, serving as the perfect way to portray bone-chilling horror scenes.
Try out our list to find your best horror anime series and have a good scare.
Shanoon Cox
Shanoon Cox is a writer and a lover of all things video.
Follow @Shanoon Cox
Shanoon Cox
Mar 27, 2024• Proven solutions
Horror anime is a sub-genre of anime series. It is based on scary stories, often featuring bloody and grotesque scenes, not for the faint of heart—the horror anime series range from emotional murder mysteries to violent paranormal thrillers.
People who like to experience the thrill of a good scare generally prefer watching horror anime series. The best horror anime can actually terrify you, and many people enjoy being scared. Since there are a lot of scary anime series on the web, you might have trouble finding the best horror anime to pass your weekend. If that’s the case, dive right in and get prepared to be scared.
Best 15 Horror Animes of All Time
Here, we have picked out some of the best horror anime series of all time that are definitely going to creep you out. Test your bravery and watch a terrifying horror anime from our list.
1. Monster
Monster is a horror anime series based on a popular Manga by Naoki Urasawa. It is an impressive thriller based on a top-notch brain surgeon working in a hospital. The young surgeon is faced with an ethical dilemma when forced to abandon the surgery of a boy to save a mayor’s life. But Dr. Tenma chooses to save the boy. This scary anime unfolds as Tenma, at the pinnacle of his medical career, is haunted by a series of death that involves the boy he saved all those years ago. This is the best horror anime series featuring a psychopath’s killing streak.
</p
2. Hell Girl
This horror anime series revolves around the subject of hate, revenge, and vengeance. With every new episode of this horror anime, you will witness a new story. The plot is unique and based on supernatural powers. Through a mysterious website, people are able to exact revenge on their tormentors, but there is always a price to pay. In the list of the best horror anime series, Hell Girl takes the lead due to thrilling scenes with the fusion of emotional storylines. As opposed to many horror anime series, this one isn’t very gory, but it portrays horror through the plot, showing the evil side of humans.
</p
3. Corpse Party
A very gruesome and horror anime is Corpse Party. This horror anime series is based on just 4 episodes, all of which are filled with terror. As the students of Kisaragi Academy perform a ritual on the grounds of their school, they are taken into another dimension where they end up in the Heavenly Host Elementary whose students and staff were murdered years ago. The terrifying ghosts and gory corpses in this scary anime are enough to terrify anyone. It is short and action-packed, guaranteeing that every scene is full of terror.
</p
4. Another
Another is the best horror anime series with terrifying deaths, much like seen in the movie’ Final Destination’. As the death curse takes the lives of the students of a class, the protagonist, a newly transferred student Kouichi, and a girl with an eye patch must get to the bottom of this. The horror anime slowly unravels scary truths about the incident that resulted in the death of Mei Misaki. Together, Kouichi and Mei try to dig out the root of the problem. Every scene is packed with suspense and horror, keep viewers scared and glued to the screens.
</p
5. Shiki
Based on the hot topic of vampires, this horror anime takes vampire stories to the next level. Shiki is an excellent scary movie with a twisting plot that follows the lives of the villagers facing the vampire curse. As the dead rise, a young doctor takes it upon himself to uncover the reality. This chilling yet adventurous horror anime is an amazing watch with a great storyline that is gripping and suspenseful, all at the same time.
</p
6. The Promised Neverland
This horror anime has a very emotional plot. The kids of Grace Field House Orphanage are very happy and content until one day, some of them break the most important rule. When the kids go out of the orphanage, they discover the truth and the sinister future awaiting them. From cheerful kids to responsible, brave kids, this is the best horror anime that keeps the viewers glued to the screens. As the kids try to escape their deadly fate, will they be able to go free or end up becoming demon food?
</p
7. Parasyte: The Maxim
As the name suggests, this horror anime series is based on a parasite that takes over human hosts. In this horror anime, the parasite is an alien species. However, this anime revolves around the protagonist, whose hand is taken over by Migi, also an alien. But as the other parasites go on a deadly streak, opening their heads and eating any human that stands in their way, the boy and Migi try to fight them off. This is a very compelling yet gory and scary anime showing gruesome murders and action scenes to keep you on edge at all times.
</p
8. Perfect Blue
Perfect Blue has been categorized as one of the best horror anime based on reality. This is an epic psychological thriller with scenes that are mind-bending. As a pop singer switches her career to become an actress, an obsessed stalker becomes a nightmare for her. She is exposed, and every move she makes is being watched. Mysterious murders start surrounding her, and she starts losing her mind. The lines between delusion and reality are blurred. This horror anime is also an excellent suspense thriller that will keep you guessing what the next move will be.
</p
9. Mononoke
Mononoke has a unique visual appeal as it is themed on old Japanese culture with vibrant animations. The protagonist, commonly known as the ‘Medicine Seller,’ goes around feudal Japan looking for evil, known as Mononoke. Somehow, the medicine seller has a special power and a sword to slay the evil. But the twist is that the medicine seller must first learn the details about the Mononoke. Unless he discovers its true form and reason, he cannot have the sword to end it. This horror anime unfolds in a very thrilling manner as the protagonist uncovers the evil and saves feudal Japan.
</p
10. Tokyo Ghoul
One of the greatest horror anime series ever, Tokyo Ghoul features an amazing storyline. When the college student Ken falls victim to his ghoul date, he is saved by doctors. But, his rebirth is as a hybrid of humans and ghouls. This horror anime series is not for the faint-hearted as it shows grotesque scenes of body horror as the ghouls devour human flesh. However, Tokyo Ghoul also portrays how Ken is forced to control his flesh-eating desires. Would the hybrid lean more towards his human trait or the evil side? We recommend watching this very scary anime to find out how Ken survives as a hybrid and does he give in to his ghoul nature?
</p
11. Elfen Lied
This horror anime is about a mutant human born, Lucy. The extremely powerful mutant, Diclonius, is being experimented upon when one day she has had enough. As she finally breaks free of captivity, it results in a huge bloodbath and a terrifying battle. With time, Lucy tries to adjust to the world. Given her dual personality, it is hard to hide her true nature. This horror anime series is packed with bloody scenes and violence, yet it also displays moments of emotional attachments and friendships when Lucy’s adorable personality is dominant.
</p
12. Ghost Hunt
As can be guessed by the name, this horror anime series is based on ghost hunting. It doesn’t involve many bloody or gory scenes, but it definitely has terrifying scenes. A group of adventurous people teamed up with the psychic research facility are investigating the paranormal activities in a building when they are faced with horrifying paranormal beings. This is a story about finding out the truth, sticking together, and making it out of the building alive. This isn’t the most horror anime on the list, but it does give very scary and creepy vibes as the team stumbles upon deadly beings.
</p
13. Higurashi When They Cry
The start of this horror anime is unlike any other. One might think it is a cheerful school drama, but it’s actually the best horror anime based on a murder mystery. The students in a rural village start killing each other in grotesque ways, and there are even scenes of torture and bloody violence. The viewer must figure out what suddenly took over the village to cause such gruesome murders. If you are looking for a good scare, this horror anime will be your best pick with its thriller-packed scenes. Are the murderers possessed, or is it something else? Watch this scary anime if you have the guts and find out.
</p
14. Shoujo Tsubaki
Shoujo Tsubaki is an adult horror anime that revolves around the life of an orphan girl. Midori is tricked by a circus master to join his show, but a horrifying future awaits her. She is raped and abused continually and is about to give up when a magician joins the club. As she sees a ray of hope, will she be able to escape her horrid fate? With a heart-wrenching storyline, this horror anime is a great watch to feel the chills of being alone and tortured.
</p
15. Angels of Death
The Angels of Death is a very intriguing horror anime that shows an amnesiac girl awaking in the basement of an abandoned building. As she tries to escape the building, she is met with psychotic killers and crazy people on each floor. However, Rachel and the serial killer Zack strike up a relationship in which Zack promises to kill her if she helps him escape the building. This scary anime certainly has some bone-chilling and gory scenes to get you creeped out.
</p
Bonus Tip-The Best Anime Movie Recorder-Wondershare Filmora
Wondershare Filmora is a powerful video editor that is perfect for both beginners and professional editors. It has tons of editing tools that are fully customizable and also offer presets to help users quickly add professional-grade cinematic effects to their videos.
With Filmora, it is easy to apply motion tracking, color grading, motion blur, green screen effect, and much more. The creative possibilities at Filmora are endless. And most of these tools are very intuitive to use. Better yet, Filmora allows users to share their videos directly to social media.
In addition, you can also use Filmora to record your favorite horror anime, make edits, add captions, and share with your friends. You can record your screen and adjust advanced settings that will allow you to set a timer, select the screen size, audio source, and much more. You can also select whether you want to display the cursor and choose its color. With a Hot Key, you can stop recording instantly, and the file will be immediately saved to your PC.
After recording, you can make further edits to the video by adding captions or special effects to enhance it. In short, with Filmora, you can record with ease and make wonderful edits to the video.
Are Horror Animes Really Horrifying?
The horror anime series are hand-drawn illustrations, and it is quite possible to portray supernatural, horrifying, and unusual creatures with ease. From our list, you will see that among the best horror anime series, most of them feature otherworldly creatures that are both terrifying and creepy to look at.
In addition, the extremely graphic nature of a scary anime further adds to its ability to scare viewers. Violence, bloodbath, and cannibalism is a common theme in majority of the scary anime series, serving as the perfect way to portray bone-chilling horror scenes.
Try out our list to find your best horror anime series and have a good scare.
Shanoon Cox
Shanoon Cox is a writer and a lover of all things video.
Follow @Shanoon Cox
Tips That Show Anybody How to Get Awesome Background for Slideshow in PowerPoint
Tips That Show Anybody How to Get Awesome Background for Slideshow in Powerpoint
An easy yet powerful editor
Numerous effects to choose from
Detailed tutorials provided by the official channel
Amazing slideshow background are an absolute attention grabber in the realm of creative PowerPoint presentations. If you wish to upgrade yours with the same, be here to learn how!
In this article
01 [How to Add Video Background in PowerPoint?](#Part 1)
02 [How to Create Moving Backgrounds in Microsoft PowerPoint?](#Part 2)
03 [Some Tips for You to Get Awesome PowerPoint Backgrounds & Templates](#Part 3)
Part 1 How to Add Video Background in PowerPoint?
When the talk is about engaging means to deliver a precise information, PowerPoint slideshows are an absolute stunner. While these are already a captivating utility to present your thing, the output and audience engagement is at par with the inclusion of attractive design elements in the presentation. As is evident, there are enormous diversities of supplementary elements to complement your presentation, let us centre our discussion to the application of video background for slideshow in PowerPoint.
User’s Guide to Add Video Background in a PowerPoint Slideshow
The following section presents a detailed explanation of the steps to supplement your PowerPoint presentations with classic video backgrounds in just a few quick steps:
Step 1: Launch Your Presentation
Start with opening the desired PowerPoint presentation to which you want to add the video background, in any of your preferred devices.
Step 2: Add a Video to Your Slide
Browse through your presentation slides to locate the one you want to add the video background to. When you have made your choice, navigate to the PowerPoint toolbar at the top and hit the ‘Insert’ tab and choose the ‘Video’ option.
You will now be presented with 2 choices, either uploading a video from your device or insert one from the web by pasting its YouTube URL into the slide. If you are uploading a video from your device, proceed with selecting the desired video and tap ‘Insert’.

Step 3: Move and Resize Your Video
After uploading your video to the slide, you need to make suitable adjustments in its size and alignment to synchronize the same with the contents of the slide. To do this, drag the top left corner of the video to that of the slide to set the top alignment ratio. In the same way, move the bottom right corner of the video to be in sync with that of the slide. You will see the video occupying the entire slide at the end of the adjustment process.

Step 4: Set the Video Background
You will now need to set the video as the background of your slide, so that the latter’s contents are displayed over the video. You can do this by right clicking on the video and choosing the ‘Send to Back’ option from the dropdown that follows. This will cause the contents of your slide to get displayed over the video.

Step 5: Playback Edit and Customization Choices
Before proceeding towards making changes in the video playback and formatting, prefer taking a quick preview of your work till here. Once you are satisfied, navigate to the PowerPoint Toolbar at the top, hit the ‘Video Tools’ tab, followed by clicking on the ‘Playback’ tab.
It is recommended to introduce the following changes in your video for the most affordable slideshow output:
● Loop Your Video
Creating a video loop will facilitate you with an automatic replay of your video without the need to restart it every time with a click. You can loop your video by navigating to the ‘Video Options’ section and choose ‘Loop Until Stopped’ by clicking within the checkbox next to it. The background video will now continue to play until you switch to a different slide.
● Automatically Start Your Video
To avoid clicking on the slide amid your presentation for the video loop to begin, adjust the latter’s settings for an automatic start. Navigate to the ‘Start’ dropdown menu and select ‘Automatically’.
● Trim Your Video
You can work with some basic video editing tools in PowerPoint, like trimming and cropping your background video to a desired length. If you wish to ward off certain portions of your video, reach to and click o the ‘Trim Video’ button. Following this, drag the slider of the video to select the desired portions of the clip and exclude the rest.
You can further work with some more editing effects to create the perfect video backgrounds for your presentation slides in line with your specific preferences.

Step 6: Annotate Your Video Background
When you are done with the video editing process, take a preview of the same to ensure that everything is set in the proper order and at the proper place. Lastly, if you wish to add suitable text annotations to your video, you can do this with the ‘ClassPoint’ tool to write over the video background. All you need to do is select a preferred pen colour and start writing on your slide screen. You can further, save the annotations for a work record.

Part 2 How to Create Moving Backgrounds in Microsoft PowerPoint?
Moving PowerPoint slideshow background is another aspect of graphic creativity at its best, which can be used in a number of ways to grab considerable viewer attention. When choosing to add moving backgrounds to your presentation, the latter can aid in improving the style of content presentation, making your audience curious about how and what happens next.
Having learnt about the utility and creation process of video backgrounds in the PowerPoint presentation tool, let us extend our discussion to the method of creating a moving slide show background in the same in the following section:
User’s Guide to Create Moving Backgrounds for PowerPoint Presentations
Discussed below is an explanatory procedure for designing moving backgrounds with an awesome appearance for slideshow presentations in Microsoft PowerPoint:
Step 1: Open Your Presentation
To begin with, launch the PowerPoint tool in your preferred device and open the presentation on which you will be working to add the moving background. After the presentation gets loaded, navigate through the same and select the desired slide to proceed with the aforesaid task.
Step 2: Choose a Video Location
To add your desired video to the slide, navigate to the PowerPoint ribbon at the top and click on the ‘Insert’ tab. Select ‘Video’ from the list of options that appears, followed by choosing one of the ‘Online Video’ or ‘Video on My PC’ options from the video selection prompt. It is further recommended to select a video in the MP4 format, as the latter gives best results of moving and video backgrounds.
Step 3: Insert Your Video
Choose the second option in the selection prompt to upload a video from your device. You will now be asked to browse through your device and locate the desired video in the ‘Insert Video’ dialog box that appears. Select your video and tap the ‘Insert’ button to add your video.
To upload videos from an online source, choose the ‘Online Video’ option in the selection prompt and proceed to search the video from PowerPoint or paste its embed code to recover the video. The chosen video will begin to download and can be added to the PowerPoint presentation after the download process comes to an end.

Step 4: Playback Editing and Video Customization
Before proceeding further, consider paying your video once by clicking on the ‘Start’ button. You can also add different effects, trim and crop or add a bookmark to your video by navigating to and clicking on the ‘Video Tools’ tab, followed by selecting the ‘Format’ option. To work with the start and playback options for the video, click on ‘Playback’ in the dropdown menu of the ‘Video Tools’ tab.

Part 3 Some Tips for You to Get Awesome PowerPoint Backgrounds & Templates
Now that you have developed a comprehensive understanding of the utility of adding video and moving background for slideshow presentation, let us look through some easy tips and tricks to conveniently access the top rated and the most popular PowerPoint slideshow templates and backgrounds in the following section:
01Cool Slide Backgrounds
Slideshow presentations in PowerPoint are supplemented with a visual spark through amazing and vibrant backgrounds that are a sign of excellent graphic creativity. When working with a PowerPoint presentation of your own, do take the liberty to use some cool slide backgrounds to your creative advantage.
When the talk is about complementing your presentation with a cohesive and upbeat background, you can either select the most suitable one from a heap of pre made slideshow templates available both in the PowerPoint slideshow creator tool as well as across the web. However, if you wish to take the excitement to another level, try hands at creating an awesome and cool backgrounds for PowerPoint slides of your own!
Talking about some really cool tips and tricks to design a slideshow presentation background in PowerPoint, start with including some specific shapes and color overlays to the background capture, experiment with a polygon background, work on enhancing the background image with classic and artistic effects and apply a mix of colors, textures and patterns to give a classy look to your slideshow backgrounds.

02Professional Slideshow Backgrounds
If you are aiming at creating a PowerPoint slideshow presentation with a business centered design approach, you will need to cut down on some extra elements that you would ideally choose to include in a personal purpose based slideshow. Paying attention to the fact that business and corporate centered presentations should be simple, subtle and to the point, it would be an intelligent step to avoid adding too many expressive elements in the background.
Whether you are creating a professional slideshow background of your own or working with a pre designed template, take care to include a complementary play of a light background theme with a maximum of 2 balancing shades.
Avoid too much vibrancy and abstain from applying over the top effects and quick transitions, lest your presentation may look a bit too crowed. If your slides have lot of written content, prefer using a white color background text in a professional font style.
If you have decided on picking a pre made template, you can browse through a diversity of suggestions across the web, while keeping the aforesaid constraints in mind. Consider taking a look at the figure given below to have a more comprehensive understating of the prerequisites of selecting a professional sideshow background template:

03Happy Birthday Slide Backgrounds
Birthday parties are the most appealing synonyms of fun and entertainment. If you are into the profession of organizing events that renders smiling and happy faces, slideshow presentations could be of great help to you in discussing about services, types of social gentries and event targets with your clients.
When looking through different options to select the perfect birthday template, either for a professional event, or just to go down the memory lane of your most cherished moments, take caution to search for a vibrant alternative with colorful images, different background designs and party oriented cool themes, wide aspect ratio with high screen resolution for a mass display and conveniently editable graphics.
If you are creating a happy birthday slide background of your own, there are variety of realms to explore your graphic design creativity, owing to the fact that the subject of creation is highly expressive and multi-dimensional. While you are free to extend your creativity to the next level, do pay attention to the above constraints for a more elusive and outstanding creation output, while maintaining the fun and entertainment quotient intact.

04Wedding Slide Backgrounds
Considering the fact that wedding events are pronounced means of fun, leisure, enjoyment and beautiful memories, anything that aims to be a part of the celebrations, should be equally ecstatic and engaging. Infusing festive occasions with technology, slideshow based wedding invitations and moment captures are the top rated modern trends of celebrating this significant life event.
If you are keen on designing the perfect slideshow presentation for wedding invitations, photo albums and thank you cards, prefer to choose a wedding slide background template with aesthetic layout and flowing element inclusions, like that of floral borders and scented candles. Look though the elements of a subtle thematic setup with soothing color combinations, preferably in complementary pastel shades, like pink and white.
Talking of template customizability, the latter should have placeholders to include names of the bride and groom, the wedding date and venue, and of course the wedding photographs. The beautiful slide background template should have enough design space to include the most elusive play of text colors and fonts to suit specific preferences of creating special memories of a cherished event.

05Slideshow Backgrounds and Templates in Filmora
When looking for the most convenient lead to an extensive variety of beautiful slideshow templates and background, the template library of Wondershare Filmora Video Editor slideshow creator program can be your most affordable destination. The aforesaid software library is known to possess the best and most perfect template choices to suit the creation constraints of almost every slideshow presentation style and objective you can possibly think of.
For Win 7 or later (64-bit)
For macOS 10.12 or later
The elusive templates are further supplemented with a plethora of design flexibilities and customization features that are all set to deliver you the most appreciable creation output. Stressing a bit on the template customization choices of the software, you can work with the tool to uplift your slideshow backgrounds with artistic image effects and overlays, annotate them with beautiful text formations in a variety of colors, fonts and sizes and lots more.
Moving a bit deeper into the creative aspect, you can upgrade the visual style of your presentations with the most perfect and seamless image and video transitions and text animations. The bottom line is, working with the aforesaid slideshow creator program, you are entitled to get jaw dropping applaud from your audience, while making a confident and a content delivery through your slideshow presentation.

● Ending Thoughts →
● Using an expressive and complementing background in your slideshow presentation uplifts its visual credibility in captivating your audience.
● Browsing through the web, you get to access a vast range of amazing slideshow backgrounds and templates to make your presentation, a visual masterpiece.
● When looking for the most distributed storehouse of slideshow backgrounds and templates, the Wondershare Filmora library is your ultimate solution.
Amazing slideshow background are an absolute attention grabber in the realm of creative PowerPoint presentations. If you wish to upgrade yours with the same, be here to learn how!
In this article
01 [How to Add Video Background in PowerPoint?](#Part 1)
02 [How to Create Moving Backgrounds in Microsoft PowerPoint?](#Part 2)
03 [Some Tips for You to Get Awesome PowerPoint Backgrounds & Templates](#Part 3)
Part 1 How to Add Video Background in PowerPoint?
When the talk is about engaging means to deliver a precise information, PowerPoint slideshows are an absolute stunner. While these are already a captivating utility to present your thing, the output and audience engagement is at par with the inclusion of attractive design elements in the presentation. As is evident, there are enormous diversities of supplementary elements to complement your presentation, let us centre our discussion to the application of video background for slideshow in PowerPoint.
User’s Guide to Add Video Background in a PowerPoint Slideshow
The following section presents a detailed explanation of the steps to supplement your PowerPoint presentations with classic video backgrounds in just a few quick steps:
Step 1: Launch Your Presentation
Start with opening the desired PowerPoint presentation to which you want to add the video background, in any of your preferred devices.
Step 2: Add a Video to Your Slide
Browse through your presentation slides to locate the one you want to add the video background to. When you have made your choice, navigate to the PowerPoint toolbar at the top and hit the ‘Insert’ tab and choose the ‘Video’ option.
You will now be presented with 2 choices, either uploading a video from your device or insert one from the web by pasting its YouTube URL into the slide. If you are uploading a video from your device, proceed with selecting the desired video and tap ‘Insert’.
Step 3: Move and Resize Your Video
After uploading your video to the slide, you need to make suitable adjustments in its size and alignment to synchronize the same with the contents of the slide. To do this, drag the top left corner of the video to that of the slide to set the top alignment ratio. In the same way, move the bottom right corner of the video to be in sync with that of the slide. You will see the video occupying the entire slide at the end of the adjustment process.
Step 4: Set the Video Background
You will now need to set the video as the background of your slide, so that the latter’s contents are displayed over the video. You can do this by right clicking on the video and choosing the ‘Send to Back’ option from the dropdown that follows. This will cause the contents of your slide to get displayed over the video.
Step 5: Playback Edit and Customization Choices
Before proceeding towards making changes in the video playback and formatting, prefer taking a quick preview of your work till here. Once you are satisfied, navigate to the PowerPoint Toolbar at the top, hit the ‘Video Tools’ tab, followed by clicking on the ‘Playback’ tab.
It is recommended to introduce the following changes in your video for the most affordable slideshow output:
● Loop Your Video
Creating a video loop will facilitate you with an automatic replay of your video without the need to restart it every time with a click. You can loop your video by navigating to the ‘Video Options’ section and choose ‘Loop Until Stopped’ by clicking within the checkbox next to it. The background video will now continue to play until you switch to a different slide.
● Automatically Start Your Video
To avoid clicking on the slide amid your presentation for the video loop to begin, adjust the latter’s settings for an automatic start. Navigate to the ‘Start’ dropdown menu and select ‘Automatically’.
● Trim Your Video
You can work with some basic video editing tools in PowerPoint, like trimming and cropping your background video to a desired length. If you wish to ward off certain portions of your video, reach to and click o the ‘Trim Video’ button. Following this, drag the slider of the video to select the desired portions of the clip and exclude the rest.
You can further work with some more editing effects to create the perfect video backgrounds for your presentation slides in line with your specific preferences.
Step 6: Annotate Your Video Background
When you are done with the video editing process, take a preview of the same to ensure that everything is set in the proper order and at the proper place. Lastly, if you wish to add suitable text annotations to your video, you can do this with the ‘ClassPoint’ tool to write over the video background. All you need to do is select a preferred pen colour and start writing on your slide screen. You can further, save the annotations for a work record.
Part 2 How to Create Moving Backgrounds in Microsoft PowerPoint?
Moving PowerPoint slideshow background is another aspect of graphic creativity at its best, which can be used in a number of ways to grab considerable viewer attention. When choosing to add moving backgrounds to your presentation, the latter can aid in improving the style of content presentation, making your audience curious about how and what happens next.
Having learnt about the utility and creation process of video backgrounds in the PowerPoint presentation tool, let us extend our discussion to the method of creating a moving slide show background in the same in the following section:
User’s Guide to Create Moving Backgrounds for PowerPoint Presentations
Discussed below is an explanatory procedure for designing moving backgrounds with an awesome appearance for slideshow presentations in Microsoft PowerPoint:
Step 1: Open Your Presentation
To begin with, launch the PowerPoint tool in your preferred device and open the presentation on which you will be working to add the moving background. After the presentation gets loaded, navigate through the same and select the desired slide to proceed with the aforesaid task.
Step 2: Choose a Video Location
To add your desired video to the slide, navigate to the PowerPoint ribbon at the top and click on the ‘Insert’ tab. Select ‘Video’ from the list of options that appears, followed by choosing one of the ‘Online Video’ or ‘Video on My PC’ options from the video selection prompt. It is further recommended to select a video in the MP4 format, as the latter gives best results of moving and video backgrounds.
Step 3: Insert Your Video
Choose the second option in the selection prompt to upload a video from your device. You will now be asked to browse through your device and locate the desired video in the ‘Insert Video’ dialog box that appears. Select your video and tap the ‘Insert’ button to add your video.
To upload videos from an online source, choose the ‘Online Video’ option in the selection prompt and proceed to search the video from PowerPoint or paste its embed code to recover the video. The chosen video will begin to download and can be added to the PowerPoint presentation after the download process comes to an end.
Step 4: Playback Editing and Video Customization
Before proceeding further, consider paying your video once by clicking on the ‘Start’ button. You can also add different effects, trim and crop or add a bookmark to your video by navigating to and clicking on the ‘Video Tools’ tab, followed by selecting the ‘Format’ option. To work with the start and playback options for the video, click on ‘Playback’ in the dropdown menu of the ‘Video Tools’ tab.
Part 3 Some Tips for You to Get Awesome PowerPoint Backgrounds & Templates
Now that you have developed a comprehensive understanding of the utility of adding video and moving background for slideshow presentation, let us look through some easy tips and tricks to conveniently access the top rated and the most popular PowerPoint slideshow templates and backgrounds in the following section:
01Cool Slide Backgrounds
Slideshow presentations in PowerPoint are supplemented with a visual spark through amazing and vibrant backgrounds that are a sign of excellent graphic creativity. When working with a PowerPoint presentation of your own, do take the liberty to use some cool slide backgrounds to your creative advantage.
When the talk is about complementing your presentation with a cohesive and upbeat background, you can either select the most suitable one from a heap of pre made slideshow templates available both in the PowerPoint slideshow creator tool as well as across the web. However, if you wish to take the excitement to another level, try hands at creating an awesome and cool backgrounds for PowerPoint slides of your own!
Talking about some really cool tips and tricks to design a slideshow presentation background in PowerPoint, start with including some specific shapes and color overlays to the background capture, experiment with a polygon background, work on enhancing the background image with classic and artistic effects and apply a mix of colors, textures and patterns to give a classy look to your slideshow backgrounds.
02Professional Slideshow Backgrounds
If you are aiming at creating a PowerPoint slideshow presentation with a business centered design approach, you will need to cut down on some extra elements that you would ideally choose to include in a personal purpose based slideshow. Paying attention to the fact that business and corporate centered presentations should be simple, subtle and to the point, it would be an intelligent step to avoid adding too many expressive elements in the background.
Whether you are creating a professional slideshow background of your own or working with a pre designed template, take care to include a complementary play of a light background theme with a maximum of 2 balancing shades.
Avoid too much vibrancy and abstain from applying over the top effects and quick transitions, lest your presentation may look a bit too crowed. If your slides have lot of written content, prefer using a white color background text in a professional font style.
If you have decided on picking a pre made template, you can browse through a diversity of suggestions across the web, while keeping the aforesaid constraints in mind. Consider taking a look at the figure given below to have a more comprehensive understating of the prerequisites of selecting a professional sideshow background template:
03Happy Birthday Slide Backgrounds
Birthday parties are the most appealing synonyms of fun and entertainment. If you are into the profession of organizing events that renders smiling and happy faces, slideshow presentations could be of great help to you in discussing about services, types of social gentries and event targets with your clients.
When looking through different options to select the perfect birthday template, either for a professional event, or just to go down the memory lane of your most cherished moments, take caution to search for a vibrant alternative with colorful images, different background designs and party oriented cool themes, wide aspect ratio with high screen resolution for a mass display and conveniently editable graphics.
If you are creating a happy birthday slide background of your own, there are variety of realms to explore your graphic design creativity, owing to the fact that the subject of creation is highly expressive and multi-dimensional. While you are free to extend your creativity to the next level, do pay attention to the above constraints for a more elusive and outstanding creation output, while maintaining the fun and entertainment quotient intact.
04Wedding Slide Backgrounds
Considering the fact that wedding events are pronounced means of fun, leisure, enjoyment and beautiful memories, anything that aims to be a part of the celebrations, should be equally ecstatic and engaging. Infusing festive occasions with technology, slideshow based wedding invitations and moment captures are the top rated modern trends of celebrating this significant life event.
If you are keen on designing the perfect slideshow presentation for wedding invitations, photo albums and thank you cards, prefer to choose a wedding slide background template with aesthetic layout and flowing element inclusions, like that of floral borders and scented candles. Look though the elements of a subtle thematic setup with soothing color combinations, preferably in complementary pastel shades, like pink and white.
Talking of template customizability, the latter should have placeholders to include names of the bride and groom, the wedding date and venue, and of course the wedding photographs. The beautiful slide background template should have enough design space to include the most elusive play of text colors and fonts to suit specific preferences of creating special memories of a cherished event.
05Slideshow Backgrounds and Templates in Filmora
When looking for the most convenient lead to an extensive variety of beautiful slideshow templates and background, the template library of Wondershare Filmora Video Editor slideshow creator program can be your most affordable destination. The aforesaid software library is known to possess the best and most perfect template choices to suit the creation constraints of almost every slideshow presentation style and objective you can possibly think of.
For Win 7 or later (64-bit)
For macOS 10.12 or later
The elusive templates are further supplemented with a plethora of design flexibilities and customization features that are all set to deliver you the most appreciable creation output. Stressing a bit on the template customization choices of the software, you can work with the tool to uplift your slideshow backgrounds with artistic image effects and overlays, annotate them with beautiful text formations in a variety of colors, fonts and sizes and lots more.
Moving a bit deeper into the creative aspect, you can upgrade the visual style of your presentations with the most perfect and seamless image and video transitions and text animations. The bottom line is, working with the aforesaid slideshow creator program, you are entitled to get jaw dropping applaud from your audience, while making a confident and a content delivery through your slideshow presentation.
● Ending Thoughts →
● Using an expressive and complementing background in your slideshow presentation uplifts its visual credibility in captivating your audience.
● Browsing through the web, you get to access a vast range of amazing slideshow backgrounds and templates to make your presentation, a visual masterpiece.
● When looking for the most distributed storehouse of slideshow backgrounds and templates, the Wondershare Filmora library is your ultimate solution.
10 Stunning Stop Motion Movies That You Should Not Miss
10 Stunning Stop Motion Movies That You Should Not Miss
An easy yet powerful editor
Numerous effects to choose from
Detailed tutorials provided by the official channel
We do have some recommendations for you. Even more than that, we’ve compiled a comprehensive guide on stop motion movies in hopes of introducing this often-forgotten art to those that may have never thought to appreciate it before.
Complete with an introduction, some examples of great stop motion animation movies and a peek at what the process is usually like for the professionals working on said movies.
In this article
01 [What Movies Use Stop Motion Animation?](#Part 1)
02 [Popular Stop Motion Movies You Might Wonder](#Part 2)
03 [Top 10 Stop Motion Animation Films](#Part 3)
04 [How to Make a Stop Motion Animation Movie](#Part 4)
Part 1 What Movies Use Stop Motion Animation?
First, that overview we promised. This will be a brief introduction to introduce certain key knowledge that you might not already know. Of course, for those who want to head straight to the recommendations, they can do so by skipping to of this article.
01What is a Stop Motion Movie?
The best way to introduce the concept of stop motion animation movies is to first reiterate that it is, literally, the oldest form of animation in film. This was what all the animators did before they figured out how to create the software required to make their characters come alive in a different way.
It involves a lot of crafting, a lot of maneuvering, a lot of careful and precise adjustments. To put it in the simplest way possible, it’s the process of taking a still image of a scene. And then introducing ‘motion’ by changing the elements of said scene, little by little, and taking a picture at every opportunity in between. So that all the still images come together to create the illusion of movement and motion.
02What is the Most Successful Stop Motion Movie?
There are plenty of answers that could be given in this case. Perhaps it should be the first-ever stop motion movie to be made? Which was “The Humpty Dumpty Circus” created by Blackton and Smith with their own daughter’s dolls.
You might also consider success by way of long-term watch ability. If so, then old classics like the “Nightmare Before Christmas” or “Rudolph the Reindeer.” And finally. You have “Chicken Run” which is considered the best performing stop motion movie of all time. Having earned somewhere around $17.5 million in its first, weekend showing.
Part 2 Popular Stop Motion Movies You Might Wonder
Now, how about some of the more popular stop motion practices to come out in the last couple of decades? Different from the stop motion movies of old but still the same at heart. What do we have to say about them?
01Lego Stop Motion Animation Movies
Well… Since our thoughts on the subject are distinctive, we thought to break it up. First starting with Lego Movie stop motion animation. This stop motion movie animation style, also called ‘Brickfilms’, is the practice of using Lego to create stop motion animation movies. It’s been around since the 1970s, but it was only 2003 that the first official film was released by Lego, who partnered up with a production company to create films for them.
It ended up being one of the best choices for them. Especially in terms of marketing their toy products, and the practice had only grown in popularity since, with both kids and adults alike finding joy in the end product.
023D Stop Motion Animation Movies
Alright, so how about 3D stop motion movies? How is it different from 3D animation movies and regular stop motion movies??? Well, it’s actually a bit of a tricky term. The 3D in this case is to differentiate it from regular 2D stop motion animation as you see in a lot of animated films from the East (where each image is hand-drawn to show motion).
In this case, props, objects, character models, and other materials are used in order to sculpt a 3D model of a scene, and pictures are taken to capture motion. The first of the movies of this style is called “Tune with Tomorrow” but you might be more familiar with the title “Coraline.”
Part 3 Top 10 Stop Motion Animation Films
Now for our list of the best stop motion animation movies of our time. This will be somewhat subjective, but also not. Every single one of the stop motion movies on this list is highly rated everywhere and has received rave reviews — making it worth taking the time to watch every single one of them when you have the time.
01Coraline (2009)
We mentioned this stop motion movie previously, but in case you haven’t already watched it, it’s a classic. The storytelling elements of “Coraline” really matched the stop motion style of animation. It was released in 2009 as a 3D movie and it shares the story of a little girl that finds joy and excitement in an alternate reality. Only to realize that it wasn’t all that it was chalked up to be.
02The Nightmare Before Christmas (1993)
“The Nightmare Before Christmas” (1993) is another stop motion animation movie that you might have already heard of before. It features the memorable character, Jack Skellington (the Pumpkin King of Halloweentown.) You can usually catch this film airing somewhere on television during the holiday season, as the story is all about Jack Skellington’s obsession with ruining Christmas.
03Chicken Run (1994)
This next stop motion movie, called “Chicken Run” (1994) was also mentioned before. It is, as was previously discussed, the highest performing stop motion animation movie on the big screen. It features quite a varied cast of chickens in a poultry farm all aiming to make an escape by learning how to fly.
04Fantastic Mr. Fox (2009)
The next film, released in the same year as “Coraline”, is called “Fantastic Mr. Fox.” This was directed by Wes Anderson, who goes on to tell the story of the main character, ‘Mr. Fox’ and how his misadventures involving some of the local farmers in the area got—not only himself—but also his family in danger.
05Rudolph the Red-Nosed Reindeer (1964)
Rudolph the Red-nosed Reindeer is another holiday classic. This one is a lot older than some of the films on this list but is no doubt just as well-known (and perhaps even more so when you consider the older generation.) Much like the nightmare before Christmas, you can usually find this film airing sometime during the holidays on any one channel.
06Kubo and The Two Strings (2016)
From the makers of Coraline is the stop motion animation movie, called “Kubo and The Two Strings” (2016). It tells the story of Kubo, who goes on a search for a suit of magical armor in an effort to destroy an evil plaguing him. It’s quite a beautiful film and is critically acclaimed for the level of effort that went in to making sure that it was produced in a way that honored the timeless art of stop motion.
07Alice (1988)
This next stop motion film is quite unique. It’s called “Alice” and it was released sometime in the late 1980s. The fun part of this story is that it begins with a live actress playing Alice. In fact, even the rabbit that leads her to wonderland, and eventually turns her into a porcelain doll, was a taxidermized hare that escaped from its display case. In this way, the stop motion aspect of the story is integrated in a fun way that matches the mood of the rest of the hypnotic story to come.
088. Mary and Max (2009)
Another stop motion movie that had been released in 2009 (a big year in stop motion animation) is called “Mary and Max.” This one tells the story of a young girl and man. One living in Australia and the other in America. The two characters form a penpal-ship that takes them through both personal growth and development, making it quite heartwarming.
09The Little Prince (2016)
Categorizing this film as ‘stop motion’ one gave us pause because, technically, only half of the film was done in the stop motion style. However, that doesn’t detract from the evident beauty in those scenes — which speaks not only of countless efforts but gives life to the exciting classic story of “The Little Prince.”
10Frankenweenie (2012)
Another classic that you might recognize is “Frankenweenie” which was released in 2012. It starts off quite grim, with a young boy bringing a dead dog back into life — only further adding to the goth aesthetic that the style of the characters is rocking.
Part 4 How to Make a Stop Motion Animation Movie
For the last part of this article, we move on to the promised ‘tutorial’. It won’t be all that comprehensive, but it should give you a better idea of how stop motion movies are created and the kind of effort and hours that are put into it. Perhaps it will inspire you to try your hand at the process yourself.
01Step 1. Get a Camera.
The first and most important part of setting up for a stop motion movie is to prepare your camera. As any little bit of jostling can cause a whole scene to look jarring, you’ll need to make sure that this is taken care of. Otherwise, you might be forced to redo a scene unnecessarily.
In this case, the invention of tripods turned out to be a major boon, as it kept the camera at the correct vantage view.
02Step 2. Prepare Materials for the Set.
Of course, as props and materials are important for bringing characters to life in a stop motion film, you’ll need some pre-prepared in order to start.
This can be Lego action figures (if you’re working on a Lego stop motion movie) or it can be a regular model or doll (if you’re working on a 3D animation stop motion animation movie.)

03Step 3. Prepare the Set.
For stop motion, it’s important that both the scene and the camera are kept in stable positions. After all, the background will be captured too.
And, to allow for that illusion of motion, it’s best if a still object is compared to one in motion. So, pay very careful when setting up your recording studio. It can make or break your project.

04Step 4. Choose Editing Software
For the last step, you’ll need to pick out an editing software that you can use in order to put together your still images and create a video.
For that, we recommend the professional Wondershare Filmora Video Editor . It’s all set up for professionals and beginners alike, allowing you the freedom to create characters that are both simple and complex with ease. In this case, of course, the goal is to put together your story through all the different frames that you captured in the process.
For Win 7 or later (64-bit)
For macOS 10.12 or later
● Key Takeaways from This Episode →
● Stop motion animation is a classic way of telling a story of fantastical characters and settings without having to draw everything frame by frame.
● It offers any film a very distinctive style that a lot of lovers of the classics find themselves constantly seeking out.
● If you go through the list that we organized out of some of the best stop motion movies in film history, you’ll notice that they’re all quite acclaimed for their masterful storytelling and fun graphics (which, before the creation of 3D animation as we know it today, was the height of entertainment.)
● This classic art form can be accomplished by just about anyone with the right equipment and a little bit of effort. It takes some patience, as we hoped to have explained in our tutorial, but the effort is worth the sense of fulfillment that comes when a story told in stills turns into a masterful animation that brings static objects and characters to life.
We do have some recommendations for you. Even more than that, we’ve compiled a comprehensive guide on stop motion movies in hopes of introducing this often-forgotten art to those that may have never thought to appreciate it before.
Complete with an introduction, some examples of great stop motion animation movies and a peek at what the process is usually like for the professionals working on said movies.
In this article
01 [What Movies Use Stop Motion Animation?](#Part 1)
02 [Popular Stop Motion Movies You Might Wonder](#Part 2)
03 [Top 10 Stop Motion Animation Films](#Part 3)
04 [How to Make a Stop Motion Animation Movie](#Part 4)
Part 1 What Movies Use Stop Motion Animation?
First, that overview we promised. This will be a brief introduction to introduce certain key knowledge that you might not already know. Of course, for those who want to head straight to the recommendations, they can do so by skipping to of this article.
01What is a Stop Motion Movie?
The best way to introduce the concept of stop motion animation movies is to first reiterate that it is, literally, the oldest form of animation in film. This was what all the animators did before they figured out how to create the software required to make their characters come alive in a different way.
It involves a lot of crafting, a lot of maneuvering, a lot of careful and precise adjustments. To put it in the simplest way possible, it’s the process of taking a still image of a scene. And then introducing ‘motion’ by changing the elements of said scene, little by little, and taking a picture at every opportunity in between. So that all the still images come together to create the illusion of movement and motion.
02What is the Most Successful Stop Motion Movie?
There are plenty of answers that could be given in this case. Perhaps it should be the first-ever stop motion movie to be made? Which was “The Humpty Dumpty Circus” created by Blackton and Smith with their own daughter’s dolls.
You might also consider success by way of long-term watch ability. If so, then old classics like the “Nightmare Before Christmas” or “Rudolph the Reindeer.” And finally. You have “Chicken Run” which is considered the best performing stop motion movie of all time. Having earned somewhere around $17.5 million in its first, weekend showing.
Part 2 Popular Stop Motion Movies You Might Wonder
Now, how about some of the more popular stop motion practices to come out in the last couple of decades? Different from the stop motion movies of old but still the same at heart. What do we have to say about them?
01Lego Stop Motion Animation Movies
Well… Since our thoughts on the subject are distinctive, we thought to break it up. First starting with Lego Movie stop motion animation. This stop motion movie animation style, also called ‘Brickfilms’, is the practice of using Lego to create stop motion animation movies. It’s been around since the 1970s, but it was only 2003 that the first official film was released by Lego, who partnered up with a production company to create films for them.
It ended up being one of the best choices for them. Especially in terms of marketing their toy products, and the practice had only grown in popularity since, with both kids and adults alike finding joy in the end product.
023D Stop Motion Animation Movies
Alright, so how about 3D stop motion movies? How is it different from 3D animation movies and regular stop motion movies??? Well, it’s actually a bit of a tricky term. The 3D in this case is to differentiate it from regular 2D stop motion animation as you see in a lot of animated films from the East (where each image is hand-drawn to show motion).
In this case, props, objects, character models, and other materials are used in order to sculpt a 3D model of a scene, and pictures are taken to capture motion. The first of the movies of this style is called “Tune with Tomorrow” but you might be more familiar with the title “Coraline.”
Part 3 Top 10 Stop Motion Animation Films
Now for our list of the best stop motion animation movies of our time. This will be somewhat subjective, but also not. Every single one of the stop motion movies on this list is highly rated everywhere and has received rave reviews — making it worth taking the time to watch every single one of them when you have the time.
01Coraline (2009)
We mentioned this stop motion movie previously, but in case you haven’t already watched it, it’s a classic. The storytelling elements of “Coraline” really matched the stop motion style of animation. It was released in 2009 as a 3D movie and it shares the story of a little girl that finds joy and excitement in an alternate reality. Only to realize that it wasn’t all that it was chalked up to be.
02The Nightmare Before Christmas (1993)
“The Nightmare Before Christmas” (1993) is another stop motion animation movie that you might have already heard of before. It features the memorable character, Jack Skellington (the Pumpkin King of Halloweentown.) You can usually catch this film airing somewhere on television during the holiday season, as the story is all about Jack Skellington’s obsession with ruining Christmas.
03Chicken Run (1994)
This next stop motion movie, called “Chicken Run” (1994) was also mentioned before. It is, as was previously discussed, the highest performing stop motion animation movie on the big screen. It features quite a varied cast of chickens in a poultry farm all aiming to make an escape by learning how to fly.
04Fantastic Mr. Fox (2009)
The next film, released in the same year as “Coraline”, is called “Fantastic Mr. Fox.” This was directed by Wes Anderson, who goes on to tell the story of the main character, ‘Mr. Fox’ and how his misadventures involving some of the local farmers in the area got—not only himself—but also his family in danger.
05Rudolph the Red-Nosed Reindeer (1964)
Rudolph the Red-nosed Reindeer is another holiday classic. This one is a lot older than some of the films on this list but is no doubt just as well-known (and perhaps even more so when you consider the older generation.) Much like the nightmare before Christmas, you can usually find this film airing sometime during the holidays on any one channel.
06Kubo and The Two Strings (2016)
From the makers of Coraline is the stop motion animation movie, called “Kubo and The Two Strings” (2016). It tells the story of Kubo, who goes on a search for a suit of magical armor in an effort to destroy an evil plaguing him. It’s quite a beautiful film and is critically acclaimed for the level of effort that went in to making sure that it was produced in a way that honored the timeless art of stop motion.
07Alice (1988)
This next stop motion film is quite unique. It’s called “Alice” and it was released sometime in the late 1980s. The fun part of this story is that it begins with a live actress playing Alice. In fact, even the rabbit that leads her to wonderland, and eventually turns her into a porcelain doll, was a taxidermized hare that escaped from its display case. In this way, the stop motion aspect of the story is integrated in a fun way that matches the mood of the rest of the hypnotic story to come.
088. Mary and Max (2009)
Another stop motion movie that had been released in 2009 (a big year in stop motion animation) is called “Mary and Max.” This one tells the story of a young girl and man. One living in Australia and the other in America. The two characters form a penpal-ship that takes them through both personal growth and development, making it quite heartwarming.
09The Little Prince (2016)
Categorizing this film as ‘stop motion’ one gave us pause because, technically, only half of the film was done in the stop motion style. However, that doesn’t detract from the evident beauty in those scenes — which speaks not only of countless efforts but gives life to the exciting classic story of “The Little Prince.”
10Frankenweenie (2012)
Another classic that you might recognize is “Frankenweenie” which was released in 2012. It starts off quite grim, with a young boy bringing a dead dog back into life — only further adding to the goth aesthetic that the style of the characters is rocking.
Part 4 How to Make a Stop Motion Animation Movie
For the last part of this article, we move on to the promised ‘tutorial’. It won’t be all that comprehensive, but it should give you a better idea of how stop motion movies are created and the kind of effort and hours that are put into it. Perhaps it will inspire you to try your hand at the process yourself.
01Step 1. Get a Camera.
The first and most important part of setting up for a stop motion movie is to prepare your camera. As any little bit of jostling can cause a whole scene to look jarring, you’ll need to make sure that this is taken care of. Otherwise, you might be forced to redo a scene unnecessarily.
In this case, the invention of tripods turned out to be a major boon, as it kept the camera at the correct vantage view.
02Step 2. Prepare Materials for the Set.
Of course, as props and materials are important for bringing characters to life in a stop motion film, you’ll need some pre-prepared in order to start.
This can be Lego action figures (if you’re working on a Lego stop motion movie) or it can be a regular model or doll (if you’re working on a 3D animation stop motion animation movie.)
03Step 3. Prepare the Set.
For stop motion, it’s important that both the scene and the camera are kept in stable positions. After all, the background will be captured too.
And, to allow for that illusion of motion, it’s best if a still object is compared to one in motion. So, pay very careful when setting up your recording studio. It can make or break your project.
04Step 4. Choose Editing Software
For the last step, you’ll need to pick out an editing software that you can use in order to put together your still images and create a video.
For that, we recommend the professional Wondershare Filmora Video Editor . It’s all set up for professionals and beginners alike, allowing you the freedom to create characters that are both simple and complex with ease. In this case, of course, the goal is to put together your story through all the different frames that you captured in the process.
For Win 7 or later (64-bit)
For macOS 10.12 or later
● Key Takeaways from This Episode →
● Stop motion animation is a classic way of telling a story of fantastical characters and settings without having to draw everything frame by frame.
● It offers any film a very distinctive style that a lot of lovers of the classics find themselves constantly seeking out.
● If you go through the list that we organized out of some of the best stop motion movies in film history, you’ll notice that they’re all quite acclaimed for their masterful storytelling and fun graphics (which, before the creation of 3D animation as we know it today, was the height of entertainment.)
● This classic art form can be accomplished by just about anyone with the right equipment and a little bit of effort. It takes some patience, as we hoped to have explained in our tutorial, but the effort is worth the sense of fulfillment that comes when a story told in stills turns into a masterful animation that brings static objects and characters to life.
That Will Make Aesthetic Cartoon Drawing More Understandable
That Will Make Aesthetic Cartoon Drawing More Understandable
An easy yet powerful editor
Numerous effects to choose from
Detailed tutorials provided by the official channel
When you are trying to make an aesthetic drawings cartoon, the primary thing to focus on is the composition. Composition is the combination, arrangement, and organization of objects within the borders of drawing space. To have a great aesthetic cartoon drawing, you must focus on bringing the eyes of the viewer toward your center of interest within an aesthetically-pleasing composition. When we create illustrations, we are often concerned with putting in a lot of details that will overload the image and lose the meaning that we originally wanted it to convey.

We engage our audience and viewer more by composing a perfect aesthetic drawing. In addition, many rules define a good composition drawing, but these rules are mainly guidelines. Also pay attention to your personal preferences and instincts. In this guide, we’ll teach you how to make an excellent aesthetic cartoon painting more understandable.
In this article
01 [Canvas Aesthetic Painting Ideas](#Part 1)
02 [Blender Aesthetic Painting Ideas](#Part 2)
03 [How to Create Super-Detailed Aesthetic Cartoon Painting](#Part 3)
Part 1 Canvas Aesthetic Painting Ideas
There are times you do not need to be a famous painter or an art professional to create beautiful wall art. Canvas painting is an all-in-one application for all skill levels, from beginners to experts. It also provides you with different painting ideas ranging from beach scenes to abstract designs to create pieces that look stunning and professional.
We have compiled a list of canvas aesthetic painting ideas to help you begin your journey as an aesthetic cartoon painter. Look through the images to determine which ones match the style of painting you wish to add to your drawing and get inspiration to create your designs.
01Disney Canvas Art
These are aesthetic cartoon painting ideas relating to 2020 Disney Canvas Art. You can get ideas from this to begin your journey into the world of painting.

02Hippie Painting Canva Art
If you are also looking for other aesthetic cartoon painting ideas to choose from, you can select from this 2020 Cute Canvas Paintings “Hippie Painting” Canvas Art.

03Spongebob Painting
These painting ideas are a part of the Canvas Aesthetic Cartoon Painting ideas of 2020 called Spongebob Painting Disney Canvas Art.

04Babs Bunny Pa Et Mini Lerret
These are a painting about “Babs Bunny Pa Et Mini Lerret.” A 2020 Mini Canvas Art Hippie Painting Canvas idea that you can choose from

Part 2 Blender Aesthetic Painting Ideas
Blender is an accessible and open-source 3D creation suite that supports the entirety of the 3D pipeline modeling, rigging, animation, simulation, compositing rendering, motion tracking, video editing, and 2D animation pipeline. It is a fact that this is one of the best open-source software you can choose from to make your aesthetic cartoon drawing.
It is entirely free software, and various artists can use it to start digging in and playing with it. Here are some of the blender aesthetic cartoon painting ideas you can choose from:
01Princess Ira and Amina
This is a fictional aesthetic drawing cartoon of an African princess having gold gifted powers with her face painting inspired by Nigerian traditional face decorations. However, her crown is adorned with crosses, crystals, and chains which incorporate several elements from different cultural designs available from all over the world to portray unity.

02Survival Knife Weekly Drills 045
This was a design painting inspired based on BUCK KNIVES in pain texturing and focuses on making a practical game-ready asset.

03Radiance
This is a blender aesthetic cartoon painting idea of a graduation project made for the Concept Art specialized cursus at New3dge School.

04 The character looks dev
This blender cartoon painting’s inspiration came from Edward, the short film’s main character. It is a work in progress but a lovely painting that can inspire you.
Part 3 How to Create Super-Detailed Aesthetic Cartoon Painting
To create a super detailed aesthetic cartoon drawing, you do not need to be a trained artist, nor do you need a fancy cartoon picture maker. All you need to create a cartoon painting photo is a simple and Free picture from a cartoon editor to help you carry out the task more effectively.
However, you can also convert your cartoon paint into creative animation using Wondershare Filmora Video Editor . Filmora is a powerful all-in-one tool for editing that you can use to that can be used for free to animate your cartoon with its tons of effects, filters, and keyframing features that can help you carry this out effectively.
For Win 7 or later (64-bit)
For macOS 10.12 or later
Here is how to create a super detailed aesthetic cartoon painting:

Step 1: Open the Picsart editor on your desktop browser and click on the new project
Step 2: Next is to click on Upload to select the photo that you want to cartoon paint from the computer library of your hard drive
Step 2: Click on the toolbar, select the effect feature from the dropdown above your photo, and click on Magic to view all available one-click cartoon filters. However, almost all of the Magic effects on this editor will help you achieve an aesthetic cartoon photo effect.
Step 4: Click on Adjust and Blend above your photo workspace on the editor. This will help you manually adjust the effects (color burn, fade, saturation, brightness, etc.).
Step 5: Preview your result and once you are happy with the new cartoon photo painting, click on the Share button and download it from the top right corner of the editor to save it on your device.
● Ending Thoughts →
● This article explained creating and gave inspiration and ideas for the aesthetic cartoon painting you can choose from to make yours. In addition, the report also recommends Filmora as an influential editor if you intend to create an animation from your cartoon painting due to its tons of features.
● So, now you can start building your aesthetic drawings and cartoons!
When you are trying to make an aesthetic drawings cartoon, the primary thing to focus on is the composition. Composition is the combination, arrangement, and organization of objects within the borders of drawing space. To have a great aesthetic cartoon drawing, you must focus on bringing the eyes of the viewer toward your center of interest within an aesthetically-pleasing composition. When we create illustrations, we are often concerned with putting in a lot of details that will overload the image and lose the meaning that we originally wanted it to convey.
We engage our audience and viewer more by composing a perfect aesthetic drawing. In addition, many rules define a good composition drawing, but these rules are mainly guidelines. Also pay attention to your personal preferences and instincts. In this guide, we’ll teach you how to make an excellent aesthetic cartoon painting more understandable.
In this article
01 [Canvas Aesthetic Painting Ideas](#Part 1)
02 [Blender Aesthetic Painting Ideas](#Part 2)
03 [How to Create Super-Detailed Aesthetic Cartoon Painting](#Part 3)
Part 1 Canvas Aesthetic Painting Ideas
There are times you do not need to be a famous painter or an art professional to create beautiful wall art. Canvas painting is an all-in-one application for all skill levels, from beginners to experts. It also provides you with different painting ideas ranging from beach scenes to abstract designs to create pieces that look stunning and professional.
We have compiled a list of canvas aesthetic painting ideas to help you begin your journey as an aesthetic cartoon painter. Look through the images to determine which ones match the style of painting you wish to add to your drawing and get inspiration to create your designs.
01Disney Canvas Art
These are aesthetic cartoon painting ideas relating to 2020 Disney Canvas Art. You can get ideas from this to begin your journey into the world of painting.
02Hippie Painting Canva Art
If you are also looking for other aesthetic cartoon painting ideas to choose from, you can select from this 2020 Cute Canvas Paintings “Hippie Painting” Canvas Art.
03Spongebob Painting
These painting ideas are a part of the Canvas Aesthetic Cartoon Painting ideas of 2020 called Spongebob Painting Disney Canvas Art.
04Babs Bunny Pa Et Mini Lerret
These are a painting about “Babs Bunny Pa Et Mini Lerret.” A 2020 Mini Canvas Art Hippie Painting Canvas idea that you can choose from
Part 2 Blender Aesthetic Painting Ideas
Blender is an accessible and open-source 3D creation suite that supports the entirety of the 3D pipeline modeling, rigging, animation, simulation, compositing rendering, motion tracking, video editing, and 2D animation pipeline. It is a fact that this is one of the best open-source software you can choose from to make your aesthetic cartoon drawing.
It is entirely free software, and various artists can use it to start digging in and playing with it. Here are some of the blender aesthetic cartoon painting ideas you can choose from:
01Princess Ira and Amina
This is a fictional aesthetic drawing cartoon of an African princess having gold gifted powers with her face painting inspired by Nigerian traditional face decorations. However, her crown is adorned with crosses, crystals, and chains which incorporate several elements from different cultural designs available from all over the world to portray unity.
02Survival Knife Weekly Drills 045
This was a design painting inspired based on BUCK KNIVES in pain texturing and focuses on making a practical game-ready asset.
03Radiance
This is a blender aesthetic cartoon painting idea of a graduation project made for the Concept Art specialized cursus at New3dge School.
04 The character looks dev
This blender cartoon painting’s inspiration came from Edward, the short film’s main character. It is a work in progress but a lovely painting that can inspire you.
Part 3 How to Create Super-Detailed Aesthetic Cartoon Painting
To create a super detailed aesthetic cartoon drawing, you do not need to be a trained artist, nor do you need a fancy cartoon picture maker. All you need to create a cartoon painting photo is a simple and Free picture from a cartoon editor to help you carry out the task more effectively.
However, you can also convert your cartoon paint into creative animation using Wondershare Filmora Video Editor . Filmora is a powerful all-in-one tool for editing that you can use to that can be used for free to animate your cartoon with its tons of effects, filters, and keyframing features that can help you carry this out effectively.
For Win 7 or later (64-bit)
For macOS 10.12 or later
Here is how to create a super detailed aesthetic cartoon painting:
Step 1: Open the Picsart editor on your desktop browser and click on the new project
Step 2: Next is to click on Upload to select the photo that you want to cartoon paint from the computer library of your hard drive
Step 2: Click on the toolbar, select the effect feature from the dropdown above your photo, and click on Magic to view all available one-click cartoon filters. However, almost all of the Magic effects on this editor will help you achieve an aesthetic cartoon photo effect.
Step 4: Click on Adjust and Blend above your photo workspace on the editor. This will help you manually adjust the effects (color burn, fade, saturation, brightness, etc.).
Step 5: Preview your result and once you are happy with the new cartoon photo painting, click on the Share button and download it from the top right corner of the editor to save it on your device.
● Ending Thoughts →
● This article explained creating and gave inspiration and ideas for the aesthetic cartoon painting you can choose from to make yours. In addition, the report also recommends Filmora as an influential editor if you intend to create an animation from your cartoon painting due to its tons of features.
● So, now you can start building your aesthetic drawings and cartoons!
What Wikipedia Can’t Tell You About the 10 Batman Cartoons
What Wikipedia Can’t Tell You About the 10 Best Batman Cartoons
An easy yet powerful editor
Numerous effects to choose from
Detailed tutorials provided by the official channel
Who does not admire the caped crusader? Over the years, Batman has been a part of our childhood through cartoons, movies, and comics, and it is still quite prevalent today, as seen by how well The Batman (2022), starring Robert Pattinson, did in theatres.
The Batman movies are probably how most of us know him, but another great way to enjoy our favorite superhero is through the animated series. These animations feature beautiful visuals and great storylines, which is why the batman cartoon series is still so popular. Here is the top 10 best batman cartoon you need to watch right now!
01The Adventures of Batman
● Name of the movie - The Adventures of Batman (1968-1969)
● Rating - 7.3/10
● Duration - 1hr
● Directors - Anatole Kirsanoff (3 Episodes, 1968)), Hal Sutherland (3 Episodes, 1968)
● Votes - 1,387
● Synopsis -
“The Adventures of Batman,” starred by Adam West, gained huge popularity in 1968. This series consisted of short segments of videos from the popular show “The Batman/Superman Hour.” This show helped launch the later gained popularity show “Super Friends.” This show was renamed a few years later as “Batman With Robin The Boy Wonder”; however that was just the beginning of the success it gained.
02The New Adventures of Batman
● Name of the movie - The New Adventures of Batman (1977–1978)
● Rating - 6.9/10
● Duration - 30min
● Directors - Don Towsley (16 Episodes, 1977)
● Votes - 1,157
● Synopsis -
“The New Adventures of Batman” is a continuation of the series “The Adventures of Batman.” This is one of the most famous series on Batman. This is the show that comes to the mind of the “Dark Knight”s fans is “The New Adventures of Batman.” This show concentrated on much nuanced objects of the character, which attracted the kids especially. At the same time, it was equally entertaining and thoughtful for its adult entertainers. This show is considered one of the most extraordinary shows made within the Batman Series collection.
03Batman Beyond
● Name of the movie - Batman Beyond (1999-2001)
● Rating - 8.1/10
● Duration - 23min
● Directors - Butch Lukic (16 Episodes, 1999-2000), Dan Riba (14 Episodes, 1999-2001), Curt Geda (11 Episodes, 1999-2000), James Tucker (5 Episodes, 2000-2001), Kyung Won Lim (7 Episodes, 1999-2001), Yukio Suzuki (2 Episodes, 1999)
● Votes - 26,997
● Synopsis -
“Batman Beyond” was debuted in 1999. Due to severe health conditions, Wayne Bruce took a break from his work in Cyberpunks’s Gotham City. This movie was a game-changer for him as he helped in the last few seasons of this show. This show took a cult turn among its fans and became a huge success. Later, this show got canceled.
04The Brave And The Bold
● Name of the movie - Batman - The Brave And The Bold (2008-2011)
● Rating - 7.3/10
● Duration - 30 min
● Directors - Ben Jones (25 Episodes, 2008-2011), Brandon Vietti (9 Episodes, 2008-2009), Lauren Montgomery (1 Episode, 2011), Michael Chang (17 Episodes, 2008-2011), Michael Goguen (15 Episodes, 2009-2011)
● Votes - 8,801
● Synopsis -
In the “Batman, The Brave And The Bold” series, “Superhero Team-Ups” was featured. Many viewers have commented on this movie as fresh and exciting. Several DC heroes or characters were featured in this movie. This was one of the shows through which the Gen Z’s were introduced to shows like Blue Beetle. This show had very interesting scripting and animation. “Batman: The Brave And The Bold” was very popular and aired for a long time on the Cartoon Network channel.
05Beware the Batman
● Name of the movie - Beware the Batman (2013-2014)
● Rating - 7.3/10
● Duration - 22 min
● Directors - Butch Lukic (26 Episodes, 2013-2014), Curt Geda (8 Episodes, 2013-2014), Sam Liu (9 Episodes, 2013-2014), Rick Morales (9 Episodes, 2013-2014)
● Votes - 4,228
● Synopsis -
“Beware the Batman” was starred Anthony Ruivivar. If you are an action fan, this series can be a delicious item on your plate for you. This series also has a detective thriller side to it. The most fantastic thing about this movie is that this movie is extraordinary about other Batman series. The famous series “Katana” was also introduced in this popular series. It was at the top of success and gained huge fandom in 2013, one of the reasons being its outstanding animation and scripting.
06The Long Halloween
● Name of the movie - Batman - The Long Halloween (2021)
● Rating - 7.3/10
● Duration - 1hr 25min
● Directors - Chris Palmer
● Votes - 14,099
● Synopsis -
This movie is a two-part movie that is it has two parts which were released in the year 2021. In this movie, Batman, Jim Gordon, and Harvey Dent work together on solving a murder mystery. The excellent character development of the character “Batman” makes this movie an exceptional piece of art. Many Batman followers and the author commented that this is one of the best adaptations done in the history of animated movies. This movie takes its viewers on a roller coaster ride through outstanding animation, action, and scripting. It is a must-watch movie for Batman followers.
07Batman - Year One
● Name of the movie - Batman - Year One (2011)
● Rating - 7.4/10
● Duration - 1hr 4min
● Directors - Sam Liu and Lauren Montgomery
● Votes - 34,586
● Synopsis -
Batman: Year One starring Bryan Canston, Ben McKenzie, and Eliza Dushku. The most fantastic thing about this movie is the casting and their outstanding acting. There has been a common reaction from its viewers that it is a pretty straightforward Batman movie. Nonetheless, some people have the feeling that it is very similar to Christopher Nolan’s “Batman Begins,” and having that kind of reaction is understandable because the authors of the movies are the same. This movie is considered one of the most popular adaptations made in the batman cartoon.
08The Dark Knight Returns
● Name of the movie - Batman - The Dark Knight Returns(2012-2013)
● Rating - 8.1/10
● Duration - 1hr 16min
● Directors - Jay Oliva
● Votes - 57,776
● Synopsis -
This movie is also two-part with two parts. This movie is considered one of the most definitive works on Batman and his greatest work. The first movie is set so that he has not been seen in ten years, and in this movie, he makes his entry. This movie sets off the final mission of fifty-five-year-old Batman, who has to confront his old enemies. The graphics on blood and violence have not been compromised in this movie, yet it remains one of the best-reviewed batman movies. The vivid graphics, story-telling, and scripting made this movie a masterpiece in the action and adventure genre.
09Mask Of The Phantasm
● Name of the movie - Batman - Mask Of The Phantasm (1993)
● Rating - 7.8/10
● Duration - 1hr 16min
● Directors - Kevin Altieri, Boyd Kirkland, Frank Paur
● Votes - 49,147
● Synopsis -
In “Batman: Mask of the Phantasm” remains one of the most outstanding animated movies made by Batman. The storyline of this movie concentrates on both the past and future of Bruce. The most exciting fact about this movie is its climaxes. This movie features Kevin Conroy and Mark Hamill as Batman and Joker, respectively. This movie remains one of the masterpieces because of its outstanding scripting and acting. The extraordinary climaxes remain to be one of the attractions for Batman followers.
10Under the Red Hood
● Name of the movie - Batman - Under the Red Hood (2013)
● Rating - 8.0/10
● Duration - 1hr 15min
● Directors - Brandon Vietti
● Votes - 60,539
● Synopsis -
This movie is slightly different from other Batman animated movies because this is the only movie that has made considerable changes in its script. They did not depend solely on the original text instead inserted their ideas. Another exciting thing about this movie is the impeccable performance by Bruce Greenwood in the role of Batman. This movie has received a great deal of appreciation from the viewers. The viewers have commented that this movie can be considered one of the best-animated Batman featuring movies. This is another Batman movie that tops the must-watch list.
● Ending Thoughts →
● Animation is often an underrated genre. It is often dismissed as children’s cartoons and is not taken seriously. However, it has proved that powerful stories and complex characters can be portrayed through animation.
● These batman shows are both critically sound as well as provide good entertainment. You can enjoy these series and movies in your leisure time. The batman cartoon is still viral. Along with the batman cartoon, one more thing that is equally watched to date is the Batman and superman cartoon.
● Are you looking for a video editing app? Here is the best photo editing app for you, Wondershare Filmora Video Editor . You can use this app for personal as well as professional use. This app is quite popular amongst professional video editors because of its user-friendly interface and fantastic editing features. You can draw batman cartoons and make slideshows using this app.
How to Cartoonize Photo Photoshop in Simple Steps
How to Cartoonize Photo Photoshop in Easy Steps
An easy yet powerful editor
Numerous effects to choose from
Detailed tutorials provided by the official channel
Cartoons, an already catchy entertainment source, can upgrade other media utilities on integration. Look through the easiest ways of creating cartoonize photo Photoshop stills!
In this article
01 [Types of Cartoon Effects in Photoshop](#Part 1)
02 [Easiest Ways to Cartoonize Photo in Photoshop](#Part 2)
03 [How to Use a Variety of Photoshop Special Effects to Create the Final Caricature Look](#Part 3)
Part 1 Types of Cartoon Effects in Photoshop
It is an absolute fun activity to explore your editing creativity in the realm of cartoonizing the otherwise ordinary still captures. Talking of the most convenient cartoon creator and editor applications, you can safely rely on the Photoshop Image Editor application to choose from a pool of cartoon editing effects for adding that spunky and funny element to your image files.
Presented in the following section, is a discussion of some of the most stunning and visibly amazing cartoon effects in the application’s Editor Library to cartoonize Photoshop images:
01Pop Art Photoshop Action
The effect is a predominantly preferred as a cartoon action Photoshop utility to caricaturize a normal image, along with customizing the same to change the colors and background of the original still capture for creating a brand new appearance with utmost ease. Apart from this, the aforesaid effect allows you to exclusively customize the globally acclaimed graphic masterpieces of Roy Lichtenstein. Working with the effect, you can edit a self-portrait or the favorite image of your pet to give the latter, a funny retro feel.

02Vintage Comic Creator
If the idea of sticking to just the creation of cartoon images is not enough to satisfy you, the Vintage Comic Creator effect allows you to expand your creativity level to work on cartoon based shape and text edits. You can use the effect to enhance an image logo or plain text with a comic book oriented text. A download of this cartoon effect template facilitates you with diversities of customizable layer styles, overlays and patterns.

03GTA Photoshop Action
This is a complete pleasure for the creative fan of Grand Theft Auto, the wicked chasing game series. Additional to creating a stark variety of edited cartoon stills, you are free to reinvent the aforesaid game’s most popular caricature edits, while using the GTA Photoshop Action editing filter. Launched by Indworks, the effect package consisting of 15 vibrant themes and 5 collage templates; promises a quick mimicry of your most cherished video and console games.

04Vector Paint Photoshop Action
The one is an amazing Photoshop effect for creating cartoon edits, which works through a merger of two different ingenious art themes or styles for transforming basic images into cartoonized stills.
The effect grants you the liberty to use varieties of art styles, such as, comic, photo retouching and energetic oil to obtain editing results comparable to that of any original photograph. The template is conveniently simple to use and assures you of quick results. All this, just at a nominal price of $6! Interesting, right?

05Ultra Realistic 3D Space Effect
Considering the fact of you being a space admirer, this one is the perfect image editor for you to add the vibrancy of stunning space elements and backgrounds within your cartoonized edits. The effect lets you play with the diverse range of customizable text and exciting caricature backgrounds. When downloading the template, you get a main setup file, a few editing examples and a web link to the free fonts present in the effect.

06Animated Zombie Grime Art Photoshop Action
Are you in love with the latest zombie grimes? If yes, then this action set is exclusive editor package for you. Working with the aforesaid image template, you can effortlessly add the perfect zombie theme to your cartoon edits, along with simultaneously creating a stunning animation, which you can use to enhance your video or GIF uploads on social media. Not forgetting the best part, you get a free access to this amazing utility.

Part 2 Easiest Ways to Cartoonize Photo in Photoshop
Having known about the amazing varieties of cartoonized editor templates in Photoshop, it is a natural instinct to feel motivated to create your own caricature images from normal capture stills. Addressing the concern of image transformation methods to turn a photo into a cartoon Photoshop, let us dive into some of the most affordable methods of creating cartoonized photos in the aforesaid editing application.
Talking of the most basic Photoshop tools for creating caricature images, you can start your editing spree with using the Graphic Tablet, Brush Tool, Layer Masks and a graphic pen to create amateur cartoonized edits from your still photographs, getting a full control on image tracing.
01Brush Tool
A few usage examples include working with a combination of the graphic tablet pen and the editor brushes to trace your image, using the brush in a masked or a fresh layer to avoid altering the actual image, and much more.
02Graphic Tablet
It is best to use the Photoshop Graphic Tablet for adhering to the concern of tracing cartoonized images. You can alternatively cater to the job with a trackpad, mouse, or even your hand. It is however, difficult to assure steady hand postures for image tracing, lest you are using a stylus pen.
03Pen Tool
Using the Pen Tool for cartoonizing your portrait, allows you to draw outlines along the desired figure within the image, along with its important elements, so that you can easily use these outlined paths to introduce different color blocks.
Similar to the Brush Tool, the Photoshop Pen utility grants you the freedom to vary the degree of detailing in your cartoon edit, from being highly expressive to only remaining around the shore. Working with the Pen Tool can, however be a bit tiring and time taking, with respect to the extent of detailing you wish to add to the caricature edits.
Additional to the aforementioned tools, you can also consider using the default image filters of the Photoshop application to get comparable results. This is an exclusively better option to choose, compared to the Pen Tool, when you are working without a Graphic Tablet. To get over the top realistic caricature renderings, you will need to supplement the use of Photoshop filters with the application’s editing channels and other adjustments.
Part 3 How to Use a Variety of Photoshop Special Effects to Create the Final Caricature Look
Considering the extensive discussion on the credibility of the Photoshop Image Editor application in the realm of creating stunning caricature images in high end resolution, let us proceed to learn about using the diversity of Photoshop’s special effects to get the last stage cartoonized appearance of ordinary still images.
User’s Guide to Create High End Cartoonized Look
The following tutorial is a stepwise explanation of the process to convert photo into cartoon Photoshop in the easiest possible way. Stick to the method for getting affordable results in a quick span.
Step 1: Download and Launch the Program
Visit the official website of Photoshop Image Editor for a free download of the software program in your system, followed by installing and launching the same in your device.
Step 2: Upload Your Image
On a successful launch of the editor program, you will be directed to the ‘Photoshop Editor’ window, where you are required to upload any desired still image from your device for creating a cartoonized edit. To do this, either simply add your image to the editor workspace using the ‘Drag and Drop’ method, or navigate to the ‘File’ tab in the top toolbar and click on ‘Open’ in the dropdown menu.
Step 3: Edge Enhancement
Once your image appears in the editor timeline, proceed to sharpen the edges of the face and body of the portrait. Start with navigating to and clicking on the ‘Filter’ option, followed by tapping on ‘Filter Gallery’ and selecting the ‘Artistic’ folder, where you need to choose the ‘Poster Edges’ option. Observe the effect of these setting on the portrait and make necessary changes.

Step 4: Background Setting
Ensure that the background and foreground of your image are set to white and black colors respectively. If not, proceed to adjust the same as required.

Step 5: Distorting the Edges
You now need to introduce some distortion in the edges of your portrait. Navigate to the ‘Filter’ option again, open the ‘Filter Gallery’ and choose ‘Torn Edges’ from the menu that drops down. Select the desired parameter values in accordance with your creative suitability.


Step 6: Using the Channels Panel
The next step is to select and copy your portrait using the ‘Ctrl + A’ and Ctrl + C commands respectively. Navigate to the ‘Channels’ panel at the right of the Photoshop workspace. At the panel’s bottom right, proceed with creating a new channel. It will be assigned the name ‘Alpha 1’ by Photoshop, which you are most welcome to change.


Step 7: Color Inversion
When you finish creating the channel, use the ‘Ctrl + V’ command to paste your portrait in the same. Proceed with inverting the image colors by navigating to the ‘Image’ option, followed by choosing the ‘Adjustment’ and ‘Invert’ options from the consecutive drop downs. Now, make a selection of the ‘White’ regions of your portrait by pressing the ‘Ctrl’ key and clicking on the ‘Alpha 1 Channel thumbnail.

Step 8: Layer Creation
Navigate to the ‘Layers’ panel at the right of the Photoshop workspace, and click on the ‘New Layer’ icon for creating a fresh layer. Fill the just created layer with black color, either by pressing ‘g’ from your system’s keyboard, or using the ‘Paint Bucket’ tool. Don’t forget to assign a suitable name to the layer.

Repeat the above process to create a separate layer and e fill the same with white color. The layer creation process is essential to separate the white and black colors of the actual image.

Step 10: Layer Dragging
In the ‘Layers’ panel, drag the ‘Black’ layer above the ‘White’ one.

Step 11: Creating Additional Layers
You are now required to create three more layers, with the same process as for the above two, for adding effects to the Skin, Clothes and Teeth/Eyes of the portrait. When you finish creation, assign suitable names to the layers, followed by dragging them below the ‘Black’ one within the ‘Layers’ panel.

Step 12: Color Selection and Application
Choose the respective colors for the clothes, skin and teeth/eyes of the cartoonized edit. To proceed with color application, navigate to the toolbar at the left of the Photoshop workspace and choose the ‘Brush Tool’. Finally, choose a particular layer and apply careful brush strokes to add color to the specific area of the portrait that you wish to edit. Follow the same process to add colors to the remaining layers to get the desired result in all areas of your cartoonized edit.

Step 13: Using the Gradient Tool
Navigate to the ‘Layers’ panel again and create a new ‘Gradient’ layer to further enhance your creation. You now need to select the ‘Gradient Tool’ from the toolbar at the left of the Photoshop workspace. The ‘Gradient Editor’ pops up with the continuously running ‘Gradient Bar’, as soon as you make the selection. Double click on the gradient boxes at both ends to select them, followed by making your color choices. Tap on ‘OK’ when you are satisfied with your work.

Step 14: Filling the Gradients
To proceed with gradient filling, press and hold the mouse button on the image at the bottom left and continue to drag the cursor to its top right corner. Leave the mouse and navigate to the ‘Layers’ panel for dragging and dropping the ‘Gradient’ layer above the ‘White’ layer.

You are now done with the process of creating a caricature edit from a normal still portrait. Your final image output will appear something like the following:

Cartoons, an already catchy entertainment source, can upgrade other media utilities on integration. Look through the easiest ways of creating cartoonize photo Photoshop stills!
In this article
01 [Types of Cartoon Effects in Photoshop](#Part 1)
02 [Easiest Ways to Cartoonize Photo in Photoshop](#Part 2)
03 [How to Use a Variety of Photoshop Special Effects to Create the Final Caricature Look](#Part 3)
Part 1 Types of Cartoon Effects in Photoshop
It is an absolute fun activity to explore your editing creativity in the realm of cartoonizing the otherwise ordinary still captures. Talking of the most convenient cartoon creator and editor applications, you can safely rely on the Photoshop Image Editor application to choose from a pool of cartoon editing effects for adding that spunky and funny element to your image files.
Presented in the following section, is a discussion of some of the most stunning and visibly amazing cartoon effects in the application’s Editor Library to cartoonize Photoshop images:
01Pop Art Photoshop Action
The effect is a predominantly preferred as a cartoon action Photoshop utility to caricaturize a normal image, along with customizing the same to change the colors and background of the original still capture for creating a brand new appearance with utmost ease. Apart from this, the aforesaid effect allows you to exclusively customize the globally acclaimed graphic masterpieces of Roy Lichtenstein. Working with the effect, you can edit a self-portrait or the favorite image of your pet to give the latter, a funny retro feel.
02Vintage Comic Creator
If the idea of sticking to just the creation of cartoon images is not enough to satisfy you, the Vintage Comic Creator effect allows you to expand your creativity level to work on cartoon based shape and text edits. You can use the effect to enhance an image logo or plain text with a comic book oriented text. A download of this cartoon effect template facilitates you with diversities of customizable layer styles, overlays and patterns.
03GTA Photoshop Action
This is a complete pleasure for the creative fan of Grand Theft Auto, the wicked chasing game series. Additional to creating a stark variety of edited cartoon stills, you are free to reinvent the aforesaid game’s most popular caricature edits, while using the GTA Photoshop Action editing filter. Launched by Indworks, the effect package consisting of 15 vibrant themes and 5 collage templates; promises a quick mimicry of your most cherished video and console games.
04Vector Paint Photoshop Action
The one is an amazing Photoshop effect for creating cartoon edits, which works through a merger of two different ingenious art themes or styles for transforming basic images into cartoonized stills.
The effect grants you the liberty to use varieties of art styles, such as, comic, photo retouching and energetic oil to obtain editing results comparable to that of any original photograph. The template is conveniently simple to use and assures you of quick results. All this, just at a nominal price of $6! Interesting, right?
05Ultra Realistic 3D Space Effect
Considering the fact of you being a space admirer, this one is the perfect image editor for you to add the vibrancy of stunning space elements and backgrounds within your cartoonized edits. The effect lets you play with the diverse range of customizable text and exciting caricature backgrounds. When downloading the template, you get a main setup file, a few editing examples and a web link to the free fonts present in the effect.
06Animated Zombie Grime Art Photoshop Action
Are you in love with the latest zombie grimes? If yes, then this action set is exclusive editor package for you. Working with the aforesaid image template, you can effortlessly add the perfect zombie theme to your cartoon edits, along with simultaneously creating a stunning animation, which you can use to enhance your video or GIF uploads on social media. Not forgetting the best part, you get a free access to this amazing utility.
Part 2 Easiest Ways to Cartoonize Photo in Photoshop
Having known about the amazing varieties of cartoonized editor templates in Photoshop, it is a natural instinct to feel motivated to create your own caricature images from normal capture stills. Addressing the concern of image transformation methods to turn a photo into a cartoon Photoshop, let us dive into some of the most affordable methods of creating cartoonized photos in the aforesaid editing application.
Talking of the most basic Photoshop tools for creating caricature images, you can start your editing spree with using the Graphic Tablet, Brush Tool, Layer Masks and a graphic pen to create amateur cartoonized edits from your still photographs, getting a full control on image tracing.
01Brush Tool
A few usage examples include working with a combination of the graphic tablet pen and the editor brushes to trace your image, using the brush in a masked or a fresh layer to avoid altering the actual image, and much more.
02Graphic Tablet
It is best to use the Photoshop Graphic Tablet for adhering to the concern of tracing cartoonized images. You can alternatively cater to the job with a trackpad, mouse, or even your hand. It is however, difficult to assure steady hand postures for image tracing, lest you are using a stylus pen.
03Pen Tool
Using the Pen Tool for cartoonizing your portrait, allows you to draw outlines along the desired figure within the image, along with its important elements, so that you can easily use these outlined paths to introduce different color blocks.
Similar to the Brush Tool, the Photoshop Pen utility grants you the freedom to vary the degree of detailing in your cartoon edit, from being highly expressive to only remaining around the shore. Working with the Pen Tool can, however be a bit tiring and time taking, with respect to the extent of detailing you wish to add to the caricature edits.
Additional to the aforementioned tools, you can also consider using the default image filters of the Photoshop application to get comparable results. This is an exclusively better option to choose, compared to the Pen Tool, when you are working without a Graphic Tablet. To get over the top realistic caricature renderings, you will need to supplement the use of Photoshop filters with the application’s editing channels and other adjustments.
Part 3 How to Use a Variety of Photoshop Special Effects to Create the Final Caricature Look
Considering the extensive discussion on the credibility of the Photoshop Image Editor application in the realm of creating stunning caricature images in high end resolution, let us proceed to learn about using the diversity of Photoshop’s special effects to get the last stage cartoonized appearance of ordinary still images.
User’s Guide to Create High End Cartoonized Look
The following tutorial is a stepwise explanation of the process to convert photo into cartoon Photoshop in the easiest possible way. Stick to the method for getting affordable results in a quick span.
Step 1: Download and Launch the Program
Visit the official website of Photoshop Image Editor for a free download of the software program in your system, followed by installing and launching the same in your device.
Step 2: Upload Your Image
On a successful launch of the editor program, you will be directed to the ‘Photoshop Editor’ window, where you are required to upload any desired still image from your device for creating a cartoonized edit. To do this, either simply add your image to the editor workspace using the ‘Drag and Drop’ method, or navigate to the ‘File’ tab in the top toolbar and click on ‘Open’ in the dropdown menu.
Step 3: Edge Enhancement
Once your image appears in the editor timeline, proceed to sharpen the edges of the face and body of the portrait. Start with navigating to and clicking on the ‘Filter’ option, followed by tapping on ‘Filter Gallery’ and selecting the ‘Artistic’ folder, where you need to choose the ‘Poster Edges’ option. Observe the effect of these setting on the portrait and make necessary changes.
Step 4: Background Setting
Ensure that the background and foreground of your image are set to white and black colors respectively. If not, proceed to adjust the same as required.
Step 5: Distorting the Edges
You now need to introduce some distortion in the edges of your portrait. Navigate to the ‘Filter’ option again, open the ‘Filter Gallery’ and choose ‘Torn Edges’ from the menu that drops down. Select the desired parameter values in accordance with your creative suitability.
Step 6: Using the Channels Panel
The next step is to select and copy your portrait using the ‘Ctrl + A’ and Ctrl + C commands respectively. Navigate to the ‘Channels’ panel at the right of the Photoshop workspace. At the panel’s bottom right, proceed with creating a new channel. It will be assigned the name ‘Alpha 1’ by Photoshop, which you are most welcome to change.
Step 7: Color Inversion
When you finish creating the channel, use the ‘Ctrl + V’ command to paste your portrait in the same. Proceed with inverting the image colors by navigating to the ‘Image’ option, followed by choosing the ‘Adjustment’ and ‘Invert’ options from the consecutive drop downs. Now, make a selection of the ‘White’ regions of your portrait by pressing the ‘Ctrl’ key and clicking on the ‘Alpha 1 Channel thumbnail.
Step 8: Layer Creation
Navigate to the ‘Layers’ panel at the right of the Photoshop workspace, and click on the ‘New Layer’ icon for creating a fresh layer. Fill the just created layer with black color, either by pressing ‘g’ from your system’s keyboard, or using the ‘Paint Bucket’ tool. Don’t forget to assign a suitable name to the layer.
Repeat the above process to create a separate layer and e fill the same with white color. The layer creation process is essential to separate the white and black colors of the actual image.
Step 10: Layer Dragging
In the ‘Layers’ panel, drag the ‘Black’ layer above the ‘White’ one.
Step 11: Creating Additional Layers
You are now required to create three more layers, with the same process as for the above two, for adding effects to the Skin, Clothes and Teeth/Eyes of the portrait. When you finish creation, assign suitable names to the layers, followed by dragging them below the ‘Black’ one within the ‘Layers’ panel.
Step 12: Color Selection and Application
Choose the respective colors for the clothes, skin and teeth/eyes of the cartoonized edit. To proceed with color application, navigate to the toolbar at the left of the Photoshop workspace and choose the ‘Brush Tool’. Finally, choose a particular layer and apply careful brush strokes to add color to the specific area of the portrait that you wish to edit. Follow the same process to add colors to the remaining layers to get the desired result in all areas of your cartoonized edit.
Step 13: Using the Gradient Tool
Navigate to the ‘Layers’ panel again and create a new ‘Gradient’ layer to further enhance your creation. You now need to select the ‘Gradient Tool’ from the toolbar at the left of the Photoshop workspace. The ‘Gradient Editor’ pops up with the continuously running ‘Gradient Bar’, as soon as you make the selection. Double click on the gradient boxes at both ends to select them, followed by making your color choices. Tap on ‘OK’ when you are satisfied with your work.
Step 14: Filling the Gradients
To proceed with gradient filling, press and hold the mouse button on the image at the bottom left and continue to drag the cursor to its top right corner. Leave the mouse and navigate to the ‘Layers’ panel for dragging and dropping the ‘Gradient’ layer above the ‘White’ layer.
You are now done with the process of creating a caricature edit from a normal still portrait. Your final image output will appear something like the following:
Top 10 Video to GIF Converters: Top Picks
Best 10 Video to GIF Converters: Top Picks
An easy yet powerful editor
Numerous effects to choose from
Detailed tutorials provided by the official channel
Having trouble converting your videos to GIF? Browse the top 10 converters to sort this out!
In this article
01 [Why GIFs are Widely Used and Popular?](#Part 1)
02 [Top 10 Ways to Turn Video into GIF](#Part 2)
Part 1 Why GIFs are Widely Used and Popular?
If you take a poll on the watch preference of GIF versus videos, most of votes you get would be in favor of watching GIFs. There are obvious reasons to the fact that anyone would prefer watching a GIF over a video, irrespective of its length. Some major ones that make it quite annoying to watch videos include the following:
● To begin with, you need to turn the video on and off, depending on your choice of watching a video or surfing through stories and feeds, failing which you get to hear additional sounds through your feed from the already running video. You further need to stop the music or go for a volume control in case you are not interested to watch the video.
● Most of the videos you run turn up to be irrelevant or uninteresting through the middle, but you don’t have a choice to make bit adjustments. If however possible, the method is not quite convenient. You may need to visit a different site in case you run a video that is not integrated with webpage of your searched content, wait for the portal’s interface to load or watch an advertisement.
● GIFs, on the other hand, do not require pausing or turning off, and run automatically. You also don’t need to mute any sounds. These ensure to-the-point message delivery and don’t divert your attention from the primary content you visit the webpage for.
Owing to the above, most of us are now much interested to convert videos to GIFs for an exact, impactful and to the point content creation and sharing. See through the next sections of this article to learn about the best video to GIF conversion tools and software.
Part 1 Top 10 Ways to Turn Video into GIF
Considering the credibility of GIFs, you may often require to convert your long videos into short and content specific GIFs. Given below are the 10 best methods to cater to the need of video to GIF conversion:
01Filmora
Wondershare Filmora Video Editor is one among the most popular and easy methods to convert videos to GIFs. It is compatible with almost all common video formats and is loaded with a plethora of exciting effects and editing tools. Take the following steps to create GIFs from videos using this application:
Wondershare Filmora
Get started easily with Filmora’s powerful performance, intuitive interface, and countless effects!
Try It Free Try It Free Try It Free Learn More >


Step 1: Import Your Video
Launch Filmora and import your desired video in the app’s welcome window. To do this, click on ‘New Project’ followed by ‘Import’ option from the drop down menu to add your video to the Filmora.

Step 2: Timeline Dragging
Add your video to the app’s timeline using the ‘Drag and Drop’ method. You can also extract video frames by taking screenshots and merge these images into your GIF from the media library.

Step 3: Explore Your Editing Skills
You can now edit the imported video in the timeline using a range of interesting effects. Crop, trim, split or make speed adjustments to give your video a catchy look.

Step 4: Include Messages
Try adding texts and supplementary elements to deliver impactful messages through your creation.

Step 5: It’s Time to Share!
Click ‘Export’ to save your GIF to your device. You are now ready to post your work in your social communities to get the most deserved attention of your peers!

02YouTube to GIF
This one is a simple and user-friendly video to GIF converter. You can convert videos to GIFs from your PC or other online platforms with this converter. The converter allows you to play with a variety of editing effects to make your creation more interesting. All you need to do is the following:
● In the video URL bar, type ‘gif’ after ‘www.’ and you will be redirected to converter’s working window. Set the GIF time interval or apply specific effects using the tools from the panel in the left of the working window.


● To set the video time frame, highlight it in the video timeline. Set the desired interval using the ‘Start Time’ and ‘End Time’ options.

● To add a new visual effect, select it from the menu. Below the video timeline, a row of parameters will get displayed. Set the effect parameters to make desired changes.
● Click ‘Create GIF’. In the ‘Settings’ menu, you can rename and add tags to your creation and even make it private.

● That’s it! You can download your GIF now. You may get a converter purchase offer for enabling advanced features. While most users prefer sticking to the free version, it is up to you whether to decline or accept the purchase offer.
● The ‘Download’ feature is exclusive to registered users. However, if you don’t prefer creating an account, just open the GIF download link in a separate tab’s ‘Direct Link’ row. Alternatively, you can replace ‘gif’ with ‘conv’ in the video URL bar and choose ‘Convert to GIF’. However, this process may take some extra minutes.

03Giphy GIF Maker
This is an editing tool that you can use to convert video to GIF online. This one is a reliable converter tool with a user-cohesive interface. It is a simple video editor that is available to you for free. All you need to do is mentioned below:
Step 1: Load your Video
Go to the official app website and paste your desired video link in the search bar. Your video gets uploaded to the app’s editor screen. Specify the time frame and check out your GIF’s preview.

Step 2: Let’s Go Editing!
Select ‘Continue to Decorate’ to edit your GIF with texts, effects, frames and filters. You can even go for a straight upload if your video doesn’t require customization.

Step 3: Time to Share!
Select ‘Continue to Upload’ and add required tags. Tap ‘Upload to Giphy’ to make a social media post or add it to the app’s website through a specific share code.
04Wondershare TunesGo
This is an effective video to GIF creator tool, loaded with extensive features. You can use this application to convert videos, live photos and multiple snaps into interesting GIFs. TunesGo gives you the freedom to edit your work in your own style with a variety of effects. Here’s what you need to do:

Step 1: Launch TunesGo
Download, install and launch the app into your PC. You may be asked for a device connection setup, but you can skip that in case GIF creation is your only requirement.

Step 2: Upload your Video
In the app’s welcome screen, navigate to ‘Toolbox’ at the top. From the drop down interface, choose ‘GIF Maker’. In the new window that pops-up next, click on ‘Add’ to upload the desired video to the app from your PC.

Step 3: Let’s Create!
Set the required time frame for your GIF in the app’s timeline and tap the ‘Create GIF’ button to start the conversion process. On completion, your work gets automatically saved in the ‘Pictures’ folder in your PC. You can also customize your target location.

05Vimeo
Vimeo is also a quick, 3-stepvideo to GIF converter. However, you need to have a Vimeo account to take up the conversion process. This is an easy and hassle free GIF creator, that adheres to your creation needs within minutes. Here’s what you need to do:
Step 1: Upload Your Video
Log in to your Vimeo account. In the opening window, select ’Upload’ from the toolbar at the top. ‘Drag and Drop’ or click ‘Choose Files’ to upload the desired video from your device.

Step 2: Create Your GIF
After you are done uploading the video, select ‘Create a GIF’ from the sidebar at the left. You will be directed to the GIF Editor window. Select a loop section from the video and set a time frame of maximum 6 seconds in the video timeline. Now click ‘Create GIF’.


Step 3: Export Your Creation
Your GIF is ready to download and share. You can also embed your GIF by generating embed codes for specific platforms.
06 Adobe Photoshop
This one is one f the most popular editing applications you can use to make GIF out of video. It’s simple and user-friendly interface does not require you to possess a Photoshop mastery for the conversion purpose. Here’s what you need to follow:
Step 1: Search Your Video
Find a video of your choice from a desired platform. In case you want a YouTube video, add ‘ss’ prior to the video’s service name in YouTube’s URL bar.
STEP 2: Edit Your Video
Use any preferable video splitters and editors to crop, trim and add interesting effects to your video and set a maximum time frame of 3 seconds.
Step 3: Create GIF
Open your edited video in Adobe Photoshop and tap ‘File Import-Video frames into layers’.

Step 4: Adjust Settings
Make required setting adjustments and click on ‘File-Save for Web’. Try adjusting image resolution and color range if your file size exceeds 10 MB.

Step 5: Save Your Work
In the ’Files’ tab at the top, select ‘Save’ and choose the ‘.gif’ extension in the ‘File Type’ dialog box to save your creation to your PC.
07Convertio
This converter provides a simple, 3-step process to create GIF from video. Either use it as a browser extension or download it from Google Chrome Webstore. Take the following steps to convert videos to GIF online.
● Upload your desired video to the service timeline. You can either choose files directly or ‘Drag and Drop’ them from your device.
● Select ‘Convert’ to make GIF from your uploaded video.
● Tap ‘Download’ to save your creation.

You can use this service to make different format conversions. However, this converter does not allow you to edit or add effects your GIF.
08MakeAGif
You can use this tool as a GIF video maker online to create, exchange and share GIFs on different platforms. Additionally, you also get the flexibility to use already saved images in your device to add them to your GIF. The app’s basic version allows you to create GIFs without watermarks. To add watermarks, you will need an account on the app. To convert videos to GIFs using this tool, you should take the following steps:
Step 1: Upload Your Video
In the app’s welcome screen, click on ‘Video to GIF’ and upload a desired video in the editor timeline. Add effects and make speed and time frame adjustments. When satisfied, tap ‘Continue to Publishing’.

Step 2: Add Names and Tags
In the publishing window, give a suitable name and add required tags to your edited video to make it easily identifiable. When you are done, click on ‘Create a GIF’ from the bottom right.

Step 3: Ready to Share!
You can now share your created GIF across social media platforms.

09Adobe Premiere
Similar to Adobe Photoshop, Adobe Premiere too is quite a preferred application for creating GIFs from videos. This is a simple, quick and free application that converts your videos to GIFs in a span of few minutes. Here’s what you need to do to go about the process:

Step 1: Edit your Video
Add a video of your choice in the Adobe Premiere timeline and play with your editing creativity to add desired effects and filters to it. Make sure to set requisite time frames to your edit.

Step 2: Prepare an Export
Click into the app’s video timeline, and prepare a file export using the following path:
File> Export> Media

Step 3: Settings Adjustments
In the Media Export window, navigate to the ‘Format’ tab. From the drop down menu, choose ‘Animated GIF’. Here, you can add your gif file, select its target destination and adjust the required settings.

Step 4: Export Your Work
Click ‘Export’ to share your creation on social media or click on ‘Queue’ to send your GIF to a specific media encoder.

1010. Movavi Video Converter
This is one of the latest video converter software you can rely on to make GIF from video files. This software allows you to create top quality animated GIFs and is compatible with a variety of video formats. Using this converter, you can create amazing GIFs in 5 quick steps: here’s what you need to follow:
Step 1: Download and Install the Software
To begin, download the converter software from its official site and adhere to the user instructions to install the same in your system.
Step 2: Upload Your Video
In the software’s opening window, click on ‘Add Media’ followed by ‘Add Video’ and select a desired video from your system to upload on the Movavi video timeline.

Step 3: Trim Your Video
Select ‘Edit’ from the right of your video file. In the editing window, specify the initial cut of the video by displacing the marker to the desired point. Click on ‘Scissors’ to add multiple cut points to your video. You can even drag the cut points around the editor timeline. Choose the unvented sections and click ‘Trash Can’. When the result satisfies you, click ‘Done’.

Step 4: Choose a Conversion Format
Navigate to the ‘Images’ tab and select ‘GIF’ and set an adequate size for the GIF. Here, you can adjust quality, frame size and rate and resize method using the ‘Cogwheel’ tool.

Step 5: Let’s Get Converting!
Tap ‘Convert’ and wait for the conversion to finish. You will be automatically directed to the folder where your converted files get saved.

● Key Takeaways from This Episode →
● GIFs are short, to the point and convenient to access, providing exact and impactful message delivery.
● The software market is flooded with a variety of editing tools to convert your dull videos to catchy GIFs.
● Filmora is a quick and smart editing tool that envisages your GIF creating experience with a range of exciting features.
Having trouble converting your videos to GIF? Browse the top 10 converters to sort this out!
In this article
01 [Why GIFs are Widely Used and Popular?](#Part 1)
02 [Top 10 Ways to Turn Video into GIF](#Part 2)
Part 1 Why GIFs are Widely Used and Popular?
If you take a poll on the watch preference of GIF versus videos, most of votes you get would be in favor of watching GIFs. There are obvious reasons to the fact that anyone would prefer watching a GIF over a video, irrespective of its length. Some major ones that make it quite annoying to watch videos include the following:
● To begin with, you need to turn the video on and off, depending on your choice of watching a video or surfing through stories and feeds, failing which you get to hear additional sounds through your feed from the already running video. You further need to stop the music or go for a volume control in case you are not interested to watch the video.
● Most of the videos you run turn up to be irrelevant or uninteresting through the middle, but you don’t have a choice to make bit adjustments. If however possible, the method is not quite convenient. You may need to visit a different site in case you run a video that is not integrated with webpage of your searched content, wait for the portal’s interface to load or watch an advertisement.
● GIFs, on the other hand, do not require pausing or turning off, and run automatically. You also don’t need to mute any sounds. These ensure to-the-point message delivery and don’t divert your attention from the primary content you visit the webpage for.
Owing to the above, most of us are now much interested to convert videos to GIFs for an exact, impactful and to the point content creation and sharing. See through the next sections of this article to learn about the best video to GIF conversion tools and software.
Part 1 Top 10 Ways to Turn Video into GIF
Considering the credibility of GIFs, you may often require to convert your long videos into short and content specific GIFs. Given below are the 10 best methods to cater to the need of video to GIF conversion:
01Filmora
Wondershare Filmora Video Editor is one among the most popular and easy methods to convert videos to GIFs. It is compatible with almost all common video formats and is loaded with a plethora of exciting effects and editing tools. Take the following steps to create GIFs from videos using this application:
Wondershare Filmora
Get started easily with Filmora’s powerful performance, intuitive interface, and countless effects!
Try It Free Try It Free Try It Free Learn More >
Step 1: Import Your Video
Launch Filmora and import your desired video in the app’s welcome window. To do this, click on ‘New Project’ followed by ‘Import’ option from the drop down menu to add your video to the Filmora.
Step 2: Timeline Dragging
Add your video to the app’s timeline using the ‘Drag and Drop’ method. You can also extract video frames by taking screenshots and merge these images into your GIF from the media library.
Step 3: Explore Your Editing Skills
You can now edit the imported video in the timeline using a range of interesting effects. Crop, trim, split or make speed adjustments to give your video a catchy look.
Step 4: Include Messages
Try adding texts and supplementary elements to deliver impactful messages through your creation.
Step 5: It’s Time to Share!
Click ‘Export’ to save your GIF to your device. You are now ready to post your work in your social communities to get the most deserved attention of your peers!
02YouTube to GIF
This one is a simple and user-friendly video to GIF converter. You can convert videos to GIFs from your PC or other online platforms with this converter. The converter allows you to play with a variety of editing effects to make your creation more interesting. All you need to do is the following:
● In the video URL bar, type ‘gif’ after ‘www.’ and you will be redirected to converter’s working window. Set the GIF time interval or apply specific effects using the tools from the panel in the left of the working window.
● To set the video time frame, highlight it in the video timeline. Set the desired interval using the ‘Start Time’ and ‘End Time’ options.
● To add a new visual effect, select it from the menu. Below the video timeline, a row of parameters will get displayed. Set the effect parameters to make desired changes.
● Click ‘Create GIF’. In the ‘Settings’ menu, you can rename and add tags to your creation and even make it private.
● That’s it! You can download your GIF now. You may get a converter purchase offer for enabling advanced features. While most users prefer sticking to the free version, it is up to you whether to decline or accept the purchase offer.
● The ‘Download’ feature is exclusive to registered users. However, if you don’t prefer creating an account, just open the GIF download link in a separate tab’s ‘Direct Link’ row. Alternatively, you can replace ‘gif’ with ‘conv’ in the video URL bar and choose ‘Convert to GIF’. However, this process may take some extra minutes.
03Giphy GIF Maker
This is an editing tool that you can use to convert video to GIF online. This one is a reliable converter tool with a user-cohesive interface. It is a simple video editor that is available to you for free. All you need to do is mentioned below:
Step 1: Load your Video
Go to the official app website and paste your desired video link in the search bar. Your video gets uploaded to the app’s editor screen. Specify the time frame and check out your GIF’s preview.
Step 2: Let’s Go Editing!
Select ‘Continue to Decorate’ to edit your GIF with texts, effects, frames and filters. You can even go for a straight upload if your video doesn’t require customization.
Step 3: Time to Share!
Select ‘Continue to Upload’ and add required tags. Tap ‘Upload to Giphy’ to make a social media post or add it to the app’s website through a specific share code.
04Wondershare TunesGo
This is an effective video to GIF creator tool, loaded with extensive features. You can use this application to convert videos, live photos and multiple snaps into interesting GIFs. TunesGo gives you the freedom to edit your work in your own style with a variety of effects. Here’s what you need to do:
Step 1: Launch TunesGo
Download, install and launch the app into your PC. You may be asked for a device connection setup, but you can skip that in case GIF creation is your only requirement.
Step 2: Upload your Video
In the app’s welcome screen, navigate to ‘Toolbox’ at the top. From the drop down interface, choose ‘GIF Maker’. In the new window that pops-up next, click on ‘Add’ to upload the desired video to the app from your PC.
Step 3: Let’s Create!
Set the required time frame for your GIF in the app’s timeline and tap the ‘Create GIF’ button to start the conversion process. On completion, your work gets automatically saved in the ‘Pictures’ folder in your PC. You can also customize your target location.
05Vimeo
Vimeo is also a quick, 3-stepvideo to GIF converter. However, you need to have a Vimeo account to take up the conversion process. This is an easy and hassle free GIF creator, that adheres to your creation needs within minutes. Here’s what you need to do:
Step 1: Upload Your Video
Log in to your Vimeo account. In the opening window, select ’Upload’ from the toolbar at the top. ‘Drag and Drop’ or click ‘Choose Files’ to upload the desired video from your device.
Step 2: Create Your GIF
After you are done uploading the video, select ‘Create a GIF’ from the sidebar at the left. You will be directed to the GIF Editor window. Select a loop section from the video and set a time frame of maximum 6 seconds in the video timeline. Now click ‘Create GIF’.
Step 3: Export Your Creation
Your GIF is ready to download and share. You can also embed your GIF by generating embed codes for specific platforms.
06 Adobe Photoshop
This one is one f the most popular editing applications you can use to make GIF out of video. It’s simple and user-friendly interface does not require you to possess a Photoshop mastery for the conversion purpose. Here’s what you need to follow:
Step 1: Search Your Video
Find a video of your choice from a desired platform. In case you want a YouTube video, add ‘ss’ prior to the video’s service name in YouTube’s URL bar.
STEP 2: Edit Your Video
Use any preferable video splitters and editors to crop, trim and add interesting effects to your video and set a maximum time frame of 3 seconds.
Step 3: Create GIF
Open your edited video in Adobe Photoshop and tap ‘File Import-Video frames into layers’.
Step 4: Adjust Settings
Make required setting adjustments and click on ‘File-Save for Web’. Try adjusting image resolution and color range if your file size exceeds 10 MB.
Step 5: Save Your Work
In the ’Files’ tab at the top, select ‘Save’ and choose the ‘.gif’ extension in the ‘File Type’ dialog box to save your creation to your PC.
07Convertio
This converter provides a simple, 3-step process to create GIF from video. Either use it as a browser extension or download it from Google Chrome Webstore. Take the following steps to convert videos to GIF online.
● Upload your desired video to the service timeline. You can either choose files directly or ‘Drag and Drop’ them from your device.
● Select ‘Convert’ to make GIF from your uploaded video.
● Tap ‘Download’ to save your creation.
You can use this service to make different format conversions. However, this converter does not allow you to edit or add effects your GIF.
08MakeAGif
You can use this tool as a GIF video maker online to create, exchange and share GIFs on different platforms. Additionally, you also get the flexibility to use already saved images in your device to add them to your GIF. The app’s basic version allows you to create GIFs without watermarks. To add watermarks, you will need an account on the app. To convert videos to GIFs using this tool, you should take the following steps:
Step 1: Upload Your Video
In the app’s welcome screen, click on ‘Video to GIF’ and upload a desired video in the editor timeline. Add effects and make speed and time frame adjustments. When satisfied, tap ‘Continue to Publishing’.
Step 2: Add Names and Tags
In the publishing window, give a suitable name and add required tags to your edited video to make it easily identifiable. When you are done, click on ‘Create a GIF’ from the bottom right.
Step 3: Ready to Share!
You can now share your created GIF across social media platforms.
09Adobe Premiere
Similar to Adobe Photoshop, Adobe Premiere too is quite a preferred application for creating GIFs from videos. This is a simple, quick and free application that converts your videos to GIFs in a span of few minutes. Here’s what you need to do to go about the process:
Step 1: Edit your Video
Add a video of your choice in the Adobe Premiere timeline and play with your editing creativity to add desired effects and filters to it. Make sure to set requisite time frames to your edit.
Step 2: Prepare an Export
Click into the app’s video timeline, and prepare a file export using the following path:
File> Export> Media
Step 3: Settings Adjustments
In the Media Export window, navigate to the ‘Format’ tab. From the drop down menu, choose ‘Animated GIF’. Here, you can add your gif file, select its target destination and adjust the required settings.
Step 4: Export Your Work
Click ‘Export’ to share your creation on social media or click on ‘Queue’ to send your GIF to a specific media encoder.
1010. Movavi Video Converter
This is one of the latest video converter software you can rely on to make GIF from video files. This software allows you to create top quality animated GIFs and is compatible with a variety of video formats. Using this converter, you can create amazing GIFs in 5 quick steps: here’s what you need to follow:
Step 1: Download and Install the Software
To begin, download the converter software from its official site and adhere to the user instructions to install the same in your system.
Step 2: Upload Your Video
In the software’s opening window, click on ‘Add Media’ followed by ‘Add Video’ and select a desired video from your system to upload on the Movavi video timeline.
Step 3: Trim Your Video
Select ‘Edit’ from the right of your video file. In the editing window, specify the initial cut of the video by displacing the marker to the desired point. Click on ‘Scissors’ to add multiple cut points to your video. You can even drag the cut points around the editor timeline. Choose the unvented sections and click ‘Trash Can’. When the result satisfies you, click ‘Done’.
Step 4: Choose a Conversion Format
Navigate to the ‘Images’ tab and select ‘GIF’ and set an adequate size for the GIF. Here, you can adjust quality, frame size and rate and resize method using the ‘Cogwheel’ tool.
Step 5: Let’s Get Converting!
Tap ‘Convert’ and wait for the conversion to finish. You will be automatically directed to the folder where your converted files get saved.
● Key Takeaways from This Episode →
● GIFs are short, to the point and convenient to access, providing exact and impactful message delivery.
● The software market is flooded with a variety of editing tools to convert your dull videos to catchy GIFs.
● Filmora is a quick and smart editing tool that envisages your GIF creating experience with a range of exciting features.
Also read:
- What Is the Best Collage Photo Grid Maker - Experts Choice for 2024
- In 2024, Ways You Can Master to Find 10 Best Free Animated Text Generator
- New In 2024, 5 Websites with Animated Logos That Catch Your Eyes
- New 2024 Approved 15 Top Pics Collage Apps
- Updated How to Cartoonize Photo Photoshop in Easy Steps
- 2024 Approved Adobe Animate Text Effects Skills You Need to Know
- In 2024, Ways to Stop Animation From Looping in Unity
- Updated In 2024, 10 Must Watch Netflix Cartoon Series For You
- New The Top Free 12 GIF Meme Maker at a Glance
- New Amazing Ways to Find Suitable Animated Graphic Maker
- New 2024 Approved Thousands Already Found 15 Best Sites to Watch Cartoons Online Free And So Can You
- New 2024 Approved 10 Top Memorable Japanese Cat Cartoons
- Updated In 2024, Adobe Auto Rigger Is AWESOME
- Updated The Only Guide Youll Ever Need to Learn That Make 2D Rigging Clear to You for 2024
- In 2024, How to Create YouTube Intro Animation Like a Pro
- 2024 Approved Top 10 Popular Cartoons You Forgot Existed
- 20 Free After Effects Logo Reveal Templates You Will Want to Know
- Updated Something About Types of Motion Graphics
- Updated In 2024, Tips That Show Anybody How to Get Awesome Background for Slideshow in PowerPoint
- New In 2024, Top 4 Websites to Get Anime Footage for Free
- How to Convert Video to GIF Fast & Easy
- Ways to Make Sure You Get the Most up to Date Cartoon Character Design Tips for 2024
- Updated Top 15 Male Anime Characters By Voting
- The Complete Guide to Whiteboard Animation
- New 2024 Approved Top 12 Video to GIF Converters High Quality to Check Out
- Updated In 2024, Top 10 Banned Anime Around the World and Why
- Updated In 2024, How to Make Your Own GIF on WhatsApp in Simple Ways
- New The 15 Most Efficient Photo to Cartoon Apps for Android for 2024
- In 2024, How to Combine Multiple GIFs Into One with GIF Combiner
- Updated Easy Cartoon Characters Drawing Tutorials for You Who Are Learning to Draw for 2024
- New In 2024, Top 10 Best and Fast Ways to Turn Image Into Gif
- Best 10 Animated Templates in Canva for 2024
- Updated Learn How to Create Adobe 3D Animation
- New How to Create Your Avatar Free
- New In 2024, Simple Shortcut to Convert Videos to Gifs on iPhone
- Updated In 2024, 20 Free After Effects Logo Reveal Templates
- Updated In 2024, 5 Different Animation Styles A Simple but Complete Guide
- Updated Complete Guide to Send Gif WhatsApp on Android for 2024
- Updated In 2024, What Is AI Voice Over? | Wondershare Virbo Glossary
- Complete Guide For iPhone X Lock Screen | Dr.fone
- Hassle-Free Ways to Remove FRP Lock from Vivo Y200e 5G Phones with/without a PC
- Ultimate Guide on Lenovo FRP Bypass
- Does Xiaomi Redmi A2 Have Find My Friends? | Dr.fone
- How To Bypass iCloud By Checkra1n Even On Apple iPhone 12 Pro Max If Youve Tried Everything
- How to Reset Gmail Password on Infinix Hot 40i Devices
- New 2024 Approved Users Guide How To Create Photo Talking Videos With the Best Tools?
- In 2024, Complete Tutorial to Use VPNa to Fake GPS Location On Infinix Hot 30i | Dr.fone
- About OnePlus Ace 2 Pro FRP Bypass
- In 2024, How to Bypass FRP on Vivo Y78 5G?
- Apply These Techniques to Improve How to Detect Fake GPS Location On Infinix Smart 7 | Dr.fone
- Edit and Send Fake Location on Telegram For your Motorola Moto G23 in 3 Ways | Dr.fone
- How to Simulate GPS Movement in AR games On OnePlus 11 5G? | Dr.fone
- What To Do if Your Honor 70 Lite 5G Auto Does Not Work | Dr.fone
- How to Unlock Apple iPhone XR With an Apple Watch & What to Do if It Doesnt Work
- How Do I Stop Someone From Tracking My Apple iPhone 15 Pro Max? | Dr.fone
- In 2024, How To Remove iCloud On Apple iPhone 7 Plus Smoothly
- How To Get Out of DFU Mode on iPhone 6 Plus? | Dr.fone
- Does Google Pixel 7a Have Find My Friends? | Dr.fone
- Process of Screen Sharing Vivo Y36 to PC- Detailed Steps | Dr.fone
- Fixing Persistent Pandora Crashes on Motorola Moto G14 | Dr.fone
- In 2024, 4 Most-Known Ways to Find Someone on Tinder For Poco C51 by Name | Dr.fone
- In 2024, How I Transferred Messages from Poco C65 to iPhone 12/XS (Max) in Seconds | Dr.fone
- 6 Proven Ways to Unlock Tecno Spark 10C Phone When You Forget the Password
- In 2024, How to Fix the Apple iPhone 13 Pro GPS not Working Issue | Dr.fone
- Undelete lost call logs from Lava Blaze 2 Pro
- Apply These Techniques to Improve How to Detect Fake GPS Location On Xiaomi 14 Ultra | Dr.fone
- Title: 15 Horror Animes That Will Trigger a Heart Attack for 2024
- Author: Elon
- Created at : 2024-05-19 03:04:30
- Updated at : 2024-05-20 03:04:30
- Link: https://animation-videos.techidaily.com/15-horror-animes-that-will-trigger-a-heart-attack-for-2024/
- License: This work is licensed under CC BY-NC-SA 4.0.
