
:max_bytes(150000):strip_icc():format(webp)/podcasts-safeforkids-5b2f3dd4eb97de0036d9f87b.jpg)
2024 Approved 8 Blender 3D Animation Tutorials for Beginners
8 Blender 3D Animation Tutorials for Beginners
8 Blender 3D Animation Tutorials for Beginners
An easy yet powerful editor
Numerous effects to choose from
Detailed tutorials provided by the official channel
Blender animation software is one of the open-source software chosen to create animations. It is easy to create animations, videos or graphics, etc. If you want to be an animation 3D artist, make creative universes, and meet each of the different characters moving around in your heart.
You will learn the step-by-step procedure to create animations and add other edits to the animation. And also a few tips to develop better Blender 3D animation effects.
In this article
01 [Is Blender best for animation?](#Part 1)
02 [How to Create 3D Animated Characters with Blender in 15 Minutes.](#Part 2)
03 [Become a Pro from Beginners in 8 Tutorials](#Part 3)
Part 1 Is Blender best for animation?
The answer to if the Blender is suitable for animation is yes. Blender animation is the best for making animations and bringing any living to animator. This software is mostly for professional works whose limitations will be learning the process, not any technical defects. Let’s talk about why Blender 3D animation software is the best and more helpful.
Character animation is an essential tool for animation, and Blender has developed this tool with no way less to other software.
There are many animation effects other than animating characters. Blender 3D for free has all the necessary tools to do all types of rigs and animations without any difficulty.
Blender is one software that has 2D animation inbuilt in it, like drawing and creating 2D animation.
Blender’s animation tools are making motion graphics possible by advancing the features than it was four years ago.
Nowadays, many people are using Blender to do professional works, including freelancers, small studios, and even game developers.
Part 2 How to Create 3D Animated Characters with Blender in 15 Minutes.
This is a series for people who want to learn how to create 3D blender animation characters from keeping a reference image. Blender’s ringing tools will be more helpful for this process.
01Step 1: Importing
Initially, import a Blender 3D animation character into the Blender to animate. Many free and paid characters are available in Vincent, and Rain v2.0 is present in Blender Cloud; above all, these characters are for free.
Steps to import the character either from Vincent or Rain v2.0
Download the character file from the cloud to any destination folder on the computer. Open the Blender and place the cursor on the origin point on the screen. Later select import present in the File menu and choose the file format. And now, allow the Python script to run for the selected character folder.

02Step 2: Add Keyframes
There will be a diamond-shaped icon below to choose the keyframe you want to add to the timeline, which you may also delete.
Adding a keyframe is simple. Open the timeline window in the animation editor. Press the alphabet ‘G’ on the keyboard, move the bone and place it. Then hit Shift+I and choose the channel LocRot and insert the keyframe. Likewise, you can adjust the keyframe by dragging, making it fast or slow to the requirements.
Moving the keyframe to 20 makes it faster, and moving to 40, slower.
03Step 3: Get Reference Materials
It will be challenging to add movements to the characters, so plenty of videos can get the moves right. There are various reference images and videos available on the Internet. You can either add the selected reference materials to the second screen or add them to the 3D space. Let’s discuss how to add it.
Hit Shift + A to add the reference material. Later select “Image” and then choose the “Background.” Scale the reference image onto the 3D space after it loads.
Afterward, you can leave it to the animation of the reference article, or you can further edit or amplify the movements.
04Step 4: Fine–Tuning and Sound
This step will add smooth movements by combining two keyframes for a more professional look. We have to use the Dope sheet to do complete this process. Let’s see how to add it.
Initially, split the window horizontally. Later switch over the dope sheet below the animation tab, where you can see keyframes of all axis. Now you can drag and edit to slow or amplify the speed.
There is a Graphic editor, which is more advanced to make the movements more accurately and directly to edit the curves.
Sound effects make any video or animation better. You can add and import the sound files. You can also create your sound and insert it into the Blender. Let’s discuss adding sound and making it sync to the character.
Download the audio file, hit shift + A to open Add menu, and choose the “Sound.” Now select the sound that you wish to add.
Drag the sound to keep it to the specific sections alone. Also, you can switch between “No Sync” to “AV Sync” in the playback to give the best synchronization to the characters. The volume and pitch can be adjusted using the sidebar.
05Step 5: Rendering
Before rendering, make sure you keep the FPS is same as that chosen during the keyframes to avoid unnecessary renders. After setting the frame correctly, causing the animation is easy.
Initially, click on “scene” and choose the file extension, file formats, and file colors (BW, RGB, or RGBA). Select the encoding container as “WebM” and video Codec as “WEBM/VP9. After adding the sound, set the audio codec to “Vorbis.” Choose output quality and speed.
After all the rendering, select Render from the top bar and select “Render Animation” in Blender Animation.
Awesome! We have successfully blended a character using Blender 3D animation software. With more practice and knowledge about more tools, one can easily use the Blender 3D mouse.
Part 3 Become a Pro from Beginners in 8 Tutorials.
01Fix 1: Complete Beginners Guide to Blender 2.8
This YouTube tutorial focuses on Blender version 2.8. The tutorial features the redesigned user interface and tools like 3D viewpoint and UV editor, which has new interactive tools. And about different 3D shapes and simple edits like adding colors and “G drag,” etc.
02Fix 2: Blender 2.9 for Absolute Beginners
This YouTube tutorial on Blender 3D animation software version 2.9 has the new advancement about denoiser interactivity in the 3D viewpoint. The YouTuber explains EEVEE, cycles, workbench, movements, rotate, and scale objects.
03Fix 3: Blender Day -1 Absolute Basics - Introduction Series for Beginners
This YouTube tutorial says about the introduction to the Blender 3D for free for beginners. He explains simple movements like rotating and scaling, shapes, and colors to the objects. He also says about the pivot plot and how to create a basic primitive using blender.
04Fix 4: Zoync TV’s Blender Beginners Series
The Blender Beginners video by ZoyncTV is on Blender 2.6. Indeed, even as hotkeys and terms change, the hidden ideas will forever be pertinent. Every video in this 11-section is somewhere between 10 and 20 minutes, split into five separate subjects: displaying, modifiers, materials, surfaces, and animations. It’s a beginner-level course.
05Fix 5: The Blender Survival Guide
The Blender Survival Guide series by Creative COW is outdated but the best video for somebody who has never utilized Blender. Each video in this 13-section series is somewhere in the range of 15 and 45 minutes in length, which means you’ll get 350 intense minutes of preparing. It is a survival reference that shows just the outright necessities.
06Fix 6: KatBit’s Blender Tutorial
The KatsBits site is home to lots of tutorials, video games. Its Blender animation tutorials are fantastic when you want a beginning stage for various 3D models. There are 45 Blender tutorials. Tutorials take you through the most common way of making a 3D level for Quake and tell you the best way to make a basic model.
07Fix 7: Daniel Krafft’s 100 Blender 2.8 Tips
While this is another Blender 2.8 tutorial, Daniel’s tips are overall for any Blender work process. He teaches simple stuff like vertex and edges and some technical parts in the Blender 3D animation software.
08Fix 8: Blender 3D: Noob to Pro
This last tutorial is a “wiki book” called Blender 3D: Noob to Pro that consists of important Blender animation tips and experiences. Start with an outline of 3D ideas and a top-to-bottom introduction to Blender.
Regarding Blender 3D mouse software, we would like to recommend one more tool to you the most. Yes, it is none other than Wondershare Filmora, a perfect alternative to Blender 3D animation software wherein you can get excellent 3D animation effects, 3D texts and animate it. There are some simple steps and various options to work in Filmora for creating 3D animated effects.
● Composition
● Creating our 3D text
● Creating the 3D look
● Basics of 3D animation
● Animating the text in 3D
There are countless YouTube tutorial videos for working with Wondershare Filmora Video Editor ‘s latest version.
Key Takeaways from This Episode
● We learned about Blender 3D animation software.
● How can you create characters using Blender animation?
● 8 Tutorials to move you from a beginner to a Pro.
Blender animation software is one of the open-source software chosen to create animations. It is easy to create animations, videos or graphics, etc. If you want to be an animation 3D artist, make creative universes, and meet each of the different characters moving around in your heart.
You will learn the step-by-step procedure to create animations and add other edits to the animation. And also a few tips to develop better Blender 3D animation effects.
In this article
01 [Is Blender best for animation?](#Part 1)
02 [How to Create 3D Animated Characters with Blender in 15 Minutes.](#Part 2)
03 [Become a Pro from Beginners in 8 Tutorials](#Part 3)
Part 1 Is Blender best for animation?
The answer to if the Blender is suitable for animation is yes. Blender animation is the best for making animations and bringing any living to animator. This software is mostly for professional works whose limitations will be learning the process, not any technical defects. Let’s talk about why Blender 3D animation software is the best and more helpful.
Character animation is an essential tool for animation, and Blender has developed this tool with no way less to other software.
There are many animation effects other than animating characters. Blender 3D for free has all the necessary tools to do all types of rigs and animations without any difficulty.
Blender is one software that has 2D animation inbuilt in it, like drawing and creating 2D animation.
Blender’s animation tools are making motion graphics possible by advancing the features than it was four years ago.
Nowadays, many people are using Blender to do professional works, including freelancers, small studios, and even game developers.
Part 2 How to Create 3D Animated Characters with Blender in 15 Minutes.
This is a series for people who want to learn how to create 3D blender animation characters from keeping a reference image. Blender’s ringing tools will be more helpful for this process.
01Step 1: Importing
Initially, import a Blender 3D animation character into the Blender to animate. Many free and paid characters are available in Vincent, and Rain v2.0 is present in Blender Cloud; above all, these characters are for free.
Steps to import the character either from Vincent or Rain v2.0
Download the character file from the cloud to any destination folder on the computer. Open the Blender and place the cursor on the origin point on the screen. Later select import present in the File menu and choose the file format. And now, allow the Python script to run for the selected character folder.
02Step 2: Add Keyframes
There will be a diamond-shaped icon below to choose the keyframe you want to add to the timeline, which you may also delete.
Adding a keyframe is simple. Open the timeline window in the animation editor. Press the alphabet ‘G’ on the keyboard, move the bone and place it. Then hit Shift+I and choose the channel LocRot and insert the keyframe. Likewise, you can adjust the keyframe by dragging, making it fast or slow to the requirements.
Moving the keyframe to 20 makes it faster, and moving to 40, slower.
03Step 3: Get Reference Materials
It will be challenging to add movements to the characters, so plenty of videos can get the moves right. There are various reference images and videos available on the Internet. You can either add the selected reference materials to the second screen or add them to the 3D space. Let’s discuss how to add it.
Hit Shift + A to add the reference material. Later select “Image” and then choose the “Background.” Scale the reference image onto the 3D space after it loads.
Afterward, you can leave it to the animation of the reference article, or you can further edit or amplify the movements.
04Step 4: Fine–Tuning and Sound
This step will add smooth movements by combining two keyframes for a more professional look. We have to use the Dope sheet to do complete this process. Let’s see how to add it.
Initially, split the window horizontally. Later switch over the dope sheet below the animation tab, where you can see keyframes of all axis. Now you can drag and edit to slow or amplify the speed.
There is a Graphic editor, which is more advanced to make the movements more accurately and directly to edit the curves.
Sound effects make any video or animation better. You can add and import the sound files. You can also create your sound and insert it into the Blender. Let’s discuss adding sound and making it sync to the character.
Download the audio file, hit shift + A to open Add menu, and choose the “Sound.” Now select the sound that you wish to add.
Drag the sound to keep it to the specific sections alone. Also, you can switch between “No Sync” to “AV Sync” in the playback to give the best synchronization to the characters. The volume and pitch can be adjusted using the sidebar.
05Step 5: Rendering
Before rendering, make sure you keep the FPS is same as that chosen during the keyframes to avoid unnecessary renders. After setting the frame correctly, causing the animation is easy.
Initially, click on “scene” and choose the file extension, file formats, and file colors (BW, RGB, or RGBA). Select the encoding container as “WebM” and video Codec as “WEBM/VP9. After adding the sound, set the audio codec to “Vorbis.” Choose output quality and speed.
After all the rendering, select Render from the top bar and select “Render Animation” in Blender Animation.
Awesome! We have successfully blended a character using Blender 3D animation software. With more practice and knowledge about more tools, one can easily use the Blender 3D mouse.
Part 3 Become a Pro from Beginners in 8 Tutorials.
01Fix 1: Complete Beginners Guide to Blender 2.8
This YouTube tutorial focuses on Blender version 2.8. The tutorial features the redesigned user interface and tools like 3D viewpoint and UV editor, which has new interactive tools. And about different 3D shapes and simple edits like adding colors and “G drag,” etc.
02Fix 2: Blender 2.9 for Absolute Beginners
This YouTube tutorial on Blender 3D animation software version 2.9 has the new advancement about denoiser interactivity in the 3D viewpoint. The YouTuber explains EEVEE, cycles, workbench, movements, rotate, and scale objects.
03Fix 3: Blender Day -1 Absolute Basics - Introduction Series for Beginners
This YouTube tutorial says about the introduction to the Blender 3D for free for beginners. He explains simple movements like rotating and scaling, shapes, and colors to the objects. He also says about the pivot plot and how to create a basic primitive using blender.
04Fix 4: Zoync TV’s Blender Beginners Series
The Blender Beginners video by ZoyncTV is on Blender 2.6. Indeed, even as hotkeys and terms change, the hidden ideas will forever be pertinent. Every video in this 11-section is somewhere between 10 and 20 minutes, split into five separate subjects: displaying, modifiers, materials, surfaces, and animations. It’s a beginner-level course.
05Fix 5: The Blender Survival Guide
The Blender Survival Guide series by Creative COW is outdated but the best video for somebody who has never utilized Blender. Each video in this 13-section series is somewhere in the range of 15 and 45 minutes in length, which means you’ll get 350 intense minutes of preparing. It is a survival reference that shows just the outright necessities.
06Fix 6: KatBit’s Blender Tutorial
The KatsBits site is home to lots of tutorials, video games. Its Blender animation tutorials are fantastic when you want a beginning stage for various 3D models. There are 45 Blender tutorials. Tutorials take you through the most common way of making a 3D level for Quake and tell you the best way to make a basic model.
07Fix 7: Daniel Krafft’s 100 Blender 2.8 Tips
While this is another Blender 2.8 tutorial, Daniel’s tips are overall for any Blender work process. He teaches simple stuff like vertex and edges and some technical parts in the Blender 3D animation software.
08Fix 8: Blender 3D: Noob to Pro
This last tutorial is a “wiki book” called Blender 3D: Noob to Pro that consists of important Blender animation tips and experiences. Start with an outline of 3D ideas and a top-to-bottom introduction to Blender.
Regarding Blender 3D mouse software, we would like to recommend one more tool to you the most. Yes, it is none other than Wondershare Filmora, a perfect alternative to Blender 3D animation software wherein you can get excellent 3D animation effects, 3D texts and animate it. There are some simple steps and various options to work in Filmora for creating 3D animated effects.
● Composition
● Creating our 3D text
● Creating the 3D look
● Basics of 3D animation
● Animating the text in 3D
There are countless YouTube tutorial videos for working with Wondershare Filmora Video Editor ‘s latest version.
Key Takeaways from This Episode
● We learned about Blender 3D animation software.
● How can you create characters using Blender animation?
● 8 Tutorials to move you from a beginner to a Pro.
How to Make a Photoshop Collage in Simple Steps
How to Make a Photoshop Collage in EASY Steps
An easy yet powerful editor
Numerous effects to choose from
Detailed tutorials provided by the official channel
Photographs are a way of capturing and stopping the time in a small frame. They hold millions of memories that we want to cherish forever in our lives. And sometimes, we want to make a cluster of all the happy memories by making a collage of the photos.

Also, what can be a better gift to someone than presenting them a collection of all the cherishable memories you have with them in photographs? And that can be made possible through various photoshop collage ideas.
In this article
01 [Does Photoshop Have Collage Templates?](#Part 1)
02 [How to Make Your Own Collage with Photoshop Templates](#Part 2)
03 [How to Custom a Photoshop Collage in 9 Simple Steps](#Part 3)
Part 1 Does Photoshop Have Collage Templates?
There is numerous photo collage template in photoshop, and you even access and use some of them for free. Additionally, you can also create your template in Photoshop and use them in making your collage. If you want to make your template in Photoshop, here is how.
Step 1: Make a new layer and fill it up with your choice of colour.
Step 2: Resize and duplicate the layer to create the pattern you want for your collage.
Step 3: Integrate a “Clipping Mask.”
Step 4: For every image, create new clipping masks.
Step 5: Your collage template is ready so, export it to use!
Part 2 How to Make Your Own Collage with Photoshop Templates
Now that we know that you can access numerous incredible photoshop templates for free, you might want to create a collage for yourself in Photoshop. So, this is how you can use the photoshop collage template to make your collage with Photoshop Templates.
First, you need to select the images you want to create a collage with. Then you will have to import them. You can either “select and import” them one at a time or even batch import all of them together. Then, you can readily choose the template you want to use, or you can also create one for yourself.
Then you can resize or edit the images in the way you want and place them in the desired order. After you are done arranging and creating the collage perfectly, save the file in JPEG format and then export it to access it whenever you want!
Part 3 How to Custom a Photoshop Collage in 9 Simple Steps
If you do not know the answer to the question: how to make a collage in photoshop, there is absolutely nothing to worry about. Because the answer to this question is simple and includes not more than nine steps.
So now, we will be discussing the nine simple steps that will help you make a custom photo collage in photoshop. Here is the list of steps that will help you in doing so.
● Step 1: Selecting your favorite photos
The first step to making a collage in photoshop is to select all the photos you would like your collage to have. Now, it will be best for you to choose your photos wisely. We understand that each photograph is equally sweet and cherishable. But, when you select the images for your collage in a thoughtful manner, the collage turns out much better than expected.
You can use different collage ideas for photoshop, such as following a particular storyline, where you collage the photos so that it recreates the memory or the moments in sequence. Another way to select your photos is by sticking to a particular theme, and it can be vintage or on one specific color or the like. It will help your collage turn out in the best and the most thoughtful way.
● Step 2: Opening the photos you have selected, in collage maker photoshop
Now that you have selected which images you would want your collage to have, the next step will require you to open those images in the collage maker Photoshop. For this, you will have to select the option “File”. There, you will find the option “Open”. Then you will open the images you have chosen in Photoshop.
Also, you can simply press the “ctrl” and the “O” keys on your keyboard and it will automatically help you open the images you have selected for the photo collage on photoshop.

Another way to open the pages you have selected for your collage is through the “Drag and Drop” function. It is more effortless to choose the images and open them in Photoshop. After you have opened the photos in Photoshop, it will open in a different tab and look like in the following picture.

● Step 3: Make a new file for your collage on photoshop
The third step requires you to make a new file for your photo collage in photoshop. For this, you need to select or click on the “File” option on Photoshop. Then, click on the “New” option. It will help you make a new file for your collage. You can also select the “ctrl” and “N” together.
As you click on the “New” option, you will be given options to choose from. Choose the one that matches your preference.
When you are working on photoshop to make a collage, the images will need a collage background because it is on this background that the photos will assemble. If you have made a collage before on photoshop, you can use the old collage photoshop template. Otherwise, you need to create a new document for the collage.

● Step 4: Add the selected images one-by-one
Adding the images can be done in many ways. One way to do so is by opening the photo and clicking on it. Another way of doing so is to use the “Marquee Tool” of Photoshop.

Another way of doing so is by pressing the “ctrl” and “A” keys on your keyboard together. You will find the matching ants border around the image when you do this.

Then, go to the “Edit” option and choose “Copy” there. Or, you can also select the “ctrl” and “C” keys on your keywords together. Then go to your new document and select the option of “Paste” from the “Edit” option, or you can also press the “ctrl” and “V” keys together to do so.
The photo will be added in its own layer on the new document.

● Step 5: Arrange the images
Now, arrange the images in the way you want. If you have chosen to tell a story through your collage creator in photoshop, then arrange the photos accordingly. You can do so with the help of the “Move” tool or simply tap V. You can also use the “Free Transform” tool to edit and transform the images in the way you want. You can resize, rotate and edit the photos in many other ways through the “Free Transform” tool.
Step 6: Integrate image space
To create a collage in photoshop in a better and more spaced-out manner, you need to add some spacing between the images you have in your collage. There are two ways to add spacing between the pictures; one way is by creating a thin, white border around each image.
And the second method is by accessing and using the “Layers” feature in Photoshop.

● Step 7: Merge all the Layers
This step is necessary when you have used the “Layer” feature to create the spacing among the images present in your collage. You will be able to do so from the “Layer” option. So, go to the “Layer” option and select the “Merge Invisible” option present there.

● Step 8: cropping the final picture
Before the final step, it is important that you crop the final picture. And to do so, you can opt for the “Crop tool”. You will be able to access it easily, or you can also simply tap C to use the “Crop tool.”

● Step 9: Save the final collage and export
After you have done all the necessary changes and are satisfied with the final collage, then, save the file. To do so, go to the “File” option and select the “Save as” option.

Then choose the file type to be “JPEG”. Type the name you would want the collage to be saved as. This completes the process of saving the file. Then choose the image quality you would want the collage to be exported in.

● Key Takeaways from This Episode →
● In this discussion, we have covered the following topics.
● We discussed whether Photoshop has collage templates.
● Then we proceeded with discussing how we can create a collage in photoshop using the templates in it.
● Lastly, we wrapped up our discussion with the nine-step tutorial about customizing a collage in Photoshop.
Photographs are a way of capturing and stopping the time in a small frame. They hold millions of memories that we want to cherish forever in our lives. And sometimes, we want to make a cluster of all the happy memories by making a collage of the photos.
Also, what can be a better gift to someone than presenting them a collection of all the cherishable memories you have with them in photographs? And that can be made possible through various photoshop collage ideas.
In this article
01 [Does Photoshop Have Collage Templates?](#Part 1)
02 [How to Make Your Own Collage with Photoshop Templates](#Part 2)
03 [How to Custom a Photoshop Collage in 9 Simple Steps](#Part 3)
Part 1 Does Photoshop Have Collage Templates?
There is numerous photo collage template in photoshop, and you even access and use some of them for free. Additionally, you can also create your template in Photoshop and use them in making your collage. If you want to make your template in Photoshop, here is how.
Step 1: Make a new layer and fill it up with your choice of colour.
Step 2: Resize and duplicate the layer to create the pattern you want for your collage.
Step 3: Integrate a “Clipping Mask.”
Step 4: For every image, create new clipping masks.
Step 5: Your collage template is ready so, export it to use!
Part 2 How to Make Your Own Collage with Photoshop Templates
Now that we know that you can access numerous incredible photoshop templates for free, you might want to create a collage for yourself in Photoshop. So, this is how you can use the photoshop collage template to make your collage with Photoshop Templates.
First, you need to select the images you want to create a collage with. Then you will have to import them. You can either “select and import” them one at a time or even batch import all of them together. Then, you can readily choose the template you want to use, or you can also create one for yourself.
Then you can resize or edit the images in the way you want and place them in the desired order. After you are done arranging and creating the collage perfectly, save the file in JPEG format and then export it to access it whenever you want!
Part 3 How to Custom a Photoshop Collage in 9 Simple Steps
If you do not know the answer to the question: how to make a collage in photoshop, there is absolutely nothing to worry about. Because the answer to this question is simple and includes not more than nine steps.
So now, we will be discussing the nine simple steps that will help you make a custom photo collage in photoshop. Here is the list of steps that will help you in doing so.
● Step 1: Selecting your favorite photos
The first step to making a collage in photoshop is to select all the photos you would like your collage to have. Now, it will be best for you to choose your photos wisely. We understand that each photograph is equally sweet and cherishable. But, when you select the images for your collage in a thoughtful manner, the collage turns out much better than expected.
You can use different collage ideas for photoshop, such as following a particular storyline, where you collage the photos so that it recreates the memory or the moments in sequence. Another way to select your photos is by sticking to a particular theme, and it can be vintage or on one specific color or the like. It will help your collage turn out in the best and the most thoughtful way.
● Step 2: Opening the photos you have selected, in collage maker photoshop
Now that you have selected which images you would want your collage to have, the next step will require you to open those images in the collage maker Photoshop. For this, you will have to select the option “File”. There, you will find the option “Open”. Then you will open the images you have chosen in Photoshop.
Also, you can simply press the “ctrl” and the “O” keys on your keyboard and it will automatically help you open the images you have selected for the photo collage on photoshop.
Another way to open the pages you have selected for your collage is through the “Drag and Drop” function. It is more effortless to choose the images and open them in Photoshop. After you have opened the photos in Photoshop, it will open in a different tab and look like in the following picture.
● Step 3: Make a new file for your collage on photoshop
The third step requires you to make a new file for your photo collage in photoshop. For this, you need to select or click on the “File” option on Photoshop. Then, click on the “New” option. It will help you make a new file for your collage. You can also select the “ctrl” and “N” together.
As you click on the “New” option, you will be given options to choose from. Choose the one that matches your preference.
When you are working on photoshop to make a collage, the images will need a collage background because it is on this background that the photos will assemble. If you have made a collage before on photoshop, you can use the old collage photoshop template. Otherwise, you need to create a new document for the collage.
● Step 4: Add the selected images one-by-one
Adding the images can be done in many ways. One way to do so is by opening the photo and clicking on it. Another way of doing so is to use the “Marquee Tool” of Photoshop.
Another way of doing so is by pressing the “ctrl” and “A” keys on your keyboard together. You will find the matching ants border around the image when you do this.
Then, go to the “Edit” option and choose “Copy” there. Or, you can also select the “ctrl” and “C” keys on your keywords together. Then go to your new document and select the option of “Paste” from the “Edit” option, or you can also press the “ctrl” and “V” keys together to do so.
The photo will be added in its own layer on the new document.
● Step 5: Arrange the images
Now, arrange the images in the way you want. If you have chosen to tell a story through your collage creator in photoshop, then arrange the photos accordingly. You can do so with the help of the “Move” tool or simply tap V. You can also use the “Free Transform” tool to edit and transform the images in the way you want. You can resize, rotate and edit the photos in many other ways through the “Free Transform” tool.
Step 6: Integrate image space
To create a collage in photoshop in a better and more spaced-out manner, you need to add some spacing between the images you have in your collage. There are two ways to add spacing between the pictures; one way is by creating a thin, white border around each image.
And the second method is by accessing and using the “Layers” feature in Photoshop.
● Step 7: Merge all the Layers
This step is necessary when you have used the “Layer” feature to create the spacing among the images present in your collage. You will be able to do so from the “Layer” option. So, go to the “Layer” option and select the “Merge Invisible” option present there.
● Step 8: cropping the final picture
Before the final step, it is important that you crop the final picture. And to do so, you can opt for the “Crop tool”. You will be able to access it easily, or you can also simply tap C to use the “Crop tool.”
● Step 9: Save the final collage and export
After you have done all the necessary changes and are satisfied with the final collage, then, save the file. To do so, go to the “File” option and select the “Save as” option.
Then choose the file type to be “JPEG”. Type the name you would want the collage to be saved as. This completes the process of saving the file. Then choose the image quality you would want the collage to be exported in.
● Key Takeaways from This Episode →
● In this discussion, we have covered the following topics.
● We discussed whether Photoshop has collage templates.
● Then we proceeded with discussing how we can create a collage in photoshop using the templates in it.
● Lastly, we wrapped up our discussion with the nine-step tutorial about customizing a collage in Photoshop.
6 Unexpected Ways Gif Animation Maker That Affect Your Marketing
6 Unexpected Ways Gif Animation Maker Can Affect Your Marketing
An easy yet powerful editor
Numerous effects to choose from
Detailed tutorials provided by the official channel
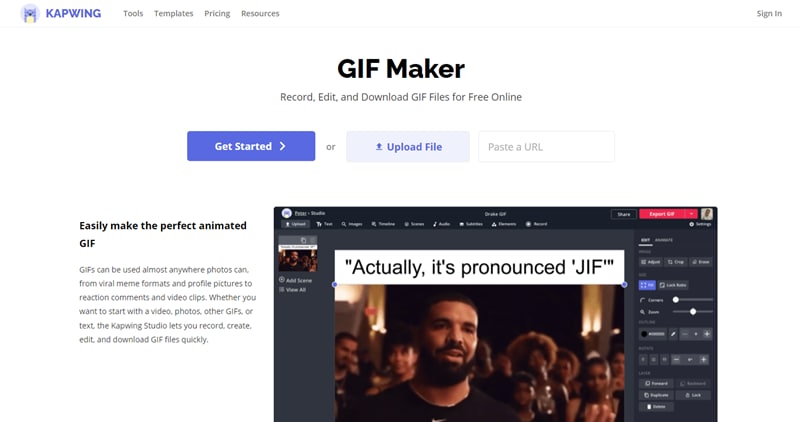
Well, if what you’re looking for is a GIF animation maker or software for GIF Animation, we’ve got your back This article starts off with a list of some GIF animation maker tools that you can use to turn your videos into a GIF file (just to give you an idea of how those can help you move forward in your GIF marketing attempts more easily.)
Before ending in a quick rundown, a couple of reasons why GIFs are worth the investment in the first place.
In this article
01 [In What Ways Can You turn videos into a GIF?](#Part 1)
02 [How Gif Animation Maker Affect Your Marketing](#Part 2)
Part 1 In What Ways Can You turn videos into a GIF?
As promised, we’ll be starting off with the tools that you’ll need in order to create GIFs easily (or GIF Animation Maker tools, if you’d prefer). We’ve made sure to pick out a variety for you so that you won’t have to go looking elsewhere for other options We also included what people tend to like and dislike about each option so that you can make a choice as to what you think is the best GIF animation maker more easily.
01**Wondershare Filmora **
If what you’re looking for is software for GIF animation, then Filmora is your best bet This software is available for both Mac and Windows users (with options for both a perpetual license and subscription packages for you to choose from.) This is a video editing tool that is capable of making incredibly professional results. And, perhaps more importantly (considering the subject of this article), it will allow you easily turn a video into a 2D Animation GIF that you can use for your marketing
URL: https://filmora.wondershare.com/
What People Like About The Maker
●Comes with advanced video editing functions
●Easily turns videos into 2D Animation GIFs
●Produces High-Quality Results each time
What People Don’t Like About The Maker
●It is a software, which requires download and installation
●The FREE version is limited
●Must pay either a subscription fee or one-time fee for full access

02Canva
If you’ve created marketing projects before, then you’ve no doubt already heard of Canva. This is what a lot of content creators use in order to easily create content for marketing online In this case, of course, we’re looking at it as an online GIF animation maker, one that, unlike Filmora, requires no download (but will require sign-up) for you to use. Canva has its own GIF Animation Maker that you can use (different from the regular Canva you might be more familiar with, as is shown in the UI screenshot below).
URL: https://www.canva.com/create/gif-maker/
What People Like About The Maker
●It is an online tool, no download or installation is required
●Built-in media library for convenient project creation
●Intuitive 2D Animation GIF interface
What People Don’t Like About The Maker
●Not as advanced when it comes to video editing functions
●Limited FREE trial version
●Must unlock Premium version (subscription-based) for full access

03PicMonkey
The next tool on this is another online GIF Animation maker, this time by the name of PicMonkey This tool is very similar to Canva in that many people know it primarily as a photo-editor tool that is great to use for creating content (as it comes with a built-in media library that you can use to quickly finish projects). But it still earned a spot on this list of ours because it allows users to create 2D animation GIFs as well
URL: https://www.picmonkey.com/
What People Like About The Maker
●Built-in media library with animated shapes and images
●GIF Animation editor and creator all-at-once
●FREE trial is available to test out its GIF animation maker functions
What People Don’t Like About The Maker
●In order to have full access, one must pay for the premium solution
●Custom animation is limited in scope
●No advanced video editing functions

04Kapwing
Kapwing is a free GIF animation creator that will allow you to create GIFs from videos easily The best part about is that it has a FREE version available for use (one that allows you to download finished video projects without watermarks so long as they are under 5 minutes). This should allow you to test out its GIF maker functions before you commit to their premium version (which is subscription-based).
URL: https://www.kapwing.com/gif-maker
What People Like About The Maker
●FREE to use with some limitations
●Quick and easy video-to-GIF conversion
●No watermark on images or video projects under 5 minutes
What People Don’t Like About The Maker
●Full access can only be unlocked by paying for the premium version
●Premium version is subscription-based and expensive
●There is an upload limit
05MakeAGif
MakeAGif is the last GIF animation maker on this list, and it just so happens that it’s one of the easiest to use as well This one is more of a converter tool in that it transforms already-finished videos into a GIF that you can share. A lot of people use it to convert their favorite videos from social media (YouTube, Facebook, etc.) into a GIF that they can share on other platforms.
URL: https://makeagif.com/video-to-gif
What People Like About The Maker
●Free to use with some limitations
●Quick and easy-to-use Video to GIF converter
●Converts pictures, YouTube videos, Facebook videos, etc. to GIF
What People Don’t Like About The Maker
●The tool is more limited in scope than the rest of the tools on this list
●The FREE version is limited
●Premium version requires paying a subscription fee
Part 2 How Gif Animation Maker Affect Your Marketing
Alright, now that you’ve been introduced to what we consider the best GIF Animation maker tools available right now (be they software or online tools), we can move on to actually discussing how you can use GIFs for your marketing efforts We’ve compiled six different ways here, but there are plenty of others, of course. It’s a very open subject.
01GIFs Are Easy to Share Ads
The best part of GIFs is that they are easily consumable media that you can share just about everywhere. For example, you can include them in your email marketing to bring a little life to what could have otherwise been a very dry message You can also have it play out on social media without prompting (different from videos, which the user usually has to play before it starts going.)
GIF LINK: https://media.giphy.com/media/fEkpR6rfmXmZHeVQ22/giphy.gif

02GIFs Can Be Used for Promoting Events
GIFs are also great for promoting events or holiday sales It’s basically just a moving 2D advertisement (like the one that is shown below). Eye-catching in a way that keeps you looking to catch the movement — in compared to if you were just looking at a still image (which might catch your attention for a moment, but usually bores you the next)
GIF LINK: https://media.giphy.com/media/WtUMnz9ZUuzwojWwij/giphy.gif

03GIFs Can Be Used for Call-to-Action Pop-Ups
Perhaps you’ve seen this already in some YouTube videos (see the GIF attached for an example), but a lot of content creators now include GIFs on their content to prompt their audience to complete an action — be it subscribing, sharing, downloading a link, buying a product, etc. It’s a great way of getting a message across in a way that is both fun and straightforward
GIF: https://media.giphy.com/media/73oSygWJFG9K1ha75z/giphy.gif

04GIFs Can Be Used to Set the Scene and Express Emotion
GIFs are also a great way to just generally set the scene or express emotion. Text is…very very difficult to make sound like anything but dry reading. Pictures are a little better, but GIFs??? Well, GIFs are great ‘moving’ pictures that offer you more leeway to set the scene by expressing emotion, intent, etc.
GIF: https://media.giphy.com/media/keizDG1zD7Q38yWm3x/giphy.gif

05GIFs Can Be Used to Tell a Story
You know the saying, “A picture can speak a thousand words?” Well, it’s true, but in comparison to GIFs??? Pictures definitely lose out in telling a story. See the attached GIF for example. With just one look, you can probably create an entire story in your head about the woman that is featured This can be very useful for future marketing prospects.
GIF: https://media.giphy.com/media/Kb5zI3B9D7cCulbNOg/giphy.gif

06GIFs Can Be Used to Explain or Share Instructions
In the same way that you can create long infographics to offer instructions or teach a lesson on a particular subject, GIFs can be used to educate your audience. Only, it’s a lot easier to use for this reason No complicated infographics formatting is required You can just put together several stills showing the step-by-step process or record a silent video like the one shown in the GIF below
GIF: https://media.giphy.com/media/FgiHOQyKUJmwg/giphy.gif
● Key Takeaways from This Episode →
● GIFs have been used for years in order to share fun moments and memes, but it has much more potential than that
● With a carefully designed GIF, not only can you catch the attention of your audience, but you can also keep that attention for much longer than you would have been able to if you were just sharing text or a still image Making it a perfect vessel for future marketing efforts
● Now, in order to make sure that you get a good story on your marketing efforts via GIF, we’ve listed some of the best GIF animation maker tools for you in the first part of this article
● A second part has also been added where we discussed all the different ways that you can use 2D Animation GIFs in your future marketing endeavors.
Well, if what you’re looking for is a GIF animation maker or software for GIF Animation, we’ve got your back This article starts off with a list of some GIF animation maker tools that you can use to turn your videos into a GIF file (just to give you an idea of how those can help you move forward in your GIF marketing attempts more easily.)
Before ending in a quick rundown, a couple of reasons why GIFs are worth the investment in the first place.
In this article
01 [In What Ways Can You turn videos into a GIF?](#Part 1)
02 [How Gif Animation Maker Affect Your Marketing](#Part 2)
Part 1 In What Ways Can You turn videos into a GIF?
As promised, we’ll be starting off with the tools that you’ll need in order to create GIFs easily (or GIF Animation Maker tools, if you’d prefer). We’ve made sure to pick out a variety for you so that you won’t have to go looking elsewhere for other options We also included what people tend to like and dislike about each option so that you can make a choice as to what you think is the best GIF animation maker more easily.
01**Wondershare Filmora **
If what you’re looking for is software for GIF animation, then Filmora is your best bet This software is available for both Mac and Windows users (with options for both a perpetual license and subscription packages for you to choose from.) This is a video editing tool that is capable of making incredibly professional results. And, perhaps more importantly (considering the subject of this article), it will allow you easily turn a video into a 2D Animation GIF that you can use for your marketing
URL: https://filmora.wondershare.com/
What People Like About The Maker
●Comes with advanced video editing functions
●Easily turns videos into 2D Animation GIFs
●Produces High-Quality Results each time
What People Don’t Like About The Maker
●It is a software, which requires download and installation
●The FREE version is limited
●Must pay either a subscription fee or one-time fee for full access
02Canva
If you’ve created marketing projects before, then you’ve no doubt already heard of Canva. This is what a lot of content creators use in order to easily create content for marketing online In this case, of course, we’re looking at it as an online GIF animation maker, one that, unlike Filmora, requires no download (but will require sign-up) for you to use. Canva has its own GIF Animation Maker that you can use (different from the regular Canva you might be more familiar with, as is shown in the UI screenshot below).
URL: https://www.canva.com/create/gif-maker/
What People Like About The Maker
●It is an online tool, no download or installation is required
●Built-in media library for convenient project creation
●Intuitive 2D Animation GIF interface
What People Don’t Like About The Maker
●Not as advanced when it comes to video editing functions
●Limited FREE trial version
●Must unlock Premium version (subscription-based) for full access
03PicMonkey
The next tool on this is another online GIF Animation maker, this time by the name of PicMonkey This tool is very similar to Canva in that many people know it primarily as a photo-editor tool that is great to use for creating content (as it comes with a built-in media library that you can use to quickly finish projects). But it still earned a spot on this list of ours because it allows users to create 2D animation GIFs as well
URL: https://www.picmonkey.com/
What People Like About The Maker
●Built-in media library with animated shapes and images
●GIF Animation editor and creator all-at-once
●FREE trial is available to test out its GIF animation maker functions
What People Don’t Like About The Maker
●In order to have full access, one must pay for the premium solution
●Custom animation is limited in scope
●No advanced video editing functions
04Kapwing
Kapwing is a free GIF animation creator that will allow you to create GIFs from videos easily The best part about is that it has a FREE version available for use (one that allows you to download finished video projects without watermarks so long as they are under 5 minutes). This should allow you to test out its GIF maker functions before you commit to their premium version (which is subscription-based).
URL: https://www.kapwing.com/gif-maker
What People Like About The Maker
●FREE to use with some limitations
●Quick and easy video-to-GIF conversion
●No watermark on images or video projects under 5 minutes
What People Don’t Like About The Maker
●Full access can only be unlocked by paying for the premium version
●Premium version is subscription-based and expensive
●There is an upload limit
05MakeAGif
MakeAGif is the last GIF animation maker on this list, and it just so happens that it’s one of the easiest to use as well This one is more of a converter tool in that it transforms already-finished videos into a GIF that you can share. A lot of people use it to convert their favorite videos from social media (YouTube, Facebook, etc.) into a GIF that they can share on other platforms.
URL: https://makeagif.com/video-to-gif
What People Like About The Maker
●Free to use with some limitations
●Quick and easy-to-use Video to GIF converter
●Converts pictures, YouTube videos, Facebook videos, etc. to GIF
What People Don’t Like About The Maker
●The tool is more limited in scope than the rest of the tools on this list
●The FREE version is limited
●Premium version requires paying a subscription fee
Part 2 How Gif Animation Maker Affect Your Marketing
Alright, now that you’ve been introduced to what we consider the best GIF Animation maker tools available right now (be they software or online tools), we can move on to actually discussing how you can use GIFs for your marketing efforts We’ve compiled six different ways here, but there are plenty of others, of course. It’s a very open subject.
01GIFs Are Easy to Share Ads
The best part of GIFs is that they are easily consumable media that you can share just about everywhere. For example, you can include them in your email marketing to bring a little life to what could have otherwise been a very dry message You can also have it play out on social media without prompting (different from videos, which the user usually has to play before it starts going.)
GIF LINK: https://media.giphy.com/media/fEkpR6rfmXmZHeVQ22/giphy.gif
02GIFs Can Be Used for Promoting Events
GIFs are also great for promoting events or holiday sales It’s basically just a moving 2D advertisement (like the one that is shown below). Eye-catching in a way that keeps you looking to catch the movement — in compared to if you were just looking at a still image (which might catch your attention for a moment, but usually bores you the next)
GIF LINK: https://media.giphy.com/media/WtUMnz9ZUuzwojWwij/giphy.gif
03GIFs Can Be Used for Call-to-Action Pop-Ups
Perhaps you’ve seen this already in some YouTube videos (see the GIF attached for an example), but a lot of content creators now include GIFs on their content to prompt their audience to complete an action — be it subscribing, sharing, downloading a link, buying a product, etc. It’s a great way of getting a message across in a way that is both fun and straightforward
GIF: https://media.giphy.com/media/73oSygWJFG9K1ha75z/giphy.gif
04GIFs Can Be Used to Set the Scene and Express Emotion
GIFs are also a great way to just generally set the scene or express emotion. Text is…very very difficult to make sound like anything but dry reading. Pictures are a little better, but GIFs??? Well, GIFs are great ‘moving’ pictures that offer you more leeway to set the scene by expressing emotion, intent, etc.
GIF: https://media.giphy.com/media/keizDG1zD7Q38yWm3x/giphy.gif
05GIFs Can Be Used to Tell a Story
You know the saying, “A picture can speak a thousand words?” Well, it’s true, but in comparison to GIFs??? Pictures definitely lose out in telling a story. See the attached GIF for example. With just one look, you can probably create an entire story in your head about the woman that is featured This can be very useful for future marketing prospects.
GIF: https://media.giphy.com/media/Kb5zI3B9D7cCulbNOg/giphy.gif
06GIFs Can Be Used to Explain or Share Instructions
In the same way that you can create long infographics to offer instructions or teach a lesson on a particular subject, GIFs can be used to educate your audience. Only, it’s a lot easier to use for this reason No complicated infographics formatting is required You can just put together several stills showing the step-by-step process or record a silent video like the one shown in the GIF below
GIF: https://media.giphy.com/media/FgiHOQyKUJmwg/giphy.gif
● Key Takeaways from This Episode →
● GIFs have been used for years in order to share fun moments and memes, but it has much more potential than that
● With a carefully designed GIF, not only can you catch the attention of your audience, but you can also keep that attention for much longer than you would have been able to if you were just sharing text or a still image Making it a perfect vessel for future marketing efforts
● Now, in order to make sure that you get a good story on your marketing efforts via GIF, we’ve listed some of the best GIF animation maker tools for you in the first part of this article
● A second part has also been added where we discussed all the different ways that you can use 2D Animation GIFs in your future marketing endeavors.
Best 15 2D Animation Software Free That Worth to Try
Top 15 2D Animation Software Free That Worth to Try
An easy yet powerful editor
Numerous effects to choose from
Detailed tutorials provided by the official channel
When you are trying to create a funny cartoon, explainer videos, or other short informative content to post online, 2D animation software is a breeze to use.
With access to the best 2D animation software, you can create compelling and intricate stories that will help you sync with the audience.
01Wondershare Filmora
Price: Free, $99.99 (Perpetual); $59.99 (1-Year)
Pros
Numerous preset options
Both for beginners and professionals
Quick video trim/edits
Cons
Straightforward user interface
Lacks various shortcuts
May need high system requirements
What are users saying?
“I am solving the problem of getting an easy-to-use, all-in-one video editor. In addition, the editor gives you the ability to command over your audio files, whereas other editors just give you the basic audio editing capabilities. Lastly, the fully editable text effects and the vast numbers too.”
Key Features
Unlimited Video Tracks.
Audio Noise Reduction.
Automatic Audio Sync.
Motion Graphics animation support.
Auto color correction.
Available for Mac and Windows.
For Win 7 or later (64-bit)
For macOS 10.12 or later
02Opentoonz
Price: Free
Pros
Accessible plugin to automatically create animation effects
Unique Xsheets & Timelines features
Audio/Soundtrack Implementer
Cons
Somewhat Limited drawing capabilities
Intricate setup
A bit outdated UI design
What are users saying?
“Not a very self-explanatory 2D animation software. I had to look up some help, but it worked out in the end (youtube tutorials).”
Key Features
GTS scanning tool
Easy to modify picture styles
Add light and distortion effects
Works with black and white and colored scans
03Pencil 2D
Price: Free
Pros
Easy to use
Open sources
Supports multiple languages
Cons
It doesn’t support shape tools
Only for beginners
It doesn’t support 3D animation
What are users saying?
“The main thing against Pencil2d is the lack of complicated tools. Some tools are not there to bring better color effects, curves, drawing tools, etc. But honestly, this is not a big problem, the intention to be the most robust in the world but to be a tool that provides you a great introduction to animation with vector drawing.”
Key Features
Simplistic design to let you make animation easily
Raster and vector workflow switching
Cross-platform compatibility to free download
04Maefloresta/TupiTube
Price: Free
Pros
Great for beginners
Effective tools management
Friendly price plan
Cons
Differences in color correction
Certain confusing tools
Unable to erase unwanted frames
What are users saying?
“Honestly, I love the app, but I wish there were an eraser, but other than that, it is great for everything from experimental clips to my YT videos that will be coming out in a few months.”
Key Features
A free downloadable app that assists on tablets and smartphones
Simple software with tutorials
Interactive user interface that beginners can use with ease
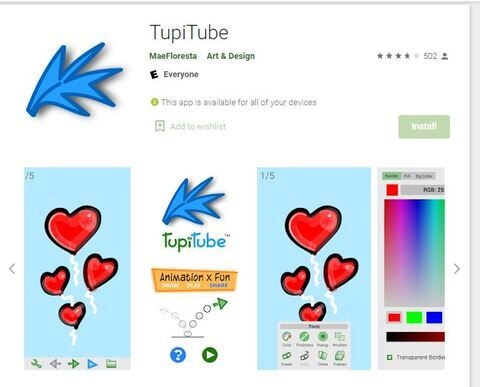
05Synfig
Price: Free
Pros
Offers 50+ layers
Easy to use layout
Lots of technical tools and functions
Cons
Difficult layout
Hard learning curve
Only a few tutorials available
What are users saying?
“It is cumbersome. You will look for tutorials to understand it, even if you have the best 2D animation software Background. - Though, it’s not famous so you may not wander for information about it as easily. - You do need high PC requirements to operate it, it is heavy. - You have to Constantly save because there are a few operations that make it crash.”
Key Features
Compatible with multiple content layers
The bone system assists for the cutout animations creation from bitmap images
Consistent with sound support to allow for the addition and syncing of narration and music to the video
06CelAction 2D
Price: $1300 Studio Edition (Single License Use)
Pros
Fast to use
Low system requirements
Add-ons available
Cons
Less dynamic
Less in demand
Time-Consuming to learn
What are users saying?
**”**I found the software pretty responsive and may not be good for beginners. Being a beginner, I need easy-to-use free download 2D animation software with low learning, and it didn’t fit my needs entirely.”
Key Features
Quick and straightforward to use professionally
Features ergonomic controls
Simply manages complicated projects with different layers
Compatible with all modern Windows machines - 32 and 64-bit Also runs with Macs through Boot Camp
The multiplane camera helps you have more excellent controls
07Moho (Anime Studio) Pro
Price: $399 (Full Pack)
Pros
Regular updates available
Advanced features
Also good for beginners
Cons
Doesn’t automatically sync
Some functions are highly advanced
Lacks flexibility
What are users saying?
“I am freelance, and Moho12 has allowed me to give more character to animated characters that I can use for some clients. The compatibility that I get with Adobe Illustrator and the speed of the render makes it one of my central tools when it comes to working with character animations.”
Key Features
Improved freehand drawing tools
Beizer manages to make it simpler for you to design your videos
Brilliant warp feature assists in creating custom meshes to twist and bend your animations
Realistic motion blur
Best 2D Animation software for different layers at the same time
08FlipBook
Price: $19.99 (FlipBook Lite); $49.99 (FlipBook Studio); $149.99 (FlipBook Pro); $199.99 (FlipBook Pro HD)
Pros
Simple to draw
Easy to import from a scanner
Quick uploads
Cons
No free version
Challenging to make subtle changes
May not be user-friendly features
What are users saying?
“FlipBook does not contain a steep learning curve, and even first-time animators will be able to produce creative projects.”
Key Features
Modifications will be active while you draw the animation, so FlipBook is pretty quick
Easy to use the shift key to make speed painting
Ten animation layers for adding extra touches
Simple to use a scanner to import images

09Reallusion CrazyTalk Animator
Price: $199 (Pipeline); $99 (Pro)
Pros
Large library of appealing templates
Both for beginners and professionals
Easy to control characters
Cons
No drawing tools
A bit high learning curve
Hard to sync voice
What are users saying?
“This is a 2D animation maker online that makes sense. CTA makes sense in everything it does. One will find the tools exactly where they are supposed to be, and things work exactly the way one expects them to work.”
Key Features
Assists real-time facial expression with precise modification
Black magic to transform the image into a moving cartoon
You can make 2D visual effects for professionals
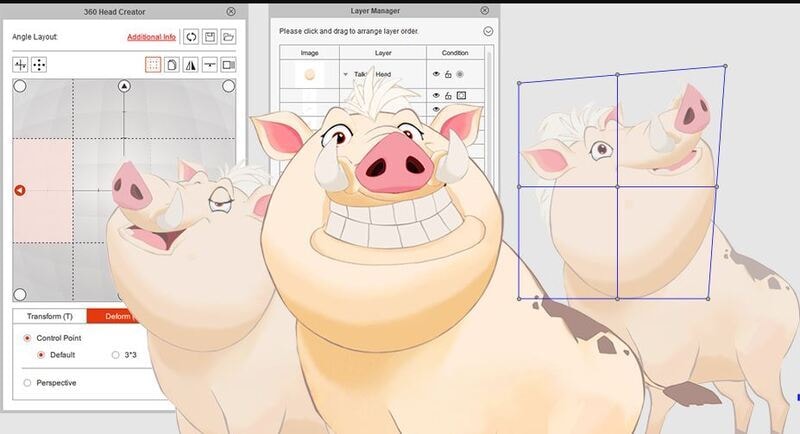
10Stop Motion Studio
Price: $59.99
Pros
Inbuilt sound editor
Easy to schedule
Not free
Cons
Certain hoops
No bone ringing tools or template designs
Only for 2D stop motion, 2D animation online
What are users saying?
“So I am in high school, Considering an animation class. Currently, we use this to make a claymation. I have noticed a few complexities with it. The camera does not aim well, which is a big hassle. It also Consists of a glitch where sometimes, if you hit the undo frame, it will delete all your other projects. When that happened to me, I was not happy. Now, this last part may just be nitpicking, but when I saw the official company’s animation, I saw their fingers in it, and the animation was not smooth.”
Key Features
Onionskin helps you to view previous frames via a transparent overlay
Audio recording and Chroma key and audio recording to better narrate and add voice effects
Simple
one-click upload to Facebook and YouTube
DSLR camera assistance for creating perfect 1080p recordings
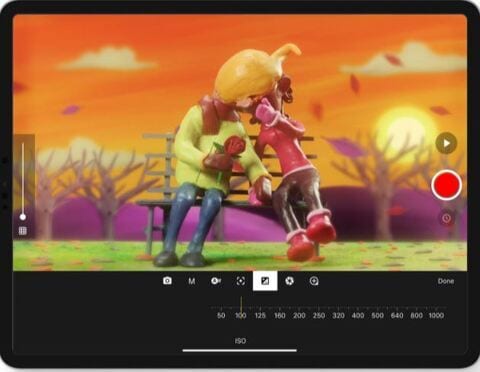
11Harmony
Price: $25.50/month (Harmony Essentials); $64.50/month (Harmony Advanced); $117.50/month (Harmony Premium)
Pros
Lots of animation and drawing tools
Offers various color controls
Flexible 2D animation
Cons
Complicated to learn
High system requirements
Not free
What are users saying?
“I have created really powerful 2D animations with Harmony; it offers almost every tool to be precise and creative in the artworks and the advanced tools for paperless animations, which they helped me a lot.”
Key Features
Smooth lines
Stabilizer
It offers 3, 4, and 5-point guides for curved perspectives.
It helps create cut-out animation.
Easy integration with software available in the production pipeline.
It offers 2D or 3D integration.
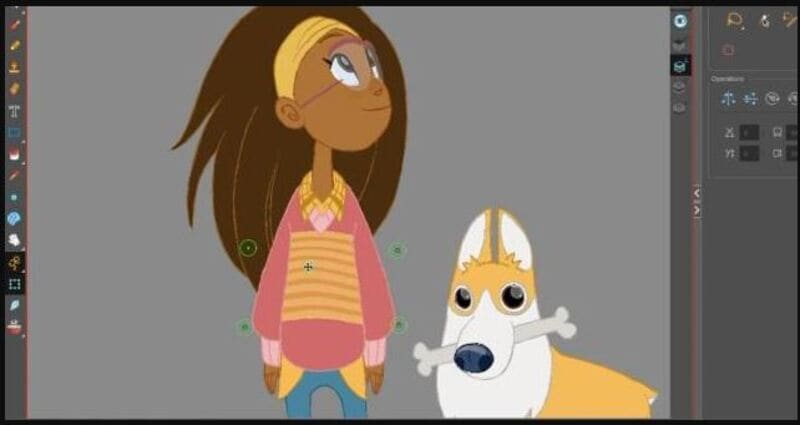
12Krita
Price: Free
Pros
Completely free
Easy to use
High compatibility
Cons
No dedicated support
Use only on desktop
Outdated UI
What are users saying?
“Krita helps me with my advertising videos as well as logos and other image editing use cases. I mainly use it to make thumbnails for my youtube channel and featured images for the articles on my website. I also use it to make some quick logos for my youtube channel and website.“
Key Features
This online 2D animation maker software allows you to add a stabilizer to the brush to smooth it.
Personalized brush with nine different brush engines.
Create comic panels with built-in vector drawing tools.
Create seamless patterns and textures by making image reference on the x and y-axis.
Import brush packs and texture from other artists.
You can flatten, combine, or order layers to organize your artwork.

13Animaker
Price: $10/mo (Basic); $19/mo (Starter); $49/mo (Pro); Custom Pricing (Enterprise)
Pros
Helpful app
Able to make beautiful videos
Tons of features
Cons
May not work on specific systems
Chunky UI
Time-Consuming
What are users saying?
“Firstly, it displays that you are limited to the materials that you can use. If you want it, you can go for its paid version, which I think is ideal for a company but still hard. Secondly, I am trying to execute a project for my science class, and so far, I’ve had three days to work on it.”
Key Features
Create animated videos in 6 unique video styles like 2D, handcraft, infographics, whiteboard, 2.5 D, and typography.
Beginners can create videos and use them as both animation and animated presentations.
Best free download 2D animation software has 200 sound effects to choose from.
It offers 100 background music tracks.
It helps you to record direct voice recordings.
Animaker allows the team to collaborate.
Export video in full HD quality.
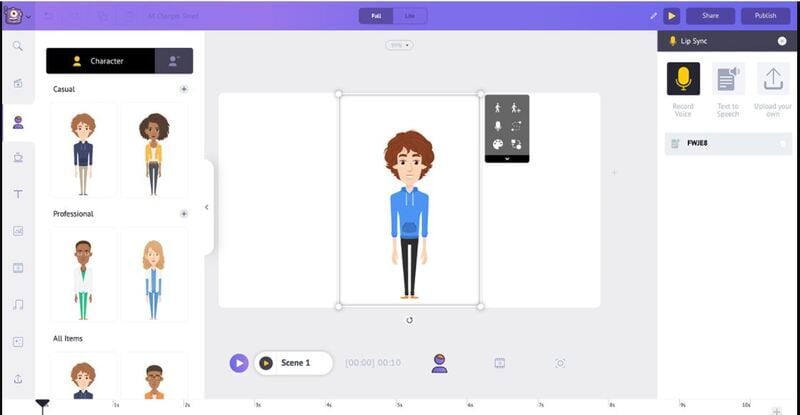
14SketchBook
Price: Free
Pros
Many options of pencils, brushes etc.
Various color options
Ideal for quick inspirations
Cons
It may be hard to enlarge projects
Lack of usability in some features
Some functions are confusing
What are users saying?
“Sketchbook has helped us in mobility. Since it is also available for tablets like iPad, it can be used to create quick artworks and concept arts and be used as a notebook to take notes. The different features also come in real handy, and the artwork created can be used to display professionally with a good amount of details.”
Key Features
It helps you draw basic shapes like circles, triangles, rectangles, etc.
Adjust the rules as per your desire.
Fill color into your artwork.
Also, import or export the layer as PSD.
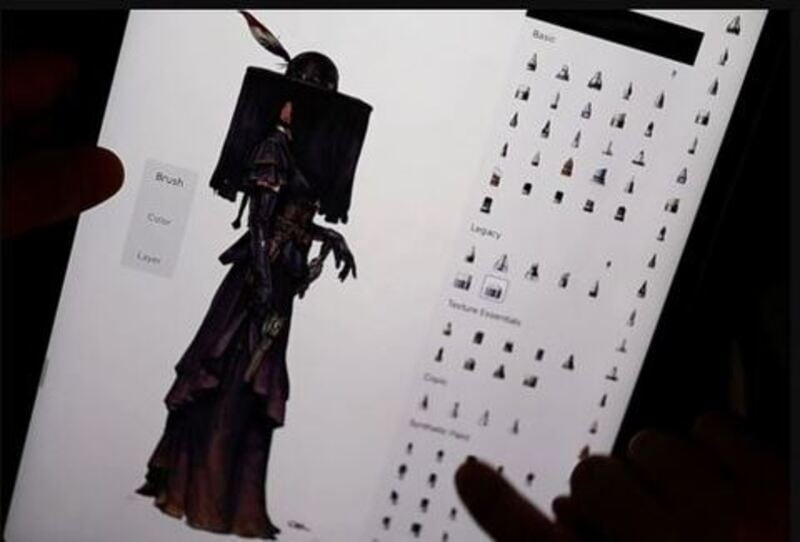
15Animate CC
Price: $20.99/mo
Pros
Helpful user interface
Various essential modules
Extremely smooth
Cons
High battery utilization
Steep learning curve
Lack some tools for handling sound
What are users saying?
“We use Animate to make educational videos, but we also use some of the drawing tools to create vector-based illustrations, and we can export them out from Animate to use them in printed products.“
Key Features
Create new poses for vector images or figures.
It helps you to arrange your layers in a parent-child hierarchy.
● Automatically matches mouth poses to voice inflections.
● Easy to export 360 VR animations.
● Create ads directly with Animate.
● Export images with the correct resolution by bypassing the image optimization and using image settings.
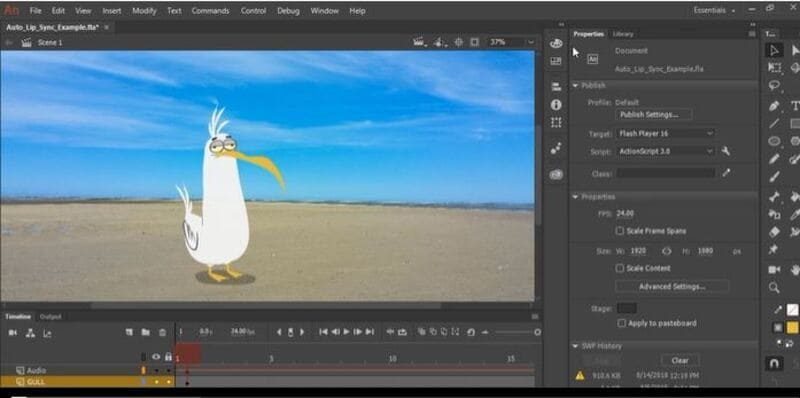
● Key Takeaways from This Episode →
● Using 2D animation software is simpler when you have the right software. You already have a storyboard and a script in mind, but now you can realize your vision in unique and intricate ways.
● So, if you want to make 3D animation, various 3D animation software options are also for you. If any of the products above will serve you well, you could use Filmora, which comes first in the series of 2D animation software.
When you are trying to create a funny cartoon, explainer videos, or other short informative content to post online, 2D animation software is a breeze to use.
With access to the best 2D animation software, you can create compelling and intricate stories that will help you sync with the audience.
01Wondershare Filmora
Price: Free, $99.99 (Perpetual); $59.99 (1-Year)
Pros
Numerous preset options
Both for beginners and professionals
Quick video trim/edits
Cons
Straightforward user interface
Lacks various shortcuts
May need high system requirements
What are users saying?
“I am solving the problem of getting an easy-to-use, all-in-one video editor. In addition, the editor gives you the ability to command over your audio files, whereas other editors just give you the basic audio editing capabilities. Lastly, the fully editable text effects and the vast numbers too.”
Key Features
Unlimited Video Tracks.
Audio Noise Reduction.
Automatic Audio Sync.
Motion Graphics animation support.
Auto color correction.
Available for Mac and Windows.
For Win 7 or later (64-bit)
For macOS 10.12 or later
02Opentoonz
Price: Free
Pros
Accessible plugin to automatically create animation effects
Unique Xsheets & Timelines features
Audio/Soundtrack Implementer
Cons
Somewhat Limited drawing capabilities
Intricate setup
A bit outdated UI design
What are users saying?
“Not a very self-explanatory 2D animation software. I had to look up some help, but it worked out in the end (youtube tutorials).”
Key Features
GTS scanning tool
Easy to modify picture styles
Add light and distortion effects
Works with black and white and colored scans
03Pencil 2D
Price: Free
Pros
Easy to use
Open sources
Supports multiple languages
Cons
It doesn’t support shape tools
Only for beginners
It doesn’t support 3D animation
What are users saying?
“The main thing against Pencil2d is the lack of complicated tools. Some tools are not there to bring better color effects, curves, drawing tools, etc. But honestly, this is not a big problem, the intention to be the most robust in the world but to be a tool that provides you a great introduction to animation with vector drawing.”
Key Features
Simplistic design to let you make animation easily
Raster and vector workflow switching
Cross-platform compatibility to free download
04Maefloresta/TupiTube
Price: Free
Pros
Great for beginners
Effective tools management
Friendly price plan
Cons
Differences in color correction
Certain confusing tools
Unable to erase unwanted frames
What are users saying?
“Honestly, I love the app, but I wish there were an eraser, but other than that, it is great for everything from experimental clips to my YT videos that will be coming out in a few months.”
Key Features
A free downloadable app that assists on tablets and smartphones
Simple software with tutorials
Interactive user interface that beginners can use with ease
05Synfig
Price: Free
Pros
Offers 50+ layers
Easy to use layout
Lots of technical tools and functions
Cons
Difficult layout
Hard learning curve
Only a few tutorials available
What are users saying?
“It is cumbersome. You will look for tutorials to understand it, even if you have the best 2D animation software Background. - Though, it’s not famous so you may not wander for information about it as easily. - You do need high PC requirements to operate it, it is heavy. - You have to Constantly save because there are a few operations that make it crash.”
Key Features
Compatible with multiple content layers
The bone system assists for the cutout animations creation from bitmap images
Consistent with sound support to allow for the addition and syncing of narration and music to the video
06CelAction 2D
Price: $1300 Studio Edition (Single License Use)
Pros
Fast to use
Low system requirements
Add-ons available
Cons
Less dynamic
Less in demand
Time-Consuming to learn
What are users saying?
**”**I found the software pretty responsive and may not be good for beginners. Being a beginner, I need easy-to-use free download 2D animation software with low learning, and it didn’t fit my needs entirely.”
Key Features
Quick and straightforward to use professionally
Features ergonomic controls
Simply manages complicated projects with different layers
Compatible with all modern Windows machines - 32 and 64-bit Also runs with Macs through Boot Camp
The multiplane camera helps you have more excellent controls
07Moho (Anime Studio) Pro
Price: $399 (Full Pack)
Pros
Regular updates available
Advanced features
Also good for beginners
Cons
Doesn’t automatically sync
Some functions are highly advanced
Lacks flexibility
What are users saying?
“I am freelance, and Moho12 has allowed me to give more character to animated characters that I can use for some clients. The compatibility that I get with Adobe Illustrator and the speed of the render makes it one of my central tools when it comes to working with character animations.”
Key Features
Improved freehand drawing tools
Beizer manages to make it simpler for you to design your videos
Brilliant warp feature assists in creating custom meshes to twist and bend your animations
Realistic motion blur
Best 2D Animation software for different layers at the same time
08FlipBook
Price: $19.99 (FlipBook Lite); $49.99 (FlipBook Studio); $149.99 (FlipBook Pro); $199.99 (FlipBook Pro HD)
Pros
Simple to draw
Easy to import from a scanner
Quick uploads
Cons
No free version
Challenging to make subtle changes
May not be user-friendly features
What are users saying?
“FlipBook does not contain a steep learning curve, and even first-time animators will be able to produce creative projects.”
Key Features
Modifications will be active while you draw the animation, so FlipBook is pretty quick
Easy to use the shift key to make speed painting
Ten animation layers for adding extra touches
Simple to use a scanner to import images
09Reallusion CrazyTalk Animator
Price: $199 (Pipeline); $99 (Pro)
Pros
Large library of appealing templates
Both for beginners and professionals
Easy to control characters
Cons
No drawing tools
A bit high learning curve
Hard to sync voice
What are users saying?
“This is a 2D animation maker online that makes sense. CTA makes sense in everything it does. One will find the tools exactly where they are supposed to be, and things work exactly the way one expects them to work.”
Key Features
Assists real-time facial expression with precise modification
Black magic to transform the image into a moving cartoon
You can make 2D visual effects for professionals
10Stop Motion Studio
Price: $59.99
Pros
Inbuilt sound editor
Easy to schedule
Not free
Cons
Certain hoops
No bone ringing tools or template designs
Only for 2D stop motion, 2D animation online
What are users saying?
“So I am in high school, Considering an animation class. Currently, we use this to make a claymation. I have noticed a few complexities with it. The camera does not aim well, which is a big hassle. It also Consists of a glitch where sometimes, if you hit the undo frame, it will delete all your other projects. When that happened to me, I was not happy. Now, this last part may just be nitpicking, but when I saw the official company’s animation, I saw their fingers in it, and the animation was not smooth.”
Key Features
Onionskin helps you to view previous frames via a transparent overlay
Audio recording and Chroma key and audio recording to better narrate and add voice effects
Simple
one-click upload to Facebook and YouTube
DSLR camera assistance for creating perfect 1080p recordings
11Harmony
Price: $25.50/month (Harmony Essentials); $64.50/month (Harmony Advanced); $117.50/month (Harmony Premium)
Pros
Lots of animation and drawing tools
Offers various color controls
Flexible 2D animation
Cons
Complicated to learn
High system requirements
Not free
What are users saying?
“I have created really powerful 2D animations with Harmony; it offers almost every tool to be precise and creative in the artworks and the advanced tools for paperless animations, which they helped me a lot.”
Key Features
Smooth lines
Stabilizer
It offers 3, 4, and 5-point guides for curved perspectives.
It helps create cut-out animation.
Easy integration with software available in the production pipeline.
It offers 2D or 3D integration.
12Krita
Price: Free
Pros
Completely free
Easy to use
High compatibility
Cons
No dedicated support
Use only on desktop
Outdated UI
What are users saying?
“Krita helps me with my advertising videos as well as logos and other image editing use cases. I mainly use it to make thumbnails for my youtube channel and featured images for the articles on my website. I also use it to make some quick logos for my youtube channel and website.“
Key Features
This online 2D animation maker software allows you to add a stabilizer to the brush to smooth it.
Personalized brush with nine different brush engines.
Create comic panels with built-in vector drawing tools.
Create seamless patterns and textures by making image reference on the x and y-axis.
Import brush packs and texture from other artists.
You can flatten, combine, or order layers to organize your artwork.
13Animaker
Price: $10/mo (Basic); $19/mo (Starter); $49/mo (Pro); Custom Pricing (Enterprise)
Pros
Helpful app
Able to make beautiful videos
Tons of features
Cons
May not work on specific systems
Chunky UI
Time-Consuming
What are users saying?
“Firstly, it displays that you are limited to the materials that you can use. If you want it, you can go for its paid version, which I think is ideal for a company but still hard. Secondly, I am trying to execute a project for my science class, and so far, I’ve had three days to work on it.”
Key Features
Create animated videos in 6 unique video styles like 2D, handcraft, infographics, whiteboard, 2.5 D, and typography.
Beginners can create videos and use them as both animation and animated presentations.
Best free download 2D animation software has 200 sound effects to choose from.
It offers 100 background music tracks.
It helps you to record direct voice recordings.
Animaker allows the team to collaborate.
Export video in full HD quality.
14SketchBook
Price: Free
Pros
Many options of pencils, brushes etc.
Various color options
Ideal for quick inspirations
Cons
It may be hard to enlarge projects
Lack of usability in some features
Some functions are confusing
What are users saying?
“Sketchbook has helped us in mobility. Since it is also available for tablets like iPad, it can be used to create quick artworks and concept arts and be used as a notebook to take notes. The different features also come in real handy, and the artwork created can be used to display professionally with a good amount of details.”
Key Features
It helps you draw basic shapes like circles, triangles, rectangles, etc.
Adjust the rules as per your desire.
Fill color into your artwork.
Also, import or export the layer as PSD.
15Animate CC
Price: $20.99/mo
Pros
Helpful user interface
Various essential modules
Extremely smooth
Cons
High battery utilization
Steep learning curve
Lack some tools for handling sound
What are users saying?
“We use Animate to make educational videos, but we also use some of the drawing tools to create vector-based illustrations, and we can export them out from Animate to use them in printed products.“
Key Features
Create new poses for vector images or figures.
It helps you to arrange your layers in a parent-child hierarchy.
● Automatically matches mouth poses to voice inflections.
● Easy to export 360 VR animations.
● Create ads directly with Animate.
● Export images with the correct resolution by bypassing the image optimization and using image settings.
● Key Takeaways from This Episode →
● Using 2D animation software is simpler when you have the right software. You already have a storyboard and a script in mind, but now you can realize your vision in unique and intricate ways.
● So, if you want to make 3D animation, various 3D animation software options are also for you. If any of the products above will serve you well, you could use Filmora, which comes first in the series of 2D animation software.
5 Photoshop Alternatives to Animate Your Logo
5 Photoshop Alternatives to Animate Logo
An easy yet powerful editor
Numerous effects to choose from
Detailed tutorials provided by the official channel
Photoshop offers everything that you can use to create a high-quality animated logo and use it to maximize your brand visibility.
![]()
How can you animate your logo in Photoshop? For people who are not familiar with the photo editing tool, it’s always a bit challenging to get started with logo animation.
In this article
01 [Why Do You Need a Gif Logo](#Part 1)
02 [A Step-by-step Guide to Logo Animation in Photoshop](#Part 2)
03 [Most Effective Tactics to Animate Logo with These 5 Photoshop Alternatives](#Part 3)
Part 1 Why Do You Need a Gif Logo
Now, before we start with the guide to animate your logo in Photoshop, let’s first understand how an animation logo can help your brand. The truth is an animated logo has the desired uniqueness factor that’ll help your brand establish a strong digital presence. An animated logo will also set you apart in the crowd, considering other companies will be using simple one-dimensional logos.
Not to mention, you can also use an animated logo in your promotional videos and apply visual effects to enhance the overall production quality of the videos. In a nutshell, there are endless possibilities of using animated logos - all you have to do is unleash your creativity and animate a logo without any hassle.
Part 2 A Step-by-step Guide to Logo Animation in Photoshop
So, now that you know the top reasons why it’s important to use an animated logo, let’s start with the step-by-step guide to animate your logo in Photoshop. It’s worth understanding that animating a logo in Photoshop is not a challenging process. However, it may take a few minutes for you to get the job done because the process is quite time-consuming.
Step 1Open Adobe Photoshop
Open Adobe Photoshop on your computer. Click “File > Scripts” and then tap “Load Files into Stack”.
![]()
Step 2Browse
On the next screen, click “Browse” and load all the JPEG files that you want to use to animate the logo.
![]()
Step 3Timeline
Wait for pictures to load into Photoshop’s timeline. Then, click “Windows” and select “Timeline” from the drop-down menu.
![]()
Step 4Make Frames from Layers
Select all the layers and tap the little “Animation” icon. Click “Make Frames from Layers” to proceed further.
![]()
Step 5Adjust the time span
Select all the frames to adjust the time span for the animation.
Step 6Select looping options
Click on “Select Looping Options” and specify the number of times you want the animation to play itself in the loop.
![]()
Step 7Final export
Your GIF animation is ready for the final export. Simply click “File>Save for Web” and then choose the final output format to export the logo in GIF format.
Part 3 Most Effective Tactics to Animate Logo with These 4 Photoshop Alternatives
Even though Photoshop is a great software to create animated logos, it’s no secret that its complex UI might seem overwhelming for some users. If that’s the case, you can look for Photoshop alternatives and use them to animate your logo online. Here we have shared five of the best alternatives to Photoshop that offer all the essential tools to animate a logo with fewer complications. All these tools have an intuitive interface and allow users to create animated logos within a few minutes.
These Photoshop alternatives include:
01 Figma
![]()
Figma is undoubtedly one of the best editing tools that you can use to animate your logos for free. Even though the tool isn’t as feature-loaded as Photoshop, it’s still one of the best Photoshop alternatives you can use to create animated logos. The tool offers a user-friendly interface where everything you need is right on your screen. Since there aren’t too many hidden menus, you’ll find it quite easier to animate your logos in Figma. There are pre-installed animation templates and transitions that you can customize to meet your business requirements and accelerate the entire designing process.
Key Features:
● Intuitive User Interface
● Support for Team Collaboration
● Can be used for UX/UI designing too
Pros
Dedicated free version for one-time users
Perfect for Novice Designers
Can be used within a professional organization for advanced editing
Cons
You will not get all the features with the free model
If you are looking to design animated logos with keyframes, Figma may not be the right choice for the job
02 Canva
![]()
Canva is another popular online editing tool that’s designed to help users fulfill different editing needs right on their browsers. Whether you want to create a banner for an event or an animated logo for your website, Canva will help you get the job done in every situation.
Being a web-based tool, Canva supports cross-platform compatibility, which means you can access it on any device you want. There are even dedicated iOS and Android apps for Canva that’ll allow you to edit logos right on your smartphone. Basically, if you want to animate your logos online free, Canva is the most suitable solution. You can also use Canva if you are looking for a long-term logo maker.
Key Features:
●Cross-Platform Compatibility
●Thousands of built-in templates with customization support
●The media library gets updated regularly
Pros
All the basic features are available in the free version
One-account to access Canva on any device you want
Ideal for one-time use as well
Cons
When it comes to customization, Canva has limited features
You won’t find advanced editing options like Photoshop
03 Luminar
![]()
Luminar is a paid editing tool that comes with built-in AI support for high-quality editing. Basically, its AI feature can automatically analyze the pictures and suggest you with the best animation templates accordingly. While many users are skeptical about the AI-support, stay assured that it’ll prove to be helpful in 80% of the situations. And, even if you don’t like the suggested templates, you can always go back to the media library and pick a template by yourself.
With AI coming into the picture, Luminar instantly speeds up the entire editing process. You won’t have to spend several hours browsing through the template options. Simply select one of the suggested templates and you’ll be able to initiate the editing process instantly.
Key Features:
●An extensive built-in media library
●Dedicated AI support for precise editing
●Edit your RAW images and add logos easily
Pros
Luminar is an ideal choice for long-time users
Available for both Windows and macOS
Apply templates to multiple images with one click
Cons
With $99 price tag, Luminar is certainly expensive
In the beginning, you may find the user interface a bit overwhelming
04 Fotor
![]()
Fotor is also an online editing tool that can be used to animate your logos online for free. Being a simple online editor, you can’t expect Fotor to offer advanced editing features like some of the other tools we have mentioned in the list.
However, stay assured that when it comes to animating logos, Fotor has everything you’ll need to get the job done. The web-based tool offers 100,000 templates that are designed for different industries. You can choose any of these templates, customize them, and create bespoke animated logos for your brand.
Key Features:
● Different templates to choose from
● Easy drag-&-drop compatibility
● Ideal for first-time as well as professional users
Pros
Available for free
Perfect for social media managers
Customizable templates
Cons
Lacks advanced editing support
The premium version doesn’t have too many useful features
Key Takeaways from This Episode
● Animate your logo in Photoshop and make it visually appealing with 5-easy steps
● If you want to integrate your animated logo into a video, you can use Wondershare Filmora Pro to get the job done within a few minutes
● If you are a beginner, you can also use web-based editing tools to animate your logo online for free.
Animated Business Logos and Tools to Create
Know All About Animated Business Logos and the Best Tools to Create One
An easy yet powerful editor
Numerous effects to choose from
Detailed tutorials provided by the official channel
Just like people, brands and businesses also have their own identities.
If you too want to reap the benefits of an animated business logo, creating an impressive one is important and to get the task done, there are several software and other tools available.
In this article
01 [About animated business logos and how they can help in the growth of the business?](#Part 1)
02 [Tips for making an effective animated business logo](#Part 2)
03 [Types of animated business logo makers](#Part 3)
04 [The best tool to create an animated business logo effortlessly- Wondershare Filmora](#Part 4)
Part 1 About Animated Business Logos and How They Can Help in the Growth of the Business?
An animated logo is a logo that has rich motion graphics. These logos are catchy and get the instant attention of the viewers. A well-created animated business logo not only gives a professional look but also helps in creating awareness about the brand, supports the story of the brand, and enhances visual appearance.
There are several ways in which an animated business logo can be used for the growth of the business. Summarized below are some of the major ones.
01Use animated logos at the start or the end of the videos
An animated logo creates a lasting impression and thus including then in the marketing videos at the starting or the end helps in the business growth. These logos can be added to the videos that are created for internal communication as well as for the public.
02Using animated logos for e-commerce
If your business is related to products, then adding animated logos to the product movies will make them look interesting.
03Use animated logos for YouTube videos
If you are using YouTube videos for your business promotion, ensure to add the animated logos for branding as it makes the videos look different from the other regular ones and thus creates an interest among the viewers.
04Using animated logos for YouTube ads
Using these motion graphic logos as short YouTube ads will work as an effective way for promoting the business and for their growth as well.
05Use animated logos for the films on your website
If you are making videos for your business websites as introduction videos or explainer videos, using animated logos adds a professional and dynamic touch.
06Using animated logos for social media sites
The number of users on social media sites is increasing every day and thus promoting your business on these sites helps you reach a wider audience. So, if you too are planning a video campaign on Facebook, Twitter, Instagram, and other sites use animated logos in the newsfeed.
Part 2 Tips for making an effective an animated business logo
The below-listed tips can help you create an impressive and interesting animated logo for your business.
● Create short animated logos: Animated logos should be short and convey the meaning and purpose of your business and brand. A long video can be boring and the target audience can lose interest and thus they have to be short, immersive, and impactful.
● Create an impression: Create an animated logo that can create a positive impression. Your animated logo needs to match the style of your business and get the interest of the viewers.
● Use the correct animation style: Several animation styles can be used for creating your business logo like 2D, 3D, traditional, and more. Different designs leave a different impact among the viewers and create a different understanding of the brand. Thus, while using the animation style, choose the one that matches your business style.
Part 3 Types of animated business logo makers
If you are looking for created animated logos, there is no dearth of tools. The majority of the editing and animated software can help you get the task done. There is several online and desktop software available using which you can either add your own logo and make an animated version of it or can design an animation from the scratch.
The choice of the tool selection depends on your budget and the features required. Some of the popularly used tools that can be considered are as below.
Popularly Used Tools →
● Renderforest
● Adobe Spark
● Logo Maker Plus
● Animaker
● Viddyoze
Popularly Used Tools →
● Offeo
● Canva
● Design Free Logo
● Tube Arsenal
● MotionDen
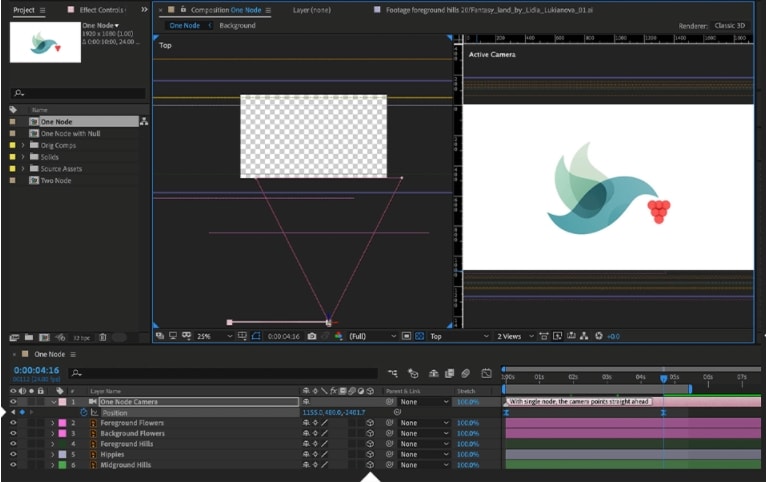
Part 4 The best tool to create an animated business logo effortlessly- Wondershare Filmora
To create animated logos effortlessly and use the best features Wondershare Filmora is an excellent choice. This desktop software can be quickly downloaded and installed on your Windows and Mac after which it can be used for multitasking like editing, creating animations, logos, and much more. The interface is simple and user-friendly which makes the program popular among all user types.
Wondershare Filmora
Power Up Your Story with Filmora. Professional video editing is made easy.
Key features of the software:
● Allows creating different types of animations including animated business logos.
● Allows creating 2D and 3D animated logos.
● Allows creating logos using keyframing for better customization.
● Multiple effects can be added like titles, tiles, warp, masking, distort, lights, flares, and more.
● To further enhance the overall looks of your animation the software offers better control over the colors and other parameters through tools like color wheels, auto-correction, scopes, and more.
● Audio controls are also offered through features like audio compression, audio noise correction, audio sync, transitions, and more.
● Compatible with all the latest Windows and Mac.
Key Takeaways from This Episode
● Animated business logos are an important aspect of any business promotion and marketing strategy.
● An impressive animated logo can help a business grow in several ways and several factors should be considered while creating an animated logo.
● Different types of desktop and online tools for animated business logos are present.
● Wondershare Filmora works as the best animation logo that can create impressive animated logos in no time.


Just like people, brands and businesses also have their own identities.
If you too want to reap the benefits of an animated business logo, creating an impressive one is important and to get the task done, there are several software and other tools available.
In this article
01 [About animated business logos and how they can help in the growth of the business?](#Part 1)
02 [Tips for making an effective animated business logo](#Part 2)
03 [Types of animated business logo makers](#Part 3)
04 [The best tool to create an animated business logo effortlessly- Wondershare Filmora](#Part 4)
Part 1 About Animated Business Logos and How They Can Help in the Growth of the Business?
An animated logo is a logo that has rich motion graphics. These logos are catchy and get the instant attention of the viewers. A well-created animated business logo not only gives a professional look but also helps in creating awareness about the brand, supports the story of the brand, and enhances visual appearance.
There are several ways in which an animated business logo can be used for the growth of the business. Summarized below are some of the major ones.
01Use animated logos at the start or the end of the videos
An animated logo creates a lasting impression and thus including then in the marketing videos at the starting or the end helps in the business growth. These logos can be added to the videos that are created for internal communication as well as for the public.
02Using animated logos for e-commerce
If your business is related to products, then adding animated logos to the product movies will make them look interesting.
03Use animated logos for YouTube videos
If you are using YouTube videos for your business promotion, ensure to add the animated logos for branding as it makes the videos look different from the other regular ones and thus creates an interest among the viewers.
04Using animated logos for YouTube ads
Using these motion graphic logos as short YouTube ads will work as an effective way for promoting the business and for their growth as well.
05Use animated logos for the films on your website
If you are making videos for your business websites as introduction videos or explainer videos, using animated logos adds a professional and dynamic touch.
06Using animated logos for social media sites
The number of users on social media sites is increasing every day and thus promoting your business on these sites helps you reach a wider audience. So, if you too are planning a video campaign on Facebook, Twitter, Instagram, and other sites use animated logos in the newsfeed.
Part 2 Tips for making an effective an animated business logo
The below-listed tips can help you create an impressive and interesting animated logo for your business.
● Create short animated logos: Animated logos should be short and convey the meaning and purpose of your business and brand. A long video can be boring and the target audience can lose interest and thus they have to be short, immersive, and impactful.
● Create an impression: Create an animated logo that can create a positive impression. Your animated logo needs to match the style of your business and get the interest of the viewers.
● Use the correct animation style: Several animation styles can be used for creating your business logo like 2D, 3D, traditional, and more. Different designs leave a different impact among the viewers and create a different understanding of the brand. Thus, while using the animation style, choose the one that matches your business style.
Part 3 Types of animated business logo makers
If you are looking for created animated logos, there is no dearth of tools. The majority of the editing and animated software can help you get the task done. There is several online and desktop software available using which you can either add your own logo and make an animated version of it or can design an animation from the scratch.
The choice of the tool selection depends on your budget and the features required. Some of the popularly used tools that can be considered are as below.
Popularly Used Tools →
● Renderforest
● Adobe Spark
● Logo Maker Plus
● Animaker
● Viddyoze
Popularly Used Tools →
● Offeo
● Canva
● Design Free Logo
● Tube Arsenal
● MotionDen
Part 4 The best tool to create an animated business logo effortlessly- Wondershare Filmora
To create animated logos effortlessly and use the best features Wondershare Filmora is an excellent choice. This desktop software can be quickly downloaded and installed on your Windows and Mac after which it can be used for multitasking like editing, creating animations, logos, and much more. The interface is simple and user-friendly which makes the program popular among all user types.
Wondershare Filmora
Power Up Your Story with Filmora. Professional video editing is made easy.
Key features of the software:
● Allows creating different types of animations including animated business logos.
● Allows creating 2D and 3D animated logos.
● Allows creating logos using keyframing for better customization.
● Multiple effects can be added like titles, tiles, warp, masking, distort, lights, flares, and more.
● To further enhance the overall looks of your animation the software offers better control over the colors and other parameters through tools like color wheels, auto-correction, scopes, and more.
● Audio controls are also offered through features like audio compression, audio noise correction, audio sync, transitions, and more.
● Compatible with all the latest Windows and Mac.
Key Takeaways from This Episode
● Animated business logos are an important aspect of any business promotion and marketing strategy.
● An impressive animated logo can help a business grow in several ways and several factors should be considered while creating an animated logo.
● Different types of desktop and online tools for animated business logos are present.
● Wondershare Filmora works as the best animation logo that can create impressive animated logos in no time.
How To Make Pinterest Slideshow in Simple Ways
How to Make Pinterest Slideshow in Simple Ways
An easy yet powerful editor
Numerous effects to choose from
Detailed tutorials provided by the official channel
Slideshows are a collection of images arranged together that an audience can quickly swipe through to view the content. Pinterest is known for its one-pin to one post feature. You cannot post more than one image or video in a pin.
Thus, business people could start sharing all of the images or products, services, or articles mostly because it can be stressful to do that. But with the Pinterest slideshow, you can now upload all the images you want to at once in one pin. Moreso, even have people view the pins simultaneously just by swiping through.
In this article
01 [How to display Pinterest’s latest pins in a slideshow? ](#Part 1)
02 [How to upload multiple photos to Pinterest?](#Part 2)
03 [How to display Pinterest’s latest pins in a slideshow? ](#Part 3)
Part 1 How to Display Pinterest Latest Pins in A Slideshow
Using Pinterest’s latest pins in a slideshow is another way to display the latest pins from any Pinterest user or blogger’s blog. Each image is linked to its pin page on Pinterest instead of the board or profile page if you use the Pinterest profile or board widget.
To install this widget, you need the user or board’s RSS feed URL, then use it as the input for a blogger slide show gadget.
Here are the tricky steps to follow for the Pinterest slide show;
Step 1: Constructing Pinterest RSS feed URL
The Pinterest RSS feed URL of a user is different from aboard.
● It would be the user’s profile URL + feed/RSS for a user. To get your Profile URL, click on your username in the top right corner of your screen, and you will see a URL in your web browser’s URL. That is your profile URL.
● For the board URL, you will get that after clicking on the board from the homepage. The URL would appear on your browser’s URL bar.

Step 2: Reformatting the feed for the slideshow gadget:
The RSS feed from step one is not very compatible with the blogger slideshow gadget. It accepts RSS feed in Media RSS format, but you can convert with Yahoo pipe. Simply plug in your feed URL in the Yahoo pipe URL.
You have to replace the value of the feed URL with the feed URL you got in step one and the pin count with the number of pins displayed on the slide show.
With this, you have successfully converted your feed URL to the media version of the Pinterest feed.
Step 3: Add the slideshow widget
Take the following step to add the slideshow widget.
Go to Dashboard > Layout and click on ‘Add A Gadget.’
Now Add, A Gadget window, scroll down and select Slideshow.

Under Source, select Other.

Put in the converted Pinterest RSS feed URL from step 2 into the Feed URL text box.
Click Save and view your blog.
Part 2 How to Upload Multiple Photos to Pinterest
If you want to display multiple photos of your product or share your brand story with pictures, then this is a feature you will grab. Pinterest allows you to display various products at a time. But first, you must also have a business account to do this.
When you upload multiple photos on Pinterest, they are known as carousel pins. This feature is a great advertising tool and will help you during the Pinterest slideshow.
This is because people would see your carousel on their home feed just like any other pin you have posted. They may also tap on the carousel and swipe through the different photos on the carousel. When the pinner saves it, they have kept the entire image.
Here is a step-by-step method to upload multiple photos to Pinterest.
Step 1: Log into your Pinterest
First, log into your Pinterest business account to access the feature. If you do not have a business account, it is elementary to do so. There is no need for you to enter any billing information if you are wondering about that. It is a straightforward process. Just open your account, click on the drop-down menu near your profile picture, see ‘convert to business,’ then upgrade your account, and you are good to go.
You should also ensure that the photos you want to upload are on your computer. If you have originally planned to use it to explain an article visually, then make sure the particular image that represents that article is correctly saved on your computer. The images should be 1:1 or 2:3 in ratio, and the format either ‘png’ or ‘jpeg.’
Add your pictures and upload. If you want to reorder your pin, you can replace or remove images within the carousel.

Step 2: Add Title
Add a title, description, and website of the carousel pin. Your title will be a snippet of what the blog post or article will be about or the recipe’s title. Your description should be the same as your Pinterest text, and you can also choose to let it appear only on your first image on your carousel pin.
Step 3: Select a Board
The last step is to select a board relevant to your carousel pin. Thus, you have your carousel pin and images. However, you cannot view this immediately as in a standard pin or video pin. But you can go back to your board to view your pin when it is ready.
Part 3 How to Make Pinterest Slideshow In 5 Simple Ways
Slideshows are a beautiful way to enhance your Pinterest account and generate more leads on your Profile. If you’ve been wondering if and how you can make slideshows on Pinterest, here’s a guaranteed step you can follow. But then Pinterest slideshows are instead referred to as a showcase.
However, to access this feature, you must first own a business account on Pinterest.
Here are five (5) simple ways you can make Slideshow on Pinterest:
Step 1: Go to your Pinterest Profile
Click settings next to your profile photo in the top right corner.

Step 2: Select Profile
When the Settings window appears, select Profile.

Step 3: Click Edit
Next to Featured Boards, click Edit.

Step 4: Select Boards
After clicking Edit for your Featured Boards, you’ll reach a screen where you may edit the boards you want to highlight. Select which boards you’d like to feature by clicking on each drop-down menu.
Opening a new Pinterest page is a good idea. Scroll down to Boards with the most Pin impressions under Analytics>Profile. These are the boards that I highlighted.

Step 5: Save
When you’ve decided which boards to include in your Featured, click Save.
● Bonus – Wondershare Filmora
With this feature, you can also tweak your Pinterest slides and make them look professional and befitting to your audience using Wondershare Filmora Video Editor .
For Win 7 or later (64-bit)
For macOS 10.12 or later
Wondershare Filmora is an online video editing software with several unique features, including split-screen, freeze-frame, loop images, and videos to help you create top-notch visual content for your brand. With features like the Chroma key, you can easily create special effects in your Pinterest slideshow background.
You can also use color match and video effects to enhance the quality of the slide.
● Ending Thoughts →
● Making a Pinterest slideshow can be confusing if you do not have the correct information. But if you do, it’ll be a great way to spice up your social media content and create more leads for your business.
● Pinterest is a social media platform that keeps growing and adding more features by the day. It is also increasing the number of users per day. Try out the simple steps stated on how to make a slideshow on Pinterest. Finally, by incorporating Filmora in your levelling up plans, you will be able to bring your brand in front of your target customer and present it nicely.
Slideshows are a collection of images arranged together that an audience can quickly swipe through to view the content. Pinterest is known for its one-pin to one post feature. You cannot post more than one image or video in a pin.
Thus, business people could start sharing all of the images or products, services, or articles mostly because it can be stressful to do that. But with the Pinterest slideshow, you can now upload all the images you want to at once in one pin. Moreso, even have people view the pins simultaneously just by swiping through.
In this article
01 [How to display Pinterest’s latest pins in a slideshow? ](#Part 1)
02 [How to upload multiple photos to Pinterest?](#Part 2)
03 [How to display Pinterest’s latest pins in a slideshow? ](#Part 3)
Part 1 How to Display Pinterest Latest Pins in A Slideshow
Using Pinterest’s latest pins in a slideshow is another way to display the latest pins from any Pinterest user or blogger’s blog. Each image is linked to its pin page on Pinterest instead of the board or profile page if you use the Pinterest profile or board widget.
To install this widget, you need the user or board’s RSS feed URL, then use it as the input for a blogger slide show gadget.
Here are the tricky steps to follow for the Pinterest slide show;
Step 1: Constructing Pinterest RSS feed URL
The Pinterest RSS feed URL of a user is different from aboard.
● It would be the user’s profile URL + feed/RSS for a user. To get your Profile URL, click on your username in the top right corner of your screen, and you will see a URL in your web browser’s URL. That is your profile URL.
● For the board URL, you will get that after clicking on the board from the homepage. The URL would appear on your browser’s URL bar.
Step 2: Reformatting the feed for the slideshow gadget:
The RSS feed from step one is not very compatible with the blogger slideshow gadget. It accepts RSS feed in Media RSS format, but you can convert with Yahoo pipe. Simply plug in your feed URL in the Yahoo pipe URL.
You have to replace the value of the feed URL with the feed URL you got in step one and the pin count with the number of pins displayed on the slide show.
With this, you have successfully converted your feed URL to the media version of the Pinterest feed.
Step 3: Add the slideshow widget
Take the following step to add the slideshow widget.
Go to Dashboard > Layout and click on ‘Add A Gadget.’
Now Add, A Gadget window, scroll down and select Slideshow.
Under Source, select Other.
Put in the converted Pinterest RSS feed URL from step 2 into the Feed URL text box.
Click Save and view your blog.
Part 2 How to Upload Multiple Photos to Pinterest
If you want to display multiple photos of your product or share your brand story with pictures, then this is a feature you will grab. Pinterest allows you to display various products at a time. But first, you must also have a business account to do this.
When you upload multiple photos on Pinterest, they are known as carousel pins. This feature is a great advertising tool and will help you during the Pinterest slideshow.
This is because people would see your carousel on their home feed just like any other pin you have posted. They may also tap on the carousel and swipe through the different photos on the carousel. When the pinner saves it, they have kept the entire image.
Here is a step-by-step method to upload multiple photos to Pinterest.
Step 1: Log into your Pinterest
First, log into your Pinterest business account to access the feature. If you do not have a business account, it is elementary to do so. There is no need for you to enter any billing information if you are wondering about that. It is a straightforward process. Just open your account, click on the drop-down menu near your profile picture, see ‘convert to business,’ then upgrade your account, and you are good to go.
You should also ensure that the photos you want to upload are on your computer. If you have originally planned to use it to explain an article visually, then make sure the particular image that represents that article is correctly saved on your computer. The images should be 1:1 or 2:3 in ratio, and the format either ‘png’ or ‘jpeg.’
Add your pictures and upload. If you want to reorder your pin, you can replace or remove images within the carousel.
Step 2: Add Title
Add a title, description, and website of the carousel pin. Your title will be a snippet of what the blog post or article will be about or the recipe’s title. Your description should be the same as your Pinterest text, and you can also choose to let it appear only on your first image on your carousel pin.
Step 3: Select a Board
The last step is to select a board relevant to your carousel pin. Thus, you have your carousel pin and images. However, you cannot view this immediately as in a standard pin or video pin. But you can go back to your board to view your pin when it is ready.
Part 3 How to Make Pinterest Slideshow In 5 Simple Ways
Slideshows are a beautiful way to enhance your Pinterest account and generate more leads on your Profile. If you’ve been wondering if and how you can make slideshows on Pinterest, here’s a guaranteed step you can follow. But then Pinterest slideshows are instead referred to as a showcase.
However, to access this feature, you must first own a business account on Pinterest.
Here are five (5) simple ways you can make Slideshow on Pinterest:
Step 1: Go to your Pinterest Profile
Click settings next to your profile photo in the top right corner.
Step 2: Select Profile
When the Settings window appears, select Profile.
Step 3: Click Edit
Next to Featured Boards, click Edit.
Step 4: Select Boards
After clicking Edit for your Featured Boards, you’ll reach a screen where you may edit the boards you want to highlight. Select which boards you’d like to feature by clicking on each drop-down menu.
Opening a new Pinterest page is a good idea. Scroll down to Boards with the most Pin impressions under Analytics>Profile. These are the boards that I highlighted.
Step 5: Save
When you’ve decided which boards to include in your Featured, click Save.
● Bonus – Wondershare Filmora
With this feature, you can also tweak your Pinterest slides and make them look professional and befitting to your audience using Wondershare Filmora Video Editor .
For Win 7 or later (64-bit)
For macOS 10.12 or later
Wondershare Filmora is an online video editing software with several unique features, including split-screen, freeze-frame, loop images, and videos to help you create top-notch visual content for your brand. With features like the Chroma key, you can easily create special effects in your Pinterest slideshow background.
You can also use color match and video effects to enhance the quality of the slide.
● Ending Thoughts →
● Making a Pinterest slideshow can be confusing if you do not have the correct information. But if you do, it’ll be a great way to spice up your social media content and create more leads for your business.
● Pinterest is a social media platform that keeps growing and adding more features by the day. It is also increasing the number of users per day. Try out the simple steps stated on how to make a slideshow on Pinterest. Finally, by incorporating Filmora in your levelling up plans, you will be able to bring your brand in front of your target customer and present it nicely.
Also read:
- New 2024 Approved 8 Blender 3D Animation Tutorials for Beginners
- Updated In 2024, Learn Disney Cartoon Drawing to See More Disney Magic Moments
- Easy Cartoon Characters Drawing Tutorials for You Beginners
- Updated How to Make Well Done Animated GIF By Yourself?
- Updated In 2024, Complete Guide to Send Gif WhatsApp on Android
- New In 2024, Learn How to Do Funny Cartoon Drawings
- Updated In 2024, How to Make an Animation With 7 Steps
- New 2024 Approved 10 Top Tools to Make Pic Collage for Windows
- Updated In 2024, 5 Foolproof Amazing Anime Text to Speech Tips for Makers
- Updated Top Claymation Shows That Make Your Memories Unforgettable for 2024
- Updated 2024 Approved Make Creative Animation Videos
- New Thousands Already Found 15 Best Sites to Watch Cartoons Online Free And So Can You for 2024
- Updated Best 15 Instant Classics Animated Cartoon Movies
- New Best 10 Anime Websites to Watch Dubbed Anime Free for 2024
- New 2024 Approved 12+ Stunning Instagram GIF Stickers and How to Make & Find
- Updated What This Post Can Teach You About Clay Animation
- New Tutorials to Make Animated Images
- Top 10 3D Text Animation Templates
- Updated In 2024, Top 8 Tools Tell You How to Make Slideshows for Instagram
- How To Animate Graphics in Canva
- New In 2024, Top 8 Tools Tell You How to Make Slideshows for Instagram
- New Top Tips for Effortless Unity 3D Animation
- New 2024 Approved Amazing Ideas About Creating Personalised WhatsApp GIF Sticker
- Updated In 2024, How to Become a Motion Graphic Designer
- Updated The 10 Most Adorable Aesthetic Cartoon Characters
- New In 2024, 10 Most Memorable Japanese Cat Cartoons
- New Tips for GIF to Animated PNG
- How to Animate Image on Scroll and Text on Scroll?
- New 2024 Approved 15 Best Collage Makers to Create Aesthetic Collages
- In 2024, How to Create YouTube Intro Animation Like a Pro
- In 2024, Is It That Easy to Make My Own Animated Character?
- In 2024, How to Make Whiteboard Animation Videos
- Updated In 2024, Tips for Learning Graphics Animation
- New OBS Animated Alternatives
- How to Create Free Photo Collage Frame in Minutes, In 2024
- 10 Options for Your Need on Animation Makers
- New In 2024, The Coolest Anime Characters Ever| List of Top Favorites
- Best 10 Animated Photo Collage Apps
- New 2024 Approved Best Tips for Effortless Unity 3D Animation
- 10 Scary Anime Girls That Will Make You Creepy
- 2024 Approved 15 Top Video to GIF App on iPhone and Android
- Updated 2024 Approved 12 Top Stop Motion Studios Worth Recommending
- Best Websites to Download Animated GIFs for Free
- How to Make Slideshow in LinkedIn
- 5 Ways to Track Asus ROG Phone 7 without App | Dr.fone
- Fixing Foneazy MockGo Not Working On Xiaomi Redmi Note 13 Pro+ 5G | Dr.fone
- How to Unlock Apple iPhone 11 Pro Passcode Screen?
- In 2024, How to Sign Out of Apple ID From iPhone X without Password?
- Hassle-Free Ways to Remove FRP Lock on Nokia G22with/without a PC
- Fix Unfortunately Settings Has Stopped on Oppo A38 Quickly | Dr.fone
- Can I Bypass a Forgotten Phone Password Of Itel P55 5G?
- In 2024, Getting the Pokemon Go GPS Signal Not Found 11 Error in Xiaomi Redmi 13C | Dr.fone
- All Must-Knows to Use Fake GPS GO Location Spoofer On Honor Magic 6 Pro | Dr.fone
- How to Unlock Vivo V29 Pro PIN Code/Pattern Lock/Password
- Full Guide How To Fix Connection Is Not Private on Tecno Spark 20 Pro+ | Dr.fone
- In 2024, How to Unlock SIM Card on Vivo Y36 online without jailbreak
- How to Downgrade Apple iPhone 12 to the Previous iOS Version? | Dr.fone
- Top Apps and Online Tools To Track Motorola Edge 2023 Phone With/Without IMEI Number
- Top-Notch Solutions for Disabled Apple ID On iPhone 13 Pro Max Making It Possible
- How Many Attempts To Unlock Apple iPhone 13 Pro
- In 2024, The Complete Guide to Itel S23+ FRP Bypass Everything You Need to Know
- 11 Proven Solutions to Fix Google Play Store Not Working Issue on Realme 12 5G | Dr.fone
- The Ultimate Guide to Online Video Marketing
- In 2024, Ultimate Guide from Google Pixel 7a FRP Bypass
- Remove FRP Lock on Poco X5
- New Best 4 Eminem Voice Generator Apps for PC, Mac, Mobile, and Online for 2024
- In 2024, 5 Ways to Transfer Music from Realme GT 5 Pro to Other Android Devices Easily | Dr.fone
- How to Remove and Reset Face ID on iPhone 11
- In 2024, How to Unlock Infinix Note 30 VIP Racing Edition Phone Pattern Lock without Factory Reset
- Apple ID is Greyed Out On Apple iPhone 6s How to Bypass?
- In 2024, Why does the pokemon go battle league not available On Vivo V27 Pro | Dr.fone
- In 2024, Fake Android Location without Rooting For Your Vivo S17e | Dr.fone
- In 2024, Why is iPogo not working On Samsung Galaxy A15 4G? Fixed | Dr.fone
- Tips and Tricks for Apple ID Locked Issue On Apple iPhone 14 Pro
- How to Transfer Music from Honor 80 Pro Straight Screen Edition to iPod | Dr.fone
- How To Enable USB Debugging on a Locked Xiaomi Redmi A2+ Phone
- Title: 2024 Approved 8 Blender 3D Animation Tutorials for Beginners
- Author: Elon
- Created at : 2024-05-19 03:04:33
- Updated at : 2024-05-20 03:04:33
- Link: https://animation-videos.techidaily.com/2024-approved-8-blender-3d-animation-tutorials-for-beginners/
- License: This work is licensed under CC BY-NC-SA 4.0.
