
:max_bytes(150000):strip_icc():format(webp)/twittermute-5bc42bbd46e0fb002679ac08.jpg)
2024 Approved 8 Free GIF Animators to Make Your Own GIF
8 Free GIF Animators to Make Your Own GIF
8 Free GIF Animators to Make Your Own GIF

Shanoon Cox
Mar 27, 2024• Proven solutions
As you all know that images and videos convey your emotions to your loved ones than words. The advent of social media led to the evolution of GIF animations. The GIF is an image file format and these lines up as frames to create a GIF animation. A series of GIF images are used to create a GIF animation. You can now make an animated GIF using the free GIF animator available for download in the commercial and online stores. It is high time to feed your inquisitiveness with the best free GIF animators and build stunning animation to please your dear ones innovatively on social media like Facebook, WhatsApp, etc.
Part 1: 8 Free GIF Animators to Make Your Own GIF
Get ready to explore eight distinct free GIF animators and create your own GIF using the below illustrations. They are listed in no particular order:
- 1. Gifmaker.me
- 2. Makeagif.com
- 3. GifPal
- 4. Microsoft GIF Animator
- 5. EZGif Animator
- 6. GIF Animator
- 7. GifGear
- 8. Giphy
1. Gifmaker.me
It is an excellent free GIF animator with customizable controls embedded wisely into this platform. There is no need for any registration to make use of this online tool. This application is compatible with Windows, Mac, and Linux. You must make sure that your web browser has flash player installed to view the animated images. Visit the official website of GIFmaker and upload multiple images on the home screen. On the right side of the window, you can figure out a control panel listing out the related parameters like animation speed, repeat times, music URL from YouTube, etc. You can customize it according to your requirement and hit ‘Create GIF Animations’ button to build your GIF animation.
Features:
- You can customize the images by reducing the size, merge, split frames, etc
- There are controls to convert video to GIF
- Make use of the options to generate strong passwords
- User-friendly interface
Pros:
- It is a freeware and no need for any complex registration procedure to access this tool
- The customizable controls are explicit and easy to reach.
- There is the availability of a preview option to view the GIF animation before downloading it to your local drive.
Cons:
- When you increase the count of the GIF images the tool takes more time to generate a GIF animation.
2. Makeagif.com
The Makeagif environment is accessible through a signup process. You must enter your Email, username, and password to utilize the built-in features of this tool. You can sign up using your Facebook and Twitter accounts. This application is compatible with Windows and web browsers. The premium version costs $11.99/month. You have to drag and drop the pictures at the timeline and follow the wizard instructions to complete the GIF animation procedure.
Features:
- It is an apt product to create GIF compatible with the social media network like Facebook, Twitter, etc
- There are built-in GIF templates organized effectively for ready to use
- The premium version has no advertisements, high-quality definition with personalized watermark.
Pros:
- Availability of a three-day trial to explore the built-in functionalities.
- Step-by-step tutorials guide the newbie
Cons:
- The free version has limited functionality
- Complex environment and the newbie take time to get comfortable with the interface.
3. GifPal
It is an online free GIF animation maker. You can make your own GIF in this environment without any registration procedure. It is compatible with Windows and Android gadgets. You have to upload the pictures into this platform and add a series of images as frames. Then, a single click is sufficient to make a stunning GIF animation. After the process completes store the file in your local drive.
Features:
- Built-in templates available for download
- This tool has a camera option to take live pictures while making your own GIF animation
- Simple wizard guides to complete the GIF animation making process
Pros:
- Step-by-step wizard assist you to quick creation of GIF animation
- Excellent tool for the beginners
Cons:
- Not suitable for professionals
- Few customizable options.
4. Microsoft GIF Animator
It is a prestigious product from Microsoft. It is a free version and you can download this tool at the Microsoft store. It is compatible with Windows 10. You must sign in with Microsoft account to download this application. It has a simple interface with explicit controls. You have to add the desired number of images with file formats like.JPEG, .bmp,. bpg,.png etc. Next set the controls like frame delay, frame count, etc. Finally, tap the ‘Create’ button to make your own GIF animation. You can download the file after the preview of your desired GIF animation.
Features:
- Quickly upload multiple images into GIF list box
- A single click of the ‘Create’ button assembles the images into GIF frames rapidly as animation
- Set frame interval according to your needs
Pros:
- The free version is sufficient enough to build quality GIF animation
- Easy to use the results on the social media platform
Cons:
- Only a few options are available to customize the GIF images
- Suitable only for beginners
5. EZGif Animator
This program is a free GIF animator tool available in the online mode without any registration process. It is compatible with Windows and web browsers. Go to its official website and choose the ‘GIF Maker’ tab and upload the images by tapping the ‘Choose files’ button. You can upload multiple images of any format without any difficulty. After the upload, tap ‘Upload and make a GIF’ button to create a quality GIF animation.
Features:
- You can upload up to 2000 image files
- Compatible with most of the image file formats like ‘GIF, PNG, JPEG, APNG, MNG, WebP, etc.
- Supports Zip file of images for an upload
- You can control frame speed optimally
Pros:
- Quickly upload multiple image files at a time
- Automate settings to adjust all the image’s size to the smallest dimension in the image list.
- No need of any subscription fee
Cons:
- This application consumes a lot of time to create GIF animation when there is a greater number of the images in the list.
- Sometimes the advertisements interrupt the process.
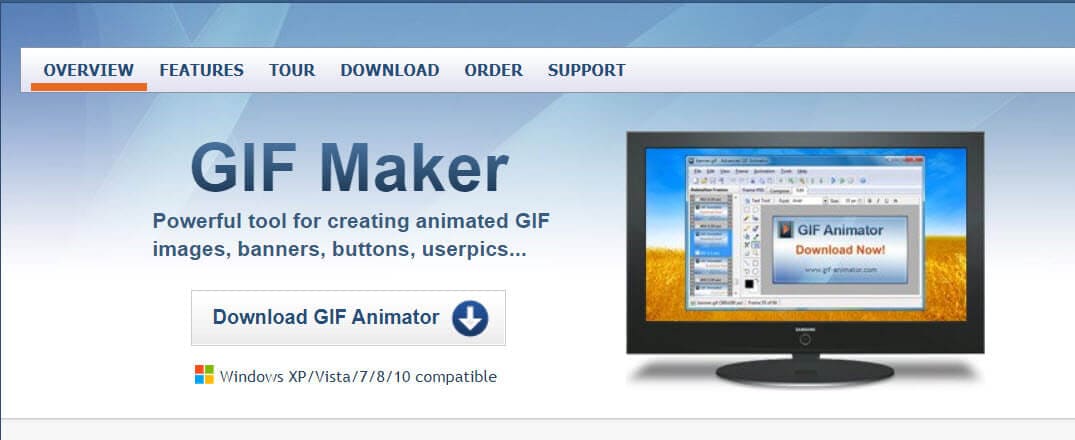
6. GIF Animator
This free GIF animator tool is compatible with Windows XP/Vista/7/8/10. You do not have to register instead go for a download process by hitting ‘Download GIF Animator’ at the home page of its official website. This application has a simple window where you can upload multiple images as frames and set frame speed, delay, etc according to your needs. Download the animation if you are convinced of the preview.
Features:
- Availability of editing tools to customize the images
- You can add texts to the uploaded images
- Set effects on the images to control its movement and appearance in the animation
Pros:
- Best suitable for the newbie
- Controls are easy to reach
- Effective wizard guides for successful completion of the GIF animation.
Cons:
- It supports only a limited number of image files
- Compatible with fewer image file formats.
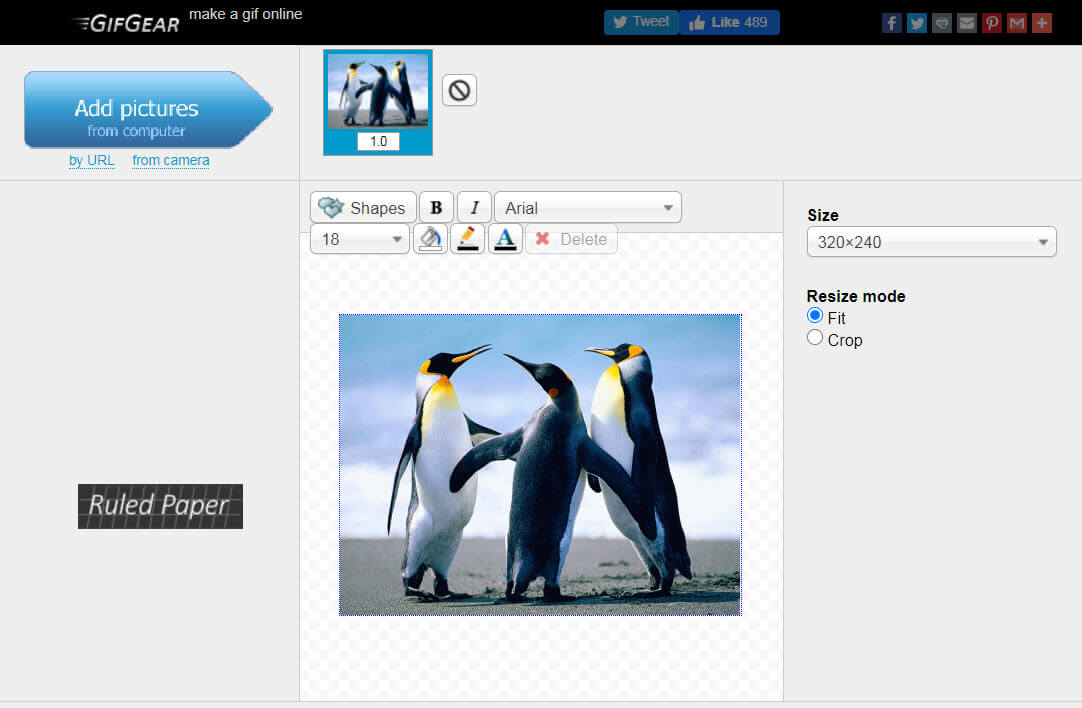
7. GifGear
The GifGear is a simple online GIF animator tool. It is free to use the application. It is compatible with Windows and web browsers. There is no registration procedure to access its features. You have to upload the images either from your local drive or you can insert the online link. Next, add multiple images to create frames. Then, customize the frame parameters like speed, delay, etc. At last, you must hit the ‘Done’ button to create a quality GIF animation.
Features:
- Simple user interface
- You can apply effects on the images
- Optimum control on the frame’s speed
- Organize the frames as per your requirement
Pros:
- Easy to use
- Comfortable for the beginners
Cons:
- Not suitable for professionals
- Allows a limited number of images to create frames
8. Giphy
You need to create an account with your Email address and password to upload the images for GIF animation. It is compatible with iOS, Android, Windows, etc. You can use this tool for personal use and strictly prohibited to employ it in creating paid ads. You can upload the image files from your local drive or enter the image link from any online media. You must travel with the wizard and set the parameters to control the frame speed and finally build a sophisticated GIF animation for your personal use.
Features:
- Easily upload the GIF animation files into your social media network by a single click
- Explore free GIF templates for your urgent need
- Compatible with most of the image file formats
Pros:
- Flawless multiple uploads of image files
- Excellent control to sequence the images in a frame for quality results
Cons:
- The making of GIF animation procedure slows down if it comprises of a huge number of images.
- Only limited images bring quality results in the GIF animation.
Conclusion
Therefore, you are in the last lines of the discussion on the making of GIF animation using a free GIF animator tool. The above-listed programs are reliable and available for free of cost. The Wondershare Filmora is a professional tool to create a GIF animation extraordinarily. This application feeds your inquisitiveness aptly and you can create mind-blowing GIF animations within a short span. Take a quick look at all the GIF animation software and wisely decide the perfect program which fits your needs. It is high time to give your valuable comments and suggestions below and stay connected with us to explore various interesting topics.
Shanoon Cox
Shanoon Cox is a writer and a lover of all things video.
Follow @Shanoon Cox
Shanoon Cox
Mar 27, 2024• Proven solutions
As you all know that images and videos convey your emotions to your loved ones than words. The advent of social media led to the evolution of GIF animations. The GIF is an image file format and these lines up as frames to create a GIF animation. A series of GIF images are used to create a GIF animation. You can now make an animated GIF using the free GIF animator available for download in the commercial and online stores. It is high time to feed your inquisitiveness with the best free GIF animators and build stunning animation to please your dear ones innovatively on social media like Facebook, WhatsApp, etc.
Part 1: 8 Free GIF Animators to Make Your Own GIF
Get ready to explore eight distinct free GIF animators and create your own GIF using the below illustrations. They are listed in no particular order:
- 1. Gifmaker.me
- 2. Makeagif.com
- 3. GifPal
- 4. Microsoft GIF Animator
- 5. EZGif Animator
- 6. GIF Animator
- 7. GifGear
- 8. Giphy
1. Gifmaker.me
It is an excellent free GIF animator with customizable controls embedded wisely into this platform. There is no need for any registration to make use of this online tool. This application is compatible with Windows, Mac, and Linux. You must make sure that your web browser has flash player installed to view the animated images. Visit the official website of GIFmaker and upload multiple images on the home screen. On the right side of the window, you can figure out a control panel listing out the related parameters like animation speed, repeat times, music URL from YouTube, etc. You can customize it according to your requirement and hit ‘Create GIF Animations’ button to build your GIF animation.
Features:
- You can customize the images by reducing the size, merge, split frames, etc
- There are controls to convert video to GIF
- Make use of the options to generate strong passwords
- User-friendly interface
Pros:
- It is a freeware and no need for any complex registration procedure to access this tool
- The customizable controls are explicit and easy to reach.
- There is the availability of a preview option to view the GIF animation before downloading it to your local drive.
Cons:
- When you increase the count of the GIF images the tool takes more time to generate a GIF animation.
2. Makeagif.com
The Makeagif environment is accessible through a signup process. You must enter your Email, username, and password to utilize the built-in features of this tool. You can sign up using your Facebook and Twitter accounts. This application is compatible with Windows and web browsers. The premium version costs $11.99/month. You have to drag and drop the pictures at the timeline and follow the wizard instructions to complete the GIF animation procedure.
Features:
- It is an apt product to create GIF compatible with the social media network like Facebook, Twitter, etc
- There are built-in GIF templates organized effectively for ready to use
- The premium version has no advertisements, high-quality definition with personalized watermark.
Pros:
- Availability of a three-day trial to explore the built-in functionalities.
- Step-by-step tutorials guide the newbie
Cons:
- The free version has limited functionality
- Complex environment and the newbie take time to get comfortable with the interface.
3. GifPal
It is an online free GIF animation maker. You can make your own GIF in this environment without any registration procedure. It is compatible with Windows and Android gadgets. You have to upload the pictures into this platform and add a series of images as frames. Then, a single click is sufficient to make a stunning GIF animation. After the process completes store the file in your local drive.
Features:
- Built-in templates available for download
- This tool has a camera option to take live pictures while making your own GIF animation
- Simple wizard guides to complete the GIF animation making process
Pros:
- Step-by-step wizard assist you to quick creation of GIF animation
- Excellent tool for the beginners
Cons:
- Not suitable for professionals
- Few customizable options.
4. Microsoft GIF Animator
It is a prestigious product from Microsoft. It is a free version and you can download this tool at the Microsoft store. It is compatible with Windows 10. You must sign in with Microsoft account to download this application. It has a simple interface with explicit controls. You have to add the desired number of images with file formats like.JPEG, .bmp,. bpg,.png etc. Next set the controls like frame delay, frame count, etc. Finally, tap the ‘Create’ button to make your own GIF animation. You can download the file after the preview of your desired GIF animation.
Features:
- Quickly upload multiple images into GIF list box
- A single click of the ‘Create’ button assembles the images into GIF frames rapidly as animation
- Set frame interval according to your needs
Pros:
- The free version is sufficient enough to build quality GIF animation
- Easy to use the results on the social media platform
Cons:
- Only a few options are available to customize the GIF images
- Suitable only for beginners
5. EZGif Animator
This program is a free GIF animator tool available in the online mode without any registration process. It is compatible with Windows and web browsers. Go to its official website and choose the ‘GIF Maker’ tab and upload the images by tapping the ‘Choose files’ button. You can upload multiple images of any format without any difficulty. After the upload, tap ‘Upload and make a GIF’ button to create a quality GIF animation.
Features:
- You can upload up to 2000 image files
- Compatible with most of the image file formats like ‘GIF, PNG, JPEG, APNG, MNG, WebP, etc.
- Supports Zip file of images for an upload
- You can control frame speed optimally
Pros:
- Quickly upload multiple image files at a time
- Automate settings to adjust all the image’s size to the smallest dimension in the image list.
- No need of any subscription fee
Cons:
- This application consumes a lot of time to create GIF animation when there is a greater number of the images in the list.
- Sometimes the advertisements interrupt the process.
6. GIF Animator
This free GIF animator tool is compatible with Windows XP/Vista/7/8/10. You do not have to register instead go for a download process by hitting ‘Download GIF Animator’ at the home page of its official website. This application has a simple window where you can upload multiple images as frames and set frame speed, delay, etc according to your needs. Download the animation if you are convinced of the preview.
Features:
- Availability of editing tools to customize the images
- You can add texts to the uploaded images
- Set effects on the images to control its movement and appearance in the animation
Pros:
- Best suitable for the newbie
- Controls are easy to reach
- Effective wizard guides for successful completion of the GIF animation.
Cons:
- It supports only a limited number of image files
- Compatible with fewer image file formats.
7. GifGear
The GifGear is a simple online GIF animator tool. It is free to use the application. It is compatible with Windows and web browsers. There is no registration procedure to access its features. You have to upload the images either from your local drive or you can insert the online link. Next, add multiple images to create frames. Then, customize the frame parameters like speed, delay, etc. At last, you must hit the ‘Done’ button to create a quality GIF animation.
Features:
- Simple user interface
- You can apply effects on the images
- Optimum control on the frame’s speed
- Organize the frames as per your requirement
Pros:
- Easy to use
- Comfortable for the beginners
Cons:
- Not suitable for professionals
- Allows a limited number of images to create frames
8. Giphy
You need to create an account with your Email address and password to upload the images for GIF animation. It is compatible with iOS, Android, Windows, etc. You can use this tool for personal use and strictly prohibited to employ it in creating paid ads. You can upload the image files from your local drive or enter the image link from any online media. You must travel with the wizard and set the parameters to control the frame speed and finally build a sophisticated GIF animation for your personal use.
Features:
- Easily upload the GIF animation files into your social media network by a single click
- Explore free GIF templates for your urgent need
- Compatible with most of the image file formats
Pros:
- Flawless multiple uploads of image files
- Excellent control to sequence the images in a frame for quality results
Cons:
- The making of GIF animation procedure slows down if it comprises of a huge number of images.
- Only limited images bring quality results in the GIF animation.
Conclusion
Therefore, you are in the last lines of the discussion on the making of GIF animation using a free GIF animator tool. The above-listed programs are reliable and available for free of cost. The Wondershare Filmora is a professional tool to create a GIF animation extraordinarily. This application feeds your inquisitiveness aptly and you can create mind-blowing GIF animations within a short span. Take a quick look at all the GIF animation software and wisely decide the perfect program which fits your needs. It is high time to give your valuable comments and suggestions below and stay connected with us to explore various interesting topics.
Shanoon Cox
Shanoon Cox is a writer and a lover of all things video.
Follow @Shanoon Cox
How to Make a Photoshop Collage in Simple Steps
How to Make a Photoshop Collage in EASY Steps
An easy yet powerful editor
Numerous effects to choose from
Detailed tutorials provided by the official channel
Photographs are a way of capturing and stopping the time in a small frame. They hold millions of memories that we want to cherish forever in our lives. And sometimes, we want to make a cluster of all the happy memories by making a collage of the photos.

Also, what can be a better gift to someone than presenting them a collection of all the cherishable memories you have with them in photographs? And that can be made possible through various photoshop collage ideas.
In this article
01 [Does Photoshop Have Collage Templates?](#Part 1)
02 [How to Make Your Own Collage with Photoshop Templates](#Part 2)
03 [How to Custom a Photoshop Collage in 9 Simple Steps](#Part 3)
Part 1 Does Photoshop Have Collage Templates?
There is numerous photo collage template in photoshop, and you even access and use some of them for free. Additionally, you can also create your template in Photoshop and use them in making your collage. If you want to make your template in Photoshop, here is how.
Step 1: Make a new layer and fill it up with your choice of colour.
Step 2: Resize and duplicate the layer to create the pattern you want for your collage.
Step 3: Integrate a “Clipping Mask.”
Step 4: For every image, create new clipping masks.
Step 5: Your collage template is ready so, export it to use!
Part 2 How to Make Your Own Collage with Photoshop Templates
Now that we know that you can access numerous incredible photoshop templates for free, you might want to create a collage for yourself in Photoshop. So, this is how you can use the photoshop collage template to make your collage with Photoshop Templates.
First, you need to select the images you want to create a collage with. Then you will have to import them. You can either “select and import” them one at a time or even batch import all of them together. Then, you can readily choose the template you want to use, or you can also create one for yourself.
Then you can resize or edit the images in the way you want and place them in the desired order. After you are done arranging and creating the collage perfectly, save the file in JPEG format and then export it to access it whenever you want!
Part 3 How to Custom a Photoshop Collage in 9 Simple Steps
If you do not know the answer to the question: how to make a collage in photoshop, there is absolutely nothing to worry about. Because the answer to this question is simple and includes not more than nine steps.
So now, we will be discussing the nine simple steps that will help you make a custom photo collage in photoshop. Here is the list of steps that will help you in doing so.
● Step 1: Selecting your favorite photos
The first step to making a collage in photoshop is to select all the photos you would like your collage to have. Now, it will be best for you to choose your photos wisely. We understand that each photograph is equally sweet and cherishable. But, when you select the images for your collage in a thoughtful manner, the collage turns out much better than expected.
You can use different collage ideas for photoshop, such as following a particular storyline, where you collage the photos so that it recreates the memory or the moments in sequence. Another way to select your photos is by sticking to a particular theme, and it can be vintage or on one specific color or the like. It will help your collage turn out in the best and the most thoughtful way.
● Step 2: Opening the photos you have selected, in collage maker photoshop
Now that you have selected which images you would want your collage to have, the next step will require you to open those images in the collage maker Photoshop. For this, you will have to select the option “File”. There, you will find the option “Open”. Then you will open the images you have chosen in Photoshop.
Also, you can simply press the “ctrl” and the “O” keys on your keyboard and it will automatically help you open the images you have selected for the photo collage on photoshop.

Another way to open the pages you have selected for your collage is through the “Drag and Drop” function. It is more effortless to choose the images and open them in Photoshop. After you have opened the photos in Photoshop, it will open in a different tab and look like in the following picture.

● Step 3: Make a new file for your collage on photoshop
The third step requires you to make a new file for your photo collage in photoshop. For this, you need to select or click on the “File” option on Photoshop. Then, click on the “New” option. It will help you make a new file for your collage. You can also select the “ctrl” and “N” together.
As you click on the “New” option, you will be given options to choose from. Choose the one that matches your preference.
When you are working on photoshop to make a collage, the images will need a collage background because it is on this background that the photos will assemble. If you have made a collage before on photoshop, you can use the old collage photoshop template. Otherwise, you need to create a new document for the collage.

● Step 4: Add the selected images one-by-one
Adding the images can be done in many ways. One way to do so is by opening the photo and clicking on it. Another way of doing so is to use the “Marquee Tool” of Photoshop.

Another way of doing so is by pressing the “ctrl” and “A” keys on your keyboard together. You will find the matching ants border around the image when you do this.

Then, go to the “Edit” option and choose “Copy” there. Or, you can also select the “ctrl” and “C” keys on your keywords together. Then go to your new document and select the option of “Paste” from the “Edit” option, or you can also press the “ctrl” and “V” keys together to do so.
The photo will be added in its own layer on the new document.

● Step 5: Arrange the images
Now, arrange the images in the way you want. If you have chosen to tell a story through your collage creator in photoshop, then arrange the photos accordingly. You can do so with the help of the “Move” tool or simply tap V. You can also use the “Free Transform” tool to edit and transform the images in the way you want. You can resize, rotate and edit the photos in many other ways through the “Free Transform” tool.
Step 6: Integrate image space
To create a collage in photoshop in a better and more spaced-out manner, you need to add some spacing between the images you have in your collage. There are two ways to add spacing between the pictures; one way is by creating a thin, white border around each image.
And the second method is by accessing and using the “Layers” feature in Photoshop.

● Step 7: Merge all the Layers
This step is necessary when you have used the “Layer” feature to create the spacing among the images present in your collage. You will be able to do so from the “Layer” option. So, go to the “Layer” option and select the “Merge Invisible” option present there.

● Step 8: cropping the final picture
Before the final step, it is important that you crop the final picture. And to do so, you can opt for the “Crop tool”. You will be able to access it easily, or you can also simply tap C to use the “Crop tool.”

● Step 9: Save the final collage and export
After you have done all the necessary changes and are satisfied with the final collage, then, save the file. To do so, go to the “File” option and select the “Save as” option.

Then choose the file type to be “JPEG”. Type the name you would want the collage to be saved as. This completes the process of saving the file. Then choose the image quality you would want the collage to be exported in.

● Key Takeaways from This Episode →
● In this discussion, we have covered the following topics.
● We discussed whether Photoshop has collage templates.
● Then we proceeded with discussing how we can create a collage in photoshop using the templates in it.
● Lastly, we wrapped up our discussion with the nine-step tutorial about customizing a collage in Photoshop.
Photographs are a way of capturing and stopping the time in a small frame. They hold millions of memories that we want to cherish forever in our lives. And sometimes, we want to make a cluster of all the happy memories by making a collage of the photos.
Also, what can be a better gift to someone than presenting them a collection of all the cherishable memories you have with them in photographs? And that can be made possible through various photoshop collage ideas.
In this article
01 [Does Photoshop Have Collage Templates?](#Part 1)
02 [How to Make Your Own Collage with Photoshop Templates](#Part 2)
03 [How to Custom a Photoshop Collage in 9 Simple Steps](#Part 3)
Part 1 Does Photoshop Have Collage Templates?
There is numerous photo collage template in photoshop, and you even access and use some of them for free. Additionally, you can also create your template in Photoshop and use them in making your collage. If you want to make your template in Photoshop, here is how.
Step 1: Make a new layer and fill it up with your choice of colour.
Step 2: Resize and duplicate the layer to create the pattern you want for your collage.
Step 3: Integrate a “Clipping Mask.”
Step 4: For every image, create new clipping masks.
Step 5: Your collage template is ready so, export it to use!
Part 2 How to Make Your Own Collage with Photoshop Templates
Now that we know that you can access numerous incredible photoshop templates for free, you might want to create a collage for yourself in Photoshop. So, this is how you can use the photoshop collage template to make your collage with Photoshop Templates.
First, you need to select the images you want to create a collage with. Then you will have to import them. You can either “select and import” them one at a time or even batch import all of them together. Then, you can readily choose the template you want to use, or you can also create one for yourself.
Then you can resize or edit the images in the way you want and place them in the desired order. After you are done arranging and creating the collage perfectly, save the file in JPEG format and then export it to access it whenever you want!
Part 3 How to Custom a Photoshop Collage in 9 Simple Steps
If you do not know the answer to the question: how to make a collage in photoshop, there is absolutely nothing to worry about. Because the answer to this question is simple and includes not more than nine steps.
So now, we will be discussing the nine simple steps that will help you make a custom photo collage in photoshop. Here is the list of steps that will help you in doing so.
● Step 1: Selecting your favorite photos
The first step to making a collage in photoshop is to select all the photos you would like your collage to have. Now, it will be best for you to choose your photos wisely. We understand that each photograph is equally sweet and cherishable. But, when you select the images for your collage in a thoughtful manner, the collage turns out much better than expected.
You can use different collage ideas for photoshop, such as following a particular storyline, where you collage the photos so that it recreates the memory or the moments in sequence. Another way to select your photos is by sticking to a particular theme, and it can be vintage or on one specific color or the like. It will help your collage turn out in the best and the most thoughtful way.
● Step 2: Opening the photos you have selected, in collage maker photoshop
Now that you have selected which images you would want your collage to have, the next step will require you to open those images in the collage maker Photoshop. For this, you will have to select the option “File”. There, you will find the option “Open”. Then you will open the images you have chosen in Photoshop.
Also, you can simply press the “ctrl” and the “O” keys on your keyboard and it will automatically help you open the images you have selected for the photo collage on photoshop.
Another way to open the pages you have selected for your collage is through the “Drag and Drop” function. It is more effortless to choose the images and open them in Photoshop. After you have opened the photos in Photoshop, it will open in a different tab and look like in the following picture.
● Step 3: Make a new file for your collage on photoshop
The third step requires you to make a new file for your photo collage in photoshop. For this, you need to select or click on the “File” option on Photoshop. Then, click on the “New” option. It will help you make a new file for your collage. You can also select the “ctrl” and “N” together.
As you click on the “New” option, you will be given options to choose from. Choose the one that matches your preference.
When you are working on photoshop to make a collage, the images will need a collage background because it is on this background that the photos will assemble. If you have made a collage before on photoshop, you can use the old collage photoshop template. Otherwise, you need to create a new document for the collage.
● Step 4: Add the selected images one-by-one
Adding the images can be done in many ways. One way to do so is by opening the photo and clicking on it. Another way of doing so is to use the “Marquee Tool” of Photoshop.
Another way of doing so is by pressing the “ctrl” and “A” keys on your keyboard together. You will find the matching ants border around the image when you do this.
Then, go to the “Edit” option and choose “Copy” there. Or, you can also select the “ctrl” and “C” keys on your keywords together. Then go to your new document and select the option of “Paste” from the “Edit” option, or you can also press the “ctrl” and “V” keys together to do so.
The photo will be added in its own layer on the new document.
● Step 5: Arrange the images
Now, arrange the images in the way you want. If you have chosen to tell a story through your collage creator in photoshop, then arrange the photos accordingly. You can do so with the help of the “Move” tool or simply tap V. You can also use the “Free Transform” tool to edit and transform the images in the way you want. You can resize, rotate and edit the photos in many other ways through the “Free Transform” tool.
Step 6: Integrate image space
To create a collage in photoshop in a better and more spaced-out manner, you need to add some spacing between the images you have in your collage. There are two ways to add spacing between the pictures; one way is by creating a thin, white border around each image.
And the second method is by accessing and using the “Layers” feature in Photoshop.
● Step 7: Merge all the Layers
This step is necessary when you have used the “Layer” feature to create the spacing among the images present in your collage. You will be able to do so from the “Layer” option. So, go to the “Layer” option and select the “Merge Invisible” option present there.
● Step 8: cropping the final picture
Before the final step, it is important that you crop the final picture. And to do so, you can opt for the “Crop tool”. You will be able to access it easily, or you can also simply tap C to use the “Crop tool.”
● Step 9: Save the final collage and export
After you have done all the necessary changes and are satisfied with the final collage, then, save the file. To do so, go to the “File” option and select the “Save as” option.
Then choose the file type to be “JPEG”. Type the name you would want the collage to be saved as. This completes the process of saving the file. Then choose the image quality you would want the collage to be exported in.
● Key Takeaways from This Episode →
● In this discussion, we have covered the following topics.
● We discussed whether Photoshop has collage templates.
● Then we proceeded with discussing how we can create a collage in photoshop using the templates in it.
● Lastly, we wrapped up our discussion with the nine-step tutorial about customizing a collage in Photoshop.
That Will Make Aesthetic Cartoon Drawing More Understandable
That Will Make Aesthetic Cartoon Drawing More Understandable
An easy yet powerful editor
Numerous effects to choose from
Detailed tutorials provided by the official channel
When you are trying to make an aesthetic drawings cartoon, the primary thing to focus on is the composition. Composition is the combination, arrangement, and organization of objects within the borders of drawing space. To have a great aesthetic cartoon drawing, you must focus on bringing the eyes of the viewer toward your center of interest within an aesthetically-pleasing composition. When we create illustrations, we are often concerned with putting in a lot of details that will overload the image and lose the meaning that we originally wanted it to convey.

We engage our audience and viewer more by composing a perfect aesthetic drawing. In addition, many rules define a good composition drawing, but these rules are mainly guidelines. Also pay attention to your personal preferences and instincts. In this guide, we’ll teach you how to make an excellent aesthetic cartoon painting more understandable.
In this article
01 [Canvas Aesthetic Painting Ideas](#Part 1)
02 [Blender Aesthetic Painting Ideas](#Part 2)
03 [How to Create Super-Detailed Aesthetic Cartoon Painting](#Part 3)
Part 1 Canvas Aesthetic Painting Ideas
There are times you do not need to be a famous painter or an art professional to create beautiful wall art. Canvas painting is an all-in-one application for all skill levels, from beginners to experts. It also provides you with different painting ideas ranging from beach scenes to abstract designs to create pieces that look stunning and professional.
We have compiled a list of canvas aesthetic painting ideas to help you begin your journey as an aesthetic cartoon painter. Look through the images to determine which ones match the style of painting you wish to add to your drawing and get inspiration to create your designs.
01Disney Canvas Art
These are aesthetic cartoon painting ideas relating to 2020 Disney Canvas Art. You can get ideas from this to begin your journey into the world of painting.

02Hippie Painting Canva Art
If you are also looking for other aesthetic cartoon painting ideas to choose from, you can select from this 2020 Cute Canvas Paintings “Hippie Painting” Canvas Art.

03Spongebob Painting
These painting ideas are a part of the Canvas Aesthetic Cartoon Painting ideas of 2020 called Spongebob Painting Disney Canvas Art.

04Babs Bunny Pa Et Mini Lerret
These are a painting about “Babs Bunny Pa Et Mini Lerret.” A 2020 Mini Canvas Art Hippie Painting Canvas idea that you can choose from

Part 2 Blender Aesthetic Painting Ideas
Blender is an accessible and open-source 3D creation suite that supports the entirety of the 3D pipeline modeling, rigging, animation, simulation, compositing rendering, motion tracking, video editing, and 2D animation pipeline. It is a fact that this is one of the best open-source software you can choose from to make your aesthetic cartoon drawing.
It is entirely free software, and various artists can use it to start digging in and playing with it. Here are some of the blender aesthetic cartoon painting ideas you can choose from:
01Princess Ira and Amina
This is a fictional aesthetic drawing cartoon of an African princess having gold gifted powers with her face painting inspired by Nigerian traditional face decorations. However, her crown is adorned with crosses, crystals, and chains which incorporate several elements from different cultural designs available from all over the world to portray unity.

02Survival Knife Weekly Drills 045
This was a design painting inspired based on BUCK KNIVES in pain texturing and focuses on making a practical game-ready asset.

03Radiance
This is a blender aesthetic cartoon painting idea of a graduation project made for the Concept Art specialized cursus at New3dge School.

04 The character looks dev
This blender cartoon painting’s inspiration came from Edward, the short film’s main character. It is a work in progress but a lovely painting that can inspire you.
Part 3 How to Create Super-Detailed Aesthetic Cartoon Painting
To create a super detailed aesthetic cartoon drawing, you do not need to be a trained artist, nor do you need a fancy cartoon picture maker. All you need to create a cartoon painting photo is a simple and Free picture from a cartoon editor to help you carry out the task more effectively.
However, you can also convert your cartoon paint into creative animation using Wondershare Filmora Video Editor . Filmora is a powerful all-in-one tool for editing that you can use to that can be used for free to animate your cartoon with its tons of effects, filters, and keyframing features that can help you carry this out effectively.
For Win 7 or later (64-bit)
For macOS 10.12 or later
Here is how to create a super detailed aesthetic cartoon painting:

Step 1: Open the Picsart editor on your desktop browser and click on the new project
Step 2: Next is to click on Upload to select the photo that you want to cartoon paint from the computer library of your hard drive
Step 2: Click on the toolbar, select the effect feature from the dropdown above your photo, and click on Magic to view all available one-click cartoon filters. However, almost all of the Magic effects on this editor will help you achieve an aesthetic cartoon photo effect.
Step 4: Click on Adjust and Blend above your photo workspace on the editor. This will help you manually adjust the effects (color burn, fade, saturation, brightness, etc.).
Step 5: Preview your result and once you are happy with the new cartoon photo painting, click on the Share button and download it from the top right corner of the editor to save it on your device.
● Ending Thoughts →
● This article explained creating and gave inspiration and ideas for the aesthetic cartoon painting you can choose from to make yours. In addition, the report also recommends Filmora as an influential editor if you intend to create an animation from your cartoon painting due to its tons of features.
● So, now you can start building your aesthetic drawings and cartoons!
When you are trying to make an aesthetic drawings cartoon, the primary thing to focus on is the composition. Composition is the combination, arrangement, and organization of objects within the borders of drawing space. To have a great aesthetic cartoon drawing, you must focus on bringing the eyes of the viewer toward your center of interest within an aesthetically-pleasing composition. When we create illustrations, we are often concerned with putting in a lot of details that will overload the image and lose the meaning that we originally wanted it to convey.
We engage our audience and viewer more by composing a perfect aesthetic drawing. In addition, many rules define a good composition drawing, but these rules are mainly guidelines. Also pay attention to your personal preferences and instincts. In this guide, we’ll teach you how to make an excellent aesthetic cartoon painting more understandable.
In this article
01 [Canvas Aesthetic Painting Ideas](#Part 1)
02 [Blender Aesthetic Painting Ideas](#Part 2)
03 [How to Create Super-Detailed Aesthetic Cartoon Painting](#Part 3)
Part 1 Canvas Aesthetic Painting Ideas
There are times you do not need to be a famous painter or an art professional to create beautiful wall art. Canvas painting is an all-in-one application for all skill levels, from beginners to experts. It also provides you with different painting ideas ranging from beach scenes to abstract designs to create pieces that look stunning and professional.
We have compiled a list of canvas aesthetic painting ideas to help you begin your journey as an aesthetic cartoon painter. Look through the images to determine which ones match the style of painting you wish to add to your drawing and get inspiration to create your designs.
01Disney Canvas Art
These are aesthetic cartoon painting ideas relating to 2020 Disney Canvas Art. You can get ideas from this to begin your journey into the world of painting.
02Hippie Painting Canva Art
If you are also looking for other aesthetic cartoon painting ideas to choose from, you can select from this 2020 Cute Canvas Paintings “Hippie Painting” Canvas Art.
03Spongebob Painting
These painting ideas are a part of the Canvas Aesthetic Cartoon Painting ideas of 2020 called Spongebob Painting Disney Canvas Art.
04Babs Bunny Pa Et Mini Lerret
These are a painting about “Babs Bunny Pa Et Mini Lerret.” A 2020 Mini Canvas Art Hippie Painting Canvas idea that you can choose from
Part 2 Blender Aesthetic Painting Ideas
Blender is an accessible and open-source 3D creation suite that supports the entirety of the 3D pipeline modeling, rigging, animation, simulation, compositing rendering, motion tracking, video editing, and 2D animation pipeline. It is a fact that this is one of the best open-source software you can choose from to make your aesthetic cartoon drawing.
It is entirely free software, and various artists can use it to start digging in and playing with it. Here are some of the blender aesthetic cartoon painting ideas you can choose from:
01Princess Ira and Amina
This is a fictional aesthetic drawing cartoon of an African princess having gold gifted powers with her face painting inspired by Nigerian traditional face decorations. However, her crown is adorned with crosses, crystals, and chains which incorporate several elements from different cultural designs available from all over the world to portray unity.
02Survival Knife Weekly Drills 045
This was a design painting inspired based on BUCK KNIVES in pain texturing and focuses on making a practical game-ready asset.
03Radiance
This is a blender aesthetic cartoon painting idea of a graduation project made for the Concept Art specialized cursus at New3dge School.
04 The character looks dev
This blender cartoon painting’s inspiration came from Edward, the short film’s main character. It is a work in progress but a lovely painting that can inspire you.
Part 3 How to Create Super-Detailed Aesthetic Cartoon Painting
To create a super detailed aesthetic cartoon drawing, you do not need to be a trained artist, nor do you need a fancy cartoon picture maker. All you need to create a cartoon painting photo is a simple and Free picture from a cartoon editor to help you carry out the task more effectively.
However, you can also convert your cartoon paint into creative animation using Wondershare Filmora Video Editor . Filmora is a powerful all-in-one tool for editing that you can use to that can be used for free to animate your cartoon with its tons of effects, filters, and keyframing features that can help you carry this out effectively.
For Win 7 or later (64-bit)
For macOS 10.12 or later
Here is how to create a super detailed aesthetic cartoon painting:
Step 1: Open the Picsart editor on your desktop browser and click on the new project
Step 2: Next is to click on Upload to select the photo that you want to cartoon paint from the computer library of your hard drive
Step 2: Click on the toolbar, select the effect feature from the dropdown above your photo, and click on Magic to view all available one-click cartoon filters. However, almost all of the Magic effects on this editor will help you achieve an aesthetic cartoon photo effect.
Step 4: Click on Adjust and Blend above your photo workspace on the editor. This will help you manually adjust the effects (color burn, fade, saturation, brightness, etc.).
Step 5: Preview your result and once you are happy with the new cartoon photo painting, click on the Share button and download it from the top right corner of the editor to save it on your device.
● Ending Thoughts →
● This article explained creating and gave inspiration and ideas for the aesthetic cartoon painting you can choose from to make yours. In addition, the report also recommends Filmora as an influential editor if you intend to create an animation from your cartoon painting due to its tons of features.
● So, now you can start building your aesthetic drawings and cartoons!
Amazing Ways to Find Suitable Animated Graphic Maker
Incredible Ways to Find Suitable Animated Graphic Maker
An easy yet powerful editor
Numerous effects to choose from
Detailed tutorials provided by the official channel
Are you an enthusiast of animations, too? Do you, too, want to create something fun and exciting and show your skills through animation?
It is a hundred percent possible, with the animated graphic maker software available in the present times. Let us know more about this fantastic world of animation and the suitable animated graphic maker that will make your animation dreams and skills more enhanced and proficient in no time!
In this article
01 [Facts About Animated Graphics You Need to Know](#Part 1)
02 [Why You Should Use Animated Graphics in Your Marketing](#Part 2)
03 [Why You Should Use Animated Graphics in Your Marketing](#Part 3)
Part 1 Facts About Animated Graphics You Need to Know
There are specific facts that are important for you to know if you want to work with animations and use graphic animated tools. The facts are as follows.
01 Can Vector Graphics Be Animated?
Precisely, yes. Vector graphics can readily be animated, and that, too, is better than pixels. Animation or movement in animations occurs due to either of the two components- pixels and vectors. One can readily be animated in vector graphics. There are software tools available that can assist in the animation of vector graphics ideally. Thus, with the help of various software, creating animated vector graphics is now effortless and fun!

02 How Do I Animate a Still Image Online?
The process to animate static images online is no big deal at all. You just have to be familiar with the various software that is available for this work. Along with being familiar with the software, you also have to know how each of them works. If you know how the animation tools in the software you are going to use, it becomes an effortless and easy task to animate still images online.
You can animate static images online with the help of some renowned software or app like - Wondershare Filmora, Plotagraph, StoryZ, GIFMaker.me, PixaMotion, Movepic, Photo Motion, and 3Dthis. Each of these software ideally provides you with all the tools and functions that you can choose for animating still images online.
Wondershare Filmora
Power Up Your Story with Filmora. Professional video editing is made easy.
03 How Do You Make Animated Vector Graphics?
There are specific steps involved that help you in creating animated graphics. And the steps are as follows.
Steps for creating animated graphics:
● Isolating the vector
This step involves the selection of the vector image that you want to animate.
● Making duplicates of the vector image
You need to duplicate the vector image that you have chosen to animate. The duplication will help you reflect the movement in the image.
● Making changes in the frames
Proceed to make minor changes in each of the frames to reflect movement in the images.
● Wash it, rinse it and continue the cycle
Make a duplication of the artboard. Then, perform the changes the same as done previously. And repeat this cycle.
● Copy the large artboard
Copy the large artboard to the software you are using for animation. And then utilize the available tools of animation in the software for animating vector graphics.

Part 2 Why You Should Use Animated Graphics in Your Marketing?
In a very precise way, we can answer as animated graphics propagate and amplify awareness of the brands that integrate their utility. However, this is a general way of answering the important question. There are several reasons that make it necessary and beneficial for you to integrate animated graphics for websites for marketing your brand name. And they are as follows.
01 Eye-catching
One of the most important reasons for your marketing to include animated graphics is that they catch the attention of the audience more than any other method of marketing. They are interesting and fun, and that is the feature that attracts the attention of the audience. They get to see your brand in a more exciting and exciting way. Consequently, marketing your brand becomes ideally effective.

02 Easily informative
The motive for marketing is to inform the audience and other people about different information about your brand or company. Often, conveying information about your brands, services, and products becomes uninteresting for the audience. To make it more appealing, animated graphics can do the perfect job. They are fascinating to watch and deliver all the required information in a new and novel way. This does not bore the audience. Instead, if the animations are unique and exciting, people can actually be interested in watching them at will.
03 Customize it based on your needs
Graphic animations can be created based on the requirements of your marketing. And it is not just about the needs; it can be based on the audience genre you have. For example, if your products or services are meant for the kids, the animation will be made according to those factors that appeal to the kids. If your brand is for senior citizens, the animations will be different. Most importantly, if your brand shifts its audience genre, animations can also be created in the genre that you are choosing to serve at present. Thus, the customization ability of graphics animation offers flexibility in marketing.

03 A most efficient method of marketing
Graphic animation delivers the required promotional information in no time and in the most attractive way possible. Thus, there can be no other method of marketing as efficient and quick as graphics animation.
Part 3How to Create Animated Graphics That Stand out?
Well, the aspect of animation has attained the attention of thousands of enthusiasts all around the globe. And so, you will find numerous people making animations. And for this reason, there is numerous animation software available too on the internet. But, what can you do to design your animation to stand out? There are a few software for graphic animation that are better than the rest. And one of them is Wondershare Filmora. It is one of the top software. And it will readily and effortlessly help you integrate your animation skills and make your animations unique among the crowd.
What are the key features of this software?
● Professional quality animation tools
Do you believe that you possess immense animation skills? Then, no other software can be as motivational for you as Filmora Pro because its tools and features help you create professional-quality animation. You can readily create animated graphics for youtube from this software.
● Option for import and export
There is no occurrence of graphics hardware acceleration while you export a file from Filmora Pro.
● Easy user interface
The tools present in this software for animation are of professional quality. You can make animations that will look highly proficient. But, that does not make this software a difficult-to-use tool.
Filmora Features →
● Limitless video tracks
● Availability in Windows and well Mac
● Auto color correction
Filmora Features →
● Audio Noise Reduction
● Motion Graphics animation support
● Automatic Audio Sync
Key Takeaways from This Episode
● This was all about the different aspects of choosing a suitable animated graphic maker.
● You can readily opt for one of the several free animated graphics maker software available.
● But, if you want to avail yourself of the best, Filmora is the best go-to software for animated graphic making and exploring your animation skills.


Are you an enthusiast of animations, too? Do you, too, want to create something fun and exciting and show your skills through animation?
It is a hundred percent possible, with the animated graphic maker software available in the present times. Let us know more about this fantastic world of animation and the suitable animated graphic maker that will make your animation dreams and skills more enhanced and proficient in no time!
In this article
01 [Facts About Animated Graphics You Need to Know](#Part 1)
02 [Why You Should Use Animated Graphics in Your Marketing](#Part 2)
03 [Why You Should Use Animated Graphics in Your Marketing](#Part 3)
Part 1 Facts About Animated Graphics You Need to Know
There are specific facts that are important for you to know if you want to work with animations and use graphic animated tools. The facts are as follows.
01 Can Vector Graphics Be Animated?
Precisely, yes. Vector graphics can readily be animated, and that, too, is better than pixels. Animation or movement in animations occurs due to either of the two components- pixels and vectors. One can readily be animated in vector graphics. There are software tools available that can assist in the animation of vector graphics ideally. Thus, with the help of various software, creating animated vector graphics is now effortless and fun!
02 How Do I Animate a Still Image Online?
The process to animate static images online is no big deal at all. You just have to be familiar with the various software that is available for this work. Along with being familiar with the software, you also have to know how each of them works. If you know how the animation tools in the software you are going to use, it becomes an effortless and easy task to animate still images online.
You can animate static images online with the help of some renowned software or app like - Wondershare Filmora, Plotagraph, StoryZ, GIFMaker.me, PixaMotion, Movepic, Photo Motion, and 3Dthis. Each of these software ideally provides you with all the tools and functions that you can choose for animating still images online.
Wondershare Filmora
Power Up Your Story with Filmora. Professional video editing is made easy.
03 How Do You Make Animated Vector Graphics?
There are specific steps involved that help you in creating animated graphics. And the steps are as follows.
Steps for creating animated graphics:
● Isolating the vector
This step involves the selection of the vector image that you want to animate.
● Making duplicates of the vector image
You need to duplicate the vector image that you have chosen to animate. The duplication will help you reflect the movement in the image.
● Making changes in the frames
Proceed to make minor changes in each of the frames to reflect movement in the images.
● Wash it, rinse it and continue the cycle
Make a duplication of the artboard. Then, perform the changes the same as done previously. And repeat this cycle.
● Copy the large artboard
Copy the large artboard to the software you are using for animation. And then utilize the available tools of animation in the software for animating vector graphics.
Part 2 Why You Should Use Animated Graphics in Your Marketing?
In a very precise way, we can answer as animated graphics propagate and amplify awareness of the brands that integrate their utility. However, this is a general way of answering the important question. There are several reasons that make it necessary and beneficial for you to integrate animated graphics for websites for marketing your brand name. And they are as follows.
01 Eye-catching
One of the most important reasons for your marketing to include animated graphics is that they catch the attention of the audience more than any other method of marketing. They are interesting and fun, and that is the feature that attracts the attention of the audience. They get to see your brand in a more exciting and exciting way. Consequently, marketing your brand becomes ideally effective.
02 Easily informative
The motive for marketing is to inform the audience and other people about different information about your brand or company. Often, conveying information about your brands, services, and products becomes uninteresting for the audience. To make it more appealing, animated graphics can do the perfect job. They are fascinating to watch and deliver all the required information in a new and novel way. This does not bore the audience. Instead, if the animations are unique and exciting, people can actually be interested in watching them at will.
03 Customize it based on your needs
Graphic animations can be created based on the requirements of your marketing. And it is not just about the needs; it can be based on the audience genre you have. For example, if your products or services are meant for the kids, the animation will be made according to those factors that appeal to the kids. If your brand is for senior citizens, the animations will be different. Most importantly, if your brand shifts its audience genre, animations can also be created in the genre that you are choosing to serve at present. Thus, the customization ability of graphics animation offers flexibility in marketing.
03 A most efficient method of marketing
Graphic animation delivers the required promotional information in no time and in the most attractive way possible. Thus, there can be no other method of marketing as efficient and quick as graphics animation.
Part 3How to Create Animated Graphics That Stand out?
Well, the aspect of animation has attained the attention of thousands of enthusiasts all around the globe. And so, you will find numerous people making animations. And for this reason, there is numerous animation software available too on the internet. But, what can you do to design your animation to stand out? There are a few software for graphic animation that are better than the rest. And one of them is Wondershare Filmora. It is one of the top software. And it will readily and effortlessly help you integrate your animation skills and make your animations unique among the crowd.
What are the key features of this software?
● Professional quality animation tools
Do you believe that you possess immense animation skills? Then, no other software can be as motivational for you as Filmora Pro because its tools and features help you create professional-quality animation. You can readily create animated graphics for youtube from this software.
● Option for import and export
There is no occurrence of graphics hardware acceleration while you export a file from Filmora Pro.
● Easy user interface
The tools present in this software for animation are of professional quality. You can make animations that will look highly proficient. But, that does not make this software a difficult-to-use tool.
Filmora Features →
● Limitless video tracks
● Availability in Windows and well Mac
● Auto color correction
Filmora Features →
● Audio Noise Reduction
● Motion Graphics animation support
● Automatic Audio Sync
Key Takeaways from This Episode
● This was all about the different aspects of choosing a suitable animated graphic maker.
● You can readily opt for one of the several free animated graphics maker software available.
● But, if you want to avail yourself of the best, Filmora is the best go-to software for animated graphic making and exploring your animation skills.
Convert Animated GIF From Video
Versatile Video Editor - Wondershare Filmora
An easy yet powerful editor
Numerous effects to choose from
Detailed tutorials provided by the official channel
The animated GIFs excite the viewers and convey a message. The instant chats include these animated GIFs to add fun to your conversation. Few web designers place animated GIFs on their web pages to attract their target customers wisely. You can convert animated GIFs from video using a reliable application available in the digital space. The animated GIFs impress the viewers and add flavor to the content. Mostly used replacing the emojis because the emojis are static images, whereas the animated GIFs showcase an action that triggers more meaning to the viewers. There are options to extract a specific clipping from videos and use them as animated GIFs. Here, you will be learning about GIFs and the best ways to edit them with sophisticated tools.

In this article
01 [What is GIF?](#Part 1)
02 [Why do People like to use GIFs?](#Part 2)
03 [Convert Animated GIF from Video](#Part 3)
04 [Tip: Easily edit your GIF for free](#Part 4)
Part 1 What is GIF?
The GIF is a Graphical Interchange Format and represents the file format in the bitmap. When compared to other image formats, GIF has unique specifications that are appreciable. The GIF has a lossless compression feature and you can transfer them to any space effortlessly. It includes 256 colors and is widely used for creating buttons and banners on the webpages. It came into practice in the year1987 and occupied the computer space commercially. GIFs are preferred to create small animations and are adopted by social media users. After the advent of PNG, the usage of GIF gradually decreased by website users. Later, the animated GIFs conquered the digital space as they replace most websites’ videos. It serves as one of the best message conveyers and is quite interesting for social media users. Gradually the younger generations were highly attracted to these animated GIFs to express their thoughts in an image format.
Part 2 Why do People like to use GIFs?
People prefer GIFs when compared to videos because animated GIFs convey a strong message quickly than videos. Social media users feel comfortable using GIFs and consider it the best way to express their emotions. Apart from the chat interface, you can find the animated GIFs occupying the website’s landing page, blog posts, and emails. The designers opt for animated GIFs instead of short videos because of their effective results. Many webpage visitors skim the content, and the animated GIFs quickly reveal what you convey. The audience understands the essential data you are emphasizing on the websites swiftly with the help of the animated GIFs.
When you include videos on your websites, the users skip the videos without making any clicks due to lack of time. The animated GIFs overcame this issue, the GIFs started to play as soon as the page loads, and the audience took a quick look at it, receiving the data you are trying to narrate through these animated GIFs. Many web page users prefer animated GIFs because they take less time to load and consume data. Both the viewers and webpage designers use GIFs instead of videos to convey their message in a visual format.
Part 3 Convert Animated GIF from Video
Giphy is the best online program that creates animated GIFs from video. It is an exclusively online program that focuses on an efficient way to create animated GIFs from videos. There are many online tools available to make your GIFs. The Giphy is an impressive application with loads of in-built features to entertain audiences. While creating a GIF, ensure it has a good loading capability to obtain efficient results. You can follow the below steps to convert GIFs from videos using the Giphy app.
Step 1
Visit the official website of Giphy and upload the videos to convert a GIF by tapping the Convert button. You can also upload the video file by pasting the URL from YouTube or Vimeo.

Step 2
Now, use the Giphy tool to trim the video and spot out the section that requires converting it as GIFs.
Trim the videos and locate the section that requires the creation of animated GIFs.

Step 3
Customize the trimmed video section using stickers, filters, and texts. After personalizing the trimmed video, tap Upload to Giphy to store the edited animated GIFs in its library.
You can access the animated GIFs from the storage library in your account.

Follow the above guidelines to create animated GIFs from videos using the Giphy online tool. Surf the steps carefully to ensure successful completion of the animated GIFs creation from video.
Part 4 Tip: Easily edit your GIF for free
Further, you can refine the GIFs using a professional editor like Filmora. The Filmora from Wondershare is an awesome tool that gives you a wow feel while editing the media files. It is an exclusive program that edits the media files effectively to obtain the desired outcomes. You can work as a pro editor without any technical skills. The simple interface of this application triggers you to use the built-in elements professionally. Tap the relevant controls to include the desired effects on the uploaded GIF images. The timeline has a user-friendly interface and there are no complexities even while handling larger image or video files.
The key features of the Filmora application
● Customize the videos based on your needs. You can crop, add text, resize the dimensions precisely.
● You can add special effects to the videos using the in-built filters
● It has a simple interface and assists you in working like a pro.
● The trimmer tool aids in creating animated GIFs from your videos
● Easy to import and export the edited files to desired storage space by a single click action.
Apart from the above functionalities, you can discover enlightening uses of Filmora by installing it on your device. The controls are explicit and you can access them without any hesitation. The simple interface aids the newbie users to master this app in no time due to its comfortable working timeline.
The stepwise procedure to create animated GIFs from the imported videos using the Filmora application.
Step 1 Install the application
Visit the official website of Filmora, download the tool concerning your system OS, and install it by following the instruction wizard. Import the desired video into the timeline by tapping the Import Media Files option.

Step 2 Add texts to the video
Based on your requirements, you can trim the video using the edit tool and insert desired texts by tapping the Title menu.

Step 3 Export the edited file
Finally, click the Export button to save the edited file on any desired storage space. During the export operation, you can perform various changes to your media files. There are options to modify the file format, resolution, and storage path. Tap the respective menus to choose the desired platform that requires the storage operation. Directly post the animated GIFs on your YouTube or Vimeo based on your needs.

The above steps will aid you in creating animated GIFs from videos and using this application efficiently to bring the desired impact on it.
Wondershare Filmora
Get started easily with Filmora’s powerful performance, intuitive interface, and countless effects!
Try It Free Try It Free Try It Free Learn More >

AI Portrait – The best feature of Wondershare Filmora for gameplay editing
The AI Portrait is a new add-on in Wondershare Filmora. It can easily remove video backgrounds without using a green screen or chroma key, allowing you to add borders, glitch effects, pixelated, noise, or segmentation video effects.

Conclusion
Thus, this article had given enough insights into creating an animated GIF from videos. You can either use an online tool or opt for Filmora to edit the videos and convert them to impressive animated GIFs. The Filmora helps you to edit the media files professionally, and its simple interface assists in handling even the complex files efficiently. Connect with this article to explore the video edit process using a reliable program like Filmora. Stay tuned to create animated GIFs that conveys explicit messages to the audience.
The animated GIFs excite the viewers and convey a message. The instant chats include these animated GIFs to add fun to your conversation. Few web designers place animated GIFs on their web pages to attract their target customers wisely. You can convert animated GIFs from video using a reliable application available in the digital space. The animated GIFs impress the viewers and add flavor to the content. Mostly used replacing the emojis because the emojis are static images, whereas the animated GIFs showcase an action that triggers more meaning to the viewers. There are options to extract a specific clipping from videos and use them as animated GIFs. Here, you will be learning about GIFs and the best ways to edit them with sophisticated tools.
In this article
01 [What is GIF?](#Part 1)
02 [Why do People like to use GIFs?](#Part 2)
03 [Convert Animated GIF from Video](#Part 3)
04 [Tip: Easily edit your GIF for free](#Part 4)
Part 1 What is GIF?
The GIF is a Graphical Interchange Format and represents the file format in the bitmap. When compared to other image formats, GIF has unique specifications that are appreciable. The GIF has a lossless compression feature and you can transfer them to any space effortlessly. It includes 256 colors and is widely used for creating buttons and banners on the webpages. It came into practice in the year1987 and occupied the computer space commercially. GIFs are preferred to create small animations and are adopted by social media users. After the advent of PNG, the usage of GIF gradually decreased by website users. Later, the animated GIFs conquered the digital space as they replace most websites’ videos. It serves as one of the best message conveyers and is quite interesting for social media users. Gradually the younger generations were highly attracted to these animated GIFs to express their thoughts in an image format.
Part 2 Why do People like to use GIFs?
People prefer GIFs when compared to videos because animated GIFs convey a strong message quickly than videos. Social media users feel comfortable using GIFs and consider it the best way to express their emotions. Apart from the chat interface, you can find the animated GIFs occupying the website’s landing page, blog posts, and emails. The designers opt for animated GIFs instead of short videos because of their effective results. Many webpage visitors skim the content, and the animated GIFs quickly reveal what you convey. The audience understands the essential data you are emphasizing on the websites swiftly with the help of the animated GIFs.
When you include videos on your websites, the users skip the videos without making any clicks due to lack of time. The animated GIFs overcame this issue, the GIFs started to play as soon as the page loads, and the audience took a quick look at it, receiving the data you are trying to narrate through these animated GIFs. Many web page users prefer animated GIFs because they take less time to load and consume data. Both the viewers and webpage designers use GIFs instead of videos to convey their message in a visual format.
Part 3 Convert Animated GIF from Video
Giphy is the best online program that creates animated GIFs from video. It is an exclusively online program that focuses on an efficient way to create animated GIFs from videos. There are many online tools available to make your GIFs. The Giphy is an impressive application with loads of in-built features to entertain audiences. While creating a GIF, ensure it has a good loading capability to obtain efficient results. You can follow the below steps to convert GIFs from videos using the Giphy app.
Step 1
Visit the official website of Giphy and upload the videos to convert a GIF by tapping the Convert button. You can also upload the video file by pasting the URL from YouTube or Vimeo.
Step 2
Now, use the Giphy tool to trim the video and spot out the section that requires converting it as GIFs.
Trim the videos and locate the section that requires the creation of animated GIFs.
Step 3
Customize the trimmed video section using stickers, filters, and texts. After personalizing the trimmed video, tap Upload to Giphy to store the edited animated GIFs in its library.
You can access the animated GIFs from the storage library in your account.
Follow the above guidelines to create animated GIFs from videos using the Giphy online tool. Surf the steps carefully to ensure successful completion of the animated GIFs creation from video.
Part 4 Tip: Easily edit your GIF for free
Further, you can refine the GIFs using a professional editor like Filmora. The Filmora from Wondershare is an awesome tool that gives you a wow feel while editing the media files. It is an exclusive program that edits the media files effectively to obtain the desired outcomes. You can work as a pro editor without any technical skills. The simple interface of this application triggers you to use the built-in elements professionally. Tap the relevant controls to include the desired effects on the uploaded GIF images. The timeline has a user-friendly interface and there are no complexities even while handling larger image or video files.
The key features of the Filmora application
● Customize the videos based on your needs. You can crop, add text, resize the dimensions precisely.
● You can add special effects to the videos using the in-built filters
● It has a simple interface and assists you in working like a pro.
● The trimmer tool aids in creating animated GIFs from your videos
● Easy to import and export the edited files to desired storage space by a single click action.
Apart from the above functionalities, you can discover enlightening uses of Filmora by installing it on your device. The controls are explicit and you can access them without any hesitation. The simple interface aids the newbie users to master this app in no time due to its comfortable working timeline.
The stepwise procedure to create animated GIFs from the imported videos using the Filmora application.
Step 1 Install the application
Visit the official website of Filmora, download the tool concerning your system OS, and install it by following the instruction wizard. Import the desired video into the timeline by tapping the Import Media Files option.
Step 2 Add texts to the video
Based on your requirements, you can trim the video using the edit tool and insert desired texts by tapping the Title menu.
Step 3 Export the edited file
Finally, click the Export button to save the edited file on any desired storage space. During the export operation, you can perform various changes to your media files. There are options to modify the file format, resolution, and storage path. Tap the respective menus to choose the desired platform that requires the storage operation. Directly post the animated GIFs on your YouTube or Vimeo based on your needs.
The above steps will aid you in creating animated GIFs from videos and using this application efficiently to bring the desired impact on it.
Wondershare Filmora
Get started easily with Filmora’s powerful performance, intuitive interface, and countless effects!
Try It Free Try It Free Try It Free Learn More >
AI Portrait – The best feature of Wondershare Filmora for gameplay editing
The AI Portrait is a new add-on in Wondershare Filmora. It can easily remove video backgrounds without using a green screen or chroma key, allowing you to add borders, glitch effects, pixelated, noise, or segmentation video effects.
Conclusion
Thus, this article had given enough insights into creating an animated GIF from videos. You can either use an online tool or opt for Filmora to edit the videos and convert them to impressive animated GIFs. The Filmora helps you to edit the media files professionally, and its simple interface assists in handling even the complex files efficiently. Connect with this article to explore the video edit process using a reliable program like Filmora. Stay tuned to create animated GIFs that conveys explicit messages to the audience.
Before You Learn Facebook Slideshow: 5 Things You Should Know
Before You Learn Facebook Slideshow Things You Should Know [How-TOS]
An easy yet powerful editor
Numerous effects to choose from
Detailed tutorials provided by the official channel
If you are looking for interesting solutions to create the most amazing slideshow on Facebook, rest assured, you are at the right place to get every help!
In this article
01 [Where Did the Facebook Slideshow Tool Go?](#Part 1)
02 [How to Create a Slideshow on Facebook?](#Part 2)
03 [Top 5 Facebook Slideshow Alternatives](#Part 3)
Part 1 Where Did the Facebook Slideshow Tool Go?
While almost everyone around you must be fascinated about the stunning and appealing slideshows that the Facebook community used to offer its users with, it is evidently sad to realize that the utility has become a story of the past. The creators of the tool have by now, took multiple rounds on removing, retrieving and again removing the utility from the official Facebook website as well as the smartphone application.
It is however relaxing to know that the Facebook developer team has worked efficiently to produce alternatives to the application’s slideshow tool after the latter’s permanent disappearance from the user account pages and app profiles. You can now work with the Facebook Ads Manager or Facebook Creator Studio to sort out the concern of creating slideshow on Facebook.
Part 2 How to Create a Slideshow on Facebook?
Facebook slideshows are incredibly awesome trends of making a concise, expressive and to the point delivery of diverse content varieties. Piping up your information through and extensive assortment of sound, text and motion, these short snippets are no less than a seamless video streaming of the same information.
If you are about to launch a new product for your business enterprise, consider working with the utility to create an elusive Facebook slideshow ad for a quick demonstration of your brand among different social media communities, turning the fun of slideshow creation into a smart and responsive product promotion strategy, without having to bother your wallet for the same.
If you are concerned about the quality of the final output, it is not a cause of worry, since the Facebook slideshow creator tool promises you of an appreciable slideshow result, that takes a quick loading time, is comparable to a high resolution video and works well with all your favourite devices.
Having talked enough on the usage credibility, let us now proceed to adhere to the concern of creating a slideshow on Facebook with a diversity of media files in the following section:
01Facebook Slideshows from Videos
Step 1: Launch the Tool
Start with opening the Facebook app in your device to launch the ‘Facebook Ads Manager’ utility and tap ‘Create’ in the latter’s welcome interface.

Step 2: Select Your Video
Browse through your device’s gallery to choose a desired video for slideshow creation. When you have made your choice, set a 16:9 aspect ratio for the same to avoid square cropping.

Step 3: Upload Your Video
Proceed with uploading your video to the Facebook tool by clicking on the ‘Add Video’ button and watch it getting split into still images frames, from where you can view a seamless slideshow display of the same.

Step 4: Select Multiple Frames
you can now select a series of image frames and arrange them in the correct sequence of appearance by clicking on each one of them to be included within the creator timeline.
Step 5: Add Captions Your Stills
Tap on the small ‘Pencil’ icon within the images to customize them with suitable captions. You can further add style to these image names by making appropriate selections of font, position color of every frame caption. Once you have finished naming all the frames, click on ‘Save’ to apply your changes.
Step 6: Preview Your Creation
When you are satisfied with your work, consider watching a preview of the same to be assured of the perfect placement of everything. To do this, navigate to the ‘Preview Pane’ at the top right corner of the program interface, and tapping the ‘Preview’ button.
02Facebook Slideshows from Images
Step 1: Launch the Tool
To begin with, open the Facebook app in any of your preferred devices and proceed to launch the ‘Facebook Ads Manager’ tool, followed by clicking on the ‘Create Slideshow’ button at the bottom of the tool’s welcome screen.

Step 2: Upload Your Images
As you complete Step 1, a ‘Video Creation Kit’ will appear, where you will need to click within the ‘Create Slideshow’ checkbox, followed by tapping on the ‘Continue’ button at the bottom right corner of the window.

Step 3: Upload Your Images
Clicking on the ‘Continue’ button will take you to the ‘Settings Box’ where you need to tap on the ‘Add Photos’ option. An image selection box will now pop up, allowing you to select and upload a maximum of 10 images from your Facebook account, stock and page galleries or your device collections. Prefer keeping all the photos within the same aspect ratio to escape the extra task of cropping the images.
When you have finished making your selections, navigate to the bottom right corner of the window and hit the ‘Confirm’ button. This will make your selections shows up all together in the ‘Settings Box’, in the sequential order of their appearance in the slideshow. If you want to introduce some changes, delete and re-upload the images.

Step 4: Customize Your Images with Captions
To add suitable captions to the slideshow images, tap the ‘Pencil’ icon within them. You are also allowed to customize the stills with transitions, effects, etc., and make adjustments to the screen time of each image frame.

Part 3 Top 5 Facebook Slideshow Alternatives
Having heard about the disappointment from the exit of the Facebook slideshow creator tool, it becomes naturally important to seek through the affordable alternatives of the same to set straight the issue of how to do a slideshow on Facebook. Working towards the solutions, let us learn about the top 5 most preferred Facebook slideshow alternatives in the following section:
03PowerDirector
One of the most suitable candidates of Facebook slideshow alternatives, PowerDirector easily lands among the highly preferred tools for creating stunning slideshows. Compatible with the MacOs and Windows operating systems, the software lets you create high end, top quality slideshow presentations with a classic and professional outlook.
Talking of the creator program’s most appealing features, this one is an upgraded slideshow creator suite that is capable enough to address your most diverse design requirements, like those of high resolution video effects, Hollywood inspired movies and personal content sharing. The software package is loaded with tons of elusive video effects, themed templates and transition effects to facilitate a compelling creation.
Working with PowerDirector’s exclusive slideshow program, you get the liberty to escape the notch of storyboard and timeline editing and start the creation process in the launch window of the program itself. The extremely user cohesive interface of the software guides you through each creation step via streamlined plug-ins, making the design process quick and super easy even for newbies.

04SmartSHOW 3D
When thinking of how to make a slideshow on facebook, this one is another top rated Facebook slideshow alternatives, that comes with an extensive toolkit to create amazing presentations from video clips and images, while complementing them with a plethora of effects and transitions. Some of the key features of the program include multiple slide layering, animating selected layers and fine tune the transitions with keyframe adjustments.
You can additionally uplift the slides with image masks, shapes, 3D animated texts and other forms of graphic arts. An additively appealing feature of the slideshow creator program is the ability to mix descriptive images with your favorite music to develop stunning masterpieces of entertaining slideshows, which you can conveniently share and enjoy with family and friends on a diversity of social media platforms.
Using the tool, you can work with applying motion graphic effects to still photos without having to be an over the top tech savvy user. The editor library of the tool is loaded with some of the most awesome transition effects, like, wipes, 3D motions, gradients and fade-ins, along with the facility of adding titles, voice comments and captions to the slides of your presentation. The tool is however, exclusively a Windows compatible utility.

05PhotoStage Slideshow Software
Next in the list of alternatives to the Facebook slideshow maker tool is the aforesaid software program, that allows you to create professional quality slideshows with as many videos and images as you can possibly think of and supplement them with a variety of texts, music, voiceovers and effects. You can further work on customizing the slideshow images with making suitable adjustments in color, brightness and saturation parameters.
The software comes with a Quick Create utility, which you can use to instantly create high resolution slideshows and spark them up with zooms, pans and fades, while getting a preview of the same in real-time. You can even proceed to burn your creation into a disk, make an online upload, or simply save it to your device.
Talking of the cost constraints of this amazing slideshow creator tool, you get to work with the software for a commercial use, free of cost for a definite time period and with a restricted number of features. However, you can always consider on buying the paid version of the program to avail an access to the latter’s entire range of features and utilities. The tool works well with all Windows and Mac supported devices.

06Kizoa
Moving ahead in the list you have the Kizoa slideshow maker for Facebook, which is a dependable alternative to the conventional Facebook slideshow creator. Choosing this tool to design your slideshow presentation, you are entitled to the amazing feature of displaying your presentation on almost any screen, including smartphones, television, computers and tablets with getting to choose from 7 types of aspect ratios. The tool is designed to have a Windows and MacOs compatibility.
The application further lets you add the most specific parts of your images within the presentation slides with its smart cropping tool, while keeping an account of the file formats and screen space requirements of the images with utmost convenience. You are also allowed to choose from a storehouse of preset templates to add your desired photos and video clips in the slideshow and entice them with GIFs, effects and texts.
When you are done with the creation process, just attempt to download and save the slideshow in any preferred file format, such as, AVI, GIF, MP4, MOV, MPEG2, etc., or even burn it to a DVD. You are now free to share your slideshow on various online media sharing platforms. Using the free version of Kizoa, you are permitted to create slideshows with a duration of 60 seconds, which can be upgraded to a limitless length with a paid subscription.

07SlideLab
If you are a newbie to the field of creating slideshows, and wondering about how to create a slideshow on Facebook 2021, this one is affordably the most perfect tool you can rely on. Packed with an extensive range of effects, music, transitions and filters, SlideLab is the smartest software choice to create slideshow presentations for family entertainment and personal use.
The tool consists of an in built sharing utility that allows you to design and share slideshows on social media platforms, like YouTube, Facebook and Instagram with a single click. Working on your slideshow within the program, you can escape the cringe of cropping the images, as they are automatically adjusted to the square fit alignment of the app’s working window. You can quickly rearrange the placement of the images in the slideshow as per your preferences.
As far as the sharing credibility of the presentation is concerned, the software grants you the liberty to export your creation in PPTX and PDF file formats, and view them later in Keynote and PowerPoint.
The app shows a convenient workflow with Windows and MacOs devices and limits the image play duration to 3 seconds, along with a permitting a restricted number of transitions and effects in its free version, which you can access by availing a paid subscription of the program.

08Creating Facebook Slideshows With Wondershare Filmora
When browsing through feasible alternatives on how to make a facebook slideshow, the IT market is indeed flooded with a hoard of creation utilities. If you have just begun trying hands at slideshow creation, consider using the Wondershare Filmora Video Editor slideshow maker application for addressing your slideshow design concerns. The extensive, feature rich library of the app lets you create attractive presentation masterpieces with a wide range of special effects, transitions, texts, titles and music tracks.
For Win 7 or later (64-bit)
For macOS 10.12 or later
Working with the Filmora slideshow creator, you can trim, crop or cut the video clips and images of your presentation to give them the best look. The tool comes with a unique Filmora Template Mode to create business oriented Facebook slideshows, is compatible to any windows and Mac supported device and lets you easily make a slideshow on Facebook.
● Ending Thoughts →
● Creating Facebook slideshows can be useful in addressing a variety of personal and professional data sharing needs.
● Browsing through design alternatives, you will land across a pool of software choices to create stunning slideshows for Facebook.
● When deciding on the best Facebook slideshow creator tool, Wondershare Filmora can be your smartest pick.
If you are looking for interesting solutions to create the most amazing slideshow on Facebook, rest assured, you are at the right place to get every help!
In this article
01 [Where Did the Facebook Slideshow Tool Go?](#Part 1)
02 [How to Create a Slideshow on Facebook?](#Part 2)
03 [Top 5 Facebook Slideshow Alternatives](#Part 3)
Part 1 Where Did the Facebook Slideshow Tool Go?
While almost everyone around you must be fascinated about the stunning and appealing slideshows that the Facebook community used to offer its users with, it is evidently sad to realize that the utility has become a story of the past. The creators of the tool have by now, took multiple rounds on removing, retrieving and again removing the utility from the official Facebook website as well as the smartphone application.
It is however relaxing to know that the Facebook developer team has worked efficiently to produce alternatives to the application’s slideshow tool after the latter’s permanent disappearance from the user account pages and app profiles. You can now work with the Facebook Ads Manager or Facebook Creator Studio to sort out the concern of creating slideshow on Facebook.
Part 2 How to Create a Slideshow on Facebook?
Facebook slideshows are incredibly awesome trends of making a concise, expressive and to the point delivery of diverse content varieties. Piping up your information through and extensive assortment of sound, text and motion, these short snippets are no less than a seamless video streaming of the same information.
If you are about to launch a new product for your business enterprise, consider working with the utility to create an elusive Facebook slideshow ad for a quick demonstration of your brand among different social media communities, turning the fun of slideshow creation into a smart and responsive product promotion strategy, without having to bother your wallet for the same.
If you are concerned about the quality of the final output, it is not a cause of worry, since the Facebook slideshow creator tool promises you of an appreciable slideshow result, that takes a quick loading time, is comparable to a high resolution video and works well with all your favourite devices.
Having talked enough on the usage credibility, let us now proceed to adhere to the concern of creating a slideshow on Facebook with a diversity of media files in the following section:
01Facebook Slideshows from Videos
Step 1: Launch the Tool
Start with opening the Facebook app in your device to launch the ‘Facebook Ads Manager’ utility and tap ‘Create’ in the latter’s welcome interface.
Step 2: Select Your Video
Browse through your device’s gallery to choose a desired video for slideshow creation. When you have made your choice, set a 16:9 aspect ratio for the same to avoid square cropping.
Step 3: Upload Your Video
Proceed with uploading your video to the Facebook tool by clicking on the ‘Add Video’ button and watch it getting split into still images frames, from where you can view a seamless slideshow display of the same.
Step 4: Select Multiple Frames
you can now select a series of image frames and arrange them in the correct sequence of appearance by clicking on each one of them to be included within the creator timeline.
Step 5: Add Captions Your Stills
Tap on the small ‘Pencil’ icon within the images to customize them with suitable captions. You can further add style to these image names by making appropriate selections of font, position color of every frame caption. Once you have finished naming all the frames, click on ‘Save’ to apply your changes.
Step 6: Preview Your Creation
When you are satisfied with your work, consider watching a preview of the same to be assured of the perfect placement of everything. To do this, navigate to the ‘Preview Pane’ at the top right corner of the program interface, and tapping the ‘Preview’ button.
02Facebook Slideshows from Images
Step 1: Launch the Tool
To begin with, open the Facebook app in any of your preferred devices and proceed to launch the ‘Facebook Ads Manager’ tool, followed by clicking on the ‘Create Slideshow’ button at the bottom of the tool’s welcome screen.
Step 2: Upload Your Images
As you complete Step 1, a ‘Video Creation Kit’ will appear, where you will need to click within the ‘Create Slideshow’ checkbox, followed by tapping on the ‘Continue’ button at the bottom right corner of the window.
Step 3: Upload Your Images
Clicking on the ‘Continue’ button will take you to the ‘Settings Box’ where you need to tap on the ‘Add Photos’ option. An image selection box will now pop up, allowing you to select and upload a maximum of 10 images from your Facebook account, stock and page galleries or your device collections. Prefer keeping all the photos within the same aspect ratio to escape the extra task of cropping the images.
When you have finished making your selections, navigate to the bottom right corner of the window and hit the ‘Confirm’ button. This will make your selections shows up all together in the ‘Settings Box’, in the sequential order of their appearance in the slideshow. If you want to introduce some changes, delete and re-upload the images.
Step 4: Customize Your Images with Captions
To add suitable captions to the slideshow images, tap the ‘Pencil’ icon within them. You are also allowed to customize the stills with transitions, effects, etc., and make adjustments to the screen time of each image frame.
Part 3 Top 5 Facebook Slideshow Alternatives
Having heard about the disappointment from the exit of the Facebook slideshow creator tool, it becomes naturally important to seek through the affordable alternatives of the same to set straight the issue of how to do a slideshow on Facebook. Working towards the solutions, let us learn about the top 5 most preferred Facebook slideshow alternatives in the following section:
03PowerDirector
One of the most suitable candidates of Facebook slideshow alternatives, PowerDirector easily lands among the highly preferred tools for creating stunning slideshows. Compatible with the MacOs and Windows operating systems, the software lets you create high end, top quality slideshow presentations with a classic and professional outlook.
Talking of the creator program’s most appealing features, this one is an upgraded slideshow creator suite that is capable enough to address your most diverse design requirements, like those of high resolution video effects, Hollywood inspired movies and personal content sharing. The software package is loaded with tons of elusive video effects, themed templates and transition effects to facilitate a compelling creation.
Working with PowerDirector’s exclusive slideshow program, you get the liberty to escape the notch of storyboard and timeline editing and start the creation process in the launch window of the program itself. The extremely user cohesive interface of the software guides you through each creation step via streamlined plug-ins, making the design process quick and super easy even for newbies.
04SmartSHOW 3D
When thinking of how to make a slideshow on facebook, this one is another top rated Facebook slideshow alternatives, that comes with an extensive toolkit to create amazing presentations from video clips and images, while complementing them with a plethora of effects and transitions. Some of the key features of the program include multiple slide layering, animating selected layers and fine tune the transitions with keyframe adjustments.
You can additionally uplift the slides with image masks, shapes, 3D animated texts and other forms of graphic arts. An additively appealing feature of the slideshow creator program is the ability to mix descriptive images with your favorite music to develop stunning masterpieces of entertaining slideshows, which you can conveniently share and enjoy with family and friends on a diversity of social media platforms.
Using the tool, you can work with applying motion graphic effects to still photos without having to be an over the top tech savvy user. The editor library of the tool is loaded with some of the most awesome transition effects, like, wipes, 3D motions, gradients and fade-ins, along with the facility of adding titles, voice comments and captions to the slides of your presentation. The tool is however, exclusively a Windows compatible utility.
05PhotoStage Slideshow Software
Next in the list of alternatives to the Facebook slideshow maker tool is the aforesaid software program, that allows you to create professional quality slideshows with as many videos and images as you can possibly think of and supplement them with a variety of texts, music, voiceovers and effects. You can further work on customizing the slideshow images with making suitable adjustments in color, brightness and saturation parameters.
The software comes with a Quick Create utility, which you can use to instantly create high resolution slideshows and spark them up with zooms, pans and fades, while getting a preview of the same in real-time. You can even proceed to burn your creation into a disk, make an online upload, or simply save it to your device.
Talking of the cost constraints of this amazing slideshow creator tool, you get to work with the software for a commercial use, free of cost for a definite time period and with a restricted number of features. However, you can always consider on buying the paid version of the program to avail an access to the latter’s entire range of features and utilities. The tool works well with all Windows and Mac supported devices.
06Kizoa
Moving ahead in the list you have the Kizoa slideshow maker for Facebook, which is a dependable alternative to the conventional Facebook slideshow creator. Choosing this tool to design your slideshow presentation, you are entitled to the amazing feature of displaying your presentation on almost any screen, including smartphones, television, computers and tablets with getting to choose from 7 types of aspect ratios. The tool is designed to have a Windows and MacOs compatibility.
The application further lets you add the most specific parts of your images within the presentation slides with its smart cropping tool, while keeping an account of the file formats and screen space requirements of the images with utmost convenience. You are also allowed to choose from a storehouse of preset templates to add your desired photos and video clips in the slideshow and entice them with GIFs, effects and texts.
When you are done with the creation process, just attempt to download and save the slideshow in any preferred file format, such as, AVI, GIF, MP4, MOV, MPEG2, etc., or even burn it to a DVD. You are now free to share your slideshow on various online media sharing platforms. Using the free version of Kizoa, you are permitted to create slideshows with a duration of 60 seconds, which can be upgraded to a limitless length with a paid subscription.
07SlideLab
If you are a newbie to the field of creating slideshows, and wondering about how to create a slideshow on Facebook 2021, this one is affordably the most perfect tool you can rely on. Packed with an extensive range of effects, music, transitions and filters, SlideLab is the smartest software choice to create slideshow presentations for family entertainment and personal use.
The tool consists of an in built sharing utility that allows you to design and share slideshows on social media platforms, like YouTube, Facebook and Instagram with a single click. Working on your slideshow within the program, you can escape the cringe of cropping the images, as they are automatically adjusted to the square fit alignment of the app’s working window. You can quickly rearrange the placement of the images in the slideshow as per your preferences.
As far as the sharing credibility of the presentation is concerned, the software grants you the liberty to export your creation in PPTX and PDF file formats, and view them later in Keynote and PowerPoint.
The app shows a convenient workflow with Windows and MacOs devices and limits the image play duration to 3 seconds, along with a permitting a restricted number of transitions and effects in its free version, which you can access by availing a paid subscription of the program.
08Creating Facebook Slideshows With Wondershare Filmora
When browsing through feasible alternatives on how to make a facebook slideshow, the IT market is indeed flooded with a hoard of creation utilities. If you have just begun trying hands at slideshow creation, consider using the Wondershare Filmora Video Editor slideshow maker application for addressing your slideshow design concerns. The extensive, feature rich library of the app lets you create attractive presentation masterpieces with a wide range of special effects, transitions, texts, titles and music tracks.
For Win 7 or later (64-bit)
For macOS 10.12 or later
Working with the Filmora slideshow creator, you can trim, crop or cut the video clips and images of your presentation to give them the best look. The tool comes with a unique Filmora Template Mode to create business oriented Facebook slideshows, is compatible to any windows and Mac supported device and lets you easily make a slideshow on Facebook.
● Ending Thoughts →
● Creating Facebook slideshows can be useful in addressing a variety of personal and professional data sharing needs.
● Browsing through design alternatives, you will land across a pool of software choices to create stunning slideshows for Facebook.
● When deciding on the best Facebook slideshow creator tool, Wondershare Filmora can be your smartest pick.
Also read:
- Updated 2024 Approved How to Create a Whiteboard Video Step by Step
- New 10 Realistic Cartoon Characters You Would Run Away From if You Met in Real Life for 2024
- New Tutorials to Make Animated Images – Even if Youre Just Starting Out
- New 10 Options for Your Need on Animation Makers
- How To Learn Cartoon Sketch Drawing
- 2024 Approved 10 Realistic Cartoon Characters You Would Run Away From if You Met in Real Life
- New 12 Captivating Websites with Triggered Animate on Scroll Examples
- New In 2024, Types of Cartoon Styles You May Use for The Next Marketing Project
- 12 Aesthetic GIF Instagram for Marketers and Creatives for 2024
- Updated Best 8 Tools Tell You How to Make Slideshows for Instagram
- Updated 2D Character Animation Everything You Should Know About It
- 2024 Approved How To Make Pinterest Slideshow in Simple Ways
- Updated How to Make Slideshow in LinkedIn
- New In 2024, The 15 Best Apps to Turn Photos Into Cartoons and Sketches
- Updated Animated Business Logos and Tools to Create
- Updated In 2024, Top 8 Tools Tell You How to Make Slideshows for Instagram
- New 2024 Approved 12+ Stunning Instagram GIF Stickers
- New How to Make a Video a Live Photo
- New Best 12 2D Animation Studios All Should Check Out for 2024
- A Beginners Guide to Explain What 3D Animation Is for 2024
- New 2024 Approved How to Animate - Adobe Animate Tutorial for All
- Updated How to Create A GIF with Sound for 2024
- New 5 Free Animated Gif Sources You Must Check for 2024
- Updated 2024 Approved Everything You Need to Know About Becoming a Motion Graphic Designer
- 12 Dubbed Anime Websites to Watch for Free
- Updated 2024 Approved Want to Make a Meme GIF?
- 15 Top Video to GIF App on iPhone and Android for 2024
- Updated 2024 Approved 10 Caricature Makers to Turn Photo to Caricature Effects
- New 2024 Approved How to Make My Photo 3D Cartoon Online
- Top 8 Anime Name Generators Online-Get Cool Anime Names
- New 2024 Approved Popular Female & Male Disney Cartoon Characters
- Tutorial Guide to Animate Pictures in Canva
- Updated In 2024, How to Find Some Different Ways to Animated Cartoon of Yourself
- Techniques for Creating Animated Logo That Few People Know About
- Interesting Fundamentals and Ultimate Guide to Animated Characters Drawings for 2024
- Updated The Only Guide Youll Ever Need to Learn About GIF Video Downloader for 2024
- Updated 2024 Approved Best 15 Greatest Claymation Movies of All Time
- Create or Find Good Morning/Night GIFs for 2024
- Adobe Animate Text Effects Skills You Need to Know for 2024
- Whats Rigging Animation and Why It Matters for 2024
- In 2024, 5 Different Animation Styles A Simple but Complete Guide
- New In 2024, Top 10 Video to GIF Converters Top Picks
- Updated In 2024, Top Claymation Shows That Make Your Memories Unforgettable
- New Ways on How to Get Started in Stop Motion Claymation for 2024
- Animated Collage Maker Tips for 2024
- 10 Classical Animated Cartoon Types With Examples for 2024
- New How to Reduce GIF Size and Best GIF Resizers
- Tutorials to Make Animated Images for 2024
- New 2024 Approved How To Learn Cartoon Sketch Drawing
- In 2024, 2 Ways to Monitor Asus ROG Phone 7 Ultimate Activity | Dr.fone
- In 2024, Fixing Foneazy MockGo Not Working On Google Pixel 7a | Dr.fone
- Which Pokémon can Evolve with a Moon Stone For Samsung Galaxy M14 5G? | Dr.fone
- How to Fix Error 495 While Download/Updating Android Apps On Tecno Spark 20 Pro | Dr.fone
- In 2024, 4 Feasible Ways to Fake Location on Facebook For your Motorola Moto G73 5G | Dr.fone
- How to Simulate GPS Movement in AR games On Motorola Razr 40? | Dr.fone
- How to fix iCloud lock on your iPhone XS Max and iPad
- What is Geo-Blocking and How to Bypass it On Apple iPhone 6? | Dr.fone
- In 2024, How to Access Your iPhone XS Max When You Forget the Passcode? | Dr.fone
- 11 Best Location Changers for Apple iPhone 7 Plus | Dr.fone
- In 2024, The Updated Method to Bypass Xiaomi Civi 3 FRP
- In 2024, Delete Gmail Account With/Without Password On Samsung Galaxy A05
- In 2024, How To Unlock SIM Cards Of Samsung Galaxy F04 Without PUK Codes
- Solved Warning Camera Failed on Itel P40+ | Dr.fone
- How to use Snapchat Location Spoofer to Protect Your Privacy On Nokia C110? | Dr.fone
- Title: 2024 Approved 8 Free GIF Animators to Make Your Own GIF
- Author: Elon
- Created at : 2024-05-19 03:04:48
- Updated at : 2024-05-20 03:04:48
- Link: https://animation-videos.techidaily.com/2024-approved-8-free-gif-animators-to-make-your-own-gif/
- License: This work is licensed under CC BY-NC-SA 4.0.
