

2024 Approved A Roster of 15 Best Disney Channel Cartoons
A Roster of 15 Best Disney Channel Cartoons
A Roster of 15 Best Disney Channel Cartoons
An easy yet powerful editor
Numerous effects to choose from
Detailed tutorials provided by the official channel
Disney channel is among the most liked channel by children. Undoubtedly, in childhood, every one of us, at some point has seen the best cartoon on it. The Disney channel cartoons always hit the top of the list because of the content and graphics used. Well, we cannot forget that still some people are fond of it and wish to try out some of the best cartoons.
Well, if you are also a big fan of the best Disney cartoons, stay tuned with us in this read till the last. Here we are exploring the list of all the best cartoons on this channel and sharing something new too. Let’s get started!
In this article
01 [All Best 10 Disney Channel Cartoons](#Part 1)
02 [All 5 Upcoming Disney Movies in 2022](#Part 2)
03 [How to View Disney Channel Cartoons](#Part 3)
Part 1 All Best 10 Disney Channel Cartoons
In this section, firstly, we discuss the best cartoons on Disney plus that viewer must try out. These are as follows:
01Gravity Falls
Gravity Falls is a Disney Channel show. It has a large fan base, and the show has been consistently popular for its high-quality storytelling. It has also been praised by critics for its artistic style and visual appeal. The show is about the adventures of a boy named Dipper Pines who lives in an old house with his family and also his brother, Mabel.
Premiered: June 15 2012
Stars (IMDb): 8.9/10
02Kim Possible
“Kim Possible is an American animated television series created by Craig McCracken for Disney Channel. The series follows the adventures of teenage girl Kim Possible and her friends Ron Stoppable and Goofy as they try to stop evil villains.
Premiered: 7 June 2002
Stars (IMDb): 7.2/10
03Phineas and Ferb
Phineas and Ferb is a popular cartoon that Disney has produced. It is known for its humorous storyline and characters. Phineas and Ferb are two best friends who are always trying to get into trouble with their inventions. They invent many different things which they use for their own purposes but never really think about the consequences of what they do. They also have some sort of relationship with Perry the Platypus.
Premiered: August 17 2007
Stars (IMDb): 8.1/10
04The Owl House
The Owl house is one of the greatest animated cartoons that has ever been made. It has a simple storyline, it is well-made, and it has a strong message. The main character of the cartoon is an owl. He has a set of skills that he can use to help humans out. The story revolves around the concept of the warrior.
Premiered: January 10, 2020
Stars (IMDb): 8.2/10
05Darkwing Duck
Darkwing Duck is a Disney Channel animated series created by Don Hertzfeldt. The show follows the adventures of Darkwing Duck and his friends as they work to save the world from evil and disaster.
Premiered: September 6 1991
Stars (IMDb): 7.6/10
06Star vs The Forces of Evil
We are all familiar with the classic Disney Channel cartoon “The Forces of Evil”. It is a story about a group of mischievous children who want to defeat evil forces. They want to take over the world and rule it. But then they learn that there are two sides to every story and that sometimes good can win out over evil.
Premiered: January 18 2015
Stars (IMDb): 8.1/10
07The New Adventures of Winnie the Pooh
Winnie the Pooh is a very popular cartoon series with a huge fan base. The story of this cartoon is about a young bear who lives in the forest, who meets two other bears and a tree, who is his best friend. He has some adventures with them. This cartoon was first shown in 1959. It was later adapted into an animated movie in 1966, which became very popular among children and adults alike.
Premiered: January 17 1988
Stars (IMDb): 7.7/10
08The Ghost and Molly McGee
The Ghost and Molly McGee want to get back home. It’s up to them to find their way through the maze of mirrors and see if they can make it back home. The two ghosts have been separated for ages, but now they are reunited in this big adventure!
Premiered: October 1 2021
Stars (IMDb): 7.3/10
09Recess
Disney channel cartoon’s “Recess” is a pre-school cartoon series produced by Disney Channel. This is a story of a few friends who met on the ground during recess time and had fun together. They get into so many things that turn out to be the game changer for them.
Premiered: September 13 1997
Stars (IMDb): 6.6/10
10Curious George
Curious George is a cute African monkey who can’t seem to stay out of mischief. “The Man in the Yellow Hat,” George’s pal, tries his hardest to look after him and is always there to save the day. Learning, forgiveness, and playful curiosity are among the show’s themes.
Premiered: 4 September 2006
Stars (IMDb): 6.5/10
Part 2 All 5 Upcoming Disney Movies in 2022
After exploring the list of best cartoons on Disney Plus, how can we forget to check out the upcoming movies on Disney in 2022? Yes, there is plenty of option available for 2022 as well. Few of them are: -
01Polar Bear (film)
A polar bear is an upcoming movie on Disney. This movie highlights the polar bear’s era and helps people to know more about them. This will be going to release on April 22, 2022.
02Fire Island
Fire Island is an upcoming American romantic comedy film directed by Andrew Ahn and written by and starring Joel Kim Booster. Releasing on Hulu on June 3, 2022. The story revolves around two friends embracing a long weeks’ vacation. They also find out some new friends during the same adventure.
03Good Luck to You, Leo Grande
Good Luck to You, Leo Grande is a romantic movie that revolves around a window. She hires a sex worker to fulfil her fantasies. This movie will hit the cinemas on January 22 2022.
04Not Okay
Not okay is a movie about friends who are planning a trip but then get into some uninvited troubles and are not in the state to come out of them. This movie will be in cinemas on August 5, 2022.
05Black Panther: Wakanda Forever
Black Panther: Wakanda Forever is a superhero film. This movie will amaze all the viewers with its plot and graphics used. This movie will be in cinemas on November 11, 2022.
Part 3 How to View Disney Channel Cartoons
We are pretty sure if you are a big fan of Disney Channel Cartoons, you might be getting curious to try out the Disney cartoon face too. But sometimes it happens that the graphics available online doesn’t meet our needs, due to which we are not able to try that out.
If the same is happening to you, then try Filmora. Yes, you read it right. This is one of the best editing tools available helpful in extracting the cartoon face, and you can use them easily. This tool will help you to edit the videos too, and after it, the same can be used with the best graphics easily.
This wonderful tool will cater to your obsession with Disney cartoons and help you to get the best outcomes available. You will be able to express more and achieve more. Exploring more about the features of Wondershare Filmora Video Editor that can help you includes: -
● Video editing is at its best.
● Editing features for every kind of video.
● Innovative interface.
● Colour correction can be done easily.
● Multiple effects for video.
For Win 7 or later (64-bit)
For macOS 10.12 or later
All these features are helpful for users to View Disney Channel Cartoons easily, and in case they are in video creation and wish to use them can go ahead with it. For sure, their editing along with video needs will be catered to, and there will be no problem in resolving things.
● Ending Thoughts →
● Disney channel has the best cartoon content, and no other channel can beat it. that’s why we created this amazing list for you.
● Filmora is one of the best tools available helpful for users to create the best videos with Disney cartoon characters too.
● Upcoming Disney channel cartoons are best to watch in 2022, and viewers must not miss them.
Apps to Animate Still Pictures
Apps to Animate Still Pictures Which Could Make Your Pictures Become Internet Sensation
An easy yet powerful editor
Numerous effects to choose from
Detailed tutorials provided by the official channel
Now, it is a question of what to do with all those still photos lying in your phone. You can be pretty certain that you won’t be retiring from clicking images anytime soon. A tip to help make posting images more interesting would be using apps to animate your photos.
You can also find an app that animates your face specifically, which is great for instagram content and has a greater chance of getting reactions or comments. So without further to do let’s get animating.
In this article
01 [Review of General Methods: Can You Animate Still Pictures?](#Part 1)
02 [10 Best apps to animate still photos on Android & iOS](#Part 2)
03 [Additional Extension: 5 Apps to Animate Old Photos](#Part 3)
Part 1 Review of General Methods: Can You Animate Still Pictures?
It’s pretty obvious that you can! These days you can do whatever you want online so animating still pictures should be a piece of cake if you know-how.
A video is basically an entire collage of moving pictures. So if you can cut out pictures from a video why not turn still pictures into animations.
There are a number of ways you can use to animate still images →
● Videos are multiple pictures that move at a frame rate. Make short copies of a video by cutting out the essential moments and playing them in a loop.
● Add and play video animation elements over a picture. With the right software, this task is as easy as copy-pasting over another image.
● Apply an animated 3D image with a transparent background over another image. Remember, the bigger the element the closer it is. So size is directly translated as distance.
● You can use multiple filters and effects on an image with an animated portrait app. Find out what app you can use further on in this article.
● Turn an image into a GIF. No matter its small size and cartoonish style, GIF animation has a very wide appeal as online content.
Part 2 10 Best apps to animate still photos on Android & iOS
01GIPHY
Giphy is the largest internet catalog for GIF files, clips & stickers. No matter if it is a scene from a movie or an animation you have watched somewhere, using this application you can easily find, save & share or simply create something new.
Price: Free
Pros
● Quickly turns still photos into an animation.
● Easily share your work through all social media channels.
Cons
● Search tags are varied; you may need to search using unlikely words to get desired results.
Applicable System: Android
02GIPHY
One of the best ways to turn your photos & videos into GIFs is using ImgPlay. It has a clearer interface making it easy to use. Imgplay comes with paid- premium and non-paid version making it suitable for personal & professional application.
Price: Pro $4.99.
Pros
● It is not packed with unnecessary features.
Cons
● ImgPlay slaps a watermark on all its non-premium versions.
Applicable System: Android & iOS.
03Loopsie
The best Part is that Loopsie provides spectacular cinematographic effects to your animated stills. Stabilization algorithm efficiently removes shaking effects & blurs.
Price: Free.
Pros
● User friendly UI
● Easy to share on social media platforms.
Cons
● Paid version is a bit pricey.
Applicable System: Only on iOS.
04StoryZ
Looking for ways to create animated visuals form still images? This is where your quest ends. An advanced editing platform that offers overlays, movement & color filters. Banner Ads & watermarks can be removed by paying a small subscription fee.
Price: Free version available. Premium costs INR 789 a year.
Pros
● Double exposure effect combines video overlay & static imagery.
Cons
● Contains Ad & watermark.
Applicable System: Android.
05Animate Me
Animate Me offers you a package of postcards & greeting snapshots that you can animate according to your need. The paid subscription will get you updated sounds & effects every now & then.
Price: Free.
Pros
● Easy to use & beginners friendly.
Cons
● Editing features & tools are limited.
Applicable System: Windows**.**
06Movepic
Create animated stills, GIFs, live-wallpapers all with Movepic. It allows you to animate simply anything by drawing a path. You can also adjust the speed of animation manually.
Price: Free.
Pros
● Animate in a light motion.
● Easy to use.
Cons
● Free version leaves a watermark on images.
Applicable System: Android & iOS.
07Pixaloop
Pixaloop is a fun app packed with significant animation & editing features. 100% free to use software delivers live animated images in a few clicks. User friendly interface edits images using powerful & precise animation tools.
Price- Free.
Pros
● Offers all the necessary features & core tools.
● Provides accuracy & flexibility to the users.
Cons
● The animation process is a bit time consuming.
Applicable System: Android & iOS.
08Zoetropic
Zoetropic has a combination of 3D tools and Camera FX to animate your images. User friendly interface allows you to mask the still areas if you wish to keep it still.
Price: $199 (Pro)
Pros
● Easily customize motion areas.
● Apply overlays & audios.
Cons
● App price is higher than similar available apps.
Applicable System: Android & iOS.
9Motionleap
It is one of the most top reviewed apps on Playstore related to animating still photos. It has several features like programming directional cues, freeze portions of your photo or even apply filters.
Price: Free version. Pro version; $3.50/month, $18/year and $55 lifetime.
Pros
● Its free version does not apply watermark.
● Intuitive Interface.
Cons
● Best features are locked in Pro version.
Applicable System: Android & iOS.
Part 3 Additional Extension: 5 Apps to Animate Old Photos
It can be unanimously agreed upon that people have been storing photos for decades as a means of preserving memories. We don’t get much opportunity to meet familiar faces too often so why not just try and animate still images of relatives. Now we already know how we can start animating images on apps but restoring original images maybe a tad more complicated than that. This time a bit of the animation is dependent on the physical state of the picture so be sure it’s in mint condition.
These photos can be restored or manipulated digitally with the help of smart AI. We have listed down some of the apps to animate old photos and reconstruct faces;
01Photos Revive
You can add colour to old worn out photos and make them look more realistic in terms of tonal colorization using artificial intelligence. The app also asks you recollect any details of the photo that you might remember in terms of the image.
Applicable OS: iOS only.

02Remini
After going through several improvements and upgrades, you can use the app Remini to confidently restore low resolution images that are either pixelated, blurred or damaged into High Definition images. This app has already been used by users to process a hundred million photos.
Applicable OS: Android 1.7.2 or higher, & iOS 9.3 or higher.

03Colorize
Another app that uses AI to add colorization to your old images. It is a popular animate your family photo app which has amazing other tools and filters to try out.
Applicable OS: Android and iOS.

04Deep Nostalgia
Using this app which has been innovated by the geology platform MyHeritage uses ai to add gestures to still images to evoke nostalgia in the users.
Applicable OS: Online.

04Google Photoscan
Google scanner is a futuristic app for restoring photos of the past. The app uses a smart scanning technology that provides several scans of the same photo automatically.
Applicable OS: Android or iOS.

Key Takeaways from This Episode
● Animating photos are a new way of reimagining still images into moving live content. There are many methods and approaches you can choose to animate your images.
● Some of them being video animations, transparent background elements, Filters and effects and of course GIFs.
● There are dozens of apps with built in smart artificial intelligence to help restore old photos or make short animations out of them. Some of them are applicable for desktops while others available both on Android and iOS.
Now, it is a question of what to do with all those still photos lying in your phone. You can be pretty certain that you won’t be retiring from clicking images anytime soon. A tip to help make posting images more interesting would be using apps to animate your photos.
You can also find an app that animates your face specifically, which is great for instagram content and has a greater chance of getting reactions or comments. So without further to do let’s get animating.
In this article
01 [Review of General Methods: Can You Animate Still Pictures?](#Part 1)
02 [10 Best apps to animate still photos on Android & iOS](#Part 2)
03 [Additional Extension: 5 Apps to Animate Old Photos](#Part 3)
Part 1 Review of General Methods: Can You Animate Still Pictures?
It’s pretty obvious that you can! These days you can do whatever you want online so animating still pictures should be a piece of cake if you know-how.
A video is basically an entire collage of moving pictures. So if you can cut out pictures from a video why not turn still pictures into animations.
There are a number of ways you can use to animate still images →
● Videos are multiple pictures that move at a frame rate. Make short copies of a video by cutting out the essential moments and playing them in a loop.
● Add and play video animation elements over a picture. With the right software, this task is as easy as copy-pasting over another image.
● Apply an animated 3D image with a transparent background over another image. Remember, the bigger the element the closer it is. So size is directly translated as distance.
● You can use multiple filters and effects on an image with an animated portrait app. Find out what app you can use further on in this article.
● Turn an image into a GIF. No matter its small size and cartoonish style, GIF animation has a very wide appeal as online content.
Part 2 10 Best apps to animate still photos on Android & iOS
01GIPHY
Giphy is the largest internet catalog for GIF files, clips & stickers. No matter if it is a scene from a movie or an animation you have watched somewhere, using this application you can easily find, save & share or simply create something new.
Price: Free
Pros
● Quickly turns still photos into an animation.
● Easily share your work through all social media channels.
Cons
● Search tags are varied; you may need to search using unlikely words to get desired results.
Applicable System: Android
02GIPHY
One of the best ways to turn your photos & videos into GIFs is using ImgPlay. It has a clearer interface making it easy to use. Imgplay comes with paid- premium and non-paid version making it suitable for personal & professional application.
Price: Pro $4.99.
Pros
● It is not packed with unnecessary features.
Cons
● ImgPlay slaps a watermark on all its non-premium versions.
Applicable System: Android & iOS.
03Loopsie
The best Part is that Loopsie provides spectacular cinematographic effects to your animated stills. Stabilization algorithm efficiently removes shaking effects & blurs.
Price: Free.
Pros
● User friendly UI
● Easy to share on social media platforms.
Cons
● Paid version is a bit pricey.
Applicable System: Only on iOS.
04StoryZ
Looking for ways to create animated visuals form still images? This is where your quest ends. An advanced editing platform that offers overlays, movement & color filters. Banner Ads & watermarks can be removed by paying a small subscription fee.
Price: Free version available. Premium costs INR 789 a year.
Pros
● Double exposure effect combines video overlay & static imagery.
Cons
● Contains Ad & watermark.
Applicable System: Android.
05Animate Me
Animate Me offers you a package of postcards & greeting snapshots that you can animate according to your need. The paid subscription will get you updated sounds & effects every now & then.
Price: Free.
Pros
● Easy to use & beginners friendly.
Cons
● Editing features & tools are limited.
Applicable System: Windows**.**
06Movepic
Create animated stills, GIFs, live-wallpapers all with Movepic. It allows you to animate simply anything by drawing a path. You can also adjust the speed of animation manually.
Price: Free.
Pros
● Animate in a light motion.
● Easy to use.
Cons
● Free version leaves a watermark on images.
Applicable System: Android & iOS.
07Pixaloop
Pixaloop is a fun app packed with significant animation & editing features. 100% free to use software delivers live animated images in a few clicks. User friendly interface edits images using powerful & precise animation tools.
Price- Free.
Pros
● Offers all the necessary features & core tools.
● Provides accuracy & flexibility to the users.
Cons
● The animation process is a bit time consuming.
Applicable System: Android & iOS.
08Zoetropic
Zoetropic has a combination of 3D tools and Camera FX to animate your images. User friendly interface allows you to mask the still areas if you wish to keep it still.
Price: $199 (Pro)
Pros
● Easily customize motion areas.
● Apply overlays & audios.
Cons
● App price is higher than similar available apps.
Applicable System: Android & iOS.
9Motionleap
It is one of the most top reviewed apps on Playstore related to animating still photos. It has several features like programming directional cues, freeze portions of your photo or even apply filters.
Price: Free version. Pro version; $3.50/month, $18/year and $55 lifetime.
Pros
● Its free version does not apply watermark.
● Intuitive Interface.
Cons
● Best features are locked in Pro version.
Applicable System: Android & iOS.
Part 3 Additional Extension: 5 Apps to Animate Old Photos
It can be unanimously agreed upon that people have been storing photos for decades as a means of preserving memories. We don’t get much opportunity to meet familiar faces too often so why not just try and animate still images of relatives. Now we already know how we can start animating images on apps but restoring original images maybe a tad more complicated than that. This time a bit of the animation is dependent on the physical state of the picture so be sure it’s in mint condition.
These photos can be restored or manipulated digitally with the help of smart AI. We have listed down some of the apps to animate old photos and reconstruct faces;
01Photos Revive
You can add colour to old worn out photos and make them look more realistic in terms of tonal colorization using artificial intelligence. The app also asks you recollect any details of the photo that you might remember in terms of the image.
Applicable OS: iOS only.
02Remini
After going through several improvements and upgrades, you can use the app Remini to confidently restore low resolution images that are either pixelated, blurred or damaged into High Definition images. This app has already been used by users to process a hundred million photos.
Applicable OS: Android 1.7.2 or higher, & iOS 9.3 or higher.
03Colorize
Another app that uses AI to add colorization to your old images. It is a popular animate your family photo app which has amazing other tools and filters to try out.
Applicable OS: Android and iOS.
04Deep Nostalgia
Using this app which has been innovated by the geology platform MyHeritage uses ai to add gestures to still images to evoke nostalgia in the users.
Applicable OS: Online.
04Google Photoscan
Google scanner is a futuristic app for restoring photos of the past. The app uses a smart scanning technology that provides several scans of the same photo automatically.
Applicable OS: Android or iOS.
Key Takeaways from This Episode
● Animating photos are a new way of reimagining still images into moving live content. There are many methods and approaches you can choose to animate your images.
● Some of them being video animations, transparent background elements, Filters and effects and of course GIFs.
● There are dozens of apps with built in smart artificial intelligence to help restore old photos or make short animations out of them. Some of them are applicable for desktops while others available both on Android and iOS.
Stunning Ideas About Creating Personalised WhatsApp GIF Sticker
Stunning Ideas About Creating Personalised WhatsApp GIF Sticker
An easy yet powerful editor
Numerous effects to choose from
Detailed tutorials provided by the official channel
WhatsApp has become the most popularly and widely used medium for text conversation and with the reach of the platform increasing every day, new features are added from time to time to keep the users hooked. In the same line, WhatsApp now allows creating customized animated GIF stickers to be used in the chats.
Animated stickers will let you express your feeling and thoughts through animations which will surely make the conversation more interesting. These stickers can be created on your Android as well as iPhone. The article below will help you to know the detailed process to create GIF sticker WhatsApp and also how these stickers can be used in your videos to make the videos more entertaining.
In this article
01 [How to Create Custom Animated WhatsApp Stickers on Android and iPhone](#Part 1)
02 [How to Use Custom Stickers in Filmora?](#Part 2)
Part 1 How to Create Custom Animated WhatsApp Stickers on Android and iPhone
Animated third-party stickers cannot be added directly to WhatsApp and thus you can create a customized one. To create these GIF stickers for WhatsApp, you would need the help of third-party apps.
For Android devices, one such popular app is the Sticker Maker app. For iPhone, we suggest using Sticker Maker Studio app.
Once these apps are installed on your device, GIF stickers can be made in no time.
Steps to make sticker GIF WhatsApp on Android phone
Step 1. Download, install and open the Sticker maker app on your Android device.
Step 2. Tap on the “Create a new sticker pack” option on your app.
Step 3. Give the desired name to your sticker pack and click on the Create button.
Step 4. To add the animated stickers, click on the created sticker pack.
Step 5. Next, click on the first box, and then from the menu choose the Select file option.

Step 6. Next, choose the video from your phone from which you wish to create a sticker. You can even add a GIF file. After the media file is added, the app will compress it and will turn it into an animated sticker automatically.
Step 7. Now, you need to add 3 animated stickers to the other boxes of the sticker app (as mentioned in step 5).
Note: Multiple stickers can be added using the same process.
Step 8. Click on the “Add to WhatsApp” button after a minimum of 3 stickers are added to the pack.
Step 9. Now, your stickers are ready. Open the WhatsApp chat and launch the sticker panel where you can see your created GIF stickers. Choose the sticker you want, add it to your chat, and send it.

Steps to make WhatsApp Sticker GIF on iPhone
Step 1. On your iPhone, download, install and launch the Sticker Maker Studio app from the app store.
Step 2. Choose the sticker pack and also the name of the author at the respective boxes and then click on the Create button.
Step 3. Next, click on the new sticker pack that is created.

Step 4. Multiple boxes will now appear from which you need to choose the first one and then
select the Files option.
Step 5. Choose the desired Video from your device from which sticker has to be created. You can also create GIF to WhatsApp sticker. Other stickers to the pack can be added similarly. The app will automatically convert the added file to a sticker.
Step 6. After the stickers are added (at least 3), click on the Add to WhatsApp button at the generated Tray icon.

Note: If you see your tray icon to be blank, click on it else there will be issues adding the stickers to the WhatsApp chat later. A tray icon can be selected from the images.
Step 7. Next, you will be asked if you wish to open WhatsApp, click on Okay.
Step 8. Now, to add the animated GIF stickers to WhatsApp, you need to click on the Save button and your stickers are ready to be used in the chat.

Part 2 How to Use Custom Stickers in Wondershare Filmora Video Editor ?
For Win 7 or later (64-bit)
For macOS 10.12 or later
Why use your customized GIF stickers only in WhatsApp chats when they can be used in Videos as well? Yes, using Wondershare Filmora software you can use your customized animated stickers in your videos as well to make them more eye-catchy and interesting. Additionally, you can also add the effects to your videos using the software.
Wondershare Filmora is a feature-packed that allows creating stunning and professional-looking videos using its wide range of functions like motion tracking, adding effects, color matching, noise enhancement, keyframe animations, adding captions, and much more.
The user-friendly interface makes the tool apt even for beginners.
Steps to add GIF animations to videos using Wondershare Filmora
Step 1. On your Windows or Mac system, launch the software and choose Media > Import> Import Media Files on the main interface.

Step 2. Next, choose and add the created animated sticker to the software interface. Alternatively, you can also select the sticker from Elements. Drag and drop the added sticker to the video.

Step 3. To adjust the parameters like the size and the rotation of the sticker, you need to double-click on the sticker at the timeline. Additionally, color adjustments can also be made and if needed, you can also add 3D motion.

Step 4. To change the size and the location of the sticker, you need to drag it accordingly in
the viewer panel.
Step 5. Next, at the Local tab, choose the video format, resolution, and desktop folder. Finally, click on the Export button to start processing.
Note: The created video can also be saved to DVD or can be uploaded to YouTube and Vimeo directly using the software.

● Key Takeaways from This Episode →
●The latest GIF sticker feature of WhatsApp allows adding interesting animations to your chats.
●To create customized GIF stickers on Android and iPhone, third-party apps have to be used.
●The customized stickers can also be added to your videos using Wondershare Filmora.
WhatsApp has become the most popularly and widely used medium for text conversation and with the reach of the platform increasing every day, new features are added from time to time to keep the users hooked. In the same line, WhatsApp now allows creating customized animated GIF stickers to be used in the chats.
Animated stickers will let you express your feeling and thoughts through animations which will surely make the conversation more interesting. These stickers can be created on your Android as well as iPhone. The article below will help you to know the detailed process to create GIF sticker WhatsApp and also how these stickers can be used in your videos to make the videos more entertaining.
In this article
01 [How to Create Custom Animated WhatsApp Stickers on Android and iPhone](#Part 1)
02 [How to Use Custom Stickers in Filmora?](#Part 2)
Part 1 How to Create Custom Animated WhatsApp Stickers on Android and iPhone
Animated third-party stickers cannot be added directly to WhatsApp and thus you can create a customized one. To create these GIF stickers for WhatsApp, you would need the help of third-party apps.
For Android devices, one such popular app is the Sticker Maker app. For iPhone, we suggest using Sticker Maker Studio app.
Once these apps are installed on your device, GIF stickers can be made in no time.
Steps to make sticker GIF WhatsApp on Android phone
Step 1. Download, install and open the Sticker maker app on your Android device.
Step 2. Tap on the “Create a new sticker pack” option on your app.
Step 3. Give the desired name to your sticker pack and click on the Create button.
Step 4. To add the animated stickers, click on the created sticker pack.
Step 5. Next, click on the first box, and then from the menu choose the Select file option.
Step 6. Next, choose the video from your phone from which you wish to create a sticker. You can even add a GIF file. After the media file is added, the app will compress it and will turn it into an animated sticker automatically.
Step 7. Now, you need to add 3 animated stickers to the other boxes of the sticker app (as mentioned in step 5).
Note: Multiple stickers can be added using the same process.
Step 8. Click on the “Add to WhatsApp” button after a minimum of 3 stickers are added to the pack.
Step 9. Now, your stickers are ready. Open the WhatsApp chat and launch the sticker panel where you can see your created GIF stickers. Choose the sticker you want, add it to your chat, and send it.
Steps to make WhatsApp Sticker GIF on iPhone
Step 1. On your iPhone, download, install and launch the Sticker Maker Studio app from the app store.
Step 2. Choose the sticker pack and also the name of the author at the respective boxes and then click on the Create button.
Step 3. Next, click on the new sticker pack that is created.
Step 4. Multiple boxes will now appear from which you need to choose the first one and then
select the Files option.
Step 5. Choose the desired Video from your device from which sticker has to be created. You can also create GIF to WhatsApp sticker. Other stickers to the pack can be added similarly. The app will automatically convert the added file to a sticker.
Step 6. After the stickers are added (at least 3), click on the Add to WhatsApp button at the generated Tray icon.
Note: If you see your tray icon to be blank, click on it else there will be issues adding the stickers to the WhatsApp chat later. A tray icon can be selected from the images.
Step 7. Next, you will be asked if you wish to open WhatsApp, click on Okay.
Step 8. Now, to add the animated GIF stickers to WhatsApp, you need to click on the Save button and your stickers are ready to be used in the chat.
Part 2 How to Use Custom Stickers in Wondershare Filmora Video Editor ?
For Win 7 or later (64-bit)
For macOS 10.12 or later
Why use your customized GIF stickers only in WhatsApp chats when they can be used in Videos as well? Yes, using Wondershare Filmora software you can use your customized animated stickers in your videos as well to make them more eye-catchy and interesting. Additionally, you can also add the effects to your videos using the software.
Wondershare Filmora is a feature-packed that allows creating stunning and professional-looking videos using its wide range of functions like motion tracking, adding effects, color matching, noise enhancement, keyframe animations, adding captions, and much more.
The user-friendly interface makes the tool apt even for beginners.
Steps to add GIF animations to videos using Wondershare Filmora
Step 1. On your Windows or Mac system, launch the software and choose Media > Import> Import Media Files on the main interface.
Step 2. Next, choose and add the created animated sticker to the software interface. Alternatively, you can also select the sticker from Elements. Drag and drop the added sticker to the video.
Step 3. To adjust the parameters like the size and the rotation of the sticker, you need to double-click on the sticker at the timeline. Additionally, color adjustments can also be made and if needed, you can also add 3D motion.
Step 4. To change the size and the location of the sticker, you need to drag it accordingly in
the viewer panel.
Step 5. Next, at the Local tab, choose the video format, resolution, and desktop folder. Finally, click on the Export button to start processing.
Note: The created video can also be saved to DVD or can be uploaded to YouTube and Vimeo directly using the software.
● Key Takeaways from This Episode →
●The latest GIF sticker feature of WhatsApp allows adding interesting animations to your chats.
●To create customized GIF stickers on Android and iPhone, third-party apps have to be used.
●The customized stickers can also be added to your videos using Wondershare Filmora.
Guide on How to Create GIF in WhatsApp iPhone
2024 Guide on How to Create GIF in WhatsApp iPhone
An easy yet powerful editor
Numerous effects to choose from
Detailed tutorials provided by the official channel
Standing for Graphics Interchange Format, GIF is short animated images that you can see all over social media sites and other online platforms. These interesting animations can also be shared during your conversations on WhatsApp.

So, if you too are looking for ways to create as well as send GIFs on WhatsApp iPhone, you are on the right page. Keep reading to know all the possible ways to send WhatsApp GIFs on iPhone.
In this article
01 [How to send WhatsApp GIF from the integrated library on iPhone](#Part 1)
02 [How to send Live Photos as WhatsApp GIF on iPhone](#Part 2)
03 [How to create WhatsApp GIF using videos on iPhone](#Part 3)
04 [How to create excellent GIF effortlessly using Wondershare Filmora- All in One video editing software](#Part 4)
Part 1 How to send WhatsApp GIF from the integrated library on iPhone
If you have the latest version of WhatsApp installed on your phone, you can easily and quickly send the GIF from the integrated library having a collection of GIFs in several categories. The steps to send GIF in WhatsApp iPhone are as below.
Step 1. On your iPhone, launch WhatsApp and open the contact or a group to which you wish to send the GIF.
Step 2. Click on the Stickers icon at the typing section and then choose the GIF option at the bottom.
Step 3. Multiple GIFs in different categories will appear. You can further search for the desired GIF using a keyword at the search icon at the bottom-left corner. The list of the Recents and the Favorites can also be searched using their respective icons.
Note: To save any particular GIF in the favorites list, tap and hold the GIF and then click on Add To Favorites option.
StepTap on the selected GIF and then click on the Send icon at the bottom-right corner. Your WhatsApp GIF iPhone will be sent.

Part 2 How to send Live Photos as WhatsApp GIF on iPhone
Live Photos on your iPhone can also be sent as GIFs in WhatsApp conversations and the steps for the same are as below.
Note: The feature is available for users having iPhone 6 or later versions.
Step 1.Open the WhatsApp contact on your iPhone to whom you wish to send the GIF. Click on the + icon and then choose the option of Photo & Video Library.
Step 2. Search for the Live photo in your gallery and then press it. When the image pops out, slide upwards and then click on the Select as GIF option.
Step 3. Tap on the Send icon to share the selected Live photo as GIF.

Part 3 How to create WhatsApp GIF using videos on iPhone
In addition to the integrated library, you can also convert the videos on your iPhone to GIF and share them on WhatsApp. To be used as GIF, the length of the videos cannot be more than 6 seconds. Thus, for a larger video, you need to trim it to be under 6 seconds. Steps to get the task done are as follows.
Step 1.Launch WhatsApp on your iPhone and select the contact to which you want to share the GIF. Next, click on + sign and then choose Photo & Video Library option.
Step 2.Select the desired video from your phone gallery.
Step 3.After the video is added, an editing screen will open. Here you can trim the video to make it under 6 seconds using the slider at the top. Further changes can be made like adding a sticker, text, or making a freehand drawing.
Step 4.After all customizations are done, click on the GIF button.
Step 5.Finally, tap on the Send icon at the bottom-right corner to send the edited video as GIF.

Part 4 How to create excellent GIF effortlessly using Wondershare Filmora- All in One video editing software
WhatsApp in your iPhone has a built-in option to create GIFs using the videos on the device. Though the process is simple, the option for editing and customizations are limited. So, if you want to create GIFs using videos online and with advanced editing tools, we suggest using Wondershare Filmora Video Editor .
This all-in-one video editing software will let you edit and customize your files in several ways and in a few simple steps, your desired GIF will be ready.
Wondershare Filmora
Get started easily with Filmora’s powerful performance, intuitive interface, and countless effects!
Try It Free Try It Free Try It Free Learn More >

Key features of the software
● Add media files in all ley formats like MP4, MOV, MKV, PNG, and others to create GIFs.
● Simple and quick steps for creating the desired animation.
● Allows to customize the GIF using functions like slow-down, crop, rotate, and many more.
● Allows adding text, voice, and other elements.
● Option to share the created GIF to Vimeo, and YouTube directly.
● Software support to all latest Windows and Mac systems.
Steps to create WhatsApp GIF using Wondershare Filmora.
Step 1.Open the installed software on your system and import the desired images and videos from your system.
Step 2.Drag and drop the added videos and images to the timeline.

Step 3.Edit the file using features like crop, rotate, split, and others.
Step 4.Add text and other elements as needed.

Step 5.At the Local tab, save the customized media as GIF. Select the file name and the destination and then finally, click on the EXPORT button to start processing.
● Key Takeaways from This Episode →
●Gifs for WhatsApp iPhone can be added from the integrated library.
●Live Photos, as well as videos, can also be used to create and share them as GIF.
●For creating interesting and funny GIF in a hassle-free manner, Wondershare Filmora works as the best software.
Standing for Graphics Interchange Format, GIF is short animated images that you can see all over social media sites and other online platforms. These interesting animations can also be shared during your conversations on WhatsApp.
So, if you too are looking for ways to create as well as send GIFs on WhatsApp iPhone, you are on the right page. Keep reading to know all the possible ways to send WhatsApp GIFs on iPhone.
In this article
01 [How to send WhatsApp GIF from the integrated library on iPhone](#Part 1)
02 [How to send Live Photos as WhatsApp GIF on iPhone](#Part 2)
03 [How to create WhatsApp GIF using videos on iPhone](#Part 3)
04 [How to create excellent GIF effortlessly using Wondershare Filmora- All in One video editing software](#Part 4)
Part 1 How to send WhatsApp GIF from the integrated library on iPhone
If you have the latest version of WhatsApp installed on your phone, you can easily and quickly send the GIF from the integrated library having a collection of GIFs in several categories. The steps to send GIF in WhatsApp iPhone are as below.
Step 1. On your iPhone, launch WhatsApp and open the contact or a group to which you wish to send the GIF.
Step 2. Click on the Stickers icon at the typing section and then choose the GIF option at the bottom.
Step 3. Multiple GIFs in different categories will appear. You can further search for the desired GIF using a keyword at the search icon at the bottom-left corner. The list of the Recents and the Favorites can also be searched using their respective icons.
Note: To save any particular GIF in the favorites list, tap and hold the GIF and then click on Add To Favorites option.
StepTap on the selected GIF and then click on the Send icon at the bottom-right corner. Your WhatsApp GIF iPhone will be sent.
Part 2 How to send Live Photos as WhatsApp GIF on iPhone
Live Photos on your iPhone can also be sent as GIFs in WhatsApp conversations and the steps for the same are as below.
Note: The feature is available for users having iPhone 6 or later versions.
Step 1.Open the WhatsApp contact on your iPhone to whom you wish to send the GIF. Click on the + icon and then choose the option of Photo & Video Library.
Step 2. Search for the Live photo in your gallery and then press it. When the image pops out, slide upwards and then click on the Select as GIF option.
Step 3. Tap on the Send icon to share the selected Live photo as GIF.
Part 3 How to create WhatsApp GIF using videos on iPhone
In addition to the integrated library, you can also convert the videos on your iPhone to GIF and share them on WhatsApp. To be used as GIF, the length of the videos cannot be more than 6 seconds. Thus, for a larger video, you need to trim it to be under 6 seconds. Steps to get the task done are as follows.
Step 1.Launch WhatsApp on your iPhone and select the contact to which you want to share the GIF. Next, click on + sign and then choose Photo & Video Library option.
Step 2.Select the desired video from your phone gallery.
Step 3.After the video is added, an editing screen will open. Here you can trim the video to make it under 6 seconds using the slider at the top. Further changes can be made like adding a sticker, text, or making a freehand drawing.
Step 4.After all customizations are done, click on the GIF button.
Step 5.Finally, tap on the Send icon at the bottom-right corner to send the edited video as GIF.
Part 4 How to create excellent GIF effortlessly using Wondershare Filmora- All in One video editing software
WhatsApp in your iPhone has a built-in option to create GIFs using the videos on the device. Though the process is simple, the option for editing and customizations are limited. So, if you want to create GIFs using videos online and with advanced editing tools, we suggest using Wondershare Filmora Video Editor .
This all-in-one video editing software will let you edit and customize your files in several ways and in a few simple steps, your desired GIF will be ready.
Wondershare Filmora
Get started easily with Filmora’s powerful performance, intuitive interface, and countless effects!
Try It Free Try It Free Try It Free Learn More >
Key features of the software
● Add media files in all ley formats like MP4, MOV, MKV, PNG, and others to create GIFs.
● Simple and quick steps for creating the desired animation.
● Allows to customize the GIF using functions like slow-down, crop, rotate, and many more.
● Allows adding text, voice, and other elements.
● Option to share the created GIF to Vimeo, and YouTube directly.
● Software support to all latest Windows and Mac systems.
Steps to create WhatsApp GIF using Wondershare Filmora.
Step 1.Open the installed software on your system and import the desired images and videos from your system.
Step 2.Drag and drop the added videos and images to the timeline.
Step 3.Edit the file using features like crop, rotate, split, and others.
Step 4.Add text and other elements as needed.
Step 5.At the Local tab, save the customized media as GIF. Select the file name and the destination and then finally, click on the EXPORT button to start processing.
● Key Takeaways from This Episode →
●Gifs for WhatsApp iPhone can be added from the integrated library.
●Live Photos, as well as videos, can also be used to create and share them as GIF.
●For creating interesting and funny GIF in a hassle-free manner, Wondershare Filmora works as the best software.
How to Make Photo Motion Effect Online?
Versatile Video Editor - Wondershare Filmora
An easy yet powerful editor
Numerous effects to choose from
Detailed tutorials provided by the official channel
It’s no wonder that the latest technology involving animated images or GIFs has become the prominent attraction center.
These loops are hilarious sometimes and can be used to express what words can’t. What if you wish to create a photo motion effect online with free-to-use animated video software of your choice? Are you also looking for the same?
Well! You can do this yourself now. With the help of this guide article, we will discuss some beneficial motion blur effect online makers that will provide information on how to animate a picture or add a photo motion effect online. So, let’s begin working on those tools and start making our GIFs.
In this article
01 [What is the photo motion effect?](#Part 1)
02 [Websites for photo motion effect online](#Part 2)
03 [Samples for a photo motion effect](#Part 3)
Part 1 What is the photo motion effect?
The photo motion effect online is ideal for creating an animation with your DSLR or still camera. It is just as it feels, the motion through photographs. Usually, with moving photo effects online, the camera is the one moving, along with its subjects. But, we aren’t concerned with the camera usage here as we’re just looking for the effect.
These are a little different than stop-motion, which generally has the fixed subjects are the only things moving bit by bit.
1. Create a Plan
Consider shooting an event or location. Also, ensure there will be lots of movement and motion and movement if it’s an event. Also, consider or brainstorm how you want the camera to move about the space if you’re shooting at a particular location. It could be you only hovering around with the camera, or you could strap it to a bike and take a ride.
2. Click lots of Photos
Keep shooting lots of photos! Most cameras consist of a burst setting, where you can set it to click an image every few seconds. Or, you may tap the shutter button yourself.
3. Import & Edit
Once you finish shooting tons of images, you must get them on your PC to animate them. And, this is where the need for photo motion effect online maker comes in handy. So, let’s discuss them more in further sections without any delay!
Part 2 Websites for photo motion effect online
The following photo motion effect online makers help you transform a static image into a dynamic image in just a few minutes. Some of them even allow you to add or remove things that weren’t in the original shape to your photos. And, they are helpful for both professional designers and beginner photographers or editors.
1. Movepic – Photo Motion

Price: Free, VIP subscription begins from $1.99 per month and consists of a 7-day free trial.
Movepic is a beginner-friendly photo motion effect online maker that you’ll love most probably. Inside the app, you’ll find the standard tools like directional animation, camera motion, and speed controls.
The software also contains a vast gallery of effects that you can use to improve and entirely convert your photo into a dynamic animation. The software recognizes photo elements like the water or sky and contains a variety of animated filters to convert scenery into one from another world.
The only downside is its watermark over your animated picture while you export the project through the accessible version of the app.
2. PixaMotion

Price: Free.
PixaMotion is a free photo motion effect online maker that can do it all pretty much well. Thanks to the sleek modern design, the app is also simple to use. You can animate your photo, add moving elements and audio, and different filters from the app’s gallery to it. The main agenda behind the app is making short loop animations.
PixaMotion contains a few different animation modes. For example, you can select whether you want to animate the entire photo or just some of your photo elements.
You can also select to save it as GIF or video after you’re ok with the completed animated picture. PixaMotion includes a paid subscription, but even the app’s free version allows you to download your photos without a watermark.
3. GIFMaker.me
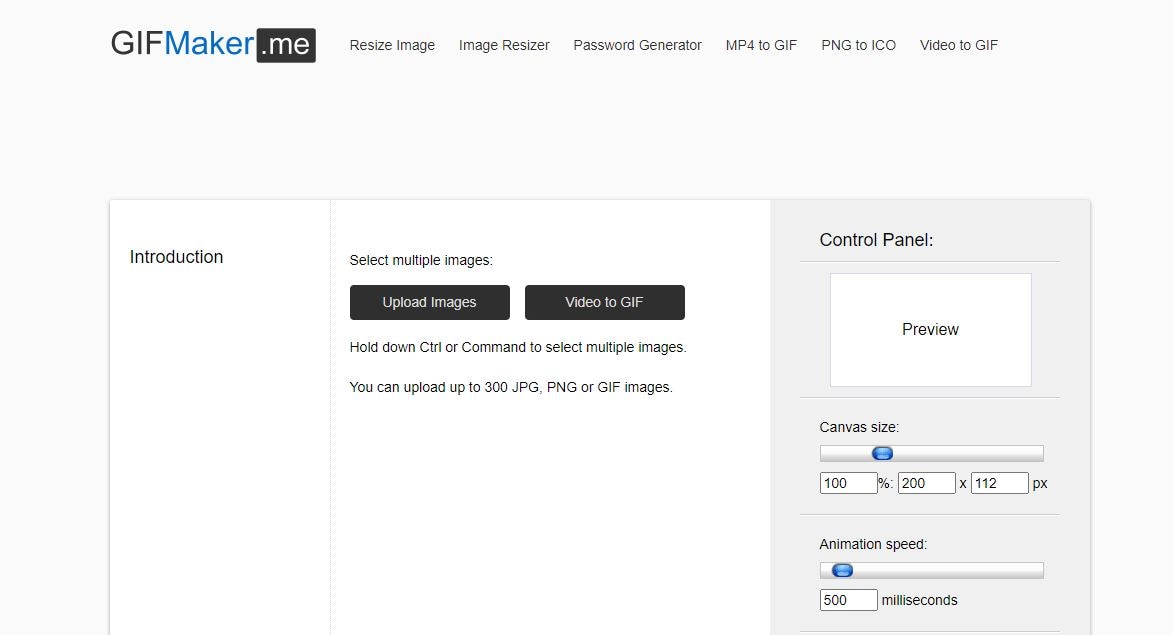
Price: Free.
If you don’t wish to download any apps or hustle through the registration process, you can use GIFMaker.me as another photo motion effect online maker. This tool helps you to animate still images online as well as transform videos into GIFs.
Compared to different apps available on this list, GIFMaker. I am less sophisticated. The app needs you to upload each image or frame separately to create an animated GIF. The 300 is the maximum number of images you can upload here with ease.
Select the desirable canvas size, animation speed, how many times you want the loop to repeat, and hit the Create GIF Animation tab after you’re all done and ready to upload. Moreover, you can upload an audio URL to add music to your GIF.
Part 3 Samples for a photo motion effect
1. Cinemagraphs

This effect has been around since about 2011, so you’ve probably seen a few already. It has all the photo properties, except there’s always some little piece of it that feels to be moving magically. The only technique for getting this photo motion effect online is to take a little bit of video and work on it.
2. Plotagraph
A Plotagraph, at first glance, is an essence of morphing technique that can seem a bit like a Cinemagraph, the effect mentioned above. The difference is that you start with a photograph in this Plotagraph and not a video. And instead of pulling a video’s piece to use as animated sections, you’re making the animation out of your image.
3. Photoshop Timeline
Many people don’t realize that Photoshop has assisted you in importing and working on a video for five years. This sample is so great because Photoshop is a much more intuitive and deep program for us photographers. You can go with elements like masks, layers, and retouching in it. Or, you can use any moving photo effect online makers mentioned above to recreate an almost similar effect with fewer complexities.
Wondershare Filmora
Get started easily with Filmora’s powerful performance, intuitive interface, and countless effects!
Try It Free Try It Free Try It Free Learn More >
AI Portrait – The best feature of Wondershare Filmora for gameplay editing
The AI Portrait is a new add-on in Wondershare Filmora. It can easily remove video backgrounds without using a green screen or chroma key, allowing you to add borders, glitch effects, pixelated, noise, or segmentation video effects.

Conclusion
At last, we hope your question, “how to find the best photo motion effect online maker,” has the answer now. We gave multiple solutions to this question, and not one. With these motion blur effect online makers, you can quickly get what you long for. Despite these, you can also consider using Filmora that can be valuable on different platforms for animations. So enjoy doing animations and creating funny and helpful GIFs. Thanks for reading this article!
It’s no wonder that the latest technology involving animated images or GIFs has become the prominent attraction center.
These loops are hilarious sometimes and can be used to express what words can’t. What if you wish to create a photo motion effect online with free-to-use animated video software of your choice? Are you also looking for the same?
Well! You can do this yourself now. With the help of this guide article, we will discuss some beneficial motion blur effect online makers that will provide information on how to animate a picture or add a photo motion effect online. So, let’s begin working on those tools and start making our GIFs.
In this article
01 [What is the photo motion effect?](#Part 1)
02 [Websites for photo motion effect online](#Part 2)
03 [Samples for a photo motion effect](#Part 3)
Part 1 What is the photo motion effect?
The photo motion effect online is ideal for creating an animation with your DSLR or still camera. It is just as it feels, the motion through photographs. Usually, with moving photo effects online, the camera is the one moving, along with its subjects. But, we aren’t concerned with the camera usage here as we’re just looking for the effect.
These are a little different than stop-motion, which generally has the fixed subjects are the only things moving bit by bit.
1. Create a Plan
Consider shooting an event or location. Also, ensure there will be lots of movement and motion and movement if it’s an event. Also, consider or brainstorm how you want the camera to move about the space if you’re shooting at a particular location. It could be you only hovering around with the camera, or you could strap it to a bike and take a ride.
2. Click lots of Photos
Keep shooting lots of photos! Most cameras consist of a burst setting, where you can set it to click an image every few seconds. Or, you may tap the shutter button yourself.
3. Import & Edit
Once you finish shooting tons of images, you must get them on your PC to animate them. And, this is where the need for photo motion effect online maker comes in handy. So, let’s discuss them more in further sections without any delay!
Part 2 Websites for photo motion effect online
The following photo motion effect online makers help you transform a static image into a dynamic image in just a few minutes. Some of them even allow you to add or remove things that weren’t in the original shape to your photos. And, they are helpful for both professional designers and beginner photographers or editors.
1. Movepic – Photo Motion
Price: Free, VIP subscription begins from $1.99 per month and consists of a 7-day free trial.
Movepic is a beginner-friendly photo motion effect online maker that you’ll love most probably. Inside the app, you’ll find the standard tools like directional animation, camera motion, and speed controls.
The software also contains a vast gallery of effects that you can use to improve and entirely convert your photo into a dynamic animation. The software recognizes photo elements like the water or sky and contains a variety of animated filters to convert scenery into one from another world.
The only downside is its watermark over your animated picture while you export the project through the accessible version of the app.
2. PixaMotion
Price: Free.
PixaMotion is a free photo motion effect online maker that can do it all pretty much well. Thanks to the sleek modern design, the app is also simple to use. You can animate your photo, add moving elements and audio, and different filters from the app’s gallery to it. The main agenda behind the app is making short loop animations.
PixaMotion contains a few different animation modes. For example, you can select whether you want to animate the entire photo or just some of your photo elements.
You can also select to save it as GIF or video after you’re ok with the completed animated picture. PixaMotion includes a paid subscription, but even the app’s free version allows you to download your photos without a watermark.
3. GIFMaker.me
Price: Free.
If you don’t wish to download any apps or hustle through the registration process, you can use GIFMaker.me as another photo motion effect online maker. This tool helps you to animate still images online as well as transform videos into GIFs.
Compared to different apps available on this list, GIFMaker. I am less sophisticated. The app needs you to upload each image or frame separately to create an animated GIF. The 300 is the maximum number of images you can upload here with ease.
Select the desirable canvas size, animation speed, how many times you want the loop to repeat, and hit the Create GIF Animation tab after you’re all done and ready to upload. Moreover, you can upload an audio URL to add music to your GIF.
Part 3 Samples for a photo motion effect
1. Cinemagraphs
This effect has been around since about 2011, so you’ve probably seen a few already. It has all the photo properties, except there’s always some little piece of it that feels to be moving magically. The only technique for getting this photo motion effect online is to take a little bit of video and work on it.
2. Plotagraph
A Plotagraph, at first glance, is an essence of morphing technique that can seem a bit like a Cinemagraph, the effect mentioned above. The difference is that you start with a photograph in this Plotagraph and not a video. And instead of pulling a video’s piece to use as animated sections, you’re making the animation out of your image.
3. Photoshop Timeline
Many people don’t realize that Photoshop has assisted you in importing and working on a video for five years. This sample is so great because Photoshop is a much more intuitive and deep program for us photographers. You can go with elements like masks, layers, and retouching in it. Or, you can use any moving photo effect online makers mentioned above to recreate an almost similar effect with fewer complexities.
Wondershare Filmora
Get started easily with Filmora’s powerful performance, intuitive interface, and countless effects!
Try It Free Try It Free Try It Free Learn More >
AI Portrait – The best feature of Wondershare Filmora for gameplay editing
The AI Portrait is a new add-on in Wondershare Filmora. It can easily remove video backgrounds without using a green screen or chroma key, allowing you to add borders, glitch effects, pixelated, noise, or segmentation video effects.
Conclusion
At last, we hope your question, “how to find the best photo motion effect online maker,” has the answer now. We gave multiple solutions to this question, and not one. With these motion blur effect online makers, you can quickly get what you long for. Despite these, you can also consider using Filmora that can be valuable on different platforms for animations. So enjoy doing animations and creating funny and helpful GIFs. Thanks for reading this article!
Before You Learn Facebook Slideshow: 5 Things You Should Know [How-TOS]
Before You Learn Facebook Slideshow Things You Should Know [How-TOS]
An easy yet powerful editor
Numerous effects to choose from
Detailed tutorials provided by the official channel
If you are looking for interesting solutions to create the most amazing slideshow on Facebook, rest assured, you are at the right place to get every help!
In this article
01 [Where Did the Facebook Slideshow Tool Go?](#Part 1)
02 [How to Create a Slideshow on Facebook?](#Part 2)
03 [Top 5 Facebook Slideshow Alternatives](#Part 3)
Part 1 Where Did the Facebook Slideshow Tool Go?
While almost everyone around you must be fascinated about the stunning and appealing slideshows that the Facebook community used to offer its users with, it is evidently sad to realize that the utility has become a story of the past. The creators of the tool have by now, took multiple rounds on removing, retrieving and again removing the utility from the official Facebook website as well as the smartphone application.
It is however relaxing to know that the Facebook developer team has worked efficiently to produce alternatives to the application’s slideshow tool after the latter’s permanent disappearance from the user account pages and app profiles. You can now work with the Facebook Ads Manager or Facebook Creator Studio to sort out the concern of creating slideshow on Facebook.
Part 2 How to Create a Slideshow on Facebook?
Facebook slideshows are incredibly awesome trends of making a concise, expressive and to the point delivery of diverse content varieties. Piping up your information through and extensive assortment of sound, text and motion, these short snippets are no less than a seamless video streaming of the same information.
If you are about to launch a new product for your business enterprise, consider working with the utility to create an elusive Facebook slideshow ad for a quick demonstration of your brand among different social media communities, turning the fun of slideshow creation into a smart and responsive product promotion strategy, without having to bother your wallet for the same.
If you are concerned about the quality of the final output, it is not a cause of worry, since the Facebook slideshow creator tool promises you of an appreciable slideshow result, that takes a quick loading time, is comparable to a high resolution video and works well with all your favourite devices.
Having talked enough on the usage credibility, let us now proceed to adhere to the concern of creating a slideshow on Facebook with a diversity of media files in the following section:
01Facebook Slideshows from Videos
Step 1: Launch the Tool
Start with opening the Facebook app in your device to launch the ‘Facebook Ads Manager’ utility and tap ‘Create’ in the latter’s welcome interface.

Step 2: Select Your Video
Browse through your device’s gallery to choose a desired video for slideshow creation. When you have made your choice, set a 16:9 aspect ratio for the same to avoid square cropping.

Step 3: Upload Your Video
Proceed with uploading your video to the Facebook tool by clicking on the ‘Add Video’ button and watch it getting split into still images frames, from where you can view a seamless slideshow display of the same.

Step 4: Select Multiple Frames
you can now select a series of image frames and arrange them in the correct sequence of appearance by clicking on each one of them to be included within the creator timeline.
Step 5: Add Captions Your Stills
Tap on the small ‘Pencil’ icon within the images to customize them with suitable captions. You can further add style to these image names by making appropriate selections of font, position color of every frame caption. Once you have finished naming all the frames, click on ‘Save’ to apply your changes.
Step 6: Preview Your Creation
When you are satisfied with your work, consider watching a preview of the same to be assured of the perfect placement of everything. To do this, navigate to the ‘Preview Pane’ at the top right corner of the program interface, and tapping the ‘Preview’ button.
02Facebook Slideshows from Images
Step 1: Launch the Tool
To begin with, open the Facebook app in any of your preferred devices and proceed to launch the ‘Facebook Ads Manager’ tool, followed by clicking on the ‘Create Slideshow’ button at the bottom of the tool’s welcome screen.

Step 2: Upload Your Images
As you complete Step 1, a ‘Video Creation Kit’ will appear, where you will need to click within the ‘Create Slideshow’ checkbox, followed by tapping on the ‘Continue’ button at the bottom right corner of the window.

Step 3: Upload Your Images
Clicking on the ‘Continue’ button will take you to the ‘Settings Box’ where you need to tap on the ‘Add Photos’ option. An image selection box will now pop up, allowing you to select and upload a maximum of 10 images from your Facebook account, stock and page galleries or your device collections. Prefer keeping all the photos within the same aspect ratio to escape the extra task of cropping the images.
When you have finished making your selections, navigate to the bottom right corner of the window and hit the ‘Confirm’ button. This will make your selections shows up all together in the ‘Settings Box’, in the sequential order of their appearance in the slideshow. If you want to introduce some changes, delete and re-upload the images.

Step 4: Customize Your Images with Captions
To add suitable captions to the slideshow images, tap the ‘Pencil’ icon within them. You are also allowed to customize the stills with transitions, effects, etc., and make adjustments to the screen time of each image frame.

Part 3 Top 5 Facebook Slideshow Alternatives
Having heard about the disappointment from the exit of the Facebook slideshow creator tool, it becomes naturally important to seek through the affordable alternatives of the same to set straight the issue of how to do a slideshow on Facebook. Working towards the solutions, let us learn about the top 5 most preferred Facebook slideshow alternatives in the following section:
03PowerDirector
One of the most suitable candidates of Facebook slideshow alternatives, PowerDirector easily lands among the highly preferred tools for creating stunning slideshows. Compatible with the MacOs and Windows operating systems, the software lets you create high end, top quality slideshow presentations with a classic and professional outlook.
Talking of the creator program’s most appealing features, this one is an upgraded slideshow creator suite that is capable enough to address your most diverse design requirements, like those of high resolution video effects, Hollywood inspired movies and personal content sharing. The software package is loaded with tons of elusive video effects, themed templates and transition effects to facilitate a compelling creation.
Working with PowerDirector’s exclusive slideshow program, you get the liberty to escape the notch of storyboard and timeline editing and start the creation process in the launch window of the program itself. The extremely user cohesive interface of the software guides you through each creation step via streamlined plug-ins, making the design process quick and super easy even for newbies.

04SmartSHOW 3D
When thinking of how to make a slideshow on facebook, this one is another top rated Facebook slideshow alternatives, that comes with an extensive toolkit to create amazing presentations from video clips and images, while complementing them with a plethora of effects and transitions. Some of the key features of the program include multiple slide layering, animating selected layers and fine tune the transitions with keyframe adjustments.
You can additionally uplift the slides with image masks, shapes, 3D animated texts and other forms of graphic arts. An additively appealing feature of the slideshow creator program is the ability to mix descriptive images with your favorite music to develop stunning masterpieces of entertaining slideshows, which you can conveniently share and enjoy with family and friends on a diversity of social media platforms.
Using the tool, you can work with applying motion graphic effects to still photos without having to be an over the top tech savvy user. The editor library of the tool is loaded with some of the most awesome transition effects, like, wipes, 3D motions, gradients and fade-ins, along with the facility of adding titles, voice comments and captions to the slides of your presentation. The tool is however, exclusively a Windows compatible utility.

05PhotoStage Slideshow Software
Next in the list of alternatives to the Facebook slideshow maker tool is the aforesaid software program, that allows you to create professional quality slideshows with as many videos and images as you can possibly think of and supplement them with a variety of texts, music, voiceovers and effects. You can further work on customizing the slideshow images with making suitable adjustments in color, brightness and saturation parameters.
The software comes with a Quick Create utility, which you can use to instantly create high resolution slideshows and spark them up with zooms, pans and fades, while getting a preview of the same in real-time. You can even proceed to burn your creation into a disk, make an online upload, or simply save it to your device.
Talking of the cost constraints of this amazing slideshow creator tool, you get to work with the software for a commercial use, free of cost for a definite time period and with a restricted number of features. However, you can always consider on buying the paid version of the program to avail an access to the latter’s entire range of features and utilities. The tool works well with all Windows and Mac supported devices.

06Kizoa
Moving ahead in the list you have the Kizoa slideshow maker for Facebook, which is a dependable alternative to the conventional Facebook slideshow creator. Choosing this tool to design your slideshow presentation, you are entitled to the amazing feature of displaying your presentation on almost any screen, including smartphones, television, computers and tablets with getting to choose from 7 types of aspect ratios. The tool is designed to have a Windows and MacOs compatibility.
The application further lets you add the most specific parts of your images within the presentation slides with its smart cropping tool, while keeping an account of the file formats and screen space requirements of the images with utmost convenience. You are also allowed to choose from a storehouse of preset templates to add your desired photos and video clips in the slideshow and entice them with GIFs, effects and texts.
When you are done with the creation process, just attempt to download and save the slideshow in any preferred file format, such as, AVI, GIF, MP4, MOV, MPEG2, etc., or even burn it to a DVD. You are now free to share your slideshow on various online media sharing platforms. Using the free version of Kizoa, you are permitted to create slideshows with a duration of 60 seconds, which can be upgraded to a limitless length with a paid subscription.

07SlideLab
If you are a newbie to the field of creating slideshows, and wondering about how to create a slideshow on Facebook 2021, this one is affordably the most perfect tool you can rely on. Packed with an extensive range of effects, music, transitions and filters, SlideLab is the smartest software choice to create slideshow presentations for family entertainment and personal use.
The tool consists of an in built sharing utility that allows you to design and share slideshows on social media platforms, like YouTube, Facebook and Instagram with a single click. Working on your slideshow within the program, you can escape the cringe of cropping the images, as they are automatically adjusted to the square fit alignment of the app’s working window. You can quickly rearrange the placement of the images in the slideshow as per your preferences.
As far as the sharing credibility of the presentation is concerned, the software grants you the liberty to export your creation in PPTX and PDF file formats, and view them later in Keynote and PowerPoint.
The app shows a convenient workflow with Windows and MacOs devices and limits the image play duration to 3 seconds, along with a permitting a restricted number of transitions and effects in its free version, which you can access by availing a paid subscription of the program.

08Creating Facebook Slideshows With Wondershare Filmora
When browsing through feasible alternatives on how to make a facebook slideshow, the IT market is indeed flooded with a hoard of creation utilities. If you have just begun trying hands at slideshow creation, consider using the Wondershare Filmora Video Editor slideshow maker application for addressing your slideshow design concerns. The extensive, feature rich library of the app lets you create attractive presentation masterpieces with a wide range of special effects, transitions, texts, titles and music tracks.
For Win 7 or later (64-bit)
For macOS 10.12 or later
Working with the Filmora slideshow creator, you can trim, crop or cut the video clips and images of your presentation to give them the best look. The tool comes with a unique Filmora Template Mode to create business oriented Facebook slideshows, is compatible to any windows and Mac supported device and lets you easily make a slideshow on Facebook.
● Ending Thoughts →
● Creating Facebook slideshows can be useful in addressing a variety of personal and professional data sharing needs.
● Browsing through design alternatives, you will land across a pool of software choices to create stunning slideshows for Facebook.
● When deciding on the best Facebook slideshow creator tool, Wondershare Filmora can be your smartest pick.
If you are looking for interesting solutions to create the most amazing slideshow on Facebook, rest assured, you are at the right place to get every help!
In this article
01 [Where Did the Facebook Slideshow Tool Go?](#Part 1)
02 [How to Create a Slideshow on Facebook?](#Part 2)
03 [Top 5 Facebook Slideshow Alternatives](#Part 3)
Part 1 Where Did the Facebook Slideshow Tool Go?
While almost everyone around you must be fascinated about the stunning and appealing slideshows that the Facebook community used to offer its users with, it is evidently sad to realize that the utility has become a story of the past. The creators of the tool have by now, took multiple rounds on removing, retrieving and again removing the utility from the official Facebook website as well as the smartphone application.
It is however relaxing to know that the Facebook developer team has worked efficiently to produce alternatives to the application’s slideshow tool after the latter’s permanent disappearance from the user account pages and app profiles. You can now work with the Facebook Ads Manager or Facebook Creator Studio to sort out the concern of creating slideshow on Facebook.
Part 2 How to Create a Slideshow on Facebook?
Facebook slideshows are incredibly awesome trends of making a concise, expressive and to the point delivery of diverse content varieties. Piping up your information through and extensive assortment of sound, text and motion, these short snippets are no less than a seamless video streaming of the same information.
If you are about to launch a new product for your business enterprise, consider working with the utility to create an elusive Facebook slideshow ad for a quick demonstration of your brand among different social media communities, turning the fun of slideshow creation into a smart and responsive product promotion strategy, without having to bother your wallet for the same.
If you are concerned about the quality of the final output, it is not a cause of worry, since the Facebook slideshow creator tool promises you of an appreciable slideshow result, that takes a quick loading time, is comparable to a high resolution video and works well with all your favourite devices.
Having talked enough on the usage credibility, let us now proceed to adhere to the concern of creating a slideshow on Facebook with a diversity of media files in the following section:
01Facebook Slideshows from Videos
Step 1: Launch the Tool
Start with opening the Facebook app in your device to launch the ‘Facebook Ads Manager’ utility and tap ‘Create’ in the latter’s welcome interface.
Step 2: Select Your Video
Browse through your device’s gallery to choose a desired video for slideshow creation. When you have made your choice, set a 16:9 aspect ratio for the same to avoid square cropping.
Step 3: Upload Your Video
Proceed with uploading your video to the Facebook tool by clicking on the ‘Add Video’ button and watch it getting split into still images frames, from where you can view a seamless slideshow display of the same.
Step 4: Select Multiple Frames
you can now select a series of image frames and arrange them in the correct sequence of appearance by clicking on each one of them to be included within the creator timeline.
Step 5: Add Captions Your Stills
Tap on the small ‘Pencil’ icon within the images to customize them with suitable captions. You can further add style to these image names by making appropriate selections of font, position color of every frame caption. Once you have finished naming all the frames, click on ‘Save’ to apply your changes.
Step 6: Preview Your Creation
When you are satisfied with your work, consider watching a preview of the same to be assured of the perfect placement of everything. To do this, navigate to the ‘Preview Pane’ at the top right corner of the program interface, and tapping the ‘Preview’ button.
02Facebook Slideshows from Images
Step 1: Launch the Tool
To begin with, open the Facebook app in any of your preferred devices and proceed to launch the ‘Facebook Ads Manager’ tool, followed by clicking on the ‘Create Slideshow’ button at the bottom of the tool’s welcome screen.
Step 2: Upload Your Images
As you complete Step 1, a ‘Video Creation Kit’ will appear, where you will need to click within the ‘Create Slideshow’ checkbox, followed by tapping on the ‘Continue’ button at the bottom right corner of the window.
Step 3: Upload Your Images
Clicking on the ‘Continue’ button will take you to the ‘Settings Box’ where you need to tap on the ‘Add Photos’ option. An image selection box will now pop up, allowing you to select and upload a maximum of 10 images from your Facebook account, stock and page galleries or your device collections. Prefer keeping all the photos within the same aspect ratio to escape the extra task of cropping the images.
When you have finished making your selections, navigate to the bottom right corner of the window and hit the ‘Confirm’ button. This will make your selections shows up all together in the ‘Settings Box’, in the sequential order of their appearance in the slideshow. If you want to introduce some changes, delete and re-upload the images.
Step 4: Customize Your Images with Captions
To add suitable captions to the slideshow images, tap the ‘Pencil’ icon within them. You are also allowed to customize the stills with transitions, effects, etc., and make adjustments to the screen time of each image frame.
Part 3 Top 5 Facebook Slideshow Alternatives
Having heard about the disappointment from the exit of the Facebook slideshow creator tool, it becomes naturally important to seek through the affordable alternatives of the same to set straight the issue of how to do a slideshow on Facebook. Working towards the solutions, let us learn about the top 5 most preferred Facebook slideshow alternatives in the following section:
03PowerDirector
One of the most suitable candidates of Facebook slideshow alternatives, PowerDirector easily lands among the highly preferred tools for creating stunning slideshows. Compatible with the MacOs and Windows operating systems, the software lets you create high end, top quality slideshow presentations with a classic and professional outlook.
Talking of the creator program’s most appealing features, this one is an upgraded slideshow creator suite that is capable enough to address your most diverse design requirements, like those of high resolution video effects, Hollywood inspired movies and personal content sharing. The software package is loaded with tons of elusive video effects, themed templates and transition effects to facilitate a compelling creation.
Working with PowerDirector’s exclusive slideshow program, you get the liberty to escape the notch of storyboard and timeline editing and start the creation process in the launch window of the program itself. The extremely user cohesive interface of the software guides you through each creation step via streamlined plug-ins, making the design process quick and super easy even for newbies.
04SmartSHOW 3D
When thinking of how to make a slideshow on facebook, this one is another top rated Facebook slideshow alternatives, that comes with an extensive toolkit to create amazing presentations from video clips and images, while complementing them with a plethora of effects and transitions. Some of the key features of the program include multiple slide layering, animating selected layers and fine tune the transitions with keyframe adjustments.
You can additionally uplift the slides with image masks, shapes, 3D animated texts and other forms of graphic arts. An additively appealing feature of the slideshow creator program is the ability to mix descriptive images with your favorite music to develop stunning masterpieces of entertaining slideshows, which you can conveniently share and enjoy with family and friends on a diversity of social media platforms.
Using the tool, you can work with applying motion graphic effects to still photos without having to be an over the top tech savvy user. The editor library of the tool is loaded with some of the most awesome transition effects, like, wipes, 3D motions, gradients and fade-ins, along with the facility of adding titles, voice comments and captions to the slides of your presentation. The tool is however, exclusively a Windows compatible utility.
05PhotoStage Slideshow Software
Next in the list of alternatives to the Facebook slideshow maker tool is the aforesaid software program, that allows you to create professional quality slideshows with as many videos and images as you can possibly think of and supplement them with a variety of texts, music, voiceovers and effects. You can further work on customizing the slideshow images with making suitable adjustments in color, brightness and saturation parameters.
The software comes with a Quick Create utility, which you can use to instantly create high resolution slideshows and spark them up with zooms, pans and fades, while getting a preview of the same in real-time. You can even proceed to burn your creation into a disk, make an online upload, or simply save it to your device.
Talking of the cost constraints of this amazing slideshow creator tool, you get to work with the software for a commercial use, free of cost for a definite time period and with a restricted number of features. However, you can always consider on buying the paid version of the program to avail an access to the latter’s entire range of features and utilities. The tool works well with all Windows and Mac supported devices.
06Kizoa
Moving ahead in the list you have the Kizoa slideshow maker for Facebook, which is a dependable alternative to the conventional Facebook slideshow creator. Choosing this tool to design your slideshow presentation, you are entitled to the amazing feature of displaying your presentation on almost any screen, including smartphones, television, computers and tablets with getting to choose from 7 types of aspect ratios. The tool is designed to have a Windows and MacOs compatibility.
The application further lets you add the most specific parts of your images within the presentation slides with its smart cropping tool, while keeping an account of the file formats and screen space requirements of the images with utmost convenience. You are also allowed to choose from a storehouse of preset templates to add your desired photos and video clips in the slideshow and entice them with GIFs, effects and texts.
When you are done with the creation process, just attempt to download and save the slideshow in any preferred file format, such as, AVI, GIF, MP4, MOV, MPEG2, etc., or even burn it to a DVD. You are now free to share your slideshow on various online media sharing platforms. Using the free version of Kizoa, you are permitted to create slideshows with a duration of 60 seconds, which can be upgraded to a limitless length with a paid subscription.
07SlideLab
If you are a newbie to the field of creating slideshows, and wondering about how to create a slideshow on Facebook 2021, this one is affordably the most perfect tool you can rely on. Packed with an extensive range of effects, music, transitions and filters, SlideLab is the smartest software choice to create slideshow presentations for family entertainment and personal use.
The tool consists of an in built sharing utility that allows you to design and share slideshows on social media platforms, like YouTube, Facebook and Instagram with a single click. Working on your slideshow within the program, you can escape the cringe of cropping the images, as they are automatically adjusted to the square fit alignment of the app’s working window. You can quickly rearrange the placement of the images in the slideshow as per your preferences.
As far as the sharing credibility of the presentation is concerned, the software grants you the liberty to export your creation in PPTX and PDF file formats, and view them later in Keynote and PowerPoint.
The app shows a convenient workflow with Windows and MacOs devices and limits the image play duration to 3 seconds, along with a permitting a restricted number of transitions and effects in its free version, which you can access by availing a paid subscription of the program.
08Creating Facebook Slideshows With Wondershare Filmora
When browsing through feasible alternatives on how to make a facebook slideshow, the IT market is indeed flooded with a hoard of creation utilities. If you have just begun trying hands at slideshow creation, consider using the Wondershare Filmora Video Editor slideshow maker application for addressing your slideshow design concerns. The extensive, feature rich library of the app lets you create attractive presentation masterpieces with a wide range of special effects, transitions, texts, titles and music tracks.
For Win 7 or later (64-bit)
For macOS 10.12 or later
Working with the Filmora slideshow creator, you can trim, crop or cut the video clips and images of your presentation to give them the best look. The tool comes with a unique Filmora Template Mode to create business oriented Facebook slideshows, is compatible to any windows and Mac supported device and lets you easily make a slideshow on Facebook.
● Ending Thoughts →
● Creating Facebook slideshows can be useful in addressing a variety of personal and professional data sharing needs.
● Browsing through design alternatives, you will land across a pool of software choices to create stunning slideshows for Facebook.
● When deciding on the best Facebook slideshow creator tool, Wondershare Filmora can be your smartest pick.
Top 10 Best and Fast Ways to Turn Image Into Gif
[Top 10] Best and Fast Ways to Turn Image into Gif
An easy yet powerful editor
Numerous effects to choose from
Detailed tutorials provided by the official channel
There are in fact ways to turn an image into GIF easily We’ll be showing off a couple of some of the easier ways below, including in-depth tutorials of some of the best methods so that you will no longer have to be troubled.
These tutorials, of course, will focus on teaching you how to create GIF from photos If that’s something you’re interested in, continue reading
In this article
01 [Why GIF?](#Part 1)
02 [How to Add an Image to a GIF?](#Part 2)
Part 1 Why GIF?
Before we move on to the tutorials, let’s do a brief account on GIF files We’ve also answered some of the more common questions regarding using a GIF image maker below for your edification
But, first: Why GIF? Well, it all comes down to what you’re looking for A lot of people use GIF files to create animated icons that they can use for their accounts. Some just genuinely want to create a GIF file that they can share with their friends and families (either for a laugh or something else) GIF files are a convenient vessel for doing this because they have a lot of flexibility and are accepted by most platforms
01Why Gif from My Images Are Blurry?
One of the biggest issues people tend to have when turning an image into GIF is that they come out of the process with a blurry end-product. No one wants that But, how are you supposed to avoid it? Well, it all depends on the tool that you’re using and your initial picture For the former, it’s best to review the upload requirements of your chosen GIF maker to get a better end result. For the latter, it’s best to pick a good, high-quality GIF creator for a better outcome
02There Are Jaggy Strokes Around Gif?
Another issue that you might suffer from while trying to create GIFs from photos is jaggy or raggedy strokes around the GIF when converted. These occur often with GIF makers that support transparency If you find these happening to you, adjust the transparency settings to get rid of the white pixel outline around your converted GIF.
Part 2 How to Add an Image to a GIF?
Now it’s finally time for the tutorials that we promised at the beginning of this article These tutorials will range from online to software solutions — so that you can get a clear idea of what you can expect from all these different GIF makers. To be more specific, we’ll be demonstrating with an online images to GIF converter, how to create animated GIF photoshop, and how to easily turn any image into GIF with the photo GIF creator, Wondershare Filmora Video Editor.
01Image to GIF: How to Turn Photos into Animated GIFs
For our first tutorial, we’re going to be demonstrating how to create GIF from photos with an online photo GIF creator More specifically, we’ll be demonstrating with Loading.IO, which is an online tool that you can use to create animated icons for your profiles or on your video content It comes with several animation options and other settings that you can use to quickly create GIFs from photos
**Step 1: Go to Loading.IO
Of course, we start off this tutorial by opening the GIF maker. In this case, since the tool is hosted online, that’s as easy as opening the link that we’ve provided below It will take you directly to the online GIF creator.
URL: https://loading.io/animation/icon/

**Step 2: Upload Photo
Once on-site, it’s time to upload the photo that you want to turn into a GIF As this is an icon creator, you should pick a photo with the proper parameters
To upload your icon for animating, select the ‘Upload’ button and browse your computer or your Google Drive for the image in question.

**Step 3: Choose animation Style
Next, choose how you want the uploaded photo to be animated Loading.IO offers a couple of animations that you can choose from Including the ‘beat’ animation, which is what we choose for our example

**Step 4: Adjust Settings
This step is technically optional, as there are default settings already prepared if you have no other specifications for your image-turned GIF. But, if you want, you can adjust certain settings for a better outcome
For example, you can speed up the animation with the ‘Speed’ slider. Or, you can increase the number of times the GIF loops by adjusting the ‘Repeat’ slider. Test out a couple of settings to get the best result

**Step 5: Download as GIF
To wrap things up, it’s time to download your finished animation Loading.IO gives several options for this. But, of course, in our case, we choose to ‘Download As: GIF’

02How to Make an Animated GIF in Photoshop [Tutorial]
For the next tutorial, we’ll be showing you how to use Photoshop to create and edit an animated GIF This process is fairly lengthy and is not recommended for beginners. But, it is a very professional method of creating an animated GIF — one that will allow you to control every step of the process (which may be exactly what you want)
**Step 1: Import Images into an Image Stack
First, starting on a new product, upload the images that you want to turn into a GIF into a photoshop ‘Image Stack’. This can be done by clicking the ‘File’ tab and selecting the ‘Scripts > Load Files into Stack…’ option
Afterward, a pop-up window will appear where you will be prompted to browse your computer for the aforementioned images Click ‘OK’ when done

**Step 2: Organize Layers
Check the ‘Layers’ panel for the images that you uploaded and organize them based on how you want them to appear for your animated GIF

**Step 3: (Optional) Import Video
If you want to work on a video to turn into a GIF instead, you can do such by selecting the ‘File’ tab and clicking on the ‘Import > Video Frames to Layers…’ option. This will get you to the same place shown in Step 2
Note: Just be careful that you do not transfer an image that is too long Photoshop may not be able to properly break it down, if so.

**Step 4: Open Timeline Then Create Frame Animation
Next, in order to start working on your animation, open the Timeline Window This can be done by clicking the ‘Window’ tab and selecting ‘Timeline’
With the ‘Timeline’ Window now open, select the ‘Create Frame Animation’ option to begin working

**Step 5: Make Frame from Layers
In order to transfer your uploaded images from the ‘Layers’ panel to your timeline, select the ‘Menu’ option on the top-right hand corner of the ‘Timeline’ window and select the ‘Make Frames From Layers’ option

**Step 6: Preview Animation and Adjust as Needed
To preview your animation, click the ‘Play’ button This is the best time to check that your frames have been organized correctly If they are not, you can adjust them by dragging and dropping them on the timeline.
OR, you can use the ‘Reverse Frames’ option if your animation has been completely flipped around

**Step 7: Create an Animation Loop
In order to be a proper looped GIF, the animation should repeat endlessly You can make sure of this by changing the ‘Repeat’ option to ‘Forever’ (as is shown in the image below).

**Step 8: Export Finished Animation to Gif
In order to finish turning your image into GIF, you’ll need to export it in the proper format This is possible by selecting the ‘File’ tab and then clicking the ‘Export > Save for Web (Legacy)…’ option
A pop-up window should appear where you can control export settings Do so in order to ensure that you have the best outcome

03How To Make an Animated GIF in Wondershare Filmora Video Editor (Fast & Easy)
For Win 7 or later (64-bit)
For macOS 10.12 or later
For our last tutorial, we’ll be showing you how to make an animated GIF with the use of Wondershare Wondershare Filmora Video Editor . Filmora is a video editor, one that is used by professionals all over to produce high-quality content And, of course, as a video editor, it works just as well as a GIF maker. One that you can use to create images into a GIF easily
**Step 1: Launch Filmora
First, download and install Filmora If you want to follow along with this demonstration, you can Wondershare offers a FREE trial where you can test out all of the software’s functions before making a commitment

Step 2: Upload Video to Turn into GIF
For this next step, we do something akin to what we did earlier with Photoshop. And that is to upload images or a video to fit into a timeline
This process is started by first uploading images, which you can do by clicking the ‘File’ tab and selecting the ‘Import Media > Import Media Files’ option

**Step 3: Drag Media to Timeline
With Filmora, the ‘Timeline’ window is already open Also, you won’t have to do anything complicated to get your media onto the said timeline. Just drag and drop it from the Media library (as is shown in the image below).

**Step 4: Edit or Adjust GIF
Before moving forward, you should take this chance to make adjustments to the media that you uploaded into your timeline There are many things that you can do at this stage so feel free to experiment
For our example, we cut down the video that we uploaded by using the ‘Trim’ option (which you can find by right-clicking on video media).

**Step 5: Export into GIF
Finally, to finish us off, we export our finished GIF This can be done by selecting the ‘Export’ tab and then clicking the ‘Create Video’ option A pop-up window will appear where you can adjust export settings

● Key Takeaways from This Episode →
● GIFs are fun and easy-to-share content It’s accepted by most platforms and can even be used to create professional, animated icons to be added to video content
● The process of turning an image into a GIF can be a bit tricky. But, don’t worry, so long as you start with high-quality media and use a reliable Photo-GIF Creator, then you should be fine
● If you’re struggling with turning your images into GIFs, check out one of the tutorials that we’ve offered We specifically chose the three GIF creators that we demonstrated to offer multiple methods that you can choose from
There are in fact ways to turn an image into GIF easily We’ll be showing off a couple of some of the easier ways below, including in-depth tutorials of some of the best methods so that you will no longer have to be troubled.
These tutorials, of course, will focus on teaching you how to create GIF from photos If that’s something you’re interested in, continue reading
In this article
01 [Why GIF?](#Part 1)
02 [How to Add an Image to a GIF?](#Part 2)
Part 1 Why GIF?
Before we move on to the tutorials, let’s do a brief account on GIF files We’ve also answered some of the more common questions regarding using a GIF image maker below for your edification
But, first: Why GIF? Well, it all comes down to what you’re looking for A lot of people use GIF files to create animated icons that they can use for their accounts. Some just genuinely want to create a GIF file that they can share with their friends and families (either for a laugh or something else) GIF files are a convenient vessel for doing this because they have a lot of flexibility and are accepted by most platforms
01Why Gif from My Images Are Blurry?
One of the biggest issues people tend to have when turning an image into GIF is that they come out of the process with a blurry end-product. No one wants that But, how are you supposed to avoid it? Well, it all depends on the tool that you’re using and your initial picture For the former, it’s best to review the upload requirements of your chosen GIF maker to get a better end result. For the latter, it’s best to pick a good, high-quality GIF creator for a better outcome
02There Are Jaggy Strokes Around Gif?
Another issue that you might suffer from while trying to create GIFs from photos is jaggy or raggedy strokes around the GIF when converted. These occur often with GIF makers that support transparency If you find these happening to you, adjust the transparency settings to get rid of the white pixel outline around your converted GIF.
Part 2 How to Add an Image to a GIF?
Now it’s finally time for the tutorials that we promised at the beginning of this article These tutorials will range from online to software solutions — so that you can get a clear idea of what you can expect from all these different GIF makers. To be more specific, we’ll be demonstrating with an online images to GIF converter, how to create animated GIF photoshop, and how to easily turn any image into GIF with the photo GIF creator, Wondershare Filmora Video Editor.
01Image to GIF: How to Turn Photos into Animated GIFs
For our first tutorial, we’re going to be demonstrating how to create GIF from photos with an online photo GIF creator More specifically, we’ll be demonstrating with Loading.IO, which is an online tool that you can use to create animated icons for your profiles or on your video content It comes with several animation options and other settings that you can use to quickly create GIFs from photos
**Step 1: Go to Loading.IO
Of course, we start off this tutorial by opening the GIF maker. In this case, since the tool is hosted online, that’s as easy as opening the link that we’ve provided below It will take you directly to the online GIF creator.
URL: https://loading.io/animation/icon/
**Step 2: Upload Photo
Once on-site, it’s time to upload the photo that you want to turn into a GIF As this is an icon creator, you should pick a photo with the proper parameters
To upload your icon for animating, select the ‘Upload’ button and browse your computer or your Google Drive for the image in question.
**Step 3: Choose animation Style
Next, choose how you want the uploaded photo to be animated Loading.IO offers a couple of animations that you can choose from Including the ‘beat’ animation, which is what we choose for our example
**Step 4: Adjust Settings
This step is technically optional, as there are default settings already prepared if you have no other specifications for your image-turned GIF. But, if you want, you can adjust certain settings for a better outcome
For example, you can speed up the animation with the ‘Speed’ slider. Or, you can increase the number of times the GIF loops by adjusting the ‘Repeat’ slider. Test out a couple of settings to get the best result
**Step 5: Download as GIF
To wrap things up, it’s time to download your finished animation Loading.IO gives several options for this. But, of course, in our case, we choose to ‘Download As: GIF’
02How to Make an Animated GIF in Photoshop [Tutorial]
For the next tutorial, we’ll be showing you how to use Photoshop to create and edit an animated GIF This process is fairly lengthy and is not recommended for beginners. But, it is a very professional method of creating an animated GIF — one that will allow you to control every step of the process (which may be exactly what you want)
**Step 1: Import Images into an Image Stack
First, starting on a new product, upload the images that you want to turn into a GIF into a photoshop ‘Image Stack’. This can be done by clicking the ‘File’ tab and selecting the ‘Scripts > Load Files into Stack…’ option
Afterward, a pop-up window will appear where you will be prompted to browse your computer for the aforementioned images Click ‘OK’ when done
**Step 2: Organize Layers
Check the ‘Layers’ panel for the images that you uploaded and organize them based on how you want them to appear for your animated GIF
**Step 3: (Optional) Import Video
If you want to work on a video to turn into a GIF instead, you can do such by selecting the ‘File’ tab and clicking on the ‘Import > Video Frames to Layers…’ option. This will get you to the same place shown in Step 2
Note: Just be careful that you do not transfer an image that is too long Photoshop may not be able to properly break it down, if so.
**Step 4: Open Timeline Then Create Frame Animation
Next, in order to start working on your animation, open the Timeline Window This can be done by clicking the ‘Window’ tab and selecting ‘Timeline’
With the ‘Timeline’ Window now open, select the ‘Create Frame Animation’ option to begin working
**Step 5: Make Frame from Layers
In order to transfer your uploaded images from the ‘Layers’ panel to your timeline, select the ‘Menu’ option on the top-right hand corner of the ‘Timeline’ window and select the ‘Make Frames From Layers’ option
**Step 6: Preview Animation and Adjust as Needed
To preview your animation, click the ‘Play’ button This is the best time to check that your frames have been organized correctly If they are not, you can adjust them by dragging and dropping them on the timeline.
OR, you can use the ‘Reverse Frames’ option if your animation has been completely flipped around
**Step 7: Create an Animation Loop
In order to be a proper looped GIF, the animation should repeat endlessly You can make sure of this by changing the ‘Repeat’ option to ‘Forever’ (as is shown in the image below).
**Step 8: Export Finished Animation to Gif
In order to finish turning your image into GIF, you’ll need to export it in the proper format This is possible by selecting the ‘File’ tab and then clicking the ‘Export > Save for Web (Legacy)…’ option
A pop-up window should appear where you can control export settings Do so in order to ensure that you have the best outcome
03How To Make an Animated GIF in Wondershare Filmora Video Editor (Fast & Easy)
For Win 7 or later (64-bit)
For macOS 10.12 or later
For our last tutorial, we’ll be showing you how to make an animated GIF with the use of Wondershare Wondershare Filmora Video Editor . Filmora is a video editor, one that is used by professionals all over to produce high-quality content And, of course, as a video editor, it works just as well as a GIF maker. One that you can use to create images into a GIF easily
**Step 1: Launch Filmora
First, download and install Filmora If you want to follow along with this demonstration, you can Wondershare offers a FREE trial where you can test out all of the software’s functions before making a commitment
Step 2: Upload Video to Turn into GIF
For this next step, we do something akin to what we did earlier with Photoshop. And that is to upload images or a video to fit into a timeline
This process is started by first uploading images, which you can do by clicking the ‘File’ tab and selecting the ‘Import Media > Import Media Files’ option
**Step 3: Drag Media to Timeline
With Filmora, the ‘Timeline’ window is already open Also, you won’t have to do anything complicated to get your media onto the said timeline. Just drag and drop it from the Media library (as is shown in the image below).
**Step 4: Edit or Adjust GIF
Before moving forward, you should take this chance to make adjustments to the media that you uploaded into your timeline There are many things that you can do at this stage so feel free to experiment
For our example, we cut down the video that we uploaded by using the ‘Trim’ option (which you can find by right-clicking on video media).
**Step 5: Export into GIF
Finally, to finish us off, we export our finished GIF This can be done by selecting the ‘Export’ tab and then clicking the ‘Create Video’ option A pop-up window will appear where you can adjust export settings
● Key Takeaways from This Episode →
● GIFs are fun and easy-to-share content It’s accepted by most platforms and can even be used to create professional, animated icons to be added to video content
● The process of turning an image into a GIF can be a bit tricky. But, don’t worry, so long as you start with high-quality media and use a reliable Photo-GIF Creator, then you should be fine
● If you’re struggling with turning your images into GIFs, check out one of the tutorials that we’ve offered We specifically chose the three GIF creators that we demonstrated to offer multiple methods that you can choose from
Also read:
- 10 Top Tools to Make Pic Collage for Windows
- Updated 2024 Approved Learn About Lip-Syncing in Animation
- Updated 10 Realistic Cartoon Characters You Would Run Away From if You Met in Real Life
- In 2024, 10 Options for Your Need on Animation Makers
- Updated All About Types of Motion Graphics for 2024
- New In 2024, Best 8 Tools Tell You How to Make Slideshows for Instagram
- New How to Create Animated Video on Canva, In 2024
- Updated Top 10 Sketch Animation Video Makers for 2024
- 2024 Approved Ideas That Will Help You Out in Learning How to Send WhatsApp Animated Gifs
- In 2024, Tips to Create Animated Social Media Posts in Canva
- New In 2024, Methods to Make Photo Motion Effect Online?
- New In 2024, Top Tips for Effortless Unity 3D Animation
- In 2024, Are You Head Over Heels With 3D Animation Design?
- Updated Best GIF to Video Converters
- New 2024 Approved OBS Animated Lower Thirds Alternatives
- Updated In 2024, A Roster of 15 Best Disney Channel Cartoons
- How To Learn Cartoon Sketch Drawing for 2024
- New 2024 Approved How to Make an Animation With 7 Steps
- In 2024, How to Change Your Poco M6 5G Location on life360 Without Anyone Knowing? | Dr.fone
- In 2024, How To Unlock Poco C55 Phone Without Password?
- Fixing Persistent Pandora Crashes on Xiaomi 13T | Dr.fone
- How to Unlock a Network Locked Itel P40 Phone?
- The 10 Best Tools to Bypass iCloud Activation Lock From iPhone 12 You Should Try Out
- Apply These Techniques to Improve How to Detect Fake GPS Location On Honor X9b | Dr.fone
- Vivo X Fold 2 Video Recovery - Recover Deleted Videos from Vivo X Fold 2
- How to Screen Mirroring Motorola Moto G13? | Dr.fone
- In 2024, How to Enable, Disable, and Change Safari Location on Apple iPhone 8 Plus | Dr.fone
- In 2024, Pokémon Go Cooldown Chart On Oppo Reno 10 Pro 5G | Dr.fone
- Title: 2024 Approved A Roster of 15 Best Disney Channel Cartoons
- Author: Elon
- Created at : 2024-06-15 11:22:33
- Updated at : 2024-06-16 11:22:33
- Link: https://animation-videos.techidaily.com/2024-approved-a-roster-of-15-best-disney-channel-cartoons/
- License: This work is licensed under CC BY-NC-SA 4.0.
