

2024 Approved All About 3D Medical Animation And Its Uses
All About 3D Medical Animation And Its Uses
All About 3D Medical Animation And Its Uses
An easy yet powerful editor
Numerous effects to choose from
Detailed tutorials provided by the official channel
You can see the use of 3D animation in all spheres of life including the medical field. More and more professionals in the field of the healthcare industry are now using 3D animations for several different tasks like education, communication, marketing, and more.

So, if you too are keen to learn about 3D medical animation videos, their uses, popular companies, and other details, you are reading on the right page.
In this article
01 [What is 3D Medical Animation?](#Part 1)
02 [Uses of 3D Medical Animations](#Part 2)
03 [Benefits of Using 3D Medical Animations](#Part 3)
04 [Top 3D Animation Companies](#Part 4)
05 [The Best Tool to Edit Your 3D Medical Animated Video – Wondershare Filmora](#Part 4)
Part 1 What is 3D Medical Animation?
A 3D medical animation can be termed as an animation that is used for different tasks in the healthcare and medical industry. These animations are used for several different tasks like explaining and detailing the concepts to the patients, compelling the investors, training professionals, marketing devices and drugs, and more. Depending on the target audience, the animations can be created by taking the help of specialized industries or using animated software.
Part 2 Uses Of 3D Medical Animations
3D animations have proved to be useful in the healthcare and medical industry in several ways. Below we have gathered some of the key benefits of the same.
01Using As A Mode Of Communication With Patients
Communication with the patients is one of the major uses of 3D animation in the healthcare field. Using animations, the communication with the patients can be enhanced in several ways. Explaining complex medical conditions and procedures to patients is difficult and here the animations help to a great extent. Going through animation will make a patient well prepared to see the doctor and learn about his/her medical condition or procedure to be performed. Patients do not have medical knowledge and these animations help them to know their condition, scenario, and procedure in a simple way that they can understand.
02Training Of Medical Professionals
Medical professionals need to keep themselves updated with the latest trends and practices and for this, they need to undergo training from time to time. 3D animations for the topics to be studied help them in better understanding the concepts and the procedures. Moreover, animations also help in e-learning.
03Educating New Professionals
For the new students using 3D animations is a great way to teach complex medical topics which otherwise explaining them orally or visually are not that effective. Animations can be used to educate about different topics like the anatomy of a human body, medical procedures, drug mechanisms, use of devices, and more.
04Used As A Marketing Tool
Since the presentation of medical information is difficult, marketing in the healthcare industry is quite a challenge. Moreover, the investors do not possess any medical know-how and the task of marketing becomes even more difficult. Thus, using 3D medical animations can be helpful here to explain the products, devices, and other things. Marketing of medicines to patients can also be done using animated mascots and characters.
05Marketing To Medical Professional
While marketing products and devices to medical professionals is not difficult in terms of knowledge or know-how as they are from the medical background. But with multiple marketing teams approaching them, time is a limitation and thus presentation needs to be short yet informative which can be achieved through the use of animations. Moreover, these animations can be sent to professionals through emails or by sharing a website link.

Part 3 Benefits Of Using 3D Medical Animations
Above we have discussed several fields and uses of 3D medical animations. Several factors make these animations useful.
●Helps in offering an in-depth and detailed explanation of complex subjects.
●Offers broad scope of explanation and especially subjects that cannot be explained easily through images or orally.
●Visual presentations offer better recall of the topic and details.
●Engagement through animations is enhanced and better.
●3D medical animations look professional and thus appear to be more reliable.
●Animations can be created to cater to a wider audience and people for different subjects.
Part 4 Top 3D Animation Companies
Creating 3D medical animation is not like creating any other 3D animation as it not only requires technical know-how but also in-depth knowledge of the medical field. Thus, for creating 3D medical animations, take help from the companies that specialize in this field to create 3D medical animation videos. Below we have shortlisted some of the popular 3D medical animation company.
●DG Medical Animations
●The SGNY Group
●Fusion Medical Animation
●TMBA Inc
●Pixeldust Studios
●Indigo Productions
●Nanobot Medical Animation Studio
●MultiVision Digital
●ICom Creative
●INVIVO
●JLab Animation
These companies offer different 3D medical animation services and depending on your requirements, you can choose the best suitable one.

Part 5 The Best Tool To Edit Your 3d Medical Animated Video – Wondershare ** Wondershare Filmora Video Editor
Even if you have got a 3D medical animation video created by a professional company, several times, the need may arise to edit and customize it. In such situations, you would need a professional tool that can help in editing the video without affecting the quality and other details. Wondershare Wondershare Filmora Video Editor is one such excellent software that can be used for the task. This Windows and Mac-based tool comes with a feature-packed built-in editor that can let you edit the files quickly and in a hassle-free manner. Additionally, you can also create decent animations using multiple features of the software.
The interface is simple and user-friendly that making the task of video creation and editing simple.
Key features of the software
● Allows creating dynamic and lively videos using over 100 layers of media.
● Allows complete editing and customization of the video using the editor.
● Animations using keyframing and other features can be created.
● Enhance audio using features like background noise reduction, keyframe audio editing, audio equalizer, and more.
● Support to features likes stabilization, fisheye correction, speed controlling, advanced color correction, 3D LUTs, and more.
● Support to Windows and Mac.
For Win 7 or later (64-bit)
For macOS 10.12 or later
● Key Takeaways from This Episode →
● The use of 3D medical animation in the healthcare and medical industry has increased manifold.
● The 3D medical animations are used for communication with patients, training, marketing, educations, and other uses.
● Several professional and specialized industries can help you create 3D medical animations.
● To edit the created videos and create other decent ones, Wondershare Wondershare Filmora Video Editor works as a great option.
You can see the use of 3D animation in all spheres of life including the medical field. More and more professionals in the field of the healthcare industry are now using 3D animations for several different tasks like education, communication, marketing, and more.
So, if you too are keen to learn about 3D medical animation videos, their uses, popular companies, and other details, you are reading on the right page.
In this article
01 [What is 3D Medical Animation?](#Part 1)
02 [Uses of 3D Medical Animations](#Part 2)
03 [Benefits of Using 3D Medical Animations](#Part 3)
04 [Top 3D Animation Companies](#Part 4)
05 [The Best Tool to Edit Your 3D Medical Animated Video – Wondershare Filmora](#Part 4)
Part 1 What is 3D Medical Animation?
A 3D medical animation can be termed as an animation that is used for different tasks in the healthcare and medical industry. These animations are used for several different tasks like explaining and detailing the concepts to the patients, compelling the investors, training professionals, marketing devices and drugs, and more. Depending on the target audience, the animations can be created by taking the help of specialized industries or using animated software.
Part 2 Uses Of 3D Medical Animations
3D animations have proved to be useful in the healthcare and medical industry in several ways. Below we have gathered some of the key benefits of the same.
01Using As A Mode Of Communication With Patients
Communication with the patients is one of the major uses of 3D animation in the healthcare field. Using animations, the communication with the patients can be enhanced in several ways. Explaining complex medical conditions and procedures to patients is difficult and here the animations help to a great extent. Going through animation will make a patient well prepared to see the doctor and learn about his/her medical condition or procedure to be performed. Patients do not have medical knowledge and these animations help them to know their condition, scenario, and procedure in a simple way that they can understand.
02Training Of Medical Professionals
Medical professionals need to keep themselves updated with the latest trends and practices and for this, they need to undergo training from time to time. 3D animations for the topics to be studied help them in better understanding the concepts and the procedures. Moreover, animations also help in e-learning.
03Educating New Professionals
For the new students using 3D animations is a great way to teach complex medical topics which otherwise explaining them orally or visually are not that effective. Animations can be used to educate about different topics like the anatomy of a human body, medical procedures, drug mechanisms, use of devices, and more.
04Used As A Marketing Tool
Since the presentation of medical information is difficult, marketing in the healthcare industry is quite a challenge. Moreover, the investors do not possess any medical know-how and the task of marketing becomes even more difficult. Thus, using 3D medical animations can be helpful here to explain the products, devices, and other things. Marketing of medicines to patients can also be done using animated mascots and characters.
05Marketing To Medical Professional
While marketing products and devices to medical professionals is not difficult in terms of knowledge or know-how as they are from the medical background. But with multiple marketing teams approaching them, time is a limitation and thus presentation needs to be short yet informative which can be achieved through the use of animations. Moreover, these animations can be sent to professionals through emails or by sharing a website link.
Part 3 Benefits Of Using 3D Medical Animations
Above we have discussed several fields and uses of 3D medical animations. Several factors make these animations useful.
●Helps in offering an in-depth and detailed explanation of complex subjects.
●Offers broad scope of explanation and especially subjects that cannot be explained easily through images or orally.
●Visual presentations offer better recall of the topic and details.
●Engagement through animations is enhanced and better.
●3D medical animations look professional and thus appear to be more reliable.
●Animations can be created to cater to a wider audience and people for different subjects.
Part 4 Top 3D Animation Companies
Creating 3D medical animation is not like creating any other 3D animation as it not only requires technical know-how but also in-depth knowledge of the medical field. Thus, for creating 3D medical animations, take help from the companies that specialize in this field to create 3D medical animation videos. Below we have shortlisted some of the popular 3D medical animation company.
●DG Medical Animations
●The SGNY Group
●Fusion Medical Animation
●TMBA Inc
●Pixeldust Studios
●Indigo Productions
●Nanobot Medical Animation Studio
●MultiVision Digital
●ICom Creative
●INVIVO
●JLab Animation
These companies offer different 3D medical animation services and depending on your requirements, you can choose the best suitable one.
Part 5 The Best Tool To Edit Your 3d Medical Animated Video – Wondershare ** Wondershare Filmora Video Editor
Even if you have got a 3D medical animation video created by a professional company, several times, the need may arise to edit and customize it. In such situations, you would need a professional tool that can help in editing the video without affecting the quality and other details. Wondershare Wondershare Filmora Video Editor is one such excellent software that can be used for the task. This Windows and Mac-based tool comes with a feature-packed built-in editor that can let you edit the files quickly and in a hassle-free manner. Additionally, you can also create decent animations using multiple features of the software.
The interface is simple and user-friendly that making the task of video creation and editing simple.
Key features of the software
● Allows creating dynamic and lively videos using over 100 layers of media.
● Allows complete editing and customization of the video using the editor.
● Animations using keyframing and other features can be created.
● Enhance audio using features like background noise reduction, keyframe audio editing, audio equalizer, and more.
● Support to features likes stabilization, fisheye correction, speed controlling, advanced color correction, 3D LUTs, and more.
● Support to Windows and Mac.
For Win 7 or later (64-bit)
For macOS 10.12 or later
● Key Takeaways from This Episode →
● The use of 3D medical animation in the healthcare and medical industry has increased manifold.
● The 3D medical animations are used for communication with patients, training, marketing, educations, and other uses.
● Several professional and specialized industries can help you create 3D medical animations.
● To edit the created videos and create other decent ones, Wondershare Wondershare Filmora Video Editor works as a great option.
Beginners Guide for Learning 3D Animation
A Beginners Guide for Learning 3D Animation
An easy yet powerful editor
Numerous effects to choose from
Detailed tutorials provided by the official channel
“I am still finding it difficult to go into animation even after covering some basic concepts of animation, hardware, software, books, and courses. Is there a way I can learn 3D animation and graphic design courses quickly and easily?”
This guide will show you what professional 3D animators go through and share how you can start your animation career. Sit back and enjoy this all-encompassing and educating guide to learn 3D Animation for beginners!
In this article
01 [Should You Study 3D Animation?](#Part 1)
02 [Top 5 Programs for 3D Animation](#Part 2)
03 [The Best 10 Online Courses to Learn 3D Animation for Beginners](#Part 3)
04 [Recommended 3D Animation Learning Books and Resources](#Part 4)
Part 1 Should You Study 3D Animation?
3D animation is a graphic design technique that uses motions to bring props, characters, objects, etc., to life. For a long time, 3D animation has created TV shows, films, and games, but now it is widely used to create materials for businesses that help them advertise their services and products. The most common usage of 3D animation is creating three-dimensional moving objects and placing them in a digital environment. There is software used to generate these objects specifically for 3D animation with 3D animation courses online for free to learn how to use such software. This software helps 3D animators to create the illusion of movement needed to bring these objects to life.
As the popularity of 3D animation begins to grow, its usage also increases. 3D animation can be useful for the following:
● Many businesses use 3D animation for presentation and more examples and graphics.
● 3D animation is used in real estate as many apartment complexes use it to create interior and exterior renders for their properties. 3D animation allows renters or buyers to view the property without visiting it.
● 3D animation can also be valuable in the medical industry to create exciting graphics for presentation.
You can divide the process of 3D animation into three primary phases:
● Modeling: The modeling stage is how characters or objects get created. This stage can include scanning natural objects into a computer or using a modeling tool. Both methods are helpful and outstanding. When you scan real-world objects into your computer, it saves a lot of time; creating a model entirely by yourself using a tool will give you control over the entire look. Irrespective of the methods used, textures must be added to the character or objects before moving to the next stage.
● Animation and layout: At this stage, the created models are animated and positioned into a particular scene, first determining a layout by creating a set and adding objects into it. The characters and things must be animated by assigning animation variables, and then models within the scene can be given life through motion capture and keyframing.
● Rendering: This stage is where the scene generates into the finished image by using a specific software as the process of rendering cannot be handled by a typical computer
For learning 3D animation, practice, to make yourself perfect for getting your 3D animation as smooth and precise as you would like it to take some time. If your set goal is to create 3D characters, you first need to know how to recreate people in a digital form. According to the 3D animation forum, it takes at least eight months to learn how to animate if only you spend about three to four hours every day. It takes firm dedication to learn 3D animation and graphic design courses.
Part 2 Top 5 Programs for 3D Animation
Aside from the three basic phases involved in 3D animation, there are other individual steps that and needed in 3D animation and 3D animation graphic design courses which include:
● Step 1: creating the story and conceptualizing
● Step 2: making the 3D models
● Step 3: rigging, texturing, and animation
● Step 4: setting up the cameras and lightning
● Step 5: rendering
● Step 6: applying special effects and compositing
● Step 7: editing, music, and Foley
● Step 8: the final output
The best part of 3D animation is finding free animation programs without watermarks that are very useful for creating content on Windows and Mac. These best 3D animation courses include:
01Filmora
For Win 7 or later (64-bit)
For macOS 10.12 or later
Wondershare Filmora Video Editor is a straightforward and powerful animation software to create 3D animated text, shapes, elements, or transitions you want for your videos with its 800+ stunning effects. This software comes with a keyframing, green screen, video stabilization, color tuning, split and zoom, amongst others, that help you create precise and smooth animation effects. Filmora program works perfectly on your Windows and Mac computer.
02Blender
Blender is an open-source, powerful 3D animation software for professional users. This animation software does not easily make an image and mission since it focuses on 3D. It takes your animation projects to a whole new level as this program works perfectly on your Mac computer.
03DAZ Studio
DAZ Studio is a potent and completely free tool for 3D animation creation that lets you create short videos whether you are using this for pleasure or business. This 3D animation creator is complicated to use, and 3D effects are at the core focus of this software. This software is highly compatible with Windows 64 bit, and you can build a model, render, and pose animation within the skin texture level.
04Terragen

Terragen is a completely free 3D animation program for Windows tablets and computers. It allows you to create a photo-realistic CG environment and 3D animation that you want. The featured image gallery on this software homepage will give you a profound idea of the outcome when you use the program.
05Anim8or
Anim8or Easy free 3D animation program supports 3D modeler and Truetype fonts to meet your advanced needs. This program is difficult for beginners but allows you to create a unique work according to your needs.
Part 3 The Best 10 Online Courses to Learn 3D Animation for Beginners
There are online 3D animation courses for beginners to learn from and these courses include:
01Introduction to Voxel Art for Character Design by Zach Soares
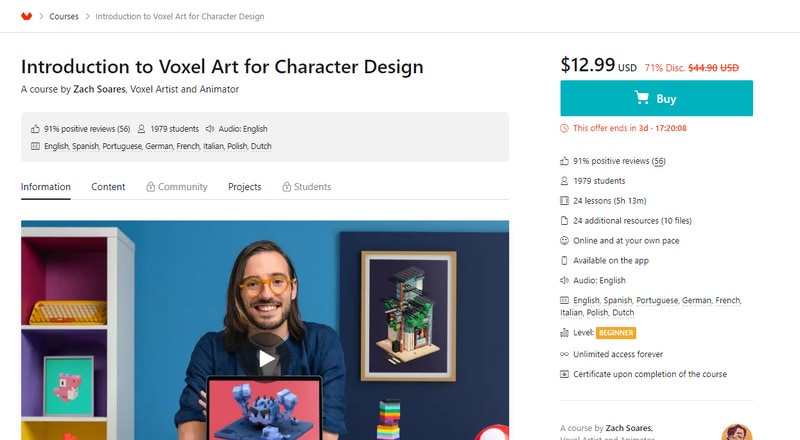
Price: $12.99
Certificate: Available upon completion of the course
02Psychedelic Animation with Photoshop and After Effects by Klarens Malluta
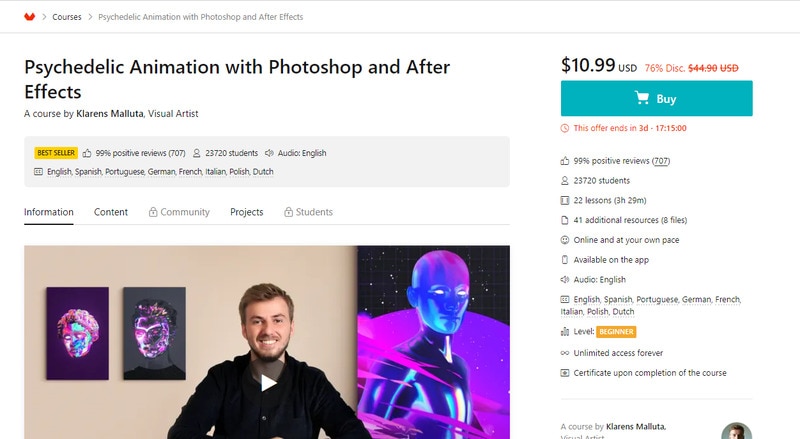
Price: $10.99
Certificate: Available upon completion of the course
032D and 3D Animation with After Effects and Cinema 4D by Andrea Gendusa
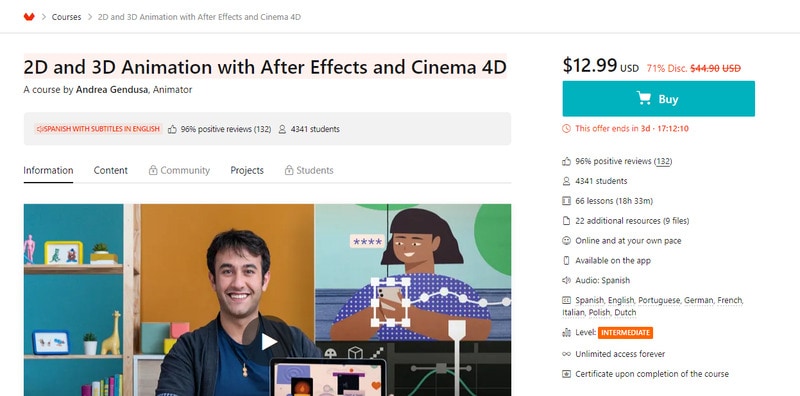
Price: $12.99
Certificate: Available upon completion of the course
04Blender for Beginners by Carlos Sifuentes Haro
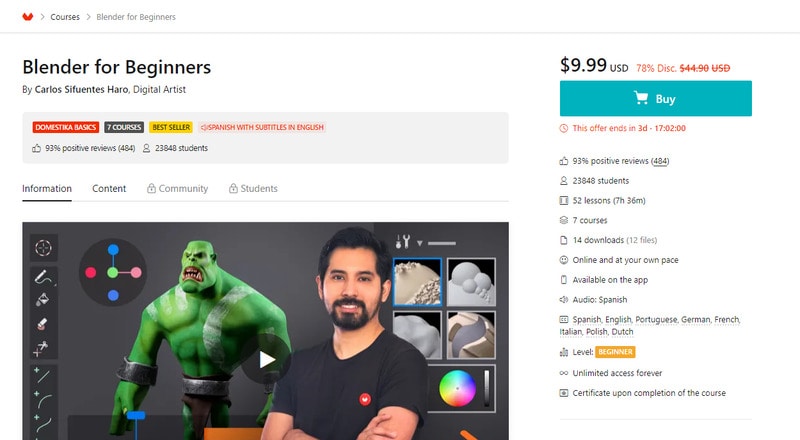
Price: $9.99
Certificate: Available upon completion of the course
05Adobe After Effects for Beginners by Manuel Neto
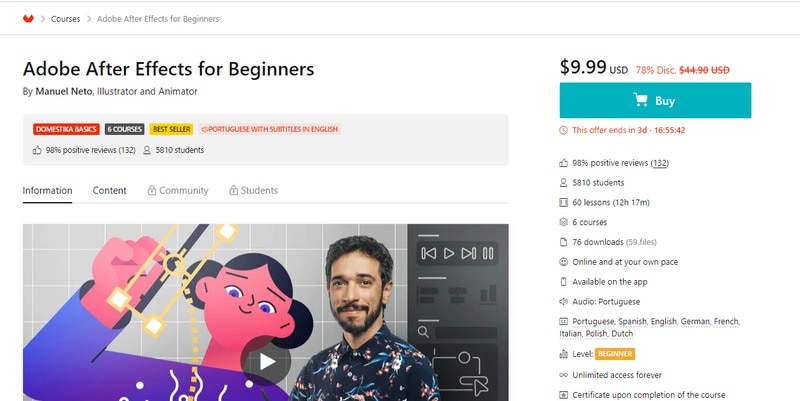
Price: $9.99
Certificate: Available upon completion of the course
06Animation for Typographic Compositions by Holke 79
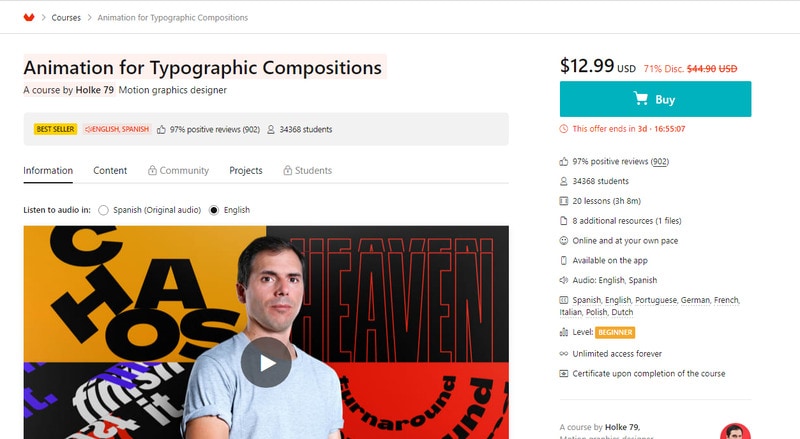
Price: $12.99
Certificate: Available upon completion of the course
07Adobe After Effects for Character Animation By Facundo López
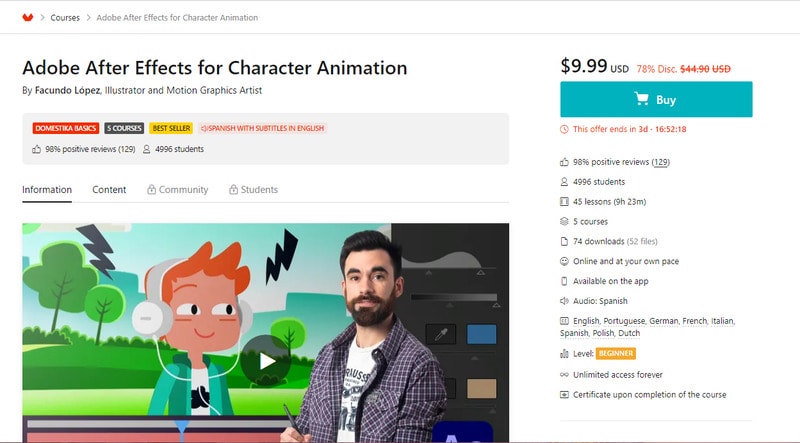
Price: $9.99
Certificate: Available upon completion of the course
08Animation Techniques with 3D Effects in After Effects by Moncho Massé
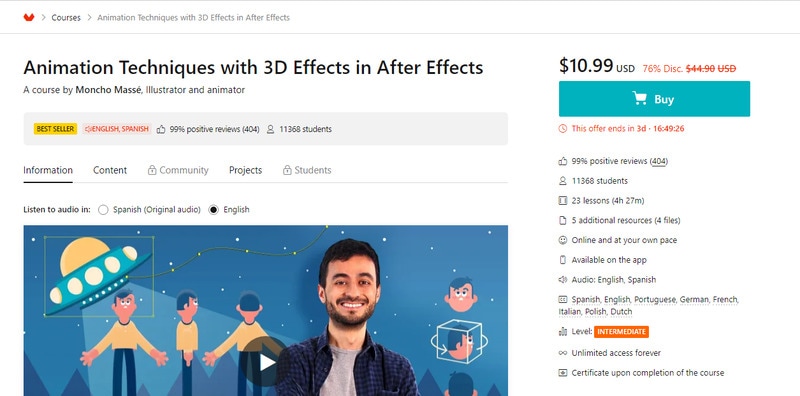
Price: $10.99
Certificate: Available upon completion of the course
093D Typography: Playing with Color and Volume by Thomas Burden
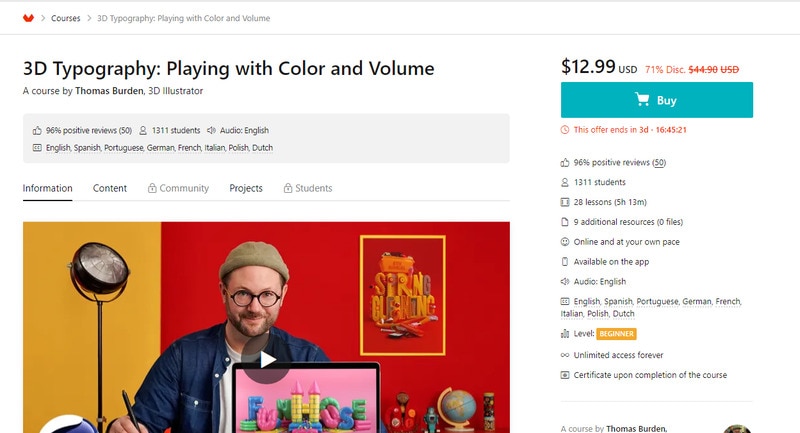
Price: $12.99
Certificate: Available upon completion of the course
103D Animation for Non Animators with Cinema 4D by Zigor Samaniego

Price: $11.99
Certificate: Certificate upon completion of the course
Part 4 Part 4 Recommended 3D Animation Learning Books and Resources
Learn 3D animation with the best 3D animation courses, learning books, and resources. Books and Resources for learning 3D animation include but are not limited to:
● 3D Animation Essentials by Andy Beane
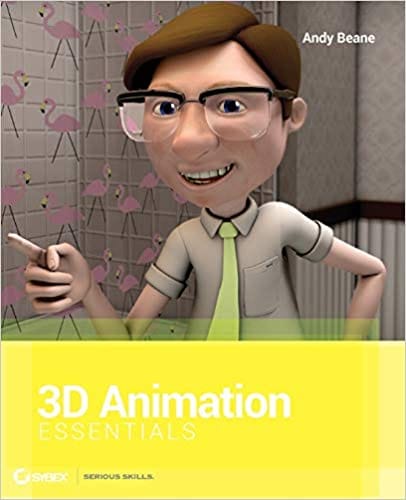
3D Animation Essentials by Andy Beane is a comprehensive book on the fundamentals and principles of 3D animation for films and video games.
● 3D Art Essential by Ami Chopine
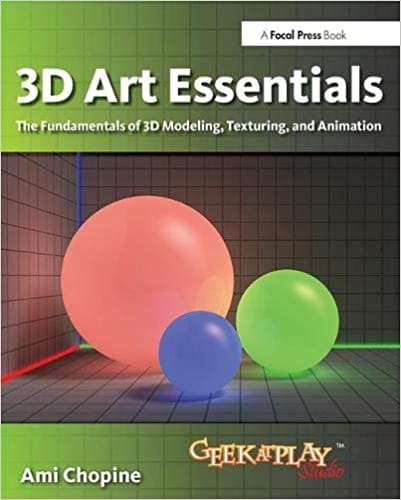
3D Art Essential by Ami Chopine is all about the hows and whys of 3D animation and teachers why certain techniques and styles work for a particular project.
● Key Takeaways from This Episode →
● Understanding 3D Animation
● Top 5 Programs used for learning 3D Animation
● The Best 10 Online 3D Animation Courses for Beginners
● 3D Animation Graphic Design Courses, Learning Books and Resources
“I am still finding it difficult to go into animation even after covering some basic concepts of animation, hardware, software, books, and courses. Is there a way I can learn 3D animation and graphic design courses quickly and easily?”
This guide will show you what professional 3D animators go through and share how you can start your animation career. Sit back and enjoy this all-encompassing and educating guide to learn 3D Animation for beginners!
In this article
01 [Should You Study 3D Animation?](#Part 1)
02 [Top 5 Programs for 3D Animation](#Part 2)
03 [The Best 10 Online Courses to Learn 3D Animation for Beginners](#Part 3)
04 [Recommended 3D Animation Learning Books and Resources](#Part 4)
Part 1 Should You Study 3D Animation?
3D animation is a graphic design technique that uses motions to bring props, characters, objects, etc., to life. For a long time, 3D animation has created TV shows, films, and games, but now it is widely used to create materials for businesses that help them advertise their services and products. The most common usage of 3D animation is creating three-dimensional moving objects and placing them in a digital environment. There is software used to generate these objects specifically for 3D animation with 3D animation courses online for free to learn how to use such software. This software helps 3D animators to create the illusion of movement needed to bring these objects to life.
As the popularity of 3D animation begins to grow, its usage also increases. 3D animation can be useful for the following:
● Many businesses use 3D animation for presentation and more examples and graphics.
● 3D animation is used in real estate as many apartment complexes use it to create interior and exterior renders for their properties. 3D animation allows renters or buyers to view the property without visiting it.
● 3D animation can also be valuable in the medical industry to create exciting graphics for presentation.
You can divide the process of 3D animation into three primary phases:
● Modeling: The modeling stage is how characters or objects get created. This stage can include scanning natural objects into a computer or using a modeling tool. Both methods are helpful and outstanding. When you scan real-world objects into your computer, it saves a lot of time; creating a model entirely by yourself using a tool will give you control over the entire look. Irrespective of the methods used, textures must be added to the character or objects before moving to the next stage.
● Animation and layout: At this stage, the created models are animated and positioned into a particular scene, first determining a layout by creating a set and adding objects into it. The characters and things must be animated by assigning animation variables, and then models within the scene can be given life through motion capture and keyframing.
● Rendering: This stage is where the scene generates into the finished image by using a specific software as the process of rendering cannot be handled by a typical computer
For learning 3D animation, practice, to make yourself perfect for getting your 3D animation as smooth and precise as you would like it to take some time. If your set goal is to create 3D characters, you first need to know how to recreate people in a digital form. According to the 3D animation forum, it takes at least eight months to learn how to animate if only you spend about three to four hours every day. It takes firm dedication to learn 3D animation and graphic design courses.
Part 2 Top 5 Programs for 3D Animation
Aside from the three basic phases involved in 3D animation, there are other individual steps that and needed in 3D animation and 3D animation graphic design courses which include:
● Step 1: creating the story and conceptualizing
● Step 2: making the 3D models
● Step 3: rigging, texturing, and animation
● Step 4: setting up the cameras and lightning
● Step 5: rendering
● Step 6: applying special effects and compositing
● Step 7: editing, music, and Foley
● Step 8: the final output
The best part of 3D animation is finding free animation programs without watermarks that are very useful for creating content on Windows and Mac. These best 3D animation courses include:
01Filmora
For Win 7 or later (64-bit)
For macOS 10.12 or later
Wondershare Filmora Video Editor is a straightforward and powerful animation software to create 3D animated text, shapes, elements, or transitions you want for your videos with its 800+ stunning effects. This software comes with a keyframing, green screen, video stabilization, color tuning, split and zoom, amongst others, that help you create precise and smooth animation effects. Filmora program works perfectly on your Windows and Mac computer.
02Blender
Blender is an open-source, powerful 3D animation software for professional users. This animation software does not easily make an image and mission since it focuses on 3D. It takes your animation projects to a whole new level as this program works perfectly on your Mac computer.
03DAZ Studio
DAZ Studio is a potent and completely free tool for 3D animation creation that lets you create short videos whether you are using this for pleasure or business. This 3D animation creator is complicated to use, and 3D effects are at the core focus of this software. This software is highly compatible with Windows 64 bit, and you can build a model, render, and pose animation within the skin texture level.
04Terragen
Terragen is a completely free 3D animation program for Windows tablets and computers. It allows you to create a photo-realistic CG environment and 3D animation that you want. The featured image gallery on this software homepage will give you a profound idea of the outcome when you use the program.
05Anim8or
Anim8or Easy free 3D animation program supports 3D modeler and Truetype fonts to meet your advanced needs. This program is difficult for beginners but allows you to create a unique work according to your needs.
Part 3 The Best 10 Online Courses to Learn 3D Animation for Beginners
There are online 3D animation courses for beginners to learn from and these courses include:
01Introduction to Voxel Art for Character Design by Zach Soares
Price: $12.99
Certificate: Available upon completion of the course
02Psychedelic Animation with Photoshop and After Effects by Klarens Malluta
Price: $10.99
Certificate: Available upon completion of the course
032D and 3D Animation with After Effects and Cinema 4D by Andrea Gendusa
Price: $12.99
Certificate: Available upon completion of the course
04Blender for Beginners by Carlos Sifuentes Haro
Price: $9.99
Certificate: Available upon completion of the course
05Adobe After Effects for Beginners by Manuel Neto
Price: $9.99
Certificate: Available upon completion of the course
06Animation for Typographic Compositions by Holke 79
Price: $12.99
Certificate: Available upon completion of the course
07Adobe After Effects for Character Animation By Facundo López
Price: $9.99
Certificate: Available upon completion of the course
08Animation Techniques with 3D Effects in After Effects by Moncho Massé
Price: $10.99
Certificate: Available upon completion of the course
093D Typography: Playing with Color and Volume by Thomas Burden
Price: $12.99
Certificate: Available upon completion of the course
103D Animation for Non Animators with Cinema 4D by Zigor Samaniego
Price: $11.99
Certificate: Certificate upon completion of the course
Part 4 Part 4 Recommended 3D Animation Learning Books and Resources
Learn 3D animation with the best 3D animation courses, learning books, and resources. Books and Resources for learning 3D animation include but are not limited to:
● 3D Animation Essentials by Andy Beane
3D Animation Essentials by Andy Beane is a comprehensive book on the fundamentals and principles of 3D animation for films and video games.
● 3D Art Essential by Ami Chopine
3D Art Essential by Ami Chopine is all about the hows and whys of 3D animation and teachers why certain techniques and styles work for a particular project.
● Key Takeaways from This Episode →
● Understanding 3D Animation
● Top 5 Programs used for learning 3D Animation
● The Best 10 Online 3D Animation Courses for Beginners
● 3D Animation Graphic Design Courses, Learning Books and Resources
How to Cartoonize Photo Photoshop in Simple Steps
How to Cartoonize Photo Photoshop in Easy Steps
An easy yet powerful editor
Numerous effects to choose from
Detailed tutorials provided by the official channel
Cartoons, an already catchy entertainment source, can upgrade other media utilities on integration. Look through the easiest ways of creating cartoonize photo Photoshop stills!
In this article
01 [Types of Cartoon Effects in Photoshop](#Part 1)
02 [Easiest Ways to Cartoonize Photo in Photoshop](#Part 2)
03 [How to Use a Variety of Photoshop Special Effects to Create the Final Caricature Look](#Part 3)
Part 1 Types of Cartoon Effects in Photoshop
It is an absolute fun activity to explore your editing creativity in the realm of cartoonizing the otherwise ordinary still captures. Talking of the most convenient cartoon creator and editor applications, you can safely rely on the Photoshop Image Editor application to choose from a pool of cartoon editing effects for adding that spunky and funny element to your image files.
Presented in the following section, is a discussion of some of the most stunning and visibly amazing cartoon effects in the application’s Editor Library to cartoonize Photoshop images:
01Pop Art Photoshop Action
The effect is a predominantly preferred as a cartoon action Photoshop utility to caricaturize a normal image, along with customizing the same to change the colors and background of the original still capture for creating a brand new appearance with utmost ease. Apart from this, the aforesaid effect allows you to exclusively customize the globally acclaimed graphic masterpieces of Roy Lichtenstein. Working with the effect, you can edit a self-portrait or the favorite image of your pet to give the latter, a funny retro feel.

02Vintage Comic Creator
If the idea of sticking to just the creation of cartoon images is not enough to satisfy you, the Vintage Comic Creator effect allows you to expand your creativity level to work on cartoon based shape and text edits. You can use the effect to enhance an image logo or plain text with a comic book oriented text. A download of this cartoon effect template facilitates you with diversities of customizable layer styles, overlays and patterns.

03GTA Photoshop Action
This is a complete pleasure for the creative fan of Grand Theft Auto, the wicked chasing game series. Additional to creating a stark variety of edited cartoon stills, you are free to reinvent the aforesaid game’s most popular caricature edits, while using the GTA Photoshop Action editing filter. Launched by Indworks, the effect package consisting of 15 vibrant themes and 5 collage templates; promises a quick mimicry of your most cherished video and console games.

04Vector Paint Photoshop Action
The one is an amazing Photoshop effect for creating cartoon edits, which works through a merger of two different ingenious art themes or styles for transforming basic images into cartoonized stills.
The effect grants you the liberty to use varieties of art styles, such as, comic, photo retouching and energetic oil to obtain editing results comparable to that of any original photograph. The template is conveniently simple to use and assures you of quick results. All this, just at a nominal price of $6! Interesting, right?

05Ultra Realistic 3D Space Effect
Considering the fact of you being a space admirer, this one is the perfect image editor for you to add the vibrancy of stunning space elements and backgrounds within your cartoonized edits. The effect lets you play with the diverse range of customizable text and exciting caricature backgrounds. When downloading the template, you get a main setup file, a few editing examples and a web link to the free fonts present in the effect.

06Animated Zombie Grime Art Photoshop Action
Are you in love with the latest zombie grimes? If yes, then this action set is exclusive editor package for you. Working with the aforesaid image template, you can effortlessly add the perfect zombie theme to your cartoon edits, along with simultaneously creating a stunning animation, which you can use to enhance your video or GIF uploads on social media. Not forgetting the best part, you get a free access to this amazing utility.

Part 2 Easiest Ways to Cartoonize Photo in Photoshop
Having known about the amazing varieties of cartoonized editor templates in Photoshop, it is a natural instinct to feel motivated to create your own caricature images from normal capture stills. Addressing the concern of image transformation methods to turn a photo into a cartoon Photoshop, let us dive into some of the most affordable methods of creating cartoonized photos in the aforesaid editing application.
Talking of the most basic Photoshop tools for creating caricature images, you can start your editing spree with using the Graphic Tablet, Brush Tool, Layer Masks and a graphic pen to create amateur cartoonized edits from your still photographs, getting a full control on image tracing.
01Brush Tool
A few usage examples include working with a combination of the graphic tablet pen and the editor brushes to trace your image, using the brush in a masked or a fresh layer to avoid altering the actual image, and much more.
02Graphic Tablet
It is best to use the Photoshop Graphic Tablet for adhering to the concern of tracing cartoonized images. You can alternatively cater to the job with a trackpad, mouse, or even your hand. It is however, difficult to assure steady hand postures for image tracing, lest you are using a stylus pen.
03Pen Tool
Using the Pen Tool for cartoonizing your portrait, allows you to draw outlines along the desired figure within the image, along with its important elements, so that you can easily use these outlined paths to introduce different color blocks.
Similar to the Brush Tool, the Photoshop Pen utility grants you the freedom to vary the degree of detailing in your cartoon edit, from being highly expressive to only remaining around the shore. Working with the Pen Tool can, however be a bit tiring and time taking, with respect to the extent of detailing you wish to add to the caricature edits.
Additional to the aforementioned tools, you can also consider using the default image filters of the Photoshop application to get comparable results. This is an exclusively better option to choose, compared to the Pen Tool, when you are working without a Graphic Tablet. To get over the top realistic caricature renderings, you will need to supplement the use of Photoshop filters with the application’s editing channels and other adjustments.
Part 3 How to Use a Variety of Photoshop Special Effects to Create the Final Caricature Look
Considering the extensive discussion on the credibility of the Photoshop Image Editor application in the realm of creating stunning caricature images in high end resolution, let us proceed to learn about using the diversity of Photoshop’s special effects to get the last stage cartoonized appearance of ordinary still images.
User’s Guide to Create High End Cartoonized Look
The following tutorial is a stepwise explanation of the process to convert photo into cartoon Photoshop in the easiest possible way. Stick to the method for getting affordable results in a quick span.
Step 1: Download and Launch the Program
Visit the official website of Photoshop Image Editor for a free download of the software program in your system, followed by installing and launching the same in your device.
Step 2: Upload Your Image
On a successful launch of the editor program, you will be directed to the ‘Photoshop Editor’ window, where you are required to upload any desired still image from your device for creating a cartoonized edit. To do this, either simply add your image to the editor workspace using the ‘Drag and Drop’ method, or navigate to the ‘File’ tab in the top toolbar and click on ‘Open’ in the dropdown menu.
Step 3: Edge Enhancement
Once your image appears in the editor timeline, proceed to sharpen the edges of the face and body of the portrait. Start with navigating to and clicking on the ‘Filter’ option, followed by tapping on ‘Filter Gallery’ and selecting the ‘Artistic’ folder, where you need to choose the ‘Poster Edges’ option. Observe the effect of these setting on the portrait and make necessary changes.

Step 4: Background Setting
Ensure that the background and foreground of your image are set to white and black colors respectively. If not, proceed to adjust the same as required.

Step 5: Distorting the Edges
You now need to introduce some distortion in the edges of your portrait. Navigate to the ‘Filter’ option again, open the ‘Filter Gallery’ and choose ‘Torn Edges’ from the menu that drops down. Select the desired parameter values in accordance with your creative suitability.


Step 6: Using the Channels Panel
The next step is to select and copy your portrait using the ‘Ctrl + A’ and Ctrl + C commands respectively. Navigate to the ‘Channels’ panel at the right of the Photoshop workspace. At the panel’s bottom right, proceed with creating a new channel. It will be assigned the name ‘Alpha 1’ by Photoshop, which you are most welcome to change.


Step 7: Color Inversion
When you finish creating the channel, use the ‘Ctrl + V’ command to paste your portrait in the same. Proceed with inverting the image colors by navigating to the ‘Image’ option, followed by choosing the ‘Adjustment’ and ‘Invert’ options from the consecutive drop downs. Now, make a selection of the ‘White’ regions of your portrait by pressing the ‘Ctrl’ key and clicking on the ‘Alpha 1 Channel thumbnail.

Step 8: Layer Creation
Navigate to the ‘Layers’ panel at the right of the Photoshop workspace, and click on the ‘New Layer’ icon for creating a fresh layer. Fill the just created layer with black color, either by pressing ‘g’ from your system’s keyboard, or using the ‘Paint Bucket’ tool. Don’t forget to assign a suitable name to the layer.

Repeat the above process to create a separate layer and e fill the same with white color. The layer creation process is essential to separate the white and black colors of the actual image.

Step 10: Layer Dragging
In the ‘Layers’ panel, drag the ‘Black’ layer above the ‘White’ one.

Step 11: Creating Additional Layers
You are now required to create three more layers, with the same process as for the above two, for adding effects to the Skin, Clothes and Teeth/Eyes of the portrait. When you finish creation, assign suitable names to the layers, followed by dragging them below the ‘Black’ one within the ‘Layers’ panel.

Step 12: Color Selection and Application
Choose the respective colors for the clothes, skin and teeth/eyes of the cartoonized edit. To proceed with color application, navigate to the toolbar at the left of the Photoshop workspace and choose the ‘Brush Tool’. Finally, choose a particular layer and apply careful brush strokes to add color to the specific area of the portrait that you wish to edit. Follow the same process to add colors to the remaining layers to get the desired result in all areas of your cartoonized edit.

Step 13: Using the Gradient Tool
Navigate to the ‘Layers’ panel again and create a new ‘Gradient’ layer to further enhance your creation. You now need to select the ‘Gradient Tool’ from the toolbar at the left of the Photoshop workspace. The ‘Gradient Editor’ pops up with the continuously running ‘Gradient Bar’, as soon as you make the selection. Double click on the gradient boxes at both ends to select them, followed by making your color choices. Tap on ‘OK’ when you are satisfied with your work.

Step 14: Filling the Gradients
To proceed with gradient filling, press and hold the mouse button on the image at the bottom left and continue to drag the cursor to its top right corner. Leave the mouse and navigate to the ‘Layers’ panel for dragging and dropping the ‘Gradient’ layer above the ‘White’ layer.

You are now done with the process of creating a caricature edit from a normal still portrait. Your final image output will appear something like the following:

Cartoons, an already catchy entertainment source, can upgrade other media utilities on integration. Look through the easiest ways of creating cartoonize photo Photoshop stills!
In this article
01 [Types of Cartoon Effects in Photoshop](#Part 1)
02 [Easiest Ways to Cartoonize Photo in Photoshop](#Part 2)
03 [How to Use a Variety of Photoshop Special Effects to Create the Final Caricature Look](#Part 3)
Part 1 Types of Cartoon Effects in Photoshop
It is an absolute fun activity to explore your editing creativity in the realm of cartoonizing the otherwise ordinary still captures. Talking of the most convenient cartoon creator and editor applications, you can safely rely on the Photoshop Image Editor application to choose from a pool of cartoon editing effects for adding that spunky and funny element to your image files.
Presented in the following section, is a discussion of some of the most stunning and visibly amazing cartoon effects in the application’s Editor Library to cartoonize Photoshop images:
01Pop Art Photoshop Action
The effect is a predominantly preferred as a cartoon action Photoshop utility to caricaturize a normal image, along with customizing the same to change the colors and background of the original still capture for creating a brand new appearance with utmost ease. Apart from this, the aforesaid effect allows you to exclusively customize the globally acclaimed graphic masterpieces of Roy Lichtenstein. Working with the effect, you can edit a self-portrait or the favorite image of your pet to give the latter, a funny retro feel.
02Vintage Comic Creator
If the idea of sticking to just the creation of cartoon images is not enough to satisfy you, the Vintage Comic Creator effect allows you to expand your creativity level to work on cartoon based shape and text edits. You can use the effect to enhance an image logo or plain text with a comic book oriented text. A download of this cartoon effect template facilitates you with diversities of customizable layer styles, overlays and patterns.
03GTA Photoshop Action
This is a complete pleasure for the creative fan of Grand Theft Auto, the wicked chasing game series. Additional to creating a stark variety of edited cartoon stills, you are free to reinvent the aforesaid game’s most popular caricature edits, while using the GTA Photoshop Action editing filter. Launched by Indworks, the effect package consisting of 15 vibrant themes and 5 collage templates; promises a quick mimicry of your most cherished video and console games.
04Vector Paint Photoshop Action
The one is an amazing Photoshop effect for creating cartoon edits, which works through a merger of two different ingenious art themes or styles for transforming basic images into cartoonized stills.
The effect grants you the liberty to use varieties of art styles, such as, comic, photo retouching and energetic oil to obtain editing results comparable to that of any original photograph. The template is conveniently simple to use and assures you of quick results. All this, just at a nominal price of $6! Interesting, right?
05Ultra Realistic 3D Space Effect
Considering the fact of you being a space admirer, this one is the perfect image editor for you to add the vibrancy of stunning space elements and backgrounds within your cartoonized edits. The effect lets you play with the diverse range of customizable text and exciting caricature backgrounds. When downloading the template, you get a main setup file, a few editing examples and a web link to the free fonts present in the effect.
06Animated Zombie Grime Art Photoshop Action
Are you in love with the latest zombie grimes? If yes, then this action set is exclusive editor package for you. Working with the aforesaid image template, you can effortlessly add the perfect zombie theme to your cartoon edits, along with simultaneously creating a stunning animation, which you can use to enhance your video or GIF uploads on social media. Not forgetting the best part, you get a free access to this amazing utility.
Part 2 Easiest Ways to Cartoonize Photo in Photoshop
Having known about the amazing varieties of cartoonized editor templates in Photoshop, it is a natural instinct to feel motivated to create your own caricature images from normal capture stills. Addressing the concern of image transformation methods to turn a photo into a cartoon Photoshop, let us dive into some of the most affordable methods of creating cartoonized photos in the aforesaid editing application.
Talking of the most basic Photoshop tools for creating caricature images, you can start your editing spree with using the Graphic Tablet, Brush Tool, Layer Masks and a graphic pen to create amateur cartoonized edits from your still photographs, getting a full control on image tracing.
01Brush Tool
A few usage examples include working with a combination of the graphic tablet pen and the editor brushes to trace your image, using the brush in a masked or a fresh layer to avoid altering the actual image, and much more.
02Graphic Tablet
It is best to use the Photoshop Graphic Tablet for adhering to the concern of tracing cartoonized images. You can alternatively cater to the job with a trackpad, mouse, or even your hand. It is however, difficult to assure steady hand postures for image tracing, lest you are using a stylus pen.
03Pen Tool
Using the Pen Tool for cartoonizing your portrait, allows you to draw outlines along the desired figure within the image, along with its important elements, so that you can easily use these outlined paths to introduce different color blocks.
Similar to the Brush Tool, the Photoshop Pen utility grants you the freedom to vary the degree of detailing in your cartoon edit, from being highly expressive to only remaining around the shore. Working with the Pen Tool can, however be a bit tiring and time taking, with respect to the extent of detailing you wish to add to the caricature edits.
Additional to the aforementioned tools, you can also consider using the default image filters of the Photoshop application to get comparable results. This is an exclusively better option to choose, compared to the Pen Tool, when you are working without a Graphic Tablet. To get over the top realistic caricature renderings, you will need to supplement the use of Photoshop filters with the application’s editing channels and other adjustments.
Part 3 How to Use a Variety of Photoshop Special Effects to Create the Final Caricature Look
Considering the extensive discussion on the credibility of the Photoshop Image Editor application in the realm of creating stunning caricature images in high end resolution, let us proceed to learn about using the diversity of Photoshop’s special effects to get the last stage cartoonized appearance of ordinary still images.
User’s Guide to Create High End Cartoonized Look
The following tutorial is a stepwise explanation of the process to convert photo into cartoon Photoshop in the easiest possible way. Stick to the method for getting affordable results in a quick span.
Step 1: Download and Launch the Program
Visit the official website of Photoshop Image Editor for a free download of the software program in your system, followed by installing and launching the same in your device.
Step 2: Upload Your Image
On a successful launch of the editor program, you will be directed to the ‘Photoshop Editor’ window, where you are required to upload any desired still image from your device for creating a cartoonized edit. To do this, either simply add your image to the editor workspace using the ‘Drag and Drop’ method, or navigate to the ‘File’ tab in the top toolbar and click on ‘Open’ in the dropdown menu.
Step 3: Edge Enhancement
Once your image appears in the editor timeline, proceed to sharpen the edges of the face and body of the portrait. Start with navigating to and clicking on the ‘Filter’ option, followed by tapping on ‘Filter Gallery’ and selecting the ‘Artistic’ folder, where you need to choose the ‘Poster Edges’ option. Observe the effect of these setting on the portrait and make necessary changes.
Step 4: Background Setting
Ensure that the background and foreground of your image are set to white and black colors respectively. If not, proceed to adjust the same as required.
Step 5: Distorting the Edges
You now need to introduce some distortion in the edges of your portrait. Navigate to the ‘Filter’ option again, open the ‘Filter Gallery’ and choose ‘Torn Edges’ from the menu that drops down. Select the desired parameter values in accordance with your creative suitability.
Step 6: Using the Channels Panel
The next step is to select and copy your portrait using the ‘Ctrl + A’ and Ctrl + C commands respectively. Navigate to the ‘Channels’ panel at the right of the Photoshop workspace. At the panel’s bottom right, proceed with creating a new channel. It will be assigned the name ‘Alpha 1’ by Photoshop, which you are most welcome to change.
Step 7: Color Inversion
When you finish creating the channel, use the ‘Ctrl + V’ command to paste your portrait in the same. Proceed with inverting the image colors by navigating to the ‘Image’ option, followed by choosing the ‘Adjustment’ and ‘Invert’ options from the consecutive drop downs. Now, make a selection of the ‘White’ regions of your portrait by pressing the ‘Ctrl’ key and clicking on the ‘Alpha 1 Channel thumbnail.
Step 8: Layer Creation
Navigate to the ‘Layers’ panel at the right of the Photoshop workspace, and click on the ‘New Layer’ icon for creating a fresh layer. Fill the just created layer with black color, either by pressing ‘g’ from your system’s keyboard, or using the ‘Paint Bucket’ tool. Don’t forget to assign a suitable name to the layer.
Repeat the above process to create a separate layer and e fill the same with white color. The layer creation process is essential to separate the white and black colors of the actual image.
Step 10: Layer Dragging
In the ‘Layers’ panel, drag the ‘Black’ layer above the ‘White’ one.
Step 11: Creating Additional Layers
You are now required to create three more layers, with the same process as for the above two, for adding effects to the Skin, Clothes and Teeth/Eyes of the portrait. When you finish creation, assign suitable names to the layers, followed by dragging them below the ‘Black’ one within the ‘Layers’ panel.
Step 12: Color Selection and Application
Choose the respective colors for the clothes, skin and teeth/eyes of the cartoonized edit. To proceed with color application, navigate to the toolbar at the left of the Photoshop workspace and choose the ‘Brush Tool’. Finally, choose a particular layer and apply careful brush strokes to add color to the specific area of the portrait that you wish to edit. Follow the same process to add colors to the remaining layers to get the desired result in all areas of your cartoonized edit.
Step 13: Using the Gradient Tool
Navigate to the ‘Layers’ panel again and create a new ‘Gradient’ layer to further enhance your creation. You now need to select the ‘Gradient Tool’ from the toolbar at the left of the Photoshop workspace. The ‘Gradient Editor’ pops up with the continuously running ‘Gradient Bar’, as soon as you make the selection. Double click on the gradient boxes at both ends to select them, followed by making your color choices. Tap on ‘OK’ when you are satisfied with your work.
Step 14: Filling the Gradients
To proceed with gradient filling, press and hold the mouse button on the image at the bottom left and continue to drag the cursor to its top right corner. Leave the mouse and navigate to the ‘Layers’ panel for dragging and dropping the ‘Gradient’ layer above the ‘White’ layer.
You are now done with the process of creating a caricature edit from a normal still portrait. Your final image output will appear something like the following:
Easy Cartoon Characters Drawing Tutorials for You Who Are Learning to Draw
Easy Cartoon Characters Drawing Tutorials for You Who Are Learning to Draw
An easy yet powerful editor
Numerous effects to choose from
Detailed tutorials provided by the official channel
Learning the art of cartoon characters drawing? We can help! Cartoon characters drawing is no rocket science, ABCD: Anybody Can Draw!

We are as excited as you as we bring to you a few of the best drawing tutorials!
In this article
01 [Double Your Results with Learning Cartoon Drawing Styles First](#Part 1)
02 [Best 6 Cartoon Characters Anyone Can Draw (with Free Video Tutorials)](#Part 2)
03 [Easy Cartoon Characters to Draw Step by Step](#Part 3)
Part 1 Double Your Results with Learning Cartoon Drawing Styles First
01 Cartoon Character Sketches
Sketching is one of the most popular art forms. Sketching can be done for real-life people or celebrities or we can also make sketches of imaginary characters and cartoons. Sketching is generally made of pencil and does not involve the usage of colors.

02 Cartoon Characters Drawing with Color
Cartoon characters can be made with color to make them more attractive. This is another popular form of art that cartoonists follow. You can explore several methods of coloring and try making your cartoon colorful.

03 Disney Cartoon Characters Drawing
Disney cartoon character drawing is probably one of the simplest. This is because they have a predefined size and are mostly symmetric. Disney cartoon characters generally use common geometric shapes such as circles, ovals, and squares. Hence making it a beginner-friendly choice!

Part 2 Best 6 Cartoon Characters Anyone Can Draw (with Free Video Tutorials)
01 Roger the alien
Roger the alien is one of the simplest cartoon characters to draw. This children’s classic cartoon character always intrigues children due to its bizarre shape. It fixes the image of an outer space characters in a child’s mind(If they exist).
What makes it easy to draw?
● The oval-shaped head is easy to draw since it is not very detailed.
● The character does not have any hair, hair is one of the more difficult parts to draw.
● The body features aren’t very prominent, hence making the character easy to draw.
Challenges you may encounter
● If you are a first-timer, then you may find it challenging to draw fingers and the toes.
● Getting the weird alien head shape might be a little difficult and may take you a few attempts.
● Making the two eyes exactly similar to each other may be challenging for a few of you.
02 Wakko Warner
What makes it easy to draw?
● The character generally has geometrical shapes and hence you can use shape tracers to draw a few parts.
● The appealing appearance of the character makes it interesting to draw.
● The eyes are not very difficult to recreate.
Challenges you may encounter
● The eyes are not very difficult to recreate.
● The shape of the mouth and the tongue that is sticking out is slightly complex.
● Perfecting the shape of the hair is a little challenging.
03 Cosmo
What makes it easy to draw?
● We recommend you to try this character out mainly because of its uniqueness.
● The eyes are not very complicated to draw.
● The body resembles a stick image and is hence simple to draw.
Challenges you may encounter
● The shape of the crown needs to be perfect, especially because of the tilt the crown has.
● The fingers are challenging to draw.
● The hair has a distinct shape, this shape needs to come out perfectly.
04 Courage the cowardly dog
What makes it easy to draw?
● Firstly, it’s one of the most favorite cartoons, hence it will ensure to keep you interested in the drawing.
● The hands and legs resemble stick figures and are simple to draw.
● The body structure is simple.
Challenges you may encounter
● Drawing a cartoon animal instead of a human being might be intriguing for beginners.
● The large eyes, which is one of the characteristic features needs to be perfect.
● The design of the ears is the trickiest part and could be difficult to draw.
05 Tom And Jerry
When we think of cartoons, the first few names that probably come to our mind are tom and jerry. This duo of a grumpy cat and a mysterious mouse has left an everlasting impact on the world of cartoons. The duo is famous throughout the world and is loved throughout age groups
Why do we recommend you to try your hands on this?
● This is a classic cartoon that almost everyone loves.
● There are several resources on the internet to help you draw the cartoon characters.
● The characters need not be perfect, even a close resemblance to them would be sufficient for the viewers to identify them due to their fame.
Challenges you may encounter
● You need to be careful with the proportion of sizes of tom and jerry.
● The structures of tom and jerry are not very simple to draw.
● Perfecting the grumpy expression on tom’s face and a frightened expression on jerry’s face is challenging.
05 Catdog
Catdog is another very interesting character. Who’d have imagined a cat and a dog morphed in a single body? Well, imagination has no end to it as they say! Catdog is a yellow cat and dog in a single body, it looks cute and at the same time intriguing.
Why do we recommend you try your hands on this?
● The cartoon character is mainly composed of geometrical shapes.
● The character is vividly colorful.
● The bright yellow color is super attractive and hence makes drawing catdog very fun.
Challenges you may encounter
● The character is illusional, you might have difficulty while deciding how to even look at it.
● The cat and dog faces are not very different from each other and have minute differences while drawing you need to be careful about having a distinct difference between the two faces.
Now that we’ve taken our baby steps towards understanding the art of drawing cartoons.
Key Takeaways from This Episode
● That’s a lot of knowledge for today, isn’t it? Today we’ve seen the basics of drawing cartoon characters.
● We also got our hands dirty by exploring a few easy cartoon characters that you could draw.
● Further, we saw the basic steps that you would need to take in order to draw the face of any cartoon character! All in all, we learned everything we needed to know to draw our first cartoon! What are you waiting for? Go try out drawing your first cartoon today!
Learning the art of cartoon characters drawing? We can help! Cartoon characters drawing is no rocket science, ABCD: Anybody Can Draw!
We are as excited as you as we bring to you a few of the best drawing tutorials!
In this article
01 [Double Your Results with Learning Cartoon Drawing Styles First](#Part 1)
02 [Best 6 Cartoon Characters Anyone Can Draw (with Free Video Tutorials)](#Part 2)
03 [Easy Cartoon Characters to Draw Step by Step](#Part 3)
Part 1 Double Your Results with Learning Cartoon Drawing Styles First
01 Cartoon Character Sketches
Sketching is one of the most popular art forms. Sketching can be done for real-life people or celebrities or we can also make sketches of imaginary characters and cartoons. Sketching is generally made of pencil and does not involve the usage of colors.
02 Cartoon Characters Drawing with Color
Cartoon characters can be made with color to make them more attractive. This is another popular form of art that cartoonists follow. You can explore several methods of coloring and try making your cartoon colorful.
03 Disney Cartoon Characters Drawing
Disney cartoon character drawing is probably one of the simplest. This is because they have a predefined size and are mostly symmetric. Disney cartoon characters generally use common geometric shapes such as circles, ovals, and squares. Hence making it a beginner-friendly choice!
Part 2 Best 6 Cartoon Characters Anyone Can Draw (with Free Video Tutorials)
01 Roger the alien
Roger the alien is one of the simplest cartoon characters to draw. This children’s classic cartoon character always intrigues children due to its bizarre shape. It fixes the image of an outer space characters in a child’s mind(If they exist).
What makes it easy to draw?
● The oval-shaped head is easy to draw since it is not very detailed.
● The character does not have any hair, hair is one of the more difficult parts to draw.
● The body features aren’t very prominent, hence making the character easy to draw.
Challenges you may encounter
● If you are a first-timer, then you may find it challenging to draw fingers and the toes.
● Getting the weird alien head shape might be a little difficult and may take you a few attempts.
● Making the two eyes exactly similar to each other may be challenging for a few of you.
02 Wakko Warner
What makes it easy to draw?
● The character generally has geometrical shapes and hence you can use shape tracers to draw a few parts.
● The appealing appearance of the character makes it interesting to draw.
● The eyes are not very difficult to recreate.
Challenges you may encounter
● The eyes are not very difficult to recreate.
● The shape of the mouth and the tongue that is sticking out is slightly complex.
● Perfecting the shape of the hair is a little challenging.
03 Cosmo
What makes it easy to draw?
● We recommend you to try this character out mainly because of its uniqueness.
● The eyes are not very complicated to draw.
● The body resembles a stick image and is hence simple to draw.
Challenges you may encounter
● The shape of the crown needs to be perfect, especially because of the tilt the crown has.
● The fingers are challenging to draw.
● The hair has a distinct shape, this shape needs to come out perfectly.
04 Courage the cowardly dog
What makes it easy to draw?
● Firstly, it’s one of the most favorite cartoons, hence it will ensure to keep you interested in the drawing.
● The hands and legs resemble stick figures and are simple to draw.
● The body structure is simple.
Challenges you may encounter
● Drawing a cartoon animal instead of a human being might be intriguing for beginners.
● The large eyes, which is one of the characteristic features needs to be perfect.
● The design of the ears is the trickiest part and could be difficult to draw.
05 Tom And Jerry
When we think of cartoons, the first few names that probably come to our mind are tom and jerry. This duo of a grumpy cat and a mysterious mouse has left an everlasting impact on the world of cartoons. The duo is famous throughout the world and is loved throughout age groups
Why do we recommend you to try your hands on this?
● This is a classic cartoon that almost everyone loves.
● There are several resources on the internet to help you draw the cartoon characters.
● The characters need not be perfect, even a close resemblance to them would be sufficient for the viewers to identify them due to their fame.
Challenges you may encounter
● You need to be careful with the proportion of sizes of tom and jerry.
● The structures of tom and jerry are not very simple to draw.
● Perfecting the grumpy expression on tom’s face and a frightened expression on jerry’s face is challenging.
05 Catdog
Catdog is another very interesting character. Who’d have imagined a cat and a dog morphed in a single body? Well, imagination has no end to it as they say! Catdog is a yellow cat and dog in a single body, it looks cute and at the same time intriguing.
Why do we recommend you try your hands on this?
● The cartoon character is mainly composed of geometrical shapes.
● The character is vividly colorful.
● The bright yellow color is super attractive and hence makes drawing catdog very fun.
Challenges you may encounter
● The character is illusional, you might have difficulty while deciding how to even look at it.
● The cat and dog faces are not very different from each other and have minute differences while drawing you need to be careful about having a distinct difference between the two faces.
Now that we’ve taken our baby steps towards understanding the art of drawing cartoons.
Key Takeaways from This Episode
● That’s a lot of knowledge for today, isn’t it? Today we’ve seen the basics of drawing cartoon characters.
● We also got our hands dirty by exploring a few easy cartoon characters that you could draw.
● Further, we saw the basic steps that you would need to take in order to draw the face of any cartoon character! All in all, we learned everything we needed to know to draw our first cartoon! What are you waiting for? Go try out drawing your first cartoon today!
Tips That Show Anybody How to Get Awesome Background for Slideshow in PowerPoint
Tips That Show Anybody How to Get Awesome Background for Slideshow in Powerpoint
An easy yet powerful editor
Numerous effects to choose from
Detailed tutorials provided by the official channel
Amazing slideshow background are an absolute attention grabber in the realm of creative PowerPoint presentations. If you wish to upgrade yours with the same, be here to learn how!
In this article
01 [How to Add Video Background in PowerPoint?](#Part 1)
02 [How to Create Moving Backgrounds in Microsoft PowerPoint?](#Part 2)
03 [Some Tips for You to Get Awesome PowerPoint Backgrounds & Templates](#Part 3)
Part 1 How to Add Video Background in PowerPoint?
When the talk is about engaging means to deliver a precise information, PowerPoint slideshows are an absolute stunner. While these are already a captivating utility to present your thing, the output and audience engagement is at par with the inclusion of attractive design elements in the presentation. As is evident, there are enormous diversities of supplementary elements to complement your presentation, let us centre our discussion to the application of video background for slideshow in PowerPoint.
User’s Guide to Add Video Background in a PowerPoint Slideshow
The following section presents a detailed explanation of the steps to supplement your PowerPoint presentations with classic video backgrounds in just a few quick steps:
Step 1: Launch Your Presentation
Start with opening the desired PowerPoint presentation to which you want to add the video background, in any of your preferred devices.
Step 2: Add a Video to Your Slide
Browse through your presentation slides to locate the one you want to add the video background to. When you have made your choice, navigate to the PowerPoint toolbar at the top and hit the ‘Insert’ tab and choose the ‘Video’ option.
You will now be presented with 2 choices, either uploading a video from your device or insert one from the web by pasting its YouTube URL into the slide. If you are uploading a video from your device, proceed with selecting the desired video and tap ‘Insert’.

Step 3: Move and Resize Your Video
After uploading your video to the slide, you need to make suitable adjustments in its size and alignment to synchronize the same with the contents of the slide. To do this, drag the top left corner of the video to that of the slide to set the top alignment ratio. In the same way, move the bottom right corner of the video to be in sync with that of the slide. You will see the video occupying the entire slide at the end of the adjustment process.

Step 4: Set the Video Background
You will now need to set the video as the background of your slide, so that the latter’s contents are displayed over the video. You can do this by right clicking on the video and choosing the ‘Send to Back’ option from the dropdown that follows. This will cause the contents of your slide to get displayed over the video.

Step 5: Playback Edit and Customization Choices
Before proceeding towards making changes in the video playback and formatting, prefer taking a quick preview of your work till here. Once you are satisfied, navigate to the PowerPoint Toolbar at the top, hit the ‘Video Tools’ tab, followed by clicking on the ‘Playback’ tab.
It is recommended to introduce the following changes in your video for the most affordable slideshow output:
● Loop Your Video
Creating a video loop will facilitate you with an automatic replay of your video without the need to restart it every time with a click. You can loop your video by navigating to the ‘Video Options’ section and choose ‘Loop Until Stopped’ by clicking within the checkbox next to it. The background video will now continue to play until you switch to a different slide.
● Automatically Start Your Video
To avoid clicking on the slide amid your presentation for the video loop to begin, adjust the latter’s settings for an automatic start. Navigate to the ‘Start’ dropdown menu and select ‘Automatically’.
● Trim Your Video
You can work with some basic video editing tools in PowerPoint, like trimming and cropping your background video to a desired length. If you wish to ward off certain portions of your video, reach to and click o the ‘Trim Video’ button. Following this, drag the slider of the video to select the desired portions of the clip and exclude the rest.
You can further work with some more editing effects to create the perfect video backgrounds for your presentation slides in line with your specific preferences.

Step 6: Annotate Your Video Background
When you are done with the video editing process, take a preview of the same to ensure that everything is set in the proper order and at the proper place. Lastly, if you wish to add suitable text annotations to your video, you can do this with the ‘ClassPoint’ tool to write over the video background. All you need to do is select a preferred pen colour and start writing on your slide screen. You can further, save the annotations for a work record.

Part 2 How to Create Moving Backgrounds in Microsoft PowerPoint?
Moving PowerPoint slideshow background is another aspect of graphic creativity at its best, which can be used in a number of ways to grab considerable viewer attention. When choosing to add moving backgrounds to your presentation, the latter can aid in improving the style of content presentation, making your audience curious about how and what happens next.
Having learnt about the utility and creation process of video backgrounds in the PowerPoint presentation tool, let us extend our discussion to the method of creating a moving slide show background in the same in the following section:
User’s Guide to Create Moving Backgrounds for PowerPoint Presentations
Discussed below is an explanatory procedure for designing moving backgrounds with an awesome appearance for slideshow presentations in Microsoft PowerPoint:
Step 1: Open Your Presentation
To begin with, launch the PowerPoint tool in your preferred device and open the presentation on which you will be working to add the moving background. After the presentation gets loaded, navigate through the same and select the desired slide to proceed with the aforesaid task.
Step 2: Choose a Video Location
To add your desired video to the slide, navigate to the PowerPoint ribbon at the top and click on the ‘Insert’ tab. Select ‘Video’ from the list of options that appears, followed by choosing one of the ‘Online Video’ or ‘Video on My PC’ options from the video selection prompt. It is further recommended to select a video in the MP4 format, as the latter gives best results of moving and video backgrounds.
Step 3: Insert Your Video
Choose the second option in the selection prompt to upload a video from your device. You will now be asked to browse through your device and locate the desired video in the ‘Insert Video’ dialog box that appears. Select your video and tap the ‘Insert’ button to add your video.
To upload videos from an online source, choose the ‘Online Video’ option in the selection prompt and proceed to search the video from PowerPoint or paste its embed code to recover the video. The chosen video will begin to download and can be added to the PowerPoint presentation after the download process comes to an end.

Step 4: Playback Editing and Video Customization
Before proceeding further, consider paying your video once by clicking on the ‘Start’ button. You can also add different effects, trim and crop or add a bookmark to your video by navigating to and clicking on the ‘Video Tools’ tab, followed by selecting the ‘Format’ option. To work with the start and playback options for the video, click on ‘Playback’ in the dropdown menu of the ‘Video Tools’ tab.

Part 3 Some Tips for You to Get Awesome PowerPoint Backgrounds & Templates
Now that you have developed a comprehensive understanding of the utility of adding video and moving background for slideshow presentation, let us look through some easy tips and tricks to conveniently access the top rated and the most popular PowerPoint slideshow templates and backgrounds in the following section:
01Cool Slide Backgrounds
Slideshow presentations in PowerPoint are supplemented with a visual spark through amazing and vibrant backgrounds that are a sign of excellent graphic creativity. When working with a PowerPoint presentation of your own, do take the liberty to use some cool slide backgrounds to your creative advantage.
When the talk is about complementing your presentation with a cohesive and upbeat background, you can either select the most suitable one from a heap of pre made slideshow templates available both in the PowerPoint slideshow creator tool as well as across the web. However, if you wish to take the excitement to another level, try hands at creating an awesome and cool backgrounds for PowerPoint slides of your own!
Talking about some really cool tips and tricks to design a slideshow presentation background in PowerPoint, start with including some specific shapes and color overlays to the background capture, experiment with a polygon background, work on enhancing the background image with classic and artistic effects and apply a mix of colors, textures and patterns to give a classy look to your slideshow backgrounds.

02Professional Slideshow Backgrounds
If you are aiming at creating a PowerPoint slideshow presentation with a business centered design approach, you will need to cut down on some extra elements that you would ideally choose to include in a personal purpose based slideshow. Paying attention to the fact that business and corporate centered presentations should be simple, subtle and to the point, it would be an intelligent step to avoid adding too many expressive elements in the background.
Whether you are creating a professional slideshow background of your own or working with a pre designed template, take care to include a complementary play of a light background theme with a maximum of 2 balancing shades.
Avoid too much vibrancy and abstain from applying over the top effects and quick transitions, lest your presentation may look a bit too crowed. If your slides have lot of written content, prefer using a white color background text in a professional font style.
If you have decided on picking a pre made template, you can browse through a diversity of suggestions across the web, while keeping the aforesaid constraints in mind. Consider taking a look at the figure given below to have a more comprehensive understating of the prerequisites of selecting a professional sideshow background template:

03Happy Birthday Slide Backgrounds
Birthday parties are the most appealing synonyms of fun and entertainment. If you are into the profession of organizing events that renders smiling and happy faces, slideshow presentations could be of great help to you in discussing about services, types of social gentries and event targets with your clients.
When looking through different options to select the perfect birthday template, either for a professional event, or just to go down the memory lane of your most cherished moments, take caution to search for a vibrant alternative with colorful images, different background designs and party oriented cool themes, wide aspect ratio with high screen resolution for a mass display and conveniently editable graphics.
If you are creating a happy birthday slide background of your own, there are variety of realms to explore your graphic design creativity, owing to the fact that the subject of creation is highly expressive and multi-dimensional. While you are free to extend your creativity to the next level, do pay attention to the above constraints for a more elusive and outstanding creation output, while maintaining the fun and entertainment quotient intact.

04Wedding Slide Backgrounds
Considering the fact that wedding events are pronounced means of fun, leisure, enjoyment and beautiful memories, anything that aims to be a part of the celebrations, should be equally ecstatic and engaging. Infusing festive occasions with technology, slideshow based wedding invitations and moment captures are the top rated modern trends of celebrating this significant life event.
If you are keen on designing the perfect slideshow presentation for wedding invitations, photo albums and thank you cards, prefer to choose a wedding slide background template with aesthetic layout and flowing element inclusions, like that of floral borders and scented candles. Look though the elements of a subtle thematic setup with soothing color combinations, preferably in complementary pastel shades, like pink and white.
Talking of template customizability, the latter should have placeholders to include names of the bride and groom, the wedding date and venue, and of course the wedding photographs. The beautiful slide background template should have enough design space to include the most elusive play of text colors and fonts to suit specific preferences of creating special memories of a cherished event.

05Slideshow Backgrounds and Templates in Filmora
When looking for the most convenient lead to an extensive variety of beautiful slideshow templates and background, the template library of Wondershare Filmora Video Editor slideshow creator program can be your most affordable destination. The aforesaid software library is known to possess the best and most perfect template choices to suit the creation constraints of almost every slideshow presentation style and objective you can possibly think of.
For Win 7 or later (64-bit)
For macOS 10.12 or later
The elusive templates are further supplemented with a plethora of design flexibilities and customization features that are all set to deliver you the most appreciable creation output. Stressing a bit on the template customization choices of the software, you can work with the tool to uplift your slideshow backgrounds with artistic image effects and overlays, annotate them with beautiful text formations in a variety of colors, fonts and sizes and lots more.
Moving a bit deeper into the creative aspect, you can upgrade the visual style of your presentations with the most perfect and seamless image and video transitions and text animations. The bottom line is, working with the aforesaid slideshow creator program, you are entitled to get jaw dropping applaud from your audience, while making a confident and a content delivery through your slideshow presentation.

● Ending Thoughts →
● Using an expressive and complementing background in your slideshow presentation uplifts its visual credibility in captivating your audience.
● Browsing through the web, you get to access a vast range of amazing slideshow backgrounds and templates to make your presentation, a visual masterpiece.
● When looking for the most distributed storehouse of slideshow backgrounds and templates, the Wondershare Filmora library is your ultimate solution.
Amazing slideshow background are an absolute attention grabber in the realm of creative PowerPoint presentations. If you wish to upgrade yours with the same, be here to learn how!
In this article
01 [How to Add Video Background in PowerPoint?](#Part 1)
02 [How to Create Moving Backgrounds in Microsoft PowerPoint?](#Part 2)
03 [Some Tips for You to Get Awesome PowerPoint Backgrounds & Templates](#Part 3)
Part 1 How to Add Video Background in PowerPoint?
When the talk is about engaging means to deliver a precise information, PowerPoint slideshows are an absolute stunner. While these are already a captivating utility to present your thing, the output and audience engagement is at par with the inclusion of attractive design elements in the presentation. As is evident, there are enormous diversities of supplementary elements to complement your presentation, let us centre our discussion to the application of video background for slideshow in PowerPoint.
User’s Guide to Add Video Background in a PowerPoint Slideshow
The following section presents a detailed explanation of the steps to supplement your PowerPoint presentations with classic video backgrounds in just a few quick steps:
Step 1: Launch Your Presentation
Start with opening the desired PowerPoint presentation to which you want to add the video background, in any of your preferred devices.
Step 2: Add a Video to Your Slide
Browse through your presentation slides to locate the one you want to add the video background to. When you have made your choice, navigate to the PowerPoint toolbar at the top and hit the ‘Insert’ tab and choose the ‘Video’ option.
You will now be presented with 2 choices, either uploading a video from your device or insert one from the web by pasting its YouTube URL into the slide. If you are uploading a video from your device, proceed with selecting the desired video and tap ‘Insert’.
Step 3: Move and Resize Your Video
After uploading your video to the slide, you need to make suitable adjustments in its size and alignment to synchronize the same with the contents of the slide. To do this, drag the top left corner of the video to that of the slide to set the top alignment ratio. In the same way, move the bottom right corner of the video to be in sync with that of the slide. You will see the video occupying the entire slide at the end of the adjustment process.
Step 4: Set the Video Background
You will now need to set the video as the background of your slide, so that the latter’s contents are displayed over the video. You can do this by right clicking on the video and choosing the ‘Send to Back’ option from the dropdown that follows. This will cause the contents of your slide to get displayed over the video.
Step 5: Playback Edit and Customization Choices
Before proceeding towards making changes in the video playback and formatting, prefer taking a quick preview of your work till here. Once you are satisfied, navigate to the PowerPoint Toolbar at the top, hit the ‘Video Tools’ tab, followed by clicking on the ‘Playback’ tab.
It is recommended to introduce the following changes in your video for the most affordable slideshow output:
● Loop Your Video
Creating a video loop will facilitate you with an automatic replay of your video without the need to restart it every time with a click. You can loop your video by navigating to the ‘Video Options’ section and choose ‘Loop Until Stopped’ by clicking within the checkbox next to it. The background video will now continue to play until you switch to a different slide.
● Automatically Start Your Video
To avoid clicking on the slide amid your presentation for the video loop to begin, adjust the latter’s settings for an automatic start. Navigate to the ‘Start’ dropdown menu and select ‘Automatically’.
● Trim Your Video
You can work with some basic video editing tools in PowerPoint, like trimming and cropping your background video to a desired length. If you wish to ward off certain portions of your video, reach to and click o the ‘Trim Video’ button. Following this, drag the slider of the video to select the desired portions of the clip and exclude the rest.
You can further work with some more editing effects to create the perfect video backgrounds for your presentation slides in line with your specific preferences.
Step 6: Annotate Your Video Background
When you are done with the video editing process, take a preview of the same to ensure that everything is set in the proper order and at the proper place. Lastly, if you wish to add suitable text annotations to your video, you can do this with the ‘ClassPoint’ tool to write over the video background. All you need to do is select a preferred pen colour and start writing on your slide screen. You can further, save the annotations for a work record.
Part 2 How to Create Moving Backgrounds in Microsoft PowerPoint?
Moving PowerPoint slideshow background is another aspect of graphic creativity at its best, which can be used in a number of ways to grab considerable viewer attention. When choosing to add moving backgrounds to your presentation, the latter can aid in improving the style of content presentation, making your audience curious about how and what happens next.
Having learnt about the utility and creation process of video backgrounds in the PowerPoint presentation tool, let us extend our discussion to the method of creating a moving slide show background in the same in the following section:
User’s Guide to Create Moving Backgrounds for PowerPoint Presentations
Discussed below is an explanatory procedure for designing moving backgrounds with an awesome appearance for slideshow presentations in Microsoft PowerPoint:
Step 1: Open Your Presentation
To begin with, launch the PowerPoint tool in your preferred device and open the presentation on which you will be working to add the moving background. After the presentation gets loaded, navigate through the same and select the desired slide to proceed with the aforesaid task.
Step 2: Choose a Video Location
To add your desired video to the slide, navigate to the PowerPoint ribbon at the top and click on the ‘Insert’ tab. Select ‘Video’ from the list of options that appears, followed by choosing one of the ‘Online Video’ or ‘Video on My PC’ options from the video selection prompt. It is further recommended to select a video in the MP4 format, as the latter gives best results of moving and video backgrounds.
Step 3: Insert Your Video
Choose the second option in the selection prompt to upload a video from your device. You will now be asked to browse through your device and locate the desired video in the ‘Insert Video’ dialog box that appears. Select your video and tap the ‘Insert’ button to add your video.
To upload videos from an online source, choose the ‘Online Video’ option in the selection prompt and proceed to search the video from PowerPoint or paste its embed code to recover the video. The chosen video will begin to download and can be added to the PowerPoint presentation after the download process comes to an end.
Step 4: Playback Editing and Video Customization
Before proceeding further, consider paying your video once by clicking on the ‘Start’ button. You can also add different effects, trim and crop or add a bookmark to your video by navigating to and clicking on the ‘Video Tools’ tab, followed by selecting the ‘Format’ option. To work with the start and playback options for the video, click on ‘Playback’ in the dropdown menu of the ‘Video Tools’ tab.
Part 3 Some Tips for You to Get Awesome PowerPoint Backgrounds & Templates
Now that you have developed a comprehensive understanding of the utility of adding video and moving background for slideshow presentation, let us look through some easy tips and tricks to conveniently access the top rated and the most popular PowerPoint slideshow templates and backgrounds in the following section:
01Cool Slide Backgrounds
Slideshow presentations in PowerPoint are supplemented with a visual spark through amazing and vibrant backgrounds that are a sign of excellent graphic creativity. When working with a PowerPoint presentation of your own, do take the liberty to use some cool slide backgrounds to your creative advantage.
When the talk is about complementing your presentation with a cohesive and upbeat background, you can either select the most suitable one from a heap of pre made slideshow templates available both in the PowerPoint slideshow creator tool as well as across the web. However, if you wish to take the excitement to another level, try hands at creating an awesome and cool backgrounds for PowerPoint slides of your own!
Talking about some really cool tips and tricks to design a slideshow presentation background in PowerPoint, start with including some specific shapes and color overlays to the background capture, experiment with a polygon background, work on enhancing the background image with classic and artistic effects and apply a mix of colors, textures and patterns to give a classy look to your slideshow backgrounds.
02Professional Slideshow Backgrounds
If you are aiming at creating a PowerPoint slideshow presentation with a business centered design approach, you will need to cut down on some extra elements that you would ideally choose to include in a personal purpose based slideshow. Paying attention to the fact that business and corporate centered presentations should be simple, subtle and to the point, it would be an intelligent step to avoid adding too many expressive elements in the background.
Whether you are creating a professional slideshow background of your own or working with a pre designed template, take care to include a complementary play of a light background theme with a maximum of 2 balancing shades.
Avoid too much vibrancy and abstain from applying over the top effects and quick transitions, lest your presentation may look a bit too crowed. If your slides have lot of written content, prefer using a white color background text in a professional font style.
If you have decided on picking a pre made template, you can browse through a diversity of suggestions across the web, while keeping the aforesaid constraints in mind. Consider taking a look at the figure given below to have a more comprehensive understating of the prerequisites of selecting a professional sideshow background template:
03Happy Birthday Slide Backgrounds
Birthday parties are the most appealing synonyms of fun and entertainment. If you are into the profession of organizing events that renders smiling and happy faces, slideshow presentations could be of great help to you in discussing about services, types of social gentries and event targets with your clients.
When looking through different options to select the perfect birthday template, either for a professional event, or just to go down the memory lane of your most cherished moments, take caution to search for a vibrant alternative with colorful images, different background designs and party oriented cool themes, wide aspect ratio with high screen resolution for a mass display and conveniently editable graphics.
If you are creating a happy birthday slide background of your own, there are variety of realms to explore your graphic design creativity, owing to the fact that the subject of creation is highly expressive and multi-dimensional. While you are free to extend your creativity to the next level, do pay attention to the above constraints for a more elusive and outstanding creation output, while maintaining the fun and entertainment quotient intact.
04Wedding Slide Backgrounds
Considering the fact that wedding events are pronounced means of fun, leisure, enjoyment and beautiful memories, anything that aims to be a part of the celebrations, should be equally ecstatic and engaging. Infusing festive occasions with technology, slideshow based wedding invitations and moment captures are the top rated modern trends of celebrating this significant life event.
If you are keen on designing the perfect slideshow presentation for wedding invitations, photo albums and thank you cards, prefer to choose a wedding slide background template with aesthetic layout and flowing element inclusions, like that of floral borders and scented candles. Look though the elements of a subtle thematic setup with soothing color combinations, preferably in complementary pastel shades, like pink and white.
Talking of template customizability, the latter should have placeholders to include names of the bride and groom, the wedding date and venue, and of course the wedding photographs. The beautiful slide background template should have enough design space to include the most elusive play of text colors and fonts to suit specific preferences of creating special memories of a cherished event.
05Slideshow Backgrounds and Templates in Filmora
When looking for the most convenient lead to an extensive variety of beautiful slideshow templates and background, the template library of Wondershare Filmora Video Editor slideshow creator program can be your most affordable destination. The aforesaid software library is known to possess the best and most perfect template choices to suit the creation constraints of almost every slideshow presentation style and objective you can possibly think of.
For Win 7 or later (64-bit)
For macOS 10.12 or later
The elusive templates are further supplemented with a plethora of design flexibilities and customization features that are all set to deliver you the most appreciable creation output. Stressing a bit on the template customization choices of the software, you can work with the tool to uplift your slideshow backgrounds with artistic image effects and overlays, annotate them with beautiful text formations in a variety of colors, fonts and sizes and lots more.
Moving a bit deeper into the creative aspect, you can upgrade the visual style of your presentations with the most perfect and seamless image and video transitions and text animations. The bottom line is, working with the aforesaid slideshow creator program, you are entitled to get jaw dropping applaud from your audience, while making a confident and a content delivery through your slideshow presentation.
● Ending Thoughts →
● Using an expressive and complementing background in your slideshow presentation uplifts its visual credibility in captivating your audience.
● Browsing through the web, you get to access a vast range of amazing slideshow backgrounds and templates to make your presentation, a visual masterpiece.
● When looking for the most distributed storehouse of slideshow backgrounds and templates, the Wondershare Filmora library is your ultimate solution.
The Ultimate Cheatsheet to 15 Adobe Animate Alternatives
The Ultimate Cheatsheet to 15 Adobe Animate Alternatives in 2024
An easy yet powerful editor
Numerous effects to choose from
Detailed tutorials provided by the official channel
Like all other Adobe premium software like Photoshop, illustrator, and premiere pro, Adobe Animate is designed for professionals.
No need to feel discouraged as there are plenty of Adobe Animate free alternatives with which you can polish the animator in you. Let’s check them out.
In this article
01 [Adobe Animate - How It Became a Good Option Without Hesitation?](#Part 1)
02 [Top 10 Adobe Animate Alternatives to Improve Animation Experience](#Part 2)
03 [The Most Comprehensive All-round Comparison Among All Alternatives](#Part 3)
Part 1 Adobe Animate - How It Became a Good Option Without Hesitation?
1. How Much Do You Know About Adobe Animate Key Features?
The Adobe Creative Cloud is constantly updating its range of virtual tools with new features which give users twice more incentive to subscribe. Adobe Animate CC, which is basically the new Adobe Flash, has also received an update recently which installed a bundle of new features to its interface, making it even more irresistible to animators.
What’s new with Adobe Animate?
● Adobe Animate Camera
Adding to Adobe’s line of exclusivity is its all-new Adobe Virtual Camera. Using this feature, Adobe animate users can now control their animation camera movements giving your animation videos a more realistic feel.
● Export any Format
Exporting your animations to your desktop is a convenience every software should provide.
● Audio Syncing
Adobe Animate enables you to synchronize audio to your animations completely easily which is yet another feature that has been recently added.
● Vector Brushes
Though it resembles the same functionality with Adobe Illustrator, Adobe Animate has renewed the tool with the ability to use tilt and pressure effects when drawing with a stylus or pen.
● Web Fonts
Now you can use a vast library of Adobe web fonts with Adobe Animate. These high-quality fonts are available in HTML5 canvas documents.
2. What Lay Behind Adobe Animate Alternative?
When it comes to choosing the best premium animation software, Adobe Animate CC is the obvious choice, but what makes beginners hesitant in using Adobe Animate is the fact that you need to subscribe to Adobe Creative Cloud.
This becomes an obstacle to those who are just starting out and are not that confident in getting their hands on a professional league interface like Animate. It also lacks sufficient facilities for practicing 3D animations.
This is exactly where free Alternatives to Adobe Animate enters the scene. Check out our list and find out which alternative suits your level of animation skills.
Part 2 Top 10 Adobe Animate Alternatives to Improve Animation Experience
No. 1 Krita

The first free-to-use Adobe Alternative on our list is ‘Krita’. It is an open-source animator with an intuitive drag and drop panel which gives users complete flexibility.
Krita llll➤
● UI
It offers over 30 different Dockers which are like toolkits for the program.
● Features
Freehand path tool+Object manipulation+HDR support+Layer Management+Enhanced OpenGL
● Compatibility
Supports various metadata formats like ORA, KRA, PSD, JPEG and PNG files.
● Popularity
Krita has a 4.3 start popularity rating at G2.com.
● Operating System
Compatible with Windows 8 or higher, macOS X 10.12 and Linux Basic.
● Pricing
Free to use.
● Who is Best For?
Krita is an excellent alternative for beginners who are looking to not get overwhelmed by comprehensive features.
● Reviewers say compared to Adobe Animate
Many reviewers have preferred Krita’s simplistic approach to Adobe Animate.
● Verdict
It is an excellent image editor and animator but can be limiting in its professional application.
Strengths
100 preloaded brushes: You can use brush tools in categories like digital, ink, paint, and sketch.
Onion Layer Editing: You can go back and check your previous drawing before moving on to the next.
Counteractive Tools: Efficiently compatible with pressure-sensitive tablets.
Weaknesses
Pixel-based Drawings: Its drawings are pixelated making it harder to achieve precisions around the rough edges.
Added Support: Exporting animation files requires support from a secondary application.
No. 2 Open Toonz

A friendlier platform for cartoon animation lovers and yet another free Adobe Animate Alternative. An open-source platform whose code can be modified by the user to add new features and graphics.
Open Toonz llll➤
● UI
Its interface has separate organized rooms called ‘workspaces’. The tools and windows in each room are different and fulfill a separate function.
● Features
Indexed Colour Palettes+Motion Tracking+Effects and Composting+Effects and Composting+Effects and Composting
● Compatibility
Opentoonz supports a plethora of file formats like AVI, 3GP, BMP, JPG, GIF, MOV, NOL, RGB, SGI, TGA, TIF, and TIFF.
● Popularity
OpenToonz has a standard rating of 4.1 stars on G2.
● Operating System
Compatible with macOS X 10.9, Windows 7 or higher.
● Pricing
Free to use.
● Who is Best For?
Can be used by both professionals and beginners alike.
● Reviewers say compared to Adobe Animate
It is a great platform to familiarize yourself with basic animation.
● Verdict
OpenToonz is an excellent animation tool for beginners but lacks some of the higher-performing functions demanded by professionals.
Strengths
TWAIN Standard Compatible: Images captured on OpenToonx using its digital camera and scanners can be used in animations.
Choose from different animation types: You can choose between standard animation and skeletal animations.
100s of Special Effects: Change the effects of your image however you want using effects like incident light or distortion waves.
Weaknesses
Suitable only for beginners: OpenToonz may still require some work in order to muster the attention of pros.
Lack of automated syncing: You may find it difficult to sync the voices of your characters.
No. 3 Toon Boom

Toon Boom is a more popular alternative to Adobe Animate and is recognized by professional animation studios worldwide. Toon Boom even has its own pro-grade animation software called Harmony which has been used to create various popular TV animated series.
Toon Boom llll➤
● UI
The extremely instinctive interface where you can navigate using various effects like zoom in & out, pan and reset your views.
● Features
Advanced Cut out+Bitmap and Vector Drawing+Bitmap and Vector Drawing+Access to Harmony Server+Access to Harmony Server
● Compatibility
Toon Boom can import dozens of different file formats like BMP, JPEG, PSD, TGA, SGI, TIFF, TVG and PAL.
● Popularity
Toom Boom is rated excellent on G2 with 4.7 stars.
● Operating System
Can run with Windows 7 & 10, macOS High Sierra, Catalina, Mojave.
● Pricing
Basic - $25/month; Advanced - $63/month; Premium - $115/month.
● Who is Best For?
Superb animation software with dozens of features that would attract freelance animators and professionals.
● Reviewers say compared to Adobe Animate
The common opinion amongst reviewers is that Toon Boom offers many more features than Adobe Animate.
● Verdict
Toon Boom is premium software that is excellent for pro-league animators and is one of Adobe Animates biggest competitors.
Strengths
Onion Skinning Feature: You can view your drawings in layers.
Import & Export Different types of files: You can export and import files like paper drawings, digital drawings and 13 other file types.
Peg Animations: You can chart your character’s movements using pegs between two points.
Weaknesses
Lacks Audio Features: You require an external audio application to include audio in your animations.
Do not include pre-made characters: You would need to create your characters from scratch.
No. 4 TVPaint Animation

TVPaint has been a household animation software that has been around for a while. It has considerable features which are great for creating versatile 2D animations.
TVPaint Animation llll➤
● UI
The TVPaint Interface is not too complex and has a wide range of bitmap drawing tools for 2D all 2D animation processes.
● Features
Bitmap Drawing Tools+Bitmap Drawing Tools+Layer Management+Layer Management+Layer Management
● Compatibility
Can import image and video files like WMV, AVI, MOV, MPEG, GIF, JPEG, PNG, and TIFF.
● Popularity
TVPaint has been around for a long while and has a 5-star G2 rating.
● Operating System
Later versions of TVPaint are compatible with Microsoft Windows, macOS X, Android, and Linux.
● Pricing
Standard version 11.0 costs €500; Professional version 11.0 costs €1250.
● Who is Best For?
It is traditionally acclaimed 2D animation software superb for professional animation studios.
● Reviewers say compared to Adobe Animate
Both TV Paint and Animate cc has the ability to perfect frame to frame animation with minor differences in the choice of tools.
● Verdict
TV Paint is a fantastic software amongst animators who wish to perfect their craft.
Strengths
Versatile Drawing Tools: You have access to all essential drawing tools like brushes, color palettes, textures and more.
Strong Painting Engine: Powerful painting tool for sketching and painting backgrounds.
Colour & Texture Generator: This tool provides an enhanced spectrum of colors.
Weaknesses
Learning Curve: TVPaint has its own learning curve as the interface is dissimilar from average animators.
Limited to Bitmap: You can only edit images in Bitmap format.
No. 5 Synfig Studio

Synfig is yet another free-to-use Adobe Animate alternative but is quite powerful in creating fabulous vector animations which are flawless to look at it.
Synfig Studio llll➤
● UI
Synfig is yet another free-to-use Adobe Animate alternative but is quite powerful in creating fabulous vector animations which are flawless to look at it.
● Features
Various different layers+Sound Support+Dozens of Drawing Tools+Dozens of Drawing Tools+Import Facility
● Compatibility
You can render multiple video formats like AVI, MPEG, GIF, and MNG.
● Popularity
Excellent Rating 5 stars for Vector Graphics on G2.
● Operating System
Can run on Windows 7 and above, macOS X 10.8 and Linux.
● Pricing
Free to use.
● Who is Best For?
Synfig is a bit complex but great for animators who are willing to learn.
● Reviewers say compared to Adobe Animate
Much more convenient interface.
● Verdict
Synfig Studios is a great program for animating vector graphics.
Strengths
Vector Tweening: Change the shape of your vectors automatically.
50+ Layers: Choose from multiple gradients, filters, distortions, geometrics and fractals.
Auto Lip-Sync: Your audio will be automatically paired with your characters.
Weaknesses
Continuous Saving: You will need to manually save your files each time.
Learning Curve: The program takes some time to master.
No. 6 Cacani

Here comes CACANi, a new chip off the old block for anime lovers. It has awesome features for drawing vector animations.
Cacani llll➤
● UI
Excellent vector drawing interface which reduces your effort and time by auto-generating drawings.
● Features
Auto-generated Drawings+Personal Drawing Assistant+Max Artist Control+Max Artist Control+Shortcut Customization
● Compatibility
BMP, PNG, JPG, TGA, and TIFF files can all be imported.
● Popularity
Relatively new to the market but is growing in popularity.
● Operating System
Compatible with Windows 7, 8, 10, or higher.
● Pricing
30-day license $20; Yearlong license $180; Lifelong license $499; Team Plans start at $399 for 4 devices; Perpetual Team Plan $799
● Who is Best For?
Animators looking to work with a more powerful set of tools and are willing to pay for it can opt for Cacani.
● Reviewers say compared to Adobe Animate
An advanced tool provides excellent support for smooth and curve drawings.
● Verdict
A premium tool meant for advanced usage and is excellent for instinctive users and animators.
Strengths
Painting Assistance: You can paint one sequence and your color combination will be carried forward to the next sequence.
Drawing Tools: Simplifies all types of vector drawings.
Stroke Correction: You can correct problems in-between frames.
Weaknesses
Cost-effective for individual use: Teams and businesses may find it a bit above budget.
Cost-effective for individual use: Teams and businesses may find it a bit above budget.
No. 7 Wick Editor

Wick Editor is a free-to-use open-source platform that is great for creating standard flash-based animations. It was incepted with the purpose to provide animators with a free platform equipped with easy-to-use toolkits.
Wick Editor llll➤
● UI
Wick’s interface includes a combination of programming and animation systems using tools like Flash and Scratch and HyperCard.
● Features
Interactive Interface+Browser Operated+Browser Operated+Includes Guides and Tutorials
● Compatibility
Requires third-party assistance to convert wick files to GIF, ZIP or HTML.
● Popularity
Moderately rate by first-time users.
● Operating System
Can run online through browsers like Firefox or Chrome.
● Pricing
Free to use.
● Who is Best For?
Suitable marketing animators and freelancers.
● Reviewers say compared to Adobe Animate
Not as comprehensive as Adobe Animate.
● Verdict
Wick Editor is more suited for animating basic promotions but not meant for professional use.
Strengths
User Friendly: Icons, texts, and labels are enlarged for convenience.
Includes Basic Programming: Combines animation elements with a programming interface.
Export to multiple formats: You can use export wick projects in multiple formats.
Weaknesses
Incompatible with Mobile Devices: It is not available for use on mobile devices.
Incompatible with Mobile Devices: It is not available for use on mobile devices.
No. 8 Blender

Animators who are looking to specialize in 3D animations can get their hands on Blender. It is a highly popular open-source 3D animation software.
Blender llll➤
● UI
Animators who are looking to specialize in 3D animations can get their hands on Blender. It is a highly popular open-source 3D animation software.
● Features
3D modelling+Raster Graphics Editing+Fluid and Smoke Simulation+Raster Graphics Editing+Rigging & Skinning
● Compatibility
Blender is compatible with a wide range of file formats namely OBJ, 3DS, FBX, STL, PLY and so on.
● Popularity
Blender has an excellent rating of 4.5 on G2.
● Operating System
Compatible for Windows 10 or higher, macOS 10.13 and Linux.
● Pricing
Free to use.
● Who is Best For?
Blender is used by animators worldwide to create professional animation productions.
● Reviewers say compared to Adobe Animate.
Adobe Animate is comparatively easier to use, but Blender is great for small-scale animation businesses.
● Verdict
An excellent diverse animation tool for small-scale studios, freelancers and hobbyists.
Strengths
Sync Sound: Match your audios with your visuals with auto-sync.
Preset Shortcuts: You can memorize a list of hotkeys for convenient use.
Shape Keys: You can add more detail with the help of shape keys like skeletal rigging.
Weaknesses
Complicated User interface: There are dozens of duplicate buttons which uncoordinated.
Glitches: Open source software is known to be glitchy as they lack premium security.
No. 9 Autodesk Maya

Maya is a well-known 3D graphics editor which is absolutely jam-packed with features and functions like 3D animation, rendering, simulation, composting, modeling and visualization. It can be considered the next level in animation after Adobe Animate.
Krita llll➤
● UI
Maya is a well-known 3D graphics editor which is absolutely jam-packed with features and functions like 3D animation, rendering, simulation, composting, modeling and visualization. It can be considered the next level in animation after Adobe Animate.
● Features
Ready to use graphs+Ready to use graphs+Bifrost Programming Environment+Ocean Simulation Systems+Seamless Import and Export
● Compatibility
Maya can import various file formats, including mayaBinary, mayaLT, mayaAscii, OBJ, audio, EPS, Adobe Illustrator, Image, FBX.
● Popularity
Maya has a standard 4.3 rating on G2.
● Operating System
Compatible with macOS X 10.13, Windows 10 or higher and Linux.
● Pricing
Annual Subscription $1700.
● Who is Best For?
Maya is equipped with a substantial number of features and requires animators to take time learn therefore grooming their animation skills.
● Reviewers say compared to Adobe Animate
Adobe animate has a much more convenient interface when compared to Autodesk Maya but it is more alluring for professional studios.
● Verdict
Autodesk Maya is mighty fine 3D animation software that opens more doors for animators with a keen sense of detail.
Strengths
A complete 3D animation package: Maya hasn’t left any stone unturned in terms of features.
One of the best in the Industry: Simple to create any type of animation.
Python API: Convenient for creating plugins and scripts.
Weaknesses
Lacks Convenient Interface: Maya’s toolkit is a bit more complex than Animate CC.
No. 10 Filmora Pro

Filmora Pro is an excellent Adobe Animate alternative in terms of convenience, versatility and the variation animation features you can explore on its super intuitive interface.
Krita llll➤
● UI
Filmora Pro is basically a video editing software with a unique interface that is simple to understand and master.
● Features
Length Adjustment+Gradient Tool+Evaporate+Linear Wipe+Pinwheel
● Compatibility
You can import a wide range of video files like MP4, MOV, WMV, AVI, F4V, MKV, TS, MPEG-2, GIF, MP3 and WEBM.
● Popularity
Filmora Pro is rated at a whopping 4.6 stars.
● Operating System
Compatible with Windows 7, 8, 10, 11, macOS 10.15, 11, 13, 14.
● Pricing
Per Year subscription $51.99; time Purchase $79.99
● Who is Best For?
Filmora Pro from Wondershare is ideal for users, from vloggers and freelancers to hobbyists and professionals.
● Reviewers say compared to Adobe Animate.
According to most reviewers, Filmora Pro has an easier-to-use interface and an abundance of features compared to Adobe Animate CC. Still, it is essentially a video editing software nonetheless.
● Verdict
Filmora Pro is an all-in-one video editing software that offers tons of editing features for all types of videos.
Strengths
Preset Options: You can experiment with a wide range of presets to edit animations quickly.
Easy Media Upload: Filmora supports a wide range of file formats.
4K video: You can also use Filmora to edit 4K videos.
Weaknesses
Lacks Shortcut Options: It may get a bit difficult to navigate on Filmora.
Cartoonish Transitions: Transition between cuts can require extra care.
Part 1 The Most Comprehensive All-round Comparison Among All Alternatives
| Tools | UI | G2 Rating | OS | Pricing |
|---|---|---|---|---|
| Krita | Versatile | 4.3 | Windows 8 or higher, macOS X 10.12 and Linux | Free |
| Open Toonz | Compartmentalized | 4.1 | MacOS X 10.9, Windows 7 or higher | Free |
| Toon Boom | Instinctive | 4.7 | Windows 7 & 10, macOS High Sierra, Catalina, Mojave | Basic – $25/month; Advanced - $63/month; Premium - $115/month |
| TVPaint Animation | Comprehensive | 5 | Windows, macOS X, Android and Linux. | Standard Version – €500; Pro Version – €1250 |
| Synfig Studio | Versatile | 5 | Windows 7 and above, macOS X 10.8 and Linux | Free |
| Cacani | Effortless | NIL | Windows 7, 8, 10 or higher | 30-day license $20; Yearlong license $180; Lifelong license $499; Team Plans start at $399 for 4 devices; Perpetual Team Plan $799 |
| Wick Editor | Hybrid | NIL | Firefox or Chrome. | Free |
| Blender | Changing | 4.5 | Windows 10 or higher, macOS 10.13 and Linux. | Free |
| Maya | Comprehensive | 4.3 | MacOS X 10.13, Windows 10 or higher and Linux. | Annual Subscription $1700 |
| Filmora Pro | Versatile | 4.6 | Windows 7, 8, 10, 11, macOS 10.15, 11, 13, 14. | Yearly – $51.99; One Time –$79.99 |

Wondershare Filmora - Best Video Editor for Mac/Windows
5,481,435 people have downloaded it.
Build unique custom animations without breaking a sweat.
Focus on creating epic stories and leave the details to Filmora’s auto features.
Start a creative adventure with drag & drop effects and endless possibilities.
Filmora simplifies advanced features to save you time and effort.
Filmora cuts out repetition so you can move on to your next creative breakthrough.
Key Takeaways from This Episode
● There are dozens of free and paid animation software out there, but only a few are ideal Adobe Animate Alternatives.
● Adobe Animate is one of the best 2D and 3D animation software in the market, with versatile tools and many plug-in options.
● You need a monthly or yearly subscription to Adobe Creative Cloud to use Animate CC, which is why we have complied a list of the best Adobe Animate Alternatives.
Like all other Adobe premium software like Photoshop, illustrator, and premiere pro, Adobe Animate is designed for professionals.
No need to feel discouraged as there are plenty of Adobe Animate free alternatives with which you can polish the animator in you. Let’s check them out.
In this article
01 [Adobe Animate - How It Became a Good Option Without Hesitation?](#Part 1)
02 [Top 10 Adobe Animate Alternatives to Improve Animation Experience](#Part 2)
03 [The Most Comprehensive All-round Comparison Among All Alternatives](#Part 3)
Part 1 Adobe Animate - How It Became a Good Option Without Hesitation?
1. How Much Do You Know About Adobe Animate Key Features?
The Adobe Creative Cloud is constantly updating its range of virtual tools with new features which give users twice more incentive to subscribe. Adobe Animate CC, which is basically the new Adobe Flash, has also received an update recently which installed a bundle of new features to its interface, making it even more irresistible to animators.
What’s new with Adobe Animate?
● Adobe Animate Camera
Adding to Adobe’s line of exclusivity is its all-new Adobe Virtual Camera. Using this feature, Adobe animate users can now control their animation camera movements giving your animation videos a more realistic feel.
● Export any Format
Exporting your animations to your desktop is a convenience every software should provide.
● Audio Syncing
Adobe Animate enables you to synchronize audio to your animations completely easily which is yet another feature that has been recently added.
● Vector Brushes
Though it resembles the same functionality with Adobe Illustrator, Adobe Animate has renewed the tool with the ability to use tilt and pressure effects when drawing with a stylus or pen.
● Web Fonts
Now you can use a vast library of Adobe web fonts with Adobe Animate. These high-quality fonts are available in HTML5 canvas documents.
2. What Lay Behind Adobe Animate Alternative?
When it comes to choosing the best premium animation software, Adobe Animate CC is the obvious choice, but what makes beginners hesitant in using Adobe Animate is the fact that you need to subscribe to Adobe Creative Cloud.
This becomes an obstacle to those who are just starting out and are not that confident in getting their hands on a professional league interface like Animate. It also lacks sufficient facilities for practicing 3D animations.
This is exactly where free Alternatives to Adobe Animate enters the scene. Check out our list and find out which alternative suits your level of animation skills.
Part 2 Top 10 Adobe Animate Alternatives to Improve Animation Experience
No. 1 Krita
The first free-to-use Adobe Alternative on our list is ‘Krita’. It is an open-source animator with an intuitive drag and drop panel which gives users complete flexibility.
Krita llll➤
● UI
It offers over 30 different Dockers which are like toolkits for the program.
● Features
Freehand path tool+Object manipulation+HDR support+Layer Management+Enhanced OpenGL
● Compatibility
Supports various metadata formats like ORA, KRA, PSD, JPEG and PNG files.
● Popularity
Krita has a 4.3 start popularity rating at G2.com.
● Operating System
Compatible with Windows 8 or higher, macOS X 10.12 and Linux Basic.
● Pricing
Free to use.
● Who is Best For?
Krita is an excellent alternative for beginners who are looking to not get overwhelmed by comprehensive features.
● Reviewers say compared to Adobe Animate
Many reviewers have preferred Krita’s simplistic approach to Adobe Animate.
● Verdict
It is an excellent image editor and animator but can be limiting in its professional application.
Strengths
100 preloaded brushes: You can use brush tools in categories like digital, ink, paint, and sketch.
Onion Layer Editing: You can go back and check your previous drawing before moving on to the next.
Counteractive Tools: Efficiently compatible with pressure-sensitive tablets.
Weaknesses
Pixel-based Drawings: Its drawings are pixelated making it harder to achieve precisions around the rough edges.
Added Support: Exporting animation files requires support from a secondary application.
No. 2 Open Toonz
A friendlier platform for cartoon animation lovers and yet another free Adobe Animate Alternative. An open-source platform whose code can be modified by the user to add new features and graphics.
Open Toonz llll➤
● UI
Its interface has separate organized rooms called ‘workspaces’. The tools and windows in each room are different and fulfill a separate function.
● Features
Indexed Colour Palettes+Motion Tracking+Effects and Composting+Effects and Composting+Effects and Composting
● Compatibility
Opentoonz supports a plethora of file formats like AVI, 3GP, BMP, JPG, GIF, MOV, NOL, RGB, SGI, TGA, TIF, and TIFF.
● Popularity
OpenToonz has a standard rating of 4.1 stars on G2.
● Operating System
Compatible with macOS X 10.9, Windows 7 or higher.
● Pricing
Free to use.
● Who is Best For?
Can be used by both professionals and beginners alike.
● Reviewers say compared to Adobe Animate
It is a great platform to familiarize yourself with basic animation.
● Verdict
OpenToonz is an excellent animation tool for beginners but lacks some of the higher-performing functions demanded by professionals.
Strengths
TWAIN Standard Compatible: Images captured on OpenToonx using its digital camera and scanners can be used in animations.
Choose from different animation types: You can choose between standard animation and skeletal animations.
100s of Special Effects: Change the effects of your image however you want using effects like incident light or distortion waves.
Weaknesses
Suitable only for beginners: OpenToonz may still require some work in order to muster the attention of pros.
Lack of automated syncing: You may find it difficult to sync the voices of your characters.
No. 3 Toon Boom
Toon Boom is a more popular alternative to Adobe Animate and is recognized by professional animation studios worldwide. Toon Boom even has its own pro-grade animation software called Harmony which has been used to create various popular TV animated series.
Toon Boom llll➤
● UI
The extremely instinctive interface where you can navigate using various effects like zoom in & out, pan and reset your views.
● Features
Advanced Cut out+Bitmap and Vector Drawing+Bitmap and Vector Drawing+Access to Harmony Server+Access to Harmony Server
● Compatibility
Toon Boom can import dozens of different file formats like BMP, JPEG, PSD, TGA, SGI, TIFF, TVG and PAL.
● Popularity
Toom Boom is rated excellent on G2 with 4.7 stars.
● Operating System
Can run with Windows 7 & 10, macOS High Sierra, Catalina, Mojave.
● Pricing
Basic - $25/month; Advanced - $63/month; Premium - $115/month.
● Who is Best For?
Superb animation software with dozens of features that would attract freelance animators and professionals.
● Reviewers say compared to Adobe Animate
The common opinion amongst reviewers is that Toon Boom offers many more features than Adobe Animate.
● Verdict
Toon Boom is premium software that is excellent for pro-league animators and is one of Adobe Animates biggest competitors.
Strengths
Onion Skinning Feature: You can view your drawings in layers.
Import & Export Different types of files: You can export and import files like paper drawings, digital drawings and 13 other file types.
Peg Animations: You can chart your character’s movements using pegs between two points.
Weaknesses
Lacks Audio Features: You require an external audio application to include audio in your animations.
Do not include pre-made characters: You would need to create your characters from scratch.
No. 4 TVPaint Animation
TVPaint has been a household animation software that has been around for a while. It has considerable features which are great for creating versatile 2D animations.
TVPaint Animation llll➤
● UI
The TVPaint Interface is not too complex and has a wide range of bitmap drawing tools for 2D all 2D animation processes.
● Features
Bitmap Drawing Tools+Bitmap Drawing Tools+Layer Management+Layer Management+Layer Management
● Compatibility
Can import image and video files like WMV, AVI, MOV, MPEG, GIF, JPEG, PNG, and TIFF.
● Popularity
TVPaint has been around for a long while and has a 5-star G2 rating.
● Operating System
Later versions of TVPaint are compatible with Microsoft Windows, macOS X, Android, and Linux.
● Pricing
Standard version 11.0 costs €500; Professional version 11.0 costs €1250.
● Who is Best For?
It is traditionally acclaimed 2D animation software superb for professional animation studios.
● Reviewers say compared to Adobe Animate
Both TV Paint and Animate cc has the ability to perfect frame to frame animation with minor differences in the choice of tools.
● Verdict
TV Paint is a fantastic software amongst animators who wish to perfect their craft.
Strengths
Versatile Drawing Tools: You have access to all essential drawing tools like brushes, color palettes, textures and more.
Strong Painting Engine: Powerful painting tool for sketching and painting backgrounds.
Colour & Texture Generator: This tool provides an enhanced spectrum of colors.
Weaknesses
Learning Curve: TVPaint has its own learning curve as the interface is dissimilar from average animators.
Limited to Bitmap: You can only edit images in Bitmap format.
No. 5 Synfig Studio
Synfig is yet another free-to-use Adobe Animate alternative but is quite powerful in creating fabulous vector animations which are flawless to look at it.
Synfig Studio llll➤
● UI
Synfig is yet another free-to-use Adobe Animate alternative but is quite powerful in creating fabulous vector animations which are flawless to look at it.
● Features
Various different layers+Sound Support+Dozens of Drawing Tools+Dozens of Drawing Tools+Import Facility
● Compatibility
You can render multiple video formats like AVI, MPEG, GIF, and MNG.
● Popularity
Excellent Rating 5 stars for Vector Graphics on G2.
● Operating System
Can run on Windows 7 and above, macOS X 10.8 and Linux.
● Pricing
Free to use.
● Who is Best For?
Synfig is a bit complex but great for animators who are willing to learn.
● Reviewers say compared to Adobe Animate
Much more convenient interface.
● Verdict
Synfig Studios is a great program for animating vector graphics.
Strengths
Vector Tweening: Change the shape of your vectors automatically.
50+ Layers: Choose from multiple gradients, filters, distortions, geometrics and fractals.
Auto Lip-Sync: Your audio will be automatically paired with your characters.
Weaknesses
Continuous Saving: You will need to manually save your files each time.
Learning Curve: The program takes some time to master.
No. 6 Cacani
Here comes CACANi, a new chip off the old block for anime lovers. It has awesome features for drawing vector animations.
Cacani llll➤
● UI
Excellent vector drawing interface which reduces your effort and time by auto-generating drawings.
● Features
Auto-generated Drawings+Personal Drawing Assistant+Max Artist Control+Max Artist Control+Shortcut Customization
● Compatibility
BMP, PNG, JPG, TGA, and TIFF files can all be imported.
● Popularity
Relatively new to the market but is growing in popularity.
● Operating System
Compatible with Windows 7, 8, 10, or higher.
● Pricing
30-day license $20; Yearlong license $180; Lifelong license $499; Team Plans start at $399 for 4 devices; Perpetual Team Plan $799
● Who is Best For?
Animators looking to work with a more powerful set of tools and are willing to pay for it can opt for Cacani.
● Reviewers say compared to Adobe Animate
An advanced tool provides excellent support for smooth and curve drawings.
● Verdict
A premium tool meant for advanced usage and is excellent for instinctive users and animators.
Strengths
Painting Assistance: You can paint one sequence and your color combination will be carried forward to the next sequence.
Drawing Tools: Simplifies all types of vector drawings.
Stroke Correction: You can correct problems in-between frames.
Weaknesses
Cost-effective for individual use: Teams and businesses may find it a bit above budget.
Cost-effective for individual use: Teams and businesses may find it a bit above budget.
No. 7 Wick Editor
Wick Editor is a free-to-use open-source platform that is great for creating standard flash-based animations. It was incepted with the purpose to provide animators with a free platform equipped with easy-to-use toolkits.
Wick Editor llll➤
● UI
Wick’s interface includes a combination of programming and animation systems using tools like Flash and Scratch and HyperCard.
● Features
Interactive Interface+Browser Operated+Browser Operated+Includes Guides and Tutorials
● Compatibility
Requires third-party assistance to convert wick files to GIF, ZIP or HTML.
● Popularity
Moderately rate by first-time users.
● Operating System
Can run online through browsers like Firefox or Chrome.
● Pricing
Free to use.
● Who is Best For?
Suitable marketing animators and freelancers.
● Reviewers say compared to Adobe Animate
Not as comprehensive as Adobe Animate.
● Verdict
Wick Editor is more suited for animating basic promotions but not meant for professional use.
Strengths
User Friendly: Icons, texts, and labels are enlarged for convenience.
Includes Basic Programming: Combines animation elements with a programming interface.
Export to multiple formats: You can use export wick projects in multiple formats.
Weaknesses
Incompatible with Mobile Devices: It is not available for use on mobile devices.
Incompatible with Mobile Devices: It is not available for use on mobile devices.
No. 8 Blender
Animators who are looking to specialize in 3D animations can get their hands on Blender. It is a highly popular open-source 3D animation software.
Blender llll➤
● UI
Animators who are looking to specialize in 3D animations can get their hands on Blender. It is a highly popular open-source 3D animation software.
● Features
3D modelling+Raster Graphics Editing+Fluid and Smoke Simulation+Raster Graphics Editing+Rigging & Skinning
● Compatibility
Blender is compatible with a wide range of file formats namely OBJ, 3DS, FBX, STL, PLY and so on.
● Popularity
Blender has an excellent rating of 4.5 on G2.
● Operating System
Compatible for Windows 10 or higher, macOS 10.13 and Linux.
● Pricing
Free to use.
● Who is Best For?
Blender is used by animators worldwide to create professional animation productions.
● Reviewers say compared to Adobe Animate.
Adobe Animate is comparatively easier to use, but Blender is great for small-scale animation businesses.
● Verdict
An excellent diverse animation tool for small-scale studios, freelancers and hobbyists.
Strengths
Sync Sound: Match your audios with your visuals with auto-sync.
Preset Shortcuts: You can memorize a list of hotkeys for convenient use.
Shape Keys: You can add more detail with the help of shape keys like skeletal rigging.
Weaknesses
Complicated User interface: There are dozens of duplicate buttons which uncoordinated.
Glitches: Open source software is known to be glitchy as they lack premium security.
No. 9 Autodesk Maya
Maya is a well-known 3D graphics editor which is absolutely jam-packed with features and functions like 3D animation, rendering, simulation, composting, modeling and visualization. It can be considered the next level in animation after Adobe Animate.
Krita llll➤
● UI
Maya is a well-known 3D graphics editor which is absolutely jam-packed with features and functions like 3D animation, rendering, simulation, composting, modeling and visualization. It can be considered the next level in animation after Adobe Animate.
● Features
Ready to use graphs+Ready to use graphs+Bifrost Programming Environment+Ocean Simulation Systems+Seamless Import and Export
● Compatibility
Maya can import various file formats, including mayaBinary, mayaLT, mayaAscii, OBJ, audio, EPS, Adobe Illustrator, Image, FBX.
● Popularity
Maya has a standard 4.3 rating on G2.
● Operating System
Compatible with macOS X 10.13, Windows 10 or higher and Linux.
● Pricing
Annual Subscription $1700.
● Who is Best For?
Maya is equipped with a substantial number of features and requires animators to take time learn therefore grooming their animation skills.
● Reviewers say compared to Adobe Animate
Adobe animate has a much more convenient interface when compared to Autodesk Maya but it is more alluring for professional studios.
● Verdict
Autodesk Maya is mighty fine 3D animation software that opens more doors for animators with a keen sense of detail.
Strengths
A complete 3D animation package: Maya hasn’t left any stone unturned in terms of features.
One of the best in the Industry: Simple to create any type of animation.
Python API: Convenient for creating plugins and scripts.
Weaknesses
Lacks Convenient Interface: Maya’s toolkit is a bit more complex than Animate CC.
No. 10 Filmora Pro
Filmora Pro is an excellent Adobe Animate alternative in terms of convenience, versatility and the variation animation features you can explore on its super intuitive interface.
Krita llll➤
● UI
Filmora Pro is basically a video editing software with a unique interface that is simple to understand and master.
● Features
Length Adjustment+Gradient Tool+Evaporate+Linear Wipe+Pinwheel
● Compatibility
You can import a wide range of video files like MP4, MOV, WMV, AVI, F4V, MKV, TS, MPEG-2, GIF, MP3 and WEBM.
● Popularity
Filmora Pro is rated at a whopping 4.6 stars.
● Operating System
Compatible with Windows 7, 8, 10, 11, macOS 10.15, 11, 13, 14.
● Pricing
Per Year subscription $51.99; time Purchase $79.99
● Who is Best For?
Filmora Pro from Wondershare is ideal for users, from vloggers and freelancers to hobbyists and professionals.
● Reviewers say compared to Adobe Animate.
According to most reviewers, Filmora Pro has an easier-to-use interface and an abundance of features compared to Adobe Animate CC. Still, it is essentially a video editing software nonetheless.
● Verdict
Filmora Pro is an all-in-one video editing software that offers tons of editing features for all types of videos.
Strengths
Preset Options: You can experiment with a wide range of presets to edit animations quickly.
Easy Media Upload: Filmora supports a wide range of file formats.
4K video: You can also use Filmora to edit 4K videos.
Weaknesses
Lacks Shortcut Options: It may get a bit difficult to navigate on Filmora.
Cartoonish Transitions: Transition between cuts can require extra care.
Part 1 The Most Comprehensive All-round Comparison Among All Alternatives
| Tools | UI | G2 Rating | OS | Pricing |
|---|---|---|---|---|
| Krita | Versatile | 4.3 | Windows 8 or higher, macOS X 10.12 and Linux | Free |
| Open Toonz | Compartmentalized | 4.1 | MacOS X 10.9, Windows 7 or higher | Free |
| Toon Boom | Instinctive | 4.7 | Windows 7 & 10, macOS High Sierra, Catalina, Mojave | Basic – $25/month; Advanced - $63/month; Premium - $115/month |
| TVPaint Animation | Comprehensive | 5 | Windows, macOS X, Android and Linux. | Standard Version – €500; Pro Version – €1250 |
| Synfig Studio | Versatile | 5 | Windows 7 and above, macOS X 10.8 and Linux | Free |
| Cacani | Effortless | NIL | Windows 7, 8, 10 or higher | 30-day license $20; Yearlong license $180; Lifelong license $499; Team Plans start at $399 for 4 devices; Perpetual Team Plan $799 |
| Wick Editor | Hybrid | NIL | Firefox or Chrome. | Free |
| Blender | Changing | 4.5 | Windows 10 or higher, macOS 10.13 and Linux. | Free |
| Maya | Comprehensive | 4.3 | MacOS X 10.13, Windows 10 or higher and Linux. | Annual Subscription $1700 |
| Filmora Pro | Versatile | 4.6 | Windows 7, 8, 10, 11, macOS 10.15, 11, 13, 14. | Yearly – $51.99; One Time –$79.99 |
Wondershare Filmora - Best Video Editor for Mac/Windows
5,481,435 people have downloaded it.
Build unique custom animations without breaking a sweat.
Focus on creating epic stories and leave the details to Filmora’s auto features.
Start a creative adventure with drag & drop effects and endless possibilities.
Filmora simplifies advanced features to save you time and effort.
Filmora cuts out repetition so you can move on to your next creative breakthrough.
Key Takeaways from This Episode
● There are dozens of free and paid animation software out there, but only a few are ideal Adobe Animate Alternatives.
● Adobe Animate is one of the best 2D and 3D animation software in the market, with versatile tools and many plug-in options.
● You need a monthly or yearly subscription to Adobe Creative Cloud to use Animate CC, which is why we have complied a list of the best Adobe Animate Alternatives.
Top 8 Anime Name & Title Generators Online-Get Cool Anime Names
Top 8 Anime Name Generators Online-Get Cool Anime Names

Shanoon Cox
Mar 27, 2024• Proven solutions
An anime name generator is a cool and fun tool that is used by anime lovers all over the world. This tool helps to create attractive anime names for you depending on your interests in anime or your character traits.
Anime names are used for a variety of purposes by anime lovers. Most of them want a cool anime-related name for their YouTube channel, game profile, twitch profile, etc. and with a large number of users on these platforms, it is difficult to get a unique name.
Also, a name becomes a symbol that represents quality, appearance, shortcomings, personality, etc.
The anime name generators will generate unique anime-related names for the users to choose from. A cool anime name always will attract more audiences to whatever content they are displaying.
Top 8 Anime Name Generators Online
A cool anime name will always attract the attention of people no matter what platform you are on. But not all people are creative enough to create such a name of their own. That is where an anime name generator comes for help.
Let’s have a look at the top 8 anime name generators available online that can be used to create unique anime names.
1. Fantasy Name Generator
The Fantasy Name Generator is a free application that can provide up to 10 anime and manga character names. The names on this site are divided into 3 categories, namely real names, fake names, and nicknames or unique names. All the names provided are Japanese.
A list of 10 names will be listed on the website when you open it. You can easily choose between male and female character anime names. If you are not satisfied with the displayed list, simply click on the Male names of Females names tab and 10 new random names will be displayed.
2. Cool Generator
The Cool Generator is another simple anime name generator that can be used to create anime names, clan names, team names, etc. All the anime names generated by this tool are unique and represent different characteristics.
A list of 24 anime names will be displayed when you open the cool generator. You can choose any one of the names from it. If you are not satisfied with the names displayed, you can go for another set of 24 names by tapping on the Generate New tab displayed above.
3. Thestoryshack.com
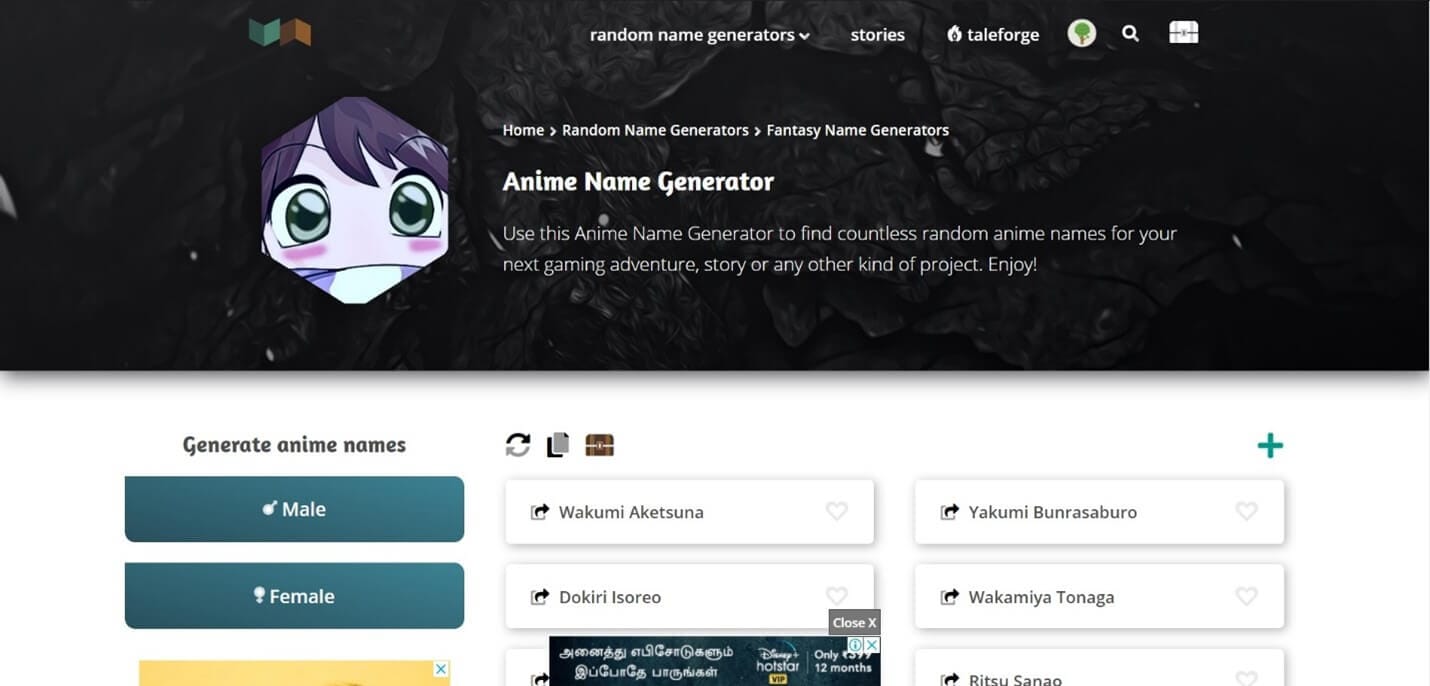
Thestoryshack.com is an awesome anime name generator that can provide you with countless anime names for your story, gaming adventure, or any other project. 6 unique names will be displayed on the page and you can go for more by clicking on the refresh tab.
This anime name-generating tool helps to choose between female and male character names very easily. They have also sorted the names into different categories elf names like elf names, dragon names, demon names, dwarf names, medieval names, Viking names, etc. for the convenience of the users.
4. Masterpiece Generator
Masterpiece Generator is another free online tool that helps you to create epic anime names. This tool allows you to create names with a maximum of 5 components, and hence you can choose between short and sweet or long and swanky names.
This application takes into account a variety of factors like gender, character title, flavor, character type, birth year, nationality, etc. to create a list of names. Once you have givens your suggestion, a list of names will be displayed on the page after clicking on the Write me some character names tab towards the bottom.
5. Reedsy
Reedsy is another tool that can generate cool Japanese anime character names for you. All the names are computer-generated and have something to do with their traditions.
A list of five Japanese names will be displayed once you open the page. The meanings of these names will also be mentioned for those who wish to choose names with specific meanings. You can choose the names between random, male, and female options. Clicking on the Generate names tab will always display a new set of names with the meanings.
6. Rumandmonkey.com
Rumandmonkey.com is a fun anime title generator that you can use to create appealing anime names. A small drawback is the number of ads that keep covering your display when you open the tool.
This anime name generator has classified the character names based on a different generation. You can choose between the greatest generation, baby boomer, generation x, millennials, and generation alpha categories. A variety of other questions will be asked on your likes and dislikes and an anime name will be displayed depending on the answers you have given. This tool only displays 1 name at a time and might require a little patience.
7. Quizony
Quizony is a great anime name generator for anime fans out there. The anime names generated by this tool represent the personality and character of the individual.
A series of questions will be asked by this tool to have an idea of likes and dislikes. A small drawback is that about 29 questions must be answered before they provide you with anime names. Once all the questions are answered the tool will choose a unique name for you. This tool has a brilliant way of choosing names but is not a suitable option if you want more than one anime name.
8. Fun Generator
As the name indicates Fun Generator is a very good application for all the fun-seeking anime lovers out there. This tool allows you to choose between a variety of Japanese anime names for your character.
A list of 5 different anime character names will be displayed when you open the site. You can either choose any one of them or go for another set by clicking on the tabs below. They also have options to choose from random, male or female character names.
Conclusion
Anime names are used by many anime lovers all over the world as their user name, profile name, etc. most people tend to keep this name for a lifetime. But not everyone can create an anime name that defines them and which is already not taken.
This problem is solved by anime name generators that are freely available online nowadays. These anime name generators help to create unique anime names that are appealing and tailored to the character traits of the individual.
We have listed the best online anime title generators available above. Choose an attractive anime name for yourself and have fun.
Shanoon Cox
Shanoon Cox is a writer and a lover of all things video.
Follow @Shanoon Cox
Shanoon Cox
Mar 27, 2024• Proven solutions
An anime name generator is a cool and fun tool that is used by anime lovers all over the world. This tool helps to create attractive anime names for you depending on your interests in anime or your character traits.
Anime names are used for a variety of purposes by anime lovers. Most of them want a cool anime-related name for their YouTube channel, game profile, twitch profile, etc. and with a large number of users on these platforms, it is difficult to get a unique name.
Also, a name becomes a symbol that represents quality, appearance, shortcomings, personality, etc.
The anime name generators will generate unique anime-related names for the users to choose from. A cool anime name always will attract more audiences to whatever content they are displaying.
Top 8 Anime Name Generators Online
A cool anime name will always attract the attention of people no matter what platform you are on. But not all people are creative enough to create such a name of their own. That is where an anime name generator comes for help.
Let’s have a look at the top 8 anime name generators available online that can be used to create unique anime names.
1. Fantasy Name Generator
The Fantasy Name Generator is a free application that can provide up to 10 anime and manga character names. The names on this site are divided into 3 categories, namely real names, fake names, and nicknames or unique names. All the names provided are Japanese.
A list of 10 names will be listed on the website when you open it. You can easily choose between male and female character anime names. If you are not satisfied with the displayed list, simply click on the Male names of Females names tab and 10 new random names will be displayed.
2. Cool Generator
The Cool Generator is another simple anime name generator that can be used to create anime names, clan names, team names, etc. All the anime names generated by this tool are unique and represent different characteristics.
A list of 24 anime names will be displayed when you open the cool generator. You can choose any one of the names from it. If you are not satisfied with the names displayed, you can go for another set of 24 names by tapping on the Generate New tab displayed above.
3. Thestoryshack.com
Thestoryshack.com is an awesome anime name generator that can provide you with countless anime names for your story, gaming adventure, or any other project. 6 unique names will be displayed on the page and you can go for more by clicking on the refresh tab.
This anime name-generating tool helps to choose between female and male character names very easily. They have also sorted the names into different categories elf names like elf names, dragon names, demon names, dwarf names, medieval names, Viking names, etc. for the convenience of the users.
4. Masterpiece Generator
Masterpiece Generator is another free online tool that helps you to create epic anime names. This tool allows you to create names with a maximum of 5 components, and hence you can choose between short and sweet or long and swanky names.
This application takes into account a variety of factors like gender, character title, flavor, character type, birth year, nationality, etc. to create a list of names. Once you have givens your suggestion, a list of names will be displayed on the page after clicking on the Write me some character names tab towards the bottom.
5. Reedsy
Reedsy is another tool that can generate cool Japanese anime character names for you. All the names are computer-generated and have something to do with their traditions.
A list of five Japanese names will be displayed once you open the page. The meanings of these names will also be mentioned for those who wish to choose names with specific meanings. You can choose the names between random, male, and female options. Clicking on the Generate names tab will always display a new set of names with the meanings.
6. Rumandmonkey.com
Rumandmonkey.com is a fun anime title generator that you can use to create appealing anime names. A small drawback is the number of ads that keep covering your display when you open the tool.
This anime name generator has classified the character names based on a different generation. You can choose between the greatest generation, baby boomer, generation x, millennials, and generation alpha categories. A variety of other questions will be asked on your likes and dislikes and an anime name will be displayed depending on the answers you have given. This tool only displays 1 name at a time and might require a little patience.
7. Quizony
Quizony is a great anime name generator for anime fans out there. The anime names generated by this tool represent the personality and character of the individual.
A series of questions will be asked by this tool to have an idea of likes and dislikes. A small drawback is that about 29 questions must be answered before they provide you with anime names. Once all the questions are answered the tool will choose a unique name for you. This tool has a brilliant way of choosing names but is not a suitable option if you want more than one anime name.
8. Fun Generator
As the name indicates Fun Generator is a very good application for all the fun-seeking anime lovers out there. This tool allows you to choose between a variety of Japanese anime names for your character.
A list of 5 different anime character names will be displayed when you open the site. You can either choose any one of them or go for another set by clicking on the tabs below. They also have options to choose from random, male or female character names.
Conclusion
Anime names are used by many anime lovers all over the world as their user name, profile name, etc. most people tend to keep this name for a lifetime. But not everyone can create an anime name that defines them and which is already not taken.
This problem is solved by anime name generators that are freely available online nowadays. These anime name generators help to create unique anime names that are appealing and tailored to the character traits of the individual.
We have listed the best online anime title generators available above. Choose an attractive anime name for yourself and have fun.
Shanoon Cox
Shanoon Cox is a writer and a lover of all things video.
Follow @Shanoon Cox
Also read:
- Updated 5 Different Animation Styles A Simple but Comprehensive Guide for 2024
- 10 Caricature Makers to Turn Your Photo to Caricature Effects
- New In 2024, Samples of Cartoon Character Face
- 8 Best Motion Graphics Online Tools for Your Inspiration for 2024
- Updated 10 Best Free GIF Apps for iPhone and iPad
- In 2024, Easy Cartoon Characters Drawing Tutorials for You Who Are Learning to Draw
- New Dead Simple Guide to Create New and Exciting Blackboard Animation for 2024
- In 2024, Top 3 Ways to Create Gif with Great 3D Gif Maker
- What Make Aesthetic Cartoon Drawing More Understandable for 2024
- New How to Create Benime Whiteboard Animation on Android
- Updated Best 10 Anime Websites to Watch Dubbed Anime Free
- How I Animate Discord Profile Pictures for 2024
- 2024 Approved Tutorials to Make Animated Images – Even if Youre Just Starting Out
- Updated In 2024, Want to Make a Meme GIF? Heres How to Do
- In 2024, 15 Types of Cartoon Drawing Styles with Examples
- 2024 Approved Learn Pencil2D Animation Tutorial Overview
- Updated 2024 Approved Top 7 Animated GIF Text Makers
- New In 2024, Tutorial Guide to Animate Pictures in Canva
- Play Store Stuck on Downloading Of Motorola Moto E13? 7 Ways to Resolve | Dr.fone
- iSpoofer is not working On Meizu 21 Pro? Fixed | Dr.fone
- How to Upgrade Apple iPhone 13 Pro to the Latest iOS/iPadOS Version? | Dr.fone
- Failed to play HEVC files on Moto G Stylus 5G (2023)
- How to Fake Snapchat Location on Honor Magic 6 | Dr.fone
- How To Get Out of DFU Mode on Apple iPhone 7? | Dr.fone
- How to Unlock iPhone 8 Plus with IMEI Code?
- How to Change OnePlus Ace 2 Location on Skout | Dr.fone
- In 2024, How To Do Infinix Hot 40 Pro Screen Sharing | Dr.fone
- How To Activate and Use Life360 Ghost Mode On Vivo Y02T | Dr.fone
- New In 2024, Maximize Yandex Translate in Video Translation and Beyond
- How to get back lost photos from Spark 20 Pro+.
- Strategies for Apps That Wont Download From Play Store On Xiaomi Redmi Note 12 5G | Dr.fone
- In 2024, Easy Ways to Manage Your Vivo S17 Pro Location Settings | Dr.fone
- In 2024, Top 9 Apple iPhone 14 Pro Max Monitoring Apps for Parental Controls | Dr.fone
- In 2024, How Motorola Moto G24 Mirror Screen to PC? | Dr.fone
- Three Ways to Sim Unlock Motorola
- Title: 2024 Approved All About 3D Medical Animation And Its Uses
- Author: Elon
- Created at : 2024-06-30 12:28:03
- Updated at : 2024-07-01 12:28:03
- Link: https://animation-videos.techidaily.com/2024-approved-all-about-3d-medical-animation-and-its-uses/
- License: This work is licensed under CC BY-NC-SA 4.0.
