
:max_bytes(150000):strip_icc():format(webp)/samsungtvhomepage-58f0d708245a4140bb4bbad8ea0cfc26.jpg)
2024 Approved Best 8 Tools Tell You How to Make Slideshows for Instagram
Best 8 Tools Tell You How to Make Slideshows for Instagram
Top 8 Tools Tell You How to Make Slideshows for Instagram
An easy yet powerful editor
Numerous effects to choose from
Detailed tutorials provided by the official channel
Instagram slideshows land among the latest social media trends of fun and entertainment. Learn how to attract jaw dropping peer attention with creating the same!
In this article
01 [When Should You Use an Instagram Slideshow?](#Part 1)
02 [How to Make an Instagram Slideshow with Music?](#Part 2)
03 [8 Best Instagram Slideshow Apps for Creating Outstanding Slideshow](#Part 3)
Part 1 When Should You Use an Instagram Slideshow?
Revolutions in technology has opened doors to a plenty of new and exciting means of information sharing, entertainment and communication. Playing its part in the game, Instagram slideshow has emerged as an exciting means of quick and impactful content sharing. Diving deeper into the discussion, let us talk about the different areas of working with an Instagram slide show in the following section:
01Explanatory Product Demonstrations and Stepwise Tutorials
Considering the diverse media collaboration entertained by this social media platform, you get the liberty to include 10 media files of videos and images while creating a slideshow on Instagram. This is an affordably sufficient media space to demonstrate your newly launched product in front of the target audience.
The aforesaid characteristic of a slideshow for Instagram can be put to another use of creating detailed, step by step guides and product usage tutorials to create an increased and confident customer reach and brand applicability. A few examples include the presentations of recipes by food blogs and chefs, or a detailed look of the day’s outfit by fashion bloggers.
02Interactive Storytelling or Recreate an Event
Gone are the times when stories and events were restricted to a single image or video with a limited scope of understanding and explanation. You can now work with a combination of multiple images and videos to create more vivid and graphical descriptions of stories, narratives and events.
You can work on creating an engaging slideshow for Instagram to tell an amazing story, voice a narration from the beginning to the end, or share your best moments with your cherished audience, which will surely give them the feel of enjoying the adventure along with you.
03Create a Collection
You can now use a slide show for Instagram to design and present a collection of manifold ideas and products within a single post. You can improvise the collection with displaying a series of related products, showcasing a summary of your different blog posts through the week, or simply present a list of your most reliable inspirations, resources and influencers.
04Exciting Video Teasers
If you have a scheduled video release to entertain your audience, try working with interactive slideshows for Instagram to create some sensational teaser content of the upcoming release to imbibe a natural sense of curiosity within your audience.
You can experiment with releasing a mini photoshoot tour of your filming set, share close up progression details, or include a cliffhanger in the end of your Instagram slideshow to ensure the retrieval of your audience towards watching the release of the actual big content. You can use these short teasers as effective means of creating a campaign buzz, while building a closer connect with your audience.
Part 2 How to Make an Instagram Slideshow with Music?
By now, you must have gathered enough knowledge regarding the credibility of Instagram slideshows in catering to a diversity of commercial, professional and personal content sharing needs. Considering the same, you may conveniently feel motivated to try hands at creating stunning slideshow presentations for Instagram on your own.
Adhering to the concern, let us move ahead with our discussion, while talking about how to make a slideshow for Instagram and supplement the same with adaptable background music to develop amazing content masterpieces and share them with social media peers, while grabbing their obvious attention.
While there are a number of choices in the software market to choose your Instagram slideshow creator tool, the FlexClip tool can be a reliable option. Read though the following section to learn the slideshow creation process in the program with a comprehensive and stepwise tutorial guide:
Step 1: Download the Slideshow Creator Tool
Visit the official website of FlexClip to download and install the slideshow maker software in your preferred device.

Step 2: Start from Scratch
After a successful installation, proceed to launch the tool in your system and wait till the software greets you with its welcome interface. Here, you will have to reach to and tap the ‘Start to Create’ button to begin with the slideshow creation process. You can also select a preset template to work on your slideshow if nothing new clicks in your mind.
Step 3: Select an Aspect Ratio
In the tool’s creator window, navigate to the ‘Options Panel’ at the left and click on ‘More’ to select a suitable aspect ratio. Picking the 9:16 ratio would be a good choice.

Step 4: Upload Your Media
In the same ‘Options Panel’, click on ‘Media’ for dragging and dropping the desired video and image files from your device to the program’s media timeline, followed by applying them to the tool’s storyboard. You can alternatively, choose to directly work with media pages of any preset slideshow template.

Step 5: Customize Your Media
You can now proceed to improvise your media files with amazing texts, filters, stickers, emojis, widgets, etc., by clicking on specific object categories from the ‘Options Panel’.

Step 6: Include Seamless Transitions
Proceed to uplift your creation to the next level with the application of stunning image and video transitions. Navigate to the ‘Options Panel’ and tap ‘Elements’. A variety of transition effects will be displayed to choose from. Select the one you like to add it to your slideshow.

Step 7: Add a Background Music
An in line background audio is the best way to set the mood of your slideshow. Choose to add the same to your creation for making a more engaging impact on the audience. Visit the ‘Options Panel’ again and click on ‘Music’ to open the program’s audio library and select a perfect background music from the huge variety of choices, to include in your slideshow.

Step 8: Preview Your Creation
When you have finished customizing your slideshow, navigate to the top right corner of the editor’s storyboard and hit the ‘Preview’ button to visualize and ensure that your slideshow has everything at the right place. You can continue editing if there is a need to make some changes.
Step 9: Time to Save and Share!
When you are happy with your work, consider saving it either to your device or Google Dropbox, from where you can easily upload the same to your Instagram handle.
Part 3 Best Instagram Slideshow Apps for Creating Outstanding Slideshow
Social media is the talk of the trend in today’s times, which has extended its boundaries to visibly everything around us. Speaking in the light of the fact, slideshow presentations are no exception. Social media platforms today have come up with amazing tools and applications to create and share a stunning slideshow Instagram story with utmost ease and within an affordable time span.
Now that you have developed a comprehensive understanding of the credibility of working with Instagram slideshows and their creation process with the inclusion of complementary background music, let us dive into learning about some of the best and most popular Instagram apps for creating awesome slideshow presentations in the following section:
01Filme Lite
This tool lands among the leading user preferences to work on creating slideshow presentations. The application software is packed with a heap of latest features that form the Instagram trends in current times.
Apart from complementing your slideshow creations with tons of features, this slideshow maker for Instagram grants you the liberty to include your most loved videos and images within your presentation and customize them with a diverse range of effects, along with adjusting their play duration within the slideshow. Additional to image and video customization, you are also allowed to choose the image transition style that perfectly suits your content arrangement within the slides.
Working with the tool, you can be sure of getting an unparalleled slideshow creation experience with a very interactive and user oriented design interface, that is simple enough to be easily understood and worked upon by a newbie to the creative world.
02VivaVideo
If you are working on a detailed presentation and wish to spark up your creation with stunning varieties of jaw dropping special effects, consider creating your PowerPoint slideshows in this application. The tool’s effect library is a storehouse of the most amazing special effects that promise of transforming your slideshow into a visual masterpiece.
You can separately apply these effects to each of the slideshow images or choose to work on a combination of selected effects to include within a single video. Apart from this, you are free to choose an apt background music for your presentation slides from the extensive audio library of the software. The bottom line is; you are assured to a complete fun experience while creating slideshows with this tool.
03Movavi
If you are familiar enough with the fundamental concepts and the trivial anecdotes of working with slideshow presentations and want to take your graphic creativity to the next level, you can try hands at using the Movavi slideshow creator software to design high end PowerPoint presentations of professional quality. The best thing about the tool is, it works online and does not require a software download for usage concerns.
Along with creating online slideshow presentations with ease, the tool permits you to create online videos within minutes and instantly download the same for specific usage. You can further, pop up your presentation slides with wonderful transition and animation effects and also make adjustments in the play duration of each slide. The tool lets you choose and add a perfect background music to your presentation from its conveniently vast audio library.
04Slideshow Lab
If you have just landed into the world of creating slideshow presentations and are looking for easy solutions on how to make a slideshow on Instagram, consider working with this software to polish your design creativity. The simple and user cohesive interface of the tool is best for beginners to understand and get customary with the creation process, that takes the minimum possible time to render an appreciable PowerPoint presentation.
Talking about the slideshow design process, you will need to start with selecting a set of desired images, followed by uploading the same into the tool’s slideshow creator timeline. The next step is to arrange the images in the sequential order of appearance, select an appealing background music and apply smooth image transitions. When you are done with everything, proceed to save the presentation to your device.
05MoShow
While you can choose to create stunning slideshow presentations with almost any class of images, the aforesaid app works best to render Instagram images into a top rated Instagram photo slideshow without compromising with the high resolution image quality of Instagram photos. The application integrates motion pictures and lighting effects to transform the otherwise regular images into lively still captures.
Considering the credibility of the tool in overall user experience, its indeed a thumbs up from graphic creators across the globe, thanks to its smart and interactive interface, in time performance and outstanding creation outputs.
06InVideo Editor
Put an end to your search of effective solutions on how to do a slideshow on Instagram with the InVideo Editor, a smart video and graphic editor that can also be employed to adhere to the requirement of creating amazing slideshow presentations from Instagram media. While the creation process hardly takes a few minutes, you can work with the application to explore your editing creativity to the finest levels. The tool works well with any of your MacOs and Windows compatible devices.
The editor’s effects library is loaded with tons of graphic transitions and filters that are dedicated to enhance the contents of your presentation with utmost ease. You can add creative modifications to the slideshow media, such as, cut, crop and trim videos and images and add the most convincing music, overlays, fonts, etc., and enjoy an additional free access to hundreds of stock videos and slideshow templates.
07LightMV
This one is an online slideshow creator utility that works well with almost any operating system including Windows, iOS, Android and Mac. Essentially a cloud centered editor program, this tool caters to your high quality slideshow creation needs in the most effective way. The design process is quite simple, where you only need to add the images and videos, design your presentation and wait till everything comes to place.
What’s more appealing factor about the tool is that you will never need to download the program in your device or purchase a subscription plan to use the application. All you need to do is land into the tool’s website in your favorite browser and tap on the ‘Slideshow’ option to begin with the creation process. You can select from a heap of preset stunning slideshow templates to create the most enhanced PowerPoint presentation.
08Fliptastic
The Fliptastic slideshow creator app is exclusively developed to adhere to the graphic design concerns of iOS users. This one is a no cost graphic utility with a plethora of versatile features and considerable user backup. The app’s effect library is packed with a unique set of slideshow design templates, transitions, background music choices and filters that work to compliment your presentation with the subtlest look ever.
Paying a bit extra attention to the audio inclusion within the slides, the app offers you a range of free music files to work with, while additionally allowing you to upload and use one from your device or the internet.
09Creating Instagram Slideshows With Filmora
Talking exclusively within the domain of video creation and editing, the credibility of the Wondershare Filmora Video Editor software needs no introduction. Moving ahead with our discussion, let us learn about the process of creating awesome Instagram slideshows with Filmora in the following section:
Step 1: Download and Install the Program
To begin with addressing the concern of how to make a slideshow on Instagram story, navigate to the official Wondershare website and download the Wondershare Filmora Video Editor to your preferred system and proceed to install the same.

Wondershare Filmora - Best Video Editor for Mac/Windows
5,481,435 people have downloaded it.
Build unique custom animations without breaking a sweat.
Focus on creating epic stories and leave the details to Filmora’s auto features.
Start a creative adventure with drag & drop effects and endless possibilities.
Filmora simplifies advanced features to save you time and effort.
Filmora cuts out repetition so you can move on to your next creative breakthrough.
Step 2: Import Your Media
Launch the editor program and wait for the latter’s welcome screen to appear. Here, you need to import the images, videos and other media files to the editor timeline for including them in your slideshow. It is recommended to collect all the image and video files into one single folder before opening a new slideshow design project.
In the editor’s welcome screen, navigate to the ‘Media’ tab at the top left corner and click on the same to open the ‘Import’ menu. From here, you need to choose the ‘Import a Media Folder’ option, followed by navigating to the folder that contains the to be imported media files. When you have reached to the required folder, select it and tap ‘OK’ to import the same into the project timeline. When all the files have been imported, you can see them in the ‘Project Media’ panel.

Step 3: Timeline Positioning of Media Files
Reach to the ‘File’ menu and choose ‘Preferences’ from the latter’s dropdown menu. In the ‘Preferences’ window, hit the ‘Editing’ tab and tap on ‘Photo Preferences’. From the drop down menu that follows, choose the ‘Crop to Fit’ option to adjust the aspect ratio of your imported images in line with the slideshow project. In case your images have the 9:16 vertical aspect ratio, select the ‘Fit’ option to make a proper screen fit.

You can proceed to include the image zoom and camera pan features within your project by clicking on the ‘Pan & Zoom’ option. You can further, modify the preset durations of transitions, effects and photos in the ‘Editing’ tab itself before adding them to the editor timeline. Another way of doing the same is to drag the ends of the media files inward or outward, post the timeline adding process.

When you have finished making the required adjustments, navigate back the ‘Media Panel’ to include the imported media files within the project timeline. You can either click on the files to add them, or choose to ‘Drag and Drop’ the same at a preferred place within the timeline.
When all the images and videos have been added, proceed to arrange them in the desired order of appearance in the slideshow, followed by adjusting their screen time and play durations through any of the methods explained above.
Step 4: Add Transitions to Eliminate Hard Cuts
The smooth play of a slideshow is often distorted by hard cuts, which can be escaped by applying smooth transition effects to the slides. Consider exploring the ‘Transitions’ tab of Filmora to choose from a diversity of easily customizable transition effects and place them at the intersection point of the respective slides in the project timeline.
Instead of applying the same transition to every slide, prefer choosing the one that exclusively suits the content arrangement and flow within particular slides. This would save your slideshow from getting a repetitive look.

Post the timeline adding of a transition, you can double click on the same to reach the ‘Transition Setting Window’, where you are allowed to customize the play duration and select its ‘Transition Mode’. Play durations can alternatively be customised in the project timeline by dragging the slider in a left or right direction.
Step 5: Add Overlays and Filters for an Improvised Colour Scheme
To enhance the thematic appeal of your slideshow, consider desaturating the colours of the included images with the extensive range of visual effects and overlays available in the ‘Effects’ tab of the software’s editing timeline. Opening the tab, you are exposed to a series of ‘Filter and Overlay’ categories, that have further subdivisions of Light Leaks, Sepia Tone and Lomography.
To add a particular effect, place it in the timeline track above the desired clip or image. Observe the changes in the ‘Preview Panel’ and proceed to adjust the effect settings if required, by double clicking on the particular effect.

Step 6: Include Motion Graphic Elements
To supplement your slideshow with elegant motion graphics, navigate to the ‘Elements’ tab in the editor timeline. From here, you can access and choose any suitable motion graphic template from a diversity of available choices, to include within the project timeline. The step is completely optional and you should pay attention to the style of content presentation and the cause of creation of your slideshow when choosing to add these elements to the same.

Step 7: Record Voiceovers and Create Soundtracks
To record a voiceover for your slideshow, navigate to the ‘Media’ tab and tap the ‘Record’ dropdown menu. Click on ‘Record Voiceover’ in the list of options that appears. The ‘Record Audio’ icon pops up and you now need to select a microphone to be used in the recording process. When you are ready, tap the ‘Record’ button to let the recording begin.

You can now see your voice recording appear in the ‘Media’ tab with the previously imported media files, ready to be placed within the audio track of the project timeline. Filmora’s audio library is a storehouse of free access music and audio effects. To add one to your slideshow, navigate and click on the ‘Audio’ tab to select from the extensive Rock, Young & Bright, Electronic, etc., music subcategories till you get the perfect match for your presentation.

Once you have selected all the music tracks, place them one by one on the project timeline and move ahead with adjusting their play durations.
Step 8: Export Your Creation
When you are satisfied with your work, you can export the slideshow directly from Filmora to a number of media sharing platforms. All you need to do is, navigate to and tap the ‘Export’ button in the top right corner of the editor screen and proceed to set the resolution and frame rate, and select the output file format of your created slideshow in the ‘Export Window’ that appears.

When you are ready with everything, click on the ‘Export’ button at the bottom right corner of the screen to share your slideshow across different platforms, including YouTube, Instagram, Vimeo, etc.
The time required by Filmora to render your slideshow on the chosen platform will depend on the output file size. Considering the fact that larger files require a much longer time to be rendered, it would be a smart decision to limit the file size of your slideshow within 500 MB.
● Ending Thoughts →
● Instagram slideshows are exciting means of diving into fun-filled entertainment with your social media peers.
● When looking for solutions on how to create a slideshow on Instagram, there are loads of choices in the software market.
● Talking of best creator alternatives, you can pick the Wondershare Filmora slideshow developer program to make an amazing Insta story slideshow.
Instagram slideshows land among the latest social media trends of fun and entertainment. Learn how to attract jaw dropping peer attention with creating the same!
In this article
01 [When Should You Use an Instagram Slideshow?](#Part 1)
02 [How to Make an Instagram Slideshow with Music?](#Part 2)
03 [8 Best Instagram Slideshow Apps for Creating Outstanding Slideshow](#Part 3)
Part 1 When Should You Use an Instagram Slideshow?
Revolutions in technology has opened doors to a plenty of new and exciting means of information sharing, entertainment and communication. Playing its part in the game, Instagram slideshow has emerged as an exciting means of quick and impactful content sharing. Diving deeper into the discussion, let us talk about the different areas of working with an Instagram slide show in the following section:
01Explanatory Product Demonstrations and Stepwise Tutorials
Considering the diverse media collaboration entertained by this social media platform, you get the liberty to include 10 media files of videos and images while creating a slideshow on Instagram. This is an affordably sufficient media space to demonstrate your newly launched product in front of the target audience.
The aforesaid characteristic of a slideshow for Instagram can be put to another use of creating detailed, step by step guides and product usage tutorials to create an increased and confident customer reach and brand applicability. A few examples include the presentations of recipes by food blogs and chefs, or a detailed look of the day’s outfit by fashion bloggers.
02Interactive Storytelling or Recreate an Event
Gone are the times when stories and events were restricted to a single image or video with a limited scope of understanding and explanation. You can now work with a combination of multiple images and videos to create more vivid and graphical descriptions of stories, narratives and events.
You can work on creating an engaging slideshow for Instagram to tell an amazing story, voice a narration from the beginning to the end, or share your best moments with your cherished audience, which will surely give them the feel of enjoying the adventure along with you.
03Create a Collection
You can now use a slide show for Instagram to design and present a collection of manifold ideas and products within a single post. You can improvise the collection with displaying a series of related products, showcasing a summary of your different blog posts through the week, or simply present a list of your most reliable inspirations, resources and influencers.
04Exciting Video Teasers
If you have a scheduled video release to entertain your audience, try working with interactive slideshows for Instagram to create some sensational teaser content of the upcoming release to imbibe a natural sense of curiosity within your audience.
You can experiment with releasing a mini photoshoot tour of your filming set, share close up progression details, or include a cliffhanger in the end of your Instagram slideshow to ensure the retrieval of your audience towards watching the release of the actual big content. You can use these short teasers as effective means of creating a campaign buzz, while building a closer connect with your audience.
Part 2 How to Make an Instagram Slideshow with Music?
By now, you must have gathered enough knowledge regarding the credibility of Instagram slideshows in catering to a diversity of commercial, professional and personal content sharing needs. Considering the same, you may conveniently feel motivated to try hands at creating stunning slideshow presentations for Instagram on your own.
Adhering to the concern, let us move ahead with our discussion, while talking about how to make a slideshow for Instagram and supplement the same with adaptable background music to develop amazing content masterpieces and share them with social media peers, while grabbing their obvious attention.
While there are a number of choices in the software market to choose your Instagram slideshow creator tool, the FlexClip tool can be a reliable option. Read though the following section to learn the slideshow creation process in the program with a comprehensive and stepwise tutorial guide:
Step 1: Download the Slideshow Creator Tool
Visit the official website of FlexClip to download and install the slideshow maker software in your preferred device.
Step 2: Start from Scratch
After a successful installation, proceed to launch the tool in your system and wait till the software greets you with its welcome interface. Here, you will have to reach to and tap the ‘Start to Create’ button to begin with the slideshow creation process. You can also select a preset template to work on your slideshow if nothing new clicks in your mind.
Step 3: Select an Aspect Ratio
In the tool’s creator window, navigate to the ‘Options Panel’ at the left and click on ‘More’ to select a suitable aspect ratio. Picking the 9:16 ratio would be a good choice.
Step 4: Upload Your Media
In the same ‘Options Panel’, click on ‘Media’ for dragging and dropping the desired video and image files from your device to the program’s media timeline, followed by applying them to the tool’s storyboard. You can alternatively, choose to directly work with media pages of any preset slideshow template.
Step 5: Customize Your Media
You can now proceed to improvise your media files with amazing texts, filters, stickers, emojis, widgets, etc., by clicking on specific object categories from the ‘Options Panel’.
Step 6: Include Seamless Transitions
Proceed to uplift your creation to the next level with the application of stunning image and video transitions. Navigate to the ‘Options Panel’ and tap ‘Elements’. A variety of transition effects will be displayed to choose from. Select the one you like to add it to your slideshow.
Step 7: Add a Background Music
An in line background audio is the best way to set the mood of your slideshow. Choose to add the same to your creation for making a more engaging impact on the audience. Visit the ‘Options Panel’ again and click on ‘Music’ to open the program’s audio library and select a perfect background music from the huge variety of choices, to include in your slideshow.
Step 8: Preview Your Creation
When you have finished customizing your slideshow, navigate to the top right corner of the editor’s storyboard and hit the ‘Preview’ button to visualize and ensure that your slideshow has everything at the right place. You can continue editing if there is a need to make some changes.
Step 9: Time to Save and Share!
When you are happy with your work, consider saving it either to your device or Google Dropbox, from where you can easily upload the same to your Instagram handle.
Part 3 Best Instagram Slideshow Apps for Creating Outstanding Slideshow
Social media is the talk of the trend in today’s times, which has extended its boundaries to visibly everything around us. Speaking in the light of the fact, slideshow presentations are no exception. Social media platforms today have come up with amazing tools and applications to create and share a stunning slideshow Instagram story with utmost ease and within an affordable time span.
Now that you have developed a comprehensive understanding of the credibility of working with Instagram slideshows and their creation process with the inclusion of complementary background music, let us dive into learning about some of the best and most popular Instagram apps for creating awesome slideshow presentations in the following section:
01Filme Lite
This tool lands among the leading user preferences to work on creating slideshow presentations. The application software is packed with a heap of latest features that form the Instagram trends in current times.
Apart from complementing your slideshow creations with tons of features, this slideshow maker for Instagram grants you the liberty to include your most loved videos and images within your presentation and customize them with a diverse range of effects, along with adjusting their play duration within the slideshow. Additional to image and video customization, you are also allowed to choose the image transition style that perfectly suits your content arrangement within the slides.
Working with the tool, you can be sure of getting an unparalleled slideshow creation experience with a very interactive and user oriented design interface, that is simple enough to be easily understood and worked upon by a newbie to the creative world.
02VivaVideo
If you are working on a detailed presentation and wish to spark up your creation with stunning varieties of jaw dropping special effects, consider creating your PowerPoint slideshows in this application. The tool’s effect library is a storehouse of the most amazing special effects that promise of transforming your slideshow into a visual masterpiece.
You can separately apply these effects to each of the slideshow images or choose to work on a combination of selected effects to include within a single video. Apart from this, you are free to choose an apt background music for your presentation slides from the extensive audio library of the software. The bottom line is; you are assured to a complete fun experience while creating slideshows with this tool.
03Movavi
If you are familiar enough with the fundamental concepts and the trivial anecdotes of working with slideshow presentations and want to take your graphic creativity to the next level, you can try hands at using the Movavi slideshow creator software to design high end PowerPoint presentations of professional quality. The best thing about the tool is, it works online and does not require a software download for usage concerns.
Along with creating online slideshow presentations with ease, the tool permits you to create online videos within minutes and instantly download the same for specific usage. You can further, pop up your presentation slides with wonderful transition and animation effects and also make adjustments in the play duration of each slide. The tool lets you choose and add a perfect background music to your presentation from its conveniently vast audio library.
04Slideshow Lab
If you have just landed into the world of creating slideshow presentations and are looking for easy solutions on how to make a slideshow on Instagram, consider working with this software to polish your design creativity. The simple and user cohesive interface of the tool is best for beginners to understand and get customary with the creation process, that takes the minimum possible time to render an appreciable PowerPoint presentation.
Talking about the slideshow design process, you will need to start with selecting a set of desired images, followed by uploading the same into the tool’s slideshow creator timeline. The next step is to arrange the images in the sequential order of appearance, select an appealing background music and apply smooth image transitions. When you are done with everything, proceed to save the presentation to your device.
05MoShow
While you can choose to create stunning slideshow presentations with almost any class of images, the aforesaid app works best to render Instagram images into a top rated Instagram photo slideshow without compromising with the high resolution image quality of Instagram photos. The application integrates motion pictures and lighting effects to transform the otherwise regular images into lively still captures.
Considering the credibility of the tool in overall user experience, its indeed a thumbs up from graphic creators across the globe, thanks to its smart and interactive interface, in time performance and outstanding creation outputs.
06InVideo Editor
Put an end to your search of effective solutions on how to do a slideshow on Instagram with the InVideo Editor, a smart video and graphic editor that can also be employed to adhere to the requirement of creating amazing slideshow presentations from Instagram media. While the creation process hardly takes a few minutes, you can work with the application to explore your editing creativity to the finest levels. The tool works well with any of your MacOs and Windows compatible devices.
The editor’s effects library is loaded with tons of graphic transitions and filters that are dedicated to enhance the contents of your presentation with utmost ease. You can add creative modifications to the slideshow media, such as, cut, crop and trim videos and images and add the most convincing music, overlays, fonts, etc., and enjoy an additional free access to hundreds of stock videos and slideshow templates.
07LightMV
This one is an online slideshow creator utility that works well with almost any operating system including Windows, iOS, Android and Mac. Essentially a cloud centered editor program, this tool caters to your high quality slideshow creation needs in the most effective way. The design process is quite simple, where you only need to add the images and videos, design your presentation and wait till everything comes to place.
What’s more appealing factor about the tool is that you will never need to download the program in your device or purchase a subscription plan to use the application. All you need to do is land into the tool’s website in your favorite browser and tap on the ‘Slideshow’ option to begin with the creation process. You can select from a heap of preset stunning slideshow templates to create the most enhanced PowerPoint presentation.
08Fliptastic
The Fliptastic slideshow creator app is exclusively developed to adhere to the graphic design concerns of iOS users. This one is a no cost graphic utility with a plethora of versatile features and considerable user backup. The app’s effect library is packed with a unique set of slideshow design templates, transitions, background music choices and filters that work to compliment your presentation with the subtlest look ever.
Paying a bit extra attention to the audio inclusion within the slides, the app offers you a range of free music files to work with, while additionally allowing you to upload and use one from your device or the internet.
09Creating Instagram Slideshows With Filmora
Talking exclusively within the domain of video creation and editing, the credibility of the Wondershare Filmora Video Editor software needs no introduction. Moving ahead with our discussion, let us learn about the process of creating awesome Instagram slideshows with Filmora in the following section:
Step 1: Download and Install the Program
To begin with addressing the concern of how to make a slideshow on Instagram story, navigate to the official Wondershare website and download the Wondershare Filmora Video Editor to your preferred system and proceed to install the same.
Wondershare Filmora - Best Video Editor for Mac/Windows
5,481,435 people have downloaded it.
Build unique custom animations without breaking a sweat.
Focus on creating epic stories and leave the details to Filmora’s auto features.
Start a creative adventure with drag & drop effects and endless possibilities.
Filmora simplifies advanced features to save you time and effort.
Filmora cuts out repetition so you can move on to your next creative breakthrough.
Step 2: Import Your Media
Launch the editor program and wait for the latter’s welcome screen to appear. Here, you need to import the images, videos and other media files to the editor timeline for including them in your slideshow. It is recommended to collect all the image and video files into one single folder before opening a new slideshow design project.
In the editor’s welcome screen, navigate to the ‘Media’ tab at the top left corner and click on the same to open the ‘Import’ menu. From here, you need to choose the ‘Import a Media Folder’ option, followed by navigating to the folder that contains the to be imported media files. When you have reached to the required folder, select it and tap ‘OK’ to import the same into the project timeline. When all the files have been imported, you can see them in the ‘Project Media’ panel.
Step 3: Timeline Positioning of Media Files
Reach to the ‘File’ menu and choose ‘Preferences’ from the latter’s dropdown menu. In the ‘Preferences’ window, hit the ‘Editing’ tab and tap on ‘Photo Preferences’. From the drop down menu that follows, choose the ‘Crop to Fit’ option to adjust the aspect ratio of your imported images in line with the slideshow project. In case your images have the 9:16 vertical aspect ratio, select the ‘Fit’ option to make a proper screen fit.
You can proceed to include the image zoom and camera pan features within your project by clicking on the ‘Pan & Zoom’ option. You can further, modify the preset durations of transitions, effects and photos in the ‘Editing’ tab itself before adding them to the editor timeline. Another way of doing the same is to drag the ends of the media files inward or outward, post the timeline adding process.
When you have finished making the required adjustments, navigate back the ‘Media Panel’ to include the imported media files within the project timeline. You can either click on the files to add them, or choose to ‘Drag and Drop’ the same at a preferred place within the timeline.
When all the images and videos have been added, proceed to arrange them in the desired order of appearance in the slideshow, followed by adjusting their screen time and play durations through any of the methods explained above.
Step 4: Add Transitions to Eliminate Hard Cuts
The smooth play of a slideshow is often distorted by hard cuts, which can be escaped by applying smooth transition effects to the slides. Consider exploring the ‘Transitions’ tab of Filmora to choose from a diversity of easily customizable transition effects and place them at the intersection point of the respective slides in the project timeline.
Instead of applying the same transition to every slide, prefer choosing the one that exclusively suits the content arrangement and flow within particular slides. This would save your slideshow from getting a repetitive look.
Post the timeline adding of a transition, you can double click on the same to reach the ‘Transition Setting Window’, where you are allowed to customize the play duration and select its ‘Transition Mode’. Play durations can alternatively be customised in the project timeline by dragging the slider in a left or right direction.
Step 5: Add Overlays and Filters for an Improvised Colour Scheme
To enhance the thematic appeal of your slideshow, consider desaturating the colours of the included images with the extensive range of visual effects and overlays available in the ‘Effects’ tab of the software’s editing timeline. Opening the tab, you are exposed to a series of ‘Filter and Overlay’ categories, that have further subdivisions of Light Leaks, Sepia Tone and Lomography.
To add a particular effect, place it in the timeline track above the desired clip or image. Observe the changes in the ‘Preview Panel’ and proceed to adjust the effect settings if required, by double clicking on the particular effect.
Step 6: Include Motion Graphic Elements
To supplement your slideshow with elegant motion graphics, navigate to the ‘Elements’ tab in the editor timeline. From here, you can access and choose any suitable motion graphic template from a diversity of available choices, to include within the project timeline. The step is completely optional and you should pay attention to the style of content presentation and the cause of creation of your slideshow when choosing to add these elements to the same.
Step 7: Record Voiceovers and Create Soundtracks
To record a voiceover for your slideshow, navigate to the ‘Media’ tab and tap the ‘Record’ dropdown menu. Click on ‘Record Voiceover’ in the list of options that appears. The ‘Record Audio’ icon pops up and you now need to select a microphone to be used in the recording process. When you are ready, tap the ‘Record’ button to let the recording begin.
You can now see your voice recording appear in the ‘Media’ tab with the previously imported media files, ready to be placed within the audio track of the project timeline. Filmora’s audio library is a storehouse of free access music and audio effects. To add one to your slideshow, navigate and click on the ‘Audio’ tab to select from the extensive Rock, Young & Bright, Electronic, etc., music subcategories till you get the perfect match for your presentation.
Once you have selected all the music tracks, place them one by one on the project timeline and move ahead with adjusting their play durations.
Step 8: Export Your Creation
When you are satisfied with your work, you can export the slideshow directly from Filmora to a number of media sharing platforms. All you need to do is, navigate to and tap the ‘Export’ button in the top right corner of the editor screen and proceed to set the resolution and frame rate, and select the output file format of your created slideshow in the ‘Export Window’ that appears.
When you are ready with everything, click on the ‘Export’ button at the bottom right corner of the screen to share your slideshow across different platforms, including YouTube, Instagram, Vimeo, etc.
The time required by Filmora to render your slideshow on the chosen platform will depend on the output file size. Considering the fact that larger files require a much longer time to be rendered, it would be a smart decision to limit the file size of your slideshow within 500 MB.
● Ending Thoughts →
● Instagram slideshows are exciting means of diving into fun-filled entertainment with your social media peers.
● When looking for solutions on how to create a slideshow on Instagram, there are loads of choices in the software market.
● Talking of best creator alternatives, you can pick the Wondershare Filmora slideshow developer program to make an amazing Insta story slideshow.
How to Animate - Adobe Animate Tutorias
How to Animate - Adobe Animate Tutorial for All
An easy yet powerful editor
Numerous effects to choose from
Detailed tutorials provided by the official channel
Now, since the tool has too many elements to understand, it’s always a good strategy to start your journey with a dedicated Adobe Animate CC tutorial.
In today’s guide, we are going to introduce a few of these tutorials so that you can easily start creating animations in Adobe Animate CC, even if you have zero prior experience with the software.
In this article
01 [Adobe Animate CC tutorial](#Part 1)
02 [How Do You Animate in Adobe Animation?](#Part 2)
03 [Other Rare Tutorials for Self-learning to Learn How to Animate](#Part 3)
Part 1 Is Adobe Animate Good for Beginners?
When people start their careers as graphic designers, they always struggle to pick the right tool to accompany them during their journey. Since there are too many options to choose from, beginners always end up comparing a tool with other available options. They even weigh the pros and cons of each animation software individually to make the best decision. The same is the case with Adobe Animate. Many beginners want to know if Adobe Animate is the right animation software to get started as a professional graphic designer.
Since the Adobe community continues to grow rapidly, you’ll also be able to find a variety of Adobe Animate tutorials quite easily.
So, as far as beginner-friendliness is concerned, Adobe Animate is a complete winner that anyone can use to create stunning animations, designs, and templates right on their PCs.
Part 2 How Do You Animate in Adobe Animation?
1. Introduction to Adobe Animate
For complete beginners, there’s nothing better than a one-stop tutorial that provides a detailed insight into the basics of Adobe Animate and helps them get familiar with different elements of the software.
Well, this 2 hours 30 minutes long YouTube Adobe Animate tutorial by TipTut is what you need to start your journey with the software. The tutorial involves everything, starting from the simple setup to creating your first animation. You can either download this tutorial on your system or watch it online to understand the basic workflow of Adobe Animate.
Key Features:
● Learn how to set up a project in Adobe Animate.
● Adjusting the elements (such as frame rate) of your first animation.
● Completing your first animation using colors, gestures, and simple movement.
2. Creating HTML Banner Ads
Apart from regular 2D animations, some designers also use Adobe Animate to create dedicated banner ads for their marketing campaigns using HTML 5. This will be a pretty useful Adobe Animate tutorial PDF for anyone who wants to join a marketing firm or plan exclusive marketing campaigns for his own products/services.
Key Features:
● Learn how to build HTML banner ads from scratch.
● Get familiar with the overall process of publishing a banner ad on platforms like Google AdWords.
● Understand how to keep the file size of a banner down to keep it optimized.
3. Animate CC Game Development
As we mentioned earlier, some people also use Adobe Animate to design games. If you want to follow the same career, this Adobe Animate CC tutorial is for you.
All the games developed in Adobe Animate are designed in HTML 5 and are usually web-based. By the end of this tutorial, you would have built a fully-functional game in Adobe Animate.
Key Features:
● Creating the game world.
● Understanding CreateJS Overview in Adobe Animate CC.
● Building in-game assets and configuring their unique features.
4. 2D Animation for Beginners
This is another useful Adobe Animate tutorial for all the beginners out there. Compiled by Walt Wonderwolk, the tutorial is separated into 12 parts in which he has explained different features of Adobe Animate in detail.
Key Features:
● Designing graphic vectors in Adobe Animate.
● Each feature is explained with a respective example.
● Learn how to add sounds to your animations to make them visually appealing.
5. Adobe Animate for Social Media
Being a feature-packed animation software, you can also use Adobe Animate to create content for your social media profiles. To do this, however, you must be familiar with all the necessary features of the tool. This 1.5 hours long tutorial will help you get familiar with features such as the tweening system that’ll help you turn regular social media posts into stunning animations.
Key Features:
● Designing simple assets and designs for social media.
● Exporting GIFs and Animated Videos.
● Customizing stills and motion graphics in Adobe Animate.
Key Takeaways from This Episode
● Adobe Animate boasts different applications, ranging from simple 2D animations to game designing
● Since Adobe Animation is an extensive software, it’ll always be a wise decision to get started with Adobe Animate tutorials.
● After you have compiled designs/animations in Adobe Animate, Wondershare Filmora Pro will help you enhance its overall quality.
How to Draw A Skeleton Cartoon – A Step by Step Guide
How to Draw Skeleton Cartoon – A Step by Step Guide
An easy yet powerful editor
Numerous effects to choose from
Detailed tutorials provided by the official channel
We often see skeleton cartoons on t-shirts and phone cases. There is a famous skeleton cartoon show. Most of the shows are pretty popular, and the skeleton cartoon in the shows became quite trendy in the fashion industry. The trend of a skeleton cartoon character is very much relevant nowadays. One might think about how this skeleton cartoon is drawn.
Sometimes it is hand drawn or digitally drawn. Here is a step-by-step guide for you if you wonder how to draw a skeleton cartoon. This guide will effortlessly help you draw the most quirky and trendy skeleton cartoon.
In this article
01 [This Is What 5 Skeletons of Famous Cartoon Characters Would Look Like](#Part 1)
02 [How to Draw Cartoon Skeletons With Step by Step](#Part 2)
Part 1 This Is What 5 Skeletons of Famous Cartoon Characters Would Look Like
From our very childhood, we have come across numerous cartoons shows. But have we ever wondered how the skeleton of these cartoon characters would look? No worries if you have not given a thought to this. This article can give you a small tour of the world where you will be able to see skeletons of a few famous cartoon characters that we have known since our childhood. The skeletons of famous cartoon characters are:
01Charlie
Charlie Brown, known as Charlie, is the main character in the comic strip Peanuts. This is a widely recognized American cartoon. Many people can relate to Charlie. Charlie is shy, nervous, and lacks confidence. These characteristics make him relatable to a chunk of common people. Charlie is referred to as the “Loveable Loser.”Charlie is an overwhelmingly short and stout character physically. Have you ever imagined how Charlie’s skeleton version would look? Here is how the skeleton cartoon of Charlie would look.

02Fred Flintstone
I have known very few people who do not know about Fred Flintstone. Fred Flinstone is the protagonist of the famous American sitcom show Yabba-Dabba-Dinosaurs and the entire franchise. The Flinstone is another show that features Fred with his family. Of course, the show’s main attraction is the Flinstone family and the way this show is set. This show is set in a way that romanticizes a family living in a cave. Coming to talk about skeletons, have you ever thought that what if a skeleton cartoon show version of The Flintstone were made. How would this short, fat man with almost a square look as a skeleton? We can look up here how the skeleton version of Fred Flintstone looks:

03Bubbles
The Bubble is one of the main characters of the popular TV cartoon show Powerpuff girls. The other protagonists are Blossom and Buttercup, her sisters. The Bubble is named Bubble because she is the bubbliest and most fun-loving among the three sisters. Bubble is a sweet little girl with a round face and big round eyes and short limbs. These characteristics in this character make it look cuter. But to think, how would we imagine Bubble in a skeleton version. This is how Bubble would look like a skeleton.

04Dexter
Dexter is the protagonist in the show Dexter’s Laboratory. Dexter is one of the most outstanding kid scientists who have made great inventions in his secret laboratory. It would be more appropriate to call Dexter an anti-heroic protagonist. He works in his secret laboratory for various projects like stopping bullying worldwide. Dexter is a short young boy with curly hair. Dexter is mostly seen wearing a white lab coat and semi-circle goggles, like someone who is always working in a lab. Imagining Dexter as a skeleton can be hilarious. But this is how Dexter would look like a skeleton cartoon.

05Pikachu
Pikachu is one of the characters or one of the Pokémons in the famous animated Japanese series Pokémon. Pikachu is a small yellow furry Pokémon. It seems very sweet to the audience and the general public, but it acquires a dangerous skill to give out an electric shock. This small yellow furry creature has featured in many films with the protagonist of the famous show Pokémon Ash Ketchum. This cartoon character has a presence in the fashion industry. It has been used to fashion dresses, bags, and many more. How would it be if we sat to think of a skeleton version of this furry creature? This may not a pleasant experience for everyone. The perfect way to demonstrate pikachu as a skeleton version would be:

Part 2 How to Draw Cartoon Skeletons With Step by Step
Have you ever tried drawing a skeleton cartoon character? You can use a skeleton cartoon to add a quirky effect to your project. You can draw an animated skeleton on your favorite t-shirt and change the vibe of the t-shirt. There are many methods to draw skeleton cartoon. Here we focus mainly on one way to draw cartoon skeleton. The method might seem difficult at the beginning, but the whole process becomes easier and smooth once you start following the steps. The steps are:
Step 1: To start with the drawing of the skeleton, let’s start with the head or the skull. The head should be round, and the jaw area needs to be at some angle or angular and have smaller lines than the long rounded lines on the upper part of the skull.
Step 2: The mouth of the skull must be open, and then we need to concentrate on other features of the face like the teeth, nose, and cheekbone.

Step 3: After the head is complete, we focus on the neck and the chest area. To draw the neck, divide the neck into small sections to show the division in the neck portion, as shown in the picture.
Step 4: To start with the rib cage, we need to draw the spine. The spine can be drawn as a long thick line and should be a continuity of the neck, so the neck and the spine should be drawn in the same way and same line. It is to be drawn at the body’s center, just below the head. You can refer to the example as shown below.
Step 5: After you have drawn the spine, to draw the rib, draw circles around the spine as if the curved lines demonstrating the rib are revolving around the spine.

Step 6: After the head and the chest region is complete. Focus on the hand. You can rest the arms any way you want. Since you are a beginner, this example shows the easiest ways to rest the hands when you are drawing a cartoon skeleton.
Step 7: The left arm will rest on the hips, and the right arm needs to be shown in a way so that it looks that the skeleton body is leaning on some object.
Step 8: Since the arms have divisions, the bones must be drawn the same way shown in the example with the same divisions on the arms.
Step 9: Keep in mind that both the arms must have equal bone divisions; otherwise, the drawing may look weird.
Step 10: Now you need to draw the hand. The hand is made of small bones. To draw the hand, divide it into small sections consisting of very small bones.

Step 11: After the hands are complete, the upper part of the body is complete. Now we need to focus on the lower part of the body.
Step 12: To start with the lower part of the body, we start with the hip portion.
Step 13: Show the hips with curved lines, and draw a round-like shape inside the curve to show the holes in the hips.
Step 14: After the hip is complete, start with the upper half of the legs. Draw a long bone from the hip to demonstrate the upper part of the leg.

Step 15: Now we need to concentrate on the other half of the leg. You can position the legs any way you want. Here in the example, the left leg will be crossed over the right leg.
Step 16: After the lower half of the legs is complete, the standing posture of the skeleton is set.
Step 17: Now we need to add the feet at the end of the leg. The feet are made of tiny pieces of bones; to draw the feet, divide them into small sections, as shown in the example.
Step 18: Draw the feet in a similar way to how you have drawn the hands.

Step 19: You can color your skeleton drawing or give your shading style after your skeleton drawing is done.
You can make quirky skeleton cartoon animations and compile them to a video, adding music effects. You might think you need different apps for the video and the audio editing part. That might be the case for other apps. Here is Wondershare Filmora Video Editor ; you can edit your video, make slideshows, and edit the background sound score. Just imagine of not changing windows while editing your exciting project can be so comfortable!
For Win 7 or later (64-bit)
For macOS 10.12 or later
● Ending Thoughts →
● It might be astonishing for you to see the skeleton versions of your favorite cartoon characters from your childhood.
● It gives a quirky effect to our minds but, at the same time, leaves us wondering about the skeleton drawing cartoon.
● Now you know the methodof drawing a cartoon skeleton. You can make your version of a skeleton cartoon; you can create your style and interpretation. You can create a skeleton dog cartoon.
● You can use the method to make animations or even paint on your t-shirt or wall paintings to add a little quirkiness.
● The cartoon skeleton gives a cool vibe. You can use your animation as your wallpaper. Keep quirking!
We often see skeleton cartoons on t-shirts and phone cases. There is a famous skeleton cartoon show. Most of the shows are pretty popular, and the skeleton cartoon in the shows became quite trendy in the fashion industry. The trend of a skeleton cartoon character is very much relevant nowadays. One might think about how this skeleton cartoon is drawn.
Sometimes it is hand drawn or digitally drawn. Here is a step-by-step guide for you if you wonder how to draw a skeleton cartoon. This guide will effortlessly help you draw the most quirky and trendy skeleton cartoon.
In this article
01 [This Is What 5 Skeletons of Famous Cartoon Characters Would Look Like](#Part 1)
02 [How to Draw Cartoon Skeletons With Step by Step](#Part 2)
Part 1 This Is What 5 Skeletons of Famous Cartoon Characters Would Look Like
From our very childhood, we have come across numerous cartoons shows. But have we ever wondered how the skeleton of these cartoon characters would look? No worries if you have not given a thought to this. This article can give you a small tour of the world where you will be able to see skeletons of a few famous cartoon characters that we have known since our childhood. The skeletons of famous cartoon characters are:
01Charlie
Charlie Brown, known as Charlie, is the main character in the comic strip Peanuts. This is a widely recognized American cartoon. Many people can relate to Charlie. Charlie is shy, nervous, and lacks confidence. These characteristics make him relatable to a chunk of common people. Charlie is referred to as the “Loveable Loser.”Charlie is an overwhelmingly short and stout character physically. Have you ever imagined how Charlie’s skeleton version would look? Here is how the skeleton cartoon of Charlie would look.
02Fred Flintstone
I have known very few people who do not know about Fred Flintstone. Fred Flinstone is the protagonist of the famous American sitcom show Yabba-Dabba-Dinosaurs and the entire franchise. The Flinstone is another show that features Fred with his family. Of course, the show’s main attraction is the Flinstone family and the way this show is set. This show is set in a way that romanticizes a family living in a cave. Coming to talk about skeletons, have you ever thought that what if a skeleton cartoon show version of The Flintstone were made. How would this short, fat man with almost a square look as a skeleton? We can look up here how the skeleton version of Fred Flintstone looks:
03Bubbles
The Bubble is one of the main characters of the popular TV cartoon show Powerpuff girls. The other protagonists are Blossom and Buttercup, her sisters. The Bubble is named Bubble because she is the bubbliest and most fun-loving among the three sisters. Bubble is a sweet little girl with a round face and big round eyes and short limbs. These characteristics in this character make it look cuter. But to think, how would we imagine Bubble in a skeleton version. This is how Bubble would look like a skeleton.
04Dexter
Dexter is the protagonist in the show Dexter’s Laboratory. Dexter is one of the most outstanding kid scientists who have made great inventions in his secret laboratory. It would be more appropriate to call Dexter an anti-heroic protagonist. He works in his secret laboratory for various projects like stopping bullying worldwide. Dexter is a short young boy with curly hair. Dexter is mostly seen wearing a white lab coat and semi-circle goggles, like someone who is always working in a lab. Imagining Dexter as a skeleton can be hilarious. But this is how Dexter would look like a skeleton cartoon.
05Pikachu
Pikachu is one of the characters or one of the Pokémons in the famous animated Japanese series Pokémon. Pikachu is a small yellow furry Pokémon. It seems very sweet to the audience and the general public, but it acquires a dangerous skill to give out an electric shock. This small yellow furry creature has featured in many films with the protagonist of the famous show Pokémon Ash Ketchum. This cartoon character has a presence in the fashion industry. It has been used to fashion dresses, bags, and many more. How would it be if we sat to think of a skeleton version of this furry creature? This may not a pleasant experience for everyone. The perfect way to demonstrate pikachu as a skeleton version would be:
Part 2 How to Draw Cartoon Skeletons With Step by Step
Have you ever tried drawing a skeleton cartoon character? You can use a skeleton cartoon to add a quirky effect to your project. You can draw an animated skeleton on your favorite t-shirt and change the vibe of the t-shirt. There are many methods to draw skeleton cartoon. Here we focus mainly on one way to draw cartoon skeleton. The method might seem difficult at the beginning, but the whole process becomes easier and smooth once you start following the steps. The steps are:
Step 1: To start with the drawing of the skeleton, let’s start with the head or the skull. The head should be round, and the jaw area needs to be at some angle or angular and have smaller lines than the long rounded lines on the upper part of the skull.
Step 2: The mouth of the skull must be open, and then we need to concentrate on other features of the face like the teeth, nose, and cheekbone.
Step 3: After the head is complete, we focus on the neck and the chest area. To draw the neck, divide the neck into small sections to show the division in the neck portion, as shown in the picture.
Step 4: To start with the rib cage, we need to draw the spine. The spine can be drawn as a long thick line and should be a continuity of the neck, so the neck and the spine should be drawn in the same way and same line. It is to be drawn at the body’s center, just below the head. You can refer to the example as shown below.
Step 5: After you have drawn the spine, to draw the rib, draw circles around the spine as if the curved lines demonstrating the rib are revolving around the spine.
Step 6: After the head and the chest region is complete. Focus on the hand. You can rest the arms any way you want. Since you are a beginner, this example shows the easiest ways to rest the hands when you are drawing a cartoon skeleton.
Step 7: The left arm will rest on the hips, and the right arm needs to be shown in a way so that it looks that the skeleton body is leaning on some object.
Step 8: Since the arms have divisions, the bones must be drawn the same way shown in the example with the same divisions on the arms.
Step 9: Keep in mind that both the arms must have equal bone divisions; otherwise, the drawing may look weird.
Step 10: Now you need to draw the hand. The hand is made of small bones. To draw the hand, divide it into small sections consisting of very small bones.
Step 11: After the hands are complete, the upper part of the body is complete. Now we need to focus on the lower part of the body.
Step 12: To start with the lower part of the body, we start with the hip portion.
Step 13: Show the hips with curved lines, and draw a round-like shape inside the curve to show the holes in the hips.
Step 14: After the hip is complete, start with the upper half of the legs. Draw a long bone from the hip to demonstrate the upper part of the leg.
Step 15: Now we need to concentrate on the other half of the leg. You can position the legs any way you want. Here in the example, the left leg will be crossed over the right leg.
Step 16: After the lower half of the legs is complete, the standing posture of the skeleton is set.
Step 17: Now we need to add the feet at the end of the leg. The feet are made of tiny pieces of bones; to draw the feet, divide them into small sections, as shown in the example.
Step 18: Draw the feet in a similar way to how you have drawn the hands.
Step 19: You can color your skeleton drawing or give your shading style after your skeleton drawing is done.
You can make quirky skeleton cartoon animations and compile them to a video, adding music effects. You might think you need different apps for the video and the audio editing part. That might be the case for other apps. Here is Wondershare Filmora Video Editor ; you can edit your video, make slideshows, and edit the background sound score. Just imagine of not changing windows while editing your exciting project can be so comfortable!
For Win 7 or later (64-bit)
For macOS 10.12 or later
● Ending Thoughts →
● It might be astonishing for you to see the skeleton versions of your favorite cartoon characters from your childhood.
● It gives a quirky effect to our minds but, at the same time, leaves us wondering about the skeleton drawing cartoon.
● Now you know the methodof drawing a cartoon skeleton. You can make your version of a skeleton cartoon; you can create your style and interpretation. You can create a skeleton dog cartoon.
● You can use the method to make animations or even paint on your t-shirt or wall paintings to add a little quirkiness.
● The cartoon skeleton gives a cool vibe. You can use your animation as your wallpaper. Keep quirking!
5 Techniques You Never Heard of for Converting MP4 to GIF in Photoshop
5 Techniques You Never heard of for Converting MP4 to GIF in Photoshop
An easy yet powerful editor
Numerous effects to choose from
Detailed tutorials provided by the official channel
When someone mentions a GIF, what comes to your mind? Some people can picture what it means but wouldn’t describe that match. So, before we discuss how to convert mp4 to gif in Photoshop, it would be wise to define it briefly. First of all, GIF stands for Graphics Interchange Format. Its file format is a compressed image, and it is most suitable for animation. We all know that an animated GIF comprises a series of many still images. However, since these images play sequentially, it may appear as if they are in motion. It is that movement illusion that makes the animation effect come about.
When someone mentions a GIF, what comes to your mind? Some people can picture what it means but wouldn’t describe that match. So, before we discuss how to convert mp4 to gif in Photoshop, it would be wise to define it briefly. First of all, GIF stands for Graphics Interchange Format. Its file format is a compressed image, and it is most suitable for animation. We all know that an animated GIF comprises a series of many still images. However, since these images play sequentially, it may appear as if they are in motion. It is that movement illusion that makes the animation effect come about.
In this article
01 [How to Convert Video to GIF in Photoshop - Easy Way](#Part 1)
02 [How to Create Animated GIFs from Video without Photoshop](#Part 2)
Part 1 How to Convert Video to GIF in Photoshop - Easy Way
If you want to convert video to GIF in Photoshop, here is a discussion of the easy way to go about it.
Step 1: Ensure that the Dimensions are Right
When you start to convert mp4 to GIF using Photoshop, it is important to highlight some things that need to be done before anything else. Ensure that you set the resolution and dimensions right. Failure to do saw will see the size of your video determine that of your GIF. Beneath such occurrences, you may find yourself having a GIF that’s too large, and its quality leaves a lot to be desired.
The dimensions you choose will depend on what you are working on at any one particular time. For instance, a 720 x 300 layout is recommended for a banner ad GIF. If there is something that one can’t stress enough is the importance of ensuring that you use pixels. As for the resolution, keep in mind that a low resolution translates to a small file size. In this case, you are at privilege to choose between two units, pixels and inches.
Additionally, set the color mode. Since GIFs are meant for screens, ensure that you select the RGB color mode. Finally, click on Create, which opens a new document, and start following these steps to convert Mp4 to GIF Photoshop.
Step 2: Import the Video you want to convert from MP4 to GIF Photoshop
Remember that we already opened Photoshop by pressing Create. Now, the next thing would be to navigate to File followed by Import before selecting the Video Frames to Layers option.

Step 3: Set Up the Following Settings Accordingly
After choosing the video file, choose Open, and a dialogue box with several options and a preview of the video appears.

The radio buttons give you two options to choose from. The “From Beginning to End” is the ideal choice if you want the whole video to be converted to GIF. However, if you want to focus on a section of the video, select “Selected Range Only.” On the other hand, the checkbox allows you to limit the video to 2 frames. Simply tick it, and Photoshop will automatically ensure that only two frames of the video are left.
Last but not least, check the “Make Frame Animation” checkbox. Once all these settings are set as recommended and depending on preference, Photoshop will export your video as several frames. In the event that the program crashes, all is not lost. You can fix it by reducing the video’s quality and then try importing it.
Step 4: Edit the GIF
Photoshop also gives you several options to help you edit your frames to perfection. In most cases, these settings are ideal for manipulating the quality of your GIF. Interestingly, it is possible to preview how the GIF will look before committing to any change. So expect two panes, right and left. The left one allows you to see the preview, whereas its right counterpart helps you edit.

Alternatively, select one of the preset choices. If you do so, there is no requirement The bottom line is that the tool makes to make any changes. That doesn’t mean you can’t choose a Preset option and then edit it to your preferences. Expect the quality of the GIF to decrease and the size to be relatively small. Right below the Preset, don’t forget to confirm that the selected option is GIF.
Step 5: Save the GIF
Once satisfied by the GIF created, save these frames as animated GIFs. Go to File, then Export, followed by Save for Web (Legacy).

That’s how to convert Mp4 to GIF in simple steps.
Part 2 How to Create Animated GIFs from Video without Photoshop
Alternatively, you can opt to convert Mp4 to GIF using Wondershare Filmora Video Editor . It is yet another tool suitable for creating animated GIFs using videos and photos. It allows the user to customize GIF images using overlays, text, animation, and elements. When it is over, you are at liberty to export it to your computer or any other common portable storage device. The bottommost line is that the tool makes it easy to use whenever necessary. The icing on the cake is the fact that you don’t have to sign up or pay a premium. In case you are wondering, it is also easy to use. All you got to do is to follow these steps.
Wondershare Filmora - Best Video Editor for Mac/Windows
5,481,435 people have downloaded it.
Build unique custom animations without breaking a sweat.
Focus on creating epic stories and leave the details to Filmora’s auto features.
Start a creative adventure with drag & drop effects and endless possibilities.
Filmora simplifies advanced features to save you time and effort.
Filmora cuts out repetition so you can move on to your next creative breakthrough.
Step 1: Import the Videos
Ensure that the videos you import are editable lest that will be a waste of time. Its design makes it compatible with a wide range of formats, including wmv, mkv, mp4, wav, mpeg, avi, jpg, and png. Since it is among the compatible formats, don’t hesitate to use Filmora to convert GIF to mp4 and vice versa instead of Photoshop.
Step 2: Drag the videos to Filmora timeline
Keep in mind that Filmora has a long list of tools you can use to edit your videos. However, you can also use them on a video that’s on its timeline. To drop them there, all you have to do is drag them to the timeline.

Step 3: Edit the File
The list of ways of editing your videos is long. Some of your options are split, crop, combine, slow down, and speed up the GIFs, to mention a few. So, pick the options that fit your situation the best. Ensure that the end product is as good as possible by using these features to the best level.
Step 4: Add Various Text Effects
In most cases, images and videos aren’t enough. You may want to add text to enhance what you want to achieve with the GIF. To do so, you can always introduce text, and trust me, it never disappoints. In addition to text, you can also add sound at this stage. Again, it is something that does GIFs the justice they deserve.

Step 5: Save and Export the GIF
When all is stated and done, you will have to save and export the GIFs so that you can use them accordingly. For instance, you can share them with friends via social media. Ensure that the extension you use is the GIF.
● Key Takeaways from This Episode →
● Based on the above discussion, it is possible to convert mp4 to GIF. As a matter of fact, it is quite easy, and you don’t need to be an expert to get it done.
●Rest assured that the video will become a GIF with a few clicks. Then, you can go ahead and use it as you may wish.
●On one side, you can use Photoshop. It is a tool designed to perform such tasks.
●If you choose it, use the above guide and follow each of the steps. It is quite detailed to the extent that you won’t get stuck along the way.
●On the other hand, you can also use Wondershare Filmora. It is yet another application that converts MP4 to GIF excellently.
When someone mentions a GIF, what comes to your mind? Some people can picture what it means but wouldn’t describe that match. So, before we discuss how to convert mp4 to gif in Photoshop, it would be wise to define it briefly. First of all, GIF stands for Graphics Interchange Format. Its file format is a compressed image, and it is most suitable for animation. We all know that an animated GIF comprises a series of many still images. However, since these images play sequentially, it may appear as if they are in motion. It is that movement illusion that makes the animation effect come about.
When someone mentions a GIF, what comes to your mind? Some people can picture what it means but wouldn’t describe that match. So, before we discuss how to convert mp4 to gif in Photoshop, it would be wise to define it briefly. First of all, GIF stands for Graphics Interchange Format. Its file format is a compressed image, and it is most suitable for animation. We all know that an animated GIF comprises a series of many still images. However, since these images play sequentially, it may appear as if they are in motion. It is that movement illusion that makes the animation effect come about.
In this article
01 [How to Convert Video to GIF in Photoshop - Easy Way](#Part 1)
02 [How to Create Animated GIFs from Video without Photoshop](#Part 2)
Part 1 How to Convert Video to GIF in Photoshop - Easy Way
If you want to convert video to GIF in Photoshop, here is a discussion of the easy way to go about it.
Step 1: Ensure that the Dimensions are Right
When you start to convert mp4 to GIF using Photoshop, it is important to highlight some things that need to be done before anything else. Ensure that you set the resolution and dimensions right. Failure to do saw will see the size of your video determine that of your GIF. Beneath such occurrences, you may find yourself having a GIF that’s too large, and its quality leaves a lot to be desired.
The dimensions you choose will depend on what you are working on at any one particular time. For instance, a 720 x 300 layout is recommended for a banner ad GIF. If there is something that one can’t stress enough is the importance of ensuring that you use pixels. As for the resolution, keep in mind that a low resolution translates to a small file size. In this case, you are at privilege to choose between two units, pixels and inches.
Additionally, set the color mode. Since GIFs are meant for screens, ensure that you select the RGB color mode. Finally, click on Create, which opens a new document, and start following these steps to convert Mp4 to GIF Photoshop.
Step 2: Import the Video you want to convert from MP4 to GIF Photoshop
Remember that we already opened Photoshop by pressing Create. Now, the next thing would be to navigate to File followed by Import before selecting the Video Frames to Layers option.
Step 3: Set Up the Following Settings Accordingly
After choosing the video file, choose Open, and a dialogue box with several options and a preview of the video appears.
The radio buttons give you two options to choose from. The “From Beginning to End” is the ideal choice if you want the whole video to be converted to GIF. However, if you want to focus on a section of the video, select “Selected Range Only.” On the other hand, the checkbox allows you to limit the video to 2 frames. Simply tick it, and Photoshop will automatically ensure that only two frames of the video are left.
Last but not least, check the “Make Frame Animation” checkbox. Once all these settings are set as recommended and depending on preference, Photoshop will export your video as several frames. In the event that the program crashes, all is not lost. You can fix it by reducing the video’s quality and then try importing it.
Step 4: Edit the GIF
Photoshop also gives you several options to help you edit your frames to perfection. In most cases, these settings are ideal for manipulating the quality of your GIF. Interestingly, it is possible to preview how the GIF will look before committing to any change. So expect two panes, right and left. The left one allows you to see the preview, whereas its right counterpart helps you edit.
Alternatively, select one of the preset choices. If you do so, there is no requirement The bottom line is that the tool makes to make any changes. That doesn’t mean you can’t choose a Preset option and then edit it to your preferences. Expect the quality of the GIF to decrease and the size to be relatively small. Right below the Preset, don’t forget to confirm that the selected option is GIF.
Step 5: Save the GIF
Once satisfied by the GIF created, save these frames as animated GIFs. Go to File, then Export, followed by Save for Web (Legacy).
That’s how to convert Mp4 to GIF in simple steps.
Part 2 How to Create Animated GIFs from Video without Photoshop
Alternatively, you can opt to convert Mp4 to GIF using Wondershare Filmora Video Editor . It is yet another tool suitable for creating animated GIFs using videos and photos. It allows the user to customize GIF images using overlays, text, animation, and elements. When it is over, you are at liberty to export it to your computer or any other common portable storage device. The bottommost line is that the tool makes it easy to use whenever necessary. The icing on the cake is the fact that you don’t have to sign up or pay a premium. In case you are wondering, it is also easy to use. All you got to do is to follow these steps.
Wondershare Filmora - Best Video Editor for Mac/Windows
5,481,435 people have downloaded it.
Build unique custom animations without breaking a sweat.
Focus on creating epic stories and leave the details to Filmora’s auto features.
Start a creative adventure with drag & drop effects and endless possibilities.
Filmora simplifies advanced features to save you time and effort.
Filmora cuts out repetition so you can move on to your next creative breakthrough.
Step 1: Import the Videos
Ensure that the videos you import are editable lest that will be a waste of time. Its design makes it compatible with a wide range of formats, including wmv, mkv, mp4, wav, mpeg, avi, jpg, and png. Since it is among the compatible formats, don’t hesitate to use Filmora to convert GIF to mp4 and vice versa instead of Photoshop.
Step 2: Drag the videos to Filmora timeline
Keep in mind that Filmora has a long list of tools you can use to edit your videos. However, you can also use them on a video that’s on its timeline. To drop them there, all you have to do is drag them to the timeline.
Step 3: Edit the File
The list of ways of editing your videos is long. Some of your options are split, crop, combine, slow down, and speed up the GIFs, to mention a few. So, pick the options that fit your situation the best. Ensure that the end product is as good as possible by using these features to the best level.
Step 4: Add Various Text Effects
In most cases, images and videos aren’t enough. You may want to add text to enhance what you want to achieve with the GIF. To do so, you can always introduce text, and trust me, it never disappoints. In addition to text, you can also add sound at this stage. Again, it is something that does GIFs the justice they deserve.
Step 5: Save and Export the GIF
When all is stated and done, you will have to save and export the GIFs so that you can use them accordingly. For instance, you can share them with friends via social media. Ensure that the extension you use is the GIF.
● Key Takeaways from This Episode →
● Based on the above discussion, it is possible to convert mp4 to GIF. As a matter of fact, it is quite easy, and you don’t need to be an expert to get it done.
●Rest assured that the video will become a GIF with a few clicks. Then, you can go ahead and use it as you may wish.
●On one side, you can use Photoshop. It is a tool designed to perform such tasks.
●If you choose it, use the above guide and follow each of the steps. It is quite detailed to the extent that you won’t get stuck along the way.
●On the other hand, you can also use Wondershare Filmora. It is yet another application that converts MP4 to GIF excellently.
Samples of Cartoon Character Face to Inspire You
Samples of Cartoon Character Face to Inspire You
An easy yet powerful editor
Numerous effects to choose from
Detailed tutorials provided by the official channel
Being able to draw facial features is an essential skill for any animator. Whether you are a beginner at drawing faces or an experienced cartoon artist that has been drawing for years, this is a skill that can gradually improve with time. With the implementation and use of simple shapes, creating various facial features and cartoon styles can be done quickly.
The methods of creating funny face cartoon characters are suitable for everyone, even if they do not have a single day of illustrating experience. These methods presented in this article are easily accessible to provide you with different results depending on your budget and your desired outcome.
The act of drawing cartoon faces can be effortless, and in this article, we will give you some fundamental samples of how you can draw cartoon faces of your own.
In this article
01 [Learn to Understand the Core of Cartoon Style](#Part 1)
02 [Top 12 Cartoon Face Examples](#Part 2)
03 [How to Draw a Cartoon Face - For Beginners](#Part 3)
04 [How to Easily Turn Yourself into a Cartoon](#Part 4)
Part 1 Learn to Understand the Core of Cartoon Style
First, you need to simplify the different parts of the cartoon character face to pick up on very subtle facial expressions and features. For example, the eyes’ shape and size will help determine if the person is feeling sad, excited, happy, excited, or sad. In addition, the amount of lift under a person’s eyebrows can help determine whether a person is mad or not.
These facial expressions are crucial to how a person communicates. It has got to the point that we can read someone’s face without truly understanding which parts of the face convey that emotion. However, these days we get exposed to everyday adaptations of facial expressions, especially with the invention of Instagram, Snapchat, and cartoon face filters.
Consequently, cartoons are a combination of different shapes that are being put together and are not difficult if the focus is on each shape individually and the process breaks down step by step.
Cartoons are a mixture of different shapes put together. It’s not difficult if you focus on each shape individually and break down the process step by step.
Finally, understanding these unconscious and subtle differences in facial expressions is crucial when planning out an animated character. Afterward, when understood, you can simplify the features to be recognizable by your audience.
Part 2 Top 12 Cartoon Face Examples
Cartoon character faces are gaining immense importance in design art due to their universality. Cartoon faces can represent people in several situations and add a comic or satirical twist to dull topics by highlighting their importance. However, drawing cartoon faces require a lot of skill and differentiation, and graphic designers, while working on basic and universal templates, always try and introduce unique elements.
Here are the top 10 examples of cartoon character faces you can choose from when you want to make your designs:
01Men and Women
This sketch features different facial expressions made by older men and women.
02Stretch and Squash
This photo shows the difference between squashing and stretching the face and provides references for extreme squash and extreme stretch.

03Dramatic Expressions
The expressions drawn here are super fun and dramatic. However, it is a great way to have fun and practice how to draw facial expressions simultaneously.
04Quick Expressive Sketches
With this, you can practice how to draw different facial expressions by doing quick sketches like this one. Perhaps you do not need to pay attention to perfection.
05This Is Good This Is Better
With this facial expression, you can see a good look and an even better expression. It shows the difference that subtle changes can make to your facial expressions**.**
06Male and Female Expressions
This includes both male and female expressions to express the facial reaction of both genders, like some funny cartoon characters face.
07Quick Sketches
This type of facial expression will help you get better at drawing cartoons, and you can use do some quick sketches every day.

08Jay Leno’s facial expression
Here, it is being exaggerated on a few of his most prominent facial features, including his chin. It is kind of a fat face cartoon character.

09Robert Pattinson Facials
In this photo, his head shape was distorted to show the thinness of his face, and his big hair also accentuates this prominent feature further.
10A,I,U,O,AE,M Facials
With this, you can practice how to draw your facial expression by pronouncing a, i, u, o, ae, m.

Part 3 How to Draw a Cartoon Face - For Beginners
Here, we have written down 7-step to follow on how to draw a cartoon character face as a beginner effectively.
● Step 1: Plan and Prepare
This is the first step is to plan out exactly what this character will convery through its expression while drawing a cartoon character.
● Step 2: Drawing A Cartoon Head
Next is time to start sketching out the shape of the head based on the plan you have made. Whatsoever shape you decide to use for your character, start with a circle to serve as the basic shape for the head.
● Step 3: Drawing Cartoon Eyes
Now, you need to draw the eye of the character, which is a crucial step because the eye is the essential part of their expression. To get the character’s eyes in the right place, you should carefully sketch the horizontal or vertical dimension lines.
● Step 4: Drawing A Cartoon Nose
The simpler the nose is, the better it looks in a cartoon. Ensure to keep a proper ratio between the mouth, eyes, and nose so that it does not look too crowded together.
● Step 5: Shaping the Face
In shaping the face, one needs to be mindful of the character, which will help to determine how to shape the jawline and head. For example, for a girl, the face should be narrower and have the chin come to a bit of a point at the end, whereas, for a boy, it requires that the face is a bit bolder and focuses more on the definition of the jawline.
● Step 6: Drawing A Cartoon Mouth
The mouth is another essential part of the cartoon character’s expression and a key indicator of how the character is feeling. It portrays whether you want the character to smile, frown, yell, be nervous, or be neutral.
● Step 7: Drawing Cartoon Hair
Next, you need to draw the cartoon hair, and, in some cases, the cartoon hair is a significant part of their appearance as it is a way to convey your character’s personality, appearance, style, or gender.
● Step 8: Coloring
Another part requires you to paint your character to improve the texture and make it beautiful.
Part 4 How to Easily Turn Yourself into a Cartoon
Are you looking to turn yourself into a cartoon? This is very necessary as it provides you with a great way to integrate diverse characters into your brand’s marketing while simultaneously keeping your content personalized.
However, after converting a picture to a cartoon character face, you can decide to animate it, and the best tool is Wondershare Filmora Video Editor . Animation is a great way to advertise your business, especially during times like these. it is a clever way for leaders, CEOs, and managers to connect with their remote workers and boost engagement, company culture, and ultimately work morale. Filmora is also a great tool to create creative and powerful animation with tons of follow-come effect that enables you to carry it out effectively and efficiently. In this section, we will guide you on how to turn yourself into a cartoon easily:
Step 1: Visit Powtoon.com and sign up for a free account, then click on the “build your character” option from the dropdown menu.
Step 2: Next is to select the cartoon gender you want.
Step 3: Finally, you can customize your character’s facial features such as skin, hair, color, clothes, and animated gestures.

Step 4: Once you are satisfied with the result, you can save it on your device or share it on social media
For Win 7 or later (64-bit)
For macOS 10.12 or later
● Ending Thoughts →
● Thus, we saw how to easily cartoon your character’s face via some samples to help you out. With the method listed above, you can easily use it to create a square-faced cartoon character or draw a fat face cartoon character.
● This article also explained how to cartoon yourself. However, to cartoon your video or create a cartoon animated video, we recommend that you use Filmora, its keyframing feature to help you carry this out effectively.
Being able to draw facial features is an essential skill for any animator. Whether you are a beginner at drawing faces or an experienced cartoon artist that has been drawing for years, this is a skill that can gradually improve with time. With the implementation and use of simple shapes, creating various facial features and cartoon styles can be done quickly.
The methods of creating funny face cartoon characters are suitable for everyone, even if they do not have a single day of illustrating experience. These methods presented in this article are easily accessible to provide you with different results depending on your budget and your desired outcome.
The act of drawing cartoon faces can be effortless, and in this article, we will give you some fundamental samples of how you can draw cartoon faces of your own.
In this article
01 [Learn to Understand the Core of Cartoon Style](#Part 1)
02 [Top 12 Cartoon Face Examples](#Part 2)
03 [How to Draw a Cartoon Face - For Beginners](#Part 3)
04 [How to Easily Turn Yourself into a Cartoon](#Part 4)
Part 1 Learn to Understand the Core of Cartoon Style
First, you need to simplify the different parts of the cartoon character face to pick up on very subtle facial expressions and features. For example, the eyes’ shape and size will help determine if the person is feeling sad, excited, happy, excited, or sad. In addition, the amount of lift under a person’s eyebrows can help determine whether a person is mad or not.
These facial expressions are crucial to how a person communicates. It has got to the point that we can read someone’s face without truly understanding which parts of the face convey that emotion. However, these days we get exposed to everyday adaptations of facial expressions, especially with the invention of Instagram, Snapchat, and cartoon face filters.
Consequently, cartoons are a combination of different shapes that are being put together and are not difficult if the focus is on each shape individually and the process breaks down step by step.
Cartoons are a mixture of different shapes put together. It’s not difficult if you focus on each shape individually and break down the process step by step.
Finally, understanding these unconscious and subtle differences in facial expressions is crucial when planning out an animated character. Afterward, when understood, you can simplify the features to be recognizable by your audience.
Part 2 Top 12 Cartoon Face Examples
Cartoon character faces are gaining immense importance in design art due to their universality. Cartoon faces can represent people in several situations and add a comic or satirical twist to dull topics by highlighting their importance. However, drawing cartoon faces require a lot of skill and differentiation, and graphic designers, while working on basic and universal templates, always try and introduce unique elements.
Here are the top 10 examples of cartoon character faces you can choose from when you want to make your designs:
01Men and Women
This sketch features different facial expressions made by older men and women.
02Stretch and Squash
This photo shows the difference between squashing and stretching the face and provides references for extreme squash and extreme stretch.
03Dramatic Expressions
The expressions drawn here are super fun and dramatic. However, it is a great way to have fun and practice how to draw facial expressions simultaneously.
04Quick Expressive Sketches
With this, you can practice how to draw different facial expressions by doing quick sketches like this one. Perhaps you do not need to pay attention to perfection.
05This Is Good This Is Better
With this facial expression, you can see a good look and an even better expression. It shows the difference that subtle changes can make to your facial expressions**.**
06Male and Female Expressions
This includes both male and female expressions to express the facial reaction of both genders, like some funny cartoon characters face.
07Quick Sketches
This type of facial expression will help you get better at drawing cartoons, and you can use do some quick sketches every day.
08Jay Leno’s facial expression
Here, it is being exaggerated on a few of his most prominent facial features, including his chin. It is kind of a fat face cartoon character.
09Robert Pattinson Facials
In this photo, his head shape was distorted to show the thinness of his face, and his big hair also accentuates this prominent feature further.
10A,I,U,O,AE,M Facials
With this, you can practice how to draw your facial expression by pronouncing a, i, u, o, ae, m.
Part 3 How to Draw a Cartoon Face - For Beginners
Here, we have written down 7-step to follow on how to draw a cartoon character face as a beginner effectively.
● Step 1: Plan and Prepare
This is the first step is to plan out exactly what this character will convery through its expression while drawing a cartoon character.
● Step 2: Drawing A Cartoon Head
Next is time to start sketching out the shape of the head based on the plan you have made. Whatsoever shape you decide to use for your character, start with a circle to serve as the basic shape for the head.
● Step 3: Drawing Cartoon Eyes
Now, you need to draw the eye of the character, which is a crucial step because the eye is the essential part of their expression. To get the character’s eyes in the right place, you should carefully sketch the horizontal or vertical dimension lines.
● Step 4: Drawing A Cartoon Nose
The simpler the nose is, the better it looks in a cartoon. Ensure to keep a proper ratio between the mouth, eyes, and nose so that it does not look too crowded together.
● Step 5: Shaping the Face
In shaping the face, one needs to be mindful of the character, which will help to determine how to shape the jawline and head. For example, for a girl, the face should be narrower and have the chin come to a bit of a point at the end, whereas, for a boy, it requires that the face is a bit bolder and focuses more on the definition of the jawline.
● Step 6: Drawing A Cartoon Mouth
The mouth is another essential part of the cartoon character’s expression and a key indicator of how the character is feeling. It portrays whether you want the character to smile, frown, yell, be nervous, or be neutral.
● Step 7: Drawing Cartoon Hair
Next, you need to draw the cartoon hair, and, in some cases, the cartoon hair is a significant part of their appearance as it is a way to convey your character’s personality, appearance, style, or gender.
● Step 8: Coloring
Another part requires you to paint your character to improve the texture and make it beautiful.
Part 4 How to Easily Turn Yourself into a Cartoon
Are you looking to turn yourself into a cartoon? This is very necessary as it provides you with a great way to integrate diverse characters into your brand’s marketing while simultaneously keeping your content personalized.
However, after converting a picture to a cartoon character face, you can decide to animate it, and the best tool is Wondershare Filmora Video Editor . Animation is a great way to advertise your business, especially during times like these. it is a clever way for leaders, CEOs, and managers to connect with their remote workers and boost engagement, company culture, and ultimately work morale. Filmora is also a great tool to create creative and powerful animation with tons of follow-come effect that enables you to carry it out effectively and efficiently. In this section, we will guide you on how to turn yourself into a cartoon easily:
Step 1: Visit Powtoon.com and sign up for a free account, then click on the “build your character” option from the dropdown menu.
Step 2: Next is to select the cartoon gender you want.
Step 3: Finally, you can customize your character’s facial features such as skin, hair, color, clothes, and animated gestures.
Step 4: Once you are satisfied with the result, you can save it on your device or share it on social media
For Win 7 or later (64-bit)
For macOS 10.12 or later
● Ending Thoughts →
● Thus, we saw how to easily cartoon your character’s face via some samples to help you out. With the method listed above, you can easily use it to create a square-faced cartoon character or draw a fat face cartoon character.
● This article also explained how to cartoon yourself. However, to cartoon your video or create a cartoon animated video, we recommend that you use Filmora, its keyframing feature to help you carry this out effectively.
Nurturing Mind, Heart, and Soul on the Top 5 Anime Streaming Sanctuaries
FREE Best Anime Streaming Sites to Download Anime

Benjamin Arango
Mar 27, 2024• Proven solutions


Anime (also known as Japanese-style animation) is a global subgenre of TV content. With billions of viewers around the globe, the Anime industry is one of the mainstream genres getting a lot of attention. It has boomed in popularity with the rise in online streaming services. People are discovering the amazing blend of art, animation, storytelling, and music. You can find the best free anime websites to watch anime online .
But why we’re here is that only a few of these streaming sites allow their users to download anime easily and watch cartoon online in HD . That said there are numerous free and paid providers out of which only a handful works properly and lets the users enjoy their favorite anime. So, let us discover the best anime streaming sites – free and paid as well as those with the feature to download anime and watch anime offline. In this article, you will learn:
- Part 1: Best Anime Streaming Sites to Download Anime[Free]
- Part 2: Best Anime Streaming Sites to Download Anime[Paid]
- Part 3: Record an Anime with Wondershare Filmora
Part 1 Best Anime Streaming Sites to Download Anime[Free]
Free Anime Streaming Sites to Download Anime at A Glance:
01 Animeland
Animeland is a free online English dubbed anime streaming site that doesn’t require you to register to watch or even download anime from the site. It is one of the most famous free anime sites offering 1080p high-definition video streaming. The site has reportedly around 1.10 million monthly viewers with famous anime series English dubbed like Naruto, Bleach, Attack on Titan, etc.

Image Source: Animeland
You can download from the site just by going on the site and searching for your desired dubbed anime movie or series. Play the episode you want to download and then on the playback window, you will see a download button right at the top of the player box, click it, and your episode will start downloading automatically.
02 Kissanime.ru
The Kissanime site is popular for dubbed anime streaming with the latest content. The site offers high-definition video quality arranged category-wise with easy access and searching features. The user interface is quite neat with high-performance servers for buffer-free streaming i.e. RapidVideo, Streamango, etc., and featured thumbnail images.
Image Source: Kissanime.ru
The website has made it very easy for users to download their desired anime seasons. To download from kissanime.ru, please search for your desired anime series and play the episode that you want to download. Shortly you’ll be taken to the screenplay page, here just scroll down a bit and you’ll find a clickable link to download the very episode that is being played in the browser window.
03 Chia-Anime
Chia-Anime is another free tier anime streaming site with a mobile-friendly UI sorted category-wise and including old and new dubbed anime series. The categorization makes navigation pretty smooth on the site and you’ll be able to find your desired anime content easily. The Chia anime has a wide range of the latest anime series like the popular “One Piece”, “High school of Death”, etc.

Image Source: Chia-Anime
The site supports ultra-high-definition video streaming with its sleek and colorful design. To download an anime episode from Chia-anime.tv, you can head onto the site and search for the anime series you want to download. Then play the intended episode once you’re on the streaming webpage you’ll see a download link just down below the video player, click on it and your download should start.
04 GoGoAnime.io
GoGoAnime is also a free anime streaming site with seven different streaming servers to choose from that make the streaming quite fast and reliable. The collection of anime movies and shows on the site is pretty satisfactory and also has a dedicated chat room where you can interact with other anime lovers and make friends.
Image Source: GoGoAnime.io
You can download the full episode of your desired anime from GoGoAnime only from the default server named VIDSTREAMING. To download play the episode and on the streaming webpage you’ll see a download icon just above the player window press it and the episode will directly start downloading.
05 9anime
9Anime also offers a free online anime streaming library. With a wide variety of fascinating anime catalogs to choose from. The site has diverse anime genres such as Yaoi, Parody, Dementia, action, etc. The servers are fast and offer HD quality content on the go. On 9anime you won’t need to sign up before enjoying your treasured anime series even for accessing the free anime resources.
Image Source: 9anime5
You can download any anime episode from the site. To do so you need to play the episode you want to download and then select the Mp4upload server in the server list then a download button will appear down the player window.
Part 2 Best Anime Streaming Sites to Download [Paid]
Paid Anime Streaming Sites to Download Anime at a Glance:
| Site | Pricing | Download | Supported OS |
|---|---|---|---|
| Funimation | $7.99 monthly | FunimationNow app | Android/IOS |
| Crunchyroll | $9.99 monthly | VRV app | Android/IOS |
| Hulu | $5.99 monthly | Hulu app | Windows 10/Android/IOS |
| Netflix | $8.99 monthly | Netflix app | Windows/Mac/Android/IOS |
| Amazon Prime Video | $12.99 monthly | Amazon Prime Video app | Android/IOS |
01 Funimation
In the anime industry, Funimation has its history with big anime series like Dragon Ball Z and other exclusives that you won’t find anywhere else. If you’re searching for titles that no other streaming site may have, you most probably will find the leading seasonal titles on Funimation.
Image Source: Funimation
Please kindly note that the anime download from Funimation is only available for mobile users on both Android and iOS. You need to install the FunimationNow app on your phone, then search for the anime you like, and download the anime episodes to watch anime offline through your library.
02 Crunchyroll
Crunchyroll is one of the top anime streaming sites – legally. You can have a free account to keep track of your watch history. But to enjoy the wonderful selection of shows from subgenres like seinen, shojo, to shonen you’ll have to buy a premium membership. There’s a Crunchyroll app for iOS and Android as well to let its users stream anime on the go.
Image Source: Crunchyroll
But you can download anime via the Crunchyroll app. Instead, you’ll have to connect it to your VRV streaming service pack and you can download your anime on the VRV app for offline viewing. Crunchyroll premium clients already have a VRV premium account.
03 Hulu
Hulu is a Walt Disney-owned subscription video-on-demand service. It’s one of the anime streaming sites offering different genres of anime in HD quality. It has an excellent variety of anime shows with its on-demand library growing each day with anime TV shows and series. Even before Netflix was imagining diving into the anime world Hulu had collected a valuable collection of anime titles that’s been growing ever since.
Image Source: Hulu Stream
Hulu also has different subscription plans so if you have the right plan you can enjoy watching anime offline. The anime can be downloaded on mobile devices only and you can find the Downloadable items in the app and if your chosen anime is downloadable you can just click the download button on the details page and there you go.
04 Netflix
The streaming giant Netflix has pushed hard in on Japanese anime. In the past two to three years the company has enormously increased its anime database buying rights to several popular titles on the internet such as Neon Genesis Evangelion, Baki, and Death Note. While also investing and producing some Netflix original anime series and movie titles as well.
Image Source: Netflix Download
Netflix comes with multiple subscription plans and allows you to download and enjoy anime offline on its mobile Netflix app. To watch anime offline, you have to search for your desired anime series and open it in the app just look around for a download icon on the description page of the specific series, and pressing it will download the title for you.
05 Amazon Prime Video
Amazon Prime Video is an online streaming service offering a large library of original as well as popular anime movies and series. Subscribers to Amazon Prime have the facility to download content even in 4K Ultra video quality. Though the site has a comparatively low reputation in its anime catalog, it has developed a decent mix of classics, brand-new, hidden gem series, and movies.
Image Source: Amazon Prime Video
A subscribed user can download anime on the mobile application of the Amazon Prime Video for both Android and IOS. To download anime, you can look out for your favorite content, and in the description of that series or movie you’ll see a download button, press it. Now you’ll be able to watch anime offline anywhere without an active internet connection.
Part 3 Record an Anime with Wondershare Filmora
There are lots of paid and subscription-based anime sites that limited people have access to and you want to share the latest episode with your friends, want to make a video for YouTube, or compose an anime reviews video with markers and voiceover to show off your editing skills but first, you’ll need to record anime. Whichever might be the case persuading you to record anime on your computer, you don’t need to worry as I’ll be taking you through each step needed to record anime. Remember to connect with other video creators in the Wondershare Video Community .
Wondershare Filmora is a proficient tool for video content creators and makes it easy and simple to record anime and create professional-looking videos on Mac and Windows. There are three kinds of screen recording types you can choose from, including full-screen, target window, and custom selection. You can record from the computer audio system or microphone audio, determine the quality you want as output, the frame rate, set hotkeys to start, and stop the recording from the settings window. Now we will dive into recording our anime video to produce a review of the Tower of God anime series.
The steps for you to record anime are (the steps are the same on Windows):
- Download Filmora and install it on your computer system either Mac or Windows as the efficient tool supports both platforms.
- Open Filmora, click on the “New Project” option, go to the Record drop-down menu, and choose the “Record PC Screen” option.
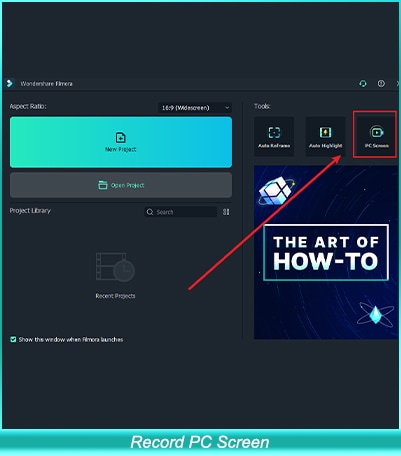
- Now head over to the anime you want to record and play it.
- You will be prompted with Wondershare Filmora Scrn recorder options i.e. in case you want Full-Screen recording, audio, and microphone options. Once you press the record (red) button Filmora will start the recording.
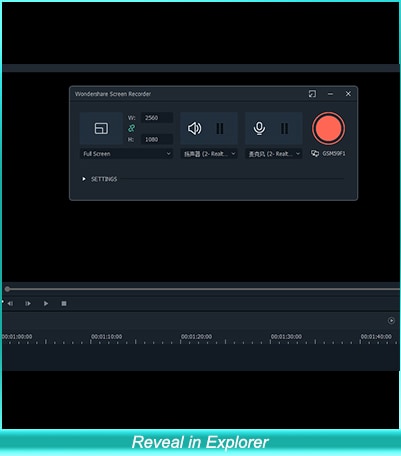
- You can confirm if the software is recording your screen or not by looking at the top menu bar, a red recording button will be displayed during the whole screen recording.
- To pause or stop the anime recording press the red button on the top menu bar.
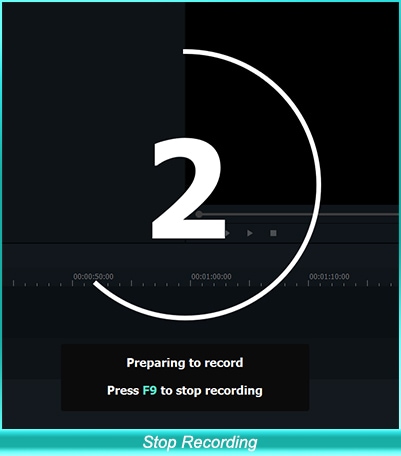
- Press the Stop button to finish recording the anime. You’ll be taken back to the Filmora editor window where you can tweak around with the recorded anime.
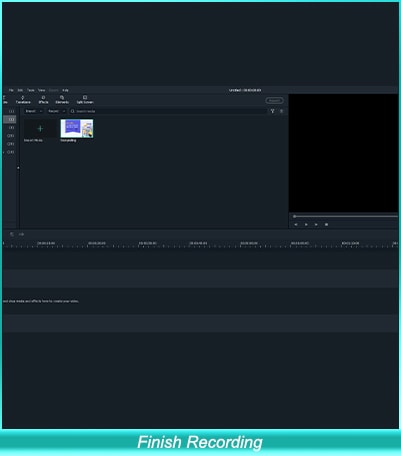
- You can locate the recorded file by right-clicking the recorded file in the media library and selecting the “Reveal in Explorer” option.

- You can drag and drop the recorded file to the timeline if you want to edit it. Filmora can easily cut, trim, rotate, layer multiple video effects, and much more. That’s up to you how deep you want to dig into the features of this amazing video editing toolkit.
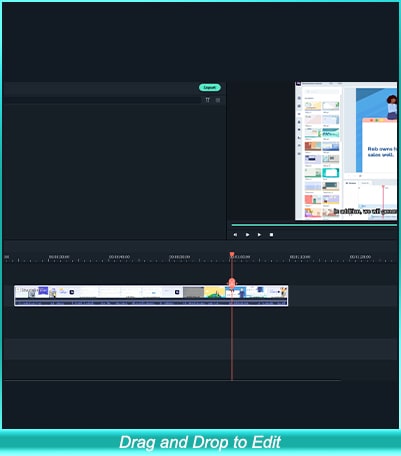
Tips:
You can also set a timer to record the anime i.e. for 20 minutes and then the screen recording will automatically stop and save the file onto the location you’ve specified in the “Save To” location bar.
Seeing all this, aren’t you interested in Filmora? Give it a go.
● Conclusion for Downloading Anime →
With the popularity of the once-niche area of animation continuously blossoming and becoming more mainstream. These free and paid sites are propping up to grab more users’ attention with unique features. Japanese anime has the power to impress anyone with its vivid imagination and colorful storytelling techniques. We’ve covered top free and paid sites that allow you to download anime content and stream on the go without worrying about an active internet connection. Also, to extend your anime interest, you can put life into the world of anime and find some apps to turn photos into cartoons and sketches !
Benjamin Arango
Benjamin Arango is a writer and a lover of all things video.
Follow @Benjamin Arango
Benjamin Arango
Mar 27, 2024• Proven solutions
Anime (also known as Japanese-style animation) is a global subgenre of TV content. With billions of viewers around the globe, the Anime industry is one of the mainstream genres getting a lot of attention. It has boomed in popularity with the rise in online streaming services. People are discovering the amazing blend of art, animation, storytelling, and music. You can find the best free anime websites to watch anime online .
But why we’re here is that only a few of these streaming sites allow their users to download anime easily and watch cartoon online in HD . That said there are numerous free and paid providers out of which only a handful works properly and lets the users enjoy their favorite anime. So, let us discover the best anime streaming sites – free and paid as well as those with the feature to download anime and watch anime offline. In this article, you will learn:
- Part 1: Best Anime Streaming Sites to Download Anime[Free]
- Part 2: Best Anime Streaming Sites to Download Anime[Paid]
- Part 3: Record an Anime with Wondershare Filmora
Part 1 Best Anime Streaming Sites to Download Anime[Free]
Free Anime Streaming Sites to Download Anime at A Glance:
01 Animeland
Animeland is a free online English dubbed anime streaming site that doesn’t require you to register to watch or even download anime from the site. It is one of the most famous free anime sites offering 1080p high-definition video streaming. The site has reportedly around 1.10 million monthly viewers with famous anime series English dubbed like Naruto, Bleach, Attack on Titan, etc.
Image Source: Animeland
You can download from the site just by going on the site and searching for your desired dubbed anime movie or series. Play the episode you want to download and then on the playback window, you will see a download button right at the top of the player box, click it, and your episode will start downloading automatically.
02 Kissanime.ru
The Kissanime site is popular for dubbed anime streaming with the latest content. The site offers high-definition video quality arranged category-wise with easy access and searching features. The user interface is quite neat with high-performance servers for buffer-free streaming i.e. RapidVideo, Streamango, etc., and featured thumbnail images.
Image Source: Kissanime.ru
The website has made it very easy for users to download their desired anime seasons. To download from kissanime.ru, please search for your desired anime series and play the episode that you want to download. Shortly you’ll be taken to the screenplay page, here just scroll down a bit and you’ll find a clickable link to download the very episode that is being played in the browser window.
03 Chia-Anime
Chia-Anime is another free tier anime streaming site with a mobile-friendly UI sorted category-wise and including old and new dubbed anime series. The categorization makes navigation pretty smooth on the site and you’ll be able to find your desired anime content easily. The Chia anime has a wide range of the latest anime series like the popular “One Piece”, “High school of Death”, etc.
Image Source: Chia-Anime
The site supports ultra-high-definition video streaming with its sleek and colorful design. To download an anime episode from Chia-anime.tv, you can head onto the site and search for the anime series you want to download. Then play the intended episode once you’re on the streaming webpage you’ll see a download link just down below the video player, click on it and your download should start.
04 GoGoAnime.io
GoGoAnime is also a free anime streaming site with seven different streaming servers to choose from that make the streaming quite fast and reliable. The collection of anime movies and shows on the site is pretty satisfactory and also has a dedicated chat room where you can interact with other anime lovers and make friends.
Image Source: GoGoAnime.io
You can download the full episode of your desired anime from GoGoAnime only from the default server named VIDSTREAMING. To download play the episode and on the streaming webpage you’ll see a download icon just above the player window press it and the episode will directly start downloading.
05 9anime
9Anime also offers a free online anime streaming library. With a wide variety of fascinating anime catalogs to choose from. The site has diverse anime genres such as Yaoi, Parody, Dementia, action, etc. The servers are fast and offer HD quality content on the go. On 9anime you won’t need to sign up before enjoying your treasured anime series even for accessing the free anime resources.
Image Source: 9anime5
You can download any anime episode from the site. To do so you need to play the episode you want to download and then select the Mp4upload server in the server list then a download button will appear down the player window.
Part 2 Best Anime Streaming Sites to Download [Paid]
Paid Anime Streaming Sites to Download Anime at a Glance:
| Site | Pricing | Download | Supported OS |
|---|---|---|---|
| Funimation | $7.99 monthly | FunimationNow app | Android/IOS |
| Crunchyroll | $9.99 monthly | VRV app | Android/IOS |
| Hulu | $5.99 monthly | Hulu app | Windows 10/Android/IOS |
| Netflix | $8.99 monthly | Netflix app | Windows/Mac/Android/IOS |
| Amazon Prime Video | $12.99 monthly | Amazon Prime Video app | Android/IOS |
01 Funimation
In the anime industry, Funimation has its history with big anime series like Dragon Ball Z and other exclusives that you won’t find anywhere else. If you’re searching for titles that no other streaming site may have, you most probably will find the leading seasonal titles on Funimation.
Image Source: Funimation
Please kindly note that the anime download from Funimation is only available for mobile users on both Android and iOS. You need to install the FunimationNow app on your phone, then search for the anime you like, and download the anime episodes to watch anime offline through your library.
02 Crunchyroll
Crunchyroll is one of the top anime streaming sites – legally. You can have a free account to keep track of your watch history. But to enjoy the wonderful selection of shows from subgenres like seinen, shojo, to shonen you’ll have to buy a premium membership. There’s a Crunchyroll app for iOS and Android as well to let its users stream anime on the go.
Image Source: Crunchyroll
But you can download anime via the Crunchyroll app. Instead, you’ll have to connect it to your VRV streaming service pack and you can download your anime on the VRV app for offline viewing. Crunchyroll premium clients already have a VRV premium account.
03 Hulu
Hulu is a Walt Disney-owned subscription video-on-demand service. It’s one of the anime streaming sites offering different genres of anime in HD quality. It has an excellent variety of anime shows with its on-demand library growing each day with anime TV shows and series. Even before Netflix was imagining diving into the anime world Hulu had collected a valuable collection of anime titles that’s been growing ever since.
Image Source: Hulu Stream
Hulu also has different subscription plans so if you have the right plan you can enjoy watching anime offline. The anime can be downloaded on mobile devices only and you can find the Downloadable items in the app and if your chosen anime is downloadable you can just click the download button on the details page and there you go.
04 Netflix
The streaming giant Netflix has pushed hard in on Japanese anime. In the past two to three years the company has enormously increased its anime database buying rights to several popular titles on the internet such as Neon Genesis Evangelion, Baki, and Death Note. While also investing and producing some Netflix original anime series and movie titles as well.
Image Source: Netflix Download
Netflix comes with multiple subscription plans and allows you to download and enjoy anime offline on its mobile Netflix app. To watch anime offline, you have to search for your desired anime series and open it in the app just look around for a download icon on the description page of the specific series, and pressing it will download the title for you.
05 Amazon Prime Video
Amazon Prime Video is an online streaming service offering a large library of original as well as popular anime movies and series. Subscribers to Amazon Prime have the facility to download content even in 4K Ultra video quality. Though the site has a comparatively low reputation in its anime catalog, it has developed a decent mix of classics, brand-new, hidden gem series, and movies.
Image Source: Amazon Prime Video
A subscribed user can download anime on the mobile application of the Amazon Prime Video for both Android and IOS. To download anime, you can look out for your favorite content, and in the description of that series or movie you’ll see a download button, press it. Now you’ll be able to watch anime offline anywhere without an active internet connection.
Part 3 Record an Anime with Wondershare Filmora
There are lots of paid and subscription-based anime sites that limited people have access to and you want to share the latest episode with your friends, want to make a video for YouTube, or compose an anime reviews video with markers and voiceover to show off your editing skills but first, you’ll need to record anime. Whichever might be the case persuading you to record anime on your computer, you don’t need to worry as I’ll be taking you through each step needed to record anime. Remember to connect with other video creators in the Wondershare Video Community .
Wondershare Filmora is a proficient tool for video content creators and makes it easy and simple to record anime and create professional-looking videos on Mac and Windows. There are three kinds of screen recording types you can choose from, including full-screen, target window, and custom selection. You can record from the computer audio system or microphone audio, determine the quality you want as output, the frame rate, set hotkeys to start, and stop the recording from the settings window. Now we will dive into recording our anime video to produce a review of the Tower of God anime series.
The steps for you to record anime are (the steps are the same on Windows):
- Download Filmora and install it on your computer system either Mac or Windows as the efficient tool supports both platforms.
- Open Filmora, click on the “New Project” option, go to the Record drop-down menu, and choose the “Record PC Screen” option.
- Now head over to the anime you want to record and play it.
- You will be prompted with Wondershare Filmora Scrn recorder options i.e. in case you want Full-Screen recording, audio, and microphone options. Once you press the record (red) button Filmora will start the recording.
- You can confirm if the software is recording your screen or not by looking at the top menu bar, a red recording button will be displayed during the whole screen recording.
- To pause or stop the anime recording press the red button on the top menu bar.
- Press the Stop button to finish recording the anime. You’ll be taken back to the Filmora editor window where you can tweak around with the recorded anime.
- You can locate the recorded file by right-clicking the recorded file in the media library and selecting the “Reveal in Explorer” option.
- You can drag and drop the recorded file to the timeline if you want to edit it. Filmora can easily cut, trim, rotate, layer multiple video effects, and much more. That’s up to you how deep you want to dig into the features of this amazing video editing toolkit.
Tips:
You can also set a timer to record the anime i.e. for 20 minutes and then the screen recording will automatically stop and save the file onto the location you’ve specified in the “Save To” location bar.
Seeing all this, aren’t you interested in Filmora? Give it a go.
● Conclusion for Downloading Anime →
With the popularity of the once-niche area of animation continuously blossoming and becoming more mainstream. These free and paid sites are propping up to grab more users’ attention with unique features. Japanese anime has the power to impress anyone with its vivid imagination and colorful storytelling techniques. We’ve covered top free and paid sites that allow you to download anime content and stream on the go without worrying about an active internet connection. Also, to extend your anime interest, you can put life into the world of anime and find some apps to turn photos into cartoons and sketches !
Benjamin Arango
Benjamin Arango is a writer and a lover of all things video.
Follow @Benjamin Arango
Top 10 Old Cartoons From Cartoon Network That You Miss
Top 10 Old Cartoons From Cartoon Network That You Miss
An easy yet powerful editor
Numerous effects to choose from
Detailed tutorials provided by the official channel
Right from our childhood days, we were drawn to the interesting late 80s cartoons shown on the old cartoon network. Watching them used to be quite fun and the best time pass after studying. At that time, the most popular and favorite were Disney cartoons.
Cartoon network was used to advertise mostly as a kids channel but it succeeded to please everyone by airing not only cartoons but also some good shows for teenagers and adults as well. It had introduced a lot of classics that defined childhood. But, now all we can do is watch the old episodes and wish we were young again.
We will refresh your memories of your childhood days with some of the most popular old Disney cartoons that you should not miss watching even today.
01**Dumbo
Rating: 7.3
Stars: 4
Do you remember Dumbo, that cute elephant baby with big ears? It was one of the shortest featured films by Disney. This animated old Disney shows cartoon had made an emotional connection with the kids as well as adults.
First, he gets separated from his mother after she tried to protect her baby from the kids who came to see him in the circus. Now, Dumbo was lonely but the Timothy, the mice never left his side. He helps Dumbo in achieving his highest potential. Later did Dumbo realizes that his ears give him the strength to fly, for which others ridiculed him all the time.
In the end, the movie gave the lesson of never giving up on our dreams and being as brave as possible to face this cruel world’s reality.
Votes: 128,942
02**Bambi
Rating: 7.3
Stars: 3.5
Bambi is a lively and engaging retelling of Disney’s characters and their adventures. It is the tale of a young deer that has yet to learn how to live in the great woods. The story revolves around his journey from his childhood days to adulthood. He learns about the forest and its inhabitants from his mother.
However, her demise changes Bambi’s life completely and this moment was the most heartbreaking part of the entire story. He grows spending time with Thumper and Flower and becomes wiser to the stag. These animated old cartoons from the cartoon network will keep your eyes glued to the screen. The movie was appreciated with many awards and achievements.
Votes: 139,750
03**Pinocchio
Rating: 7.5
Stars: 4.5
A classic tale of adventure, Pinocchio is a puppet whose nose grows when he lies. He was crafted by recognized by the carpenter Gepetoo and life was added by a fairy. This live-action Disney adaptation of the book by Carlo Collodi was a smash hit in Italy and was distributed by Disney to the old cartoon network website and other channels.
Each part of this animated cartoon won the heart of the audience including the whale climax, the theme song “when you wish upon a star”, and so on. The most iconic moment in this classic was Pinocchio saving Gepetto from the whale. Despite him being a disobedient character, it left many lessons to unfold for the kids.
Votes: 141,146
04**Snow White & the Seven Dwarves
Rating: 7.6
Stars: 3
Snow White & the Seven brought a revolution to the animated cinematic world. It was a beautiful fairy tale of a girl whose charm captured everyone’s heart in the kingdom including the dwarves. But, her wicked stepmother when asked her magic mirror who is fairest of all? It said about Snow White and this made her feel jealous.
She planned to kill her with a poisonous apple. However, Snow White survived as a kiss from her true love could save her. It was a classic Disney masterpiece loved by millions of fans around the world. Today also, this beloved title will make for a perfect addition to every family movie collection.
Votes: 194,392
05**The Jungle Book
Rating: 7.6
Stars: 4
Who can forget the epic character Mowgli, Bagheera, and Baloo in the jungle book? For several years, its series aired on the old cartoon network. His battle with the Shere Khan and quest to know about himself while spending time with his wolf siblings, all kept enchanting audiences. This is among the most loved old Disney channel cartoons of that time.
Even today, no one can refuse to watch it. It was also the last film produced by the Walt Disney house. Its movie has received several awards like the Peta innovation in Film Award, Academy Award, BAFTA Awards, and so on.
Votes: 177,666
06**Alice in Wonderland
Rating: 7.4
Stars: 3.5
Alice in Wonderland focuses on the story of a girl who fell asleep and dreams of falling into a white rabbit hole. She ends up landing in an animated world of fantastical creatures. As she follows the White Rabbit, she grows in size until she is finally small enough to enter a garden full of talking flowers and oversized insects.
After meeting the Mad Hatter, the Cheshire Cat, and other strange characters, Alice embarks on a series of adventures that take her to a tea party with the Mad Hatter, a tea party with the March Hare, and then a trial at the hands of the Queen of Hearts. She encounters many strange creatures on her journey. Her adventures go terrible at first but as she meets and spends time with them, things started going well.
Votes: 138,126
07**Cinderella
Rating: 7.3
Stars: 3
Cinderella is a classic tale filled with adventure, romance, and magic. When a young woman’s father unexpectedly passes away, her loving stepmother and step sisters neglect her.
But Cinderella finds comfort in her animal friends, like the mice Gus and Jaq who help her clean and cook, the lovable bird Juno, and especially the kind-hearted Fairy Godmother who helps make Cinderella’s dreams come true at a royal ball. Her fortune wasn’t in her favor but her luck turned out good eventually after meeting her Godmother who reunited her with a Prince.
The story of Cinderella makes us believe in the magic existing in the Universe. Somewhere, you have a silent well-wisher to chance your life.
Votes: 138,126
08**The Little Mermaid
Rating: 7.6
Stars: 3.5
The Little Mermaid is a wildly popular Disney animated film and a wonderful modern fairy tale. Ariel, the daughter of King Triton, has years to be in the world outside of the sea. She fell in love with the handsome Prince, Ariel soon finds out that they cannot be together because he is a human and she is a mermaid. So she makes a deal with Ursula, an evil sorceress to turn her into a human for three days on land.
She meets Flounder the fish, Sebastian the crab, and a host of other sea creatures. At times it’s just too much to handle but eventually, Ariel discovers her strength and that dreams do come true when you believe in yourself!
This cartoon won two academy awards for the “Under the sea” song. It was also the start of the Disney Renaissance period.
Votes: 254,253
09**The Lion King
Rating: 8.5
Stars: 4.5
The Lion King, a beloved animated movie of all time, bursts onto the cartoon channels in a visually spectacular way that touched hearts and captivated minds. You will experience the joy, excitement, and anticipation of Simba’s adventure-filled journey that is filled with humor, affection, and heart-racing excitement. He was about to succeed his father but uncle Scar killed him and made Simba responsible for his death. Some of the old cartoon channels kept showing this show for a long time.
Votes: 1,017,146
10**Tangled
Rating: 7.8
Stars: 3.5
Disney snatches you up and tugs at your heart with this tale about a little lost princess living in a secluded tower. She had long blonde hair and was finding a way to see the world that she knew nothing about it. You’ll get to know Rapunzel as you’ve never seen her before in this exciting one of the old Disney cartoons. This animated cartoon shows her struggle of living away from her parents and escaping the tower with the help of an intruder Flynn Rider.
Votes: 437,453
● Ending Thoughts →
● For a while, you can live your childhood again by watching Old Disney cartoons.
● Theyare immemorial and watching them even today leaves us connected.
● Thanks to the old cartoon network website keeping the legacy of cartoons going still today.
● But yeah, those classics aren’t aired anymore on cartoon networks so you can watch them through YouTube.
Also read:
- New In 2024, How to Create Slideshow in LinkedIn
- 2024 Approved How to Create Slideshow in LinkedIn
- New In 2024, How to Combine Multiple GIFs Into One with GIF Combiner
- New Most Effective Tactics to Set WhatsApp Status for 2024
- New The Secret Sauce for Making GIF Instagram Story More Aesthetic
- How to Draw Skeleton Cartoon – A Step by Step Guide
- 2024 Approved OBS Animated Alternatives
- Best 10 Video to GIF Converters Top Picks
- Updated How to Create Picsart Cartoon in Simple Ways
- Best Websites to Download Animated GIFs for Free
- New Best 15 Anime Shows That Are Great to Binge Watch
- Updated 2024 Approved 6 Proven Ways to Dub Anime for Anime Voice Actor
- Updated In 2024, The 10 Most Adorable Aesthetic Cartoon Characters of All Time
- Updated 2024 Approved 26 Cool Anime Girl Names and Their Meanings
- New Samples of Cartoon Character Face
- New What Wikipedia Wont Tell You About Character Rigging for 2024
- New 2024 Approved 10 Cartoon Canvas Painting Ideas for Total Beginners
- New How To Learn Cartoon Sketch Drawing— Pencil Sketch for Beginners
- How-To Guide Secret Shortcut to Adobe Animate Character Tutorial
- Best 8 Tools Tell You How to Make Slideshows for Instagram for 2024
- Updated In-Depth Study of Cartoon Painting Starts From Learning to Draw It
- 2024 Approved How To Create Animated Clipart in PowerPoint
- In 2024, 4 Things You Need to Know About Pinterest GIF
- 2024 Approved Apps to Animate Still Pictures Which Could Make Your Pictures Become Internet Sensation
- Updated Best Tips for Effortless Unity 3D Animation for 2024
- Updated In 2024, Techniques on How to Make After Effects 2D Animation
- New 2024 Approved 12 Captivating Websites with Triggered Animate on Scroll Examples
- New How to Learn Cartoon Characters Sketch Quickly for 2024
- New Creative Ways to Make iPhone Text GIF
- Updated 4 Things You Should Know About Pinterest GIF for 2024
- Updated 5 Photoshop Alternatives to Animate Logo
- New 2024 Approved Secrets to Make 2D Game Animation
- 2024 Approved How to Make Photo Motion Effect Online?
- Updated In 2024, Top 3 Ways to Create Gif Images with Great 3D Gif Maker
- How to Transfer Photos from Oppo Find X6 Pro to New Android? | Dr.fone
- In 2024, Top 5 Tracking Apps to Track Vivo V29e without Them Knowing | Dr.fone
- In 2024, How To Factory Unlock Your Telstra iPhone 8
- In 2024, Android Unlock Code Sim Unlock Your Oppo A1x 5G Phone and Remove Locked Screen
- All Things You Need to Know about Wipe Data/Factory Reset For Honor Magic 5 | Dr.fone
- How to Downgrade Apple iPhone XS without Losing Data? | Dr.fone
- In 2024, How to Change Location on TikTok to See More Content On your Vivo S17e | Dr.fone
- How to Rescue Lost Music from Vivo S17e
- In 2024, A Quick Guide to Oppo Find X7 Ultra FRP Bypass Instantly
- How to Reset Vivo S17 Without the Home Button | Dr.fone
- Recover your photos after Realme Narzo N53 has been deleted.
- Title: 2024 Approved Best 8 Tools Tell You How to Make Slideshows for Instagram
- Author: Elon
- Created at : 2024-05-19 03:05:01
- Updated at : 2024-05-20 03:05:01
- Link: https://animation-videos.techidaily.com/2024-approved-best-8-tools-tell-you-how-to-make-slideshows-for-instagram/
- License: This work is licensed under CC BY-NC-SA 4.0.
