
:max_bytes(150000):strip_icc():format(webp)/tesla-bot-f6353f76ae214924916445da1da620ca.png)
2024 Approved Creative Ways to Create iPhone Text GIF
Creative Ways to Create iPhone Text GIF
Creative Ways to Make iPhone Text GIF
An easy yet powerful editor
Numerous effects to choose from
Detailed tutorials provided by the official channel
GIFs add fun and humor to interactions via text messages. GIFs allow you to convey ideas, emotions, and thoughts in much more precise ways than an emoji would. iPhones operating on iOS 10 or later versions have an in-built GIF keyboard, making it super easy to add GIFs. iPhone text GIFs are readily accessible from GIF keyboards. Still, if you do not have one, you can resort to third-party applications like GIPHY and GIF keyboard for more prominent access to GIF libraries.

Let’s now delve into the different ways of adding GIFs in text messages on iPhone and directly sending them using the Messages app.
In this article
01 [How to Text a GIF: For iOS and Android](#Part 1)
02 [How to Text a GIF on an iPhone Using a Third-Party App](#Part 2)
03 [How to Send GIFs on iPhone](#Part 3)
Part 1 How to Text a GIF: For iOS and Android Users
iPhone text GIFs make texting more fun. Hence, we dedicated this part to teaching you how to use iPhone text GIFs to revitalize and better express yourself while texting.
On iPhone, there are two different ways to send iPhone text GIFs – employing the default keyboard or through the help of third-party apps. You can use the iOS default keyboard to search for GIFs in iMessage on iPhones directly. This applies to all iPhones running on iOS 10 and later versions. If your iPhone belongs to this category, follow the simple steps to add GIFs in text messages on iPhone:
01Sending GIFs using the iPhone Default Keyboard
Here’s how you can send iPhone text GIFs using the iOS default keyboard:
Step 1: On your iPhone, click on the iMessage app to open it.

Step 2: Click on the contact you want to send the GIF to from the list. If you have not previously sent a message to the contact, at the top right corner, click the Write icon represented as a square with a pencil, then enter the name of the contact you want to send the GIF to.

Step 3: Click the Images icon from the menu bar below the new message field. The image icon represents a white magnifying glass in the middle of a pink-colored circle.

Step 4: This pops up a GIF keyboard with the prompt, “Find images.” Browse through the library of GIFs to see recently used or popular GIFs. If you’re looking for a specific GIF, type in a search keyword into the Find images search bar to discover the results of GIFs that best match your request. For example, you may type “Compliments of the season” or “Grumpy,” depending on what you want.

Step 5: Scroll through the different GIFs on your screen to find the one that best fits your message. Click on it to automatically add it to your message in the text field. Peradventure you selected the wrong GIF, hit the small “x” icon at the top right corner of the GIF to delete it.

Step 6: Click the Send icon, represented as a blue arrow icon, to send your GIF.

You can add comments to a GIF just before sending it on the iMessage app. Type a message under the GIF before clicking “Send” to get the comment delivered together with the GIF.
From these simple steps, you can tell that sending a GIF from an iOS default keyboard is straightforward.
02Sending GIFs from an Android Device
Adding a GIF while using an Android phone is pretty much straightforward. Using the Gboard keyboard, follow the steps below to add a GIF on Android:
Step 1: Open the Message app and at the bottom of the screen, click the text bubble icon to enter the name of the person you’re texting in the contact field > Click Start.

Step 2: Click the smiley icon on the keyboard > Swipe to browse through GIFs and stickers or enter a search text to find your desired GIF.

Step 3: Select the GIF you want by clicking on it > Hit Send.
Part 2 How to Text a GIF on an iPhone Using a Third-Party App
Sending a GIF from an iPhone is also possible using third-party applications such as GIF Keyboard and GIPHY. These applications are built to add character to text messaging using animated objects called GIFs. Adding a GIF to your texts usually brings in some humor and life. You must have downloaded them from App Store and installed them on your iPhone to use these applications.
You can also visit third-party websites to send GIFs from there. For example, GIPHY supports searching and sending GIFs via iMessage.
Here are the steps to follow to search and send GIFs on iPhone text messages on iMessage using third-party tools:
Step 1: Search for your desired GIF on GIPHY or other GIF websites.

Step 2: Click on the GIF to open it.

Step 3: Long press on the GIF, and from the pop-up options, click Open.

Step 4: Launch Messages, click the Write icon and enter the person’s contact details you want to text.

Step 5: Click on the text box to bring up your iOS keyboard.

Step 6: Click on the text box again to add the paste option.

Step 7: When the GIF appears, click Paste.

Step 8: A preview of the GIF would appear on the text box. Hit Send when you’re ready to send the GIF.

If you use a GIF website other than GIPHY, the sent GIF may appear as a link rather than an image. If you’re okay with that, make sure the address of the shared animated image you end with the file extension, “.gif” if not, iMessage would not be able to load it.
Part 3 How to Send GIFs on iPhone
To save your file with .GIF extension, you need an application or software accessible online and offline. Indeed, many GIF creators are available in the market, both free and paid versions. However, Wondershare Filmora Video Editor is one of the preferable programs for video conversion to GIF. The software is intuitive and does not require any tech knowledge to use it. With this software, you can customize or create your GIFs while adding creative animation effects and texts to them. Filmora supports GIF creation from a variety of video formats including .mpeg, .dat, .mkv, .wmv, .mp4, .avi, and .evo.
Wondershare Filmora
Get started easily with Filmora’s powerful performance, intuitive interface, and countless effects!
Try It Free Try It Free Try It Free Learn More >

With Filmora, you can create and edit your GIFs with its in-built tools like rotation, color correction, cropping, speed alterations, merging, and lots more. What is more, you can also make a GIF online using Filmora online meme maker. This platform allows you to make videos, GIFs, and image memes without a watermark. You need no sign-up, and it is free to use. Create captions for your GIF while changing your text size, position, and color. Your text can be directly placed outside or inside the GIF and rotated to give it an artistic feel. When you finish creating, your GIF is ready to be used across all devices, including your iPhone.
If you’re unsure about how to use Wondershare Filmora for creating your GIF, below is a YouTube clip to guide you through the process for iPhone text GIFs.
● Key Takeaways from This Episode →
● How to create a GIF on an iPhone text and Android device.
● How to text a GIF using third-party tools like GIPHY and GIF Keyboard.
● The use of Wondershare Filmora to create GIFs with animated texts and outstanding edits.
●If you have stayed with us till this point, you’d have learned how to use your iOS default keyboard to send iPhone text GIFs effortlessly. You have also known how to send GIFs using the Gboard keyboard on your Android devices. Finally, you were introduced to Wondershare Filmora, a professional video editing software that allows you to create stunning GIFs in text messages for iPhone online and offline.
GIFs add fun and humor to interactions via text messages. GIFs allow you to convey ideas, emotions, and thoughts in much more precise ways than an emoji would. iPhones operating on iOS 10 or later versions have an in-built GIF keyboard, making it super easy to add GIFs. iPhone text GIFs are readily accessible from GIF keyboards. Still, if you do not have one, you can resort to third-party applications like GIPHY and GIF keyboard for more prominent access to GIF libraries.
Let’s now delve into the different ways of adding GIFs in text messages on iPhone and directly sending them using the Messages app.
In this article
01 [How to Text a GIF: For iOS and Android](#Part 1)
02 [How to Text a GIF on an iPhone Using a Third-Party App](#Part 2)
03 [How to Send GIFs on iPhone](#Part 3)
Part 1 How to Text a GIF: For iOS and Android Users
iPhone text GIFs make texting more fun. Hence, we dedicated this part to teaching you how to use iPhone text GIFs to revitalize and better express yourself while texting.
On iPhone, there are two different ways to send iPhone text GIFs – employing the default keyboard or through the help of third-party apps. You can use the iOS default keyboard to search for GIFs in iMessage on iPhones directly. This applies to all iPhones running on iOS 10 and later versions. If your iPhone belongs to this category, follow the simple steps to add GIFs in text messages on iPhone:
01Sending GIFs using the iPhone Default Keyboard
Here’s how you can send iPhone text GIFs using the iOS default keyboard:
Step 1: On your iPhone, click on the iMessage app to open it.
Step 2: Click on the contact you want to send the GIF to from the list. If you have not previously sent a message to the contact, at the top right corner, click the Write icon represented as a square with a pencil, then enter the name of the contact you want to send the GIF to.
Step 3: Click the Images icon from the menu bar below the new message field. The image icon represents a white magnifying glass in the middle of a pink-colored circle.
Step 4: This pops up a GIF keyboard with the prompt, “Find images.” Browse through the library of GIFs to see recently used or popular GIFs. If you’re looking for a specific GIF, type in a search keyword into the Find images search bar to discover the results of GIFs that best match your request. For example, you may type “Compliments of the season” or “Grumpy,” depending on what you want.
Step 5: Scroll through the different GIFs on your screen to find the one that best fits your message. Click on it to automatically add it to your message in the text field. Peradventure you selected the wrong GIF, hit the small “x” icon at the top right corner of the GIF to delete it.
Step 6: Click the Send icon, represented as a blue arrow icon, to send your GIF.
You can add comments to a GIF just before sending it on the iMessage app. Type a message under the GIF before clicking “Send” to get the comment delivered together with the GIF.
From these simple steps, you can tell that sending a GIF from an iOS default keyboard is straightforward.
02Sending GIFs from an Android Device
Adding a GIF while using an Android phone is pretty much straightforward. Using the Gboard keyboard, follow the steps below to add a GIF on Android:
Step 1: Open the Message app and at the bottom of the screen, click the text bubble icon to enter the name of the person you’re texting in the contact field > Click Start.
Step 2: Click the smiley icon on the keyboard > Swipe to browse through GIFs and stickers or enter a search text to find your desired GIF.
Step 3: Select the GIF you want by clicking on it > Hit Send.
Part 2 How to Text a GIF on an iPhone Using a Third-Party App
Sending a GIF from an iPhone is also possible using third-party applications such as GIF Keyboard and GIPHY. These applications are built to add character to text messaging using animated objects called GIFs. Adding a GIF to your texts usually brings in some humor and life. You must have downloaded them from App Store and installed them on your iPhone to use these applications.
You can also visit third-party websites to send GIFs from there. For example, GIPHY supports searching and sending GIFs via iMessage.
Here are the steps to follow to search and send GIFs on iPhone text messages on iMessage using third-party tools:
Step 1: Search for your desired GIF on GIPHY or other GIF websites.
Step 2: Click on the GIF to open it.
Step 3: Long press on the GIF, and from the pop-up options, click Open.
Step 4: Launch Messages, click the Write icon and enter the person’s contact details you want to text.
Step 5: Click on the text box to bring up your iOS keyboard.
Step 6: Click on the text box again to add the paste option.
Step 7: When the GIF appears, click Paste.
Step 8: A preview of the GIF would appear on the text box. Hit Send when you’re ready to send the GIF.
If you use a GIF website other than GIPHY, the sent GIF may appear as a link rather than an image. If you’re okay with that, make sure the address of the shared animated image you end with the file extension, “.gif” if not, iMessage would not be able to load it.
Part 3 How to Send GIFs on iPhone
To save your file with .GIF extension, you need an application or software accessible online and offline. Indeed, many GIF creators are available in the market, both free and paid versions. However, Wondershare Filmora Video Editor is one of the preferable programs for video conversion to GIF. The software is intuitive and does not require any tech knowledge to use it. With this software, you can customize or create your GIFs while adding creative animation effects and texts to them. Filmora supports GIF creation from a variety of video formats including .mpeg, .dat, .mkv, .wmv, .mp4, .avi, and .evo.
Wondershare Filmora
Get started easily with Filmora’s powerful performance, intuitive interface, and countless effects!
Try It Free Try It Free Try It Free Learn More >
With Filmora, you can create and edit your GIFs with its in-built tools like rotation, color correction, cropping, speed alterations, merging, and lots more. What is more, you can also make a GIF online using Filmora online meme maker. This platform allows you to make videos, GIFs, and image memes without a watermark. You need no sign-up, and it is free to use. Create captions for your GIF while changing your text size, position, and color. Your text can be directly placed outside or inside the GIF and rotated to give it an artistic feel. When you finish creating, your GIF is ready to be used across all devices, including your iPhone.
If you’re unsure about how to use Wondershare Filmora for creating your GIF, below is a YouTube clip to guide you through the process for iPhone text GIFs.
● Key Takeaways from This Episode →
● How to create a GIF on an iPhone text and Android device.
● How to text a GIF using third-party tools like GIPHY and GIF Keyboard.
● The use of Wondershare Filmora to create GIFs with animated texts and outstanding edits.
●If you have stayed with us till this point, you’d have learned how to use your iOS default keyboard to send iPhone text GIFs effortlessly. You have also known how to send GIFs using the Gboard keyboard on your Android devices. Finally, you were introduced to Wondershare Filmora, a professional video editing software that allows you to create stunning GIFs in text messages for iPhone online and offline.
Ways to Stop Animation From Looping in Unity
How to Stop Animation from Looping in Unity
An easy yet powerful editor
Numerous effects to choose from
Detailed tutorials provided by the official channel
Unity is an IDE interface all designed exclusively for game developers. However, you can do much more with Unity than game development. But, our main concern here is something else than this subject. You’re looking for easy tutorials on Unity stop animation!

And luckily, we’ve got you covered as we’ve briefly explained how to perform Unity stop animation from looping and the steps to make a smooth animation.
In this article
01 [What is Unity Used for?](#Part 1)
02 [How to Stop Animation Playing in Loop in Unity?](#Part 2)
03 [How to Smooth an Animation in Unity?](#Part 3)
Part 1 What is Unity Used for?
Unity is a software tool friendly to all the game developers out there. This tool is used by the large community of game developers to power and create their game development projects. And, the software is more of a professional means and not a simple pared-down ‘game builder .’Unity also offers one of the most significant inbuilt features like rendering, physics, and collision detection. Thus, one of the powerful aspects of Unity is that game developers need not go out of the box and create everything from scratch. Instead, they are available with the physics engine required to develop games quickly. Another robust feature of Unity is that it includes an excellent ‘Asset Store’ where developers can upload their creations and showcase them to the whole community. So, that’s Unity and its uses in a broader scope!
Before we take you through the next section, it’s important to mention that Unity is also known as cross-platform IDE, where IDE stands for ‘integrated development environment.’ So, it can be called more of an interface with access to all the tools and resources required to develop games.
Apart from the game development, Unity is known for other excellent usage purposes as:
● Simulations
● Animation
● Architectural Visualization
● Previsualization for Film
● Interactive Experiences
Among these features only, we’ll describe Unity stop animation from looping in detail.
Part 2 How to Stop Animation Playing in Loop in Unity?
As we said, we’ll describe to you the most accessible definition of how to stop Animation in Unity. Thus, there are simple steps that we’d like to define firsthand before explaining the whole procedure with an image-centric step-by-step guide.
So, those simple steps to stop motion animation in After Effects in the loop also go like below:
Step 1 Go to the Project tab and select Animation.
Step 2 Open the Inspector tab.
Step 3 Uncheck the checkbox Loop Time, and you’re good to go!
We’ll describe the same, i.e., Unity stop animation from looping through the step guide below.
In this guide, we’ll explain right from applying the Animation so that you’d understand better. So, let’s begin without any further ado!
01Step 1 Delete animation folder
We have already created an animation folder in the folder named as own Animation, so click that folder, click the animation folder, and then another folder along with as shown below. Hold the Shift key and click another folder. Then, right-click the Delete tab as depicted below.
Similarly, you can also delete the Animation if you wish.

02Step 2 Create an animation for the subject
Now, you may have different subjects. We’re creating Animation on Mobile Joystick for reference, as shown below.

Now, hit the Create tab on the Unity panel below. Then, proceed to save your Animation in the folder you’ve already created for the same.

03Step 3 Give positions to the animation
Firstly, hit the red-icon button used for recording, as shown below.

Give the position on the left side after you click the button. And, then, clicking almost near to 3you can give the position to the right-hand side as shown below.

Now, the animation has been set. You can see the animation from left to right if you click the Play button. So, here, you can see the results of infinite loop animation, which won’t stop.

You can follow two ways to stop this Animation in Unity from looping, and we’ll describe both methods below.
04Step 4 Stop animation Unity Way 1
Go to the animation folder where you’ve created the animation and click the New Animation icon as shown below.

Now, you have to uncheck the Loop Time tab on the top-right corner of the Unity panel.

05Step 5 Stop animation Unity Way 2
Alternatively, you can click the Animator tab on the top of the Unity panel and double-tap the New Animation button. Then, it will also delete or uncheck the loop time, as shown below.

These were all the steps to stop animation Unity.
Part 3 How to Smooth an Animation in Unity?
After done with Unity stop animation, it’s time to smooth your Unity animation. Again, we will describe it simply if you’re used to the Unity platform and then with a step guide with respective screenshots.
So, stay tuned until the end to reveal the easy steps of smoothing an animation in Unity.
Select the Dopesheet at the bottom of the animation window. Then, you need to switch to the ‘Curves’ view once you create your Animation in the Dopesheet. These animation curves help you accelerate and decelerate animations so that the movement and other things can stop and start smoothly.
So, let’s begin with the step guide tutorial on the same as follows:
For reference, take an example of a metronome object imported from Blender to Unity. Here, we’ve grouped all the pendulum objects under one rotation so that when we move the pendulum, it pivots to the correct point, as shown below.

01Add the animator
So, the first step begins with adding the Animator component to the parent object. You can do this by clicking the Add Component tab on the Unity panel’s left side, searching for Animator, and clicking the Animator.
You will also need a controller to control the animations. Go to your animation folder, right-click, and select Create> Animator Controller tab.

Let’s call or give it a name metronome animator as shown below.
Then, you need to drag this into your animator component. Again, you need to go to your animations folder, right-click, select Create> Animations tab.
Now, give this a name pendulum full swing.
02Open the animator tab
Now, open the animator tab, drag this pendulum swing animation to that panel, and double-tap the yellow-colored New Animation button.

03Create an animation
With the game object selected, the animated metronome pendulum, in this case, we’d like to animate the X component of the rotation. So, you need to click Add Property> Transform> Rotation tab and click the + sign on its right, as shown below.
Now, click the plus sign automatically to set two keyframes, one at the beginning and one at the end. Now, click on end select all, and then delete for now.

04Add keyframes to rotate the pendulum
With the first set of keyframes and the pendulum all way to the right, go halfway and change the rotation to the left on the left panel of Unity. Then, add another keyframe.

05Slow down the animation
As you can observe, the Animation of this pendulum is in a straight line and feels unnatural to the eyes. Thus, we’re required to smooth this Animation now! For this purpose, go to the Curves; you can see the pink properties of rotation as going from one side to another.

Now, you need to adjust these pink curves. Start by adding a key to one of its sides, as shown below. After that, it is all on you how slow or fasts you want these values to be.
Here, you’re all done smoothing the animation in Unity after learning the stop-animation Unity tutorial.
You can even stop motion animation on Photoshop with the above tutorial.
06Bonus Tip:
We want to introduce an excellent video editor software called Filmora Video Editor . It is from the house of Wondershare, a well-known software company worldwide.

Wondershare Filmora - Best Video Editor for Mac/Windows
5,481,435 people have downloaded it.
Build unique custom animations without breaking a sweat.
Focus on creating epic stories and leave the details to Filmora’s auto features.
Start a creative adventure with drag & drop effects and endless possibilities.
Filmora simplifies advanced features to save you time and effort.
Filmora cuts out repetition so you can move on to your next creative breakthrough.
With Filmora, you can easily add Animation and edit your videos to make them look world-class. The latest version and new updates are eye-candy and quick fix for beginner video editors.
So, please pay a visit to the Filmora website and check out its Mac and Windows version for free today.
● Key Takeaways from This Episode →
● Learning the concept and usage of Unity
● A tutorial on how to stop animation in Unity from looping
● A tutorial on how to smooth animation in Unity
● Introduction to Filmora, the top-most video editor software for beginners.
Unity is an IDE interface all designed exclusively for game developers. However, you can do much more with Unity than game development. But, our main concern here is something else than this subject. You’re looking for easy tutorials on Unity stop animation!
And luckily, we’ve got you covered as we’ve briefly explained how to perform Unity stop animation from looping and the steps to make a smooth animation.
In this article
01 [What is Unity Used for?](#Part 1)
02 [How to Stop Animation Playing in Loop in Unity?](#Part 2)
03 [How to Smooth an Animation in Unity?](#Part 3)
Part 1 What is Unity Used for?
Unity is a software tool friendly to all the game developers out there. This tool is used by the large community of game developers to power and create their game development projects. And, the software is more of a professional means and not a simple pared-down ‘game builder .’Unity also offers one of the most significant inbuilt features like rendering, physics, and collision detection. Thus, one of the powerful aspects of Unity is that game developers need not go out of the box and create everything from scratch. Instead, they are available with the physics engine required to develop games quickly. Another robust feature of Unity is that it includes an excellent ‘Asset Store’ where developers can upload their creations and showcase them to the whole community. So, that’s Unity and its uses in a broader scope!
Before we take you through the next section, it’s important to mention that Unity is also known as cross-platform IDE, where IDE stands for ‘integrated development environment.’ So, it can be called more of an interface with access to all the tools and resources required to develop games.
Apart from the game development, Unity is known for other excellent usage purposes as:
● Simulations
● Animation
● Architectural Visualization
● Previsualization for Film
● Interactive Experiences
Among these features only, we’ll describe Unity stop animation from looping in detail.
Part 2 How to Stop Animation Playing in Loop in Unity?
As we said, we’ll describe to you the most accessible definition of how to stop Animation in Unity. Thus, there are simple steps that we’d like to define firsthand before explaining the whole procedure with an image-centric step-by-step guide.
So, those simple steps to stop motion animation in After Effects in the loop also go like below:
Step 1 Go to the Project tab and select Animation.
Step 2 Open the Inspector tab.
Step 3 Uncheck the checkbox Loop Time, and you’re good to go!
We’ll describe the same, i.e., Unity stop animation from looping through the step guide below.
In this guide, we’ll explain right from applying the Animation so that you’d understand better. So, let’s begin without any further ado!
01Step 1 Delete animation folder
We have already created an animation folder in the folder named as own Animation, so click that folder, click the animation folder, and then another folder along with as shown below. Hold the Shift key and click another folder. Then, right-click the Delete tab as depicted below.
Similarly, you can also delete the Animation if you wish.
02Step 2 Create an animation for the subject
Now, you may have different subjects. We’re creating Animation on Mobile Joystick for reference, as shown below.
Now, hit the Create tab on the Unity panel below. Then, proceed to save your Animation in the folder you’ve already created for the same.
03Step 3 Give positions to the animation
Firstly, hit the red-icon button used for recording, as shown below.
Give the position on the left side after you click the button. And, then, clicking almost near to 3you can give the position to the right-hand side as shown below.
Now, the animation has been set. You can see the animation from left to right if you click the Play button. So, here, you can see the results of infinite loop animation, which won’t stop.
You can follow two ways to stop this Animation in Unity from looping, and we’ll describe both methods below.
04Step 4 Stop animation Unity Way 1
Go to the animation folder where you’ve created the animation and click the New Animation icon as shown below.
Now, you have to uncheck the Loop Time tab on the top-right corner of the Unity panel.
05Step 5 Stop animation Unity Way 2
Alternatively, you can click the Animator tab on the top of the Unity panel and double-tap the New Animation button. Then, it will also delete or uncheck the loop time, as shown below.
These were all the steps to stop animation Unity.
Part 3 How to Smooth an Animation in Unity?
After done with Unity stop animation, it’s time to smooth your Unity animation. Again, we will describe it simply if you’re used to the Unity platform and then with a step guide with respective screenshots.
So, stay tuned until the end to reveal the easy steps of smoothing an animation in Unity.
Select the Dopesheet at the bottom of the animation window. Then, you need to switch to the ‘Curves’ view once you create your Animation in the Dopesheet. These animation curves help you accelerate and decelerate animations so that the movement and other things can stop and start smoothly.
So, let’s begin with the step guide tutorial on the same as follows:
For reference, take an example of a metronome object imported from Blender to Unity. Here, we’ve grouped all the pendulum objects under one rotation so that when we move the pendulum, it pivots to the correct point, as shown below.
01Add the animator
So, the first step begins with adding the Animator component to the parent object. You can do this by clicking the Add Component tab on the Unity panel’s left side, searching for Animator, and clicking the Animator.
You will also need a controller to control the animations. Go to your animation folder, right-click, and select Create> Animator Controller tab.
Let’s call or give it a name metronome animator as shown below.
Then, you need to drag this into your animator component. Again, you need to go to your animations folder, right-click, select Create> Animations tab.
Now, give this a name pendulum full swing.
02Open the animator tab
Now, open the animator tab, drag this pendulum swing animation to that panel, and double-tap the yellow-colored New Animation button.
03Create an animation
With the game object selected, the animated metronome pendulum, in this case, we’d like to animate the X component of the rotation. So, you need to click Add Property> Transform> Rotation tab and click the + sign on its right, as shown below.
Now, click the plus sign automatically to set two keyframes, one at the beginning and one at the end. Now, click on end select all, and then delete for now.
04Add keyframes to rotate the pendulum
With the first set of keyframes and the pendulum all way to the right, go halfway and change the rotation to the left on the left panel of Unity. Then, add another keyframe.
05Slow down the animation
As you can observe, the Animation of this pendulum is in a straight line and feels unnatural to the eyes. Thus, we’re required to smooth this Animation now! For this purpose, go to the Curves; you can see the pink properties of rotation as going from one side to another.
Now, you need to adjust these pink curves. Start by adding a key to one of its sides, as shown below. After that, it is all on you how slow or fasts you want these values to be.
Here, you’re all done smoothing the animation in Unity after learning the stop-animation Unity tutorial.
You can even stop motion animation on Photoshop with the above tutorial.
06Bonus Tip:
We want to introduce an excellent video editor software called Filmora Video Editor . It is from the house of Wondershare, a well-known software company worldwide.
Wondershare Filmora - Best Video Editor for Mac/Windows
5,481,435 people have downloaded it.
Build unique custom animations without breaking a sweat.
Focus on creating epic stories and leave the details to Filmora’s auto features.
Start a creative adventure with drag & drop effects and endless possibilities.
Filmora simplifies advanced features to save you time and effort.
Filmora cuts out repetition so you can move on to your next creative breakthrough.
With Filmora, you can easily add Animation and edit your videos to make them look world-class. The latest version and new updates are eye-candy and quick fix for beginner video editors.
So, please pay a visit to the Filmora website and check out its Mac and Windows version for free today.
● Key Takeaways from This Episode →
● Learning the concept and usage of Unity
● A tutorial on how to stop animation in Unity from looping
● A tutorial on how to smooth animation in Unity
● Introduction to Filmora, the top-most video editor software for beginners.
6 Unexpected Ways Gif Animation Maker That Affect Your Marketing
6 Unexpected Ways Gif Animation Maker Can Affect Your Marketing
An easy yet powerful editor
Numerous effects to choose from
Detailed tutorials provided by the official channel
Well, if what you’re looking for is a GIF animation maker or software for GIF Animation, we’ve got your back This article starts off with a list of some GIF animation maker tools that you can use to turn your videos into a GIF file (just to give you an idea of how those can help you move forward in your GIF marketing attempts more easily.)
Before ending in a quick rundown, a couple of reasons why GIFs are worth the investment in the first place.
In this article
01 [In What Ways Can You turn videos into a GIF?](#Part 1)
02 [How Gif Animation Maker Affect Your Marketing](#Part 2)
Part 1 In What Ways Can You turn videos into a GIF?
As promised, we’ll be starting off with the tools that you’ll need in order to create GIFs easily (or GIF Animation Maker tools, if you’d prefer). We’ve made sure to pick out a variety for you so that you won’t have to go looking elsewhere for other options We also included what people tend to like and dislike about each option so that you can make a choice as to what you think is the best GIF animation maker more easily.
01**Wondershare Filmora **
If what you’re looking for is software for GIF animation, then Filmora is your best bet This software is available for both Mac and Windows users (with options for both a perpetual license and subscription packages for you to choose from.) This is a video editing tool that is capable of making incredibly professional results. And, perhaps more importantly (considering the subject of this article), it will allow you easily turn a video into a 2D Animation GIF that you can use for your marketing
URL: https://filmora.wondershare.com/
What People Like About The Maker
●Comes with advanced video editing functions
●Easily turns videos into 2D Animation GIFs
●Produces High-Quality Results each time
What People Don’t Like About The Maker
●It is a software, which requires download and installation
●The FREE version is limited
●Must pay either a subscription fee or one-time fee for full access

02Canva
If you’ve created marketing projects before, then you’ve no doubt already heard of Canva. This is what a lot of content creators use in order to easily create content for marketing online In this case, of course, we’re looking at it as an online GIF animation maker, one that, unlike Filmora, requires no download (but will require sign-up) for you to use. Canva has its own GIF Animation Maker that you can use (different from the regular Canva you might be more familiar with, as is shown in the UI screenshot below).
URL: https://www.canva.com/create/gif-maker/
What People Like About The Maker
●It is an online tool, no download or installation is required
●Built-in media library for convenient project creation
●Intuitive 2D Animation GIF interface
What People Don’t Like About The Maker
●Not as advanced when it comes to video editing functions
●Limited FREE trial version
●Must unlock Premium version (subscription-based) for full access

03PicMonkey
The next tool on this is another online GIF Animation maker, this time by the name of PicMonkey This tool is very similar to Canva in that many people know it primarily as a photo-editor tool that is great to use for creating content (as it comes with a built-in media library that you can use to quickly finish projects). But it still earned a spot on this list of ours because it allows users to create 2D animation GIFs as well
URL: https://www.picmonkey.com/
What People Like About The Maker
●Built-in media library with animated shapes and images
●GIF Animation editor and creator all-at-once
●FREE trial is available to test out its GIF animation maker functions
What People Don’t Like About The Maker
●In order to have full access, one must pay for the premium solution
●Custom animation is limited in scope
●No advanced video editing functions

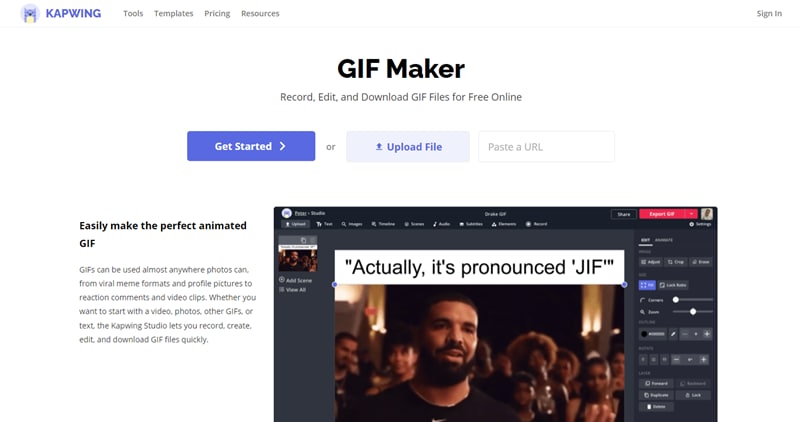
04Kapwing
Kapwing is a free GIF animation creator that will allow you to create GIFs from videos easily The best part about is that it has a FREE version available for use (one that allows you to download finished video projects without watermarks so long as they are under 5 minutes). This should allow you to test out its GIF maker functions before you commit to their premium version (which is subscription-based).
URL: https://www.kapwing.com/gif-maker
What People Like About The Maker
●FREE to use with some limitations
●Quick and easy video-to-GIF conversion
●No watermark on images or video projects under 5 minutes
What People Don’t Like About The Maker
●Full access can only be unlocked by paying for the premium version
●Premium version is subscription-based and expensive
●There is an upload limit
05MakeAGif
MakeAGif is the last GIF animation maker on this list, and it just so happens that it’s one of the easiest to use as well This one is more of a converter tool in that it transforms already-finished videos into a GIF that you can share. A lot of people use it to convert their favorite videos from social media (YouTube, Facebook, etc.) into a GIF that they can share on other platforms.
URL: https://makeagif.com/video-to-gif
What People Like About The Maker
●Free to use with some limitations
●Quick and easy-to-use Video to GIF converter
●Converts pictures, YouTube videos, Facebook videos, etc. to GIF
What People Don’t Like About The Maker
●The tool is more limited in scope than the rest of the tools on this list
●The FREE version is limited
●Premium version requires paying a subscription fee
Part 2 How Gif Animation Maker Affect Your Marketing
Alright, now that you’ve been introduced to what we consider the best GIF Animation maker tools available right now (be they software or online tools), we can move on to actually discussing how you can use GIFs for your marketing efforts We’ve compiled six different ways here, but there are plenty of others, of course. It’s a very open subject.
01GIFs Are Easy to Share Ads
The best part of GIFs is that they are easily consumable media that you can share just about everywhere. For example, you can include them in your email marketing to bring a little life to what could have otherwise been a very dry message You can also have it play out on social media without prompting (different from videos, which the user usually has to play before it starts going.)
GIF LINK: https://media.giphy.com/media/fEkpR6rfmXmZHeVQ22/giphy.gif

02GIFs Can Be Used for Promoting Events
GIFs are also great for promoting events or holiday sales It’s basically just a moving 2D advertisement (like the one that is shown below). Eye-catching in a way that keeps you looking to catch the movement — in compared to if you were just looking at a still image (which might catch your attention for a moment, but usually bores you the next)
GIF LINK: https://media.giphy.com/media/WtUMnz9ZUuzwojWwij/giphy.gif
03GIFs Can Be Used for Call-to-Action Pop-Ups
Perhaps you’ve seen this already in some YouTube videos (see the GIF attached for an example), but a lot of content creators now include GIFs on their content to prompt their audience to complete an action — be it subscribing, sharing, downloading a link, buying a product, etc. It’s a great way of getting a message across in a way that is both fun and straightforward
GIF: https://media.giphy.com/media/73oSygWJFG9K1ha75z/giphy.gif
04GIFs Can Be Used to Set the Scene and Express Emotion
GIFs are also a great way to just generally set the scene or express emotion. Text is…very very difficult to make sound like anything but dry reading. Pictures are a little better, but GIFs??? Well, GIFs are great ‘moving’ pictures that offer you more leeway to set the scene by expressing emotion, intent, etc.
GIF: https://media.giphy.com/media/keizDG1zD7Q38yWm3x/giphy.gif
05GIFs Can Be Used to Tell a Story
You know the saying, “A picture can speak a thousand words?” Well, it’s true, but in comparison to GIFs??? Pictures definitely lose out in telling a story. See the attached GIF for example. With just one look, you can probably create an entire story in your head about the woman that is featured This can be very useful for future marketing prospects.
GIF: https://media.giphy.com/media/Kb5zI3B9D7cCulbNOg/giphy.gif

06GIFs Can Be Used to Explain or Share Instructions
In the same way that you can create long infographics to offer instructions or teach a lesson on a particular subject, GIFs can be used to educate your audience. Only, it’s a lot easier to use for this reason No complicated infographics formatting is required You can just put together several stills showing the step-by-step process or record a silent video like the one shown in the GIF below
GIF: https://media.giphy.com/media/FgiHOQyKUJmwg/giphy.gif
● Key Takeaways from This Episode →
● GIFs have been used for years in order to share fun moments and memes, but it has much more potential than that
● With a carefully designed GIF, not only can you catch the attention of your audience, but you can also keep that attention for much longer than you would have been able to if you were just sharing text or a still image Making it a perfect vessel for future marketing efforts
● Now, in order to make sure that you get a good story on your marketing efforts via GIF, we’ve listed some of the best GIF animation maker tools for you in the first part of this article
● A second part has also been added where we discussed all the different ways that you can use 2D Animation GIFs in your future marketing endeavors.
Well, if what you’re looking for is a GIF animation maker or software for GIF Animation, we’ve got your back This article starts off with a list of some GIF animation maker tools that you can use to turn your videos into a GIF file (just to give you an idea of how those can help you move forward in your GIF marketing attempts more easily.)
Before ending in a quick rundown, a couple of reasons why GIFs are worth the investment in the first place.
In this article
01 [In What Ways Can You turn videos into a GIF?](#Part 1)
02 [How Gif Animation Maker Affect Your Marketing](#Part 2)
Part 1 In What Ways Can You turn videos into a GIF?
As promised, we’ll be starting off with the tools that you’ll need in order to create GIFs easily (or GIF Animation Maker tools, if you’d prefer). We’ve made sure to pick out a variety for you so that you won’t have to go looking elsewhere for other options We also included what people tend to like and dislike about each option so that you can make a choice as to what you think is the best GIF animation maker more easily.
01**Wondershare Filmora **
If what you’re looking for is software for GIF animation, then Filmora is your best bet This software is available for both Mac and Windows users (with options for both a perpetual license and subscription packages for you to choose from.) This is a video editing tool that is capable of making incredibly professional results. And, perhaps more importantly (considering the subject of this article), it will allow you easily turn a video into a 2D Animation GIF that you can use for your marketing
URL: https://filmora.wondershare.com/
What People Like About The Maker
●Comes with advanced video editing functions
●Easily turns videos into 2D Animation GIFs
●Produces High-Quality Results each time
What People Don’t Like About The Maker
●It is a software, which requires download and installation
●The FREE version is limited
●Must pay either a subscription fee or one-time fee for full access
02Canva
If you’ve created marketing projects before, then you’ve no doubt already heard of Canva. This is what a lot of content creators use in order to easily create content for marketing online In this case, of course, we’re looking at it as an online GIF animation maker, one that, unlike Filmora, requires no download (but will require sign-up) for you to use. Canva has its own GIF Animation Maker that you can use (different from the regular Canva you might be more familiar with, as is shown in the UI screenshot below).
URL: https://www.canva.com/create/gif-maker/
What People Like About The Maker
●It is an online tool, no download or installation is required
●Built-in media library for convenient project creation
●Intuitive 2D Animation GIF interface
What People Don’t Like About The Maker
●Not as advanced when it comes to video editing functions
●Limited FREE trial version
●Must unlock Premium version (subscription-based) for full access
03PicMonkey
The next tool on this is another online GIF Animation maker, this time by the name of PicMonkey This tool is very similar to Canva in that many people know it primarily as a photo-editor tool that is great to use for creating content (as it comes with a built-in media library that you can use to quickly finish projects). But it still earned a spot on this list of ours because it allows users to create 2D animation GIFs as well
URL: https://www.picmonkey.com/
What People Like About The Maker
●Built-in media library with animated shapes and images
●GIF Animation editor and creator all-at-once
●FREE trial is available to test out its GIF animation maker functions
What People Don’t Like About The Maker
●In order to have full access, one must pay for the premium solution
●Custom animation is limited in scope
●No advanced video editing functions
04Kapwing
Kapwing is a free GIF animation creator that will allow you to create GIFs from videos easily The best part about is that it has a FREE version available for use (one that allows you to download finished video projects without watermarks so long as they are under 5 minutes). This should allow you to test out its GIF maker functions before you commit to their premium version (which is subscription-based).
URL: https://www.kapwing.com/gif-maker
What People Like About The Maker
●FREE to use with some limitations
●Quick and easy video-to-GIF conversion
●No watermark on images or video projects under 5 minutes
What People Don’t Like About The Maker
●Full access can only be unlocked by paying for the premium version
●Premium version is subscription-based and expensive
●There is an upload limit
05MakeAGif
MakeAGif is the last GIF animation maker on this list, and it just so happens that it’s one of the easiest to use as well This one is more of a converter tool in that it transforms already-finished videos into a GIF that you can share. A lot of people use it to convert their favorite videos from social media (YouTube, Facebook, etc.) into a GIF that they can share on other platforms.
URL: https://makeagif.com/video-to-gif
What People Like About The Maker
●Free to use with some limitations
●Quick and easy-to-use Video to GIF converter
●Converts pictures, YouTube videos, Facebook videos, etc. to GIF
What People Don’t Like About The Maker
●The tool is more limited in scope than the rest of the tools on this list
●The FREE version is limited
●Premium version requires paying a subscription fee
Part 2 How Gif Animation Maker Affect Your Marketing
Alright, now that you’ve been introduced to what we consider the best GIF Animation maker tools available right now (be they software or online tools), we can move on to actually discussing how you can use GIFs for your marketing efforts We’ve compiled six different ways here, but there are plenty of others, of course. It’s a very open subject.
01GIFs Are Easy to Share Ads
The best part of GIFs is that they are easily consumable media that you can share just about everywhere. For example, you can include them in your email marketing to bring a little life to what could have otherwise been a very dry message You can also have it play out on social media without prompting (different from videos, which the user usually has to play before it starts going.)
GIF LINK: https://media.giphy.com/media/fEkpR6rfmXmZHeVQ22/giphy.gif
02GIFs Can Be Used for Promoting Events
GIFs are also great for promoting events or holiday sales It’s basically just a moving 2D advertisement (like the one that is shown below). Eye-catching in a way that keeps you looking to catch the movement — in compared to if you were just looking at a still image (which might catch your attention for a moment, but usually bores you the next)
GIF LINK: https://media.giphy.com/media/WtUMnz9ZUuzwojWwij/giphy.gif
03GIFs Can Be Used for Call-to-Action Pop-Ups
Perhaps you’ve seen this already in some YouTube videos (see the GIF attached for an example), but a lot of content creators now include GIFs on their content to prompt their audience to complete an action — be it subscribing, sharing, downloading a link, buying a product, etc. It’s a great way of getting a message across in a way that is both fun and straightforward
GIF: https://media.giphy.com/media/73oSygWJFG9K1ha75z/giphy.gif
04GIFs Can Be Used to Set the Scene and Express Emotion
GIFs are also a great way to just generally set the scene or express emotion. Text is…very very difficult to make sound like anything but dry reading. Pictures are a little better, but GIFs??? Well, GIFs are great ‘moving’ pictures that offer you more leeway to set the scene by expressing emotion, intent, etc.
GIF: https://media.giphy.com/media/keizDG1zD7Q38yWm3x/giphy.gif
05GIFs Can Be Used to Tell a Story
You know the saying, “A picture can speak a thousand words?” Well, it’s true, but in comparison to GIFs??? Pictures definitely lose out in telling a story. See the attached GIF for example. With just one look, you can probably create an entire story in your head about the woman that is featured This can be very useful for future marketing prospects.
GIF: https://media.giphy.com/media/Kb5zI3B9D7cCulbNOg/giphy.gif
06GIFs Can Be Used to Explain or Share Instructions
In the same way that you can create long infographics to offer instructions or teach a lesson on a particular subject, GIFs can be used to educate your audience. Only, it’s a lot easier to use for this reason No complicated infographics formatting is required You can just put together several stills showing the step-by-step process or record a silent video like the one shown in the GIF below
GIF: https://media.giphy.com/media/FgiHOQyKUJmwg/giphy.gif
● Key Takeaways from This Episode →
● GIFs have been used for years in order to share fun moments and memes, but it has much more potential than that
● With a carefully designed GIF, not only can you catch the attention of your audience, but you can also keep that attention for much longer than you would have been able to if you were just sharing text or a still image Making it a perfect vessel for future marketing efforts
● Now, in order to make sure that you get a good story on your marketing efforts via GIF, we’ve listed some of the best GIF animation maker tools for you in the first part of this article
● A second part has also been added where we discussed all the different ways that you can use 2D Animation GIFs in your future marketing endeavors.
How to Animate - Adobe Animate Tutorias
How to Animate - Adobe Animate Tutorial for All
An easy yet powerful editor
Numerous effects to choose from
Detailed tutorials provided by the official channel
Now, since the tool has too many elements to understand, it’s always a good strategy to start your journey with a dedicated Adobe Animate CC tutorial.
In today’s guide, we are going to introduce a few of these tutorials so that you can easily start creating animations in Adobe Animate CC, even if you have zero prior experience with the software.
In this article
01 [Adobe Animate CC tutorial](#Part 1)
02 [How Do You Animate in Adobe Animation?](#Part 2)
03 [Other Rare Tutorials for Self-learning to Learn How to Animate](#Part 3)
Part 1 Is Adobe Animate Good for Beginners?
When people start their careers as graphic designers, they always struggle to pick the right tool to accompany them during their journey. Since there are too many options to choose from, beginners always end up comparing a tool with other available options. They even weigh the pros and cons of each animation software individually to make the best decision. The same is the case with Adobe Animate. Many beginners want to know if Adobe Animate is the right animation software to get started as a professional graphic designer.
Since the Adobe community continues to grow rapidly, you’ll also be able to find a variety of Adobe Animate tutorials quite easily.
So, as far as beginner-friendliness is concerned, Adobe Animate is a complete winner that anyone can use to create stunning animations, designs, and templates right on their PCs.
Part 2 How Do You Animate in Adobe Animation?
1. Introduction to Adobe Animate
For complete beginners, there’s nothing better than a one-stop tutorial that provides a detailed insight into the basics of Adobe Animate and helps them get familiar with different elements of the software.
Well, this 2 hours 30 minutes long YouTube Adobe Animate tutorial by TipTut is what you need to start your journey with the software. The tutorial involves everything, starting from the simple setup to creating your first animation. You can either download this tutorial on your system or watch it online to understand the basic workflow of Adobe Animate.
Key Features:
● Learn how to set up a project in Adobe Animate.
● Adjusting the elements (such as frame rate) of your first animation.
● Completing your first animation using colors, gestures, and simple movement.
2. Creating HTML Banner Ads
Apart from regular 2D animations, some designers also use Adobe Animate to create dedicated banner ads for their marketing campaigns using HTML 5. This will be a pretty useful Adobe Animate tutorial PDF for anyone who wants to join a marketing firm or plan exclusive marketing campaigns for his own products/services.
Key Features:
● Learn how to build HTML banner ads from scratch.
● Get familiar with the overall process of publishing a banner ad on platforms like Google AdWords.
● Understand how to keep the file size of a banner down to keep it optimized.
3. Animate CC Game Development
As we mentioned earlier, some people also use Adobe Animate to design games. If you want to follow the same career, this Adobe Animate CC tutorial is for you.
All the games developed in Adobe Animate are designed in HTML 5 and are usually web-based. By the end of this tutorial, you would have built a fully-functional game in Adobe Animate.
Key Features:
● Creating the game world.
● Understanding CreateJS Overview in Adobe Animate CC.
● Building in-game assets and configuring their unique features.
4. 2D Animation for Beginners
This is another useful Adobe Animate tutorial for all the beginners out there. Compiled by Walt Wonderwolk, the tutorial is separated into 12 parts in which he has explained different features of Adobe Animate in detail.
Key Features:
● Designing graphic vectors in Adobe Animate.
● Each feature is explained with a respective example.
● Learn how to add sounds to your animations to make them visually appealing.
5. Adobe Animate for Social Media
Being a feature-packed animation software, you can also use Adobe Animate to create content for your social media profiles. To do this, however, you must be familiar with all the necessary features of the tool. This 1.5 hours long tutorial will help you get familiar with features such as the tweening system that’ll help you turn regular social media posts into stunning animations.
Key Features:
● Designing simple assets and designs for social media.
● Exporting GIFs and Animated Videos.
● Customizing stills and motion graphics in Adobe Animate.
Key Takeaways from This Episode
● Adobe Animate boasts different applications, ranging from simple 2D animations to game designing
● Since Adobe Animation is an extensive software, it’ll always be a wise decision to get started with Adobe Animate tutorials.
● After you have compiled designs/animations in Adobe Animate, Wondershare Filmora Pro will help you enhance its overall quality.
Tips to Create Animated Social Media Posts in Canva
Versatile Video Editor - Wondershare Filmora
An easy yet powerful editor
Numerous effects to choose from
Detailed tutorials provided by the official channel
Eye-catching social media posts are an excellent, attention-grabbing way to make your ideal clients stop scrolling. Today, we’ll describe how to create animated social media posts through Canva posts entirely free and without any design experience required on Canva.
Level up your next social media campaign by adding beautifully designed graphics! You can choose from our library of professionally designed Canva layouts for Facebook, Pinterest, Twitter, Instagram, and more.
Without any further ado, let’s get into the process as follows!
In this article
01 [Which social media animated posts can be created on Canva?](#Part 1)
02 [What Canva can help with animated social media posts?](#Part 2)
03 [Steps to create animated social media pictures in Canva](#Part 3)
04 [Steps to create animated social media videos in Canva](#Part 4)
Part 1 Which social media animated posts can be created on Canva?
With the latest Canva Pro feature, you can go for Canva Animator!
Yes, you can easily create animated social media posts via Canva, like Facebook stories or animated Instagram stories. And, you can also create ads for any other social media platform using its Custom Design feature.
It consists of ready-made templates for Facebook, Twitter, Instagram, and more.
To explore the entire animated social media templates, visit the Canva official website, log in, and type in the vibrant social media to see different options below.

All of the templates that will come upon Canva are fully customizable as per your requirements. If you prefer, you can also select a blank animated story template, which is probably the first among these options.
Part 2 What Canva can help with animated social media posts?
As already discussed, Canva consists of thousands of templates to choose from among the category of animated social media posts. Moreover, there are lots of free as well as paid templates.
Another thing that Canva can help you with these templates is complete customization. You can easily customize the entire template ranging from its colors selection to images to elements etc. And, you can even remove aspects if you don’t like anything among the template designs.
Understand the pros of Canva to get our point better as follows:
Canva provides a range of features due to which has gained popularity among millions of people. The benefits of using Canva are −
1. Free Design Platform
Canva is free to use platform for everyone. You can use it for creating attention-grabbing designs for marketing campaigns, social media, or projects.
There are certain features in Canva that are useful for professionals. You can get Canva Pro to access those features with a premium library of stock photos, shapes, fonts, and templates.
You can also go for in-app purchases if you are not looking to purchase the Pro version.
2. No skills or experience required
To use Canva, you don’t need any prior experience as a graphic designer. You can swap between images and fonts to create a professional design with many layouts and tools available.
3. Ease of use with multiple templates and fonts
Canva has a library of different backgrounds, images, templates, fonts, stickers to ensure that you get outstanding outcomes. You can create an engaging design in just a few clicks with these tools. The only thing you need is creativity.

4. Endless options
Canva has every digital design option covered, from Pinterest and Facebook posts to Resume, e−book

5. User−friendly interface
The Canva’s layout is pretty simple to use.
On the design page of Canva, there are the grids for templates, photos, stickers, and background on the left-hand side. Above the design are the color palettes, font tabs, and other formatting tools. You can use these tools with the drag and drop editor in your design in a few clicks.

6. Create a team
You can make your Canva team so that they can have access to the designs. You can determine the kind of access your team members or employees have through the shareable links to make edits.

Part 3 Steps to create animated social media pictures in Canva
Unleash your creativity by animating your design pages, elements, and text.
Make or open an existing design.
- Hit to choose the page, element, or text box that you wish to animate.
- Once you hit the Animate tab above the editor on the toolbar, you will see the displayed options on the side panel.
- Please hover your mouse over it to preview an option. Then, you’ll see your design animate.
- Click on it to apply.
- For pages: To control the animation timing, click to select the page, and then click on the stopwatch icon above the editor.
- Download your design in GIF or video format.
You can also directly share them on social media or schedule them for later.
Part 4 Steps to create animated social media videos in Canva
1. Select your template
Sign in to Canva, then choose and make your social media story template. There are two vastly different ways to explore this: You can either select “Create a design” at the top or go for a particular template to get the ideal dimensions.
2. Animate your video
Here’s where the fun begins! Now that you are ready to start editing your selected template, you can add animated and unique elements to your story in three various ways.
- Add a video
You’re ready to add in your video once you’ve chosen your template! Upload or select any video you might want to use and drag it into a placeholder on your story chosen template. If needed, adjust the size and positioning until it fits.
- Animated design elements
Another option to animate your social media posts videos is through the Elements feature in Canva by choosing the “Stickers” tab.
You can either enter your requirement in the search bar or scroll through Canva’s huge graphics and enter “animated {insert the word you’re searching for, i.e., lines, arrows}. Then, you can drag and drop them right into your design.
There are specific search terms for your reference: Animated Sparkle, Animated Arrow, Animated Word, and Animated Line.
- Use the Animate button.
There’s an “Animate” button you’ll see at the top when you’re in your design. Hit on the page you wish to animate, and the Animate tab will pop up on the top left.
Use these three features to create an animated video individually or all together – they’ll be sure to up-level your stories in a fun and unique way.
3. Preview and Download
You can preview your animated stories once you finish the action by hitting the “Play” tab at the top of your screen.
There you have your Canva animated social media creation!
For quick reference, be sure to download my Animated Canva Elements document, all my favorite animated elements. Head to the video to grab them!
As you know how to create an animation and the steps needed, you must also be aware of one of the best editing software available.
Here we recommend using Filmora. You can use it to create compelling animation videos than the animated social media on Canva posts so that the animation will come out smooth and natural by adding keyframes. You are just required to frame a white plane to begin creating animation. Despite this, its audio mixer and color correction editing elements will increase your animation video to a new level. Download it to have a try (Free)!
Wondershare Filmora
Get started easily with Filmora’s powerful performance, intuitive interface, and countless effects!
Try It Free Try It Free Try It Free Learn More >
AI Portrait – The best feature of Wondershare Filmora for gameplay editing
The AI Portrait is a new add-on in Wondershare Filmora. It can easily remove video backgrounds without using a green screen or chroma key, allowing you to add borders, glitch effects, pixelated, noise, or segmentation video effects.

Conclusion
And that, my friends, is how you can create your unique animated graphics quickly and easily. So, now it’s your turn! With our above tutorial, you can now permit yourself to make and craft your first and exclusive Canva animated GIFs for social media!
Besides, do not forget to try out the Wondershare FilmorPro for any video editing that you may need for your animated social media videos via Canva.
I can’t wait to hear all about it. See you next time.
Eye-catching social media posts are an excellent, attention-grabbing way to make your ideal clients stop scrolling. Today, we’ll describe how to create animated social media posts through Canva posts entirely free and without any design experience required on Canva.
Level up your next social media campaign by adding beautifully designed graphics! You can choose from our library of professionally designed Canva layouts for Facebook, Pinterest, Twitter, Instagram, and more.
Without any further ado, let’s get into the process as follows!
In this article
01 [Which social media animated posts can be created on Canva?](#Part 1)
02 [What Canva can help with animated social media posts?](#Part 2)
03 [Steps to create animated social media pictures in Canva](#Part 3)
04 [Steps to create animated social media videos in Canva](#Part 4)
Part 1 Which social media animated posts can be created on Canva?
With the latest Canva Pro feature, you can go for Canva Animator!
Yes, you can easily create animated social media posts via Canva, like Facebook stories or animated Instagram stories. And, you can also create ads for any other social media platform using its Custom Design feature.
It consists of ready-made templates for Facebook, Twitter, Instagram, and more.
To explore the entire animated social media templates, visit the Canva official website, log in, and type in the vibrant social media to see different options below.
All of the templates that will come upon Canva are fully customizable as per your requirements. If you prefer, you can also select a blank animated story template, which is probably the first among these options.
Part 2 What Canva can help with animated social media posts?
As already discussed, Canva consists of thousands of templates to choose from among the category of animated social media posts. Moreover, there are lots of free as well as paid templates.
Another thing that Canva can help you with these templates is complete customization. You can easily customize the entire template ranging from its colors selection to images to elements etc. And, you can even remove aspects if you don’t like anything among the template designs.
Understand the pros of Canva to get our point better as follows:
Canva provides a range of features due to which has gained popularity among millions of people. The benefits of using Canva are −
1. Free Design Platform
Canva is free to use platform for everyone. You can use it for creating attention-grabbing designs for marketing campaigns, social media, or projects.
There are certain features in Canva that are useful for professionals. You can get Canva Pro to access those features with a premium library of stock photos, shapes, fonts, and templates.
You can also go for in-app purchases if you are not looking to purchase the Pro version.
2. No skills or experience required
To use Canva, you don’t need any prior experience as a graphic designer. You can swap between images and fonts to create a professional design with many layouts and tools available.
3. Ease of use with multiple templates and fonts
Canva has a library of different backgrounds, images, templates, fonts, stickers to ensure that you get outstanding outcomes. You can create an engaging design in just a few clicks with these tools. The only thing you need is creativity.
4. Endless options
Canva has every digital design option covered, from Pinterest and Facebook posts to Resume, e−book
5. User−friendly interface
The Canva’s layout is pretty simple to use.
On the design page of Canva, there are the grids for templates, photos, stickers, and background on the left-hand side. Above the design are the color palettes, font tabs, and other formatting tools. You can use these tools with the drag and drop editor in your design in a few clicks.
6. Create a team
You can make your Canva team so that they can have access to the designs. You can determine the kind of access your team members or employees have through the shareable links to make edits.
Part 3 Steps to create animated social media pictures in Canva
Unleash your creativity by animating your design pages, elements, and text.
Make or open an existing design.
- Hit to choose the page, element, or text box that you wish to animate.
- Once you hit the Animate tab above the editor on the toolbar, you will see the displayed options on the side panel.
- Please hover your mouse over it to preview an option. Then, you’ll see your design animate.
- Click on it to apply.
- For pages: To control the animation timing, click to select the page, and then click on the stopwatch icon above the editor.
- Download your design in GIF or video format.
You can also directly share them on social media or schedule them for later.
Part 4 Steps to create animated social media videos in Canva
1. Select your template
Sign in to Canva, then choose and make your social media story template. There are two vastly different ways to explore this: You can either select “Create a design” at the top or go for a particular template to get the ideal dimensions.
2. Animate your video
Here’s where the fun begins! Now that you are ready to start editing your selected template, you can add animated and unique elements to your story in three various ways.
- Add a video
You’re ready to add in your video once you’ve chosen your template! Upload or select any video you might want to use and drag it into a placeholder on your story chosen template. If needed, adjust the size and positioning until it fits.
- Animated design elements
Another option to animate your social media posts videos is through the Elements feature in Canva by choosing the “Stickers” tab.
You can either enter your requirement in the search bar or scroll through Canva’s huge graphics and enter “animated {insert the word you’re searching for, i.e., lines, arrows}. Then, you can drag and drop them right into your design.
There are specific search terms for your reference: Animated Sparkle, Animated Arrow, Animated Word, and Animated Line.
- Use the Animate button.
There’s an “Animate” button you’ll see at the top when you’re in your design. Hit on the page you wish to animate, and the Animate tab will pop up on the top left.
Use these three features to create an animated video individually or all together – they’ll be sure to up-level your stories in a fun and unique way.
3. Preview and Download
You can preview your animated stories once you finish the action by hitting the “Play” tab at the top of your screen.
There you have your Canva animated social media creation!
For quick reference, be sure to download my Animated Canva Elements document, all my favorite animated elements. Head to the video to grab them!
As you know how to create an animation and the steps needed, you must also be aware of one of the best editing software available.
Here we recommend using Filmora. You can use it to create compelling animation videos than the animated social media on Canva posts so that the animation will come out smooth and natural by adding keyframes. You are just required to frame a white plane to begin creating animation. Despite this, its audio mixer and color correction editing elements will increase your animation video to a new level. Download it to have a try (Free)!
Wondershare Filmora
Get started easily with Filmora’s powerful performance, intuitive interface, and countless effects!
Try It Free Try It Free Try It Free Learn More >
AI Portrait – The best feature of Wondershare Filmora for gameplay editing
The AI Portrait is a new add-on in Wondershare Filmora. It can easily remove video backgrounds without using a green screen or chroma key, allowing you to add borders, glitch effects, pixelated, noise, or segmentation video effects.
Conclusion
And that, my friends, is how you can create your unique animated graphics quickly and easily. So, now it’s your turn! With our above tutorial, you can now permit yourself to make and craft your first and exclusive Canva animated GIFs for social media!
Besides, do not forget to try out the Wondershare FilmorPro for any video editing that you may need for your animated social media videos via Canva.
I can’t wait to hear all about it. See you next time.
Animated Business Logos and Tools to Create
Know All About Animated Business Logos and the Best Tools to Create One
An easy yet powerful editor
Numerous effects to choose from
Detailed tutorials provided by the official channel
Just like people, brands and businesses also have their own identities.
If you too want to reap the benefits of an animated business logo, creating an impressive one is important and to get the task done, there are several software and other tools available.
In this article
01 [About animated business logos and how they can help in the growth of the business?](#Part 1)
02 [Tips for making an effective animated business logo](#Part 2)
03 [Types of animated business logo makers](#Part 3)
04 [The best tool to create an animated business logo effortlessly- Wondershare Filmora](#Part 4)
Part 1 About Animated Business Logos and How They Can Help in the Growth of the Business?
An animated logo is a logo that has rich motion graphics. These logos are catchy and get the instant attention of the viewers. A well-created animated business logo not only gives a professional look but also helps in creating awareness about the brand, supports the story of the brand, and enhances visual appearance.
There are several ways in which an animated business logo can be used for the growth of the business. Summarized below are some of the major ones.
01Use animated logos at the start or the end of the videos
An animated logo creates a lasting impression and thus including then in the marketing videos at the starting or the end helps in the business growth. These logos can be added to the videos that are created for internal communication as well as for the public.
02Using animated logos for e-commerce
If your business is related to products, then adding animated logos to the product movies will make them look interesting.
03Use animated logos for YouTube videos
If you are using YouTube videos for your business promotion, ensure to add the animated logos for branding as it makes the videos look different from the other regular ones and thus creates an interest among the viewers.
04Using animated logos for YouTube ads
Using these motion graphic logos as short YouTube ads will work as an effective way for promoting the business and for their growth as well.
05Use animated logos for the films on your website
If you are making videos for your business websites as introduction videos or explainer videos, using animated logos adds a professional and dynamic touch.
06Using animated logos for social media sites
The number of users on social media sites is increasing every day and thus promoting your business on these sites helps you reach a wider audience. So, if you too are planning a video campaign on Facebook, Twitter, Instagram, and other sites use animated logos in the newsfeed.
Part 2 Tips for making an effective an animated business logo
The below-listed tips can help you create an impressive and interesting animated logo for your business.
● Create short animated logos: Animated logos should be short and convey the meaning and purpose of your business and brand. A long video can be boring and the target audience can lose interest and thus they have to be short, immersive, and impactful.
● Create an impression: Create an animated logo that can create a positive impression. Your animated logo needs to match the style of your business and get the interest of the viewers.
● Use the correct animation style: Several animation styles can be used for creating your business logo like 2D, 3D, traditional, and more. Different designs leave a different impact among the viewers and create a different understanding of the brand. Thus, while using the animation style, choose the one that matches your business style.
Part 3 Types of animated business logo makers
If you are looking for created animated logos, there is no dearth of tools. The majority of the editing and animated software can help you get the task done. There is several online and desktop software available using which you can either add your own logo and make an animated version of it or can design an animation from the scratch.
The choice of the tool selection depends on your budget and the features required. Some of the popularly used tools that can be considered are as below.
Popularly Used Tools →
● Renderforest
● Adobe Spark
● Logo Maker Plus
● Animaker
● Viddyoze
Popularly Used Tools →
● Offeo
● Canva
● Design Free Logo
● Tube Arsenal
● MotionDen
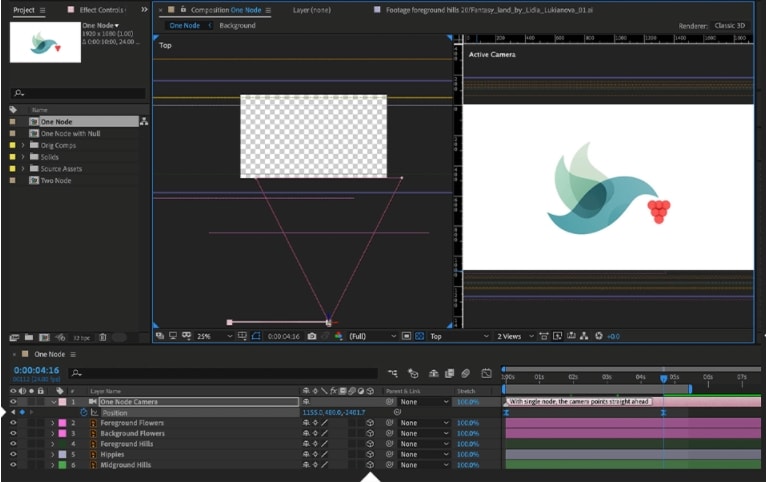
Part 4 The best tool to create an animated business logo effortlessly- Wondershare Filmora
To create animated logos effortlessly and use the best features Wondershare Filmora is an excellent choice. This desktop software can be quickly downloaded and installed on your Windows and Mac after which it can be used for multitasking like editing, creating animations, logos, and much more. The interface is simple and user-friendly which makes the program popular among all user types.
Wondershare Filmora
Power Up Your Story with Filmora. Professional video editing is made easy.
Key features of the software:
● Allows creating different types of animations including animated business logos.
● Allows creating 2D and 3D animated logos.
● Allows creating logos using keyframing for better customization.
● Multiple effects can be added like titles, tiles, warp, masking, distort, lights, flares, and more.
● To further enhance the overall looks of your animation the software offers better control over the colors and other parameters through tools like color wheels, auto-correction, scopes, and more.
● Audio controls are also offered through features like audio compression, audio noise correction, audio sync, transitions, and more.
● Compatible with all the latest Windows and Mac.
Key Takeaways from This Episode
● Animated business logos are an important aspect of any business promotion and marketing strategy.
● An impressive animated logo can help a business grow in several ways and several factors should be considered while creating an animated logo.
● Different types of desktop and online tools for animated business logos are present.
● Wondershare Filmora works as the best animation logo that can create impressive animated logos in no time.


Just like people, brands and businesses also have their own identities.
If you too want to reap the benefits of an animated business logo, creating an impressive one is important and to get the task done, there are several software and other tools available.
In this article
01 [About animated business logos and how they can help in the growth of the business?](#Part 1)
02 [Tips for making an effective animated business logo](#Part 2)
03 [Types of animated business logo makers](#Part 3)
04 [The best tool to create an animated business logo effortlessly- Wondershare Filmora](#Part 4)
Part 1 About Animated Business Logos and How They Can Help in the Growth of the Business?
An animated logo is a logo that has rich motion graphics. These logos are catchy and get the instant attention of the viewers. A well-created animated business logo not only gives a professional look but also helps in creating awareness about the brand, supports the story of the brand, and enhances visual appearance.
There are several ways in which an animated business logo can be used for the growth of the business. Summarized below are some of the major ones.
01Use animated logos at the start or the end of the videos
An animated logo creates a lasting impression and thus including then in the marketing videos at the starting or the end helps in the business growth. These logos can be added to the videos that are created for internal communication as well as for the public.
02Using animated logos for e-commerce
If your business is related to products, then adding animated logos to the product movies will make them look interesting.
03Use animated logos for YouTube videos
If you are using YouTube videos for your business promotion, ensure to add the animated logos for branding as it makes the videos look different from the other regular ones and thus creates an interest among the viewers.
04Using animated logos for YouTube ads
Using these motion graphic logos as short YouTube ads will work as an effective way for promoting the business and for their growth as well.
05Use animated logos for the films on your website
If you are making videos for your business websites as introduction videos or explainer videos, using animated logos adds a professional and dynamic touch.
06Using animated logos for social media sites
The number of users on social media sites is increasing every day and thus promoting your business on these sites helps you reach a wider audience. So, if you too are planning a video campaign on Facebook, Twitter, Instagram, and other sites use animated logos in the newsfeed.
Part 2 Tips for making an effective an animated business logo
The below-listed tips can help you create an impressive and interesting animated logo for your business.
● Create short animated logos: Animated logos should be short and convey the meaning and purpose of your business and brand. A long video can be boring and the target audience can lose interest and thus they have to be short, immersive, and impactful.
● Create an impression: Create an animated logo that can create a positive impression. Your animated logo needs to match the style of your business and get the interest of the viewers.
● Use the correct animation style: Several animation styles can be used for creating your business logo like 2D, 3D, traditional, and more. Different designs leave a different impact among the viewers and create a different understanding of the brand. Thus, while using the animation style, choose the one that matches your business style.
Part 3 Types of animated business logo makers
If you are looking for created animated logos, there is no dearth of tools. The majority of the editing and animated software can help you get the task done. There is several online and desktop software available using which you can either add your own logo and make an animated version of it or can design an animation from the scratch.
The choice of the tool selection depends on your budget and the features required. Some of the popularly used tools that can be considered are as below.
Popularly Used Tools →
● Renderforest
● Adobe Spark
● Logo Maker Plus
● Animaker
● Viddyoze
Popularly Used Tools →
● Offeo
● Canva
● Design Free Logo
● Tube Arsenal
● MotionDen
Part 4 The best tool to create an animated business logo effortlessly- Wondershare Filmora
To create animated logos effortlessly and use the best features Wondershare Filmora is an excellent choice. This desktop software can be quickly downloaded and installed on your Windows and Mac after which it can be used for multitasking like editing, creating animations, logos, and much more. The interface is simple and user-friendly which makes the program popular among all user types.
Wondershare Filmora
Power Up Your Story with Filmora. Professional video editing is made easy.
Key features of the software:
● Allows creating different types of animations including animated business logos.
● Allows creating 2D and 3D animated logos.
● Allows creating logos using keyframing for better customization.
● Multiple effects can be added like titles, tiles, warp, masking, distort, lights, flares, and more.
● To further enhance the overall looks of your animation the software offers better control over the colors and other parameters through tools like color wheels, auto-correction, scopes, and more.
● Audio controls are also offered through features like audio compression, audio noise correction, audio sync, transitions, and more.
● Compatible with all the latest Windows and Mac.
Key Takeaways from This Episode
● Animated business logos are an important aspect of any business promotion and marketing strategy.
● An impressive animated logo can help a business grow in several ways and several factors should be considered while creating an animated logo.
● Different types of desktop and online tools for animated business logos are present.
● Wondershare Filmora works as the best animation logo that can create impressive animated logos in no time.
Also read:
- Finding The Best Animated Profile Picture Maker
- New In 2024, Beginner Tutorial on Making Unity 2D Animation
- New 2024 Approved Incredible Ways to Find Suitable Animated Graphic Maker
- The 10 Best Batman Anime Movies- 2024 Updated
- Updated 2024 Approved 10 Cartoon Photo Converters
- Updated Top 10 Websites to Download Anime Subtitles for Free
- 2024 Approved Formula to Animate Photos From 10 Animate Pictures App
- Updated Adobe Rigger Is AWESOME for 2024
- Updated In 2024, A Beginners Guide to Tell You What 3D Animation Is
- Updated Why These 10+ Top Text Motion Templates Are Worth Your Attention for 2024
- Updated Top 10 Old Cartoons From Cartoon Network That You Miss
- Updated In 2024, 4 Smart Solutions to Create or Find Good Morning/Night GIFs
- Best 8 Tools Tell You How to Make Slideshows for Instagram
- In 2024, How to Make a GIF in Photoshop
- Updated 12 Top Stop Motion Studios Worth Recommending
- Updated In 2024, How to Make 3D Cartoon of Yourself
- Updated In 2024, Best 10 Animated DP for WhatsApp
- 10 Best Animation Makers for Kids to Have Fun
- New In 2024, 5 Free Animated Gif Sources You Must Check
- Learn About Lip-Syncing in Animation
- In 2024, Top 12 2D Animation Studios All Should Check Out
- Most Effective Tactics to Set WhatsApp Status for 2024
- Updated Top 10 Best and Fast Ways to Turn Image Into Gif
- 2024 Approved Looking for Love Animated GIFs? Here Are 5 Free Sources For You
- New In 2024, What Is Still Motion Animation and How Does It Work?
- Updated How to Turn Yourself Into a WhatsApp Cartoon for 2024
- New In 2024, Top 15 Male Anime Characters By Voting
- Updated In 2024, 12 Captivating Websites with Triggered Animate on Scroll Examples
- Updated 2024 Approved How to Become a Motion Graphic Designer
- How to Downgrade Apple iPhone SE without Losing Anything? | Dr.fone
- Which is the Best Fake GPS Joystick App On Infinix Smart 8 Plus? | Dr.fone
- How To Leave a Life360 Group On Samsung Galaxy A34 5G Without Anyone Knowing? | Dr.fone
- In 2024, Android Unlock Code Sim Unlock Your Vivo Y55s 5G (2023) Phone and Remove Locked Screen
- Will Pokémon Go Ban the Account if You Use PGSharp On Realme 12 Pro 5G | Dr.fone
- Hard Reset Vivo X100 Pro in 3 Efficient Ways | Dr.fone
- How to Unlock Xiaomi 14 Bootloader Easily
- In 2024, Top 4 Ways to Trace Oppo A1 5G Location | Dr.fone
- In 2024, The Ultimate Guide How to Bypass Swipe Screen to Unlock on Poco F5 5G Device
- In 2024, Top 4 Ways to Trace Apple iPhone 14 Plus Location | Dr.fone
- How to Transfer Music from Itel P55T to iPod | Dr.fone
- How To Unlock Apple iPhone 15 Without Swiping Up? 6 Ways | Dr.fone
- Updated In 2024, How To Reach More Users by Using Instagram Live Shopping
- The Updated Method to Bypass Gionee FRP
- Which Pokémon can Evolve with a Moon Stone For Nokia G22? | Dr.fone
- Updated In 2024, Step-by-Step Guide How to Translate Twitter Video Easily
- In 2024, How to Remove a Previously Synced Google Account from Your Samsung Galaxy XCover 6 Pro Tactical Edition
- In 2024, How To Transfer Messages From Apple iPhone 13 to other iPhone All iOS Versions | Dr.fone
- The Ultimate Guide to Get the Rare Candy on Pokemon Go Fire Red On Vivo V27 Pro | Dr.fone
- 8 Quick Fixes Unfortunately, Snapchat has Stopped on Samsung Galaxy M34 | Dr.fone
- New Everything You Want To Know About Kapwing Video Translation
- In 2024, How To Bypass the Required Apple Store Verification For iPhone 13 Pro | Dr.fone
- Title: 2024 Approved Creative Ways to Create iPhone Text GIF
- Author: Elon
- Created at : 2024-05-19 03:04:56
- Updated at : 2024-05-20 03:04:56
- Link: https://animation-videos.techidaily.com/2024-approved-creative-ways-to-create-iphone-text-gif/
- License: This work is licensed under CC BY-NC-SA 4.0.
