

2024 Approved How to Cartoonize Photo Photoshop in Easy Steps
How to Cartoonize Photo Photoshop in Easy Steps
How to Cartoonize Photo Photoshop in Easy Steps
An easy yet powerful editor
Numerous effects to choose from
Detailed tutorials provided by the official channel
Cartoons, an already catchy entertainment source, can upgrade other media utilities on integration. Look through the easiest ways of creating cartoonize photo Photoshop stills!
In this article
01 [Types of Cartoon Effects in Photoshop](#Part 1)
02 [Easiest Ways to Cartoonize Photo in Photoshop](#Part 2)
03 [How to Use a Variety of Photoshop Special Effects to Create the Final Caricature Look](#Part 3)
Part 1 Types of Cartoon Effects in Photoshop
It is an absolute fun activity to explore your editing creativity in the realm of cartoonizing the otherwise ordinary still captures. Talking of the most convenient cartoon creator and editor applications, you can safely rely on the Photoshop Image Editor application to choose from a pool of cartoon editing effects for adding that spunky and funny element to your image files.
Presented in the following section, is a discussion of some of the most stunning and visibly amazing cartoon effects in the application’s Editor Library to cartoonize Photoshop images:
01Pop Art Photoshop Action
The effect is a predominantly preferred as a cartoon action Photoshop utility to caricaturize a normal image, along with customizing the same to change the colors and background of the original still capture for creating a brand new appearance with utmost ease. Apart from this, the aforesaid effect allows you to exclusively customize the globally acclaimed graphic masterpieces of Roy Lichtenstein. Working with the effect, you can edit a self-portrait or the favorite image of your pet to give the latter, a funny retro feel.

02Vintage Comic Creator
If the idea of sticking to just the creation of cartoon images is not enough to satisfy you, the Vintage Comic Creator effect allows you to expand your creativity level to work on cartoon based shape and text edits. You can use the effect to enhance an image logo or plain text with a comic book oriented text. A download of this cartoon effect template facilitates you with diversities of customizable layer styles, overlays and patterns.

03GTA Photoshop Action
This is a complete pleasure for the creative fan of Grand Theft Auto, the wicked chasing game series. Additional to creating a stark variety of edited cartoon stills, you are free to reinvent the aforesaid game’s most popular caricature edits, while using the GTA Photoshop Action editing filter. Launched by Indworks, the effect package consisting of 15 vibrant themes and 5 collage templates; promises a quick mimicry of your most cherished video and console games.

04Vector Paint Photoshop Action
The one is an amazing Photoshop effect for creating cartoon edits, which works through a merger of two different ingenious art themes or styles for transforming basic images into cartoonized stills.
The effect grants you the liberty to use varieties of art styles, such as, comic, photo retouching and energetic oil to obtain editing results comparable to that of any original photograph. The template is conveniently simple to use and assures you of quick results. All this, just at a nominal price of $6! Interesting, right?

05Ultra Realistic 3D Space Effect
Considering the fact of you being a space admirer, this one is the perfect image editor for you to add the vibrancy of stunning space elements and backgrounds within your cartoonized edits. The effect lets you play with the diverse range of customizable text and exciting caricature backgrounds. When downloading the template, you get a main setup file, a few editing examples and a web link to the free fonts present in the effect.

06Animated Zombie Grime Art Photoshop Action
Are you in love with the latest zombie grimes? If yes, then this action set is exclusive editor package for you. Working with the aforesaid image template, you can effortlessly add the perfect zombie theme to your cartoon edits, along with simultaneously creating a stunning animation, which you can use to enhance your video or GIF uploads on social media. Not forgetting the best part, you get a free access to this amazing utility.

Part 2 Easiest Ways to Cartoonize Photo in Photoshop
Having known about the amazing varieties of cartoonized editor templates in Photoshop, it is a natural instinct to feel motivated to create your own caricature images from normal capture stills. Addressing the concern of image transformation methods to turn a photo into a cartoon Photoshop, let us dive into some of the most affordable methods of creating cartoonized photos in the aforesaid editing application.
Talking of the most basic Photoshop tools for creating caricature images, you can start your editing spree with using the Graphic Tablet, Brush Tool, Layer Masks and a graphic pen to create amateur cartoonized edits from your still photographs, getting a full control on image tracing.
01Brush Tool
A few usage examples include working with a combination of the graphic tablet pen and the editor brushes to trace your image, using the brush in a masked or a fresh layer to avoid altering the actual image, and much more.
02Graphic Tablet
It is best to use the Photoshop Graphic Tablet for adhering to the concern of tracing cartoonized images. You can alternatively cater to the job with a trackpad, mouse, or even your hand. It is however, difficult to assure steady hand postures for image tracing, lest you are using a stylus pen.
03Pen Tool
Using the Pen Tool for cartoonizing your portrait, allows you to draw outlines along the desired figure within the image, along with its important elements, so that you can easily use these outlined paths to introduce different color blocks.
Similar to the Brush Tool, the Photoshop Pen utility grants you the freedom to vary the degree of detailing in your cartoon edit, from being highly expressive to only remaining around the shore. Working with the Pen Tool can, however be a bit tiring and time taking, with respect to the extent of detailing you wish to add to the caricature edits.
Additional to the aforementioned tools, you can also consider using the default image filters of the Photoshop application to get comparable results. This is an exclusively better option to choose, compared to the Pen Tool, when you are working without a Graphic Tablet. To get over the top realistic caricature renderings, you will need to supplement the use of Photoshop filters with the application’s editing channels and other adjustments.
Part 3 How to Use a Variety of Photoshop Special Effects to Create the Final Caricature Look
Considering the extensive discussion on the credibility of the Photoshop Image Editor application in the realm of creating stunning caricature images in high end resolution, let us proceed to learn about using the diversity of Photoshop’s special effects to get the last stage cartoonized appearance of ordinary still images.
User’s Guide to Create High End Cartoonized Look
The following tutorial is a stepwise explanation of the process to convert photo into cartoon Photoshop in the easiest possible way. Stick to the method for getting affordable results in a quick span.
Step 1: Download and Launch the Program
Visit the official website of Photoshop Image Editor for a free download of the software program in your system, followed by installing and launching the same in your device.
Step 2: Upload Your Image
On a successful launch of the editor program, you will be directed to the ‘Photoshop Editor’ window, where you are required to upload any desired still image from your device for creating a cartoonized edit. To do this, either simply add your image to the editor workspace using the ‘Drag and Drop’ method, or navigate to the ‘File’ tab in the top toolbar and click on ‘Open’ in the dropdown menu.
Step 3: Edge Enhancement
Once your image appears in the editor timeline, proceed to sharpen the edges of the face and body of the portrait. Start with navigating to and clicking on the ‘Filter’ option, followed by tapping on ‘Filter Gallery’ and selecting the ‘Artistic’ folder, where you need to choose the ‘Poster Edges’ option. Observe the effect of these setting on the portrait and make necessary changes.

Step 4: Background Setting
Ensure that the background and foreground of your image are set to white and black colors respectively. If not, proceed to adjust the same as required.

Step 5: Distorting the Edges
You now need to introduce some distortion in the edges of your portrait. Navigate to the ‘Filter’ option again, open the ‘Filter Gallery’ and choose ‘Torn Edges’ from the menu that drops down. Select the desired parameter values in accordance with your creative suitability.


Step 6: Using the Channels Panel
The next step is to select and copy your portrait using the ‘Ctrl + A’ and Ctrl + C commands respectively. Navigate to the ‘Channels’ panel at the right of the Photoshop workspace. At the panel’s bottom right, proceed with creating a new channel. It will be assigned the name ‘Alpha 1’ by Photoshop, which you are most welcome to change.


Step 7: Color Inversion
When you finish creating the channel, use the ‘Ctrl + V’ command to paste your portrait in the same. Proceed with inverting the image colors by navigating to the ‘Image’ option, followed by choosing the ‘Adjustment’ and ‘Invert’ options from the consecutive drop downs. Now, make a selection of the ‘White’ regions of your portrait by pressing the ‘Ctrl’ key and clicking on the ‘Alpha 1 Channel thumbnail.

Step 8: Layer Creation
Navigate to the ‘Layers’ panel at the right of the Photoshop workspace, and click on the ‘New Layer’ icon for creating a fresh layer. Fill the just created layer with black color, either by pressing ‘g’ from your system’s keyboard, or using the ‘Paint Bucket’ tool. Don’t forget to assign a suitable name to the layer.

Repeat the above process to create a separate layer and e fill the same with white color. The layer creation process is essential to separate the white and black colors of the actual image.

Step 10: Layer Dragging
In the ‘Layers’ panel, drag the ‘Black’ layer above the ‘White’ one.

Step 11: Creating Additional Layers
You are now required to create three more layers, with the same process as for the above two, for adding effects to the Skin, Clothes and Teeth/Eyes of the portrait. When you finish creation, assign suitable names to the layers, followed by dragging them below the ‘Black’ one within the ‘Layers’ panel.

Step 12: Color Selection and Application
Choose the respective colors for the clothes, skin and teeth/eyes of the cartoonized edit. To proceed with color application, navigate to the toolbar at the left of the Photoshop workspace and choose the ‘Brush Tool’. Finally, choose a particular layer and apply careful brush strokes to add color to the specific area of the portrait that you wish to edit. Follow the same process to add colors to the remaining layers to get the desired result in all areas of your cartoonized edit.

Step 13: Using the Gradient Tool
Navigate to the ‘Layers’ panel again and create a new ‘Gradient’ layer to further enhance your creation. You now need to select the ‘Gradient Tool’ from the toolbar at the left of the Photoshop workspace. The ‘Gradient Editor’ pops up with the continuously running ‘Gradient Bar’, as soon as you make the selection. Double click on the gradient boxes at both ends to select them, followed by making your color choices. Tap on ‘OK’ when you are satisfied with your work.

Step 14: Filling the Gradients
To proceed with gradient filling, press and hold the mouse button on the image at the bottom left and continue to drag the cursor to its top right corner. Leave the mouse and navigate to the ‘Layers’ panel for dragging and dropping the ‘Gradient’ layer above the ‘White’ layer.

You are now done with the process of creating a caricature edit from a normal still portrait. Your final image output will appear something like the following:

Cartoons, an already catchy entertainment source, can upgrade other media utilities on integration. Look through the easiest ways of creating cartoonize photo Photoshop stills!
In this article
01 [Types of Cartoon Effects in Photoshop](#Part 1)
02 [Easiest Ways to Cartoonize Photo in Photoshop](#Part 2)
03 [How to Use a Variety of Photoshop Special Effects to Create the Final Caricature Look](#Part 3)
Part 1 Types of Cartoon Effects in Photoshop
It is an absolute fun activity to explore your editing creativity in the realm of cartoonizing the otherwise ordinary still captures. Talking of the most convenient cartoon creator and editor applications, you can safely rely on the Photoshop Image Editor application to choose from a pool of cartoon editing effects for adding that spunky and funny element to your image files.
Presented in the following section, is a discussion of some of the most stunning and visibly amazing cartoon effects in the application’s Editor Library to cartoonize Photoshop images:
01Pop Art Photoshop Action
The effect is a predominantly preferred as a cartoon action Photoshop utility to caricaturize a normal image, along with customizing the same to change the colors and background of the original still capture for creating a brand new appearance with utmost ease. Apart from this, the aforesaid effect allows you to exclusively customize the globally acclaimed graphic masterpieces of Roy Lichtenstein. Working with the effect, you can edit a self-portrait or the favorite image of your pet to give the latter, a funny retro feel.
02Vintage Comic Creator
If the idea of sticking to just the creation of cartoon images is not enough to satisfy you, the Vintage Comic Creator effect allows you to expand your creativity level to work on cartoon based shape and text edits. You can use the effect to enhance an image logo or plain text with a comic book oriented text. A download of this cartoon effect template facilitates you with diversities of customizable layer styles, overlays and patterns.
03GTA Photoshop Action
This is a complete pleasure for the creative fan of Grand Theft Auto, the wicked chasing game series. Additional to creating a stark variety of edited cartoon stills, you are free to reinvent the aforesaid game’s most popular caricature edits, while using the GTA Photoshop Action editing filter. Launched by Indworks, the effect package consisting of 15 vibrant themes and 5 collage templates; promises a quick mimicry of your most cherished video and console games.
04Vector Paint Photoshop Action
The one is an amazing Photoshop effect for creating cartoon edits, which works through a merger of two different ingenious art themes or styles for transforming basic images into cartoonized stills.
The effect grants you the liberty to use varieties of art styles, such as, comic, photo retouching and energetic oil to obtain editing results comparable to that of any original photograph. The template is conveniently simple to use and assures you of quick results. All this, just at a nominal price of $6! Interesting, right?
05Ultra Realistic 3D Space Effect
Considering the fact of you being a space admirer, this one is the perfect image editor for you to add the vibrancy of stunning space elements and backgrounds within your cartoonized edits. The effect lets you play with the diverse range of customizable text and exciting caricature backgrounds. When downloading the template, you get a main setup file, a few editing examples and a web link to the free fonts present in the effect.
06Animated Zombie Grime Art Photoshop Action
Are you in love with the latest zombie grimes? If yes, then this action set is exclusive editor package for you. Working with the aforesaid image template, you can effortlessly add the perfect zombie theme to your cartoon edits, along with simultaneously creating a stunning animation, which you can use to enhance your video or GIF uploads on social media. Not forgetting the best part, you get a free access to this amazing utility.
Part 2 Easiest Ways to Cartoonize Photo in Photoshop
Having known about the amazing varieties of cartoonized editor templates in Photoshop, it is a natural instinct to feel motivated to create your own caricature images from normal capture stills. Addressing the concern of image transformation methods to turn a photo into a cartoon Photoshop, let us dive into some of the most affordable methods of creating cartoonized photos in the aforesaid editing application.
Talking of the most basic Photoshop tools for creating caricature images, you can start your editing spree with using the Graphic Tablet, Brush Tool, Layer Masks and a graphic pen to create amateur cartoonized edits from your still photographs, getting a full control on image tracing.
01Brush Tool
A few usage examples include working with a combination of the graphic tablet pen and the editor brushes to trace your image, using the brush in a masked or a fresh layer to avoid altering the actual image, and much more.
02Graphic Tablet
It is best to use the Photoshop Graphic Tablet for adhering to the concern of tracing cartoonized images. You can alternatively cater to the job with a trackpad, mouse, or even your hand. It is however, difficult to assure steady hand postures for image tracing, lest you are using a stylus pen.
03Pen Tool
Using the Pen Tool for cartoonizing your portrait, allows you to draw outlines along the desired figure within the image, along with its important elements, so that you can easily use these outlined paths to introduce different color blocks.
Similar to the Brush Tool, the Photoshop Pen utility grants you the freedom to vary the degree of detailing in your cartoon edit, from being highly expressive to only remaining around the shore. Working with the Pen Tool can, however be a bit tiring and time taking, with respect to the extent of detailing you wish to add to the caricature edits.
Additional to the aforementioned tools, you can also consider using the default image filters of the Photoshop application to get comparable results. This is an exclusively better option to choose, compared to the Pen Tool, when you are working without a Graphic Tablet. To get over the top realistic caricature renderings, you will need to supplement the use of Photoshop filters with the application’s editing channels and other adjustments.
Part 3 How to Use a Variety of Photoshop Special Effects to Create the Final Caricature Look
Considering the extensive discussion on the credibility of the Photoshop Image Editor application in the realm of creating stunning caricature images in high end resolution, let us proceed to learn about using the diversity of Photoshop’s special effects to get the last stage cartoonized appearance of ordinary still images.
User’s Guide to Create High End Cartoonized Look
The following tutorial is a stepwise explanation of the process to convert photo into cartoon Photoshop in the easiest possible way. Stick to the method for getting affordable results in a quick span.
Step 1: Download and Launch the Program
Visit the official website of Photoshop Image Editor for a free download of the software program in your system, followed by installing and launching the same in your device.
Step 2: Upload Your Image
On a successful launch of the editor program, you will be directed to the ‘Photoshop Editor’ window, where you are required to upload any desired still image from your device for creating a cartoonized edit. To do this, either simply add your image to the editor workspace using the ‘Drag and Drop’ method, or navigate to the ‘File’ tab in the top toolbar and click on ‘Open’ in the dropdown menu.
Step 3: Edge Enhancement
Once your image appears in the editor timeline, proceed to sharpen the edges of the face and body of the portrait. Start with navigating to and clicking on the ‘Filter’ option, followed by tapping on ‘Filter Gallery’ and selecting the ‘Artistic’ folder, where you need to choose the ‘Poster Edges’ option. Observe the effect of these setting on the portrait and make necessary changes.
Step 4: Background Setting
Ensure that the background and foreground of your image are set to white and black colors respectively. If not, proceed to adjust the same as required.
Step 5: Distorting the Edges
You now need to introduce some distortion in the edges of your portrait. Navigate to the ‘Filter’ option again, open the ‘Filter Gallery’ and choose ‘Torn Edges’ from the menu that drops down. Select the desired parameter values in accordance with your creative suitability.
Step 6: Using the Channels Panel
The next step is to select and copy your portrait using the ‘Ctrl + A’ and Ctrl + C commands respectively. Navigate to the ‘Channels’ panel at the right of the Photoshop workspace. At the panel’s bottom right, proceed with creating a new channel. It will be assigned the name ‘Alpha 1’ by Photoshop, which you are most welcome to change.
Step 7: Color Inversion
When you finish creating the channel, use the ‘Ctrl + V’ command to paste your portrait in the same. Proceed with inverting the image colors by navigating to the ‘Image’ option, followed by choosing the ‘Adjustment’ and ‘Invert’ options from the consecutive drop downs. Now, make a selection of the ‘White’ regions of your portrait by pressing the ‘Ctrl’ key and clicking on the ‘Alpha 1 Channel thumbnail.
Step 8: Layer Creation
Navigate to the ‘Layers’ panel at the right of the Photoshop workspace, and click on the ‘New Layer’ icon for creating a fresh layer. Fill the just created layer with black color, either by pressing ‘g’ from your system’s keyboard, or using the ‘Paint Bucket’ tool. Don’t forget to assign a suitable name to the layer.
Repeat the above process to create a separate layer and e fill the same with white color. The layer creation process is essential to separate the white and black colors of the actual image.
Step 10: Layer Dragging
In the ‘Layers’ panel, drag the ‘Black’ layer above the ‘White’ one.
Step 11: Creating Additional Layers
You are now required to create three more layers, with the same process as for the above two, for adding effects to the Skin, Clothes and Teeth/Eyes of the portrait. When you finish creation, assign suitable names to the layers, followed by dragging them below the ‘Black’ one within the ‘Layers’ panel.
Step 12: Color Selection and Application
Choose the respective colors for the clothes, skin and teeth/eyes of the cartoonized edit. To proceed with color application, navigate to the toolbar at the left of the Photoshop workspace and choose the ‘Brush Tool’. Finally, choose a particular layer and apply careful brush strokes to add color to the specific area of the portrait that you wish to edit. Follow the same process to add colors to the remaining layers to get the desired result in all areas of your cartoonized edit.
Step 13: Using the Gradient Tool
Navigate to the ‘Layers’ panel again and create a new ‘Gradient’ layer to further enhance your creation. You now need to select the ‘Gradient Tool’ from the toolbar at the left of the Photoshop workspace. The ‘Gradient Editor’ pops up with the continuously running ‘Gradient Bar’, as soon as you make the selection. Double click on the gradient boxes at both ends to select them, followed by making your color choices. Tap on ‘OK’ when you are satisfied with your work.
Step 14: Filling the Gradients
To proceed with gradient filling, press and hold the mouse button on the image at the bottom left and continue to drag the cursor to its top right corner. Leave the mouse and navigate to the ‘Layers’ panel for dragging and dropping the ‘Gradient’ layer above the ‘White’ layer.
You are now done with the process of creating a caricature edit from a normal still portrait. Your final image output will appear something like the following:
What Is Motion Graphics
What is Motion Graphics
An easy yet powerful editor
Numerous effects to choose from
Detailed tutorials provided by the official channel
Are you new to motion graphics and looking to learn everything about animated motion then you are at the right webpage. In this article, we will cover everything about motion graphic videos.
In this article
01 [What is Motion Graphics? (Motion Graphics Definition)](#Part 1)
02 [5 Motion Graphics Animation Trends You Need to Know About](#Part 2)
03 [History of Motion Graphics](#Part 3)
04 [Uses of Motion Graphics Today (motion Graphics Examples)](#Part 4)
05 [Motion Graphics Vs. Animation: What’s the Difference?](#Part 5)
05 [How to Make Motion Graphics?](#Part 5)
Part 1 What is Motion Graphics?
Motion graphics is known as videos with the mix-up of the text, effect, stickers, and many other types of components. It’s known as an animated graphic design as well. Motion graphics are a great way to communicate with the target audience with the help of video, text, and emotions in the videos. The motion graphics videos with the music, effects, and text can give a great message to the audience.
Part 2 5 Motion Graphics Animation Trends You Need to Know About
01Mix up the and 3D
Mixing up the and animations in the videos is still getting momentum. People love the way the motion graphic designer explains the video using the mixing of and 3D. This trend is also used in the hundreds of costly advertisements.
02Trend of Broken Text in Videos
The broken text trend is also used in thousands of videos and it helps designers to show the poetic meaning of the client video they are making. People take it positively and understand the video with just the broken text at the right place.
03Adding VFX in the Videos
02Trend of Broken Text in Videos
VFX trend is catching people a lot now a day. The complex visual effects in the videos get the attention of the audience very quickly. While browsing videos over the internet you can also observe the VFX effects in the case of the firestorm, explosions, etc in the videos.
04Animated Logos of Companies
Animated logos are in huge demand even by the biggest companies around the globe. Animated logos are also used in the motion graphic videos while showing the company products or in the marketing videos. The animated logos capture the attention of people very quickly.
05Thin Lines in the Videos
In animated motion graphics videos lines also plays a very important role as they can easily help viewers to understand the shape, directions, and many more other things. Designers are now drawing the thin lines in their videos.
Part 3 History of Motion Graphics
Previously, before the presence of motion graphics in the world of technology the graphics worked just the images in the un-moving and flat formats.
Motion graphics first came into the scene when Oskar Fischinger and Norman McLaren were doing some experimental work. Later in 195some designers introduced motion graphics to the public in a bigger way. The designers later used in a few films that time and these films are still a great example of the motion graphics used at that time. Motion graphics in these films presented information such as the product company, actors, film directors, movie title, and many other things about the films in a very creative way.
Playing with the words or graphic elements was never seen by the people before the motion graphics. Later it’s started used in mostly all films and ad videos.
Now a day in the few years the advancement of animation software’s and the improvements in designs allowed people to learn more about motion graphics and try to produce new and eye-catching graphics.
Part 4 Uses of Motion Graphics Today
Now a day due to the new technology every day the presence of the screen in multiple devices has extended the usage of motion graphics. Motion graphics are generally used in every device that has a screen such as opening the TV, introducing the information with the bumpers, and many other things. Below are a few examples where motion graphics are mainly used:
01Branding
Branding is the biggest channel and branding owners were looking for something different to refresh their brand and make it different from the other SKY channels. The Nerdo Creative Studio used motion graphics in their channel video and created a beautiful video with typography and text effects. This video makes it different from the other channels which generally people don’t see every day on television.

02Sharing Product Information Or Promotion Video
The main usage of motion graphics is promoting the products using the product videos created with the help of beautiful motion graphic backgrounds and texts. This helps brands to promote their products in front of customers in a clear way and get more sales. In the product videos, the animated motion graphics can help you a lot in creating entertaining, fun, and engaging eye-catching product videos.

03Telling a Story to the Audience
Storytelling about a brand or anything is a very complicated task because your story must be to the point and understandable by the viewers. In this case, motion graphics help a lot. For example, you can view the above video on the URL with clear images, text, icons, and great background music. This is a great concept and you can even use it for making ads for your products or for making short films.

04Explaining A Concept To Your Students Or In The Company Meetings
Motion graphics are a great way to make the explainer videos for your products or the new concepts to your students in the school or college. Motion graphic videos can more clearly explain the concepts to the audience instead of using a presentation. The YouTube video link above shows how beautifully the designer has explained the concept of blockchain in the video.

05Creating Awareness About Something
The above video is about empowering women and girls where motion graphics are used. This awareness video doesn’t have any fancy design or great colors but still, it clears its message to the people.

Part 5 Motion Graphics vs. Animation: What’s the Difference?
Motion graphics are generally represented with moving images, text, and other objects and these graphics can easily display information with the help of moving objects such as the moving website logo, blurring text, bars in graphs, etc. Simply we can say the motion graphics can display the letters and shapes in the motion of the user’s choice. Sometimes things are very hard to explain with the still images whereas with the help of a few seconds of motion graphics you can clear everything perfectly.
If we talk about animation then this is a term under which motion graphics falls. Animation is used for more than 1years. So, we can say motion graphics are a part of animation itself. Any technique in the world which helps users to move static images or objects is known as animation. It can be Claymation, anime, cartoons, or motion graphics.
Mainly the content separates the motion graphics from the other types of animations because, in the motion graphic text, objects are associated with the other graphic designs.
Part 6 How to Make Motion Graphics?
Wondershare Filmora Video Editor
Wondershare Filmora is desktop software that allows you to quickly make beautiful motion graphic videos without doing any effort. This motion graphics video maker program is available for windows as well as the Mac operating system computers. Wondershare Filmora is capable of making the best videos very easily even you can apply motion tracking in the videos with this software. It allows you to edit the videos from scratch and create the end-level best videos. It offers you several features such as video effects, split screen, green screen, and color grading and controlling the speed of your videos. Finally, this is a complete solution for all your video editing and motion graphic problems.
For Win 7 or later (64-bit)
For macOS 10.12 or later
● Key Takeaways from This Episode →
● This is the information about what motion graphics is and how to create the best motion graphics video on your computer with the help of Wondershare Filmora.
● There are hundreds of other motion graphics video maker software and apps available over the internet but not any app can design the best videos as compared to the Wondershare Filmora.
● The best part is that it is very easy to use and you can quickly make motion graphics videos even if you are a newbie.
Are you new to motion graphics and looking to learn everything about animated motion then you are at the right webpage. In this article, we will cover everything about motion graphic videos.
In this article
01 [What is Motion Graphics? (Motion Graphics Definition)](#Part 1)
02 [5 Motion Graphics Animation Trends You Need to Know About](#Part 2)
03 [History of Motion Graphics](#Part 3)
04 [Uses of Motion Graphics Today (motion Graphics Examples)](#Part 4)
05 [Motion Graphics Vs. Animation: What’s the Difference?](#Part 5)
05 [How to Make Motion Graphics?](#Part 5)
Part 1 What is Motion Graphics?
Motion graphics is known as videos with the mix-up of the text, effect, stickers, and many other types of components. It’s known as an animated graphic design as well. Motion graphics are a great way to communicate with the target audience with the help of video, text, and emotions in the videos. The motion graphics videos with the music, effects, and text can give a great message to the audience.
Part 2 5 Motion Graphics Animation Trends You Need to Know About
01Mix up the and 3D
Mixing up the and animations in the videos is still getting momentum. People love the way the motion graphic designer explains the video using the mixing of and 3D. This trend is also used in the hundreds of costly advertisements.
02Trend of Broken Text in Videos
The broken text trend is also used in thousands of videos and it helps designers to show the poetic meaning of the client video they are making. People take it positively and understand the video with just the broken text at the right place.
03Adding VFX in the Videos
02Trend of Broken Text in Videos
VFX trend is catching people a lot now a day. The complex visual effects in the videos get the attention of the audience very quickly. While browsing videos over the internet you can also observe the VFX effects in the case of the firestorm, explosions, etc in the videos.
04Animated Logos of Companies
Animated logos are in huge demand even by the biggest companies around the globe. Animated logos are also used in the motion graphic videos while showing the company products or in the marketing videos. The animated logos capture the attention of people very quickly.
05Thin Lines in the Videos
In animated motion graphics videos lines also plays a very important role as they can easily help viewers to understand the shape, directions, and many more other things. Designers are now drawing the thin lines in their videos.
Part 3 History of Motion Graphics
Previously, before the presence of motion graphics in the world of technology the graphics worked just the images in the un-moving and flat formats.
Motion graphics first came into the scene when Oskar Fischinger and Norman McLaren were doing some experimental work. Later in 195some designers introduced motion graphics to the public in a bigger way. The designers later used in a few films that time and these films are still a great example of the motion graphics used at that time. Motion graphics in these films presented information such as the product company, actors, film directors, movie title, and many other things about the films in a very creative way.
Playing with the words or graphic elements was never seen by the people before the motion graphics. Later it’s started used in mostly all films and ad videos.
Now a day in the few years the advancement of animation software’s and the improvements in designs allowed people to learn more about motion graphics and try to produce new and eye-catching graphics.
Part 4 Uses of Motion Graphics Today
Now a day due to the new technology every day the presence of the screen in multiple devices has extended the usage of motion graphics. Motion graphics are generally used in every device that has a screen such as opening the TV, introducing the information with the bumpers, and many other things. Below are a few examples where motion graphics are mainly used:
01Branding
Branding is the biggest channel and branding owners were looking for something different to refresh their brand and make it different from the other SKY channels. The Nerdo Creative Studio used motion graphics in their channel video and created a beautiful video with typography and text effects. This video makes it different from the other channels which generally people don’t see every day on television.
02Sharing Product Information Or Promotion Video
The main usage of motion graphics is promoting the products using the product videos created with the help of beautiful motion graphic backgrounds and texts. This helps brands to promote their products in front of customers in a clear way and get more sales. In the product videos, the animated motion graphics can help you a lot in creating entertaining, fun, and engaging eye-catching product videos.
03Telling a Story to the Audience
Storytelling about a brand or anything is a very complicated task because your story must be to the point and understandable by the viewers. In this case, motion graphics help a lot. For example, you can view the above video on the URL with clear images, text, icons, and great background music. This is a great concept and you can even use it for making ads for your products or for making short films.
04Explaining A Concept To Your Students Or In The Company Meetings
Motion graphics are a great way to make the explainer videos for your products or the new concepts to your students in the school or college. Motion graphic videos can more clearly explain the concepts to the audience instead of using a presentation. The YouTube video link above shows how beautifully the designer has explained the concept of blockchain in the video.
05Creating Awareness About Something
The above video is about empowering women and girls where motion graphics are used. This awareness video doesn’t have any fancy design or great colors but still, it clears its message to the people.
Part 5 Motion Graphics vs. Animation: What’s the Difference?
Motion graphics are generally represented with moving images, text, and other objects and these graphics can easily display information with the help of moving objects such as the moving website logo, blurring text, bars in graphs, etc. Simply we can say the motion graphics can display the letters and shapes in the motion of the user’s choice. Sometimes things are very hard to explain with the still images whereas with the help of a few seconds of motion graphics you can clear everything perfectly.
If we talk about animation then this is a term under which motion graphics falls. Animation is used for more than 1years. So, we can say motion graphics are a part of animation itself. Any technique in the world which helps users to move static images or objects is known as animation. It can be Claymation, anime, cartoons, or motion graphics.
Mainly the content separates the motion graphics from the other types of animations because, in the motion graphic text, objects are associated with the other graphic designs.
Part 6 How to Make Motion Graphics?
Wondershare Filmora Video Editor
Wondershare Filmora is desktop software that allows you to quickly make beautiful motion graphic videos without doing any effort. This motion graphics video maker program is available for windows as well as the Mac operating system computers. Wondershare Filmora is capable of making the best videos very easily even you can apply motion tracking in the videos with this software. It allows you to edit the videos from scratch and create the end-level best videos. It offers you several features such as video effects, split screen, green screen, and color grading and controlling the speed of your videos. Finally, this is a complete solution for all your video editing and motion graphic problems.
For Win 7 or later (64-bit)
For macOS 10.12 or later
● Key Takeaways from This Episode →
● This is the information about what motion graphics is and how to create the best motion graphics video on your computer with the help of Wondershare Filmora.
● There are hundreds of other motion graphics video maker software and apps available over the internet but not any app can design the best videos as compared to the Wondershare Filmora.
● The best part is that it is very easy to use and you can quickly make motion graphics videos even if you are a newbie.
How to Create Benime Whiteboard Animation in Android
How to Create Benime Whiteboard Animation in Android
An easy yet powerful editor
Numerous effects to choose from
Detailed tutorials provided by the official channel
Millions of people on social media would want to post the working system, information, and business policies on a topic. For this reason, such people need an easy way to make a good quality influential video in a short time. Although many applications can help you create animated videos.
In this article, we will be talking about whiteboard animation and, more specifically, about Benime whiteboard animation mod APK.
In this article
01 [What’s Benime Used for?](#Part 1)
02 [How to Create Benime Whiteboard Animation in Android](#Part 2)
Part 1 What’s Benime Used for?
Benime is the first doodle video creation application on Android devices that allows users to create professional and realistic doodle videos within minutes. It can add music and voice-over to audio, create presentations and marketing videos, and create a whiteboard animation using built-in assets.
One of the practical uses of Benime whiteboard animation is that it makes it very easy for anybody to create a professional whiteboard animation without any experience or knowledge in animation. With this application, you can use the built-in templates or decide to start from scratch using your drawings or images, then record yourself talking over the top of your work. It is one of the most active Android applications to explain ideas through a captivating animated video that can eventually increase your followers quickly.
It is used not just to explain information in an impersonal codon way but also to connect with your audience. By allowing your audience to show concern about what you are trying to showcase and evoking empathy.
It helps you get the audience to pay attention to the content you are creating by providing you with personalized graphics, colors, and images.
Benime is a great application that can help create an animated video using built-in assets. The application is flexible, user-friendly, and accessible via Benime whiteboard animation APK download. To download the Android application and make your desired video, you can also visit the Google play store to proceed with downloading the application as it contains advertisements and offers in-app purchases.
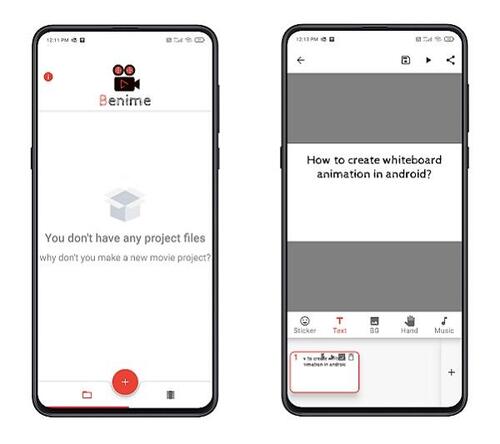
So, in short, we can say that Benime is valuable for,
● Whiteboard animation creation
● Inbuilt assets for video making
● Editing video with either voice, music, text, color
● Motion Slide animation
● Board background
● Supports online rendering of videos
● Instant preview functioning
● Sharing video in MP4 format
Part 2 How to Create Benime Whiteboard Animation in Android
We will also be giving you tips on all you need to know about creating a whiteboard animation:
● Write a script, whether it is a short script or a regular video. The whiteboard animation video might not succeed with exciting information and images and no coherent story. Since it is not a set of bullet points, storyboards, or blog stories, having a proper script is everything you need.
● Next is to start your storyboard to help you organize your thoughts much better. By creating a storyboard, you have a good idea of how the final product will look like and the transition of the story.
● Create memorable photos that will excite your audience. Perhaps if you are a creative person, this part will be much easier as all you need is to create a unique and fun image that will help pass the information that she wants to get across.
● Animates the created images and finds clearance between your script and the photos.
● Record the audio, which is the final step to ensure a perfectly synchronized audio and content.
Benime Whiteboard Animation application offers tons of features that can be used to enhance whiteboard animation creation. More so, here is a step-by-guide on how to use the Benime application more effectively and efficiently in creating a whiteboard animation:
01Software Download
First, download and install the Benime application on your phone and then open it.
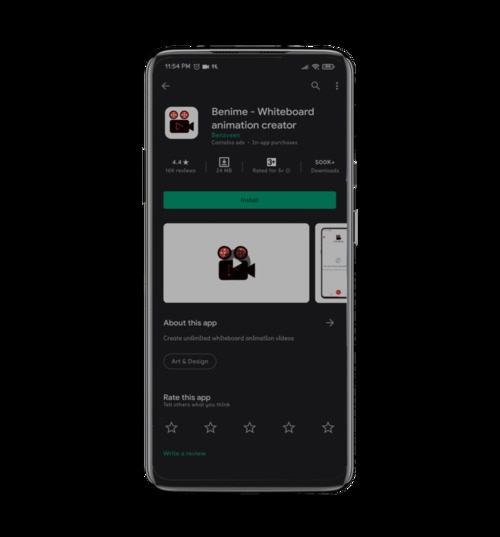
02Create New Video
Click on the + sign to make a new video. Enter the video title, choose the desired video quality, and click Create a Movie.
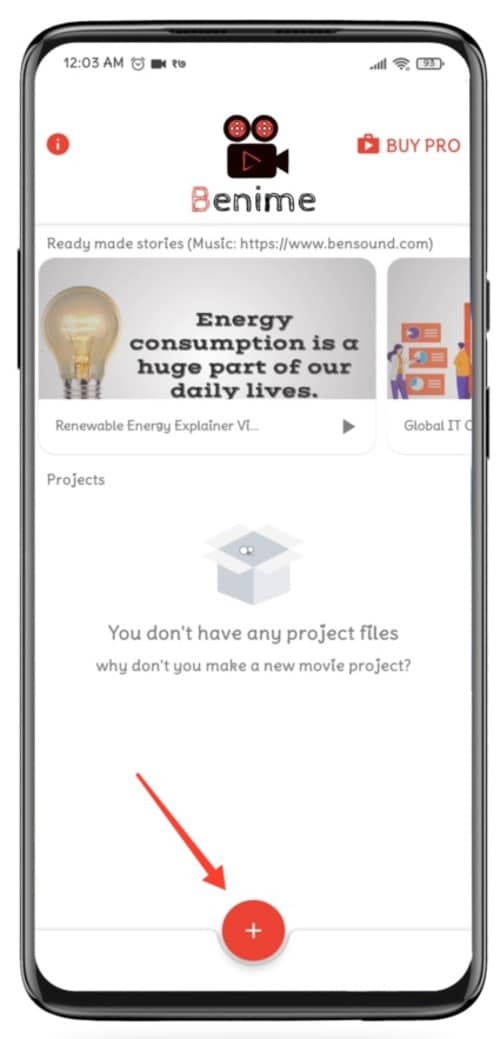
03Enter Text
A blank slide will be visible, where you will make changes, tap the Text option to enter the text.
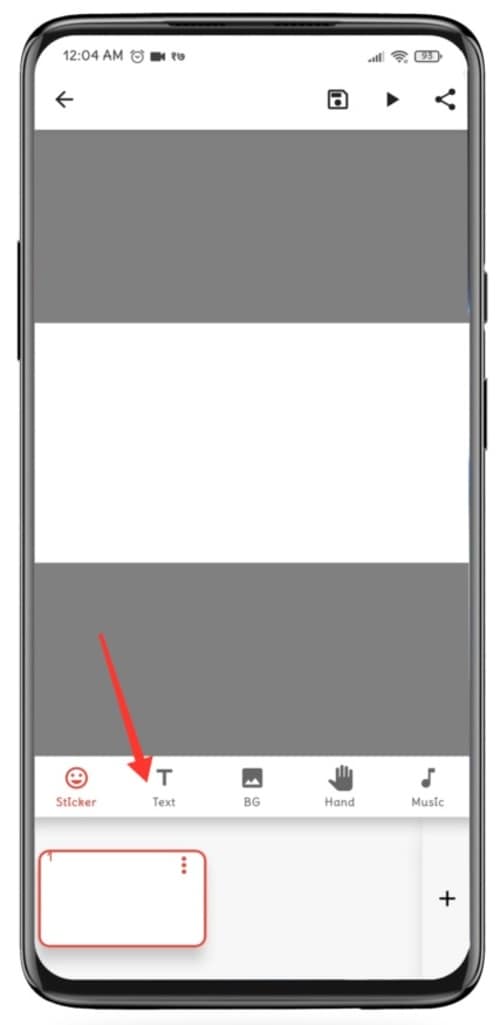
04Edit Text
After entering your desired text, click on the Insert option. The text size can be changeable by swiping to the left or right on the size line. More so, you can edit the color of the text by clicking on the color option. You can also change and use the application by clicking on the hand option. Background color change can go with the BG option.
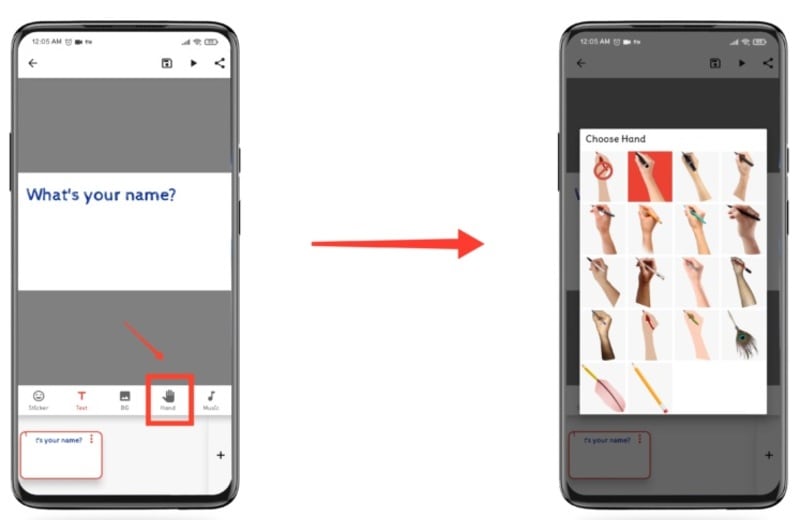
If you want to insert some characters, drawings, pictures, etc. Click on the sticker option at the bottom left and then slide to the right at the top to choose the icon or image that you want to insert.
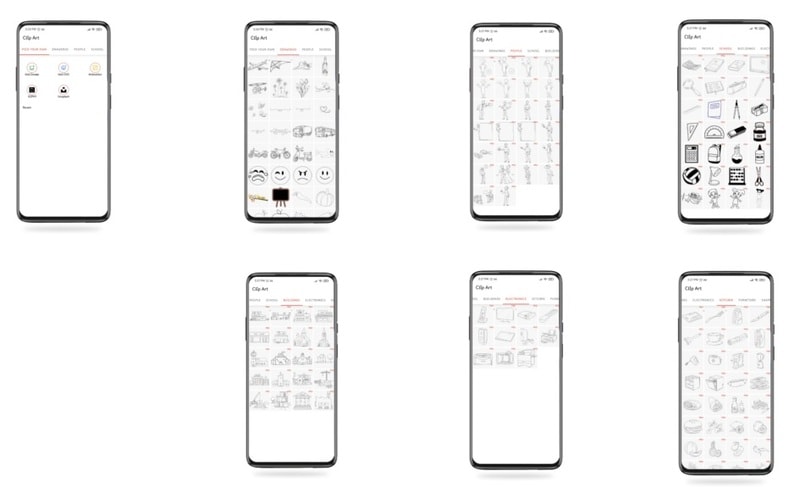
05Add Audio
After you are ok with the text and image, you can now add your voice over or music by clicking on any of the two options: voice over and music track.
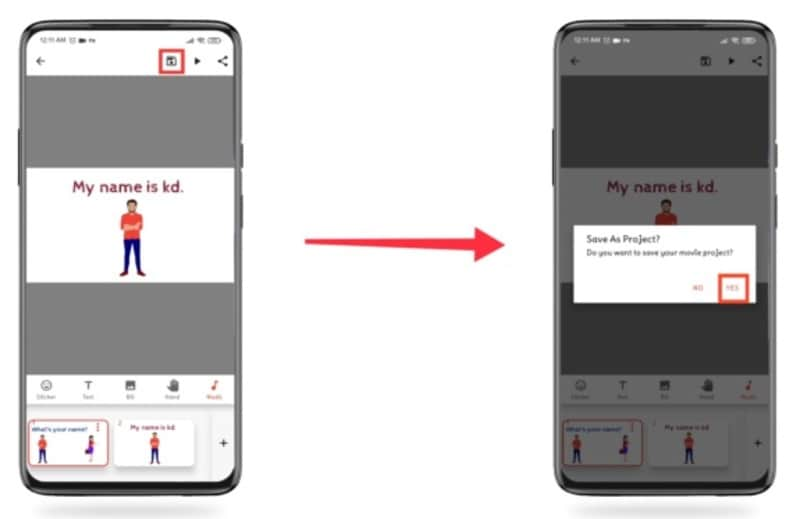
05Create and Share your Video
Lastly, click on the Save icon and then click on Yes. Then insert the name of the video and click on Make movie. Instantly the video will enter the rendering mode, and after this process, you will get the option of playing and sharing the film. Select the one you wish.
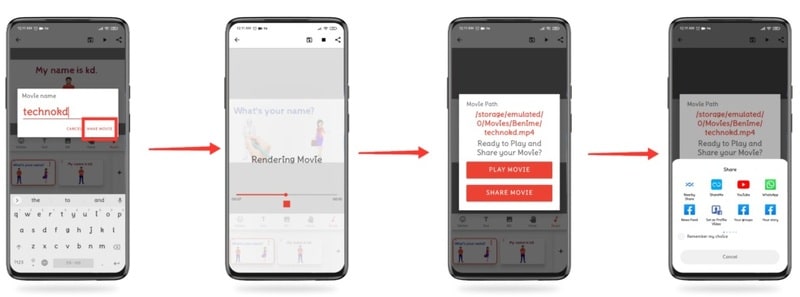
Benime Whiteboard animation can also be on PC via varieties of software. However, the Filmora software has proven to be one of the best because of its features. While working or creating a storyboard, the most aptly used software is Filmora. That will make it easy to create whiteboard animation with lots and lots of editing options in terms of transparency, 2D/animation, smooth keyframing, and a lot more.
Part 3 PC Tools Useful For Whiteboard Animation
01Renderforest Whiteboard Animation
Renderforest whiteboard animation: This is a free whiteboard animation tool that creates exciting and unique animation stories, a cloud-based program that does not need a powerful machine. It weeds hundreds of ready-made scenes to enhance your whiteboard animation stories
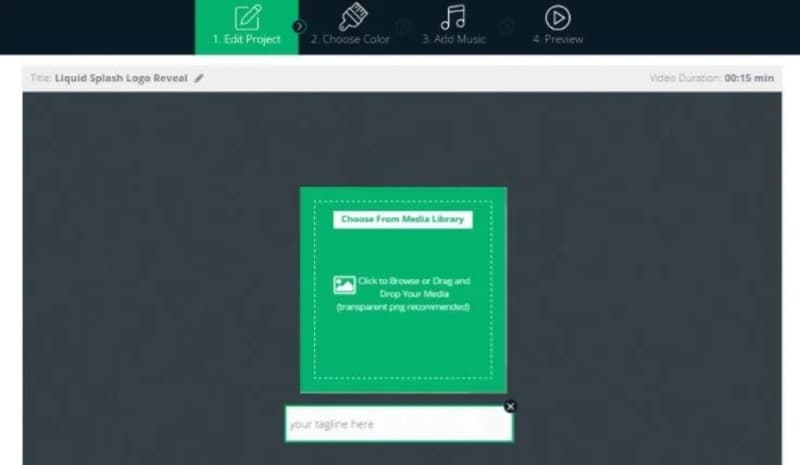
02Powtoon Whiteboard Animation
This can make a whiteboard animation very quickly for free, with an object to touch up video and free royalty music to make your whiteboard animation perfect.
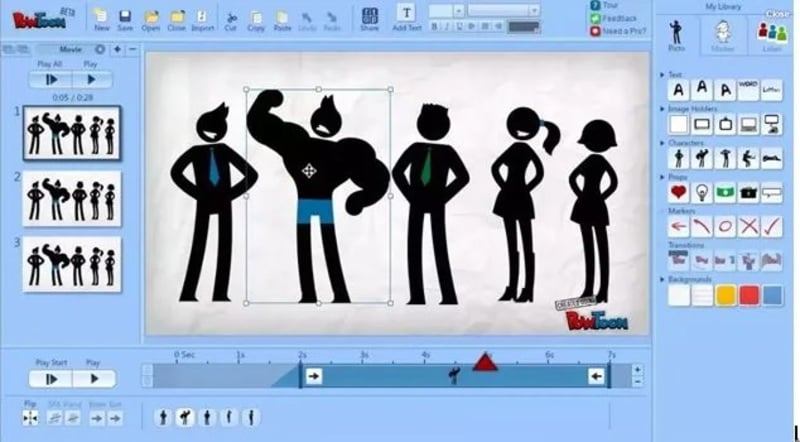
03Fiverr Whiteboard Animation
If looking for different whiteboard and animation explainers, Fiverr whiteboard animation will be the right choice. That will assist you in how to keep or engage your audience with proper explanation.
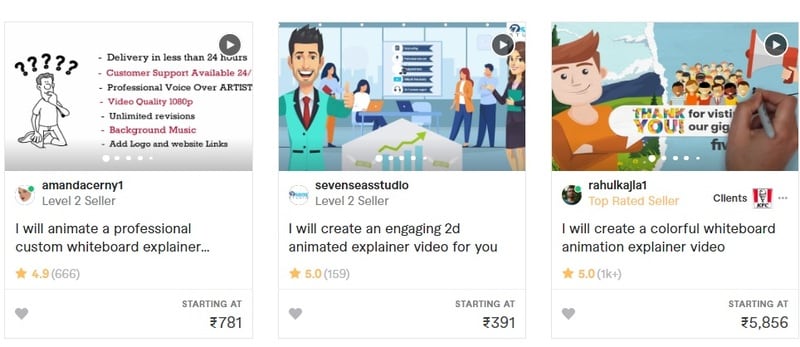
04Whiteboard Animation Videoscribe
Being in the education domain is a noble cause, and you can enhance the delivery of quality education through Whiteboard Animation Videoscribe. That will give you the freedom to modify your content with animation drawing. However, it is a subscription-based service.
05Vyond Whiteboard Animation
Vyond whiteboard animation provides you with in-house whiteboard animated video production solutions for educational, professional, or training purposes.
06Animaker Whiteboard Animation
This is another free whiteboard animation software used to make videos quickly with various functions. It includes a free-to-use option and a full video length that is enough. It supports a few props, characters, infographic icons, animated maps, charts, etc.
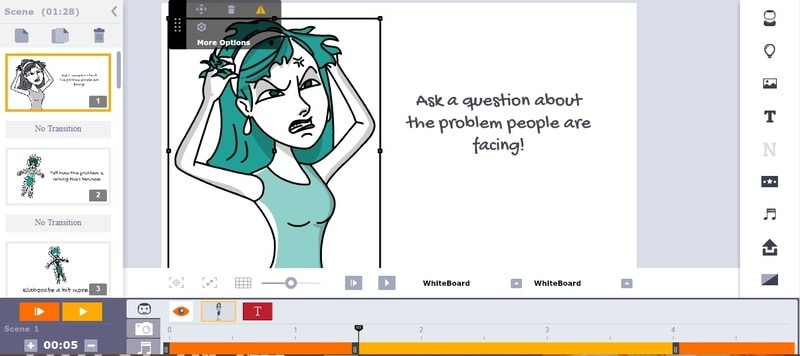
07Rawshorts Whiteboard Animation
This simple, easy-to-use whiteboard animation comes with an explainer video with a drag-and-drop interface. You can either start from nothing or choose between the animated whiteboard templates. Rendering and sharing the animated video in this software is super easy and comes with a Facebook, YouTube, and other social media platform integration. Anyone can use whether you are a beginner or professional, creating videos to show your client, training videos, and marketing videos that help demonstrate a strategy.
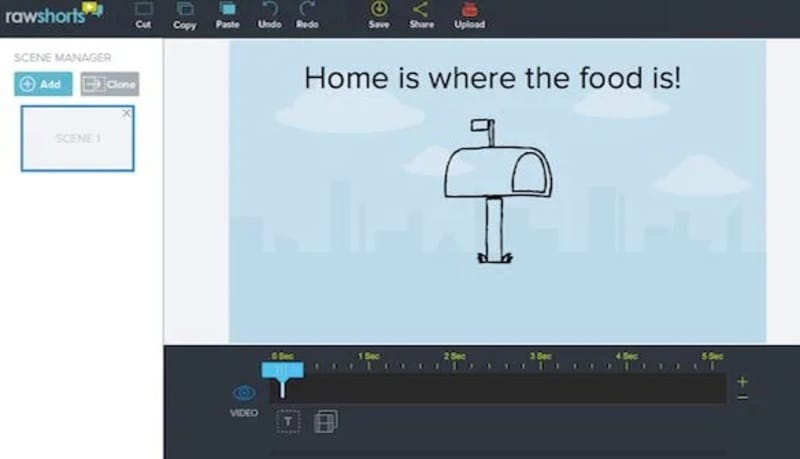
08Videojeeves Whiteboard Animation
This software has many whiteboard animation options, whether you are open to sharing something with your friends or creating a whiteboard animation for work. It helps to make your job easier and faster.
09Truscribe Whiteboard Animation
This premier software offers customers a dedicated plan when they are whiteboard animation videos can be created. With this software, the process can start when customers request a quote on their website, giving them more reliable information about the pricing and strategy.
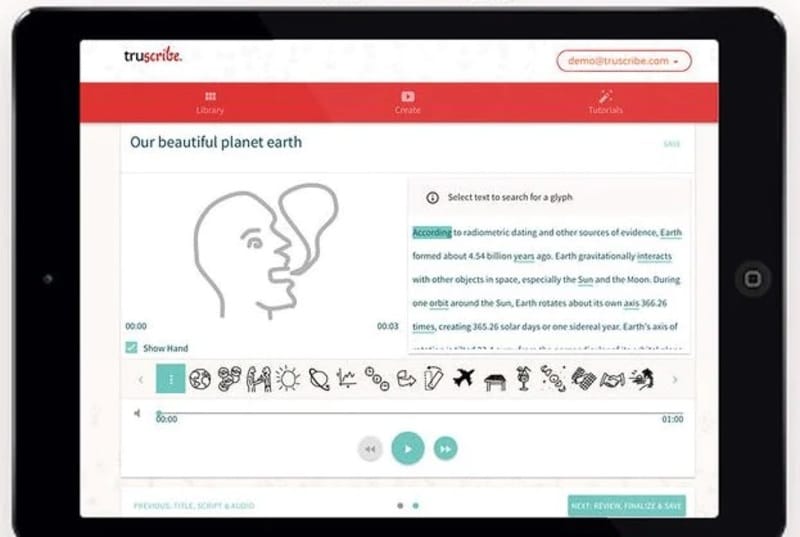
● Key Takeaways from This Episode →
● Basic functionality of Benime Whiteboard Animation software.
● How to create whiteboard animation with Benime.
● Whiteboard animation on PC with Filmora and some other relevant software.
Millions of people on social media would want to post the working system, information, and business policies on a topic. For this reason, such people need an easy way to make a good quality influential video in a short time. Although many applications can help you create animated videos.
In this article, we will be talking about whiteboard animation and, more specifically, about Benime whiteboard animation mod APK.
In this article
01 [What’s Benime Used for?](#Part 1)
02 [How to Create Benime Whiteboard Animation in Android](#Part 2)
Part 1 What’s Benime Used for?
Benime is the first doodle video creation application on Android devices that allows users to create professional and realistic doodle videos within minutes. It can add music and voice-over to audio, create presentations and marketing videos, and create a whiteboard animation using built-in assets.
One of the practical uses of Benime whiteboard animation is that it makes it very easy for anybody to create a professional whiteboard animation without any experience or knowledge in animation. With this application, you can use the built-in templates or decide to start from scratch using your drawings or images, then record yourself talking over the top of your work. It is one of the most active Android applications to explain ideas through a captivating animated video that can eventually increase your followers quickly.
It is used not just to explain information in an impersonal codon way but also to connect with your audience. By allowing your audience to show concern about what you are trying to showcase and evoking empathy.
It helps you get the audience to pay attention to the content you are creating by providing you with personalized graphics, colors, and images.
Benime is a great application that can help create an animated video using built-in assets. The application is flexible, user-friendly, and accessible via Benime whiteboard animation APK download. To download the Android application and make your desired video, you can also visit the Google play store to proceed with downloading the application as it contains advertisements and offers in-app purchases.
So, in short, we can say that Benime is valuable for,
● Whiteboard animation creation
● Inbuilt assets for video making
● Editing video with either voice, music, text, color
● Motion Slide animation
● Board background
● Supports online rendering of videos
● Instant preview functioning
● Sharing video in MP4 format
Part 2 How to Create Benime Whiteboard Animation in Android
We will also be giving you tips on all you need to know about creating a whiteboard animation:
● Write a script, whether it is a short script or a regular video. The whiteboard animation video might not succeed with exciting information and images and no coherent story. Since it is not a set of bullet points, storyboards, or blog stories, having a proper script is everything you need.
● Next is to start your storyboard to help you organize your thoughts much better. By creating a storyboard, you have a good idea of how the final product will look like and the transition of the story.
● Create memorable photos that will excite your audience. Perhaps if you are a creative person, this part will be much easier as all you need is to create a unique and fun image that will help pass the information that she wants to get across.
● Animates the created images and finds clearance between your script and the photos.
● Record the audio, which is the final step to ensure a perfectly synchronized audio and content.
Benime Whiteboard Animation application offers tons of features that can be used to enhance whiteboard animation creation. More so, here is a step-by-guide on how to use the Benime application more effectively and efficiently in creating a whiteboard animation:
01Software Download
First, download and install the Benime application on your phone and then open it.
02Create New Video
Click on the + sign to make a new video. Enter the video title, choose the desired video quality, and click Create a Movie.
03Enter Text
A blank slide will be visible, where you will make changes, tap the Text option to enter the text.
04Edit Text
After entering your desired text, click on the Insert option. The text size can be changeable by swiping to the left or right on the size line. More so, you can edit the color of the text by clicking on the color option. You can also change and use the application by clicking on the hand option. Background color change can go with the BG option.
If you want to insert some characters, drawings, pictures, etc. Click on the sticker option at the bottom left and then slide to the right at the top to choose the icon or image that you want to insert.
05Add Audio
After you are ok with the text and image, you can now add your voice over or music by clicking on any of the two options: voice over and music track.
05Create and Share your Video
Lastly, click on the Save icon and then click on Yes. Then insert the name of the video and click on Make movie. Instantly the video will enter the rendering mode, and after this process, you will get the option of playing and sharing the film. Select the one you wish.
Benime Whiteboard animation can also be on PC via varieties of software. However, the Filmora software has proven to be one of the best because of its features. While working or creating a storyboard, the most aptly used software is Filmora. That will make it easy to create whiteboard animation with lots and lots of editing options in terms of transparency, 2D/animation, smooth keyframing, and a lot more.
Part 3 PC Tools Useful For Whiteboard Animation
01Renderforest Whiteboard Animation
Renderforest whiteboard animation: This is a free whiteboard animation tool that creates exciting and unique animation stories, a cloud-based program that does not need a powerful machine. It weeds hundreds of ready-made scenes to enhance your whiteboard animation stories
02Powtoon Whiteboard Animation
This can make a whiteboard animation very quickly for free, with an object to touch up video and free royalty music to make your whiteboard animation perfect.
03Fiverr Whiteboard Animation
If looking for different whiteboard and animation explainers, Fiverr whiteboard animation will be the right choice. That will assist you in how to keep or engage your audience with proper explanation.
04Whiteboard Animation Videoscribe
Being in the education domain is a noble cause, and you can enhance the delivery of quality education through Whiteboard Animation Videoscribe. That will give you the freedom to modify your content with animation drawing. However, it is a subscription-based service.
05Vyond Whiteboard Animation
Vyond whiteboard animation provides you with in-house whiteboard animated video production solutions for educational, professional, or training purposes.
06Animaker Whiteboard Animation
This is another free whiteboard animation software used to make videos quickly with various functions. It includes a free-to-use option and a full video length that is enough. It supports a few props, characters, infographic icons, animated maps, charts, etc.
07Rawshorts Whiteboard Animation
This simple, easy-to-use whiteboard animation comes with an explainer video with a drag-and-drop interface. You can either start from nothing or choose between the animated whiteboard templates. Rendering and sharing the animated video in this software is super easy and comes with a Facebook, YouTube, and other social media platform integration. Anyone can use whether you are a beginner or professional, creating videos to show your client, training videos, and marketing videos that help demonstrate a strategy.
08Videojeeves Whiteboard Animation
This software has many whiteboard animation options, whether you are open to sharing something with your friends or creating a whiteboard animation for work. It helps to make your job easier and faster.
09Truscribe Whiteboard Animation
This premier software offers customers a dedicated plan when they are whiteboard animation videos can be created. With this software, the process can start when customers request a quote on their website, giving them more reliable information about the pricing and strategy.
● Key Takeaways from This Episode →
● Basic functionality of Benime Whiteboard Animation software.
● How to create whiteboard animation with Benime.
● Whiteboard animation on PC with Filmora and some other relevant software.
10 2D/3D Animation Tips & Tricks to Bring New Ideas to You
10 2D/3D Animation Tips & Tricks to Bring New Ideas to You

Shanoon Cox
Mar 27, 2024• Proven solutions
Animation is a skill that you need years to practice. However, the learning process can be boosted if you master some animation tips. If you’re looking for great 2D/3D animation tips and tricks, this is what we will offer here.
There are some overlaps between 2D and 3D animation tips like practicing and object pose, but in essence, animation tips can be learned commonly.
These animation tips will help you make your 2D and 3D animations as bold and creative as possible, while reduce your workload and enable you to get your work out into the world quicker with excellent animation software . Let’s take a look at the top 10 2D/3D animation tips and tricks right now.
- Part 1: 2D Animation Tips for Beginners
- Part 2: 3D Animation Tips for Beginners
- Part 3: Frequently Asked Questions about Animation Tips
You may also like: Top 10 Anime Websites to Watch Anime Free
Part 1: 2D Animation Tips for Beginners
1. Find a reference in the real world
This first 2D animation tip is to find a reference. Using a real-world reference can help you animate faces effectively. When studios work with voice-over artists , they often record their facial movements so 2D animators can work with them and ensure their expressions are captured convincingly.
If this isn’t possible, consider using your face, so you have something to refer back to. You could use a mirror and speak the words your character will be saying into it. This can help you get the animated expressions just right.

2. Observe real life
The second animation tip is about observation. One of the key aspects of 2D animation is bringing life to animate objections. You need to think hard about how emotion can be portrayed and choose each movement carefully.
Spend time watching how people in real-life environments talk and interact with each one another, how they move, and how they express emotion. People-watching can be worth its weight in gold when it comes to preparing animations for 2D. Don’t be afraid to spend a great deal of time doing this, as it can be counted as valuable research.

3. Simplicity is the key
2D animation is never complicated compared with 3D. Think carefully before making a scene too complex. If there is too much information to digest, the overall effect can be one of confusion, and you may even find yourself compromising the realism of the scene. Try not to litter the scene with too many pose changes or other elements, and keep it authentic.

4. Draw animation again and again
Drawing animation takes a lot of time. It can’t be finished within one day, so you better know deep down that one piece of work only can be done after you have revised it many times. For 2D animation, it means you need to draw objects on paper many times.
In other words, the animation is a skill that needs practice and time. You can’t master it quickly. Luckily, all pains will be rewarded someday.

5. Feedback is crucial
Feedback is an essential part of artistic development . It’s wise to actively seek out commentary from knowledgeable figures who can help you improve. Naturally, we may see work we have invested a great deal of time and effort indifferently to someone not so involved in the creative process. Feedback can equate to a valuable learning opportunity that will help you make the result hit the spot much more convincingly.

Part 2: 3D Animation Tips for Beginners
Speaking of 3D animation, we think it is not easy to start at first. In this case, you need more tips and tricks.
6. Carefully use keyframing
3D Animation is all about poses. Remember, this animation tip is crucial. Individual frames come together to create movement and tell a story. The keyframes in 3D animation videos are the first and last movements in any sequence. You need to create strong first and last poses for your movements before deciding what happens between them. You must make these poses as memorable and powerful as you can.

7. Evaluate constructive criticism
It’s vital to pay attention to constructive criticism rather than simply choosing to ignore it. Most examples of constructive criticism aren’t about offending you, and friendly advice can play a pivotal role in helping you get the results that you are looking for.
This 3D animation tip can take years to reach the level you want to when it comes to the animation industry. Even if you don’t receive a great deal of or even any positive feedback, the people offering their comments may simply be trying to help you so you can improve. You may find that the criticism is being made purely because of personal preference on the part of the commentator.

8. Take the rhythm in animation
For 3D stop motion animation video, rhythm is an element to do storytelling. The best 3D animations have a strong sense of rhythm and a natural movement flow. Many inexperienced animators have found themselves animating too fast or slow. Don’t worry if you have this problem in the early days, as chances are you’ll start to get it right with time. Timing and spacing between your frames create movement in your animation. With time, you will get a better idea of how many frames you need to move the object from point A to B.

9. Basic model
You may see your system working too hard when you use a high-res model , and this can dramatically slow down the animation process. When you playback the animation in real-time, you may not see every frame. If you are working on the motion of a character, use a simple proxy 3D model to prevent this problem. You can then work more effectively with movement and return the more complex model to the process later.

10. Use ‘shark fin’
This is a advanced 3D animation tip for you. A curve known as the ‘shark fin’ is often used for facial animation processes. This can help you represent rapid facial movements, including those involving the lips and eyebrows. Faces can move very quickly, so it’s wise to make expressions occur within just one or two frames, or three if the spacing demands it.

Part 3: Frequently Asked Questions about Animation Tips
Below are four FAQs about 2D and 3D animation tips that people have asked many times. Hope they are helpful.
1. Are there any animation tricks to use?
We must say muting dialogue is one trick you should know. If your audio is on, you need to listen to it again and again. Thus, audio can disturb your creating process. After you finished the animation, you can turn audio on to revise the animation.
Besides, when you do animation, another trick is you can pause the post before the character goes into the next pose. It is a commonly used trick used by professionals, so you might think it is useful.
2. Is animation hard to learn?
Many beginners are wondering is it difficult to learn animation. The answer is NO if you are about to learn 2D animation. Many tutorials and lessons are easy to find in the market. However, if you start on 3D animation, it will be much harder than you thought. In this case, we recommend you learning 2D animation first.
3. Can I learn animation on my own?
You can learn animation on your own, but that’s not the best way. We recommend you learning animation by attending a training class , especially if you are a starter. You can build a solid animation knowledge base fast compared with learning on your own.
4. How can I get better at animation?
The best answer to get better is to imitate and practice. This tip is the most useful, practical, but difficult to complete one. If you can practice like half a year, you will get much better at animation.
Conclusion
By taking the above animation tips, you can create engaging, inspiring, and unforgettable animations that will captivate your audience. Why not get started following these animation tips right now?
Shanoon Cox
Shanoon Cox is a writer and a lover of all things video.
Follow @Shanoon Cox
Shanoon Cox
Mar 27, 2024• Proven solutions
Animation is a skill that you need years to practice. However, the learning process can be boosted if you master some animation tips. If you’re looking for great 2D/3D animation tips and tricks, this is what we will offer here.
There are some overlaps between 2D and 3D animation tips like practicing and object pose, but in essence, animation tips can be learned commonly.
These animation tips will help you make your 2D and 3D animations as bold and creative as possible, while reduce your workload and enable you to get your work out into the world quicker with excellent animation software . Let’s take a look at the top 10 2D/3D animation tips and tricks right now.
- Part 1: 2D Animation Tips for Beginners
- Part 2: 3D Animation Tips for Beginners
- Part 3: Frequently Asked Questions about Animation Tips
You may also like: Top 10 Anime Websites to Watch Anime Free
Part 1: 2D Animation Tips for Beginners
1. Find a reference in the real world
This first 2D animation tip is to find a reference. Using a real-world reference can help you animate faces effectively. When studios work with voice-over artists , they often record their facial movements so 2D animators can work with them and ensure their expressions are captured convincingly.
If this isn’t possible, consider using your face, so you have something to refer back to. You could use a mirror and speak the words your character will be saying into it. This can help you get the animated expressions just right.
2. Observe real life
The second animation tip is about observation. One of the key aspects of 2D animation is bringing life to animate objections. You need to think hard about how emotion can be portrayed and choose each movement carefully.
Spend time watching how people in real-life environments talk and interact with each one another, how they move, and how they express emotion. People-watching can be worth its weight in gold when it comes to preparing animations for 2D. Don’t be afraid to spend a great deal of time doing this, as it can be counted as valuable research.
3. Simplicity is the key
2D animation is never complicated compared with 3D. Think carefully before making a scene too complex. If there is too much information to digest, the overall effect can be one of confusion, and you may even find yourself compromising the realism of the scene. Try not to litter the scene with too many pose changes or other elements, and keep it authentic.
4. Draw animation again and again
Drawing animation takes a lot of time. It can’t be finished within one day, so you better know deep down that one piece of work only can be done after you have revised it many times. For 2D animation, it means you need to draw objects on paper many times.
In other words, the animation is a skill that needs practice and time. You can’t master it quickly. Luckily, all pains will be rewarded someday.
5. Feedback is crucial
Feedback is an essential part of artistic development . It’s wise to actively seek out commentary from knowledgeable figures who can help you improve. Naturally, we may see work we have invested a great deal of time and effort indifferently to someone not so involved in the creative process. Feedback can equate to a valuable learning opportunity that will help you make the result hit the spot much more convincingly.
Part 2: 3D Animation Tips for Beginners
Speaking of 3D animation, we think it is not easy to start at first. In this case, you need more tips and tricks.
6. Carefully use keyframing
3D Animation is all about poses. Remember, this animation tip is crucial. Individual frames come together to create movement and tell a story. The keyframes in 3D animation videos are the first and last movements in any sequence. You need to create strong first and last poses for your movements before deciding what happens between them. You must make these poses as memorable and powerful as you can.
7. Evaluate constructive criticism
It’s vital to pay attention to constructive criticism rather than simply choosing to ignore it. Most examples of constructive criticism aren’t about offending you, and friendly advice can play a pivotal role in helping you get the results that you are looking for.
This 3D animation tip can take years to reach the level you want to when it comes to the animation industry. Even if you don’t receive a great deal of or even any positive feedback, the people offering their comments may simply be trying to help you so you can improve. You may find that the criticism is being made purely because of personal preference on the part of the commentator.
8. Take the rhythm in animation
For 3D stop motion animation video, rhythm is an element to do storytelling. The best 3D animations have a strong sense of rhythm and a natural movement flow. Many inexperienced animators have found themselves animating too fast or slow. Don’t worry if you have this problem in the early days, as chances are you’ll start to get it right with time. Timing and spacing between your frames create movement in your animation. With time, you will get a better idea of how many frames you need to move the object from point A to B.
9. Basic model
You may see your system working too hard when you use a high-res model , and this can dramatically slow down the animation process. When you playback the animation in real-time, you may not see every frame. If you are working on the motion of a character, use a simple proxy 3D model to prevent this problem. You can then work more effectively with movement and return the more complex model to the process later.
10. Use ‘shark fin’
This is a advanced 3D animation tip for you. A curve known as the ‘shark fin’ is often used for facial animation processes. This can help you represent rapid facial movements, including those involving the lips and eyebrows. Faces can move very quickly, so it’s wise to make expressions occur within just one or two frames, or three if the spacing demands it.
Part 3: Frequently Asked Questions about Animation Tips
Below are four FAQs about 2D and 3D animation tips that people have asked many times. Hope they are helpful.
1. Are there any animation tricks to use?
We must say muting dialogue is one trick you should know. If your audio is on, you need to listen to it again and again. Thus, audio can disturb your creating process. After you finished the animation, you can turn audio on to revise the animation.
Besides, when you do animation, another trick is you can pause the post before the character goes into the next pose. It is a commonly used trick used by professionals, so you might think it is useful.
2. Is animation hard to learn?
Many beginners are wondering is it difficult to learn animation. The answer is NO if you are about to learn 2D animation. Many tutorials and lessons are easy to find in the market. However, if you start on 3D animation, it will be much harder than you thought. In this case, we recommend you learning 2D animation first.
3. Can I learn animation on my own?
You can learn animation on your own, but that’s not the best way. We recommend you learning animation by attending a training class , especially if you are a starter. You can build a solid animation knowledge base fast compared with learning on your own.
4. How can I get better at animation?
The best answer to get better is to imitate and practice. This tip is the most useful, practical, but difficult to complete one. If you can practice like half a year, you will get much better at animation.
Conclusion
By taking the above animation tips, you can create engaging, inspiring, and unforgettable animations that will captivate your audience. Why not get started following these animation tips right now?
Shanoon Cox
Shanoon Cox is a writer and a lover of all things video.
Follow @Shanoon Cox
How To Remove The Endless Loop From Animated GIF
How To Remove The Endless Loop From Animated GIF
Shanoon Cox
Mar 27, 2024• Proven solutions
People may discover for themselves a lot of eye-catching looping gifs on the Internet that is of great interest to them. But sometimes, you may want to give an ending for your gif for a special effect. Then, here this article will show you how to do it with ease.
How to Remove Loop From GIFs
The answer to the problem is very simple. Just open a GIF editor (or an editor that supports GIFs), then choose Remove loop option, and resave it. There are many freeware or online GIF editors that can help you achieve this. If you have no idea which one to choose and how to use it, this guide will help you a lot.
Do you want to convert video to GIF or do you want to edit your GIFs? Wondershare Filmora is the best choice for you to create GIFs from videos and photos, while you can add text, overlays, or combine multiple GIFs together easily with Filmora.
However, if you want to make a GIF online, Filmora meme maker is your ultimate solution. It helps you make image, GIF and video memes directly without watermark. It is totally FREE to use and no sign up. You can change text size, color and position to create caption when you are editing. You can also put text inside or outside in GIF. Just with a few clicks, your GIF is done . Try it now Download Mac Version ](https://tools.techidaily.com/wondershare/filmora/download/ )
Online Solutions to Stop Endless GIF Loop
1. Lunapic
How:
- First, you head over to the Lunapic website.
- Click the Browse icon to upload your GIF image from your home computer. You can also type out the URL, then select Open from URL and select Go. It is that simple.
- Select or click on the Animation icon from the top menu.
- Select Edit GIF Animation.
- Click the drop down menu and decide on the number of loops for the GIF image.
- Hit the Apply button.
Pros:
- User friendly and free
- Zooming, adding text, splitting and rotating are excellent tools to use on this application
Cons:
- Not being able to use it without Internet.
- Very slowly while uploading large files.
2. GIFCREATOR.ME:
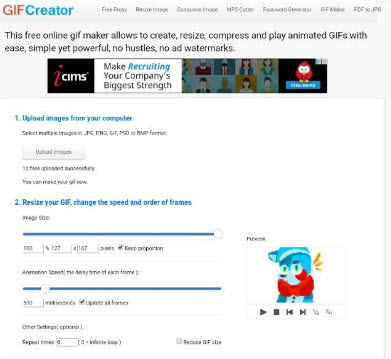
How:
- Upload the GIF pictures from your laptop computer.
- Compress the size of your GIF pictures.
- Set repeat times, 0=infinite loop
- Click Create Animation icon button
Pros:
- User friendly and easy to use. Free
Cons:
- Cannot be used without an internet connection.
- Cannot perform any other editing like correcting the color, adding additional text or cropping a GIF photo.
3. Ezgif.com

How:
- Choose the GIF image file that you want to use.
- Upload the image to Ezgif.com.
- Drag or drop your photos in the order that you desire.
- Set the Loop with the count of how many times you want it to loop. If it is empty, the loop is infinite.
- Select Animate It.
Pros:
- User friendly and free.
- Can do basic editing like adding new text, effects, cropping photos, splitting, and resizing your images. Cons: very slow, interface not intuitive
Cons:
- very slow, interface not intuitive Ask internet connection
Desktop Solutions to Removing Loops from GIFs
1. Photoshop

How:
- Open your file on the Photoshop.
- Select the File icon and press the Save for Web icon.
- Check if the Animation button on the bottom of the save dialog is no longer the color of grey.
- Set looping count and then click on the preview menu for the animation. Then, you click Save.
Pros:
- Professional, offers you many other advanced editing features
Cons:
- Pricy, complicated.
2. Beneton Movie GIF
How:
- Open your GIF images.
- Uncheck the ‘loop’ box in the bottom left
- Save.
Pros:
- a very small program that can get the job done.
Cons:
- crash sometimes.
3. Falco GIF Animator

How:
- Open your GIF using the program
- Uncheck the “repeat forever” box in the bottom right
- Then “save as” from the file menu
Pros:
- Opens large GIFs without problems
- Simple and straightforward.
- A lot of useful GIF editing functions that you will like if you need to work with GIFs in general.
Cons:
- Bundled with some other software you might not need. So be sure to uncheck the options you don’t want.
4. GIMP
How:
- Open your GIF, then resave it.
- You will be presented with a number of screens during the saving process.
- Make sure to ‘save as animation’ and then uncheck ‘loop forever’ as shown in the screenshots above.
Pros:
- Upload large GIFs without problems
Cons:
- It may be too large if you just want to a quick solution for GIF
- Changes the color of white spaces in GIFs
Frequently Asked Questions About Removing Loops from GIFs
1. How To Stop A GIF From Looping?
Even though GIFs can be saved as infinite loops, this isn’t a mandatory option, as most GIF editors enable you to choose if you want a GIF to be a loop or not. Import a GIF into the editor you are using and then make sure that the Remove Loop option is selected.
This will effectively stop the GIF file from replaying once it reaches the end, so you can proceed to export the GIF from the editor. Keep in mind that some GIF editors don’t allow you to set the Loop count and leaving this box empty will create an infinite loop.
2. How To Set A GIF Loop Count?
Nearly all GIF editors allow you to specify how many loops a GIF is going to make before it comes to a stop. All you need to do in order to set the loop count for a GIF is import it into a GIF editor and click the Edit GIF option.
You will see the loop count box, among other options so you can simply insert the value you want and confirm the changes you’ve made. Afterward, you should export the GIF you edited and it will have the loop as many times as you specified.
Shanoon Cox
Shanoon Cox is a writer and a lover of all things video.
Follow @Shanoon Cox
Shanoon Cox
Mar 27, 2024• Proven solutions
People may discover for themselves a lot of eye-catching looping gifs on the Internet that is of great interest to them. But sometimes, you may want to give an ending for your gif for a special effect. Then, here this article will show you how to do it with ease.
How to Remove Loop From GIFs
The answer to the problem is very simple. Just open a GIF editor (or an editor that supports GIFs), then choose Remove loop option, and resave it. There are many freeware or online GIF editors that can help you achieve this. If you have no idea which one to choose and how to use it, this guide will help you a lot.
Do you want to convert video to GIF or do you want to edit your GIFs? Wondershare Filmora is the best choice for you to create GIFs from videos and photos, while you can add text, overlays, or combine multiple GIFs together easily with Filmora.
However, if you want to make a GIF online, Filmora meme maker is your ultimate solution. It helps you make image, GIF and video memes directly without watermark. It is totally FREE to use and no sign up. You can change text size, color and position to create caption when you are editing. You can also put text inside or outside in GIF. Just with a few clicks, your GIF is done . Try it now Download Mac Version ](https://tools.techidaily.com/wondershare/filmora/download/ )
Online Solutions to Stop Endless GIF Loop
1. Lunapic
How:
- First, you head over to the Lunapic website.
- Click the Browse icon to upload your GIF image from your home computer. You can also type out the URL, then select Open from URL and select Go. It is that simple.
- Select or click on the Animation icon from the top menu.
- Select Edit GIF Animation.
- Click the drop down menu and decide on the number of loops for the GIF image.
- Hit the Apply button.
Pros:
- User friendly and free
- Zooming, adding text, splitting and rotating are excellent tools to use on this application
Cons:
- Not being able to use it without Internet.
- Very slowly while uploading large files.
2. GIFCREATOR.ME:
How:
- Upload the GIF pictures from your laptop computer.
- Compress the size of your GIF pictures.
- Set repeat times, 0=infinite loop
- Click Create Animation icon button
Pros:
- User friendly and easy to use. Free
Cons:
- Cannot be used without an internet connection.
- Cannot perform any other editing like correcting the color, adding additional text or cropping a GIF photo.
3. Ezgif.com
How:
- Choose the GIF image file that you want to use.
- Upload the image to Ezgif.com.
- Drag or drop your photos in the order that you desire.
- Set the Loop with the count of how many times you want it to loop. If it is empty, the loop is infinite.
- Select Animate It.
Pros:
- User friendly and free.
- Can do basic editing like adding new text, effects, cropping photos, splitting, and resizing your images. Cons: very slow, interface not intuitive
Cons:
- very slow, interface not intuitive Ask internet connection
Desktop Solutions to Removing Loops from GIFs
1. Photoshop
How:
- Open your file on the Photoshop.
- Select the File icon and press the Save for Web icon.
- Check if the Animation button on the bottom of the save dialog is no longer the color of grey.
- Set looping count and then click on the preview menu for the animation. Then, you click Save.
Pros:
- Professional, offers you many other advanced editing features
Cons:
- Pricy, complicated.
2. Beneton Movie GIF
How:
- Open your GIF images.
- Uncheck the ‘loop’ box in the bottom left
- Save.
Pros:
- a very small program that can get the job done.
Cons:
- crash sometimes.
3. Falco GIF Animator
How:
- Open your GIF using the program
- Uncheck the “repeat forever” box in the bottom right
- Then “save as” from the file menu
Pros:
- Opens large GIFs without problems
- Simple and straightforward.
- A lot of useful GIF editing functions that you will like if you need to work with GIFs in general.
Cons:
- Bundled with some other software you might not need. So be sure to uncheck the options you don’t want.
4. GIMP
How:
- Open your GIF, then resave it.
- You will be presented with a number of screens during the saving process.
- Make sure to ‘save as animation’ and then uncheck ‘loop forever’ as shown in the screenshots above.
Pros:
- Upload large GIFs without problems
Cons:
- It may be too large if you just want to a quick solution for GIF
- Changes the color of white spaces in GIFs
Frequently Asked Questions About Removing Loops from GIFs
1. How To Stop A GIF From Looping?
Even though GIFs can be saved as infinite loops, this isn’t a mandatory option, as most GIF editors enable you to choose if you want a GIF to be a loop or not. Import a GIF into the editor you are using and then make sure that the Remove Loop option is selected.
This will effectively stop the GIF file from replaying once it reaches the end, so you can proceed to export the GIF from the editor. Keep in mind that some GIF editors don’t allow you to set the Loop count and leaving this box empty will create an infinite loop.
2. How To Set A GIF Loop Count?
Nearly all GIF editors allow you to specify how many loops a GIF is going to make before it comes to a stop. All you need to do in order to set the loop count for a GIF is import it into a GIF editor and click the Edit GIF option.
You will see the loop count box, among other options so you can simply insert the value you want and confirm the changes you’ve made. Afterward, you should export the GIF you edited and it will have the loop as many times as you specified.
Shanoon Cox
Shanoon Cox is a writer and a lover of all things video.
Follow @Shanoon Cox
Are You Head Over Heels With 3D Animation Design?
Are You Head Over Heels With 3D Animation Design?
An easy yet powerful editor
Numerous effects to choose from
Detailed tutorials provided by the official channel
3D animation design is an acronym for three-dimensional animation, meaning that the backgrounds and characters in this project are in a three-dimensional space. 3D animation artist makes use of computer graphics to make the object looks like they’re moving in a three-dimensional space.
Today, 3D animation design and animation are trendy, helpful, and in high demand to both the designer and the animator. Animation tools are beneficial to create a background, storyboards, models, and after-effects and can also be used to animate characters from movies, commercials, and televisions.
In this article
01 [What is a Bachelor of 3D Design and Animation?](#Part 1)
02 [Best 3D Animation and Design Software for Beginners and Professionals](#Part 2)
Part 1 What is a Bachelor of 3D Design and Animation?
It is a fact that anything that has to do with computer-generated graphics like 3D animation is a growing field and required in high demand due to the advancement of ICT around the world, and it is an advanced form of design. If you’re aspiring to be a professional interior designer, you should consider adding the value of 3D animation interior designing skills to your resume.
The bachelor of 3D designs and animation provides you with skills, knowledge, and experience in rigging, animation, lighting, texturing, compositing, and modeling. The course will help you get your practical skill in 3D designs, animation, and interactivity in the game industry, and the study of professional practice in 3D animation and character design workplaces. There are also several reasons why learning 3D makes sense which include:
● Graphic design with 3D animation saves time. It gives you more detail quality and brings imagination to reality.
● It opens you up to more professional opportunities.
● It keeps you in line with the modern world.
● 3D animation character design allows you to challenge yourself by expanding your skill and growing your portfolio to stay abreast and improve yourself.
● The 3D animation design allows you to create a more detailed and realistic concept for better design evaluation.
● It allows you to make a new creative workflow.
● The production of a wide range of 3D software makes it easier to create 3D designs.
● There are plenty online resources to learn 3D designs.
● 3D animation interior design opens new career opportunities and increases the marketability of your skill as a designer.
Part 2 Best 3D Animation and Design Software for Beginners and Professionals
3D modeling has improved the way we design. It is vital to use decent software to produce the best output because it improves your Design accuracy and efficiency and helps the designer and end-user visualize space requirements. There is excellent graphic design possibility with 3D animation software for creating a perfect design used by beginners and professionals, and this software includes:
01Best 3D Animation and Design Software for Beginners
● Adobe’s Creative Cloud
Adobe’s Creative Cloud is a straightforward 3D animation house design tool for beginners. It is a subscription-based service that provides over 20 desktop and mobile designing apps for UX, web, video, photography, etc. If you need a medium to showcase your work, you are at the right place as it does not just display your work but also gives ideas on characters design, colors, photographs, videos, icons, etc.
● ****Wondershare Filmora Video Editor **
For Win 7 or later (64-bit)
For macOS 10.12 or later
Filmora is one of the most accessible 3D animation design software for beginners. This software allows you to create various shapes of your choice, add a keyframe in for the movement, fine-tuning to make it smooth, and also allows you to add visual text, color, and effects before exporting it.
● Seamless3d
Seamless3d Is 100-percent free, open-source 3D software that you can download and helps you create specialized 3D design and animation videos images or 3D characters. It also supports FFmpeg video formats such as AVI, MP4, etc.
● Stykz
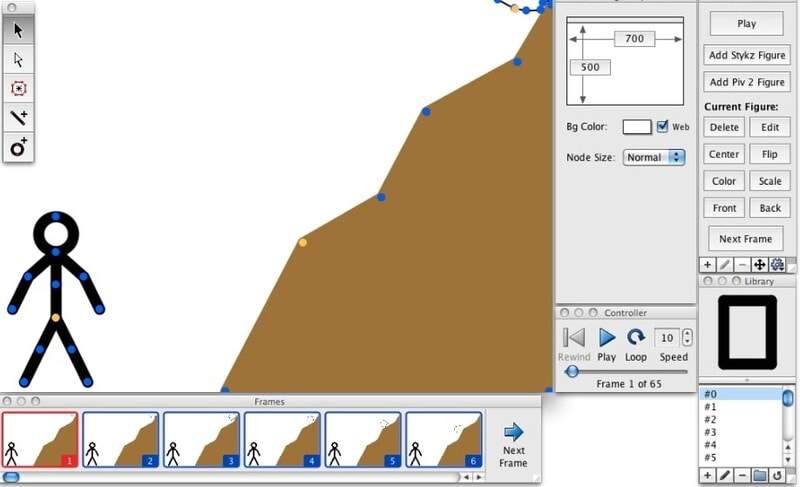
Stykz is an easy-to-use and straightforward animation program for beginners. It is entirely free and easy to customize without a watermark.
● Maya
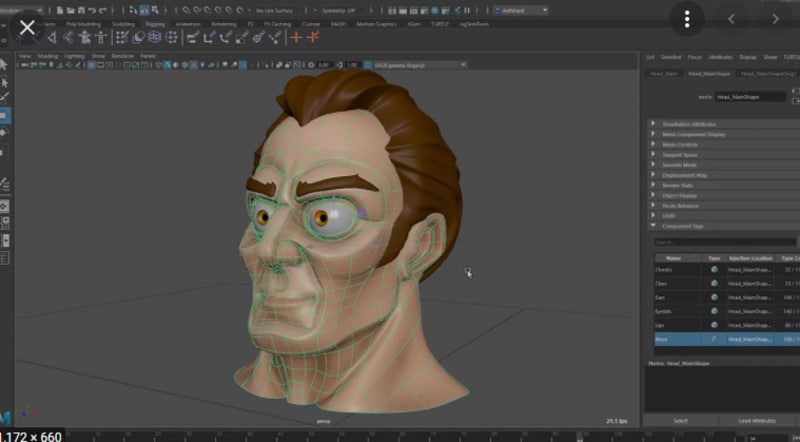
Maya is a user-friendly beginner software for 3D animation character design, wearable technology, and motion graphics. This software has various 3D rendering and shading features that impact GPU, which helps speed up the workflow.
02Best 3D Animation and Design Software for Professionals
● SketchUp Pro
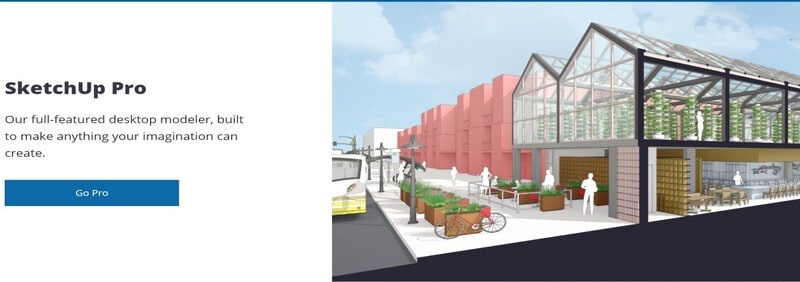
SketchUp Pro is the best 3D animation design software most companies and designers use to automatically transform 3D models into 2D design. It gives your 3D animation home design a personalized touch with the help of its customized features.
● iclone 7
iclone 7 is one of the fastest 3D animation design tools professionals use to create animation movies, content creation, video games education, and art. It is a paid to that is packed with many features to help your design.
● Arnold
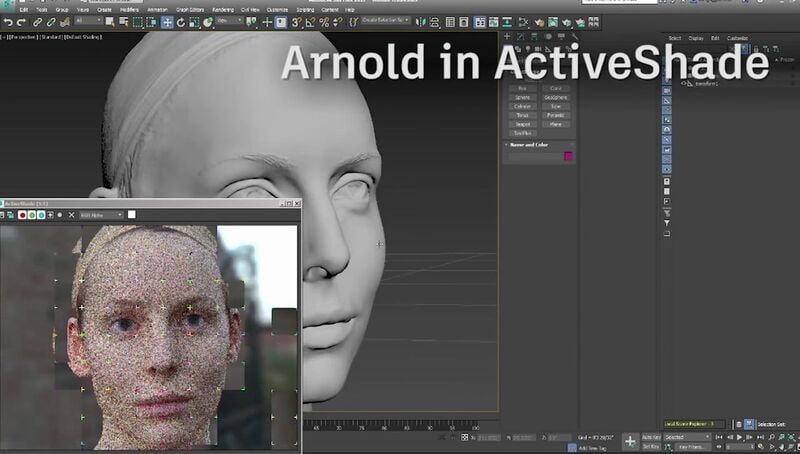
Arnold is a paid 3D software that allows you to render 3D images in high quality quickly. It also interactively produces immediate results and leaves more iteration time with an intuitive and straightforward UI control.
● Akeytsu
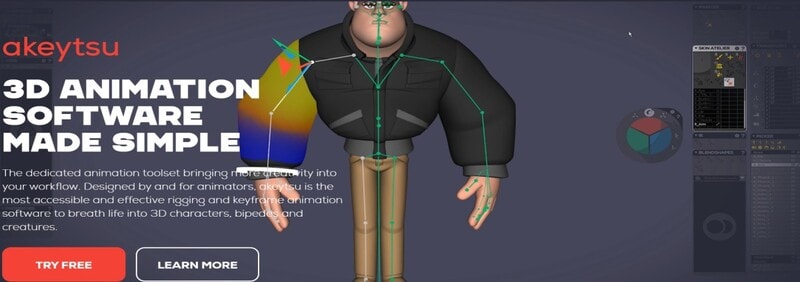
Akeytsu is a 3D design software for animation well known for its creativity and crafts. It makes designing 3D animation house design much more accessible with its cycle of animation tools.
● Blender
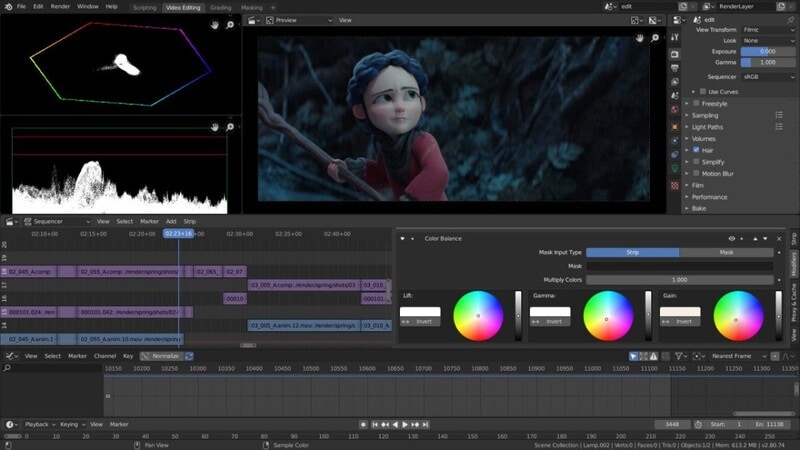
Blender is a good alternative for 3D design and animation open-source software professionals. It is a multi-functional platform that works on Windows MacBook and Linux computers and ensures that you have a smooth experience in 3D designs.
● Key Takeaways from This Episode →
● Understanding what is a Bachelor of 3D design and animation?
● Best 3D animation and character design Software for Beginners and Professionals
● Finding out why 3D animation makes sense.
3D animation design is an acronym for three-dimensional animation, meaning that the backgrounds and characters in this project are in a three-dimensional space. 3D animation artist makes use of computer graphics to make the object looks like they’re moving in a three-dimensional space.
Today, 3D animation design and animation are trendy, helpful, and in high demand to both the designer and the animator. Animation tools are beneficial to create a background, storyboards, models, and after-effects and can also be used to animate characters from movies, commercials, and televisions.
In this article
01 [What is a Bachelor of 3D Design and Animation?](#Part 1)
02 [Best 3D Animation and Design Software for Beginners and Professionals](#Part 2)
Part 1 What is a Bachelor of 3D Design and Animation?
It is a fact that anything that has to do with computer-generated graphics like 3D animation is a growing field and required in high demand due to the advancement of ICT around the world, and it is an advanced form of design. If you’re aspiring to be a professional interior designer, you should consider adding the value of 3D animation interior designing skills to your resume.
The bachelor of 3D designs and animation provides you with skills, knowledge, and experience in rigging, animation, lighting, texturing, compositing, and modeling. The course will help you get your practical skill in 3D designs, animation, and interactivity in the game industry, and the study of professional practice in 3D animation and character design workplaces. There are also several reasons why learning 3D makes sense which include:
● Graphic design with 3D animation saves time. It gives you more detail quality and brings imagination to reality.
● It opens you up to more professional opportunities.
● It keeps you in line with the modern world.
● 3D animation character design allows you to challenge yourself by expanding your skill and growing your portfolio to stay abreast and improve yourself.
● The 3D animation design allows you to create a more detailed and realistic concept for better design evaluation.
● It allows you to make a new creative workflow.
● The production of a wide range of 3D software makes it easier to create 3D designs.
● There are plenty online resources to learn 3D designs.
● 3D animation interior design opens new career opportunities and increases the marketability of your skill as a designer.
Part 2 Best 3D Animation and Design Software for Beginners and Professionals
3D modeling has improved the way we design. It is vital to use decent software to produce the best output because it improves your Design accuracy and efficiency and helps the designer and end-user visualize space requirements. There is excellent graphic design possibility with 3D animation software for creating a perfect design used by beginners and professionals, and this software includes:
01Best 3D Animation and Design Software for Beginners
● Adobe’s Creative Cloud
Adobe’s Creative Cloud is a straightforward 3D animation house design tool for beginners. It is a subscription-based service that provides over 20 desktop and mobile designing apps for UX, web, video, photography, etc. If you need a medium to showcase your work, you are at the right place as it does not just display your work but also gives ideas on characters design, colors, photographs, videos, icons, etc.
● ****Wondershare Filmora Video Editor **
For Win 7 or later (64-bit)
For macOS 10.12 or later
Filmora is one of the most accessible 3D animation design software for beginners. This software allows you to create various shapes of your choice, add a keyframe in for the movement, fine-tuning to make it smooth, and also allows you to add visual text, color, and effects before exporting it.
● Seamless3d
Seamless3d Is 100-percent free, open-source 3D software that you can download and helps you create specialized 3D design and animation videos images or 3D characters. It also supports FFmpeg video formats such as AVI, MP4, etc.
● Stykz
Stykz is an easy-to-use and straightforward animation program for beginners. It is entirely free and easy to customize without a watermark.
● Maya
Maya is a user-friendly beginner software for 3D animation character design, wearable technology, and motion graphics. This software has various 3D rendering and shading features that impact GPU, which helps speed up the workflow.
02Best 3D Animation and Design Software for Professionals
● SketchUp Pro
SketchUp Pro is the best 3D animation design software most companies and designers use to automatically transform 3D models into 2D design. It gives your 3D animation home design a personalized touch with the help of its customized features.
● iclone 7
iclone 7 is one of the fastest 3D animation design tools professionals use to create animation movies, content creation, video games education, and art. It is a paid to that is packed with many features to help your design.
● Arnold
Arnold is a paid 3D software that allows you to render 3D images in high quality quickly. It also interactively produces immediate results and leaves more iteration time with an intuitive and straightforward UI control.
● Akeytsu
Akeytsu is a 3D design software for animation well known for its creativity and crafts. It makes designing 3D animation house design much more accessible with its cycle of animation tools.
● Blender
Blender is a good alternative for 3D design and animation open-source software professionals. It is a multi-functional platform that works on Windows MacBook and Linux computers and ensures that you have a smooth experience in 3D designs.
● Key Takeaways from This Episode →
● Understanding what is a Bachelor of 3D design and animation?
● Best 3D animation and character design Software for Beginners and Professionals
● Finding out why 3D animation makes sense.
Also read:
- Some Must-Know Useful Lego Animation Ideas for You
- New How to Create Picsart Cartoon in Simple Ways
- Updated 2024 Approved How to Liven Up Your Animate Website on Scroll
- Updated 2024 Approved 6 Unexpected Ways Gif Animation Maker Can Affect Your Marketing
- Best 10 Anime Websites to Watch Dubbed Anime Free
- Top 7 Animated GIF Text Makers
- In 2024, How To Turn Yourself Into Anime Character
- New 2024 Approved 12 Websites with Triggered Animate on Scroll Examples
- New Top 10 Cartoon Canvas Painting Ideas for Total Beginners for 2024
- 6 Proven Ways to Dub Anime for Anime Voice Actor for 2024
- New 5 Techniques You Never Heard of for Converting MP4 to GIF in Photoshop for 2024
- Updated In 2024, The 10 Most Adorable Aesthetic Cartoon Characters
- New 2024 Approved Top 15 Greatest Claymation Movies of All Time
- 2024 Approved Top Tips for Effortless Unity 3D Animation
- Top 10 Best and Fast Ways to Turn Image Into Gif
- 2024 Approved Some Must-Know Useful Lego Animation Ideas
- New How to Make a Video a Live Photo 2023 for 2024
- New 2024 Approved 8 Best Motion Graphics Online Tools for Your Inspiration
- In 2024, Whats Rigging Animation
- In 2024, 10 Stunning Stop Motion Movies That You Should Not Miss
- New 15 Types of Cartoon Drawing Styles Examples for 2024
- 5 Best Adobe Animate Courses & Classes | Beginners Complete Tutorial for 2024
- 10 Best Convert Video Between GIF Software High Quality
- New In 2024, That Will Make Aesthetic Cartoon Drawing More Understandable
- Updated 20 Best Anime Movies You Cannot Miss 2024 Update
- Updated How to Create Benime Whiteboard Animation on Android for 2024
- New 2024 Approved Top 3 Ways to Create Gif with Great 3D Gif Maker
- New In 2024, Whiteboard Animation Services Top 15 Animation Companies to Pick
- What Is Still Motion Animation?
- New In 2024, The Top Free 12 GIF Meme Maker at a Glance
- The Art of Comics - Learn How to Do Funny Cartoon Drawings
- New How to Find & Make Animated Christmas GIFs?
- 2024 Approved Why These 10 Top Text Motion Templates Are Worth Your Attention
- How To Turn Yourself Into Anime Character for 2024
- Ways to Create an Adobe Collage for 2024
- 2024 Approved The Best 8 Places for High-Quality Royalty Free Gifs (Paid and Free)
- 15 Types of Cartoon Drawing Styles Examples
- New 21 Top Free Anime Websites to Watch Anime Online-Anime for 2024
- In 2024, 10 Great Apps for Turning Funny Animated Images Into Comics
- New In 2024, Beginners Guide for Learning 3D Animation
- 6 Fixes to Unfortunately WhatsApp has stopped Error Popups On Nubia Red Magic 9 Pro | Dr.fone
- How to Fix Life360 Shows Wrong Location On OnePlus 12R? | Dr.fone
- 3 Solutions to Find Your Vivo V30 Lite 5G Current Location of a Mobile Number | Dr.fone
- How to Fix OnePlus Nord 3 5G Find My Friends No Location Found? | Dr.fone
- Top IMEI Unlokers for Your Vivo Y100 5G Phone
- What To Do When Tecno Spark 20C Has Black Screen of Death? | Dr.fone
- In 2024, How To Unlock Samsung Galaxy M34 Phone Without Password?
- Why does the pokemon go battle league not available On Vivo Y78+ (T1) Edition | Dr.fone
- In 2024, Ways To Find Unlocking Codes For Lava Blaze 2 Pro Phones
- In 2024, Top 10 Fingerprint Lock Apps to Lock Your Xiaomi 14 Phone
- How to Find iSpoofer Pro Activation Key On Oppo A59 5G? | Dr.fone
- Can Life360 Track Or See Text Messages? What Can You Do with Life360 On Samsung Galaxy A23 5G? | Dr.fone
- How To Fix Unresponsive Phone Touchscreen Of Nokia C12 Plus | Dr.fone
- How to Change Google Play Location On Xiaomi Redmi Note 12 Pro 5G | Dr.fone
- In 2024, Unova Stone Pokémon Go Evolution List and How Catch Them For Oppo A78 5G | Dr.fone
- Sim Unlock OnePlus 11R Phones without Code 2 Ways to Remove Android Sim Lock
- Title: 2024 Approved How to Cartoonize Photo Photoshop in Easy Steps
- Author: Elon
- Created at : 2024-06-30 12:28:12
- Updated at : 2024-07-01 12:28:12
- Link: https://animation-videos.techidaily.com/2024-approved-how-to-cartoonize-photo-photoshop-in-easy-steps/
- License: This work is licensed under CC BY-NC-SA 4.0.
