
:max_bytes(150000):strip_icc():format(webp)/woman-with-remote-cropped-getty-169707531-5b2ebd5943a1030036b1eb56.jpg)
2024 Approved How to Create a Whiteboard Video Step by Step 2023 Updated
How to Create a Whiteboard Video Step by Step [2023 Updated]
How to Create a Whiteboard Video Step by Step

Shanoon Cox
Mar 27, 2024• Proven solutions
Drawings will always have a special place in storytelling. Whether you are demonstrating a new concept to a child, highlighting the features of a product to your bosses, or showcasing the intricacies of a marketing campaign, drawings make it easier for the audience to understand what is being said.
That is why it is so important to learn how to create whiteboard animation. When you learn how to create a whiteboard video with animate pictures app , you are in a unique position when it comes to selling your story, and convincing others of what you already know.
- Part1: What is Whiteboard Animation Video?
- Part2: How to Create Whiteboard Animation Videos?
- Part3: Useful Tips for Creating Whiteboard Animation
Part 1:What is Whiteboard Animation Video?
To understand the whiteboard animation video, we must go back to the beginning. Think about how professors illustrate different topics and equations using a whiteboard. They will write down the important words or formulas and then expand on that information through their lecture.
Whiteboard animation is taking those words, phrases and images to another level. Whiteboard animation is a series of events or videos that are created using 2D animation software . These videos can be showcased in any type of setting. You can upload them onto a social media site, show them as part of a presentation, or add them to a crowdfunding or product funding page.
When someone watches a whiteboard animation video, they see the series of images and graphics in sequential order, and there is usually a narration accompanying those images. These videos can be short, anywhere from 30 to 90 seconds. The idea is to deliver information in a clear, coherent and concise way.
To create whiteboard animation, the goal is to take complex concepts and information, and make it easy to understand. Now we can go into some detail about how to create a whiteboard video.
Part 2:How to Create Whiteboard Animation Videos?
Step 1: Write a Script
Much like a normal video or a short skit, there must be a script if a whiteboard animation video is to succeed. Having interesting images and information is great, but they are nothing without a coherent story.
It is not a blog post, storyboard or a set of bullet points. What you need is a proper script, which says everything in regards to the video. Why? Because then you will know precisely what images should be added in certain sections, what the narrator must say, and what transitions are necessary.

Step 2: Start with the Storyboard
Now you have a script. You have a clear idea of how you want your video to come across. It is time to start creating the storyboard. With a storyboard, you will be able to organize your thoughts much better. You can see how each frame comes onto the screen, and how one shot ties into the other.
When you create your storyboard, you will have a good idea about how your final product will look. If there are some transitions you are not happy with, this is the moment where you can make changes.

Step 3: Create Images
If you are a creative person, you will find this part very easy. It is all about creating fun and unique images that will help convey the information that you want to get across. Try to create memorable images that will excite your audience. The simpler, more distinctive and interesting you can make those images, the better your end result.

Step 4: Animate Those Images
Now you have your images, and it is time to find some coherence between those images and your script. You will have to time the animation for your images as you do not want things lingering on the screen for too long, or being seen for a brief second. It may be a good idea for you to speak out the narration as you are animating the images and timing their animation. It will help you with the timing.

Step 5: Record and Sync the Audio
The final step involves getting your audio. Every animated video must have narration as it helps to explain what is happening in the images that people are seeing. Record your audio, and ensure it is perfectly in sync with your content.

Part 3:Useful Tips for Creating Whiteboard Animation
Evoke Empathy
The goal of a whiteboard animation video is not just to explain information in a cold and impersonal way. You are hoping to make a connection with your audience. You want them to care about what you are showcasing. By evoking empathy, you will create the connection that you desire.
By adding emotional references, such as funny, lighthearted, cute or emotional moments, you will find your videos are getting a much better reception from the audience. People can relate to content better when it makes them feel things - especially if those feelings are positive.
Personalize the Images
Showing interesting images is a good start. But if you can personalize these images with graphics and color, your storyboard will look even better. Remember that your goal is to get people to stand up and take notice of the content that you are creating.
Conclusion
Now that we have gone over the entire process of creating a whiteboard animation video, we hope that you are ready to get started on your project. And if you are wondering how you will edit your video, we recommend Filmora . You can use it to make animation video by adding keyframes, so the animation will be smooth and natural. You just need to build a white plane to easily start making animation. Besides, color correction and audio mixer will raise up your explainer video to a new level. Download it to have a try (Free)!
Shanoon Cox
Shanoon Cox is a writer and a lover of all things video.
Follow @Shanoon Cox
Shanoon Cox
Mar 27, 2024• Proven solutions
Drawings will always have a special place in storytelling. Whether you are demonstrating a new concept to a child, highlighting the features of a product to your bosses, or showcasing the intricacies of a marketing campaign, drawings make it easier for the audience to understand what is being said.
That is why it is so important to learn how to create whiteboard animation. When you learn how to create a whiteboard video with animate pictures app , you are in a unique position when it comes to selling your story, and convincing others of what you already know.
- Part1: What is Whiteboard Animation Video?
- Part2: How to Create Whiteboard Animation Videos?
- Part3: Useful Tips for Creating Whiteboard Animation
Part 1:What is Whiteboard Animation Video?
To understand the whiteboard animation video, we must go back to the beginning. Think about how professors illustrate different topics and equations using a whiteboard. They will write down the important words or formulas and then expand on that information through their lecture.
Whiteboard animation is taking those words, phrases and images to another level. Whiteboard animation is a series of events or videos that are created using 2D animation software . These videos can be showcased in any type of setting. You can upload them onto a social media site, show them as part of a presentation, or add them to a crowdfunding or product funding page.
When someone watches a whiteboard animation video, they see the series of images and graphics in sequential order, and there is usually a narration accompanying those images. These videos can be short, anywhere from 30 to 90 seconds. The idea is to deliver information in a clear, coherent and concise way.
To create whiteboard animation, the goal is to take complex concepts and information, and make it easy to understand. Now we can go into some detail about how to create a whiteboard video.
Part 2:How to Create Whiteboard Animation Videos?
Step 1: Write a Script
Much like a normal video or a short skit, there must be a script if a whiteboard animation video is to succeed. Having interesting images and information is great, but they are nothing without a coherent story.
It is not a blog post, storyboard or a set of bullet points. What you need is a proper script, which says everything in regards to the video. Why? Because then you will know precisely what images should be added in certain sections, what the narrator must say, and what transitions are necessary.
Step 2: Start with the Storyboard
Now you have a script. You have a clear idea of how you want your video to come across. It is time to start creating the storyboard. With a storyboard, you will be able to organize your thoughts much better. You can see how each frame comes onto the screen, and how one shot ties into the other.
When you create your storyboard, you will have a good idea about how your final product will look. If there are some transitions you are not happy with, this is the moment where you can make changes.
Step 3: Create Images
If you are a creative person, you will find this part very easy. It is all about creating fun and unique images that will help convey the information that you want to get across. Try to create memorable images that will excite your audience. The simpler, more distinctive and interesting you can make those images, the better your end result.
Step 4: Animate Those Images
Now you have your images, and it is time to find some coherence between those images and your script. You will have to time the animation for your images as you do not want things lingering on the screen for too long, or being seen for a brief second. It may be a good idea for you to speak out the narration as you are animating the images and timing their animation. It will help you with the timing.
Step 5: Record and Sync the Audio
The final step involves getting your audio. Every animated video must have narration as it helps to explain what is happening in the images that people are seeing. Record your audio, and ensure it is perfectly in sync with your content.
Part 3:Useful Tips for Creating Whiteboard Animation
Evoke Empathy
The goal of a whiteboard animation video is not just to explain information in a cold and impersonal way. You are hoping to make a connection with your audience. You want them to care about what you are showcasing. By evoking empathy, you will create the connection that you desire.
By adding emotional references, such as funny, lighthearted, cute or emotional moments, you will find your videos are getting a much better reception from the audience. People can relate to content better when it makes them feel things - especially if those feelings are positive.
Personalize the Images
Showing interesting images is a good start. But if you can personalize these images with graphics and color, your storyboard will look even better. Remember that your goal is to get people to stand up and take notice of the content that you are creating.
Conclusion
Now that we have gone over the entire process of creating a whiteboard animation video, we hope that you are ready to get started on your project. And if you are wondering how you will edit your video, we recommend Filmora . You can use it to make animation video by adding keyframes, so the animation will be smooth and natural. You just need to build a white plane to easily start making animation. Besides, color correction and audio mixer will raise up your explainer video to a new level. Download it to have a try (Free)!
Shanoon Cox
Shanoon Cox is a writer and a lover of all things video.
Follow @Shanoon Cox
Amazing Techniques of Motion Graphics in Premiere Pro
Little Known Techniques of Motion Graphics in Premiere Pro
An easy yet powerful editor
Numerous effects to choose from
Detailed tutorials provided by the official channel
Video editing has recently gained momentum in content design, and with Motion Graphics Premiere Pro editing templates, it has all the fun in the house.
In this article
01 [5 Editing Motion Graphics Techniques in Adobe Premiere Pro](#Part 1)
02 [10 Free Motion Graphics Templates for Premiere Pro](#Part 2)
03 [How to Use Motion Graphics Templates in Premiere Pro](#Part 3)
Part 1 5 Editing Motion Graphics Techniques in Adobe Premiere Pro
A variety of editing techniques of motion graphics for Premiere Pro are ready to give a classy touch to your videos. Let’s brush up through the best you can have.
01Cropping Clips
Cropping your videos allows you to fit them into your required size frames. To remove any unwanted portions of your edits, crop them in adobe Premiere Pro with your desired aspect ratio to give that ‘just perfect’ look to your edits.
Start from importing and adding your footage to your project panel, followed by creating a fresh composition. Now, choose ‘Crop’ from the Effects panel to add it to your clip, either by double-clicking or dragging and dropping.
02Trimming Clips
If you want to adjust the ‘In and Out’ play back sequence of your edited clips, you can go for trimming them. You can trim your clips in the Source and Program monitors, or even in the Premiere Pro timeline. You can choose from the standard cut, jump cut, B-roll cut etc, to suit your editing needs and styles.
All you need to do is open the clip, mark the In and Out points, adjust their sequence with previous or next edits in your cue and that’s it. You can also use keyboard shortcuts for this purpose. However, you need to preset these shortcuts before you begin editing your clips.
03Adding Text
You can try adding simple and formatted texts to enhance your video outlook. This comes handy when you are aiming to deliver specific messages to your audience. You can add normal write-ups, callout quotations and customize your text in a number of exciting styles. Just go to the Type tool, format your text in the Text Box and you’re done!
04Audio Level Adjustment
Want to add spark to your clips with a synchronized audio visual effect? After you finish trimming and cropping, consider opting for an in-line audio adjustment. This will definitely enhance your video and take your craft to the next level.
All you need to do is select an audio clip, click on ‘Audio Gain’ in the drop down menu, set desired Decibel count in the Audio Gain Box and select ‘OK’.
05Exporting Videos
Once you are done with your video craft, you should certainly look forward to making it available for social exposure. To do this, select appropriate sequence constraints in the Export window, choose the export platform, format and Codec, make fine tuning and bit rate adjustments and finish export either in Premiere Pro or Media Encoder. You may also save these settings for your next exports.
Part 2 Free Motion Graphics Templates for Premiere Pro
Let’s have a look into your best choices of free motion graphic templates for Premiere Pro:
0114 Premiere Pro Lumetri Looks
Want to enhance your video creativity with that amazing Hollywood feel? You can undoubtedly opt for the Premiere Lumetri Looks template that gives you the liberty to provide a Hollywood oriented color scheme to your videos, just like those incredible color patterns one would see in Dr. Strangelove, The Martian and many more famous Hollywood flicks.

0215 Animated Lower Thirds
This template comes handy when you need to add lower thirds to your videos, either to introduce different content varieties or to objectify your video components. You can use this template with ease in your personal as well as commercial videos to give them that explicit professional touch.

03Horror Trailer Titles
If horror videos turn you on, use this template in video creations to customize them with that intense and scary feel! This template helps you add scary title slates that are just enough to add a terrifying quotient to your videos. From personal to professional, this template can add intensity to any video type.
04Instagram Stories Premiere Pro Template
This template is a definite catch for those Instagram lovers who constantly experiment to post engaging stories on the platform. If you want your IG stories to grab the talk, go for this animation template to customize photos and text so that they get the buzz among your followers.

05Dust Overlays
Comprising of studio-like effects, this template allows you to enhance your films with high quality dynamic animation in appealing texture variations. Use this template to create videos with those attractive misty backgrounds with cohesive variations in lighting with adjustable power effects.
06Travel Stories Premiere Pro Template
If you are into travel blogging and trying to add spunk to your stories and videos, this template is there to help you out with its catchy text animations and flowy transitions. Available in an upgraded configuration, this template is everything you need to make your travel blogs hover the trending charts.

07Digital Slideshow
Go for this template to add spark to your graphic presentations. Designed primarily for professional usage, it is equally effective in personal projects also. Developed by Evanto Elements, the company offers unlimited access on subscription.

08Free Quotes Premiere Pro Template
If you want to add animated quotes to your video creations, this template is a must try for you. Providing 6 quoting options and a ‘click to change’ text and color interface with convenient customizability keeps it among the top choices for hastle free motion editing.

09Cinematic Title Style Library
If you are bored with those conventional Premiere Pro titles but don’t want to invest time in creating styles of your own, you can use the modernized title styles from this library to enhance your creations with that intense cinematic feel. You can use them comfortably for personal and commercial purposes.

10Space Background Elements
This set of background templates is designed to provide realistic settings to video creators who work on science fiction and space oriented themes. Loaded with different real-time effects, this template provides the ultimate feel of a space travel in 4K.

Part 2 Alternatives to Premiere Pro: Filmora
If not Premiere Pro, you can go for Filmora as a dependable alternative. It’s an exquisite set of amazing and top-notch tools for creating g and editing videos. Wondershare introduced Filmora as an effective, easy-to-use editing software that’s equally caters to the editing pace of beginners as well as experts. You can use Filmora with Windows and macOS.
Packed with a range of appealing customization choices, Filmora comes to you in four principal versions:
● Wondershare Filmora Video Editor
Suitable for beginners, this is the basic and the simplest version having inbuilt editing templates. It’s desktop compatible software.
For Win 7 or later (64-bit)
For macOS 10.12 or later
● Filmora
Android and iOS compatibility in this version of Filmora brought video editing from PCs and laptops into smartphones.

● FilmoraScrn
This version allows you to record your editing screen if you’re a working on Windows.

Part 4 How to Use Motion Graphics Templates in Premiere Pro
After getting familiar with Premiere Pro editing and templates, let’s get into using these adobe premiere motion graphics templates for an exemplary video creating experience. Take up the following steps to get started.
● Go to Premiere Pro Essential Graphics Panel
In the Premiere Pro startup page, select ‘Window’ from the toolbar and select ‘Essential Graphics’ from the drop down menu.
● Add Motion Graphics Templates to Library
Click the ‘Import’ button present at the bottom in the right side of the Essential Graphics Panel. Go to and choose your downloaded motion graphics template file and select ‘Open’. Your file is added to the Essential Graphics Library.
● Drag-Drop the MOGRT to Timeline
‘Drag’ your motion graphics template from the library and ‘Drop’ it on your Timeline.
● Customize Your Template
Go to the ‘Edit’ option in the Essential Graphics Panel to look for customization choices available for your selected motion graphics adobe template.
● Key Takeaways from This Episode →
● Adobe Premiere Pro is an amazing video creation and editing tool that ensures to give a professional class to your edits. Be it personal creativity or professional expertise, this software is all set to give you a wholesome editing experience you will never forget.
● Loaded with an extensive variety of editing templates, available for free and on subscription, adobe premiere pro is a one stop access to all your editing concerns. Its customizable effects will certainly make your creations stand out in the league.
● Video editing is a high in demand craft of excellence. With advancements in software developments, the creative market offers you a pool of over the top editing software that is ready to give that classy spunk to your videos. So just your own from the pool and go on a spree of creating trend setting videos that never miss out on grabbing the attention of everyone around!
Video editing has recently gained momentum in content design, and with Motion Graphics Premiere Pro editing templates, it has all the fun in the house.
In this article
01 [5 Editing Motion Graphics Techniques in Adobe Premiere Pro](#Part 1)
02 [10 Free Motion Graphics Templates for Premiere Pro](#Part 2)
03 [How to Use Motion Graphics Templates in Premiere Pro](#Part 3)
Part 1 5 Editing Motion Graphics Techniques in Adobe Premiere Pro
A variety of editing techniques of motion graphics for Premiere Pro are ready to give a classy touch to your videos. Let’s brush up through the best you can have.
01Cropping Clips
Cropping your videos allows you to fit them into your required size frames. To remove any unwanted portions of your edits, crop them in adobe Premiere Pro with your desired aspect ratio to give that ‘just perfect’ look to your edits.
Start from importing and adding your footage to your project panel, followed by creating a fresh composition. Now, choose ‘Crop’ from the Effects panel to add it to your clip, either by double-clicking or dragging and dropping.
02Trimming Clips
If you want to adjust the ‘In and Out’ play back sequence of your edited clips, you can go for trimming them. You can trim your clips in the Source and Program monitors, or even in the Premiere Pro timeline. You can choose from the standard cut, jump cut, B-roll cut etc, to suit your editing needs and styles.
All you need to do is open the clip, mark the In and Out points, adjust their sequence with previous or next edits in your cue and that’s it. You can also use keyboard shortcuts for this purpose. However, you need to preset these shortcuts before you begin editing your clips.
03Adding Text
You can try adding simple and formatted texts to enhance your video outlook. This comes handy when you are aiming to deliver specific messages to your audience. You can add normal write-ups, callout quotations and customize your text in a number of exciting styles. Just go to the Type tool, format your text in the Text Box and you’re done!
04Audio Level Adjustment
Want to add spark to your clips with a synchronized audio visual effect? After you finish trimming and cropping, consider opting for an in-line audio adjustment. This will definitely enhance your video and take your craft to the next level.
All you need to do is select an audio clip, click on ‘Audio Gain’ in the drop down menu, set desired Decibel count in the Audio Gain Box and select ‘OK’.
05Exporting Videos
Once you are done with your video craft, you should certainly look forward to making it available for social exposure. To do this, select appropriate sequence constraints in the Export window, choose the export platform, format and Codec, make fine tuning and bit rate adjustments and finish export either in Premiere Pro or Media Encoder. You may also save these settings for your next exports.
Part 2 Free Motion Graphics Templates for Premiere Pro
Let’s have a look into your best choices of free motion graphic templates for Premiere Pro:
0114 Premiere Pro Lumetri Looks
Want to enhance your video creativity with that amazing Hollywood feel? You can undoubtedly opt for the Premiere Lumetri Looks template that gives you the liberty to provide a Hollywood oriented color scheme to your videos, just like those incredible color patterns one would see in Dr. Strangelove, The Martian and many more famous Hollywood flicks.
0215 Animated Lower Thirds
This template comes handy when you need to add lower thirds to your videos, either to introduce different content varieties or to objectify your video components. You can use this template with ease in your personal as well as commercial videos to give them that explicit professional touch.
03Horror Trailer Titles
If horror videos turn you on, use this template in video creations to customize them with that intense and scary feel! This template helps you add scary title slates that are just enough to add a terrifying quotient to your videos. From personal to professional, this template can add intensity to any video type.
04Instagram Stories Premiere Pro Template
This template is a definite catch for those Instagram lovers who constantly experiment to post engaging stories on the platform. If you want your IG stories to grab the talk, go for this animation template to customize photos and text so that they get the buzz among your followers.
05Dust Overlays
Comprising of studio-like effects, this template allows you to enhance your films with high quality dynamic animation in appealing texture variations. Use this template to create videos with those attractive misty backgrounds with cohesive variations in lighting with adjustable power effects.
06Travel Stories Premiere Pro Template
If you are into travel blogging and trying to add spunk to your stories and videos, this template is there to help you out with its catchy text animations and flowy transitions. Available in an upgraded configuration, this template is everything you need to make your travel blogs hover the trending charts.
07Digital Slideshow
Go for this template to add spark to your graphic presentations. Designed primarily for professional usage, it is equally effective in personal projects also. Developed by Evanto Elements, the company offers unlimited access on subscription.
08Free Quotes Premiere Pro Template
If you want to add animated quotes to your video creations, this template is a must try for you. Providing 6 quoting options and a ‘click to change’ text and color interface with convenient customizability keeps it among the top choices for hastle free motion editing.
09Cinematic Title Style Library
If you are bored with those conventional Premiere Pro titles but don’t want to invest time in creating styles of your own, you can use the modernized title styles from this library to enhance your creations with that intense cinematic feel. You can use them comfortably for personal and commercial purposes.
10Space Background Elements
This set of background templates is designed to provide realistic settings to video creators who work on science fiction and space oriented themes. Loaded with different real-time effects, this template provides the ultimate feel of a space travel in 4K.
Part 2 Alternatives to Premiere Pro: Filmora
If not Premiere Pro, you can go for Filmora as a dependable alternative. It’s an exquisite set of amazing and top-notch tools for creating g and editing videos. Wondershare introduced Filmora as an effective, easy-to-use editing software that’s equally caters to the editing pace of beginners as well as experts. You can use Filmora with Windows and macOS.
Packed with a range of appealing customization choices, Filmora comes to you in four principal versions:
● Wondershare Filmora Video Editor
Suitable for beginners, this is the basic and the simplest version having inbuilt editing templates. It’s desktop compatible software.
For Win 7 or later (64-bit)
For macOS 10.12 or later
● Filmora
Android and iOS compatibility in this version of Filmora brought video editing from PCs and laptops into smartphones.
● FilmoraScrn
This version allows you to record your editing screen if you’re a working on Windows.
Part 4 How to Use Motion Graphics Templates in Premiere Pro
After getting familiar with Premiere Pro editing and templates, let’s get into using these adobe premiere motion graphics templates for an exemplary video creating experience. Take up the following steps to get started.
● Go to Premiere Pro Essential Graphics Panel
In the Premiere Pro startup page, select ‘Window’ from the toolbar and select ‘Essential Graphics’ from the drop down menu.
● Add Motion Graphics Templates to Library
Click the ‘Import’ button present at the bottom in the right side of the Essential Graphics Panel. Go to and choose your downloaded motion graphics template file and select ‘Open’. Your file is added to the Essential Graphics Library.
● Drag-Drop the MOGRT to Timeline
‘Drag’ your motion graphics template from the library and ‘Drop’ it on your Timeline.
● Customize Your Template
Go to the ‘Edit’ option in the Essential Graphics Panel to look for customization choices available for your selected motion graphics adobe template.
● Key Takeaways from This Episode →
● Adobe Premiere Pro is an amazing video creation and editing tool that ensures to give a professional class to your edits. Be it personal creativity or professional expertise, this software is all set to give you a wholesome editing experience you will never forget.
● Loaded with an extensive variety of editing templates, available for free and on subscription, adobe premiere pro is a one stop access to all your editing concerns. Its customizable effects will certainly make your creations stand out in the league.
● Video editing is a high in demand craft of excellence. With advancements in software developments, the creative market offers you a pool of over the top editing software that is ready to give that classy spunk to your videos. So just your own from the pool and go on a spree of creating trend setting videos that never miss out on grabbing the attention of everyone around!
10 Creative Wallpaper Collage Ideas and Photos
10 Creative Wallpaper Collage Ideas and Photos for 2024
An easy yet powerful editor
Numerous effects to choose from
Detailed tutorials provided by the official channel
Photos are not only some captured moments, but memories for lifetime. So, why not relive these happy and special moments by creating a wallpaper of these photos in a collage format. You can choose from the huge collection of your photos and create wallpaper collages. Set a theme for different rooms and then create interesting wall picture collage. In this article we will help you to learn about some creative wallpaper collage ideas and photos for 2024.
In this article
01 [Top 10 wall collage ideas](#Part 1)
02 [How can wondershare filmora help you design your desired wall collage](#Part 2)
Part 1 Top 10 wall collage ideas
There is no dearth of ideas, themes, and designs when it comes to wall photo collages and wallpaper. To make your selection task a little easier, we have shortlisted some of the popular and creative wall collage ideas that can be used in 2024.
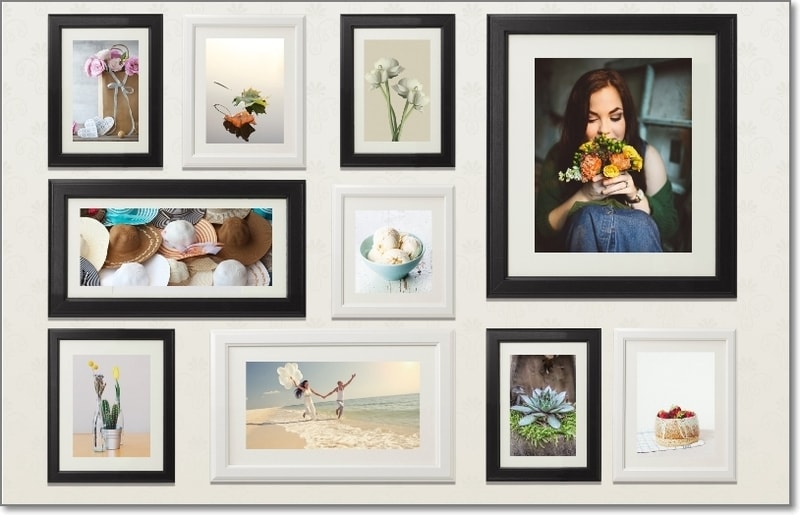
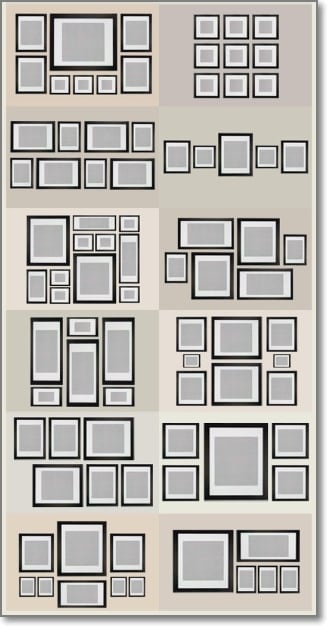
01A simple traditional collage
As it is said simplicity is the best, the same goes with the wall collages. A traditional collage having multiple images set in an order never goes out of fashion. Depending on the size of the wall, you can choose the shape and the number of the pictures to be added to the wallpaper.
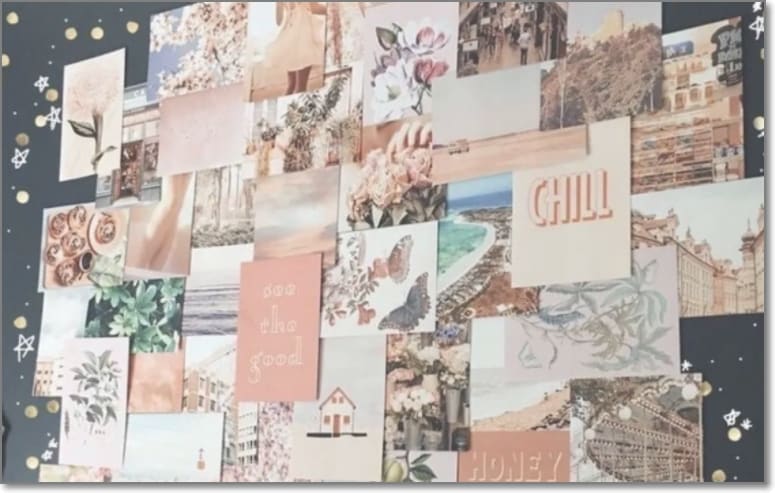
02Full wall collage
This is one of the easiest ways of creating a collage, where you can get all your favourite pics printed and framed and put up randomly on an entire wall. Besides the captured images, you can also choose some of the stock images available at several online sites like Filmora, Canva, and more.
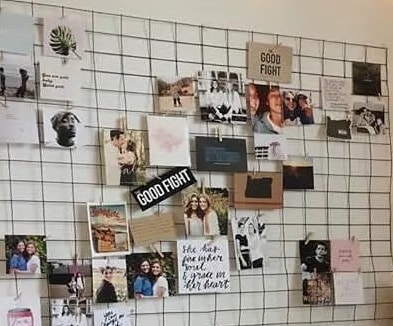
03Creating a photo grid
Besides putting the photos on a wall directly, you can even place them on some rack to create a collage. Creating a wallpaper on a frame or a grid has multiple benefits like it will keep your walls clean, can be moved at any place of your choice and add to overall looks to the room.
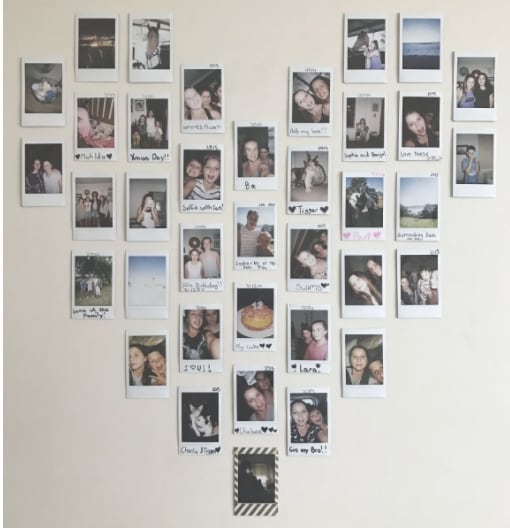
04Creating a collage using polaroid
Instead of getting your images printed and framed, simply take polaroid prints and hang them on a fairy light. This is one of the pocket-friendly collage wall ideas that will also will add warmth and coziness to your room and living space.

05Creating a collage in some shape
Choose a shape of your choice and then set all the desired pictures in that particular shape. This wall collage will look interesting and creative as well. While setting the images in a particular shape ensure that all the pictures are more or less of the same size to make it look symmetrical.
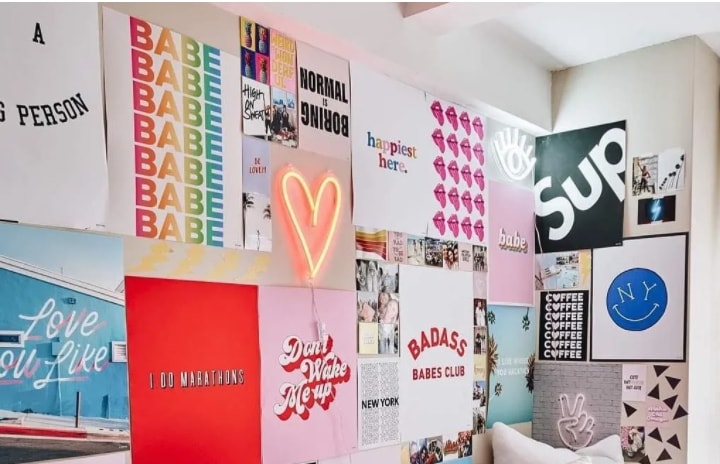
06Adding neon sign to collages
Another interesting way to pep up your wall collage is by adding a neon sign like a heart shape, cloud, or any other amidst your photos on the wall. Neon signs in different shapes, sizes, and colors are available online at pocket friendly prices. As per the theme of your photos, you can add one or more neon signs.
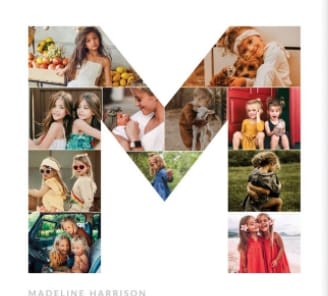
07Wall collage in a letter shape
Create a photo collage in the shape of your name initial or an entire name. You can also create collages for each room in the initials of the name of the person staying in those room. These collages will give a personalised touch to your room.
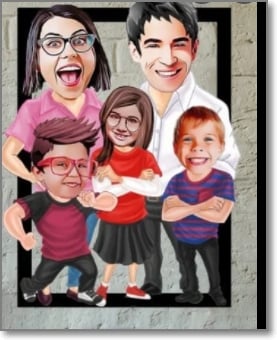
08Caricature wall collage
To add some fun elements to your wall, use caricature of your photos, instead of the simple pictures. There are several online sites that can help you convert your regular images into caricatures that can be used for creating wallpapers.
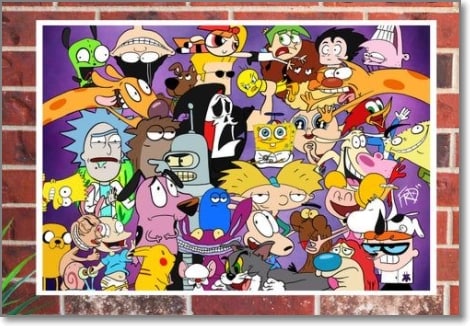
09Cartoon wall collage
If you want to decorate a kid’s room wall then nothing can be better than using pictures of their favorite cartoon characters for creating a collage. You can even create an interesting wall of your room if you too like cartoon characters. Stock images of these characters in high quality are available on several online sites.
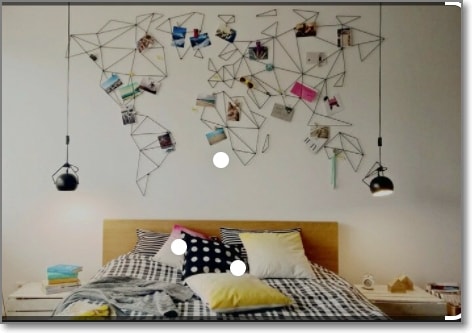
10World Map wall collage
This is one of the best collage ideas if you love to travel. You can create a world map on your wall and then add your own captured images to the places which you have visited.
Part 2 How can Wondershare Filmora help you design your desired wall collage
Using your own captured images for creating a wall collage is a good idea but to further enhance the wallpaper or use the pictures that would match the desired theme you could select the images from the stock library available at several sites.
One such excellent tool is Wondershare Filmora where you can get a huge collection of images in an array of themes and categories. The royalty free images at Wondershare can be used without any worries.
Additionally, the software also has a collection of music and sound effects that can be used for creating online presentations. Wondershare Filmora Video Editor is complete video editing software that can be used for creating professional looking videos. Some of the key features of the tool include adding filters, overlays, transitions, titles, and much more.

Wondershare Filmora - Best Video Editor for Mac/Windows
5,481,435 people have downloaded it.
Build unique custom animations without breaking a sweat.
Focus on creating epic stories and leave the details to Filmora’s auto features.
Start a creative adventure with drag & drop effects and endless possibilities.
Filmora simplifies advanced features to save you time and effort.
Filmora cuts out repetition so you can move on to your next creative breakthrough.
The software is available for download on Windows and Mac systems.
● Key Takeaways from This Episode →
● Wall collages using captured pictures and stock images is an interesting way to decorate your walls.
● There are several creative ideas for wall collage.
● Wondershare Filmora is an excellent tool to find a huge collection of stock images in an array of categories and for all video editing requirements.
Photos are not only some captured moments, but memories for lifetime. So, why not relive these happy and special moments by creating a wallpaper of these photos in a collage format. You can choose from the huge collection of your photos and create wallpaper collages. Set a theme for different rooms and then create interesting wall picture collage. In this article we will help you to learn about some creative wallpaper collage ideas and photos for 2024.
In this article
01 [Top 10 wall collage ideas](#Part 1)
02 [How can wondershare filmora help you design your desired wall collage](#Part 2)
Part 1 Top 10 wall collage ideas
There is no dearth of ideas, themes, and designs when it comes to wall photo collages and wallpaper. To make your selection task a little easier, we have shortlisted some of the popular and creative wall collage ideas that can be used in 2024.
01A simple traditional collage
As it is said simplicity is the best, the same goes with the wall collages. A traditional collage having multiple images set in an order never goes out of fashion. Depending on the size of the wall, you can choose the shape and the number of the pictures to be added to the wallpaper.
02Full wall collage
This is one of the easiest ways of creating a collage, where you can get all your favourite pics printed and framed and put up randomly on an entire wall. Besides the captured images, you can also choose some of the stock images available at several online sites like Filmora, Canva, and more.
03Creating a photo grid
Besides putting the photos on a wall directly, you can even place them on some rack to create a collage. Creating a wallpaper on a frame or a grid has multiple benefits like it will keep your walls clean, can be moved at any place of your choice and add to overall looks to the room.
04Creating a collage using polaroid
Instead of getting your images printed and framed, simply take polaroid prints and hang them on a fairy light. This is one of the pocket-friendly collage wall ideas that will also will add warmth and coziness to your room and living space.
05Creating a collage in some shape
Choose a shape of your choice and then set all the desired pictures in that particular shape. This wall collage will look interesting and creative as well. While setting the images in a particular shape ensure that all the pictures are more or less of the same size to make it look symmetrical.
06Adding neon sign to collages
Another interesting way to pep up your wall collage is by adding a neon sign like a heart shape, cloud, or any other amidst your photos on the wall. Neon signs in different shapes, sizes, and colors are available online at pocket friendly prices. As per the theme of your photos, you can add one or more neon signs.
07Wall collage in a letter shape
Create a photo collage in the shape of your name initial or an entire name. You can also create collages for each room in the initials of the name of the person staying in those room. These collages will give a personalised touch to your room.
08Caricature wall collage
To add some fun elements to your wall, use caricature of your photos, instead of the simple pictures. There are several online sites that can help you convert your regular images into caricatures that can be used for creating wallpapers.
09Cartoon wall collage
If you want to decorate a kid’s room wall then nothing can be better than using pictures of their favorite cartoon characters for creating a collage. You can even create an interesting wall of your room if you too like cartoon characters. Stock images of these characters in high quality are available on several online sites.
10World Map wall collage
This is one of the best collage ideas if you love to travel. You can create a world map on your wall and then add your own captured images to the places which you have visited.
Part 2 How can Wondershare Filmora help you design your desired wall collage
Using your own captured images for creating a wall collage is a good idea but to further enhance the wallpaper or use the pictures that would match the desired theme you could select the images from the stock library available at several sites.
One such excellent tool is Wondershare Filmora where you can get a huge collection of images in an array of themes and categories. The royalty free images at Wondershare can be used without any worries.
Additionally, the software also has a collection of music and sound effects that can be used for creating online presentations. Wondershare Filmora Video Editor is complete video editing software that can be used for creating professional looking videos. Some of the key features of the tool include adding filters, overlays, transitions, titles, and much more.
Wondershare Filmora - Best Video Editor for Mac/Windows
5,481,435 people have downloaded it.
Build unique custom animations without breaking a sweat.
Focus on creating epic stories and leave the details to Filmora’s auto features.
Start a creative adventure with drag & drop effects and endless possibilities.
Filmora simplifies advanced features to save you time and effort.
Filmora cuts out repetition so you can move on to your next creative breakthrough.
The software is available for download on Windows and Mac systems.
● Key Takeaways from This Episode →
● Wall collages using captured pictures and stock images is an interesting way to decorate your walls.
● There are several creative ideas for wall collage.
● Wondershare Filmora is an excellent tool to find a huge collection of stock images in an array of categories and for all video editing requirements.
The Best 8 Places for High-Quality Royalty Free Gifs (Paid and Free)
The Best 8 Places for High-Quality Royalty Free Gifs (Paid and Free)
An easy yet powerful editor
Numerous effects to choose from
Detailed tutorials provided by the official channel
Our list of the top 8 beats places to download royalty-free GIFs. You may get a lot of GIF libraries free by visiting these websites. These websites allow animated GIFs for various purposes, including personal, educational, and commercial ones. You can use the GIFs you download on your websites, blogs, presentations, and emails, among other things. The most excellent part about most of these websites is that you don’t have to pay anything or give them credit in exchange for royalty-free GIFs. These websites include trendy and attractive GIFs, while others only have older royalty-free GIFs. The GIFs on these websites are similarly free of any watermark.
There are numerous websites to download royalty GIFs with stock sound effects and photographs. However, when it comes to copyright-free GIFs, only a few websites offer them up for download. So, after spending a much time on the internet, I’ve found five websites that can assist you in doing the same. Two of the websites, “Best Animations” and “Animate It,” only enable you to use the GIFs you download for personal use.
In this article
01 [Is GIFs Royalty Free?](#Part 1)
02 [Are GIFs on Giphy Free to Use?](#Part 2)
03 [The Best 8 Places for High-Quality Royalty Free Gifs (Paid and Free)](#Part 3)
Part 1 Is GIFs Royalty Free?
There is no legal method to licensing the usage of GIFs for business purposes. Given the preceding, commercial companies’ use of GIFs remains a bit of a grey area.
The following are some excellent general guidelines to follow for royalty-free GIFs:
● Avoid using GIFs in a way that can irritate the copyright holder. In most cases, you can determine fair use by context rather than content. A reasonable rule of thumb is to put yourself in the position of the copyright owner and ask yourself, “Would I disprove this to the point of commencing litigation?”
● Provide acknowledgment to the original owner where GIFs are “stolen” from known copyright content (e.g., Credit: Universal Studios)
● If in doubt, stay away from GIFs derived from extremely litigious sources, and search out alternatives (or develop your own!)
Part 2 Are GIFs on Giphy Free to Use?
All property rights in the Services are owned and retained by Giphy and their licensors, and hence these are not copyright-free GIFs. However, Giphy grants users a limited, non-exclusive, non-transferable, and revocable license to use Gifs on Giphy, subject to these Terms. You may find copyrighted material (such as text, graphics, pictures, images, and illustrations), trademarks, and other proprietary information and materials of Giphy and their licensors on the Services. You may not copy, modify, publish, transmit, distribute, perform, or display any content for commercial purposes or in any way violate these Terms of Service. Except for content in the public domain or the content you have permission to use in connection with the use of the Services and compliance with these Terms of Service.
Copyright laws in the United States and around the world protect their Services. Giphy has the right (but not the obligation) to remove, block, edit, or alter any content any time, without any notice, for any reason or no reason at all. Giphy, however, reserves the right to access, read, store, and disclose any information that we reasonably believe is required to comply with applicable laws or protect our, our users’ and the public’s rights, property, or safety.
Part 3 The Best 8 Places for High-Quality Royalty Free Gifs (Paid and Free)
Here are the best 8 places to get free to use GIFs for commercial use
01MOTION ELEMENT
Features:
● You can experience animation from the inside out.
● Change the GIFs Duration with a single click.
● This royalty-free GIF website allows you to change colors with a single click.
● You can also edit the backgrounds.
● The style is a simple drag-and-drop motion.
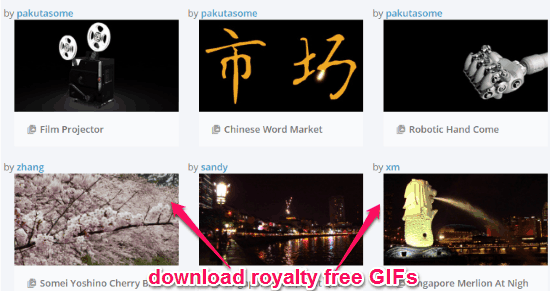
02SEVENOAKS
Features:
● Sevenoaks copyright-free GIFs are high-quality and old.
● All the GIFs are three-dimensional.
● It offers tons of GIFs scattered across 25+ categories.
● You can download GIFs free to use.
● The process can be over in a click.
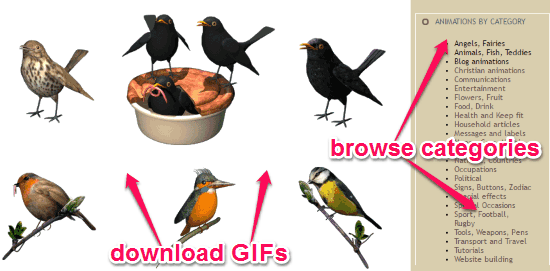
03BEST ANIMATIONS
Features
● This site with GIF images free to download provides more than 20 categories for its users.
● It offers a variety of GIFs.
● However, GIFs are only useful for personal use.
● Easy-to-download gif in a few clicks.
● Directly share the GIFs via social networks.
04GIFGIFS
Features
● GIFGIFs offers hundreds of royalty-free GIFs.
● But it offers low-quality and old files.
● This GIF library for free serves various purposes.
● It also provides the direct link, HTML code, and BBCode for every GIF file.
● Change background in simple clicks.
05ANIMATE IT
Features
● More than 50 categories of GIF images are free to download.
● GIFs with both good and bad resolutions are available.
● It has a mixture of old and modern GIFs.
● GIFs with Animate are for personal use only.
● You can get your choice of free-to-use GIF with one click.
06GIPHY
Features:
● Download GIF in one click
● Varieties of GIFs to leverage on.
● Directly share to social media.
● Giphy offers some modern royalty-free GIFs.
● One of the top high quality and resolution offering GIF websites.
07PIXABAY.COM
Features:
● One of the top websites with free-to-use GIFs.
● Download in a few clicks
● High quality with the best resolution
● You get various types of GIFs for a variety of purpose
● Exclusive GIF library for free with Modern GIFs.

08STOCKSNAP
Features:
● Highest quality, highest resolution pictures with Stocksnap.
● All photos uploaded to the site get released under Creative Commons.
● Photos do not require attribution.
● Curate the top stock photos from around the web
● Select images from several daily submissions.
If you want to generate a GIF online, though, Filmora’s online meme maker is the best option. It is possible to create a watermark-free photo, GIF, and video memes with it. It’s completely free to use, and there’s no need to sign up. You can adjust the text size, color, and position while editing a caption. You can also add text to the inside or outside of a GIF.
GIFs may be made from a collection of still photos or even moving movies, and the procedure is straightforward enough for anyone to undertake. To do this task fast and efficiently, we recommend Wondershare Filmora Video Editor . The user-friendly and engaging interface of the software product is the basis for this recommendation. Filmora allows you to swiftly combine many still images into GIFs or convert tiny films into GIFs. Furthermore, the Filmora platform will enable users to easily customize GIFs by adding overlays, components, and text to their GIFs.
Wondershare Filmora
Get started easily with Filmora’s powerful performance, intuitive interface, and countless effects!
Try It Free Try It Free Try It Free Learn More >

● Key Takeaways from This Episode →
● Now that you’ve gathered information on the best places to get e-commerce GIFs from different websites and free GIF apps, you can now go-ahead to explore these free GIFs for commercial use and personal use.
● Notwithstanding, you can still check out a recommendable free GIF app, Filmora by Wondershare, and be sure to meet your need for a unique GIF.
Our list of the top 8 beats places to download royalty-free GIFs. You may get a lot of GIF libraries free by visiting these websites. These websites allow animated GIFs for various purposes, including personal, educational, and commercial ones. You can use the GIFs you download on your websites, blogs, presentations, and emails, among other things. The most excellent part about most of these websites is that you don’t have to pay anything or give them credit in exchange for royalty-free GIFs. These websites include trendy and attractive GIFs, while others only have older royalty-free GIFs. The GIFs on these websites are similarly free of any watermark.
There are numerous websites to download royalty GIFs with stock sound effects and photographs. However, when it comes to copyright-free GIFs, only a few websites offer them up for download. So, after spending a much time on the internet, I’ve found five websites that can assist you in doing the same. Two of the websites, “Best Animations” and “Animate It,” only enable you to use the GIFs you download for personal use.
In this article
01 [Is GIFs Royalty Free?](#Part 1)
02 [Are GIFs on Giphy Free to Use?](#Part 2)
03 [The Best 8 Places for High-Quality Royalty Free Gifs (Paid and Free)](#Part 3)
Part 1 Is GIFs Royalty Free?
There is no legal method to licensing the usage of GIFs for business purposes. Given the preceding, commercial companies’ use of GIFs remains a bit of a grey area.
The following are some excellent general guidelines to follow for royalty-free GIFs:
● Avoid using GIFs in a way that can irritate the copyright holder. In most cases, you can determine fair use by context rather than content. A reasonable rule of thumb is to put yourself in the position of the copyright owner and ask yourself, “Would I disprove this to the point of commencing litigation?”
● Provide acknowledgment to the original owner where GIFs are “stolen” from known copyright content (e.g., Credit: Universal Studios)
● If in doubt, stay away from GIFs derived from extremely litigious sources, and search out alternatives (or develop your own!)
Part 2 Are GIFs on Giphy Free to Use?
All property rights in the Services are owned and retained by Giphy and their licensors, and hence these are not copyright-free GIFs. However, Giphy grants users a limited, non-exclusive, non-transferable, and revocable license to use Gifs on Giphy, subject to these Terms. You may find copyrighted material (such as text, graphics, pictures, images, and illustrations), trademarks, and other proprietary information and materials of Giphy and their licensors on the Services. You may not copy, modify, publish, transmit, distribute, perform, or display any content for commercial purposes or in any way violate these Terms of Service. Except for content in the public domain or the content you have permission to use in connection with the use of the Services and compliance with these Terms of Service.
Copyright laws in the United States and around the world protect their Services. Giphy has the right (but not the obligation) to remove, block, edit, or alter any content any time, without any notice, for any reason or no reason at all. Giphy, however, reserves the right to access, read, store, and disclose any information that we reasonably believe is required to comply with applicable laws or protect our, our users’ and the public’s rights, property, or safety.
Part 3 The Best 8 Places for High-Quality Royalty Free Gifs (Paid and Free)
Here are the best 8 places to get free to use GIFs for commercial use
01MOTION ELEMENT
Features:
● You can experience animation from the inside out.
● Change the GIFs Duration with a single click.
● This royalty-free GIF website allows you to change colors with a single click.
● You can also edit the backgrounds.
● The style is a simple drag-and-drop motion.
02SEVENOAKS
Features:
● Sevenoaks copyright-free GIFs are high-quality and old.
● All the GIFs are three-dimensional.
● It offers tons of GIFs scattered across 25+ categories.
● You can download GIFs free to use.
● The process can be over in a click.
03BEST ANIMATIONS
Features
● This site with GIF images free to download provides more than 20 categories for its users.
● It offers a variety of GIFs.
● However, GIFs are only useful for personal use.
● Easy-to-download gif in a few clicks.
● Directly share the GIFs via social networks.
04GIFGIFS
Features
● GIFGIFs offers hundreds of royalty-free GIFs.
● But it offers low-quality and old files.
● This GIF library for free serves various purposes.
● It also provides the direct link, HTML code, and BBCode for every GIF file.
● Change background in simple clicks.
05ANIMATE IT
Features
● More than 50 categories of GIF images are free to download.
● GIFs with both good and bad resolutions are available.
● It has a mixture of old and modern GIFs.
● GIFs with Animate are for personal use only.
● You can get your choice of free-to-use GIF with one click.
06GIPHY
Features:
● Download GIF in one click
● Varieties of GIFs to leverage on.
● Directly share to social media.
● Giphy offers some modern royalty-free GIFs.
● One of the top high quality and resolution offering GIF websites.
07PIXABAY.COM
Features:
● One of the top websites with free-to-use GIFs.
● Download in a few clicks
● High quality with the best resolution
● You get various types of GIFs for a variety of purpose
● Exclusive GIF library for free with Modern GIFs.
08STOCKSNAP
Features:
● Highest quality, highest resolution pictures with Stocksnap.
● All photos uploaded to the site get released under Creative Commons.
● Photos do not require attribution.
● Curate the top stock photos from around the web
● Select images from several daily submissions.
If you want to generate a GIF online, though, Filmora’s online meme maker is the best option. It is possible to create a watermark-free photo, GIF, and video memes with it. It’s completely free to use, and there’s no need to sign up. You can adjust the text size, color, and position while editing a caption. You can also add text to the inside or outside of a GIF.
GIFs may be made from a collection of still photos or even moving movies, and the procedure is straightforward enough for anyone to undertake. To do this task fast and efficiently, we recommend Wondershare Filmora Video Editor . The user-friendly and engaging interface of the software product is the basis for this recommendation. Filmora allows you to swiftly combine many still images into GIFs or convert tiny films into GIFs. Furthermore, the Filmora platform will enable users to easily customize GIFs by adding overlays, components, and text to their GIFs.
Wondershare Filmora
Get started easily with Filmora’s powerful performance, intuitive interface, and countless effects!
Try It Free Try It Free Try It Free Learn More >
● Key Takeaways from This Episode →
● Now that you’ve gathered information on the best places to get e-commerce GIFs from different websites and free GIF apps, you can now go-ahead to explore these free GIFs for commercial use and personal use.
● Notwithstanding, you can still check out a recommendable free GIF app, Filmora by Wondershare, and be sure to meet your need for a unique GIF.
Ways on How to Get Started in Stop Motion Claymation
How to Get Started in Stop Motion Claymation
An easy yet powerful editor
Numerous effects to choose from
Detailed tutorials provided by the official channel
Stop Motion Claymation is not a new concept. It has been floating around the media industry since the 1950 and many creators have utilized it to tell their stories to the world. If you haven’t heard about claymations so far, you are not alone. Unfortunately, a wide range of the global population is unfamiliar with the concept of stop motion claymation.

But, if you are someone who wants to get into animation, but don’t have an expensive budget, claymations can be a great tool to share your story with the world and attract a global audience. In this guide, we are going to talk about claymations, some of the most popular claymation websites, and the best ways to get started with stop motion claymation. So, if you also want to explore your creative side and be unique with the approach, continue reading. By the end of this guide, you’ll be running out to buy clay and make some high-quality clay stop-motion animations.
In this article
01 [Ways to Make Stop Motion Videos with Clay Using Your Phone](#Part 1)
02 [How to Edit a Stop Motion Claymation Animation ](#Part 2)
03 [Best 5 Clay for Stop Motion and Ways to Get Started](#Part 3)
Part 1 Ways to Make Stop Motion Videos with Clay Using Your Phone
So, now that you are familiar with the basic concept of clay stop animation, let’s understand how you can get started with claymation animations. Ideally, if you are an absolute beginner, you would want to start by understanding the dynamics of creating clay models first. Whether you are going to create a animation or a simple stop motion clip, the models will play a major role in the story and it would be important that these models look appealing.
When it comes to capturing the motion, you don’t need any expensive cameras. You can easily shoot the entire motion on your phone as well. Today, even the basic smartphones come with recording features and they are enough to capture the movement of your clay models. However, if you want to keep the production quality as high as possible, make sure to invest in a decent tripod. A tripod will ensure that your stop motion claymation doesn’t feel jerky at all.
After you have crafted the clay models and purchased the tripod, the next step would be to write down a script for the animation. Whether you are creating a short video or a 3-hour long movie, a script will ensure that you don’t miss out on any important scenes while recording the animation. There are multiple script writing software you can find online that’ll speed up the entire process. However, as a beginner, you can also pen down your script in a regular MS Word document. Lack of resources should never come between your creativity.
Once the script is final, the next phase would be to record the stop motion animation claymation. This is the stage where you have to be extra careful because you’ll practically be recording the storyline of your animation. Simply fire up the smartphone’s camera and start shooting each frame one-by-one. Keep in mind that shooting a stop motion animation is pretty time-consuming and it can even take up to 5-7 hours to get the job done. So, make sure to grab your cup of coffee and stay patient throughout the process.
Part 2 How to Edit a Stop Motion Claymation Animation
At this point, you would have several hundred photographs and a script in mind to make your stop motion claymation. So, the next part would be to turn these raw images into an animation. To do this, you can use different types of video editing applications. However, we recommend using Wondershare Wondershare Filmora Video Editor for the job.
It’s a full-scale cross-platform video editing tool that’s designed to help creators showcase their creativity by turning RAW images/clips into visually engaging videos. Filmora is targeted towards a wide variety of creators such as YouTubers, social media influencers, production artists, and even animators. For an animator, Filmora is nothing short of an oasis.
The tool comes with a built-in media library where you’ll find hundreds of ready-to-use animation templates. These templates could be integrated into your video with a single click. The best part is all these templates are fully customizable, which means you can modify them to meet the overall theme of your claymation.
Filmora boasts a timeline-based interface that makes the editing process a hassle-free task, especially when you have hundreds of images to edit. You can simply bring all the images to the timeline and merge them together to make a stunning animation within a few minutes. The tool also comes with a dedicated audio editing panel where you can add the voiceover or background tracks to bring life to your stop animation claymation. If you have edited any videos in the past, you may already know that the audio is the backbone for any video, even if you are editing a stop motion animation using clay.
Here’s a quick recap of all the features that make Wondershare Filmora an ideal video editing software for stop motion claymation animation.
● Timeline based user interface for more convenient editing
● Built-in media library to find graphic, animation, and audio templates
● Export videos directly to YouTube and other social media platforms
● Available for both Windows and macOS
So, if you are also ready with your clay models and smartphone’s camera, get started with the shooting process and use Filmora to turn the RAW images to a visually enticing stop motion claymation.
Part 3 Best 5 Clay for Stop Motion and Ways to Get Started
In case you are getting serious about stop motion claymations, you would also want to understand which clays are best for such animations. To be honest, you can find dozens of clays in the market. But, not every clay is worth using in a claymation. Here are 5 of the best clays for stop motion animations you can use in your projects.
01Puppet Putty
Puppet Putty is one of the most popular clay brands that’s specifically marketed towards claymation fanatics. As compared to other available options, the Puppet Putty is comparatively softer, which means you can easily mold it into different shapes using your hands only. While the Puppet Putty works great by itself, you can also combine it with other types of clay to make your clay models more appealing.
02Van Aken
Van Aken is another popular clay brand that’s ideal for claymation animations. It’s one of the inexpensive clays and that’s the reason why many claymation fanatics use it to create clay models for their projects. One of the best features of the Van Aken clay is that it’s available in different colors, which means you can get creative with your models by mixing different color combinations. Some animators also mix Van Aken with Pupper Putty to make the characters look more stunning under the perfect lighting conditions.
03Sargent Art
Sargent Art is a brand that primarily designs clays for sculpting. However, you can also use it to create clay models for your claymations. Sargent Art’s clay has the perfect blend of Wax and Oil, which makes it quite easier for the animator to sculpt different models.
04Sculpey
Sculpey is a clay brand that designs polymer-based clays that are relatively better than the traditional ceramic mud clays. This type of clay is made up of plastic and it’s comparatively more pliable than any regular clay. And, once you have your sculpture ready, you can simply place the cay model in an oven and make it rock solid within a few minutes.
05Plastilina
Finally, Plastilina is also a great option for stop motion claymation models. You can use Plastilina to design parts of the model that need to look as natural as possible. For example, you can use Plastilina to create parts such as teeth, eyes, and tongue so that your animation characters don’t contain any distortions.
● Key Takeaways from This Episode →
● Stop motion claymation animations are a great way to create stunning animations and share your creative stories with the world.
● To get started with claymations, you’ll need the right type of clay, an editing software like Wondershare Filmora Video Editor , and a storyline.
● There are different types of clays you can use to create clay models for your animations. To make your animations look more natural, you can also mix different types of clays together. This will also allow you to create personalized color combinations for your animation projects.
Stop Motion Claymation is not a new concept. It has been floating around the media industry since the 1950 and many creators have utilized it to tell their stories to the world. If you haven’t heard about claymations so far, you are not alone. Unfortunately, a wide range of the global population is unfamiliar with the concept of stop motion claymation.
But, if you are someone who wants to get into animation, but don’t have an expensive budget, claymations can be a great tool to share your story with the world and attract a global audience. In this guide, we are going to talk about claymations, some of the most popular claymation websites, and the best ways to get started with stop motion claymation. So, if you also want to explore your creative side and be unique with the approach, continue reading. By the end of this guide, you’ll be running out to buy clay and make some high-quality clay stop-motion animations.
In this article
01 [Ways to Make Stop Motion Videos with Clay Using Your Phone](#Part 1)
02 [How to Edit a Stop Motion Claymation Animation ](#Part 2)
03 [Best 5 Clay for Stop Motion and Ways to Get Started](#Part 3)
Part 1 Ways to Make Stop Motion Videos with Clay Using Your Phone
So, now that you are familiar with the basic concept of clay stop animation, let’s understand how you can get started with claymation animations. Ideally, if you are an absolute beginner, you would want to start by understanding the dynamics of creating clay models first. Whether you are going to create a animation or a simple stop motion clip, the models will play a major role in the story and it would be important that these models look appealing.
When it comes to capturing the motion, you don’t need any expensive cameras. You can easily shoot the entire motion on your phone as well. Today, even the basic smartphones come with recording features and they are enough to capture the movement of your clay models. However, if you want to keep the production quality as high as possible, make sure to invest in a decent tripod. A tripod will ensure that your stop motion claymation doesn’t feel jerky at all.
After you have crafted the clay models and purchased the tripod, the next step would be to write down a script for the animation. Whether you are creating a short video or a 3-hour long movie, a script will ensure that you don’t miss out on any important scenes while recording the animation. There are multiple script writing software you can find online that’ll speed up the entire process. However, as a beginner, you can also pen down your script in a regular MS Word document. Lack of resources should never come between your creativity.
Once the script is final, the next phase would be to record the stop motion animation claymation. This is the stage where you have to be extra careful because you’ll practically be recording the storyline of your animation. Simply fire up the smartphone’s camera and start shooting each frame one-by-one. Keep in mind that shooting a stop motion animation is pretty time-consuming and it can even take up to 5-7 hours to get the job done. So, make sure to grab your cup of coffee and stay patient throughout the process.
Part 2 How to Edit a Stop Motion Claymation Animation
At this point, you would have several hundred photographs and a script in mind to make your stop motion claymation. So, the next part would be to turn these raw images into an animation. To do this, you can use different types of video editing applications. However, we recommend using Wondershare Wondershare Filmora Video Editor for the job.
It’s a full-scale cross-platform video editing tool that’s designed to help creators showcase their creativity by turning RAW images/clips into visually engaging videos. Filmora is targeted towards a wide variety of creators such as YouTubers, social media influencers, production artists, and even animators. For an animator, Filmora is nothing short of an oasis.
The tool comes with a built-in media library where you’ll find hundreds of ready-to-use animation templates. These templates could be integrated into your video with a single click. The best part is all these templates are fully customizable, which means you can modify them to meet the overall theme of your claymation.
Filmora boasts a timeline-based interface that makes the editing process a hassle-free task, especially when you have hundreds of images to edit. You can simply bring all the images to the timeline and merge them together to make a stunning animation within a few minutes. The tool also comes with a dedicated audio editing panel where you can add the voiceover or background tracks to bring life to your stop animation claymation. If you have edited any videos in the past, you may already know that the audio is the backbone for any video, even if you are editing a stop motion animation using clay.
Here’s a quick recap of all the features that make Wondershare Filmora an ideal video editing software for stop motion claymation animation.
● Timeline based user interface for more convenient editing
● Built-in media library to find graphic, animation, and audio templates
● Export videos directly to YouTube and other social media platforms
● Available for both Windows and macOS
So, if you are also ready with your clay models and smartphone’s camera, get started with the shooting process and use Filmora to turn the RAW images to a visually enticing stop motion claymation.
Part 3 Best 5 Clay for Stop Motion and Ways to Get Started
In case you are getting serious about stop motion claymations, you would also want to understand which clays are best for such animations. To be honest, you can find dozens of clays in the market. But, not every clay is worth using in a claymation. Here are 5 of the best clays for stop motion animations you can use in your projects.
01Puppet Putty
Puppet Putty is one of the most popular clay brands that’s specifically marketed towards claymation fanatics. As compared to other available options, the Puppet Putty is comparatively softer, which means you can easily mold it into different shapes using your hands only. While the Puppet Putty works great by itself, you can also combine it with other types of clay to make your clay models more appealing.
02Van Aken
Van Aken is another popular clay brand that’s ideal for claymation animations. It’s one of the inexpensive clays and that’s the reason why many claymation fanatics use it to create clay models for their projects. One of the best features of the Van Aken clay is that it’s available in different colors, which means you can get creative with your models by mixing different color combinations. Some animators also mix Van Aken with Pupper Putty to make the characters look more stunning under the perfect lighting conditions.
03Sargent Art
Sargent Art is a brand that primarily designs clays for sculpting. However, you can also use it to create clay models for your claymations. Sargent Art’s clay has the perfect blend of Wax and Oil, which makes it quite easier for the animator to sculpt different models.
04Sculpey
Sculpey is a clay brand that designs polymer-based clays that are relatively better than the traditional ceramic mud clays. This type of clay is made up of plastic and it’s comparatively more pliable than any regular clay. And, once you have your sculpture ready, you can simply place the cay model in an oven and make it rock solid within a few minutes.
05Plastilina
Finally, Plastilina is also a great option for stop motion claymation models. You can use Plastilina to design parts of the model that need to look as natural as possible. For example, you can use Plastilina to create parts such as teeth, eyes, and tongue so that your animation characters don’t contain any distortions.
● Key Takeaways from This Episode →
● Stop motion claymation animations are a great way to create stunning animations and share your creative stories with the world.
● To get started with claymations, you’ll need the right type of clay, an editing software like Wondershare Filmora Video Editor , and a storyline.
● There are different types of clays you can use to create clay models for your animations. To make your animations look more natural, you can also mix different types of clays together. This will also allow you to create personalized color combinations for your animation projects.
Secret Shortcut to Adobe Animate Character Tutorial
How-to Guide: Secret Shortcut to Adobe Animate Character Tutorial
An easy yet powerful editor
Numerous effects to choose from
Detailed tutorials provided by the official channel
Whether you are a beginner or an experienced graphics designer, you can use Adobe Character Animator to animate 2D characters easily. But, if you are an absolute beginner, it might take a few weeks to get familiar with the software’s features/workflow.

Irrespective of your experience with the tool, this Adobe animate character tutorial will help you get started and edit visually appealing animated shorts.
In this article
01 [How Do I Animate a Character in Adobe Animation?](#Part 1)
02 [Is Adobe Character Animator Easy to Use?](#Part 2)
03 [How to Rig a Simple Character | Adobe Animate Tutorial](#Part 3)
04 [One-Stop Solution to Edit High-Quality Videos in Every Situation](#Part 4)
Part 1 How Do I Animate a Character in Adobe Animation?
1. Start With a Script
If you want to create an animation that engages the customers, you must always start your journey with a script. Like a short movie, even an animated sketch requires a script. It’ll set the tone for the entire animation and help you start sailing in the right direction.

If you have a full production team, the writers will take care of scriptwriting and you’ll just have to suggest a few changes in between. But, if you are working on your own, you’ll have to handle the script writing all-by-yourself. In any case, however, make sure to start by crafting a beautiful script with an amazing storyline.
2. Record the Voiceover
The next step in our Adobe Animate character tutorial is recording the voiceover for the video. Unless you are planning to create a GIF animation, you would need a dedicated voiceover for your animated video to make it more appealing.

Now, before you even begin with animating the character, recording the audio will help you clear out one task from the list. To record the voiceover, you can try different types of audio recording software and equipment.
3. Start Creating the Character
At this point in our Adobe animate character tutorial, we are ready to design the actual character itself. To do this, launch Adobe Character Animator on your system. On its home screen, you’ll see a tab containing different types of characters (along with their dedicated Photoshop and Illustrator versions). Click on any of these characters and it’ll automatically open in the editing panel of Adobe character animator.

Now, you can start with animating the character. In the top-left corner, you’ll see two different options, i.e., “
If you double-tap the “Scene” tab the character will open up in a real-time environment where it’ll react to your movement and speech. Make sure that the webcam stays turned on throughout the process. Then, simply press the “Record” button and start recording the entire scene for your animation.
Part 2 Is Adobe Character Animator Easy to Use?
That’s how you can animate a character in Adobe character animator and create visually stunning animations. However, many beginners want to know if it’s easy to use Adobe character animator. The answer is Yes! With Character Animator, Adobe has developed a relatively easy-to-use interface that anyone can use easily.
Part 3 How to Rig a Simple Character | Adobe Animate Tutorial
Now, if you aspire to become a skilled graphic designer, here are a few tutorials that’ll help you get started with Adobe Character Animator and explore all its features.
1. Getting Started With Adobe Character Animator
This 15 minutes Adobe animate character tutorial by Okay Samurai is the best thing you’ll find on the Internet, especially if you are a complete beginner and want to learn different elements of the software.
2. Creating Illustrator Puppet
Adobe Character Animator lets users create both Illustrator and Photoshop puppets. If you want to become an expert in the former, this hour-long YouTube video is the best tutorial for you.
3. Getting Started With Advanced Rigging
This is another useful Adobe Animate character tutorial that’s exclusively designed to help editors understand the basics of creating a character such as “Surr”. For people who don’t know, it’s a free character in the Illustrator puppet library that you can directly import into your project.
4. Animation Workflow in Adobe Character Animator
If you are looking for an all-in-one tutorial to understand the entire workflow of working with the software, this tutorial by Okay Samurai is the best place to get started.
5. Adding an Illustrator Puppet on Live Footage
In this tutorial, you’ll understand how you can create an Illustrator puppet and add it to real-life footage, even when there’s camera movement.
6. Using the Walk Behavior in Adobe Character Animator
This tutorial will be the perfect knowledge hub. In this tutorial, you’ll learn about the basics of using the walk behavior in Adobe Character Animator and how to apply it to different characters to make it walk across the scene.
7. Creating and Implementing Replays
Replays are one of the most powerful (and one of the latest) features of Adobe Character Animator. With Replays, you can record a gesture/movement and apply a trigger to use it anytime you want throughout the animation. This tutorial will help you understand how to implement the replays in the software and use them to craft the perfect storyline.
8. Cartoon Workflow in Character Animator
Thanks to this amazing 1 hour 40 minutes long Adobe animate character tutorial, you’ll be able to get familiar with the complete workflow of pairing the software with other tools and compiling a cartoon animation at the end using Adobe After Effects.
9. Running an Animated Livestream
If you are a YouTuber or have your own Instagram brand, this will be a pretty exciting way to engage with your audience. Simply use the livestream feature, create a stunning 2D character, and interact with your audience in a more interactive manner.
10. Working With Adobe Fresco and Character Animator
This is also a useful Adobe character animate tutorial by David Werner that’ll help you understand how to use both Adobe Fresco and Character Animator together. After this tutorial, you’ll be able to import your Fresco drawings into Character Animator and customize them to create visually engaging animations.
Key Takeaways from This Episode
● Adobe Character Animator is among the most powerful animation tools you can use in 2021 to create stunning animations
● You should always start designing an animation in Character Animator by writing dedicated scripts.
● You can also pair Adobe Character Animator with other Adobe editing tools such as Illustrator, Photoshop, and Adobe Fresco
Whether you are a beginner or an experienced graphics designer, you can use Adobe Character Animator to animate 2D characters easily. But, if you are an absolute beginner, it might take a few weeks to get familiar with the software’s features/workflow.
Irrespective of your experience with the tool, this Adobe animate character tutorial will help you get started and edit visually appealing animated shorts.
In this article
01 [How Do I Animate a Character in Adobe Animation?](#Part 1)
02 [Is Adobe Character Animator Easy to Use?](#Part 2)
03 [How to Rig a Simple Character | Adobe Animate Tutorial](#Part 3)
04 [One-Stop Solution to Edit High-Quality Videos in Every Situation](#Part 4)
Part 1 How Do I Animate a Character in Adobe Animation?
1. Start With a Script
If you want to create an animation that engages the customers, you must always start your journey with a script. Like a short movie, even an animated sketch requires a script. It’ll set the tone for the entire animation and help you start sailing in the right direction.
If you have a full production team, the writers will take care of scriptwriting and you’ll just have to suggest a few changes in between. But, if you are working on your own, you’ll have to handle the script writing all-by-yourself. In any case, however, make sure to start by crafting a beautiful script with an amazing storyline.
2. Record the Voiceover
The next step in our Adobe Animate character tutorial is recording the voiceover for the video. Unless you are planning to create a GIF animation, you would need a dedicated voiceover for your animated video to make it more appealing.
Now, before you even begin with animating the character, recording the audio will help you clear out one task from the list. To record the voiceover, you can try different types of audio recording software and equipment.
3. Start Creating the Character
At this point in our Adobe animate character tutorial, we are ready to design the actual character itself. To do this, launch Adobe Character Animator on your system. On its home screen, you’ll see a tab containing different types of characters (along with their dedicated Photoshop and Illustrator versions). Click on any of these characters and it’ll automatically open in the editing panel of Adobe character animator.
Now, you can start with animating the character. In the top-left corner, you’ll see two different options, i.e., “
If you double-tap the “Scene” tab the character will open up in a real-time environment where it’ll react to your movement and speech. Make sure that the webcam stays turned on throughout the process. Then, simply press the “Record” button and start recording the entire scene for your animation.
Part 2 Is Adobe Character Animator Easy to Use?
That’s how you can animate a character in Adobe character animator and create visually stunning animations. However, many beginners want to know if it’s easy to use Adobe character animator. The answer is Yes! With Character Animator, Adobe has developed a relatively easy-to-use interface that anyone can use easily.
Part 3 How to Rig a Simple Character | Adobe Animate Tutorial
Now, if you aspire to become a skilled graphic designer, here are a few tutorials that’ll help you get started with Adobe Character Animator and explore all its features.
1. Getting Started With Adobe Character Animator
This 15 minutes Adobe animate character tutorial by Okay Samurai is the best thing you’ll find on the Internet, especially if you are a complete beginner and want to learn different elements of the software.
2. Creating Illustrator Puppet
Adobe Character Animator lets users create both Illustrator and Photoshop puppets. If you want to become an expert in the former, this hour-long YouTube video is the best tutorial for you.
3. Getting Started With Advanced Rigging
This is another useful Adobe Animate character tutorial that’s exclusively designed to help editors understand the basics of creating a character such as “Surr”. For people who don’t know, it’s a free character in the Illustrator puppet library that you can directly import into your project.
4. Animation Workflow in Adobe Character Animator
If you are looking for an all-in-one tutorial to understand the entire workflow of working with the software, this tutorial by Okay Samurai is the best place to get started.
5. Adding an Illustrator Puppet on Live Footage
In this tutorial, you’ll understand how you can create an Illustrator puppet and add it to real-life footage, even when there’s camera movement.
6. Using the Walk Behavior in Adobe Character Animator
This tutorial will be the perfect knowledge hub. In this tutorial, you’ll learn about the basics of using the walk behavior in Adobe Character Animator and how to apply it to different characters to make it walk across the scene.
7. Creating and Implementing Replays
Replays are one of the most powerful (and one of the latest) features of Adobe Character Animator. With Replays, you can record a gesture/movement and apply a trigger to use it anytime you want throughout the animation. This tutorial will help you understand how to implement the replays in the software and use them to craft the perfect storyline.
8. Cartoon Workflow in Character Animator
Thanks to this amazing 1 hour 40 minutes long Adobe animate character tutorial, you’ll be able to get familiar with the complete workflow of pairing the software with other tools and compiling a cartoon animation at the end using Adobe After Effects.
9. Running an Animated Livestream
If you are a YouTuber or have your own Instagram brand, this will be a pretty exciting way to engage with your audience. Simply use the livestream feature, create a stunning 2D character, and interact with your audience in a more interactive manner.
10. Working With Adobe Fresco and Character Animator
This is also a useful Adobe character animate tutorial by David Werner that’ll help you understand how to use both Adobe Fresco and Character Animator together. After this tutorial, you’ll be able to import your Fresco drawings into Character Animator and customize them to create visually engaging animations.
Key Takeaways from This Episode
● Adobe Character Animator is among the most powerful animation tools you can use in 2021 to create stunning animations
● You should always start designing an animation in Character Animator by writing dedicated scripts.
● You can also pair Adobe Character Animator with other Adobe editing tools such as Illustrator, Photoshop, and Adobe Fresco
The Best 20 Motion Graphics Companies & Studios
The Best 20 Motion Graphics Companies & Studios
An easy yet powerful editor
Numerous effects to choose from
Detailed tutorials provided by the official channel
Generally, while watching the movies or the commercial ads you will see the great work of the motion graphic motion graphic companies but sometimes you don’t know who they are or how to connect with them. Here, we will share the best 20 motion graphics studio providing motion graphics services.
In this article
01 [Best 20 Motion Graphics Companies & Studios](#Part 1)
02 [Make Motion Graphics Videos without Hiring Motion Graphics Company](#Part 2)
Part 1 Best 20 Motion Graphics Companies & Studios
01Galera
Location: L’viv, Ukraine
Min. Project Size: $5,000+
Avg. Hourly Rate: $- $/ hr
Service Focus: Video Production
Animation Focus: 50%
02Cub Studio
Location: London
Min. Project Size: Not Disclosed
Avg. Hourly Rate: Not Disclosed
Service Focus: Video Production
Animation Focus: 45%
03BuzzFlick
Location: New York,
Min. Project Size: $1,000+
Avg. Hourly Rate: $- $/ hr
Service Focus: Video Production & Graphic Design
Animation Focus: 20%
04Thinkmojo
Location: Campbell
Min. Project Size: Not Disclosed
Avg. Hourly Rate: Not Disclosed
Service Focus: Video Production
Animation Focus: 50%
05Covalent
Location: Pittsburgh, United States
Min. Project Size: $5,000+
Avg. Hourly Rate: $1- $1/ hr
Service Focus: Video Production, Digital Strategy & Broadcast Video
Animation Focus: 40%
06FEVR
Location: Miami
Min. Project Size: $10,000+
Avg. Hourly Rate: $1- $1/ hr
Service Focus: Video Production
Animation Focus: 100%
07Sparkhouse
Location: Irvine & Carlsbad
Min. Project Size: $10,000+
Avg. Hourly Rate: $1- $1/ hr
Service Focus: Video Production
Animation Focus: 50%
08Shoot You
Location: New York
Min. Project Size: $5,000+
Avg. Hourly Rate: $1- $1/ hr
Service Focus: Video Production, Advertising & Content Marketing
Animation Focus: 50%
09Early Light Media
Location: Severna Park, United States
Min. Project Size: Undisclosed
Avg. Hourly Rate: $1- $1/ hr
Service Focus: Video Production
Animation Focus: 40%
10Commotion Engine
Location: Chamblee, United States
Min. Project Size: $5,000+
Avg. Hourly Rate: $1- $1/ hr
Service Focus: Video Production & Graphic Design
Animation Focus: 35%
11Demo Duck
Location: Chicago. United States
Min. Project Size: $5,000+
Avg. Hourly Rate: $1- $1/ hr
Service Focus: Video Production
Animation Focus: 40%
12The Mill
Location: London, United Kingdom
Min. Project Size: $10,000+
Avg. Hourly Rate: $1- $1/ hr
Service Focus: Graphic Design, Video Production
Animation Focus: 40%
13Troika
Location: Los Angeles, United States
Min. Project Size: $5,000+
Avg. Hourly Rate: $1- $1/ hr
Service Focus: Advertising, Branding & Digital Strategy
Animation Focus: 60%
14Explainify
Location: Fayetteville, United States
Min. Project Size: $10,000+
Avg. Hourly Rate: $1- $1/ hr
Service Focus: Video Production & Broadcast Video
Animation Focus: 40%
15Rip Media Group
Location: Los Angeles, United States
Min. Project Size: $1,000+
Avg. Hourly Rate: $1- $1/ hr
Service Focus: Video Production, Content Marketing & Conversion Optimization
Animation Focus: 40%

16CRFT
Location: New York
Min. Project Size: $1,000+
Avg. Hourly Rate: $- $/ hr
Service Focus: Video Production
Animation Focus: 51%
17Production M
Location: Studio City, United States
Min. Project Size: $10,000+
Avg. Hourly Rate: $30/ hr
Service Focus: Video Production
Animation Focus: 50%

18Signature Video Group
Location: Toronto, Canada
Min. Project Size: $10,000+
Avg. Hourly Rate: Undisclosed
Service Focus: Video Production
Animation Focus: 50%
19BX Films
Location: Walnut Creek, CA
Min. Project Size: $25,000+
Avg. Hourly Rate: $1- $1/ hr
Service Focus: Video Production & Broadcast Video
Animation Focus: 50%
20Bottle Rocket Media
Location: Chicago, IL
Min. Project Size: $10,000+
Avg. Hourly Rate: $1- $1/ hr
Service Focus: Video Production & Broadcast Video
Animation Focus: 50%
Part 2 Make Motion Graphics Videos without Hiring Motion Graphics Company
● Wondershare Filmora Video Editor
Wondershare Filmora is powerful motion graphic video maker software which really helps you a lot if you don’t want to hire a motion graphics agency and want to make your videos by yourself. This video creator program comes with several features such as adding effects, audio, video, text, stickers and many other types of elements to the motion graphic videos.
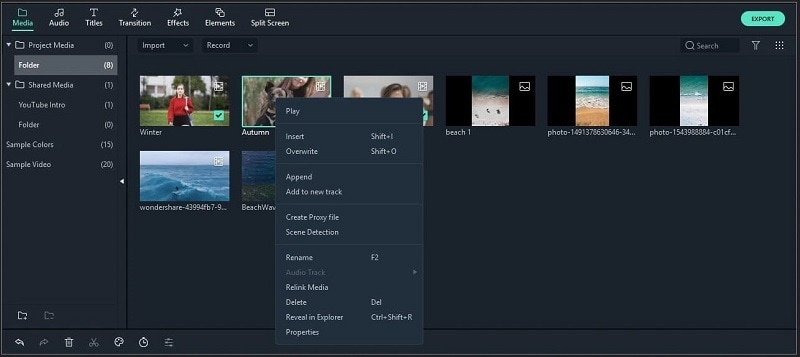
This program can save your lots of cost of hiring motion graphics studio for making your product or brand videos. The best part of the software is that it comes with a very easy to use interface which can be used by everyone to create videos even if you are a newbie or the non tech savvy person. It comes with the options to add motion tracking, key framing, color match, audio ducking, green screen, video split and video effects.
Wondershare Filmora - Best Video Editor for Mac/Windows
5,481,435 people have downloaded it.
Build unique custom animations without breaking a sweat.
Focus on creating epic stories and leave the details to Filmora’s auto features.
Start a creative adventure with drag & drop effects and endless possibilities.
Filmora simplifies advanced features to save you time and effort.
Filmora cuts out repetition so you can move on to your next creative breakthrough.
● Key Takeaways from This Episode →
● The list we have compiled in this article about the motion graphics services companies, are the companies who are providing very good services for the motion graphics videos.
● These best motion graphics studios can help you to create the best product videos according to your choice. But, the fact is that these companies charges lots of price for making videos.
Generally, while watching the movies or the commercial ads you will see the great work of the motion graphic motion graphic companies but sometimes you don’t know who they are or how to connect with them. Here, we will share the best 20 motion graphics studio providing motion graphics services.
In this article
01 [Best 20 Motion Graphics Companies & Studios](#Part 1)
02 [Make Motion Graphics Videos without Hiring Motion Graphics Company](#Part 2)
Part 1 Best 20 Motion Graphics Companies & Studios
01Galera
Location: L’viv, Ukraine
Min. Project Size: $5,000+
Avg. Hourly Rate: $- $/ hr
Service Focus: Video Production
Animation Focus: 50%
02Cub Studio
Location: London
Min. Project Size: Not Disclosed
Avg. Hourly Rate: Not Disclosed
Service Focus: Video Production
Animation Focus: 45%
03BuzzFlick
Location: New York,
Min. Project Size: $1,000+
Avg. Hourly Rate: $- $/ hr
Service Focus: Video Production & Graphic Design
Animation Focus: 20%
04Thinkmojo
Location: Campbell
Min. Project Size: Not Disclosed
Avg. Hourly Rate: Not Disclosed
Service Focus: Video Production
Animation Focus: 50%
05Covalent
Location: Pittsburgh, United States
Min. Project Size: $5,000+
Avg. Hourly Rate: $1- $1/ hr
Service Focus: Video Production, Digital Strategy & Broadcast Video
Animation Focus: 40%
06FEVR
Location: Miami
Min. Project Size: $10,000+
Avg. Hourly Rate: $1- $1/ hr
Service Focus: Video Production
Animation Focus: 100%
07Sparkhouse
Location: Irvine & Carlsbad
Min. Project Size: $10,000+
Avg. Hourly Rate: $1- $1/ hr
Service Focus: Video Production
Animation Focus: 50%
08Shoot You
Location: New York
Min. Project Size: $5,000+
Avg. Hourly Rate: $1- $1/ hr
Service Focus: Video Production, Advertising & Content Marketing
Animation Focus: 50%
09Early Light Media
Location: Severna Park, United States
Min. Project Size: Undisclosed
Avg. Hourly Rate: $1- $1/ hr
Service Focus: Video Production
Animation Focus: 40%
10Commotion Engine
Location: Chamblee, United States
Min. Project Size: $5,000+
Avg. Hourly Rate: $1- $1/ hr
Service Focus: Video Production & Graphic Design
Animation Focus: 35%
11Demo Duck
Location: Chicago. United States
Min. Project Size: $5,000+
Avg. Hourly Rate: $1- $1/ hr
Service Focus: Video Production
Animation Focus: 40%
12The Mill
Location: London, United Kingdom
Min. Project Size: $10,000+
Avg. Hourly Rate: $1- $1/ hr
Service Focus: Graphic Design, Video Production
Animation Focus: 40%
13Troika
Location: Los Angeles, United States
Min. Project Size: $5,000+
Avg. Hourly Rate: $1- $1/ hr
Service Focus: Advertising, Branding & Digital Strategy
Animation Focus: 60%
14Explainify
Location: Fayetteville, United States
Min. Project Size: $10,000+
Avg. Hourly Rate: $1- $1/ hr
Service Focus: Video Production & Broadcast Video
Animation Focus: 40%
15Rip Media Group
Location: Los Angeles, United States
Min. Project Size: $1,000+
Avg. Hourly Rate: $1- $1/ hr
Service Focus: Video Production, Content Marketing & Conversion Optimization
Animation Focus: 40%
16CRFT
Location: New York
Min. Project Size: $1,000+
Avg. Hourly Rate: $- $/ hr
Service Focus: Video Production
Animation Focus: 51%
17Production M
Location: Studio City, United States
Min. Project Size: $10,000+
Avg. Hourly Rate: $30/ hr
Service Focus: Video Production
Animation Focus: 50%
18Signature Video Group
Location: Toronto, Canada
Min. Project Size: $10,000+
Avg. Hourly Rate: Undisclosed
Service Focus: Video Production
Animation Focus: 50%
19BX Films
Location: Walnut Creek, CA
Min. Project Size: $25,000+
Avg. Hourly Rate: $1- $1/ hr
Service Focus: Video Production & Broadcast Video
Animation Focus: 50%
20Bottle Rocket Media
Location: Chicago, IL
Min. Project Size: $10,000+
Avg. Hourly Rate: $1- $1/ hr
Service Focus: Video Production & Broadcast Video
Animation Focus: 50%
Part 2 Make Motion Graphics Videos without Hiring Motion Graphics Company
● Wondershare Filmora Video Editor
Wondershare Filmora is powerful motion graphic video maker software which really helps you a lot if you don’t want to hire a motion graphics agency and want to make your videos by yourself. This video creator program comes with several features such as adding effects, audio, video, text, stickers and many other types of elements to the motion graphic videos.
This program can save your lots of cost of hiring motion graphics studio for making your product or brand videos. The best part of the software is that it comes with a very easy to use interface which can be used by everyone to create videos even if you are a newbie or the non tech savvy person. It comes with the options to add motion tracking, key framing, color match, audio ducking, green screen, video split and video effects.
Wondershare Filmora - Best Video Editor for Mac/Windows
5,481,435 people have downloaded it.
Build unique custom animations without breaking a sweat.
Focus on creating epic stories and leave the details to Filmora’s auto features.
Start a creative adventure with drag & drop effects and endless possibilities.
Filmora simplifies advanced features to save you time and effort.
Filmora cuts out repetition so you can move on to your next creative breakthrough.
● Key Takeaways from This Episode →
● The list we have compiled in this article about the motion graphics services companies, are the companies who are providing very good services for the motion graphics videos.
● These best motion graphics studios can help you to create the best product videos according to your choice. But, the fact is that these companies charges lots of price for making videos.
Also read:
- Updated In 2024, 10 Popular Cartoon Characters That You Wont Want to Miss
- Tips That Show Anybody How to Get Awesome Background for Slideshow in PowerPoint for 2024
- New 2024 Approved Why These 10+ Top Text Motion Templates Are Worth Your Attention
- Updated Top 10 Sketch Animation Video Makers
- 2024 Approved Best 12 Evil Cartoon Characters of All Time
- 2024 Approved How to Create an Animated Sticky Navbar
- Updated 10 Best Convert Video Between GIF Software High Quality
- Updated 2024 Approved How to Create a Whiteboard Video Step by Step
- New Top 15 Male Anime Characters By Voting for 2024
- New 2024 Approved 12 Websites with Triggered Animate on Scroll Examples
- Updated What Is the Best Collage Photo Grid Maker - Experts Choice for 2024
- Tips for Canva Animated Elements for 2024
- 5 Free Animated Gif Sources You Must Check
- Whats the Best 10 Photo Animator Templates That Bring Your Images to Life?
- New In 2024, Easy Shortcut to Convert Videos to Gifs on iPhone
- Top 15 2D Animation Software Free That Worth to Try
- New Learn How to Make Your Characters Interactive in Unity Animation Rigging for 2024
- Updated Learn Easy Blender Rigging in Only 2 Minutes for 2024
- Updated 2024 Approved Best Guide for Beginners on 2D Animation Making
- Updated In 2024, How To Turn Yourself Into Anime Character
- 2024 Approved All About 3D Medical Animation
- In 2024, How to Turn Yourself Into a WhatsApp Cartoon
- Before You Learn Facebook Slideshow 5 Things You Should Know for 2024
- New Top 15 Greatest Claymation Movies of All Time
- New Tutorials to Make Animated Images
- New Looking for Love Animated GIFs? Here Are 5 Free Sources For You for 2024
- Updated 2024 Approved Step-by-Step Guide to Send Gif WhatsApp on Android
- New Best 10 Popular Cartoons You Forgot Existed
- New In 2024, Everything You Need to Know About Becoming a Motion Graphic Designer
- New In 2024, Best 10 3D Text Animation Templates
- Updated Ideas of Learning How to Send WhatsApp Animated Gifs
- New Best 10 Animated Templates in Canva
- New 2024 Approved 10 Cartoon Photo Converters You Couldnt Do Without
- In 2024, The Top 20 Motion Graphics Companies & Studios
- 8 Solutions to Fix Find My Friends Location Not Available On Oppo Find X6 Pro | Dr.fone
- How To Transfer Data From Apple iPhone 15 Pro To Other iPhone 11 Pro Max devices? | Dr.fone
- Bricked Your Honor Play 40C? Heres A Full Solution | Dr.fone
- Life360 Circle Everything You Need to Know On Motorola Moto E13 | Dr.fone
- How To Unlock iPhone 14 Pro Official Method to Unlock Your iPhone 14 Pro
- In 2024, Does Airplane Mode Turn off GPS Location On Lava Yuva 3? | Dr.fone
- Different Methods for Resetting Tecno Pova 6 Pro 5G Phones with Screen Locked and Not | Dr.fone
- In 2024, Top 5 Honor Magic5 Ultimate Bypass FRP Tools for PC That Actually Work
- Top 9 Motorola Edge 2023 Monitoring Apps for Parental Controls | Dr.fone
- How To Stream Anything From Itel S23+ to Apple TV | Dr.fone
- In 2024, Bypass iCloud Activation Lock with IMEI Code On Apple iPhone 12 Pro Max
- Factory Reset iPhone SE | Dr.fone
- Fix Unfortunately Settings Has Stopped on Asus ROG Phone 8 Quickly | Dr.fone
- How to Simulate GPS Movement in AR games On OnePlus 11 5G? | Dr.fone
- How to Downgrade Apple iPhone 8 Plus to the Previous iOS System Version? | Dr.fone
- In 2024, How to Reset Apple ID and Apple Password From iPhone 8 Plus
- 8 Solutions to Fix Find My Friends Location Not Available On Nokia C22 | Dr.fone
- In 2024, Which Pokémon can Evolve with a Moon Stone For Samsung Galaxy A24? | Dr.fone
- Super Easy Ways To Deal with Vivo V27e Unresponsive Screen | Dr.fone
- Top 5 Car Locator Apps for Vivo X100 Pro | Dr.fone
- In 2024, 6 Proven Ways to Unlock Realme 12+ 5G Phone When You Forget the Password
- How to Resolve Honor X8b Screen Not Working | Dr.fone
- In 2024, How to Fix iPad or Apple iPhone XS Max Stuck On Activation Lock?
- Hard Reset Lava Agni 2 5G in 3 Efficient Ways | Dr.fone
- In 2024, iSpoofer is not working On Oppo A1x 5G? Fixed | Dr.fone
- In 2024, How To Unlock Apple iPhone 11 Pro 3 Ways To Unlock
- Quick Fixes for Why Is My Oppo Find X6 Pro Black and White | Dr.fone
- Title: 2024 Approved How to Create a Whiteboard Video Step by Step 2023 Updated
- Author: Elon
- Created at : 2024-05-19 03:04:51
- Updated at : 2024-05-20 03:04:51
- Link: https://animation-videos.techidaily.com/2024-approved-how-to-create-a-whiteboard-video-step-by-step-2023-updated/
- License: This work is licensed under CC BY-NC-SA 4.0.
