
:max_bytes(150000):strip_icc():format(webp)/GettyImages-667603173-fac0b8f4b1d9453c866d332dc73821f8.jpg)
2024 Approved How to Create Benime Whiteboard Animation on Android
How to Create Benime Whiteboard Animation on Android
How to Create Benime Whiteboard Animation in Android
An easy yet powerful editor
Numerous effects to choose from
Detailed tutorials provided by the official channel
Millions of people on social media would want to post the working system, information, and business policies on a topic. For this reason, such people need an easy way to make a good quality influential video in a short time. Although many applications can help you create animated videos.
In this article, we will be talking about whiteboard animation and, more specifically, about Benime whiteboard animation mod APK.
In this article
01 [What’s Benime Used for?](#Part 1)
02 [How to Create Benime Whiteboard Animation in Android](#Part 2)
Part 1 What’s Benime Used for?
Benime is the first doodle video creation application on Android devices that allows users to create professional and realistic doodle videos within minutes. It can add music and voice-over to audio, create presentations and marketing videos, and create a whiteboard animation using built-in assets.
One of the practical uses of Benime whiteboard animation is that it makes it very easy for anybody to create a professional whiteboard animation without any experience or knowledge in animation. With this application, you can use the built-in templates or decide to start from scratch using your drawings or images, then record yourself talking over the top of your work. It is one of the most active Android applications to explain ideas through a captivating animated video that can eventually increase your followers quickly.
It is used not just to explain information in an impersonal codon way but also to connect with your audience. By allowing your audience to show concern about what you are trying to showcase and evoking empathy.
It helps you get the audience to pay attention to the content you are creating by providing you with personalized graphics, colors, and images.
Benime is a great application that can help create an animated video using built-in assets. The application is flexible, user-friendly, and accessible via Benime whiteboard animation APK download. To download the Android application and make your desired video, you can also visit the Google play store to proceed with downloading the application as it contains advertisements and offers in-app purchases.
So, in short, we can say that Benime is valuable for,
● Whiteboard animation creation
● Inbuilt assets for video making
● Editing video with either voice, music, text, color
● Motion Slide animation
● Board background
● Supports online rendering of videos
● Instant preview functioning
● Sharing video in MP4 format
Part 2 How to Create Benime Whiteboard Animation in Android
We will also be giving you tips on all you need to know about creating a whiteboard animation:
● Write a script, whether it is a short script or a regular video. The whiteboard animation video might not succeed with exciting information and images and no coherent story. Since it is not a set of bullet points, storyboards, or blog stories, having a proper script is everything you need.
● Next is to start your storyboard to help you organize your thoughts much better. By creating a storyboard, you have a good idea of how the final product will look like and the transition of the story.
● Create memorable photos that will excite your audience. Perhaps if you are a creative person, this part will be much easier as all you need is to create a unique and fun image that will help pass the information that she wants to get across.
● Animates the created images and finds clearance between your script and the photos.
● Record the audio, which is the final step to ensure a perfectly synchronized audio and content.
Benime Whiteboard Animation application offers tons of features that can be used to enhance whiteboard animation creation. More so, here is a step-by-guide on how to use the Benime application more effectively and efficiently in creating a whiteboard animation:
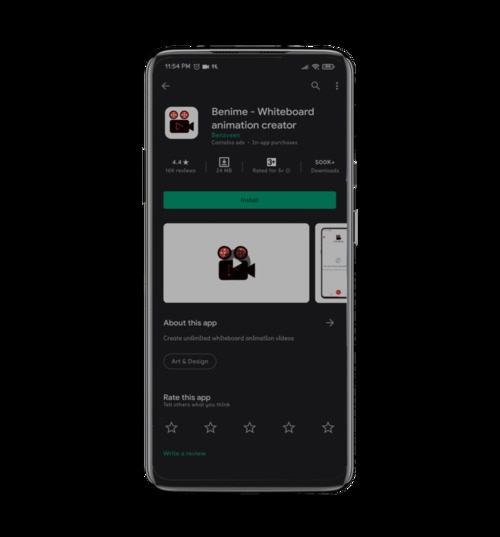
01Software Download
First, download and install the Benime application on your phone and then open it.
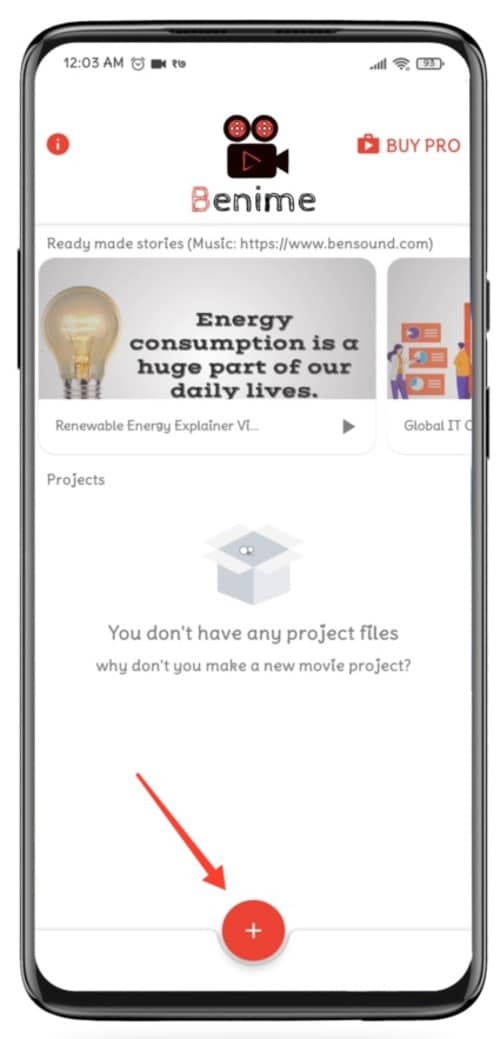
02Create New Video
Click on the + sign to make a new video. Enter the video title, choose the desired video quality, and click Create a Movie.
03Enter Text
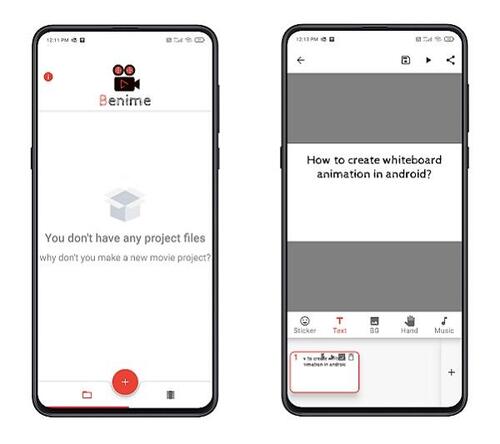
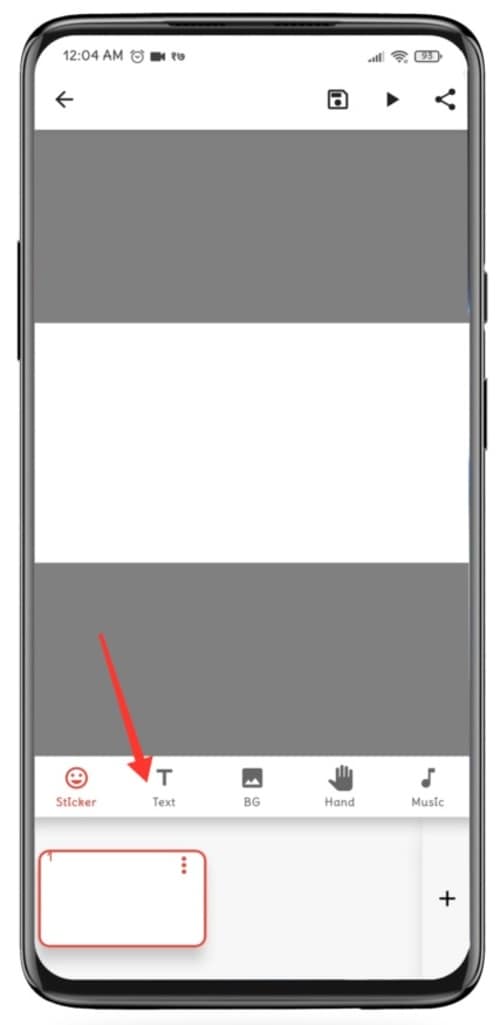
A blank slide will be visible, where you will make changes, tap the Text option to enter the text.
04Edit Text
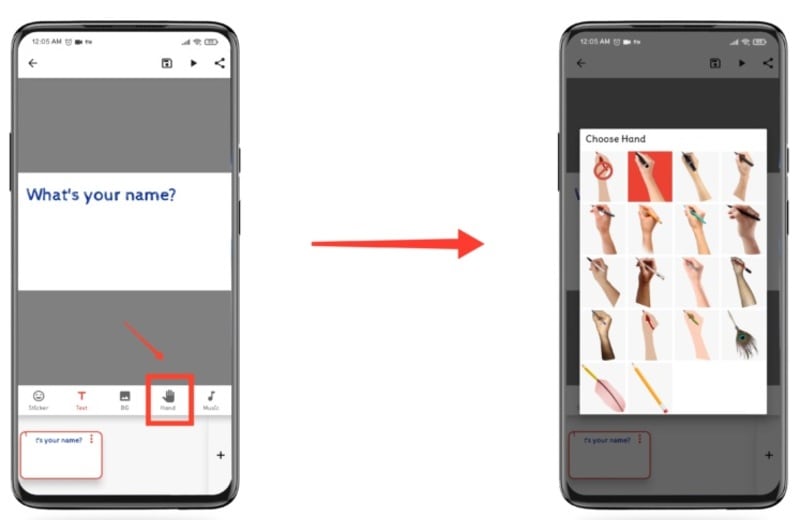
After entering your desired text, click on the Insert option. The text size can be changeable by swiping to the left or right on the size line. More so, you can edit the color of the text by clicking on the color option. You can also change and use the application by clicking on the hand option. Background color change can go with the BG option.
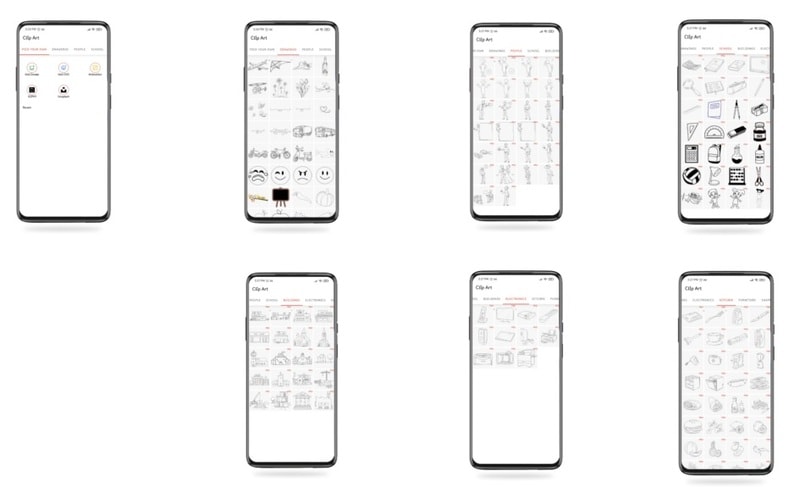
If you want to insert some characters, drawings, pictures, etc. Click on the sticker option at the bottom left and then slide to the right at the top to choose the icon or image that you want to insert.
05Add Audio
After you are ok with the text and image, you can now add your voice over or music by clicking on any of the two options: voice over and music track.
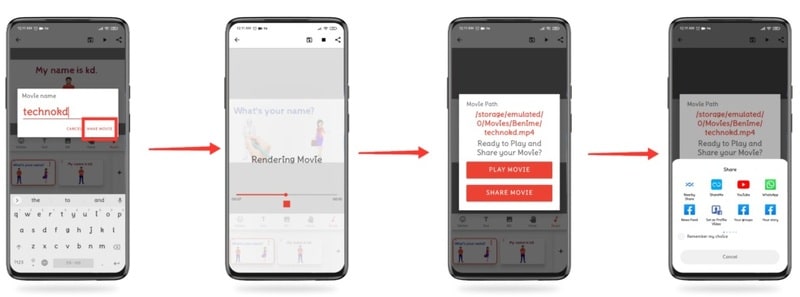
05Create and Share your Video
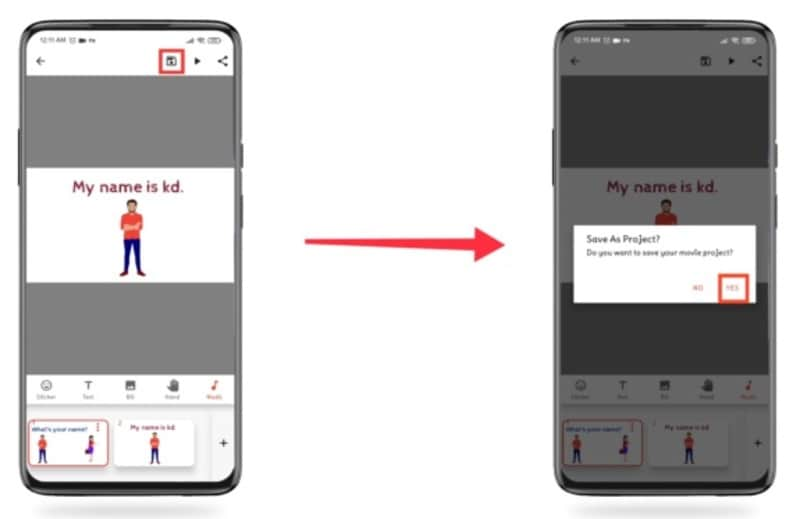
Lastly, click on the Save icon and then click on Yes. Then insert the name of the video and click on Make movie. Instantly the video will enter the rendering mode, and after this process, you will get the option of playing and sharing the film. Select the one you wish.
Benime Whiteboard animation can also be on PC via varieties of software. However, the Filmora software has proven to be one of the best because of its features. While working or creating a storyboard, the most aptly used software is Filmora. That will make it easy to create whiteboard animation with lots and lots of editing options in terms of transparency, 2D/animation, smooth keyframing, and a lot more.
Part 3 PC Tools Useful For Whiteboard Animation
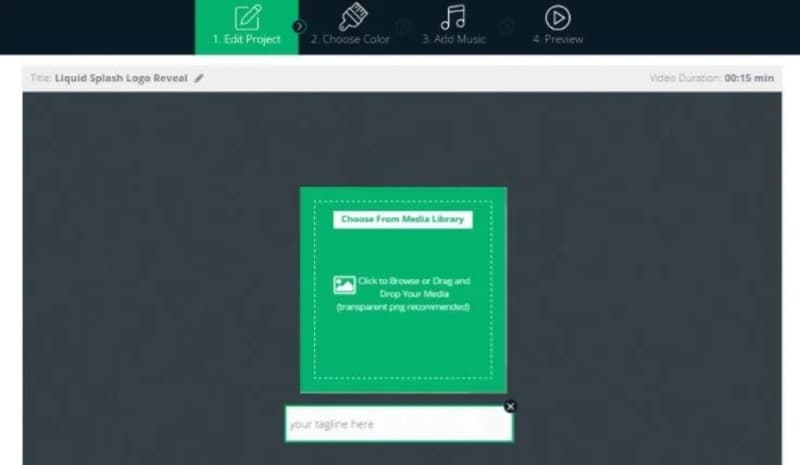
01Renderforest Whiteboard Animation
Renderforest whiteboard animation: This is a free whiteboard animation tool that creates exciting and unique animation stories, a cloud-based program that does not need a powerful machine. It weeds hundreds of ready-made scenes to enhance your whiteboard animation stories
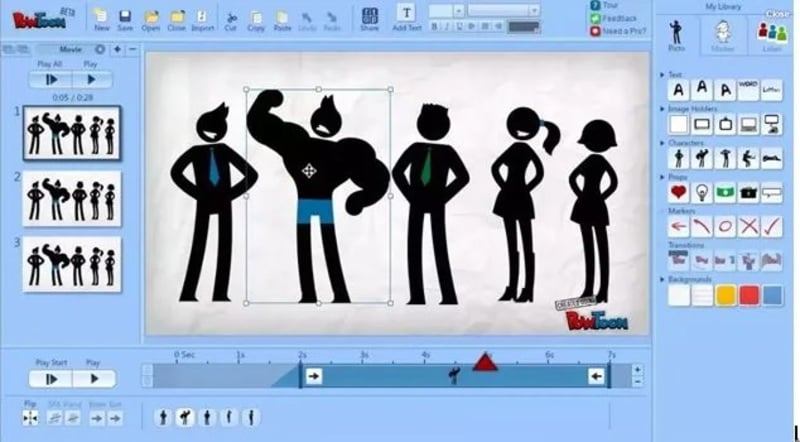
02Powtoon Whiteboard Animation
This can make a whiteboard animation very quickly for free, with an object to touch up video and free royalty music to make your whiteboard animation perfect.
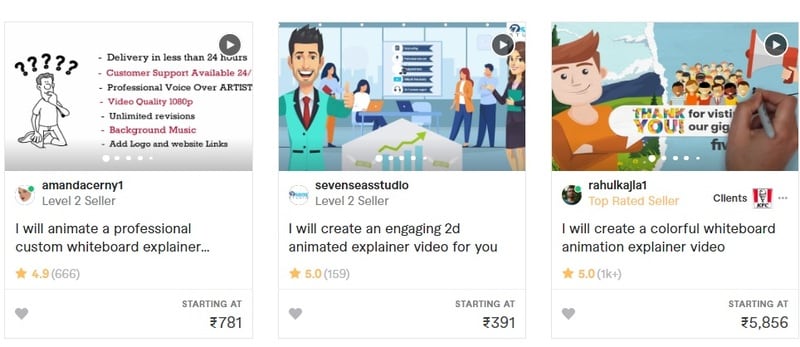
03Fiverr Whiteboard Animation
If looking for different whiteboard and animation explainers, Fiverr whiteboard animation will be the right choice. That will assist you in how to keep or engage your audience with proper explanation.
04Whiteboard Animation Videoscribe
Being in the education domain is a noble cause, and you can enhance the delivery of quality education through Whiteboard Animation Videoscribe. That will give you the freedom to modify your content with animation drawing. However, it is a subscription-based service.
05Vyond Whiteboard Animation
Vyond whiteboard animation provides you with in-house whiteboard animated video production solutions for educational, professional, or training purposes.
06Animaker Whiteboard Animation
This is another free whiteboard animation software used to make videos quickly with various functions. It includes a free-to-use option and a full video length that is enough. It supports a few props, characters, infographic icons, animated maps, charts, etc.
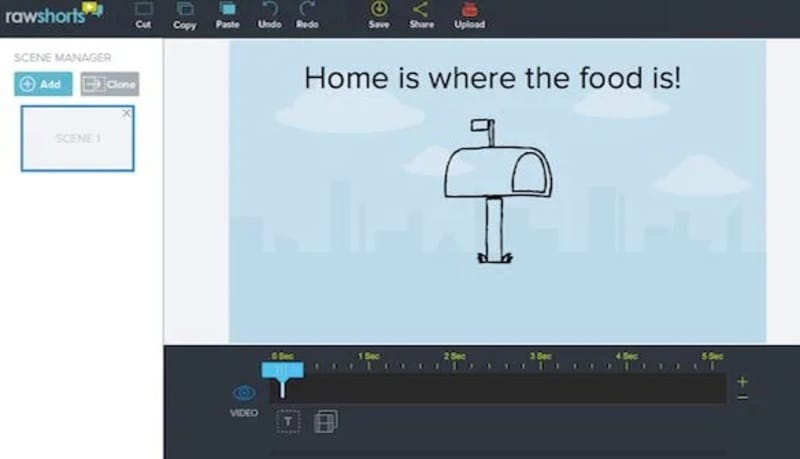
07Rawshorts Whiteboard Animation
This simple, easy-to-use whiteboard animation comes with an explainer video with a drag-and-drop interface. You can either start from nothing or choose between the animated whiteboard templates. Rendering and sharing the animated video in this software is super easy and comes with a Facebook, YouTube, and other social media platform integration. Anyone can use whether you are a beginner or professional, creating videos to show your client, training videos, and marketing videos that help demonstrate a strategy.
08Videojeeves Whiteboard Animation
This software has many whiteboard animation options, whether you are open to sharing something with your friends or creating a whiteboard animation for work. It helps to make your job easier and faster.
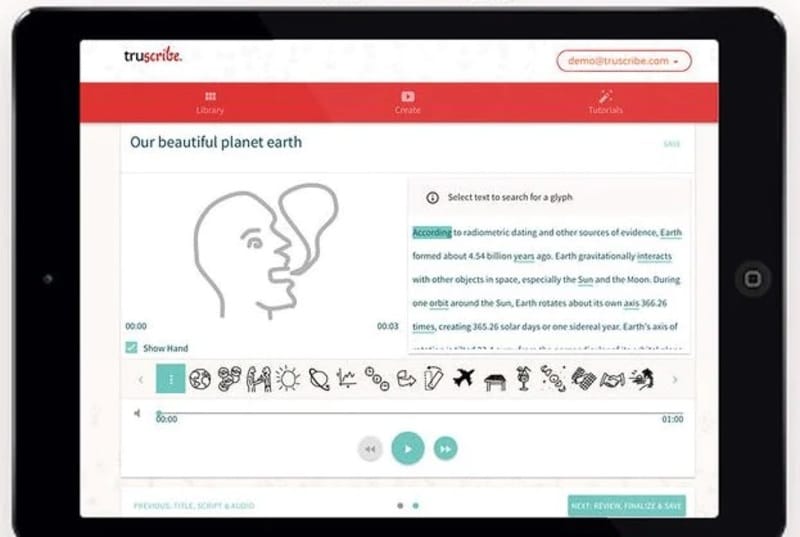
09Truscribe Whiteboard Animation
This premier software offers customers a dedicated plan when they are whiteboard animation videos can be created. With this software, the process can start when customers request a quote on their website, giving them more reliable information about the pricing and strategy.
● Key Takeaways from This Episode →
● Basic functionality of Benime Whiteboard Animation software.
● How to create whiteboard animation with Benime.
● Whiteboard animation on PC with Filmora and some other relevant software.
Millions of people on social media would want to post the working system, information, and business policies on a topic. For this reason, such people need an easy way to make a good quality influential video in a short time. Although many applications can help you create animated videos.
In this article, we will be talking about whiteboard animation and, more specifically, about Benime whiteboard animation mod APK.
In this article
01 [What’s Benime Used for?](#Part 1)
02 [How to Create Benime Whiteboard Animation in Android](#Part 2)
Part 1 What’s Benime Used for?
Benime is the first doodle video creation application on Android devices that allows users to create professional and realistic doodle videos within minutes. It can add music and voice-over to audio, create presentations and marketing videos, and create a whiteboard animation using built-in assets.
One of the practical uses of Benime whiteboard animation is that it makes it very easy for anybody to create a professional whiteboard animation without any experience or knowledge in animation. With this application, you can use the built-in templates or decide to start from scratch using your drawings or images, then record yourself talking over the top of your work. It is one of the most active Android applications to explain ideas through a captivating animated video that can eventually increase your followers quickly.
It is used not just to explain information in an impersonal codon way but also to connect with your audience. By allowing your audience to show concern about what you are trying to showcase and evoking empathy.
It helps you get the audience to pay attention to the content you are creating by providing you with personalized graphics, colors, and images.
Benime is a great application that can help create an animated video using built-in assets. The application is flexible, user-friendly, and accessible via Benime whiteboard animation APK download. To download the Android application and make your desired video, you can also visit the Google play store to proceed with downloading the application as it contains advertisements and offers in-app purchases.
So, in short, we can say that Benime is valuable for,
● Whiteboard animation creation
● Inbuilt assets for video making
● Editing video with either voice, music, text, color
● Motion Slide animation
● Board background
● Supports online rendering of videos
● Instant preview functioning
● Sharing video in MP4 format
Part 2 How to Create Benime Whiteboard Animation in Android
We will also be giving you tips on all you need to know about creating a whiteboard animation:
● Write a script, whether it is a short script or a regular video. The whiteboard animation video might not succeed with exciting information and images and no coherent story. Since it is not a set of bullet points, storyboards, or blog stories, having a proper script is everything you need.
● Next is to start your storyboard to help you organize your thoughts much better. By creating a storyboard, you have a good idea of how the final product will look like and the transition of the story.
● Create memorable photos that will excite your audience. Perhaps if you are a creative person, this part will be much easier as all you need is to create a unique and fun image that will help pass the information that she wants to get across.
● Animates the created images and finds clearance between your script and the photos.
● Record the audio, which is the final step to ensure a perfectly synchronized audio and content.
Benime Whiteboard Animation application offers tons of features that can be used to enhance whiteboard animation creation. More so, here is a step-by-guide on how to use the Benime application more effectively and efficiently in creating a whiteboard animation:
01Software Download
First, download and install the Benime application on your phone and then open it.
02Create New Video
Click on the + sign to make a new video. Enter the video title, choose the desired video quality, and click Create a Movie.
03Enter Text
A blank slide will be visible, where you will make changes, tap the Text option to enter the text.
04Edit Text
After entering your desired text, click on the Insert option. The text size can be changeable by swiping to the left or right on the size line. More so, you can edit the color of the text by clicking on the color option. You can also change and use the application by clicking on the hand option. Background color change can go with the BG option.
If you want to insert some characters, drawings, pictures, etc. Click on the sticker option at the bottom left and then slide to the right at the top to choose the icon or image that you want to insert.
05Add Audio
After you are ok with the text and image, you can now add your voice over or music by clicking on any of the two options: voice over and music track.
05Create and Share your Video
Lastly, click on the Save icon and then click on Yes. Then insert the name of the video and click on Make movie. Instantly the video will enter the rendering mode, and after this process, you will get the option of playing and sharing the film. Select the one you wish.
Benime Whiteboard animation can also be on PC via varieties of software. However, the Filmora software has proven to be one of the best because of its features. While working or creating a storyboard, the most aptly used software is Filmora. That will make it easy to create whiteboard animation with lots and lots of editing options in terms of transparency, 2D/animation, smooth keyframing, and a lot more.
Part 3 PC Tools Useful For Whiteboard Animation
01Renderforest Whiteboard Animation
Renderforest whiteboard animation: This is a free whiteboard animation tool that creates exciting and unique animation stories, a cloud-based program that does not need a powerful machine. It weeds hundreds of ready-made scenes to enhance your whiteboard animation stories
02Powtoon Whiteboard Animation
This can make a whiteboard animation very quickly for free, with an object to touch up video and free royalty music to make your whiteboard animation perfect.
03Fiverr Whiteboard Animation
If looking for different whiteboard and animation explainers, Fiverr whiteboard animation will be the right choice. That will assist you in how to keep or engage your audience with proper explanation.
04Whiteboard Animation Videoscribe
Being in the education domain is a noble cause, and you can enhance the delivery of quality education through Whiteboard Animation Videoscribe. That will give you the freedom to modify your content with animation drawing. However, it is a subscription-based service.
05Vyond Whiteboard Animation
Vyond whiteboard animation provides you with in-house whiteboard animated video production solutions for educational, professional, or training purposes.
06Animaker Whiteboard Animation
This is another free whiteboard animation software used to make videos quickly with various functions. It includes a free-to-use option and a full video length that is enough. It supports a few props, characters, infographic icons, animated maps, charts, etc.
07Rawshorts Whiteboard Animation
This simple, easy-to-use whiteboard animation comes with an explainer video with a drag-and-drop interface. You can either start from nothing or choose between the animated whiteboard templates. Rendering and sharing the animated video in this software is super easy and comes with a Facebook, YouTube, and other social media platform integration. Anyone can use whether you are a beginner or professional, creating videos to show your client, training videos, and marketing videos that help demonstrate a strategy.
08Videojeeves Whiteboard Animation
This software has many whiteboard animation options, whether you are open to sharing something with your friends or creating a whiteboard animation for work. It helps to make your job easier and faster.
09Truscribe Whiteboard Animation
This premier software offers customers a dedicated plan when they are whiteboard animation videos can be created. With this software, the process can start when customers request a quote on their website, giving them more reliable information about the pricing and strategy.
● Key Takeaways from This Episode →
● Basic functionality of Benime Whiteboard Animation software.
● How to create whiteboard animation with Benime.
● Whiteboard animation on PC with Filmora and some other relevant software.
Adobe Rigger Is AWESOME
Adobe Auto Rigger is AWESOME
An easy yet powerful editor
Numerous effects to choose from
Detailed tutorials provided by the official channel
The Adobe Auto rigger is definitely something to look into if you want to quickly and easily prep 3D Animated Characters (without having to learn all the difficult ins and outs of Adobe 3D Rigging.) It’s a perfect tool for beginners.
Especially those that aren’t really looking to create big animated projects, just small animated characters or objects that they can use for their websites, video content, video game development, etc.
In this article
01 [What’s Adobe Auto Rigger?](#Part 1)
02 [How Do You Auto Rig a Character in Adobe?](#Part 2)
03 [Other AWESOME Auto Rigger Tools](#Part 3)
Part 1 What’s Adobe Auto Rigger?
Alright, so what is the Adobe Auto Rigger and how does it differ from Adobe Animate Advanced Rigging or Adobe After Effects Rigging? Is there any difference at all??? The simple answer? Yes, there is a definite difference.
It’s all thanks to the third-party tool, Mixamo, which will allow you to upload characters for auto rigging (basically bypassing the kind of work that is usually required for manually rigging and animating in Adobe Animate and After Effects.) We’ll talk more about this in the tutorial below. For now, all you need to know is that it takes care of setting up a character for you with only a few simple steps.
Thus, enabling you to quickly move forward in your projects if you wish. Whether you’re intending to create a quick little animation for your website, or jumping into a video editing software like Wondershare Filmora Video Editor (which is great professional software with everything you need to start creating high-quality content that you can share with your audience.)

Part 2 How Do You Auto Rig a Character in Adobe?
Now onto our promised tutorial. Here, we make use of the Adobe Auto Rigger, Mixamo, in order to demonstrate how you can bypass Adobe Rigging by making use of Mixamo’s auto-rigging functions or their pre-existing character models for creating your projects.
01Upload Your Own Character
To start, you’ll need to visit ‘Maximo.com’ and sign in with your Adobe ID (email and password required.)
You can also sign-up for free if you’d like. That option is available for those who may want to explore the available options first.
Once you’re logged in, go to the ‘Editor’ panel and prepare to upload a custom character for automatic rigging. This is assuming that you have a character design already prepared, of course. If not, then don’t worry. The next should help.

02(Optional) Browse for Downloadable Characters
The best part of Mixamo is that it has a rich library full of pre-rigged characters that you can use should you wish to. These can be found under the ‘Characters’ tab (shown in the image below.)
So, if you don’t have a character model prepared just yet or have no intention of diving too deeply into character design just in general, you don’t have to worry. You can just download one of the pre-rigged characters here and use them for your project.

03Rig a Custom Character
If you’ve decided to go forward with a custom character, after all, upload it to the Adobe Auto Rigger (shown in the image below.)
This is a very straightforward tool that you can use to place the most important markers on your figure (chin, wrists, elbows, knees, and groin). Once you’ve confirmed the placement of all these points, you can continue and come out of it with your Model auto-rigged and work-ready.

04Download Rigged Character and Begin Animation
It may take several minutes for the Adobe Auto Rigger to completely finish auto-rigging your project, so have a bit of patience. You’ll be taken back to the main interface when complete, and you’ll be able to download your now rigged model for use.
Part 3 Other AWESOME Auto Rigger Tools
Now, just in case you’re interested in other methods of automatically rigging outside of what we demonstrated above for rigging in Adobe Animate and After Effects… We’ve included some other add-ons and tools that you can use with other popular Animation software. They’re all a little bit different, so make sure to pay attention to the details provided (and watch the video attached too. As it should show you just what exactly each of these auto-rigging tools is capable of doing for you.)
01InstantRig - Auto Rigger
The first Auto Rigger on this list is ‘Instant Rig.’ This is a rigging tool for the Animation software called 3ds Max. More specifically, it’s a ‘modular rigging’ tool. That makes it very versatile, allowing you to determine the features of the character that you are working with based on their attributes (no matter how many fingers, toes, tails, ears, etc. they need.) The tool is particularly popular with game developers, as it is a quick and easy way of rigging game characters — whether they be humanoid or beastly in form. (A free version of the tool is available, but a full license will require a one-time fee of around $35.)
02Auto-Rig Pro
Next, we have the auto-rigging addon for the free, open-source Animation Software, Blender. This add-on can be used very similarly to the Adobe Animate Puppet Rig tools — and is free to use besides. The add-on has a ‘smart feature’ that is capable of automatically rigging up joints and bones of humanoid forms in an instant and can also be used for rigging up non-humanoid characters — albeit, it would have to be manual.
03Perseus Auto Rig - Maya
Next up, we have Perseus Auto Rig. This one works with Maya (which is a very popular professional software used by a lot of animation studios in the industry) and actually comes in three versions. There’s the Perseus ‘Biped Rigging’ license for humanoid characters, the Perseus ‘Facial Rigging’ license for rigging facial features, and the Perseus ‘Quadruped Rigging’ license for non-humanoid creatures.
04Auto Character Setup
Next is the auto-character set-up tool for MODO. This is a tool designed for rigging up bi-pedal characters — so mostly humanoid forms. But it does offer some flexibility as to the form that bipedal character takes. So, you can adjust it as needed if there’s something incongruous with your design and the auto-rigger itself.
05IKMAX
For our last tool for auto-rigging, we have IKMAX. This works for 3ds Max and Maya (both of which we’ve mentioned before. It’s very easy to use and adjust as needed — with sliders that you can fiddle around with the work through any problem areas if need be.
● Key Takeaways from This Episode →
● If you’re interested in introducing animations into your content but you don’t have the time or the patience to get too involved with Adobe Rigging (which is a complex subject to talk about even for some professional animators), the auto-rigging solutions are definitely something to consider.
● The Adobe Auto Rigger, Mixamo, is an especially exciting tool to try out. Not only is it incredibly easy to use, but it comes with pre-made character designs that you can play around with to start your experimentations into animation early.
● If Adobe is not your software of choice, don’t worry. There are other auto-rigging tools that you can try out if need be. We introduced at least five that you can use with some of the more popular alternative animation software in a list for you to look through.
The Adobe Auto rigger is definitely something to look into if you want to quickly and easily prep 3D Animated Characters (without having to learn all the difficult ins and outs of Adobe 3D Rigging.) It’s a perfect tool for beginners.
Especially those that aren’t really looking to create big animated projects, just small animated characters or objects that they can use for their websites, video content, video game development, etc.
In this article
01 [What’s Adobe Auto Rigger?](#Part 1)
02 [How Do You Auto Rig a Character in Adobe?](#Part 2)
03 [Other AWESOME Auto Rigger Tools](#Part 3)
Part 1 What’s Adobe Auto Rigger?
Alright, so what is the Adobe Auto Rigger and how does it differ from Adobe Animate Advanced Rigging or Adobe After Effects Rigging? Is there any difference at all??? The simple answer? Yes, there is a definite difference.
It’s all thanks to the third-party tool, Mixamo, which will allow you to upload characters for auto rigging (basically bypassing the kind of work that is usually required for manually rigging and animating in Adobe Animate and After Effects.) We’ll talk more about this in the tutorial below. For now, all you need to know is that it takes care of setting up a character for you with only a few simple steps.
Thus, enabling you to quickly move forward in your projects if you wish. Whether you’re intending to create a quick little animation for your website, or jumping into a video editing software like Wondershare Filmora Video Editor (which is great professional software with everything you need to start creating high-quality content that you can share with your audience.)
Part 2 How Do You Auto Rig a Character in Adobe?
Now onto our promised tutorial. Here, we make use of the Adobe Auto Rigger, Mixamo, in order to demonstrate how you can bypass Adobe Rigging by making use of Mixamo’s auto-rigging functions or their pre-existing character models for creating your projects.
01Upload Your Own Character
To start, you’ll need to visit ‘Maximo.com’ and sign in with your Adobe ID (email and password required.)
You can also sign-up for free if you’d like. That option is available for those who may want to explore the available options first.
Once you’re logged in, go to the ‘Editor’ panel and prepare to upload a custom character for automatic rigging. This is assuming that you have a character design already prepared, of course. If not, then don’t worry. The next should help.
02(Optional) Browse for Downloadable Characters
The best part of Mixamo is that it has a rich library full of pre-rigged characters that you can use should you wish to. These can be found under the ‘Characters’ tab (shown in the image below.)
So, if you don’t have a character model prepared just yet or have no intention of diving too deeply into character design just in general, you don’t have to worry. You can just download one of the pre-rigged characters here and use them for your project.
03Rig a Custom Character
If you’ve decided to go forward with a custom character, after all, upload it to the Adobe Auto Rigger (shown in the image below.)
This is a very straightforward tool that you can use to place the most important markers on your figure (chin, wrists, elbows, knees, and groin). Once you’ve confirmed the placement of all these points, you can continue and come out of it with your Model auto-rigged and work-ready.
04Download Rigged Character and Begin Animation
It may take several minutes for the Adobe Auto Rigger to completely finish auto-rigging your project, so have a bit of patience. You’ll be taken back to the main interface when complete, and you’ll be able to download your now rigged model for use.
Part 3 Other AWESOME Auto Rigger Tools
Now, just in case you’re interested in other methods of automatically rigging outside of what we demonstrated above for rigging in Adobe Animate and After Effects… We’ve included some other add-ons and tools that you can use with other popular Animation software. They’re all a little bit different, so make sure to pay attention to the details provided (and watch the video attached too. As it should show you just what exactly each of these auto-rigging tools is capable of doing for you.)
01InstantRig - Auto Rigger
The first Auto Rigger on this list is ‘Instant Rig.’ This is a rigging tool for the Animation software called 3ds Max. More specifically, it’s a ‘modular rigging’ tool. That makes it very versatile, allowing you to determine the features of the character that you are working with based on their attributes (no matter how many fingers, toes, tails, ears, etc. they need.) The tool is particularly popular with game developers, as it is a quick and easy way of rigging game characters — whether they be humanoid or beastly in form. (A free version of the tool is available, but a full license will require a one-time fee of around $35.)
02Auto-Rig Pro
Next, we have the auto-rigging addon for the free, open-source Animation Software, Blender. This add-on can be used very similarly to the Adobe Animate Puppet Rig tools — and is free to use besides. The add-on has a ‘smart feature’ that is capable of automatically rigging up joints and bones of humanoid forms in an instant and can also be used for rigging up non-humanoid characters — albeit, it would have to be manual.
03Perseus Auto Rig - Maya
Next up, we have Perseus Auto Rig. This one works with Maya (which is a very popular professional software used by a lot of animation studios in the industry) and actually comes in three versions. There’s the Perseus ‘Biped Rigging’ license for humanoid characters, the Perseus ‘Facial Rigging’ license for rigging facial features, and the Perseus ‘Quadruped Rigging’ license for non-humanoid creatures.
04Auto Character Setup
Next is the auto-character set-up tool for MODO. This is a tool designed for rigging up bi-pedal characters — so mostly humanoid forms. But it does offer some flexibility as to the form that bipedal character takes. So, you can adjust it as needed if there’s something incongruous with your design and the auto-rigger itself.
05IKMAX
For our last tool for auto-rigging, we have IKMAX. This works for 3ds Max and Maya (both of which we’ve mentioned before. It’s very easy to use and adjust as needed — with sliders that you can fiddle around with the work through any problem areas if need be.
● Key Takeaways from This Episode →
● If you’re interested in introducing animations into your content but you don’t have the time or the patience to get too involved with Adobe Rigging (which is a complex subject to talk about even for some professional animators), the auto-rigging solutions are definitely something to consider.
● The Adobe Auto Rigger, Mixamo, is an especially exciting tool to try out. Not only is it incredibly easy to use, but it comes with pre-made character designs that you can play around with to start your experimentations into animation early.
● If Adobe is not your software of choice, don’t worry. There are other auto-rigging tools that you can try out if need be. We introduced at least five that you can use with some of the more popular alternative animation software in a list for you to look through.
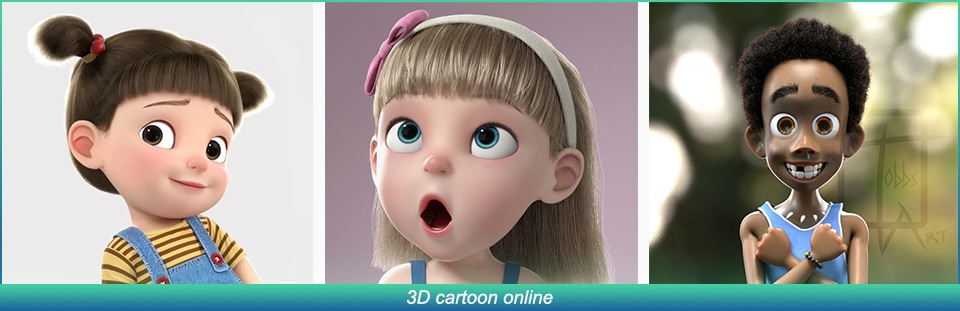
How to Make Photo 3D Cartoon Online
How to Make My Photo 3D Cartoon Online
An easy yet powerful editor
Numerous effects to choose from
Detailed tutorials provided by the official channel
Animated pictures are picking up the pace on the list of the top trends since they are able to convey so much in a fraction of a second which normal pictures or videos are incapable of.
From creating vlogs to making your photos into a 3D cartoon online, everything is possible with the right software or app.
In this article
01 [3 Secrets to Creating an (amazing) Animated Video](#Part 1)
02 [Best 10 3D Photo Maker and Photo Animator Apps](#Part 2)
03 [How to Make Your Own Photo into Cartoon?](#Part 3)
Part 1 3 Secrets to Creating an (amazing) Animated Video
Animation is the perfect tool to boost any campaign. It is a medium of brand communication that has the potential to reach out to a wide variety of audiences. Most recently, photo animations like GIFs, cartooned pictures and motion graphic posters are becoming widely popular.

Marketers and content creators can take full advantage of online apps to develop amazing animated videos that would instantly grasp the viewer’s attention. Here are three secrets you should know about creating an amazing animated video:
Storytelling:
● It is easier to tell a story with moving pictures.
● They add a different level of visual charisma to the storytelling process.
● With the help of a few interesting and easy-to-use apps, you can create stunning cinematic images and establish your own unique style of storytelling.

Persuasive Call to Action:
● A call-to-action is a standard way of telling people what you want them to do such as making a purchase, downloading an e-book or registering for a subscription.
● It helps your audience if you guide them step-by-step with the help of images.
● Try out a combination of both written and animated graphics to boost your content’s persuasion.
● It is easier to convince people when they have the information laid out in front of their eyes.

Simplify the Complex:
● It helps if you imagine your audience like children who need a picture book to learn their lessons.
● It is easier to retain information when they are visually stimulating.
● Designing animated graphics is pretty easy when you understand the purpose behind it.
● Scrutinize your work to check if it is causing any hindrance in keeping up with the information.

Animating images can be a fun and engaging process. It only involves understanding the mindset of your target audience. This process need not be complicated. You can start out by converting your photos into 3D animations using a 3D animated photo maker.
Part 2 Best 10 3D Photo Maker and Photo Animator Apps 800
No. 1 LucidPix

Lucidpix permits you to explore your creative side in fun ways. An app that captures depth-enhanced pictures! Anyone with a smart device (mobile or tablet) can start creating 3D photos using lucidpix.
YouTube Product Demo Video ↓ ↓ ↓
| Name of maker | Size | Rating | Operating System |
|---|---|---|---|
| Lucid Inc. | 39 to 154 MB | 3.6/5 on playstore. | Android and iOS. |
Pros
Free download
User-friendly UI
Easily converts a regular photo into 3D
Cons
Contains Ads
Always offers & insists users to buy app
App is still under development
No. 2 Wigglegram

Wigglegram creates a single 3D image after combining multiple photographs. It turns all the captured photos into one single animated photo to make it look like a 3D image.
YouTube Product Demo Video ↓ ↓ ↓
| Name of maker | Size | Rating | Operating System |
|---|---|---|---|
| n4no | 8.7MB | 3.0/5 on Playstore | Android & iOS |
Pros
Direct social media share option.
Helps create reaction Gifs.
Super easy and fast 3D photo-making experience.
Cons
It doesn’t have good ratings.
App contains Ads.
App size is below 10MB.
No. 3 MotionLeap

Earlier branded as Pixaloop, Motionleap is a great option to animate still images. It also has cool features like animated rains, snow, butterfly & diamond.
YouTube Product Demo Video ↓ ↓ ↓
| Name of maker | Size | Rating | Operating System |
|---|---|---|---|
| Lightricks Ltd | 84 to 197 MB | 4.2/5 Playstore | iOS and Android |
Pros
Easy to use & accurate.
Elements opacity can be controlled.
Neat & clean effects, elements and overlays.
Cons
Better source photos are required.
Animation takes more time in comparison to other apps.
No. 4 Movepic

This super cool app offers effects that let you add glitches, flowing water and even a live sky to your images by just selecting the area you wish to apply the effects and is not that heavy to download.
YouTube Product Demo Video ↓ ↓ ↓
| Name of maker | Size | Rating | Operating System |
|---|---|---|---|
| ryzenrise | 48.16 MB | 4.3/5 on Playstore | Android and iOS (alternative) |
Pros
Is it a secure app to use?
Great for applying photo motion.
Regularly updated for bug fixes.
Cons
Regularly updated for bug fixes.
Lacks certain editing features
No. 5 Adobe Spark

Adobe Spark is a free-to-use photo animation software and has Adobe trust with it. It offers hundreds of fonts and templates for any type of photo though you would bear a watermark for the free version.
YouTube Product Demo Video ↓ ↓ ↓
| Name of maker | Size | Rating | Operating System |
|---|---|---|---|
| Adobe | 2.5 MB | 4.5/5 on Playstore | Android and iOS |
Pros
Hundreds of exclusive templates.
Intuitive interface best suited for beginners.
Easy to view dashboard.
Cons
Limited features in the free version.
Glitches in design.
No. 6 PopPic 6

PopPic 6 is a 3D camera with which you can directly click and apply a 3D filter effect to your flat images in order to make them pop.
YouTube Product Demo Video ↓ ↓ ↓
| Name of maker | Size | Rating | Operating System |
|---|---|---|---|
| PopPic 3D LLC | 36.9 MB | 4.7/5 on Applestore | iOS |
Pros
Ready to click 3D camera.
Dozens of filters.
Stylish and simple app design.
Cons
Limited functionality.
Low performance.
No. 7 ImgPlay

ImgPlay is kind of a cross between the features of Werble and Motionleap. There are hundreds of ready-to-use animations for your photos.
YouTube Product Demo Video ↓ ↓ ↓
| Name of maker | Size | Rating | Operating System |
|---|---|---|---|
| ImgBase Inc | 139 MB | 3.9/5 on Applestore | Android and iOS |
Pros
The convenient app to create easy GIFs.
Click, save and share feature.
Live photo features.
Cons
Limited editing options.
Not for professional graphics.
No. 8 GIPHY

Giphy is like a search engine for GIFs but also has an app version that lets you create amazing GIF animations that are ready for upload.
YouTube Product Demo Video ↓ ↓ ↓
| Name of maker | Size | Rating | Operating System |
|---|---|---|---|
| GIPHY | 100 MB | 4.8/5 on Playstore. | Android and iOS. |
Pros
Great for simple animations.
Create GIFs for promotions.
A vast range of options.
Cons
Limited color options.
Only suitable for GIF animations.
No. 9 Photo Bender

Photo Bender is more specifically designed for Android users. It is an app that enables you to warp your images against an animated effect. There are slight editing features also available in the app like bending and stretching an image.
YouTube Product Demo Video ↓ ↓ ↓
| Name of maker | Size | Rating | Operating System |
|---|---|---|---|
| Smart Photo Editor | 3.5 MB | 3.5/5 on Playstore | Android |
Pros
Export GIF, JPEG and PNG files.
Use simple editing features like coloring, stretching, and brushing.
Completely free to use.
Cons
Limited only to Android.
No. 10 Vimage 3D

An award-winning app for creating awe-inspiring animated images. Programmed to automatically detect what edits your images need. Does involve paying a premium.
YouTube Product Demo Video ↓ ↓ ↓
| Name of maker | Size | Rating | Operating System |
|---|---|---|---|
| Vimage | 21MB | 5.0/5 on Playstore | Android and iOS |
Pros
A large variety of filters, sounds and animated effects.
Max 2560p resolution.
Intuitive app interface.
Cons
Best features are limited to the premium version.
The free version comes with a non-removable watermark.
Part 3 How to Make Your Own Photo into Cartoon?
Prior to the digital age, creating a cartoon would require an entire team of professional animators such as in the house of Disney. A Cartoon animation meant sketching each frame by hand while maintaining continuity.
Now with the help of smart video effects, you can literally turn any image into a cartoon. These cartoonish animations can be both engaging and entertaining with some help from Wondershare Filmora .
Though we have enlisted 10 exceptional apps for ‘cartooning’ your images, Filmora gives you the flexibility which other apps don’t. You can create awesome animated videos online using Filmora while saving a ton of time.
You can use Filmora on both Mac and PC. Turn selfies, stock pictures, and snapshots into inspiring cartoon visuals using dozens of amazing filters and features on Filmora Pro.
Some of the exclusive features of Filmora Pro;
Audio Features →
● Noise Reduction.
● Audio Sync.
● Transition Audio.
● Compressor.
Animation Features →
● Motion Tracking.
● Ease In/Ease Out.
● Pan & Zoom
Movie Editing →
● Add Titles and Texts.
● Cinematic Lighting.
● Masking.
● Distortion and Wrapping.
Colouring Features →
● Colour Wheels
● Colour Correction
● Scopes.
By now you should know that Filmora Pro has a ton of customizable features that you can experiment with but this can be a bit confusing for beginners.
Key Takeaways from This Episode
● You can now turn your images into amazing animated cartoons using a wide range of 3d animated image-makers available online.
● Creating an exceptional animated video is a matter of storytelling, visual engagement and simplifying complex information.
● Use Filmora Pro to get your hands on professional editing software which is jam-packed with a bunch of exclusive features.
Animated pictures are picking up the pace on the list of the top trends since they are able to convey so much in a fraction of a second which normal pictures or videos are incapable of.
From creating vlogs to making your photos into a 3D cartoon online, everything is possible with the right software or app.
In this article
01 [3 Secrets to Creating an (amazing) Animated Video](#Part 1)
02 [Best 10 3D Photo Maker and Photo Animator Apps](#Part 2)
03 [How to Make Your Own Photo into Cartoon?](#Part 3)
Part 1 3 Secrets to Creating an (amazing) Animated Video
Animation is the perfect tool to boost any campaign. It is a medium of brand communication that has the potential to reach out to a wide variety of audiences. Most recently, photo animations like GIFs, cartooned pictures and motion graphic posters are becoming widely popular.
Marketers and content creators can take full advantage of online apps to develop amazing animated videos that would instantly grasp the viewer’s attention. Here are three secrets you should know about creating an amazing animated video:
Storytelling:
● It is easier to tell a story with moving pictures.
● They add a different level of visual charisma to the storytelling process.
● With the help of a few interesting and easy-to-use apps, you can create stunning cinematic images and establish your own unique style of storytelling.
Persuasive Call to Action:
● A call-to-action is a standard way of telling people what you want them to do such as making a purchase, downloading an e-book or registering for a subscription.
● It helps your audience if you guide them step-by-step with the help of images.
● Try out a combination of both written and animated graphics to boost your content’s persuasion.
● It is easier to convince people when they have the information laid out in front of their eyes.
Simplify the Complex:
● It helps if you imagine your audience like children who need a picture book to learn their lessons.
● It is easier to retain information when they are visually stimulating.
● Designing animated graphics is pretty easy when you understand the purpose behind it.
● Scrutinize your work to check if it is causing any hindrance in keeping up with the information.
Animating images can be a fun and engaging process. It only involves understanding the mindset of your target audience. This process need not be complicated. You can start out by converting your photos into 3D animations using a 3D animated photo maker.
Part 2 Best 10 3D Photo Maker and Photo Animator Apps 800
No. 1 LucidPix
Lucidpix permits you to explore your creative side in fun ways. An app that captures depth-enhanced pictures! Anyone with a smart device (mobile or tablet) can start creating 3D photos using lucidpix.
YouTube Product Demo Video ↓ ↓ ↓
| Name of maker | Size | Rating | Operating System |
|---|---|---|---|
| Lucid Inc. | 39 to 154 MB | 3.6/5 on playstore. | Android and iOS. |
Pros
Free download
User-friendly UI
Easily converts a regular photo into 3D
Cons
Contains Ads
Always offers & insists users to buy app
App is still under development
No. 2 Wigglegram
Wigglegram creates a single 3D image after combining multiple photographs. It turns all the captured photos into one single animated photo to make it look like a 3D image.
YouTube Product Demo Video ↓ ↓ ↓
| Name of maker | Size | Rating | Operating System |
|---|---|---|---|
| n4no | 8.7MB | 3.0/5 on Playstore | Android & iOS |
Pros
Direct social media share option.
Helps create reaction Gifs.
Super easy and fast 3D photo-making experience.
Cons
It doesn’t have good ratings.
App contains Ads.
App size is below 10MB.
No. 3 MotionLeap
Earlier branded as Pixaloop, Motionleap is a great option to animate still images. It also has cool features like animated rains, snow, butterfly & diamond.
YouTube Product Demo Video ↓ ↓ ↓
| Name of maker | Size | Rating | Operating System |
|---|---|---|---|
| Lightricks Ltd | 84 to 197 MB | 4.2/5 Playstore | iOS and Android |
Pros
Easy to use & accurate.
Elements opacity can be controlled.
Neat & clean effects, elements and overlays.
Cons
Better source photos are required.
Animation takes more time in comparison to other apps.
No. 4 Movepic
This super cool app offers effects that let you add glitches, flowing water and even a live sky to your images by just selecting the area you wish to apply the effects and is not that heavy to download.
YouTube Product Demo Video ↓ ↓ ↓
| Name of maker | Size | Rating | Operating System |
|---|---|---|---|
| ryzenrise | 48.16 MB | 4.3/5 on Playstore | Android and iOS (alternative) |
Pros
Is it a secure app to use?
Great for applying photo motion.
Regularly updated for bug fixes.
Cons
Regularly updated for bug fixes.
Lacks certain editing features
No. 5 Adobe Spark
Adobe Spark is a free-to-use photo animation software and has Adobe trust with it. It offers hundreds of fonts and templates for any type of photo though you would bear a watermark for the free version.
YouTube Product Demo Video ↓ ↓ ↓
| Name of maker | Size | Rating | Operating System |
|---|---|---|---|
| Adobe | 2.5 MB | 4.5/5 on Playstore | Android and iOS |
Pros
Hundreds of exclusive templates.
Intuitive interface best suited for beginners.
Easy to view dashboard.
Cons
Limited features in the free version.
Glitches in design.
No. 6 PopPic 6
PopPic 6 is a 3D camera with which you can directly click and apply a 3D filter effect to your flat images in order to make them pop.
YouTube Product Demo Video ↓ ↓ ↓
| Name of maker | Size | Rating | Operating System |
|---|---|---|---|
| PopPic 3D LLC | 36.9 MB | 4.7/5 on Applestore | iOS |
Pros
Ready to click 3D camera.
Dozens of filters.
Stylish and simple app design.
Cons
Limited functionality.
Low performance.
No. 7 ImgPlay
ImgPlay is kind of a cross between the features of Werble and Motionleap. There are hundreds of ready-to-use animations for your photos.
YouTube Product Demo Video ↓ ↓ ↓
| Name of maker | Size | Rating | Operating System |
|---|---|---|---|
| ImgBase Inc | 139 MB | 3.9/5 on Applestore | Android and iOS |
Pros
The convenient app to create easy GIFs.
Click, save and share feature.
Live photo features.
Cons
Limited editing options.
Not for professional graphics.
No. 8 GIPHY
Giphy is like a search engine for GIFs but also has an app version that lets you create amazing GIF animations that are ready for upload.
YouTube Product Demo Video ↓ ↓ ↓
| Name of maker | Size | Rating | Operating System |
|---|---|---|---|
| GIPHY | 100 MB | 4.8/5 on Playstore. | Android and iOS. |
Pros
Great for simple animations.
Create GIFs for promotions.
A vast range of options.
Cons
Limited color options.
Only suitable for GIF animations.
No. 9 Photo Bender
Photo Bender is more specifically designed for Android users. It is an app that enables you to warp your images against an animated effect. There are slight editing features also available in the app like bending and stretching an image.
YouTube Product Demo Video ↓ ↓ ↓
| Name of maker | Size | Rating | Operating System |
|---|---|---|---|
| Smart Photo Editor | 3.5 MB | 3.5/5 on Playstore | Android |
Pros
Export GIF, JPEG and PNG files.
Use simple editing features like coloring, stretching, and brushing.
Completely free to use.
Cons
Limited only to Android.
No. 10 Vimage 3D
An award-winning app for creating awe-inspiring animated images. Programmed to automatically detect what edits your images need. Does involve paying a premium.
YouTube Product Demo Video ↓ ↓ ↓
| Name of maker | Size | Rating | Operating System |
|---|---|---|---|
| Vimage | 21MB | 5.0/5 on Playstore | Android and iOS |
Pros
A large variety of filters, sounds and animated effects.
Max 2560p resolution.
Intuitive app interface.
Cons
Best features are limited to the premium version.
The free version comes with a non-removable watermark.
Part 3 How to Make Your Own Photo into Cartoon?
Prior to the digital age, creating a cartoon would require an entire team of professional animators such as in the house of Disney. A Cartoon animation meant sketching each frame by hand while maintaining continuity.
Now with the help of smart video effects, you can literally turn any image into a cartoon. These cartoonish animations can be both engaging and entertaining with some help from Wondershare Filmora .
Though we have enlisted 10 exceptional apps for ‘cartooning’ your images, Filmora gives you the flexibility which other apps don’t. You can create awesome animated videos online using Filmora while saving a ton of time.
You can use Filmora on both Mac and PC. Turn selfies, stock pictures, and snapshots into inspiring cartoon visuals using dozens of amazing filters and features on Filmora Pro.
Some of the exclusive features of Filmora Pro;
Audio Features →
● Noise Reduction.
● Audio Sync.
● Transition Audio.
● Compressor.
Animation Features →
● Motion Tracking.
● Ease In/Ease Out.
● Pan & Zoom
Movie Editing →
● Add Titles and Texts.
● Cinematic Lighting.
● Masking.
● Distortion and Wrapping.
Colouring Features →
● Colour Wheels
● Colour Correction
● Scopes.
By now you should know that Filmora Pro has a ton of customizable features that you can experiment with but this can be a bit confusing for beginners.
Key Takeaways from This Episode
● You can now turn your images into amazing animated cartoons using a wide range of 3d animated image-makers available online.
● Creating an exceptional animated video is a matter of storytelling, visual engagement and simplifying complex information.
● Use Filmora Pro to get your hands on professional editing software which is jam-packed with a bunch of exclusive features.
Amazing Techniques of Motion Graphics in Premiere Pro
Little Known Techniques of Motion Graphics in Premiere Pro
An easy yet powerful editor
Numerous effects to choose from
Detailed tutorials provided by the official channel
Video editing has recently gained momentum in content design, and with Motion Graphics Premiere Pro editing templates, it has all the fun in the house.
In this article
01 [5 Editing Motion Graphics Techniques in Adobe Premiere Pro](#Part 1)
02 [10 Free Motion Graphics Templates for Premiere Pro](#Part 2)
03 [How to Use Motion Graphics Templates in Premiere Pro](#Part 3)
Part 1 5 Editing Motion Graphics Techniques in Adobe Premiere Pro
A variety of editing techniques of motion graphics for Premiere Pro are ready to give a classy touch to your videos. Let’s brush up through the best you can have.
01Cropping Clips
Cropping your videos allows you to fit them into your required size frames. To remove any unwanted portions of your edits, crop them in adobe Premiere Pro with your desired aspect ratio to give that ‘just perfect’ look to your edits.
Start from importing and adding your footage to your project panel, followed by creating a fresh composition. Now, choose ‘Crop’ from the Effects panel to add it to your clip, either by double-clicking or dragging and dropping.
02Trimming Clips
If you want to adjust the ‘In and Out’ play back sequence of your edited clips, you can go for trimming them. You can trim your clips in the Source and Program monitors, or even in the Premiere Pro timeline. You can choose from the standard cut, jump cut, B-roll cut etc, to suit your editing needs and styles.
All you need to do is open the clip, mark the In and Out points, adjust their sequence with previous or next edits in your cue and that’s it. You can also use keyboard shortcuts for this purpose. However, you need to preset these shortcuts before you begin editing your clips.
03Adding Text
You can try adding simple and formatted texts to enhance your video outlook. This comes handy when you are aiming to deliver specific messages to your audience. You can add normal write-ups, callout quotations and customize your text in a number of exciting styles. Just go to the Type tool, format your text in the Text Box and you’re done!
04Audio Level Adjustment
Want to add spark to your clips with a synchronized audio visual effect? After you finish trimming and cropping, consider opting for an in-line audio adjustment. This will definitely enhance your video and take your craft to the next level.
All you need to do is select an audio clip, click on ‘Audio Gain’ in the drop down menu, set desired Decibel count in the Audio Gain Box and select ‘OK’.
05Exporting Videos
Once you are done with your video craft, you should certainly look forward to making it available for social exposure. To do this, select appropriate sequence constraints in the Export window, choose the export platform, format and Codec, make fine tuning and bit rate adjustments and finish export either in Premiere Pro or Media Encoder. You may also save these settings for your next exports.
Part 2 Free Motion Graphics Templates for Premiere Pro
Let’s have a look into your best choices of free motion graphic templates for Premiere Pro:
0114 Premiere Pro Lumetri Looks
Want to enhance your video creativity with that amazing Hollywood feel? You can undoubtedly opt for the Premiere Lumetri Looks template that gives you the liberty to provide a Hollywood oriented color scheme to your videos, just like those incredible color patterns one would see in Dr. Strangelove, The Martian and many more famous Hollywood flicks.

0215 Animated Lower Thirds
This template comes handy when you need to add lower thirds to your videos, either to introduce different content varieties or to objectify your video components. You can use this template with ease in your personal as well as commercial videos to give them that explicit professional touch.

03Horror Trailer Titles
If horror videos turn you on, use this template in video creations to customize them with that intense and scary feel! This template helps you add scary title slates that are just enough to add a terrifying quotient to your videos. From personal to professional, this template can add intensity to any video type.
04Instagram Stories Premiere Pro Template
This template is a definite catch for those Instagram lovers who constantly experiment to post engaging stories on the platform. If you want your IG stories to grab the talk, go for this animation template to customize photos and text so that they get the buzz among your followers.

05Dust Overlays
Comprising of studio-like effects, this template allows you to enhance your films with high quality dynamic animation in appealing texture variations. Use this template to create videos with those attractive misty backgrounds with cohesive variations in lighting with adjustable power effects.
06Travel Stories Premiere Pro Template
If you are into travel blogging and trying to add spunk to your stories and videos, this template is there to help you out with its catchy text animations and flowy transitions. Available in an upgraded configuration, this template is everything you need to make your travel blogs hover the trending charts.

07Digital Slideshow
Go for this template to add spark to your graphic presentations. Designed primarily for professional usage, it is equally effective in personal projects also. Developed by Evanto Elements, the company offers unlimited access on subscription.

08Free Quotes Premiere Pro Template
If you want to add animated quotes to your video creations, this template is a must try for you. Providing 6 quoting options and a ‘click to change’ text and color interface with convenient customizability keeps it among the top choices for hastle free motion editing.

09Cinematic Title Style Library
If you are bored with those conventional Premiere Pro titles but don’t want to invest time in creating styles of your own, you can use the modernized title styles from this library to enhance your creations with that intense cinematic feel. You can use them comfortably for personal and commercial purposes.

10Space Background Elements
This set of background templates is designed to provide realistic settings to video creators who work on science fiction and space oriented themes. Loaded with different real-time effects, this template provides the ultimate feel of a space travel in 4K.

Part 2 Alternatives to Premiere Pro: Filmora
If not Premiere Pro, you can go for Filmora as a dependable alternative. It’s an exquisite set of amazing and top-notch tools for creating g and editing videos. Wondershare introduced Filmora as an effective, easy-to-use editing software that’s equally caters to the editing pace of beginners as well as experts. You can use Filmora with Windows and macOS.
Packed with a range of appealing customization choices, Filmora comes to you in four principal versions:
● Wondershare Filmora Video Editor
Suitable for beginners, this is the basic and the simplest version having inbuilt editing templates. It’s desktop compatible software.
For Win 7 or later (64-bit)
For macOS 10.12 or later
● Filmora
Android and iOS compatibility in this version of Filmora brought video editing from PCs and laptops into smartphones.

● FilmoraScrn
This version allows you to record your editing screen if you’re a working on Windows.

Part 4 How to Use Motion Graphics Templates in Premiere Pro
After getting familiar with Premiere Pro editing and templates, let’s get into using these adobe premiere motion graphics templates for an exemplary video creating experience. Take up the following steps to get started.
● Go to Premiere Pro Essential Graphics Panel
In the Premiere Pro startup page, select ‘Window’ from the toolbar and select ‘Essential Graphics’ from the drop down menu.
● Add Motion Graphics Templates to Library
Click the ‘Import’ button present at the bottom in the right side of the Essential Graphics Panel. Go to and choose your downloaded motion graphics template file and select ‘Open’. Your file is added to the Essential Graphics Library.
● Drag-Drop the MOGRT to Timeline
‘Drag’ your motion graphics template from the library and ‘Drop’ it on your Timeline.
● Customize Your Template
Go to the ‘Edit’ option in the Essential Graphics Panel to look for customization choices available for your selected motion graphics adobe template.
● Key Takeaways from This Episode →
● Adobe Premiere Pro is an amazing video creation and editing tool that ensures to give a professional class to your edits. Be it personal creativity or professional expertise, this software is all set to give you a wholesome editing experience you will never forget.
● Loaded with an extensive variety of editing templates, available for free and on subscription, adobe premiere pro is a one stop access to all your editing concerns. Its customizable effects will certainly make your creations stand out in the league.
● Video editing is a high in demand craft of excellence. With advancements in software developments, the creative market offers you a pool of over the top editing software that is ready to give that classy spunk to your videos. So just your own from the pool and go on a spree of creating trend setting videos that never miss out on grabbing the attention of everyone around!
Video editing has recently gained momentum in content design, and with Motion Graphics Premiere Pro editing templates, it has all the fun in the house.
In this article
01 [5 Editing Motion Graphics Techniques in Adobe Premiere Pro](#Part 1)
02 [10 Free Motion Graphics Templates for Premiere Pro](#Part 2)
03 [How to Use Motion Graphics Templates in Premiere Pro](#Part 3)
Part 1 5 Editing Motion Graphics Techniques in Adobe Premiere Pro
A variety of editing techniques of motion graphics for Premiere Pro are ready to give a classy touch to your videos. Let’s brush up through the best you can have.
01Cropping Clips
Cropping your videos allows you to fit them into your required size frames. To remove any unwanted portions of your edits, crop them in adobe Premiere Pro with your desired aspect ratio to give that ‘just perfect’ look to your edits.
Start from importing and adding your footage to your project panel, followed by creating a fresh composition. Now, choose ‘Crop’ from the Effects panel to add it to your clip, either by double-clicking or dragging and dropping.
02Trimming Clips
If you want to adjust the ‘In and Out’ play back sequence of your edited clips, you can go for trimming them. You can trim your clips in the Source and Program monitors, or even in the Premiere Pro timeline. You can choose from the standard cut, jump cut, B-roll cut etc, to suit your editing needs and styles.
All you need to do is open the clip, mark the In and Out points, adjust their sequence with previous or next edits in your cue and that’s it. You can also use keyboard shortcuts for this purpose. However, you need to preset these shortcuts before you begin editing your clips.
03Adding Text
You can try adding simple and formatted texts to enhance your video outlook. This comes handy when you are aiming to deliver specific messages to your audience. You can add normal write-ups, callout quotations and customize your text in a number of exciting styles. Just go to the Type tool, format your text in the Text Box and you’re done!
04Audio Level Adjustment
Want to add spark to your clips with a synchronized audio visual effect? After you finish trimming and cropping, consider opting for an in-line audio adjustment. This will definitely enhance your video and take your craft to the next level.
All you need to do is select an audio clip, click on ‘Audio Gain’ in the drop down menu, set desired Decibel count in the Audio Gain Box and select ‘OK’.
05Exporting Videos
Once you are done with your video craft, you should certainly look forward to making it available for social exposure. To do this, select appropriate sequence constraints in the Export window, choose the export platform, format and Codec, make fine tuning and bit rate adjustments and finish export either in Premiere Pro or Media Encoder. You may also save these settings for your next exports.
Part 2 Free Motion Graphics Templates for Premiere Pro
Let’s have a look into your best choices of free motion graphic templates for Premiere Pro:
0114 Premiere Pro Lumetri Looks
Want to enhance your video creativity with that amazing Hollywood feel? You can undoubtedly opt for the Premiere Lumetri Looks template that gives you the liberty to provide a Hollywood oriented color scheme to your videos, just like those incredible color patterns one would see in Dr. Strangelove, The Martian and many more famous Hollywood flicks.
0215 Animated Lower Thirds
This template comes handy when you need to add lower thirds to your videos, either to introduce different content varieties or to objectify your video components. You can use this template with ease in your personal as well as commercial videos to give them that explicit professional touch.
03Horror Trailer Titles
If horror videos turn you on, use this template in video creations to customize them with that intense and scary feel! This template helps you add scary title slates that are just enough to add a terrifying quotient to your videos. From personal to professional, this template can add intensity to any video type.
04Instagram Stories Premiere Pro Template
This template is a definite catch for those Instagram lovers who constantly experiment to post engaging stories on the platform. If you want your IG stories to grab the talk, go for this animation template to customize photos and text so that they get the buzz among your followers.
05Dust Overlays
Comprising of studio-like effects, this template allows you to enhance your films with high quality dynamic animation in appealing texture variations. Use this template to create videos with those attractive misty backgrounds with cohesive variations in lighting with adjustable power effects.
06Travel Stories Premiere Pro Template
If you are into travel blogging and trying to add spunk to your stories and videos, this template is there to help you out with its catchy text animations and flowy transitions. Available in an upgraded configuration, this template is everything you need to make your travel blogs hover the trending charts.
07Digital Slideshow
Go for this template to add spark to your graphic presentations. Designed primarily for professional usage, it is equally effective in personal projects also. Developed by Evanto Elements, the company offers unlimited access on subscription.
08Free Quotes Premiere Pro Template
If you want to add animated quotes to your video creations, this template is a must try for you. Providing 6 quoting options and a ‘click to change’ text and color interface with convenient customizability keeps it among the top choices for hastle free motion editing.
09Cinematic Title Style Library
If you are bored with those conventional Premiere Pro titles but don’t want to invest time in creating styles of your own, you can use the modernized title styles from this library to enhance your creations with that intense cinematic feel. You can use them comfortably for personal and commercial purposes.
10Space Background Elements
This set of background templates is designed to provide realistic settings to video creators who work on science fiction and space oriented themes. Loaded with different real-time effects, this template provides the ultimate feel of a space travel in 4K.
Part 2 Alternatives to Premiere Pro: Filmora
If not Premiere Pro, you can go for Filmora as a dependable alternative. It’s an exquisite set of amazing and top-notch tools for creating g and editing videos. Wondershare introduced Filmora as an effective, easy-to-use editing software that’s equally caters to the editing pace of beginners as well as experts. You can use Filmora with Windows and macOS.
Packed with a range of appealing customization choices, Filmora comes to you in four principal versions:
● Wondershare Filmora Video Editor
Suitable for beginners, this is the basic and the simplest version having inbuilt editing templates. It’s desktop compatible software.
For Win 7 or later (64-bit)
For macOS 10.12 or later
● Filmora
Android and iOS compatibility in this version of Filmora brought video editing from PCs and laptops into smartphones.
● FilmoraScrn
This version allows you to record your editing screen if you’re a working on Windows.
Part 4 How to Use Motion Graphics Templates in Premiere Pro
After getting familiar with Premiere Pro editing and templates, let’s get into using these adobe premiere motion graphics templates for an exemplary video creating experience. Take up the following steps to get started.
● Go to Premiere Pro Essential Graphics Panel
In the Premiere Pro startup page, select ‘Window’ from the toolbar and select ‘Essential Graphics’ from the drop down menu.
● Add Motion Graphics Templates to Library
Click the ‘Import’ button present at the bottom in the right side of the Essential Graphics Panel. Go to and choose your downloaded motion graphics template file and select ‘Open’. Your file is added to the Essential Graphics Library.
● Drag-Drop the MOGRT to Timeline
‘Drag’ your motion graphics template from the library and ‘Drop’ it on your Timeline.
● Customize Your Template
Go to the ‘Edit’ option in the Essential Graphics Panel to look for customization choices available for your selected motion graphics adobe template.
● Key Takeaways from This Episode →
● Adobe Premiere Pro is an amazing video creation and editing tool that ensures to give a professional class to your edits. Be it personal creativity or professional expertise, this software is all set to give you a wholesome editing experience you will never forget.
● Loaded with an extensive variety of editing templates, available for free and on subscription, adobe premiere pro is a one stop access to all your editing concerns. Its customizable effects will certainly make your creations stand out in the league.
● Video editing is a high in demand craft of excellence. With advancements in software developments, the creative market offers you a pool of over the top editing software that is ready to give that classy spunk to your videos. So just your own from the pool and go on a spree of creating trend setting videos that never miss out on grabbing the attention of everyone around!
Tips for GIF to Animated PNG
Versatile Video Editor - Wondershare Filmora
An easy yet powerful editor
Numerous effects to choose from
Detailed tutorials provided by the official channel
The advent of many instant chats had led to the demand for GIFs and animated PNGs. Users access these files to express their emotions amidst the chat environment. There are unique ways to convert GIFs to animated PNGs precisely. In the digital space, there are surplus applications are available to perform this conversion process without compromising with the quality factors.
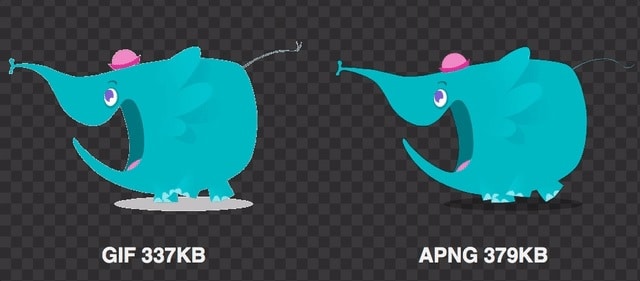
In this article, a detailed discussion on the GIFs and the animated PNGs are available for better understanding. It is the process of working with images and implementing some actions with the pictures that makes it appear interesting. Most GIFs and animated PNGs are used for fun and it helps to excite your friends amidst serious chats. It serves as the source of conveying thoughts with fun-filled visuals. Before choosing between the GIFs and APNGs, analyze which file format offers you surplus advantages for optimal handling. Here, in the below discussion you will study the features of this file format and the precise methods to switch between these two files efficiently.
In this article
01 [What is GIF & What is animated PNG](#Part 1)
02 [GIF vs animated PNG, which is better?](#Part 2)
03 [Can PNG be animated like GIF?](#Part 3)
04 [How to Convert GIF to animated PNG?](#Part 4)
Part 1 What is GIF & What is animated PNG
The GIFs are animated images and the picture moves in a sequence in a cycle. The movement repeats without stopping. This type of picture is popular on the webpages and the built-in templates are available in the digital space for quick downloads. The single-frame GIFs take more time to download and displays exciting moves that trigger laughter with audiences. GIF takes the abbreviation of Graphics Interchange Format. It came into existence in the year 1980s and is widely used globally. GIFs are animated images in a basic format. It adopts the safe LZW algorithm that tracks the colors optimally.
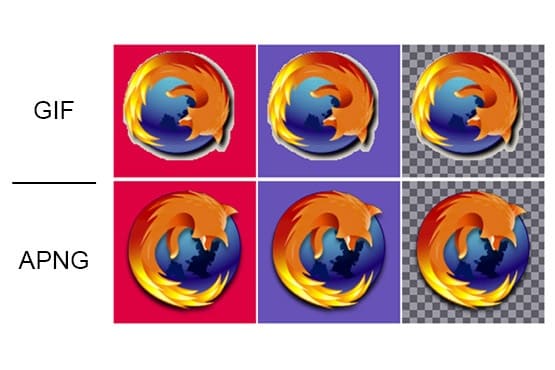
The superior form of the motion picture is animated PNGs. It stands for Portable Network Graphics. This format supports indexed color, grayscale, and true color images. Additionally, the animated PNGs has advantages like alpha channels, cross-platform gamma corrections and two-dimensional interlacing. APNG came into existence in the year 1995 and is compatible with a few web browsers.
Part 2 GIF vs animated PNG, which is better?
When compared to GIFs and APNG, APNG seems to be technically strong with a wide range of supporting features. The quality of the file of APNG is good as it displays 24-bit images and 8- bit transparency. The APNG images can be compressed to the smallest value thereby encouraging the ease of transfer between devices. APNG has access to many color combinations whereas GIFs can use up to 256 colors. The new web browser versions are compatible with APNGs and the older browsers play the GIFs precisely. To view the APNG files in the older browsers you require external plugins or extensions. The higher quality APNGs are mostly used by professionals when compared to GIFs. The portability in moving the animated images is simple with APNGs. The GIF files have a poor compression rate and it is difficult to transfer at the digital space.
Part 3 Can PNG be animated like GIF?
You can animate the PNG files like GIF using reliable tools in the online space. There are unique programs to establish this process. It works on every detail on the PNG files and adds transition effects to the images to implement the movements. If you take closer looks at the digital space, you will acquire sophisticated programs to add transitions to the static pictures. While animating the PNG files, you must include frames, durations, and transition effects to the PNG images to include the animations. Based on the settings, the animated PNG file functions. Every move of the images is assigned by the attributes set by the users with the help of powerful applications in the digital space. You can also find online tools to assist in this operation. The static PNG files get desired moves by animating like GIF files. The APNG has superior quality when compared to GIF files. As discussed above many professionals opt for APNG files than GIFs.

Part 4 How to Convert GIF to animated PNG?
In this section, you will learn how to convert GIF to animated PNG using online tools. Use the recommended online platform to carry out the quality conversions to acquire desired outcomes.
1. EZGIF
It is an exclusive online space that brings quality animations to GIF files acquiring the properties of APNG. By converting the GIFs to APNG, you can enhance various features like easy storage, best compression, quality elements in the file. When you step into this website, you can perform a wide range of conversion processes between animated and static image files. Choose the right tabs on the menu to trigger the desired changes to the uploaded files.
Choose GIF to APNG tab at the top menu to begin this conversion process. The GIF files will receive all the good functionalities of APNG after this conversion process. You can download the animated PNGs to any platform after a successful conversion.
Follow the below steps to proceed with GIF to animated PNGs using the EZGIF online tool.
Step 1
Go to the website and upload the GIF file by tapping the ‘Choose File’ button. The maximum file size is 50MB that ensures a flawless upload process. Here, you can either choose a file from a local drive or paste the URL from an online source into this webpage flawlessly. Then, click the Upload button to trigger this GIF to the APNG conversion process.
Step 2
Format the output and click the convert button to download the animated PNG files.
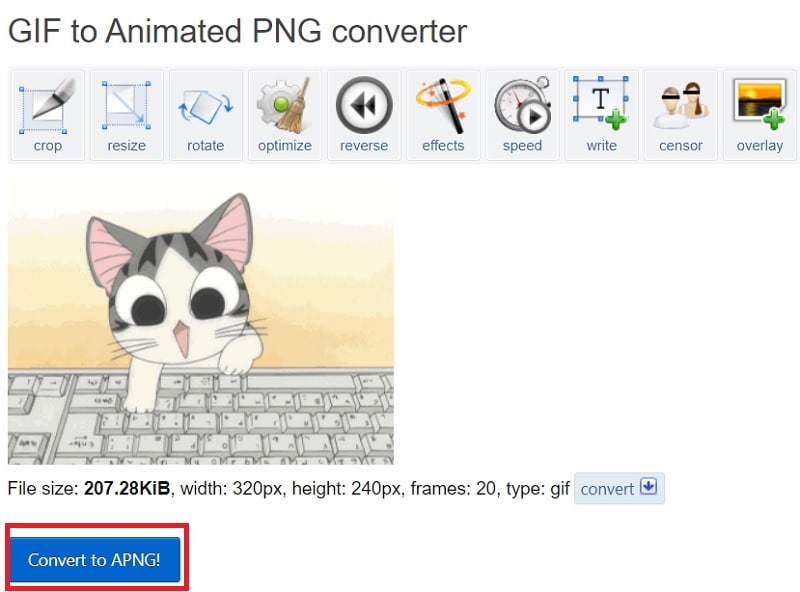
It is a simple and yet effective one that helps to convert the GIFs to animated PNGs in no time. You can also use the edit tools to make changes to the GIF files before the conversion process. The converted files are available for downloads at your local system drive. Access them when required and upload them to the desired platform to make fun with your friends and family members.
2. Free convert
In this section, you will be learning how to use the Free convert webpage to carry out the GIF to the animated PNG conversion process. It is a user-friendly interface where the controls are explicit to make the perfect click appropriately. This website provides a secure platform to carry out the conversion process optimally. The uploaded files are deleted automatically after 2 hours. You can expect a quality conversion process to take place on this website.
The stepwise process to convert GIF to animated PNG using the Freeconvert website.
Step 1
Upload the Gif files by tapping the ‘Choose GIF files’ button. This platform supports GIF file sizes up to 1GB.

Step 2
Hit the Convert to APNG button to trigger the conversion process and download the APNG file to desired storage space precisely.

Surf the above steps to carry out a precise conversion process between GIF and animated PNG. After this format conversion process, you can enjoy all the benefits of APNG overcoming the constraints with the GIF files.
These are the two efficient ways of converting the GIF files to APNG format using online web pages. You can choose any one of the websites to carry out the desired APNG conversion process optimally.
Wondershare Filmora
Get started easily with Filmora’s powerful performance, intuitive interface, and countless effects!
Try It Free Try It Free Try It Free Learn More >

AI Portrait – The best feature of Wondershare Filmora for gameplay editing
The AI Portrait is a new add-on in Wondershare Filmora. It can easily remove video backgrounds without using a green screen or chroma key, allowing you to add borders, glitch effects, pixelated, noise, or segmentation video effects.

Conclusion
Thus, this article had given valuable insights on the conversion of GIF to animated PNG files. The enlightening discussion about the GIFs and APNGs assists you to choose the best one from these two options. You must be clear about the differences between these formats and select the ones that meet your needs appropriately. Connect with the above-discussed web pages to carry out the conversion effortlessly with a few clicks. Stay connected with this article to discover the new horizons of animated clippings that excite you during online communications.
The advent of many instant chats had led to the demand for GIFs and animated PNGs. Users access these files to express their emotions amidst the chat environment. There are unique ways to convert GIFs to animated PNGs precisely. In the digital space, there are surplus applications are available to perform this conversion process without compromising with the quality factors.
In this article, a detailed discussion on the GIFs and the animated PNGs are available for better understanding. It is the process of working with images and implementing some actions with the pictures that makes it appear interesting. Most GIFs and animated PNGs are used for fun and it helps to excite your friends amidst serious chats. It serves as the source of conveying thoughts with fun-filled visuals. Before choosing between the GIFs and APNGs, analyze which file format offers you surplus advantages for optimal handling. Here, in the below discussion you will study the features of this file format and the precise methods to switch between these two files efficiently.
In this article
01 [What is GIF & What is animated PNG](#Part 1)
02 [GIF vs animated PNG, which is better?](#Part 2)
03 [Can PNG be animated like GIF?](#Part 3)
04 [How to Convert GIF to animated PNG?](#Part 4)
Part 1 What is GIF & What is animated PNG
The GIFs are animated images and the picture moves in a sequence in a cycle. The movement repeats without stopping. This type of picture is popular on the webpages and the built-in templates are available in the digital space for quick downloads. The single-frame GIFs take more time to download and displays exciting moves that trigger laughter with audiences. GIF takes the abbreviation of Graphics Interchange Format. It came into existence in the year 1980s and is widely used globally. GIFs are animated images in a basic format. It adopts the safe LZW algorithm that tracks the colors optimally.
The superior form of the motion picture is animated PNGs. It stands for Portable Network Graphics. This format supports indexed color, grayscale, and true color images. Additionally, the animated PNGs has advantages like alpha channels, cross-platform gamma corrections and two-dimensional interlacing. APNG came into existence in the year 1995 and is compatible with a few web browsers.
Part 2 GIF vs animated PNG, which is better?
When compared to GIFs and APNG, APNG seems to be technically strong with a wide range of supporting features. The quality of the file of APNG is good as it displays 24-bit images and 8- bit transparency. The APNG images can be compressed to the smallest value thereby encouraging the ease of transfer between devices. APNG has access to many color combinations whereas GIFs can use up to 256 colors. The new web browser versions are compatible with APNGs and the older browsers play the GIFs precisely. To view the APNG files in the older browsers you require external plugins or extensions. The higher quality APNGs are mostly used by professionals when compared to GIFs. The portability in moving the animated images is simple with APNGs. The GIF files have a poor compression rate and it is difficult to transfer at the digital space.
Part 3 Can PNG be animated like GIF?
You can animate the PNG files like GIF using reliable tools in the online space. There are unique programs to establish this process. It works on every detail on the PNG files and adds transition effects to the images to implement the movements. If you take closer looks at the digital space, you will acquire sophisticated programs to add transitions to the static pictures. While animating the PNG files, you must include frames, durations, and transition effects to the PNG images to include the animations. Based on the settings, the animated PNG file functions. Every move of the images is assigned by the attributes set by the users with the help of powerful applications in the digital space. You can also find online tools to assist in this operation. The static PNG files get desired moves by animating like GIF files. The APNG has superior quality when compared to GIF files. As discussed above many professionals opt for APNG files than GIFs.
Part 4 How to Convert GIF to animated PNG?
In this section, you will learn how to convert GIF to animated PNG using online tools. Use the recommended online platform to carry out the quality conversions to acquire desired outcomes.
1. EZGIF
It is an exclusive online space that brings quality animations to GIF files acquiring the properties of APNG. By converting the GIFs to APNG, you can enhance various features like easy storage, best compression, quality elements in the file. When you step into this website, you can perform a wide range of conversion processes between animated and static image files. Choose the right tabs on the menu to trigger the desired changes to the uploaded files.
Choose GIF to APNG tab at the top menu to begin this conversion process. The GIF files will receive all the good functionalities of APNG after this conversion process. You can download the animated PNGs to any platform after a successful conversion.
Follow the below steps to proceed with GIF to animated PNGs using the EZGIF online tool.
Step 1
Go to the website and upload the GIF file by tapping the ‘Choose File’ button. The maximum file size is 50MB that ensures a flawless upload process. Here, you can either choose a file from a local drive or paste the URL from an online source into this webpage flawlessly. Then, click the Upload button to trigger this GIF to the APNG conversion process.
Step 2
Format the output and click the convert button to download the animated PNG files.
It is a simple and yet effective one that helps to convert the GIFs to animated PNGs in no time. You can also use the edit tools to make changes to the GIF files before the conversion process. The converted files are available for downloads at your local system drive. Access them when required and upload them to the desired platform to make fun with your friends and family members.
2. Free convert
In this section, you will be learning how to use the Free convert webpage to carry out the GIF to the animated PNG conversion process. It is a user-friendly interface where the controls are explicit to make the perfect click appropriately. This website provides a secure platform to carry out the conversion process optimally. The uploaded files are deleted automatically after 2 hours. You can expect a quality conversion process to take place on this website.
The stepwise process to convert GIF to animated PNG using the Freeconvert website.
Step 1
Upload the Gif files by tapping the ‘Choose GIF files’ button. This platform supports GIF file sizes up to 1GB.
Step 2
Hit the Convert to APNG button to trigger the conversion process and download the APNG file to desired storage space precisely.
Surf the above steps to carry out a precise conversion process between GIF and animated PNG. After this format conversion process, you can enjoy all the benefits of APNG overcoming the constraints with the GIF files.
These are the two efficient ways of converting the GIF files to APNG format using online web pages. You can choose any one of the websites to carry out the desired APNG conversion process optimally.
Wondershare Filmora
Get started easily with Filmora’s powerful performance, intuitive interface, and countless effects!
Try It Free Try It Free Try It Free Learn More >
AI Portrait – The best feature of Wondershare Filmora for gameplay editing
The AI Portrait is a new add-on in Wondershare Filmora. It can easily remove video backgrounds without using a green screen or chroma key, allowing you to add borders, glitch effects, pixelated, noise, or segmentation video effects.
Conclusion
Thus, this article had given valuable insights on the conversion of GIF to animated PNG files. The enlightening discussion about the GIFs and APNGs assists you to choose the best one from these two options. You must be clear about the differences between these formats and select the ones that meet your needs appropriately. Connect with the above-discussed web pages to carry out the conversion effortlessly with a few clicks. Stay connected with this article to discover the new horizons of animated clippings that excite you during online communications.
Easy Cartoon Characters Drawing Tutorials for You Who Are Learning to Draw
Easy Cartoon Characters Drawing Tutorials for You Who Are Learning to Draw
An easy yet powerful editor
Numerous effects to choose from
Detailed tutorials provided by the official channel
Learning the art of cartoon characters drawing? We can help! Cartoon characters drawing is no rocket science, ABCD: Anybody Can Draw!

We are as excited as you as we bring to you a few of the best drawing tutorials!
In this article
01 [Double Your Results with Learning Cartoon Drawing Styles First](#Part 1)
02 [Best 6 Cartoon Characters Anyone Can Draw (with Free Video Tutorials)](#Part 2)
03 [Easy Cartoon Characters to Draw Step by Step](#Part 3)
Part 1 Double Your Results with Learning Cartoon Drawing Styles First
01 Cartoon Character Sketches
Sketching is one of the most popular art forms. Sketching can be done for real-life people or celebrities or we can also make sketches of imaginary characters and cartoons. Sketching is generally made of pencil and does not involve the usage of colors.

02 Cartoon Characters Drawing with Color
Cartoon characters can be made with color to make them more attractive. This is another popular form of art that cartoonists follow. You can explore several methods of coloring and try making your cartoon colorful.

03 Disney Cartoon Characters Drawing
Disney cartoon character drawing is probably one of the simplest. This is because they have a predefined size and are mostly symmetric. Disney cartoon characters generally use common geometric shapes such as circles, ovals, and squares. Hence making it a beginner-friendly choice!

Part 2 Best 6 Cartoon Characters Anyone Can Draw (with Free Video Tutorials)
01 Roger the alien
Roger the alien is one of the simplest cartoon characters to draw. This children’s classic cartoon character always intrigues children due to its bizarre shape. It fixes the image of an outer space characters in a child’s mind(If they exist).
What makes it easy to draw?
● The oval-shaped head is easy to draw since it is not very detailed.
● The character does not have any hair, hair is one of the more difficult parts to draw.
● The body features aren’t very prominent, hence making the character easy to draw.
Challenges you may encounter
● If you are a first-timer, then you may find it challenging to draw fingers and the toes.
● Getting the weird alien head shape might be a little difficult and may take you a few attempts.
● Making the two eyes exactly similar to each other may be challenging for a few of you.
02 Wakko Warner
What makes it easy to draw?
● The character generally has geometrical shapes and hence you can use shape tracers to draw a few parts.
● The appealing appearance of the character makes it interesting to draw.
● The eyes are not very difficult to recreate.
Challenges you may encounter
● The eyes are not very difficult to recreate.
● The shape of the mouth and the tongue that is sticking out is slightly complex.
● Perfecting the shape of the hair is a little challenging.
03 Cosmo
What makes it easy to draw?
● We recommend you to try this character out mainly because of its uniqueness.
● The eyes are not very complicated to draw.
● The body resembles a stick image and is hence simple to draw.
Challenges you may encounter
● The shape of the crown needs to be perfect, especially because of the tilt the crown has.
● The fingers are challenging to draw.
● The hair has a distinct shape, this shape needs to come out perfectly.
04 Courage the cowardly dog
What makes it easy to draw?
● Firstly, it’s one of the most favorite cartoons, hence it will ensure to keep you interested in the drawing.
● The hands and legs resemble stick figures and are simple to draw.
● The body structure is simple.
Challenges you may encounter
● Drawing a cartoon animal instead of a human being might be intriguing for beginners.
● The large eyes, which is one of the characteristic features needs to be perfect.
● The design of the ears is the trickiest part and could be difficult to draw.
05 Tom And Jerry
When we think of cartoons, the first few names that probably come to our mind are tom and jerry. This duo of a grumpy cat and a mysterious mouse has left an everlasting impact on the world of cartoons. The duo is famous throughout the world and is loved throughout age groups
Why do we recommend you to try your hands on this?
● This is a classic cartoon that almost everyone loves.
● There are several resources on the internet to help you draw the cartoon characters.
● The characters need not be perfect, even a close resemblance to them would be sufficient for the viewers to identify them due to their fame.
Challenges you may encounter
● You need to be careful with the proportion of sizes of tom and jerry.
● The structures of tom and jerry are not very simple to draw.
● Perfecting the grumpy expression on tom’s face and a frightened expression on jerry’s face is challenging.
05 Catdog
Catdog is another very interesting character. Who’d have imagined a cat and a dog morphed in a single body? Well, imagination has no end to it as they say! Catdog is a yellow cat and dog in a single body, it looks cute and at the same time intriguing.
Why do we recommend you try your hands on this?
● The cartoon character is mainly composed of geometrical shapes.
● The character is vividly colorful.
● The bright yellow color is super attractive and hence makes drawing catdog very fun.
Challenges you may encounter
● The character is illusional, you might have difficulty while deciding how to even look at it.
● The cat and dog faces are not very different from each other and have minute differences while drawing you need to be careful about having a distinct difference between the two faces.
Now that we’ve taken our baby steps towards understanding the art of drawing cartoons.
Key Takeaways from This Episode
● That’s a lot of knowledge for today, isn’t it? Today we’ve seen the basics of drawing cartoon characters.
● We also got our hands dirty by exploring a few easy cartoon characters that you could draw.
● Further, we saw the basic steps that you would need to take in order to draw the face of any cartoon character! All in all, we learned everything we needed to know to draw our first cartoon! What are you waiting for? Go try out drawing your first cartoon today!
Learning the art of cartoon characters drawing? We can help! Cartoon characters drawing is no rocket science, ABCD: Anybody Can Draw!
We are as excited as you as we bring to you a few of the best drawing tutorials!
In this article
01 [Double Your Results with Learning Cartoon Drawing Styles First](#Part 1)
02 [Best 6 Cartoon Characters Anyone Can Draw (with Free Video Tutorials)](#Part 2)
03 [Easy Cartoon Characters to Draw Step by Step](#Part 3)
Part 1 Double Your Results with Learning Cartoon Drawing Styles First
01 Cartoon Character Sketches
Sketching is one of the most popular art forms. Sketching can be done for real-life people or celebrities or we can also make sketches of imaginary characters and cartoons. Sketching is generally made of pencil and does not involve the usage of colors.
02 Cartoon Characters Drawing with Color
Cartoon characters can be made with color to make them more attractive. This is another popular form of art that cartoonists follow. You can explore several methods of coloring and try making your cartoon colorful.
03 Disney Cartoon Characters Drawing
Disney cartoon character drawing is probably one of the simplest. This is because they have a predefined size and are mostly symmetric. Disney cartoon characters generally use common geometric shapes such as circles, ovals, and squares. Hence making it a beginner-friendly choice!
Part 2 Best 6 Cartoon Characters Anyone Can Draw (with Free Video Tutorials)
01 Roger the alien
Roger the alien is one of the simplest cartoon characters to draw. This children’s classic cartoon character always intrigues children due to its bizarre shape. It fixes the image of an outer space characters in a child’s mind(If they exist).
What makes it easy to draw?
● The oval-shaped head is easy to draw since it is not very detailed.
● The character does not have any hair, hair is one of the more difficult parts to draw.
● The body features aren’t very prominent, hence making the character easy to draw.
Challenges you may encounter
● If you are a first-timer, then you may find it challenging to draw fingers and the toes.
● Getting the weird alien head shape might be a little difficult and may take you a few attempts.
● Making the two eyes exactly similar to each other may be challenging for a few of you.
02 Wakko Warner
What makes it easy to draw?
● The character generally has geometrical shapes and hence you can use shape tracers to draw a few parts.
● The appealing appearance of the character makes it interesting to draw.
● The eyes are not very difficult to recreate.
Challenges you may encounter
● The eyes are not very difficult to recreate.
● The shape of the mouth and the tongue that is sticking out is slightly complex.
● Perfecting the shape of the hair is a little challenging.
03 Cosmo
What makes it easy to draw?
● We recommend you to try this character out mainly because of its uniqueness.
● The eyes are not very complicated to draw.
● The body resembles a stick image and is hence simple to draw.
Challenges you may encounter
● The shape of the crown needs to be perfect, especially because of the tilt the crown has.
● The fingers are challenging to draw.
● The hair has a distinct shape, this shape needs to come out perfectly.
04 Courage the cowardly dog
What makes it easy to draw?
● Firstly, it’s one of the most favorite cartoons, hence it will ensure to keep you interested in the drawing.
● The hands and legs resemble stick figures and are simple to draw.
● The body structure is simple.
Challenges you may encounter
● Drawing a cartoon animal instead of a human being might be intriguing for beginners.
● The large eyes, which is one of the characteristic features needs to be perfect.
● The design of the ears is the trickiest part and could be difficult to draw.
05 Tom And Jerry
When we think of cartoons, the first few names that probably come to our mind are tom and jerry. This duo of a grumpy cat and a mysterious mouse has left an everlasting impact on the world of cartoons. The duo is famous throughout the world and is loved throughout age groups
Why do we recommend you to try your hands on this?
● This is a classic cartoon that almost everyone loves.
● There are several resources on the internet to help you draw the cartoon characters.
● The characters need not be perfect, even a close resemblance to them would be sufficient for the viewers to identify them due to their fame.
Challenges you may encounter
● You need to be careful with the proportion of sizes of tom and jerry.
● The structures of tom and jerry are not very simple to draw.
● Perfecting the grumpy expression on tom’s face and a frightened expression on jerry’s face is challenging.
05 Catdog
Catdog is another very interesting character. Who’d have imagined a cat and a dog morphed in a single body? Well, imagination has no end to it as they say! Catdog is a yellow cat and dog in a single body, it looks cute and at the same time intriguing.
Why do we recommend you try your hands on this?
● The cartoon character is mainly composed of geometrical shapes.
● The character is vividly colorful.
● The bright yellow color is super attractive and hence makes drawing catdog very fun.
Challenges you may encounter
● The character is illusional, you might have difficulty while deciding how to even look at it.
● The cat and dog faces are not very different from each other and have minute differences while drawing you need to be careful about having a distinct difference between the two faces.
Now that we’ve taken our baby steps towards understanding the art of drawing cartoons.
Key Takeaways from This Episode
● That’s a lot of knowledge for today, isn’t it? Today we’ve seen the basics of drawing cartoon characters.
● We also got our hands dirty by exploring a few easy cartoon characters that you could draw.
● Further, we saw the basic steps that you would need to take in order to draw the face of any cartoon character! All in all, we learned everything we needed to know to draw our first cartoon! What are you waiting for? Go try out drawing your first cartoon today!
Easy Shortcut to Convert Videos to Gifs on iPhone
Simple Shortcut to Convert Videos to Gifs on iPhone
An easy yet powerful editor
Numerous effects to choose from
Detailed tutorials provided by the official channel
To create iPhone video to GIF there are several third-party apps available. You can even choose the online sites for the task, but the editing and other options will be limited. The GIFs on your iPhone can be created using videos as well as Live photos.

One of the best ways to create a GIF is using the Shortcuts app that comes pre-installed on devices running on iOS 13 and later versions of the OS. The app has shortcuts to accomplish several tasks on your iPhone including GIF creation. Learn about using Shortcuts and other tools for creating a GIF on iPhone.
In this article
01 [How to make GIF from Video on iPhone using Shortcut App](#Part 1)
02 [How to save Live Photos as GIF on iPhone](#Part 2)
03 [How to save Live Photos as GIF on iPhone](#Part 3)
04 [How to save videos as live photos on your iPhone?](#Part 4)
05 [Best tool for creating GIFs and video editing on your Windows and Mac- Wondershare Filmora](#Part 5)
Part 1 How to make GIF from Video on iPhone using Shortcut App
One of the easiest ways to convert video GIF iPhone is by using the Shortcuts app. If you have deleted the app, you can reinstall it from the app store. Once the app is installed, you would next need to allow the untrusted shortcuts and for this go to Settings > Shortcuts> toggle Add Untrusted Shortcuts to add the shortcuts created by the user. The further steps for converting video to GIF iPhone are as follows.
Step 1. On your iPhone, download the Video to GIF shortcut. You can download it using iCloud or RoutineHub. Find the shortcut and click on Get Shortcut will let you check the action of the shortcut.
Move down and click on the red Add Untrusted Shortcut button that will add the shortcut for the library.

Step 2. Go to the My Shortcuts tab and click on the Video to GIF section. If you are using it for the first time, you need to grant permission to use the videos and photos. Click on the OK button and continue.

Step 3. Next, browse and add the video from which you wish to create the GIF. Since GIF animations are short, it is always recommended to use short videos.
Step 4. Video processing will start and during this, the Video to GIF shortcut will be greyed out.

Step 5. Once done, the preview of the GIF will appear on the screen. Finally, you can save the GIF to your Photos app on iPhone or can also share it through email, AirDrop, iMessage, and other third-party services as needed.

Part 2 How to save Live Photos as GIF on iPhone
Live Photo is an interesting feature of the iPhone where an image is captured in an animated form for a couple of seconds. These Live Photos can be easily converted to GIFs using the steps below.
Step 1. On your iPhone Photo app, open the Live Photo that you want to save as GIF.
Step 2. Darg the selected photo upwards and will see multiple effects options along with other image details.
Step 3 To save the selected image as GIF, choose Loop or Bounce animation. Once done, share the image on mail and other services listed or save it to the device.

Part 3 How to save Live Photo as video on iPhone
You can also convert your live photos to videos and then use them for making GIFs and for other uses. The steps for iPhone live photo to video are as follows.
Step 1. On your iPhone, open the Photos app and choose the Live Photo that you want to convert.
Step 2. Next, click on the share button at the bottom of the screen and multiple options will be seen.
Step 3. Scroll down and choose Save as Video option and with this, the live photo will be saved as a Video.
Additionally, you can also convert the LivePhotos to videos using the shortcut app.

Part 4 How to save videos as live photos on your iPhone?
If you need to convert your videos to live photos on iPhone, there are several third-party tools available and one of the widely used is IntoLive. Using this app, videos, as well as GIFs, can be converted into live photos.
Steps on how to turn a video into a live photo iPhone
Step 1. Download, install and launch the IntoLive app from the app store.
Step 2. Next, browse and add the desired video.
Step 3. If needed, the added video can be customized using several supported features.
Step 4. Next, click on the Make option at the top-right corner and then choose the repeats you want for a Live Photo.
Step 5. Finally, click on the Live Photo and your Live Photo will be saved to the device.

Part 5 Best tool for creating GIFs and video editing on your Windows and Mac- Wondershare Filmora
Above we have listed several ways to create GIFs on your iPhone and also to convert videos to LivePhotos and vice-versa. Installing different tools for different tasks is a hassle and also a time-consuming task. So, if you are looking for an all-in-one tool that allows you to create GIFs, and professionally edit your media files, Wondershare Filmora Video Editor is the best tool to consider. Available for quick download on your Windows and Mac system, this feature-packed software has an intuitive and user-friendly interface.
Wondershare Filmora
Get started easily with Filmora’s powerful performance, intuitive interface, and countless effects!
Try It Free Try It Free Try It Free Learn More >
Media files in all key formats are supported by the tool and there are multiple options for editing and video creation like splitting, rotating, cutting, adding effects, sounds, text, and other elements. In a few simple steps, your customized GIF and other professional-looking media files will be ready.
Steps to create GIF using Wondershare Filmora
Step 1. Launch the installed software on your system and add the video or images from the system.
Step 2. The added media files next need to be dragged and dropped to the timeline at the bottom of the interface.
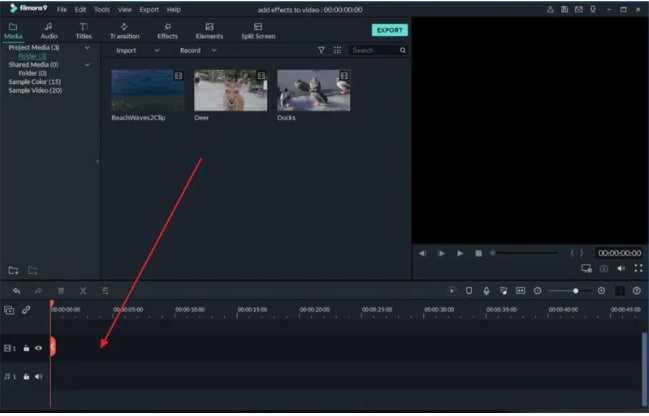
Step 3. After the files are moved, you can customize them using several editing tools like rotate, crop, cut, and more.
Step 4. Next, add text, effects, sound, and other elements as needed.

Step 5. Finally choose to export the file and then from the Local tab, select the GIF option. Choose a file name and location and then finally click on the EXPORT button.

● Key Takeaways from This Episode →
●There are several ways to turn video into GIF iPhone.
●Using shortcuts is one of the most straightforward methods for creating GIFs using videos.
●You can also convert videos to LivePhoto and vice versa on your iPhone using third-party apps.
●Wondershare Filmora is an excellent software to make GIFs and professionally edit media files.
To create iPhone video to GIF there are several third-party apps available. You can even choose the online sites for the task, but the editing and other options will be limited. The GIFs on your iPhone can be created using videos as well as Live photos.
One of the best ways to create a GIF is using the Shortcuts app that comes pre-installed on devices running on iOS 13 and later versions of the OS. The app has shortcuts to accomplish several tasks on your iPhone including GIF creation. Learn about using Shortcuts and other tools for creating a GIF on iPhone.
In this article
01 [How to make GIF from Video on iPhone using Shortcut App](#Part 1)
02 [How to save Live Photos as GIF on iPhone](#Part 2)
03 [How to save Live Photos as GIF on iPhone](#Part 3)
04 [How to save videos as live photos on your iPhone?](#Part 4)
05 [Best tool for creating GIFs and video editing on your Windows and Mac- Wondershare Filmora](#Part 5)
Part 1 How to make GIF from Video on iPhone using Shortcut App
One of the easiest ways to convert video GIF iPhone is by using the Shortcuts app. If you have deleted the app, you can reinstall it from the app store. Once the app is installed, you would next need to allow the untrusted shortcuts and for this go to Settings > Shortcuts> toggle Add Untrusted Shortcuts to add the shortcuts created by the user. The further steps for converting video to GIF iPhone are as follows.
Step 1. On your iPhone, download the Video to GIF shortcut. You can download it using iCloud or RoutineHub. Find the shortcut and click on Get Shortcut will let you check the action of the shortcut.
Move down and click on the red Add Untrusted Shortcut button that will add the shortcut for the library.
Step 2. Go to the My Shortcuts tab and click on the Video to GIF section. If you are using it for the first time, you need to grant permission to use the videos and photos. Click on the OK button and continue.
Step 3. Next, browse and add the video from which you wish to create the GIF. Since GIF animations are short, it is always recommended to use short videos.
Step 4. Video processing will start and during this, the Video to GIF shortcut will be greyed out.
Step 5. Once done, the preview of the GIF will appear on the screen. Finally, you can save the GIF to your Photos app on iPhone or can also share it through email, AirDrop, iMessage, and other third-party services as needed.
Part 2 How to save Live Photos as GIF on iPhone
Live Photo is an interesting feature of the iPhone where an image is captured in an animated form for a couple of seconds. These Live Photos can be easily converted to GIFs using the steps below.
Step 1. On your iPhone Photo app, open the Live Photo that you want to save as GIF.
Step 2. Darg the selected photo upwards and will see multiple effects options along with other image details.
Step 3 To save the selected image as GIF, choose Loop or Bounce animation. Once done, share the image on mail and other services listed or save it to the device.
Part 3 How to save Live Photo as video on iPhone
You can also convert your live photos to videos and then use them for making GIFs and for other uses. The steps for iPhone live photo to video are as follows.
Step 1. On your iPhone, open the Photos app and choose the Live Photo that you want to convert.
Step 2. Next, click on the share button at the bottom of the screen and multiple options will be seen.
Step 3. Scroll down and choose Save as Video option and with this, the live photo will be saved as a Video.
Additionally, you can also convert the LivePhotos to videos using the shortcut app.
Part 4 How to save videos as live photos on your iPhone?
If you need to convert your videos to live photos on iPhone, there are several third-party tools available and one of the widely used is IntoLive. Using this app, videos, as well as GIFs, can be converted into live photos.
Steps on how to turn a video into a live photo iPhone
Step 1. Download, install and launch the IntoLive app from the app store.
Step 2. Next, browse and add the desired video.
Step 3. If needed, the added video can be customized using several supported features.
Step 4. Next, click on the Make option at the top-right corner and then choose the repeats you want for a Live Photo.
Step 5. Finally, click on the Live Photo and your Live Photo will be saved to the device.
Part 5 Best tool for creating GIFs and video editing on your Windows and Mac- Wondershare Filmora
Above we have listed several ways to create GIFs on your iPhone and also to convert videos to LivePhotos and vice-versa. Installing different tools for different tasks is a hassle and also a time-consuming task. So, if you are looking for an all-in-one tool that allows you to create GIFs, and professionally edit your media files, Wondershare Filmora Video Editor is the best tool to consider. Available for quick download on your Windows and Mac system, this feature-packed software has an intuitive and user-friendly interface.
Wondershare Filmora
Get started easily with Filmora’s powerful performance, intuitive interface, and countless effects!
Try It Free Try It Free Try It Free Learn More >
Media files in all key formats are supported by the tool and there are multiple options for editing and video creation like splitting, rotating, cutting, adding effects, sounds, text, and other elements. In a few simple steps, your customized GIF and other professional-looking media files will be ready.
Steps to create GIF using Wondershare Filmora
Step 1. Launch the installed software on your system and add the video or images from the system.
Step 2. The added media files next need to be dragged and dropped to the timeline at the bottom of the interface.
Step 3. After the files are moved, you can customize them using several editing tools like rotate, crop, cut, and more.
Step 4. Next, add text, effects, sound, and other elements as needed.
Step 5. Finally choose to export the file and then from the Local tab, select the GIF option. Choose a file name and location and then finally click on the EXPORT button.
● Key Takeaways from This Episode →
●There are several ways to turn video into GIF iPhone.
●Using shortcuts is one of the most straightforward methods for creating GIFs using videos.
●You can also convert videos to LivePhoto and vice versa on your iPhone using third-party apps.
●Wondershare Filmora is an excellent software to make GIFs and professionally edit media files.
Also read:
- Updated 2024 Approved Ways to Make Sure You Get the Most up to Date Cartoon Character Design Tips
- Best 12 Illusion Gifs Top Picks for 2024
- New The Art of Comics - Learn How to Do Funny Cartoon Drawings
- Handy Tip From Adobe Animate Rigging Tutorial for All Learners for 2024
- In 2024, How to Create Slideshow in LinkedIn
- Updated In 2024, Best 10 3D Text Animation Templates
- Updated 2024 Approved Top 8 Anime Name & Title Generators Online-Get Cool Anime Names
- New How to Make Animated Videos for Business Simple Guide for 2024
- New 2024 Approved How to Make GIF Stickers for WhatsApp 100 The Simple Way
- New 2024 Approved 10 Popular Cartoon Characters That You Wont Want to Miss
- 10 Cartoon Characters That Should Top Your List
- In 2024, Top 10 Apps to Enhance Your Instagram Story Slideshow
- Updated How to Create an Animated Sticky Navbar
- Updated Make Well Done Animated GIF for 2024
- In 2024, 10 Popular Cartoon Characters That You Wont Want to Miss
- Can I Do Animated Logo Design Without Design Skills for 2024
- New Whats the Best 10 Photo Animator Templates That Bring Your Images to Life, In 2024
- In 2024, Best 8 Tools Tell You How to Make Slideshows for Instagram
- Updated 2024 Approved What Wikipedia Wont Tell You About Character Rigging
- The Most Efficient Techniques for You to Make 3D Animation Character
- New In 2024, How to Create Benime Whiteboard Animation in Android
- Updated How to Make Creative Animation Videos
- A Beginners Guide to Explain What 3D Animation Is
- In 2024, Best 10 Animoji Apps You Can Use to Edit Animoji
- New In 2024, 5 Different Animation Styles A Simple but Complete Guide
- New Top 10 Best Photo to Animation Converters
- New The Best 8 Places for High-Quality Royalty Free Gifs for 2024
- Updated How to Cartoonize Photo Photoshop in Simple Steps for 2024
- New 2024 Approved How to Create a Whiteboard Animation Video
- New In 2024, Best 10 Animated DP for WhatsApp
- New 2024 Approved Techniques for Creating Animated Logo That Few People Know About
- New How to Create Photo Collage Frame for Free in Minutes?
- Updated In 2024, How to Create Animated Video on Canva?
- New In 2024, A Beginners Guide for Learning 3D Animation
- New Tutorials for Animating Picture Online Without Learning From Scratch
- Updated In 2024, The Best 8 Places for High-Quality Royalty Free Gifs
- Updated In 2024, How to Make Architecture Animation
- Best 10 Animoji Apps You Can Use to Edit Animoji for 2024
- In 2024, Create Animated Video on Canva
- In 2024, 10 of the Best Disney Animated Shows (Sorted by Popularity Ascending)
- New 15 Best Video to GIF App on iPhone and Android for 2024
- In 2024, Apple ID is Greyed Out On iPhone 15 Plus How to Bypass?
- iSpoofer is not working On Infinix Smart 7 HD? Fixed | Dr.fone
- Tecno Pova 6 Pro 5G Screen Unresponsive? Heres How to Fix It | Dr.fone
- 2 Ways to Monitor OnePlus 12 Activity | Dr.fone
- Strategies for Apps That Wont Download From Play Store On Infinix Note 30 5G | Dr.fone
- Easy steps to recover deleted data from Huawei P60
- What You Need To Know To Improve Your Vivo Y27s Hard Reset | Dr.fone
- How to Rescue Lost Messages from Infinix GT 10 Pro
- How To Change Your SIM PIN Code on Your Infinix Hot 30i Phone
- In 2024, How to Use Life360 on Windows PC For Vivo Y100t? | Dr.fone
- In 2024, A How-To Guide on Bypassing Apple iPhone XS Max iCloud Activation Lock
- In 2024, Still Using Pattern Locks with Vivo S17e? Tips, Tricks and Helpful Advice
- In 2024, How to Transfer Data from OnePlus 11R to Samsung Phone | Dr.fone
- In 2024, How to Detect and Stop mSpy from Spying on Your Realme C51 | Dr.fone
- How to Stop My Spouse from Spying on My Infinix Zero 5G 2023 Turbo | Dr.fone
- App Wont Open on Your Oppo Find X6 Pro? Here Are All Fixes | Dr.fone
- In 2024, Three Ways to Sim Unlock OnePlus 11 5G
- In 2024, 5 Ways to Transfer Music from Oppo A58 4G to Other Android Devices Easily | Dr.fone
- How To Unlock Stolen Apple iPhone 15 Plus In Different Conditionsin | Dr.fone
- In 2024, 9 Best Phone Monitoring Apps for Nokia C12 | Dr.fone
- In 2024, Finest Text-to-Speech Male Voice Tools for Natural Output
- Title: 2024 Approved How to Create Benime Whiteboard Animation on Android
- Author: Elon
- Created at : 2024-05-19 03:04:41
- Updated at : 2024-05-20 03:04:41
- Link: https://animation-videos.techidaily.com/2024-approved-how-to-create-benime-whiteboard-animation-on-android/
- License: This work is licensed under CC BY-NC-SA 4.0.
