
:max_bytes(150000):strip_icc():format(webp)/GettyImages-1065028028-8e770c58918e4cf8b0852e81cff60ed6.jpg)
2024 Approved How to Send and Add Snapchat GIFs 100 The Easy Way
How to Send and Add Snapchat GIFs 100% in Easy Way
How to Send and Add Snapchat GIFs 100% The Easy Way
An easy yet powerful editor
Numerous effects to choose from
Detailed tutorials provided by the official channel
GIFs make texting so much more fun. You can express many emotions and include entertaining animations to give your messages a human touch. Users may share and receive GIFs on most social networking networks, and Snapchat is no exception. We’ll show you how to send GIFs on Snapchat, whether you’re an Android or iOS user, in this article.
This covers instructions on how to get GIFs in Snapchat and how to transmit GIFs in chat rooms and on Snapchat Stories updates. Let’s get started.
In this article
01 [How to Send GIFs on Snapchat](#Part 1)
02 [How to Get GIFs on Snapchat Snaps and Messages?](#Part 2)
Part 1 How to Send GIFs on Snapchat
Here is a simple step guide on how to send Snapchat GIF:
Step 1: Take a photo
Start your Snapchat app as usual and snap a photo or video.

Step 2: Tap the Sticker icon
From the row on the right side of the screen, tap the Sticker icon.
To add a GIF to your photo or video, scroll down and select one. You can also use the search option to locate more particular GIFs by entering a term or phrase.

Step 3: Drag GIF
Drag the GIF you added to the screen’s desired location.
Pinch your screen to change the GIF’s size as needed.
Step 4: Save and Share
You can then share your Snap with other social networking platforms by sending it to your Stories, friends/contacts, or just saving it to your gallery.

Part 2 How to Get GIFs on Snapchat Snaps and Messages?
Getting a GIF on Snapchat can be tasking, but here is a simple guide to achieving that.
Step 1: Make use of a Gboard.
Enter the chat of the friend or person to whom you want to send the GIF and maximize or open the keyboard using the text bar.

Step 2: Select the GIF you want.
Choose a GIF from the collection or catalog that you’d want to utilize and submit it.

You can use the same snap to apply many stickers. Drag and drop it on the trashcan icon to get rid of it.
Here’s how to get Gboard on your Android device if it didn’t come with it:
• Download the Gboard from the Play Store or whichever playstore you want.
• Go to Settings> System> Languages and Input> Virtual Keyboard and select it.
• Double-check that Gboard is selected as your primary keyboard.
After that, grant any permissions it requires so that you can use it right away in Snapchat.
Now that it’s as simple as it gets, let’s send comparable GIFs utilizing iOS devices.
For iPhone/iPad:
For iPhone users, you must first download and install the giphy app on your phone. Once you have successfully set the giphy app as your default keyboard, you can send Snapchat GIFs chat by following the steps below:
Step 1: Press the Globe icon
Continuously press and hold the globe icon to the left of the space bar to reveal the available keyboard, then choose a specific or favorite GIF from the giphy list.

Step 2: Find GIF
Find the GIF you wish to send and tap it to copy it.

Step 3: Paste GIF
Return to the conversation, paste the GIF into the text box, and press the send button.

For those who don’t know how to use the Giphy app on their iPhones or iPads, read the following instructions:
• Go to the Settings menu and pick the General icon.
•To see your keyboard options, go to the keyboard setting and tap it.
• To see the accessible keyboard, tap on the part labelled keyboard.
• Select Add a New Keyboard.
• The Giphy keyboard will undoubtedly be among the third-party keyboards.
• Once you’ve included or added the keyboard, it’ll appear in the “active keyboard” section.
• Select the Allow Full Access option.
Have you heard of Filmora before? I’m afraid not, Wondershare Filmora Video Editor is a video editing program that allows you to edit videos in various ways.
It’s exciting and amusing to make your animated GIF from any video or photo. Due to their large size, video scenes might be challenging to manage, but GIFs are perfect for profile posts and sharing with friends as simple jokes.
However, if you wish to create a GIF online, Filmora’s online meme maker is the ideal choice. You may use it to make a watermark-free photo, GIF, and video memes. It is free to use, and there is no need to register. You can change the text size, color, and position when you’re altering a caption. You can also add text to the inside or outside in a GIF.
Wondershare Filmora
Get started easily with Filmora’s powerful performance, intuitive interface, and countless effects!
Try It Free Try It Free Try It Free Learn More >

GIFs may be created from a collection of static photographs or even moving movies, and the process is effortless enough for anyone to do. We recommend Wondershare Filmora for you to complete this task quickly and easily. The rationale for this suggestion is the software tool’s user-friendly and engaging interface. You can soon mix a lot of stills into GIFs or convert small videos into GIFs with Filmora. What’s more, the Filmora platform enables easy modification of GIFs, with users able to add overlays, components, and text to their GIFs.
● Key Takeaways from This Episode →
● You must have gotten one or two tips on how to send and add Snapchat GIFs, all that is for you is to grab your phone, be it an Android or iOS, and make your chat, conversations, photos, and videos more interesting by making use of GIFs on Snapchat.
● iPhone users must ensure that the Giphy app is installed to achieve this.It is also important to note that you can create your exciting GIFs using Wondershare Filmora, and this can help you easily create an awesome GIF in no time. Get to it!!
GIFs make texting so much more fun. You can express many emotions and include entertaining animations to give your messages a human touch. Users may share and receive GIFs on most social networking networks, and Snapchat is no exception. We’ll show you how to send GIFs on Snapchat, whether you’re an Android or iOS user, in this article.
This covers instructions on how to get GIFs in Snapchat and how to transmit GIFs in chat rooms and on Snapchat Stories updates. Let’s get started.
In this article
01 [How to Send GIFs on Snapchat](#Part 1)
02 [How to Get GIFs on Snapchat Snaps and Messages?](#Part 2)
Part 1 How to Send GIFs on Snapchat
Here is a simple step guide on how to send Snapchat GIF:
Step 1: Take a photo
Start your Snapchat app as usual and snap a photo or video.
Step 2: Tap the Sticker icon
From the row on the right side of the screen, tap the Sticker icon.
To add a GIF to your photo or video, scroll down and select one. You can also use the search option to locate more particular GIFs by entering a term or phrase.
Step 3: Drag GIF
Drag the GIF you added to the screen’s desired location.
Pinch your screen to change the GIF’s size as needed.
Step 4: Save and Share
You can then share your Snap with other social networking platforms by sending it to your Stories, friends/contacts, or just saving it to your gallery.
Part 2 How to Get GIFs on Snapchat Snaps and Messages?
Getting a GIF on Snapchat can be tasking, but here is a simple guide to achieving that.
Step 1: Make use of a Gboard.
Enter the chat of the friend or person to whom you want to send the GIF and maximize or open the keyboard using the text bar.
Step 2: Select the GIF you want.
Choose a GIF from the collection or catalog that you’d want to utilize and submit it.
You can use the same snap to apply many stickers. Drag and drop it on the trashcan icon to get rid of it.
Here’s how to get Gboard on your Android device if it didn’t come with it:
• Download the Gboard from the Play Store or whichever playstore you want.
• Go to Settings> System> Languages and Input> Virtual Keyboard and select it.
• Double-check that Gboard is selected as your primary keyboard.
After that, grant any permissions it requires so that you can use it right away in Snapchat.
Now that it’s as simple as it gets, let’s send comparable GIFs utilizing iOS devices.
For iPhone/iPad:
For iPhone users, you must first download and install the giphy app on your phone. Once you have successfully set the giphy app as your default keyboard, you can send Snapchat GIFs chat by following the steps below:
Step 1: Press the Globe icon
Continuously press and hold the globe icon to the left of the space bar to reveal the available keyboard, then choose a specific or favorite GIF from the giphy list.
Step 2: Find GIF
Find the GIF you wish to send and tap it to copy it.
Step 3: Paste GIF
Return to the conversation, paste the GIF into the text box, and press the send button.
For those who don’t know how to use the Giphy app on their iPhones or iPads, read the following instructions:
• Go to the Settings menu and pick the General icon.
•To see your keyboard options, go to the keyboard setting and tap it.
• To see the accessible keyboard, tap on the part labelled keyboard.
• Select Add a New Keyboard.
• The Giphy keyboard will undoubtedly be among the third-party keyboards.
• Once you’ve included or added the keyboard, it’ll appear in the “active keyboard” section.
• Select the Allow Full Access option.
Have you heard of Filmora before? I’m afraid not, Wondershare Filmora Video Editor is a video editing program that allows you to edit videos in various ways.
It’s exciting and amusing to make your animated GIF from any video or photo. Due to their large size, video scenes might be challenging to manage, but GIFs are perfect for profile posts and sharing with friends as simple jokes.
However, if you wish to create a GIF online, Filmora’s online meme maker is the ideal choice. You may use it to make a watermark-free photo, GIF, and video memes. It is free to use, and there is no need to register. You can change the text size, color, and position when you’re altering a caption. You can also add text to the inside or outside in a GIF.
Wondershare Filmora
Get started easily with Filmora’s powerful performance, intuitive interface, and countless effects!
Try It Free Try It Free Try It Free Learn More >
GIFs may be created from a collection of static photographs or even moving movies, and the process is effortless enough for anyone to do. We recommend Wondershare Filmora for you to complete this task quickly and easily. The rationale for this suggestion is the software tool’s user-friendly and engaging interface. You can soon mix a lot of stills into GIFs or convert small videos into GIFs with Filmora. What’s more, the Filmora platform enables easy modification of GIFs, with users able to add overlays, components, and text to their GIFs.
● Key Takeaways from This Episode →
● You must have gotten one or two tips on how to send and add Snapchat GIFs, all that is for you is to grab your phone, be it an Android or iOS, and make your chat, conversations, photos, and videos more interesting by making use of GIFs on Snapchat.
● iPhone users must ensure that the Giphy app is installed to achieve this.It is also important to note that you can create your exciting GIFs using Wondershare Filmora, and this can help you easily create an awesome GIF in no time. Get to it!!
Are You Ready to Animate Game Character From Scratch?
Are You Ready to Animate Game Character from Scratch?
An easy yet powerful editor
Numerous effects to choose from
Detailed tutorials provided by the official channel
As the popularity of animated video games is reaching new heights, demand for game animators are also going up. But, the Information regarding how to animate games is less or not sufficient enough.
In this article
01 [What is 2D & 3D Animation Game?](#Part 1)
02 [How Do You Animate Games?](#Part 2)
03 [How to Draw 2d & 3d Characters for Video Games?](#Part 3)
Part 1 What is 2D & 3D Animation Game?
Gaming animation is a blend of art and technology. It is one of those fields that require several technical skills. These are brilliant programming skills, understanding the basics of computer science, and practical technology know-how, collectively standing as the basic fundamental of Animation. Both 2D and 3D Animation changed the gaming experience forever and created an array of opportunities. But they differ in working and application.
01Working on 2D Animation
Flipbook can be a good example of the mechanism behind 2D Animation. After drawing a character or an object on the first page of a notebook, continue drawing for the next page and so on. Each removing should be a bit ahead or behind. When flipped swiftly, the series of drawings makes the character or object move.
The working of 2D Animation is not so different. But the detailing of the subject or the object cannot be minimal as a flipbook. 2D Animation demands more characters and more details while at the same time requiring smooth, visually appealing, and accurate detailing, which is a lot of pressure for the makers. Thanks to 2D making software, a week’s work can be taken care of in minutes or two.
02Working on 3D Animation
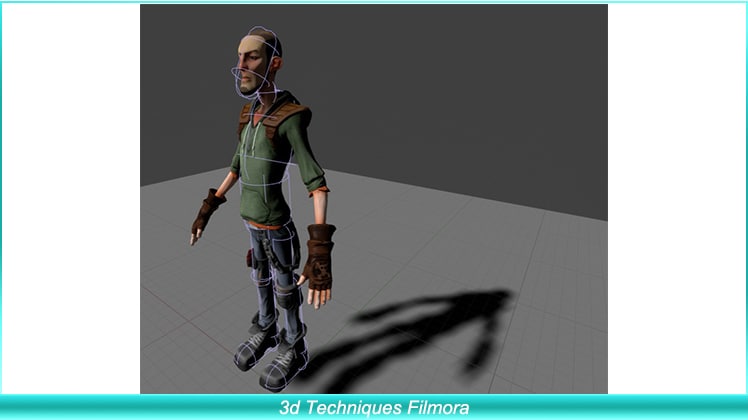
The working mechanism of 3D Animation is more complicated than 2D. It is a layered process that requires several skills. It also involves “rigged” and animated 3D models. In 3D, the initial sketch of the entire subject and object is the first step towards the animation procedure. The second step is to make a 3D model of the intended animated object. It was third, texturing of the 3D animated object. Rigging is the final step; it gives the 3D model the power and ability to move. Once rigging is done, the character is already for posing. Drop it to the scene and start your Animation.
Part 2 How Do You Animate Games?
01Do You Know How Hot Animated Games Are?
A practical example of how Animation has been handed down over the ages would be the case of ‘Anime’. It has persisted as one of the top cultural exports of Japan and has successfully completed more than 20 years of legacy. The name ‘anime’ practically is a shorter version of the word Animation.
You will find that the reasons for animate games to be so popular are in vast numbers. For example, the anime industry is valued at 19 billion USD, to begin with.
A brief overview of reasons why animate games are so popular:
● There is a Game for Everyone
Game animations are evolving which is why it is able to reach out to a majority of people’s interests.
● Unique Styles of Animation
Gaming animations have come a long way and they have a more individual appeal for all age groups.
● Game History
Gamers have something else to look forward to other than just gaming. There is a story behind every game.
● Customization
Players can customize their characters the way they wish to see themselves.
● Action
Gamers can fight in an action sequence or drive a Lamborghini in a high-speed car chase.
02How Do I Create My Own Game Character?
Designing a character starts with imaging a character in its suitable background or subject. If you are a big fan of fantasy games, your imaginations should not have any boundaries. But, in the case of a sports game, you might have to limit your imagination based on realistic features.
How to streamline wild ideas to get a brilliant character out of it?
● Get an idea
Decide whether the character in mind is the main character or what role, in particular, is it going to play in the game.
● Gender
Gender plays a crucial role in character creation. As it pre-decides certain character traits.
● Build personality
Every character has a specific goal. The personality of each character helps them to achieve their goal.
● Back-story
The personality traits of every character are derived from their back-story.
● Strength& Weakness
Each character should have something unique be it in their personality or in their strength.
● Define Relationship
It is important to imagine and define what relationship the characters have.
● Provide aesthetics
Visual Aesthetics is a realm that has no bounds in the art of gaming.
● Create more characters
Including other characters in relation to the protagonist of the game would make the game or the storyline more interesting.
Part 3 How to Draw 2d & 3d Characters for Video Games
01How to Make a 2d & 3d Game Character - Tutorial
First, we conceive an idea in our mind in an abstract form. But, creating a character from an initial sketch all the way to making it into a full-drawn animation is about developing details keeping the speed of work steady.
Detailed animate game tutorials available online:
● Create composition
Make it more defined and structured. A tip to immediately jump-start your imagination would be to see your character in different lights and shades.
● Refine the Character Sketch
Once you have the clay, it’s time to add form.
● Add References
Start looking for references that suit your character.
● Add Details
Now, it’s time to get into the details, like literally. Start breaking your character into blocks and pieces. Maybe not too literally.
02Learn to Animate Games That Are Underrated Now
With more advancement comes more banishment, which means more and types of games are fading out to obscurity. You can now animate games that are underrated and add a bit of your own flavor to them using software.
You can also apply 3D rendering techniques to apply light and shadow effects to your games.
Stop motion is also a popular 2D gaming animation technique that is used in a number of underrated game models like cutout, Claymation, pixilation.
Motion graphics is amazing tool beginners have fun experimenting with. You can create engaging 2D game animations with motion graphic software like Adobe after effects. Make stunning adobe animation tutorials with the same.
Key Takeaways from This Episode
● Both 2D and 3D Animation offer a separate flavor of the experience. 2D animations run on a definitive FPS and can be compared to a simple flipbook animation, while 3D Animation involves a process called rigging that gives the Animation several movements and abilities.
● Animated games have a global appeal because of their unique style, history, customization, and action features. Animating your own character requires you to pay attention to the details like personality, back story, gender, and aesthetics.
● You can start your animation process with 5 simple steps - concept, composition, sketch, reference, and detailing.
As the popularity of animated video games is reaching new heights, demand for game animators are also going up. But, the Information regarding how to animate games is less or not sufficient enough.
In this article
01 [What is 2D & 3D Animation Game?](#Part 1)
02 [How Do You Animate Games?](#Part 2)
03 [How to Draw 2d & 3d Characters for Video Games?](#Part 3)
Part 1 What is 2D & 3D Animation Game?
Gaming animation is a blend of art and technology. It is one of those fields that require several technical skills. These are brilliant programming skills, understanding the basics of computer science, and practical technology know-how, collectively standing as the basic fundamental of Animation. Both 2D and 3D Animation changed the gaming experience forever and created an array of opportunities. But they differ in working and application.
01Working on 2D Animation
Flipbook can be a good example of the mechanism behind 2D Animation. After drawing a character or an object on the first page of a notebook, continue drawing for the next page and so on. Each removing should be a bit ahead or behind. When flipped swiftly, the series of drawings makes the character or object move.
The working of 2D Animation is not so different. But the detailing of the subject or the object cannot be minimal as a flipbook. 2D Animation demands more characters and more details while at the same time requiring smooth, visually appealing, and accurate detailing, which is a lot of pressure for the makers. Thanks to 2D making software, a week’s work can be taken care of in minutes or two.
02Working on 3D Animation
The working mechanism of 3D Animation is more complicated than 2D. It is a layered process that requires several skills. It also involves “rigged” and animated 3D models. In 3D, the initial sketch of the entire subject and object is the first step towards the animation procedure. The second step is to make a 3D model of the intended animated object. It was third, texturing of the 3D animated object. Rigging is the final step; it gives the 3D model the power and ability to move. Once rigging is done, the character is already for posing. Drop it to the scene and start your Animation.
Part 2 How Do You Animate Games?
01Do You Know How Hot Animated Games Are?
A practical example of how Animation has been handed down over the ages would be the case of ‘Anime’. It has persisted as one of the top cultural exports of Japan and has successfully completed more than 20 years of legacy. The name ‘anime’ practically is a shorter version of the word Animation.
You will find that the reasons for animate games to be so popular are in vast numbers. For example, the anime industry is valued at 19 billion USD, to begin with.
A brief overview of reasons why animate games are so popular:
● There is a Game for Everyone
Game animations are evolving which is why it is able to reach out to a majority of people’s interests.
● Unique Styles of Animation
Gaming animations have come a long way and they have a more individual appeal for all age groups.
● Game History
Gamers have something else to look forward to other than just gaming. There is a story behind every game.
● Customization
Players can customize their characters the way they wish to see themselves.
● Action
Gamers can fight in an action sequence or drive a Lamborghini in a high-speed car chase.
02How Do I Create My Own Game Character?
Designing a character starts with imaging a character in its suitable background or subject. If you are a big fan of fantasy games, your imaginations should not have any boundaries. But, in the case of a sports game, you might have to limit your imagination based on realistic features.
How to streamline wild ideas to get a brilliant character out of it?
● Get an idea
Decide whether the character in mind is the main character or what role, in particular, is it going to play in the game.
● Gender
Gender plays a crucial role in character creation. As it pre-decides certain character traits.
● Build personality
Every character has a specific goal. The personality of each character helps them to achieve their goal.
● Back-story
The personality traits of every character are derived from their back-story.
● Strength& Weakness
Each character should have something unique be it in their personality or in their strength.
● Define Relationship
It is important to imagine and define what relationship the characters have.
● Provide aesthetics
Visual Aesthetics is a realm that has no bounds in the art of gaming.
● Create more characters
Including other characters in relation to the protagonist of the game would make the game or the storyline more interesting.
Part 3 How to Draw 2d & 3d Characters for Video Games
01How to Make a 2d & 3d Game Character - Tutorial
First, we conceive an idea in our mind in an abstract form. But, creating a character from an initial sketch all the way to making it into a full-drawn animation is about developing details keeping the speed of work steady.
Detailed animate game tutorials available online:
● Create composition
Make it more defined and structured. A tip to immediately jump-start your imagination would be to see your character in different lights and shades.
● Refine the Character Sketch
Once you have the clay, it’s time to add form.
● Add References
Start looking for references that suit your character.
● Add Details
Now, it’s time to get into the details, like literally. Start breaking your character into blocks and pieces. Maybe not too literally.
02Learn to Animate Games That Are Underrated Now
With more advancement comes more banishment, which means more and types of games are fading out to obscurity. You can now animate games that are underrated and add a bit of your own flavor to them using software.
You can also apply 3D rendering techniques to apply light and shadow effects to your games.
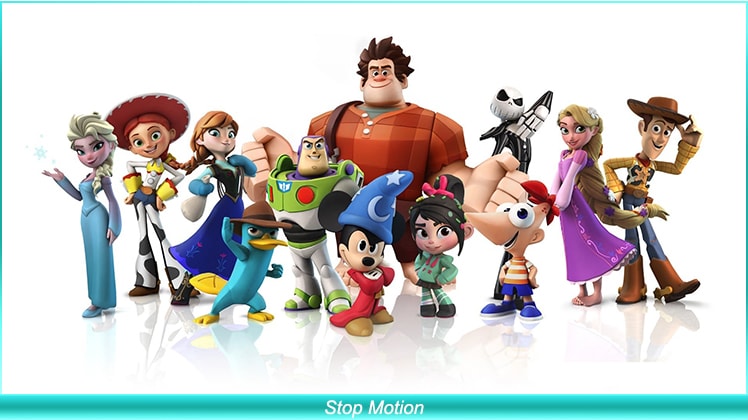
Stop motion is also a popular 2D gaming animation technique that is used in a number of underrated game models like cutout, Claymation, pixilation.
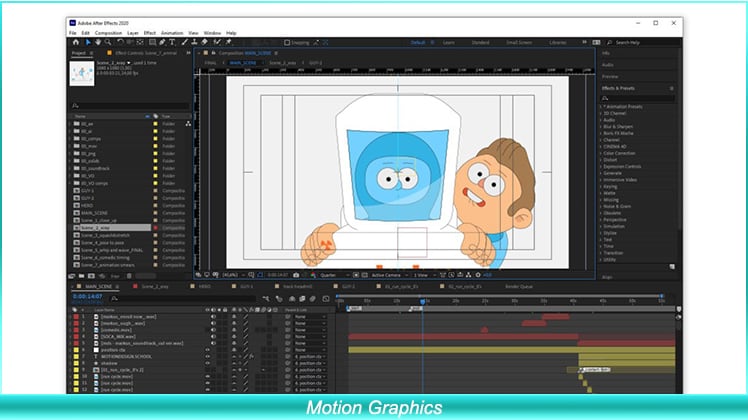
Motion graphics is amazing tool beginners have fun experimenting with. You can create engaging 2D game animations with motion graphic software like Adobe after effects. Make stunning adobe animation tutorials with the same.
Key Takeaways from This Episode
● Both 2D and 3D Animation offer a separate flavor of the experience. 2D animations run on a definitive FPS and can be compared to a simple flipbook animation, while 3D Animation involves a process called rigging that gives the Animation several movements and abilities.
● Animated games have a global appeal because of their unique style, history, customization, and action features. Animating your own character requires you to pay attention to the details like personality, back story, gender, and aesthetics.
● You can start your animation process with 5 simple steps - concept, composition, sketch, reference, and detailing.
As the popularity of animated video games is reaching new heights, demand for game animators are also going up. But, the Information regarding how to animate games is less or not sufficient enough.
In this article
01 [What is 2D & 3D Animation Game?](#Part 1)
02 [How Do You Animate Games?](#Part 2)
03 [How to Draw 2d & 3d Characters for Video Games?](#Part 3)
Part 1 What is 2D & 3D Animation Game?
Gaming animation is a blend of art and technology. It is one of those fields that require several technical skills. These are brilliant programming skills, understanding the basics of computer science, and practical technology know-how, collectively standing as the basic fundamental of Animation. Both 2D and 3D Animation changed the gaming experience forever and created an array of opportunities. But they differ in working and application.
01Working on 2D Animation
Flipbook can be a good example of the mechanism behind 2D Animation. After drawing a character or an object on the first page of a notebook, continue drawing for the next page and so on. Each removing should be a bit ahead or behind. When flipped swiftly, the series of drawings makes the character or object move.
The working of 2D Animation is not so different. But the detailing of the subject or the object cannot be minimal as a flipbook. 2D Animation demands more characters and more details while at the same time requiring smooth, visually appealing, and accurate detailing, which is a lot of pressure for the makers. Thanks to 2D making software, a week’s work can be taken care of in minutes or two.
02Working on 3D Animation
The working mechanism of 3D Animation is more complicated than 2D. It is a layered process that requires several skills. It also involves “rigged” and animated 3D models. In 3D, the initial sketch of the entire subject and object is the first step towards the animation procedure. The second step is to make a 3D model of the intended animated object. It was third, texturing of the 3D animated object. Rigging is the final step; it gives the 3D model the power and ability to move. Once rigging is done, the character is already for posing. Drop it to the scene and start your Animation.
Part 2 How Do You Animate Games?
01Do You Know How Hot Animated Games Are?
A practical example of how Animation has been handed down over the ages would be the case of ‘Anime’. It has persisted as one of the top cultural exports of Japan and has successfully completed more than 20 years of legacy. The name ‘anime’ practically is a shorter version of the word Animation.
You will find that the reasons for animate games to be so popular are in vast numbers. For example, the anime industry is valued at 19 billion USD, to begin with.
A brief overview of reasons why animate games are so popular:
● There is a Game for Everyone
Game animations are evolving which is why it is able to reach out to a majority of people’s interests.
● Unique Styles of Animation
Gaming animations have come a long way and they have a more individual appeal for all age groups.
● Game History
Gamers have something else to look forward to other than just gaming. There is a story behind every game.
● Customization
Players can customize their characters the way they wish to see themselves.
● Action
Gamers can fight in an action sequence or drive a Lamborghini in a high-speed car chase.
02How Do I Create My Own Game Character?
Designing a character starts with imaging a character in its suitable background or subject. If you are a big fan of fantasy games, your imaginations should not have any boundaries. But, in the case of a sports game, you might have to limit your imagination based on realistic features.
How to streamline wild ideas to get a brilliant character out of it?
● Get an idea
Decide whether the character in mind is the main character or what role, in particular, is it going to play in the game.
● Gender
Gender plays a crucial role in character creation. As it pre-decides certain character traits.
● Build personality
Every character has a specific goal. The personality of each character helps them to achieve their goal.
● Back-story
The personality traits of every character are derived from their back-story.
● Strength& Weakness
Each character should have something unique be it in their personality or in their strength.
● Define Relationship
It is important to imagine and define what relationship the characters have.
● Provide aesthetics
Visual Aesthetics is a realm that has no bounds in the art of gaming.
● Create more characters
Including other characters in relation to the protagonist of the game would make the game or the storyline more interesting.
Part 3 How to Draw 2d & 3d Characters for Video Games
01How to Make a 2d & 3d Game Character - Tutorial
First, we conceive an idea in our mind in an abstract form. But, creating a character from an initial sketch all the way to making it into a full-drawn animation is about developing details keeping the speed of work steady.
Detailed animate game tutorials available online:
● Create composition
Make it more defined and structured. A tip to immediately jump-start your imagination would be to see your character in different lights and shades.
● Refine the Character Sketch
Once you have the clay, it’s time to add form.
● Add References
Start looking for references that suit your character.
● Add Details
Now, it’s time to get into the details, like literally. Start breaking your character into blocks and pieces. Maybe not too literally.
02Learn to Animate Games That Are Underrated Now
With more advancement comes more banishment, which means more and types of games are fading out to obscurity. You can now animate games that are underrated and add a bit of your own flavor to them using software.
You can also apply 3D rendering techniques to apply light and shadow effects to your games.
Stop motion is also a popular 2D gaming animation technique that is used in a number of underrated game models like cutout, Claymation, pixilation.
Motion graphics is amazing tool beginners have fun experimenting with. You can create engaging 2D game animations with motion graphic software like Adobe after effects. Make stunning adobe animation tutorials with the same.
Key Takeaways from This Episode
● Both 2D and 3D Animation offer a separate flavor of the experience. 2D animations run on a definitive FPS and can be compared to a simple flipbook animation, while 3D Animation involves a process called rigging that gives the Animation several movements and abilities.
● Animated games have a global appeal because of their unique style, history, customization, and action features. Animating your own character requires you to pay attention to the details like personality, back story, gender, and aesthetics.
● You can start your animation process with 5 simple steps - concept, composition, sketch, reference, and detailing.
Why These 10 Top Text Motion Templates Are Worth Your Attention
Why These 10+ Top Text Motion Templates Are Worth Your Attention
An easy yet powerful editor
Numerous effects to choose from
Detailed tutorials provided by the official channel
If you’re looking to add some ‘text in motion‘ to your video projects, then you’ve come to the right place! We’ve listed some of our favorite Text Motion After Effects and Text Motion Graphics Premiere Pro templates that you can use to get a head start in the realm of adding motion into text! (As a bonus, we’ve also included an overview on text motion and some of the best text motion graphics tutorials that you can refer to when trying out the templates we’ve recommended.)
In this article
01 [What’s Text Motion?](#Part 1)
02 [10 Best Text Motion After Effects](#Part 2)
03 [Tutorials for Making Great Text Motion](#Part 3)
Part 1 What’s Text Motion?
Alright, first of all, let’s answer the big question! Text Motion, what is it and why should you be adding it to your projects ASAP? Well, in regards to the former, the answer is simple: text motion graphics is literally text animation that you can add to your projects to give it an extra bit of life and make it more show-stealing!
In regards to the latter, the answer is in its description! After all, why wouldn’t you want your projects to be able to capture more attention?

Have a look at the screenshot above that we included of an example project on the video editor, Wondershare Filmora . As you can see, we inserted text in motion at the very start. And despite being a still screenshot of said text motion graphics, the preview is eye-catching even when paused!
This is the kind of project that you can do yourself with the right templates and the right video editor. We’ve got your back on the first in the list coming up. And, as for the second, we recommend that you try out Filmora! It is, as you can see, quite an expansive software. One that will allow you to truly make the most of the text motion graphics you’ll be able to create at the end of this article.
Part 2 10 Best Text Motion After Effects
Alright, now let’s move on to our promised Text Motion Graphics After Effects and Text Motion Graphics Premiere Pro templates. We’ve tried our best to pick a variety out for you so that you can have a good selection to choose from! You should also take the time to explore the different platforms where these templates are offered in case you end up needing a different look!
01Clean and Elegant Corporate Identity – Text Reveal (Mogrt)
The first on this list is the ‘Clean and Elegant Corporate Identity — Text Reveal’ by Mogrt. The title is quite explanatory in and of itself, but just in case you’re confused, it’s a template that was designed for professionals and brands to establish their corporate identity. The font is very modern in design, and it comes with several flare variations so that the reveal works out in the way that you want it to.
Other aspects, like the shadow blur, opacity, particle size (for the reveal), and text glossiness are also adjustable and can be changed at will based on your standards.
02Multipurpose Clean 3D Text to Title
The next text motion template is the ‘Multipurpose Clean 3D Text to Title’ also created by Mogrt. This one is text motion graphics that you can use for Premiere Pro and, with proper customization, and be used for just about anything that you want! It’s a very multi-purpose kind of graphic, one that you can maybe sneak in as an advert or for announcing celebrations or anniversaries!
As a final note, if you want to use this graphic as text motion for after effects , it is available for that as well!
03Simple Motion Text | Premiere Pro
This next template, the ‘Simple Motion Text’ graphic, is one that is available for both Premiere Pro and After Effects (though the link we’ve provided is for the Premiere Pro version!) As the name implies, the animation is quite simple, which may be exactly what you want, in any case. It certainly makes it very versatile (especially as you can change font style and color as you will). Making it the perfect template for a beginner that’s just starting out and doesn’t want anything too complicated.
0430 Glitch Text Presets For Premiere Pro | Mogrt
This next template, the ‘30 Glitch Text Presets’ by Mogrt is a Premiere Pro exclusive! It’s also quite fun in its particulars. As a template, it’s not as versatile as the one that we introduced previously, since the ‘glitch’ effect gives off quite the unique vibes, but that doesn’t make it any less potent at catching the eyes of your audience!
The best part, in this case, is that it comes with 30 pre-sets, all with fitting glitch sound effects (included in the pack) that you can use. Of course, there are other customization functions as well, including font style, color, transparency, and so on.
05Comic Bubbles MOGRT
Again, this next templated, called ‘Comic Bubbles’, kind of has its own unique vibe, making it inflexible in some ways but also more fun if that’s the kind of look that you’re looking for. Which, in this case, are literal ‘Comic’ text bubbles, like you would see in your old 90s comic (loud, pop-y, and with lots of bright colors!) The only difference from that to this is that these comic text bubbles move, allowing you to create ‘punchy’ text in between animated projects.
For your reference, there are 80 different comic bubbles included in the pack. All of which are easy to customize and will allow you to adjust colors, text, and transition effects (have a look at the video that we’ve linked if you want to see it in action!)
06Smoke To Text Reveal (Mogrt)
This next template, ‘Smoke to Text Reveal’ is another one that serves a very particular need. To help with visualization, the text motion graphics are at first obscured by smoke before it bubbles up into a crisp, modern text reveal! It’s perfect for those looking for underwater-themed text motion graphics. Or those who want to serve a hint of mystery with the smoke effect.
This is Text Motion Graphics - Premiere Pro. And the best part about it is that you can customize the text and the background at will — allowing you to truly make the template your own and make the most out of the smoke-to-reveal effect.
07Text Messages Toolkit
Want to appeal to the Gen Z audience? Then, the ‘text messages toolkit’ might be a fun text motion graphics for you to try. As you can perhaps surmise from the name, it’s a template that you can use in order to create ‘text message’ interactions. It’s customizable too! You can change the text box color, size, transparency, and just have a ball pimping it out of that’s what you want.
08Large Text Title Block
With the ‘large text title block’ template, you have the flexibility of the naturally more modern and minimalistic design, allowing you to use it for a wide variety of different projects. It works especially well for advertisements, if you’re wondering about potential uses, or as transition graphics between text to video!
09Blueprint Titles
Want something that’s a little quirkier? Or, perhaps, instructional? Then the ‘Blueprint Titles’ template is one that you can consider. As you can perhaps guess from the name, it allows you to create text motion graphics in a style that is similar to the kind of blueprints you usually see when working with design or architecture.
10Dynamic Minimalism
Sometimes, simple really is best! And, this next template, the ‘Dynamic Minimalism’ text motion after effects and text motion graphics premiere pro template is one that you might want in your arsenal just for the sake of your simpler projects! The kit comes with 30 different animations, as well as other customization functions that you can play around with to add a little personality to what are otherwise very minimalistic designs.
Part 3 Tutorials for Making Great Text Motion
For the last part of this article, we’ll be introducing some tutorials that you can refer to while trying out the templates that we recommended! We’ve pulled all of this from YouTube so that you can start learning immediately! And, of course, a variety has been chosen so that you can get your info from more than one source.
01Smooth Professional Text Animation in Premiere Pro - TUTORIAL
The first tutorial we have for you was created by Ignace Aleya on YouTube. This tutorial is a ‘Premiere Pro’ tutorial that focuses on helping beginners and intermediate users alike in understanding the ways of text motion graphics. He offers some pretty good pointers and tricks on keeping the quality of your work high. And the way that he shares his knowledge is pretty solid too! Allowing you to both watch and enjoy the video.
02Easy Title Motion Graphics
This next tutorial is about text motion graphics while working in Adobe After Effects. Like the previous tutorial, it will teach you the basics of using templates! It was posted by SonduckFilm, and the video covers five different “Easy Title Motion Graphics” as examples! Altogether, it’s a great choice if what you’re looking for is tips on making the most out of the templates we introduced on our list.
03Basic Logo Animations
Next, we have a tutorial from the YouTube content creator, Broken! This one is on the subject of both simple and complex logo animations that you can create when working on establishing a brand. It’s a great video for beginners and is quite informative on the subject of customization.
● Key Takeaways from This Episode →
● What is text motion and why do you need to start using it for your own projects ASAP? Well, text motion graphics are, basically, text animation! They’re eye-catching and informative at the same time, making them a great vessel for getting a message across to your audience.
● If you want to start creating text motion graphics yourself, we suggest starting with templates first! At least then, you’ll be able to make yourself comfortable while learning about the opportunities available to you.
● There are many different templates out there that you can try. Some are multi-purpose, some not. We’ve chosen a variety to introduce to you in of this article! Complete with a list of some tutorials in that you can refer to no matter what kind of project you’re working on.
If you’re looking to add some ‘text in motion‘ to your video projects, then you’ve come to the right place! We’ve listed some of our favorite Text Motion After Effects and Text Motion Graphics Premiere Pro templates that you can use to get a head start in the realm of adding motion into text! (As a bonus, we’ve also included an overview on text motion and some of the best text motion graphics tutorials that you can refer to when trying out the templates we’ve recommended.)
In this article
01 [What’s Text Motion?](#Part 1)
02 [10 Best Text Motion After Effects](#Part 2)
03 [Tutorials for Making Great Text Motion](#Part 3)
Part 1 What’s Text Motion?
Alright, first of all, let’s answer the big question! Text Motion, what is it and why should you be adding it to your projects ASAP? Well, in regards to the former, the answer is simple: text motion graphics is literally text animation that you can add to your projects to give it an extra bit of life and make it more show-stealing!
In regards to the latter, the answer is in its description! After all, why wouldn’t you want your projects to be able to capture more attention?
Have a look at the screenshot above that we included of an example project on the video editor, Wondershare Filmora . As you can see, we inserted text in motion at the very start. And despite being a still screenshot of said text motion graphics, the preview is eye-catching even when paused!
This is the kind of project that you can do yourself with the right templates and the right video editor. We’ve got your back on the first in the list coming up. And, as for the second, we recommend that you try out Filmora! It is, as you can see, quite an expansive software. One that will allow you to truly make the most of the text motion graphics you’ll be able to create at the end of this article.
Part 2 10 Best Text Motion After Effects
Alright, now let’s move on to our promised Text Motion Graphics After Effects and Text Motion Graphics Premiere Pro templates. We’ve tried our best to pick a variety out for you so that you can have a good selection to choose from! You should also take the time to explore the different platforms where these templates are offered in case you end up needing a different look!
01Clean and Elegant Corporate Identity – Text Reveal (Mogrt)
The first on this list is the ‘Clean and Elegant Corporate Identity — Text Reveal’ by Mogrt. The title is quite explanatory in and of itself, but just in case you’re confused, it’s a template that was designed for professionals and brands to establish their corporate identity. The font is very modern in design, and it comes with several flare variations so that the reveal works out in the way that you want it to.
Other aspects, like the shadow blur, opacity, particle size (for the reveal), and text glossiness are also adjustable and can be changed at will based on your standards.
02Multipurpose Clean 3D Text to Title
The next text motion template is the ‘Multipurpose Clean 3D Text to Title’ also created by Mogrt. This one is text motion graphics that you can use for Premiere Pro and, with proper customization, and be used for just about anything that you want! It’s a very multi-purpose kind of graphic, one that you can maybe sneak in as an advert or for announcing celebrations or anniversaries!
As a final note, if you want to use this graphic as text motion for after effects , it is available for that as well!
03Simple Motion Text | Premiere Pro
This next template, the ‘Simple Motion Text’ graphic, is one that is available for both Premiere Pro and After Effects (though the link we’ve provided is for the Premiere Pro version!) As the name implies, the animation is quite simple, which may be exactly what you want, in any case. It certainly makes it very versatile (especially as you can change font style and color as you will). Making it the perfect template for a beginner that’s just starting out and doesn’t want anything too complicated.
0430 Glitch Text Presets For Premiere Pro | Mogrt
This next template, the ‘30 Glitch Text Presets’ by Mogrt is a Premiere Pro exclusive! It’s also quite fun in its particulars. As a template, it’s not as versatile as the one that we introduced previously, since the ‘glitch’ effect gives off quite the unique vibes, but that doesn’t make it any less potent at catching the eyes of your audience!
The best part, in this case, is that it comes with 30 pre-sets, all with fitting glitch sound effects (included in the pack) that you can use. Of course, there are other customization functions as well, including font style, color, transparency, and so on.
05Comic Bubbles MOGRT
Again, this next templated, called ‘Comic Bubbles’, kind of has its own unique vibe, making it inflexible in some ways but also more fun if that’s the kind of look that you’re looking for. Which, in this case, are literal ‘Comic’ text bubbles, like you would see in your old 90s comic (loud, pop-y, and with lots of bright colors!) The only difference from that to this is that these comic text bubbles move, allowing you to create ‘punchy’ text in between animated projects.
For your reference, there are 80 different comic bubbles included in the pack. All of which are easy to customize and will allow you to adjust colors, text, and transition effects (have a look at the video that we’ve linked if you want to see it in action!)
06Smoke To Text Reveal (Mogrt)
This next template, ‘Smoke to Text Reveal’ is another one that serves a very particular need. To help with visualization, the text motion graphics are at first obscured by smoke before it bubbles up into a crisp, modern text reveal! It’s perfect for those looking for underwater-themed text motion graphics. Or those who want to serve a hint of mystery with the smoke effect.
This is Text Motion Graphics - Premiere Pro. And the best part about it is that you can customize the text and the background at will — allowing you to truly make the template your own and make the most out of the smoke-to-reveal effect.
07Text Messages Toolkit
Want to appeal to the Gen Z audience? Then, the ‘text messages toolkit’ might be a fun text motion graphics for you to try. As you can perhaps surmise from the name, it’s a template that you can use in order to create ‘text message’ interactions. It’s customizable too! You can change the text box color, size, transparency, and just have a ball pimping it out of that’s what you want.
08Large Text Title Block
With the ‘large text title block’ template, you have the flexibility of the naturally more modern and minimalistic design, allowing you to use it for a wide variety of different projects. It works especially well for advertisements, if you’re wondering about potential uses, or as transition graphics between text to video!
09Blueprint Titles
Want something that’s a little quirkier? Or, perhaps, instructional? Then the ‘Blueprint Titles’ template is one that you can consider. As you can perhaps guess from the name, it allows you to create text motion graphics in a style that is similar to the kind of blueprints you usually see when working with design or architecture.
10Dynamic Minimalism
Sometimes, simple really is best! And, this next template, the ‘Dynamic Minimalism’ text motion after effects and text motion graphics premiere pro template is one that you might want in your arsenal just for the sake of your simpler projects! The kit comes with 30 different animations, as well as other customization functions that you can play around with to add a little personality to what are otherwise very minimalistic designs.
Part 3 Tutorials for Making Great Text Motion
For the last part of this article, we’ll be introducing some tutorials that you can refer to while trying out the templates that we recommended! We’ve pulled all of this from YouTube so that you can start learning immediately! And, of course, a variety has been chosen so that you can get your info from more than one source.
01Smooth Professional Text Animation in Premiere Pro - TUTORIAL
The first tutorial we have for you was created by Ignace Aleya on YouTube. This tutorial is a ‘Premiere Pro’ tutorial that focuses on helping beginners and intermediate users alike in understanding the ways of text motion graphics. He offers some pretty good pointers and tricks on keeping the quality of your work high. And the way that he shares his knowledge is pretty solid too! Allowing you to both watch and enjoy the video.
02Easy Title Motion Graphics
This next tutorial is about text motion graphics while working in Adobe After Effects. Like the previous tutorial, it will teach you the basics of using templates! It was posted by SonduckFilm, and the video covers five different “Easy Title Motion Graphics” as examples! Altogether, it’s a great choice if what you’re looking for is tips on making the most out of the templates we introduced on our list.
03Basic Logo Animations
Next, we have a tutorial from the YouTube content creator, Broken! This one is on the subject of both simple and complex logo animations that you can create when working on establishing a brand. It’s a great video for beginners and is quite informative on the subject of customization.
● Key Takeaways from This Episode →
● What is text motion and why do you need to start using it for your own projects ASAP? Well, text motion graphics are, basically, text animation! They’re eye-catching and informative at the same time, making them a great vessel for getting a message across to your audience.
● If you want to start creating text motion graphics yourself, we suggest starting with templates first! At least then, you’ll be able to make yourself comfortable while learning about the opportunities available to you.
● There are many different templates out there that you can try. Some are multi-purpose, some not. We’ve chosen a variety to introduce to you in of this article! Complete with a list of some tutorials in that you can refer to no matter what kind of project you’re working on.
Before You Learn 3D Animation: Things You Should Know
Before You Learn 3D Animation: Some Things You Should Know
An easy yet powerful editor
Numerous effects to choose from
Detailed tutorials provided by the official channel
Before you delve into the profession of creating 3d cartoon filters, you need to understand or decide if creating animated characters is something you would like to do. It’s not going to be smooth as you will get frustrated at some point, you will get confused, and it will be challenging, but in the end, it is rewarding because it is an expression of your mind coming to life. You are the one to breathe life into your characters who represent your imaginations. You will also have to infuse a great deal of your creativity to create beautiful and exciting characters for others to enjoy. Meanwhile, let’s first understand what 3d animations mean.
Becoming a 3d animator is not a feat you can achieve in a short time. It is not days, weeks, months, or even years. Like any other profession, a professional 3d animator must have put in a great deal of work, mixed with a lot of passion and love for what he is doing. To become successful as a 3d animator, you must love what you are doing or be ready to put in the work.
This article will expose what you should learn to create beautiful 3d animation cartoons, including what to expect as a 3d animator.
In this article
01 [What are 3d animation and the process of 3d animation?](#Part 1)
02 [Differences between 2d animation and 3d animation](#Part 2)
03 [A roaster of 8 best 3d animation software.](#Part 3)
04 [Top 3 3d animation making mistakes to avoid](#Part 4)
Part 1 What Is 3D Animation And The Process of 3D Animation?
animation is a term that describes the art of creating 3-dimensional images and placing them in a digital environment. It is a process that uses motion to bring objects, characters, etc., to life.
It is also known as computer-generated imagery, and it is currently the most common animation type for feature films.
Various software and programs are designed specifically for 3d animations and allow the animators to bring the objects to life.
The process of 3d animation happens in three(3) stages;
● Modeling
● Layout and animation
● Rendering
Modeling in 3d animation involves generating the objects or characters either by using a modeling tool or using a real thing. The real object is scanned directly into the computer, where other processes follow. You have total control over your character and how you want them to appear by modeling. You decide the weight, specifications, feel, etc. However, scanning objects save a lot of time. You must add texture before modeling your character or reviewing it before moving to the following layout and animation.
Layout and animation stage: A layout is determined when the generated objects move to this stage. It involves creating a set/scene where the objects can position. Layout first happens before animation does. After adding the objects and characters, they get animated using animation variables. After this, you use motion capture or keyframing to give life to the models in the scenes.
Rendering: Rendering is using software or programs. It is not something to do using just your computer. These tools can generate the scenes into the finished image according to the client’s requirements or set goals.
Creating cartoon background images or any other form of animations is a process that requires a lot of planning and work, which sums up a lot of time. To learn 3d animation, you must be ready to give in ample time as it is a profession that requires some time to handle.
The process listed above also shows the creativity requirement required to succeed in the 3d animation industry. To think that you must create the scenes, which is the layout stage, means you have to be creative in your imagination. If you then decide to model your character from scratch using modeling tools. That also requires another job of thinking and extracting a lot of your creative juices.
Part 2 What is the difference between 2d animation and 3d animation?
Anyone can decide to learn animation with no plan in mind or understanding of what the profession involves. animation is different from 2d animation, and if you want to learn animation, you need to understand the distinction between these two.
animation can have a lot of creative possibilities, whereas 3d animation has a lot of natural abilities. The visual style of both types of animation is explicitly different.
3d animation is a more intensive technical process than the various stages mentioned earlier. It would most likely involve different specialists to handle them to get a more professional output. However, 2d animation consists of drawing the characters frame by frame.
animated cartoons are in The Simpsons, Pinocchio, the Lion king, etc.

animations are like the ones Dreamworks, Pixar, produce. They include the avengers, the bad guys, etc.


Part 3 A Roaster Of 8 Best 3D Animation Software

Several 3D animation software exists in the market, both free and paid. If you are a animation creator or love animation for fun, you can use the free software to make your videos, cartoon photos, 3d cartoon faces, etc.
With many animation software available in the market, you can only fully trust a few.
Here’s a roaster of 8 best 3D animation software you could use to create the cartoon monsters you’ve always been curious about;
● Filmora
● Blender
● Maya
● Wings 3d
● Adobe Animate
● Cinema 4d
● K-3D
● Milcamo
Filmora Video animation tool: This is a highly recommended 3D animation tool with many features and pros. It has a wide range of keyframes, about six of which make your cartoon background images smooth and natural.
| Software | Features | OS | Pro |
|---|---|---|---|
| Wondershare Filmora Video Editor | It has an auto-color correction It has smooth keyframes | Windows, Mac | You can apply light flare effects You can apply an audio mixer |
| Blender | It has textured brushes and masking for 3d painting. It has add-ons and customised tools with high python scripting. | Windows, Linux, Mac computers | It has Virtual reality rendering, Strong camera restoration. It had both manual and automatic tracking. |
| Maya | Free trial of 30 days. Can create complex technical effects | Windows, Max | Good Control and perfect accuracy. Can collect motion capture data. |
| Wings 3d | Auto UV mapping system It has support for light and material effects. | Windows, Linux, and Mac OS | Advanced 3d and 2d modeling tools. It is free to use |
| Adobe animate | Virtual camera functionality gives a realistic view. Adoptive animation effects, zooming, panning etc. | Windows, Mac | Effective audio syncing technology. Customizable font, styling etc. |
| Cinema 4d | Concepts develop without time modeling Large library of preset scenes. | Windows, Mac | Customised with a huge asset range It is a faster tool than Maya Dissect complete scene and is faster than Maya. |
| K-3D | It has property adjustment capabilities with handy strong features. I5 is made up of basic tools for animation, curves, patches. | Mac OS X, Linux, FreeBSD, windows platforms | It is very flexible for either complex or basic workflows. It has a wide selection of plugins. |
| Mixamo | Streamlined user experience It has a faster search function that is accurate | Windows, Mac | It has fast character and animation browsing. Download multiple animations at a go |
For Win 7 or later (64-bit)
For macOS 10.12 or later
Part 4 Top Three (3) 3d Animation Making Mistakes To Avoid

As we initially mentioned, 3d animation requires an intensive technical process. It is a skill that you need to hone over the years by paying attention to detail, being highly creative, and daring to succeed.
Here are 3 mistakes you must avoid during the animation process;
● Forgetting the ‘why’ factor
● Over-animating a scene
● Not giving your viewers time to take it in
Forgetting the why: In a animation cartoon, every move, walking step, and smile is essential. Every character represented in your cartoon background is there for a specific reason.
You would be making a mistake that will affect the result if you lose focus on this reason. Your viewers won’t find your cartoon believable if the moves and acting don’t add up.
Your characters don’t just move because they want to move. Something must have spurred the motion or reaction. It could be for what happened to them, what they heard, or saw another character did in the scene. Do not neglect the why of the act.
While animating, focus on why and keep revisiting until all your characters and objects are knitted closely together.
Over-animating a scene: This is another mistake animators should avoid. If you animate your characters, everything may be a mess if you animate the background and foreground. Simplicity is how to get this thing, keep it simple and focused.
Do not have much going on in each scene but only where you need the attention of your viewers. Animators that do this end up confusing their viewers with no direction.
You can use camera effects such as depth of field to make your audience focus on the point you are trying to make in the particular scene.
Not giving your viewers time to take it in: This is another 3d animation making a mistake you should be careful of. Not giving your viewers time to process the happenings on the scene before the next.
This can be avoided by timing and measuring cuts such that any animation at the start of a new scene is timed to enable the viewers to take it in. You can ask for third-party criticism on your work to find out how your animation is received and see pointers to mistakes such as this. The third party could be your colleague or friend.
Note: You can easily avoid any error or mistake or modify your 3D animation with the help of the Wondershare Filmora video editor. That will provide a solid base for featuring 3D animation.
● Ending Thoughts →
● 3D animation refers to using motion to breathe life into inanimate objects, and they can create animated videos and animation cartoons.
● 3D animation is highly technical, unlike 2d animation
● You can avoid the above 3d mistakes if you remain objective and open, and ready to accept constructive criticism.
● Becoming an animator is a fun thing to do, and it allows you to be free to express your creativity while entertaining other people entirely.
● Before you start learning 3d animation and create cartoon photos, ensure that you have read through all that we have explained here to have good information about what you are going into.
Before you delve into the profession of creating 3d cartoon filters, you need to understand or decide if creating animated characters is something you would like to do. It’s not going to be smooth as you will get frustrated at some point, you will get confused, and it will be challenging, but in the end, it is rewarding because it is an expression of your mind coming to life. You are the one to breathe life into your characters who represent your imaginations. You will also have to infuse a great deal of your creativity to create beautiful and exciting characters for others to enjoy. Meanwhile, let’s first understand what 3d animations mean.
Becoming a 3d animator is not a feat you can achieve in a short time. It is not days, weeks, months, or even years. Like any other profession, a professional 3d animator must have put in a great deal of work, mixed with a lot of passion and love for what he is doing. To become successful as a 3d animator, you must love what you are doing or be ready to put in the work.
This article will expose what you should learn to create beautiful 3d animation cartoons, including what to expect as a 3d animator.
In this article
01 [What are 3d animation and the process of 3d animation?](#Part 1)
02 [Differences between 2d animation and 3d animation](#Part 2)
03 [A roaster of 8 best 3d animation software.](#Part 3)
04 [Top 3 3d animation making mistakes to avoid](#Part 4)
Part 1 What Is 3D Animation And The Process of 3D Animation?
animation is a term that describes the art of creating 3-dimensional images and placing them in a digital environment. It is a process that uses motion to bring objects, characters, etc., to life.
It is also known as computer-generated imagery, and it is currently the most common animation type for feature films.
Various software and programs are designed specifically for 3d animations and allow the animators to bring the objects to life.
The process of 3d animation happens in three(3) stages;
● Modeling
● Layout and animation
● Rendering
Modeling in 3d animation involves generating the objects or characters either by using a modeling tool or using a real thing. The real object is scanned directly into the computer, where other processes follow. You have total control over your character and how you want them to appear by modeling. You decide the weight, specifications, feel, etc. However, scanning objects save a lot of time. You must add texture before modeling your character or reviewing it before moving to the following layout and animation.
Layout and animation stage: A layout is determined when the generated objects move to this stage. It involves creating a set/scene where the objects can position. Layout first happens before animation does. After adding the objects and characters, they get animated using animation variables. After this, you use motion capture or keyframing to give life to the models in the scenes.
Rendering: Rendering is using software or programs. It is not something to do using just your computer. These tools can generate the scenes into the finished image according to the client’s requirements or set goals.
Creating cartoon background images or any other form of animations is a process that requires a lot of planning and work, which sums up a lot of time. To learn 3d animation, you must be ready to give in ample time as it is a profession that requires some time to handle.
The process listed above also shows the creativity requirement required to succeed in the 3d animation industry. To think that you must create the scenes, which is the layout stage, means you have to be creative in your imagination. If you then decide to model your character from scratch using modeling tools. That also requires another job of thinking and extracting a lot of your creative juices.
Part 2 What is the difference between 2d animation and 3d animation?
Anyone can decide to learn animation with no plan in mind or understanding of what the profession involves. animation is different from 2d animation, and if you want to learn animation, you need to understand the distinction between these two.
animation can have a lot of creative possibilities, whereas 3d animation has a lot of natural abilities. The visual style of both types of animation is explicitly different.
3d animation is a more intensive technical process than the various stages mentioned earlier. It would most likely involve different specialists to handle them to get a more professional output. However, 2d animation consists of drawing the characters frame by frame.
animated cartoons are in The Simpsons, Pinocchio, the Lion king, etc.
animations are like the ones Dreamworks, Pixar, produce. They include the avengers, the bad guys, etc.
Part 3 A Roaster Of 8 Best 3D Animation Software
Several 3D animation software exists in the market, both free and paid. If you are a animation creator or love animation for fun, you can use the free software to make your videos, cartoon photos, 3d cartoon faces, etc.
With many animation software available in the market, you can only fully trust a few.
Here’s a roaster of 8 best 3D animation software you could use to create the cartoon monsters you’ve always been curious about;
● Filmora
● Blender
● Maya
● Wings 3d
● Adobe Animate
● Cinema 4d
● K-3D
● Milcamo
Filmora Video animation tool: This is a highly recommended 3D animation tool with many features and pros. It has a wide range of keyframes, about six of which make your cartoon background images smooth and natural.
| Software | Features | OS | Pro |
|---|---|---|---|
| Wondershare Filmora Video Editor | It has an auto-color correction It has smooth keyframes | Windows, Mac | You can apply light flare effects You can apply an audio mixer |
| Blender | It has textured brushes and masking for 3d painting. It has add-ons and customised tools with high python scripting. | Windows, Linux, Mac computers | It has Virtual reality rendering, Strong camera restoration. It had both manual and automatic tracking. |
| Maya | Free trial of 30 days. Can create complex technical effects | Windows, Max | Good Control and perfect accuracy. Can collect motion capture data. |
| Wings 3d | Auto UV mapping system It has support for light and material effects. | Windows, Linux, and Mac OS | Advanced 3d and 2d modeling tools. It is free to use |
| Adobe animate | Virtual camera functionality gives a realistic view. Adoptive animation effects, zooming, panning etc. | Windows, Mac | Effective audio syncing technology. Customizable font, styling etc. |
| Cinema 4d | Concepts develop without time modeling Large library of preset scenes. | Windows, Mac | Customised with a huge asset range It is a faster tool than Maya Dissect complete scene and is faster than Maya. |
| K-3D | It has property adjustment capabilities with handy strong features. I5 is made up of basic tools for animation, curves, patches. | Mac OS X, Linux, FreeBSD, windows platforms | It is very flexible for either complex or basic workflows. It has a wide selection of plugins. |
| Mixamo | Streamlined user experience It has a faster search function that is accurate | Windows, Mac | It has fast character and animation browsing. Download multiple animations at a go |
For Win 7 or later (64-bit)
For macOS 10.12 or later
Part 4 Top Three (3) 3d Animation Making Mistakes To Avoid
As we initially mentioned, 3d animation requires an intensive technical process. It is a skill that you need to hone over the years by paying attention to detail, being highly creative, and daring to succeed.
Here are 3 mistakes you must avoid during the animation process;
● Forgetting the ‘why’ factor
● Over-animating a scene
● Not giving your viewers time to take it in
Forgetting the why: In a animation cartoon, every move, walking step, and smile is essential. Every character represented in your cartoon background is there for a specific reason.
You would be making a mistake that will affect the result if you lose focus on this reason. Your viewers won’t find your cartoon believable if the moves and acting don’t add up.
Your characters don’t just move because they want to move. Something must have spurred the motion or reaction. It could be for what happened to them, what they heard, or saw another character did in the scene. Do not neglect the why of the act.
While animating, focus on why and keep revisiting until all your characters and objects are knitted closely together.
Over-animating a scene: This is another mistake animators should avoid. If you animate your characters, everything may be a mess if you animate the background and foreground. Simplicity is how to get this thing, keep it simple and focused.
Do not have much going on in each scene but only where you need the attention of your viewers. Animators that do this end up confusing their viewers with no direction.
You can use camera effects such as depth of field to make your audience focus on the point you are trying to make in the particular scene.
Not giving your viewers time to take it in: This is another 3d animation making a mistake you should be careful of. Not giving your viewers time to process the happenings on the scene before the next.
This can be avoided by timing and measuring cuts such that any animation at the start of a new scene is timed to enable the viewers to take it in. You can ask for third-party criticism on your work to find out how your animation is received and see pointers to mistakes such as this. The third party could be your colleague or friend.
Note: You can easily avoid any error or mistake or modify your 3D animation with the help of the Wondershare Filmora video editor. That will provide a solid base for featuring 3D animation.
● Ending Thoughts →
● 3D animation refers to using motion to breathe life into inanimate objects, and they can create animated videos and animation cartoons.
● 3D animation is highly technical, unlike 2d animation
● You can avoid the above 3d mistakes if you remain objective and open, and ready to accept constructive criticism.
● Becoming an animator is a fun thing to do, and it allows you to be free to express your creativity while entertaining other people entirely.
● Before you start learning 3d animation and create cartoon photos, ensure that you have read through all that we have explained here to have good information about what you are going into.
Top 10 Online Animated Logo Makers Everyone Should Know
Top 10 Free Online Animated Logo Makers Everyone Should Know
An easy yet powerful editor
Numerous effects to choose from
Detailed tutorials provided by the official channel
And as we all know objects in motion are much more attractive than static visuals, logo animation is the latest trend that is gaining popularity at a fast pace.
![]()
If you too want to create some interesting 3D logo motion and other types of animated logos but are confused about how to start, we are here to help you.
In this article
01 [What are Animated Logos and their benefits](#Part 1)
02 [Top 10 online tools for creating animated logos ](#Part 2)
03 [The Best Alternative to Online Animated Logo Makers](#Part 3)
Part 1 What Are Animated Logos and Their Benefits
A logo can be termed as the first face of your brand or a business which gives it a visual identity. A logo works as the foundation of the brand that helps in its growth as well as reputation. The trend has shifted from basic static logos to animated ones which include interesting motion graphics. These logos are catchy and capable of getting the instant attention of the people.
![]()
There are several benefits associated with using logo animation and some of the key ones are enlisted below.
● Create brand awareness A well-designed animated logo can create brand awareness by grabbing the interest of the potential clients and also creating a strong connection with them.
● Goes well with the brand story Animated logos gives you the freedom to use images, sounds, and motion graphics to have a connect with the audience. Thus, using animations logos that match your brand story can be created efficiently.
● Add professionalism and create a modern look Moving ahead with the times is the best thing with its business or promotion. So, a good animated logo will not only add a professional touch to your brand or a business but will also give a modern touch.
Part 2 Top 10 Online Tools for Creating Animated Logos
If you are low on budget or do not want to risk initially with the paid animated logos, free online tools work best. These programs work from your browser, need no software download, and are simple to use. Some of these tools can also be used to create logo to 3D animation. To cut down on your research work, we have shortlisted some of the widely used online animated logo makers as below.
01 Renderforest
When it comes to branding and animations online, this is the top-rated tool in its category. The tool allows creating impressive animated logos in just a few minutes. Pre-set styles are available that can be used according to the brand type.
Key Features:
● Allows creating animated logos using the AI of the tool.
● Intuitive and user-friendly interface.
● Comes with pre-set styles and readymade templates to choose from like minimal, abstract, organic, and more.
● Fonts and icons can be customized.
● High-definition export.
![]()
02 Viddyoze
This is another popular cloud-based tool that helps create interesting animated logos in a few simple clicks. The created animations can be further customized by making changes in the color scheme and other parameters.
Key Features:
● Simple to use online tool for creating 3D animations.
● Offers live-action animation.
● Characters and logos can be mixed and combined in a video.
● Comes with multiple templates and movie filters.
![]()
03 Adobe Spark
Adobe needs no introduction when it comes to editing and animations. Adobe Spark is a feature-packed online tool that helps you perform multiple functions including animated logo creation. Several templates in different categories are available to match your brand or business.
Key Features:
● Cloud-based tool for creating creative animated logos.
● Designs and templates are available in multiple categories.
● Customizable icons, colors, texts, fonts, and others.
● Support a wide range of additional features.
![]()
04 Design Free Logo
This is a free online 3D animated logo maker that comes with several pre-designed samples and templates for creating a perfect animated logo for your company. Simple to use, the tool is apt even for beginners in designing.
Key Features:
● This is 3D animation logo online free tool.
● Comes with a wide range of templates in an array of categories like the abstract, alphabet, floral, food, 3D, and more.
● Logos can be created based on the industry type.
● Simple and user-friendly interface.
![]()
05 PixTeller
Using this browser-based tool, motion to your logo elements can be added to create an impressive animated logo. A wide range of logo shapes, templates, and designs are available and option for customization is also there.
Key Features:
● Create animated logos frame by frame for better editing and customization.
● Comes with more than 100,000 shapes for the logos and over 130 fonts for creating a logo of your choice.
● Multiple customizable templates and designs in different categories are available.
● Support multiple filters like shadow, warp, blur, spacing, height, pixelate, and more.
● Created animated logos can be downloaded in MP4 or GIF format.
![]()
06 Offeo
This online animation tool is apt for creating hi-tech animated logos and the simple interface makes it perfect even for beginners. The tool is known for the perfect blend of creativity and handcraft.
Key Features:
● Create animated logos for websites as well as other platforms easily and quickly.
● Multiple library functions and customizable options are available.
● Allows adjusting the speed of the animation.
● Comes with multiple templates and graphics to choose from.
● Option to choose the ready-made elements or add the local ones.
![]()
07 Animaker
This free online tool just requires free sign-up after which it is all set to help you create rich animated logos. You can choose from the wide range of supported built-in templates as well as characters to match your requirements.
Key Features:
● This free SaaS video animation online tool helps create impressive animated logos, cartoons, and others.
● Comes with multiple templates, designs, characters, icons, charts, maps, and bags to choose from.
● Icons, colors, and other parameters can be customized using this 3D animation logo online free tool**.**
● Allows viewing the logo in different styles using the board style.
● Comes with sound effects and an option for voice recording and text to speech.
● Easy drag and drop interface make functioning quick.
● Software is supported in 50 languages worldwide.
● Created animations can be uploaded to social media sites.
![]()
08 Quince Media
For creating different types of animated media including animated logos this is a decent tool to use. Being an online program, it works from your browser and is free to use. Images in PNG and vector format can be added to the tool for creating the choice of animation.
Key Features:
● Create animated logos and other animated media using this simple and quick online tool.
● Comes with multiple designs and templates.
● 3D animated logos can be created for social media, films, broadcasts, and other platforms.
● Simple and fast to use.
![]()
09 MotionDen
This is a simple and easy online tool that can help you create animated logos in a hassle-free manner. You can even create other animated projects like slideshows, intros, and others using the program.
Key Features:
● A simple online tool with a user-friendly interface for creating logos.
● Comes with multiple templates in different categories like serenity, dark smoke, fire red, and more.
● Support to a wide range of devices including desktop, smartphone, and tablets.
● Allows creating 3D logos.
● Templates can be customized as per the requirements.
![]()
10 Tube Arsenal
This online tool is mainly used for creating YouTube video intros but it supports other functions as well including animated logo creation. The 3D editor of the program will let you add animations as needed. The extensive collection of templates lets you choose the design that best matches your requirements.
Key Features:
● Create animated logos using the 3D editor of the tool.
● Comes with an array of templates to choose from.
● Allows customizing color, text, images, and other parameters.
● This 3D animation logo online free support unlimited quick previews.
● Simple and user-friendly interface.
![]()
Key Takeaways from This Episode
● Logos are an integral part of brands and businesses that helps create brand awareness among potential clients.
● Animated logos are the present-day trend where motion graphics are added to the logos. These logo animation are interesting and can reach a broader audience and leave more impact.
● Several online tools for creating animated logos for free are available. Check out the features of these tools and choose the most suitable one.
● Wondershare Filmoa works as the best online alternative that helps in creating rich animated logos with an option for customization.
You Can Turn a TikTok Into a GIF Now
You Can Turn a TikTok Into a GIF Now. Here’s How
An easy yet powerful editor
Numerous effects to choose from
Detailed tutorials provided by the official channel
Want to add sharing flexibility to TikTok videos? Convert them into GIFs!
In this article
01 [What is GIF TikTok?](#Part 1)
02 [How to Make a GIF From a TikTok Video](#Part 2)
Part 1 What Is TikTok GIF?
In today’s IT enhanced lifestyle, having a profound reach on social media is the new name of popularity. Everyone out there is profusely keen on creating and sharing a plethora of content varieties; memes, videos, animations and what not, across social communities. However, TikTok videos lag behind in this race; often lack the ‘Share’ flexibility.
To match up, there are solutions to convert TikTok video into GIFs. A TikTok GIF is a short, impactful and to the point clip that’s here to share fun and exciting content in the most interesting ways. If you have a bunch of TikTok videos to share with your peers, but missing out on an effective sharing solution, you can conveniently look forward to convert those videos into catchy and interesting GIFs that will definitely hold the attention of your viewers.
Feel motivated? See through the rest of this article to know some quick and easy TikTok to GIF conversion tools and software!
Part 2 How to Make a GIF From a TikTok Video
When looking through solutions to create GIF TikTok videos, you will find a pool of methods and tools available on the internet. All you need to do is select the best one for yourself and get started with converting TikTok Videos into GIFs. Given below are some of the best solutions adhering to the aforesaid concern:
01Filmora
Wondershare Filmora Video Editor is one of the best application software to create a TikTok GIF. This is a simple and smart converter application that caters to your concern in just a few minutes. What’s best is that this app is absolutely free to use and is compatible with your PC, smartphone and a variety of other devices. Here’s how you can use Filmora to convert your TikTok videos into GIFs:

Step 1: Import Your Video
Start with importing a desired TikTok video file to the Filmora timeline. You can also ‘Drag and Drop’ the video file to the editor timeline. Using this application, you have the flexibility to import your clip in almost any video format.

Step 2: Edit Your Clip
Suited to your content preferences, you can edit and enhance your clips with a variety of effects, like, cut, trim, rotate, split, etc., and make appropriate speed adjustments. You can even include text messages to make your GIF more impactful.

Wondershare Filmora
Get started easily with Filmora’s powerful performance, intuitive interface, and countless effects!
Try It Free Try It Free Try It Free Learn More >
Step 3: Let’s Save and Share!
When you are happy, save your work using the .gif file extension. That’s it! You are ready to share your creation with your social media peers.

02TikTok’s Inbuilt GIF Converter
TikTok allows you to directly convert its videos into GIFs. You can use the TikTok application in your smartphone to take up the conversion process. All you need to do is follow the steps given below:
Step 1: Select Your TikTok Video
To get started, open the TikTok application in your smartphone and select the video you want to convert into GIF.
Step 2: Share the Video
Click the ‘Share’ icon at the right of the video screen.

Step 3: Format Selection
Scroll down to the bottom of the screen and choose the ‘Share as GIF’ option. This will automatically convert your TikTok video into GIF in a few seconds.

Step 4: Save and Export
Click on the ‘Save Image’ option to save the GIF in your phone’s gallery. You can also export your creation to different social media platforms.
03Wondershare UniConverter
This one is a handy toolbox loaded with a variety of features that allow you to play with your video creativity. Using this tool, you can quickly create GIF for TikTok and also fix the size and duration of the same. This software supports almost all video formats and comes with an inbuilt editor that you can use to add effects and make your GIFs all the more interesting. This is compatible with your Windows or MacOS PC.
Take the following steps to create GIFs from TikTok videos using this software:

Step 1: Download and Launch the Application
Download the Wondershare UniConverter application to your PC from the software’s official website.
Step 2: Open GIF Maker
In the app’s welcome screen, navigate to the ‘Toolbox’ tab and select ‘GIF Maker’ from the panel that gets displayed.
Step 3: Upload Your TikTok Video
In the next pop-up window, select ‘Video to GIF’ and click on the (+) icon in the centre. You can also click on ‘Add Files’ in the top left and choose a saved TikTok video from your PC to upload.

Step 4: Trim Your Video
Trim the uploaded video to the desired portion from where you wish to create the GIF and set adequate time frames for the same. You can even drag the video thumbnail slider to trim the video.

Step 5: Let’s Get Creating!
Set the final size and frame rate from the ‘Output Size’ and ‘Frame Rate’ tabs respectively. To save your creation, browse and choose the desired system folder by clicking on the ‘Save to:’ tab. Lastly, select ‘Create GIF’ to start the conversion process.

04Kapwing GIF Maker
There may be instances where you cannot save or share TikTok videos. To cut the rush in such cases, you can use Kapwing’s GIF Maker to convert videos from TikTok to GIF online. This one is a free video editing tool that works with almost all internet enabled smartphones and supports almost all common video formats. Here’s what you need to do for making GIFs from TikTok videos using this tool:
Step 1: Copy a Video Link
Search your desired TikTok video and click on the ‘Share’ icon. In the drop down menu, select ‘Copy Link’ to save the video link in your device memory. Once this happens, you will get a confirmation message that says, ‘Copied’.

Step 2: Open GIF Maker
Open the GIF Maker tool in your browser and paste the saved TikTok video link in the editor’s URL bar. This will automatically redirect you to the Kapwing Studio, where you have the liberty to trim, crop or split your video clip to the desired time frame. It is better to set a play span of 3-5 seconds.
You can trim the clip by dragging its ends or introduce cuts at specific points using the split button above the editor timeline. To make volume adjustments, select the video layer and click on ‘Edit Video’ and move the adjuster circle to the left or right to decrease, increase and mute the video volume.


Step 3: Download and Share Your Creation
To save your work, tap ‘Export Video’ at the top and select ‘Export as GIF’ from the drop down menu. Wait for the conversion process to finish and click ‘Download’. This will save the GIF to your device.
You will find a watermark at the corner of your clip. Click ‘Sign In to Remove the Watermark’ to remove it. A workspace for the present and later projects will be created, where you can save you work for a couple of days with Kapwing’s free version. To export your work to social media, click ‘Share’. You can even host your creation on websites. Just copy the video link and select ‘Embed’.

05TT Downloader
This one is another online tool you can use to create GIFs from TikTok videos. This is a quick converter tool that transforms TikTok videos to GIFs in 5 easy steps within minutes. It is a browser tool and does not require a software download. All you need to do is explained in the following steps:

Step 1:
Visit the official site of the tool.
Step 2:
Select ‘TikTok to GIF’ to get redirected to the TikTok to GIF Converter home page.
Step 3:
Copy and paste the desired TikTok video link in the converter’s URL bar. To proceed further, click on ‘Get Video’.

Step 4:
Trim your clip within a time frame of 1-10 seconds.
Step 5:
Click ‘Done’ to initiate the conversion process. Once it finishes, you can download the converted GIF to your device.
06MiniTool MovieMaker
You can prefer this tool to convert TikTok videos in your PC into GIFs. This tool gives you the liberty to trim, cut, reverse and rotate GIFs and even add text and filters to them. Here’s how you can use this tool to transform TikTok videos into interesting GIFs:
Step 1:
Download and install this GIF maker tool in your PC. Launch the same when you are done with the installation process.
Step 2:
In the converter window, import and add your desired TikTok clip into the converter timeline.

Step 3:
You are now free to edit and add text to your video.
Step 4:
Once you finish, tap ‘Export’ and choose your output format as GIF.
Step 5:
Hit ‘Export’ to let the conversion process begin.
● Key Takeaways from This Episode →
● TikTok videos often lack the save and share features, which is an obvious necessity of today’s social outlook.
● Varieties of online tools and software are available for converting TikTok videos to GIFs to increase the sharing flexibility.
● Filmora is a quick and intelligent choice to take up the conversion process within a catch of few clicks.
Want to add sharing flexibility to TikTok videos? Convert them into GIFs!
In this article
01 [What is GIF TikTok?](#Part 1)
02 [How to Make a GIF From a TikTok Video](#Part 2)
Part 1 What Is TikTok GIF?
In today’s IT enhanced lifestyle, having a profound reach on social media is the new name of popularity. Everyone out there is profusely keen on creating and sharing a plethora of content varieties; memes, videos, animations and what not, across social communities. However, TikTok videos lag behind in this race; often lack the ‘Share’ flexibility.
To match up, there are solutions to convert TikTok video into GIFs. A TikTok GIF is a short, impactful and to the point clip that’s here to share fun and exciting content in the most interesting ways. If you have a bunch of TikTok videos to share with your peers, but missing out on an effective sharing solution, you can conveniently look forward to convert those videos into catchy and interesting GIFs that will definitely hold the attention of your viewers.
Feel motivated? See through the rest of this article to know some quick and easy TikTok to GIF conversion tools and software!
Part 2 How to Make a GIF From a TikTok Video
When looking through solutions to create GIF TikTok videos, you will find a pool of methods and tools available on the internet. All you need to do is select the best one for yourself and get started with converting TikTok Videos into GIFs. Given below are some of the best solutions adhering to the aforesaid concern:
01Filmora
Wondershare Filmora Video Editor is one of the best application software to create a TikTok GIF. This is a simple and smart converter application that caters to your concern in just a few minutes. What’s best is that this app is absolutely free to use and is compatible with your PC, smartphone and a variety of other devices. Here’s how you can use Filmora to convert your TikTok videos into GIFs:
Step 1: Import Your Video
Start with importing a desired TikTok video file to the Filmora timeline. You can also ‘Drag and Drop’ the video file to the editor timeline. Using this application, you have the flexibility to import your clip in almost any video format.
Step 2: Edit Your Clip
Suited to your content preferences, you can edit and enhance your clips with a variety of effects, like, cut, trim, rotate, split, etc., and make appropriate speed adjustments. You can even include text messages to make your GIF more impactful.
Wondershare Filmora
Get started easily with Filmora’s powerful performance, intuitive interface, and countless effects!
Try It Free Try It Free Try It Free Learn More >
Step 3: Let’s Save and Share!
When you are happy, save your work using the .gif file extension. That’s it! You are ready to share your creation with your social media peers.
02TikTok’s Inbuilt GIF Converter
TikTok allows you to directly convert its videos into GIFs. You can use the TikTok application in your smartphone to take up the conversion process. All you need to do is follow the steps given below:
Step 1: Select Your TikTok Video
To get started, open the TikTok application in your smartphone and select the video you want to convert into GIF.
Step 2: Share the Video
Click the ‘Share’ icon at the right of the video screen.
Step 3: Format Selection
Scroll down to the bottom of the screen and choose the ‘Share as GIF’ option. This will automatically convert your TikTok video into GIF in a few seconds.
Step 4: Save and Export
Click on the ‘Save Image’ option to save the GIF in your phone’s gallery. You can also export your creation to different social media platforms.
03Wondershare UniConverter
This one is a handy toolbox loaded with a variety of features that allow you to play with your video creativity. Using this tool, you can quickly create GIF for TikTok and also fix the size and duration of the same. This software supports almost all video formats and comes with an inbuilt editor that you can use to add effects and make your GIFs all the more interesting. This is compatible with your Windows or MacOS PC.
Take the following steps to create GIFs from TikTok videos using this software:
Step 1: Download and Launch the Application
Download the Wondershare UniConverter application to your PC from the software’s official website.
Step 2: Open GIF Maker
In the app’s welcome screen, navigate to the ‘Toolbox’ tab and select ‘GIF Maker’ from the panel that gets displayed.
Step 3: Upload Your TikTok Video
In the next pop-up window, select ‘Video to GIF’ and click on the (+) icon in the centre. You can also click on ‘Add Files’ in the top left and choose a saved TikTok video from your PC to upload.
Step 4: Trim Your Video
Trim the uploaded video to the desired portion from where you wish to create the GIF and set adequate time frames for the same. You can even drag the video thumbnail slider to trim the video.
Step 5: Let’s Get Creating!
Set the final size and frame rate from the ‘Output Size’ and ‘Frame Rate’ tabs respectively. To save your creation, browse and choose the desired system folder by clicking on the ‘Save to:’ tab. Lastly, select ‘Create GIF’ to start the conversion process.
04Kapwing GIF Maker
There may be instances where you cannot save or share TikTok videos. To cut the rush in such cases, you can use Kapwing’s GIF Maker to convert videos from TikTok to GIF online. This one is a free video editing tool that works with almost all internet enabled smartphones and supports almost all common video formats. Here’s what you need to do for making GIFs from TikTok videos using this tool:
Step 1: Copy a Video Link
Search your desired TikTok video and click on the ‘Share’ icon. In the drop down menu, select ‘Copy Link’ to save the video link in your device memory. Once this happens, you will get a confirmation message that says, ‘Copied’.
Step 2: Open GIF Maker
Open the GIF Maker tool in your browser and paste the saved TikTok video link in the editor’s URL bar. This will automatically redirect you to the Kapwing Studio, where you have the liberty to trim, crop or split your video clip to the desired time frame. It is better to set a play span of 3-5 seconds.
You can trim the clip by dragging its ends or introduce cuts at specific points using the split button above the editor timeline. To make volume adjustments, select the video layer and click on ‘Edit Video’ and move the adjuster circle to the left or right to decrease, increase and mute the video volume.
Step 3: Download and Share Your Creation
To save your work, tap ‘Export Video’ at the top and select ‘Export as GIF’ from the drop down menu. Wait for the conversion process to finish and click ‘Download’. This will save the GIF to your device.
You will find a watermark at the corner of your clip. Click ‘Sign In to Remove the Watermark’ to remove it. A workspace for the present and later projects will be created, where you can save you work for a couple of days with Kapwing’s free version. To export your work to social media, click ‘Share’. You can even host your creation on websites. Just copy the video link and select ‘Embed’.
05TT Downloader
This one is another online tool you can use to create GIFs from TikTok videos. This is a quick converter tool that transforms TikTok videos to GIFs in 5 easy steps within minutes. It is a browser tool and does not require a software download. All you need to do is explained in the following steps:
Step 1:
Visit the official site of the tool.
Step 2:
Select ‘TikTok to GIF’ to get redirected to the TikTok to GIF Converter home page.
Step 3:
Copy and paste the desired TikTok video link in the converter’s URL bar. To proceed further, click on ‘Get Video’.
Step 4:
Trim your clip within a time frame of 1-10 seconds.
Step 5:
Click ‘Done’ to initiate the conversion process. Once it finishes, you can download the converted GIF to your device.
06MiniTool MovieMaker
You can prefer this tool to convert TikTok videos in your PC into GIFs. This tool gives you the liberty to trim, cut, reverse and rotate GIFs and even add text and filters to them. Here’s how you can use this tool to transform TikTok videos into interesting GIFs:
Step 1:
Download and install this GIF maker tool in your PC. Launch the same when you are done with the installation process.
Step 2:
In the converter window, import and add your desired TikTok clip into the converter timeline.
Step 3:
You are now free to edit and add text to your video.
Step 4:
Once you finish, tap ‘Export’ and choose your output format as GIF.
Step 5:
Hit ‘Export’ to let the conversion process begin.
● Key Takeaways from This Episode →
● TikTok videos often lack the save and share features, which is an obvious necessity of today’s social outlook.
● Varieties of online tools and software are available for converting TikTok videos to GIFs to increase the sharing flexibility.
● Filmora is a quick and intelligent choice to take up the conversion process within a catch of few clicks.
Pencil2D Animation Tutorial Overview
Animation is one of the trendiest technologies. The basics of animation were formulated in the 2000s from the moving page trick. The first few animators learned that animation is nothing but continuous switching of frames from one to another. One animated still is switched to another and then another in a quick sequence such that it makes a sequential moving frame. Today, animation has come a long way from where it started and today it is used for several commercials, tutorials, and even educational lecture videos. Pencil2D animation is an amazing animation tool that can be used by even neophytes. Want to learn more about 2d pencil animation and its super cool features? Well, you’re at the perfect place. Today we’ll be telling you more about pencil 2d animation and giving you a small overview of its usage.
In this article
01 [What is Pencil2D and How to Install?](#Part 1)
02 [Overview of the Application Interface](#Part 2)
03 [How to Create Animations with Pencil2D?](#Part 3)
Part 1 What is Pencil2D and How to Install?
2d pencil animation is popular open-source animation software. The software is pretty cool for those who are newly starting off with animation. The open-source software is available on all major operating systems including Windows, Mac OS, and Unix. Using this amazing software, we can make amazing cartoon characters using traditional cartoon-making techniques such as tracing drawing, skinning. Using this software, you can save animations in the native animation formats or extract the animation to PNG, JPG, or other formats. Wish to explore more about pencil 2d animation software? Follow the steps listed below in order to download the pencil2d animation software.
● Firstly, you need to ensure that your device has ample space on it.
● Next, you need to head to the official website of pencil2d.
● Further, you need to select your operating system. You can find different versions of the software, namely windows 7/8/10, windows XP/ Vista, Mac OS, and Linux
● Once downloaded, you need to start the installation setup. Note that this may take a while to download.
● Once downloaded, you can start familiarizing yourself with the software.
Part 2 Overview of the Application Interface
1. The brush tool
The brush tool must have reminded you of paint software in windows. The brush tool is a popular and highly utilitarian basic tool in Pencil2D animation software. You can either access it via the user interface or quickly access it by using the B key on your keyboard. As the name suggests, the brush tool is literally just a brush that allows you to draw and paint any sort of drawings of different shades, colors, and thickness. If you wish to change the color, you can find a color palette on the left side of the interface.

2. The eraser tool
You’ve a brush tool; it’s almost common sense that there’d be an eraser. The eraser tool has an eraser as its icon. If you wish to use the eraser, click on the eraser tool or simply click the E button on your keyboard. Once you’ve selected the tool, you need to simply hover over the parts you wish to erase.

3. Bucket tool
The bucket tool is another useful tool that you can find in the left tool pane of pencil 2d animation. The tool icon looks like a bucket and it is used to fill an entire area with a particular color. You can choose the color you’d like to fill from the color pallet available on the left side. Alternatively, you can also access the bucket tool by pressing the “K” key on your keyboard.

4. Custom colors
A cool feature that you can find on pencil 2d animation software is the custom color one. You can merge and mix colors according to your choice and create your own color. To do so, you need to click on the small color box that you’ll find at the top right of your screen. By doing so, a huge color wheel will appear on your screen. Now you can either enter values of the R, G, and B if you wish to merge different colors and make a new one or select a particular color from the huge color wheel that appears in front of you. These colors vary in gradient, shade, and a lot of different factors.

5. The Undo button
The Undo button is a highly useful functionality for the lazy ones who do not wish to erase the mistake they made. By undoing, the previous step gets reverted and you can start over again. The traditional undo shortcut, Ctrl+Z does work in the pencil 2d animation. Alternatively, you can also use the undo feature via the user interface. You can do so by heading over to the edit option in the topmost bar. The first option in the drop-down menu would be undo.

Part 3 How to Create Animations with Pencil2D?
Creating animations in pencil 2d is slightly sophisticated and certainly needs minimal practice. Follow the steps listed below in order to learn how to animate through pencil 2d to make your first animation.
1. Ensure that you’ve turned on your bitmap on the first frame
Animation works through quick switching of frame which makes it appear as though the object is in motion. By turning on the bitmap, pencil 2d animation ensures that you’ve no blank frames at the start of your animation.

2. Draw your animated character
Since you’re trying to animate, you need to have an animated character or object. Hence, the first step to making your first animation is by drawing the object or character that you wish to animate. Try to make the character as realistic as possible. To start with, maybe you can try animating just a stick figure; this is because animating a complex character is rather difficult for beginners.

3.The three circular buttons
Once you’re satisfied with the character you draw, you need to spot the 3 circular buttons which are arranged in the “+”,”-“,”+” order. By pressing the first “+” button, you can add an empty slide. If you click on the “-“ button, it will delete the most recent slide and if you click on the next “+” button, it will duplicate the current slide.

4.Repeat until you get an animation
Now that you know how to deal with multiple frames, you can continue creating frames and making the animated characters move by tweaking with the drawing in every frame. For instance, if you wish to show that the animated character is running, in one of the frames the left leg should be forward and in the next one, the right leg should be forward. Keep repeating this process of tweaking with frames until you’ve your desired animated video.

Now that we’ve seen the process of animation via Pencil2D, you must have realized that it’s pretty orthodox and complicated. Moreover, you cannot carry out rigging and other newer animation techniques. Hence, we introduce you to Wondershare Filmora Video Editor , your all in one animation making platform. Here you can animate without any hassle. Wondershare Filmora makes your job easier with multiple animation features, you needn’t even draw your animated character. You can simply import a custom-made character and rig the character. Further, you need not deal with multiple frames and personally pay attention to each frame. All in all, Filmora makes your job simple and your animations much more seamless.
For Win 7 or later (64-bit)
For macOS 10.12 or later
Key Takeaways from This Episode
● Animation is actively being used for multiple purposes.
● Today we took a look at one of the orthodox yet popular animation tools, Pencil2D.
● The Pencil2D animation tool offers you multiple functionalities and allows you to make animations.
● Next, we also took a look at Wondershare Filmora Pro, your one-stop shop for all animation needs. You can find multiple animation features here and it’s all so simple.
● What are you waiting for? Your next animation is just one click away.
02 [Overview of the Application Interface](#Part 2)
03 [How to Create Animations with Pencil2D?](#Part 3)
Part 1 What is Pencil2D and How to Install?
2d pencil animation is popular open-source animation software. The software is pretty cool for those who are newly starting off with animation. The open-source software is available on all major operating systems including Windows, Mac OS, and Unix. Using this amazing software, we can make amazing cartoon characters using traditional cartoon-making techniques such as tracing drawing, skinning. Using this software, you can save animations in the native animation formats or extract the animation to PNG, JPG, or other formats. Wish to explore more about pencil 2d animation software? Follow the steps listed below in order to download the pencil2d animation software.
● Firstly, you need to ensure that your device has ample space on it.
● Next, you need to head to the official website of pencil2d.
● Further, you need to select your operating system. You can find different versions of the software, namely windows 7/8/10, windows XP/ Vista, Mac OS, and Linux
● Once downloaded, you need to start the installation setup. Note that this may take a while to download.
● Once downloaded, you can start familiarizing yourself with the software.
Part 2 Overview of the Application Interface
1. The brush tool
The brush tool must have reminded you of paint software in windows. The brush tool is a popular and highly utilitarian basic tool in Pencil2D animation software. You can either access it via the user interface or quickly access it by using the B key on your keyboard. As the name suggests, the brush tool is literally just a brush that allows you to draw and paint any sort of drawings of different shades, colors, and thickness. If you wish to change the color, you can find a color palette on the left side of the interface.
2. The eraser tool
You’ve a brush tool; it’s almost common sense that there’d be an eraser. The eraser tool has an eraser as its icon. If you wish to use the eraser, click on the eraser tool or simply click the E button on your keyboard. Once you’ve selected the tool, you need to simply hover over the parts you wish to erase.
3. Bucket tool
The bucket tool is another useful tool that you can find in the left tool pane of pencil 2d animation. The tool icon looks like a bucket and it is used to fill an entire area with a particular color. You can choose the color you’d like to fill from the color pallet available on the left side. Alternatively, you can also access the bucket tool by pressing the “K” key on your keyboard.
4. Custom colors
A cool feature that you can find on pencil 2d animation software is the custom color one. You can merge and mix colors according to your choice and create your own color. To do so, you need to click on the small color box that you’ll find at the top right of your screen. By doing so, a huge color wheel will appear on your screen. Now you can either enter values of the R, G, and B if you wish to merge different colors and make a new one or select a particular color from the huge color wheel that appears in front of you. These colors vary in gradient, shade, and a lot of different factors.
5. The Undo button
The Undo button is a highly useful functionality for the lazy ones who do not wish to erase the mistake they made. By undoing, the previous step gets reverted and you can start over again. The traditional undo shortcut, Ctrl+Z does work in the pencil 2d animation. Alternatively, you can also use the undo feature via the user interface. You can do so by heading over to the edit option in the topmost bar. The first option in the drop-down menu would be undo.
Part 3 How to Create Animations with Pencil2D?
Creating animations in pencil 2d is slightly sophisticated and certainly needs minimal practice. Follow the steps listed below in order to learn how to animate through pencil 2d to make your first animation.
1. Ensure that you’ve turned on your bitmap on the first frame
Animation works through quick switching of frame which makes it appear as though the object is in motion. By turning on the bitmap, pencil 2d animation ensures that you’ve no blank frames at the start of your animation.
2. Draw your animated character
Since you’re trying to animate, you need to have an animated character or object. Hence, the first step to making your first animation is by drawing the object or character that you wish to animate. Try to make the character as realistic as possible. To start with, maybe you can try animating just a stick figure; this is because animating a complex character is rather difficult for beginners.
3.The three circular buttons
Once you’re satisfied with the character you draw, you need to spot the 3 circular buttons which are arranged in the “+”,”-“,”+” order. By pressing the first “+” button, you can add an empty slide. If you click on the “-“ button, it will delete the most recent slide and if you click on the next “+” button, it will duplicate the current slide.
4.Repeat until you get an animation
Now that you know how to deal with multiple frames, you can continue creating frames and making the animated characters move by tweaking with the drawing in every frame. For instance, if you wish to show that the animated character is running, in one of the frames the left leg should be forward and in the next one, the right leg should be forward. Keep repeating this process of tweaking with frames until you’ve your desired animated video.
Now that we’ve seen the process of animation via Pencil2D, you must have realized that it’s pretty orthodox and complicated. Moreover, you cannot carry out rigging and other newer animation techniques. Hence, we introduce you to Wondershare Filmora Video Editor , your all in one animation making platform. Here you can animate without any hassle. Wondershare Filmora makes your job easier with multiple animation features, you needn’t even draw your animated character. You can simply import a custom-made character and rig the character. Further, you need not deal with multiple frames and personally pay attention to each frame. All in all, Filmora makes your job simple and your animations much more seamless.
For Win 7 or later (64-bit)
For macOS 10.12 or later
Key Takeaways from This Episode
● Animation is actively being used for multiple purposes.
● Today we took a look at one of the orthodox yet popular animation tools, Pencil2D.
● The Pencil2D animation tool offers you multiple functionalities and allows you to make animations.
● Next, we also took a look at Wondershare Filmora Pro, your one-stop shop for all animation needs. You can find multiple animation features here and it’s all so simple.
● What are you waiting for? Your next animation is just one click away.
Also read:
- 5 Must Try Ways to Add and Send GIF in Text Message on Android for 2024
- 10 Cartoon Character Makers to Make Animated Characters for 2024
- New 2024 Approved Techniques for Making After Effects 2D Animation
- New In 2024, 12 Captivating Websites with Triggered Animate on Scroll Examples
- 15 Best Pics Collage Apps Top Picks for 2024
- 2024 Approved How To Remove The Endless Loop From Animated GIF
- Updated Christmas Is Coming! How to Find & Make Animated Christmas GIFs, In 2024
- Updated 26 Cool Anime Girl Names and Their Meanings
- In 2024, 2D Character Animation Everything You Should Know About It
- New Whiteboard Animation Services Top 15 Animation Companies to Pick for 2024
- New Best 10 Anime Websites to Watch Dubbed Anime Free
- In 2024, How to Animate - Adobe Animate Tutorias
- In 2024, How to Find 3D Animation Studio
- Updated 15 Horror Animes That Will Trigger a Heart Attack
- New Create Animated Video on Canva
- Updated 2024 Approved 10 Top Tools to Make Pic Collage for Windows
- In 2024, 21 Top Free Anime Websites to Watch Anime Online-Anime
- New 2024 Approved The Top Free 12 GIF Meme Maker at a Glance
- The Only Guide Youll Need to Learn About GIF Video Downloader for 2024
- Updated 5 Techniques You Never Heard of for Converting MP4 to GIF in Photoshop for 2024
- New 2024 Approved 15 Best Video to GIF App on iPhone and Android
- Updated 2024 Approved Top 10 Banned Anime Around the World and Why
- New Convert Animated GIF From Video
- New 2024 Approved Nurturing Mind, Heart, and Soul on the Top 5 Anime Streaming Sanctuaries
- Ways to Create an Adobe Collage for 2024
- Updated All About 3D Medical Animation
- 2024 Approved Cartoon Fundamentals How to Learn Cartoon Characters Sketch Quickly
- Updated In 2024, Easy Cartoon Characters Drawing Tutorials for You Who Are Learning to Draw
- Updated 10 Caricature Makers to Turn Your Photo to Caricature Effects
- How to Make Photo Motion Effect Online?
- Best Practices on Online 3D Avatar Creator
- Updated In 2024, Best 12 Evil Cartoon Characters of All Time
- New 2024 Approved Best 15 Classics Animated Cartoon Movies
- New 2024 Approved Whats the Best 10 Photo Animator Templates That Bring Your Images to Life?
- New 2024 Approved Most Effective Ways to Set WhatsApp Status
- New Most Effective Tactics to Set WhatsApp Status
- New FREE Best Anime Streaming Sites to Download Anime for 2024
- New Is It That Easy to Make My Own Animated Character, In 2024
- How to Create an Adobe Collage for 2024
- How to Reset Xiaomi Redmi A2+ without Losing Data | Dr.fone
- Simple and Effective Ways to Change Your Country on YouTube App Of your Sony Xperia 10 V | Dr.fone
- In 2024, Top 7 Phone Number Locators To Track Oppo Reno 10 Pro+ 5G Location | Dr.fone
- In 2024, Sim Unlock Vivo S17 Phones without Code 2 Ways to Remove Android Sim Lock
- Sony Xperia 10 V Unlock Tool - Remove android phone password, PIN, Pattern and fingerprint
- 9 Solutions to Fix Process System Isnt Responding Error on Samsung Galaxy M14 5G | Dr.fone
- In 2024, What Legendaries Are In Pokemon Platinum On Honor Magic 6 Pro? | Dr.fone
- Rootjunky APK To Bypass Google FRP Lock For Vivo X100 Pro
- In 2024, Learn How To Lock Stolen Your iPhone 15 Pro Max Properly
- In 2024, How to Transfer Contacts from Realme Narzo 60 5G to iPhone XS/11 | Dr.fone
- The Best iSpoofer Alternative to Try On Meizu 21 Pro | Dr.fone
- Issues playing MKV video on Galaxy A05s
- In 2024, iSpoofer is not working On Samsung Galaxy M34 5G? Fixed | Dr.fone
- Hassle-Free Ways to Remove FRP Lock on Oppo A78 5G Phones with/without a PC
- In 2024, 9 Best Phone Monitoring Apps for Samsung Galaxy S23 | Dr.fone
- How To Fix iPhone SE (2020) Unavailable Issue With Ease | Dr.fone
- In 2024, How to Transfer Contacts from Google Pixel Fold To Phone | Dr.fone
- In 2024, 10 Best Text-to-Video AI Generators to Create Engaging Videos
- How to Transfer Data from Infinix Note 30i to Samsung Phone | Dr.fone
- In 2024, Best Motorola G24 Power Pattern Lock Removal Tools Remove Android Pattern Lock Without Losing Data
- Full Guide How To Fix Connection Is Not Private on Samsung Galaxy S24 Ultra | Dr.fone
- In 2024, How to Unlock SIM Card on Motorola Edge 40 online without jailbreak
- How to Fix Oppo A79 5G Find My Friends No Location Found? | Dr.fone
- 5 Best Route Generator Apps You Should Try On Nubia Red Magic 8S Pro | Dr.fone
- How to Access Your iPhone 15 When You Forget the Passcode?
- In 2024, Exploring AI Face Generators | Wondershare Virbo Glossary
- In 2024, How to Track Oppo Reno 8T 5G Location by Number | Dr.fone
- How To Transfer WhatsApp From iPhone 13 Pro to Android? | Dr.fone
- 3 Effective Methods to Fake GPS location on Android For your Honor X50i | Dr.fone
- New AI Avatar | Wondershare Virbo User Guide for 2024
- A Detailed Guide on Faking Your Location in Mozilla Firefox On Honor Magic 6 Pro | Dr.fone
- Prevent Cross-Site Tracking on Oppo K11x and Browser | Dr.fone
- How to Unlock Xiaomi Redmi 13C PIN Code/Pattern Lock/Password
- Will Motorola Moto G Stylus 5G (2023) play AVCHD mts files?
- How to Fix My Honor X50 GT Location Is Wrong | Dr.fone
- How to Unlock T-Mobile iPhone 6s Plus online without SIM Card?
- PassFab Apple iPhone 13 Pro Backup Unlocker Top 4 Alternatives
- Title: 2024 Approved How to Send and Add Snapchat GIFs 100 The Easy Way
- Author: Elon
- Created at : 2024-05-19 03:04:54
- Updated at : 2024-05-20 03:04:54
- Link: https://animation-videos.techidaily.com/2024-approved-how-to-send-and-add-snapchat-gifs-100-the-easy-way/
- License: This work is licensed under CC BY-NC-SA 4.0.
