
:max_bytes(150000):strip_icc():format(webp)/copilot-b197f8dd690845d5bf8ebbc082c89c20.jpg)
2024 Approved Learn How to Create Adobe 3D Animation
Learn How to Create Adobe 3D Animation
Learn How to Create Adobe 3D Animation
An easy yet powerful editor
Numerous effects to choose from
Detailed tutorials provided by the official channel
As with learning any profession, to become a professional Adobe 3D animation expert isn’t something generally fulfilled in just a few weeks, months, or even years. Instead, it’s a career path that takes a great deal of dedication and love to the art form, but it will be entirely worth considering if you wish it.
This article will explain how to proceed with Adobe 3D animation and the supportive steps to get you there successfully.
In this article
01 [Does Adobe Have 3D Animation Software?](#Part 1)
02 [8 Video After Effects Templates for 2022 Inspiration](#Part 2)
03 [How to Quickly Make Adobe 3D Animation with Adobe Stock 3D Assets?](#Part 3)
Part 1 Does Adobe Have 3D Animation Software?
You’ll be able to create a range of animation styles using After Effects CC once you grasp the basic concepts. This gets started in an animation tutorial by Sara Barnes, which teaches you top tips for animating illustrations in After Effects, beginning with the basics.
Adobe After Effects is software for making special effects and motion graphics used in online content, video, and other presentations. It is available on both Mac OS and Windows PC. The After Effects is famous in TV and film post-production for creating animation, special effects, and video compositing.
Tasks made using After Effects can be helpful in videos, broadcast TV, web, kiosks, and in-store displays - a part of the Adobe Creative Cloud.
This software can create a cartoon character, design titles, and apply animation. Although Adobe 3D animation can do all these tasks, it is not similar to video editing software.
This program can apply effects after the footage has been edited or create motion graphics and animation from static objects created otherwise.
It is a tool for storytelling and visually making those appealing motion graphics that integrate into any medium to improve a presentation, image, story, or mood.
01How is After Effects used?
The primary uses of After Effects categorize into three sections:
Effects,
Animation, and
Compositing.
The kind of animation for which After Effects is widely used is Motion Graphics, which includes making the motion of traditionally static objects such as text, logos, and other graphic elements.
Sometimes called visual effects (VFX), the effects are famous in video and film. For example, adding snow to a video scene, creating water or fire, making objects appear to turn into liquid are all instances of different effects - After Effects can create these visual effects from your video.
It also implies digital compositing, including merging multiple videos into a single product and integrating various videos via compositing.
02Who uses After Effects?
The After Effects is valuable to animators, visual artists, advertising agencies, video editors, video artists, video producers, social media professionals, motion graphics designers, UX professionals, etc. Gaining proficiency in After Effects comes in-depth from training, tutorials, and other hands-on use courses.
Part 2 5 Video After Effects Templates for 2022 Inspiration
It’s a great time to promote your business, craft an excellent video presentation, or showcase your product launch. The fantastic way to do it is with the templates of Adobe After Effects. They also include the After Effects 3D logo animation template free.
In case you’re looking for multiple After Effects AE templates or wish to try out different options to find just the right one?
Then Envato Elements is ideal for you. Let’s consider using these five of the top Adobe After Effects templates from Envato Elements for 2021:
01Memory Sketch
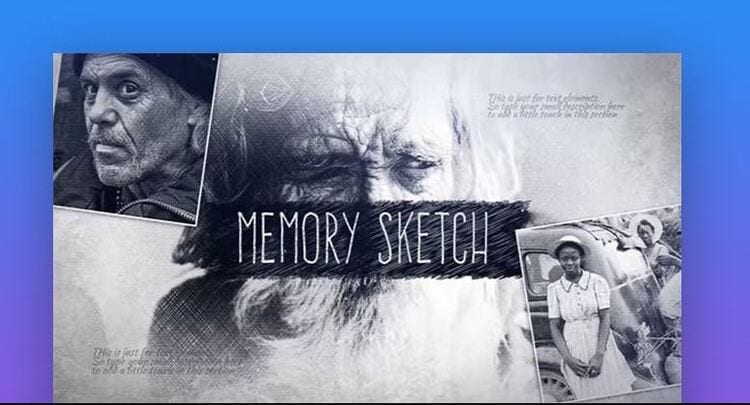
Memory Sketch is a beautiful artistic collection of After Effects video templates perfect for your next movie. Its potent effects transform your photo slideshows into stunning artworks. Images are rendered as crisp brush drawings, providing a personalized feel and warmth to all your work.
02Opener V3
The best After Effects templates in 2022 consistsof following key features:
● bold, modern styling
● simple customization
Opener V3 offers plenty of both, serving as the great kickoff to videos on any topic.
You’ll find that it works well as a promo clip, an intro, or a standalone project alike.
03Ink Titles
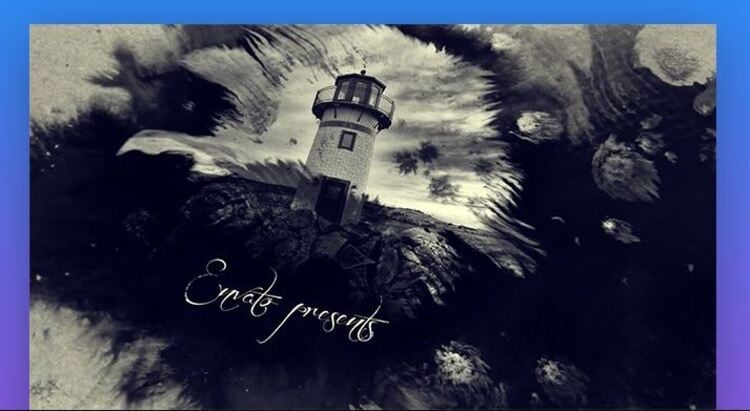
While you might think only of photos, the best AE project templates never forget your text. That’s the power of Ink Titles, an amazing set of captions for After Effects. Ideally suited for intros and credits alike, this one is a must-have in your AE video template toolbox.
04Spacious Particle Logo Reveal
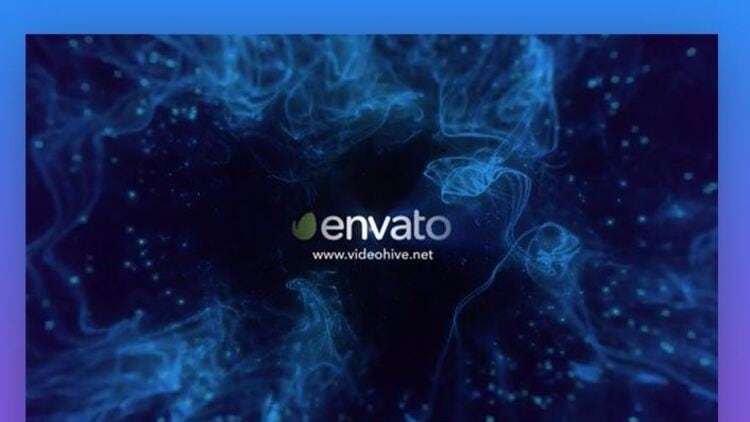
With starry graphics, these awesome Envato After Effects templates bring your logo on-screen in a genuinely out-of-this-world style. Easily adaptable to any logo, they’re an unbeatable way to introduce your brand to an audience. In addition, with After Effects, it’s easy to change the duration, timing, and much more.
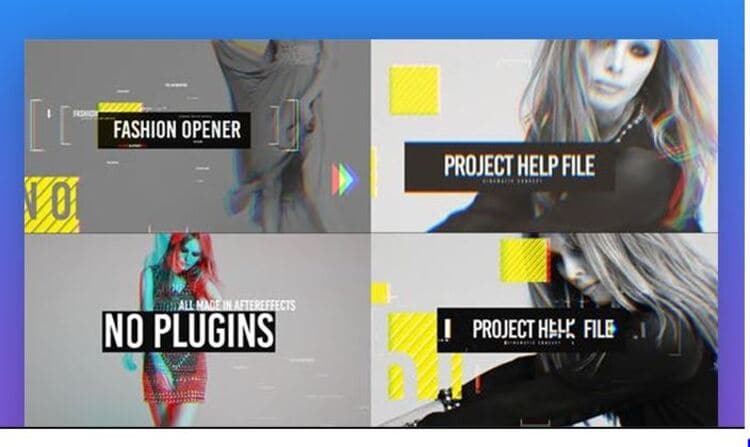
0570 Glitch Title Animation Presets Pack
Glitch Adobe After Effects templates lend a grungy, hip vibe to your video projects. This design comes with 70 unique glitch text animations with six different types and layout styles. With sound effects already built-in, customize any of the best AE templates in seconds.
Part 3 How to Quickly Make Adobe 3D Animation with Adobe Stock 3D Assets?
For this example, we’re taking a coffee mug and creating a scenario of emitting particles around the mug via step by step guide as follows. However, the tutorial will be quick, as the subtitle suggests, without wasting much of your time.
01Step 1: Download model
Go to Adobe Stock and download your 3D model to proceed with. We’ll use the same model for our entire scene. Also, make sure that the model has an excellent volume to it.
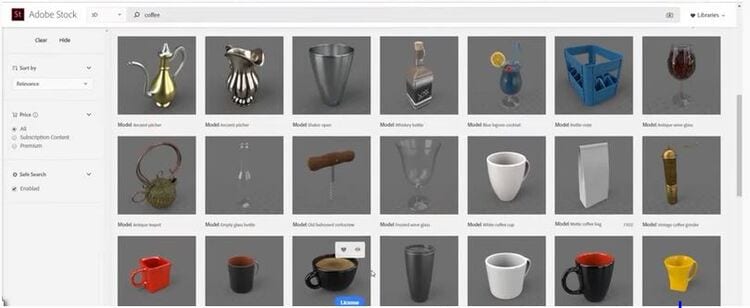
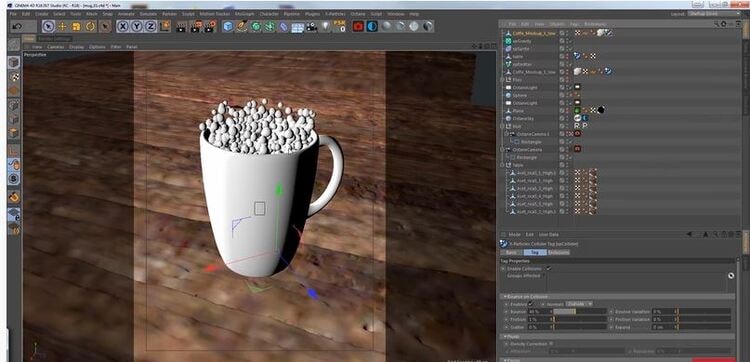
Now, the cup is needed to enter the screen of your 3D software, as shown below.
02Step 2: Fill Up The Composition
Then, try to fill up the composition. Thus, the whole animation or the main subject will be this 3D model we’ve just downloaded.
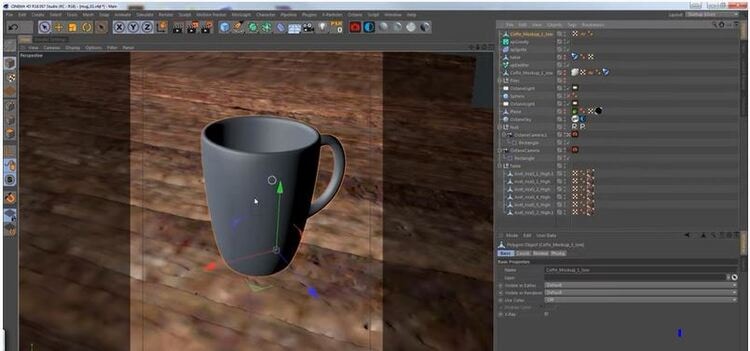
Now, we’ll apply primary material to the model that all comes with downloading the model from the Adobe Stock Assets.
03Step 3: Set Up Animation
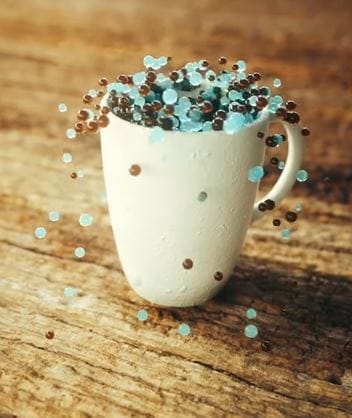
Then, you need to set up animation from that one package of 3D files. We’ll have the particles emit out from the coffee mug, and they will be the spherical particles. These particles will drive the entire animation.
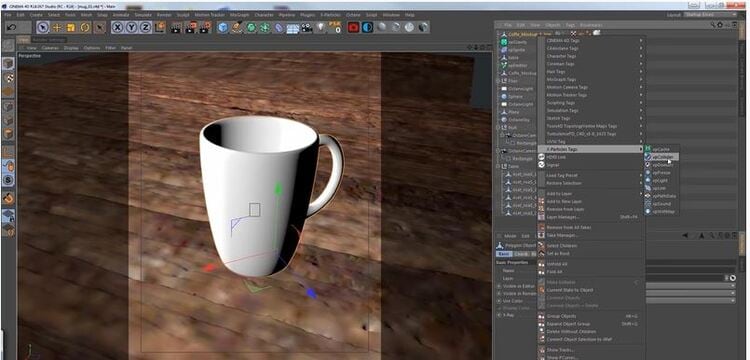
Now, you’re all done with the primary 3D animation, as shown below!
Since it’s the basic animation, you can play with the colors, masks, and other selections afterward for final rendering.
● Key Takeaways from This Episode →
● Understanding Adobe’s 3D animation process
● 8 After Effects for video making
● The ultimate process or step guide to quickly make Adobe 3D animation via Adobe Stock 3D Assets.
As with learning any profession, to become a professional Adobe 3D animation expert isn’t something generally fulfilled in just a few weeks, months, or even years. Instead, it’s a career path that takes a great deal of dedication and love to the art form, but it will be entirely worth considering if you wish it.
This article will explain how to proceed with Adobe 3D animation and the supportive steps to get you there successfully.
In this article
01 [Does Adobe Have 3D Animation Software?](#Part 1)
02 [8 Video After Effects Templates for 2022 Inspiration](#Part 2)
03 [How to Quickly Make Adobe 3D Animation with Adobe Stock 3D Assets?](#Part 3)
Part 1 Does Adobe Have 3D Animation Software?
You’ll be able to create a range of animation styles using After Effects CC once you grasp the basic concepts. This gets started in an animation tutorial by Sara Barnes, which teaches you top tips for animating illustrations in After Effects, beginning with the basics.
Adobe After Effects is software for making special effects and motion graphics used in online content, video, and other presentations. It is available on both Mac OS and Windows PC. The After Effects is famous in TV and film post-production for creating animation, special effects, and video compositing.
Tasks made using After Effects can be helpful in videos, broadcast TV, web, kiosks, and in-store displays - a part of the Adobe Creative Cloud.
This software can create a cartoon character, design titles, and apply animation. Although Adobe 3D animation can do all these tasks, it is not similar to video editing software.
This program can apply effects after the footage has been edited or create motion graphics and animation from static objects created otherwise.
It is a tool for storytelling and visually making those appealing motion graphics that integrate into any medium to improve a presentation, image, story, or mood.
01How is After Effects used?
The primary uses of After Effects categorize into three sections:
Effects,
Animation, and
Compositing.
The kind of animation for which After Effects is widely used is Motion Graphics, which includes making the motion of traditionally static objects such as text, logos, and other graphic elements.
Sometimes called visual effects (VFX), the effects are famous in video and film. For example, adding snow to a video scene, creating water or fire, making objects appear to turn into liquid are all instances of different effects - After Effects can create these visual effects from your video.
It also implies digital compositing, including merging multiple videos into a single product and integrating various videos via compositing.
02Who uses After Effects?
The After Effects is valuable to animators, visual artists, advertising agencies, video editors, video artists, video producers, social media professionals, motion graphics designers, UX professionals, etc. Gaining proficiency in After Effects comes in-depth from training, tutorials, and other hands-on use courses.
Part 2 5 Video After Effects Templates for 2022 Inspiration
It’s a great time to promote your business, craft an excellent video presentation, or showcase your product launch. The fantastic way to do it is with the templates of Adobe After Effects. They also include the After Effects 3D logo animation template free.
In case you’re looking for multiple After Effects AE templates or wish to try out different options to find just the right one?
Then Envato Elements is ideal for you. Let’s consider using these five of the top Adobe After Effects templates from Envato Elements for 2021:
01Memory Sketch
Memory Sketch is a beautiful artistic collection of After Effects video templates perfect for your next movie. Its potent effects transform your photo slideshows into stunning artworks. Images are rendered as crisp brush drawings, providing a personalized feel and warmth to all your work.
02Opener V3
The best After Effects templates in 2022 consistsof following key features:
● bold, modern styling
● simple customization
Opener V3 offers plenty of both, serving as the great kickoff to videos on any topic.
You’ll find that it works well as a promo clip, an intro, or a standalone project alike.
03Ink Titles
While you might think only of photos, the best AE project templates never forget your text. That’s the power of Ink Titles, an amazing set of captions for After Effects. Ideally suited for intros and credits alike, this one is a must-have in your AE video template toolbox.
04Spacious Particle Logo Reveal
With starry graphics, these awesome Envato After Effects templates bring your logo on-screen in a genuinely out-of-this-world style. Easily adaptable to any logo, they’re an unbeatable way to introduce your brand to an audience. In addition, with After Effects, it’s easy to change the duration, timing, and much more.
0570 Glitch Title Animation Presets Pack
Glitch Adobe After Effects templates lend a grungy, hip vibe to your video projects. This design comes with 70 unique glitch text animations with six different types and layout styles. With sound effects already built-in, customize any of the best AE templates in seconds.
Part 3 How to Quickly Make Adobe 3D Animation with Adobe Stock 3D Assets?
For this example, we’re taking a coffee mug and creating a scenario of emitting particles around the mug via step by step guide as follows. However, the tutorial will be quick, as the subtitle suggests, without wasting much of your time.
01Step 1: Download model
Go to Adobe Stock and download your 3D model to proceed with. We’ll use the same model for our entire scene. Also, make sure that the model has an excellent volume to it.
Now, the cup is needed to enter the screen of your 3D software, as shown below.
02Step 2: Fill Up The Composition
Then, try to fill up the composition. Thus, the whole animation or the main subject will be this 3D model we’ve just downloaded.
Now, we’ll apply primary material to the model that all comes with downloading the model from the Adobe Stock Assets.
03Step 3: Set Up Animation
Then, you need to set up animation from that one package of 3D files. We’ll have the particles emit out from the coffee mug, and they will be the spherical particles. These particles will drive the entire animation.
Now, you’re all done with the primary 3D animation, as shown below!
Since it’s the basic animation, you can play with the colors, masks, and other selections afterward for final rendering.
● Key Takeaways from This Episode →
● Understanding Adobe’s 3D animation process
● 8 After Effects for video making
● The ultimate process or step guide to quickly make Adobe 3D animation via Adobe Stock 3D Assets.
How to Combine Two/More GIFs Into One [GIF Mergers Offered]
How to Combine Multiple GIFs into One with GIF Combiner

Shanoon Cox
Mar 27, 2024• Proven solutions
Are you looking for a software tool to create animated GIFs? Go online, you will easily find so many with impressive editing abilities. There are so many interesting things that you can do with a collection of GIFs. Many professionals these days are trying new tricks to make classic small duration animated movies with interactive GIF creator tools .
The article below will provide you step by step guidance about how to merge or combine animated GIFs together.
We are going to discuss two methods where one GIF combiner can assist you to play GIFs side by side, whereas the other will tell you about playing another GIF in continuation after first. In the end, we will also let you know the three best GIF combiners you can use.
Keep reading.
If you are not able to use Photoshop due to its complicated interface and Ezgif is not a suitable tool for your device, then the best recommendation for your animated GIF creation needs is Wondershare Filmora .
This tool is designed with a user-friendly interface and it can easily assist you in the development of high-quality gifs. There are so many customization options associated with each design like color correction, speed adjustments, and overlays, etc.
Filmora offers compatibility over Windows as well as Mac devices so you can easily access it anywhere. Further, it can process more than 150 file formats so you need not worry about your selection. Simply download Wondershare Filmora for your desktop and get started with impressive GIF editing.
Download it now to have a try!
See how to make a cool GIF from a video with Wondershare Filmora.
 Download Mac Version ](https://tools.techidaily.com/wondershare/filmora/download/ )
Part 1: How to Combine/Merge Animated GIFs Into One
Method 1: Merge GIFs into one with Photoshop
Adobe Photoshop is one of the top-rated photo editing software tools and nowadays it is popularly being used for GIF combining. Using Photoshop, you can easily play multiple GIF images side by side on the screen. Here are a few simple to follow steps to accomplish this task:
Step 1: Import GIFs to combine
First of all, users need to launch Adobe Photoshop on their device and then import both GIF images to individual tabs. This task can be easily done using Drag and Drop tools. Resize both tabs so that you can view both images at a time on screen.
Step 2: Save GIF with name
Go to the Window menu and ensure that the Timeline option is marked in the drop-down menu.

Now open one empty file with height same as that of already imported GIF files. Save this file with any suitable name, for example Z.

Note: If you need a transparent view of your imported GIF images then go to Layer and select New and finally hit Layer option. You can now hide its bottom layer.
Step 3: Copy frames

Now move to the tab of the first GIF file and then to the timeline toolbar. On the top right corner of your screen, you will find the menu icon. Here you need to select and copy all frames.
Step 4: Paste your copy
It is time to move to GIF Z file, move to its timeline toolbar, and then select the menu icon from the top right corner of your screen. Paste your recently copied selection over here. Never forget to choose Paste Over selection option from Pop up Dialogue Box.
Step 5: Copy and paste
Simply repeat the process explained in Step 3 and 4 for the 2nd GIF image. After execution of these steps, your GIF Z file will be containing all layers of your imported GIF files but as you have pasted them one over another so it is important to separate their elements now.
Step 6: To make separation
To do this separation, go to GIF Z tab and then select layers of second GIF file and simply move them below the first GIF layer files. Users can now have a preview of both GIFs in the timeline window.

Step 7: Change image settings
After finalizing the best preview for your edited files, you can hit the file menu option and then save your project for device or web option. It will immediately open a dialogue box where users can easily specify their image quality and loop count details. Never forget to have one more preview before saving the final results.

Step 8: Save your project
As now you are done with all the editing tasks so it is time to hit the “Save” option and then provide your destination address to the modified file. Your animated GIF file is now ready to get uploaded on the internet.
Check this video to learn more on how to combine gifs with Photoshop
Method 2: Combine GIFs and Play one After Another
Many youngsters love to create impressive stories by just combining a few GIF images one after another in sequence. If you are also one of them then you should follow these steps discussed in the second method.
We are recommending Ezgif.com to complete this task with the easy to follow steps as discussed below:
You may also like: Top 26 Best Free GIF Makers Online >>
Step 1: Upload GIFs files
First of all, you need to upload your desired GIF files to the Ezgif.com platform. For fast selection of multiple files simply follow Ctrl key-based selection.
This tool also allows users to create a mixture of animated GIF files with simple still images even if they are of different file formats. The conversion process will be carried out automatically by this tool.
Step 2: Adjust frame
As soon as these files will get uploaded, you will find all frames on the editor window. Here you can easily adjust frame delays as well as their order. Note that, GIFs are often ordered in alphabetic order so while reorganizing your files, never forget to rename them accurately. Now hit the “Animate It” button and it will immediately prepare a small preview window on the screen.

Step 3: Optimize your GIFs
Ezgif.com provides a wide range of optimization options to users after this preview. You can easily adjust features as per your requirement by setting desired values for text, speed, effects, rotate, resize and crop, etc. If you do not want to make such changes then you can directly hit the save button. This software tool will take a few seconds to process your project and then a new GIF image with all defined frames will be generated. It will be containing all source images with your preferred ordered sequence. You can easily find it at your destination folder and use it further for entertainment.
Part 2: 3 Best GIF Combiners You Can Make GIFs
1. Filmora Meme Maker - Online GIF Combiner
If you want to combine GIFs online, the Filmora meme maker is your ultimate solution.
It helps you make images, GIFs and video memes directly without watermark. It is totally FREE to use and no signup. You can change text size, color and position to create caption when you are editing. You can also put text inside or outside in GIF.
Just with a few clicks, your GIF is done . Try Now!

2. GIPHY
GIPHY is a GIF combiner where you can find various GIF files to combine. All of the GIFs are funny and interesting to use for people who love to combine GIFs. There are some examples in this site, so you can have the inspiration to combine GIFs if you don’t know where to start. You also can find different styles: reaction, sports, artists and more.

3. PIXEL
If you don’t want to use Photoshop to combine GIFs, here we recommend using PIXEL. You can use it to make GIFs easily online. You can add more than one GIF at one time. Besides, this GIF combiner can also change the GIF size to fit your needs. After the editing is made, you need to click create animation to export GIFs. You should know that GIF size is 32×32 for PIXEL, and 64×64 for SUPER PIXEL.
![]()
Frequently Asked Questions About Combing GIFs
1. Can I Combine A Few Gifs?
Yes, you can. Any photo or video editing software that supports GIF file format allows you to combine one or more GIFs. For instance, Adobe Photoshop users can combine several GIF files and play them simultaneously next to each other, but this task can be overwhelming if you are not familiar with this photo editing software.
An online GIF combiner like Ezgif enables you to combine multiple GIFs from your web browser for free, which makes it a great option for anyone who doesn’t have access to a professional photo or video editing software.
2. How To Merge Several Animated GIFs?
Playing two or more GIFs one after another in a single file is easy, as you just have to arrange them in a way you want them to appear in the final version of the GIF on the editor’s timeline and then export your project as a GIF file.
What’s more, you will be able to remove the frames of the GIFs you don’t want to include in the output file or apply different filters and effects. However, the options you are going to have at your disposal depending on the GIF maker or video editing software you are using to merge several animated GIFs into a single file.
Shanoon Cox
Shanoon Cox is a writer and a lover of all things video.
Follow @Shanoon Cox
Shanoon Cox
Mar 27, 2024• Proven solutions
Are you looking for a software tool to create animated GIFs? Go online, you will easily find so many with impressive editing abilities. There are so many interesting things that you can do with a collection of GIFs. Many professionals these days are trying new tricks to make classic small duration animated movies with interactive GIF creator tools .
The article below will provide you step by step guidance about how to merge or combine animated GIFs together.
We are going to discuss two methods where one GIF combiner can assist you to play GIFs side by side, whereas the other will tell you about playing another GIF in continuation after first. In the end, we will also let you know the three best GIF combiners you can use.
Keep reading.
If you are not able to use Photoshop due to its complicated interface and Ezgif is not a suitable tool for your device, then the best recommendation for your animated GIF creation needs is Wondershare Filmora .
This tool is designed with a user-friendly interface and it can easily assist you in the development of high-quality gifs. There are so many customization options associated with each design like color correction, speed adjustments, and overlays, etc.
Filmora offers compatibility over Windows as well as Mac devices so you can easily access it anywhere. Further, it can process more than 150 file formats so you need not worry about your selection. Simply download Wondershare Filmora for your desktop and get started with impressive GIF editing.
Download it now to have a try!
See how to make a cool GIF from a video with Wondershare Filmora.
Download Mac Version ](https://tools.techidaily.com/wondershare/filmora/download/ )
Part 1: How to Combine/Merge Animated GIFs Into One
Method 1: Merge GIFs into one with Photoshop
Adobe Photoshop is one of the top-rated photo editing software tools and nowadays it is popularly being used for GIF combining. Using Photoshop, you can easily play multiple GIF images side by side on the screen. Here are a few simple to follow steps to accomplish this task:
Step 1: Import GIFs to combine
First of all, users need to launch Adobe Photoshop on their device and then import both GIF images to individual tabs. This task can be easily done using Drag and Drop tools. Resize both tabs so that you can view both images at a time on screen.
Step 2: Save GIF with name
Go to the Window menu and ensure that the Timeline option is marked in the drop-down menu.
Now open one empty file with height same as that of already imported GIF files. Save this file with any suitable name, for example Z.
Note: If you need a transparent view of your imported GIF images then go to Layer and select New and finally hit Layer option. You can now hide its bottom layer.
Step 3: Copy frames
Now move to the tab of the first GIF file and then to the timeline toolbar. On the top right corner of your screen, you will find the menu icon. Here you need to select and copy all frames.
Step 4: Paste your copy
It is time to move to GIF Z file, move to its timeline toolbar, and then select the menu icon from the top right corner of your screen. Paste your recently copied selection over here. Never forget to choose Paste Over selection option from Pop up Dialogue Box.
Step 5: Copy and paste
Simply repeat the process explained in Step 3 and 4 for the 2nd GIF image. After execution of these steps, your GIF Z file will be containing all layers of your imported GIF files but as you have pasted them one over another so it is important to separate their elements now.
Step 6: To make separation
To do this separation, go to GIF Z tab and then select layers of second GIF file and simply move them below the first GIF layer files. Users can now have a preview of both GIFs in the timeline window.
Step 7: Change image settings
After finalizing the best preview for your edited files, you can hit the file menu option and then save your project for device or web option. It will immediately open a dialogue box where users can easily specify their image quality and loop count details. Never forget to have one more preview before saving the final results.
Step 8: Save your project
As now you are done with all the editing tasks so it is time to hit the “Save” option and then provide your destination address to the modified file. Your animated GIF file is now ready to get uploaded on the internet.
Check this video to learn more on how to combine gifs with Photoshop
Method 2: Combine GIFs and Play one After Another
Many youngsters love to create impressive stories by just combining a few GIF images one after another in sequence. If you are also one of them then you should follow these steps discussed in the second method.
We are recommending Ezgif.com to complete this task with the easy to follow steps as discussed below:
You may also like: Top 26 Best Free GIF Makers Online >>
Step 1: Upload GIFs files
First of all, you need to upload your desired GIF files to the Ezgif.com platform. For fast selection of multiple files simply follow Ctrl key-based selection.
This tool also allows users to create a mixture of animated GIF files with simple still images even if they are of different file formats. The conversion process will be carried out automatically by this tool.
Step 2: Adjust frame
As soon as these files will get uploaded, you will find all frames on the editor window. Here you can easily adjust frame delays as well as their order. Note that, GIFs are often ordered in alphabetic order so while reorganizing your files, never forget to rename them accurately. Now hit the “Animate It” button and it will immediately prepare a small preview window on the screen.
Step 3: Optimize your GIFs
Ezgif.com provides a wide range of optimization options to users after this preview. You can easily adjust features as per your requirement by setting desired values for text, speed, effects, rotate, resize and crop, etc. If you do not want to make such changes then you can directly hit the save button. This software tool will take a few seconds to process your project and then a new GIF image with all defined frames will be generated. It will be containing all source images with your preferred ordered sequence. You can easily find it at your destination folder and use it further for entertainment.
Part 2: 3 Best GIF Combiners You Can Make GIFs
1. Filmora Meme Maker - Online GIF Combiner
If you want to combine GIFs online, the Filmora meme maker is your ultimate solution.
It helps you make images, GIFs and video memes directly without watermark. It is totally FREE to use and no signup. You can change text size, color and position to create caption when you are editing. You can also put text inside or outside in GIF.
Just with a few clicks, your GIF is done . Try Now!
2. GIPHY
GIPHY is a GIF combiner where you can find various GIF files to combine. All of the GIFs are funny and interesting to use for people who love to combine GIFs. There are some examples in this site, so you can have the inspiration to combine GIFs if you don’t know where to start. You also can find different styles: reaction, sports, artists and more.
3. PIXEL
If you don’t want to use Photoshop to combine GIFs, here we recommend using PIXEL. You can use it to make GIFs easily online. You can add more than one GIF at one time. Besides, this GIF combiner can also change the GIF size to fit your needs. After the editing is made, you need to click create animation to export GIFs. You should know that GIF size is 32×32 for PIXEL, and 64×64 for SUPER PIXEL.
![]()
Frequently Asked Questions About Combing GIFs
1. Can I Combine A Few Gifs?
Yes, you can. Any photo or video editing software that supports GIF file format allows you to combine one or more GIFs. For instance, Adobe Photoshop users can combine several GIF files and play them simultaneously next to each other, but this task can be overwhelming if you are not familiar with this photo editing software.
An online GIF combiner like Ezgif enables you to combine multiple GIFs from your web browser for free, which makes it a great option for anyone who doesn’t have access to a professional photo or video editing software.
2. How To Merge Several Animated GIFs?
Playing two or more GIFs one after another in a single file is easy, as you just have to arrange them in a way you want them to appear in the final version of the GIF on the editor’s timeline and then export your project as a GIF file.
What’s more, you will be able to remove the frames of the GIFs you don’t want to include in the output file or apply different filters and effects. However, the options you are going to have at your disposal depending on the GIF maker or video editing software you are using to merge several animated GIFs into a single file.
Shanoon Cox
Shanoon Cox is a writer and a lover of all things video.
Follow @Shanoon Cox
How To Create Pinterest Slideshow in Simple Ways
How to Make Pinterest Slideshow in Simple Ways
An easy yet powerful editor
Numerous effects to choose from
Detailed tutorials provided by the official channel
Slideshows are a collection of images arranged together that an audience can quickly swipe through to view the content. Pinterest is known for its one-pin to one post feature. You cannot post more than one image or video in a pin.
Thus, business people could start sharing all of the images or products, services, or articles mostly because it can be stressful to do that. But with the Pinterest slideshow, you can now upload all the images you want to at once in one pin. Moreso, even have people view the pins simultaneously just by swiping through.
In this article
01 [How to display Pinterest’s latest pins in a slideshow? ](#Part 1)
02 [How to upload multiple photos to Pinterest?](#Part 2)
03 [How to display Pinterest’s latest pins in a slideshow? ](#Part 3)
Part 1 How to Display Pinterest Latest Pins in A Slideshow
Using Pinterest’s latest pins in a slideshow is another way to display the latest pins from any Pinterest user or blogger’s blog. Each image is linked to its pin page on Pinterest instead of the board or profile page if you use the Pinterest profile or board widget.
To install this widget, you need the user or board’s RSS feed URL, then use it as the input for a blogger slide show gadget.
Here are the tricky steps to follow for the Pinterest slide show;
Step 1: Constructing Pinterest RSS feed URL
The Pinterest RSS feed URL of a user is different from aboard.
● It would be the user’s profile URL + feed/RSS for a user. To get your Profile URL, click on your username in the top right corner of your screen, and you will see a URL in your web browser’s URL. That is your profile URL.
● For the board URL, you will get that after clicking on the board from the homepage. The URL would appear on your browser’s URL bar.

Step 2: Reformatting the feed for the slideshow gadget:
The RSS feed from step one is not very compatible with the blogger slideshow gadget. It accepts RSS feed in Media RSS format, but you can convert with Yahoo pipe. Simply plug in your feed URL in the Yahoo pipe URL.
You have to replace the value of the feed URL with the feed URL you got in step one and the pin count with the number of pins displayed on the slide show.
With this, you have successfully converted your feed URL to the media version of the Pinterest feed.
Step 3: Add the slideshow widget
Take the following step to add the slideshow widget.
Go to Dashboard > Layout and click on ‘Add A Gadget.’
Now Add, A Gadget window, scroll down and select Slideshow.

Under Source, select Other.

Put in the converted Pinterest RSS feed URL from step 2 into the Feed URL text box.
Click Save and view your blog.
Part 2 How to Upload Multiple Photos to Pinterest
If you want to display multiple photos of your product or share your brand story with pictures, then this is a feature you will grab. Pinterest allows you to display various products at a time. But first, you must also have a business account to do this.
When you upload multiple photos on Pinterest, they are known as carousel pins. This feature is a great advertising tool and will help you during the Pinterest slideshow.
This is because people would see your carousel on their home feed just like any other pin you have posted. They may also tap on the carousel and swipe through the different photos on the carousel. When the pinner saves it, they have kept the entire image.
Here is a step-by-step method to upload multiple photos to Pinterest.
Step 1: Log into your Pinterest
First, log into your Pinterest business account to access the feature. If you do not have a business account, it is elementary to do so. There is no need for you to enter any billing information if you are wondering about that. It is a straightforward process. Just open your account, click on the drop-down menu near your profile picture, see ‘convert to business,’ then upgrade your account, and you are good to go.
You should also ensure that the photos you want to upload are on your computer. If you have originally planned to use it to explain an article visually, then make sure the particular image that represents that article is correctly saved on your computer. The images should be 1:1 or 2:3 in ratio, and the format either ‘png’ or ‘jpeg.’
Add your pictures and upload. If you want to reorder your pin, you can replace or remove images within the carousel.

Step 2: Add Title
Add a title, description, and website of the carousel pin. Your title will be a snippet of what the blog post or article will be about or the recipe’s title. Your description should be the same as your Pinterest text, and you can also choose to let it appear only on your first image on your carousel pin.
Step 3: Select a Board
The last step is to select a board relevant to your carousel pin. Thus, you have your carousel pin and images. However, you cannot view this immediately as in a standard pin or video pin. But you can go back to your board to view your pin when it is ready.
Part 3 How to Make Pinterest Slideshow In 5 Simple Ways
Slideshows are a beautiful way to enhance your Pinterest account and generate more leads on your Profile. If you’ve been wondering if and how you can make slideshows on Pinterest, here’s a guaranteed step you can follow. But then Pinterest slideshows are instead referred to as a showcase.
However, to access this feature, you must first own a business account on Pinterest.
Here are five (5) simple ways you can make Slideshow on Pinterest:
Step 1: Go to your Pinterest Profile
Click settings next to your profile photo in the top right corner.

Step 2: Select Profile
When the Settings window appears, select Profile.

Step 3: Click Edit
Next to Featured Boards, click Edit.

Step 4: Select Boards
After clicking Edit for your Featured Boards, you’ll reach a screen where you may edit the boards you want to highlight. Select which boards you’d like to feature by clicking on each drop-down menu.
Opening a new Pinterest page is a good idea. Scroll down to Boards with the most Pin impressions under Analytics>Profile. These are the boards that I highlighted.

Step 5: Save
When you’ve decided which boards to include in your Featured, click Save.
● Bonus – Wondershare Filmora
With this feature, you can also tweak your Pinterest slides and make them look professional and befitting to your audience using Wondershare Filmora Video Editor .
For Win 7 or later (64-bit)
For macOS 10.12 or later
Wondershare Filmora is an online video editing software with several unique features, including split-screen, freeze-frame, loop images, and videos to help you create top-notch visual content for your brand. With features like the Chroma key, you can easily create special effects in your Pinterest slideshow background.
You can also use color match and video effects to enhance the quality of the slide.
● Ending Thoughts →
● Making a Pinterest slideshow can be confusing if you do not have the correct information. But if you do, it’ll be a great way to spice up your social media content and create more leads for your business.
● Pinterest is a social media platform that keeps growing and adding more features by the day. It is also increasing the number of users per day. Try out the simple steps stated on how to make a slideshow on Pinterest. Finally, by incorporating Filmora in your levelling up plans, you will be able to bring your brand in front of your target customer and present it nicely.
Slideshows are a collection of images arranged together that an audience can quickly swipe through to view the content. Pinterest is known for its one-pin to one post feature. You cannot post more than one image or video in a pin.
Thus, business people could start sharing all of the images or products, services, or articles mostly because it can be stressful to do that. But with the Pinterest slideshow, you can now upload all the images you want to at once in one pin. Moreso, even have people view the pins simultaneously just by swiping through.
In this article
01 [How to display Pinterest’s latest pins in a slideshow? ](#Part 1)
02 [How to upload multiple photos to Pinterest?](#Part 2)
03 [How to display Pinterest’s latest pins in a slideshow? ](#Part 3)
Part 1 How to Display Pinterest Latest Pins in A Slideshow
Using Pinterest’s latest pins in a slideshow is another way to display the latest pins from any Pinterest user or blogger’s blog. Each image is linked to its pin page on Pinterest instead of the board or profile page if you use the Pinterest profile or board widget.
To install this widget, you need the user or board’s RSS feed URL, then use it as the input for a blogger slide show gadget.
Here are the tricky steps to follow for the Pinterest slide show;
Step 1: Constructing Pinterest RSS feed URL
The Pinterest RSS feed URL of a user is different from aboard.
● It would be the user’s profile URL + feed/RSS for a user. To get your Profile URL, click on your username in the top right corner of your screen, and you will see a URL in your web browser’s URL. That is your profile URL.
● For the board URL, you will get that after clicking on the board from the homepage. The URL would appear on your browser’s URL bar.
Step 2: Reformatting the feed for the slideshow gadget:
The RSS feed from step one is not very compatible with the blogger slideshow gadget. It accepts RSS feed in Media RSS format, but you can convert with Yahoo pipe. Simply plug in your feed URL in the Yahoo pipe URL.
You have to replace the value of the feed URL with the feed URL you got in step one and the pin count with the number of pins displayed on the slide show.
With this, you have successfully converted your feed URL to the media version of the Pinterest feed.
Step 3: Add the slideshow widget
Take the following step to add the slideshow widget.
Go to Dashboard > Layout and click on ‘Add A Gadget.’
Now Add, A Gadget window, scroll down and select Slideshow.
Under Source, select Other.
Put in the converted Pinterest RSS feed URL from step 2 into the Feed URL text box.
Click Save and view your blog.
Part 2 How to Upload Multiple Photos to Pinterest
If you want to display multiple photos of your product or share your brand story with pictures, then this is a feature you will grab. Pinterest allows you to display various products at a time. But first, you must also have a business account to do this.
When you upload multiple photos on Pinterest, they are known as carousel pins. This feature is a great advertising tool and will help you during the Pinterest slideshow.
This is because people would see your carousel on their home feed just like any other pin you have posted. They may also tap on the carousel and swipe through the different photos on the carousel. When the pinner saves it, they have kept the entire image.
Here is a step-by-step method to upload multiple photos to Pinterest.
Step 1: Log into your Pinterest
First, log into your Pinterest business account to access the feature. If you do not have a business account, it is elementary to do so. There is no need for you to enter any billing information if you are wondering about that. It is a straightforward process. Just open your account, click on the drop-down menu near your profile picture, see ‘convert to business,’ then upgrade your account, and you are good to go.
You should also ensure that the photos you want to upload are on your computer. If you have originally planned to use it to explain an article visually, then make sure the particular image that represents that article is correctly saved on your computer. The images should be 1:1 or 2:3 in ratio, and the format either ‘png’ or ‘jpeg.’
Add your pictures and upload. If you want to reorder your pin, you can replace or remove images within the carousel.
Step 2: Add Title
Add a title, description, and website of the carousel pin. Your title will be a snippet of what the blog post or article will be about or the recipe’s title. Your description should be the same as your Pinterest text, and you can also choose to let it appear only on your first image on your carousel pin.
Step 3: Select a Board
The last step is to select a board relevant to your carousel pin. Thus, you have your carousel pin and images. However, you cannot view this immediately as in a standard pin or video pin. But you can go back to your board to view your pin when it is ready.
Part 3 How to Make Pinterest Slideshow In 5 Simple Ways
Slideshows are a beautiful way to enhance your Pinterest account and generate more leads on your Profile. If you’ve been wondering if and how you can make slideshows on Pinterest, here’s a guaranteed step you can follow. But then Pinterest slideshows are instead referred to as a showcase.
However, to access this feature, you must first own a business account on Pinterest.
Here are five (5) simple ways you can make Slideshow on Pinterest:
Step 1: Go to your Pinterest Profile
Click settings next to your profile photo in the top right corner.
Step 2: Select Profile
When the Settings window appears, select Profile.
Step 3: Click Edit
Next to Featured Boards, click Edit.
Step 4: Select Boards
After clicking Edit for your Featured Boards, you’ll reach a screen where you may edit the boards you want to highlight. Select which boards you’d like to feature by clicking on each drop-down menu.
Opening a new Pinterest page is a good idea. Scroll down to Boards with the most Pin impressions under Analytics>Profile. These are the boards that I highlighted.
Step 5: Save
When you’ve decided which boards to include in your Featured, click Save.
● Bonus – Wondershare Filmora
With this feature, you can also tweak your Pinterest slides and make them look professional and befitting to your audience using Wondershare Filmora Video Editor .
For Win 7 or later (64-bit)
For macOS 10.12 or later
Wondershare Filmora is an online video editing software with several unique features, including split-screen, freeze-frame, loop images, and videos to help you create top-notch visual content for your brand. With features like the Chroma key, you can easily create special effects in your Pinterest slideshow background.
You can also use color match and video effects to enhance the quality of the slide.
● Ending Thoughts →
● Making a Pinterest slideshow can be confusing if you do not have the correct information. But if you do, it’ll be a great way to spice up your social media content and create more leads for your business.
● Pinterest is a social media platform that keeps growing and adding more features by the day. It is also increasing the number of users per day. Try out the simple steps stated on how to make a slideshow on Pinterest. Finally, by incorporating Filmora in your levelling up plans, you will be able to bring your brand in front of your target customer and present it nicely.
Create Animated Video on Canva
Canva is a simple way—without any graphic design experience—to make professional graphics for social media, newsletters, presentations, business cards, gift certificates, brochures, and more. Flexible design templates offer the ideal layout for your target destination, letting you aim over the design, not the file formatting or the size.
So, can you make an animated video on Canva?
Yes, because Canva lives on the cloud, you can access your graphics from anywhere you can get online while using Canva on the cloud. Learn how you can play, get up, and run with Canva in this short, fun tutorial guide. We’ll discuss adding and editing images, using inbuilt design templates, and working with typography to build your next project with Canva.
In the subsequent sections, we shall learn more about Canva animated videos and how to create one easily on your PC.
In this article
01 [Create an animated video with a Canva template](#Part 1)
02 [Create Canva animated video with your video](#Part 2)
Part 1 Create an animated video with a Canva template
In this section, we’ll explore how to make animated video on Canva, which applies to both the free and pro account of Canva. However, the steps given below got created from Canva’s free account. We suppose that you’ve already created an account on Canva and logged into the platform. So, further steps will proceed as follows:
Go to the Video tab given in the top front panel of Canva and choose any template of your desire. Let’s say we’ve selected the very first template, 1920 × 1080 pixels. There are lots of options provided by Canva from where you can choose your favorites. You can also create a template with a custom size.

After you enter the editing panel, you have the choice of different templates on the left-hand panel. You can search for a template of your choice among them and can create other pages, as shown below. To preview the templates, you can click the Play button with mentioned time duration on the top right corner of the editing screen.

Now, it’s time to add creativity and explore more editing elements within the Canva. You can modify the entire template given and add something of your own.

Now, you can explore various editing Elements given on the left-hand panel, as shown below. There are multiple options available here as well.

You can add some text within the Canva template, and you can search from the left-hand panel. Given above are various options by which you can bold, italicize, and underline the text.

Now, let’s add some music to the video. So, go to the Audio tab and select any one of the options among them. There are different choices for you to explore here as well.

After you’re done, you can hit the Preview Play button on the top and see your project, as shown below.
It’s all done, and you can proceed with the next section.
Part 2 Create Canva animated video with your video
We’ll discuss how to create an animated video by uploading our video in Canva without using any template in this section. After logging in to the Canva account credentials, select the Video tab and choose the different templates offered.
We’ve selected a blank template for the purpose as follows.

Now, you need to head directly towards the Uploads tab and upload your video created over here.

By now, you have most probably got over with uploading your media. Click the uploaded video, and it will automatically enter within the editing panel of Canva, as shown below.

You’re all done now, and it’s all finished! Even though template usage is quite simple, it’s pretty straightforward when you don’t use any ready-made template. However, you can still beautify this simple video with different elements like text, music, etc.
Animation style videos influence people of all ages to whatever generation, or the kind you belong to will be one of them for sure.
Animated ones provoke diverse impacts instead of ordinary videos on the audience utilizing illustration, kinesthetic, etc. But the fact is, due to technological advancements and overexposure to social media sites, we have forgotten its significance.
Want to know some other most accessible software tools that can bring out the artist in you? Here is an alternative that is all you need.
Are you surprised to find that you can go with various animation styles to boost your business or bring out your talents? But are you confused about how to revamp your story and effectively film it? Why should you worry when the best animation maker and Canva’s alternative Wondershare Filmora is here exclusively for you to create fantastic animation videos that could stand out of the box?
Conclusion
Do you aspire to paint with bright colors to videos or want to become an animator? Then, choose animation styles that you most enjoy, find attractive today, start working on them, or create Canva animated videos as the tutorial indicates above. Lastly, don’t forget to give Filmora a chance to upscale your creation and give your animation style a life!
02 [Create Canva animated video with your video](#Part 2)
Part 1 Create an animated video with a Canva template
In this section, we’ll explore how to make animated video on Canva, which applies to both the free and pro account of Canva. However, the steps given below got created from Canva’s free account. We suppose that you’ve already created an account on Canva and logged into the platform. So, further steps will proceed as follows:
Go to the Video tab given in the top front panel of Canva and choose any template of your desire. Let’s say we’ve selected the very first template, 1920 × 1080 pixels. There are lots of options provided by Canva from where you can choose your favorites. You can also create a template with a custom size.
After you enter the editing panel, you have the choice of different templates on the left-hand panel. You can search for a template of your choice among them and can create other pages, as shown below. To preview the templates, you can click the Play button with mentioned time duration on the top right corner of the editing screen.
Now, it’s time to add creativity and explore more editing elements within the Canva. You can modify the entire template given and add something of your own.
Now, you can explore various editing Elements given on the left-hand panel, as shown below. There are multiple options available here as well.
You can add some text within the Canva template, and you can search from the left-hand panel. Given above are various options by which you can bold, italicize, and underline the text.
Now, let’s add some music to the video. So, go to the Audio tab and select any one of the options among them. There are different choices for you to explore here as well.
After you’re done, you can hit the Preview Play button on the top and see your project, as shown below.
It’s all done, and you can proceed with the next section.
Part 2 Create Canva animated video with your video
We’ll discuss how to create an animated video by uploading our video in Canva without using any template in this section. After logging in to the Canva account credentials, select the Video tab and choose the different templates offered.
We’ve selected a blank template for the purpose as follows.
Now, you need to head directly towards the Uploads tab and upload your video created over here.
By now, you have most probably got over with uploading your media. Click the uploaded video, and it will automatically enter within the editing panel of Canva, as shown below.
You’re all done now, and it’s all finished! Even though template usage is quite simple, it’s pretty straightforward when you don’t use any ready-made template. However, you can still beautify this simple video with different elements like text, music, etc.
Animation style videos influence people of all ages to whatever generation, or the kind you belong to will be one of them for sure.
Animated ones provoke diverse impacts instead of ordinary videos on the audience utilizing illustration, kinesthetic, etc. But the fact is, due to technological advancements and overexposure to social media sites, we have forgotten its significance.
Want to know some other most accessible software tools that can bring out the artist in you? Here is an alternative that is all you need.
Are you surprised to find that you can go with various animation styles to boost your business or bring out your talents? But are you confused about how to revamp your story and effectively film it? Why should you worry when the best animation maker and Canva’s alternative Wondershare Filmora is here exclusively for you to create fantastic animation videos that could stand out of the box?
Conclusion
Do you aspire to paint with bright colors to videos or want to become an animator? Then, choose animation styles that you most enjoy, find attractive today, start working on them, or create Canva animated videos as the tutorial indicates above. Lastly, don’t forget to give Filmora a chance to upscale your creation and give your animation style a life!
How to Become a Motion Graphic Designer
Everything You Need to Know About Becoming a Motion Graphic Designer
An easy yet powerful editor
Numerous effects to choose from
Detailed tutorials provided by the official channel
With the rapid change in all the creative industries the role of Motion Graphic Designer has also changed as well as boomed. Here is everything that you must know about motion graphics and a graphic designer.
In this article
01 [What Projects Can a Freelance Motion Graphic Designer Work On? ](#Part 1)
02 [What is Motion Design? Graphic Design Explained](#Part 2)
03 [The Best 5 Awesome Motion Graphic Examples You’ll Wish You Made](#Part 3)
04 [3 Graphic Design Tips for Motion Graphics](#Part 4)
Part 1 What Projects Can a Freelance Motion Graphic Designer Work On?
01What Does a Motion Graphics Designer Do?
You can call them motion designers and they tend to work with the digitally creative industries. This means that they create artwork for television, films or webs. This includes the movie trailers, its clips, title sequence, commercials and much more. They make the use of different graphics, animations, visual effects and many other techniques so that they can bring life into the creations they made.
With the increased reach and demand of visual contents, the motion designers can have a good scope on all the digital and social media platforms. You can help in creating interactive intros, pages and other social media content. If you excelled in your field of work then you may also go for working in Hollywood movies or collaborating with big brands.
02Where Do Motion Graphics Designers Work?
Famous motion graphic designers are supposed to work in offices of motion pictures, software companies, computer systems and advertising agencies too. In such industries, there is a high scope of self-employed workers as this is a sector of skills and at the initial stage you are employed independently and later on you can collaborate with the teams.
You can also work in production houses, technical and scientific service agencies, etc. You can do the job at regular basis or you can be available for the requirements only. Also the motion designers get a chance to meet the clients and managers in order to discuss about the timelines, budgets and the goals’ of the project.
03What Skills Do Motion Graphics Designers Need?
If you want to become a motion graphic designer then you will need to possess the following skills:
● modeling - It is true that calligraphy and are still having an important place in the graphic designing sector but nowadays modeling has a different approach and reach amongst the audience and clients. This is why you must excel in creating the graphics in modeling.
● **Organization -**no matter if you are a freelancer or working in a team, you will need to have a proper organization of your projects as well as clients. The better your organization will the easier your projects can be.
● **Lighting and texturing effects -**your audience is not going to see the model that you have made. Besides they will see the final output and this is the reason why you need to pay a special attention on the texturing and lighting effects. graphics must be made in such a way that it appears to be realistic.
● **Timing and adaptability -**timing and adaptability are two important things that a motion designer needs to understand. As the plan can change any time so the scope and the designing will. You must be able to adapt these changes in a simple way. You will also need to focus on the timing as your graphic and motion designing must have a natural rhythm.
● **Animation perspective -**as you are a motion designer then you need to understand that objects do move and with it you also need to move the light sources. You should be able to design complex movements as well as a single element at a time and then spinning it in many other ways.
04How to Become a Motion Graphics Designer?
After you have gained all the skills to become a graphic designer you will need to follow some proper steps for becoming one and here mentioned are those steps:
● Earn a degree - First of all you should know that you can be a motion graphic designer without earning a degree but it is more beneficial to have one. You may have degrees in relevant fields like digital media, art, designing or such sectors.
● Learn to use the tools - Besides having the degree you should also know to use the required tools correctly. Using the tools is important to create the animations and graphics. Don’t forget to have the trials of the tools and software that you are going to use.
● Create your visual library - While learning the basic concepts you should also start creating your visual library. You may store them as photos, artwork, patterns, GIF animations, music as well as other visual components.
● Improve your knowledge by learning the principles - Learning the principles of animation and graphic is very important for starting your career as a motion designer. The basic principles of graphic motion include arcs, appeal, secondary action, staging, anticipation, squash and stretch, easy in as well as easy out and a lot more.
● Build portfolio and seek collaborations - As the clients mostly rely on the portfolios so you should make your portfolio in such a way that it attracts more clients and let you have effective collaborations. You can tell about your specialty in it so that they can know how you can help them.
● Your client base - once you have made your portfolio then it will become easy for you to have a client base. The best way to do so is to make a portfolio website that you can use to make collaborations. You can even have benefit of prior collaborations so that it helps you in building the clients.
Part 2 What is Motion Design? Graphic Design Explained
01Similarities between Motion Graphics and Graphic Design
In both of these designing sectors, the designer or artist make the use of computers for creating the graphics that are used for the purposes of informing, entertaining and persuading. Both the career options give you a chance to work with many industries and let you use the highly advanced techniques and software for creating and manipulating the effects as well as graphic designs.
If you are willing to pursue either career then you will need to have a good sense of creativity. You will also need to have visual designing skills and with it you should also be able to understand the needs and requirements of your clients. For both the career opportunities, you can work as a freelancer or even collaborate with the production or web companies.
02Differences between Motion Graphics and Graphic Design
Although you can see many similarities between motion graphics and graphic designing but there are many major differences among them too. Here are some of them:
**Animation -**The biggest difference that you may notice between the two is use of animations. Animations are used differently in both the sectors. Motion graphic includes the moving element whereas graphic designing do not involve such animations. Here the designers make the use of still images in the format of print or in any digital format.
**Industry placement -**You have to face industry placement issues while working in the graphic designing sector. When you are working in motion graphics you can work in various sectors of entertainment industry. Majority of the motion graphic designers are working as freelancers however the graphic designers tend to work with the industries like creating clothes, develop logos or designing the websites. These are not mostly self-employed and work in-house of such industries.
Part 3 The Best 5 Awesome Motion Graphic Examples You’ll Wish You Made
● Silent - This video is great to celebrate the cinema magic. You can get the glimpse of cinema in the highly created animations and graphics.
● Bing snapshot - In this video you can get the tutorial of Bing searching app that is owned by Microsoft. The animated and high graphics make it easier to learn that.
● **ICT motion graphics -**Through this video, you can understand the concept of using the data which is business sensitive in the process of production. You can know the paperless management of business productivity
● Google cloud IoT solutions - this video is excellent in conveying messages of hard concepts. In this video, the graphics are used to deliver the message of data collection, storage and distribution of that data.
● **Long live New York -**this animated video is an excellent option that delivers an extraordinary message of organ donations.
Part 4 3 Graphic Design Tips for Motion Graphics
Make the graphics from scratch: It is important to know that making graphic is not much technical. You can even make them using the scratch ideas and materials. You will need not to make many efforts in creating the graphics and you can make the things in a better way too.
Know your goals: you should know your goals before creating the graphics. This is important because goals are very much essential to create the best graphics for your clients and that suits to the needs and requirements of the particular project.
Tools: a motion designer is not complete without the proper tools. Nowadays Wondershare Filmora Video Editor is the best tool used for graphic designing.
For Win 7 or later (64-bit)
For macOS 10.12 or later
● Key Takeaways from This Episode →
● Motion designers are becoming the backbone of each creative industry and there is also a good scope for them in all those sectors. They can work in production houses, web companies, computer companies and a lot more.
● With the increased scope it is also important to know that a motion graphic designer needs to be well-skilled with all the requirements for a particular project.
● There are various tools that can be used for making your work better and with stand the customers’ needs. Wondershare Filmora is such a tool which is highly advanced and makes the video content extraordinary and better.
How to Turn Yourself Into WhatsApp Cartoon
How to Turn Yourself Into a WhatsApp Cartoon
An easy yet powerful editor
Numerous effects to choose from
Detailed tutorials provided by the official channel
Let me ask you a question - how much fun would it be if you could create your own animated stickers and send them to your friends and family members on Whatsapp? I mean, it would make the entire conversation more fun and also add a personal element to the entire chat. Right? Well, to tell you the truth, it is possible to create Whatsapp cartoons and stickers, and the best part is you don’t need any technical expertise to get the job done.
Of course, for a long time, Whatsapp didn’t allow its users to use third-party animated stickers within the messenger. But, recently the messaging platform introduced a custom “stickers pack” feature that now allows people to upload their own stickers and create a dedicated sticker app.
You can also rely on several third-party sticker designer applications to get the job done. So, if you have been looking for a way to use your own face as an animated sticker in Whatsapp, continue reading. In this guide, we’ll walk you through different ways to create and upload a custom cartoon sticker in Whatsapp and make your Whatsapp chats more fun.
In this article
01 [How to Create Your Own Custom Animated Whatsapp Stickers](#Part 1)
02 [How to Create Custom Animated Whatsapp Stickers on Android and iPhone](#Part 2)
Part 1 How to Create Your Own Custom Animated Whatsapp Stickers
Now, before we go any further, I would like to point out that Whatsapp doesn’t allow users to directly create a custom cartoon sticker. There’s no AR feature that’ll turn your face into a cartoon character. So, to use a cartoon Whatsapp profile picture, you’ll have to rely on a third-party tool to get the job done. Based on which platform you use to access Whatsapp, you can choose a wide variety of Whatsapp animated sticker creators and use them to design custom cartoon stickers to make traditional Whatsapp conversations more fun.
One of the easiest ways to create custom stickers for Whatsapp is to use Wondershare Wondershare Filmora Video Editor . Filmora is a full-scale video editing software that’s specifically designed to help editors unleash their creativity and create stunning movies for different platforms.
For Win 7 or later (64-bit)
For macOS 10.12 or later
Filmora is among the most popular video editing tools that many creators use to edit high-quality YouTube vlogs and other types of videos for other platforms. However, Wondershare Filmora is not just a video editing tool. You can also use it to create custom cartoon animations and export them in the desired format within a few seconds. Filmora has a timeline-based interface that makes it relatively easier for editors to streamline the entire editing process while ensuring that none of the shots go missing.

Filmora also has a built-in media store - known as FilmStocks - where you can find hundreds of video effects, animations, animated characters, etc. FilmStocks also offers access to copyright-free music, allowing creators to use high-quality music in their videos without worrying about unexpected copyright strikes.
So, if you are looking for an all-in-one tool to create Whatsapp cartoon stickers, install Wondershare Filmora on your computer and start turning your face into an animated sticker.
Part 1 How to Create Custom Animated Whatsapp Stickers on Android and iPhone
One of the tools that can help you do the job is “Toon Me”. As the name implies, Toon Me is an online platform that’s designed to help users turn their faces into respective cartoon stickers. It’s designed by the developers at Photo Labs - an online platform that makes photo editing a hassle-free task. Since the tool is designed by expert developers, you can expect to get the best results in the end. And, the best part is creating custom cartoon characters using Toon Me is a relatively easy process.

All you have to do is download Toon Me on your phone and use the camera to create a Whatsapp cartoon sticker for yourself. The app is available on both Google Play Store and Apple’s App Store. It means regardless of the smartphone you’re using, Toon Me will allow you to design a Whatsapp cartoon sticker without any hassle.
Like Toon Me, there are dozens of other applications you can install on your smartphone to create personalized animated stickers. One such example is Sticker Maker. Sticker Maker is an Android application that’ll allow you to capture your face and turn it into an animated sticker. It’s compatible across different Android versions and runs smoothly on all Android models. So, if you own an Android device, here’s the step-by-step process to use Sticker Maker to turn your face into an animated sticker.
Step 1 - Start by installing Sticker Maker on your smartphone and launch the application to get started.
Step 2 - On its home screen, click the “Create a New Sticker Pack” option.
Step 3 - Give the sticker pack a name and then, press enter to proceed further.
Step 4 - At this point, you can either select one of the existing pictures from your Gallery or open the camera to click a fresh selfie. Either way, upload the picture and let the app convert it into a corresponding sticker.
Step 5 - You can upload 8-10 pictures at once and create the entire sticker pack instantly. And, once you have successfully created the sticker pack, simply click the “Add to Whatsapp” button.

That’s it; the selected sticker pack will get added to your Whatsapp’s sticker collection and you’ll be able to use them right away. That’s how quick and easy it is to create custom Whatsapp cartoons using different tools on your smartphone.
● Ending Thoughts →
● Using personalized Whatsapp cartoon stickers is a great way to make Whatsapp conversations fun.
● Wondershare Filmora is a feature-packed video editing software that’s designed to help creators create stunning videos and Whatsapp stickers. Its timeline-based interface and built-in media store will allow you to create stunning Whatsapp stickers without any hassle
● You can also download dedicated sticker maker applications on your iPhone or Android devices and use them directly to create visually appealing animated stickers for Whatsapp.
Let me ask you a question - how much fun would it be if you could create your own animated stickers and send them to your friends and family members on Whatsapp? I mean, it would make the entire conversation more fun and also add a personal element to the entire chat. Right? Well, to tell you the truth, it is possible to create Whatsapp cartoons and stickers, and the best part is you don’t need any technical expertise to get the job done.
Of course, for a long time, Whatsapp didn’t allow its users to use third-party animated stickers within the messenger. But, recently the messaging platform introduced a custom “stickers pack” feature that now allows people to upload their own stickers and create a dedicated sticker app.
You can also rely on several third-party sticker designer applications to get the job done. So, if you have been looking for a way to use your own face as an animated sticker in Whatsapp, continue reading. In this guide, we’ll walk you through different ways to create and upload a custom cartoon sticker in Whatsapp and make your Whatsapp chats more fun.
In this article
01 [How to Create Your Own Custom Animated Whatsapp Stickers](#Part 1)
02 [How to Create Custom Animated Whatsapp Stickers on Android and iPhone](#Part 2)
Part 1 How to Create Your Own Custom Animated Whatsapp Stickers
Now, before we go any further, I would like to point out that Whatsapp doesn’t allow users to directly create a custom cartoon sticker. There’s no AR feature that’ll turn your face into a cartoon character. So, to use a cartoon Whatsapp profile picture, you’ll have to rely on a third-party tool to get the job done. Based on which platform you use to access Whatsapp, you can choose a wide variety of Whatsapp animated sticker creators and use them to design custom cartoon stickers to make traditional Whatsapp conversations more fun.
One of the easiest ways to create custom stickers for Whatsapp is to use Wondershare Wondershare Filmora Video Editor . Filmora is a full-scale video editing software that’s specifically designed to help editors unleash their creativity and create stunning movies for different platforms.
For Win 7 or later (64-bit)
For macOS 10.12 or later
Filmora is among the most popular video editing tools that many creators use to edit high-quality YouTube vlogs and other types of videos for other platforms. However, Wondershare Filmora is not just a video editing tool. You can also use it to create custom cartoon animations and export them in the desired format within a few seconds. Filmora has a timeline-based interface that makes it relatively easier for editors to streamline the entire editing process while ensuring that none of the shots go missing.
Filmora also has a built-in media store - known as FilmStocks - where you can find hundreds of video effects, animations, animated characters, etc. FilmStocks also offers access to copyright-free music, allowing creators to use high-quality music in their videos without worrying about unexpected copyright strikes.
So, if you are looking for an all-in-one tool to create Whatsapp cartoon stickers, install Wondershare Filmora on your computer and start turning your face into an animated sticker.
Part 1 How to Create Custom Animated Whatsapp Stickers on Android and iPhone
One of the tools that can help you do the job is “Toon Me”. As the name implies, Toon Me is an online platform that’s designed to help users turn their faces into respective cartoon stickers. It’s designed by the developers at Photo Labs - an online platform that makes photo editing a hassle-free task. Since the tool is designed by expert developers, you can expect to get the best results in the end. And, the best part is creating custom cartoon characters using Toon Me is a relatively easy process.
All you have to do is download Toon Me on your phone and use the camera to create a Whatsapp cartoon sticker for yourself. The app is available on both Google Play Store and Apple’s App Store. It means regardless of the smartphone you’re using, Toon Me will allow you to design a Whatsapp cartoon sticker without any hassle.
Like Toon Me, there are dozens of other applications you can install on your smartphone to create personalized animated stickers. One such example is Sticker Maker. Sticker Maker is an Android application that’ll allow you to capture your face and turn it into an animated sticker. It’s compatible across different Android versions and runs smoothly on all Android models. So, if you own an Android device, here’s the step-by-step process to use Sticker Maker to turn your face into an animated sticker.
Step 1 - Start by installing Sticker Maker on your smartphone and launch the application to get started.
Step 2 - On its home screen, click the “Create a New Sticker Pack” option.
Step 3 - Give the sticker pack a name and then, press enter to proceed further.
Step 4 - At this point, you can either select one of the existing pictures from your Gallery or open the camera to click a fresh selfie. Either way, upload the picture and let the app convert it into a corresponding sticker.
Step 5 - You can upload 8-10 pictures at once and create the entire sticker pack instantly. And, once you have successfully created the sticker pack, simply click the “Add to Whatsapp” button.
That’s it; the selected sticker pack will get added to your Whatsapp’s sticker collection and you’ll be able to use them right away. That’s how quick and easy it is to create custom Whatsapp cartoons using different tools on your smartphone.
● Ending Thoughts →
● Using personalized Whatsapp cartoon stickers is a great way to make Whatsapp conversations fun.
● Wondershare Filmora is a feature-packed video editing software that’s designed to help creators create stunning videos and Whatsapp stickers. Its timeline-based interface and built-in media store will allow you to create stunning Whatsapp stickers without any hassle
● You can also download dedicated sticker maker applications on your iPhone or Android devices and use them directly to create visually appealing animated stickers for Whatsapp.
Finding The Best Animated Profile Picture Maker
DP Animation Maker Tutorial for Finding The Best Animated Profile Picture Maker
An easy yet powerful editor
Numerous effects to choose from
Detailed tutorials provided by the official channel
Social media is getting more and more competitive, and it’s crucial to make a good first impression. Animated profile pictures grab the user’s attention and give the added boost that helps you become different in a good way.
This article will show you the ten top animated profile picture makers using which you can create awesome profile pictures with ease.
In this article
01 [What does “PFP” mean?](#Part 1)
02 [The 10 Best Animated Profile Picture Makers for Making awesome profile pictures](#Part 2)
03 [What Happens if You Make Animated Video Instead of Pictures?](#Part 3)
Part 1 What does “PFP” mean?
PFP stands for “Picture For Profile” or, more commonly, “Profile Picture.” It is the first thing people see when they visit your profile on a social networking website. The profile owners typically upload their own images on Facebook, Twitter, Instagram, WhatsApp, and others at different times during the year or when anything significant happens.
Adding a photo gives your followers a chance to put a face to the name and an idea of what you look like. This allows them to better relate to you and creates a strong foundation for conversations and any other type of interactions.
Part 2 The 10 Best Animated Profile Picture Makers for Making awesome profile pictures
Animated profile pictures add fun and steal the show when you add them to your social accounts. What’s more, it can be much easier to create a WhatsApp animated profile picture when you’re using the right tool. Here in this post, we present you with the ten best animated profile picture makers for your reference and use.
01Canva
Canva lets you make an animated profile picture as simple as “drag and drop” without any creativity. Canva’s unique WYSIWYG animation technique makes it very straightforward to create your own avatar - making awesome animated gifs has never been simpler.
The UI is simple enough that even the smallest of details are well thought out. The captions are editable, so you easily customize the words appearing in each awesome gif.
Canva, one of the best animated profile picture makers, is a great alternative for those who prefer to work and create using the browser and without downloading and installing any software. You can also access Canva directly from any mobile device or tablet, making it convenient for you to share creative greetings and social media posts with your friends and loved ones.

●Pros:
● A near-unlimited number of stunning pre-built templates for a wide range of usage
● Beautiful and easy-to-use application interface
● The tool gets frequent bug fixes and updates with the latest features and even more templates
Cons:
● The free plan comes with a pretty meager cloud storage capacity
● No vector design is possible
● Lack of the ability to connect more than one Facebook login for those who handle personal and business pages separately
02Placeit
Are you looking for an easy way to make a simple but effective WhatsApp animated profile picture? Go to Placeit.net, and be creative with its wide range of customizable attractive pre-built templates.
Templates are hand-drawn and professionally designed. With thousands of animated templates, you can create a profile picture in a jiffy. Placeit lets you post fun and exciting photos that attract attention and grow your fanbase in no time.
Make your profile picture come to life with this one-of-a-kind animated profile picture maker! Using its proprietary image editor, you will be able to spread smiles, laughter, surprise, and much more right in seconds.

Pros:
● The overall UI is fairly streamlined – making an animated profile picture should take more than just a few clicks
● From color schemes to changing text fonts – everything is customizable
● Templates are ultra-high-quality
Cons:
● A bit expensive monthly plan
● Pay-per-item cost is definitely not affordable
● No option to add your own custom font
03PicMonkey
PicMonkey is a powerful yet simple online photo editor that lets you showcase your creativity and brand through animated profile pictures, cover photos, advertisements of all kinds, and more. In addition to its easy-to-learn features, PicMonkey offers endless possibilities for amateurs and professionals alike!
To be a meaningful part of the social media world, creating your own profile picture is not only fun but also a smart way to show your individuality. And with PicMonkey’s image editor, crafting the perfect profile picture doesn’t have to be complicated. With over 15 million users, PicMonkey is a leading photo editing software that has been helping individuals create drool-worthy designs in minutes.

Pros:
● The interface is user-friendly, and the tool offers an easy-to-learn feature set
● With a plethora of customizable in-built templates, you can generate some fresh animated profile pictures every time you try the app
● The developer keeps the tool updated with new resources and features always
Cons:
● You cannot work on more than one template simultaneously
● Lacks a proper and detailed user guide with useful tips
● Without paying for the Pro version, you can’t access some super-handy basic features
04Powerpuff Yourself
Are you looking for an easy way to make your own avatar? Powerpuff Yourself is a user-friendly tool that produces realistic anime avatars based on your photos. The features that you can expect are –
● Anime avatars, each with six different skin tones.
● Female or male avatars,
● Unique background based on your answers to the questions, and
● About 70 different hairstyles.
Make your very own anime avatar with this cute animated profile picture generator by simply selecting mouth, eyes, glasses, hair, and dress for your preferred character. After choosing the scene for the background, answer some questions about yourself and press the button to create your avatar!

Pros:
● Choose from a variety of combinations of face, eyes, hairstyles, clothes, and accessories
● Share your fresh customized avatar with just a single click
● Available in all major languages
Cons:
● No option to upload your own custom design
● The generated avatar can’t be white-labeled as the end result gets saved with the CN logo
● While the background can be animated, you are not allowed to animate the main character
05Pixlr
Change the way you see yourself on social networks With Pixlr. It is a free online profile picture maker, tablet, and mobile photo editor with all the amazing editing features one can expect only from professional tools like Photoshop. Ever wonder how your photos would look in black-and-white or what that flower in your hand looks like as a cartoon? Go to pixlr.com, log in with Facebook to create your free account, and you will be surprised by what you can do with its host of powerful self-edit features.
Complete your online persona with the help of Pixlr, now available on browser, Android, and iOS! Use the Pixlr app to take a picture and then, with a few taps or mouse clicks, enhance and decorate it. Add funny text, use special effects filters, crop and rotate, remove red-eye - it’s all there in one app! Make an impact with your profile picture and be recognized as an expert in your field.

Pros:
● Offers a simple yet powerful browser-based graphics editing experience
● A great collection of multipurpose templates designed to keep the modern social platforms in mind
● Plenty of super useful features are available in the free version
Cons:
● Some annoying glitches in the middle of editing while shifting from one tab to another
● A fair number of options work slowly due to bugs that need to be ironed out
● The doodle tool offers no “brush” feature
06Animate Me
Animate Me is a new application for iPhone that assists you with creating animated images. It has an easy-to-use interface to make animations with photos so that you can design your own animated image in a jiffy without any hassle.
The tool has two modes to create images. One of the modes is Edit mode, where you can edit your work immediately after you finish drawing. And another is Camera mode, which allows you to make a hand-drawn animation out of videos already shot. This dp animation maker tutorial can be easy for you to understand.
Touch, draw and share your animation - with Animate Me, there is no longer any need for professional graphics tools. Create animation from your photos, GIF files, or live camera action with just a touch, and share it with family and friends by email, message or post it to your Facebook wall.

Pros:
● Straightforward user interface
● Add images from your device or Facebook album or choose one from the app’s pre-built collection
● Add exciting cool features and cute sounds to your images
Cons:
● The free version of the tool has a limited number of options
● Frequent updates come with new bugs
● Some users complained of “bad words” even in the kid’s voice
07Picstun
Do you want to make awesome animated videos with your photos easily? Picstun is the best photo animator app in the Android market which can add powerful video effects to a picture free and instantaneously. It produces beautiful cartoon effects for your photos and video, allowing you to tell animated video stories in gorgeous styles instead of sharing static pictures.
You can learn this simple yet professional photo animator easily. Users of PicStun are able to create an animated video with a variety of over 3,000 pictures in various topics and animation effects.
The best thing about this application is that you can use your gallery images, too, on which the animation will be superimposed. There are many other nifty features in this next-generation picture animation maker tool. For instance, adding text, effects, music, and more right onto your pictures is possible directly from the application interface.

Pros:
● A wide range of animation effects are available
● Allows you to preview the result before you finally save it and share the same with the world
● One-click social network sharing
Cons:
● The application often crashes when trying to import multiple images into it
● A limited number of effects beg for an update with fresh animation possibilities
● Lacks proper instructions for the new users
08Loopsie
Loopsie allows you to create picture animation using your own photos. Add emojis, text, drawings, and speech bubbles to your photos in a matter of seconds to create amazing GIF images that can be used for messages or for sharing.
Are you tired of boring photos? This animated profile picture maker lets you animate your images! Just add one of the characters to your photo and give them an animated life. Loopsie supports video creation too! Add video clips and photos, pick a theme for your video, and Loopsie will do the work for you. Now, you can also hashtag on Facebook or Twitter to show off your design like the pros!

Pros:
● An easy-to-use interface offers a short learning curve
● The resolutions of end-results are readily social media compatible
● Can share on all major social networking sites directly within the app
Cons:
● While it allows the user to import their own videos, they get ranked randomly inside the app
● A new user can find it a little difficult to use the software without enough instruction set
● Recent updates added too many gimmicky filters without actually improving the experience much
09PFPmaker
PFPmaker is the original animated profile picture maker that allows adding eye-catching animations to your profile images on major social platforms like Instagram, Facebook, Twitter, and more. With PFPMaker, creating personalized animated gifs of yourself is a piece of cake. Simply decide what you want in your animation, upload some images (or take from the in-built collection inside the app), and PFPMaker will make it happen.
Increase your brand awareness, get more likes and shares, and drive more traffic to your website - all by making custom animated profile pictures using PFPmaker. Now you can create a professional identity in a matter of seconds and acquire new followers, fans, or customers!

Pros:
● Generates strikingly gorgeous animated profile images in seconds
● Its AI-powered background removal tool works awesomely well
● Loads of customization option makes this a cool nifty tool
Cons:
● No native Android or iOS app is available; everything is browser-based
● Competitors offer more animation possibilities
● While users can request a specific feature, it gets implemented rarely
10Animated GIF Maker
Animated GIF Maker is an online tool to create animated gif pictures from the user’s photos and images. The tool can convert image files up to 6MB in size, with a maximum of 5 frames. However, files greater than 3MB in size will not be displayed on the result page
Make a photo animation! Upload your own images, and Animated Gif Maker will merge them into a cool animated GIF. You can use this tool to create an animated profile picture for your social page or just have fun making short videos with your friends’ photos. Adjust the file format, resize the image and add text to your new animated picture – whatever way you want to customize the result is possible by this little tool!

Pros:
● Allows a user to upload more than one file at the same time
● Images can be converted into multiple formats easily
● Cropping and resizing the uploaded pictures is a breeze
Cons:
● File upload size restricted to 6 MB
● No native smartphone app
● The browser-based interface offers limited functionalities
Key Takeaways from This Episode
● Keeping your Facebook, Twitter, and other social profile photos fresh is vital if you want to make a good impression.
● Or perhaps you just want to have an image that is up to date and relevant. But have you ever tried to use an animated profile picture maker?
● If not, this is the right time you choose from one of our preferred tools from this article and surprise your friends with your new whatsapp animated profile picture today.
Social media is getting more and more competitive, and it’s crucial to make a good first impression. Animated profile pictures grab the user’s attention and give the added boost that helps you become different in a good way.
This article will show you the ten top animated profile picture makers using which you can create awesome profile pictures with ease.
In this article
01 [What does “PFP” mean?](#Part 1)
02 [The 10 Best Animated Profile Picture Makers for Making awesome profile pictures](#Part 2)
03 [What Happens if You Make Animated Video Instead of Pictures?](#Part 3)
Part 1 What does “PFP” mean?
PFP stands for “Picture For Profile” or, more commonly, “Profile Picture.” It is the first thing people see when they visit your profile on a social networking website. The profile owners typically upload their own images on Facebook, Twitter, Instagram, WhatsApp, and others at different times during the year or when anything significant happens.
Adding a photo gives your followers a chance to put a face to the name and an idea of what you look like. This allows them to better relate to you and creates a strong foundation for conversations and any other type of interactions.
Part 2 The 10 Best Animated Profile Picture Makers for Making awesome profile pictures
Animated profile pictures add fun and steal the show when you add them to your social accounts. What’s more, it can be much easier to create a WhatsApp animated profile picture when you’re using the right tool. Here in this post, we present you with the ten best animated profile picture makers for your reference and use.
01Canva
Canva lets you make an animated profile picture as simple as “drag and drop” without any creativity. Canva’s unique WYSIWYG animation technique makes it very straightforward to create your own avatar - making awesome animated gifs has never been simpler.
The UI is simple enough that even the smallest of details are well thought out. The captions are editable, so you easily customize the words appearing in each awesome gif.
Canva, one of the best animated profile picture makers, is a great alternative for those who prefer to work and create using the browser and without downloading and installing any software. You can also access Canva directly from any mobile device or tablet, making it convenient for you to share creative greetings and social media posts with your friends and loved ones.
●Pros:
● A near-unlimited number of stunning pre-built templates for a wide range of usage
● Beautiful and easy-to-use application interface
● The tool gets frequent bug fixes and updates with the latest features and even more templates
Cons:
● The free plan comes with a pretty meager cloud storage capacity
● No vector design is possible
● Lack of the ability to connect more than one Facebook login for those who handle personal and business pages separately
02Placeit
Are you looking for an easy way to make a simple but effective WhatsApp animated profile picture? Go to Placeit.net, and be creative with its wide range of customizable attractive pre-built templates.
Templates are hand-drawn and professionally designed. With thousands of animated templates, you can create a profile picture in a jiffy. Placeit lets you post fun and exciting photos that attract attention and grow your fanbase in no time.
Make your profile picture come to life with this one-of-a-kind animated profile picture maker! Using its proprietary image editor, you will be able to spread smiles, laughter, surprise, and much more right in seconds.
Pros:
● The overall UI is fairly streamlined – making an animated profile picture should take more than just a few clicks
● From color schemes to changing text fonts – everything is customizable
● Templates are ultra-high-quality
Cons:
● A bit expensive monthly plan
● Pay-per-item cost is definitely not affordable
● No option to add your own custom font
03PicMonkey
PicMonkey is a powerful yet simple online photo editor that lets you showcase your creativity and brand through animated profile pictures, cover photos, advertisements of all kinds, and more. In addition to its easy-to-learn features, PicMonkey offers endless possibilities for amateurs and professionals alike!
To be a meaningful part of the social media world, creating your own profile picture is not only fun but also a smart way to show your individuality. And with PicMonkey’s image editor, crafting the perfect profile picture doesn’t have to be complicated. With over 15 million users, PicMonkey is a leading photo editing software that has been helping individuals create drool-worthy designs in minutes.
Pros:
● The interface is user-friendly, and the tool offers an easy-to-learn feature set
● With a plethora of customizable in-built templates, you can generate some fresh animated profile pictures every time you try the app
● The developer keeps the tool updated with new resources and features always
Cons:
● You cannot work on more than one template simultaneously
● Lacks a proper and detailed user guide with useful tips
● Without paying for the Pro version, you can’t access some super-handy basic features
04Powerpuff Yourself
Are you looking for an easy way to make your own avatar? Powerpuff Yourself is a user-friendly tool that produces realistic anime avatars based on your photos. The features that you can expect are –
● Anime avatars, each with six different skin tones.
● Female or male avatars,
● Unique background based on your answers to the questions, and
● About 70 different hairstyles.
Make your very own anime avatar with this cute animated profile picture generator by simply selecting mouth, eyes, glasses, hair, and dress for your preferred character. After choosing the scene for the background, answer some questions about yourself and press the button to create your avatar!
Pros:
● Choose from a variety of combinations of face, eyes, hairstyles, clothes, and accessories
● Share your fresh customized avatar with just a single click
● Available in all major languages
Cons:
● No option to upload your own custom design
● The generated avatar can’t be white-labeled as the end result gets saved with the CN logo
● While the background can be animated, you are not allowed to animate the main character
05Pixlr
Change the way you see yourself on social networks With Pixlr. It is a free online profile picture maker, tablet, and mobile photo editor with all the amazing editing features one can expect only from professional tools like Photoshop. Ever wonder how your photos would look in black-and-white or what that flower in your hand looks like as a cartoon? Go to pixlr.com, log in with Facebook to create your free account, and you will be surprised by what you can do with its host of powerful self-edit features.
Complete your online persona with the help of Pixlr, now available on browser, Android, and iOS! Use the Pixlr app to take a picture and then, with a few taps or mouse clicks, enhance and decorate it. Add funny text, use special effects filters, crop and rotate, remove red-eye - it’s all there in one app! Make an impact with your profile picture and be recognized as an expert in your field.
Pros:
● Offers a simple yet powerful browser-based graphics editing experience
● A great collection of multipurpose templates designed to keep the modern social platforms in mind
● Plenty of super useful features are available in the free version
Cons:
● Some annoying glitches in the middle of editing while shifting from one tab to another
● A fair number of options work slowly due to bugs that need to be ironed out
● The doodle tool offers no “brush” feature
06Animate Me
Animate Me is a new application for iPhone that assists you with creating animated images. It has an easy-to-use interface to make animations with photos so that you can design your own animated image in a jiffy without any hassle.
The tool has two modes to create images. One of the modes is Edit mode, where you can edit your work immediately after you finish drawing. And another is Camera mode, which allows you to make a hand-drawn animation out of videos already shot. This dp animation maker tutorial can be easy for you to understand.
Touch, draw and share your animation - with Animate Me, there is no longer any need for professional graphics tools. Create animation from your photos, GIF files, or live camera action with just a touch, and share it with family and friends by email, message or post it to your Facebook wall.
Pros:
● Straightforward user interface
● Add images from your device or Facebook album or choose one from the app’s pre-built collection
● Add exciting cool features and cute sounds to your images
Cons:
● The free version of the tool has a limited number of options
● Frequent updates come with new bugs
● Some users complained of “bad words” even in the kid’s voice
07Picstun
Do you want to make awesome animated videos with your photos easily? Picstun is the best photo animator app in the Android market which can add powerful video effects to a picture free and instantaneously. It produces beautiful cartoon effects for your photos and video, allowing you to tell animated video stories in gorgeous styles instead of sharing static pictures.
You can learn this simple yet professional photo animator easily. Users of PicStun are able to create an animated video with a variety of over 3,000 pictures in various topics and animation effects.
The best thing about this application is that you can use your gallery images, too, on which the animation will be superimposed. There are many other nifty features in this next-generation picture animation maker tool. For instance, adding text, effects, music, and more right onto your pictures is possible directly from the application interface.
Pros:
● A wide range of animation effects are available
● Allows you to preview the result before you finally save it and share the same with the world
● One-click social network sharing
Cons:
● The application often crashes when trying to import multiple images into it
● A limited number of effects beg for an update with fresh animation possibilities
● Lacks proper instructions for the new users
08Loopsie
Loopsie allows you to create picture animation using your own photos. Add emojis, text, drawings, and speech bubbles to your photos in a matter of seconds to create amazing GIF images that can be used for messages or for sharing.
Are you tired of boring photos? This animated profile picture maker lets you animate your images! Just add one of the characters to your photo and give them an animated life. Loopsie supports video creation too! Add video clips and photos, pick a theme for your video, and Loopsie will do the work for you. Now, you can also hashtag on Facebook or Twitter to show off your design like the pros!
Pros:
● An easy-to-use interface offers a short learning curve
● The resolutions of end-results are readily social media compatible
● Can share on all major social networking sites directly within the app
Cons:
● While it allows the user to import their own videos, they get ranked randomly inside the app
● A new user can find it a little difficult to use the software without enough instruction set
● Recent updates added too many gimmicky filters without actually improving the experience much
09PFPmaker
PFPmaker is the original animated profile picture maker that allows adding eye-catching animations to your profile images on major social platforms like Instagram, Facebook, Twitter, and more. With PFPMaker, creating personalized animated gifs of yourself is a piece of cake. Simply decide what you want in your animation, upload some images (or take from the in-built collection inside the app), and PFPMaker will make it happen.
Increase your brand awareness, get more likes and shares, and drive more traffic to your website - all by making custom animated profile pictures using PFPmaker. Now you can create a professional identity in a matter of seconds and acquire new followers, fans, or customers!
Pros:
● Generates strikingly gorgeous animated profile images in seconds
● Its AI-powered background removal tool works awesomely well
● Loads of customization option makes this a cool nifty tool
Cons:
● No native Android or iOS app is available; everything is browser-based
● Competitors offer more animation possibilities
● While users can request a specific feature, it gets implemented rarely
10Animated GIF Maker
Animated GIF Maker is an online tool to create animated gif pictures from the user’s photos and images. The tool can convert image files up to 6MB in size, with a maximum of 5 frames. However, files greater than 3MB in size will not be displayed on the result page
Make a photo animation! Upload your own images, and Animated Gif Maker will merge them into a cool animated GIF. You can use this tool to create an animated profile picture for your social page or just have fun making short videos with your friends’ photos. Adjust the file format, resize the image and add text to your new animated picture – whatever way you want to customize the result is possible by this little tool!
Pros:
● Allows a user to upload more than one file at the same time
● Images can be converted into multiple formats easily
● Cropping and resizing the uploaded pictures is a breeze
Cons:
● File upload size restricted to 6 MB
● No native smartphone app
● The browser-based interface offers limited functionalities
Key Takeaways from This Episode
● Keeping your Facebook, Twitter, and other social profile photos fresh is vital if you want to make a good impression.
● Or perhaps you just want to have an image that is up to date and relevant. But have you ever tried to use an animated profile picture maker?
● If not, this is the right time you choose from one of our preferred tools from this article and surprise your friends with your new whatsapp animated profile picture today.
Also read:
- New In 2024, Best 15 Anime Fonts-Find Your Favorite One
- Updated How to Reduce GIF Size and Best GIF Resizers
- In 2024, Guide on How to Create GIF in WhatsApp iPhone
- New How To Remove The Endless Loop From Animated GIF
- New In 2024, Top 10 Best Photo to Animation Converters That Give You an Advantage
- Updated 10 Caricature Makers to Turn Your Photo to Caricature Effects
- Updated 2024 Approved Best Websites to Download Animated GIFs for Free-Free GIF Download
- Updated 10 Must Watch Netflix Cartoon Series
- 2024 Approved Most Effective Ways to Set WhatsApp Status
- New 12 Top Stop Motion Studios Worth Recommending for 2024
- 12 Animation Video Maker That Can Triple Conversion Rates for 2024
- Dead Simple Guide to Create New and Exciting Blackboard Animation for 2024
- 2024 Approved 10 Realistic Cartoon Characters You Would Run Away From if You Met in Real Life
- New In 2024, Little Known Techniques of Motion Graphics in Premiere Pro
- New How to Make Creative Animation Videos for 2024
- 4 Most-Known Ways to Find Someone on Tinder For Apple iPhone SE by Name | Dr.fone
- How To Fake GPS On Xiaomi 14 For Mobile Legends? | Dr.fone
- In 2024, Apple ID Locked for Security Reasons On Apple iPhone 13 mini? Find the Best Solution Here
- Remove FRP Lock on Xiaomi 13T
- How To Do Vivo V30 Lite 5G Screen Sharing | Dr.fone
- How to Screen Mirroring Tecno Spark 20 Pro+? | Dr.fone
- How To Get Out of DFU Mode on iPhone 7 Plus? | Dr.fone
- Complete guide for recovering contacts files on Honor Magic Vs 2.
- In 2024, How Do I Stop Someone From Tracking My Nokia G310? | Dr.fone
- 3 Ways to Fake GPS Without Root On Honor X50i+ | Dr.fone
- 3 Facts You Need to Know about Screen Mirroring Lava Yuva 3 Pro | Dr.fone
- How To Remove Flashlight From Apple iPhone 14 Plus Lock Screen | Dr.fone
- In 2024, Top 15 Apps To Hack WiFi Password On Nokia C22
- Title: 2024 Approved Learn How to Create Adobe 3D Animation
- Author: Elon
- Created at : 2024-05-19 03:04:34
- Updated at : 2024-05-20 03:04:34
- Link: https://animation-videos.techidaily.com/2024-approved-learn-how-to-create-adobe-3d-animation/
- License: This work is licensed under CC BY-NC-SA 4.0.
