

2024 Approved Tutorial on Making Unity 2D Animation
Beginner Tutorial on Making Unity 2D Animation
Beginner Tutorial on Making Unity 2D Animation
An easy yet powerful editor
Numerous effects to choose from
Detailed tutorials provided by the official channel
Now, ideally, Unity is considered to be a suitable tool for 3D games that have too many animated elements. But, this doesn’t mean that you cannot design 2D animations with Unity.
In this guide, we are going to show you how to get started with 2D animations in Unity and incorporate them into your games to enhance the overall gameplay.
In this article
01 [Can Unity Be Used for 2D Animation?](#Part 1)
02 [How Do You Make a 2D Animation in Unity?](#Part 2)
Part 1 Can Unity Be Used for 2D Animation?
First, things first; can Unity be used for 2D animations. The answer is Yes! Being a full-scale gaming engine, developers/designers can use Unity to create stunning Unity 2D animations for their games. The tool has dedicated 2D animation packages that contain all the elements you’ll need to create high-quality 2D animations for your games.
Keep in mind that for each object, you’ll have to create a separate 2D sprite sheet and use it to configure the 2D animation. However, there are other 2D animation packages that you can install, using sprite sheets is the most common method to get the job done. The latest versions of Unity also offer a dedicated Stripe library where you can add multiple Stripe Sheets and it becomes relatively easier to manage them.
With the Sprite library, 2D animations with Unity becomes a hassle-free job. Designers can even manage dozens of 2D animations without any hassle. The Sprite editor will also let you control the overall movement of different moving objects in your animation and make it look more sleek. In general, if you are planning to create 2D animations for your videos or even a dedicated mobile game, Unity can be a suitable software for the job.
Part 2 How Do You Make a 2D Animation in Unity?
To create a 2D animation with Unity, the first step would be to create a dedicated Sprite sheet. Now, you can use a wide variety of third-party programs to create the desired Sprite sheet. In general, it depends on the project requirements and the personal preferences of the designer himself. However, whichever tool you use to create the Stripe sheets, make sure that the final image is a transparent PNG file as it’ll make your job much easier while animating objects in Unity.
After you have successfully designed the stripe (a transparent image file) in an external application, the next step would be to import it to Unity. When you import the Stripe file, make sure to create a separate Sprite folder so that you can easily manage all these files in one place. Also, a dedicated Stripe folder will allow you to keep a check on each Stripe file in a hassle-free manner.

While importing 2D animations into Unity, you can also configure its settings to ensure that it matches the overall game design. Ideally, we recommend keeping the Pixels Per Unit to the same size as all your visual components. This will allow you to maintain the desired consistency throughout the project and make it visually enticing.
Now, before proceeding any further, make sure to switch to the “Stripe Editor” window. With the “Stripe Editor”, you’ll be able to control the overall settings of each animation individually and control the movement to make it look crisper. In the Stripe window, you can also adjust the slice settings and save your work to avoid any potential data loss.
At this point, you can move towards creating the 2D animation with Unity. To do this, you’ll have to bring both the Animation and the Animator tabs to UnityParts editing panel. You can make them visible by tapping the “Windows” option on your screen.

That’s it; a timeline-based editing panel will appear on your screen. From here onwards, you can get started with animating the object. Each animation will depend on your specific game requirements. So, feel free to unleash your creativity and use different elements of Unity to bring your 2D animations to life.
Part 3 Part 3 Creating 2D Animations for Your Videos - An Effective Solution for Video Editors
Now, when it comes to creating 2D animations for videos, you may not want to use a tool like Unity to get the job done. Why? Because Unity is more suitable for animating objects for games. Not to mention, Unity has a steep learning curve and if you are not an experienced Unity developer, you may fail to create a 2D animation properly.
So, if you only need a 2D animation for videos, we have a better alternative for the job. Instead of Unity, you can use Wondershare Filmora Video Editor for the job. It’s a full-scale video editing software that’s specifically designed to edit high-quality videos. Whether you are a YouTube or simply edit videos for your clients, using Wondershare Filmora will help you showcase your creativity more effectively.

Filmora has a built-in media library that offers a plethora of ready-to-use animation templates as well as video effects. You can import these animations into your video with a single click and enhance the overall quality of the video to drive better engagement. These animations are also customizable, which means you can tweak their appearance to match the overall theme of your video itself. The media player also offers audio effects that’ll make your videos more dramatic.
And, finally, you’ll also find a wide variety of advanced editing options such as keyframing, motion detection, and green screen editing. All these features will allow you to uplift the production quality of your videos and engage potential viewers more effectively.
For Win 7 or later (64-bit)
For macOS 10.12 or later
A few key features of Filmora that make it the most reliable video editing software include:
● Thousands of ready-to-use animation templates and video effects
● Easy-to-use timeline-based editing panel
● Dedicated audio editor to control the sound quality
● Cross-platform compatibility
So, if you are also planning to launch a high-scale video for YouTube or any other platform by adding
Key Takeaways from This Episode
● Creating 2D animations with Unity is possible, however, you must be an expert game developer with extensive experience in Unity game development
● To create Unity 2D animations, you’ll have to use Sprite Sheets and then import them into Unity to turn them into animation.
● Now, if you are a regular video editor and only want to create 2D animations for videos, you can also use full-scale software such as Wondershare Filmora Pro.
Now, ideally, Unity is considered to be a suitable tool for 3D games that have too many animated elements. But, this doesn’t mean that you cannot design 2D animations with Unity.
In this guide, we are going to show you how to get started with 2D animations in Unity and incorporate them into your games to enhance the overall gameplay.
In this article
01 [Can Unity Be Used for 2D Animation?](#Part 1)
02 [How Do You Make a 2D Animation in Unity?](#Part 2)
Part 1 Can Unity Be Used for 2D Animation?
First, things first; can Unity be used for 2D animations. The answer is Yes! Being a full-scale gaming engine, developers/designers can use Unity to create stunning Unity 2D animations for their games. The tool has dedicated 2D animation packages that contain all the elements you’ll need to create high-quality 2D animations for your games.
Keep in mind that for each object, you’ll have to create a separate 2D sprite sheet and use it to configure the 2D animation. However, there are other 2D animation packages that you can install, using sprite sheets is the most common method to get the job done. The latest versions of Unity also offer a dedicated Stripe library where you can add multiple Stripe Sheets and it becomes relatively easier to manage them.
With the Sprite library, 2D animations with Unity becomes a hassle-free job. Designers can even manage dozens of 2D animations without any hassle. The Sprite editor will also let you control the overall movement of different moving objects in your animation and make it look more sleek. In general, if you are planning to create 2D animations for your videos or even a dedicated mobile game, Unity can be a suitable software for the job.
Part 2 How Do You Make a 2D Animation in Unity?
To create a 2D animation with Unity, the first step would be to create a dedicated Sprite sheet. Now, you can use a wide variety of third-party programs to create the desired Sprite sheet. In general, it depends on the project requirements and the personal preferences of the designer himself. However, whichever tool you use to create the Stripe sheets, make sure that the final image is a transparent PNG file as it’ll make your job much easier while animating objects in Unity.
After you have successfully designed the stripe (a transparent image file) in an external application, the next step would be to import it to Unity. When you import the Stripe file, make sure to create a separate Sprite folder so that you can easily manage all these files in one place. Also, a dedicated Stripe folder will allow you to keep a check on each Stripe file in a hassle-free manner.
While importing 2D animations into Unity, you can also configure its settings to ensure that it matches the overall game design. Ideally, we recommend keeping the Pixels Per Unit to the same size as all your visual components. This will allow you to maintain the desired consistency throughout the project and make it visually enticing.
Now, before proceeding any further, make sure to switch to the “Stripe Editor” window. With the “Stripe Editor”, you’ll be able to control the overall settings of each animation individually and control the movement to make it look crisper. In the Stripe window, you can also adjust the slice settings and save your work to avoid any potential data loss.
At this point, you can move towards creating the 2D animation with Unity. To do this, you’ll have to bring both the Animation and the Animator tabs to UnityParts editing panel. You can make them visible by tapping the “Windows” option on your screen.
That’s it; a timeline-based editing panel will appear on your screen. From here onwards, you can get started with animating the object. Each animation will depend on your specific game requirements. So, feel free to unleash your creativity and use different elements of Unity to bring your 2D animations to life.
Part 3 Part 3 Creating 2D Animations for Your Videos - An Effective Solution for Video Editors
Now, when it comes to creating 2D animations for videos, you may not want to use a tool like Unity to get the job done. Why? Because Unity is more suitable for animating objects for games. Not to mention, Unity has a steep learning curve and if you are not an experienced Unity developer, you may fail to create a 2D animation properly.
So, if you only need a 2D animation for videos, we have a better alternative for the job. Instead of Unity, you can use Wondershare Filmora Video Editor for the job. It’s a full-scale video editing software that’s specifically designed to edit high-quality videos. Whether you are a YouTube or simply edit videos for your clients, using Wondershare Filmora will help you showcase your creativity more effectively.
Filmora has a built-in media library that offers a plethora of ready-to-use animation templates as well as video effects. You can import these animations into your video with a single click and enhance the overall quality of the video to drive better engagement. These animations are also customizable, which means you can tweak their appearance to match the overall theme of your video itself. The media player also offers audio effects that’ll make your videos more dramatic.
And, finally, you’ll also find a wide variety of advanced editing options such as keyframing, motion detection, and green screen editing. All these features will allow you to uplift the production quality of your videos and engage potential viewers more effectively.
For Win 7 or later (64-bit)
For macOS 10.12 or later
A few key features of Filmora that make it the most reliable video editing software include:
● Thousands of ready-to-use animation templates and video effects
● Easy-to-use timeline-based editing panel
● Dedicated audio editor to control the sound quality
● Cross-platform compatibility
So, if you are also planning to launch a high-scale video for YouTube or any other platform by adding
Key Takeaways from This Episode
● Creating 2D animations with Unity is possible, however, you must be an expert game developer with extensive experience in Unity game development
● To create Unity 2D animations, you’ll have to use Sprite Sheets and then import them into Unity to turn them into animation.
● Now, if you are a regular video editor and only want to create 2D animations for videos, you can also use full-scale software such as Wondershare Filmora Pro.
That Will Make Aesthetic Cartoon Drawing More Understandable
That Will Make Aesthetic Cartoon Drawing More Understandable
An easy yet powerful editor
Numerous effects to choose from
Detailed tutorials provided by the official channel
When you are trying to make an aesthetic drawings cartoon, the primary thing to focus on is the composition. Composition is the combination, arrangement, and organization of objects within the borders of drawing space. To have a great aesthetic cartoon drawing, you must focus on bringing the eyes of the viewer toward your center of interest within an aesthetically-pleasing composition. When we create illustrations, we are often concerned with putting in a lot of details that will overload the image and lose the meaning that we originally wanted it to convey.

We engage our audience and viewer more by composing a perfect aesthetic drawing. In addition, many rules define a good composition drawing, but these rules are mainly guidelines. Also pay attention to your personal preferences and instincts. In this guide, we’ll teach you how to make an excellent aesthetic cartoon painting more understandable.
In this article
01 [Canvas Aesthetic Painting Ideas](#Part 1)
02 [Blender Aesthetic Painting Ideas](#Part 2)
03 [How to Create Super-Detailed Aesthetic Cartoon Painting](#Part 3)
Part 1 Canvas Aesthetic Painting Ideas
There are times you do not need to be a famous painter or an art professional to create beautiful wall art. Canvas painting is an all-in-one application for all skill levels, from beginners to experts. It also provides you with different painting ideas ranging from beach scenes to abstract designs to create pieces that look stunning and professional.
We have compiled a list of canvas aesthetic painting ideas to help you begin your journey as an aesthetic cartoon painter. Look through the images to determine which ones match the style of painting you wish to add to your drawing and get inspiration to create your designs.
01Disney Canvas Art
These are aesthetic cartoon painting ideas relating to 2020 Disney Canvas Art. You can get ideas from this to begin your journey into the world of painting.

02Hippie Painting Canva Art
If you are also looking for other aesthetic cartoon painting ideas to choose from, you can select from this 2020 Cute Canvas Paintings “Hippie Painting” Canvas Art.

03Spongebob Painting
These painting ideas are a part of the Canvas Aesthetic Cartoon Painting ideas of 2020 called Spongebob Painting Disney Canvas Art.

04Babs Bunny Pa Et Mini Lerret
These are a painting about “Babs Bunny Pa Et Mini Lerret.” A 2020 Mini Canvas Art Hippie Painting Canvas idea that you can choose from

Part 2 Blender Aesthetic Painting Ideas
Blender is an accessible and open-source 3D creation suite that supports the entirety of the 3D pipeline modeling, rigging, animation, simulation, compositing rendering, motion tracking, video editing, and 2D animation pipeline. It is a fact that this is one of the best open-source software you can choose from to make your aesthetic cartoon drawing.
It is entirely free software, and various artists can use it to start digging in and playing with it. Here are some of the blender aesthetic cartoon painting ideas you can choose from:
01Princess Ira and Amina
This is a fictional aesthetic drawing cartoon of an African princess having gold gifted powers with her face painting inspired by Nigerian traditional face decorations. However, her crown is adorned with crosses, crystals, and chains which incorporate several elements from different cultural designs available from all over the world to portray unity.

02Survival Knife Weekly Drills 045
This was a design painting inspired based on BUCK KNIVES in pain texturing and focuses on making a practical game-ready asset.

03Radiance
This is a blender aesthetic cartoon painting idea of a graduation project made for the Concept Art specialized cursus at New3dge School.

04 The character looks dev
This blender cartoon painting’s inspiration came from Edward, the short film’s main character. It is a work in progress but a lovely painting that can inspire you.
Part 3 How to Create Super-Detailed Aesthetic Cartoon Painting
To create a super detailed aesthetic cartoon drawing, you do not need to be a trained artist, nor do you need a fancy cartoon picture maker. All you need to create a cartoon painting photo is a simple and Free picture from a cartoon editor to help you carry out the task more effectively.
However, you can also convert your cartoon paint into creative animation using Wondershare Filmora Video Editor . Filmora is a powerful all-in-one tool for editing that you can use to that can be used for free to animate your cartoon with its tons of effects, filters, and keyframing features that can help you carry this out effectively.
For Win 7 or later (64-bit)
For macOS 10.12 or later
Here is how to create a super detailed aesthetic cartoon painting:

Step 1: Open the Picsart editor on your desktop browser and click on the new project
Step 2: Next is to click on Upload to select the photo that you want to cartoon paint from the computer library of your hard drive
Step 2: Click on the toolbar, select the effect feature from the dropdown above your photo, and click on Magic to view all available one-click cartoon filters. However, almost all of the Magic effects on this editor will help you achieve an aesthetic cartoon photo effect.
Step 4: Click on Adjust and Blend above your photo workspace on the editor. This will help you manually adjust the effects (color burn, fade, saturation, brightness, etc.).
Step 5: Preview your result and once you are happy with the new cartoon photo painting, click on the Share button and download it from the top right corner of the editor to save it on your device.
● Ending Thoughts →
● This article explained creating and gave inspiration and ideas for the aesthetic cartoon painting you can choose from to make yours. In addition, the report also recommends Filmora as an influential editor if you intend to create an animation from your cartoon painting due to its tons of features.
● So, now you can start building your aesthetic drawings and cartoons Try It Free
When you are trying to make an aesthetic drawings cartoon, the primary thing to focus on is the composition. Composition is the combination, arrangement, and organization of objects within the borders of drawing space. To have a great aesthetic cartoon drawing, you must focus on bringing the eyes of the viewer toward your center of interest within an aesthetically-pleasing composition. When we create illustrations, we are often concerned with putting in a lot of details that will overload the image and lose the meaning that we originally wanted it to convey.
We engage our audience and viewer more by composing a perfect aesthetic drawing. In addition, many rules define a good composition drawing, but these rules are mainly guidelines. Also pay attention to your personal preferences and instincts. In this guide, we’ll teach you how to make an excellent aesthetic cartoon painting more understandable.
In this article
01 [Canvas Aesthetic Painting Ideas](#Part 1)
02 [Blender Aesthetic Painting Ideas](#Part 2)
03 [How to Create Super-Detailed Aesthetic Cartoon Painting](#Part 3)
Part 1 Canvas Aesthetic Painting Ideas
There are times you do not need to be a famous painter or an art professional to create beautiful wall art. Canvas painting is an all-in-one application for all skill levels, from beginners to experts. It also provides you with different painting ideas ranging from beach scenes to abstract designs to create pieces that look stunning and professional.
We have compiled a list of canvas aesthetic painting ideas to help you begin your journey as an aesthetic cartoon painter. Look through the images to determine which ones match the style of painting you wish to add to your drawing and get inspiration to create your designs.
01Disney Canvas Art
These are aesthetic cartoon painting ideas relating to 2020 Disney Canvas Art. You can get ideas from this to begin your journey into the world of painting.
02Hippie Painting Canva Art
If you are also looking for other aesthetic cartoon painting ideas to choose from, you can select from this 2020 Cute Canvas Paintings “Hippie Painting” Canvas Art.
03Spongebob Painting
These painting ideas are a part of the Canvas Aesthetic Cartoon Painting ideas of 2020 called Spongebob Painting Disney Canvas Art.
04Babs Bunny Pa Et Mini Lerret
These are a painting about “Babs Bunny Pa Et Mini Lerret.” A 2020 Mini Canvas Art Hippie Painting Canvas idea that you can choose from
Part 2 Blender Aesthetic Painting Ideas
Blender is an accessible and open-source 3D creation suite that supports the entirety of the 3D pipeline modeling, rigging, animation, simulation, compositing rendering, motion tracking, video editing, and 2D animation pipeline. It is a fact that this is one of the best open-source software you can choose from to make your aesthetic cartoon drawing.
It is entirely free software, and various artists can use it to start digging in and playing with it. Here are some of the blender aesthetic cartoon painting ideas you can choose from:
01Princess Ira and Amina
This is a fictional aesthetic drawing cartoon of an African princess having gold gifted powers with her face painting inspired by Nigerian traditional face decorations. However, her crown is adorned with crosses, crystals, and chains which incorporate several elements from different cultural designs available from all over the world to portray unity.
02Survival Knife Weekly Drills 045
This was a design painting inspired based on BUCK KNIVES in pain texturing and focuses on making a practical game-ready asset.
03Radiance
This is a blender aesthetic cartoon painting idea of a graduation project made for the Concept Art specialized cursus at New3dge School.
04 The character looks dev
This blender cartoon painting’s inspiration came from Edward, the short film’s main character. It is a work in progress but a lovely painting that can inspire you.
Part 3 How to Create Super-Detailed Aesthetic Cartoon Painting
To create a super detailed aesthetic cartoon drawing, you do not need to be a trained artist, nor do you need a fancy cartoon picture maker. All you need to create a cartoon painting photo is a simple and Free picture from a cartoon editor to help you carry out the task more effectively.
However, you can also convert your cartoon paint into creative animation using Wondershare Filmora Video Editor . Filmora is a powerful all-in-one tool for editing that you can use to that can be used for free to animate your cartoon with its tons of effects, filters, and keyframing features that can help you carry this out effectively.
For Win 7 or later (64-bit)
For macOS 10.12 or later
Here is how to create a super detailed aesthetic cartoon painting:
Step 1: Open the Picsart editor on your desktop browser and click on the new project
Step 2: Next is to click on Upload to select the photo that you want to cartoon paint from the computer library of your hard drive
Step 2: Click on the toolbar, select the effect feature from the dropdown above your photo, and click on Magic to view all available one-click cartoon filters. However, almost all of the Magic effects on this editor will help you achieve an aesthetic cartoon photo effect.
Step 4: Click on Adjust and Blend above your photo workspace on the editor. This will help you manually adjust the effects (color burn, fade, saturation, brightness, etc.).
Step 5: Preview your result and once you are happy with the new cartoon photo painting, click on the Share button and download it from the top right corner of the editor to save it on your device.
● Ending Thoughts →
● This article explained creating and gave inspiration and ideas for the aesthetic cartoon painting you can choose from to make yours. In addition, the report also recommends Filmora as an influential editor if you intend to create an animation from your cartoon painting due to its tons of features.
● So, now you can start building your aesthetic drawings and cartoons!
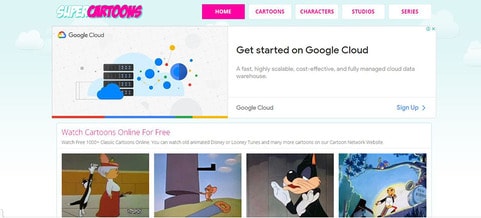
15 Best Sites to Watch Cartoons Online Free And So Can You
Thousands Already Found 15 Best Sites to Watch Cartoons Online Free And So Can You
An easy yet powerful editor
Numerous effects to choose from
Detailed tutorials provided by the official channel
Some of the greatest cartoons are available on televisions or streamed at particular locations or channels only. In this case, you can watch cartoons online.
In this article
01 [Pow! Bam! Ka-Boom! 15 Ways to Watch Cartoons Online](#Part 1)
02 [How to Make Cartoon Animation, Even if You Are New to Animation](#Part 2)
Part 1 Pow! Bam! Ka-Boom! 15 Ways to Watch Cartoons Online
01Boomerang
Popular Cartoon Resources: Scooby-Doo, Looney Tunes, and the Flintstones to Dorothy and the Wizard of Oz and Bunnicula.
Date of establishment: 1992
Recommended reasons: Boomerang allows you to try their free plan first. If you like it, then you can move to purchase their plan for $4.99 per month or $39.99 per year. It has all the classic cartoons stored in it. You can enjoy any classic cartoon at any time. You can also watch it on a television subscription.

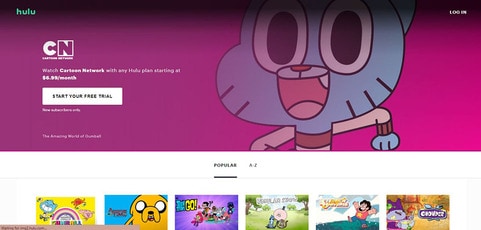
02Hulu
Popular Cartoon Resources: All types of cartoons and animations, including Jimmy Neutron, Rugrats, Doug, Arnolds, etc.
Average viewing capacity: 82M
Website traffic:
Date of establishment: October 29, 2007
Recommended reasons: Hulu offers unlimited instant streaming. It is an ad-free website. You can watch cartoons anytime from your choice of device. You can download them and view them later offline.
03YouTube
Popular Cartoon Resources: All cartoons from Disney, Cartoon Network, famous cartoons like Tom and Jerry, Pink Panther, Mickey Mouse, Talking Tom, and Friends are available here.
Average viewing capacity: 1B
Website traffic: 37% of all mobile traffic
Date of establishment: February 14, 2005
Recommended reasons: You can watch all cartoons free of cost. It supports videos at various resolutions and dimensions. YouTube also has a vast collection of animated films. You can share your favorite cartoons with friends directly from YouTube.

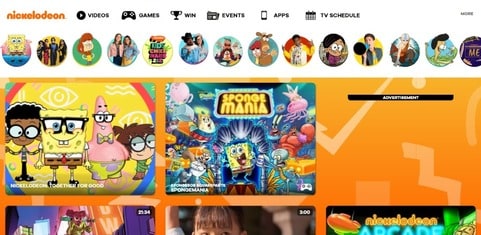
04Nick
Popular Cartoon Resources: Rocko’s Modern Life, All That, The Amanda Show, The Adventures of Pete & Pete, Double Dare, Kenan & Kel, etc.
Average viewing capacity: 1.231M
Website traffic:
Date of establishment: 1977
Recommended reasons: Nick is one of the most popular sites for watching cartoons online. It has a massive collection of Nickelodeon cartoons and animated shows. Not only that, Nick holds interesting contests for children with exciting prizes.
05Comedy Central
Popular Cartoon Resources: Ugly Americans, Lil’ Bush, Kid Notorious, Drawn Together, Futurama, etc.
Average viewing capacity: 1.3M
Website traffic:
Date of establishment: April 1, 1991
Recommended reasons: You can watch cartoons here for free. Signing up or downloading the app is not mandatory in Comedy Central. It has a vast collection of animated movies too.

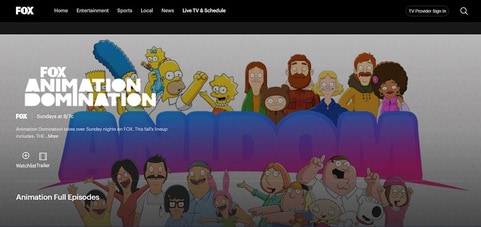
06Fox
Popular Cartoon Resources: The Simpsons, Family Guy, Bob’s Burgers, and more
Average viewing capacity: 2.5M
Website traffic: 68.37% traffic
Date of establishment: October 9, 1986
Recommended reasons: Fox is an entertainment site that offers you free cartoons in HD. You can watch it from your mobile phone or connect it with television. Fox has other amazing shows too.
07AT & T TV
Popular Cartoon Resources: Cartoons from famous channels like Disney, cartoon networks, and Nick.
Average viewing capacity: 15M
Website traffic: 48.37% traffic from this channel
Date of establishment: November 30, 2016
Recommended reasons: Using this website, you can view three simultaneous devices. It allows you to watch your favorite cartoons and animated movies on any compatible device. It has parental control option too.

08Vudu
Popular Cartoon Resources: Finn collection, Jake collection, My little pony, Etc.
Average viewing capacity:
Website traffic: 52.70%
Date of establishment: January 1, 2004
Recommended reasons: Vudu offers free titles that release or updated every week. It allows a cloud-digital locker so that you can store all cartoons in one place. You can arrange cartoons based on their release date, Genres, etc.

09Disney+
Popular Cartoon Resources: The little mermaid, Lilo, Stitch, Pinocchio, Toy story, etc.
Average viewing capacity: 126M
Website traffic:
Date of establishment: November 12, 2019
Recommended reasons: This is the best website to watch all Disney classics, non-classics, animated, non-animated cartoons in one place. You will get access to short exclusives with their premium version.

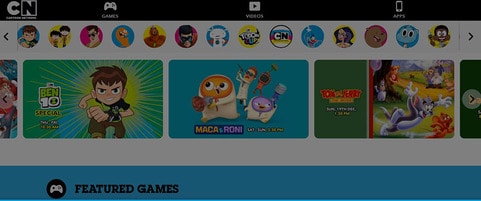
10Cartoon Network
Popular Cartoon Resources: Tom & Jerry, Amazing world of Gumball, Teen Titans Go, etc.
Average viewing capacity: 94M
Website traffic:
Date of establishment: October 1, 1992
Recommended reasons: This is an entirely free website for mobile app and website users. It has a huge library of classic and modern cartoons for children and adults.
11SideReel
Popular Cartoon Resources: Road Runner, Tweety Bird, Speedy Gonzales, Porky Pig, and more
Average viewing capacity:
Website traffic:
Date of establishment: April 2007
Recommended reasons: SideReel has a collection of more than 1,000 cartoons that children love to watch daily. It gives you the latest episode alert of famous cartoons. You can track your favorite shows too from this website.

12SuperCartoons
Popular Cartoon Resources: Classic Disney cartoons, Looney Tunes, Tom & Jerry, Road Runner, etc.
Average viewing capacity:
Website traffic:
Date of establishment: 1923
Recommended reasons: This website has 1000+ classic cartoons. You can watch them at 0 costs. It views cartoons by genres, characters, and channels too.
13Netflix
Popular Cartoon Resources: Big Mouth, BoJack Horseman, F Is For Family, etc.
Average viewing capacity: 192.25M
Website traffic: 15% of all internet traffic globally
Date of establishment: August 29, 1997
Recommended reasons: Netflix is one of the most-streamed websites. It has a huge collection of cartoons. All you need is their subscription, and you can enjoy thousands of cartoons, animated movies, etc.

14ToonJet
Popular Cartoon Resources: Betty Boop, Popeye, Looney Tunes, etc.
Average viewing capacity: 2.18M
Website traffic:
Date of establishment: 2005
Recommended reasons: Want to go down memory lane? ToonJet is the best place to watch your favorite old classics. You will get all types of cartons available here.

15Voot Kids
Popular Cartoon Resources: Motu Patlu, Ben10, Peppa Pig, Talking Tom, Pokemon, Paw Petrol, etc.
Average viewing capacity: 24M
Website traffic:
Date of establishment: March 26, 2016
Recommended reasons: Voot Kid is an animation cartoon streaming website. Children can listen to storybooks and learn a lot from this website. Here you can watch cartoons both online and offline.

16Crunchyroll
Popular Cartoon Resources: My hero academia, Naruto, Fate series, Toradora, etc.
Average viewing capacity:
Website traffic:
Date of establishment: 2006
Recommended reasons: Crunchyroll is the perfect place for your favorite cartoons and anime. You can stream them free. You can also put reviews on the anime series you are watching.

Part 2 How to Make Cartoon Animation, Even if You Are New to Animation
Do you wish to make cool and professional cartoon animations? Does the budget of making one make a step back? You need not worry about that anymore. With the advancement in technology, you can create cartoon animation easily, even if you are a newbie. Filmora Pro is right there for you. In Filmora Pro, you will get features to animate your video, adjust video clarity, sound, duration, add realistic effects, etc. And the best part is they offer you their free trial for a month. You can try the software for a month and then decide whether to purchase it or not. Here, we will discuss its key features that will help you quickly make a professional cartoon animation.
Animation
● Motion Tracking: Input graphics or texts at moving points of your video
● Animate: Customize your animation with preset motions or keyframes
● Pan and zoom: Create a realistic camera movement
● Ease in and Ease out feature: Create fluid motions by changing speed and durations.
Video editing
● Advanced editing: Filmora Pro has advanced editing features to ensure your work has a professional finish.
● Unlimited tracks: Add any track of your choice from the endless options.
● Automatic stabilization: It can fix your video.
● Preset Transition: The preset transition feature is built to give the video a realistic touch.
● Built-in screen recorder: Helps you in live-recording of games.
Sound editing
● Automatic Audio sync: You can replace the original audio with a different higher-quality audio file.
● Audio noise reduction: Eliminate the background noise and narrate your story with clarity.
● Audio compressor: Adjust the high and low in your audio and normalize the volume.
● Audio Transitions: Overlap audio or out in crossfades to create a smooth change in between clips.
Key Takeaways from This Episode
● With modern technology advancing, it is easy to stream cartoons online.
● Some multiple websites and apps offer both free and paid cartoon streaming.
● The websites are user-friendly and compatible with all devices.
Some of the greatest cartoons are available on televisions or streamed at particular locations or channels only. In this case, you can watch cartoons online.
In this article
01 [Pow! Bam! Ka-Boom! 15 Ways to Watch Cartoons Online](#Part 1)
02 [How to Make Cartoon Animation, Even if You Are New to Animation](#Part 2)
Part 1 Pow! Bam! Ka-Boom! 15 Ways to Watch Cartoons Online
01Boomerang
Popular Cartoon Resources: Scooby-Doo, Looney Tunes, and the Flintstones to Dorothy and the Wizard of Oz and Bunnicula.
Date of establishment: 1992
Recommended reasons: Boomerang allows you to try their free plan first. If you like it, then you can move to purchase their plan for $4.99 per month or $39.99 per year. It has all the classic cartoons stored in it. You can enjoy any classic cartoon at any time. You can also watch it on a television subscription.
02Hulu
Popular Cartoon Resources: All types of cartoons and animations, including Jimmy Neutron, Rugrats, Doug, Arnolds, etc.
Average viewing capacity: 82M
Website traffic:
Date of establishment: October 29, 2007
Recommended reasons: Hulu offers unlimited instant streaming. It is an ad-free website. You can watch cartoons anytime from your choice of device. You can download them and view them later offline.
03YouTube
Popular Cartoon Resources: All cartoons from Disney, Cartoon Network, famous cartoons like Tom and Jerry, Pink Panther, Mickey Mouse, Talking Tom, and Friends are available here.
Average viewing capacity: 1B
Website traffic: 37% of all mobile traffic
Date of establishment: February 14, 2005
Recommended reasons: You can watch all cartoons free of cost. It supports videos at various resolutions and dimensions. YouTube also has a vast collection of animated films. You can share your favorite cartoons with friends directly from YouTube.
04Nick
Popular Cartoon Resources: Rocko’s Modern Life, All That, The Amanda Show, The Adventures of Pete & Pete, Double Dare, Kenan & Kel, etc.
Average viewing capacity: 1.231M
Website traffic:
Date of establishment: 1977
Recommended reasons: Nick is one of the most popular sites for watching cartoons online. It has a massive collection of Nickelodeon cartoons and animated shows. Not only that, Nick holds interesting contests for children with exciting prizes.
05Comedy Central
Popular Cartoon Resources: Ugly Americans, Lil’ Bush, Kid Notorious, Drawn Together, Futurama, etc.
Average viewing capacity: 1.3M
Website traffic:
Date of establishment: April 1, 1991
Recommended reasons: You can watch cartoons here for free. Signing up or downloading the app is not mandatory in Comedy Central. It has a vast collection of animated movies too.
06Fox
Popular Cartoon Resources: The Simpsons, Family Guy, Bob’s Burgers, and more
Average viewing capacity: 2.5M
Website traffic: 68.37% traffic
Date of establishment: October 9, 1986
Recommended reasons: Fox is an entertainment site that offers you free cartoons in HD. You can watch it from your mobile phone or connect it with television. Fox has other amazing shows too.
07AT & T TV
Popular Cartoon Resources: Cartoons from famous channels like Disney, cartoon networks, and Nick.
Average viewing capacity: 15M
Website traffic: 48.37% traffic from this channel
Date of establishment: November 30, 2016
Recommended reasons: Using this website, you can view three simultaneous devices. It allows you to watch your favorite cartoons and animated movies on any compatible device. It has parental control option too.
08Vudu
Popular Cartoon Resources: Finn collection, Jake collection, My little pony, Etc.
Average viewing capacity:
Website traffic: 52.70%
Date of establishment: January 1, 2004
Recommended reasons: Vudu offers free titles that release or updated every week. It allows a cloud-digital locker so that you can store all cartoons in one place. You can arrange cartoons based on their release date, Genres, etc.
09Disney+
Popular Cartoon Resources: The little mermaid, Lilo, Stitch, Pinocchio, Toy story, etc.
Average viewing capacity: 126M
Website traffic:
Date of establishment: November 12, 2019
Recommended reasons: This is the best website to watch all Disney classics, non-classics, animated, non-animated cartoons in one place. You will get access to short exclusives with their premium version.
10Cartoon Network
Popular Cartoon Resources: Tom & Jerry, Amazing world of Gumball, Teen Titans Go, etc.
Average viewing capacity: 94M
Website traffic:
Date of establishment: October 1, 1992
Recommended reasons: This is an entirely free website for mobile app and website users. It has a huge library of classic and modern cartoons for children and adults.
11SideReel
Popular Cartoon Resources: Road Runner, Tweety Bird, Speedy Gonzales, Porky Pig, and more
Average viewing capacity:
Website traffic:
Date of establishment: April 2007
Recommended reasons: SideReel has a collection of more than 1,000 cartoons that children love to watch daily. It gives you the latest episode alert of famous cartoons. You can track your favorite shows too from this website.
12SuperCartoons
Popular Cartoon Resources: Classic Disney cartoons, Looney Tunes, Tom & Jerry, Road Runner, etc.
Average viewing capacity:
Website traffic:
Date of establishment: 1923
Recommended reasons: This website has 1000+ classic cartoons. You can watch them at 0 costs. It views cartoons by genres, characters, and channels too.
13Netflix
Popular Cartoon Resources: Big Mouth, BoJack Horseman, F Is For Family, etc.
Average viewing capacity: 192.25M
Website traffic: 15% of all internet traffic globally
Date of establishment: August 29, 1997
Recommended reasons: Netflix is one of the most-streamed websites. It has a huge collection of cartoons. All you need is their subscription, and you can enjoy thousands of cartoons, animated movies, etc.
14ToonJet
Popular Cartoon Resources: Betty Boop, Popeye, Looney Tunes, etc.
Average viewing capacity: 2.18M
Website traffic:
Date of establishment: 2005
Recommended reasons: Want to go down memory lane? ToonJet is the best place to watch your favorite old classics. You will get all types of cartons available here.
15Voot Kids
Popular Cartoon Resources: Motu Patlu, Ben10, Peppa Pig, Talking Tom, Pokemon, Paw Petrol, etc.
Average viewing capacity: 24M
Website traffic:
Date of establishment: March 26, 2016
Recommended reasons: Voot Kid is an animation cartoon streaming website. Children can listen to storybooks and learn a lot from this website. Here you can watch cartoons both online and offline.
16Crunchyroll
Popular Cartoon Resources: My hero academia, Naruto, Fate series, Toradora, etc.
Average viewing capacity:
Website traffic:
Date of establishment: 2006
Recommended reasons: Crunchyroll is the perfect place for your favorite cartoons and anime. You can stream them free. You can also put reviews on the anime series you are watching.
Part 2 How to Make Cartoon Animation, Even if You Are New to Animation
Do you wish to make cool and professional cartoon animations? Does the budget of making one make a step back? You need not worry about that anymore. With the advancement in technology, you can create cartoon animation easily, even if you are a newbie. Filmora Pro is right there for you. In Filmora Pro, you will get features to animate your video, adjust video clarity, sound, duration, add realistic effects, etc. And the best part is they offer you their free trial for a month. You can try the software for a month and then decide whether to purchase it or not. Here, we will discuss its key features that will help you quickly make a professional cartoon animation.
Animation
● Motion Tracking: Input graphics or texts at moving points of your video
● Animate: Customize your animation with preset motions or keyframes
● Pan and zoom: Create a realistic camera movement
● Ease in and Ease out feature: Create fluid motions by changing speed and durations.
Video editing
● Advanced editing: Filmora Pro has advanced editing features to ensure your work has a professional finish.
● Unlimited tracks: Add any track of your choice from the endless options.
● Automatic stabilization: It can fix your video.
● Preset Transition: The preset transition feature is built to give the video a realistic touch.
● Built-in screen recorder: Helps you in live-recording of games.
Sound editing
● Automatic Audio sync: You can replace the original audio with a different higher-quality audio file.
● Audio noise reduction: Eliminate the background noise and narrate your story with clarity.
● Audio compressor: Adjust the high and low in your audio and normalize the volume.
● Audio Transitions: Overlap audio or out in crossfades to create a smooth change in between clips.
Key Takeaways from This Episode
● With modern technology advancing, it is easy to stream cartoons online.
● Some multiple websites and apps offer both free and paid cartoon streaming.
● The websites are user-friendly and compatible with all devices.
The Secret Sauce for Making GIF Instagram Story More Stunning
The Secret Sauce for Making GIF Instagram Story More Aesthetic
An easy yet powerful editor
Numerous effects to choose from
Detailed tutorials provided by the official channel
Adding own gift stickers to an Instagram story is in trend. An Instagram story can be made more creative with an Instagram gif story. Make a powerful impact with a gif on an Instagram story.
In this article
01 [How to Post Gifs to Instagram Story](#Part 1)
02 [8 Cute Instagram Stickers to Make Your Stories Aesthetic](#Part 2)
03 [How to Create Custom Gifs for Instagram Stories](#Part 3)
Part 1 How to Post Gifs to Instagram Story
Instagram stories are one of the best mediums to get connected to people at large. To be in trends and grab maximum people’s attention, it is very necessary to be updated with the new elements of Instagram stories. Gif Instagram story is a new way to increase the followers and be in trends. Adding these gifs in Instagram stories will improve your business by creating more engaging content for business promotion. Let’s see how this can be done?
● Go to the Instagram app installed on your phone. While adding a sticker to a picture of videos in Instagram stories, a GIF option will appear.
● When you tap it, you can find several attractive gifs in the library powered by GIPHY.
● Tap add sticker button that appears on the top of the Instagram stories. Tap the ‘GIF’ icon; the library of trending gifs will appear.
● Look for the gif you need to add to your story. You also have a search option to find your favorite or trending gif.
● After selecting the desired gif, you can add it to your photo or video after resizing it as you desired.
● After finishing, tap on the ‘Your story’ icon.
So, this way, it is easy to create gif story instagram with just a few simple steps.
Part 2 Cute Instagram Stickers to Make Your Stories Aesthetic
Cute Instagram stickers are the best way to lift the creativity of your Instagram stories. Adding stickers are an amazing idea to add design to Instagram stories. Stickers make stories more creative and interesting. Some of the amazing stickers to beautify Instagram stories are:
01BOHO
Boho stickers are good when you search for new stickers. They add fun to the story and give an amazing look for any lifestyle picture over an Instagram story. Boho white is also one type of sticker where are of them are white. Applying white boho to the picture background highlights the space and looks good. One has so many options from cute stars, hearts, lines, and flowers.
02FOOPKLO
For those who want words and saying gif on instagram story, there are some cute pink stickers available. These can be searched as FOOPKLO. Pink flowers, clusters, sayings, hearts, and some more cute stickers are there which can make Instagram stories lovelier.
03HALEYIVERS
For those who are active Instagram users and update their stories every day, the old stickers may not entertain them. So, for those, there are HALEYIVERS stickers. Good morning, days, sunshine, coffee, stars, and hearts add a great style to the Instagram stories. So, next time you need some punch over Instagram stories add some HALEYIVERS stickers.
04OHLALALITA
Instagram story gif is one of the great ways to even express your thoughts and moods in a summarized way. So, for those who wish to add a short story on Instagram, OHLALALITA has the best stickers. Loaded with so many cute words such as Tank you, Made with love, chill, glow, bye-bye, Wow, and many more, it makes any story in just simple words.
05SCARLETPIN
Instagram story gifs are a gift to those who are food lovers. Now with some new additions of gifs from GIPHY, they can post their food stories over their Instagram stories. The range of stickers that can help them is SCARLETPIN. These consist of some bright and colorful stickers of food. Red strawberries, tea, leaves, and oranges are great stuff to include in the morning Instagram stories.
06CURSIVE
Gif for Instagram story is also available in attractive writings. CURSIVE is the most attractive form of writing stories. Popular and cute sayings can be checked on CURSIVE and can be included in the stories. They can be searched and remembered easily. Cursive phrases can be added to the Instagram stories that look visually appealing to the viewers.
07EMOJIS
Emojis are the most lovable stickers available and can be part of any Instagram story. Typing on emojis can be done easily and they can be searched on the search bar. Perfect emojis gifs can be applied to an Instagram story that suits the situation. It can be moved or resized as per the requirement. These emojis gifs add a fun element to the Instagram stories.
08PAINT & BRUSH
Instagram gif story can be made creative with paint and brush. Earlier the users can add text with plain background only. But, paint and brush have enhanced it. Now users can add paint behind the text to make it more engaging. They are simple yet very attractive when added to the stories.
Part 3 How to Create Custom Gifs for Instagram Stories
Funny and expressive Instagram stories of your own always win the hearts of followers. Custom-made gif for Instagram is a great tool for business owners as it brings volume to their business by increasing leads. Custom-made gifs over Instagram stories are eye-catching and thus people get interested in the business. This helps in creating a good brand image for the business.
So, some of the ways to create fascinating custom Gifs Instagram stories for self and business are:
01Pin Instagram stories
Visiting a place and letting people know where you are through Instagram stories is always loved by all. Now, this can be done attractively by using the Pin feature. One can pin on the pictures and videos over the Instagram stories to a particular place. This is the most interesting element to make an Instagram story catchy. It can be done easily by tapping and holding it till it shows a pin at the little bar. This was one can pin gif at the desired location. This gif can pop up at a certain location only. It can be applied to videos one has made of a certain location by moving the gif to a place where one desires.
02Using Gif to give life to any image
To make gif Instagram story aesthetic, adding some moves with sparkles will be the right option. An Instagram user can give life to a picture by including animated elements. Gif adds a fun and surprising element to any Instagram story. When movement in any picture is added through gif, it catches the attention of the viewers and they follow it. A business can make its content engaging with gifs and can achieve its goal.
03Gifs Instagram story to catch viewer’s attention
Gif can be used effectively to create attractive Instagram stories. These gifs are good for the business to highlight their important elements. Gifs like the link in bio, sound on, and swipe up are created for a call to action from the viewers. Adding arrows and signals through gif in the Instagram stories direct the people to spend some minutes on the stories and find something new.
04Highlighting text with gif effects
A customized Instagram story can be made by highlighting text through adding gifs. Sparkle, stars, and highlights gifs can be searched easily and can be applied to any Instagram story. By adding a gif, the text looks stunning and grabs the attention of the viewers. GIPHY has several text-based gifs which can take an ordinary text over the story at a great level. It can be searched by mentioning related keywords.
05Adding gifs to customize selfies
Selfies to Instagram stories are very common. But they can be made even better with some amazing gifs from GIPHY. One can add sunglasses, hats, jewelry, and other fun props to the selfies. Filters can be added by creating their own story through a gif.
06Filmora V11 – A GIF resource
Wondershare Filmora Video Editor (The Filmora Meme maker) : Some many apps and websites offer beautiful gifs to beautify Instagram stories. One of the places where Instagram users can find a wide collection of attractive gifs is Filmora V11. It is a user-friendly tool that has media editing features. It can be used to add sound, light effects, and beautiful gifs to Instagram stories.

Wondershare Filmora - Best Video Editor for Mac/Windows
5,481,435 people have downloaded it.
Build unique custom animations without breaking a sweat.
Focus on creating epic stories and leave the details to Filmora’s auto features.
Start a creative adventure with drag & drop effects and endless possibilities.
Filmora simplifies advanced features to save you time and effort.
Filmora cuts out repetition so you can move on to your next creative breakthrough.
For creating gifs, Filmora V11 can be used and it can be made in a few simple steps. Filmora V11 app is required to be installed on the system and media files can be imported there. Files can be dragged for creating gifs. Filters, stickers, and other effects can be added. They can be further customized as per the requirement of the users. After adding background effects, music, and sound, the gif can be previewed also. The media can be saved as GIFs and can be easily exported also. To customize gifs, the Filmora Meme maker can be used. Captions can be added to GIFs and can be customized by using templates available at Filmora.
So, next time you need to know how to add your own gif to Instagram story, go to Filmora V11. This is one of the great platforms to create some amazing custom gifs to add to Instagram stories. If you want to surprise your viewers with some interesting gifs, try Filmora V11.
● Key Takeaways from This Episode →
● Instagram stories are the most effective way to mark a great impression on the viewers. It is also one of the effective tools to lift any business. Best results can be obtained when attractive and interesting gifs are added to Instagram stories.
● Instagram stories gifs are becoming trendy and there are so many cute and amazing gif stickers available to create Instagram stories. Some of the widely used gifs and stickers are Boho, FOOPKLO, HALEYIVERS, OHLALALITA, and EMOJIS. Instagram users can explore these cute and funny stickers and add them to beautify their Instagram stories.
● Customized gif has spiced up the Instagram stories and amazed the people. This feature helps a business to influence people towards their work and attract more people. The content becomes more engaging and interesting through a customized gif.
Adding own gift stickers to an Instagram story is in trend. An Instagram story can be made more creative with an Instagram gif story. Make a powerful impact with a gif on an Instagram story.
In this article
01 [How to Post Gifs to Instagram Story](#Part 1)
02 [8 Cute Instagram Stickers to Make Your Stories Aesthetic](#Part 2)
03 [How to Create Custom Gifs for Instagram Stories](#Part 3)
Part 1 How to Post Gifs to Instagram Story
Instagram stories are one of the best mediums to get connected to people at large. To be in trends and grab maximum people’s attention, it is very necessary to be updated with the new elements of Instagram stories. Gif Instagram story is a new way to increase the followers and be in trends. Adding these gifs in Instagram stories will improve your business by creating more engaging content for business promotion. Let’s see how this can be done?
● Go to the Instagram app installed on your phone. While adding a sticker to a picture of videos in Instagram stories, a GIF option will appear.
● When you tap it, you can find several attractive gifs in the library powered by GIPHY.
● Tap add sticker button that appears on the top of the Instagram stories. Tap the ‘GIF’ icon; the library of trending gifs will appear.
● Look for the gif you need to add to your story. You also have a search option to find your favorite or trending gif.
● After selecting the desired gif, you can add it to your photo or video after resizing it as you desired.
● After finishing, tap on the ‘Your story’ icon.
So, this way, it is easy to create gif story instagram with just a few simple steps.
Part 2 Cute Instagram Stickers to Make Your Stories Aesthetic
Cute Instagram stickers are the best way to lift the creativity of your Instagram stories. Adding stickers are an amazing idea to add design to Instagram stories. Stickers make stories more creative and interesting. Some of the amazing stickers to beautify Instagram stories are:
01BOHO
Boho stickers are good when you search for new stickers. They add fun to the story and give an amazing look for any lifestyle picture over an Instagram story. Boho white is also one type of sticker where are of them are white. Applying white boho to the picture background highlights the space and looks good. One has so many options from cute stars, hearts, lines, and flowers.
02FOOPKLO
For those who want words and saying gif on instagram story, there are some cute pink stickers available. These can be searched as FOOPKLO. Pink flowers, clusters, sayings, hearts, and some more cute stickers are there which can make Instagram stories lovelier.
03HALEYIVERS
For those who are active Instagram users and update their stories every day, the old stickers may not entertain them. So, for those, there are HALEYIVERS stickers. Good morning, days, sunshine, coffee, stars, and hearts add a great style to the Instagram stories. So, next time you need some punch over Instagram stories add some HALEYIVERS stickers.
04OHLALALITA
Instagram story gif is one of the great ways to even express your thoughts and moods in a summarized way. So, for those who wish to add a short story on Instagram, OHLALALITA has the best stickers. Loaded with so many cute words such as Tank you, Made with love, chill, glow, bye-bye, Wow, and many more, it makes any story in just simple words.
05SCARLETPIN
Instagram story gifs are a gift to those who are food lovers. Now with some new additions of gifs from GIPHY, they can post their food stories over their Instagram stories. The range of stickers that can help them is SCARLETPIN. These consist of some bright and colorful stickers of food. Red strawberries, tea, leaves, and oranges are great stuff to include in the morning Instagram stories.
06CURSIVE
Gif for Instagram story is also available in attractive writings. CURSIVE is the most attractive form of writing stories. Popular and cute sayings can be checked on CURSIVE and can be included in the stories. They can be searched and remembered easily. Cursive phrases can be added to the Instagram stories that look visually appealing to the viewers.
07EMOJIS
Emojis are the most lovable stickers available and can be part of any Instagram story. Typing on emojis can be done easily and they can be searched on the search bar. Perfect emojis gifs can be applied to an Instagram story that suits the situation. It can be moved or resized as per the requirement. These emojis gifs add a fun element to the Instagram stories.
08PAINT & BRUSH
Instagram gif story can be made creative with paint and brush. Earlier the users can add text with plain background only. But, paint and brush have enhanced it. Now users can add paint behind the text to make it more engaging. They are simple yet very attractive when added to the stories.
Part 3 How to Create Custom Gifs for Instagram Stories
Funny and expressive Instagram stories of your own always win the hearts of followers. Custom-made gif for Instagram is a great tool for business owners as it brings volume to their business by increasing leads. Custom-made gifs over Instagram stories are eye-catching and thus people get interested in the business. This helps in creating a good brand image for the business.
So, some of the ways to create fascinating custom Gifs Instagram stories for self and business are:
01Pin Instagram stories
Visiting a place and letting people know where you are through Instagram stories is always loved by all. Now, this can be done attractively by using the Pin feature. One can pin on the pictures and videos over the Instagram stories to a particular place. This is the most interesting element to make an Instagram story catchy. It can be done easily by tapping and holding it till it shows a pin at the little bar. This was one can pin gif at the desired location. This gif can pop up at a certain location only. It can be applied to videos one has made of a certain location by moving the gif to a place where one desires.
02Using Gif to give life to any image
To make gif Instagram story aesthetic, adding some moves with sparkles will be the right option. An Instagram user can give life to a picture by including animated elements. Gif adds a fun and surprising element to any Instagram story. When movement in any picture is added through gif, it catches the attention of the viewers and they follow it. A business can make its content engaging with gifs and can achieve its goal.
03Gifs Instagram story to catch viewer’s attention
Gif can be used effectively to create attractive Instagram stories. These gifs are good for the business to highlight their important elements. Gifs like the link in bio, sound on, and swipe up are created for a call to action from the viewers. Adding arrows and signals through gif in the Instagram stories direct the people to spend some minutes on the stories and find something new.
04Highlighting text with gif effects
A customized Instagram story can be made by highlighting text through adding gifs. Sparkle, stars, and highlights gifs can be searched easily and can be applied to any Instagram story. By adding a gif, the text looks stunning and grabs the attention of the viewers. GIPHY has several text-based gifs which can take an ordinary text over the story at a great level. It can be searched by mentioning related keywords.
05Adding gifs to customize selfies
Selfies to Instagram stories are very common. But they can be made even better with some amazing gifs from GIPHY. One can add sunglasses, hats, jewelry, and other fun props to the selfies. Filters can be added by creating their own story through a gif.
06Filmora V11 – A GIF resource
Wondershare Filmora Video Editor (The Filmora Meme maker) : Some many apps and websites offer beautiful gifs to beautify Instagram stories. One of the places where Instagram users can find a wide collection of attractive gifs is Filmora V11. It is a user-friendly tool that has media editing features. It can be used to add sound, light effects, and beautiful gifs to Instagram stories.
Wondershare Filmora - Best Video Editor for Mac/Windows
5,481,435 people have downloaded it.
Build unique custom animations without breaking a sweat.
Focus on creating epic stories and leave the details to Filmora’s auto features.
Start a creative adventure with drag & drop effects and endless possibilities.
Filmora simplifies advanced features to save you time and effort.
Filmora cuts out repetition so you can move on to your next creative breakthrough.
For creating gifs, Filmora V11 can be used and it can be made in a few simple steps. Filmora V11 app is required to be installed on the system and media files can be imported there. Files can be dragged for creating gifs. Filters, stickers, and other effects can be added. They can be further customized as per the requirement of the users. After adding background effects, music, and sound, the gif can be previewed also. The media can be saved as GIFs and can be easily exported also. To customize gifs, the Filmora Meme maker can be used. Captions can be added to GIFs and can be customized by using templates available at Filmora.
So, next time you need to know how to add your own gif to Instagram story, go to Filmora V11. This is one of the great platforms to create some amazing custom gifs to add to Instagram stories. If you want to surprise your viewers with some interesting gifs, try Filmora V11.
● Key Takeaways from This Episode →
● Instagram stories are the most effective way to mark a great impression on the viewers. It is also one of the effective tools to lift any business. Best results can be obtained when attractive and interesting gifs are added to Instagram stories.
● Instagram stories gifs are becoming trendy and there are so many cute and amazing gif stickers available to create Instagram stories. Some of the widely used gifs and stickers are Boho, FOOPKLO, HALEYIVERS, OHLALALITA, and EMOJIS. Instagram users can explore these cute and funny stickers and add them to beautify their Instagram stories.
● Customized gif has spiced up the Instagram stories and amazed the people. This feature helps a business to influence people towards their work and attract more people. The content becomes more engaging and interesting through a customized gif.
10 Trendy & Stylish Free Logo Animation Templates
10 Trendy & Stylish Free Logo Animation Templates in 2024
An easy yet powerful editor
Numerous effects to choose from
Detailed tutorials provided by the official channel
The logo animation of your video or presentation sets the tone for how your audience will perceive your brand. There are many stylish and trendy free logo animation templates that you can use to create an inspiring impression of your brand. The basic is to make sure your logo animation grabs your viewer’s attention and is catchy to make them remember your company’s name. This article will guide you through complete logo animation
![]()
This article will guide you through complete logo animation templates. We have also included various logo animations that you can choose from for your brand. Along with that, you will also see how logo motion graphics and 3D logo effects come out to be a wonder to promote your business to the next level following After Effects logo templates and free logo intro templates. The article also guides you through proper steps to apply logo motion effectively with respective screenshots.
In this article
01 [What an Animated Logo Can Do for Your Business](#Part 1)
02 [10 Top Quality Free Logo Animation Templates](#Part 2)
03 [5 Techniques for Custom Logo Animation in After Effects](#Part 3)
04 [How to Make a Logo Animation for Free in Just 3 Minutes](#Part 4)
Part 1 What an Animated Logo Can Do for Your Business
It is widespread info that logo animation is often an effective promotional tool. Here are some of the fantastic purposes or benefits of an animated logo to your Business is that:
● It helps to increase the memorability of the brand.
● Stop motion logo helps in advertising and creating brand awareness.
● Logo animation on YouTube can improve storytelling, i.e., your animated video can tell a story about your brand.
● logo intro starts an original image for your brand’s growth.
To make animated logo work for your Business perfectly and efficiently, consider the following factors:
● Critically analyze the business goal and think of the brand’s personality.
● The logo animation should orient to the user’s preference. Therefore make sure you carry out user research.
● Create an unpredictable animation logo. Try to make your audience surprised so that the final results are unexpected in the first few seconds.
● After Effects logo animation templates should not be too long; therefore, try not to make your animated logo complex and keep it short. The recommendation is for it to stay under seconds.
![]()
Part 1 Top Quality Free Logo Animation Templates
This article section will provide a top-quality template for free logo animation on YouTube and other platforms for your business growth. From the list, you can select the logo animation templates free download that matches your need:
![]()
01Web Series
Web Series logo animation can be helpful on a web series Project. The pictures include some cool effects with minimal and captivating design to wow your audience.
02 VHS 8Logo Intro
VHS 8Logo templates will take you back to the time of kung-fu movies and arcade 8-bit games. It is easy to edit and comes with a video tutorial featuring distortion effects, broken videotape, and lousy TV.
03 Comic Logo
Comic Logo can be used in cartoons, comics, and kids theme video projects and comes in very handy. It has a cartoon style animation, is very colorful, and will be appreciated and loved by your audience
04 Zero Glitch
Zero GlitchCan be used to give a glitch introduction to your video. It has an industrial and unique draft design that can perfectly fit any project that needs a techno logo opening.
05 Quick bling
Quick bling is an elegant and simple logo animation template for upcoming projects. This logo template is easily customized and has a tutorial if you encounter any problems.
06 Rise From The Dark
Rise from Dark comes up with some eye-grabbing yet simple After Effect logo animation template free download that can fit any video content. This logo template is perfect whether you need a logo intro for an event opener, TV show, or promo.
07 Sports Logo Template
Sports Logo Template includes pre-rendering footage with an easy customization option. It doesn’t require any plugins.
08 Holi Festival Logo Templates
Holi Festival Logo Templates are perfect when you want to grab your audience’s attention. A juicy bright explosion of color and features seven sounds of vibrant animation. It is super easy to use in animating your logo.
09 Light City Logo Templates
Light City Logo Templates is a stunning logo animation template that features a luminescent cityscape and golden lions against a dark background specially designed for a dramatic and mysterious luxurious feel.
10 Drifting Car Logo Templates
Drifting Car Logo Templates is the perfect answer for a movie project. It has seconds of footage with a funky sports car.
Part 3 5 Techniques for Custom Logo Animation in After Effects
A perfect way to capture your viewers’ attention and remind them who made the video is by creating a striking and simple logo animation After Effects template free download for your video project and using the After Effects logo animation template in an absolute sense. In this article, we will throw away tools that you will need to animate your logo from scratch in After Effects:
![]()
01Technique 1: Separate the Layers
Separate the layers in Photoshop or illustrator and check if they are all separated and correctly named
![]()
Steps: Next, import your logo into after-effects as footage correctly. Otherwise, cannot access the individual layers in your logo:
● For illustrator make sure the logo elements are on a separate layer.
● If the element is grouped, that is the same way they will be in After Effect.
● To simplify this process, select the group in AI. Using the layer menu, click on the release to layers>sequence.
● Click on import and select your logo design file.
● Select composition>retain layer sizes
● Click on import, and your logo will appear in your media browser as a comp containing its layer and include the folder of those layers.
02Technique 2: Editing Properly
If you made a mistake and important your file as a footer is better than a composition, here is how to fix it:
● Drag your single a high elements to the timeline from the browser media
● Right click>create>convert to layered comp
● Now your Design file will be accessible in layers
03Technique 3: Transitions
You can opt for different available transitions out of the logo intro template After Effects to modify your logo. Then, you can go with the dual Effect of logo animation with a transition effect.
![]()
04Technique 4: Logo Animation
Animate each layer using the straight-forward property scale, rotation, position, and opacity properties
● Select the layer in the timeline to add a keyframe to your layers
● Create and finish a keyframe by placing your Playhead on the frame you want
● Create where you want the animation to start by moving several frames backward from your first keyframe
● Change the value of the keyframe property until you are satisfied with the look
● Continue with each of the layers in turn until you feel happy with the effects
![]()
05Technique 5: Title Animation
Animate the title using the varieties of animation styles in After Effects if you can edit a text layer.
● Remove any AI text objects that you want to replace with after effects text layer.
● Create a fresh After Effects text layer.
● Copy-paste the text from AI to after-effects. In doing this, it will use the same font, color, and sizes is when you paste it in
● Go to the effects browser, choose your title animation, and drag and drop it to your new title.
● View all keyframes by pressing U and select the layer in the timeline, then adjust as you like.
Part 4 How to Make a Logo Animation for Free in Just 3 Minutes
Filmora is one of the best software editing tools for beginners to design logo animation and logo intro template free download easily and quickly with keyframing. It produces high-quality and smoothly animated logos with motion blur that gives your logo animation more touch-up. The logo intro-free animation in Filmora is simple to replicate if you get some logo inspiration and then conclude how you will execute your animation. All the editing tools like shape, elements, etc., are available in Filmora software.
![]()
01Step 1: Create Logo
First, you need to create the logo or have a png logo image using any photo editing software like Photoshop or Canva.
Wondershare Filmora - Best Video Editor for Mac/Windows
5,481,435 people have downloaded it.
Build unique custom animations without breaking a sweat.
Focus on creating epic stories and leave the details to Filmora’s auto features.
Start a creative adventure with drag & drop effects and endless possibilities.
Filmora simplifies advanced features to save you time and effort.
Filmora cuts out repetition so you can move on to your next creative breakthrough.
02Step 2: Import background
After you have edited your logo on Photoshop, import background video and logo in Filmora and Use the key-framing feature to animate your logo
03Step 3: Add effects
Add other effects to your logo animation to make it perfect by adding colors, text, etc., to wow your logo animations. Add shapes to the image to give it some effect then add the motions to these shapes.
04Step 4: Export
Once you are satisfied with the trendy and stylish free logo, you can export and share them on your social media platform.
● Key Takeaways from This Episode →
● Impact of animated logo for business
● Top-quality free logo animation
● Steps to make logo through Premiere Pro logo animation template for free.
Learn How to Make Your Characters Interactive in Unity Animation Rigging
Learn How to Make Your Characters Interactive in Unity Animation Rigging
An easy yet powerful editor
Numerous effects to choose from
Detailed tutorials provided by the official channel
Animation is one such aspect that is formed from the integration of several varied factors and processes. One of the most vital ones is the process of rigging. Thus, we will be discussing Unity character rigging as Unity is one of the most efficient platforms for animation.
Additionally, we will introduce you to one of the best tools you can use to edit videos and nurture the creative skills you carry in yourself. So, without any further delay, let us start our discussion.
In this article
01 [What is Unity Rigging?](#Part 1)
02 [Is It Better to Rig in Unity or Blender?](#Part 2)
03 [How To Use Animation Rigging In Unity](#Part 3)
Part 1 What is Unity Rigging?
To understand what Unity rigging is, we must start our discussion first by discussing rigging in animation. In animation, rigging is the process in which your animation characters are separated into two parts. One is the mesh-like structure of the characters. And the other is the skeletal structure given to the characters.
You integrate bones and joints and join them accordingly in the characters present in your animation. It is similar to the presence of the human skeletal system. Moreover, just like the skeletal system in humans helps in the movements of the different parts of the body, the bone and joint structure through rigging also enables the characters in animation to move.
Therefore, we can say that rigging is the process by which you can enable your characters’ in animation to move and show different facial expressions, etc. So, it is obvious that without the process of rigging, the animation is impossible, which makes rigging one of the most crucial aspects of animation.
Now that we know what rigging in animation is, we will be discussing what is animation rigging in Unity. Unity technologies have developed a cross-platform gaming engine called ‘Unity’. And this platform also offers the ones interested in animation to learn animation rigging.
The Unity platform offers robust and effective tools for animation rigging. And these tools assist the animators to create real-time rigs in Unity. Most commonly, the set of tools in Unity for rigging is used on the characters. But, if one likes, they can also use the tools on ani Game Object that includes animations and skeletons.
Therefore, when you utilise the platform of Unity or the toolsets of Unity to perform rigging in animation, it can be referred to as unity rigging. It is one of the most powerful and renowned platforms for animation, creating the finest and most professional animation creations.

Part 2 Is It Better to Rig in Unity or Blender?
Another platform that can ideally assist you in animation is Blender. A common question arises as to whether one should choose blender rigging over Unity or vice versa. We have laid down the following table to compare the different features of Blender with that of Unity.
| | Unity | Blender | |
| ——————- | ————————————————————————————————————————- | ————————————————————————————————————————————— |
| About | It is a game engine that enables you in creating human-machine interfaces, AR simulations, customize splash screens, etc. | It is a computer graphics software that is open source and is mainly used for creating 3D models. |
| Types Supported | Supports 3D | |
| Best Purpose | Ideal for film, architecture, automotive, transportation, and other industries | Ideal for animation and design that assists in VFX, simulation, organizations of all sizes with rendering, modeling, and video editing. |
There are many features that Blender lacks, but Unity includes. The features included in Unity but are absent in Blender are as follows.
● Drawing
● Games
● In-Game Analytics
● Multi-player Gaming Network
● Player Management
● Virtual Reality
● IT Asset Management
● Prototype Creation
Therefore, it is preferred to opt for Unity rigging than Blender rigging, as Blender lacks a considerable number of features.
Part 3 How To Use Animation Rigging In Unity
Now, we will be introducing you to the different steps that will help you in unity rig animation. The following list includes the steps in the sequence that, when you deploy, will help you rig in the platform of Unity.
Step 1Installation
The first step is to install the “animation rigging package” of Unity. You will get the animation rigging package in the “Package Manager”. You will be able to avail of this animation package in Unity 2019.1 and above.
This package offers you a library that consists of rig constraints. And this library of rig constraints enables you to create procedural motion during the runtime. And the general term used for this is called “runtime rigging”.
The “Asset’s Animator Root” consist of the “Rig Builder Component”, which is the source where the rigs are accumulated. The rigs here are the constraints put together in groups. With these steps you will be able to create Unity humanoid rig that will make your animation creations look the finest, most realistic and most professional.

Step 2Rig Builder set-up
After installing the unity animation rigging package, the next step is to set up the rig builder. You will have to use the “Animator component” in this step. Using the “Animator component”, integrate the “Rig Builder component” with the “GameObject”. Generally, in the hierarchy of rig, it is the topmost “Transform”.
Then, you will have to make a new child GameObject. To which, you will have to integrate the “Rig component”. After this step, you need to access the “Animator root”, where you will find the “Rig Builder component”. In the “Rig Builder component”, you need to assign the “Rig to the Rig Layers” list.
It will complete the task of creating the most basic rig. The further steps will help you install the required behaviours in the character or characters.

Step 3Bone Rendering
Whether it is unity rigging or 3D, bone rendering is the most crucial step to enable your animation characters to gain movement. The “Unity Editor” will help you interact and work with the character’s skeleton in the “Scene view.”
You can add “Transform” lists and then display them in various visual styles with the help of the “Bone Renderer: component. It enables you to integrate numerous “Bone Renderer” components, each of them having its unique style of display. As a result, gameplay debugging, rig setup, keyframing, and other artist workflows are facilitated.

Step 4Adding Rig Effectors
This step enables one to add Gizmos to Transforms, facilitating selection and visualisation. The “Effector” are invisible during “Game View”, and this step enhances the quality of the character animation.

Step 5Managing the Rig Constraints
Your characters gain “runtime animation” through the rig constraints, and thus, these are the building blocks facilitating assembling the rigs. The rigs are combined in multiple and varied ways to obtain the desired motions and movements in the characters.

Step 6Working with the Two Bone IK Constraint
The first step here is to rest your character to the “Bind Pose.” you can do so by opting for the “Menu Bar” and selecting the “Animation Rigging” option. You will find the “Bind Pose” option there, and you will have to click on it.

Then add a child GameObject below “Character Rig”. Then add a new child GameObject below “Right Arm IK”. Integrate two new child GameObjects beneath the “Right Arm Ik” by naming the first and the second one “RH IK Target” and “RH IK Hint”, respectively.

Integrate the “Rig Builder Component” with the “Animator root GameObject”. Then proceed with selecting the “CharecterRig GameObject” and integrating a “Rig Component”. Select “Two Bone IK Contrainst” to the “Right Arm IK.”

Then, incorporate a “Box Effector” to the RH IK Target. Integrate a “Ball Effector” to the “RH IK Hint”.

Then select the “RH IK Hint” and “Right Elbow”. Select “Animation Rigging>align Transform”. Move away from the “Ball Effector”. Select the “Right Arm IK GameObject” and integrate the required bones. Integrate the Character Rig GameObkect with Rig Layer list by selecting the option of “Ninja”. Then press “Play” and see your creation come to life.

Now, you might as well want to showcase your creativity in editing and video making. For that, we have the best tool for you- FILMORA. This is the finest video editing tool with the most proficient features included in the following list.
● Over 8effects for editing videos
● Keyboard shortcut, audio ducking colour, colour match
● You can also change the speed of the videos
● Every professional-level video editing tool that you need is included in Wondershare Filmora Video Editor
The features are innumerable and so can not be possibly listed differently. So, you can readily try out this tool yourself, and if you do not want to purchase in the first instance, you can easily avail of its free trial. Although, we can guarantee that after using its free trial, you would definitely want to use every avail feature of the tool!

For Win 7 or later (64-bit)
For macOS 10.12 or later
● Key Takeaways from This Episode →
● A short introduction to the process of rigging, with which we proceeded on describing and understanding what unity rigging is. We also stated how important it is in the sphere of animation.
● Next, we compared rigging in Blender and Unity. After comparing the different factors, we decided that it is optimum to choose Unity for character rigging because of the lack of features in Blender.
● Lastly, we introduced you to the best video editing tool that will equally assist you in nurturing your creativity, video editing, and animation skills.
Animation is one such aspect that is formed from the integration of several varied factors and processes. One of the most vital ones is the process of rigging. Thus, we will be discussing Unity character rigging as Unity is one of the most efficient platforms for animation.
Additionally, we will introduce you to one of the best tools you can use to edit videos and nurture the creative skills you carry in yourself. So, without any further delay, let us start our discussion.
In this article
01 [What is Unity Rigging?](#Part 1)
02 [Is It Better to Rig in Unity or Blender?](#Part 2)
03 [How To Use Animation Rigging In Unity](#Part 3)
Part 1 What is Unity Rigging?
To understand what Unity rigging is, we must start our discussion first by discussing rigging in animation. In animation, rigging is the process in which your animation characters are separated into two parts. One is the mesh-like structure of the characters. And the other is the skeletal structure given to the characters.
You integrate bones and joints and join them accordingly in the characters present in your animation. It is similar to the presence of the human skeletal system. Moreover, just like the skeletal system in humans helps in the movements of the different parts of the body, the bone and joint structure through rigging also enables the characters in animation to move.
Therefore, we can say that rigging is the process by which you can enable your characters’ in animation to move and show different facial expressions, etc. So, it is obvious that without the process of rigging, the animation is impossible, which makes rigging one of the most crucial aspects of animation.
Now that we know what rigging in animation is, we will be discussing what is animation rigging in Unity. Unity technologies have developed a cross-platform gaming engine called ‘Unity’. And this platform also offers the ones interested in animation to learn animation rigging.
The Unity platform offers robust and effective tools for animation rigging. And these tools assist the animators to create real-time rigs in Unity. Most commonly, the set of tools in Unity for rigging is used on the characters. But, if one likes, they can also use the tools on ani Game Object that includes animations and skeletons.
Therefore, when you utilise the platform of Unity or the toolsets of Unity to perform rigging in animation, it can be referred to as unity rigging. It is one of the most powerful and renowned platforms for animation, creating the finest and most professional animation creations.
Part 2 Is It Better to Rig in Unity or Blender?
Another platform that can ideally assist you in animation is Blender. A common question arises as to whether one should choose blender rigging over Unity or vice versa. We have laid down the following table to compare the different features of Blender with that of Unity.
| | Unity | Blender | |
| ——————- | ————————————————————————————————————————- | ————————————————————————————————————————————— |
| About | It is a game engine that enables you in creating human-machine interfaces, AR simulations, customize splash screens, etc. | It is a computer graphics software that is open source and is mainly used for creating 3D models. |
| Types Supported | Supports 3D | |
| Best Purpose | Ideal for film, architecture, automotive, transportation, and other industries | Ideal for animation and design that assists in VFX, simulation, organizations of all sizes with rendering, modeling, and video editing. |
There are many features that Blender lacks, but Unity includes. The features included in Unity but are absent in Blender are as follows.
● Drawing
● Games
● In-Game Analytics
● Multi-player Gaming Network
● Player Management
● Virtual Reality
● IT Asset Management
● Prototype Creation
Therefore, it is preferred to opt for Unity rigging than Blender rigging, as Blender lacks a considerable number of features.
Part 3 How To Use Animation Rigging In Unity
Now, we will be introducing you to the different steps that will help you in unity rig animation. The following list includes the steps in the sequence that, when you deploy, will help you rig in the platform of Unity.
Step 1Installation
The first step is to install the “animation rigging package” of Unity. You will get the animation rigging package in the “Package Manager”. You will be able to avail of this animation package in Unity 2019.1 and above.
This package offers you a library that consists of rig constraints. And this library of rig constraints enables you to create procedural motion during the runtime. And the general term used for this is called “runtime rigging”.
The “Asset’s Animator Root” consist of the “Rig Builder Component”, which is the source where the rigs are accumulated. The rigs here are the constraints put together in groups. With these steps you will be able to create Unity humanoid rig that will make your animation creations look the finest, most realistic and most professional.
Step 2Rig Builder set-up
After installing the unity animation rigging package, the next step is to set up the rig builder. You will have to use the “Animator component” in this step. Using the “Animator component”, integrate the “Rig Builder component” with the “GameObject”. Generally, in the hierarchy of rig, it is the topmost “Transform”.
Then, you will have to make a new child GameObject. To which, you will have to integrate the “Rig component”. After this step, you need to access the “Animator root”, where you will find the “Rig Builder component”. In the “Rig Builder component”, you need to assign the “Rig to the Rig Layers” list.
It will complete the task of creating the most basic rig. The further steps will help you install the required behaviours in the character or characters.
Step 3Bone Rendering
Whether it is unity rigging or 3D, bone rendering is the most crucial step to enable your animation characters to gain movement. The “Unity Editor” will help you interact and work with the character’s skeleton in the “Scene view.”
You can add “Transform” lists and then display them in various visual styles with the help of the “Bone Renderer: component. It enables you to integrate numerous “Bone Renderer” components, each of them having its unique style of display. As a result, gameplay debugging, rig setup, keyframing, and other artist workflows are facilitated.
Step 4Adding Rig Effectors
This step enables one to add Gizmos to Transforms, facilitating selection and visualisation. The “Effector” are invisible during “Game View”, and this step enhances the quality of the character animation.
Step 5Managing the Rig Constraints
Your characters gain “runtime animation” through the rig constraints, and thus, these are the building blocks facilitating assembling the rigs. The rigs are combined in multiple and varied ways to obtain the desired motions and movements in the characters.
Step 6Working with the Two Bone IK Constraint
The first step here is to rest your character to the “Bind Pose.” you can do so by opting for the “Menu Bar” and selecting the “Animation Rigging” option. You will find the “Bind Pose” option there, and you will have to click on it.
Then add a child GameObject below “Character Rig”. Then add a new child GameObject below “Right Arm IK”. Integrate two new child GameObjects beneath the “Right Arm Ik” by naming the first and the second one “RH IK Target” and “RH IK Hint”, respectively.
Integrate the “Rig Builder Component” with the “Animator root GameObject”. Then proceed with selecting the “CharecterRig GameObject” and integrating a “Rig Component”. Select “Two Bone IK Contrainst” to the “Right Arm IK.”
Then, incorporate a “Box Effector” to the RH IK Target. Integrate a “Ball Effector” to the “RH IK Hint”.
Then select the “RH IK Hint” and “Right Elbow”. Select “Animation Rigging>align Transform”. Move away from the “Ball Effector”. Select the “Right Arm IK GameObject” and integrate the required bones. Integrate the Character Rig GameObkect with Rig Layer list by selecting the option of “Ninja”. Then press “Play” and see your creation come to life.
Now, you might as well want to showcase your creativity in editing and video making. For that, we have the best tool for you- FILMORA. This is the finest video editing tool with the most proficient features included in the following list.
● Over 8effects for editing videos
● Keyboard shortcut, audio ducking colour, colour match
● You can also change the speed of the videos
● Every professional-level video editing tool that you need is included in Wondershare Filmora Video Editor
The features are innumerable and so can not be possibly listed differently. So, you can readily try out this tool yourself, and if you do not want to purchase in the first instance, you can easily avail of its free trial. Although, we can guarantee that after using its free trial, you would definitely want to use every avail feature of the tool!
For Win 7 or later (64-bit)
For macOS 10.12 or later
● Key Takeaways from This Episode →
● A short introduction to the process of rigging, with which we proceeded on describing and understanding what unity rigging is. We also stated how important it is in the sphere of animation.
● Next, we compared rigging in Blender and Unity. After comparing the different factors, we decided that it is optimum to choose Unity for character rigging because of the lack of features in Blender.
● Lastly, we introduced you to the best video editing tool that will equally assist you in nurturing your creativity, video editing, and animation skills.
https://images.wondershare.com/filmora/article-images/filmora9-website
2D Character Animation: Everything You Should Know About It
An easy yet powerful editor
Numerous effects to choose from
Detailed tutorials provided by the official channel
2D character animation is one of the significant kinds of animation popularly used for creating animated movies, marketing videos, cartoons, advertisements, educational content, corporate presentations, video games, etc.
With the popularity of video content, more and more businesses tend to use animation for promotion, as they magnify conversion rates by 20%. Some companies hire 2D character animation services; others try to make them online with software help.
In this article
01 [What is 2D Character Animation and What Does 2D Animation Do?](#Part 1)
02 [2D Character Animation Tips and Tricks](#Part 2)
03 [An Ultimate Guide to Create 2D Character Animation Online](#Part 3)
04 [5 Great 2D Character Animation Templates](#Part 4)
Part 1 What is 2D Character Animation and What Does 2D Animation Do?
2D animation is identified by having its characters and objects created in a 2D space. It means that they only have height and width to specify.
However, 2D animation is considered a traditional style, known from the 1800s. Initially, it was designed by merging the frames in which one drawing was followed by another and making them different; every second consists of 24 frames.
We all remember the classic Disney animations. Snow White and the Seven Dwarfs, The Little Mermaid, Bambi, etc. They are some of the highly famous 2D animation styles.
With the advancement of computer technologies, this process also got digitized through various 2D character animation software.
In this guide, we’ll talk about everything relatable to 2D character animation, and let’s proceed with the expert tips and tricks to create inspirational style within animation character 2D.
Part 2 2D Character Animation Tips and Tricks
01Look for a real-time reference
Using a real-world reference for 2D character animation can help you effectively animate faces. For example, when studios collaborate with voice-over artists, they often record their facial movements. It further helps 2D animators to ensure their expressions get captured convincingly.
If it seems impossible, you can consider using your face, so you have something to refer back to. You could also use a mirror and utter the words your character will speak. It will display the correct animated expressions.
02Observe real life
You need to use observation a lot more. One of the primary aspects of 2D character animation is bringing life to animate objections. Therefore, you must carefully consider how emotion can get portrayed and select each movement accordingly.
Take time watching how people in real-life environments talk and interact with each other, how they express emotions, how they move, etc. Please don’t spend much time doing this, as it is valuable to research.
03Simplicity is the key
2D character animation is never complex compared with 3D. Think carefully before creating a scene too complicated. You must not include too much information, which is hard to digest, and you may even find yourself compromising the scene’s realism. Try not to heavy the stage with too many pose changes or other elements, and keep it genuine.
04Draw animation again and again
Drawing animation consumes a lot of time. You can’t complete it within one day, so you better know deep down that one task only can be done after you have revamped it various times. For 2D character animation, you may need to draw objects on paper several times.
You can’t master the skill of animation character 2D quickly. Luckily, all pains will be relieved someday.
05Feedback is important
Feedback is an essential element of artistic development. It’s wise to actively seek out feedback from familiar figures who can help you enhance. Naturally, we may see work we have invested a great deal of time and effort indifferently to someone not so involved in the creative process. Feedback can equate to a valuable learning opportunity that will assist you produce the results hit the spot much more appropriately.
Part 3 An Ultimate Guide to Create 2D Character Animation Online
Let’s now look at making an illustrated 2D character animation move on a screen.
While there are nearly numerous options for 2D character animation tools and software, this tutorial will animate a character in Adobe After Effects.
Steps to create 2D character animation After Effects
01Step 1: Download and Install Duik
You need to install the Duik animation plugin for Adobe After Effects to simplify the whole process. You can animate and rig characters’ entire limbs with Duik using just the placement of their feet and hands.
While this isn’t an essential step, it can be valuable for beginners, as you’ll see in this tutorial. Luckily, Duik is available for free from Rainbox Laboratory.
02Step 2: Design Your Character
You need a moving character before you’re able to start animating. You can create this character in Adobe Illustrator and import it into After Effects.
Try creating a straightforward character with an aim on the character’s limbs.
In the example mentioned below, you can see that the body is a very rudimentary shape—a circle—with long legs that make it simple to consider the animation process.

Check the character’s joints. Making a round joint between the lower and upper parts of the legs, for instance, will help the character move more smoothly.

03Step 3: Make and Import Your Character Artwork
Now, you’ll need to make a few final adjustments before moving your character artwork. Break your character out into layers firstly. Every section of the character that will move independently needs a separate layer.
So, layers include his circular body, face, and the leg’s segments (i.e., lower leg, upper leg, and foot).

To import your character artwork, go to File, click the Import tab, and choose your character file. Ensure that you need to import it as a composition to ensure it includes the layers you just created.
04Step 4: Establish Initial Character Rigging
Now, the 2D character animation is almost over by the initial rigging.
Firstly, lower the opacity of all your layers to above 50% to see the critical joints within the character.
Next, you must ensure that the joints hinge in the ideal direction. It’s simple to do with the anchor point tool. For each character’s layer, place the anchor point at the center of gravity for each layer of the 2D character animation.
The anchor point would probably go between the eyes for the layer of the face (i.e., the nose, eyes, and mouth). For each legs’ section, hold the anchor point where the leg will hinge (e.g., the anchor point would be at the highest point for the leg’s upper portion, where it meets the body).

Then, use the parent tool to join the limbs’ sections. For instance, the parent of the foot would be the lower leg, and the upper portion is the parent of the lower leg.
It makes sure that the leg moves together as one unit with multiple hinge points.
Finally, use the Duik toolbar to create character controllers. Controllers control the rotation and position of critical elements within your character. For the ankles of the 2D character animation, you would select the controller that encompasses both the rotation and position.
05Step 5: Create Your Rig
Use the Duik toolbar to create a rig. Select each layer from the extremities inward from each limb, lasting with your controllers.
You would select the ankle for a leg, followed by the upper portion, the lower leg, and conclusively, the controller at the ankle. Then, select auto-rig within the Rigging area of the Duik toolbar.
The entire leg will move when you move that ankle controller. If your character contains them, repeat the process for the other leg, along with other limbs.
Before proceeding, test the limbs to make sure they hinge and move correctly. You need to adjust the opacity of the character back to 100% once you are satisfied with the movements.

06Step 6: Start Animating Your Character
You can begin animating after completing a rig. First, create keyframes—the ending and beginning points of the character’s movement. The character’s legs are at their most magnified are thus the endpoints for a walk cycle. Make sure that the beginning and ending of keyframes are identical to get an ideal loop.
Start adding in-between frames from there, like when one leg crosses over the other in the middle of a walking stride.
Moreover, you can add ‘easing” to the animation via 2D character animation After Effects’ Easy Ease tab, located under the Animation button, and Keyframe Assistant.
It will smoothen the transition between the keyframes. You will have a primary walking sequence at this instance.

Now, you can make further refinements to add detail and secondary movement, like a bobbing motion of the head. You can also modify elements like the keyframe velocity, further smoothing out the animation.
As you practice, you’ll get a better feel for your animation preferences and develop more advanced realistic 2D animation character design capabilities.
Part 4 5 Great 2D Character Animation Templates
1 – FrameStory Character Animation Toolkit
2 – Explainer Video Character Animation ToolKit
3 – 2D Character Animation After Effects Template
4 – Character Animation ToolKit
5 – Rigged Character Animation Mockup Template
Given above is a list of the best 2D character animation templates worth considering. Yet, if you are tired of using After Effects Templates, why not select Wondershare Filmora Template Mode?
It is a brand-new mode recently launched by Filmora to ramp up your story. It is a simplistic way to use compared with After Effects.
****Wondershare Filmora Video Editor Template Mode**
For Win 7 or later (64-bit)
For macOS 10.12 or later
Filmora Template Mode is a bold breakthrough that helps you create incredible videos in a minute. Forget about dragging n dropping the video clips into a timeline; Filmora template Mode provides you a new way of generating videos automatically by using various stylish video templates.
Steps to create a stunning animated video in 3 levels
01Step 1: Choose a template
Pick up a video template that best suits your needs.

02Step 2: Import Media
Import at least three video clips or images and let AI assist you in ramping the production process without hassle.

03Step 3: Export Project
Export media among multiple social media platforms.

● Key Takeaways from This Episode →
● Understanding 2D character animation tips and tricks
● A step by step guide to creating 2D character animation online
● Five best 2D character animation templates
● The best alternative of using the Template mode directly within the Wondershare Filmora
2D character animation is one of the significant kinds of animation popularly used for creating animated movies, marketing videos, cartoons, advertisements, educational content, corporate presentations, video games, etc.
With the popularity of video content, more and more businesses tend to use animation for promotion, as they magnify conversion rates by 20%. Some companies hire 2D character animation services; others try to make them online with software help.
In this article
01 [What is 2D Character Animation and What Does 2D Animation Do?](#Part 1)
02 [2D Character Animation Tips and Tricks](#Part 2)
03 [An Ultimate Guide to Create 2D Character Animation Online](#Part 3)
04 [5 Great 2D Character Animation Templates](#Part 4)
Part 1 What is 2D Character Animation and What Does 2D Animation Do?
2D animation is identified by having its characters and objects created in a 2D space. It means that they only have height and width to specify.
However, 2D animation is considered a traditional style, known from the 1800s. Initially, it was designed by merging the frames in which one drawing was followed by another and making them different; every second consists of 24 frames.
We all remember the classic Disney animations. Snow White and the Seven Dwarfs, The Little Mermaid, Bambi, etc. They are some of the highly famous 2D animation styles.
With the advancement of computer technologies, this process also got digitized through various 2D character animation software.
In this guide, we’ll talk about everything relatable to 2D character animation, and let’s proceed with the expert tips and tricks to create inspirational style within animation character 2D.
Part 2 2D Character Animation Tips and Tricks
01Look for a real-time reference
Using a real-world reference for 2D character animation can help you effectively animate faces. For example, when studios collaborate with voice-over artists, they often record their facial movements. It further helps 2D animators to ensure their expressions get captured convincingly.
If it seems impossible, you can consider using your face, so you have something to refer back to. You could also use a mirror and utter the words your character will speak. It will display the correct animated expressions.
02Observe real life
You need to use observation a lot more. One of the primary aspects of 2D character animation is bringing life to animate objections. Therefore, you must carefully consider how emotion can get portrayed and select each movement accordingly.
Take time watching how people in real-life environments talk and interact with each other, how they express emotions, how they move, etc. Please don’t spend much time doing this, as it is valuable to research.
03Simplicity is the key
2D character animation is never complex compared with 3D. Think carefully before creating a scene too complicated. You must not include too much information, which is hard to digest, and you may even find yourself compromising the scene’s realism. Try not to heavy the stage with too many pose changes or other elements, and keep it genuine.
04Draw animation again and again
Drawing animation consumes a lot of time. You can’t complete it within one day, so you better know deep down that one task only can be done after you have revamped it various times. For 2D character animation, you may need to draw objects on paper several times.
You can’t master the skill of animation character 2D quickly. Luckily, all pains will be relieved someday.
05Feedback is important
Feedback is an essential element of artistic development. It’s wise to actively seek out feedback from familiar figures who can help you enhance. Naturally, we may see work we have invested a great deal of time and effort indifferently to someone not so involved in the creative process. Feedback can equate to a valuable learning opportunity that will assist you produce the results hit the spot much more appropriately.
Part 3 An Ultimate Guide to Create 2D Character Animation Online
Let’s now look at making an illustrated 2D character animation move on a screen.
While there are nearly numerous options for 2D character animation tools and software, this tutorial will animate a character in Adobe After Effects.
Steps to create 2D character animation After Effects
01Step 1: Download and Install Duik
You need to install the Duik animation plugin for Adobe After Effects to simplify the whole process. You can animate and rig characters’ entire limbs with Duik using just the placement of their feet and hands.
While this isn’t an essential step, it can be valuable for beginners, as you’ll see in this tutorial. Luckily, Duik is available for free from Rainbox Laboratory.
02Step 2: Design Your Character
You need a moving character before you’re able to start animating. You can create this character in Adobe Illustrator and import it into After Effects.
Try creating a straightforward character with an aim on the character’s limbs.
In the example mentioned below, you can see that the body is a very rudimentary shape—a circle—with long legs that make it simple to consider the animation process.
Check the character’s joints. Making a round joint between the lower and upper parts of the legs, for instance, will help the character move more smoothly.
03Step 3: Make and Import Your Character Artwork
Now, you’ll need to make a few final adjustments before moving your character artwork. Break your character out into layers firstly. Every section of the character that will move independently needs a separate layer.
So, layers include his circular body, face, and the leg’s segments (i.e., lower leg, upper leg, and foot).
To import your character artwork, go to File, click the Import tab, and choose your character file. Ensure that you need to import it as a composition to ensure it includes the layers you just created.
04Step 4: Establish Initial Character Rigging
Now, the 2D character animation is almost over by the initial rigging.
Firstly, lower the opacity of all your layers to above 50% to see the critical joints within the character.
Next, you must ensure that the joints hinge in the ideal direction. It’s simple to do with the anchor point tool. For each character’s layer, place the anchor point at the center of gravity for each layer of the 2D character animation.
The anchor point would probably go between the eyes for the layer of the face (i.e., the nose, eyes, and mouth). For each legs’ section, hold the anchor point where the leg will hinge (e.g., the anchor point would be at the highest point for the leg’s upper portion, where it meets the body).
Then, use the parent tool to join the limbs’ sections. For instance, the parent of the foot would be the lower leg, and the upper portion is the parent of the lower leg.
It makes sure that the leg moves together as one unit with multiple hinge points.
Finally, use the Duik toolbar to create character controllers. Controllers control the rotation and position of critical elements within your character. For the ankles of the 2D character animation, you would select the controller that encompasses both the rotation and position.
05Step 5: Create Your Rig
Use the Duik toolbar to create a rig. Select each layer from the extremities inward from each limb, lasting with your controllers.
You would select the ankle for a leg, followed by the upper portion, the lower leg, and conclusively, the controller at the ankle. Then, select auto-rig within the Rigging area of the Duik toolbar.
The entire leg will move when you move that ankle controller. If your character contains them, repeat the process for the other leg, along with other limbs.
Before proceeding, test the limbs to make sure they hinge and move correctly. You need to adjust the opacity of the character back to 100% once you are satisfied with the movements.
06Step 6: Start Animating Your Character
You can begin animating after completing a rig. First, create keyframes—the ending and beginning points of the character’s movement. The character’s legs are at their most magnified are thus the endpoints for a walk cycle. Make sure that the beginning and ending of keyframes are identical to get an ideal loop.
Start adding in-between frames from there, like when one leg crosses over the other in the middle of a walking stride.
Moreover, you can add ‘easing” to the animation via 2D character animation After Effects’ Easy Ease tab, located under the Animation button, and Keyframe Assistant.
It will smoothen the transition between the keyframes. You will have a primary walking sequence at this instance.
Now, you can make further refinements to add detail and secondary movement, like a bobbing motion of the head. You can also modify elements like the keyframe velocity, further smoothing out the animation.
As you practice, you’ll get a better feel for your animation preferences and develop more advanced realistic 2D animation character design capabilities.
Part 4 5 Great 2D Character Animation Templates
1 – FrameStory Character Animation Toolkit
2 – Explainer Video Character Animation ToolKit
3 – 2D Character Animation After Effects Template
4 – Character Animation ToolKit
5 – Rigged Character Animation Mockup Template
Given above is a list of the best 2D character animation templates worth considering. Yet, if you are tired of using After Effects Templates, why not select Wondershare Filmora Template Mode?
It is a brand-new mode recently launched by Filmora to ramp up your story. It is a simplistic way to use compared with After Effects.
****Wondershare Filmora Video Editor Template Mode**
For Win 7 or later (64-bit)
For macOS 10.12 or later
Filmora Template Mode is a bold breakthrough that helps you create incredible videos in a minute. Forget about dragging n dropping the video clips into a timeline; Filmora template Mode provides you a new way of generating videos automatically by using various stylish video templates.
Steps to create a stunning animated video in 3 levels
01Step 1: Choose a template
Pick up a video template that best suits your needs.
02Step 2: Import Media
Import at least three video clips or images and let AI assist you in ramping the production process without hassle.
03Step 3: Export Project
Export media among multiple social media platforms.
● Key Takeaways from This Episode →
● Understanding 2D character animation tips and tricks
● A step by step guide to creating 2D character animation online
● Five best 2D character animation templates
● The best alternative of using the Template mode directly within the Wondershare Filmora
Also read:
- What Are Differences Between 2D And 3D Animation
- New 2024 Approved How to Create Benime Whiteboard Animation in Android
- 2D Character Animation Everything You Should Know About It for 2024
- Updated 2024 Approved Ways on How to Get Started in Stop Motion Claymation
- New 2024 Approved 5 Foolproof Amazing Anime Text to Speech Tips
- Updated 4 Things You Should Know About Pinterest GIF
- How to Make a Video a Live Photo 2023
- Updated In 2024, Best 15 Horror Animes That Will Trigger a Heart Attack
- New Best 15 Classics Animated Cartoon Movies for 2024
- Updated 2024 Approved 5 Different Animation Styles A Simple but Comprehensive Guide
- Updated Best 15 Classics Animated Cartoon Movies
- New How to Animate Image on Scroll and Text on Scroll?
- Updated 10 Cartoon Character Makers to Create Animated Characters
- How to Draw Cartoons Step by Step with This Guide for 2024
- Updated In 2024, 8 Best Motion Graphics Online Tools for Your Inspiration
- In 2024, Adobe Animate CC Everything You Need to Know
- In 2024, Best 12 Video to GIF Converters High Quality to Check Out
- 10 Most Memorable Japanese Cat Cartoons
- In 2024, That Will Make Aesthetic Cartoon Drawing More Understandable
- New 10 Photoshop Cartoon Effects For Creatives
- Updated How to Get Started in Stop Motion Claymation for 2024
- 2024 Approved The Most Efficient Techniques to Make 3D Animation Character
- How to Create YouTube Intro Animation Like a Pro
- Epic Formula to Animate Photos From These 10 Animate Pictures App
- Updated In 2024, Nurturing Mind, Heart, and Soul on the Top 5 Anime Streaming Sanctuaries
- 2024 Approved Ways to Get the Most up to Date Cartoon Character Design Tips
- New 2024 Approved Top Tips for Effortless Unity 3D Animation
- New How to Make Whiteboard Animation Videos for 2024
- 10 Options for Your Need on Animation Makers for 2024
- Updated The Top 20 Motion Graphics Companies & Studios
- What This Post Can Teach You About Clay Animation
- In 2024, Interesting Fundamentals and Ultimate Guide to Animated Characters Drawings
- New In 2024, Top 4 Websites to Get Anime Footage for Free
- New Great Ways to Make Claymation Videos for 2024
- Updated 15 Best Sites to Watch Cartoons Online Free And So Can You for 2024
- New Create or Find Good Morning/Night GIFs
- Updated In 2024, Best 15 Greatest Claymation Movies of All Time
- Ultimate Guide to Animated Characters Drawings for 2024
- Updated How to Make a Video a Live Photo 2023 for 2024
- Updated 10 Best Tools to Make Pic Collage for Windows
- New 2024 Approved 21 Top Free Anime Websites to Watch Anime Online-Anime
- The Top Free 12 GIF Meme Maker at a Glance for 2024
- Updated Methods to Make Photo Motion Effect Online, In 2024
- Updated In 2024, In-Depth Study of Cartoon Painting Starts From Learning to Draw It
- Stunning Ideas About Creating Personalised WhatsApp GIF Sticker
- Updated 2024 Approved 5 Different Animation Styles A Simple but Complete Guide
- New How to Learn Cartoon Characters Sketch Quickly
- New In 2024, How I Animate Discord Profile Pictures (& You Can Too)
- Updated 2024 Approved 10 Best Convert Video Between GIF Software High Quality
- In 2024, 3 Effective Methods to Fake GPS location on Android For your Samsung Galaxy F34 5G | Dr.fone
- In 2024, Ways To Find Unlocking Codes For Meizu 21 Phones
- Effective Ways To Fix Checkra1n Error 31 From Apple iPhone SE
- In 2024, Unlock Your Boost Mobile iPhone 14 Pro Before the Plan Expires
- How To Enable USB Debugging on a Locked Itel P55 Phone
- How to Unlock Apple iPhone 11 Pro, Apples New iPhone | Dr.fone
- Complete Tutorial for Oppo Reno 11 5G Hard Reset | Dr.fone
- Restore Missing App Icon on Lava Blaze Pro 5G Step-by-Step Solutions | Dr.fone
- How to Unlock iPhone SE Passcode without Computer? | Dr.fone
- 5 Ways to Track Vivo Y100t without App | Dr.fone
- In 2024, Latest way to get Shiny Meltan Box in Pokémon Go Mystery Box On Vivo Y17s | Dr.fone
- In 2024, Ultimate guide to get the meltan box pokemon go For OnePlus Nord N30 5G | Dr.fone
- Is GSM Flasher ADB Legit? Full Review To Bypass Your Vivo V30 ProFRP Lock
- How to Transfer Photos from Lava Yuva 2 to New Android? | Dr.fone
- How to Factory Reset Honor Play 7T without Losing Data | Dr.fone
- The Most Useful Tips for Pokemon Go Ultra League On Oppo F25 Pro 5G | Dr.fone
- How To Simulate GPS Movement With Location Spoofer On Lenovo ThinkPhone? | Dr.fone
- Turning Off Two Factor Authentication From iPhone 14 Plus? 5 Tips You Must Know
- In 2024, How to Transfer Contacts from Vivo Y100t to Other Android Devices Devices? | Dr.fone
- In 2024, How to Track Realme Narzo 60 5G by Phone Number | Dr.fone
- In 2024, 4 Things You Must Know About Apple iPhone X Activation Lock
- How to Track Realme Narzo 60 Pro 5G Location by Number | Dr.fone
- Best Fixes For Vivo Y100i Hard Reset | Dr.fone
- In 2024, How To Check if Your Asus ROG Phone 7 Is Unlocked
- In 2024, How to Use Life360 on Windows PC For Tecno Phantom V Fold? | Dr.fone
- How to Repair Broken video files of Itel P55 5G?
- In 2024, How to Fake GPS on Android without Mock Location For your Vivo S17 | Dr.fone
- In 2024, Is GSM Flasher ADB Legit? Full Review To Bypass Your Asus ROG Phone 8FRP Lock
- In 2024, What is the best Pokemon for pokemon pvp ranking On Motorola Moto G73 5G? | Dr.fone
- This is how you can recover deleted pictures from Huawei .
- In 2024, How Can We Bypass Samsung Galaxy F15 5G FRP?
- Solutions to Spy on Xiaomi Redmi 12 5G with and without jailbreak | Dr.fone
- In 2024, Switch Cards Between Apple iPhone 14 Plus and other iPhones Will Move All Phone Services? | Dr.fone
- The Ultimate Guide to Vivo Y27 4G Pattern Lock Screen Everything You Need to Know
- What are Location Permissions Life360 On Vivo T2 5G? | Dr.fone
- In 2024, How to Cast Honor X50i+ Screen to PC Using WiFi | Dr.fone
- How to Unlock Apple iPhone 11 Pro Max with a Mask On | Dr.fone
- In 2024, Mastering Lock Screen Settings How to Enable and Disable on Vivo Y27 4G
- How To Upgrade or Downgrade iPhone 15 Plus Without Data Loss? | Dr.fone
- Nokia Data Retrieval tool – restore lost data from Nokia C110
- In 2024, How to Unlock Samsung Galaxy Z Flip 5 Phone with Broken Screen
- In 2024, What Is a SIM Network Unlock PIN? Get Your Vivo Y100 5G Phone Network-Ready
- How to Change/Fake Your Oppo A78 5G Location on Viber | Dr.fone
- Apple ID is Greyed Out From iPhone 7 How to Bypass?
- Title: 2024 Approved Tutorial on Making Unity 2D Animation
- Author: Elon
- Created at : 2024-06-23 02:10:09
- Updated at : 2024-06-24 02:10:09
- Link: https://animation-videos.techidaily.com/2024-approved-tutorial-on-making-unity-2d-animation/
- License: This work is licensed under CC BY-NC-SA 4.0.
