
:max_bytes(150000):strip_icc():format(webp)/GettyImages-1198110246-e12a30f2b10645edb984dc66113911c9.jpg)
2024 Approved Tutorials to Make Animated Images
Tutorials to Make Animated Images
Tutorials to Make Animated Images – Even if You’re Just Starting out
An easy yet powerful editor
Numerous effects to choose from
Detailed tutorials provided by the official channel
Not to mention, if you animate pictures, you’ll be able to stand apart in the crowd and maximize your brand exposure. By creating animated happy birthday images, you’ll be able to bring life to the still images.
In this guide, we’ll walk you through different ways to make animated images. Read this guide and you’ll be able to animate your images without any hassle.
In this article
01 [What are Animated Pictures?](#Part 1)
02 [Is It Possible to Animate Pictures On Your Own?](#Part 2)
03 [5 Best Tools to Make Animated Pictures](#Part 3)
Part 1 What are Animated Pictures?
For readers who aren’t familiar with animated images, here’s what you need to know. An animated image (also referred to as GIF) is designed by adding motion to a still image. Remember all the funny cat memes you see on Instagram? Well, they are a great example of animated images.
However, it’s important to understand that the applications of animated images aren’t only limited to social media and marketing. You can even animate your family photos and add life to those 20-year old pictures you’ve been saving forever. Not to mention, you can also create animated images of your favorite superhero movie. Love the Justice League starcast? Simply pick your favorite superhero and you’ll get stunning Justice League animated images.
Part 2 Is It Possible to Animate Pictures On Your Own?
When it comes to animating images, the majority of users want to know if it’s at all possible to create animated images by themselves. Even though animating an image is a tedious task, it’s safe to say that you can do it without any external help.
Of course, if you choose a tool like Adobe Photoshop to do the job, you’ll be out of luck because of the steep learning curve. But, there are hundreds of other alternatives you can use to animate pictures. There are ready-to-use 3D photo animators online that’ll allow you to animate any image within a few seconds. These tools are equipped with pre-installed animation templates that you can apply to any image and bring life to them.
Part 3 4 Best Tools to Make Animated Pictures
So, now that you know the key benefits of animated pictures, let’s take a look at the seven best tools you can use to create stunning animated images. To ensure we provide you with a diverse list of photo animators, we have included both platform-dependent and cross-platform solutions to the list.
01Motion Leap
Motion Leap is a free 3D motion graphics generator that works on the Android platform. The tool offers an easy-to-use interface that editors can utilize to turn their still images into dedicated videos that play in loop. One of the major advantages of using Motion Leap for animating images is that it doesn’t leave a watermark on your pictures, even if you are using the free version of the tool. In fact, the free version offers all the necessary tools you’ll need to create animated pictures.
Since Motion Leap works on mobile, you don’t have to fire up your laptop every time you want to create an animated picture. Simply launch the app on your smartphone and you’ll be able to animate pictures right away. As of now, the only downside of Motion Leap is that it doesn’t save the output in GIF format, unless you have purchased the premium version.
Key Features:
● Add motion graphics by simply dragging objects on your screen
● Freeze specific areas within the image and apply dedicated filters
● Built-in editing panel to adjust different elements such as exposure, contrast, highlights, etc.
● Motion Leap is affordable
02Animate Me
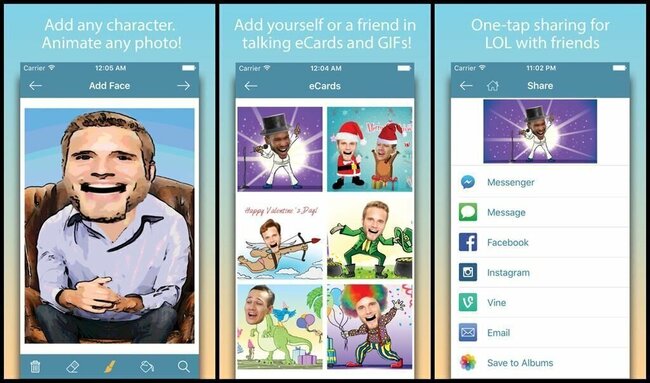
Animate Me is an exclusive iOS 3D photo animator that you can install on your iDevices and animate different types of images instantly. Though the app isn’t targeted towards professional marketers, it’s a fun tool if you want to animate your family photos or create happy birthday animated images. The app is available for free, which means you can create fun animated pictures without paying a single penny.
In addition to animating pictures, you can also use Animate Me to animate videos and create visually appealing eCards. In case you don’t know, e-Cards are used to communicate with others in a fun manner. With dozens of built-in e-card templates, you’ll be able to create high-quality e-cards right away. These templates support complete customization - so you can also use your face to customize the e-card.
Key Features of Animate Me:
● Hundreds of ready-to-use e-card templates
● Add sound effects to the characters used in an e-card
● Animate images and videos right on your smartphone
03Gyazo
Gyazo is a desktop-based screen capture tool that’s primarily designed to capture full or a specific portion of the screen. The tool is available for Windows, macOS, and Linux, which means you can use it across all desktop platforms without any hassle.
Apart from capturing screens, you can also use Gyazo to turn screen captures into dedicated GIFs with a single click. It’s worth noting that you won’t get any advanced editing options like other tools mentioned in the list, but Gyazo is still a reliable tool for users who want to animate screenshots.
Key Features:
● Capture screens and turn them into GIFs
● Animate pictures for free
● Available for Windows, macOS, and Linux
04GIFmaker.me
GIFMaker.me is an online 3D photo animator that’s primarily designed to turn regular images into GIFs. Being an online tool, you have the liberty to access GIFmaker.me across different platforms, be it mobile or desktop. The online editor offers an easy-to-use interface and provides an array of built-in features that you can use to create stunning GIFs.
All you have to do is decide the motion by dragging the subjects across the screen and the tool will automatically replicate it in a loop. Apart from creating GIFs from still images, you can also use GIFmaker to add animations to your videos. The tool has several ready-to-use animation templates that you can apply to your videos with the simple drag-&-drop functionality.
Key Features:
● Merge multiple images to create a custom GIF
● Reduce the size or reverse the motion of a particular GIF
● No sign-in required. You can start creating animated images directly with GIFmaker.me
Key Takeaways from This Episode
● Animated pictures can be used in different situations, be it for marketing purposes or simply for fun
● With dedicated tools, you can animate pictures all by yourself - without any professional assistance
● Wondershare Filmora Pro is an ideal video editing tool that provides a plethora of animation templates that you can apply to both videos and images.
Not to mention, if you animate pictures, you’ll be able to stand apart in the crowd and maximize your brand exposure. By creating animated happy birthday images, you’ll be able to bring life to the still images.
In this guide, we’ll walk you through different ways to make animated images. Read this guide and you’ll be able to animate your images without any hassle.
In this article
01 [What are Animated Pictures?](#Part 1)
02 [Is It Possible to Animate Pictures On Your Own?](#Part 2)
03 [5 Best Tools to Make Animated Pictures](#Part 3)
Part 1 What are Animated Pictures?
For readers who aren’t familiar with animated images, here’s what you need to know. An animated image (also referred to as GIF) is designed by adding motion to a still image. Remember all the funny cat memes you see on Instagram? Well, they are a great example of animated images.
However, it’s important to understand that the applications of animated images aren’t only limited to social media and marketing. You can even animate your family photos and add life to those 20-year old pictures you’ve been saving forever. Not to mention, you can also create animated images of your favorite superhero movie. Love the Justice League starcast? Simply pick your favorite superhero and you’ll get stunning Justice League animated images.
Part 2 Is It Possible to Animate Pictures On Your Own?
When it comes to animating images, the majority of users want to know if it’s at all possible to create animated images by themselves. Even though animating an image is a tedious task, it’s safe to say that you can do it without any external help.
Of course, if you choose a tool like Adobe Photoshop to do the job, you’ll be out of luck because of the steep learning curve. But, there are hundreds of other alternatives you can use to animate pictures. There are ready-to-use 3D photo animators online that’ll allow you to animate any image within a few seconds. These tools are equipped with pre-installed animation templates that you can apply to any image and bring life to them.
Part 3 4 Best Tools to Make Animated Pictures
So, now that you know the key benefits of animated pictures, let’s take a look at the seven best tools you can use to create stunning animated images. To ensure we provide you with a diverse list of photo animators, we have included both platform-dependent and cross-platform solutions to the list.
01Motion Leap
Motion Leap is a free 3D motion graphics generator that works on the Android platform. The tool offers an easy-to-use interface that editors can utilize to turn their still images into dedicated videos that play in loop. One of the major advantages of using Motion Leap for animating images is that it doesn’t leave a watermark on your pictures, even if you are using the free version of the tool. In fact, the free version offers all the necessary tools you’ll need to create animated pictures.
Since Motion Leap works on mobile, you don’t have to fire up your laptop every time you want to create an animated picture. Simply launch the app on your smartphone and you’ll be able to animate pictures right away. As of now, the only downside of Motion Leap is that it doesn’t save the output in GIF format, unless you have purchased the premium version.
Key Features:
● Add motion graphics by simply dragging objects on your screen
● Freeze specific areas within the image and apply dedicated filters
● Built-in editing panel to adjust different elements such as exposure, contrast, highlights, etc.
● Motion Leap is affordable
02Animate Me
Animate Me is an exclusive iOS 3D photo animator that you can install on your iDevices and animate different types of images instantly. Though the app isn’t targeted towards professional marketers, it’s a fun tool if you want to animate your family photos or create happy birthday animated images. The app is available for free, which means you can create fun animated pictures without paying a single penny.
In addition to animating pictures, you can also use Animate Me to animate videos and create visually appealing eCards. In case you don’t know, e-Cards are used to communicate with others in a fun manner. With dozens of built-in e-card templates, you’ll be able to create high-quality e-cards right away. These templates support complete customization - so you can also use your face to customize the e-card.
Key Features of Animate Me:
● Hundreds of ready-to-use e-card templates
● Add sound effects to the characters used in an e-card
● Animate images and videos right on your smartphone
03Gyazo
Gyazo is a desktop-based screen capture tool that’s primarily designed to capture full or a specific portion of the screen. The tool is available for Windows, macOS, and Linux, which means you can use it across all desktop platforms without any hassle.
Apart from capturing screens, you can also use Gyazo to turn screen captures into dedicated GIFs with a single click. It’s worth noting that you won’t get any advanced editing options like other tools mentioned in the list, but Gyazo is still a reliable tool for users who want to animate screenshots.
Key Features:
● Capture screens and turn them into GIFs
● Animate pictures for free
● Available for Windows, macOS, and Linux
04GIFmaker.me
GIFMaker.me is an online 3D photo animator that’s primarily designed to turn regular images into GIFs. Being an online tool, you have the liberty to access GIFmaker.me across different platforms, be it mobile or desktop. The online editor offers an easy-to-use interface and provides an array of built-in features that you can use to create stunning GIFs.
All you have to do is decide the motion by dragging the subjects across the screen and the tool will automatically replicate it in a loop. Apart from creating GIFs from still images, you can also use GIFmaker to add animations to your videos. The tool has several ready-to-use animation templates that you can apply to your videos with the simple drag-&-drop functionality.
Key Features:
● Merge multiple images to create a custom GIF
● Reduce the size or reverse the motion of a particular GIF
● No sign-in required. You can start creating animated images directly with GIFmaker.me
Key Takeaways from This Episode
● Animated pictures can be used in different situations, be it for marketing purposes or simply for fun
● With dedicated tools, you can animate pictures all by yourself - without any professional assistance
● Wondershare Filmora Pro is an ideal video editing tool that provides a plethora of animation templates that you can apply to both videos and images.
Top 20+ Best Free GIF Makers Online to Quickly Edit GIF
Top 20+ Best Free GIF Makers Online to Quickly Edit GIF

Shanoon Cox
Mar 27, 2024• Proven solutions
GIF sharing images are gaining more and more popularity these days because of their lesser loading time and small file size. The best part is that they can be constructed with ease using a few editing tools online. Most of the online GIF editors are available for free and they allow users to develop customized interactive images with the advanced feature sets, which simplify the creation process of GIF images and videos. However, there are still some GIF makers online that are not easy to use.
We need an easy to use and free GIF editor online to use for quickly making a GIF and share it with friends to have fun. The following list are great makers to edit GIF from video or image. Check it out!
Recommendation – Filmora: Easy GIF Maker Software Free Download for PC and Mac
Wondershare Filmora is often recommended due to its rich feature set that allows easy customization, editing and conversion. If you are looking forward to working on GIF images and videos then probably Filmora can solve all your troubles. You can add text/title to edit your GIF. Besides, various stickers and overlays are also available to use. Below are few incredible features of Wondershare Filmora .
- This GIF editor can process all popular media file formats with ease and it works perfectly on Windows as well as Mac devices.
- Export images and videos to GIF format directly, or save the gif to the mobile device for sharing.
- Share the GIF Video to YouTube or Vimeo directly.
- It does not demand any active internet connection. Users simply need to download their tool and start working offline.
- It is possible to edit already created GIF images in Filmora and you can access inbuilt tools for this purpose. The list of commonly used editing tools includes overlays, elements and text etc.
- Users need not waste time uploading or downloading images because its drag and drop tools make everything much easier and laborious tasks can be completed within a fraction of seconds.
Check this video tutorial to know more details:
 Download Mac Version ](https://tools.techidaily.com/wondershare/filmora/download/ )
The article below includes the list of best online GIF maker tools that you can use to make GIF from images or videos with ease online.
Top 20+ Best Free GIF Makers Online
1. Filmora meme maker

Filmora meme maker is your ultimate solution. It helps you make image, GIF and video memes directly without watermark. It is totally FREE to use and no sign up. You can change text size, color and position to create caption when you are using this online GIF editor. You can also put text inside or outside in GIF. Just with a few clicks, your GIF is done . Try it now!
How to make a GIF online?
Some people are wondering how do I make a GIF online? Well, don’t worry. We will let you know the steps to make a GIF online with Filmora meme maker. You just need to open it and then follow the steps below. Check it out!
1. Import video/image first
To make a gif online, you need to import your media and gif material to Filmora meme maker. You can make a GIF from video or image, and Filmora meme maker supports all. You can drag gif resource to the center of the page, or directly click it to upload.
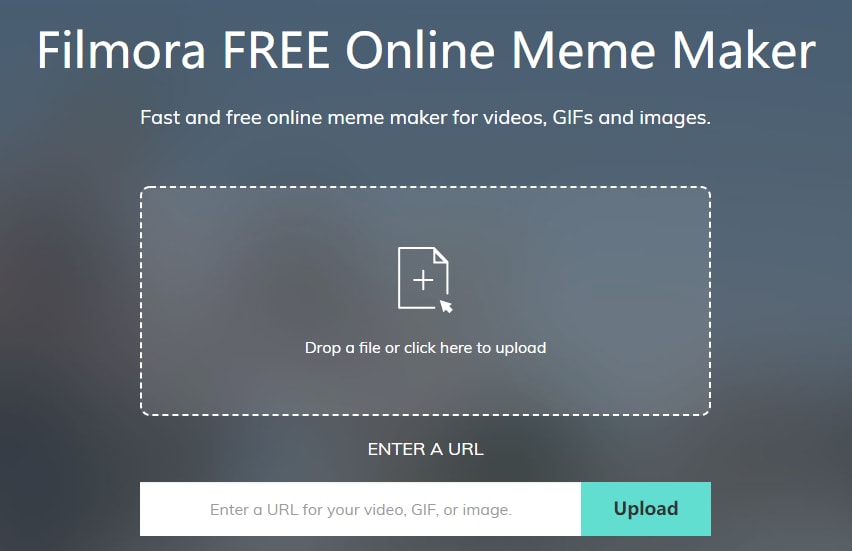
2. Edit the GIF online
If you want to make GIF from video. Just import the video to this tool. The file size must be under 50MB size. After it is uploaded, you need to trim one part you like. Drag the slider to left or right to get it. If your uploaded file is image, you can flip and rotate it first. You can enter your text from inside and outside. Besides, you can change font type, size and color. Just position your text field to anywhere.
3. Export the GIF file
After selecting the format you want, click create to export this GIF. You can preview it online. Click download if you like it. It may take a while according to your file size.

See, make gif online with Filmora online maker is easy.
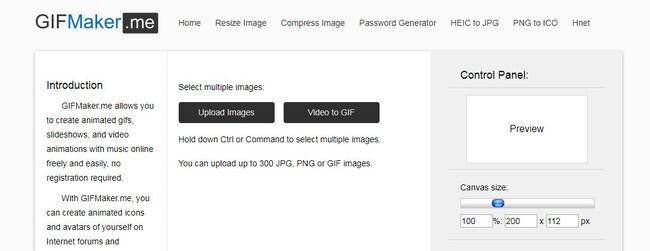
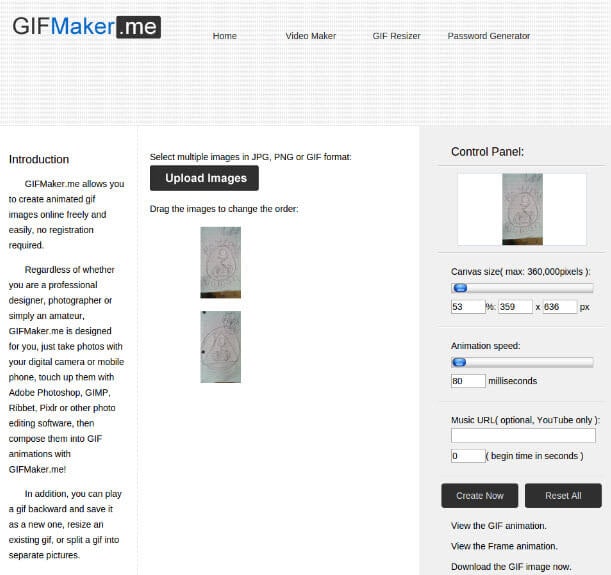
3. GIFMaker.me:
This photo to GIF online maker can easily process almost all media file formats like JPG, GIF and PNG so that interactive GIFs can be created. Users can also enjoy live preview of all changes before exporting created GIF image to device, so it is a great GIF editor online to use.
4. Giphy:

This popular GIF search engine and interactive design tool can develop results of your choice instantly. Giphy allows you to make GIF slideshow with images as well as videos. You can add multiple images or paste the YouTube, Vimeo or Giphy URL to upload the video. You can adjust the duration of each frame/image, and add captions, stickers, filters to the GIF file or draw on it. And you can choose different styles and animations when adding captions when editing GIF.
5. GIFMakerOnline.com:

You can use it to make GIF online. Those who are searching for a super quick way to develops GIFs with additional watermarks and image quality settings can prefer to move t GIFMakerOnline.com. It can directly upload your resulting GIF files on popular social media sites.
6. GIFMake.com:
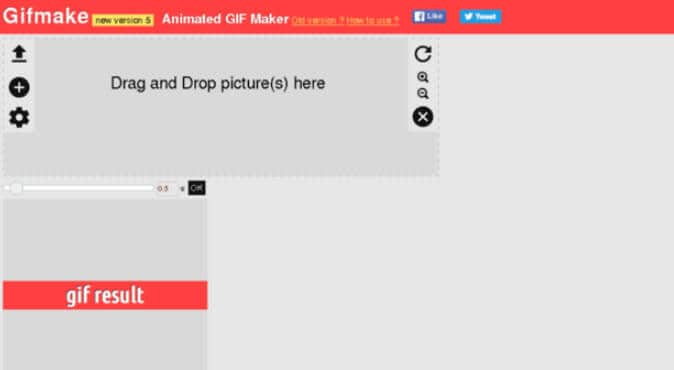
If you have already collected images in png, jpeg and gif format and now want to create one interesting animated GIF image by merging them then GIFMake.com can help you better. You can this online gif editor to make a GIF with dragging and dropping.
7. ImgFlip:
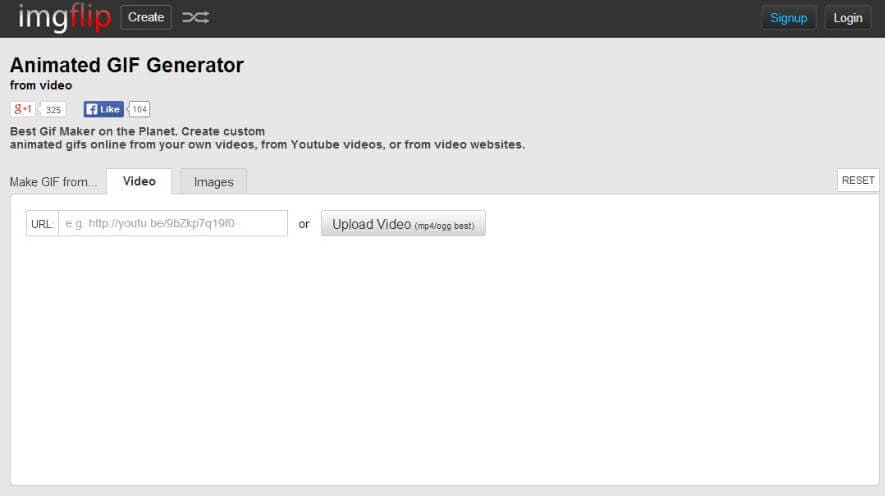
This online animated GIF maker allows users to create GIFs from images, photos and videos. You can add a MP4/OGG video from computer or paste a video URL to upload the video footage. You can upload several images to make a GIF and adjust the width, height and quality.
It will help you to watch preview of your GIF before it is created and that is definitely important for generating good results. Users can alter quality of GIF with animations, photo order adjustments and resizing features. Besides that, you can also add text to GIF or crop and rotate GIFs.
8. MakeaGIF.com:
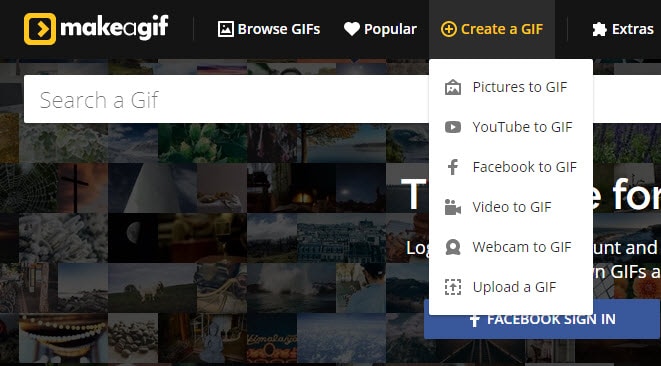
This GIF editor can help users to develop a high quality GIF from collection of images or from a video file. It can also process webcam recordings or YouTube videos for creation of GIFs.
9. Animated GIF Maker:
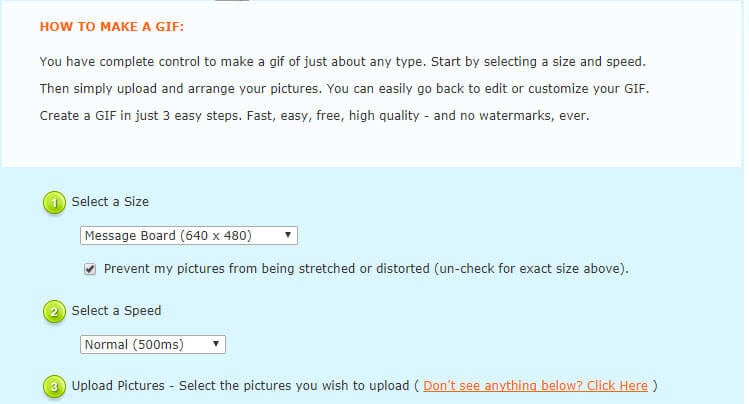
This animated GIF maker is a portable solution for all GIF creators with only 2MB file size. It is designed with intuitive and easier to use interface that can develop classic GIFs for you with better adjustments over quality, frame delays and size, though it still provides the Size and Speed preset. However, this GIF Maker only allows you to upload images to make GIF.
10. Convertio:
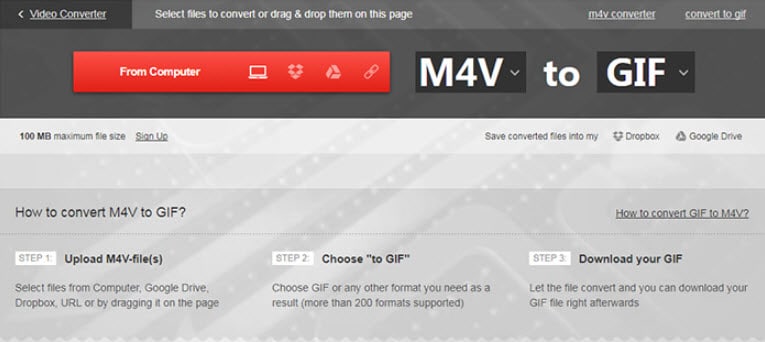
Convertio is an online GIF maker which is able to easily process all file formats so that users can easily upload any image or video for development of application specific GIFs.
This online GIF editor allows you to upload image or videos in several ways: uploading from your computer, from Dropbox, from Google Drive, or pasting the file URL or website URL. The maximum file size is 100MB. Besides converting image or videos to GIF, you can also convert GIF files to MP4 videos.
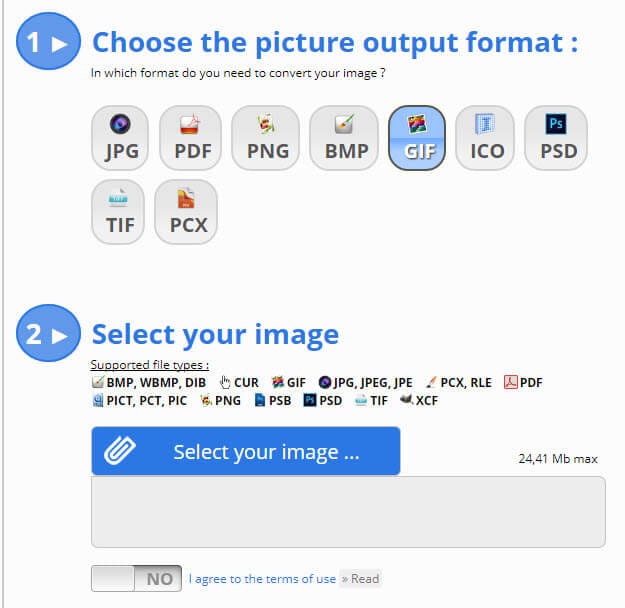
11. Convert Image:
This GIF maker tool is be used to convert png, jpg and many other images formats into animated GIFs with ease. However, you can upload one image at a time and the maximum file size is 24MB.
12. CreateGIF.net:
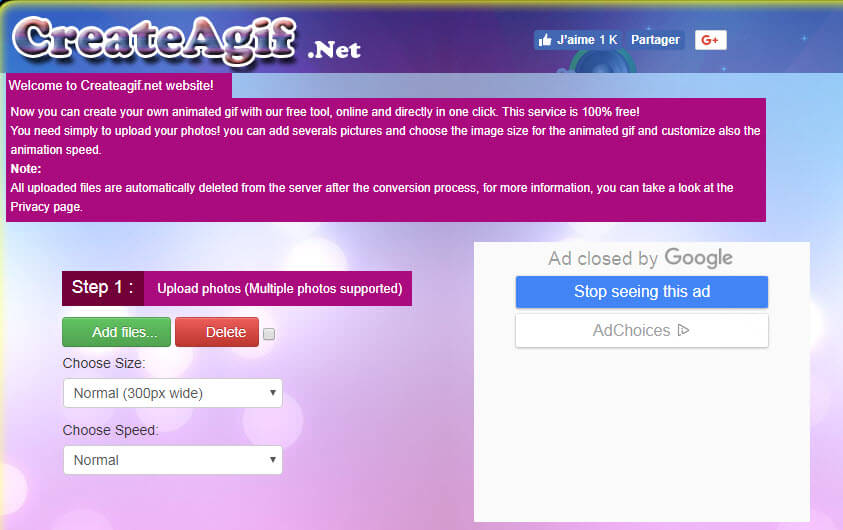
Here is a free and easy to use online GIF animator tool that helps users to select multiple images from computer. After manipulating details about speed and size of GIFs, it can help you to generate quality GIF images.
This online GIF Maker allows you to re-order the multiple images and compose several images into one GIF file. However, the biggest pixel is 450px wide. There is no indication about the maximum file size that you can upload, but when I upload a 700KB, it reports error.
13. EditPhotoForFree.com:
There are so many unique features and colour manipulation options on EditPhotoForFree.com. Users can easily access to many customizable features on this platform for development of application specific GIFs.
This online GIF creator allows you to add images in JPG and PNG formats, animated gif and video in Mp4, WebM and OGG formats to make a GIF. It also allows you to record webcam to make a GIF and add shapes in SVG format. You can add GIF effects like text and background. There are some editing features built in, such as flip horizontal and flip vertical, and shadow and opacity settings. But the preview window is not reacted timely.
14. GIFPal:

This creative GIF maker can show you effect of all changes that you made to your imported files before saving the final results. One can customize GIF content with hue, saturation, contrast, text and drawing tools. You also can edit GIF by adding text.
15. GIFNinja:
It can easily split or create animated GIF files as per user’s specifications. This online GIF editor can help you make GIF in a minute.
16. GIFGear.com:
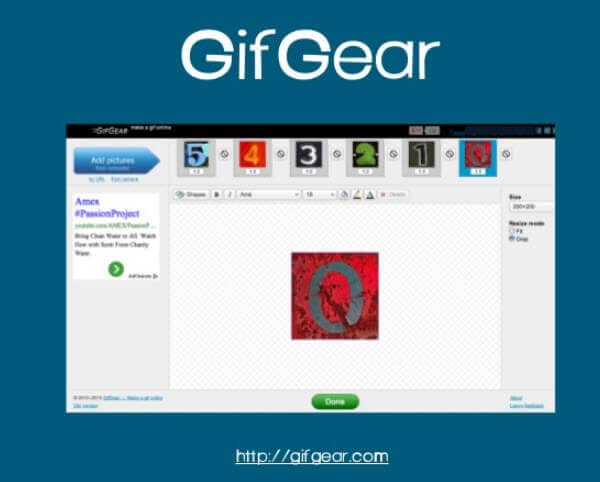
GIFGear.com allows users to develop interactive GIF images with particular size and customization options. One can also decide duration of animation and several effects can be added in form of frames, overlays, pixelations and fade etc.
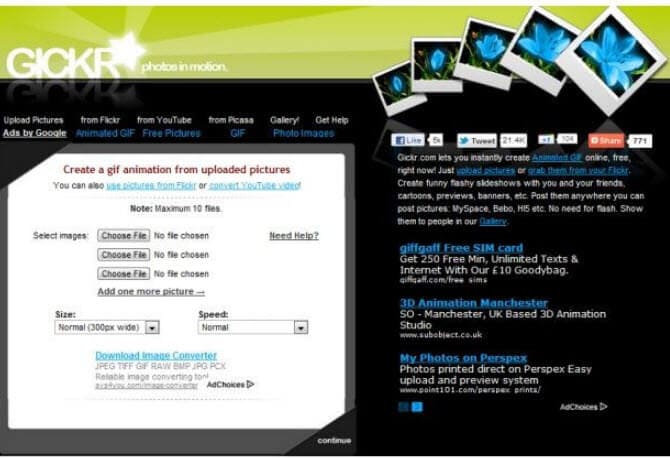
17. Gickr.com:
Gickr.com allows users to develop animated GIFs within few seconds and this platform can be accessed by anyone for free. Users simply need to uploaded images, add desired effects and convert project to GIF extension.
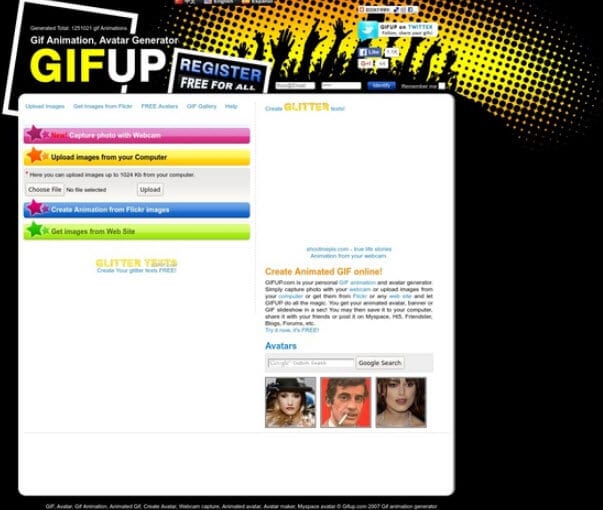
18. Gifup.com:
Here is your advanced yet personal GIF creator that can provide impressive results instantly. It allows users to upload 1024 Kb file size with ease and uploaded images can be easily processed for generation of classic GIFs. Its interface is easy to understand. If you like to make GIF like a pro, you can this one to make a GIF. Have a try!
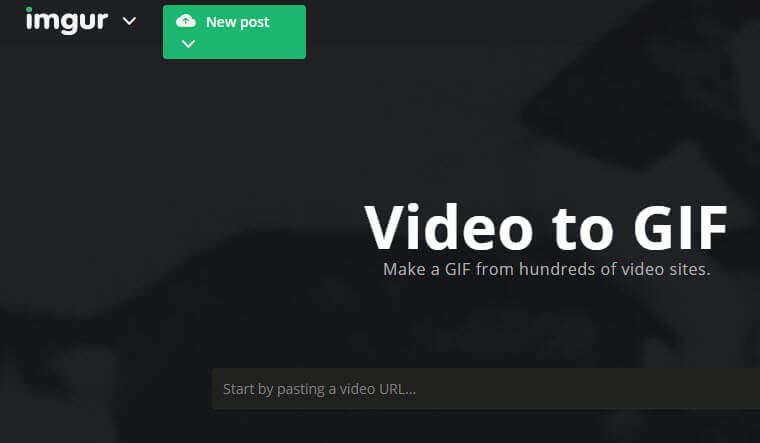
19. IMGUR:
Here is one of the most widely used GIF image sharing center that can easily process raw content from computer or in form of provided URLs.
20. Meme Center:

This platform is being popularly used for development of meme with so many quick features. It is really impressive to add reactions to GIFs or select already existing videos/images to get desired results. You can still edit GIF thought it is a meme center.
21. Online Image Converter:

This tool works on your browser and can share resulting GIF files on other popular websites with ease. The process is smooth to edit GIF online.
22. Picasion:

It assists users to develop classic GIFs with images that can be uploaded from computer or using video URLs. One can also import images from webcam or try stills from Flickr or Picasa.
23. Toolson.Net’s GIF Maker:
With this GIF maker tool you can easily arrange your uploaded images in any order and then apply GIF based animation effect to that sequence. One can also add borders, frames and filters to this content.
24. Zamzar:
This name is popular among professional image editors due to its wide set of features and impressive capabilities.
Conclusion
These free online GIF makers discussed above allows you to turning images or videos to looping and animated GIFs quickly. If you want to try more offline GIF creators, you can check our picks ofbest free GIF creators in 2019 , which includes both offline and online gif creators. Which one(s) will you use to make a GIF online? Share with us in the comment section below.
Download Mac Version ](https://tools.techidaily.com/wondershare/filmora/download/ )
Frequently Asked Questions about Making GIFs Online
1. How to make a GIF without a watermark?
You’ll need a GIF maker or a video editing software that allows you to export GIF files without a watermark. We recommend EZGIF or Filmora Meme Maker because you can use them for free and none of your GIFs are going to be watermarked, regardless of how many you create on a daily or weekly level.
EZGIF lets you combine up to 2000 images in a single GIF file, and it supports all common image files, so that you don’t have to worry about the format in which pictures you want to include in your GIF are saved. Filmora Meme Maker is the right choice for you if you want to add text to the GIFs you create.
2. What are GIFs made of?
GIFs consist of a series of pictures that simulate a movement, and they can either be comprised of still or moving images.
In case you want to create a GIF out of photos, you will have to take a number of consecutive photos with your camera and then merge them into a GIF. The number of photos you will have to take depends on the duration of the GIF you want to create, and it varies from just five to more than one thousand.
Optionally, you can also create GIFs from video files, but you should keep in mind that the sound is going to be removed automatically, as GIF files cannot contain audio.
Shanoon Cox
Shanoon Cox is a writer and a lover of all things video.
Follow @Shanoon Cox
Shanoon Cox
Mar 27, 2024• Proven solutions
GIF sharing images are gaining more and more popularity these days because of their lesser loading time and small file size. The best part is that they can be constructed with ease using a few editing tools online. Most of the online GIF editors are available for free and they allow users to develop customized interactive images with the advanced feature sets, which simplify the creation process of GIF images and videos. However, there are still some GIF makers online that are not easy to use.
We need an easy to use and free GIF editor online to use for quickly making a GIF and share it with friends to have fun. The following list are great makers to edit GIF from video or image. Check it out!
Recommendation – Filmora: Easy GIF Maker Software Free Download for PC and Mac
Wondershare Filmora is often recommended due to its rich feature set that allows easy customization, editing and conversion. If you are looking forward to working on GIF images and videos then probably Filmora can solve all your troubles. You can add text/title to edit your GIF. Besides, various stickers and overlays are also available to use. Below are few incredible features of Wondershare Filmora .
- This GIF editor can process all popular media file formats with ease and it works perfectly on Windows as well as Mac devices.
- Export images and videos to GIF format directly, or save the gif to the mobile device for sharing.
- Share the GIF Video to YouTube or Vimeo directly.
- It does not demand any active internet connection. Users simply need to download their tool and start working offline.
- It is possible to edit already created GIF images in Filmora and you can access inbuilt tools for this purpose. The list of commonly used editing tools includes overlays, elements and text etc.
- Users need not waste time uploading or downloading images because its drag and drop tools make everything much easier and laborious tasks can be completed within a fraction of seconds.
Check this video tutorial to know more details:
Download Mac Version ](https://tools.techidaily.com/wondershare/filmora/download/ )
The article below includes the list of best online GIF maker tools that you can use to make GIF from images or videos with ease online.
Top 20+ Best Free GIF Makers Online
1. Filmora meme maker
Filmora meme maker is your ultimate solution. It helps you make image, GIF and video memes directly without watermark. It is totally FREE to use and no sign up. You can change text size, color and position to create caption when you are using this online GIF editor. You can also put text inside or outside in GIF. Just with a few clicks, your GIF is done . Try it now!
How to make a GIF online?
Some people are wondering how do I make a GIF online? Well, don’t worry. We will let you know the steps to make a GIF online with Filmora meme maker. You just need to open it and then follow the steps below. Check it out!
1. Import video/image first
To make a gif online, you need to import your media and gif material to Filmora meme maker. You can make a GIF from video or image, and Filmora meme maker supports all. You can drag gif resource to the center of the page, or directly click it to upload.
2. Edit the GIF online
If you want to make GIF from video. Just import the video to this tool. The file size must be under 50MB size. After it is uploaded, you need to trim one part you like. Drag the slider to left or right to get it. If your uploaded file is image, you can flip and rotate it first. You can enter your text from inside and outside. Besides, you can change font type, size and color. Just position your text field to anywhere.
3. Export the GIF file
After selecting the format you want, click create to export this GIF. You can preview it online. Click download if you like it. It may take a while according to your file size.
See, make gif online with Filmora online maker is easy.
3. GIFMaker.me:
This photo to GIF online maker can easily process almost all media file formats like JPG, GIF and PNG so that interactive GIFs can be created. Users can also enjoy live preview of all changes before exporting created GIF image to device, so it is a great GIF editor online to use.
4. Giphy:
This popular GIF search engine and interactive design tool can develop results of your choice instantly. Giphy allows you to make GIF slideshow with images as well as videos. You can add multiple images or paste the YouTube, Vimeo or Giphy URL to upload the video. You can adjust the duration of each frame/image, and add captions, stickers, filters to the GIF file or draw on it. And you can choose different styles and animations when adding captions when editing GIF.
5. GIFMakerOnline.com:
You can use it to make GIF online. Those who are searching for a super quick way to develops GIFs with additional watermarks and image quality settings can prefer to move t GIFMakerOnline.com. It can directly upload your resulting GIF files on popular social media sites.
6. GIFMake.com:
If you have already collected images in png, jpeg and gif format and now want to create one interesting animated GIF image by merging them then GIFMake.com can help you better. You can this online gif editor to make a GIF with dragging and dropping.
7. ImgFlip:
This online animated GIF maker allows users to create GIFs from images, photos and videos. You can add a MP4/OGG video from computer or paste a video URL to upload the video footage. You can upload several images to make a GIF and adjust the width, height and quality.
It will help you to watch preview of your GIF before it is created and that is definitely important for generating good results. Users can alter quality of GIF with animations, photo order adjustments and resizing features. Besides that, you can also add text to GIF or crop and rotate GIFs.
8. MakeaGIF.com:
This GIF editor can help users to develop a high quality GIF from collection of images or from a video file. It can also process webcam recordings or YouTube videos for creation of GIFs.
9. Animated GIF Maker:
This animated GIF maker is a portable solution for all GIF creators with only 2MB file size. It is designed with intuitive and easier to use interface that can develop classic GIFs for you with better adjustments over quality, frame delays and size, though it still provides the Size and Speed preset. However, this GIF Maker only allows you to upload images to make GIF.
10. Convertio:
Convertio is an online GIF maker which is able to easily process all file formats so that users can easily upload any image or video for development of application specific GIFs.
This online GIF editor allows you to upload image or videos in several ways: uploading from your computer, from Dropbox, from Google Drive, or pasting the file URL or website URL. The maximum file size is 100MB. Besides converting image or videos to GIF, you can also convert GIF files to MP4 videos.
11. Convert Image:
This GIF maker tool is be used to convert png, jpg and many other images formats into animated GIFs with ease. However, you can upload one image at a time and the maximum file size is 24MB.
12. CreateGIF.net:
Here is a free and easy to use online GIF animator tool that helps users to select multiple images from computer. After manipulating details about speed and size of GIFs, it can help you to generate quality GIF images.
This online GIF Maker allows you to re-order the multiple images and compose several images into one GIF file. However, the biggest pixel is 450px wide. There is no indication about the maximum file size that you can upload, but when I upload a 700KB, it reports error.
13. EditPhotoForFree.com:
There are so many unique features and colour manipulation options on EditPhotoForFree.com. Users can easily access to many customizable features on this platform for development of application specific GIFs.
This online GIF creator allows you to add images in JPG and PNG formats, animated gif and video in Mp4, WebM and OGG formats to make a GIF. It also allows you to record webcam to make a GIF and add shapes in SVG format. You can add GIF effects like text and background. There are some editing features built in, such as flip horizontal and flip vertical, and shadow and opacity settings. But the preview window is not reacted timely.
14. GIFPal:
This creative GIF maker can show you effect of all changes that you made to your imported files before saving the final results. One can customize GIF content with hue, saturation, contrast, text and drawing tools. You also can edit GIF by adding text.
15. GIFNinja:
It can easily split or create animated GIF files as per user’s specifications. This online GIF editor can help you make GIF in a minute.
16. GIFGear.com:
GIFGear.com allows users to develop interactive GIF images with particular size and customization options. One can also decide duration of animation and several effects can be added in form of frames, overlays, pixelations and fade etc.
17. Gickr.com:
Gickr.com allows users to develop animated GIFs within few seconds and this platform can be accessed by anyone for free. Users simply need to uploaded images, add desired effects and convert project to GIF extension.
18. Gifup.com:
Here is your advanced yet personal GIF creator that can provide impressive results instantly. It allows users to upload 1024 Kb file size with ease and uploaded images can be easily processed for generation of classic GIFs. Its interface is easy to understand. If you like to make GIF like a pro, you can this one to make a GIF. Have a try!
19. IMGUR:
Here is one of the most widely used GIF image sharing center that can easily process raw content from computer or in form of provided URLs.
20. Meme Center:
This platform is being popularly used for development of meme with so many quick features. It is really impressive to add reactions to GIFs or select already existing videos/images to get desired results. You can still edit GIF thought it is a meme center.
21. Online Image Converter:
This tool works on your browser and can share resulting GIF files on other popular websites with ease. The process is smooth to edit GIF online.
22. Picasion:
It assists users to develop classic GIFs with images that can be uploaded from computer or using video URLs. One can also import images from webcam or try stills from Flickr or Picasa.
23. Toolson.Net’s GIF Maker:
With this GIF maker tool you can easily arrange your uploaded images in any order and then apply GIF based animation effect to that sequence. One can also add borders, frames and filters to this content.
24. Zamzar:
This name is popular among professional image editors due to its wide set of features and impressive capabilities.
Conclusion
These free online GIF makers discussed above allows you to turning images or videos to looping and animated GIFs quickly. If you want to try more offline GIF creators, you can check our picks ofbest free GIF creators in 2019 , which includes both offline and online gif creators. Which one(s) will you use to make a GIF online? Share with us in the comment section below.
Download Mac Version ](https://tools.techidaily.com/wondershare/filmora/download/ )
Frequently Asked Questions about Making GIFs Online
1. How to make a GIF without a watermark?
You’ll need a GIF maker or a video editing software that allows you to export GIF files without a watermark. We recommend EZGIF or Filmora Meme Maker because you can use them for free and none of your GIFs are going to be watermarked, regardless of how many you create on a daily or weekly level.
EZGIF lets you combine up to 2000 images in a single GIF file, and it supports all common image files, so that you don’t have to worry about the format in which pictures you want to include in your GIF are saved. Filmora Meme Maker is the right choice for you if you want to add text to the GIFs you create.
2. What are GIFs made of?
GIFs consist of a series of pictures that simulate a movement, and they can either be comprised of still or moving images.
In case you want to create a GIF out of photos, you will have to take a number of consecutive photos with your camera and then merge them into a GIF. The number of photos you will have to take depends on the duration of the GIF you want to create, and it varies from just five to more than one thousand.
Optionally, you can also create GIFs from video files, but you should keep in mind that the sound is going to be removed automatically, as GIF files cannot contain audio.
Shanoon Cox
Shanoon Cox is a writer and a lover of all things video.
Follow @Shanoon Cox
Best 8 Tools Tell You How to Make Slideshows for Instagram
Top 8 Tools Tell You How to Make Slideshows for Instagram
An easy yet powerful editor
Numerous effects to choose from
Detailed tutorials provided by the official channel
Instagram slideshows land among the latest social media trends of fun and entertainment. Learn how to attract jaw dropping peer attention with creating the same!
In this article
01 [When Should You Use an Instagram Slideshow?](#Part 1)
02 [How to Make an Instagram Slideshow with Music?](#Part 2)
03 [8 Best Instagram Slideshow Apps for Creating Outstanding Slideshow](#Part 3)
Part 1 When Should You Use an Instagram Slideshow?
Revolutions in technology has opened doors to a plenty of new and exciting means of information sharing, entertainment and communication. Playing its part in the game, Instagram slideshow has emerged as an exciting means of quick and impactful content sharing. Diving deeper into the discussion, let us talk about the different areas of working with an Instagram slide show in the following section:
01Explanatory Product Demonstrations and Stepwise Tutorials
Considering the diverse media collaboration entertained by this social media platform, you get the liberty to include 10 media files of videos and images while creating a slideshow on Instagram. This is an affordably sufficient media space to demonstrate your newly launched product in front of the target audience.
The aforesaid characteristic of a slideshow for Instagram can be put to another use of creating detailed, step by step guides and product usage tutorials to create an increased and confident customer reach and brand applicability. A few examples include the presentations of recipes by food blogs and chefs, or a detailed look of the day’s outfit by fashion bloggers.
02Interactive Storytelling or Recreate an Event
Gone are the times when stories and events were restricted to a single image or video with a limited scope of understanding and explanation. You can now work with a combination of multiple images and videos to create more vivid and graphical descriptions of stories, narratives and events.
You can work on creating an engaging slideshow for Instagram to tell an amazing story, voice a narration from the beginning to the end, or share your best moments with your cherished audience, which will surely give them the feel of enjoying the adventure along with you.
03Create a Collection
You can now use a slide show for Instagram to design and present a collection of manifold ideas and products within a single post. You can improvise the collection with displaying a series of related products, showcasing a summary of your different blog posts through the week, or simply present a list of your most reliable inspirations, resources and influencers.
04Exciting Video Teasers
If you have a scheduled video release to entertain your audience, try working with interactive slideshows for Instagram to create some sensational teaser content of the upcoming release to imbibe a natural sense of curiosity within your audience.
You can experiment with releasing a mini photoshoot tour of your filming set, share close up progression details, or include a cliffhanger in the end of your Instagram slideshow to ensure the retrieval of your audience towards watching the release of the actual big content. You can use these short teasers as effective means of creating a campaign buzz, while building a closer connect with your audience.
Part 2 How to Make an Instagram Slideshow with Music?
By now, you must have gathered enough knowledge regarding the credibility of Instagram slideshows in catering to a diversity of commercial, professional and personal content sharing needs. Considering the same, you may conveniently feel motivated to try hands at creating stunning slideshow presentations for Instagram on your own.
Adhering to the concern, let us move ahead with our discussion, while talking about how to make a slideshow for Instagram and supplement the same with adaptable background music to develop amazing content masterpieces and share them with social media peers, while grabbing their obvious attention.
While there are a number of choices in the software market to choose your Instagram slideshow creator tool, the FlexClip tool can be a reliable option. Read though the following section to learn the slideshow creation process in the program with a comprehensive and stepwise tutorial guide:
Step 1: Download the Slideshow Creator Tool
Visit the official website of FlexClip to download and install the slideshow maker software in your preferred device.

Step 2: Start from Scratch
After a successful installation, proceed to launch the tool in your system and wait till the software greets you with its welcome interface. Here, you will have to reach to and tap the ‘Start to Create’ button to begin with the slideshow creation process. You can also select a preset template to work on your slideshow if nothing new clicks in your mind.
Step 3: Select an Aspect Ratio
In the tool’s creator window, navigate to the ‘Options Panel’ at the left and click on ‘More’ to select a suitable aspect ratio. Picking the 9:16 ratio would be a good choice.

Step 4: Upload Your Media
In the same ‘Options Panel’, click on ‘Media’ for dragging and dropping the desired video and image files from your device to the program’s media timeline, followed by applying them to the tool’s storyboard. You can alternatively, choose to directly work with media pages of any preset slideshow template.

Step 5: Customize Your Media
You can now proceed to improvise your media files with amazing texts, filters, stickers, emojis, widgets, etc., by clicking on specific object categories from the ‘Options Panel’.

Step 6: Include Seamless Transitions
Proceed to uplift your creation to the next level with the application of stunning image and video transitions. Navigate to the ‘Options Panel’ and tap ‘Elements’. A variety of transition effects will be displayed to choose from. Select the one you like to add it to your slideshow.

Step 7: Add a Background Music
An in line background audio is the best way to set the mood of your slideshow. Choose to add the same to your creation for making a more engaging impact on the audience. Visit the ‘Options Panel’ again and click on ‘Music’ to open the program’s audio library and select a perfect background music from the huge variety of choices, to include in your slideshow.

Step 8: Preview Your Creation
When you have finished customizing your slideshow, navigate to the top right corner of the editor’s storyboard and hit the ‘Preview’ button to visualize and ensure that your slideshow has everything at the right place. You can continue editing if there is a need to make some changes.
Step 9: Time to Save and Share!
When you are happy with your work, consider saving it either to your device or Google Dropbox, from where you can easily upload the same to your Instagram handle.
Part 3 Best Instagram Slideshow Apps for Creating Outstanding Slideshow
Social media is the talk of the trend in today’s times, which has extended its boundaries to visibly everything around us. Speaking in the light of the fact, slideshow presentations are no exception. Social media platforms today have come up with amazing tools and applications to create and share a stunning slideshow Instagram story with utmost ease and within an affordable time span.
Now that you have developed a comprehensive understanding of the credibility of working with Instagram slideshows and their creation process with the inclusion of complementary background music, let us dive into learning about some of the best and most popular Instagram apps for creating awesome slideshow presentations in the following section:
01Filme Lite
This tool lands among the leading user preferences to work on creating slideshow presentations. The application software is packed with a heap of latest features that form the Instagram trends in current times.
Apart from complementing your slideshow creations with tons of features, this slideshow maker for Instagram grants you the liberty to include your most loved videos and images within your presentation and customize them with a diverse range of effects, along with adjusting their play duration within the slideshow. Additional to image and video customization, you are also allowed to choose the image transition style that perfectly suits your content arrangement within the slides.
Working with the tool, you can be sure of getting an unparalleled slideshow creation experience with a very interactive and user oriented design interface, that is simple enough to be easily understood and worked upon by a newbie to the creative world.
02VivaVideo
If you are working on a detailed presentation and wish to spark up your creation with stunning varieties of jaw dropping special effects, consider creating your PowerPoint slideshows in this application. The tool’s effect library is a storehouse of the most amazing special effects that promise of transforming your slideshow into a visual masterpiece.
You can separately apply these effects to each of the slideshow images or choose to work on a combination of selected effects to include within a single video. Apart from this, you are free to choose an apt background music for your presentation slides from the extensive audio library of the software. The bottom line is; you are assured to a complete fun experience while creating slideshows with this tool.
03Movavi
If you are familiar enough with the fundamental concepts and the trivial anecdotes of working with slideshow presentations and want to take your graphic creativity to the next level, you can try hands at using the Movavi slideshow creator software to design high end PowerPoint presentations of professional quality. The best thing about the tool is, it works online and does not require a software download for usage concerns.
Along with creating online slideshow presentations with ease, the tool permits you to create online videos within minutes and instantly download the same for specific usage. You can further, pop up your presentation slides with wonderful transition and animation effects and also make adjustments in the play duration of each slide. The tool lets you choose and add a perfect background music to your presentation from its conveniently vast audio library.
04Slideshow Lab
If you have just landed into the world of creating slideshow presentations and are looking for easy solutions on how to make a slideshow on Instagram, consider working with this software to polish your design creativity. The simple and user cohesive interface of the tool is best for beginners to understand and get customary with the creation process, that takes the minimum possible time to render an appreciable PowerPoint presentation.
Talking about the slideshow design process, you will need to start with selecting a set of desired images, followed by uploading the same into the tool’s slideshow creator timeline. The next step is to arrange the images in the sequential order of appearance, select an appealing background music and apply smooth image transitions. When you are done with everything, proceed to save the presentation to your device.
05MoShow
While you can choose to create stunning slideshow presentations with almost any class of images, the aforesaid app works best to render Instagram images into a top rated Instagram photo slideshow without compromising with the high resolution image quality of Instagram photos. The application integrates motion pictures and lighting effects to transform the otherwise regular images into lively still captures.
Considering the credibility of the tool in overall user experience, its indeed a thumbs up from graphic creators across the globe, thanks to its smart and interactive interface, in time performance and outstanding creation outputs.
06InVideo Editor
Put an end to your search of effective solutions on how to do a slideshow on Instagram with the InVideo Editor, a smart video and graphic editor that can also be employed to adhere to the requirement of creating amazing slideshow presentations from Instagram media. While the creation process hardly takes a few minutes, you can work with the application to explore your editing creativity to the finest levels. The tool works well with any of your MacOs and Windows compatible devices.
The editor’s effects library is loaded with tons of graphic transitions and filters that are dedicated to enhance the contents of your presentation with utmost ease. You can add creative modifications to the slideshow media, such as, cut, crop and trim videos and images and add the most convincing music, overlays, fonts, etc., and enjoy an additional free access to hundreds of stock videos and slideshow templates.
07LightMV
This one is an online slideshow creator utility that works well with almost any operating system including Windows, iOS, Android and Mac. Essentially a cloud centered editor program, this tool caters to your high quality slideshow creation needs in the most effective way. The design process is quite simple, where you only need to add the images and videos, design your presentation and wait till everything comes to place.
What’s more appealing factor about the tool is that you will never need to download the program in your device or purchase a subscription plan to use the application. All you need to do is land into the tool’s website in your favorite browser and tap on the ‘Slideshow’ option to begin with the creation process. You can select from a heap of preset stunning slideshow templates to create the most enhanced PowerPoint presentation.
08Fliptastic
The Fliptastic slideshow creator app is exclusively developed to adhere to the graphic design concerns of iOS users. This one is a no cost graphic utility with a plethora of versatile features and considerable user backup. The app’s effect library is packed with a unique set of slideshow design templates, transitions, background music choices and filters that work to compliment your presentation with the subtlest look ever.
Paying a bit extra attention to the audio inclusion within the slides, the app offers you a range of free music files to work with, while additionally allowing you to upload and use one from your device or the internet.
09Creating Instagram Slideshows With Filmora
Talking exclusively within the domain of video creation and editing, the credibility of the Wondershare Filmora Video Editor software needs no introduction. Moving ahead with our discussion, let us learn about the process of creating awesome Instagram slideshows with Filmora in the following section:
Step 1: Download and Install the Program
To begin with addressing the concern of how to make a slideshow on Instagram story, navigate to the official Wondershare website and download the Wondershare Filmora Video Editor to your preferred system and proceed to install the same.

Wondershare Filmora - Best Video Editor for Mac/Windows
5,481,435 people have downloaded it.
Build unique custom animations without breaking a sweat.
Focus on creating epic stories and leave the details to Filmora’s auto features.
Start a creative adventure with drag & drop effects and endless possibilities.
Filmora simplifies advanced features to save you time and effort.
Filmora cuts out repetition so you can move on to your next creative breakthrough.
Step 2: Import Your Media
Launch the editor program and wait for the latter’s welcome screen to appear. Here, you need to import the images, videos and other media files to the editor timeline for including them in your slideshow. It is recommended to collect all the image and video files into one single folder before opening a new slideshow design project.
In the editor’s welcome screen, navigate to the ‘Media’ tab at the top left corner and click on the same to open the ‘Import’ menu. From here, you need to choose the ‘Import a Media Folder’ option, followed by navigating to the folder that contains the to be imported media files. When you have reached to the required folder, select it and tap ‘OK’ to import the same into the project timeline. When all the files have been imported, you can see them in the ‘Project Media’ panel.

Step 3: Timeline Positioning of Media Files
Reach to the ‘File’ menu and choose ‘Preferences’ from the latter’s dropdown menu. In the ‘Preferences’ window, hit the ‘Editing’ tab and tap on ‘Photo Preferences’. From the drop down menu that follows, choose the ‘Crop to Fit’ option to adjust the aspect ratio of your imported images in line with the slideshow project. In case your images have the 9:16 vertical aspect ratio, select the ‘Fit’ option to make a proper screen fit.

You can proceed to include the image zoom and camera pan features within your project by clicking on the ‘Pan & Zoom’ option. You can further, modify the preset durations of transitions, effects and photos in the ‘Editing’ tab itself before adding them to the editor timeline. Another way of doing the same is to drag the ends of the media files inward or outward, post the timeline adding process.

When you have finished making the required adjustments, navigate back the ‘Media Panel’ to include the imported media files within the project timeline. You can either click on the files to add them, or choose to ‘Drag and Drop’ the same at a preferred place within the timeline.
When all the images and videos have been added, proceed to arrange them in the desired order of appearance in the slideshow, followed by adjusting their screen time and play durations through any of the methods explained above.
Step 4: Add Transitions to Eliminate Hard Cuts
The smooth play of a slideshow is often distorted by hard cuts, which can be escaped by applying smooth transition effects to the slides. Consider exploring the ‘Transitions’ tab of Filmora to choose from a diversity of easily customizable transition effects and place them at the intersection point of the respective slides in the project timeline.
Instead of applying the same transition to every slide, prefer choosing the one that exclusively suits the content arrangement and flow within particular slides. This would save your slideshow from getting a repetitive look.

Post the timeline adding of a transition, you can double click on the same to reach the ‘Transition Setting Window’, where you are allowed to customize the play duration and select its ‘Transition Mode’. Play durations can alternatively be customised in the project timeline by dragging the slider in a left or right direction.
Step 5: Add Overlays and Filters for an Improvised Colour Scheme
To enhance the thematic appeal of your slideshow, consider desaturating the colours of the included images with the extensive range of visual effects and overlays available in the ‘Effects’ tab of the software’s editing timeline. Opening the tab, you are exposed to a series of ‘Filter and Overlay’ categories, that have further subdivisions of Light Leaks, Sepia Tone and Lomography.
To add a particular effect, place it in the timeline track above the desired clip or image. Observe the changes in the ‘Preview Panel’ and proceed to adjust the effect settings if required, by double clicking on the particular effect.

Step 6: Include Motion Graphic Elements
To supplement your slideshow with elegant motion graphics, navigate to the ‘Elements’ tab in the editor timeline. From here, you can access and choose any suitable motion graphic template from a diversity of available choices, to include within the project timeline. The step is completely optional and you should pay attention to the style of content presentation and the cause of creation of your slideshow when choosing to add these elements to the same.

Step 7: Record Voiceovers and Create Soundtracks
To record a voiceover for your slideshow, navigate to the ‘Media’ tab and tap the ‘Record’ dropdown menu. Click on ‘Record Voiceover’ in the list of options that appears. The ‘Record Audio’ icon pops up and you now need to select a microphone to be used in the recording process. When you are ready, tap the ‘Record’ button to let the recording begin.

You can now see your voice recording appear in the ‘Media’ tab with the previously imported media files, ready to be placed within the audio track of the project timeline. Filmora’s audio library is a storehouse of free access music and audio effects. To add one to your slideshow, navigate and click on the ‘Audio’ tab to select from the extensive Rock, Young & Bright, Electronic, etc., music subcategories till you get the perfect match for your presentation.

Once you have selected all the music tracks, place them one by one on the project timeline and move ahead with adjusting their play durations.
Step 8: Export Your Creation
When you are satisfied with your work, you can export the slideshow directly from Filmora to a number of media sharing platforms. All you need to do is, navigate to and tap the ‘Export’ button in the top right corner of the editor screen and proceed to set the resolution and frame rate, and select the output file format of your created slideshow in the ‘Export Window’ that appears.

When you are ready with everything, click on the ‘Export’ button at the bottom right corner of the screen to share your slideshow across different platforms, including YouTube, Instagram, Vimeo, etc.
The time required by Filmora to render your slideshow on the chosen platform will depend on the output file size. Considering the fact that larger files require a much longer time to be rendered, it would be a smart decision to limit the file size of your slideshow within 500 MB.
● Ending Thoughts →
● Instagram slideshows are exciting means of diving into fun-filled entertainment with your social media peers.
● When looking for solutions on how to create a slideshow on Instagram, there are loads of choices in the software market.
● Talking of best creator alternatives, you can pick the Wondershare Filmora slideshow developer program to make an amazing Insta story slideshow.
Instagram slideshows land among the latest social media trends of fun and entertainment. Learn how to attract jaw dropping peer attention with creating the same!
In this article
01 [When Should You Use an Instagram Slideshow?](#Part 1)
02 [How to Make an Instagram Slideshow with Music?](#Part 2)
03 [8 Best Instagram Slideshow Apps for Creating Outstanding Slideshow](#Part 3)
Part 1 When Should You Use an Instagram Slideshow?
Revolutions in technology has opened doors to a plenty of new and exciting means of information sharing, entertainment and communication. Playing its part in the game, Instagram slideshow has emerged as an exciting means of quick and impactful content sharing. Diving deeper into the discussion, let us talk about the different areas of working with an Instagram slide show in the following section:
01Explanatory Product Demonstrations and Stepwise Tutorials
Considering the diverse media collaboration entertained by this social media platform, you get the liberty to include 10 media files of videos and images while creating a slideshow on Instagram. This is an affordably sufficient media space to demonstrate your newly launched product in front of the target audience.
The aforesaid characteristic of a slideshow for Instagram can be put to another use of creating detailed, step by step guides and product usage tutorials to create an increased and confident customer reach and brand applicability. A few examples include the presentations of recipes by food blogs and chefs, or a detailed look of the day’s outfit by fashion bloggers.
02Interactive Storytelling or Recreate an Event
Gone are the times when stories and events were restricted to a single image or video with a limited scope of understanding and explanation. You can now work with a combination of multiple images and videos to create more vivid and graphical descriptions of stories, narratives and events.
You can work on creating an engaging slideshow for Instagram to tell an amazing story, voice a narration from the beginning to the end, or share your best moments with your cherished audience, which will surely give them the feel of enjoying the adventure along with you.
03Create a Collection
You can now use a slide show for Instagram to design and present a collection of manifold ideas and products within a single post. You can improvise the collection with displaying a series of related products, showcasing a summary of your different blog posts through the week, or simply present a list of your most reliable inspirations, resources and influencers.
04Exciting Video Teasers
If you have a scheduled video release to entertain your audience, try working with interactive slideshows for Instagram to create some sensational teaser content of the upcoming release to imbibe a natural sense of curiosity within your audience.
You can experiment with releasing a mini photoshoot tour of your filming set, share close up progression details, or include a cliffhanger in the end of your Instagram slideshow to ensure the retrieval of your audience towards watching the release of the actual big content. You can use these short teasers as effective means of creating a campaign buzz, while building a closer connect with your audience.
Part 2 How to Make an Instagram Slideshow with Music?
By now, you must have gathered enough knowledge regarding the credibility of Instagram slideshows in catering to a diversity of commercial, professional and personal content sharing needs. Considering the same, you may conveniently feel motivated to try hands at creating stunning slideshow presentations for Instagram on your own.
Adhering to the concern, let us move ahead with our discussion, while talking about how to make a slideshow for Instagram and supplement the same with adaptable background music to develop amazing content masterpieces and share them with social media peers, while grabbing their obvious attention.
While there are a number of choices in the software market to choose your Instagram slideshow creator tool, the FlexClip tool can be a reliable option. Read though the following section to learn the slideshow creation process in the program with a comprehensive and stepwise tutorial guide:
Step 1: Download the Slideshow Creator Tool
Visit the official website of FlexClip to download and install the slideshow maker software in your preferred device.
Step 2: Start from Scratch
After a successful installation, proceed to launch the tool in your system and wait till the software greets you with its welcome interface. Here, you will have to reach to and tap the ‘Start to Create’ button to begin with the slideshow creation process. You can also select a preset template to work on your slideshow if nothing new clicks in your mind.
Step 3: Select an Aspect Ratio
In the tool’s creator window, navigate to the ‘Options Panel’ at the left and click on ‘More’ to select a suitable aspect ratio. Picking the 9:16 ratio would be a good choice.
Step 4: Upload Your Media
In the same ‘Options Panel’, click on ‘Media’ for dragging and dropping the desired video and image files from your device to the program’s media timeline, followed by applying them to the tool’s storyboard. You can alternatively, choose to directly work with media pages of any preset slideshow template.
Step 5: Customize Your Media
You can now proceed to improvise your media files with amazing texts, filters, stickers, emojis, widgets, etc., by clicking on specific object categories from the ‘Options Panel’.
Step 6: Include Seamless Transitions
Proceed to uplift your creation to the next level with the application of stunning image and video transitions. Navigate to the ‘Options Panel’ and tap ‘Elements’. A variety of transition effects will be displayed to choose from. Select the one you like to add it to your slideshow.
Step 7: Add a Background Music
An in line background audio is the best way to set the mood of your slideshow. Choose to add the same to your creation for making a more engaging impact on the audience. Visit the ‘Options Panel’ again and click on ‘Music’ to open the program’s audio library and select a perfect background music from the huge variety of choices, to include in your slideshow.
Step 8: Preview Your Creation
When you have finished customizing your slideshow, navigate to the top right corner of the editor’s storyboard and hit the ‘Preview’ button to visualize and ensure that your slideshow has everything at the right place. You can continue editing if there is a need to make some changes.
Step 9: Time to Save and Share!
When you are happy with your work, consider saving it either to your device or Google Dropbox, from where you can easily upload the same to your Instagram handle.
Part 3 Best Instagram Slideshow Apps for Creating Outstanding Slideshow
Social media is the talk of the trend in today’s times, which has extended its boundaries to visibly everything around us. Speaking in the light of the fact, slideshow presentations are no exception. Social media platforms today have come up with amazing tools and applications to create and share a stunning slideshow Instagram story with utmost ease and within an affordable time span.
Now that you have developed a comprehensive understanding of the credibility of working with Instagram slideshows and their creation process with the inclusion of complementary background music, let us dive into learning about some of the best and most popular Instagram apps for creating awesome slideshow presentations in the following section:
01Filme Lite
This tool lands among the leading user preferences to work on creating slideshow presentations. The application software is packed with a heap of latest features that form the Instagram trends in current times.
Apart from complementing your slideshow creations with tons of features, this slideshow maker for Instagram grants you the liberty to include your most loved videos and images within your presentation and customize them with a diverse range of effects, along with adjusting their play duration within the slideshow. Additional to image and video customization, you are also allowed to choose the image transition style that perfectly suits your content arrangement within the slides.
Working with the tool, you can be sure of getting an unparalleled slideshow creation experience with a very interactive and user oriented design interface, that is simple enough to be easily understood and worked upon by a newbie to the creative world.
02VivaVideo
If you are working on a detailed presentation and wish to spark up your creation with stunning varieties of jaw dropping special effects, consider creating your PowerPoint slideshows in this application. The tool’s effect library is a storehouse of the most amazing special effects that promise of transforming your slideshow into a visual masterpiece.
You can separately apply these effects to each of the slideshow images or choose to work on a combination of selected effects to include within a single video. Apart from this, you are free to choose an apt background music for your presentation slides from the extensive audio library of the software. The bottom line is; you are assured to a complete fun experience while creating slideshows with this tool.
03Movavi
If you are familiar enough with the fundamental concepts and the trivial anecdotes of working with slideshow presentations and want to take your graphic creativity to the next level, you can try hands at using the Movavi slideshow creator software to design high end PowerPoint presentations of professional quality. The best thing about the tool is, it works online and does not require a software download for usage concerns.
Along with creating online slideshow presentations with ease, the tool permits you to create online videos within minutes and instantly download the same for specific usage. You can further, pop up your presentation slides with wonderful transition and animation effects and also make adjustments in the play duration of each slide. The tool lets you choose and add a perfect background music to your presentation from its conveniently vast audio library.
04Slideshow Lab
If you have just landed into the world of creating slideshow presentations and are looking for easy solutions on how to make a slideshow on Instagram, consider working with this software to polish your design creativity. The simple and user cohesive interface of the tool is best for beginners to understand and get customary with the creation process, that takes the minimum possible time to render an appreciable PowerPoint presentation.
Talking about the slideshow design process, you will need to start with selecting a set of desired images, followed by uploading the same into the tool’s slideshow creator timeline. The next step is to arrange the images in the sequential order of appearance, select an appealing background music and apply smooth image transitions. When you are done with everything, proceed to save the presentation to your device.
05MoShow
While you can choose to create stunning slideshow presentations with almost any class of images, the aforesaid app works best to render Instagram images into a top rated Instagram photo slideshow without compromising with the high resolution image quality of Instagram photos. The application integrates motion pictures and lighting effects to transform the otherwise regular images into lively still captures.
Considering the credibility of the tool in overall user experience, its indeed a thumbs up from graphic creators across the globe, thanks to its smart and interactive interface, in time performance and outstanding creation outputs.
06InVideo Editor
Put an end to your search of effective solutions on how to do a slideshow on Instagram with the InVideo Editor, a smart video and graphic editor that can also be employed to adhere to the requirement of creating amazing slideshow presentations from Instagram media. While the creation process hardly takes a few minutes, you can work with the application to explore your editing creativity to the finest levels. The tool works well with any of your MacOs and Windows compatible devices.
The editor’s effects library is loaded with tons of graphic transitions and filters that are dedicated to enhance the contents of your presentation with utmost ease. You can add creative modifications to the slideshow media, such as, cut, crop and trim videos and images and add the most convincing music, overlays, fonts, etc., and enjoy an additional free access to hundreds of stock videos and slideshow templates.
07LightMV
This one is an online slideshow creator utility that works well with almost any operating system including Windows, iOS, Android and Mac. Essentially a cloud centered editor program, this tool caters to your high quality slideshow creation needs in the most effective way. The design process is quite simple, where you only need to add the images and videos, design your presentation and wait till everything comes to place.
What’s more appealing factor about the tool is that you will never need to download the program in your device or purchase a subscription plan to use the application. All you need to do is land into the tool’s website in your favorite browser and tap on the ‘Slideshow’ option to begin with the creation process. You can select from a heap of preset stunning slideshow templates to create the most enhanced PowerPoint presentation.
08Fliptastic
The Fliptastic slideshow creator app is exclusively developed to adhere to the graphic design concerns of iOS users. This one is a no cost graphic utility with a plethora of versatile features and considerable user backup. The app’s effect library is packed with a unique set of slideshow design templates, transitions, background music choices and filters that work to compliment your presentation with the subtlest look ever.
Paying a bit extra attention to the audio inclusion within the slides, the app offers you a range of free music files to work with, while additionally allowing you to upload and use one from your device or the internet.
09Creating Instagram Slideshows With Filmora
Talking exclusively within the domain of video creation and editing, the credibility of the Wondershare Filmora Video Editor software needs no introduction. Moving ahead with our discussion, let us learn about the process of creating awesome Instagram slideshows with Filmora in the following section:
Step 1: Download and Install the Program
To begin with addressing the concern of how to make a slideshow on Instagram story, navigate to the official Wondershare website and download the Wondershare Filmora Video Editor to your preferred system and proceed to install the same.
Wondershare Filmora - Best Video Editor for Mac/Windows
5,481,435 people have downloaded it.
Build unique custom animations without breaking a sweat.
Focus on creating epic stories and leave the details to Filmora’s auto features.
Start a creative adventure with drag & drop effects and endless possibilities.
Filmora simplifies advanced features to save you time and effort.
Filmora cuts out repetition so you can move on to your next creative breakthrough.
Step 2: Import Your Media
Launch the editor program and wait for the latter’s welcome screen to appear. Here, you need to import the images, videos and other media files to the editor timeline for including them in your slideshow. It is recommended to collect all the image and video files into one single folder before opening a new slideshow design project.
In the editor’s welcome screen, navigate to the ‘Media’ tab at the top left corner and click on the same to open the ‘Import’ menu. From here, you need to choose the ‘Import a Media Folder’ option, followed by navigating to the folder that contains the to be imported media files. When you have reached to the required folder, select it and tap ‘OK’ to import the same into the project timeline. When all the files have been imported, you can see them in the ‘Project Media’ panel.
Step 3: Timeline Positioning of Media Files
Reach to the ‘File’ menu and choose ‘Preferences’ from the latter’s dropdown menu. In the ‘Preferences’ window, hit the ‘Editing’ tab and tap on ‘Photo Preferences’. From the drop down menu that follows, choose the ‘Crop to Fit’ option to adjust the aspect ratio of your imported images in line with the slideshow project. In case your images have the 9:16 vertical aspect ratio, select the ‘Fit’ option to make a proper screen fit.
You can proceed to include the image zoom and camera pan features within your project by clicking on the ‘Pan & Zoom’ option. You can further, modify the preset durations of transitions, effects and photos in the ‘Editing’ tab itself before adding them to the editor timeline. Another way of doing the same is to drag the ends of the media files inward or outward, post the timeline adding process.
When you have finished making the required adjustments, navigate back the ‘Media Panel’ to include the imported media files within the project timeline. You can either click on the files to add them, or choose to ‘Drag and Drop’ the same at a preferred place within the timeline.
When all the images and videos have been added, proceed to arrange them in the desired order of appearance in the slideshow, followed by adjusting their screen time and play durations through any of the methods explained above.
Step 4: Add Transitions to Eliminate Hard Cuts
The smooth play of a slideshow is often distorted by hard cuts, which can be escaped by applying smooth transition effects to the slides. Consider exploring the ‘Transitions’ tab of Filmora to choose from a diversity of easily customizable transition effects and place them at the intersection point of the respective slides in the project timeline.
Instead of applying the same transition to every slide, prefer choosing the one that exclusively suits the content arrangement and flow within particular slides. This would save your slideshow from getting a repetitive look.
Post the timeline adding of a transition, you can double click on the same to reach the ‘Transition Setting Window’, where you are allowed to customize the play duration and select its ‘Transition Mode’. Play durations can alternatively be customised in the project timeline by dragging the slider in a left or right direction.
Step 5: Add Overlays and Filters for an Improvised Colour Scheme
To enhance the thematic appeal of your slideshow, consider desaturating the colours of the included images with the extensive range of visual effects and overlays available in the ‘Effects’ tab of the software’s editing timeline. Opening the tab, you are exposed to a series of ‘Filter and Overlay’ categories, that have further subdivisions of Light Leaks, Sepia Tone and Lomography.
To add a particular effect, place it in the timeline track above the desired clip or image. Observe the changes in the ‘Preview Panel’ and proceed to adjust the effect settings if required, by double clicking on the particular effect.
Step 6: Include Motion Graphic Elements
To supplement your slideshow with elegant motion graphics, navigate to the ‘Elements’ tab in the editor timeline. From here, you can access and choose any suitable motion graphic template from a diversity of available choices, to include within the project timeline. The step is completely optional and you should pay attention to the style of content presentation and the cause of creation of your slideshow when choosing to add these elements to the same.
Step 7: Record Voiceovers and Create Soundtracks
To record a voiceover for your slideshow, navigate to the ‘Media’ tab and tap the ‘Record’ dropdown menu. Click on ‘Record Voiceover’ in the list of options that appears. The ‘Record Audio’ icon pops up and you now need to select a microphone to be used in the recording process. When you are ready, tap the ‘Record’ button to let the recording begin.
You can now see your voice recording appear in the ‘Media’ tab with the previously imported media files, ready to be placed within the audio track of the project timeline. Filmora’s audio library is a storehouse of free access music and audio effects. To add one to your slideshow, navigate and click on the ‘Audio’ tab to select from the extensive Rock, Young & Bright, Electronic, etc., music subcategories till you get the perfect match for your presentation.
Once you have selected all the music tracks, place them one by one on the project timeline and move ahead with adjusting their play durations.
Step 8: Export Your Creation
When you are satisfied with your work, you can export the slideshow directly from Filmora to a number of media sharing platforms. All you need to do is, navigate to and tap the ‘Export’ button in the top right corner of the editor screen and proceed to set the resolution and frame rate, and select the output file format of your created slideshow in the ‘Export Window’ that appears.
When you are ready with everything, click on the ‘Export’ button at the bottom right corner of the screen to share your slideshow across different platforms, including YouTube, Instagram, Vimeo, etc.
The time required by Filmora to render your slideshow on the chosen platform will depend on the output file size. Considering the fact that larger files require a much longer time to be rendered, it would be a smart decision to limit the file size of your slideshow within 500 MB.
● Ending Thoughts →
● Instagram slideshows are exciting means of diving into fun-filled entertainment with your social media peers.
● When looking for solutions on how to create a slideshow on Instagram, there are loads of choices in the software market.
● Talking of best creator alternatives, you can pick the Wondershare Filmora slideshow developer program to make an amazing Insta story slideshow.
How to Stop Animation From Looping in Unity
How to Stop Animation from Looping in Unity
An easy yet powerful editor
Numerous effects to choose from
Detailed tutorials provided by the official channel
Unity is an IDE interface all designed exclusively for game developers. However, you can do much more with Unity than game development. But, our main concern here is something else than this subject. You’re looking for easy tutorials on Unity stop animation!

And luckily, we’ve got you covered as we’ve briefly explained how to perform Unity stop animation from looping and the steps to make a smooth animation.
In this article
01 [What is Unity Used for?](#Part 1)
02 [How to Stop Animation Playing in Loop in Unity?](#Part 2)
03 [How to Smooth an Animation in Unity?](#Part 3)
Part 1 What is Unity Used for?
Unity is a software tool friendly to all the game developers out there. This tool is used by the large community of game developers to power and create their game development projects. And, the software is more of a professional means and not a simple pared-down ‘game builder .’Unity also offers one of the most significant inbuilt features like rendering, physics, and collision detection. Thus, one of the powerful aspects of Unity is that game developers need not go out of the box and create everything from scratch. Instead, they are available with the physics engine required to develop games quickly. Another robust feature of Unity is that it includes an excellent ‘Asset Store’ where developers can upload their creations and showcase them to the whole community. So, that’s Unity and its uses in a broader scope!
Before we take you through the next section, it’s important to mention that Unity is also known as cross-platform IDE, where IDE stands for ‘integrated development environment.’ So, it can be called more of an interface with access to all the tools and resources required to develop games.
Apart from the game development, Unity is known for other excellent usage purposes as:
● Simulations
● Animation
● Architectural Visualization
● Previsualization for Film
● Interactive Experiences
Among these features only, we’ll describe Unity stop animation from looping in detail.
Part 2 How to Stop Animation Playing in Loop in Unity?
As we said, we’ll describe to you the most accessible definition of how to stop Animation in Unity. Thus, there are simple steps that we’d like to define firsthand before explaining the whole procedure with an image-centric step-by-step guide.
So, those simple steps to stop motion animation in After Effects in the loop also go like below:
Step 1 Go to the Project tab and select Animation.
Step 2 Open the Inspector tab.
Step 3 Uncheck the checkbox Loop Time, and you’re good to go!
We’ll describe the same, i.e., Unity stop animation from looping through the step guide below.
In this guide, we’ll explain right from applying the Animation so that you’d understand better. So, let’s begin without any further ado!
01Step 1 Delete animation folder
We have already created an animation folder in the folder named as own Animation, so click that folder, click the animation folder, and then another folder along with as shown below. Hold the Shift key and click another folder. Then, right-click the Delete tab as depicted below.
Similarly, you can also delete the Animation if you wish.

02Step 2 Create an animation for the subject
Now, you may have different subjects. We’re creating Animation on Mobile Joystick for reference, as shown below.

Now, hit the Create tab on the Unity panel below. Then, proceed to save your Animation in the folder you’ve already created for the same.

03Step 3 Give positions to the animation
Firstly, hit the red-icon button used for recording, as shown below.

Give the position on the left side after you click the button. And, then, clicking almost near to 3you can give the position to the right-hand side as shown below.

Now, the animation has been set. You can see the animation from left to right if you click the Play button. So, here, you can see the results of infinite loop animation, which won’t stop.

You can follow two ways to stop this Animation in Unity from looping, and we’ll describe both methods below.
04Step 4 Stop animation Unity Way 1
Go to the animation folder where you’ve created the animation and click the New Animation icon as shown below.

Now, you have to uncheck the Loop Time tab on the top-right corner of the Unity panel.

05Step 5 Stop animation Unity Way 2
Alternatively, you can click the Animator tab on the top of the Unity panel and double-tap the New Animation button. Then, it will also delete or uncheck the loop time, as shown below.

These were all the steps to stop animation Unity.
Part 3 How to Smooth an Animation in Unity?
After done with Unity stop animation, it’s time to smooth your Unity animation. Again, we will describe it simply if you’re used to the Unity platform and then with a step guide with respective screenshots.
So, stay tuned until the end to reveal the easy steps of smoothing an animation in Unity.
Select the Dopesheet at the bottom of the animation window. Then, you need to switch to the ‘Curves’ view once you create your Animation in the Dopesheet. These animation curves help you accelerate and decelerate animations so that the movement and other things can stop and start smoothly.
So, let’s begin with the step guide tutorial on the same as follows:
For reference, take an example of a metronome object imported from Blender to Unity. Here, we’ve grouped all the pendulum objects under one rotation so that when we move the pendulum, it pivots to the correct point, as shown below.

01Add the animator
So, the first step begins with adding the Animator component to the parent object. You can do this by clicking the Add Component tab on the Unity panel’s left side, searching for Animator, and clicking the Animator.
You will also need a controller to control the animations. Go to your animation folder, right-click, and select Create> Animator Controller tab.

Let’s call or give it a name metronome animator as shown below.
Then, you need to drag this into your animator component. Again, you need to go to your animations folder, right-click, select Create> Animations tab.
Now, give this a name pendulum full swing.
02Open the animator tab
Now, open the animator tab, drag this pendulum swing animation to that panel, and double-tap the yellow-colored New Animation button.

03Create an animation
With the game object selected, the animated metronome pendulum, in this case, we’d like to animate the X component of the rotation. So, you need to click Add Property> Transform> Rotation tab and click the + sign on its right, as shown below.
Now, click the plus sign automatically to set two keyframes, one at the beginning and one at the end. Now, click on end select all, and then delete for now.

04Add keyframes to rotate the pendulum
With the first set of keyframes and the pendulum all way to the right, go halfway and change the rotation to the left on the left panel of Unity. Then, add another keyframe.

05Slow down the animation
As you can observe, the Animation of this pendulum is in a straight line and feels unnatural to the eyes. Thus, we’re required to smooth this Animation now! For this purpose, go to the Curves; you can see the pink properties of rotation as going from one side to another.

Now, you need to adjust these pink curves. Start by adding a key to one of its sides, as shown below. After that, it is all on you how slow or fasts you want these values to be.
Here, you’re all done smoothing the animation in Unity after learning the stop-animation Unity tutorial.
You can even stop motion animation on Photoshop with the above tutorial.
06Bonus Tip:
We want to introduce an excellent video editor software called Filmora Video Editor . It is from the house of Wondershare, a well-known software company worldwide.
Wondershare Filmora - Best Video Editor for Mac/Windows
5,481,435 people have downloaded it.
Build unique custom animations without breaking a sweat.
Focus on creating epic stories and leave the details to Filmora’s auto features.
Start a creative adventure with drag & drop effects and endless possibilities.
Filmora simplifies advanced features to save you time and effort.
Filmora cuts out repetition so you can move on to your next creative breakthrough.
With Filmora, you can easily add Animation and edit your videos to make them look world-class. The latest version and new updates are eye-candy and quick fix for beginner video editors.
So, please pay a visit to the Filmora website and check out its Mac and Windows version for free today.
● Key Takeaways from This Episode →
● Learning the concept and usage of Unity
● A tutorial on how to stop animation in Unity from looping
● A tutorial on how to smooth animation in Unity
● Introduction to Filmora, the top-most video editor software for beginners.
Unity is an IDE interface all designed exclusively for game developers. However, you can do much more with Unity than game development. But, our main concern here is something else than this subject. You’re looking for easy tutorials on Unity stop animation!
And luckily, we’ve got you covered as we’ve briefly explained how to perform Unity stop animation from looping and the steps to make a smooth animation.
In this article
01 [What is Unity Used for?](#Part 1)
02 [How to Stop Animation Playing in Loop in Unity?](#Part 2)
03 [How to Smooth an Animation in Unity?](#Part 3)
Part 1 What is Unity Used for?
Unity is a software tool friendly to all the game developers out there. This tool is used by the large community of game developers to power and create their game development projects. And, the software is more of a professional means and not a simple pared-down ‘game builder .’Unity also offers one of the most significant inbuilt features like rendering, physics, and collision detection. Thus, one of the powerful aspects of Unity is that game developers need not go out of the box and create everything from scratch. Instead, they are available with the physics engine required to develop games quickly. Another robust feature of Unity is that it includes an excellent ‘Asset Store’ where developers can upload their creations and showcase them to the whole community. So, that’s Unity and its uses in a broader scope!
Before we take you through the next section, it’s important to mention that Unity is also known as cross-platform IDE, where IDE stands for ‘integrated development environment.’ So, it can be called more of an interface with access to all the tools and resources required to develop games.
Apart from the game development, Unity is known for other excellent usage purposes as:
● Simulations
● Animation
● Architectural Visualization
● Previsualization for Film
● Interactive Experiences
Among these features only, we’ll describe Unity stop animation from looping in detail.
Part 2 How to Stop Animation Playing in Loop in Unity?
As we said, we’ll describe to you the most accessible definition of how to stop Animation in Unity. Thus, there are simple steps that we’d like to define firsthand before explaining the whole procedure with an image-centric step-by-step guide.
So, those simple steps to stop motion animation in After Effects in the loop also go like below:
Step 1 Go to the Project tab and select Animation.
Step 2 Open the Inspector tab.
Step 3 Uncheck the checkbox Loop Time, and you’re good to go!
We’ll describe the same, i.e., Unity stop animation from looping through the step guide below.
In this guide, we’ll explain right from applying the Animation so that you’d understand better. So, let’s begin without any further ado!
01Step 1 Delete animation folder
We have already created an animation folder in the folder named as own Animation, so click that folder, click the animation folder, and then another folder along with as shown below. Hold the Shift key and click another folder. Then, right-click the Delete tab as depicted below.
Similarly, you can also delete the Animation if you wish.
02Step 2 Create an animation for the subject
Now, you may have different subjects. We’re creating Animation on Mobile Joystick for reference, as shown below.
Now, hit the Create tab on the Unity panel below. Then, proceed to save your Animation in the folder you’ve already created for the same.
03Step 3 Give positions to the animation
Firstly, hit the red-icon button used for recording, as shown below.
Give the position on the left side after you click the button. And, then, clicking almost near to 3you can give the position to the right-hand side as shown below.
Now, the animation has been set. You can see the animation from left to right if you click the Play button. So, here, you can see the results of infinite loop animation, which won’t stop.
You can follow two ways to stop this Animation in Unity from looping, and we’ll describe both methods below.
04Step 4 Stop animation Unity Way 1
Go to the animation folder where you’ve created the animation and click the New Animation icon as shown below.
Now, you have to uncheck the Loop Time tab on the top-right corner of the Unity panel.
05Step 5 Stop animation Unity Way 2
Alternatively, you can click the Animator tab on the top of the Unity panel and double-tap the New Animation button. Then, it will also delete or uncheck the loop time, as shown below.
These were all the steps to stop animation Unity.
Part 3 How to Smooth an Animation in Unity?
After done with Unity stop animation, it’s time to smooth your Unity animation. Again, we will describe it simply if you’re used to the Unity platform and then with a step guide with respective screenshots.
So, stay tuned until the end to reveal the easy steps of smoothing an animation in Unity.
Select the Dopesheet at the bottom of the animation window. Then, you need to switch to the ‘Curves’ view once you create your Animation in the Dopesheet. These animation curves help you accelerate and decelerate animations so that the movement and other things can stop and start smoothly.
So, let’s begin with the step guide tutorial on the same as follows:
For reference, take an example of a metronome object imported from Blender to Unity. Here, we’ve grouped all the pendulum objects under one rotation so that when we move the pendulum, it pivots to the correct point, as shown below.
01Add the animator
So, the first step begins with adding the Animator component to the parent object. You can do this by clicking the Add Component tab on the Unity panel’s left side, searching for Animator, and clicking the Animator.
You will also need a controller to control the animations. Go to your animation folder, right-click, and select Create> Animator Controller tab.
Let’s call or give it a name metronome animator as shown below.
Then, you need to drag this into your animator component. Again, you need to go to your animations folder, right-click, select Create> Animations tab.
Now, give this a name pendulum full swing.
02Open the animator tab
Now, open the animator tab, drag this pendulum swing animation to that panel, and double-tap the yellow-colored New Animation button.
03Create an animation
With the game object selected, the animated metronome pendulum, in this case, we’d like to animate the X component of the rotation. So, you need to click Add Property> Transform> Rotation tab and click the + sign on its right, as shown below.
Now, click the plus sign automatically to set two keyframes, one at the beginning and one at the end. Now, click on end select all, and then delete for now.
04Add keyframes to rotate the pendulum
With the first set of keyframes and the pendulum all way to the right, go halfway and change the rotation to the left on the left panel of Unity. Then, add another keyframe.
05Slow down the animation
As you can observe, the Animation of this pendulum is in a straight line and feels unnatural to the eyes. Thus, we’re required to smooth this Animation now! For this purpose, go to the Curves; you can see the pink properties of rotation as going from one side to another.
Now, you need to adjust these pink curves. Start by adding a key to one of its sides, as shown below. After that, it is all on you how slow or fasts you want these values to be.
Here, you’re all done smoothing the animation in Unity after learning the stop-animation Unity tutorial.
You can even stop motion animation on Photoshop with the above tutorial.
06Bonus Tip:
We want to introduce an excellent video editor software called Filmora Video Editor . It is from the house of Wondershare, a well-known software company worldwide.
Wondershare Filmora - Best Video Editor for Mac/Windows
5,481,435 people have downloaded it.
Build unique custom animations without breaking a sweat.
Focus on creating epic stories and leave the details to Filmora’s auto features.
Start a creative adventure with drag & drop effects and endless possibilities.
Filmora simplifies advanced features to save you time and effort.
Filmora cuts out repetition so you can move on to your next creative breakthrough.
With Filmora, you can easily add Animation and edit your videos to make them look world-class. The latest version and new updates are eye-candy and quick fix for beginner video editors.
So, please pay a visit to the Filmora website and check out its Mac and Windows version for free today.
● Key Takeaways from This Episode →
● Learning the concept and usage of Unity
● A tutorial on how to stop animation in Unity from looping
● A tutorial on how to smooth animation in Unity
● Introduction to Filmora, the top-most video editor software for beginners.
12 Animation Video Maker That Can Triple Conversion Rates
12 Animation Video Maker That Can Triple Conversion Rates
An easy yet powerful editor
Numerous effects to choose from
Detailed tutorials provided by the official channel
Gone are the days when creating animation requires expert skills, time, and a lot of money. Thanks to technological advancement several software and tools are available for creating animated videos in a hassle-free manner.

The following parts of the topic will help you to learn in detail about animation videos, their importance, the best software, and animation online website tools.
In this article
01 [What is an Animated Video and Its Importance?](#Part 1)
02 [Top 11 Online Animation Video Maker](#Part 2)
03 [Best Alternative To Online Tools For Creating Professional Animated Videos ](#Part 3)
Part 1 What is an Animated Video and Its Importance?
Animated Video
In simplest terms, animation refers to a method where figures appear as moving images to make them look lively and interesting. Using the drawings, effects, designs, and illustrations, an animated video is created to catch your attention. Animations can be of several types like cartoon animations, 3D animations, motion graphics, CGI, 2D animations, and more.
Benefits of using Animated videos
Animated videos have dominated the entire digital space and there are several reasons for the same. Some of the major ones are enlisted below.
● Add life to your concepts
● Bring in the content to your interesting ideas
● Ability to represent abstract ideas visually
● Video production can be managed in a hassle-free manner
● Animated videos are more visually and psychologically appealing
● Helps in boosting the conversion rates
● Makes you stand out from the competition
● Helps in expanding the reach and getting the attention and engagement
● Improves SEO
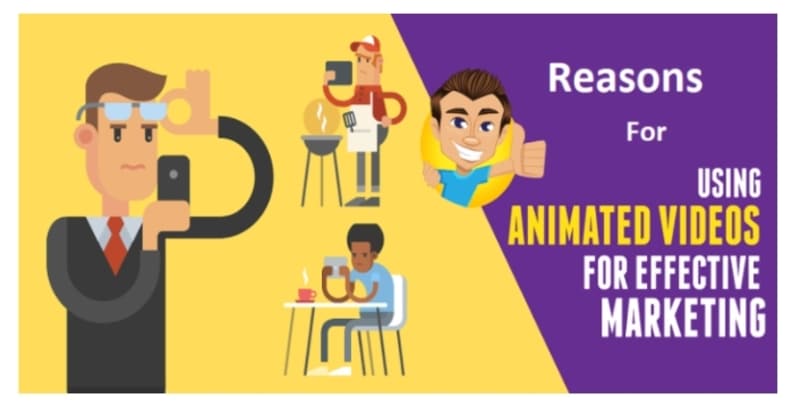
Part 2 Top 11 online animation video maker
If you are in search of a simple yet effective solution to create animations, 3D animation maker online tools work as a great choice. The majority of these programs are free and simple to use and support all basic animation requirements. Below listed are the top 11 online 3D animation makers that can be used for creating impressive animations.
01PowToon
This is a widely used online tool that supports creating videos in multiple formats including animated ones. The tool majorly supports features related to cartoon animation and depending on your requirements you can choose from different licenses and plans. Some of the key features of the tool include presentation mode, animation mode, readymade templates, integration with different tools, and others.

02Moovly
This is one of the top online animation maker 3D tool for creating interesting and eye-catchy animations. The tool is completely cloud-based and thus there is no need for any software download or installation. Different types of animations like doodles, cartoons, and others can be created easily using the program. Huge stock of videos, sound, music, motion graphics, photos, and others are available at the program to create a customized animation as required.
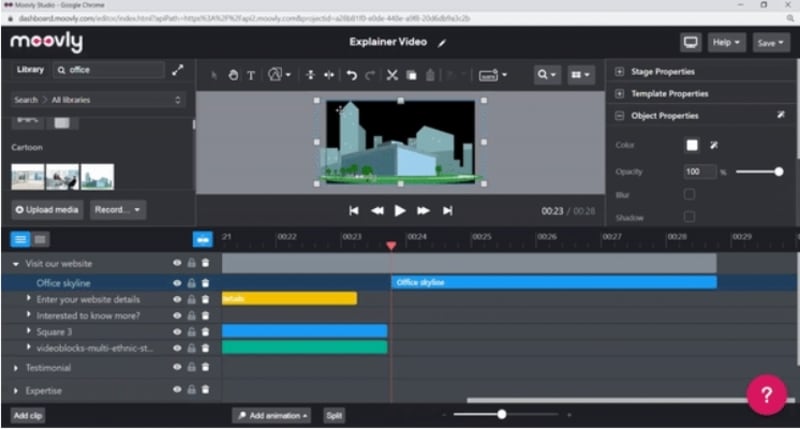
03Explee
This is a simple to use online tool that can help you create animated videos in a few simple steps. The program focuses on using a whiteboard which along with Explee’s Bringlife technology can create impressive animations. More than 6000 images are available at the tool for illustrating your concept and ideas. Some of the animation features supported by the tool include draw, pop, pin, fade, and others.
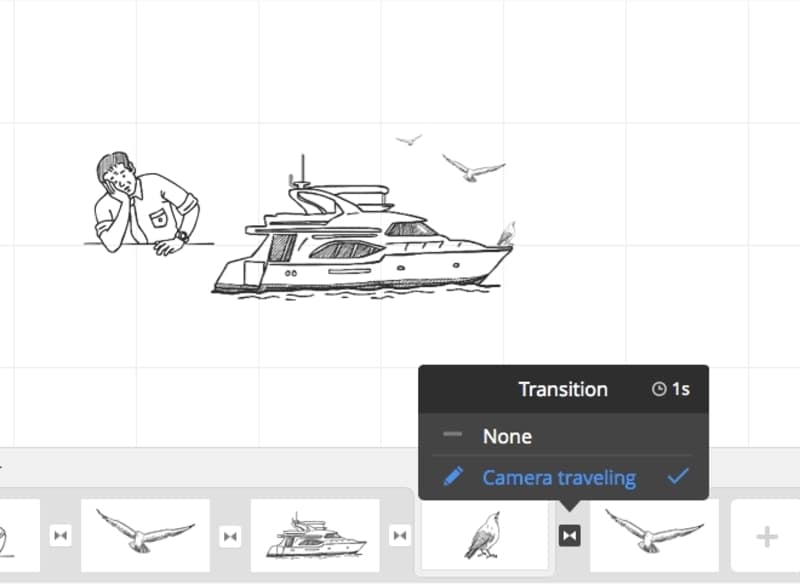
04Wideo
This is a simple yet versatile 3D online animation maker tool for animated video creation. Several pre-designed templates are available using which animated videos can be created quickly and easily. The free version of the tool allows creating animations for up to 30 seconds and for longer animations you would need to upgrade to a paid subscription. The tool also has a stock of free video library and the processed files can be exported as MP4 videos.
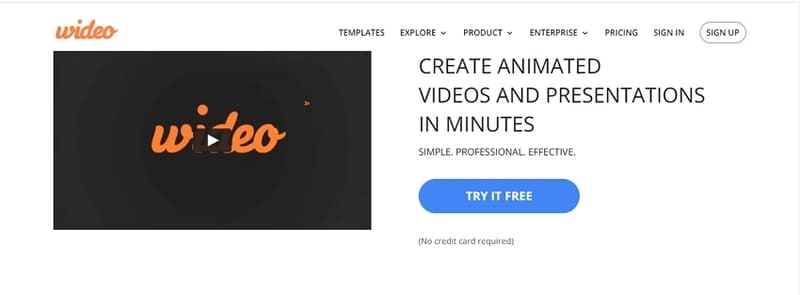
05Animaker
Creating cartoons and other animations can be done quickly and easily using this online tool that comes along with several pre-designed templates. The tool is simple to use and requires no specialized skill sets or technical know-how. Some of the interesting features for animation creation include character building, lip-syncing, facial expressions, smart moves, and more. You can customize the templates at the program and create the desired animation using the wide collection of images, videos, GIFs, and music files.
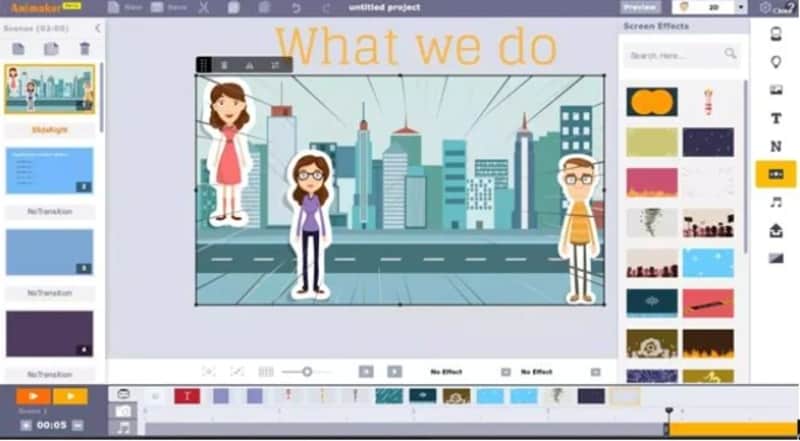
06Vyond
Professional-looking animated videos can be created using this cloud-based tool. You can either create an animation from scratch or use one of the templates at the site and then customize it as needed. The lip-sync feature of the tool allows you to import or an audio file or even add a voice recording. Animations for marketing, training, communications, HR and other purposes can be created using the tool. The tool comes with a 14-days free trial version after which you need to upgrade to a paid plan.
07Renderforest
This online tool comes with more than 500 templates in different categories that can be used along with multiple customization tools of the program to create the desired 2D as well as 3D animation. Simple interface and easy steps make the tool apt even for the ones who do not possess technical know-how. Several toolkits like the 3D video toolkit, whiteboard animation toolkit, and others are available at the site for you to learn the process. Customization options include adding music, adjusting scene order, adjusting VoiceOver, and more. The created video can be directly uploaded to YouTube or can be saved to the local system or project library.
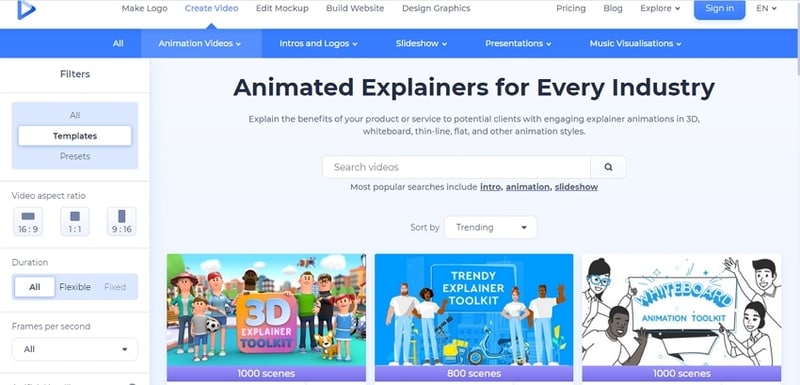
08Animatron
Using this browser-based tool you can easily create animated videos for multiple purposes like presentation, explainer videos, banners, whiteboard animations, and more. You can choose from more than 200 animated templates available at the site and then customize them as required multiple functions. In addition to your videos and other media files, you can also add them from the free library available at Animatron. You can preview the created animation and then export it to your system or directly to popular social media platforms. Tutorials o guide you through the process of animated video creation are also present on the site.
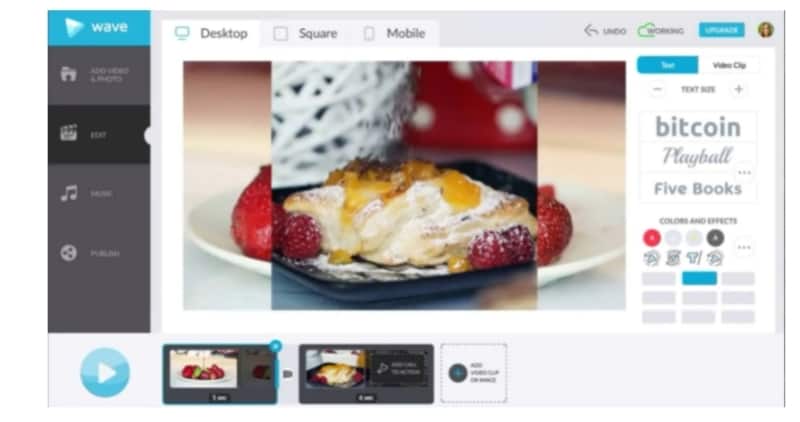
09MotionDen
This is another widely used name when it comes to online video creation tools. This simple yet functional program will let you create animated videos of your choice using multiple templates available at the site. There is a collection of desktop as well as mobile-friendly templates. These template’s video, music, photos, text, and other elements can be customized using the program editor and then the processed video can be quickly downloaded to your local system.
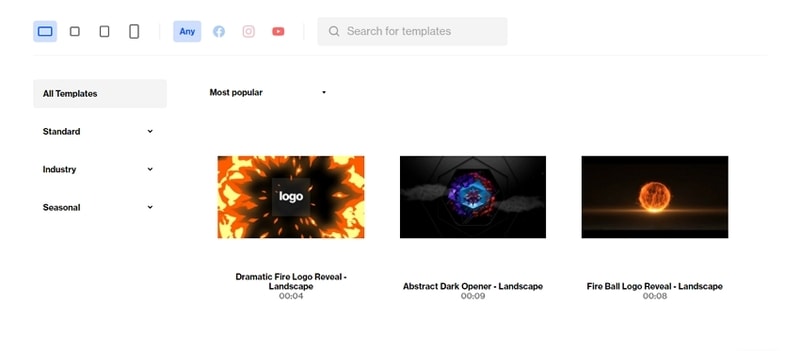
10Toonator
Creating cartoons is simple and quick using this online tool that requires no software download or installation. Using the program, you can create an interesting cartoon as needed as well as edit the graphics. The tool can also work with your tablets that making it easy to edit the files using a pen or fingers. You can even check the designs of cartoons that have been created by other users.
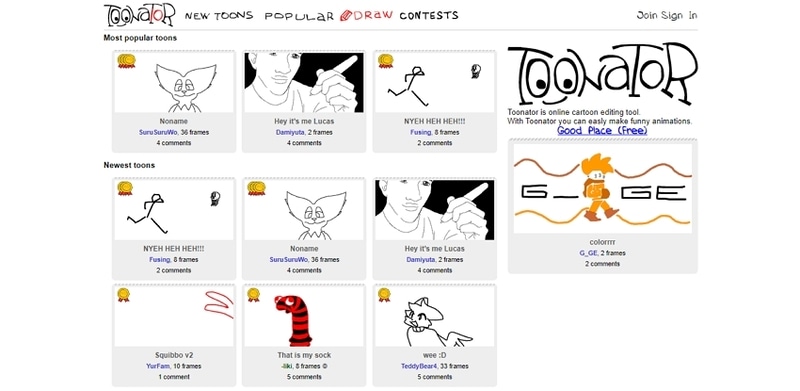
11Biteable
To create animations for your social media sites, marketing, and other requirements, this is a versatile tool to use. You can use the readymade templates available at the site or can also create animation from a scratch. Customize the templates by selecting the scenes, adding images, music, and text as needed. The animated videos can be saved locally or can also be uploaded to popular social media sites.
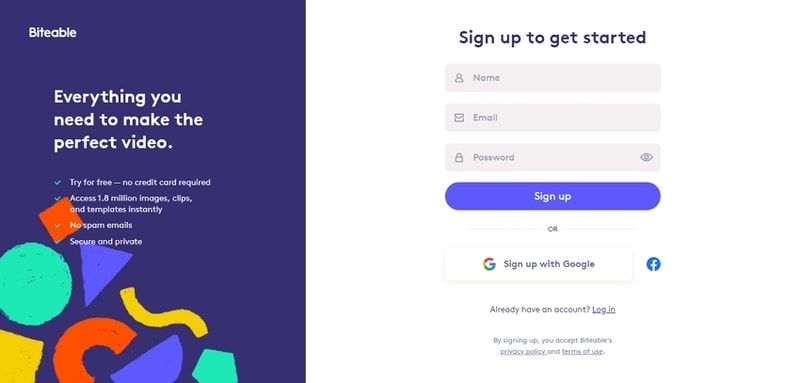
Part 3 Part Best Alternative to online tools for creating professional animated videos
****Wondershare Filmora Video Editor **
Online tools are simple programs for basic animated video creation. Moreover, these programs are internet-dependent and support limited file size processing. So, if you are looking for an alternative program for creating professional-looking animated videos with support to advanced features, Wondershare Fimora works as an excellent alternative. This Windows and Mac-based tool comes with an array of features that can let you create the desired 2D, 3D, and other animated videos in just a few simple steps.
For Win 7 or later (64-bit)
For macOS 10.12 or later
Key features of the software
● Create professional-looking 2D, 3D, and other animated videos using keyframes.
● Customize the animations using features like motion tracking, pan & zoom, ease-in, ease-out, and more.
● Add customized text & titles, lights & flares, masking, warp, distorting, and more.
● High-quality pre-set available for auto-correction, color wheels, scopes, and more.
● Customize audio using features like automatic audio sync, audio compression, noise reduction, audio transitions, and more.
● Windows and Mac support.
● Key Takeaways from This Episode →
● Animated videos are important to improve the conversion rates, increase the reach of the videos, engage the viewers, and more.
● Several 3D online animation maker is available that can help create decent animated videos.
● With restrictions and limitations of 3D animation websites, professional software like Wondershare Fimora works as the best alternative.
Gone are the days when creating animation requires expert skills, time, and a lot of money. Thanks to technological advancement several software and tools are available for creating animated videos in a hassle-free manner.
The following parts of the topic will help you to learn in detail about animation videos, their importance, the best software, and animation online website tools.
In this article
01 [What is an Animated Video and Its Importance?](#Part 1)
02 [Top 11 Online Animation Video Maker](#Part 2)
03 [Best Alternative To Online Tools For Creating Professional Animated Videos ](#Part 3)
Part 1 What is an Animated Video and Its Importance?
Animated Video
In simplest terms, animation refers to a method where figures appear as moving images to make them look lively and interesting. Using the drawings, effects, designs, and illustrations, an animated video is created to catch your attention. Animations can be of several types like cartoon animations, 3D animations, motion graphics, CGI, 2D animations, and more.
Benefits of using Animated videos
Animated videos have dominated the entire digital space and there are several reasons for the same. Some of the major ones are enlisted below.
● Add life to your concepts
● Bring in the content to your interesting ideas
● Ability to represent abstract ideas visually
● Video production can be managed in a hassle-free manner
● Animated videos are more visually and psychologically appealing
● Helps in boosting the conversion rates
● Makes you stand out from the competition
● Helps in expanding the reach and getting the attention and engagement
● Improves SEO
Part 2 Top 11 online animation video maker
If you are in search of a simple yet effective solution to create animations, 3D animation maker online tools work as a great choice. The majority of these programs are free and simple to use and support all basic animation requirements. Below listed are the top 11 online 3D animation makers that can be used for creating impressive animations.
01PowToon
This is a widely used online tool that supports creating videos in multiple formats including animated ones. The tool majorly supports features related to cartoon animation and depending on your requirements you can choose from different licenses and plans. Some of the key features of the tool include presentation mode, animation mode, readymade templates, integration with different tools, and others.
02Moovly
This is one of the top online animation maker 3D tool for creating interesting and eye-catchy animations. The tool is completely cloud-based and thus there is no need for any software download or installation. Different types of animations like doodles, cartoons, and others can be created easily using the program. Huge stock of videos, sound, music, motion graphics, photos, and others are available at the program to create a customized animation as required.
03Explee
This is a simple to use online tool that can help you create animated videos in a few simple steps. The program focuses on using a whiteboard which along with Explee’s Bringlife technology can create impressive animations. More than 6000 images are available at the tool for illustrating your concept and ideas. Some of the animation features supported by the tool include draw, pop, pin, fade, and others.
04Wideo
This is a simple yet versatile 3D online animation maker tool for animated video creation. Several pre-designed templates are available using which animated videos can be created quickly and easily. The free version of the tool allows creating animations for up to 30 seconds and for longer animations you would need to upgrade to a paid subscription. The tool also has a stock of free video library and the processed files can be exported as MP4 videos.
05Animaker
Creating cartoons and other animations can be done quickly and easily using this online tool that comes along with several pre-designed templates. The tool is simple to use and requires no specialized skill sets or technical know-how. Some of the interesting features for animation creation include character building, lip-syncing, facial expressions, smart moves, and more. You can customize the templates at the program and create the desired animation using the wide collection of images, videos, GIFs, and music files.
06Vyond
Professional-looking animated videos can be created using this cloud-based tool. You can either create an animation from scratch or use one of the templates at the site and then customize it as needed. The lip-sync feature of the tool allows you to import or an audio file or even add a voice recording. Animations for marketing, training, communications, HR and other purposes can be created using the tool. The tool comes with a 14-days free trial version after which you need to upgrade to a paid plan.
07Renderforest
This online tool comes with more than 500 templates in different categories that can be used along with multiple customization tools of the program to create the desired 2D as well as 3D animation. Simple interface and easy steps make the tool apt even for the ones who do not possess technical know-how. Several toolkits like the 3D video toolkit, whiteboard animation toolkit, and others are available at the site for you to learn the process. Customization options include adding music, adjusting scene order, adjusting VoiceOver, and more. The created video can be directly uploaded to YouTube or can be saved to the local system or project library.
08Animatron
Using this browser-based tool you can easily create animated videos for multiple purposes like presentation, explainer videos, banners, whiteboard animations, and more. You can choose from more than 200 animated templates available at the site and then customize them as required multiple functions. In addition to your videos and other media files, you can also add them from the free library available at Animatron. You can preview the created animation and then export it to your system or directly to popular social media platforms. Tutorials o guide you through the process of animated video creation are also present on the site.
09MotionDen
This is another widely used name when it comes to online video creation tools. This simple yet functional program will let you create animated videos of your choice using multiple templates available at the site. There is a collection of desktop as well as mobile-friendly templates. These template’s video, music, photos, text, and other elements can be customized using the program editor and then the processed video can be quickly downloaded to your local system.
10Toonator
Creating cartoons is simple and quick using this online tool that requires no software download or installation. Using the program, you can create an interesting cartoon as needed as well as edit the graphics. The tool can also work with your tablets that making it easy to edit the files using a pen or fingers. You can even check the designs of cartoons that have been created by other users.
11Biteable
To create animations for your social media sites, marketing, and other requirements, this is a versatile tool to use. You can use the readymade templates available at the site or can also create animation from a scratch. Customize the templates by selecting the scenes, adding images, music, and text as needed. The animated videos can be saved locally or can also be uploaded to popular social media sites.
Part 3 Part Best Alternative to online tools for creating professional animated videos
****Wondershare Filmora Video Editor **
Online tools are simple programs for basic animated video creation. Moreover, these programs are internet-dependent and support limited file size processing. So, if you are looking for an alternative program for creating professional-looking animated videos with support to advanced features, Wondershare Fimora works as an excellent alternative. This Windows and Mac-based tool comes with an array of features that can let you create the desired 2D, 3D, and other animated videos in just a few simple steps.
For Win 7 or later (64-bit)
For macOS 10.12 or later
Key features of the software
● Create professional-looking 2D, 3D, and other animated videos using keyframes.
● Customize the animations using features like motion tracking, pan & zoom, ease-in, ease-out, and more.
● Add customized text & titles, lights & flares, masking, warp, distorting, and more.
● High-quality pre-set available for auto-correction, color wheels, scopes, and more.
● Customize audio using features like automatic audio sync, audio compression, noise reduction, audio transitions, and more.
● Windows and Mac support.
● Key Takeaways from This Episode →
● Animated videos are important to improve the conversion rates, increase the reach of the videos, engage the viewers, and more.
● Several 3D online animation maker is available that can help create decent animated videos.
● With restrictions and limitations of 3D animation websites, professional software like Wondershare Fimora works as the best alternative.
Best 15 Classics Animated Cartoon Movies
Best 15 Instant Classics Animated Cartoon Movies
An easy yet powerful editor
Numerous effects to choose from
Detailed tutorials provided by the official channel
The animated characters let an individual experience a world that has certain things that hardly exist in reality.
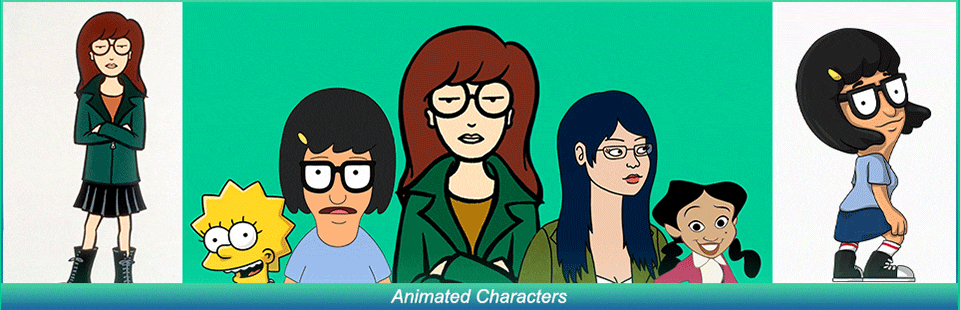
Here we will share all the relatable details about the particular movie that will be helpful in deciding whether you wish to watch it or not.
In this article
01 [Which is the Best Animated Movie Ever?](#Part 1)
02 [We know how to animate. Do you?](#Part 2)
Part 1 Which is the Best Animated Movie Ever?
Let’s have a look at the best 15 classical animated cartoon movies that you should watch if you are an animation movie lover.
01 Toy Story 4
Toy Story 4 was released on June 21, 2019 in the United States and will be available for streaming on October 1, 2019.The IMDb rating for Toy Story 4 was 7.7 out of 10, and the Rotten Tomatoes rating was 97%. This movie ranks first among all the animated movies available till date. This is a movie from Walt Disney, and its gross revenue was $434 million.

02 Spider-Man: into the spider verse
Spider-Man: Into the Spider Verse was released in theatres on December 14, 2018 and started streaming on March 19, 2019. The IMDB rating for this movie is 8.4 out of 10 and the Rotten Tomatoes rating is 97%. This movie is from Sony Pictures Entertainment and Columbia Pictures. The gross revenue was $190.2 million.

03 Inside Out
Inside Out was released worldwide in theatres on June 19, 2015 and started streaming on November 3, 2015. This movie received an 8.1 IMDB rating out of 10, and the Rotten Tomatoes rating was 98%. It is from Walt Disney and has a gross revenue of $2 million.

04 COCO
Coco was released in theatres on November 22, 2017 and started streaming on February 13, 2018. The IMDB rating for this movie is 8.4 out of 10 and the Rotten Tomatoes rating is 97%. This movie is from Walt Disney. The gross revenue was $210.5 million.

05 Snow White and the Seven Dwarfs
Snow White and the Seven Dwarfs (1937) was released in theatres in 1937 and started streaming on Nov. 16, 2004. The IMDB rating for this movie is 7.6 out of 10 and the Rotten Tomatoes rating is 98%. This movie is from Walt Disney.

06 Incredibles 2
Incredibles 2 (2018) was released in theatres on June 15, 2018 and became available for streaming on November 6, 2018.The IMDB rating for this movie is 7.6 out of 10 and the Rotten Tomatoes rating is 97%. This movie is from Walt Disney. The gross revenue was $608.6 million.

07 Zootopia (2016)
Zootopia (2016) was released in theatres on March 4, 2016 and started streaming on June 7, 2016. The IMDB rating for this movie is 8.0 out of 10 and the Rotten Tomatoes rating is 98%. This movie is from Walt Disney. The gross revenue was $200 million.

08 Paddington 2 (2018)
Paddington 2 (2018) was released in theatres on Jan. 1, 2018 and started streaming on Apr. 24, 2018. The IMDB rating for this movie is 7.8 out of 10 and the Rotten Tomatoes rating is 99%. This movie is from Warner Bros. Pictures. The gross revenue was $38.4 million.

09 Up
Up was released in theatres on May 29, 2009 and started streaming on Nov. 10, 2009. The IMDB rating for this movie is 8.2 out of 10 and the Rotten Tomatoes rating is 98%. This movie is from Walt Disney and Pixar Animation Studios. The gross revenue was $78.2 million.

10 Toy Story 2 (1999)
Toy Story 2 (1999) was released in theatres on December 24, 1999 and started streaming on March 23, 2010. The IMDB rating for this movie is 7.9 out of 10 and the Rotten Tomatoes rating is 100%. This movie is from Walt Disney Pictures. The gross revenue was $245.9 million.

11 Toy Story 3 (2010)
Toy Story 3 (2010) was released in theatres on June 18, 2010 and started streaming on Nov. 2, 2010. The IMDB rating for this movie is 8.2 out of 10 and the Rotten Tomatoes rating is 98%. This movie is from Walt Disney. The gross revenue was $415.0 million.

12 Finding Dory (2016)
Finding Dory (2016) was released in theatres on June 17, 2016 and started streaming on Nov. 15, 2016. The IMDB rating for this movie is 7.3 out of 10 and the Rotten Tomatoes rating is 94%. This movie is from Sony Pictures Entertainment and Columbia Pictures. The gross revenue was $486.2 million.

13 Finding Nemo (2003)
Finding Nemo (2003) was released in theatres on May 30, 2003 and started streaming on Nov. 4, 2003. The IMDB rating for this movie is 8.1 out of 10 and the Rotten Tomatoes rating is 99%. This movie is from Walt Disney Pictures. The gross revenue was $110.2 million.

13 Pinocchio (1940)
Pinocchio (1940) was released in theatres on February 9, 1940 and started streaming on December 3, 2002. The IMDB rating for this movie is 8.4 out of 10 and the Rotten Tomatoes rating is 100%. This movie is from Walt Disney Pictures. The gross revenue was $18.7 million.

13 The LEGO Movie (2014)
The LEGO Movie (2014) was released in theatres on February 7, 2014 and started streaming on June 17, 2014. The IMDB rating for this movie is 7.7 out of 10 and the Rotten Tomatoes rating is 96%. This movie is from Warner Bros. Pictures. The gross revenue was $257.8 million.
The animated characters let an individual experience a world that has certain things that hardly exist in reality.
Here we will share all the relatable details about the particular movie that will be helpful in deciding whether you wish to watch it or not.
In this article
01 [Which is the Best Animated Movie Ever?](#Part 1)
02 [We know how to animate. Do you?](#Part 2)
Part 1 Which is the Best Animated Movie Ever?
Let’s have a look at the best 15 classical animated cartoon movies that you should watch if you are an animation movie lover.
01 Toy Story 4
Toy Story 4 was released on June 21, 2019 in the United States and will be available for streaming on October 1, 2019.The IMDb rating for Toy Story 4 was 7.7 out of 10, and the Rotten Tomatoes rating was 97%. This movie ranks first among all the animated movies available till date. This is a movie from Walt Disney, and its gross revenue was $434 million.
02 Spider-Man: into the spider verse
Spider-Man: Into the Spider Verse was released in theatres on December 14, 2018 and started streaming on March 19, 2019. The IMDB rating for this movie is 8.4 out of 10 and the Rotten Tomatoes rating is 97%. This movie is from Sony Pictures Entertainment and Columbia Pictures. The gross revenue was $190.2 million.
03 Inside Out
Inside Out was released worldwide in theatres on June 19, 2015 and started streaming on November 3, 2015. This movie received an 8.1 IMDB rating out of 10, and the Rotten Tomatoes rating was 98%. It is from Walt Disney and has a gross revenue of $2 million.
04 COCO
Coco was released in theatres on November 22, 2017 and started streaming on February 13, 2018. The IMDB rating for this movie is 8.4 out of 10 and the Rotten Tomatoes rating is 97%. This movie is from Walt Disney. The gross revenue was $210.5 million.
05 Snow White and the Seven Dwarfs
Snow White and the Seven Dwarfs (1937) was released in theatres in 1937 and started streaming on Nov. 16, 2004. The IMDB rating for this movie is 7.6 out of 10 and the Rotten Tomatoes rating is 98%. This movie is from Walt Disney.
06 Incredibles 2
Incredibles 2 (2018) was released in theatres on June 15, 2018 and became available for streaming on November 6, 2018.The IMDB rating for this movie is 7.6 out of 10 and the Rotten Tomatoes rating is 97%. This movie is from Walt Disney. The gross revenue was $608.6 million.
07 Zootopia (2016)
Zootopia (2016) was released in theatres on March 4, 2016 and started streaming on June 7, 2016. The IMDB rating for this movie is 8.0 out of 10 and the Rotten Tomatoes rating is 98%. This movie is from Walt Disney. The gross revenue was $200 million.
08 Paddington 2 (2018)
Paddington 2 (2018) was released in theatres on Jan. 1, 2018 and started streaming on Apr. 24, 2018. The IMDB rating for this movie is 7.8 out of 10 and the Rotten Tomatoes rating is 99%. This movie is from Warner Bros. Pictures. The gross revenue was $38.4 million.
09 Up
Up was released in theatres on May 29, 2009 and started streaming on Nov. 10, 2009. The IMDB rating for this movie is 8.2 out of 10 and the Rotten Tomatoes rating is 98%. This movie is from Walt Disney and Pixar Animation Studios. The gross revenue was $78.2 million.
10 Toy Story 2 (1999)
Toy Story 2 (1999) was released in theatres on December 24, 1999 and started streaming on March 23, 2010. The IMDB rating for this movie is 7.9 out of 10 and the Rotten Tomatoes rating is 100%. This movie is from Walt Disney Pictures. The gross revenue was $245.9 million.
11 Toy Story 3 (2010)
Toy Story 3 (2010) was released in theatres on June 18, 2010 and started streaming on Nov. 2, 2010. The IMDB rating for this movie is 8.2 out of 10 and the Rotten Tomatoes rating is 98%. This movie is from Walt Disney. The gross revenue was $415.0 million.
12 Finding Dory (2016)
Finding Dory (2016) was released in theatres on June 17, 2016 and started streaming on Nov. 15, 2016. The IMDB rating for this movie is 7.3 out of 10 and the Rotten Tomatoes rating is 94%. This movie is from Sony Pictures Entertainment and Columbia Pictures. The gross revenue was $486.2 million.
13 Finding Nemo (2003)
Finding Nemo (2003) was released in theatres on May 30, 2003 and started streaming on Nov. 4, 2003. The IMDB rating for this movie is 8.1 out of 10 and the Rotten Tomatoes rating is 99%. This movie is from Walt Disney Pictures. The gross revenue was $110.2 million.
13 Pinocchio (1940)
Pinocchio (1940) was released in theatres on February 9, 1940 and started streaming on December 3, 2002. The IMDB rating for this movie is 8.4 out of 10 and the Rotten Tomatoes rating is 100%. This movie is from Walt Disney Pictures. The gross revenue was $18.7 million.
13 The LEGO Movie (2014)
The LEGO Movie (2014) was released in theatres on February 7, 2014 and started streaming on June 17, 2014. The IMDB rating for this movie is 7.7 out of 10 and the Rotten Tomatoes rating is 96%. This movie is from Warner Bros. Pictures. The gross revenue was $257.8 million.
Also read:
- New In 2024, 10 Classical Animated Cartoon Types With Examples
- Updated In 2024, Beginner Tutorial on Making Unity 2D Animation
- Ways You Can Master to Find 10 Best Free Animated Text Generator for 2024
- Updated In 2024, How to Find Some Different Ways to Animated Cartoon of Yourself
- Updated The 10 Best Batman Anime Movies- 2024 Updated
- In 2024, 10 Cartoon Characters That Should Top Your List
- Updated 2024 Approved Ready to Animate Game Character From Scratch?
- New In 2024, How to Animate - Adobe Animate Tutorias
- 10 of the Best Disney Animated Shows
- New Best 15 Classics Animated Cartoon Movies for 2024
- Tutorials for Animating Picture Online Without Learning From Scratch for 2024
- In 2024, The 15 Most Efficient Photo to Cartoon Apps for Android
- What Is A GIF
- Updated Best 15 Female Anime Characters-Who Is Your Favorite?
- New In 2024, 10 Must Watch Netflix Cartoon Series For You
- Handy Tip From Adobe Animate Rigging Tutorial for All Learners for 2024
- Updated How to Reduce GIF Size and Best GIF Resizers
- Updated How to Analyze an Editorial Cartoon Easily for 2024
- Best 10 Apps to Enhance Your Instagram Story Slideshow for 2024
- In 2024, Thousands Already Found 15 Best Sites to Watch Cartoons Online Free And So Can You
- 12 Animated Slideshow PowerPoint Templates for 2024
- In 2024, 12 Best Stop Motion Studios Worth Recommending
- Updated 2024 Approved 15 Top Pics Collage Apps
- Updated In 2024, 5 Photoshop Alternatives to Animate Your Logo
- Updated How to Make a GIF in Photoshop for 2024
- How to Make Photo 3D Cartoon Online for 2024
- Updated 2024 Approved Best 10 Popular Cartoons You Forgot Existed
- Updated How to Draw Cartoons Step by Step with This Guide for 2024
- In 2024, Top 10 Online Animated Logo Makers Everyone Should Know
- Updated 2024 Approved Ways to Create Animated Clipart in PowerPoint
- New 8 Blender 3D Animation Tutorials
- 10 Photoshop Cartoon Effects For Creatives for 2024
- New That Will Make Aesthetic Cartoon Drawing More Understandable
- Updated How to Analyze an Editorial Cartoon Easily
- New 2024 Approved How to Make Photo 3D Cartoon Online
- New Samples of Cartoon Character Face to Inspire You for 2024
- 2024 Approved Little Known Techniques of Motion Graphics in Premiere Pro
- New 10 Top Memorable Japanese Cat Cartoons for 2024
- New 8 Best Motion Graphics Online Tools for Your Inspiration
- New 2024 Approved Animated Collage Maker Tips
- Learn All About 3D Logo Animation and Templates
- In 2024, How To Delete iCloud Account Remove Your Apple ID Permanently On iPhone XR
- 4 Ways to Fix Android Blue Screen of Death On Xiaomi Redmi Note 13 5G | Dr.fone
- In 2024, How to Get and Use Pokemon Go Promo Codes On Poco M6 5G | Dr.fone
- Planning to Use a Pokemon Go Joystick on Motorola Moto G14? | Dr.fone
- How to Use Phone Clone to Migrate Your Nokia C22 Data? | Dr.fone
- How To Unlock SIM Cards Of Vivo Y200 Without PUK Codes
- In 2024, Catch or Beat Sleeping Snorlax on Pokemon Go For Honor Magic Vs 2 | Dr.fone
- How To Change Vivo Y200e 5G Lock Screen Clock in Seconds
- Dose Life360 Notify Me When Someone Checks My Location On Motorola G24 Power? | Dr.fone
- 2 Ways to Transfer Text Messages from Honor X50 to iPhone 15/14/13/12/11/X/8/ | Dr.fone
- In 2024, 10 Easy-to-Use FRP Bypass Tools for Unlocking Google Accounts On Vivo X90S
- Fix Unfortunately Settings Has Stopped on Oppo Reno 9A Quickly | Dr.fone
- In 2024, How to Turn Off Find My Apple iPhone XS Max when Phone is Broken? | Dr.fone
- In 2024, Complete Tutorial to Use VPNa to Fake GPS Location On OnePlus Nord N30 SE | Dr.fone
- Easy Guide How To Bypass Samsung Galaxy S23 Ultra FRP Android 10/11/12/13
- The way to get back lost messages from P40+
- 4 Feasible Ways to Fake Location on Facebook For your Tecno Phantom V Flip | Dr.fone
- In 2024, Pokemon Go Error 12 Failed to Detect Location On Oppo A78? | Dr.fone
- How to Cast Vivo V29 Pro Screen to PC Using WiFi | Dr.fone
- How to Delete iCloud Account From Apple iPhone 12 without Password?
- 3 Solutions to Find Your Samsung Galaxy Z Flip 5 Current Location of a Mobile Number | Dr.fone
- In 2024, How to Get and Use Pokemon Go Promo Codes On Apple iPhone 13 mini | Dr.fone
- Easy Guide How To Bypass Itel P55T FRP Android 10/11/12/13
- In 2024, 4 Ways to Transfer Music from Nokia C12 to iPhone | Dr.fone
- Title: 2024 Approved Tutorials to Make Animated Images
- Author: Elon
- Created at : 2024-05-19 03:04:32
- Updated at : 2024-05-20 03:04:32
- Link: https://animation-videos.techidaily.com/2024-approved-tutorials-to-make-animated-images/
- License: This work is licensed under CC BY-NC-SA 4.0.
