

2024 Approved Ways You Can Master to Find 10 Best Free Animated Text Generator
Ways to Master to Find 10 Best Free Animated Text Generator
Ways You Can Master to Find 10 Best Free Animated Text Generator
An easy yet powerful editor
Numerous effects to choose from
Detailed tutorials provided by the official channel
We’ve compiled a list of some of the best text animation software and tools out there!
One for general, animated text generators, and the other for online text gif maker tools. Pick whichever suits your project and start working on a more professional look today.
In this article
01 [10 Best Animated Text Generators for 2021](#Part 1)
02 [8 Best Online Text GIF Generators to Make Animated Word GIFs](#Part 2)
03 [How to Use an Animated Text Generator to Make Stunning Videos?](#Part 3)
Part 1 10 Best Animated Text Generators for 2021
For our first list, as promised, we’ve compiled a list of some of the best-animated text generators for 2021. This is a general list of text animation software that you have to either download or install to use! If you want the online text animation maker list, that would be the one after this!
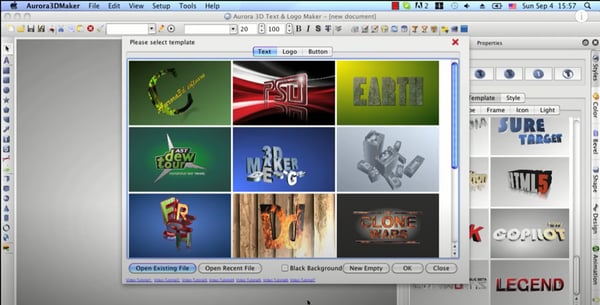
01Aurora: 3D Text Logo Maker
PRICE: FREE!
RATING: 4.5/5
The first animated text generator on our list is Aurora 3D. Aurora offers several different products, but the one that we’re focusing on today is their 3D Text & Logo maker, which you can use to create some pretty advanced text animations with no sweat (as well as logos, of course, as the name implies)! The software is available for both Mac and Windows OS computers and desktops.
02Animaker
PRICE: Basic Plan = $10 per month!
RATING: 4.9/5
If you’re looking for a more modern text animation maker, then Animaker might just be the one that you want! With this, you can create your 3D text animations from scratch, or choose from the dozens of templates and presets that they have for text, animated characters, icons, and other properties. This is more of a video editor than a strict text tool, but we thought it was important to give you a good variety. It’s also not FREE, but you can try it for free for a time so that you can check if it’s the one for you.

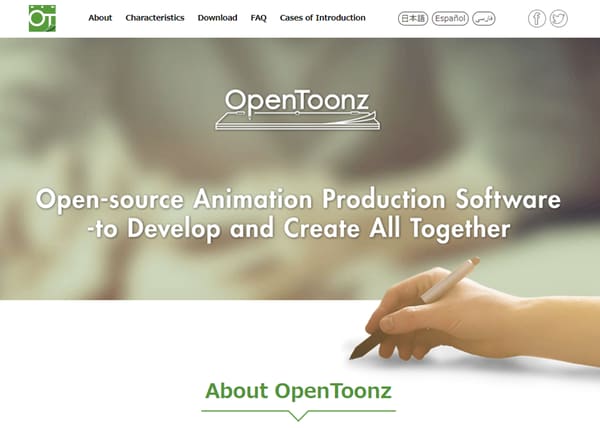
03OpenToonz
PRICE: Free
RATING: 4/5
OpenToonz is a free text animation software that you can use for both basic and advanced 2D animation. It comes in several different languages (including Spanish and Japanese) and is very useful for creating simple text animation from scratch — no complicated tools. Just create and go! (It is also available in both Mac and Windows!)
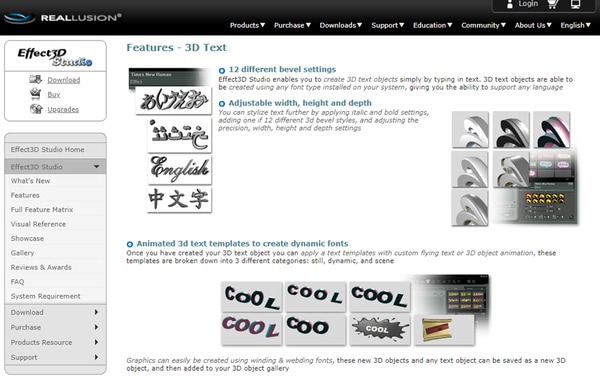
04Reallusion
PRICE: Free
RATING: 4/5
Reallusion is another open-source text gif maker that you can use if you’re looking for something quick-and-easy. It supports a ton of different fonts, as well as ways to control the width, height, dimension, and style of every single object inside of their 3D properties gallery — giving you a lot of options for customization without any added cost!
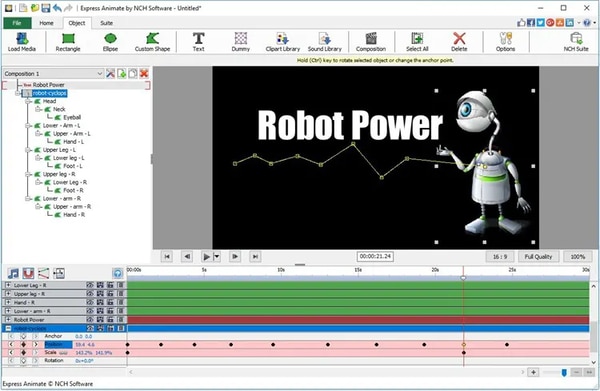
05Express Animate
PRICE: $60 (full license)
RATING: 4/5
Express Animate, just like Open Toonz, it is more of an animation tool than one strictly created for text animation. However, it does work for that purpose as well. So, if you’re willing to pay for the full license (which will cost $60), it could be a fairly good tool for you. Especially if you’re interested in trying out more complex animations in the future.
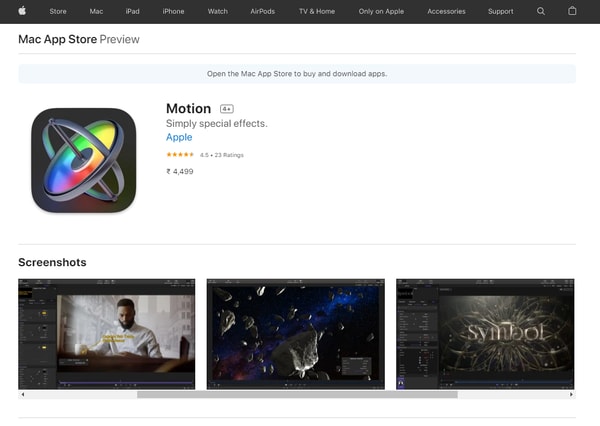
06Motion
PRICE: $47
RATING: 3.9/5
Motion is a Mac-only software. It is, just like some of the other options on this list, a great option for those looking for a tool that can help them with general animations (not just text animation — although it provides tools for that as well). The best part of Motion is undoubtedly its graphic library, where you have access to a ton of different presets and templates that you can use to simplify your text-animation-making.
07Xara 3D Maker
PRICE: $39.99
RATING: 3.9/5
Xara is another one of our paid options. It also comes complete with a range of different templates and presets that you can use in order to simplify your animation-generating. And, if you end up disliking the product after you try it, they do offer a 30-day money-back guarantee that you can take advantage of to make sure that you get the most out of your purchase.
08Easy Banner
PRICE: FREE
RATING: 3.5/5
Easy Banner is a free animated text-banner-making software. It’s only available in Windows, and its uses are limited to created banners. However, if that’s what you’re looking for? Then there’s no reason not to try it out! Especially since it’s free, and it comes with some pretty advanced customization options for getting the exact look that you want on your text banners.
09Falco GIF Animator
PRICE: FREE
RATING: 3.5/5
Falco Gif Animator is from the same creators of the previous item on this list (Softpedia!) The two offer similar tools, but for different purposes. Whilst the previous tool was for the creation of animated-text banners, this one is a GIF maker for icons, cursors, logos, etc. It’s also FREE! So, if the project you’re working on is applicable to its available features? Then you should definitely try it!

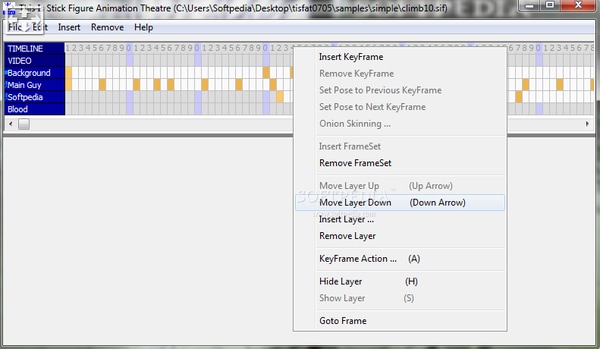
10TISFAT
PRICE: Free
RATING: 3/5
TISFAT is the last of the tools that we have for you. It’s an open-source stick animation tool that you can use to create text animations in whatever style or format that you desire. Making it more customizable than some of the other Softpedia options we just introduced, but still, one to consider based on your own circumstances.
Part 2 8 Best Online Text GIF Generators to Make Animated Word GIFs
And so, we move on to our next list! Here’s where we introduce online solutions for animated text generation needs! So, all the tools on this list will not require any downloading, but they will require that you have internet while working!
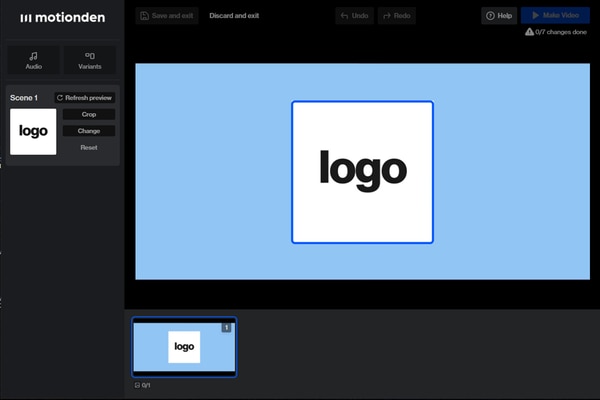
01MotionDen
| PROS | CONS |
|---|---|
| ● FREE version available● Large resources library● Easy-to-use video templates | ● Must upgrade to the premium version to export high-quality projects without a watermark.● The FREE version has a 5-video limit (you cannot work on any more projects than that).● Difficult to use for creating text animation from scratch. |
RATING: 4.8/5
MotionDen is a good entry point for text animation online solutions! It comes with tons of different templates that you can choose from to start working on your project immediately. MotionDen also offers a free version that you can test out for a limited number of times (one that gives you access to all their tools and their large resource library). So, you can decide to upgrade to their premium version whenever you want to (which will cost you around $29 per month!)
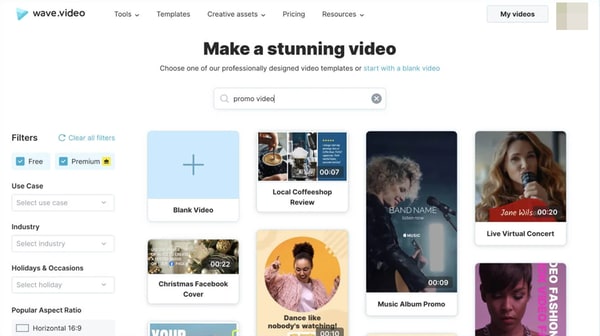
02Wave.Video
| PROS | CONS |
|---|---|
| ● FREE version is available for trying out its tools.● Vast library of animation properties for you to play around with.● Vast library of animation properties for you to play around with. | ● FREE version limits the length of your projects to 15 seconds.● You can also only create five video projects with the free version.● You can also only create five video projects with the free version. |
RATING: 4.5/5
Wave.Video, just like MotionDen, is a freemium software. You can try it out for free and start using their online video editing tools immediately to create short promos, logos, text gifs, etc. If you want access to some of its more advanced tools, however, you’ll need to pay the premium price ($24-48), which, to you, may or may not be worth the vast library of polished animation properties.
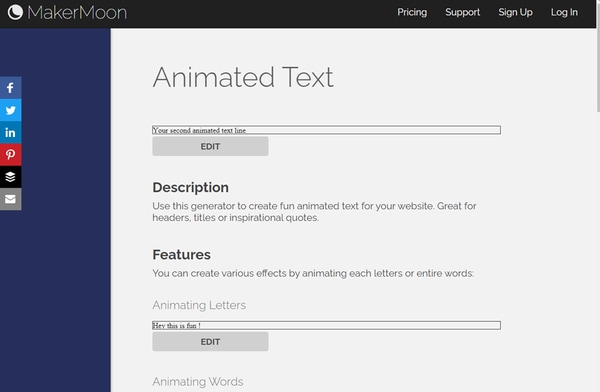
03MakerMoon
| PROS | CONS |
|---|---|
| ● Easy-to-use, and comes with templates and presets!● Advanced video editing tools that you can use to personalize your projects.● FREE plan is available. | ● The FREE version is limited in use.● You also cannot download high-quality projects without a watermark with the free version.● Basic animations only. |
RATING: 4.3/5
If you want to keep things simple, then MakerMoon might be your preferred choice for text animation. It is, like the previous picks, an online video maker, but one with the focus on creating text-centric projects, which you can personalize in a number of ways to create logos, banners, short videos, gifs, etc.
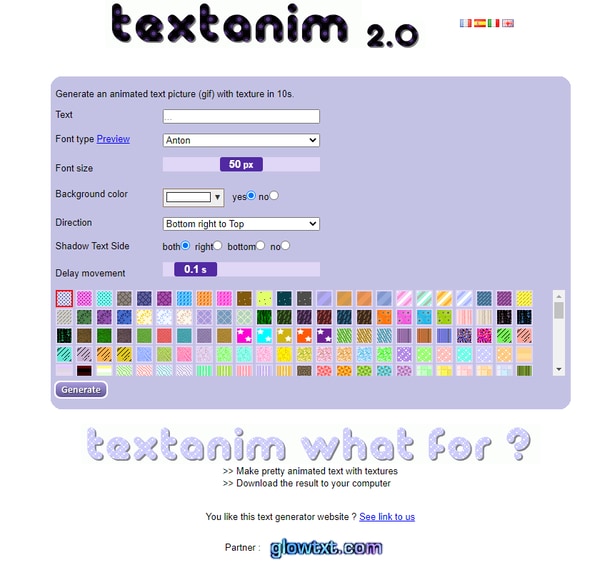
04Textanim
| PROS | CONS |
|---|---|
| ● FREE online GIF maker● A variety of different font style options● Animated Effects options | ● Output is GIF only.● Limited animations options.● Limited resource library. |
RATING: 4/5
Textanim is a very bubbly and glittery kind of gif-maker, made for a more specific kind of project. But, if it works, it works! Plus, it’s also the first completely FREE online gif maker on this list. So, you can test it out without having to make any commitments and use it literally anytime you feel like it. Unfortunately, though, it should be said that the animations here are mainly for effects (i.e., glowing, sparkling, etc.). The text won’t actually move. So, if that’s not what you’re looking for? Then it might not be for you.
05SnackThis
| PROS | CONS |
|---|---|
| ● FREE version for testing its tools and resources is available.● Lots of modern templates are available.● Editing tools for polishing projects. | ● If you’re using the FREE version, you will not be able to actually download your project.● You will also need to register to use it.● The customization options are limited. |
RATING: 4/5
SnackThis, unlike Textanim, is the type to cater to a wider array of users. Its templates are all very modern and professional-looking. So, if what you’re looking for is to create text banners, logos, icons, etc. for your business? Then this definitely is an option that you may want to consider. It’s pretty easy to use too! All you have to do is select the template that you want to use, and then edit it to match what you need.
06Animatron Studio
| PROS | CONS |
|---|---|
| ● More customizable functions.● Advanced video editing options.● Pre-made templates are available for easier animating. | ● FREE Version is limited.● Might be difficult for inexperienced animators.● Output formats are MP4 and GIF only. |
RATING: 3.9/5
Animatron Studio is the tool to use if what you’re looking for is customization. This tool is really better described as animation software, rather than a simple text generator. That means that you have more options than what you might see from other online text animation tools, but it also means that you’ll need to put in more effort to come up with a polished-looking end-product.

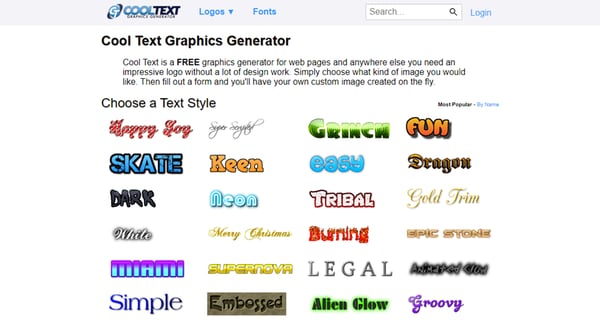
07Cool Text
| PROS | CONS |
|---|---|
| ● Easy and quick to use.● Various font customization options.● FREE to use. | ● Limited customizability.● Old-fashioned fonts. |
RATING: 3.5/5
As a departure from the previous pick, we have Cool Text, which is its complete opposite! This is an older software and is definitely best described strictly as an animated text generator. With Cool Text, you can make logos or icons very easily. The options are, of course, more limited because of that, but it may very well be all you need based on the kind of project you’re working on.
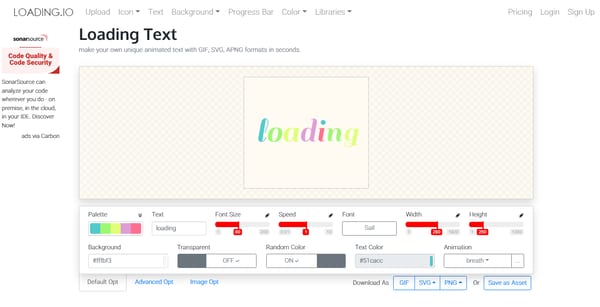
08Loading.io
| PROS | CONS |
|---|---|
| ● Lots of fonts customization options.● Three different output formats (svg., png., and gif).● Also pre-set animations to choose from. | ● The FREE version is limited.● It isn’t as advanced as some of the other tools on this list. |
RATING: 3.5/5
For our last online text animator, we have Loading.io. This one is a very simple, and very straightforward kind of tool. It’s also a freemium one, so you’ll have to pay in order to unlock some of its features, but it’s a solid contender for its customization tools, which gives a lot more options to choose from.
Part 3 How to Use an Animated Text Generator to Make Stunning Videos?
Now, if you need help making use of your finished animated text, icons, etc. Then you’ll probably need a video editor like Wondershare Filmora !
For Win 7 or later (64-bit)
For macOS 10.14 or later
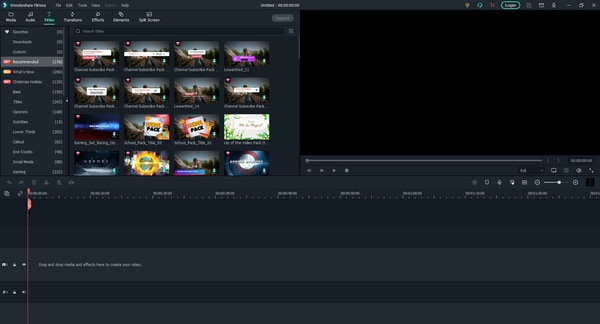
As you can see from the image shown above, Wondershare Filmora is a very sleek video editing software. It’s used by all sorts of professionals as well, as it comes with all kinds of resources and tools that you can use in order to create stunning videos (including, believe it or not, templates for animated text! So, if you want, you can even skip the animated text maker altogether and just get straight to using Filmora.)
Key Takeaways from This Episode
● There are various text animation generators in the market! Some of which you can download straight to your desktop or computer!
● There are also online GIF makers that you can use straight from your browser, leaving out all the hassle of having to download or install anything and helping you get straight to work!
● If you want to polish up your project some more, then consider using an advanced video editor like Filmora Pro to make sure that your work is sparkly clean!
We’ve compiled a list of some of the best text animation software and tools out there!
One for general, animated text generators, and the other for online text gif maker tools. Pick whichever suits your project and start working on a more professional look today.
In this article
01 [10 Best Animated Text Generators for 2021](#Part 1)
02 [8 Best Online Text GIF Generators to Make Animated Word GIFs](#Part 2)
03 [How to Use an Animated Text Generator to Make Stunning Videos?](#Part 3)
Part 1 10 Best Animated Text Generators for 2021
For our first list, as promised, we’ve compiled a list of some of the best-animated text generators for 2021. This is a general list of text animation software that you have to either download or install to use! If you want the online text animation maker list, that would be the one after this!
01Aurora: 3D Text Logo Maker
PRICE: FREE!
RATING: 4.5/5
The first animated text generator on our list is Aurora 3D. Aurora offers several different products, but the one that we’re focusing on today is their 3D Text & Logo maker, which you can use to create some pretty advanced text animations with no sweat (as well as logos, of course, as the name implies)! The software is available for both Mac and Windows OS computers and desktops.
02Animaker
PRICE: Basic Plan = $10 per month!
RATING: 4.9/5
If you’re looking for a more modern text animation maker, then Animaker might just be the one that you want! With this, you can create your 3D text animations from scratch, or choose from the dozens of templates and presets that they have for text, animated characters, icons, and other properties. This is more of a video editor than a strict text tool, but we thought it was important to give you a good variety. It’s also not FREE, but you can try it for free for a time so that you can check if it’s the one for you.
03OpenToonz
PRICE: Free
RATING: 4/5
OpenToonz is a free text animation software that you can use for both basic and advanced 2D animation. It comes in several different languages (including Spanish and Japanese) and is very useful for creating simple text animation from scratch — no complicated tools. Just create and go! (It is also available in both Mac and Windows!)
04Reallusion
PRICE: Free
RATING: 4/5
Reallusion is another open-source text gif maker that you can use if you’re looking for something quick-and-easy. It supports a ton of different fonts, as well as ways to control the width, height, dimension, and style of every single object inside of their 3D properties gallery — giving you a lot of options for customization without any added cost!
05Express Animate
PRICE: $60 (full license)
RATING: 4/5
Express Animate, just like Open Toonz, it is more of an animation tool than one strictly created for text animation. However, it does work for that purpose as well. So, if you’re willing to pay for the full license (which will cost $60), it could be a fairly good tool for you. Especially if you’re interested in trying out more complex animations in the future.
06Motion
PRICE: $47
RATING: 3.9/5
Motion is a Mac-only software. It is, just like some of the other options on this list, a great option for those looking for a tool that can help them with general animations (not just text animation — although it provides tools for that as well). The best part of Motion is undoubtedly its graphic library, where you have access to a ton of different presets and templates that you can use to simplify your text-animation-making.
07Xara 3D Maker
PRICE: $39.99
RATING: 3.9/5
Xara is another one of our paid options. It also comes complete with a range of different templates and presets that you can use in order to simplify your animation-generating. And, if you end up disliking the product after you try it, they do offer a 30-day money-back guarantee that you can take advantage of to make sure that you get the most out of your purchase.
08Easy Banner
PRICE: FREE
RATING: 3.5/5
Easy Banner is a free animated text-banner-making software. It’s only available in Windows, and its uses are limited to created banners. However, if that’s what you’re looking for? Then there’s no reason not to try it out! Especially since it’s free, and it comes with some pretty advanced customization options for getting the exact look that you want on your text banners.
09Falco GIF Animator
PRICE: FREE
RATING: 3.5/5
Falco Gif Animator is from the same creators of the previous item on this list (Softpedia!) The two offer similar tools, but for different purposes. Whilst the previous tool was for the creation of animated-text banners, this one is a GIF maker for icons, cursors, logos, etc. It’s also FREE! So, if the project you’re working on is applicable to its available features? Then you should definitely try it!
10TISFAT
PRICE: Free
RATING: 3/5
TISFAT is the last of the tools that we have for you. It’s an open-source stick animation tool that you can use to create text animations in whatever style or format that you desire. Making it more customizable than some of the other Softpedia options we just introduced, but still, one to consider based on your own circumstances.
Part 2 8 Best Online Text GIF Generators to Make Animated Word GIFs
And so, we move on to our next list! Here’s where we introduce online solutions for animated text generation needs! So, all the tools on this list will not require any downloading, but they will require that you have internet while working!
01MotionDen
| PROS | CONS |
|---|---|
| ● FREE version available● Large resources library● Easy-to-use video templates | ● Must upgrade to the premium version to export high-quality projects without a watermark.● The FREE version has a 5-video limit (you cannot work on any more projects than that).● Difficult to use for creating text animation from scratch. |
RATING: 4.8/5
MotionDen is a good entry point for text animation online solutions! It comes with tons of different templates that you can choose from to start working on your project immediately. MotionDen also offers a free version that you can test out for a limited number of times (one that gives you access to all their tools and their large resource library). So, you can decide to upgrade to their premium version whenever you want to (which will cost you around $29 per month!)
02Wave.Video
| PROS | CONS |
|---|---|
| ● FREE version is available for trying out its tools.● Vast library of animation properties for you to play around with.● Vast library of animation properties for you to play around with. | ● FREE version limits the length of your projects to 15 seconds.● You can also only create five video projects with the free version.● You can also only create five video projects with the free version. |
RATING: 4.5/5
Wave.Video, just like MotionDen, is a freemium software. You can try it out for free and start using their online video editing tools immediately to create short promos, logos, text gifs, etc. If you want access to some of its more advanced tools, however, you’ll need to pay the premium price ($24-48), which, to you, may or may not be worth the vast library of polished animation properties.
03MakerMoon
| PROS | CONS |
|---|---|
| ● Easy-to-use, and comes with templates and presets!● Advanced video editing tools that you can use to personalize your projects.● FREE plan is available. | ● The FREE version is limited in use.● You also cannot download high-quality projects without a watermark with the free version.● Basic animations only. |
RATING: 4.3/5
If you want to keep things simple, then MakerMoon might be your preferred choice for text animation. It is, like the previous picks, an online video maker, but one with the focus on creating text-centric projects, which you can personalize in a number of ways to create logos, banners, short videos, gifs, etc.
04Textanim
| PROS | CONS |
|---|---|
| ● FREE online GIF maker● A variety of different font style options● Animated Effects options | ● Output is GIF only.● Limited animations options.● Limited resource library. |
RATING: 4/5
Textanim is a very bubbly and glittery kind of gif-maker, made for a more specific kind of project. But, if it works, it works! Plus, it’s also the first completely FREE online gif maker on this list. So, you can test it out without having to make any commitments and use it literally anytime you feel like it. Unfortunately, though, it should be said that the animations here are mainly for effects (i.e., glowing, sparkling, etc.). The text won’t actually move. So, if that’s not what you’re looking for? Then it might not be for you.
05SnackThis
| PROS | CONS |
|---|---|
| ● FREE version for testing its tools and resources is available.● Lots of modern templates are available.● Editing tools for polishing projects. | ● If you’re using the FREE version, you will not be able to actually download your project.● You will also need to register to use it.● The customization options are limited. |
RATING: 4/5
SnackThis, unlike Textanim, is the type to cater to a wider array of users. Its templates are all very modern and professional-looking. So, if what you’re looking for is to create text banners, logos, icons, etc. for your business? Then this definitely is an option that you may want to consider. It’s pretty easy to use too! All you have to do is select the template that you want to use, and then edit it to match what you need.
06Animatron Studio
| PROS | CONS |
|---|---|
| ● More customizable functions.● Advanced video editing options.● Pre-made templates are available for easier animating. | ● FREE Version is limited.● Might be difficult for inexperienced animators.● Output formats are MP4 and GIF only. |
RATING: 3.9/5
Animatron Studio is the tool to use if what you’re looking for is customization. This tool is really better described as animation software, rather than a simple text generator. That means that you have more options than what you might see from other online text animation tools, but it also means that you’ll need to put in more effort to come up with a polished-looking end-product.
07Cool Text
| PROS | CONS |
|---|---|
| ● Easy and quick to use.● Various font customization options.● FREE to use. | ● Limited customizability.● Old-fashioned fonts. |
RATING: 3.5/5
As a departure from the previous pick, we have Cool Text, which is its complete opposite! This is an older software and is definitely best described strictly as an animated text generator. With Cool Text, you can make logos or icons very easily. The options are, of course, more limited because of that, but it may very well be all you need based on the kind of project you’re working on.
08Loading.io
| PROS | CONS |
|---|---|
| ● Lots of fonts customization options.● Three different output formats (svg., png., and gif).● Also pre-set animations to choose from. | ● The FREE version is limited.● It isn’t as advanced as some of the other tools on this list. |
RATING: 3.5/5
For our last online text animator, we have Loading.io. This one is a very simple, and very straightforward kind of tool. It’s also a freemium one, so you’ll have to pay in order to unlock some of its features, but it’s a solid contender for its customization tools, which gives a lot more options to choose from.
Part 3 How to Use an Animated Text Generator to Make Stunning Videos?
Now, if you need help making use of your finished animated text, icons, etc. Then you’ll probably need a video editor like Wondershare Filmora !
For Win 7 or later (64-bit)
For macOS 10.14 or later
As you can see from the image shown above, Wondershare Filmora is a very sleek video editing software. It’s used by all sorts of professionals as well, as it comes with all kinds of resources and tools that you can use in order to create stunning videos (including, believe it or not, templates for animated text! So, if you want, you can even skip the animated text maker altogether and just get straight to using Filmora.)
Key Takeaways from This Episode
● There are various text animation generators in the market! Some of which you can download straight to your desktop or computer!
● There are also online GIF makers that you can use straight from your browser, leaving out all the hassle of having to download or install anything and helping you get straight to work!
● If you want to polish up your project some more, then consider using an advanced video editor like Filmora Pro to make sure that your work is sparkly clean!
Secret Source to Make a Great Stop Motion Puppet
Secret Source to Make a Stop Motion Puppetd
An easy yet powerful editor
Numerous effects to choose from
Detailed tutorials provided by the official channel
The significant difference between a stop-motion puppet and other types is that they have an armature inside. An armature is the puppet’s skeleton, a must to hold its position without sleeping for each captured frame. The stop motion puppet makeover should be precise to prevent it from breaking down or falling quickly. In addition, buying a stop-motion puppet armature might be pretty expensive, so making them by yourself is much more fun and cheaper.

To prevent any mishap during your stop-motion puppet making, your pupils should be as durable and lightweight as possible, and they must be designed based on what you will be doing and what kind of movement will be required of them. In essence, your story’s overall purpose for creating the animation will be the ultimate factor in how your character is built and designed.
In this article
01 [8 Popular Stop Motion Puppet Examples](#Part 1)
02 [How to Make a Stop Motion Puppet](#Part 2)
Part 1 8 Popular Stop Motion Puppet Examples
While wandering all through the web world, you will encounter many famous stop motion puppets. Some of them are very popular stop-motion puppets for sale, and this section of the article is about to explore eight (of them and what they stand for:
01Rudolph the Red-Nosed Reindeer

Rudolph, the Red-Nosed Reindeer, is a pleasant Christmas stop motion animated TV special in 19produced by video craft international limited. These figures starred in the perennially beloved stop motion animation Christmas special.
02Nestor the Long-Eared Christmas Donkey

The Long-Eared Christmas Donkey, Nestor is a Christmas stop motion animated TV special in 19produced by Rankin-Bass productions. The story is back in the Roman Empire days when miniature donkeys were born with very long years and kept getting into trouble. When the owner decides to throw him out of the stable, his mother sacrifices her life to save him from a blizzard.
03Santa Claus is Comin’ to Town

This is a stop-motion animation TV special in 19made by Rankin-bass productions. The story tells all about Santa Claus when he was a baby and growing up with the Kringles. The story is told and sang by a special delivery Kluger voiced by Fred Astaire.
04Negative Space
This one is one of the world’s wide appreciated and Oscar-nominated stop motion puppet animations that reflect the son and father relationship in an interactive way. It is a must to watch animation effects.

05Fantastic Mr. Fox

Fantastic Mr. Fox is a 20puppet animation movie that talks about an urban fox that cannot resist returning to his farm and must help his community survive the farmer’s retaliation.
06Coraline

Coraline is a 20Pope x animation TV series that talks about an adventurous 11-year-old girl that finds another strange world that is an idealized version of her frustrating home.
07The Nightmare before Christmas

The nightmare before Christmas is a puppet animation TV series that talks about Jack Skellington, the king of Halloween Town, and discovers Christmas town but his attempts to bring Christmas to his home result in confusion.
07Corpse bride

Corpse Bride is a puppet animated family TV series in 20talks about a shy groom practicing his wedding vow in the inadvertent presence of a deceased young woman as she rises from the grave, assuming that he has married her.
Part 2 How to Make a Stop Motion Puppet
Do you have a story, and you need some puppets to take the place of your actors, and you want to double in stop motion animation. The fact is there are different ways to create your Stop Motion Puppet, and as per your storyboard requirement, you can go with other methods. Such as, you can either use tools to build your puppet armature, otherwise can make some puppets from clothes and threads to give it a structure, else can use clay to assign a static puppet structure. It’s all your choice, so all in all what you need is:
● A Storyboard
● Puppet armature tools
● Camera setup
● Editing Software (in our case, we are going to use Wondershare Filmora Video Editor )
In this tutorial, we will be teaching you how to make stop-motion puppets in a way that is relatively cost-effective to produce durable means whose construction requires little or no time or extra equipment:

Wondershare Filmora - Best Video Editor for Mac/Windows
5,481,435 people have downloaded it.
Build unique custom animations without breaking a sweat.
Focus on creating epic stories and leave the details to Filmora’s auto features.
Start a creative adventure with drag & drop effects and endless possibilities.
Filmora simplifies advanced features to save you time and effort.
Filmora cuts out repetition so you can move on to your next creative breakthrough.
Materials:
● Ball head screws (M2.5)
● Small screws (M3)
● Ball head screws (2xand brass pipes whose diameter is less than ball head screws
● Brass plate (strips 2mm thick)
Tools:
● M3 thread tap
● M2.5 thread tap
● Screwdriver
● Pliers
● Drill press
● Drills of 2.5 mm, 2 mm, 3 mm
● Power sander
● Loctite
● File
● Bandsaw
Step
● Use the brass to mark the length of the bone
● Cut the tube according to the length
● Sandpaper or file it Square
● On both sides of the tube, use the tap to cause the tread
● Use the screws in the brass tube to screw the ball head

Step 2:
● On each sides of the brass strip, drill 2.5 mm holes
● Then, between holes of the holes you drill, drill 2.5 mm holes
● Between the other 2.5 mm holes, drill 3mm holes

Step 3:
● On the 2.5 mm holes on the sides, use the 3mm drill to create some cup
● With the 3 mm tap, cut the thread in the 2 mm holes in the middle

Step 4:
● Without damaging the holes, file the end of the strip with all the holes as close to the first 3
● From the strip, cut the parts with the first three holes
● Also, as close to the most used flyer to file the other side.
Note: Make sure you are careful while filing as this will get very hot

**Step 5:**Join all the parts together and make sure that the cup on the outer holes of the two plates is two words each other and tighten the bolts to hold the bones

Step 6: Join to strip of bras together and form a torso. Then cut the torso and form the feet

Step 7: When your puppet is the way you want it, lock teeth styles by fixing the ball head screw in place

Animation Editing:
Also, you can make a stop motion video on Filmora by considering the following factors:
● Camera Steadiness is a must for every shot you plan for Stop Motion Video. Shaking a camera is not good. Else, your video won’t be smooth.
● Ensure capture the shot under consistent light and prevent light exposure from changing on the object; otherwise, there will be inconsistency in the video.
● To make it easier, play the film in advance, as the more friends your video, the smoother the video will be.
Here are steps to make a stop motion video on Filmora:
Step 1 Place the camera steady and bring your object in the frame. Lightly move your things and capture the movement frame by frame.

Step 2 Download and start, or if you have already installed, run the Filmora program and choose a suitable frame rate in the project settings. After selecting the resolution, click on the file and go to the project setting.

Step 3 Now import the media file using the import option from the file menu and import the captured images.

Step 4 Adjust the menu’s preference or press the shortcut key Ctrl+Shift+, and a window will appear on your screen. Select the editing panel and change the photo duration between 0.2 to 0.5 seconds.

Step 5 Once done with all the settings and satisfied with the results, click on export and select your desired video format. Your video will be exported and saved in your library so you can share it with friends.

● Key Takeaways from This Episode →
● Get to know about what is stop motion puppets.
● Different examples of how dinosaur stop motion puppet or other puppet animation form works.
● The process to create your stop motion puppet and how Filmora will assist you in it.
The significant difference between a stop-motion puppet and other types is that they have an armature inside. An armature is the puppet’s skeleton, a must to hold its position without sleeping for each captured frame. The stop motion puppet makeover should be precise to prevent it from breaking down or falling quickly. In addition, buying a stop-motion puppet armature might be pretty expensive, so making them by yourself is much more fun and cheaper.
To prevent any mishap during your stop-motion puppet making, your pupils should be as durable and lightweight as possible, and they must be designed based on what you will be doing and what kind of movement will be required of them. In essence, your story’s overall purpose for creating the animation will be the ultimate factor in how your character is built and designed.
In this article
01 [8 Popular Stop Motion Puppet Examples](#Part 1)
02 [How to Make a Stop Motion Puppet](#Part 2)
Part 1 8 Popular Stop Motion Puppet Examples
While wandering all through the web world, you will encounter many famous stop motion puppets. Some of them are very popular stop-motion puppets for sale, and this section of the article is about to explore eight (of them and what they stand for:
01Rudolph the Red-Nosed Reindeer
Rudolph, the Red-Nosed Reindeer, is a pleasant Christmas stop motion animated TV special in 19produced by video craft international limited. These figures starred in the perennially beloved stop motion animation Christmas special.
02Nestor the Long-Eared Christmas Donkey
The Long-Eared Christmas Donkey, Nestor is a Christmas stop motion animated TV special in 19produced by Rankin-Bass productions. The story is back in the Roman Empire days when miniature donkeys were born with very long years and kept getting into trouble. When the owner decides to throw him out of the stable, his mother sacrifices her life to save him from a blizzard.
03Santa Claus is Comin’ to Town
This is a stop-motion animation TV special in 19made by Rankin-bass productions. The story tells all about Santa Claus when he was a baby and growing up with the Kringles. The story is told and sang by a special delivery Kluger voiced by Fred Astaire.
04Negative Space
This one is one of the world’s wide appreciated and Oscar-nominated stop motion puppet animations that reflect the son and father relationship in an interactive way. It is a must to watch animation effects.
05Fantastic Mr. Fox
Fantastic Mr. Fox is a 20puppet animation movie that talks about an urban fox that cannot resist returning to his farm and must help his community survive the farmer’s retaliation.
06Coraline
Coraline is a 20Pope x animation TV series that talks about an adventurous 11-year-old girl that finds another strange world that is an idealized version of her frustrating home.
07The Nightmare before Christmas
The nightmare before Christmas is a puppet animation TV series that talks about Jack Skellington, the king of Halloween Town, and discovers Christmas town but his attempts to bring Christmas to his home result in confusion.
07Corpse bride
Corpse Bride is a puppet animated family TV series in 20talks about a shy groom practicing his wedding vow in the inadvertent presence of a deceased young woman as she rises from the grave, assuming that he has married her.
Part 2 How to Make a Stop Motion Puppet
Do you have a story, and you need some puppets to take the place of your actors, and you want to double in stop motion animation. The fact is there are different ways to create your Stop Motion Puppet, and as per your storyboard requirement, you can go with other methods. Such as, you can either use tools to build your puppet armature, otherwise can make some puppets from clothes and threads to give it a structure, else can use clay to assign a static puppet structure. It’s all your choice, so all in all what you need is:
● A Storyboard
● Puppet armature tools
● Camera setup
● Editing Software (in our case, we are going to use Wondershare Filmora Video Editor )
In this tutorial, we will be teaching you how to make stop-motion puppets in a way that is relatively cost-effective to produce durable means whose construction requires little or no time or extra equipment:
Wondershare Filmora - Best Video Editor for Mac/Windows
5,481,435 people have downloaded it.
Build unique custom animations without breaking a sweat.
Focus on creating epic stories and leave the details to Filmora’s auto features.
Start a creative adventure with drag & drop effects and endless possibilities.
Filmora simplifies advanced features to save you time and effort.
Filmora cuts out repetition so you can move on to your next creative breakthrough.
Materials:
● Ball head screws (M2.5)
● Small screws (M3)
● Ball head screws (2xand brass pipes whose diameter is less than ball head screws
● Brass plate (strips 2mm thick)
Tools:
● M3 thread tap
● M2.5 thread tap
● Screwdriver
● Pliers
● Drill press
● Drills of 2.5 mm, 2 mm, 3 mm
● Power sander
● Loctite
● File
● Bandsaw
Step
● Use the brass to mark the length of the bone
● Cut the tube according to the length
● Sandpaper or file it Square
● On both sides of the tube, use the tap to cause the tread
● Use the screws in the brass tube to screw the ball head
Step 2:
● On each sides of the brass strip, drill 2.5 mm holes
● Then, between holes of the holes you drill, drill 2.5 mm holes
● Between the other 2.5 mm holes, drill 3mm holes
Step 3:
● On the 2.5 mm holes on the sides, use the 3mm drill to create some cup
● With the 3 mm tap, cut the thread in the 2 mm holes in the middle
Step 4:
● Without damaging the holes, file the end of the strip with all the holes as close to the first 3
● From the strip, cut the parts with the first three holes
● Also, as close to the most used flyer to file the other side.
Note: Make sure you are careful while filing as this will get very hot
**Step 5:**Join all the parts together and make sure that the cup on the outer holes of the two plates is two words each other and tighten the bolts to hold the bones
Step 6: Join to strip of bras together and form a torso. Then cut the torso and form the feet
Step 7: When your puppet is the way you want it, lock teeth styles by fixing the ball head screw in place
Animation Editing:
Also, you can make a stop motion video on Filmora by considering the following factors:
● Camera Steadiness is a must for every shot you plan for Stop Motion Video. Shaking a camera is not good. Else, your video won’t be smooth.
● Ensure capture the shot under consistent light and prevent light exposure from changing on the object; otherwise, there will be inconsistency in the video.
● To make it easier, play the film in advance, as the more friends your video, the smoother the video will be.
Here are steps to make a stop motion video on Filmora:
Step 1 Place the camera steady and bring your object in the frame. Lightly move your things and capture the movement frame by frame.
Step 2 Download and start, or if you have already installed, run the Filmora program and choose a suitable frame rate in the project settings. After selecting the resolution, click on the file and go to the project setting.
Step 3 Now import the media file using the import option from the file menu and import the captured images.
Step 4 Adjust the menu’s preference or press the shortcut key Ctrl+Shift+, and a window will appear on your screen. Select the editing panel and change the photo duration between 0.2 to 0.5 seconds.
Step 5 Once done with all the settings and satisfied with the results, click on export and select your desired video format. Your video will be exported and saved in your library so you can share it with friends.
● Key Takeaways from This Episode →
● Get to know about what is stop motion puppets.
● Different examples of how dinosaur stop motion puppet or other puppet animation form works.
● The process to create your stop motion puppet and how Filmora will assist you in it.
What’s the Best 10 Photo Animator Templates That Bring Your Images to Life?
What’s the Best 10 Photo Animator Templates That Bring Your Images to Life?
An easy yet powerful editor
Numerous effects to choose from
Detailed tutorials provided by the official channel
Using free 3d motion graphics, we can animate the image and bring it back to life.
Using a 3d animation photo maker online we can animate any image using a template and bring it back to life. This must have gotten you excited? We are as excited as you are as we give you an overview of 3d photo animation online.
In this article
01 [What is 3D Image Animate?](#Part 1)
02 [What is 3D Photo Motion?](#Part 2)
03 [How to Create 3D Animations from a Single Still Image?](#Part 3)
Part 1 What is 3D Image Animate?
3D Image Animate is making a moving scene using just a simple image. It is quite a complicated process and requires high technical skills to achieve a moving animation out of a still image. For your convenience, here we list some of the examples that will make you understand what 3D Image Animate is.
01Resuscitate a Person or Object
This first 3D Image Animate example depicts turning a real-life still image of a person and making him move out of that still image. Sounds absurd, right? Well, just look at this example below.
02Pan View of Car
This next example shows a still image of a car is turned into a moving scene as if the camera person is shooting a pan view of a parked Car.
03Dispersing Elements
Here is another amazing 3D Photo Animate example for you. In this one, you’ll get to see an image that is stacked with several elements, fruits, and veggies (in this case), which get dispersed out of the canvas. Go ahead check it out.
Part 2 What is 3D Photo Motion?
3D photo motion is basically a contemporary technology that helps us to bring life into the pictures. In simple words, using 3D photo motion and animation tools we can make still images into moving ones. 3D animation photo maker online offers you several motion templates. You can apply any of the available motion templates to a still image and make it animated. 3D photo motion helps convert 2D images to life like moving 3D images. This can be useful when working with a project that deals with many still images. By using animation on still images, the project can become more attractive and hence has a higher chance of getting liked!
Part 3 How to Create 3D Animations from a Single Still Image?
01Simple steps to create 3d animations from a single still image
When it comes to animation, Adobe is recognized as one of the best tools. Animation with Adobe is one of the most convenient ways of animation. Here is how you can convert any 2D image to a 3D animated image using adobe. For those of you who are used to animating with adobe, it must be simple to follow the few steps listed below:
● Firstly, you need to convert the 2D layers of the still image to 3D postcards (planes that possess 3D properties). In case the layer you are starting with is a text layer, any transparency will be retained.
● Now to convert the object into 3D, wrap the 2D layer around any 3D object such as cube, cone, or sphere. Choose the shape that suits your layer.
● Next, you need to create a 3D mesh from greyscale information in a 2D image.
● Now you need to simulate a metalworking technique called “Repousse”. By doing so, you will be extruding a 2D object in a 3D space
● Next, you need to build a 3D volume from any multi-frame file like DICOM. Photoshop automatically converts the individual slices of the file into a 3D object that can be manipulated in 3D space from any angle. Furthermore, if you wish to optimize the display, you can also apply any 3D volume render effects.
02Best 10 Photo Animator Templates to Bring Your Images to Life
3D motion photo animator
The first tool on the list of 3d photo animators onlineis an excellent tool called 3D motion photo Animator. The tool helps to split landscape shots into numerous panels depending on the distance of the object from the camera. Furthermore, the plug-in also adds a soft parallax movement into the layers, giving the final image a beautiful 3D effect. The tool also has several editing options and a wide range of lens flare. The animator tool allows you to tweak the weather by using the weather effect options available in the tool.
3D photo animator
This 3d animation photo maker online takes the hype of the parallax effect in animation to a whole different level. The animator allows you to add parallax effects to any still image to make it appear 3 dimensional. Moreover, you can also add depth to the animated image to enhance the 3 dimensional effects and make it appear more realistic.
Live photo animation
Live photo animation is another seamless tool that offers free 3d motion graphics. The tool which is mainly meant for animation gives you the ability to mask the object and a keyframe from vivid natural movements. Once the subject and the background have been isolated and processed, they work independently from each other. This means that, due to independent operation, live photo animation becomes even more realistic since the subject can be animated without affecting the background. The tool also has cool zooming and 3D tracking effects.
Easy 3D face photo Animator
Most tools for 3d photo animation online fail to make the image look completely 3 dimensional. Even after the animation is performed, the people and the objects continue to look 2 dimensional. However easy 3D face photo Animator solves the problem. Using this tool, you can individually animate a face and make it 3 dimensional. It uses several panels to recreate the effect that’d be provided by a video recorder.
Live photo Animator
Looking for an animating tool to animate still images and transform them into stunning videos like action pictures? Live photo Animator is just the perfect tool for you then. The tool has a simple interface and helps generate realistic 3d action images. The plug-in works on the principle of duplicating action elements in an image. These action images include water, dust, fire, and other different kinds of moving objects in an image.
Photo Animator tool
The photo Animator tool kit is a great tool to generate animated 3D images. This quick time-saving tool is your go-to tool for photo effects and zooming. Moreover, the pack also consists of 50 preset animation templates that you can choose from. All you need to do is drag and drop the still images into the tool, and then you need to select the template that you’d like to apply to the image. The tool then processes the image and animates it to convert the still image into a 3d one.
Media animator
Think of smooth and seamless media transitions? Media animator is the perfect tool for you. This software offers a set of seamless and dynamically animated media transitions. The smooth transition effects make the images produced by this tool perfect for using the 3D animations in your official presentations and slideshows.
3D photo Animator
Have an attractive image that you wish to enhance by using animation? Here’s a simple software that can help you add a touch of flair to any simple image. The software has amazing 3d animation powers. When you zoom on the images produced by the software, the entire perspective changes, and the image looks entirely 3D.
Particular photo animation
The animating tool is the best for those who wish to finish animation quickly. The software has an amazing and stylish way of making slideshows. The tool has several templates that concentrate on the particular motion.
Key Takeaways from This Episode
● 3d animation is one of the most budding fields these days. It makes our photos life-like and brings back real life memories.
● Using 3D animation, still images are brought back to life and memories from years back are revived.
● We looked at a few of the best tools for animating an image and converting them to 3D. 3D images can also help make your project reports and presentations much more attractive and earn you the extra edge over your colleagues.
● We recommend you to try a few of these cool tools and get your hands dirty with animation today!
Easy Cartoon Characters Drawing Tutorials for You Who Are Learning to Draw
Easy Cartoon Characters Drawing Tutorials for You Who Are Learning to Draw
An easy yet powerful editor
Numerous effects to choose from
Detailed tutorials provided by the official channel
Learning the art of cartoon characters drawing? We can help! Cartoon characters drawing is no rocket science, ABCD: Anybody Can Draw!

We are as excited as you as we bring to you a few of the best drawing tutorials!
In this article
01 [Double Your Results with Learning Cartoon Drawing Styles First](#Part 1)
02 [Best 6 Cartoon Characters Anyone Can Draw (with Free Video Tutorials)](#Part 2)
03 [Easy Cartoon Characters to Draw Step by Step](#Part 3)
Part 1 Double Your Results with Learning Cartoon Drawing Styles First
01 Cartoon Character Sketches
Sketching is one of the most popular art forms. Sketching can be done for real-life people or celebrities or we can also make sketches of imaginary characters and cartoons. Sketching is generally made of pencil and does not involve the usage of colors.

02 Cartoon Characters Drawing with Color
Cartoon characters can be made with color to make them more attractive. This is another popular form of art that cartoonists follow. You can explore several methods of coloring and try making your cartoon colorful.

03 Disney Cartoon Characters Drawing
Disney cartoon character drawing is probably one of the simplest. This is because they have a predefined size and are mostly symmetric. Disney cartoon characters generally use common geometric shapes such as circles, ovals, and squares. Hence making it a beginner-friendly choice!

Part 2 Best 6 Cartoon Characters Anyone Can Draw (with Free Video Tutorials)
01 Roger the alien
Roger the alien is one of the simplest cartoon characters to draw. This children’s classic cartoon character always intrigues children due to its bizarre shape. It fixes the image of an outer space characters in a child’s mind(If they exist).
What makes it easy to draw?
● The oval-shaped head is easy to draw since it is not very detailed.
● The character does not have any hair, hair is one of the more difficult parts to draw.
● The body features aren’t very prominent, hence making the character easy to draw.
Challenges you may encounter
● If you are a first-timer, then you may find it challenging to draw fingers and the toes.
● Getting the weird alien head shape might be a little difficult and may take you a few attempts.
● Making the two eyes exactly similar to each other may be challenging for a few of you.
02 Wakko Warner
What makes it easy to draw?
● The character generally has geometrical shapes and hence you can use shape tracers to draw a few parts.
● The appealing appearance of the character makes it interesting to draw.
● The eyes are not very difficult to recreate.
Challenges you may encounter
● The eyes are not very difficult to recreate.
● The shape of the mouth and the tongue that is sticking out is slightly complex.
● Perfecting the shape of the hair is a little challenging.
03 Cosmo
What makes it easy to draw?
● We recommend you to try this character out mainly because of its uniqueness.
● The eyes are not very complicated to draw.
● The body resembles a stick image and is hence simple to draw.
Challenges you may encounter
● The shape of the crown needs to be perfect, especially because of the tilt the crown has.
● The fingers are challenging to draw.
● The hair has a distinct shape, this shape needs to come out perfectly.
04 Courage the cowardly dog
What makes it easy to draw?
● Firstly, it’s one of the most favorite cartoons, hence it will ensure to keep you interested in the drawing.
● The hands and legs resemble stick figures and are simple to draw.
● The body structure is simple.
Challenges you may encounter
● Drawing a cartoon animal instead of a human being might be intriguing for beginners.
● The large eyes, which is one of the characteristic features needs to be perfect.
● The design of the ears is the trickiest part and could be difficult to draw.
05 Tom And Jerry
When we think of cartoons, the first few names that probably come to our mind are tom and jerry. This duo of a grumpy cat and a mysterious mouse has left an everlasting impact on the world of cartoons. The duo is famous throughout the world and is loved throughout age groups
Why do we recommend you to try your hands on this?
● This is a classic cartoon that almost everyone loves.
● There are several resources on the internet to help you draw the cartoon characters.
● The characters need not be perfect, even a close resemblance to them would be sufficient for the viewers to identify them due to their fame.
Challenges you may encounter
● You need to be careful with the proportion of sizes of tom and jerry.
● The structures of tom and jerry are not very simple to draw.
● Perfecting the grumpy expression on tom’s face and a frightened expression on jerry’s face is challenging.
05 Catdog
Catdog is another very interesting character. Who’d have imagined a cat and a dog morphed in a single body? Well, imagination has no end to it as they say! Catdog is a yellow cat and dog in a single body, it looks cute and at the same time intriguing.
Why do we recommend you try your hands on this?
● The cartoon character is mainly composed of geometrical shapes.
● The character is vividly colorful.
● The bright yellow color is super attractive and hence makes drawing catdog very fun.
Challenges you may encounter
● The character is illusional, you might have difficulty while deciding how to even look at it.
● The cat and dog faces are not very different from each other and have minute differences while drawing you need to be careful about having a distinct difference between the two faces.
Now that we’ve taken our baby steps towards understanding the art of drawing cartoons.
Key Takeaways from This Episode
● That’s a lot of knowledge for today, isn’t it? Today we’ve seen the basics of drawing cartoon characters.
● We also got our hands dirty by exploring a few easy cartoon characters that you could draw.
● Further, we saw the basic steps that you would need to take in order to draw the face of any cartoon character! All in all, we learned everything we needed to know to draw our first cartoon! What are you waiting for? Go try out drawing your first cartoon today!
Learning the art of cartoon characters drawing? We can help! Cartoon characters drawing is no rocket science, ABCD: Anybody Can Draw!
We are as excited as you as we bring to you a few of the best drawing tutorials!
In this article
01 [Double Your Results with Learning Cartoon Drawing Styles First](#Part 1)
02 [Best 6 Cartoon Characters Anyone Can Draw (with Free Video Tutorials)](#Part 2)
03 [Easy Cartoon Characters to Draw Step by Step](#Part 3)
Part 1 Double Your Results with Learning Cartoon Drawing Styles First
01 Cartoon Character Sketches
Sketching is one of the most popular art forms. Sketching can be done for real-life people or celebrities or we can also make sketches of imaginary characters and cartoons. Sketching is generally made of pencil and does not involve the usage of colors.
02 Cartoon Characters Drawing with Color
Cartoon characters can be made with color to make them more attractive. This is another popular form of art that cartoonists follow. You can explore several methods of coloring and try making your cartoon colorful.
03 Disney Cartoon Characters Drawing
Disney cartoon character drawing is probably one of the simplest. This is because they have a predefined size and are mostly symmetric. Disney cartoon characters generally use common geometric shapes such as circles, ovals, and squares. Hence making it a beginner-friendly choice!
Part 2 Best 6 Cartoon Characters Anyone Can Draw (with Free Video Tutorials)
01 Roger the alien
Roger the alien is one of the simplest cartoon characters to draw. This children’s classic cartoon character always intrigues children due to its bizarre shape. It fixes the image of an outer space characters in a child’s mind(If they exist).
What makes it easy to draw?
● The oval-shaped head is easy to draw since it is not very detailed.
● The character does not have any hair, hair is one of the more difficult parts to draw.
● The body features aren’t very prominent, hence making the character easy to draw.
Challenges you may encounter
● If you are a first-timer, then you may find it challenging to draw fingers and the toes.
● Getting the weird alien head shape might be a little difficult and may take you a few attempts.
● Making the two eyes exactly similar to each other may be challenging for a few of you.
02 Wakko Warner
What makes it easy to draw?
● The character generally has geometrical shapes and hence you can use shape tracers to draw a few parts.
● The appealing appearance of the character makes it interesting to draw.
● The eyes are not very difficult to recreate.
Challenges you may encounter
● The eyes are not very difficult to recreate.
● The shape of the mouth and the tongue that is sticking out is slightly complex.
● Perfecting the shape of the hair is a little challenging.
03 Cosmo
What makes it easy to draw?
● We recommend you to try this character out mainly because of its uniqueness.
● The eyes are not very complicated to draw.
● The body resembles a stick image and is hence simple to draw.
Challenges you may encounter
● The shape of the crown needs to be perfect, especially because of the tilt the crown has.
● The fingers are challenging to draw.
● The hair has a distinct shape, this shape needs to come out perfectly.
04 Courage the cowardly dog
What makes it easy to draw?
● Firstly, it’s one of the most favorite cartoons, hence it will ensure to keep you interested in the drawing.
● The hands and legs resemble stick figures and are simple to draw.
● The body structure is simple.
Challenges you may encounter
● Drawing a cartoon animal instead of a human being might be intriguing for beginners.
● The large eyes, which is one of the characteristic features needs to be perfect.
● The design of the ears is the trickiest part and could be difficult to draw.
05 Tom And Jerry
When we think of cartoons, the first few names that probably come to our mind are tom and jerry. This duo of a grumpy cat and a mysterious mouse has left an everlasting impact on the world of cartoons. The duo is famous throughout the world and is loved throughout age groups
Why do we recommend you to try your hands on this?
● This is a classic cartoon that almost everyone loves.
● There are several resources on the internet to help you draw the cartoon characters.
● The characters need not be perfect, even a close resemblance to them would be sufficient for the viewers to identify them due to their fame.
Challenges you may encounter
● You need to be careful with the proportion of sizes of tom and jerry.
● The structures of tom and jerry are not very simple to draw.
● Perfecting the grumpy expression on tom’s face and a frightened expression on jerry’s face is challenging.
05 Catdog
Catdog is another very interesting character. Who’d have imagined a cat and a dog morphed in a single body? Well, imagination has no end to it as they say! Catdog is a yellow cat and dog in a single body, it looks cute and at the same time intriguing.
Why do we recommend you try your hands on this?
● The cartoon character is mainly composed of geometrical shapes.
● The character is vividly colorful.
● The bright yellow color is super attractive and hence makes drawing catdog very fun.
Challenges you may encounter
● The character is illusional, you might have difficulty while deciding how to even look at it.
● The cat and dog faces are not very different from each other and have minute differences while drawing you need to be careful about having a distinct difference between the two faces.
Now that we’ve taken our baby steps towards understanding the art of drawing cartoons.
Key Takeaways from This Episode
● That’s a lot of knowledge for today, isn’t it? Today we’ve seen the basics of drawing cartoon characters.
● We also got our hands dirty by exploring a few easy cartoon characters that you could draw.
● Further, we saw the basic steps that you would need to take in order to draw the face of any cartoon character! All in all, we learned everything we needed to know to draw our first cartoon! What are you waiting for? Go try out drawing your first cartoon today!
10 Scary Anime Girls That Will Make You Creepy
10 Scary Anime Girls That Will Make You Creepy

Shanoon Cox
Mar 27, 2024• Proven solutions
Animes have been one of the widely enjoyed forms of entertainment by people all over the world for decades. There are certain animes that attract people due to their scariness and the characters in them.
Even though girls are usually displayed as cute and pinkish and lovely, some animes display them as creepy. And believe me, these creepy anime girls have a huge fan base and are capable of giving the audience a chill over the spine while watching them.
The creepiness of the anime girls adds to the horror of animes and people enjoy watching them. So let’s find out more about these scary anime girls and why their scary character is loved by the fans.
10 Scary Anime Girls in the Scary Animes
There are a lot of animes with different genres. But some of the animes have some characters that stand out due to their weirdness and creepiness. Let’s talk about 10 such scary anime girls that still give the audience creeps:
- 1. Ai Enma (Hell Girl)
- 2. Shion Sonozaki (Higurashi: When They Cry)
- 3. Sachiko Shinozaki (Corpse Party)
- 4. Shiro (Deadman Wonderland)
- 5. Megumi Shimizu (Shiki)
- 6. Esdeath (Akame Ga Kill!)
- 7. Himiko Toga (My Hero Academia)
- 8. Hana Midorikawa (Prison School)
- 9. Isabella (The Promised Neverland)
- 10. Lucy (Elfen Lied)
1. Ai Enma (Hell Girl)
Ai Enma is one of the cute-looking characters in Hell Girl, but do not be deceived by her looks. She was a girl who was buried alive when she was seven, by her own villagers. Enma crawled out of the ground and burned the entire village, killing every single person living there as an act of vengeance.
Later as a punishment for her horrific doings, she was cast out and sentenced to live out her afterlife as Hell Girl. Still, in her childhood, Ai was assigned the job of dragging dead souls to hell, whether they deserved it or not. The coldness in her eyes and the way she does things without a shiver is what makes her creepy.
2. Shion Sonozaki (Higurashi: When They Cry)
Shion Sonozaki from Higurashi: When They Cry is a dark character who is not exactly what she seems outside. The town she lives in is cursed and she is trying to break that dark cycle that offers only death and tragedy.
There is too much to the story, and saying more about it may reveal the suspense. The story is filled with horror and adventure, and the character of Shion absorbs some of the darkness of the town, which gives a scary impact on the audience.
3. Sachiko Shinozaki (Corpse Party)
Sachiko from Corpse Party is a friendly-looking but scary character who loves to rip out the tongues of some of her fellow characters. She tortures students in Heavenly Host Elementry School which is a living hell in the anime.
Sachiko unleashes a lot of horror in the series and she plays the part of an elementary school ghost breaking all the expectations of the audience. Torturing her fellow mates and cutting their tongues out before death is something that makes Sachiko a perfect scary anime girl.
4. Shiro (Deadman Wonderland)
Shiro, the creepy-looking girl from Deadman Wonderland is another character to be scared of. She was adopted for the only purpose of being used as a human experiment in her childhood. The experiments instilled a very scary character in her which gives a horror nature to the anime in total.
The experiments on here were very painful and multiple personalities called “The Wretched Egg” were developed by her to cope up with torture. The creepy nature and the use of her special skills to murder some characters in the anime and frame her adopted brother for it is very dark and scary.
5. Megumi Shimizu (Shiki)
Megumi Shimizu of Shiki is a young girl and the first of all to be killed by the Kirishiki family. She was the first person who died who was not Yamairi and also the first to rise as Shiki.
After becoming a Shiki Megumi became very malicious and attacked the villagers. She enjoyed attacking them and that is very creepy. She also was ready to kill Tohru Mutou and Kaori’s father due to some small reasons. Her character without a drop of sympathy or care for the people around her is very scary and makes her very unpredictable.
6. Esdeath (Akame Ga Kill!)
Esdeath in Akame Ga Kill who is also known as the ice queen of the empire is a very manipulative character and a sadist. She follows the motto, the strong survive and the weak die, and justifies killing innocents and torturing enemies because of it.
Esdeath once made a prince who lost to strip naked before her and lick her boots, before killing his which is a different level of dark. She keeps her sadistic character in check to be in power which is very scary and dangerous for someone with power. She unleashing her cruelty on defenseless people is another thing that makes her a perfect scary anime girl.

7. Himiko Toga (My Hero Academia)
Himiko is a cute-looking girl that possesses the ability to shapeshift to anything she wants. The creepy part is, in order to shapeshift she has to ingest another person’s blood.
Though Himiko appears to be a typical funny school girl, she can turn into a murderous beast in the blink of an eye. Her twister view of relationships and her trying to befriend people while trying to kill them at the same time all give us creepy chills while watching the anime.
8. Hana Midorikawa (Prison School)
Though Hana Midorikawa looks very cute and innocent she is as creepy as any girl can get. The story evolves in an underground prison school which is an explainable aspect that made Hana the sadist she is.
At first, Hana might seem to be a cute girl who does not belong at the place she currently is, but going deeper the opinion of the audience changes extremely. Hana happens to be a violent sociopath with a lot of dangerous thoughts and a urination fetish, and that is just the beginning of her creepiness.
9. Isabella (The Promised Neverland)
Isabella who is also known as Mama is one of the main characters in the Promised Land. Being a caretaker to children, though she appears to be loving and affectionate to her children, that’s not the real case.
Isabella has a twisted character and shows detachment to her tragedies. This character shows antagonism, betrayal, and a twisted nature enough for the fans to feel creepy about her.
10. Lucy (Elfen Lied)
Lucy in Elfen Lied is a character that sometimes gets sympathy and other times creeps the audience out. She has difficulty drawing a line between good and evil. She can be seen as being sadistically tormented and ruthlessly tormenting about the cruelty around her.
Her surroundings and the people are responsible for how she is and that is why despite being creepy she is loved by a lot of people.
Final thoughts
Though most animes are fun to watch, horror animes are also enjoyed by a lot of people. The main aspect of these horror animes is the scary characters that make the audience wonder.
We have listed the top 10 scary anime girls of different animes that are equally liked and hated by the audience all over the world. The way they act, their cruelty, sadism all define their scary character. These scary anime girls have created such a huge impact that a fan might forget the anime name but never the name of the scary anime girl who gives him/her chills all over the body.
Shanoon Cox
Shanoon Cox is a writer and a lover of all things video.
Follow @Shanoon Cox
Shanoon Cox
Mar 27, 2024• Proven solutions
Animes have been one of the widely enjoyed forms of entertainment by people all over the world for decades. There are certain animes that attract people due to their scariness and the characters in them.
Even though girls are usually displayed as cute and pinkish and lovely, some animes display them as creepy. And believe me, these creepy anime girls have a huge fan base and are capable of giving the audience a chill over the spine while watching them.
The creepiness of the anime girls adds to the horror of animes and people enjoy watching them. So let’s find out more about these scary anime girls and why their scary character is loved by the fans.
10 Scary Anime Girls in the Scary Animes
There are a lot of animes with different genres. But some of the animes have some characters that stand out due to their weirdness and creepiness. Let’s talk about 10 such scary anime girls that still give the audience creeps:
- 1. Ai Enma (Hell Girl)
- 2. Shion Sonozaki (Higurashi: When They Cry)
- 3. Sachiko Shinozaki (Corpse Party)
- 4. Shiro (Deadman Wonderland)
- 5. Megumi Shimizu (Shiki)
- 6. Esdeath (Akame Ga Kill!)
- 7. Himiko Toga (My Hero Academia)
- 8. Hana Midorikawa (Prison School)
- 9. Isabella (The Promised Neverland)
- 10. Lucy (Elfen Lied)
1. Ai Enma (Hell Girl)
Ai Enma is one of the cute-looking characters in Hell Girl, but do not be deceived by her looks. She was a girl who was buried alive when she was seven, by her own villagers. Enma crawled out of the ground and burned the entire village, killing every single person living there as an act of vengeance.
Later as a punishment for her horrific doings, she was cast out and sentenced to live out her afterlife as Hell Girl. Still, in her childhood, Ai was assigned the job of dragging dead souls to hell, whether they deserved it or not. The coldness in her eyes and the way she does things without a shiver is what makes her creepy.
2. Shion Sonozaki (Higurashi: When They Cry)
Shion Sonozaki from Higurashi: When They Cry is a dark character who is not exactly what she seems outside. The town she lives in is cursed and she is trying to break that dark cycle that offers only death and tragedy.
There is too much to the story, and saying more about it may reveal the suspense. The story is filled with horror and adventure, and the character of Shion absorbs some of the darkness of the town, which gives a scary impact on the audience.
3. Sachiko Shinozaki (Corpse Party)
Sachiko from Corpse Party is a friendly-looking but scary character who loves to rip out the tongues of some of her fellow characters. She tortures students in Heavenly Host Elementry School which is a living hell in the anime.
Sachiko unleashes a lot of horror in the series and she plays the part of an elementary school ghost breaking all the expectations of the audience. Torturing her fellow mates and cutting their tongues out before death is something that makes Sachiko a perfect scary anime girl.
4. Shiro (Deadman Wonderland)
Shiro, the creepy-looking girl from Deadman Wonderland is another character to be scared of. She was adopted for the only purpose of being used as a human experiment in her childhood. The experiments instilled a very scary character in her which gives a horror nature to the anime in total.
The experiments on here were very painful and multiple personalities called “The Wretched Egg” were developed by her to cope up with torture. The creepy nature and the use of her special skills to murder some characters in the anime and frame her adopted brother for it is very dark and scary.
5. Megumi Shimizu (Shiki)
Megumi Shimizu of Shiki is a young girl and the first of all to be killed by the Kirishiki family. She was the first person who died who was not Yamairi and also the first to rise as Shiki.
After becoming a Shiki Megumi became very malicious and attacked the villagers. She enjoyed attacking them and that is very creepy. She also was ready to kill Tohru Mutou and Kaori’s father due to some small reasons. Her character without a drop of sympathy or care for the people around her is very scary and makes her very unpredictable.
6. Esdeath (Akame Ga Kill!)
Esdeath in Akame Ga Kill who is also known as the ice queen of the empire is a very manipulative character and a sadist. She follows the motto, the strong survive and the weak die, and justifies killing innocents and torturing enemies because of it.
Esdeath once made a prince who lost to strip naked before her and lick her boots, before killing his which is a different level of dark. She keeps her sadistic character in check to be in power which is very scary and dangerous for someone with power. She unleashing her cruelty on defenseless people is another thing that makes her a perfect scary anime girl.
7. Himiko Toga (My Hero Academia)
Himiko is a cute-looking girl that possesses the ability to shapeshift to anything she wants. The creepy part is, in order to shapeshift she has to ingest another person’s blood.
Though Himiko appears to be a typical funny school girl, she can turn into a murderous beast in the blink of an eye. Her twister view of relationships and her trying to befriend people while trying to kill them at the same time all give us creepy chills while watching the anime.
8. Hana Midorikawa (Prison School)
Though Hana Midorikawa looks very cute and innocent she is as creepy as any girl can get. The story evolves in an underground prison school which is an explainable aspect that made Hana the sadist she is.
At first, Hana might seem to be a cute girl who does not belong at the place she currently is, but going deeper the opinion of the audience changes extremely. Hana happens to be a violent sociopath with a lot of dangerous thoughts and a urination fetish, and that is just the beginning of her creepiness.
9. Isabella (The Promised Neverland)
Isabella who is also known as Mama is one of the main characters in the Promised Land. Being a caretaker to children, though she appears to be loving and affectionate to her children, that’s not the real case.
Isabella has a twisted character and shows detachment to her tragedies. This character shows antagonism, betrayal, and a twisted nature enough for the fans to feel creepy about her.
10. Lucy (Elfen Lied)
Lucy in Elfen Lied is a character that sometimes gets sympathy and other times creeps the audience out. She has difficulty drawing a line between good and evil. She can be seen as being sadistically tormented and ruthlessly tormenting about the cruelty around her.
Her surroundings and the people are responsible for how she is and that is why despite being creepy she is loved by a lot of people.
Final thoughts
Though most animes are fun to watch, horror animes are also enjoyed by a lot of people. The main aspect of these horror animes is the scary characters that make the audience wonder.
We have listed the top 10 scary anime girls of different animes that are equally liked and hated by the audience all over the world. The way they act, their cruelty, sadism all define their scary character. These scary anime girls have created such a huge impact that a fan might forget the anime name but never the name of the scary anime girl who gives him/her chills all over the body.
Shanoon Cox
Shanoon Cox is a writer and a lover of all things video.
Follow @Shanoon Cox
Useful Tips for Canva Animated Elements
Versatile Video Editor - Wondershare Filmora
An easy yet powerful editor
Numerous effects to choose from
Detailed tutorials provided by the official channel
Thanks to the progress of graphic design, users are no longer simply satisfied with everyday designs, no matter how complex the design itself. They want innovation, they want a fresh and mesmerizing new idea. This becomes increasingly harder to achieve and helps push the boundaries of what designers want.
This is where motion can come into play. Movement in graphic design has emerged as a recent design trend. This is where users benefit from valuable tips for Canva animated elements.
Without further ado, let’s dive into everything you need to know to design animated elements in Canva.
In this article
01 [What is Canva?](#Part 1)
02 [Animate An Element In Canva ](#Part 2)
03 [Make Elements Move In Canva](#Part 3)
04 [How About Making Animated Elements On Video](#Part 4)
Part 1 What is Canva?
Canva has become a buzzword in the designing and animation world. It’s a graphic design platform that allows users to create graphic designs for social media, for presentations, documents, cards for any memorable occasion. It was founded by Melanie Perkins, an Australian technology entrepreneur.
Canva has become a buzzword in the designing and animation world. It’s a graphic design platform that allows users to create graphic designs for social media, for presentations, documents, cards for any memorable occasion. It was founded by Melanie Perkins, an Australian technology entrepreneur.
It allows users to work individually or across teams. With real-time live changes made available, Canva is pushing the boundary of what is possible and making it more accessible. With the introduction of animated elements in Canva, the possibilities for design horizons have expanded significantly.
Part 2 Animate An Element In Canva
There are one of two ways to go about creating an animation. You can work off an existing template or create a custom template. If you’re wondering how to animate individual elements in Canva then this guide is for you.
The first step to animation is building your custom static design. For that you need to go to Canva and select “Create a Design” option. Once you do, select the type of content you’re attempting to create- from Instagram posts to a presentation or an A4 document.
Think of the text font you’re going to use.

Then you should look into adding elements that suit your text on the design.

You can upload photographs into your creation with the upload button. This also extends to uploading audio that you want to use on video clips.

Once you’re done with these steps, you should have a customized static design that you can use. Let’s now look at how to animate individual elements in Canva. These elements are the text, the image, audio, and video.
2.1 Image
To add an image to Canva, you need to upload it in the ‘Upload’ tab on Canva. Once you do, the image can then be selected for display on your presentation.
For images, you can also choose to frame them within the “elements” tab. There are two kinds of elements. One which allows photographs to be embedded in them and ones which don’t. You can choose any element as a frame for your embedded image.
The next thing is to choose the “Animate” button. This will open up different options for animation features. The animate button allows a preview of what each animation does in real-time.

The ones with the crown are premium features exclusive to Canva Pro, the paid subscription.
2.2 Text
Add in the text you want to see to the image. The text can be in any style that you choose. Canva offers a variety of fonts that you can use to customize the color, size, and duration of the display.

2.3 Video
If you’re ready to take your content creation skills to the next level, this section is for you. You have the option of adding videos to Canva as well. Just load the video you have on hand to the Canva “Uploads” section. Introduce the video clip to the design.
Another way to embed the video is by using an element and embedding your video within it.
With video, you also have options like cropping, adjusting the playback. With playback, you can choose “Autoplay Video” and “Loop Video.” These are basic options for how the video can be played. The crop function allows you to trim the video to any point in time.
On top of this, you can use the animate button, which can create options for how the video is introduced to the backdrop.

If you want to remove the animation, you need to go to the “Animate” button and select the ‘None’ option to delete the animation from the design.
You can opt to animate either just the elements or you can animate the slide on the whole with “Page Animations.”
Part 3 Make Elements Move In Canva
How To Arrange The Order Of An Animation?
The brilliant thing about Canva is that you can decide the order you want to create your animation. The component elements of a Canva backdrop are the text, audio, images, video. These form the basis for the animated elements in Canva.
You can work on whichever component feels more accessible to you. Canva also allows users to make videos for title sequences and end-cards for video sharing platforms.
How to Change The Duration Of Animated Graphic In Canva
Once you’ve added a video element to your presentation, you’ll notice that the timer disappears from the production. This is because the presentation only lasts the duration of the video.
If you go to the next slide of the presentation, you can often notice a timer available. It has a default duration of five seconds. If you click on the clock symbol, a menu with “Timing” will appear with a slider. You can adjust the timing from 0.1 seconds up to a maximum of 30 seconds.
Part 4 How About Making Animated Elements On Video
If you’ve decided Canva is not the tool for you, you can choose any video editing software to make your animation.
Wondershare Filmora is the tool that can help you level up your content creation. It allows users to increase precision and provides professional video editing options.
AI Portrait – The best feature of Wondershare Filmora for gameplay editing
The AI Portrait is a new add-on in Wondershare Filmora. It can easily remove video backgrounds without using a green screen or chroma key, allowing you to add borders, glitch effects, pixelated, noise, or segmentation video effects.

Conclusion
Now that you understand how to build an animation and the software required, you should differentiate between average and extraordinary editing tools.
Filmora and Canva are the best editing tools in this case. Like you can animate individual elements Canva, you can do the same in the other tool also. It may be used to produce animation videos by introducing keyframes, resulting in a seamless and realistic animation. Aside from that, using color correction and an audio processor can help take your animations to the next tier.
Download it today to make your videos better.
Thanks to the progress of graphic design, users are no longer simply satisfied with everyday designs, no matter how complex the design itself. They want innovation, they want a fresh and mesmerizing new idea. This becomes increasingly harder to achieve and helps push the boundaries of what designers want.
This is where motion can come into play. Movement in graphic design has emerged as a recent design trend. This is where users benefit from valuable tips for Canva animated elements.
Without further ado, let’s dive into everything you need to know to design animated elements in Canva.
In this article
01 [What is Canva?](#Part 1)
02 [Animate An Element In Canva ](#Part 2)
03 [Make Elements Move In Canva](#Part 3)
04 [How About Making Animated Elements On Video](#Part 4)
Part 1 What is Canva?
Canva has become a buzzword in the designing and animation world. It’s a graphic design platform that allows users to create graphic designs for social media, for presentations, documents, cards for any memorable occasion. It was founded by Melanie Perkins, an Australian technology entrepreneur.
Canva has become a buzzword in the designing and animation world. It’s a graphic design platform that allows users to create graphic designs for social media, for presentations, documents, cards for any memorable occasion. It was founded by Melanie Perkins, an Australian technology entrepreneur.
It allows users to work individually or across teams. With real-time live changes made available, Canva is pushing the boundary of what is possible and making it more accessible. With the introduction of animated elements in Canva, the possibilities for design horizons have expanded significantly.
Part 2 Animate An Element In Canva
There are one of two ways to go about creating an animation. You can work off an existing template or create a custom template. If you’re wondering how to animate individual elements in Canva then this guide is for you.
The first step to animation is building your custom static design. For that you need to go to Canva and select “Create a Design” option. Once you do, select the type of content you’re attempting to create- from Instagram posts to a presentation or an A4 document.
Think of the text font you’re going to use.
Then you should look into adding elements that suit your text on the design.
You can upload photographs into your creation with the upload button. This also extends to uploading audio that you want to use on video clips.
Once you’re done with these steps, you should have a customized static design that you can use. Let’s now look at how to animate individual elements in Canva. These elements are the text, the image, audio, and video.
2.1 Image
To add an image to Canva, you need to upload it in the ‘Upload’ tab on Canva. Once you do, the image can then be selected for display on your presentation.
For images, you can also choose to frame them within the “elements” tab. There are two kinds of elements. One which allows photographs to be embedded in them and ones which don’t. You can choose any element as a frame for your embedded image.
The next thing is to choose the “Animate” button. This will open up different options for animation features. The animate button allows a preview of what each animation does in real-time.
The ones with the crown are premium features exclusive to Canva Pro, the paid subscription.
2.2 Text
Add in the text you want to see to the image. The text can be in any style that you choose. Canva offers a variety of fonts that you can use to customize the color, size, and duration of the display.
2.3 Video
If you’re ready to take your content creation skills to the next level, this section is for you. You have the option of adding videos to Canva as well. Just load the video you have on hand to the Canva “Uploads” section. Introduce the video clip to the design.
Another way to embed the video is by using an element and embedding your video within it.
With video, you also have options like cropping, adjusting the playback. With playback, you can choose “Autoplay Video” and “Loop Video.” These are basic options for how the video can be played. The crop function allows you to trim the video to any point in time.
On top of this, you can use the animate button, which can create options for how the video is introduced to the backdrop.
If you want to remove the animation, you need to go to the “Animate” button and select the ‘None’ option to delete the animation from the design.
You can opt to animate either just the elements or you can animate the slide on the whole with “Page Animations.”
Part 3 Make Elements Move In Canva
How To Arrange The Order Of An Animation?
The brilliant thing about Canva is that you can decide the order you want to create your animation. The component elements of a Canva backdrop are the text, audio, images, video. These form the basis for the animated elements in Canva.
You can work on whichever component feels more accessible to you. Canva also allows users to make videos for title sequences and end-cards for video sharing platforms.
How to Change The Duration Of Animated Graphic In Canva
Once you’ve added a video element to your presentation, you’ll notice that the timer disappears from the production. This is because the presentation only lasts the duration of the video.
If you go to the next slide of the presentation, you can often notice a timer available. It has a default duration of five seconds. If you click on the clock symbol, a menu with “Timing” will appear with a slider. You can adjust the timing from 0.1 seconds up to a maximum of 30 seconds.
Part 4 How About Making Animated Elements On Video
If you’ve decided Canva is not the tool for you, you can choose any video editing software to make your animation.
Wondershare Filmora is the tool that can help you level up your content creation. It allows users to increase precision and provides professional video editing options.
AI Portrait – The best feature of Wondershare Filmora for gameplay editing
The AI Portrait is a new add-on in Wondershare Filmora. It can easily remove video backgrounds without using a green screen or chroma key, allowing you to add borders, glitch effects, pixelated, noise, or segmentation video effects.
Conclusion
Now that you understand how to build an animation and the software required, you should differentiate between average and extraordinary editing tools.
Filmora and Canva are the best editing tools in this case. Like you can animate individual elements Canva, you can do the same in the other tool also. It may be used to produce animation videos by introducing keyframes, resulting in a seamless and realistic animation. Aside from that, using color correction and an audio processor can help take your animations to the next tier.
Download it today to make your videos better.
Learn How to Make Your Characters Interactive in Unity Animation Rigging
Learn How to Make Your Characters Interactive in Unity Animation Rigging
An easy yet powerful editor
Numerous effects to choose from
Detailed tutorials provided by the official channel
Animation is one such aspect that is formed from the integration of several varied factors and processes. One of the most vital ones is the process of rigging. Thus, we will be discussing Unity character rigging as Unity is one of the most efficient platforms for animation.
Additionally, we will introduce you to one of the best tools you can use to edit videos and nurture the creative skills you carry in yourself. So, without any further delay, let us start our discussion.
In this article
01 [What is Unity Rigging?](#Part 1)
02 [Is It Better to Rig in Unity or Blender?](#Part 2)
03 [How To Use Animation Rigging In Unity](#Part 3)
Part 1 What is Unity Rigging?
To understand what Unity rigging is, we must start our discussion first by discussing rigging in animation. In animation, rigging is the process in which your animation characters are separated into two parts. One is the mesh-like structure of the characters. And the other is the skeletal structure given to the characters.
You integrate bones and joints and join them accordingly in the characters present in your animation. It is similar to the presence of the human skeletal system. Moreover, just like the skeletal system in humans helps in the movements of the different parts of the body, the bone and joint structure through rigging also enables the characters in animation to move.
Therefore, we can say that rigging is the process by which you can enable your characters’ in animation to move and show different facial expressions, etc. So, it is obvious that without the process of rigging, the animation is impossible, which makes rigging one of the most crucial aspects of animation.
Now that we know what rigging in animation is, we will be discussing what is animation rigging in Unity. Unity technologies have developed a cross-platform gaming engine called ‘Unity’. And this platform also offers the ones interested in animation to learn animation rigging.
The Unity platform offers robust and effective tools for animation rigging. And these tools assist the animators to create real-time rigs in Unity. Most commonly, the set of tools in Unity for rigging is used on the characters. But, if one likes, they can also use the tools on ani Game Object that includes animations and skeletons.
Therefore, when you utilise the platform of Unity or the toolsets of Unity to perform rigging in animation, it can be referred to as unity rigging. It is one of the most powerful and renowned platforms for animation, creating the finest and most professional animation creations.

Part 2 Is It Better to Rig in Unity or Blender?
Another platform that can ideally assist you in animation is Blender. A common question arises as to whether one should choose blender rigging over Unity or vice versa. We have laid down the following table to compare the different features of Blender with that of Unity.
| | Unity | Blender | |
| ——————- | ————————————————————————————————————————- | ————————————————————————————————————————————— |
| About | It is a game engine that enables you in creating human-machine interfaces, AR simulations, customize splash screens, etc. | It is a computer graphics software that is open source and is mainly used for creating 3D models. |
| Types Supported | Supports 3D | |
| Best Purpose | Ideal for film, architecture, automotive, transportation, and other industries | Ideal for animation and design that assists in VFX, simulation, organizations of all sizes with rendering, modeling, and video editing. |
There are many features that Blender lacks, but Unity includes. The features included in Unity but are absent in Blender are as follows.
● Drawing
● Games
● In-Game Analytics
● Multi-player Gaming Network
● Player Management
● Virtual Reality
● IT Asset Management
● Prototype Creation
Therefore, it is preferred to opt for Unity rigging than Blender rigging, as Blender lacks a considerable number of features.
Part 3 How To Use Animation Rigging In Unity
Now, we will be introducing you to the different steps that will help you in unity rig animation. The following list includes the steps in the sequence that, when you deploy, will help you rig in the platform of Unity.
Step 1Installation
The first step is to install the “animation rigging package” of Unity. You will get the animation rigging package in the “Package Manager”. You will be able to avail of this animation package in Unity 2019.1 and above.
This package offers you a library that consists of rig constraints. And this library of rig constraints enables you to create procedural motion during the runtime. And the general term used for this is called “runtime rigging”.
The “Asset’s Animator Root” consist of the “Rig Builder Component”, which is the source where the rigs are accumulated. The rigs here are the constraints put together in groups. With these steps you will be able to create Unity humanoid rig that will make your animation creations look the finest, most realistic and most professional.

Step 2Rig Builder set-up
After installing the unity animation rigging package, the next step is to set up the rig builder. You will have to use the “Animator component” in this step. Using the “Animator component”, integrate the “Rig Builder component” with the “GameObject”. Generally, in the hierarchy of rig, it is the topmost “Transform”.
Then, you will have to make a new child GameObject. To which, you will have to integrate the “Rig component”. After this step, you need to access the “Animator root”, where you will find the “Rig Builder component”. In the “Rig Builder component”, you need to assign the “Rig to the Rig Layers” list.
It will complete the task of creating the most basic rig. The further steps will help you install the required behaviours in the character or characters.

Step 3Bone Rendering
Whether it is unity rigging or 3D, bone rendering is the most crucial step to enable your animation characters to gain movement. The “Unity Editor” will help you interact and work with the character’s skeleton in the “Scene view.”
You can add “Transform” lists and then display them in various visual styles with the help of the “Bone Renderer: component. It enables you to integrate numerous “Bone Renderer” components, each of them having its unique style of display. As a result, gameplay debugging, rig setup, keyframing, and other artist workflows are facilitated.

Step 4Adding Rig Effectors
This step enables one to add Gizmos to Transforms, facilitating selection and visualisation. The “Effector” are invisible during “Game View”, and this step enhances the quality of the character animation.

Step 5Managing the Rig Constraints
Your characters gain “runtime animation” through the rig constraints, and thus, these are the building blocks facilitating assembling the rigs. The rigs are combined in multiple and varied ways to obtain the desired motions and movements in the characters.

Step 6Working with the Two Bone IK Constraint
The first step here is to rest your character to the “Bind Pose.” you can do so by opting for the “Menu Bar” and selecting the “Animation Rigging” option. You will find the “Bind Pose” option there, and you will have to click on it.

Then add a child GameObject below “Character Rig”. Then add a new child GameObject below “Right Arm IK”. Integrate two new child GameObjects beneath the “Right Arm Ik” by naming the first and the second one “RH IK Target” and “RH IK Hint”, respectively.

Integrate the “Rig Builder Component” with the “Animator root GameObject”. Then proceed with selecting the “CharecterRig GameObject” and integrating a “Rig Component”. Select “Two Bone IK Contrainst” to the “Right Arm IK.”

Then, incorporate a “Box Effector” to the RH IK Target. Integrate a “Ball Effector” to the “RH IK Hint”.

Then select the “RH IK Hint” and “Right Elbow”. Select “Animation Rigging>align Transform”. Move away from the “Ball Effector”. Select the “Right Arm IK GameObject” and integrate the required bones. Integrate the Character Rig GameObkect with Rig Layer list by selecting the option of “Ninja”. Then press “Play” and see your creation come to life.

Now, you might as well want to showcase your creativity in editing and video making. For that, we have the best tool for you- FILMORA. This is the finest video editing tool with the most proficient features included in the following list.
● Over 8effects for editing videos
● Keyboard shortcut, audio ducking colour, colour match
● You can also change the speed of the videos
● Every professional-level video editing tool that you need is included in Wondershare Filmora Video Editor
The features are innumerable and so can not be possibly listed differently. So, you can readily try out this tool yourself, and if you do not want to purchase in the first instance, you can easily avail of its free trial. Although, we can guarantee that after using its free trial, you would definitely want to use every avail feature of the tool!

For Win 7 or later (64-bit)
For macOS 10.12 or later
● Key Takeaways from This Episode →
● A short introduction to the process of rigging, with which we proceeded on describing and understanding what unity rigging is. We also stated how important it is in the sphere of animation.
● Next, we compared rigging in Blender and Unity. After comparing the different factors, we decided that it is optimum to choose Unity for character rigging because of the lack of features in Blender.
● Lastly, we introduced you to the best video editing tool that will equally assist you in nurturing your creativity, video editing, and animation skills.
Animation is one such aspect that is formed from the integration of several varied factors and processes. One of the most vital ones is the process of rigging. Thus, we will be discussing Unity character rigging as Unity is one of the most efficient platforms for animation.
Additionally, we will introduce you to one of the best tools you can use to edit videos and nurture the creative skills you carry in yourself. So, without any further delay, let us start our discussion.
In this article
01 [What is Unity Rigging?](#Part 1)
02 [Is It Better to Rig in Unity or Blender?](#Part 2)
03 [How To Use Animation Rigging In Unity](#Part 3)
Part 1 What is Unity Rigging?
To understand what Unity rigging is, we must start our discussion first by discussing rigging in animation. In animation, rigging is the process in which your animation characters are separated into two parts. One is the mesh-like structure of the characters. And the other is the skeletal structure given to the characters.
You integrate bones and joints and join them accordingly in the characters present in your animation. It is similar to the presence of the human skeletal system. Moreover, just like the skeletal system in humans helps in the movements of the different parts of the body, the bone and joint structure through rigging also enables the characters in animation to move.
Therefore, we can say that rigging is the process by which you can enable your characters’ in animation to move and show different facial expressions, etc. So, it is obvious that without the process of rigging, the animation is impossible, which makes rigging one of the most crucial aspects of animation.
Now that we know what rigging in animation is, we will be discussing what is animation rigging in Unity. Unity technologies have developed a cross-platform gaming engine called ‘Unity’. And this platform also offers the ones interested in animation to learn animation rigging.
The Unity platform offers robust and effective tools for animation rigging. And these tools assist the animators to create real-time rigs in Unity. Most commonly, the set of tools in Unity for rigging is used on the characters. But, if one likes, they can also use the tools on ani Game Object that includes animations and skeletons.
Therefore, when you utilise the platform of Unity or the toolsets of Unity to perform rigging in animation, it can be referred to as unity rigging. It is one of the most powerful and renowned platforms for animation, creating the finest and most professional animation creations.
Part 2 Is It Better to Rig in Unity or Blender?
Another platform that can ideally assist you in animation is Blender. A common question arises as to whether one should choose blender rigging over Unity or vice versa. We have laid down the following table to compare the different features of Blender with that of Unity.
| | Unity | Blender | |
| ——————- | ————————————————————————————————————————- | ————————————————————————————————————————————— |
| About | It is a game engine that enables you in creating human-machine interfaces, AR simulations, customize splash screens, etc. | It is a computer graphics software that is open source and is mainly used for creating 3D models. |
| Types Supported | Supports 3D | |
| Best Purpose | Ideal for film, architecture, automotive, transportation, and other industries | Ideal for animation and design that assists in VFX, simulation, organizations of all sizes with rendering, modeling, and video editing. |
There are many features that Blender lacks, but Unity includes. The features included in Unity but are absent in Blender are as follows.
● Drawing
● Games
● In-Game Analytics
● Multi-player Gaming Network
● Player Management
● Virtual Reality
● IT Asset Management
● Prototype Creation
Therefore, it is preferred to opt for Unity rigging than Blender rigging, as Blender lacks a considerable number of features.
Part 3 How To Use Animation Rigging In Unity
Now, we will be introducing you to the different steps that will help you in unity rig animation. The following list includes the steps in the sequence that, when you deploy, will help you rig in the platform of Unity.
Step 1Installation
The first step is to install the “animation rigging package” of Unity. You will get the animation rigging package in the “Package Manager”. You will be able to avail of this animation package in Unity 2019.1 and above.
This package offers you a library that consists of rig constraints. And this library of rig constraints enables you to create procedural motion during the runtime. And the general term used for this is called “runtime rigging”.
The “Asset’s Animator Root” consist of the “Rig Builder Component”, which is the source where the rigs are accumulated. The rigs here are the constraints put together in groups. With these steps you will be able to create Unity humanoid rig that will make your animation creations look the finest, most realistic and most professional.
Step 2Rig Builder set-up
After installing the unity animation rigging package, the next step is to set up the rig builder. You will have to use the “Animator component” in this step. Using the “Animator component”, integrate the “Rig Builder component” with the “GameObject”. Generally, in the hierarchy of rig, it is the topmost “Transform”.
Then, you will have to make a new child GameObject. To which, you will have to integrate the “Rig component”. After this step, you need to access the “Animator root”, where you will find the “Rig Builder component”. In the “Rig Builder component”, you need to assign the “Rig to the Rig Layers” list.
It will complete the task of creating the most basic rig. The further steps will help you install the required behaviours in the character or characters.
Step 3Bone Rendering
Whether it is unity rigging or 3D, bone rendering is the most crucial step to enable your animation characters to gain movement. The “Unity Editor” will help you interact and work with the character’s skeleton in the “Scene view.”
You can add “Transform” lists and then display them in various visual styles with the help of the “Bone Renderer: component. It enables you to integrate numerous “Bone Renderer” components, each of them having its unique style of display. As a result, gameplay debugging, rig setup, keyframing, and other artist workflows are facilitated.
Step 4Adding Rig Effectors
This step enables one to add Gizmos to Transforms, facilitating selection and visualisation. The “Effector” are invisible during “Game View”, and this step enhances the quality of the character animation.
Step 5Managing the Rig Constraints
Your characters gain “runtime animation” through the rig constraints, and thus, these are the building blocks facilitating assembling the rigs. The rigs are combined in multiple and varied ways to obtain the desired motions and movements in the characters.
Step 6Working with the Two Bone IK Constraint
The first step here is to rest your character to the “Bind Pose.” you can do so by opting for the “Menu Bar” and selecting the “Animation Rigging” option. You will find the “Bind Pose” option there, and you will have to click on it.
Then add a child GameObject below “Character Rig”. Then add a new child GameObject below “Right Arm IK”. Integrate two new child GameObjects beneath the “Right Arm Ik” by naming the first and the second one “RH IK Target” and “RH IK Hint”, respectively.
Integrate the “Rig Builder Component” with the “Animator root GameObject”. Then proceed with selecting the “CharecterRig GameObject” and integrating a “Rig Component”. Select “Two Bone IK Contrainst” to the “Right Arm IK.”
Then, incorporate a “Box Effector” to the RH IK Target. Integrate a “Ball Effector” to the “RH IK Hint”.
Then select the “RH IK Hint” and “Right Elbow”. Select “Animation Rigging>align Transform”. Move away from the “Ball Effector”. Select the “Right Arm IK GameObject” and integrate the required bones. Integrate the Character Rig GameObkect with Rig Layer list by selecting the option of “Ninja”. Then press “Play” and see your creation come to life.
Now, you might as well want to showcase your creativity in editing and video making. For that, we have the best tool for you- FILMORA. This is the finest video editing tool with the most proficient features included in the following list.
● Over 8effects for editing videos
● Keyboard shortcut, audio ducking colour, colour match
● You can also change the speed of the videos
● Every professional-level video editing tool that you need is included in Wondershare Filmora Video Editor
The features are innumerable and so can not be possibly listed differently. So, you can readily try out this tool yourself, and if you do not want to purchase in the first instance, you can easily avail of its free trial. Although, we can guarantee that after using its free trial, you would definitely want to use every avail feature of the tool!
For Win 7 or later (64-bit)
For macOS 10.12 or later
● Key Takeaways from This Episode →
● A short introduction to the process of rigging, with which we proceeded on describing and understanding what unity rigging is. We also stated how important it is in the sphere of animation.
● Next, we compared rigging in Blender and Unity. After comparing the different factors, we decided that it is optimum to choose Unity for character rigging because of the lack of features in Blender.
● Lastly, we introduced you to the best video editing tool that will equally assist you in nurturing your creativity, video editing, and animation skills.
Also read:
- Updated 10 Caricature Makers to Turn Photo to Caricature Effects for 2024
- Updated Ways to Create an Adobe Collage for 2024
- Updated 2024 Approved Everything You Need to Know About Becoming a Motion Graphic Designer
- Updated Handy Tips From Adobe Animate Rigging Tutorial for All Learners
- In 2024, What Wikipedia Wont Tell You About Character Rigging
- 12 Aesthetic GIF Instagram for Marketers
- In 2024, Create or Find Good Morning/Night GIFs
- New 5 Must Try Ways to Add and Send GIF in Text Message on Android for 2024
- New 6 Unexpected Ways Gif Animation Maker Can Affect Your Marketing for 2024
- New Learn Disney Cartoon Drawing to See More Disney Magic Moments for 2024
- New How to Make GIF Instagram
- New In 2024, How to Make a Video a Live Photo
- In 2024, Make Well Done Animated GIF
- Updated DP Animation Maker Tutorial for Finding The Best Animated Profile Picture Maker
- New 10 Amazing Cartoon Music Examples You Need to Bookmark
- Updated 10 Cartoon Canvas Painting Ideas for Total Beginners for 2024
- New The Secret Sauce for Making GIF Instagram Story More Stunning for 2024
- Updated Best 15 Classics Animated Cartoon Movies
- The Most Efficient Techniques for You to Make 3D Animation Character for 2024
- 2024 Approved 10 Cartoon Characters That Should Top Your List
- New 2024 Approved Ways to Get the Most up to Date Cartoon Character Design Tips
- New 2024 Approved Best 8 Tools Tell You How to Make Slideshows for Instagram
- New In 2024, 15 Forgotten Cartoon Characters of All Time You Used to Love
- 2024 Approved How to Obtain and Create Animated GIF Icons Like a Pro?
- New Are You Head Over Heels With 3D Animation Design for 2024
- New In 2024, In-Depth Study of Cartoon Painting Starts From Learning to Draw It
- In 2024, How to Liven Up Your Animate Website on Scroll
- Top 10 Cartoon Canvas Painting Ideas for Total Beginners
- 2024 Approved How to Combine Two/More GIFs Into One GIF Mergers Offered
- New In 2024, Best 15 Horror Animes That Will Trigger a Heart Attack
- New The Art of Comics - Learn How to Do Funny Cartoon Drawings
- In 2024, Types of Cartoon Styles You May Use for The Next Marketing Project
- New Everything You Need to Know About Becoming a Motion Graphic Designer
- Updated 2024 Approved How to Make GIF Instagram
- New How to Animate - Adobe Animate Tutorial for All
- New How to Make a Video a Live Photo 2023 for 2024
- Updated How to Create an Adobe Collage, In 2024
- Updated In 2024, Popular Tips on Learning Animate Rigging
- Updated Best Websites to Download Animated GIFs for Free
- How to Unlock Realme GT 5 Pro PIN Code/Pattern Lock/Password
- The Best 8 VPN Hardware Devices Reviewed On Infinix Hot 30 5G | Dr.fone
- In 2024, For People Wanting to Mock GPS on Vivo Y100i Devices | Dr.fone
- In 2024, Does Life360 Notify When You Log Out On Vivo V27? | Dr.fone
- Play HEVC H.265 on Samsung Galaxy S24 Ultra, is it possible?
- The Best Android SIM Unlock Code Generators Unlock Your Vivo Y77t Phone Hassle-Free
- In 2024, Can I Remove the Apple Watch Activation Lock By iPhone XS Max without the Previous Owner?
- In 2024, Hacks to do pokemon go trainer battles For Lava Yuva 3 | Dr.fone
- In 2024, How To Do Realme Narzo 60 Pro 5G Screen Sharing | Dr.fone
- In 2024, FRP Hijacker by Hagard Download and Bypass your Lava Blaze 2 Pro FRP Locks
- Put and play MKV movies on Motorola Edge 40 Neo
- Updated 2024 Approved Top 6 Free Talking Stock Photo Sites
- How To Simulate GPS Movement With Location Spoofer On Samsung Galaxy M34? | Dr.fone
- What should I do if I dont find the deleted iPhone 6 Plus files after scanning? | Stellar
- Best 3 Infinix Zero 30 5G Emulator for Mac to Run Your Wanted Android Apps | Dr.fone
- New In 2024, Translate Any Hindi Video Into English With AI
- How To Fix Unresponsive Phone Touchscreen Of Samsung Galaxy S24 | Dr.fone
- How to Come up With the Best Pokemon Team On OnePlus Nord CE 3 5G? | Dr.fone
- How to Exit Android Factory Mode On Tecno Camon 20 Premier 5G? | Dr.fone
- In 2024, Step-by-Step Tutorial How To Bypass Motorola FRP
- In 2024, How to Get and Use Pokemon Go Promo Codes On Honor Magic 6 Pro | Dr.fone
- In 2024, Lock Your Poco C55 Phone in Style The Top 5 Gesture Lock Screen Apps
- Forgotten The Voicemail Password Of Samsung Galaxy XCover 6 Pro Tactical Edition? Try These Fixes
- How to Change/Add Location Filters on Snapchat For your Apple iPhone 6s Plus | Dr.fone
- 3 Best Tools to Hard Reset Vivo Y100A | Dr.fone
- How Can I Use a Fake GPS Without Mock Location On Motorola G54 5G? | Dr.fone
- Methods to Change GPS Location On Realme C51 | Dr.fone
- Full Guide to Unlock Your Xiaomi Redmi 13C
- Title: 2024 Approved Ways You Can Master to Find 10 Best Free Animated Text Generator
- Author: Elon
- Created at : 2024-06-15 11:22:37
- Updated at : 2024-06-16 11:22:37
- Link: https://animation-videos.techidaily.com/2024-approved-ways-you-can-master-to-find-10-best-free-animated-text-generator/
- License: This work is licensed under CC BY-NC-SA 4.0.
