

2024 Approved What Is the Best Collage Photo Grid Maker - Experts Choice
What Is the Best Collage Photo Grid Maker - Experts Choice
What is the Best Collage Photo Grid Maker - Experts Choice
An easy yet powerful editor
Numerous effects to choose from
Detailed tutorials provided by the official channel
Whether it is an Instagram collage grid, other social media sites, an online platform, a greeting card, or even a wall of your room, collages are everywhere. It is a great way to assemble multiple pictures into a single frame. Depending on your purpose, theme, and other factors, there are several different styles of collages that can be created like photo grid, shaped collage, polaroid collage, and more. One of the most classic and traditional styles is a photo grid collage. Taking the help of a dedicated collage-making app or a tool can help you create an amazing and eye-catchy collage in no time. Keep reading to learn more about collage photo grid and the best tools to create them.

In this article
01 [What is a photo grid?](#Part 1)
02 [Need for using special tools and apps to create a photo grid collage](#Part 2)
03 [Top 5 tools to create photo grid](#Part 3)
04 [Use stock images to enhance your photo grid](#Part 4)
Part 1 What is a photo grid?
When a special grid frame having a specific number of rows and columns is used for arranging photos, the created collage is known as a photo grid collage. These multiple added images will make them look like a single picture in a frame. A photo grid is one of the most classic styles of creating a collage that is also the most widely used one. You can never go wrong with a collage while arranging the pictures in a photo grid.
Part 2 Need for using special tools and apps to create a photo grid collage
Though creating a photo grid may look like a simple process which it is also, there are a lot of elements that go into creating an impressive and attractive collage. Adding the images of the correct size and orientation, adjusting the borders, customizing the frames, adding filters, adding text, are some of the many factors that help in creating a wonderful collage, and for this good collage-making tool or an app is required.
These special photo grid collage maker tools have built-in templates, designs, and support other features that help you create an interesting photo grid of your choice. Moreover, some of these programs also come with high-quality stock images that can be used in the grid to further enhance their overall looks.
Part 3 Top 5 tools to create photo grid
We have selected the top 5 grid collage maker tools that can be used to create a customized photo grid.
01Fotor
This is one of the best tools available for creating a photo grid using one of the several templates available. It is the Classic Collage style of this app that will let you create a customized grid where you can add the desired number of images and then edit the background, borders, and other elements. You can even add text, stickers, effects, and other interesting filters. Fotor is a free online tool that can be used from your browser and you just need to free sign-up using your Google, Facebook, or Apple account.

02FotoJet
This is another free-to-use browser-based tool that can be used for creating a photo grid. The interface of the tool is simple and there are multiple grid options to choose from depending on the number of images to be added. The spacing between the grids as well as the roundness of the margins can also be adjusted as desired. The tool also gives you the option to choose the added image file resolution. Text, clipart, and background to the collage can also be added and there is also a library of images that can be used. The created collage can be saved or can also be shared directly to Twitter, Pinterest, and Tumblr.

03Adobe Spark
This is one of the top collages making tools that can be used to design the desired collage in different styles including photo grid. Unlike other Adobe tools, the collage-making program is simple and quick to use and does not require advanced technical know-how. You simply need to create a free account for Adobe Creative Cloud and the collage-making features can be easily used. There are pre-set designs and templates available to match your theme and requirements. You can further make customization to other collage elements as needed.

04Photo Collage
This free-to-use online tool requires no software download or installation and allows creating a grid quickly and easily. The interface of the tool is user-friendly where you just need to browse and add the images or can simply drag and drop them as well. You can choose from multiple template options available and can also add text, effects, and stickers to the collage. Multiple image editing options are also supported like zoom, flip, transparency, and more.

05Canva
Free and simple to use, this is one of the most widely used collage-making tools that is available as a browser-based program as well as Android and iOS app. Several photo-grid templates in different styles are available at the site that lets you create the desired collage in no time. You can customize the selected templates by adding filters, texts, effects, and more elements available. A paid version of the tool with advanced features is also available.

Part 4 Use stock images to enhance your photo grid
Adding high-quality and interesting images to your photo grid will level up its overall look and make it eye-catchy. If you are running short of such interesting and bright images, no need to worry as several sites have a good collection of images that can be used. One such program that we recommend here to check the stock images is Wondershare Filmora. Though Filmora is an advanced Windows and Mac-based video editing software, there are multiple additional features supported one of them is a collection of images in an array of categories.
Depending on the theme of your photo grid, you can select the desired images and other media from Wondershare Filmora Video Editor . Additionally, the split-screen feature of the software will let you add and play multiple videos in a single frame that makes it look like a video collage.

Wondershare Filmora - Best Video Editor for Mac/Windows
5,481,435 people have downloaded it.
Build unique custom animations without breaking a sweat.
Focus on creating epic stories and leave the details to Filmora’s auto features.
Start a creative adventure with drag & drop effects and endless possibilities.
Filmora simplifies advanced features to save you time and effort.
Filmora cuts out repetition so you can move on to your next creative breakthrough.
● Key Takeaways from This Episode →
● A photo grid is a classic and traditional style of creating a collage.
● There are several online tools, software, and mobile apps available for creating interesting photo grids.
● Wondershare Filmora is a great site to get stock of images in different categories and for all types of video editing requirements.
Whether it is an Instagram collage grid, other social media sites, an online platform, a greeting card, or even a wall of your room, collages are everywhere. It is a great way to assemble multiple pictures into a single frame. Depending on your purpose, theme, and other factors, there are several different styles of collages that can be created like photo grid, shaped collage, polaroid collage, and more. One of the most classic and traditional styles is a photo grid collage. Taking the help of a dedicated collage-making app or a tool can help you create an amazing and eye-catchy collage in no time. Keep reading to learn more about collage photo grid and the best tools to create them.
In this article
01 [What is a photo grid?](#Part 1)
02 [Need for using special tools and apps to create a photo grid collage](#Part 2)
03 [Top 5 tools to create photo grid](#Part 3)
04 [Use stock images to enhance your photo grid](#Part 4)
Part 1 What is a photo grid?
When a special grid frame having a specific number of rows and columns is used for arranging photos, the created collage is known as a photo grid collage. These multiple added images will make them look like a single picture in a frame. A photo grid is one of the most classic styles of creating a collage that is also the most widely used one. You can never go wrong with a collage while arranging the pictures in a photo grid.
Part 2 Need for using special tools and apps to create a photo grid collage
Though creating a photo grid may look like a simple process which it is also, there are a lot of elements that go into creating an impressive and attractive collage. Adding the images of the correct size and orientation, adjusting the borders, customizing the frames, adding filters, adding text, are some of the many factors that help in creating a wonderful collage, and for this good collage-making tool or an app is required.
These special photo grid collage maker tools have built-in templates, designs, and support other features that help you create an interesting photo grid of your choice. Moreover, some of these programs also come with high-quality stock images that can be used in the grid to further enhance their overall looks.
Part 3 Top 5 tools to create photo grid
We have selected the top 5 grid collage maker tools that can be used to create a customized photo grid.
01Fotor
This is one of the best tools available for creating a photo grid using one of the several templates available. It is the Classic Collage style of this app that will let you create a customized grid where you can add the desired number of images and then edit the background, borders, and other elements. You can even add text, stickers, effects, and other interesting filters. Fotor is a free online tool that can be used from your browser and you just need to free sign-up using your Google, Facebook, or Apple account.
02FotoJet
This is another free-to-use browser-based tool that can be used for creating a photo grid. The interface of the tool is simple and there are multiple grid options to choose from depending on the number of images to be added. The spacing between the grids as well as the roundness of the margins can also be adjusted as desired. The tool also gives you the option to choose the added image file resolution. Text, clipart, and background to the collage can also be added and there is also a library of images that can be used. The created collage can be saved or can also be shared directly to Twitter, Pinterest, and Tumblr.
03Adobe Spark
This is one of the top collages making tools that can be used to design the desired collage in different styles including photo grid. Unlike other Adobe tools, the collage-making program is simple and quick to use and does not require advanced technical know-how. You simply need to create a free account for Adobe Creative Cloud and the collage-making features can be easily used. There are pre-set designs and templates available to match your theme and requirements. You can further make customization to other collage elements as needed.
04Photo Collage
This free-to-use online tool requires no software download or installation and allows creating a grid quickly and easily. The interface of the tool is user-friendly where you just need to browse and add the images or can simply drag and drop them as well. You can choose from multiple template options available and can also add text, effects, and stickers to the collage. Multiple image editing options are also supported like zoom, flip, transparency, and more.
05Canva
Free and simple to use, this is one of the most widely used collage-making tools that is available as a browser-based program as well as Android and iOS app. Several photo-grid templates in different styles are available at the site that lets you create the desired collage in no time. You can customize the selected templates by adding filters, texts, effects, and more elements available. A paid version of the tool with advanced features is also available.
Part 4 Use stock images to enhance your photo grid
Adding high-quality and interesting images to your photo grid will level up its overall look and make it eye-catchy. If you are running short of such interesting and bright images, no need to worry as several sites have a good collection of images that can be used. One such program that we recommend here to check the stock images is Wondershare Filmora. Though Filmora is an advanced Windows and Mac-based video editing software, there are multiple additional features supported one of them is a collection of images in an array of categories.
Depending on the theme of your photo grid, you can select the desired images and other media from Wondershare Filmora Video Editor . Additionally, the split-screen feature of the software will let you add and play multiple videos in a single frame that makes it look like a video collage.
Wondershare Filmora - Best Video Editor for Mac/Windows
5,481,435 people have downloaded it.
Build unique custom animations without breaking a sweat.
Focus on creating epic stories and leave the details to Filmora’s auto features.
Start a creative adventure with drag & drop effects and endless possibilities.
Filmora simplifies advanced features to save you time and effort.
Filmora cuts out repetition so you can move on to your next creative breakthrough.
● Key Takeaways from This Episode →
● A photo grid is a classic and traditional style of creating a collage.
● There are several online tools, software, and mobile apps available for creating interesting photo grids.
● Wondershare Filmora is a great site to get stock of images in different categories and for all types of video editing requirements.
What’s Rigging Animation
What’s Rigging Animation and Why It Matters
An easy yet powerful editor
Numerous effects to choose from
Detailed tutorials provided by the official channel
Today there is a lot pre-made skeletons you can use and reuse as many times as you want, making only a few minor adjustments to the base design. If your creativity is sparking like firecrackers, then a rig can make it look more defined and/or realistic.
Not convinced? Let’s talk more about Rigging Animation.
In this article
01 [What is Rigging Animation](#Part 1)
02 [The Ultimate Collection for Free Maya Rigs [2022]](#Part 2)
Part 1 What is Rigging Animation
01Why Your Animators Need to Know How to Rig
Walk into any professional animation studio toady, you would notice unfamiliar skeleton figures in at least one of the screens.
This is called skeleton animation and is a major technique used in creating animated models that give us that 36vibe of the character in movies. It helps animators in controlling its movement just like a puppet. Hidden call back to the Matrix.
What you see in most movies or games, are characters and models who supported by a network of digital mechanical skeletons all rigged to move in a certain way.
02How Does Rigging Work?
The process of rigging is usually the second step in a long line of other methods applied after creating a model.
There is a series of interdependent bones that need to be constructed which is representation of the skeletal structure which is the basic goal in rigging animation.
With the right digital animation software you can reposition, repurpose and scale these bones in more ways than one.
The next step would involve recording the different movements of these bones on a timeline. This part of the process is called keyframing in animation.
These simple steps are actually more intricate than they actually are. Each movement acts as trigger to another set of movements like how the shoulder bone is connected to the forearm of our body.
This movement of the model becomes even more realistic once its weight scale has been determined. Painting weight can be considered to be the most unnerving challenge in the entire process.
Which is where Inverse Kinematics can help in making things 5easier by just reversing forward kinematic movements.
All of these aspects of rigging makes it possible to help animation mimic real life movements.
03How is Rigging Used?
Rigging is a technique which has only started gaining more prominence in recent times due to how crucial it is to the gaming and animation movie industry.
Not only is it used on characters but all mechanical objects in animations can also be rigged. With the help of a computerized program physicality is added to the bone structure and is recorded through a series of frames. These recording are then played back.
There are other applications to the and modelling process which goes beyond the entertainment industry such as giving virtual medical demonstrations or modeling a product.
This entire process can get much more repetitive and complex when it comes to rigging something as dynamic as the human face.
04Intro to Rigging Software
You might already be aware by now that there are some major animation software on the market that can provide you with just about every tool you need to make jaw dropping rigger animations.
Software like Blender, Cinema 4D, Maya and Houdini employs fantastic Skeletal Animation and digital motion capturing techniques. They open the doors to more realistic animations that can be used to create far more interactive and personalized digital worlds.
Maya and 3Ds Max is used to do real time animation rigging and is considered by most to be the industry standard by most animators.
Blender on the other hand is a free to use software. Though not quite as strong as Maya, it is an open source software which is equipped with everything you need to rig and animate models.
You can import completed animated files onto game engines and all types of other applications. The most common format for importing animated files is .fbx.
Part 2 The Ultimate Collection for Free Maya Rigs [2022]
01How’s Maya Rigs?
To tell the truth, every year you have spent on learning animation would come into great use in making your imagination come to life. Maya is probably the one software which gives you credit for just knowing it.
Maya has several levels of features you need to practice before you can call yourself a Maya master.
The best way to get your hands practiced on animating on Maya is by becoming well versed with all the stats and proportions while working with rigs. You would surely need to get your hands on high quality rig packages that makes the learning experience even more worth it.
With time, you would get better at understanding of the specifics of building a structure you would be showing in the final result. However getting stuck with the wrong type of rig can end up making your animating experience counterintuitive.
Here is a list of Maya Rigs you can start on right away;
02Best Free Maya Rigs of 2022
● Basic Rigs

Understanding the Basic Functionality of inanimate objects is a clear place to start in animation rigging. It helps you get a strong grasp over animation principals like bouncing a ball, before moving on to more challenging rigging packages.
● Ultimate Rigs
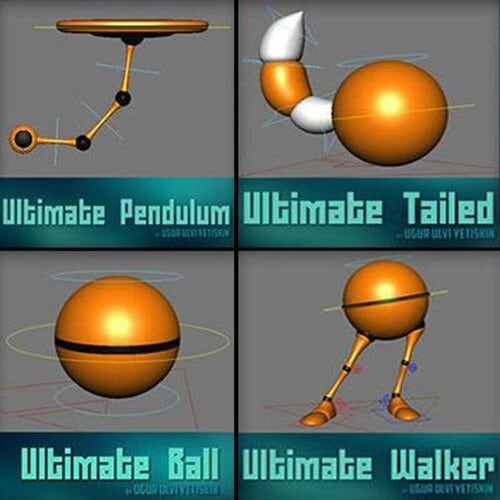
As you keep trying out different basic rigging functionalities, you eventually would need an ultimate rigging pack which is a complete set of all basic rigs. It is a great option to download and have this as a backup.
● Flour Sack
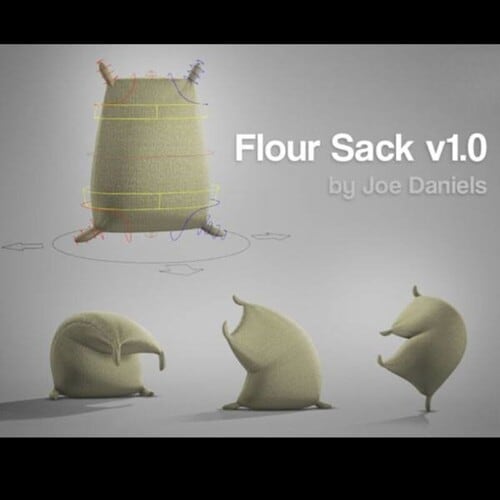
The Flour Sack free Rig is old school trainer pack. It simplifies your understanding character emotions by applying posing and adding weight to an object with a whimsical undefined structure.
● Wall E

If you are easily familiar with this character then you should remember how beautifully Wall-E was able express himself. It certainly is a step up on your journey to improving motion capture techniques. Try making your own Dreamworks style animation with Filmora from Wondershare where you can pair your animations with a few amazing film editing tools.
● JuiceBox
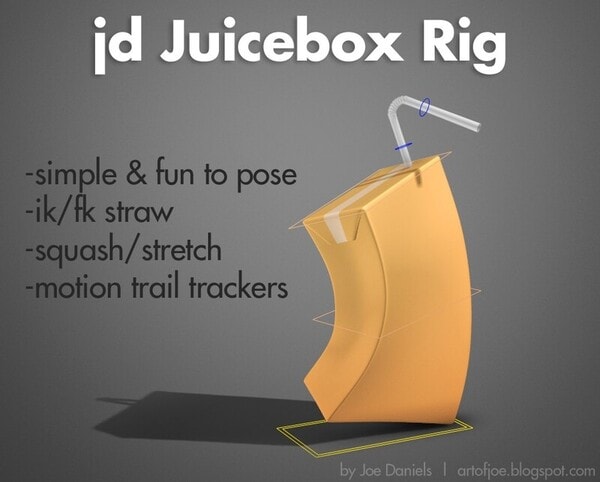
Another favored animation teaching prop is the Juice Box. It follows similar principals like the Flour Sack but the straw adds a different dimension to it. This is where an animator can try out more ways to get creative without a simple straw getting in their way.
● The Walking Egg
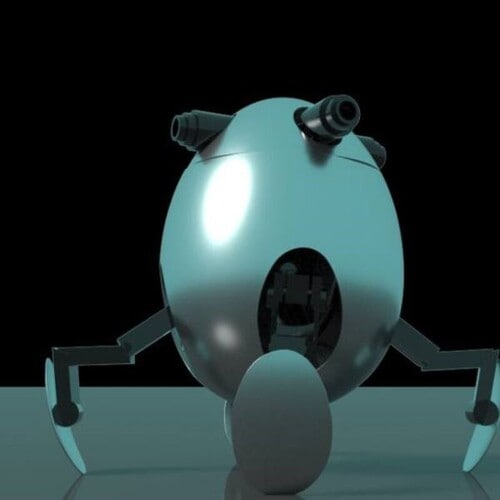
An egg shaped mechanical quadruped robot who has the ability to contract its legs into its body. Its legs are probably its best feature since it is lockable at then joints. A fun part of this robot is that its screen eyes can turn into guns.
● Cartoon Chameleon
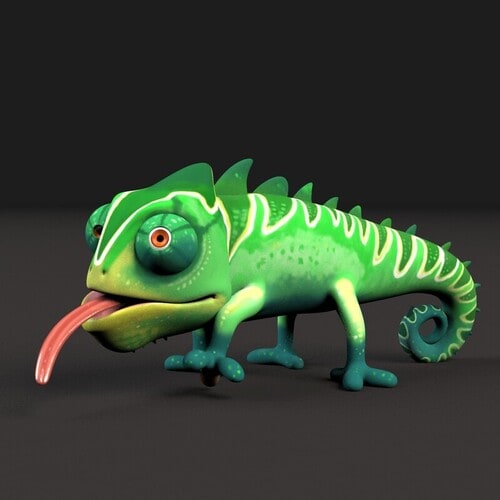
This chameleon has all basic body and facial functions needed by a quadruped. It is a funny whimsical character similar to ‘Pasacal’ from the movie “Tangled” which you can play with. Its tongue is a special feature although you may need to work on its control.
● Judy Hopps
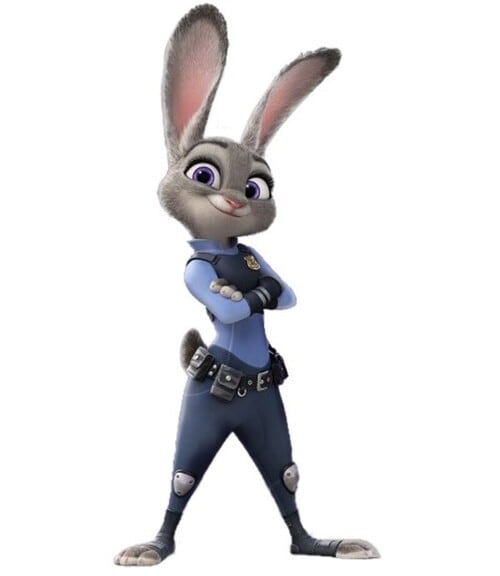
Time to master the art of animating emotions and Judy with her amazing big round eyes can easily be adjusted with the help of floating controllers. The dynamic features of this rig has micro facial controls which you practice with.
● Roboter 2.0.1
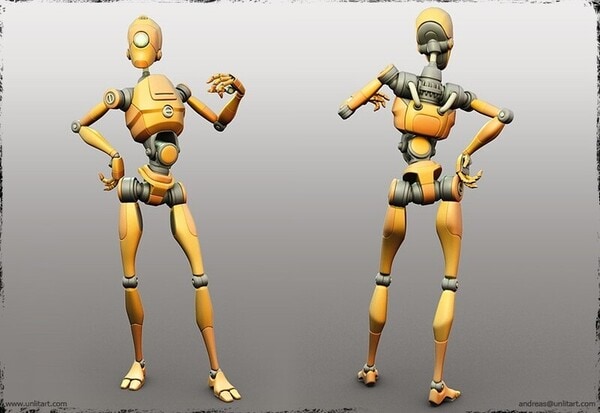
Interested in Robots? Try playing with this humanoid figure but be warned that it might not feel as easy to replicate natural human body motion. It might take some practice but you can try taking on the initial steps by practicing on a robot rig. At least you can excuse any minor imperfections.
● Bony and Beefy
The next challenge would be to master this incredibly advanced rig. There are various different body specifications which you will need to be familiar with. This rig gives you a fair advantage by already toggling all visibility controls.
● Key Takeaways from This Episode →
● Rigging is a fantastic way to learn the foundations of animations and how it all ties into the final result. It involves creating skeletal animations of bones that share parental relationship with each other; one bone moves an entire set. You can record these movements and then play them over timeline.
● You can practice rigging with both simple and advanced animations. Complex rigging structures like facial features may require separate project of its own. There are various rigging software like Blender and Maya which provides you with everything you need to carry out a successful rigging process.
● Get started with rigging animation by practicing on free Maya Rigs. Find out which rig suits you best according to your skills level.
Today there is a lot pre-made skeletons you can use and reuse as many times as you want, making only a few minor adjustments to the base design. If your creativity is sparking like firecrackers, then a rig can make it look more defined and/or realistic.
Not convinced? Let’s talk more about Rigging Animation.
In this article
01 [What is Rigging Animation](#Part 1)
02 [The Ultimate Collection for Free Maya Rigs [2022]](#Part 2)
Part 1 What is Rigging Animation
01Why Your Animators Need to Know How to Rig
Walk into any professional animation studio toady, you would notice unfamiliar skeleton figures in at least one of the screens.
This is called skeleton animation and is a major technique used in creating animated models that give us that 36vibe of the character in movies. It helps animators in controlling its movement just like a puppet. Hidden call back to the Matrix.
What you see in most movies or games, are characters and models who supported by a network of digital mechanical skeletons all rigged to move in a certain way.
02How Does Rigging Work?
The process of rigging is usually the second step in a long line of other methods applied after creating a model.
There is a series of interdependent bones that need to be constructed which is representation of the skeletal structure which is the basic goal in rigging animation.
With the right digital animation software you can reposition, repurpose and scale these bones in more ways than one.
The next step would involve recording the different movements of these bones on a timeline. This part of the process is called keyframing in animation.
These simple steps are actually more intricate than they actually are. Each movement acts as trigger to another set of movements like how the shoulder bone is connected to the forearm of our body.
This movement of the model becomes even more realistic once its weight scale has been determined. Painting weight can be considered to be the most unnerving challenge in the entire process.
Which is where Inverse Kinematics can help in making things 5easier by just reversing forward kinematic movements.
All of these aspects of rigging makes it possible to help animation mimic real life movements.
03How is Rigging Used?
Rigging is a technique which has only started gaining more prominence in recent times due to how crucial it is to the gaming and animation movie industry.
Not only is it used on characters but all mechanical objects in animations can also be rigged. With the help of a computerized program physicality is added to the bone structure and is recorded through a series of frames. These recording are then played back.
There are other applications to the and modelling process which goes beyond the entertainment industry such as giving virtual medical demonstrations or modeling a product.
This entire process can get much more repetitive and complex when it comes to rigging something as dynamic as the human face.
04Intro to Rigging Software
You might already be aware by now that there are some major animation software on the market that can provide you with just about every tool you need to make jaw dropping rigger animations.
Software like Blender, Cinema 4D, Maya and Houdini employs fantastic Skeletal Animation and digital motion capturing techniques. They open the doors to more realistic animations that can be used to create far more interactive and personalized digital worlds.
Maya and 3Ds Max is used to do real time animation rigging and is considered by most to be the industry standard by most animators.
Blender on the other hand is a free to use software. Though not quite as strong as Maya, it is an open source software which is equipped with everything you need to rig and animate models.
You can import completed animated files onto game engines and all types of other applications. The most common format for importing animated files is .fbx.
Part 2 The Ultimate Collection for Free Maya Rigs [2022]
01How’s Maya Rigs?
To tell the truth, every year you have spent on learning animation would come into great use in making your imagination come to life. Maya is probably the one software which gives you credit for just knowing it.
Maya has several levels of features you need to practice before you can call yourself a Maya master.
The best way to get your hands practiced on animating on Maya is by becoming well versed with all the stats and proportions while working with rigs. You would surely need to get your hands on high quality rig packages that makes the learning experience even more worth it.
With time, you would get better at understanding of the specifics of building a structure you would be showing in the final result. However getting stuck with the wrong type of rig can end up making your animating experience counterintuitive.
Here is a list of Maya Rigs you can start on right away;
02Best Free Maya Rigs of 2022
● Basic Rigs
Understanding the Basic Functionality of inanimate objects is a clear place to start in animation rigging. It helps you get a strong grasp over animation principals like bouncing a ball, before moving on to more challenging rigging packages.
● Ultimate Rigs
As you keep trying out different basic rigging functionalities, you eventually would need an ultimate rigging pack which is a complete set of all basic rigs. It is a great option to download and have this as a backup.
● Flour Sack
The Flour Sack free Rig is old school trainer pack. It simplifies your understanding character emotions by applying posing and adding weight to an object with a whimsical undefined structure.
● Wall E
If you are easily familiar with this character then you should remember how beautifully Wall-E was able express himself. It certainly is a step up on your journey to improving motion capture techniques. Try making your own Dreamworks style animation with Filmora from Wondershare where you can pair your animations with a few amazing film editing tools.
● JuiceBox
Another favored animation teaching prop is the Juice Box. It follows similar principals like the Flour Sack but the straw adds a different dimension to it. This is where an animator can try out more ways to get creative without a simple straw getting in their way.
● The Walking Egg
An egg shaped mechanical quadruped robot who has the ability to contract its legs into its body. Its legs are probably its best feature since it is lockable at then joints. A fun part of this robot is that its screen eyes can turn into guns.
● Cartoon Chameleon
This chameleon has all basic body and facial functions needed by a quadruped. It is a funny whimsical character similar to ‘Pasacal’ from the movie “Tangled” which you can play with. Its tongue is a special feature although you may need to work on its control.
● Judy Hopps
Time to master the art of animating emotions and Judy with her amazing big round eyes can easily be adjusted with the help of floating controllers. The dynamic features of this rig has micro facial controls which you practice with.
● Roboter 2.0.1
Interested in Robots? Try playing with this humanoid figure but be warned that it might not feel as easy to replicate natural human body motion. It might take some practice but you can try taking on the initial steps by practicing on a robot rig. At least you can excuse any minor imperfections.
● Bony and Beefy
The next challenge would be to master this incredibly advanced rig. There are various different body specifications which you will need to be familiar with. This rig gives you a fair advantage by already toggling all visibility controls.
● Key Takeaways from This Episode →
● Rigging is a fantastic way to learn the foundations of animations and how it all ties into the final result. It involves creating skeletal animations of bones that share parental relationship with each other; one bone moves an entire set. You can record these movements and then play them over timeline.
● You can practice rigging with both simple and advanced animations. Complex rigging structures like facial features may require separate project of its own. There are various rigging software like Blender and Maya which provides you with everything you need to carry out a successful rigging process.
● Get started with rigging animation by practicing on free Maya Rigs. Find out which rig suits you best according to your skills level.
15 Types of Cartoon Drawing Styles Examples
15 Types of Cartoon Drawing Styles with Examples
An easy yet powerful editor
Numerous effects to choose from
Detailed tutorials provided by the official channel
The perfect, if not the best, place to begin cartoon drawing style as an artist is drawings or sketches since you don’t need a lot of drawing equipment to start this type of drawing. What you chiefly need is just your pen and paper to begin.
So, let’s move ahead as this content will show you different cartoon drawing styles, and in no time, you’ll master the art.
In this article
01 [15 Types of Cartoon You May Use for Your Next Marketing Project](#Part 1)
02 [How To Draw Myself In Five Different Cartoon Styles](#Part 2)
Part 1 Types of Cartoon You May Use for Your Next Marketing Project
As I’ve mentioned before, there are various types and styles of cartoon drawings. Below are a few cartoon drawing styles you may want to use for your next project.
01Modern Cartoon Style
This style is currently the most common art style displayed on TV channels like Cartoon Network.
Note that this cartoon-style drawing’s main features are the thick outlines, geometric shapes, and bright colors.
One of the significant reasons this drawing style is this way is that using simple shapes without much detail makes the overall animation process much faster and saves resources for the studios. Nonetheless, it is a beautiful and captivating cartoon drawing style!
This drawing style is used by many modern cartoons. Here are a few examples:
● The Powerpuff Girls
● Dexter’s Laboratory
● Codename: Kids Next Door
● Gravity Falls
02Realistic Cartoon Style
This cartoon drawing style is more quirky since, generally, cartoon drawing is more likely to simplify shapes. The realistic cartoon-style drawing adds more details and keeps figures much more in line with reality. This drawing style is typical among artists who vectorize people’s photographs.
You can also, to some extent, include Caricatures in this category. Caricatures are generally very realistic besides the whole enlargement and shrinking of specific body parts!
Few examples of realistic cartoon drawing styles:
● Ugly Americans
● General Caricataures
● Archer
03Modern Anime
This style tends to be more complex, primarily seen in drawings where the characters seem to be in motion, like in comic books. Modern-day drawings of this style have a lot of shadows and highlights in their character and environment, giving them a relatively new level of complexity.
Here are a few examples of modern animes that follow this Japanese cartoon drawing style.
● My Hero Academia
● Sword Art Online
● Attack on Titan
● Fullmetal Alchemist Brotherhood
04Classic Manga
The old Japanese manga characters tend to possess human-like attributes (proportions) in terms of the body. The difference is the big eyes they have the most time.
Generally, this cartoon drawing style focuses more on feminine bodies, possessing angular chins and thin bodies. Some drawing styles tend to make some parts of the body overtly long compared to the rest of the body; for instance, the legs are mostly longer than other parts.
A few examples of classic manga possessing this cartoon style drawing are:
● Oh My Goddess
● Urusei Yatsura
● Sailor Moon
● Hellsing
05Chibi Drawing Style
The Chibi Cartoon Drawing Style mainly focuses on making the characters into a tiny version of themselves as if being compressed or compacted into a small container.
Examples of where this drawing style is used:
● Lucky Star
● Bottle Fairy
● Himouto! Umaru-chan
06The Simpsons Cartoon Drawing Style
This cartoon-style drawing is widely famous. Though this style has undergone some evolution throughout the years, the main features remained constant! That is to say, the yellow bodies and big and white sphere-like eyes remained.
07Classic Disney
This drawing style was a staple for years, though this drawing style has had an evolutionary cartoon drawing style over the years.
08Mid 20th Century Disney
Disney upped their game during the mid 20th century and started working more with live actors, drawing from references, and filming shots before drawing the cartoons.
Some remarkable examples of this cartoon drawing style are
● Alice in Wonderland
● Cinderella
● Beauty and the Beast
09Modern Disney Drawing Style
This cartoon-style drawing is an immediate improvement of the mid-20th 20th drawing style. This cartoon style is brighter, more detailed, and more complex generally.
Although Disney has stopped creating 2D cartoon drawings, there are still some examples of this more refined art style:
● The Princess and the Frog
● Lilo and Stitch
10Old Cartoon Drawing Style
This drawing style is mostly in black and white format, with very high contrast body parts. The features of this style are having short bodies and long limbs. Sometimes, this type of drawing is referred to as Noodle drawing because the character’s body moves as if there are no bones in their body.
Some examples of this cartoon drawing style include:
● Mickey Mouse
● Betty Boop
11South Park
South Park cartoon drawing style is aptly geometric and has little depth. Shadows or highlights in this cartoon-style are rare. The colors are pretty solid and clean.
12Chrono Trigger/ Dragon Ball (Akira Toriyama)
Akira Toriyama’s cartoon drawing style characterizes having big and almost rectangular eyes and a lot of geometric shapes and definitions in the muscles.
13Crayon Shin-Chan
This cartoon-style drawing is effortless. An exciting aspect of this style is that it doesn’t mind pushing the limits of the character.
The lines generally are thin, and the eyes are prominent in black and white colors.
14Betty Boop
Betty Boop’s cartoon drawing style possesses contrasting black and white colors. Fragile lines with the characters contain a very high amount of black shapes.
15Adventure Time
Adventure Time’s art is incredibly geometric, and its characters are nearly boneless, making it a more current example of a cartoon drawing style.
More fluid animation is possible as a result of this. The art is also quite brilliant, with vibrant hues that leap off the screen.
Aside from that, the characters’ eyes are usually tiny (with a few exceptions), and the lines are skinny.
Part 2 How to draw myself in five different cartoon styles
There are loads of cartoon characters to choose from when trying to draw me. To sketch yourself as a cartoon, first, you have to determine what cartoon drawing style to appear in. This will give you hints on how to go about the drawing.
● The traditional drawing method is a pencil and paper.
● Online Avatar builders
● Adobe character animator
● Outsource to designers or illustrators
● Hire a studio or a freelancer
● Wondershare Filmora Video Editor
Wondershare Filmora - Best Video Editor for Mac/Windows
5,481,435 people have downloaded it.
Build unique custom animations without breaking a sweat.
Focus on creating epic stories and leave the details to Filmora’s auto features.
Start a creative adventure with drag & drop effects and endless possibilities.
Filmora simplifies advanced features to save you time and effort.
Filmora cuts out repetition so you can move on to your next creative breakthrough.
The Filmora software is an easy-to-use editing app with many beautiful features that can make your animation or cartoon-style drawing more vibrant.
● Split-screen makes it easier to tell a story or draw with multiple screens.
● Preset templates are superb for turning your drawings into creative videos.
● Motion graphics
● Keyframing
● Screen recorder and other unique features.
● Ending Thoughts →
● We’ve looked at the various cartoon drawing styles.
● How to draw self in cartoon style.
● The Filmora software to upbeat your sketches at the professional level.
● hus, go check out any cartoon-style drawings and see which one you like best. Make sure to study the reference drawing and practice more to perfect the artist in you.
Top 3 Ways to Create Gif with Great 3D Gif Maker
Top 3 Ways to Create Gif Images with Great 3D Gif Maker
An easy yet powerful editor
Numerous effects to choose from
Detailed tutorials provided by the official channel
If what you’re searching for is a 3D GIF Maker, then we’ve got your back. Below, we’ve not only listed the three best ways to create 3D animated GIFs, but we’ve also included a brief tutorial that you can reference when creating your very own GIF images.
In this article
01 [Best 3 Ways to Create 3D Animated GIFs](#Part 1)
02 [Create 3D animated GIFs online with Filmora](#Part 2)
Part 1 Best 3 Ways to Create 3D Animated GIFs
First off, as promised, we have a brief list of some 3D GIF Maker tools that you can try. We’ve made sure to pick a unique set of 3D GIF Maker tools and 3D GIF Generator tools in order to give you a variety to choose from. It won’t be the most comprehensive list, but it should help you on your way to understanding how these 3D GIF makers usually work and how you can use them in order to create GIF images that you can share with your friends, family, and colleagues.
01 ** Wondershare Filmora Video Editor
The first 3D GIF Maker on our list is Filmora. It’s probably not the first one that you’d naturally think of as a 3D GIF Maker, seeing as it was developed to be more than that. But, it doesn’t discount the fact that it can be used in order to create and edit your own GIFs.
Wondershare Filmora is available for both Windows and Mac users. It allows you to create a GIF with images or video easily and even gives you the tools needed to edit and perfect it before you export it for use (a process that we’ll be showing off in more detail in the tutorial section below if you’re interested in learning more.)
For Win 7 or later (64-bit)
For macOS 10.12 or later
022. Adobe Photoshop
Adobe Photoshop, much like Filmora, is probably not, first and foremost, considered a mere 3D GIF Maker. However, it doesn’t erase its 3D GIF Creator functions. This tool, if used correctly, can make just about anything you want.
The process of using it, of course, is a little fussier than other alternatives (you’ll probably want to look up a more detailed explanation on the subject), but the fussiness does also mean that you can control every detail of your project and get it to look exactly how you want it to look.
03EaseUS Video Editor
Similar to Filmora, EaseUS Video Editor is an advanced video editing tool that you can use as a 3D GIF Creator quite easily. It comes built-in with templates, filters, design elements, transition effects, music, and so much more — allowing you to freely design your GIF images so that they can be ready for publishing right off the bat.
The beauty of it, of course, is that, much like with all the other options that we introduced today, you can use the program for more than just 3D GIF creation after the fact — opening yourself up for different and more complex projects in the future (be they image, audio, or video-related.)
Part 2 Create 3D Animated Gifs Online With ** Wondershare Filmora Video Editor
Now, as promised, we’ve also included a tutorial that you can follow along with to create your own 3D Animated GIFs with the tool, Wondershare Filmora Video Editor . With this tool, we’ll be showing you the basic way to do it (by using a premade video that you can edit and then convert into GIF format). But, feel free to explore the tool and use it as you wish (i.e., as a 3D spinning GIF creator, 3D rotating text GIF maker, 3D cube GIF maker, and so on.)
01Step 1: Launch ** Filmora Video Editor
First things first, launch the 3D GIF maker that you intend to use. In our case, that is Filmora (a screenshot has been provided below for your edification and reference. We’ll be using Filmora as our example.)
02Step 2: Upload File(s)
Next, upload the file or files that you want to turn into a GIF.
As mentioned in the introduction, we’ll be using a pre-made video, but you can use whatever you wish (i.e., images). In order to upload, we clicked the File tab (pointed out in the image below) and selected Import Media > Import Media File. However, you can also drag and drop your file(s) on the designated area of the UI..
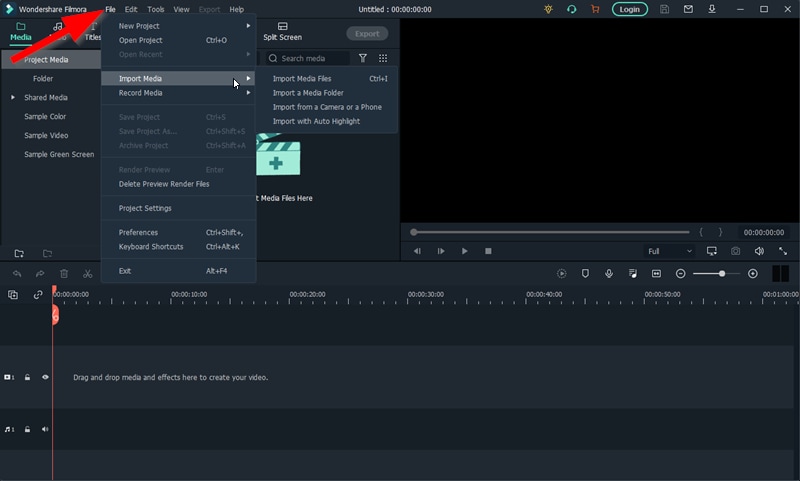
03Step 3: Drag Uploaded Media to Timeline
To create a GIF withFilmora , you’ll need to first create a video. Don’t worry, this is simple. Just drag and drop the media that you want to use onto the timeline.
Note: Any uploaded media will be in the media folder (marked [1] in the image below). Drag media from there onto the timeline (marked [2] in the image below) in order to create a video.
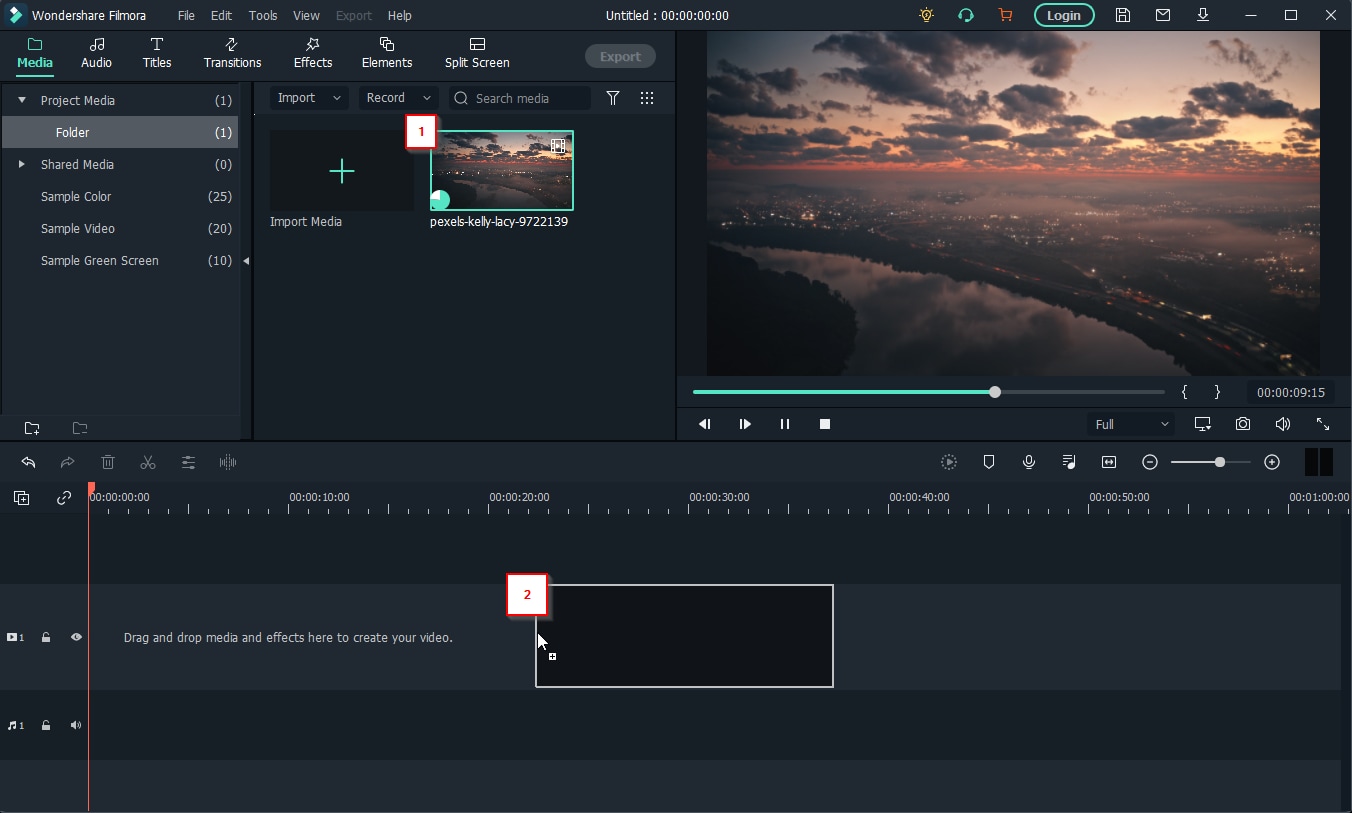
04Step 4: (Optional) Edit Video
If you want, take this opportunity to work on your video some more before converting it into a GIF. Filmora is set up to help you with this. Providing all the following features:
●Trim or Cut features to trim down the video.
●Add Text or audio to video.
●Use templates, filters, or other elements to design videos.
●Add transitions for better video flow.
And then some. In our case, we used the ‘Trim’ feature to cut down our video for a cleaner look.
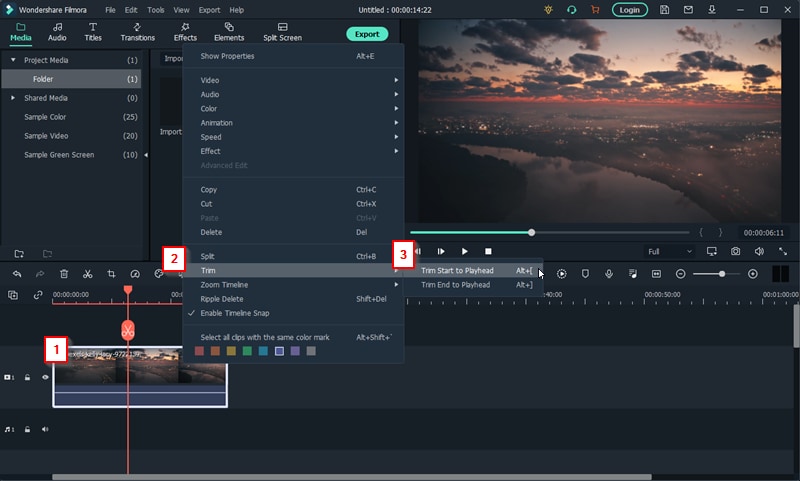
05Step 5: Create Video > GIF
Once you’re done editing your video, you can now convert it to a GIF.
This is easy enough to do. Just click the ‘Export’ tab and select the ‘Create Video’ option. That will allow you to choose to convert your finished video into a GIF file that you can share with your friends.
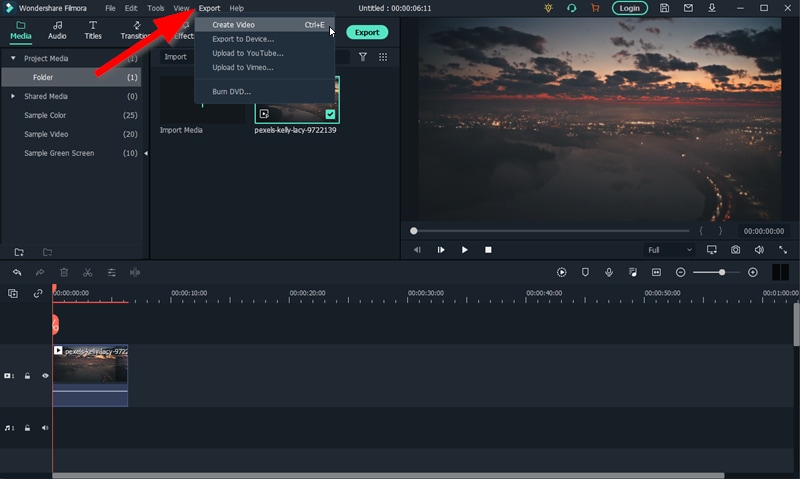
● Key Takeaways from This Episode →
● GIFs are a great way of sharing fun moments with friends and family. And, these days, it’s easier than ever to create them.
● There are 3D GIF Makers available everywhere online. Each one is a little different, of course. But capable of allowing you to create GIFs with images and videos that you can eventually share.
● One such example is the 3D GIF Maker, Filmora. It was the first one that we introduced on our list of the best 3D GIf Makers.
● We also included a tutorial on how you can use Filmora as a 3D GIF Generator for your reference. You can try out the program today if you like. Wondershare offers a FREE trial that you can use in order to explore the many functions of the software before you commit to buying out the perpetual license or signing up for one of their subscription packages.
If what you’re searching for is a 3D GIF Maker, then we’ve got your back. Below, we’ve not only listed the three best ways to create 3D animated GIFs, but we’ve also included a brief tutorial that you can reference when creating your very own GIF images.
In this article
01 [Best 3 Ways to Create 3D Animated GIFs](#Part 1)
02 [Create 3D animated GIFs online with Filmora](#Part 2)
Part 1 Best 3 Ways to Create 3D Animated GIFs
First off, as promised, we have a brief list of some 3D GIF Maker tools that you can try. We’ve made sure to pick a unique set of 3D GIF Maker tools and 3D GIF Generator tools in order to give you a variety to choose from. It won’t be the most comprehensive list, but it should help you on your way to understanding how these 3D GIF makers usually work and how you can use them in order to create GIF images that you can share with your friends, family, and colleagues.
01 ** Wondershare Filmora Video Editor
The first 3D GIF Maker on our list is Filmora. It’s probably not the first one that you’d naturally think of as a 3D GIF Maker, seeing as it was developed to be more than that. But, it doesn’t discount the fact that it can be used in order to create and edit your own GIFs.
Wondershare Filmora is available for both Windows and Mac users. It allows you to create a GIF with images or video easily and even gives you the tools needed to edit and perfect it before you export it for use (a process that we’ll be showing off in more detail in the tutorial section below if you’re interested in learning more.)
For Win 7 or later (64-bit)
For macOS 10.12 or later
022. Adobe Photoshop
Adobe Photoshop, much like Filmora, is probably not, first and foremost, considered a mere 3D GIF Maker. However, it doesn’t erase its 3D GIF Creator functions. This tool, if used correctly, can make just about anything you want.
The process of using it, of course, is a little fussier than other alternatives (you’ll probably want to look up a more detailed explanation on the subject), but the fussiness does also mean that you can control every detail of your project and get it to look exactly how you want it to look.
03EaseUS Video Editor
Similar to Filmora, EaseUS Video Editor is an advanced video editing tool that you can use as a 3D GIF Creator quite easily. It comes built-in with templates, filters, design elements, transition effects, music, and so much more — allowing you to freely design your GIF images so that they can be ready for publishing right off the bat.
The beauty of it, of course, is that, much like with all the other options that we introduced today, you can use the program for more than just 3D GIF creation after the fact — opening yourself up for different and more complex projects in the future (be they image, audio, or video-related.)
Part 2 Create 3D Animated Gifs Online With ** Wondershare Filmora Video Editor
Now, as promised, we’ve also included a tutorial that you can follow along with to create your own 3D Animated GIFs with the tool, Wondershare Filmora Video Editor . With this tool, we’ll be showing you the basic way to do it (by using a premade video that you can edit and then convert into GIF format). But, feel free to explore the tool and use it as you wish (i.e., as a 3D spinning GIF creator, 3D rotating text GIF maker, 3D cube GIF maker, and so on.)
01Step 1: Launch ** Filmora Video Editor
First things first, launch the 3D GIF maker that you intend to use. In our case, that is Filmora (a screenshot has been provided below for your edification and reference. We’ll be using Filmora as our example.)
02Step 2: Upload File(s)
Next, upload the file or files that you want to turn into a GIF.
As mentioned in the introduction, we’ll be using a pre-made video, but you can use whatever you wish (i.e., images). In order to upload, we clicked the File tab (pointed out in the image below) and selected Import Media > Import Media File. However, you can also drag and drop your file(s) on the designated area of the UI..
03Step 3: Drag Uploaded Media to Timeline
To create a GIF withFilmora , you’ll need to first create a video. Don’t worry, this is simple. Just drag and drop the media that you want to use onto the timeline.
Note: Any uploaded media will be in the media folder (marked [1] in the image below). Drag media from there onto the timeline (marked [2] in the image below) in order to create a video.
04Step 4: (Optional) Edit Video
If you want, take this opportunity to work on your video some more before converting it into a GIF. Filmora is set up to help you with this. Providing all the following features:
●Trim or Cut features to trim down the video.
●Add Text or audio to video.
●Use templates, filters, or other elements to design videos.
●Add transitions for better video flow.
And then some. In our case, we used the ‘Trim’ feature to cut down our video for a cleaner look.
05Step 5: Create Video > GIF
Once you’re done editing your video, you can now convert it to a GIF.
This is easy enough to do. Just click the ‘Export’ tab and select the ‘Create Video’ option. That will allow you to choose to convert your finished video into a GIF file that you can share with your friends.
● Key Takeaways from This Episode →
● GIFs are a great way of sharing fun moments with friends and family. And, these days, it’s easier than ever to create them.
● There are 3D GIF Makers available everywhere online. Each one is a little different, of course. But capable of allowing you to create GIFs with images and videos that you can eventually share.
● One such example is the 3D GIF Maker, Filmora. It was the first one that we introduced on our list of the best 3D GIf Makers.
● We also included a tutorial on how you can use Filmora as a 3D GIF Generator for your reference. You can try out the program today if you like. Wondershare offers a FREE trial that you can use in order to explore the many functions of the software before you commit to buying out the perpetual license or signing up for one of their subscription packages.
Simple Guide to Create New and Exciting Blackboard Animation
Dead Simple Guide to Create New and Exciting Blackboard Animation
An easy yet powerful editor
Numerous effects to choose from
Detailed tutorials provided by the official channel
Yes, it is definitely possible In fact, it couldn’t be easier. A lot of the ‘whiteboard animation’ generators also work as blackboard animation generators.
In this guide, we hope to shed some light on the subject so that everyone can have an easier time approaching the matter of creating a blackboard project on their own.
In this article
01 [Is Blackboard Animation Outdated?](#Part 1)
02 [How to Combine Modern Needs with Blackboard Animation?](#Part 2)
03 [How to Create a Blackboard Animation in ONE DAY?](#Part 3)
Part 1 Is Blackboard Animation Outdated?
Blackboard animation some may say is as outdated as the concept of ‘blackboards’ themselves. After all, nowadays, whiteboards are the standard for presenting information in a school setting — with many preferring the ease of using dry-erase markers over the more unwieldy chalk.
However, unlike the inconveniences of using an actual chalkboard, chalkboard animation is not so different from whiteboard animation In fact, it’s just given a different look. One that may be exactly what you’re looking for — especially if you’re looking to get in touch with the older generation (who would no doubt be more familiar with the concept.)

Part 2 How to Combine Modern Needs with Blackboard Animation?
But alright, so how do you make it so that your blackboard animation is just as suited for the modern generation as it is for the older generation?? Well, that’s easy really. You’ll need images Or, rather, you’ll need visuals outside of just the plain text that is usually associated with chalkboard animation.
With the right kind of visuals to go along with your informational text, you can boost the effectiveness of your chalkboard animation video and make it more palatable. Perfectly in line with the modern needs of the era.

Part 3 How to Create a Blackboard Animation in ONE DAY?
Alright, so onto actually talking about how you can go about creating a chalkboard animation video Take note, this is going to be an ‘overview’ kind of tutorial. We’ve also decided to choose a more ‘custom’ method, rather than using one of the premium blackboard animation generators (which usually require you to pay a steep price in order to gain access to a media library.)
01Step 1. Pick Your Software
The first step in creating chalkboard animation is to pick the software that you want to use This can be something more ‘animation-specific’, like After Effects. Or something more ‘video-editing-specific’ like Filmora.
Again, because this is meant to be more of a ‘general’ tutorial, we won’t be showing you exactly how to use whatever editing software you decide to use in order to create your blackboard animation videos. But, as a general kind of advice, it would be best that you pick a video editor like Wondershare Filmora Video Editor that offers a Timeline feature that will allow you to quickly put together a project

02Step 2. Create a Storyboard
Next, to make the actual blackboard animation creation process go smoother, it’s important that you create a storyboard that will outline the video that you want to create
The more detailed this storyboard is, the better Although, of course, you don’t necessarily have to draw every single frame of your chalkboard animation beforehand. Just sketch out the general idea. It will help make sure that you won’t have to rush about making all sorts of corrections in the future

03Step 3. Draw Characters
For this step, we say ‘characters’ and use the word ‘draw.’ But really, this is a very open kind of step where we encourage you to put together all media that you will need to make your project into a reality This is where the storyboard really helps. After all, with that, you have an idea of exactly what kind of characters, settings, music, audio, etc. you’ll need for each scene (if not each frame)
If you’re not the ‘drawing’ type, by the way, there are both FREE and premium media libraries that you can take advantage of to use for your project It might be difficult to find matching art styles at first. But, if you’re really particular about that, then you can always find a freelance digital artist to design with a specific style in mind

04Step 4. Put Together Project
Last of all, of course, is the process of putting everything together. Do you have your software? Great Launch it and create a new project Do you have your storyboard? That’s also great Now you have an idea where each character and setting will go
In the image below, we’re only showing the start of a potential project. We’ve only added one image to the timeline But, as you can see, with the use of Filmora, even this one image can be turned into a video

● Key Takeaways from This Episode →
● Blackboards are naturally associated with learning This makes blackboard animation videos a great method of sharing information with an audience. Whether you’re doing it to promote your services/goods or just genuinely looking to impart knowledge to another
● Some may think that blackboards are outdated — for the mere fact that blackboards themselves are considered outdated when compared to whiteboards — but that doesn’t make them any less effective at getting a message across so long as you include the right kind of visuals
● In our brief ‘overview’ tutorial, we expand on the subject of blackboard animation some more. Be warned, it’s not the kind of project you should go into if you’re not prepared for the work Longer projects, especially, will require quite a bit of elbow grease to get done.
● Still, there’s something satisfying about a well-done chalkboard animation video that will not only be a joy to create but also, hopefully, catch the attention of your audience as well.
Yes, it is definitely possible In fact, it couldn’t be easier. A lot of the ‘whiteboard animation’ generators also work as blackboard animation generators.
In this guide, we hope to shed some light on the subject so that everyone can have an easier time approaching the matter of creating a blackboard project on their own.
In this article
01 [Is Blackboard Animation Outdated?](#Part 1)
02 [How to Combine Modern Needs with Blackboard Animation?](#Part 2)
03 [How to Create a Blackboard Animation in ONE DAY?](#Part 3)
Part 1 Is Blackboard Animation Outdated?
Blackboard animation some may say is as outdated as the concept of ‘blackboards’ themselves. After all, nowadays, whiteboards are the standard for presenting information in a school setting — with many preferring the ease of using dry-erase markers over the more unwieldy chalk.
However, unlike the inconveniences of using an actual chalkboard, chalkboard animation is not so different from whiteboard animation In fact, it’s just given a different look. One that may be exactly what you’re looking for — especially if you’re looking to get in touch with the older generation (who would no doubt be more familiar with the concept.)
Part 2 How to Combine Modern Needs with Blackboard Animation?
But alright, so how do you make it so that your blackboard animation is just as suited for the modern generation as it is for the older generation?? Well, that’s easy really. You’ll need images Or, rather, you’ll need visuals outside of just the plain text that is usually associated with chalkboard animation.
With the right kind of visuals to go along with your informational text, you can boost the effectiveness of your chalkboard animation video and make it more palatable. Perfectly in line with the modern needs of the era.
Part 3 How to Create a Blackboard Animation in ONE DAY?
Alright, so onto actually talking about how you can go about creating a chalkboard animation video Take note, this is going to be an ‘overview’ kind of tutorial. We’ve also decided to choose a more ‘custom’ method, rather than using one of the premium blackboard animation generators (which usually require you to pay a steep price in order to gain access to a media library.)
01Step 1. Pick Your Software
The first step in creating chalkboard animation is to pick the software that you want to use This can be something more ‘animation-specific’, like After Effects. Or something more ‘video-editing-specific’ like Filmora.
Again, because this is meant to be more of a ‘general’ tutorial, we won’t be showing you exactly how to use whatever editing software you decide to use in order to create your blackboard animation videos. But, as a general kind of advice, it would be best that you pick a video editor like Wondershare Filmora Video Editor that offers a Timeline feature that will allow you to quickly put together a project
02Step 2. Create a Storyboard
Next, to make the actual blackboard animation creation process go smoother, it’s important that you create a storyboard that will outline the video that you want to create
The more detailed this storyboard is, the better Although, of course, you don’t necessarily have to draw every single frame of your chalkboard animation beforehand. Just sketch out the general idea. It will help make sure that you won’t have to rush about making all sorts of corrections in the future
03Step 3. Draw Characters
For this step, we say ‘characters’ and use the word ‘draw.’ But really, this is a very open kind of step where we encourage you to put together all media that you will need to make your project into a reality This is where the storyboard really helps. After all, with that, you have an idea of exactly what kind of characters, settings, music, audio, etc. you’ll need for each scene (if not each frame)
If you’re not the ‘drawing’ type, by the way, there are both FREE and premium media libraries that you can take advantage of to use for your project It might be difficult to find matching art styles at first. But, if you’re really particular about that, then you can always find a freelance digital artist to design with a specific style in mind
04Step 4. Put Together Project
Last of all, of course, is the process of putting everything together. Do you have your software? Great Launch it and create a new project Do you have your storyboard? That’s also great Now you have an idea where each character and setting will go
In the image below, we’re only showing the start of a potential project. We’ve only added one image to the timeline But, as you can see, with the use of Filmora, even this one image can be turned into a video
● Key Takeaways from This Episode →
● Blackboards are naturally associated with learning This makes blackboard animation videos a great method of sharing information with an audience. Whether you’re doing it to promote your services/goods or just genuinely looking to impart knowledge to another
● Some may think that blackboards are outdated — for the mere fact that blackboards themselves are considered outdated when compared to whiteboards — but that doesn’t make them any less effective at getting a message across so long as you include the right kind of visuals
● In our brief ‘overview’ tutorial, we expand on the subject of blackboard animation some more. Be warned, it’s not the kind of project you should go into if you’re not prepared for the work Longer projects, especially, will require quite a bit of elbow grease to get done.
● Still, there’s something satisfying about a well-done chalkboard animation video that will not only be a joy to create but also, hopefully, catch the attention of your audience as well.
How To Create Animated Clipart in PowerPoint
How To Create Animated Clipart in PowerPoint
An easy yet powerful editor
Numerous effects to choose from
Detailed tutorials provided by the official channel
Clipart is a special type of graphic art. There are pre-made images that are used to illustrate all sorts of things.

The use of animated clipart is increasing day by day. Here, we will discuss the steps of creating animated clipart for PowerPoint.
In this article
01 [What is Moving Clipart Called?](#Part 1)
02 [Where Can I Find Free Animated Clipart?](#Part 2)
03 [How Do You Add an Animated Clipart to a Slide?](#Part 3)
Part 1 What is Moving Clipart Called?
The moving clipart is basically called animated clipart or Animated Gifs. These are easy and quick ways to present contents that are dynamic, especially on Web pages. The sizes of these files are small compared to the other alternatives for creating dynamic content like Flash and Java. If you would like to learn more about video animation , you can watch this tutorial:
For Win 7 or later (64-bit)
For macOS 10.12 or later
These are several images that are encoded in GIF or Graphic interchange format. This contains a number of frames or images within a single file and can be described by the graphic control extension of its own.

Part 2 Where Can I Find Free Animated Clipart?
We all love to use different types of images to express ourselves. However, the process of finding out better quality, copyright > free and also high > resolution free images a really tough task. To make sure that you can find the right one for you, you can go through some really amazing image resources.
These image resources have a huge collection of CCO or Creative Commons licensed and high > quality pictures to meet your different types of needs. Also, keep in mind to check on to the page that is licensed before using any clipart or animated clip art for copyright infringement.
01 Upsplash

Unsplash is a special site that was launched in the year 2013. This site posts ten photos that are handpicked every ten days. These photos are free of charge. As categorized under CCO, this site offers high > quality resolution images that can add beauty as well as credibility to your work.
02 Pixabay

Pixabay was launched in the year 2016 and has 550,000 free illustrations, photos, and vectors. It is equipped with a search engine that is versatile and can easily customize and broaden the search. Thus, this can offer you accurate results regarding your searches.
If you wish to use high > quality public domain pictures or animated clip art, this site can be your perfect option.
03 Public Domain

This website known as Public Domain has a collection of various high > quality pictures, images, and vectors that you can easily use for your animated videos. Especially, vectors are available here in a big number.
04 Openclipart

Though there are many websites where you can get clip arts, very few of them can provide clip arts of excellent quality. This website known as Openclipart is a reliable source of 11,000 designed clip arts that you can easily use in your animation videos.
05 Bing

Bing is no doubt an extensive search engine that can work similarly to Google. Bing has a special filter that has a large number of superior quality public domain images, vectors, clip arts, and illustrations to amaze you.
06 Photopin

As Photopin has millions of free images, many bloggers prefer to use this for their blog posts. However, Photopin does not come under the CCO license. So, you can use their images but you need to add a link to their website.
07 Pond5 creative

Pond5 is the largest online marketplace of the world for royalty–free stock music has now released the creative common category for media with the target to make it easily accessible to their users.
This site offers not only some superior quality free images, but you can also find some special characters, effects, vectors, sounds, animated clip art, 3D models, and many more. You just have to use the filter showing “Public domain only” to get those free licensed images.
08 Clker.com

Clker is mainly used for clip arts. You can easily get numerous clip arts of different sizes without any charges. This is an amazing source of free graphics, vectors, illustrations, etc. Moreover, this site is also licensed under CCO.
Part 3 How Do You Add an Animated Clipart to a Slide?

You can easily add animated clip art or GIF into the Google slides, to make your creation more visually attractive. To do this task you can choose multiple methods, but the easiest of them is using a GIF URL.
Here is the complete process of how to add a GIF to Google slides using a URL.
01 How to add a GIF to Google Slides using a URL

Step 1Open Your Presentation
Firstly, you need to go to slides.google.com and then open your presentation, or you can also create a new one.
Step 2Choose GIF That You Want to Insert
Click the slide that you want to insert the GIF onto in the sidebar located on the left side.
Step 3Image
In the top toolbar, just select “Insert”, then the “Image” option. After that, select “By URL”.
Step 4Paste URL
Just paste the URL into that box.
Step 5Insert
After that, the GIF will pop up, at that time just click on “Insert”.
02 Can you animate objects in PowerPoint?

How to add animations to the pictures, shapes, texts in a PowerPoint presentation?
Step 1Select the Text
First of all, you have to select the text or object that you wish to animate.
Step 2Select “Animations”
Next, Select “Animations” and choose an animation.
Step 3Choose “Effect Options”
Just choose “Effect Options” and select an effect.
How to manage effects and animations?
● With Previous
You can play an animation simultaneously as the previous animation in you the sequence.
● After previous
You can start an animation right after the previous ones starts.
● On click
You can start an animation or move the animated clip art while you click a slide.
● Delay
You may add time before an effect starts to run.
● Duration
You can also shorten or lengthen an effect.
How to change the order of animations?
● Move the option you desire Later
You can make an animation happen later in the sequence.
● Move the option you desire earlier
You can make an animation appear earlier in the sequence.
How to add animation to the grouped objects?
● Step 1
You need to press “Ctrl” and select the objects you want.
● Step 2
Select “Format> Group> Group” to group those objects or texts.
● Step 3
Select “Animations” and choose an animation.
03 How to Add Animated Clipart in Powerpoint?

Here is the detailed process for you.
Step 1Choose a Clip art image
You need to select the desired image. You can either select an image from the default option in PowerPoint showing Office clipart or you can search for images online or insert your own collection of photos.
Step 2Select an animation effect
You have to go to the “Animation “ tab and click on the option that shows “Add Animation”. From that drop-down menu, you will get several animation effects to animate your static image and create your animated clipart for PowerPoint.
Step 3Choose among different effects
PowerPoint offers animation effects of different types, like motion paths, entrance effects, entrance effects and emphasis effects.
Step 4Bringing transition effects
After creating animated clipart, you can also choose a transition effect to offer a special look to your presentation. In this case, when the slide is revealed this transition effect can easily complement your animation.
04 How Do I Make an Animated Video in Powerpoint?
When you wish to create an animated video for PowerPoint, you can do this easily. The steps are:
Step 1Insert the video into a slide
Insert the video into a slide and then click on “Insert “and select the option “Video”.
Click on the video and align it to the right position and size. Open “Animation Pane”.
Step 2Create a speech bubble
It is not necessary to interrupt your video while inserting an animation. So, it’s important to create a speech bubble.
Click “Shapes” and choose between different arrows, shapes, flow charts, that you can insert into the video.
Step 3Select “Animation Pane”
Click on the speech bubble. Go to “Animations” and select “Animation Pane”.
The animations can be inserted from the “Entrance” area.
Step 4Choose “Inbox”
Click on the speech bubble and choose “Inbox” and then “Fly-In”. The effects will appear in the area of the animation.
By moving the animation on this you can select the time when the animation will appear in the video.
Step 5Play the video
Right-click on “Start With Previous” to allow the animation to start and move.
The speech bubble will appear in the video after just 30 seconds, so move the animation until 30 sec. If you wish to stop the video in just 30 sec, click on the video and add “Play”.
Step 6Move the animation
Click right and choose the “Start With Previous” option. Move the animation to 0 seconds. Add “Pause”.
Click on “Add Animation” and then “Pause”. Then click right and choose “Start With Previous Again”. Move the animation to 30 sec as you need to stop the video from there. You can change the length by inserting the animation “Pause” again.
Step 7Run the video
Click right and select “Start With Previous”. While the continuation of the video, if you want the speech bubble to disappear, click on the bubble and on “Add Animation” and then “Exit” and choose “Fly Out”.
Click right and choose “Start With Previous “again. Move the animation to 60 seconds, as the video will start to run there.
Clipart is a special type of graphic art. There are pre-made images that are used to illustrate all sorts of things.
The use of animated clipart is increasing day by day. Here, we will discuss the steps of creating animated clipart for PowerPoint.
In this article
01 [What is Moving Clipart Called?](#Part 1)
02 [Where Can I Find Free Animated Clipart?](#Part 2)
03 [How Do You Add an Animated Clipart to a Slide?](#Part 3)
Part 1 What is Moving Clipart Called?
The moving clipart is basically called animated clipart or Animated Gifs. These are easy and quick ways to present contents that are dynamic, especially on Web pages. The sizes of these files are small compared to the other alternatives for creating dynamic content like Flash and Java. If you would like to learn more about video animation , you can watch this tutorial:
For Win 7 or later (64-bit)
For macOS 10.12 or later
These are several images that are encoded in GIF or Graphic interchange format. This contains a number of frames or images within a single file and can be described by the graphic control extension of its own.
Part 2 Where Can I Find Free Animated Clipart?
We all love to use different types of images to express ourselves. However, the process of finding out better quality, copyright > free and also high > resolution free images a really tough task. To make sure that you can find the right one for you, you can go through some really amazing image resources.
These image resources have a huge collection of CCO or Creative Commons licensed and high > quality pictures to meet your different types of needs. Also, keep in mind to check on to the page that is licensed before using any clipart or animated clip art for copyright infringement.
01 Upsplash
Unsplash is a special site that was launched in the year 2013. This site posts ten photos that are handpicked every ten days. These photos are free of charge. As categorized under CCO, this site offers high > quality resolution images that can add beauty as well as credibility to your work.
02 Pixabay
Pixabay was launched in the year 2016 and has 550,000 free illustrations, photos, and vectors. It is equipped with a search engine that is versatile and can easily customize and broaden the search. Thus, this can offer you accurate results regarding your searches.
If you wish to use high > quality public domain pictures or animated clip art, this site can be your perfect option.
03 Public Domain
This website known as Public Domain has a collection of various high > quality pictures, images, and vectors that you can easily use for your animated videos. Especially, vectors are available here in a big number.
04 Openclipart
Though there are many websites where you can get clip arts, very few of them can provide clip arts of excellent quality. This website known as Openclipart is a reliable source of 11,000 designed clip arts that you can easily use in your animation videos.
05 Bing
Bing is no doubt an extensive search engine that can work similarly to Google. Bing has a special filter that has a large number of superior quality public domain images, vectors, clip arts, and illustrations to amaze you.
06 Photopin
As Photopin has millions of free images, many bloggers prefer to use this for their blog posts. However, Photopin does not come under the CCO license. So, you can use their images but you need to add a link to their website.
07 Pond5 creative
Pond5 is the largest online marketplace of the world for royalty–free stock music has now released the creative common category for media with the target to make it easily accessible to their users.
This site offers not only some superior quality free images, but you can also find some special characters, effects, vectors, sounds, animated clip art, 3D models, and many more. You just have to use the filter showing “Public domain only” to get those free licensed images.
08 Clker.com
Clker is mainly used for clip arts. You can easily get numerous clip arts of different sizes without any charges. This is an amazing source of free graphics, vectors, illustrations, etc. Moreover, this site is also licensed under CCO.
Part 3 How Do You Add an Animated Clipart to a Slide?
You can easily add animated clip art or GIF into the Google slides, to make your creation more visually attractive. To do this task you can choose multiple methods, but the easiest of them is using a GIF URL.
Here is the complete process of how to add a GIF to Google slides using a URL.
01 How to add a GIF to Google Slides using a URL
Step 1Open Your Presentation
Firstly, you need to go to slides.google.com and then open your presentation, or you can also create a new one.
Step 2Choose GIF That You Want to Insert
Click the slide that you want to insert the GIF onto in the sidebar located on the left side.
Step 3Image
In the top toolbar, just select “Insert”, then the “Image” option. After that, select “By URL”.
Step 4Paste URL
Just paste the URL into that box.
Step 5Insert
After that, the GIF will pop up, at that time just click on “Insert”.
02 Can you animate objects in PowerPoint?
How to add animations to the pictures, shapes, texts in a PowerPoint presentation?
Step 1Select the Text
First of all, you have to select the text or object that you wish to animate.
Step 2Select “Animations”
Next, Select “Animations” and choose an animation.
Step 3Choose “Effect Options”
Just choose “Effect Options” and select an effect.
How to manage effects and animations?
● With Previous
You can play an animation simultaneously as the previous animation in you the sequence.
● After previous
You can start an animation right after the previous ones starts.
● On click
You can start an animation or move the animated clip art while you click a slide.
● Delay
You may add time before an effect starts to run.
● Duration
You can also shorten or lengthen an effect.
How to change the order of animations?
● Move the option you desire Later
You can make an animation happen later in the sequence.
● Move the option you desire earlier
You can make an animation appear earlier in the sequence.
How to add animation to the grouped objects?
● Step 1
You need to press “Ctrl” and select the objects you want.
● Step 2
Select “Format> Group> Group” to group those objects or texts.
● Step 3
Select “Animations” and choose an animation.
03 How to Add Animated Clipart in Powerpoint?
Here is the detailed process for you.
Step 1Choose a Clip art image
You need to select the desired image. You can either select an image from the default option in PowerPoint showing Office clipart or you can search for images online or insert your own collection of photos.
Step 2Select an animation effect
You have to go to the “Animation “ tab and click on the option that shows “Add Animation”. From that drop-down menu, you will get several animation effects to animate your static image and create your animated clipart for PowerPoint.
Step 3Choose among different effects
PowerPoint offers animation effects of different types, like motion paths, entrance effects, entrance effects and emphasis effects.
Step 4Bringing transition effects
After creating animated clipart, you can also choose a transition effect to offer a special look to your presentation. In this case, when the slide is revealed this transition effect can easily complement your animation.
04 How Do I Make an Animated Video in Powerpoint?
When you wish to create an animated video for PowerPoint, you can do this easily. The steps are:
Step 1Insert the video into a slide
Insert the video into a slide and then click on “Insert “and select the option “Video”.
Click on the video and align it to the right position and size. Open “Animation Pane”.
Step 2Create a speech bubble
It is not necessary to interrupt your video while inserting an animation. So, it’s important to create a speech bubble.
Click “Shapes” and choose between different arrows, shapes, flow charts, that you can insert into the video.
Step 3Select “Animation Pane”
Click on the speech bubble. Go to “Animations” and select “Animation Pane”.
The animations can be inserted from the “Entrance” area.
Step 4Choose “Inbox”
Click on the speech bubble and choose “Inbox” and then “Fly-In”. The effects will appear in the area of the animation.
By moving the animation on this you can select the time when the animation will appear in the video.
Step 5Play the video
Right-click on “Start With Previous” to allow the animation to start and move.
The speech bubble will appear in the video after just 30 seconds, so move the animation until 30 sec. If you wish to stop the video in just 30 sec, click on the video and add “Play”.
Step 6Move the animation
Click right and choose the “Start With Previous” option. Move the animation to 0 seconds. Add “Pause”.
Click on “Add Animation” and then “Pause”. Then click right and choose “Start With Previous Again”. Move the animation to 30 sec as you need to stop the video from there. You can change the length by inserting the animation “Pause” again.
Step 7Run the video
Click right and select “Start With Previous”. While the continuation of the video, if you want the speech bubble to disappear, click on the bubble and on “Add Animation” and then “Exit” and choose “Fly Out”.
Click right and choose “Start With Previous “again. Move the animation to 60 seconds, as the video will start to run there.
12 Animation Video Maker That Can Triple Your Conversion Rates
12 Animation Video Maker That Can Triple Conversion Rates
An easy yet powerful editor
Numerous effects to choose from
Detailed tutorials provided by the official channel
Gone are the days when creating animation requires expert skills, time, and a lot of money. Thanks to technological advancement several software and tools are available for creating animated videos in a hassle-free manner.

The following parts of the topic will help you to learn in detail about animation videos, their importance, the best software, and animation online website tools.
In this article
01 [What is an Animated Video and Its Importance?](#Part 1)
02 [Top 11 Online Animation Video Maker](#Part 2)
03 [Best Alternative To Online Tools For Creating Professional Animated Videos](#Part 3)
Part 1 What is an Animated Video and Its Importance?
Animated Video
In simplest terms, animation refers to a method where figures appear as moving images to make them look lively and interesting. Using the drawings, effects, designs, and illustrations, an animated video is created to catch your attention. Animations can be of several types like cartoon animations, 3D animations, motion graphics, CGI, 2D animations, and more.
Benefits of using Animated videos
Animated videos have dominated the entire digital space and there are several reasons for the same. Some of the major ones are enlisted below.
● Add life to your concepts
● Bring in the content to your interesting ideas
● Ability to represent abstract ideas visually
● Video production can be managed in a hassle-free manner
● Animated videos are more visually and psychologically appealing
● Helps in boosting the conversion rates
● Makes you stand out from the competition
● Helps in expanding the reach and getting the attention and engagement
● Improves SEO
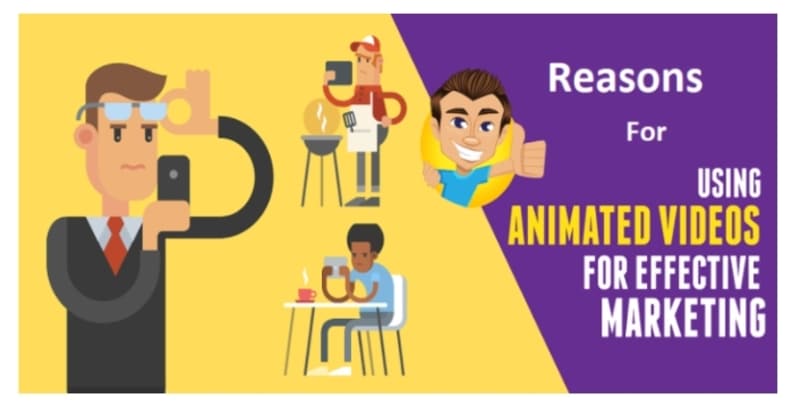
Part 2 Top 11 online animation video maker
If you are in search of a simple yet effective solution to create animations, 3D animation maker online tools work as a great choice. The majority of these programs are free and simple to use and support all basic animation requirements. Below listed are the top 11 online 3D animation makers that can be used for creating impressive animations.
01PowToon
This is a widely used online tool that supports creating videos in multiple formats including animated ones. The tool majorly supports features related to cartoon animation and depending on your requirements you can choose from different licenses and plans. Some of the key features of the tool include presentation mode, animation mode, readymade templates, integration with different tools, and others.

02Moovly
This is one of the top online animation maker 3D tool for creating interesting and eye-catchy animations. The tool is completely cloud-based and thus there is no need for any software download or installation. Different types of animations like doodles, cartoons, and others can be created easily using the program. Huge stock of videos, sound, music, motion graphics, photos, and others are available at the program to create a customized animation as required.
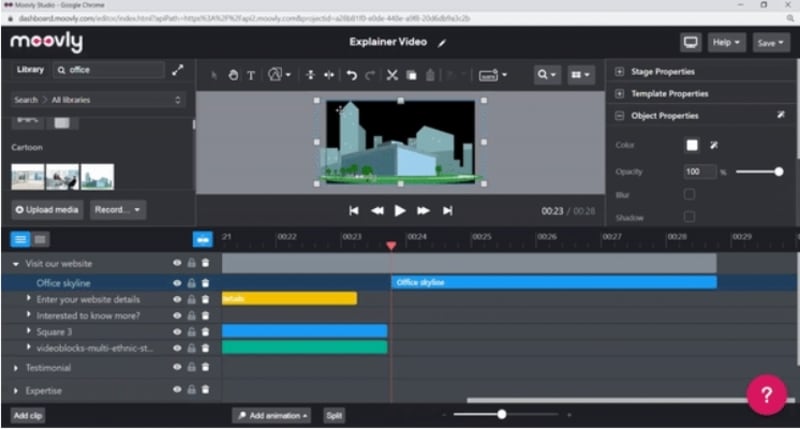
03Explee
This is a simple to use online tool that can help you create animated videos in a few simple steps. The program focuses on using a whiteboard which along with Explee’s Bringlife technology can create impressive animations. More than 6000 images are available at the tool for illustrating your concept and ideas. Some of the animation features supported by the tool include draw, pop, pin, fade, and others.
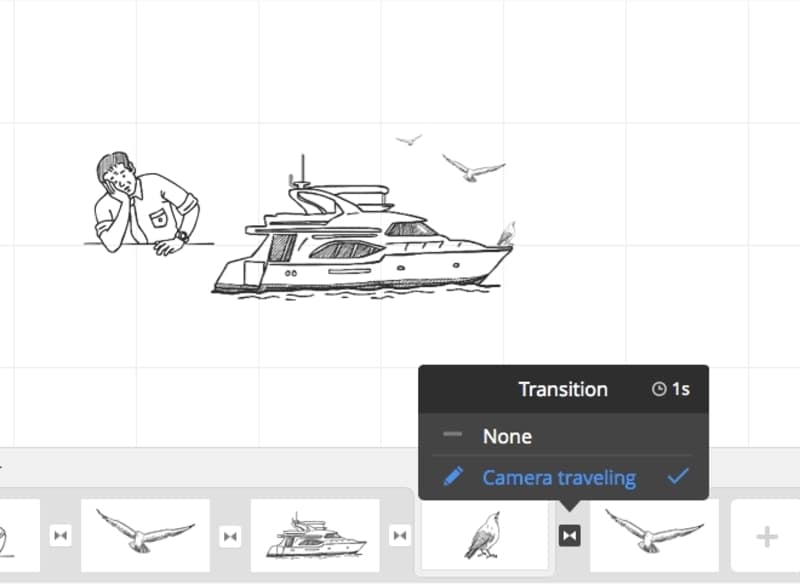
04Wideo
This is a simple yet versatile 3D online animation maker tool for animated video creation. Several pre-designed templates are available using which animated videos can be created quickly and easily. The free version of the tool allows creating animations for up to 30 seconds and for longer animations you would need to upgrade to a paid subscription. The tool also has a stock of free video library and the processed files can be exported as MP4 videos.
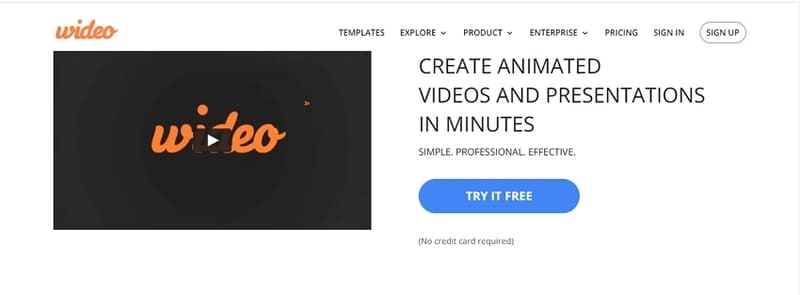
05Animaker
Creating cartoons and other animations can be done quickly and easily using this online tool that comes along with several pre-designed templates. The tool is simple to use and requires no specialized skill sets or technical know-how. Some of the interesting features for animation creation include character building, lip-syncing, facial expressions, smart moves, and more. You can customize the templates at the program and create the desired animation using the wide collection of images, videos, GIFs, and music files.
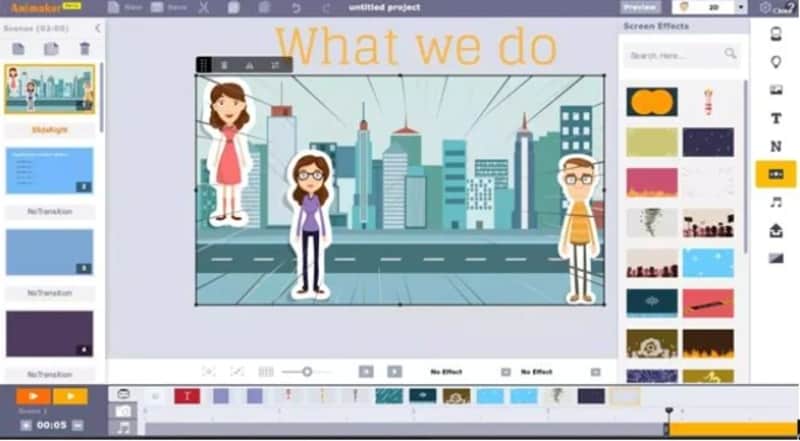
06Vyond
Professional-looking animated videos can be created using this cloud-based tool. You can either create an animation from scratch or use one of the templates at the site and then customize it as needed. The lip-sync feature of the tool allows you to import or an audio file or even add a voice recording. Animations for marketing, training, communications, HR and other purposes can be created using the tool. The tool comes with a 14-days free trial version after which you need to upgrade to a paid plan.
07Renderforest
This online tool comes with more than 500 templates in different categories that can be used along with multiple customization tools of the program to create the desired 2D as well as 3D animation. Simple interface and easy steps make the tool apt even for the ones who do not possess technical know-how. Several toolkits like the 3D video toolkit, whiteboard animation toolkit, and others are available at the site for you to learn the process. Customization options include adding music, adjusting scene order, adjusting VoiceOver, and more. The created video can be directly uploaded to YouTube or can be saved to the local system or project library.
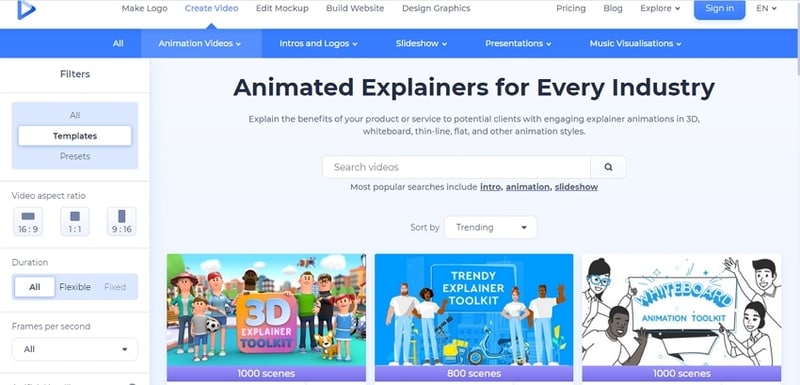
08Animatron
Using this browser-based tool you can easily create animated videos for multiple purposes like presentation, explainer videos, banners, whiteboard animations, and more. You can choose from more than 200 animated templates available at the site and then customize them as required multiple functions. In addition to your videos and other media files, you can also add them from the free library available at Animatron. You can preview the created animation and then export it to your system or directly to popular social media platforms. Tutorials o guide you through the process of animated video creation are also present on the site.
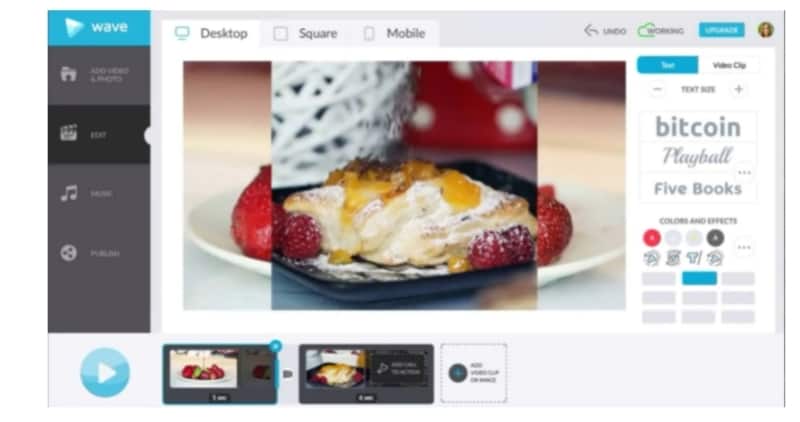
09MotionDen
This is another widely used name when it comes to online video creation tools. This simple yet functional program will let you create animated videos of your choice using multiple templates available at the site. There is a collection of desktop as well as mobile-friendly templates. These template’s video, music, photos, text, and other elements can be customized using the program editor and then the processed video can be quickly downloaded to your local system.
10Toonator
Creating cartoons is simple and quick using this online tool that requires no software download or installation. Using the program, you can create an interesting cartoon as needed as well as edit the graphics. The tool can also work with your tablets that making it easy to edit the files using a pen or fingers. You can even check the designs of cartoons that have been created by other users.
11Biteable
To create animations for your social media sites, marketing, and other requirements, this is a versatile tool to use. You can use the readymade templates available at the site or can also create animation from a scratch. Customize the templates by selecting the scenes, adding images, music, and text as needed. The animated videos can be saved locally or can also be uploaded to popular social media sites.
Part 3 Part Best Alternative to online tools for creating professional animated videos
****Wondershare Filmora Video Editor **
Online tools are simple programs for basic animated video creation. Moreover, these programs are internet-dependent and support limited file size processing. So, if you are looking for an alternative program for creating professional-looking animated videos with support to advanced features, Wondershare Fimora works as an excellent alternative. This Windows and Mac-based tool comes with an array of features that can let you create the desired 2D, 3D, and other animated videos in just a few simple steps.
For Win 7 or later (64-bit)
For macOS 10.12 or later
Key features of the software
● Create professional-looking 2D, 3D, and other animated videos using keyframes.
● Customize the animations using features like motion tracking, pan & zoom, ease-in, ease-out, and more.
● Add customized text & titles, lights & flares, masking, warp, distorting, and more.
● High-quality pre-set available for auto-correction, color wheels, scopes, and more.
● Customize audio using features like automatic audio sync, audio compression, noise reduction, audio transitions, and more.
● Windows and Mac support.
● Key Takeaways from This Episode →
● Animated videos are important to improve the conversion rates, increase the reach of the videos, engage the viewers, and more.
● Several 3D online animation maker is available that can help create decent animated videos.
● With restrictions and limitations of 3D animation websites, professional software like Wondershare Fimora works as the best alternative.
Gone are the days when creating animation requires expert skills, time, and a lot of money. Thanks to technological advancement several software and tools are available for creating animated videos in a hassle-free manner.
The following parts of the topic will help you to learn in detail about animation videos, their importance, the best software, and animation online website tools.
In this article
01 [What is an Animated Video and Its Importance?](#Part 1)
02 [Top 11 Online Animation Video Maker](#Part 2)
03 [Best Alternative To Online Tools For Creating Professional Animated Videos](#Part 3)
Part 1 What is an Animated Video and Its Importance?
Animated Video
In simplest terms, animation refers to a method where figures appear as moving images to make them look lively and interesting. Using the drawings, effects, designs, and illustrations, an animated video is created to catch your attention. Animations can be of several types like cartoon animations, 3D animations, motion graphics, CGI, 2D animations, and more.
Benefits of using Animated videos
Animated videos have dominated the entire digital space and there are several reasons for the same. Some of the major ones are enlisted below.
● Add life to your concepts
● Bring in the content to your interesting ideas
● Ability to represent abstract ideas visually
● Video production can be managed in a hassle-free manner
● Animated videos are more visually and psychologically appealing
● Helps in boosting the conversion rates
● Makes you stand out from the competition
● Helps in expanding the reach and getting the attention and engagement
● Improves SEO
Part 2 Top 11 online animation video maker
If you are in search of a simple yet effective solution to create animations, 3D animation maker online tools work as a great choice. The majority of these programs are free and simple to use and support all basic animation requirements. Below listed are the top 11 online 3D animation makers that can be used for creating impressive animations.
01PowToon
This is a widely used online tool that supports creating videos in multiple formats including animated ones. The tool majorly supports features related to cartoon animation and depending on your requirements you can choose from different licenses and plans. Some of the key features of the tool include presentation mode, animation mode, readymade templates, integration with different tools, and others.
02Moovly
This is one of the top online animation maker 3D tool for creating interesting and eye-catchy animations. The tool is completely cloud-based and thus there is no need for any software download or installation. Different types of animations like doodles, cartoons, and others can be created easily using the program. Huge stock of videos, sound, music, motion graphics, photos, and others are available at the program to create a customized animation as required.
03Explee
This is a simple to use online tool that can help you create animated videos in a few simple steps. The program focuses on using a whiteboard which along with Explee’s Bringlife technology can create impressive animations. More than 6000 images are available at the tool for illustrating your concept and ideas. Some of the animation features supported by the tool include draw, pop, pin, fade, and others.
04Wideo
This is a simple yet versatile 3D online animation maker tool for animated video creation. Several pre-designed templates are available using which animated videos can be created quickly and easily. The free version of the tool allows creating animations for up to 30 seconds and for longer animations you would need to upgrade to a paid subscription. The tool also has a stock of free video library and the processed files can be exported as MP4 videos.
05Animaker
Creating cartoons and other animations can be done quickly and easily using this online tool that comes along with several pre-designed templates. The tool is simple to use and requires no specialized skill sets or technical know-how. Some of the interesting features for animation creation include character building, lip-syncing, facial expressions, smart moves, and more. You can customize the templates at the program and create the desired animation using the wide collection of images, videos, GIFs, and music files.
06Vyond
Professional-looking animated videos can be created using this cloud-based tool. You can either create an animation from scratch or use one of the templates at the site and then customize it as needed. The lip-sync feature of the tool allows you to import or an audio file or even add a voice recording. Animations for marketing, training, communications, HR and other purposes can be created using the tool. The tool comes with a 14-days free trial version after which you need to upgrade to a paid plan.
07Renderforest
This online tool comes with more than 500 templates in different categories that can be used along with multiple customization tools of the program to create the desired 2D as well as 3D animation. Simple interface and easy steps make the tool apt even for the ones who do not possess technical know-how. Several toolkits like the 3D video toolkit, whiteboard animation toolkit, and others are available at the site for you to learn the process. Customization options include adding music, adjusting scene order, adjusting VoiceOver, and more. The created video can be directly uploaded to YouTube or can be saved to the local system or project library.
08Animatron
Using this browser-based tool you can easily create animated videos for multiple purposes like presentation, explainer videos, banners, whiteboard animations, and more. You can choose from more than 200 animated templates available at the site and then customize them as required multiple functions. In addition to your videos and other media files, you can also add them from the free library available at Animatron. You can preview the created animation and then export it to your system or directly to popular social media platforms. Tutorials o guide you through the process of animated video creation are also present on the site.
09MotionDen
This is another widely used name when it comes to online video creation tools. This simple yet functional program will let you create animated videos of your choice using multiple templates available at the site. There is a collection of desktop as well as mobile-friendly templates. These template’s video, music, photos, text, and other elements can be customized using the program editor and then the processed video can be quickly downloaded to your local system.
10Toonator
Creating cartoons is simple and quick using this online tool that requires no software download or installation. Using the program, you can create an interesting cartoon as needed as well as edit the graphics. The tool can also work with your tablets that making it easy to edit the files using a pen or fingers. You can even check the designs of cartoons that have been created by other users.
11Biteable
To create animations for your social media sites, marketing, and other requirements, this is a versatile tool to use. You can use the readymade templates available at the site or can also create animation from a scratch. Customize the templates by selecting the scenes, adding images, music, and text as needed. The animated videos can be saved locally or can also be uploaded to popular social media sites.
Part 3 Part Best Alternative to online tools for creating professional animated videos
****Wondershare Filmora Video Editor **
Online tools are simple programs for basic animated video creation. Moreover, these programs are internet-dependent and support limited file size processing. So, if you are looking for an alternative program for creating professional-looking animated videos with support to advanced features, Wondershare Fimora works as an excellent alternative. This Windows and Mac-based tool comes with an array of features that can let you create the desired 2D, 3D, and other animated videos in just a few simple steps.
For Win 7 or later (64-bit)
For macOS 10.12 or later
Key features of the software
● Create professional-looking 2D, 3D, and other animated videos using keyframes.
● Customize the animations using features like motion tracking, pan & zoom, ease-in, ease-out, and more.
● Add customized text & titles, lights & flares, masking, warp, distorting, and more.
● High-quality pre-set available for auto-correction, color wheels, scopes, and more.
● Customize audio using features like automatic audio sync, audio compression, noise reduction, audio transitions, and more.
● Windows and Mac support.
● Key Takeaways from This Episode →
● Animated videos are important to improve the conversion rates, increase the reach of the videos, engage the viewers, and more.
● Several 3D online animation maker is available that can help create decent animated videos.
● With restrictions and limitations of 3D animation websites, professional software like Wondershare Fimora works as the best alternative.
Also read:
- New In 2024, Top 7 Animated GIF Text Makers
- New Make Creative Animation Videos for 2024
- New 2024 Approved How to Make a GIF in Photoshop
- 10 Trendy & Stylish Free Logo Animation Templates for 2024
- In 2024, 12 Animated Slideshow PowerPoint Templates
- Updated Top 15 Greatest Claymation Movies of All Time
- Popular Female & Male Disney Cartoon Characters To Empower You
- New 2024 Approved The Most Efficient Techniques to Make 3D Animation Character
- Updated Ultimate Guide to Animated Characters Drawings for 2024
- New The Best Free 12 GIF Meme Maker at a Glance for 2024
- In 2024, Adobe Animate CC Everything You Need to Know
- Make Creative Animation Videos
- Simple Shortcut to Convert Videos to Gifs on iPhone
- New 2024 Approved How to Make 3D Cartoon of Yourself
- How-To Guide Secret Shortcut to Adobe Animate Character Tutorial
- Updated Nurturing Mind, Heart, and Soul on the Top 5 Anime Streaming Sanctuaries for 2024
- Best Guide for Beginners on 2D Animation Making
- New 2024 Approved How to Make an Animation With 7 Steps
- Updated Guide on How to Create GIF in WhatsApp iPhone for 2024
- New Ways on How to Get Started in Stop Motion Claymation for 2024
- New In 2024, How I Animate Discord Profile Pictures
- Updated The 15 Best Apps to Turn Photos Into Cartoons and Sketches
- In 2024, All About Types of Motion Graphics
- In 2024, 5 Foolproof Amazing Anime Text to Speech Tips
- New In 2024, Top 10 Animated DP for WhatsApp
- 10 Realistic Cartoon Characters You Will Run Away From if You Met in R
- Updated What Wikipedia Wont Tell You Specifically About Character Rigging
- New Popular Female & Male Disney Cartoon Characters To Empower You for 2024
- Updated Adobe Animate Riggings PROPER Tutorial for You for 2024
- New Best 10 Anime Series of All Time | Watch Anime Online
- New In 2024, Top 10 Online Animated Logo Makers Everyone Should Know
- New Ways to Master to Find 10 Best Free Animated Text Generator for 2024
- 2024 Approved Top 10 Best Photo to Animation Converters That Give You an Advantage
- New 2024 Approved The Most Efficient Techniques for You to Make 3D Animation Character
- Animate Graphics in Canva for 2024
- Updated In 2024, How to Analyze an Editorial Cartoon
- Updated 2024 Approved Adobe Animate Riggings Tutorial for You
- In 2024, How I Animate Discord Profile Pictures (& You Can Too)
- Updated In 2024, Adobe Rigger Is AWESOME
- Updated Top 15 Male Anime Characters By Voting for 2024
- In 2024, Apps to Animate Still Pictures
- Updated In 2024, How to Create Your Own Avatar Free
- In 2024, How to Create Slideshow in LinkedIn
- Updated How to Find 3D Animation Studio Meeting All Your Inspiring Needs for 2024
- New Top 10 Websites to Download Anime Subtitles for Free
- How to turn off the screen lock on my Yuva 3
- In 2024, The Updated Method to Bypass Vivo Y56 5G FRP
- How To Change Country on App Store for iPhone 14 Pro Max With 7 Methods | Dr.fone
- How to Fix Corrupt video files of Xiaomi 13T using Video Repair Utility?
- In 2024, How to Unlock Nubia Red Magic 9 Pro+ Phone without Google Account?
- How To Exit DFU Mode on Apple iPhone SE? | Dr.fone
- 3 Solutions to Hard Reset Motorola Edge+ (2023) Phone Using PC | Dr.fone
- Full Guide How To Fix Connection Is Not Private on Motorola Moto G13 | Dr.fone
- How to Transfer Data from Oppo Find N3 Flip to Samsung Phone | Dr.fone
- In 2024, How to Change Your Poco C55 Location on life360 Without Anyone Knowing? | Dr.fone
- How to Remove an AirTag from Your Apple ID Account From Apple iPhone 7?
- In 2024, Top 4 SIM Location Trackers To Easily Find Your Lost Nubia Red Magic 9 Pro Device
- In 2024, Can You Unlock iPhone 6s After Forgetting the Passcode?
- Still Using Pattern Locks with Samsung Galaxy S24+? Tips, Tricks and Helpful Advice
- The way to recover deleted contacts on Honor Magic5 Ultimate without backup.
- In 2024, How to Cast Apple iPhone 15 to Chromecast? | Dr.fone
- Hard Reset Honor 90 GT in 3 Efficient Ways | Dr.fone
- In 2024, How to Reset a Vivo X100 Pro Phone that is Locked?
- In 2024, 3 Ways to Erase Apple iPhone XR When Its Locked Within Seconds | Dr.fone
- In 2024, 6 Ways To Transfer Contacts From OnePlus Nord N30 SE to iPhone | Dr.fone
- How to Send and Fake Live Location on Facebook Messenger Of your Samsung Galaxy F15 5G | Dr.fone
- A Step-by-Step Guide to Finding Your Apple ID From Your iPhone 12 Pro
- In 2024, Complete Review & Guide to Techeligible FRP Bypass and More For Samsung Galaxy F34 5G
- Updated Narakeet Review Convenient Text to Speech Voice Maker
- The way to recover deleted contacts on Meizu without backup.
- Solutions to restore deleted files from Tecno Pova 5
- Catch or Beat Sleeping Snorlax on Pokemon Go For Realme V30T | Dr.fone
- In 2024, Top 15 Augmented Reality Games Like Pokémon GO To Play On Honor Magic V2 | Dr.fone
- 6 Proven Ways to Unlock Vivo Y27s Phone When You Forget the Password
- In 2024, A Working Guide For Pachirisu Pokemon Go Map On Vivo X Fold 2 | Dr.fone
- How to Bypass Google FRP Lock from Vivo V29 Devices
- In 2024, Ways To Find Unlocking Codes For Motorola Moto G04 Phones
- 3 Ways to Unlock Apple iPhone 14 Pro without Passcode or Face ID
- How to Reset Apple iPhone 14 Pro Max to Factory Settings? | Dr.fone
- 2 Ways to Monitor Vivo V29 Activity | Dr.fone
- In 2024, How To Remove Passcode From iPhone 8? Complete Guide | Dr.fone
- List of Pokémon Go Joysticks On Poco X5 | Dr.fone
- 9 Solutions to Fix Process System Isnt Responding Error on Infinix Hot 30i | Dr.fone
- Title: 2024 Approved What Is the Best Collage Photo Grid Maker - Experts Choice
- Author: Elon
- Created at : 2024-06-30 12:27:47
- Updated at : 2024-07-01 12:27:47
- Link: https://animation-videos.techidaily.com/2024-approved-what-is-the-best-collage-photo-grid-maker-experts-choice/
- License: This work is licensed under CC BY-NC-SA 4.0.
