

2D Character Animation Everything You Should Know About It for 2024
2D Character Animation: Everything You Should Know About It
2D Character Animation: Everything You Should Know About It
An easy yet powerful editor
Numerous effects to choose from
Detailed tutorials provided by the official channel
2D character animation is one of the significant kinds of animation popularly used for creating animated movies, marketing videos, cartoons, advertisements, educational content, corporate presentations, video games, etc.
With the popularity of video content, more and more businesses tend to use animation for promotion, as they magnify conversion rates by 20%. Some companies hire 2D character animation services; others try to make them online with software help.
In this article
01 [What is 2D Character Animation and What Does 2D Animation Do?](#Part 1)
02 [2D Character Animation Tips and Tricks](#Part 2)
03 [An Ultimate Guide to Create 2D Character Animation Online](#Part 3)
04 [5 Great 2D Character Animation Templates](#Part 4)
Part 1 What is 2D Character Animation and What Does 2D Animation Do?
2D animation is identified by having its characters and objects created in a 2D space. It means that they only have height and width to specify.
However, 2D animation is considered a traditional style, known from the 1800s. Initially, it was designed by merging the frames in which one drawing was followed by another and making them different; every second consists of 24 frames.
We all remember the classic Disney animations. Snow White and the Seven Dwarfs, The Little Mermaid, Bambi, etc. They are some of the highly famous 2D animation styles.
With the advancement of computer technologies, this process also got digitized through various 2D character animation software.
In this guide, we’ll talk about everything relatable to 2D character animation, and let’s proceed with the expert tips and tricks to create inspirational style within animation character 2D.
Part 2 2D Character Animation Tips and Tricks
01Look for a real-time reference
Using a real-world reference for 2D character animation can help you effectively animate faces. For example, when studios collaborate with voice-over artists, they often record their facial movements. It further helps 2D animators to ensure their expressions get captured convincingly.
If it seems impossible, you can consider using your face, so you have something to refer back to. You could also use a mirror and utter the words your character will speak. It will display the correct animated expressions.
02Observe real life
You need to use observation a lot more. One of the primary aspects of 2D character animation is bringing life to animate objections. Therefore, you must carefully consider how emotion can get portrayed and select each movement accordingly.
Take time watching how people in real-life environments talk and interact with each other, how they express emotions, how they move, etc. Please don’t spend much time doing this, as it is valuable to research.
03Simplicity is the key
2D character animation is never complex compared with 3D. Think carefully before creating a scene too complicated. You must not include too much information, which is hard to digest, and you may even find yourself compromising the scene’s realism. Try not to heavy the stage with too many pose changes or other elements, and keep it genuine.
04Draw animation again and again
Drawing animation consumes a lot of time. You can’t complete it within one day, so you better know deep down that one task only can be done after you have revamped it various times. For 2D character animation, you may need to draw objects on paper several times.
You can’t master the skill of animation character 2D quickly. Luckily, all pains will be relieved someday.
05Feedback is important
Feedback is an essential element of artistic development. It’s wise to actively seek out feedback from familiar figures who can help you enhance. Naturally, we may see work we have invested a great deal of time and effort indifferently to someone not so involved in the creative process. Feedback can equate to a valuable learning opportunity that will assist you produce the results hit the spot much more appropriately.
Part 3 An Ultimate Guide to Create 2D Character Animation Online
Let’s now look at making an illustrated 2D character animation move on a screen.
While there are nearly numerous options for 2D character animation tools and software, this tutorial will animate a character in Adobe After Effects.
Steps to create 2D character animation After Effects
01Step 1: Download and Install Duik
You need to install the Duik animation plugin for Adobe After Effects to simplify the whole process. You can animate and rig characters’ entire limbs with Duik using just the placement of their feet and hands.
While this isn’t an essential step, it can be valuable for beginners, as you’ll see in this tutorial. Luckily, Duik is available for free from Rainbox Laboratory.
02Step 2: Design Your Character
You need a moving character before you’re able to start animating. You can create this character in Adobe Illustrator and import it into After Effects.
Try creating a straightforward character with an aim on the character’s limbs.
In the example mentioned below, you can see that the body is a very rudimentary shape—a circle—with long legs that make it simple to consider the animation process.

Check the character’s joints. Making a round joint between the lower and upper parts of the legs, for instance, will help the character move more smoothly.

03Step 3: Make and Import Your Character Artwork
Now, you’ll need to make a few final adjustments before moving your character artwork. Break your character out into layers firstly. Every section of the character that will move independently needs a separate layer.
So, layers include his circular body, face, and the leg’s segments (i.e., lower leg, upper leg, and foot).

To import your character artwork, go to File, click the Import tab, and choose your character file. Ensure that you need to import it as a composition to ensure it includes the layers you just created.
04Step 4: Establish Initial Character Rigging
Now, the 2D character animation is almost over by the initial rigging.
Firstly, lower the opacity of all your layers to above 50% to see the critical joints within the character.
Next, you must ensure that the joints hinge in the ideal direction. It’s simple to do with the anchor point tool. For each character’s layer, place the anchor point at the center of gravity for each layer of the 2D character animation.
The anchor point would probably go between the eyes for the layer of the face (i.e., the nose, eyes, and mouth). For each legs’ section, hold the anchor point where the leg will hinge (e.g., the anchor point would be at the highest point for the leg’s upper portion, where it meets the body).

Then, use the parent tool to join the limbs’ sections. For instance, the parent of the foot would be the lower leg, and the upper portion is the parent of the lower leg.
It makes sure that the leg moves together as one unit with multiple hinge points.
Finally, use the Duik toolbar to create character controllers. Controllers control the rotation and position of critical elements within your character. For the ankles of the 2D character animation, you would select the controller that encompasses both the rotation and position.
05Step 5: Create Your Rig
Use the Duik toolbar to create a rig. Select each layer from the extremities inward from each limb, lasting with your controllers.
You would select the ankle for a leg, followed by the upper portion, the lower leg, and conclusively, the controller at the ankle. Then, select auto-rig within the Rigging area of the Duik toolbar.
The entire leg will move when you move that ankle controller. If your character contains them, repeat the process for the other leg, along with other limbs.
Before proceeding, test the limbs to make sure they hinge and move correctly. You need to adjust the opacity of the character back to 100% once you are satisfied with the movements.

06Step 6: Start Animating Your Character
You can begin animating after completing a rig. First, create keyframes—the ending and beginning points of the character’s movement. The character’s legs are at their most magnified are thus the endpoints for a walk cycle. Make sure that the beginning and ending of keyframes are identical to get an ideal loop.
Start adding in-between frames from there, like when one leg crosses over the other in the middle of a walking stride.
Moreover, you can add ‘easing” to the animation via 2D character animation After Effects’ Easy Ease tab, located under the Animation button, and Keyframe Assistant.
It will smoothen the transition between the keyframes. You will have a primary walking sequence at this instance.

Now, you can make further refinements to add detail and secondary movement, like a bobbing motion of the head. You can also modify elements like the keyframe velocity, further smoothing out the animation.
As you practice, you’ll get a better feel for your animation preferences and develop more advanced realistic 2D animation character design capabilities.
Part 4 5 Great 2D Character Animation Templates
1 – FrameStory Character Animation Toolkit
2 – Explainer Video Character Animation ToolKit
3 – 2D Character Animation After Effects Template
4 – Character Animation ToolKit
5 – Rigged Character Animation Mockup Template
Given above is a list of the best 2D character animation templates worth considering. Yet, if you are tired of using After Effects Templates, why not select Wondershare Filmora Template Mode?
It is a brand-new mode recently launched by Filmora to ramp up your story. It is a simplistic way to use compared with After Effects.
****Wondershare Filmora Video Editor Template Mode**
For Win 7 or later (64-bit)
For macOS 10.12 or later
Filmora Template Mode is a bold breakthrough that helps you create incredible videos in a minute. Forget about dragging n dropping the video clips into a timeline; Filmora template Mode provides you a new way of generating videos automatically by using various stylish video templates.
Steps to create a stunning animated video in 3 levels
01Step 1: Choose a template
Pick up a video template that best suits your needs.

02Step 2: Import Media
Import at least three video clips or images and let AI assist you in ramping the production process without hassle.

03Step 3: Export Project
Export media among multiple social media platforms.

● Key Takeaways from This Episode →
● Understanding 2D character animation tips and tricks
● A step by step guide to creating 2D character animation online
● Five best 2D character animation templates
● The best alternative of using the Template mode directly within the Wondershare Filmora
2D character animation is one of the significant kinds of animation popularly used for creating animated movies, marketing videos, cartoons, advertisements, educational content, corporate presentations, video games, etc.
With the popularity of video content, more and more businesses tend to use animation for promotion, as they magnify conversion rates by 20%. Some companies hire 2D character animation services; others try to make them online with software help.
In this article
01 [What is 2D Character Animation and What Does 2D Animation Do?](#Part 1)
02 [2D Character Animation Tips and Tricks](#Part 2)
03 [An Ultimate Guide to Create 2D Character Animation Online](#Part 3)
04 [5 Great 2D Character Animation Templates](#Part 4)
Part 1 What is 2D Character Animation and What Does 2D Animation Do?
2D animation is identified by having its characters and objects created in a 2D space. It means that they only have height and width to specify.
However, 2D animation is considered a traditional style, known from the 1800s. Initially, it was designed by merging the frames in which one drawing was followed by another and making them different; every second consists of 24 frames.
We all remember the classic Disney animations. Snow White and the Seven Dwarfs, The Little Mermaid, Bambi, etc. They are some of the highly famous 2D animation styles.
With the advancement of computer technologies, this process also got digitized through various 2D character animation software.
In this guide, we’ll talk about everything relatable to 2D character animation, and let’s proceed with the expert tips and tricks to create inspirational style within animation character 2D.
Part 2 2D Character Animation Tips and Tricks
01Look for a real-time reference
Using a real-world reference for 2D character animation can help you effectively animate faces. For example, when studios collaborate with voice-over artists, they often record their facial movements. It further helps 2D animators to ensure their expressions get captured convincingly.
If it seems impossible, you can consider using your face, so you have something to refer back to. You could also use a mirror and utter the words your character will speak. It will display the correct animated expressions.
02Observe real life
You need to use observation a lot more. One of the primary aspects of 2D character animation is bringing life to animate objections. Therefore, you must carefully consider how emotion can get portrayed and select each movement accordingly.
Take time watching how people in real-life environments talk and interact with each other, how they express emotions, how they move, etc. Please don’t spend much time doing this, as it is valuable to research.
03Simplicity is the key
2D character animation is never complex compared with 3D. Think carefully before creating a scene too complicated. You must not include too much information, which is hard to digest, and you may even find yourself compromising the scene’s realism. Try not to heavy the stage with too many pose changes or other elements, and keep it genuine.
04Draw animation again and again
Drawing animation consumes a lot of time. You can’t complete it within one day, so you better know deep down that one task only can be done after you have revamped it various times. For 2D character animation, you may need to draw objects on paper several times.
You can’t master the skill of animation character 2D quickly. Luckily, all pains will be relieved someday.
05Feedback is important
Feedback is an essential element of artistic development. It’s wise to actively seek out feedback from familiar figures who can help you enhance. Naturally, we may see work we have invested a great deal of time and effort indifferently to someone not so involved in the creative process. Feedback can equate to a valuable learning opportunity that will assist you produce the results hit the spot much more appropriately.
Part 3 An Ultimate Guide to Create 2D Character Animation Online
Let’s now look at making an illustrated 2D character animation move on a screen.
While there are nearly numerous options for 2D character animation tools and software, this tutorial will animate a character in Adobe After Effects.
Steps to create 2D character animation After Effects
01Step 1: Download and Install Duik
You need to install the Duik animation plugin for Adobe After Effects to simplify the whole process. You can animate and rig characters’ entire limbs with Duik using just the placement of their feet and hands.
While this isn’t an essential step, it can be valuable for beginners, as you’ll see in this tutorial. Luckily, Duik is available for free from Rainbox Laboratory.
02Step 2: Design Your Character
You need a moving character before you’re able to start animating. You can create this character in Adobe Illustrator and import it into After Effects.
Try creating a straightforward character with an aim on the character’s limbs.
In the example mentioned below, you can see that the body is a very rudimentary shape—a circle—with long legs that make it simple to consider the animation process.
Check the character’s joints. Making a round joint between the lower and upper parts of the legs, for instance, will help the character move more smoothly.
03Step 3: Make and Import Your Character Artwork
Now, you’ll need to make a few final adjustments before moving your character artwork. Break your character out into layers firstly. Every section of the character that will move independently needs a separate layer.
So, layers include his circular body, face, and the leg’s segments (i.e., lower leg, upper leg, and foot).
To import your character artwork, go to File, click the Import tab, and choose your character file. Ensure that you need to import it as a composition to ensure it includes the layers you just created.
04Step 4: Establish Initial Character Rigging
Now, the 2D character animation is almost over by the initial rigging.
Firstly, lower the opacity of all your layers to above 50% to see the critical joints within the character.
Next, you must ensure that the joints hinge in the ideal direction. It’s simple to do with the anchor point tool. For each character’s layer, place the anchor point at the center of gravity for each layer of the 2D character animation.
The anchor point would probably go between the eyes for the layer of the face (i.e., the nose, eyes, and mouth). For each legs’ section, hold the anchor point where the leg will hinge (e.g., the anchor point would be at the highest point for the leg’s upper portion, where it meets the body).
Then, use the parent tool to join the limbs’ sections. For instance, the parent of the foot would be the lower leg, and the upper portion is the parent of the lower leg.
It makes sure that the leg moves together as one unit with multiple hinge points.
Finally, use the Duik toolbar to create character controllers. Controllers control the rotation and position of critical elements within your character. For the ankles of the 2D character animation, you would select the controller that encompasses both the rotation and position.
05Step 5: Create Your Rig
Use the Duik toolbar to create a rig. Select each layer from the extremities inward from each limb, lasting with your controllers.
You would select the ankle for a leg, followed by the upper portion, the lower leg, and conclusively, the controller at the ankle. Then, select auto-rig within the Rigging area of the Duik toolbar.
The entire leg will move when you move that ankle controller. If your character contains them, repeat the process for the other leg, along with other limbs.
Before proceeding, test the limbs to make sure they hinge and move correctly. You need to adjust the opacity of the character back to 100% once you are satisfied with the movements.
06Step 6: Start Animating Your Character
You can begin animating after completing a rig. First, create keyframes—the ending and beginning points of the character’s movement. The character’s legs are at their most magnified are thus the endpoints for a walk cycle. Make sure that the beginning and ending of keyframes are identical to get an ideal loop.
Start adding in-between frames from there, like when one leg crosses over the other in the middle of a walking stride.
Moreover, you can add ‘easing” to the animation via 2D character animation After Effects’ Easy Ease tab, located under the Animation button, and Keyframe Assistant.
It will smoothen the transition between the keyframes. You will have a primary walking sequence at this instance.
Now, you can make further refinements to add detail and secondary movement, like a bobbing motion of the head. You can also modify elements like the keyframe velocity, further smoothing out the animation.
As you practice, you’ll get a better feel for your animation preferences and develop more advanced realistic 2D animation character design capabilities.
Part 4 5 Great 2D Character Animation Templates
1 – FrameStory Character Animation Toolkit
2 – Explainer Video Character Animation ToolKit
3 – 2D Character Animation After Effects Template
4 – Character Animation ToolKit
5 – Rigged Character Animation Mockup Template
Given above is a list of the best 2D character animation templates worth considering. Yet, if you are tired of using After Effects Templates, why not select Wondershare Filmora Template Mode?
It is a brand-new mode recently launched by Filmora to ramp up your story. It is a simplistic way to use compared with After Effects.
****Wondershare Filmora Video Editor Template Mode**
For Win 7 or later (64-bit)
For macOS 10.12 or later
Filmora Template Mode is a bold breakthrough that helps you create incredible videos in a minute. Forget about dragging n dropping the video clips into a timeline; Filmora template Mode provides you a new way of generating videos automatically by using various stylish video templates.
Steps to create a stunning animated video in 3 levels
01Step 1: Choose a template
Pick up a video template that best suits your needs.
02Step 2: Import Media
Import at least three video clips or images and let AI assist you in ramping the production process without hassle.
03Step 3: Export Project
Export media among multiple social media platforms.
● Key Takeaways from This Episode →
● Understanding 2D character animation tips and tricks
● A step by step guide to creating 2D character animation online
● Five best 2D character animation templates
● The best alternative of using the Template mode directly within the Wondershare Filmora
How to Make an Animated Travel Map Video?
How to Make an Animated Travel Map Video?

Benjamin Arango
Mar 27, 2024• Proven solutions
Animated travel map videos make it easy for the viewers to follow the routes from the source to destination locations right on the single screen. While the static maps would only allow the audience to see the markers from where the journey would start and is expected to end, the animated ones show the real-time movements and therefore look more interactive when viewed.
That said, here you will learn how to create an attractive and engaging animated travel map video using one of the easiest post-production applications, Wondershare Filmora, which is widely appreciated by amateurs and professionals throughout the globe. In another section, you will also learn about an alternative program that might be of some help in case you are more into online designing.
- Method 1: Make Animated Travel Map Videos with Location Video Maker - [Video Tutorial]
- Method 2: Make Interactive Animated Travel Map with Pictramap
- Method 3: Create Animated Travel Map Using Multidev
Method 1 Make Animated Travel Map Videos with Location Video Maker
The entire process of creating an animated travel map video in Wondershare’s Filmora is categorized into two parts, wherein the first part you will collect all the ingredients that are needed to get started, and in the second part you will actually make an animated map using the tools and features present in Filmora.
Watch a video tutorial to see how to make an animated map for a video:
For Win 7 or later (64-bit)
 Secure Download
For macOS 10.14 or later
Secure Download


Part 1: Prepare the Travel Map Materials
Following are the ingredients and the methods to collect them for animated travel map preparation:
Step 1: Get the Map
The first thing that you would need to prepare an animated map is an image of a realistic map. Thanks to Google and Microsoft, these things are now pretty easy to arrange. The process is given below:
- Launch your preferred web browser
- Type google.com in the address bar or the search box and hit Enter
- Scroll to zoom out so you can see the entire world map on one screen

- Type Snipping Tool in the Cortana search box present on the left side of the Taskbar
- Launch Snipping Tool, and use it to capture the screenshot of the map
Note: Snipping Tool is a built-in app in Windows 10 and is available for free. If you are using any other operating system, or have a different program to capture the screenshots, feel free to use it according to your convenience.
- Save the screenshot you captured as a JPG file on your PC
Step 2: Mark Out the Map Path
The next step in the process of preparing an animated travel map is to mark your route on it. To do so, you can use any of your preferred photo editing tools. However, to keep this illustration simple, Microsoft Paint is used here, and the method is given below:
- Right-click the screenshot you just captured
- Go to Open with on the context menu, and then click Paint from the submenu that appears
- Pick your preferred color from the pallet of the Paint interface. It is advisable to use an eye-catchy shade such as Red
- Use the Sphere shape tool to draw a circle over the source and destination locations on the map
- Use the Line tool to draw a line from the source point to the destination. Try giving the line a few turns to make it look realistic
- Go to File > Save As, and save the marked image with a different name
Note: Once this is done, you should have two image files of the map, i.e., one without the marks and one with it
Step 3: Download Some Travel Icons
Another important ingredient in an effective travel map animation is touring icons such as location marker image, a traveling medium symbol like a helicopter, airplane, car/bike (for short distances), etc. A couple of websites that offer royalty-free stock photos at absolutely no cost are listed below:
Note: Although the websites given above allow you to download and use their stock images and icons for free, you may need to give credits to the designers/creators of the symbols while using their objects. Therefore, you are suggested to check the Terms & Conditions and norms of usage of the elements before downloading and adding them to your projects.
Part 2: Make Animated Travel Map Videos with Filmora
After you have gathered all the necessary ingredients that are required to create a travel map animation, it is now time to get to work. The following instructions would guide you through the step-by-step process of preparing a decent and realistic animated travel map in Wondershare Filmora :
For Win 7 or later (64-bit)
Secure Download
For macOS 10.14 or later
Secure Download
Step 1: Import Ingredients to Filmora and Add Them to the Timeline
Launch the video editor on your computer, click anywhere inside the Media window at the upper-left area, and import all the images and icons that you collected earlier to program. Next, drag both the images of the map, i.e., with and without the marks to the Timeline, and ensure that they are of the same duration and are placed on the same track.

Note: Be sure to put the map without the marks first, and then the one with the marks. Also note that the images have the playback duration of 5 seconds in the Timeline by default, and this tenure can be reduced or increased by dragging the side handle of the media to the left or right respectively.
Step 2: Add Transition for Illusion of Route Appearance
Go to Transition from the standard toolbar at the top, locate the Erase Slide transition effect from the available presets, and place it in between the two image files that you earlier added to the Timeline. Next, click and drag either of the side handles of the transition to the end of the media clip. Notice how the other side of the effect is expanded in equal proportion.

Step 3: Preview and Export
Press the Spacebar on the keyboard to preview the video and see if the route appears as if it is being drawn on the map. Once the animation looks acceptable, click EXPORT from the top-center, go to the Local tab on the Export window, select MP4 from the formats list in the left, and click EXPORT from the bottom-right corner to export the current animation to MP4.
Step 4: Customize the Travel Map Media
Either start a new project and import the video of the map you exported in the previous step to the app and then to the Timeline, or remove the existing media from the Timeline in the same project, and add the exported video to it for convenience.

For Win 7 or later (64-bit)
Secure Download
For macOS 10.14 or later
Secure Download
Next, position the Skimmer (Playhead) a couple of frames before the one the route line appears and starts stretching from, and click the Split icon from the editing toolbar above the Timeline itself. Repeat this process for the other side of the media, i.e., position the Skimmer a couple of frames after the route line reaches the destination location, and click the Split icon again. Then remove the separated segments from both the sides by selecting them and pressing Delete on the keyboard, leaving only the portion where the animation is visible.

Optionally, right-click the media that is left behind in the Timeline, and go to Speed and Duration from the context menu. On the Custom Speed box, drag the Speed slider to the left to decrease the playback speed resulting in the increased duration of the media. Alternatively, you can manually enter a value in the Speed box to get precise tenure. Click OK when you are done.

Step 5: Add Animations to Travel Map
Right-click the media in the Timeline, and go to Add Animation from the context menu. Make sure that the Skimmer is on the first frame, and add several keyframes as explained below:
- Click Add to add the first keyframe

- Move a couple of frames further, and click Add one more time. Now, while you are on this second keyframe, use the Scale slider to zoom in to the map so the source location remains within focus.

- Next, move the Playhead further and add another keyframe a couple of frames before the route line hits the edge of the window.
- After this, move the Playhead again and position it where the route line reaches its destination location. Add another keyframe here as well, and move the map in the Preview window so the focus is now on the destination.
- Move the Playhead a few frames further, add another keyframe, and use the Scale slider to zoom a bit more into the map to make the entire animation look realistic. Click OK to save the changes.
Step 6: Add Icons and Titles, and Export the Project
Drag the image of the traveling medium to the Timeline, and place it on the frame the route line starts from. Make sure to place the image on the track above the map, and stretch it to the end so it remains visible throughout the animation. Next, use the method explained above to add keyframes to move the medium along with the route line from the source to the destination. Optionally, add the image of the location marker at the destination point, go to Transition, and add your preferred transition effect, preferably Dissolve, to the marker track in the Timeline so it looks as if it has appeared as the medium arrived the destination.
For Win 7 or later (64-bit)
Secure Download
For macOS 10.14 or later
Secure Download
Get back to the first frame in the Timeline, go to Titles on the standard toolbar, and add a title preset somewhere near the source location. Resize the text, change the format as needed, and add your preferred caption to it such as the start time, name, etc. Reduce the duration of the track so the title appears for a few frames, preferably before the map animation starts. Click OK when done. Repeat this process for the destination point as well.
Once everything is complete, click the Play button in the Preview window to review your work. If the video looks acceptable, click EXPORT from the top-center of the interface, and use the method explained earlier to export the animated travel map in your preferred format.
![]()
Method 2 How to Make Interactive Animated Travel Map with Pictramap
If you don’t want to install a dedicated animation software on your computer due to limited hardware resources or some other reason, there is an online solution called Pictramap to create a travel map animation using a web browser. The web app offers a lucrative interface that could be easily understood and worked with to produce an animated map for free.
The process to create an animated travel map with Pictramap is given below:
Step 1: Create a Project
Launch your favorite web browser, go to https://www.pictramap.com/ , click Create yours now, it’s free, and sign up to Pictramap using your preferred method. When you are on the Dashboard, enter a name in the field available under the My Projects section, and click Create to create a new project (the animated map).

Step 2: Define the Locations and Method of Commute
On the map, right-click the location you want to start your journey from, enter the name of the location or any other significant title, and click Add. Click the location marker, click the Travel Mode icon, and select your preferred mode of traveling. Repeat this process to mark the destination location as well.

Step 3: Preview the Animation
Click the View Animation button from the upper-right corner of the page to see the animated travel map.

Downsides of Using Pictramap to Create Animated Travel Map Video
Although Pictramap allows you to create a travel map animation with ease and extremely quickly, at the time of this writing, it offers no way of downloading the animation to your PC, and therefore it couldn’t be used in your projects.
If you are using Wondershare Filmora, you can use its built-in screen recording feature to record the animation that Pictramap plays, and then save the captured footage as MP4 or any other format on your computer. This video can then be imported to your projects for further uses.
![]()
A cross-platform for making videos anywhere for all creators

Why your video editing isn’t good enough? How about some creative inspo?
- 100 Million+ Users
- 150+ Countries and Regions
- 4 Million+ Social Media Followers
- 5 Million+ Stock Media for Use
* Secure Download

Method 3 How To Make Animated Travel Map Using Multidev
Multi.dev is still a new web-based application to build awesome animated maps, but it’s good! The application helps you create presentations about all your recent and previous trips. And the interface is also hassle-free.
So, follow this step-by-step guide to making animated maps with Multi.dev.
Step 1: Open Multi.dev
Visit Multi.dev from your internet browser.

Once the tool gets open, you will see a demo video. This example clip will have animated maps of different locations. So it is up to you whether to use the same example and edit the places you have been to or are planning to visit. Or, simply create a new animated map from scratch.
Step 2: Choose Your First Location
Take your mouse cursor on the left side of the application and type the first location in the search bar. As soon as you do it, you will see that the “travel arrow” will automatically begin from there. Likewise, type and select the next location through the search bar.
Once you type the location, you will see 8 travel modes, including airplane, bus, and train. You can select the same mode for all sites or a different mode for another place. Totally up to you!

Step 3: Select Map Themes
All your chosen places will be highlighted in the software’s minimalistic map.

Step 4: Download Map on Your Computer
If you’re happy with the animated map, click the “Create Video” button to save the animated map on your computer in a few minutes.


Contrarily, you can also share the animation by choosing the “Share Animation” option.
Conclusion
An animated travel map plays an important role to add a realistic touring effect to your motion picture projects. While you can use a web app like Pictramap to create such an animation online easily and for free, the limitations it comes along with might keep you from choosing this method.
Instead, you may want to get more inclined toward a dedicated post-production software like Wondershare Filmora that gives you full control over the process, and the freedom to choose your preferred format to export the animation to for independent usage.
For Win 7 or later (64-bit)
Secure Download
For macOS 10.14 or later
Secure Download
Benjamin Arango
Benjamin Arango is a writer and a lover of all things video.
Follow @Benjamin Arango
Benjamin Arango
Mar 27, 2024• Proven solutions
Animated travel map videos make it easy for the viewers to follow the routes from the source to destination locations right on the single screen. While the static maps would only allow the audience to see the markers from where the journey would start and is expected to end, the animated ones show the real-time movements and therefore look more interactive when viewed.
That said, here you will learn how to create an attractive and engaging animated travel map video using one of the easiest post-production applications, Wondershare Filmora, which is widely appreciated by amateurs and professionals throughout the globe. In another section, you will also learn about an alternative program that might be of some help in case you are more into online designing.
- Method 1: Make Animated Travel Map Videos with Location Video Maker - [Video Tutorial]
- Method 2: Make Interactive Animated Travel Map with Pictramap
- Method 3: Create Animated Travel Map Using Multidev
Method 1 Make Animated Travel Map Videos with Location Video Maker
The entire process of creating an animated travel map video in Wondershare’s Filmora is categorized into two parts, wherein the first part you will collect all the ingredients that are needed to get started, and in the second part you will actually make an animated map using the tools and features present in Filmora.
Watch a video tutorial to see how to make an animated map for a video:
For Win 7 or later (64-bit)
Secure Download
For macOS 10.14 or later
Secure Download
Part 1: Prepare the Travel Map Materials
Following are the ingredients and the methods to collect them for animated travel map preparation:
Step 1: Get the Map
The first thing that you would need to prepare an animated map is an image of a realistic map. Thanks to Google and Microsoft, these things are now pretty easy to arrange. The process is given below:
- Launch your preferred web browser
- Type google.com in the address bar or the search box and hit Enter
- Scroll to zoom out so you can see the entire world map on one screen
- Type Snipping Tool in the Cortana search box present on the left side of the Taskbar
- Launch Snipping Tool, and use it to capture the screenshot of the map
Note: Snipping Tool is a built-in app in Windows 10 and is available for free. If you are using any other operating system, or have a different program to capture the screenshots, feel free to use it according to your convenience.
- Save the screenshot you captured as a JPG file on your PC
Step 2: Mark Out the Map Path
The next step in the process of preparing an animated travel map is to mark your route on it. To do so, you can use any of your preferred photo editing tools. However, to keep this illustration simple, Microsoft Paint is used here, and the method is given below:
- Right-click the screenshot you just captured
- Go to Open with on the context menu, and then click Paint from the submenu that appears
- Pick your preferred color from the pallet of the Paint interface. It is advisable to use an eye-catchy shade such as Red
- Use the Sphere shape tool to draw a circle over the source and destination locations on the map
- Use the Line tool to draw a line from the source point to the destination. Try giving the line a few turns to make it look realistic
- Go to File > Save As, and save the marked image with a different name
Note: Once this is done, you should have two image files of the map, i.e., one without the marks and one with it
Step 3: Download Some Travel Icons
Another important ingredient in an effective travel map animation is touring icons such as location marker image, a traveling medium symbol like a helicopter, airplane, car/bike (for short distances), etc. A couple of websites that offer royalty-free stock photos at absolutely no cost are listed below:
Note: Although the websites given above allow you to download and use their stock images and icons for free, you may need to give credits to the designers/creators of the symbols while using their objects. Therefore, you are suggested to check the Terms & Conditions and norms of usage of the elements before downloading and adding them to your projects.
Part 2: Make Animated Travel Map Videos with Filmora
After you have gathered all the necessary ingredients that are required to create a travel map animation, it is now time to get to work. The following instructions would guide you through the step-by-step process of preparing a decent and realistic animated travel map in Wondershare Filmora :
For Win 7 or later (64-bit)
Secure Download
For macOS 10.14 or later
Secure Download
Step 1: Import Ingredients to Filmora and Add Them to the Timeline
Launch the video editor on your computer, click anywhere inside the Media window at the upper-left area, and import all the images and icons that you collected earlier to program. Next, drag both the images of the map, i.e., with and without the marks to the Timeline, and ensure that they are of the same duration and are placed on the same track.
Note: Be sure to put the map without the marks first, and then the one with the marks. Also note that the images have the playback duration of 5 seconds in the Timeline by default, and this tenure can be reduced or increased by dragging the side handle of the media to the left or right respectively.
Step 2: Add Transition for Illusion of Route Appearance
Go to Transition from the standard toolbar at the top, locate the Erase Slide transition effect from the available presets, and place it in between the two image files that you earlier added to the Timeline. Next, click and drag either of the side handles of the transition to the end of the media clip. Notice how the other side of the effect is expanded in equal proportion.
Step 3: Preview and Export
Press the Spacebar on the keyboard to preview the video and see if the route appears as if it is being drawn on the map. Once the animation looks acceptable, click EXPORT from the top-center, go to the Local tab on the Export window, select MP4 from the formats list in the left, and click EXPORT from the bottom-right corner to export the current animation to MP4.
Step 4: Customize the Travel Map Media
Either start a new project and import the video of the map you exported in the previous step to the app and then to the Timeline, or remove the existing media from the Timeline in the same project, and add the exported video to it for convenience.
For Win 7 or later (64-bit)
Secure Download
For macOS 10.14 or later
Secure Download
Next, position the Skimmer (Playhead) a couple of frames before the one the route line appears and starts stretching from, and click the Split icon from the editing toolbar above the Timeline itself. Repeat this process for the other side of the media, i.e., position the Skimmer a couple of frames after the route line reaches the destination location, and click the Split icon again. Then remove the separated segments from both the sides by selecting them and pressing Delete on the keyboard, leaving only the portion where the animation is visible.
Optionally, right-click the media that is left behind in the Timeline, and go to Speed and Duration from the context menu. On the Custom Speed box, drag the Speed slider to the left to decrease the playback speed resulting in the increased duration of the media. Alternatively, you can manually enter a value in the Speed box to get precise tenure. Click OK when you are done.
Step 5: Add Animations to Travel Map
Right-click the media in the Timeline, and go to Add Animation from the context menu. Make sure that the Skimmer is on the first frame, and add several keyframes as explained below:
- Click Add to add the first keyframe
- Move a couple of frames further, and click Add one more time. Now, while you are on this second keyframe, use the Scale slider to zoom in to the map so the source location remains within focus.
- Next, move the Playhead further and add another keyframe a couple of frames before the route line hits the edge of the window.
- After this, move the Playhead again and position it where the route line reaches its destination location. Add another keyframe here as well, and move the map in the Preview window so the focus is now on the destination.
- Move the Playhead a few frames further, add another keyframe, and use the Scale slider to zoom a bit more into the map to make the entire animation look realistic. Click OK to save the changes.
Step 6: Add Icons and Titles, and Export the Project
Drag the image of the traveling medium to the Timeline, and place it on the frame the route line starts from. Make sure to place the image on the track above the map, and stretch it to the end so it remains visible throughout the animation. Next, use the method explained above to add keyframes to move the medium along with the route line from the source to the destination. Optionally, add the image of the location marker at the destination point, go to Transition, and add your preferred transition effect, preferably Dissolve, to the marker track in the Timeline so it looks as if it has appeared as the medium arrived the destination.
For Win 7 or later (64-bit)
Secure Download
For macOS 10.14 or later
Secure Download
Get back to the first frame in the Timeline, go to Titles on the standard toolbar, and add a title preset somewhere near the source location. Resize the text, change the format as needed, and add your preferred caption to it such as the start time, name, etc. Reduce the duration of the track so the title appears for a few frames, preferably before the map animation starts. Click OK when done. Repeat this process for the destination point as well.
Once everything is complete, click the Play button in the Preview window to review your work. If the video looks acceptable, click EXPORT from the top-center of the interface, and use the method explained earlier to export the animated travel map in your preferred format.
![]()
Method 2 How to Make Interactive Animated Travel Map with Pictramap
If you don’t want to install a dedicated animation software on your computer due to limited hardware resources or some other reason, there is an online solution called Pictramap to create a travel map animation using a web browser. The web app offers a lucrative interface that could be easily understood and worked with to produce an animated map for free.
The process to create an animated travel map with Pictramap is given below:
Step 1: Create a Project
Launch your favorite web browser, go to https://www.pictramap.com/ , click Create yours now, it’s free, and sign up to Pictramap using your preferred method. When you are on the Dashboard, enter a name in the field available under the My Projects section, and click Create to create a new project (the animated map).
Step 2: Define the Locations and Method of Commute
On the map, right-click the location you want to start your journey from, enter the name of the location or any other significant title, and click Add. Click the location marker, click the Travel Mode icon, and select your preferred mode of traveling. Repeat this process to mark the destination location as well.
Step 3: Preview the Animation
Click the View Animation button from the upper-right corner of the page to see the animated travel map.
Downsides of Using Pictramap to Create Animated Travel Map Video
Although Pictramap allows you to create a travel map animation with ease and extremely quickly, at the time of this writing, it offers no way of downloading the animation to your PC, and therefore it couldn’t be used in your projects.
If you are using Wondershare Filmora, you can use its built-in screen recording feature to record the animation that Pictramap plays, and then save the captured footage as MP4 or any other format on your computer. This video can then be imported to your projects for further uses.
![]()
A cross-platform for making videos anywhere for all creators
Why your video editing isn’t good enough? How about some creative inspo?
- 100 Million+ Users
- 150+ Countries and Regions
- 4 Million+ Social Media Followers
- 5 Million+ Stock Media for Use
* Secure Download
Method 3 How To Make Animated Travel Map Using Multidev
Multi.dev is still a new web-based application to build awesome animated maps, but it’s good! The application helps you create presentations about all your recent and previous trips. And the interface is also hassle-free.
So, follow this step-by-step guide to making animated maps with Multi.dev.
Step 1: Open Multi.dev
Visit Multi.dev from your internet browser.
Once the tool gets open, you will see a demo video. This example clip will have animated maps of different locations. So it is up to you whether to use the same example and edit the places you have been to or are planning to visit. Or, simply create a new animated map from scratch.
Step 2: Choose Your First Location
Take your mouse cursor on the left side of the application and type the first location in the search bar. As soon as you do it, you will see that the “travel arrow” will automatically begin from there. Likewise, type and select the next location through the search bar.
Once you type the location, you will see 8 travel modes, including airplane, bus, and train. You can select the same mode for all sites or a different mode for another place. Totally up to you!
Step 3: Select Map Themes
All your chosen places will be highlighted in the software’s minimalistic map.
Step 4: Download Map on Your Computer
If you’re happy with the animated map, click the “Create Video” button to save the animated map on your computer in a few minutes.
Contrarily, you can also share the animation by choosing the “Share Animation” option.
Conclusion
An animated travel map plays an important role to add a realistic touring effect to your motion picture projects. While you can use a web app like Pictramap to create such an animation online easily and for free, the limitations it comes along with might keep you from choosing this method.
Instead, you may want to get more inclined toward a dedicated post-production software like Wondershare Filmora that gives you full control over the process, and the freedom to choose your preferred format to export the animation to for independent usage.
For Win 7 or later (64-bit)
Secure Download
For macOS 10.14 or later
Secure Download
Benjamin Arango
Benjamin Arango is a writer and a lover of all things video.
Follow @Benjamin Arango
The Most Efficient Techniques for You to Make 3D Animation Character
The Most Efficient Techniques for You to Make 3D Animation Character
An easy yet powerful editor
Numerous effects to choose from
Detailed tutorials provided by the official channel
Character development can be referred to as the stages from making the concept to animation. Over the years, as the process becomes more accessible, the detail that the character artist can show on their characters becomes higher.
The person who designs the animation 3D character is usually the first person on a production to visualize the characters from the description given to them in a story.
In this article
01 [What is 3D Character Animation?](#Part 1)
02 [How to Create Your Animated Character in 3D](#Part 2)
03 [How to Create Attractive 3D Character Animation Video?](#Part 3)
Part 1 What is 3D Character Animation?
3D character animation creates three-dimensional images in a moving state. To develop character animation, you must involve your thoughts, emotions, and personalities.
A 3D character animation can function in a product video or external videos to explain a product or concept. You can also use animation modeling AutoDesk to animate your character with the addition of keyframes or by applying motion capture to your model. There are lots of websites or places to find 3D character Model and such sites include but are not limited to:
01TurboSquid
TurboSquid is a great website to look for easy 3D character animation models and offers you the ability to filter for television and movie characters or game characters and helps narrow down your search.
Quality: beginner to professional
Price: ranging from free to $100 for model collection
02CadNav
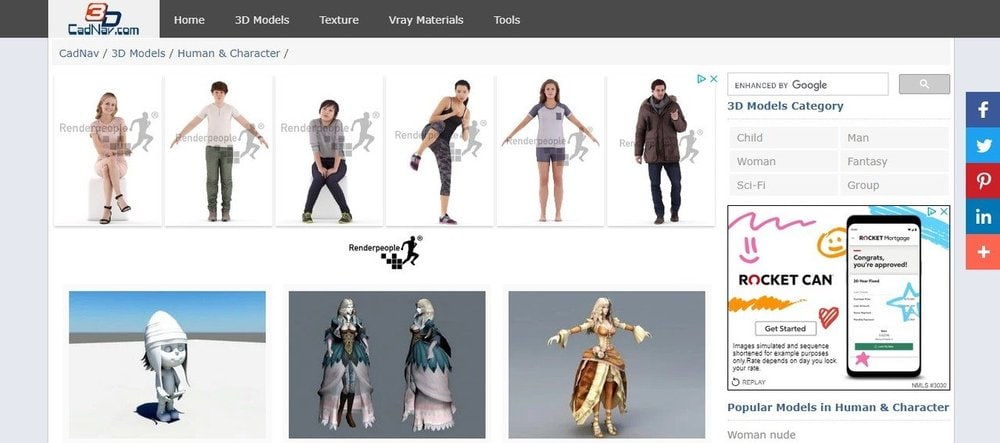
CadNav is a well-known site with lots of excellent models. But unfortunately, the side does not have proper search functionality, and the models are in a long list that you can filter by large crowd categories like the main character.
Quality: beginner to mid-range
Price: free
03CGTrader

CGTrader is a modeling site with numerous lists of 3D max-character animation models. The selection from this site is pretty expensive and of good quality.
Quality: beginner to professional
Price: ranging from free to $100 and $200 for model collection
044. DeviantArt
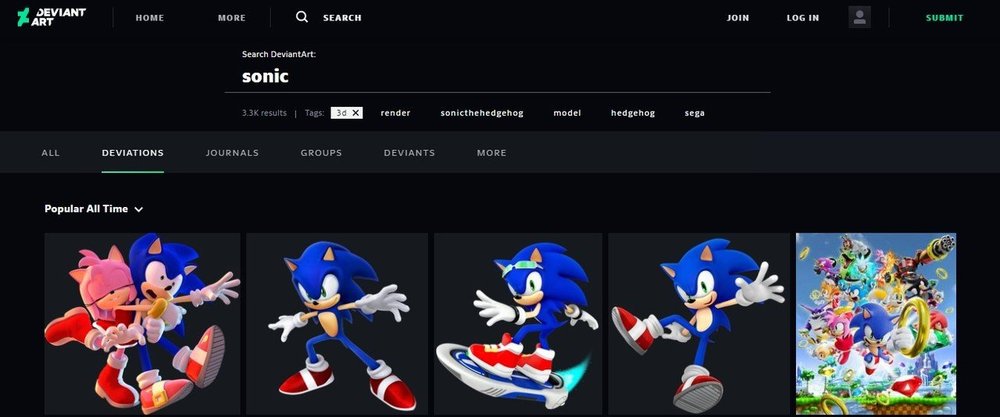
DeviantArt is a unique item mainly for artists to post the artwork in various mediums. The quality and prices of the models vary significantly since the platform is for artists to display their work and get public interest.
Quality: Varies
Price: Varies
05Steam
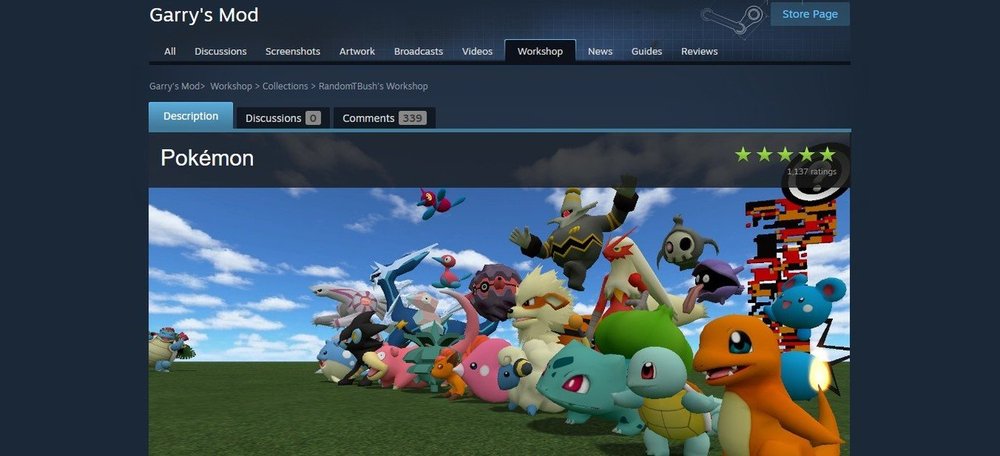
Steam has a good range of 3Ds max 3D animation character animation modeling Autodesk that is very useful. Although they tend not to much the extensive selection of some of the other sites listed, they have an animation and modeling section, which is helpful if you are looking for relevant software.
Quality: fairly high
Price: free
Part 2 How to Create Your Animated Character in 3D
3D is one of the ways to grab your visitor’s attention and convert them to lead, and 3D character designs add life to the characters.
Below are steps on how to create your 3D animation character:
01Step1: Make a Story
Brainstorm and work on the storyboard. Make sure you don’t forget to translate your ideas into visuals by creating a perfect story after brainstorming the idea for the animated topic.
02Step 2: Draw your Character
It’s time for you to design the characters, known as modeling. In these steps, you can draw and model the characters differently using the excellent animation software mentioned in this article. During designing, make sure you don’t rush the design texturing. Texture can be according to art’s concept, which you can assign to the model.
03Step 3: Process your Models
Once over with texturing, it is time for you to process with rigging and skinning. All the 3D rigged characters for animation can move from animators, while 3D models combine with a rigged skeleton in skinning. This step is because it controls the rig, which can easily change the 3D model. Animates the model, which is one of the most critical and time-consuming tasks which involves you adding life to your 3D character. More so, this affects you using a 3D application to ensure that the objects or models adjust according to your need.
04Step 4: Export and Share your 3D Character
Rendering the final output is the last in the 3D animation character. Once everything is complete, all information is translated into a file to combine all shots in a single frame. Then, the animated characters are exported and shared.
Part 3 How to Create Attractive 3D Character Animation Video?
To create a perfect 3D character animation video has been a very challenging aspect of 3D animation based on the highly competitive industry Filmora has proven to be one of the best tools in creating an easy 3D character animation video following the steps below:
01Step 1: Prepare a Script and Practice Storyboarding
Write a script of the animation video you want to make. The script gives you an insight into the base story, how it looks, who is talking to who, the dialogue, and at what time of the day it took place, most importantly, what your story characters are saying to one another.
Practice storyboarding, a sequence of images or movie shoes that helps you understand how exactly the story will feel on will look the camera angles and a flowchart of how everything looks. A storyboard can be of various types. It may be an outline, colorful, black and white, or something with complete details.
02Step 2: Add Voice and Start Animating
Creating an animated video without a voice might not be interesting, so always remember to add a voice-over to your animated movie.
You can start animating your video. The story determines the length of the video, and the process includes importing images and adding them to the timeline.
03Step 3: Prepare Final Mix and Export
This step requires you to assemble the voice records and prepare the final mix to add them to your animated video.
After the final editing, review it and export it to produce a 3D max character animation that you can then share on a social media platform for viewers.
Key Takeaways from This Episode
● Understanding what 3D Animation Character is
● Knowing How to Create Easy 3D Character Animation
● Learning How to Create Attractive 3D Rigged Character Animation
Character development can be referred to as the stages from making the concept to animation. Over the years, as the process becomes more accessible, the detail that the character artist can show on their characters becomes higher.
The person who designs the animation 3D character is usually the first person on a production to visualize the characters from the description given to them in a story.
In this article
01 [What is 3D Character Animation?](#Part 1)
02 [How to Create Your Animated Character in 3D](#Part 2)
03 [How to Create Attractive 3D Character Animation Video?](#Part 3)
Part 1 What is 3D Character Animation?
3D character animation creates three-dimensional images in a moving state. To develop character animation, you must involve your thoughts, emotions, and personalities.
A 3D character animation can function in a product video or external videos to explain a product or concept. You can also use animation modeling AutoDesk to animate your character with the addition of keyframes or by applying motion capture to your model. There are lots of websites or places to find 3D character Model and such sites include but are not limited to:
01TurboSquid
TurboSquid is a great website to look for easy 3D character animation models and offers you the ability to filter for television and movie characters or game characters and helps narrow down your search.
Quality: beginner to professional
Price: ranging from free to $100 for model collection
02CadNav
CadNav is a well-known site with lots of excellent models. But unfortunately, the side does not have proper search functionality, and the models are in a long list that you can filter by large crowd categories like the main character.
Quality: beginner to mid-range
Price: free
03CGTrader
CGTrader is a modeling site with numerous lists of 3D max-character animation models. The selection from this site is pretty expensive and of good quality.
Quality: beginner to professional
Price: ranging from free to $100 and $200 for model collection
044. DeviantArt
DeviantArt is a unique item mainly for artists to post the artwork in various mediums. The quality and prices of the models vary significantly since the platform is for artists to display their work and get public interest.
Quality: Varies
Price: Varies
05Steam
Steam has a good range of 3Ds max 3D animation character animation modeling Autodesk that is very useful. Although they tend not to much the extensive selection of some of the other sites listed, they have an animation and modeling section, which is helpful if you are looking for relevant software.
Quality: fairly high
Price: free
Part 2 How to Create Your Animated Character in 3D
3D is one of the ways to grab your visitor’s attention and convert them to lead, and 3D character designs add life to the characters.
Below are steps on how to create your 3D animation character:
01Step1: Make a Story
Brainstorm and work on the storyboard. Make sure you don’t forget to translate your ideas into visuals by creating a perfect story after brainstorming the idea for the animated topic.
02Step 2: Draw your Character
It’s time for you to design the characters, known as modeling. In these steps, you can draw and model the characters differently using the excellent animation software mentioned in this article. During designing, make sure you don’t rush the design texturing. Texture can be according to art’s concept, which you can assign to the model.
03Step 3: Process your Models
Once over with texturing, it is time for you to process with rigging and skinning. All the 3D rigged characters for animation can move from animators, while 3D models combine with a rigged skeleton in skinning. This step is because it controls the rig, which can easily change the 3D model. Animates the model, which is one of the most critical and time-consuming tasks which involves you adding life to your 3D character. More so, this affects you using a 3D application to ensure that the objects or models adjust according to your need.
04Step 4: Export and Share your 3D Character
Rendering the final output is the last in the 3D animation character. Once everything is complete, all information is translated into a file to combine all shots in a single frame. Then, the animated characters are exported and shared.
Part 3 How to Create Attractive 3D Character Animation Video?
To create a perfect 3D character animation video has been a very challenging aspect of 3D animation based on the highly competitive industry Filmora has proven to be one of the best tools in creating an easy 3D character animation video following the steps below:
01Step 1: Prepare a Script and Practice Storyboarding
Write a script of the animation video you want to make. The script gives you an insight into the base story, how it looks, who is talking to who, the dialogue, and at what time of the day it took place, most importantly, what your story characters are saying to one another.
Practice storyboarding, a sequence of images or movie shoes that helps you understand how exactly the story will feel on will look the camera angles and a flowchart of how everything looks. A storyboard can be of various types. It may be an outline, colorful, black and white, or something with complete details.
02Step 2: Add Voice and Start Animating
Creating an animated video without a voice might not be interesting, so always remember to add a voice-over to your animated movie.
You can start animating your video. The story determines the length of the video, and the process includes importing images and adding them to the timeline.
03Step 3: Prepare Final Mix and Export
This step requires you to assemble the voice records and prepare the final mix to add them to your animated video.
After the final editing, review it and export it to produce a 3D max character animation that you can then share on a social media platform for viewers.
Key Takeaways from This Episode
● Understanding what 3D Animation Character is
● Knowing How to Create Easy 3D Character Animation
● Learning How to Create Attractive 3D Rigged Character Animation
Best 15 Horror Animes That Will Trigger a Heart Attack
15 Horror Animes That Will Trigger a Heart Attack

Shanoon Cox
Mar 27, 2024• Proven solutions
Horror anime is a sub-genre of anime series. It is based on scary stories, often featuring bloody and grotesque scenes, not for the faint of heart—the horror anime series range from emotional murder mysteries to violent paranormal thrillers.
People who like to experience the thrill of a good scare generally prefer watching horror anime series. The best horror anime can actually terrify you, and many people enjoy being scared. Since there are a lot of scary anime series on the web, you might have trouble finding the best horror anime to pass your weekend. If that’s the case, dive right in and get prepared to be scared.
Best 15 Horror Animes of All Time
Here, we have picked out some of the best horror anime series of all time that are definitely going to creep you out. Test your bravery and watch a terrifying horror anime from our list.
1. Monster
Monster is a horror anime series based on a popular Manga by Naoki Urasawa. It is an impressive thriller based on a top-notch brain surgeon working in a hospital. The young surgeon is faced with an ethical dilemma when forced to abandon the surgery of a boy to save a mayor’s life. But Dr. Tenma chooses to save the boy. This scary anime unfolds as Tenma, at the pinnacle of his medical career, is haunted by a series of death that involves the boy he saved all those years ago. This is the best horror anime series featuring a psychopath’s killing streak.
 </p
</p
2. Hell Girl
This horror anime series revolves around the subject of hate, revenge, and vengeance. With every new episode of this horror anime, you will witness a new story. The plot is unique and based on supernatural powers. Through a mysterious website, people are able to exact revenge on their tormentors, but there is always a price to pay. In the list of the best horror anime series, Hell Girl takes the lead due to thrilling scenes with the fusion of emotional storylines. As opposed to many horror anime series, this one isn’t very gory, but it portrays horror through the plot, showing the evil side of humans.
 </p
</p
3. Corpse Party
A very gruesome and horror anime is Corpse Party. This horror anime series is based on just 4 episodes, all of which are filled with terror. As the students of Kisaragi Academy perform a ritual on the grounds of their school, they are taken into another dimension where they end up in the Heavenly Host Elementary whose students and staff were murdered years ago. The terrifying ghosts and gory corpses in this scary anime are enough to terrify anyone. It is short and action-packed, guaranteeing that every scene is full of terror.
 </p
</p
4. Another
Another is the best horror anime series with terrifying deaths, much like seen in the movie’ Final Destination’. As the death curse takes the lives of the students of a class, the protagonist, a newly transferred student Kouichi, and a girl with an eye patch must get to the bottom of this. The horror anime slowly unravels scary truths about the incident that resulted in the death of Mei Misaki. Together, Kouichi and Mei try to dig out the root of the problem. Every scene is packed with suspense and horror, keep viewers scared and glued to the screens.
 </p
</p
5. Shiki
Based on the hot topic of vampires, this horror anime takes vampire stories to the next level. Shiki is an excellent scary movie with a twisting plot that follows the lives of the villagers facing the vampire curse. As the dead rise, a young doctor takes it upon himself to uncover the reality. This chilling yet adventurous horror anime is an amazing watch with a great storyline that is gripping and suspenseful, all at the same time.
 </p
</p
6. The Promised Neverland
This horror anime has a very emotional plot. The kids of Grace Field House Orphanage are very happy and content until one day, some of them break the most important rule. When the kids go out of the orphanage, they discover the truth and the sinister future awaiting them. From cheerful kids to responsible, brave kids, this is the best horror anime that keeps the viewers glued to the screens. As the kids try to escape their deadly fate, will they be able to go free or end up becoming demon food?
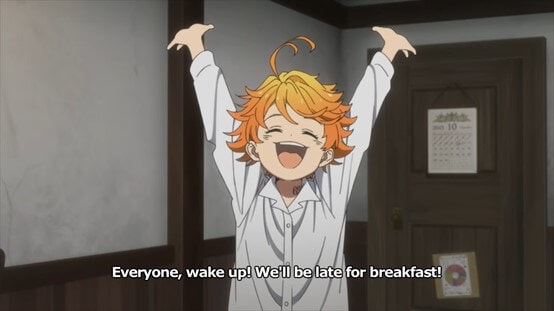 </p
</p
7. Parasyte: The Maxim
As the name suggests, this horror anime series is based on a parasite that takes over human hosts. In this horror anime, the parasite is an alien species. However, this anime revolves around the protagonist, whose hand is taken over by Migi, also an alien. But as the other parasites go on a deadly streak, opening their heads and eating any human that stands in their way, the boy and Migi try to fight them off. This is a very compelling yet gory and scary anime showing gruesome murders and action scenes to keep you on edge at all times.
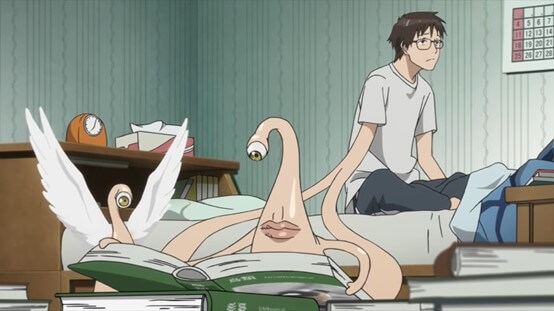 </p
</p
8. Perfect Blue
Perfect Blue has been categorized as one of the best horror anime based on reality. This is an epic psychological thriller with scenes that are mind-bending. As a pop singer switches her career to become an actress, an obsessed stalker becomes a nightmare for her. She is exposed, and every move she makes is being watched. Mysterious murders start surrounding her, and she starts losing her mind. The lines between delusion and reality are blurred. This horror anime is also an excellent suspense thriller that will keep you guessing what the next move will be.
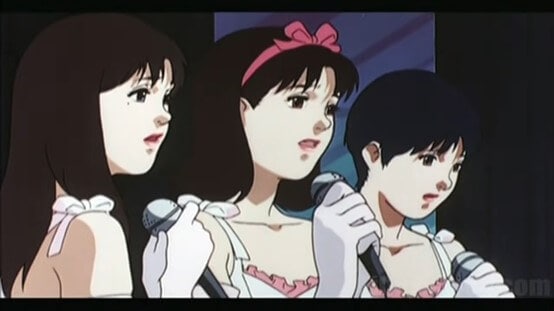 </p
</p
9. Mononoke
Mononoke has a unique visual appeal as it is themed on old Japanese culture with vibrant animations. The protagonist, commonly known as the ‘Medicine Seller,’ goes around feudal Japan looking for evil, known as Mononoke. Somehow, the medicine seller has a special power and a sword to slay the evil. But the twist is that the medicine seller must first learn the details about the Mononoke. Unless he discovers its true form and reason, he cannot have the sword to end it. This horror anime unfolds in a very thrilling manner as the protagonist uncovers the evil and saves feudal Japan.
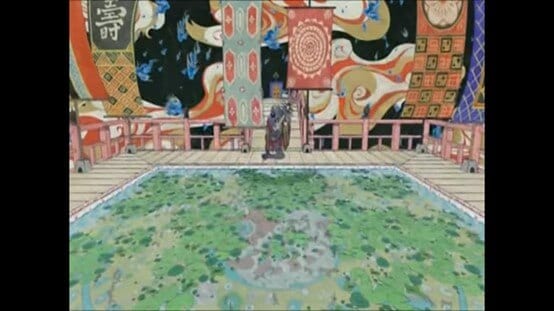 </p
</p
10. Tokyo Ghoul
One of the greatest horror anime series ever, Tokyo Ghoul features an amazing storyline. When the college student Ken falls victim to his ghoul date, he is saved by doctors. But, his rebirth is as a hybrid of humans and ghouls. This horror anime series is not for the faint-hearted as it shows grotesque scenes of body horror as the ghouls devour human flesh. However, Tokyo Ghoul also portrays how Ken is forced to control his flesh-eating desires. Would the hybrid lean more towards his human trait or the evil side? We recommend watching this very scary anime to find out how Ken survives as a hybrid and does he give in to his ghoul nature?
 </p
</p
11. Elfen Lied
This horror anime is about a mutant human born, Lucy. The extremely powerful mutant, Diclonius, is being experimented upon when one day she has had enough. As she finally breaks free of captivity, it results in a huge bloodbath and a terrifying battle. With time, Lucy tries to adjust to the world. Given her dual personality, it is hard to hide her true nature. This horror anime series is packed with bloody scenes and violence, yet it also displays moments of emotional attachments and friendships when Lucy’s adorable personality is dominant.
 </p
</p
12. Ghost Hunt
As can be guessed by the name, this horror anime series is based on ghost hunting. It doesn’t involve many bloody or gory scenes, but it definitely has terrifying scenes. A group of adventurous people teamed up with the psychic research facility are investigating the paranormal activities in a building when they are faced with horrifying paranormal beings. This is a story about finding out the truth, sticking together, and making it out of the building alive. This isn’t the most horror anime on the list, but it does give very scary and creepy vibes as the team stumbles upon deadly beings.
 </p
</p
13. Higurashi When They Cry
The start of this horror anime is unlike any other. One might think it is a cheerful school drama, but it’s actually the best horror anime based on a murder mystery. The students in a rural village start killing each other in grotesque ways, and there are even scenes of torture and bloody violence. The viewer must figure out what suddenly took over the village to cause such gruesome murders. If you are looking for a good scare, this horror anime will be your best pick with its thriller-packed scenes. Are the murderers possessed, or is it something else? Watch this scary anime if you have the guts and find out.
 </p
</p
14. Shoujo Tsubaki
Shoujo Tsubaki is an adult horror anime that revolves around the life of an orphan girl. Midori is tricked by a circus master to join his show, but a horrifying future awaits her. She is raped and abused continually and is about to give up when a magician joins the club. As she sees a ray of hope, will she be able to escape her horrid fate? With a heart-wrenching storyline, this horror anime is a great watch to feel the chills of being alone and tortured.
 </p
</p
15. Angels of Death
The Angels of Death is a very intriguing horror anime that shows an amnesiac girl awaking in the basement of an abandoned building. As she tries to escape the building, she is met with psychotic killers and crazy people on each floor. However, Rachel and the serial killer Zack strike up a relationship in which Zack promises to kill her if she helps him escape the building. This scary anime certainly has some bone-chilling and gory scenes to get you creeped out.
 </p
</p
Bonus Tip-The Best Anime Movie Recorder- Wondershare Filmora
Wondershare Filmora is a powerful video editor that is perfect for both beginners and professional editors. It has tons of editing tools that are fully customizable and also offer presets to help users quickly add professional-grade cinematic effects to their videos.
With Filmora, it is easy to apply motion tracking, color grading, motion blur, green screen effect, and much more. The creative possibilities at Filmora are endless. And most of these tools are very intuitive to use. Better yet, Filmora allows users to share their videos directly to social media.
In addition, you can also use Filmora to record your favorite horror anime, make edits, add captions, and share with your friends. You can record your screen and adjust advanced settings that will allow you to set a timer, select the screen size, audio source, and much more. You can also select whether you want to display the cursor and choose its color. With a Hot Key, you can stop recording instantly, and the file will be immediately saved to your PC.
After recording, you can make further edits to the video by adding captions or special effects to enhance it. In short, with Filmora, you can record with ease and make wonderful edits to the video.


Are Horror Animes Really Horrifying?
The horror anime series are hand-drawn illustrations, and it is quite possible to portray supernatural, horrifying, and unusual creatures with ease. From our list, you will see that among the best horror anime series, most of them feature otherworldly creatures that are both terrifying and creepy to look at.
In addition, the extremely graphic nature of a scary anime further adds to its ability to scare viewers. Violence, bloodbath, and cannibalism is a common theme in majority of the scary anime series, serving as the perfect way to portray bone-chilling horror scenes.
Try out our list to find your best horror anime series and have a good scare.
Shanoon Cox
Shanoon Cox is a writer and a lover of all things video.
Follow @Shanoon Cox
Shanoon Cox
Mar 27, 2024• Proven solutions
Horror anime is a sub-genre of anime series. It is based on scary stories, often featuring bloody and grotesque scenes, not for the faint of heart—the horror anime series range from emotional murder mysteries to violent paranormal thrillers.
People who like to experience the thrill of a good scare generally prefer watching horror anime series. The best horror anime can actually terrify you, and many people enjoy being scared. Since there are a lot of scary anime series on the web, you might have trouble finding the best horror anime to pass your weekend. If that’s the case, dive right in and get prepared to be scared.
Best 15 Horror Animes of All Time
Here, we have picked out some of the best horror anime series of all time that are definitely going to creep you out. Test your bravery and watch a terrifying horror anime from our list.
1. Monster
Monster is a horror anime series based on a popular Manga by Naoki Urasawa. It is an impressive thriller based on a top-notch brain surgeon working in a hospital. The young surgeon is faced with an ethical dilemma when forced to abandon the surgery of a boy to save a mayor’s life. But Dr. Tenma chooses to save the boy. This scary anime unfolds as Tenma, at the pinnacle of his medical career, is haunted by a series of death that involves the boy he saved all those years ago. This is the best horror anime series featuring a psychopath’s killing streak.
</p
2. Hell Girl
This horror anime series revolves around the subject of hate, revenge, and vengeance. With every new episode of this horror anime, you will witness a new story. The plot is unique and based on supernatural powers. Through a mysterious website, people are able to exact revenge on their tormentors, but there is always a price to pay. In the list of the best horror anime series, Hell Girl takes the lead due to thrilling scenes with the fusion of emotional storylines. As opposed to many horror anime series, this one isn’t very gory, but it portrays horror through the plot, showing the evil side of humans.
</p
3. Corpse Party
A very gruesome and horror anime is Corpse Party. This horror anime series is based on just 4 episodes, all of which are filled with terror. As the students of Kisaragi Academy perform a ritual on the grounds of their school, they are taken into another dimension where they end up in the Heavenly Host Elementary whose students and staff were murdered years ago. The terrifying ghosts and gory corpses in this scary anime are enough to terrify anyone. It is short and action-packed, guaranteeing that every scene is full of terror.
</p
4. Another
Another is the best horror anime series with terrifying deaths, much like seen in the movie’ Final Destination’. As the death curse takes the lives of the students of a class, the protagonist, a newly transferred student Kouichi, and a girl with an eye patch must get to the bottom of this. The horror anime slowly unravels scary truths about the incident that resulted in the death of Mei Misaki. Together, Kouichi and Mei try to dig out the root of the problem. Every scene is packed with suspense and horror, keep viewers scared and glued to the screens.
</p
5. Shiki
Based on the hot topic of vampires, this horror anime takes vampire stories to the next level. Shiki is an excellent scary movie with a twisting plot that follows the lives of the villagers facing the vampire curse. As the dead rise, a young doctor takes it upon himself to uncover the reality. This chilling yet adventurous horror anime is an amazing watch with a great storyline that is gripping and suspenseful, all at the same time.
</p
6. The Promised Neverland
This horror anime has a very emotional plot. The kids of Grace Field House Orphanage are very happy and content until one day, some of them break the most important rule. When the kids go out of the orphanage, they discover the truth and the sinister future awaiting them. From cheerful kids to responsible, brave kids, this is the best horror anime that keeps the viewers glued to the screens. As the kids try to escape their deadly fate, will they be able to go free or end up becoming demon food?
</p
7. Parasyte: The Maxim
As the name suggests, this horror anime series is based on a parasite that takes over human hosts. In this horror anime, the parasite is an alien species. However, this anime revolves around the protagonist, whose hand is taken over by Migi, also an alien. But as the other parasites go on a deadly streak, opening their heads and eating any human that stands in their way, the boy and Migi try to fight them off. This is a very compelling yet gory and scary anime showing gruesome murders and action scenes to keep you on edge at all times.
</p
8. Perfect Blue
Perfect Blue has been categorized as one of the best horror anime based on reality. This is an epic psychological thriller with scenes that are mind-bending. As a pop singer switches her career to become an actress, an obsessed stalker becomes a nightmare for her. She is exposed, and every move she makes is being watched. Mysterious murders start surrounding her, and she starts losing her mind. The lines between delusion and reality are blurred. This horror anime is also an excellent suspense thriller that will keep you guessing what the next move will be.
</p
9. Mononoke
Mononoke has a unique visual appeal as it is themed on old Japanese culture with vibrant animations. The protagonist, commonly known as the ‘Medicine Seller,’ goes around feudal Japan looking for evil, known as Mononoke. Somehow, the medicine seller has a special power and a sword to slay the evil. But the twist is that the medicine seller must first learn the details about the Mononoke. Unless he discovers its true form and reason, he cannot have the sword to end it. This horror anime unfolds in a very thrilling manner as the protagonist uncovers the evil and saves feudal Japan.
</p
10. Tokyo Ghoul
One of the greatest horror anime series ever, Tokyo Ghoul features an amazing storyline. When the college student Ken falls victim to his ghoul date, he is saved by doctors. But, his rebirth is as a hybrid of humans and ghouls. This horror anime series is not for the faint-hearted as it shows grotesque scenes of body horror as the ghouls devour human flesh. However, Tokyo Ghoul also portrays how Ken is forced to control his flesh-eating desires. Would the hybrid lean more towards his human trait or the evil side? We recommend watching this very scary anime to find out how Ken survives as a hybrid and does he give in to his ghoul nature?
</p
11. Elfen Lied
This horror anime is about a mutant human born, Lucy. The extremely powerful mutant, Diclonius, is being experimented upon when one day she has had enough. As she finally breaks free of captivity, it results in a huge bloodbath and a terrifying battle. With time, Lucy tries to adjust to the world. Given her dual personality, it is hard to hide her true nature. This horror anime series is packed with bloody scenes and violence, yet it also displays moments of emotional attachments and friendships when Lucy’s adorable personality is dominant.
</p
12. Ghost Hunt
As can be guessed by the name, this horror anime series is based on ghost hunting. It doesn’t involve many bloody or gory scenes, but it definitely has terrifying scenes. A group of adventurous people teamed up with the psychic research facility are investigating the paranormal activities in a building when they are faced with horrifying paranormal beings. This is a story about finding out the truth, sticking together, and making it out of the building alive. This isn’t the most horror anime on the list, but it does give very scary and creepy vibes as the team stumbles upon deadly beings.
</p
13. Higurashi When They Cry
The start of this horror anime is unlike any other. One might think it is a cheerful school drama, but it’s actually the best horror anime based on a murder mystery. The students in a rural village start killing each other in grotesque ways, and there are even scenes of torture and bloody violence. The viewer must figure out what suddenly took over the village to cause such gruesome murders. If you are looking for a good scare, this horror anime will be your best pick with its thriller-packed scenes. Are the murderers possessed, or is it something else? Watch this scary anime if you have the guts and find out.
</p
14. Shoujo Tsubaki
Shoujo Tsubaki is an adult horror anime that revolves around the life of an orphan girl. Midori is tricked by a circus master to join his show, but a horrifying future awaits her. She is raped and abused continually and is about to give up when a magician joins the club. As she sees a ray of hope, will she be able to escape her horrid fate? With a heart-wrenching storyline, this horror anime is a great watch to feel the chills of being alone and tortured.
</p
15. Angels of Death
The Angels of Death is a very intriguing horror anime that shows an amnesiac girl awaking in the basement of an abandoned building. As she tries to escape the building, she is met with psychotic killers and crazy people on each floor. However, Rachel and the serial killer Zack strike up a relationship in which Zack promises to kill her if she helps him escape the building. This scary anime certainly has some bone-chilling and gory scenes to get you creeped out.
</p
Bonus Tip-The Best Anime Movie Recorder- Wondershare Filmora
Wondershare Filmora is a powerful video editor that is perfect for both beginners and professional editors. It has tons of editing tools that are fully customizable and also offer presets to help users quickly add professional-grade cinematic effects to their videos.
With Filmora, it is easy to apply motion tracking, color grading, motion blur, green screen effect, and much more. The creative possibilities at Filmora are endless. And most of these tools are very intuitive to use. Better yet, Filmora allows users to share their videos directly to social media.
In addition, you can also use Filmora to record your favorite horror anime, make edits, add captions, and share with your friends. You can record your screen and adjust advanced settings that will allow you to set a timer, select the screen size, audio source, and much more. You can also select whether you want to display the cursor and choose its color. With a Hot Key, you can stop recording instantly, and the file will be immediately saved to your PC.
After recording, you can make further edits to the video by adding captions or special effects to enhance it. In short, with Filmora, you can record with ease and make wonderful edits to the video.
Are Horror Animes Really Horrifying?
The horror anime series are hand-drawn illustrations, and it is quite possible to portray supernatural, horrifying, and unusual creatures with ease. From our list, you will see that among the best horror anime series, most of them feature otherworldly creatures that are both terrifying and creepy to look at.
In addition, the extremely graphic nature of a scary anime further adds to its ability to scare viewers. Violence, bloodbath, and cannibalism is a common theme in majority of the scary anime series, serving as the perfect way to portray bone-chilling horror scenes.
Try out our list to find your best horror anime series and have a good scare.
Shanoon Cox
Shanoon Cox is a writer and a lover of all things video.
Follow @Shanoon Cox
How to Create A GIF with Sound?
How to Create A GIF with Sound?
Shanoon Cox
Mar 27, 2024• Proven solutions
GIFs are simple animations without any sound. However, modern GIFs have the ability to carry audio and are more preferred. The technology is absolutely new, and you can even add music to GIF files. Today, we will explore the best tools to create GIFs with sound. You can also join the trend and share GIFs with audio bites with your friends and family.
Part 1: How to Create a GIF with Sound on Imgur?
Imgur is a popular image sharing platform . It’s also one of the oldest services, starting its journey way back in 2009.
You can upload images on Imgur and embed them on your websites or blogs. The service is really popular, thanks to forums like Reddit. People love to share images on Imgur, which is fast and convenient.
Now, you can also upload and watch GIFs on Imgur. The platform even introduced a new GIF format to make GIFs more smooth and reliable. Additionally, Imgur even lets you upload GIFs with sound through its iOS app.
You can watch the GIFs with audio from your computer and tablets. Soon, you will be able to access the feature from the Imgur Android app. The new GIFs are really catching on, and people love the sound bites that come along. GIFs with sound are more fun to watch, and you can also easily convey your message.
Here is how you can create and upload GIFs with sound on Imgur.
- Download and run the latest version of the Imgur iOS app from here: https://apps.apple.com/us/app/imgur-funny-meme-gif-maker/id639881495
- Now press the camera button and choose a video from your device. You can add only video files with sound for making a GIF with sound.
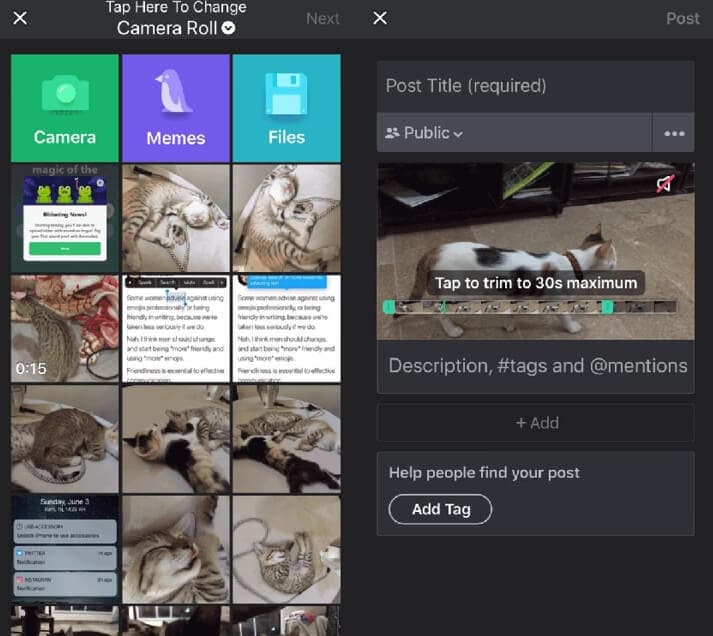
Note: Your GIF with audio cannot be more than 30-seconds long. Use the app the trim your video down to 30-seconds. If you want, you can even trim your video below 30-seconds.
- Now, press the speaker icon on the video to unmute the sound. You can next upload the video with sound and watch it as a GIF.
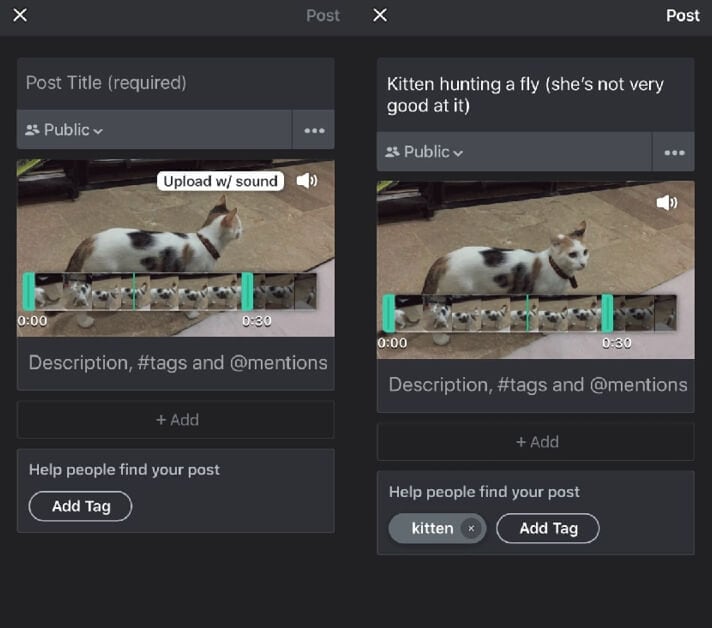
Part 2: How to Create GIF with sound on Gfycat?
Gfycat is one of the largest GIF sharing sites. You can find thousands of GIFs shared by users from all across the world. The GIFs are neatly sorted into categories so that you can find your favorite ones easily.
Gfycat was the pioneer in video to GIF conversion . It first offered the service in 2013 that took the internet by storm. Since then, Gfycat has been the choice of millions of people for sharing memes and short videos.
Gfycat now enables you to share GIFs with sound. You can upload any video and convert it to a GIF without sacrificing the sound. However, you can only upload only up to a minute of GIF that contains sound.
Follow the steps below to create your GIF with sound-
- Launch the Gfycat website and choose the video you want to convert. You can add files from your device or use URLs of video sites. Be sure to choose small file sizes for the best results.
- You can now trim your video down to your desired length. Remember that adding sound will make the file size big. So, it pays to keep your GIFs short to 60 seconds. Use the sliders to select the portion of the video you want to convert and then click Continue.
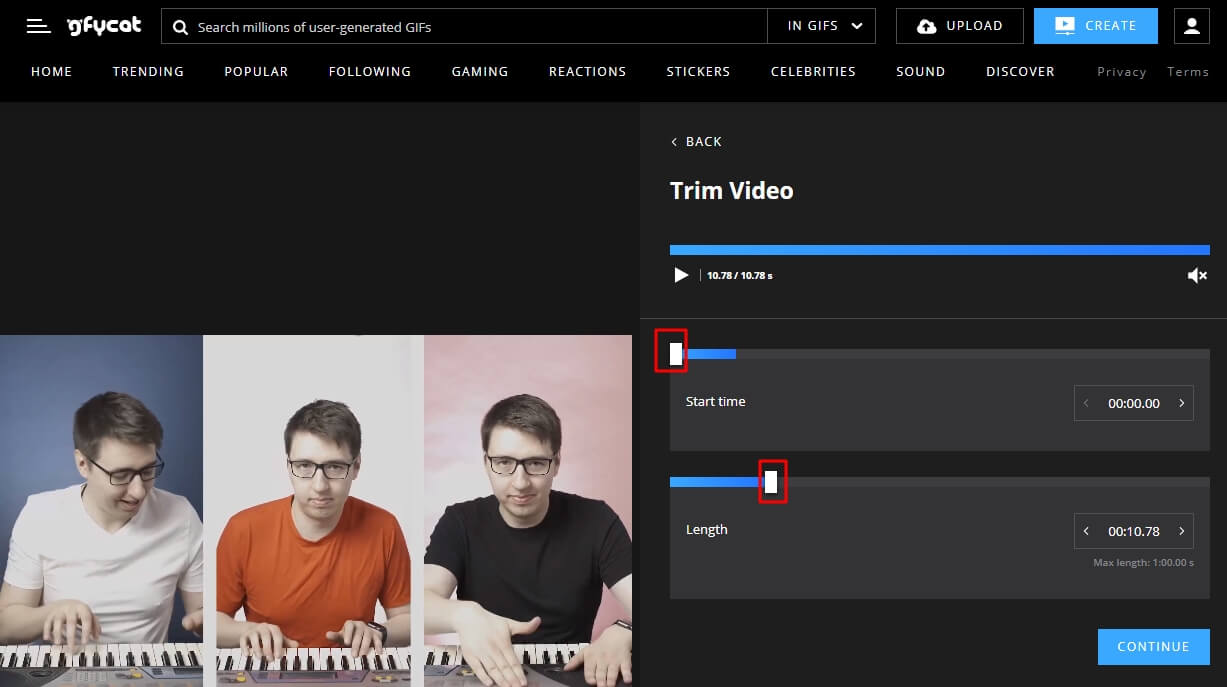
- Besides sound, Gfycat also lets you add texts and captions to your GIFs. You can move the slider to the proper time and then click ADD A CAPTION to add a new text box. If you don’t need to add text, click Continue and jump to the next step.
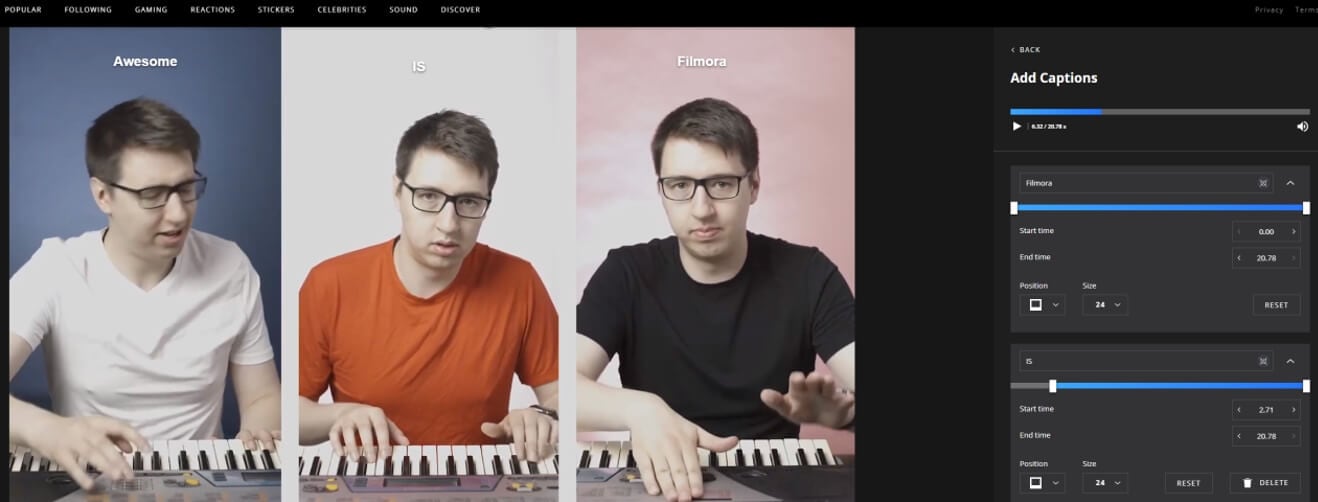
- Now comes the time to add titles and tags to your GIFs. To create and share the GIF with sound, remember to enable the Speaker icon. After you’re done, just click the FINISH button to upload your GIF with sound on Gfycat.
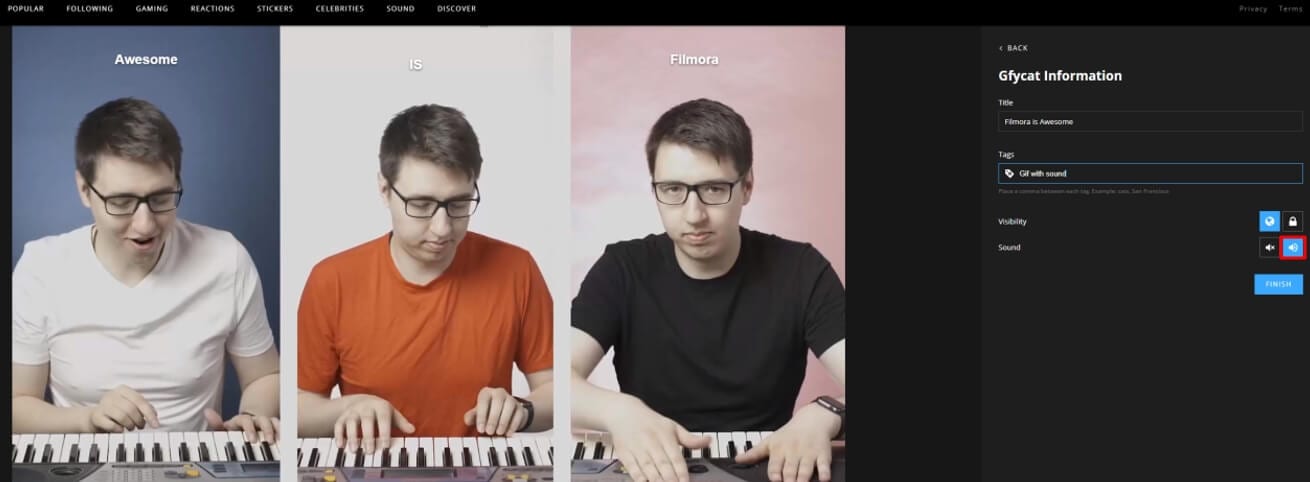
Part 3: How to Add Music And Sound Effect To GIFs With Filmora?
Filmora is a cutting-edge video and GIF editing software. Adding sound to GIFs is really easy and can be done in a few steps. You have several perks like-
1. Vast Audio Library
The Audio library brings you a royalty-free music and sound effect library. You can use a plethora of audio files, sound effects, and music for your GIFs without spending a cent. Besides, the Filmstock effect store provides more sound effects and music to try.
2. Optimum Sync
Filmora features advanced beat detection to detect the hits in the audio and generate markers, you can sync your audio with GIFs perfectly with the help of markers. You don’t have to worry about your GIFs appearing out of sync with your audio.
3. Provide Voiceover
You can use your voiceover for your GIFs to make them awesome. Just hook up your microphone and record your voice for ultimate enjoyment.
How to Add Sound to GIFs in Filmora Video Editor?
- The first step to adding music and sound effect to your GIF is to import them to your timeline.
- Then you can choose to add music and sound effect from the in-built audio library, or record your own voice.
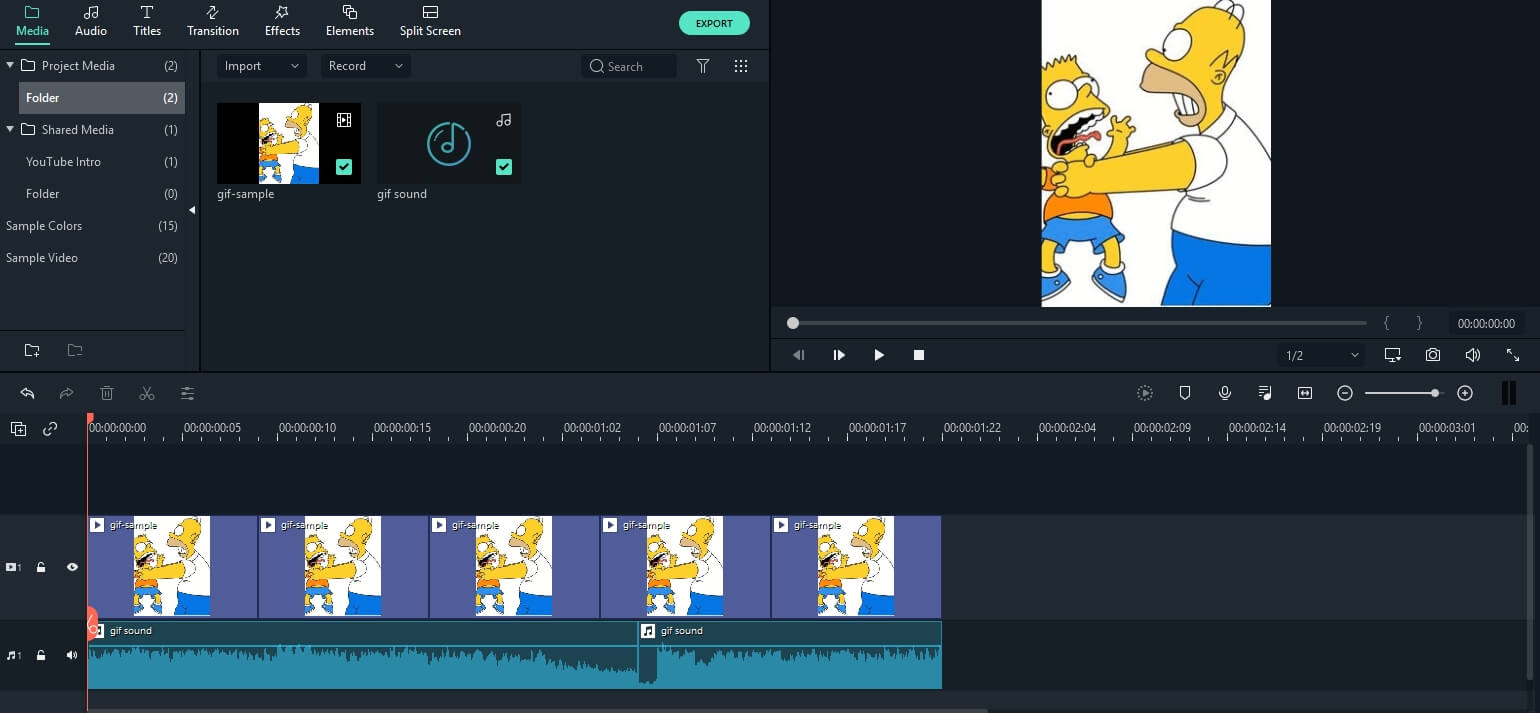
When you’re done, just export your gif file as a video in mp4 or other proper formats. You can also configure the resolution and bits for better results.
FIlmora is very user-friendly, and you don’t need to face any learning curve. You can quickly start adding audio and create GIFs with sound in minutes!
FAQ About Sound GIF
Where can I see GIFs with sound?
Presently, only a few platforms allow you to play GIFs with sounds. For that, you have to first embed an audio file in your image or use a video.
Some platforms like Giphy, Imgur, Gfycat, or Tenor let you watch GIFs with sound. You can also give YouTube a try and find GIFs with audio. Else, you can watch them on your mobiles or tablets.
Creating a GIF with sound is simple, quick and easy with Filmora. Have you tried it out yet?
Shanoon Cox
Shanoon Cox is a writer and a lover of all things video.
Follow @Shanoon Cox
Shanoon Cox
Mar 27, 2024• Proven solutions
GIFs are simple animations without any sound. However, modern GIFs have the ability to carry audio and are more preferred. The technology is absolutely new, and you can even add music to GIF files. Today, we will explore the best tools to create GIFs with sound. You can also join the trend and share GIFs with audio bites with your friends and family.
Part 1: How to Create a GIF with Sound on Imgur?
Imgur is a popular image sharing platform . It’s also one of the oldest services, starting its journey way back in 2009.
You can upload images on Imgur and embed them on your websites or blogs. The service is really popular, thanks to forums like Reddit. People love to share images on Imgur, which is fast and convenient.
Now, you can also upload and watch GIFs on Imgur. The platform even introduced a new GIF format to make GIFs more smooth and reliable. Additionally, Imgur even lets you upload GIFs with sound through its iOS app.
You can watch the GIFs with audio from your computer and tablets. Soon, you will be able to access the feature from the Imgur Android app. The new GIFs are really catching on, and people love the sound bites that come along. GIFs with sound are more fun to watch, and you can also easily convey your message.
Here is how you can create and upload GIFs with sound on Imgur.
- Download and run the latest version of the Imgur iOS app from here: https://apps.apple.com/us/app/imgur-funny-meme-gif-maker/id639881495
- Now press the camera button and choose a video from your device. You can add only video files with sound for making a GIF with sound.
Note: Your GIF with audio cannot be more than 30-seconds long. Use the app the trim your video down to 30-seconds. If you want, you can even trim your video below 30-seconds.
- Now, press the speaker icon on the video to unmute the sound. You can next upload the video with sound and watch it as a GIF.
Part 2: How to Create GIF with sound on Gfycat?
Gfycat is one of the largest GIF sharing sites. You can find thousands of GIFs shared by users from all across the world. The GIFs are neatly sorted into categories so that you can find your favorite ones easily.
Gfycat was the pioneer in video to GIF conversion . It first offered the service in 2013 that took the internet by storm. Since then, Gfycat has been the choice of millions of people for sharing memes and short videos.
Gfycat now enables you to share GIFs with sound. You can upload any video and convert it to a GIF without sacrificing the sound. However, you can only upload only up to a minute of GIF that contains sound.
Follow the steps below to create your GIF with sound-
- Launch the Gfycat website and choose the video you want to convert. You can add files from your device or use URLs of video sites. Be sure to choose small file sizes for the best results.
- You can now trim your video down to your desired length. Remember that adding sound will make the file size big. So, it pays to keep your GIFs short to 60 seconds. Use the sliders to select the portion of the video you want to convert and then click Continue.
- Besides sound, Gfycat also lets you add texts and captions to your GIFs. You can move the slider to the proper time and then click ADD A CAPTION to add a new text box. If you don’t need to add text, click Continue and jump to the next step.
- Now comes the time to add titles and tags to your GIFs. To create and share the GIF with sound, remember to enable the Speaker icon. After you’re done, just click the FINISH button to upload your GIF with sound on Gfycat.
Part 3: How to Add Music And Sound Effect To GIFs With Filmora?
Filmora is a cutting-edge video and GIF editing software. Adding sound to GIFs is really easy and can be done in a few steps. You have several perks like-
1. Vast Audio Library
The Audio library brings you a royalty-free music and sound effect library. You can use a plethora of audio files, sound effects, and music for your GIFs without spending a cent. Besides, the Filmstock effect store provides more sound effects and music to try.
2. Optimum Sync
Filmora features advanced beat detection to detect the hits in the audio and generate markers, you can sync your audio with GIFs perfectly with the help of markers. You don’t have to worry about your GIFs appearing out of sync with your audio.
3. Provide Voiceover
You can use your voiceover for your GIFs to make them awesome. Just hook up your microphone and record your voice for ultimate enjoyment.
How to Add Sound to GIFs in Filmora Video Editor?
- The first step to adding music and sound effect to your GIF is to import them to your timeline.
- Then you can choose to add music and sound effect from the in-built audio library, or record your own voice.
When you’re done, just export your gif file as a video in mp4 or other proper formats. You can also configure the resolution and bits for better results.
FIlmora is very user-friendly, and you don’t need to face any learning curve. You can quickly start adding audio and create GIFs with sound in minutes!
FAQ About Sound GIF
Where can I see GIFs with sound?
Presently, only a few platforms allow you to play GIFs with sounds. For that, you have to first embed an audio file in your image or use a video.
Some platforms like Giphy, Imgur, Gfycat, or Tenor let you watch GIFs with sound. You can also give YouTube a try and find GIFs with audio. Else, you can watch them on your mobiles or tablets.
Creating a GIF with sound is simple, quick and easy with Filmora. Have you tried it out yet?
Shanoon Cox
Shanoon Cox is a writer and a lover of all things video.
Follow @Shanoon Cox
The Secret Sauce for Making GIF Instagram Story More Stunning
The Secret Sauce for Making GIF Instagram Story More Aesthetic
An easy yet powerful editor
Numerous effects to choose from
Detailed tutorials provided by the official channel
Adding own gift stickers to an Instagram story is in trend. An Instagram story can be made more creative with an Instagram gif story. Make a powerful impact with a gif on an Instagram story.
In this article
01 [How to Post Gifs to Instagram Story](#Part 1)
02 [8 Cute Instagram Stickers to Make Your Stories Aesthetic](#Part 2)
03 [How to Create Custom Gifs for Instagram Stories](#Part 3)
Part 1 How to Post Gifs to Instagram Story
Instagram stories are one of the best mediums to get connected to people at large. To be in trends and grab maximum people’s attention, it is very necessary to be updated with the new elements of Instagram stories. Gif Instagram story is a new way to increase the followers and be in trends. Adding these gifs in Instagram stories will improve your business by creating more engaging content for business promotion. Let’s see how this can be done?
● Go to the Instagram app installed on your phone. While adding a sticker to a picture of videos in Instagram stories, a GIF option will appear.
● When you tap it, you can find several attractive gifs in the library powered by GIPHY.
● Tap add sticker button that appears on the top of the Instagram stories. Tap the ‘GIF’ icon; the library of trending gifs will appear.
● Look for the gif you need to add to your story. You also have a search option to find your favorite or trending gif.
● After selecting the desired gif, you can add it to your photo or video after resizing it as you desired.
● After finishing, tap on the ‘Your story’ icon.
So, this way, it is easy to create gif story instagram with just a few simple steps.
Part 2 Cute Instagram Stickers to Make Your Stories Aesthetic
Cute Instagram stickers are the best way to lift the creativity of your Instagram stories. Adding stickers are an amazing idea to add design to Instagram stories. Stickers make stories more creative and interesting. Some of the amazing stickers to beautify Instagram stories are:
01BOHO
Boho stickers are good when you search for new stickers. They add fun to the story and give an amazing look for any lifestyle picture over an Instagram story. Boho white is also one type of sticker where are of them are white. Applying white boho to the picture background highlights the space and looks good. One has so many options from cute stars, hearts, lines, and flowers.
02FOOPKLO

For those who want words and saying gif on instagram story, there are some cute pink stickers available. These can be searched as FOOPKLO. Pink flowers, clusters, sayings, hearts, and some more cute stickers are there which can make Instagram stories lovelier.
03HALEYIVERS
For those who are active Instagram users and update their stories every day, the old stickers may not entertain them. So, for those, there are HALEYIVERS stickers. Good morning, days, sunshine, coffee, stars, and hearts add a great style to the Instagram stories. So, next time you need some punch over Instagram stories add some HALEYIVERS stickers.
04OHLALALITA
Instagram story gif is one of the great ways to even express your thoughts and moods in a summarized way. So, for those who wish to add a short story on Instagram, OHLALALITA has the best stickers. Loaded with so many cute words such as Tank you, Made with love, chill, glow, bye-bye, Wow, and many more, it makes any story in just simple words.
05SCARLETPIN
Instagram story gifs are a gift to those who are food lovers. Now with some new additions of gifs from GIPHY, they can post their food stories over their Instagram stories. The range of stickers that can help them is SCARLETPIN. These consist of some bright and colorful stickers of food. Red strawberries, tea, leaves, and oranges are great stuff to include in the morning Instagram stories.
06CURSIVE

Gif for Instagram story is also available in attractive writings. CURSIVE is the most attractive form of writing stories. Popular and cute sayings can be checked on CURSIVE and can be included in the stories. They can be searched and remembered easily. Cursive phrases can be added to the Instagram stories that look visually appealing to the viewers.
07EMOJIS
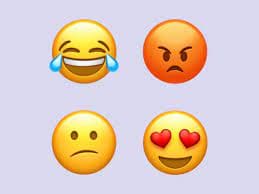
Emojis are the most lovable stickers available and can be part of any Instagram story. Typing on emojis can be done easily and they can be searched on the search bar. Perfect emojis gifs can be applied to an Instagram story that suits the situation. It can be moved or resized as per the requirement. These emojis gifs add a fun element to the Instagram stories.
08PAINT & BRUSH
Instagram gif story can be made creative with paint and brush. Earlier the users can add text with plain background only. But, paint and brush have enhanced it. Now users can add paint behind the text to make it more engaging. They are simple yet very attractive when added to the stories.
Part 3 How to Create Custom Gifs for Instagram Stories
Funny and expressive Instagram stories of your own always win the hearts of followers. Custom-made gif for Instagram is a great tool for business owners as it brings volume to their business by increasing leads. Custom-made gifs over Instagram stories are eye-catching and thus people get interested in the business. This helps in creating a good brand image for the business.
So, some of the ways to create fascinating custom Gifs Instagram stories for self and business are:
01Pin Instagram stories
Visiting a place and letting people know where you are through Instagram stories is always loved by all. Now, this can be done attractively by using the Pin feature. One can pin on the pictures and videos over the Instagram stories to a particular place. This is the most interesting element to make an Instagram story catchy. It can be done easily by tapping and holding it till it shows a pin at the little bar. This was one can pin gif at the desired location. This gif can pop up at a certain location only. It can be applied to videos one has made of a certain location by moving the gif to a place where one desires.
02Using Gif to give life to any image
To make gif Instagram story aesthetic, adding some moves with sparkles will be the right option. An Instagram user can give life to a picture by including animated elements. Gif adds a fun and surprising element to any Instagram story. When movement in any picture is added through gif, it catches the attention of the viewers and they follow it. A business can make its content engaging with gifs and can achieve its goal.
03Gifs Instagram story to catch viewer’s attention
Gif can be used effectively to create attractive Instagram stories. These gifs are good for the business to highlight their important elements. Gifs like the link in bio, sound on, and swipe up are created for a call to action from the viewers. Adding arrows and signals through gif in the Instagram stories direct the people to spend some minutes on the stories and find something new.
04Highlighting text with gif effects
A customized Instagram story can be made by highlighting text through adding gifs. Sparkle, stars, and highlights gifs can be searched easily and can be applied to any Instagram story. By adding a gif, the text looks stunning and grabs the attention of the viewers. GIPHY has several text-based gifs which can take an ordinary text over the story at a great level. It can be searched by mentioning related keywords.
05Adding gifs to customize selfies
Selfies to Instagram stories are very common. But they can be made even better with some amazing gifs from GIPHY. One can add sunglasses, hats, jewelry, and other fun props to the selfies. Filters can be added by creating their own story through a gif.
06Filmora V11 – A GIF resource
Wondershare Filmora Video Editor (The Filmora Meme maker) : Some many apps and websites offer beautiful gifs to beautify Instagram stories. One of the places where Instagram users can find a wide collection of attractive gifs is Filmora V11. It is a user-friendly tool that has media editing features. It can be used to add sound, light effects, and beautiful gifs to Instagram stories.

Wondershare Filmora - Best Video Editor for Mac/Windows
5,481,435 people have downloaded it.
Build unique custom animations without breaking a sweat.
Focus on creating epic stories and leave the details to Filmora’s auto features.
Start a creative adventure with drag & drop effects and endless possibilities.
Filmora simplifies advanced features to save you time and effort.
Filmora cuts out repetition so you can move on to your next creative breakthrough.
For creating gifs, Filmora V11 can be used and it can be made in a few simple steps. Filmora V11 app is required to be installed on the system and media files can be imported there. Files can be dragged for creating gifs. Filters, stickers, and other effects can be added. They can be further customized as per the requirement of the users. After adding background effects, music, and sound, the gif can be previewed also. The media can be saved as GIFs and can be easily exported also. To customize gifs, the Filmora Meme maker can be used. Captions can be added to GIFs and can be customized by using templates available at Filmora.
So, next time you need to know how to add your own gif to Instagram story, go to Filmora V11. This is one of the great platforms to create some amazing custom gifs to add to Instagram stories. If you want to surprise your viewers with some interesting gifs, try Filmora V11.
● Key Takeaways from This Episode →
● Instagram stories are the most effective way to mark a great impression on the viewers. It is also one of the effective tools to lift any business. Best results can be obtained when attractive and interesting gifs are added to Instagram stories.
● Instagram stories gifs are becoming trendy and there are so many cute and amazing gif stickers available to create Instagram stories. Some of the widely used gifs and stickers are Boho, FOOPKLO, HALEYIVERS, OHLALALITA, and EMOJIS. Instagram users can explore these cute and funny stickers and add them to beautify their Instagram stories.
● Customized gif has spiced up the Instagram stories and amazed the people. This feature helps a business to influence people towards their work and attract more people. The content becomes more engaging and interesting through a customized gif.
Adding own gift stickers to an Instagram story is in trend. An Instagram story can be made more creative with an Instagram gif story. Make a powerful impact with a gif on an Instagram story.
In this article
01 [How to Post Gifs to Instagram Story](#Part 1)
02 [8 Cute Instagram Stickers to Make Your Stories Aesthetic](#Part 2)
03 [How to Create Custom Gifs for Instagram Stories](#Part 3)
Part 1 How to Post Gifs to Instagram Story
Instagram stories are one of the best mediums to get connected to people at large. To be in trends and grab maximum people’s attention, it is very necessary to be updated with the new elements of Instagram stories. Gif Instagram story is a new way to increase the followers and be in trends. Adding these gifs in Instagram stories will improve your business by creating more engaging content for business promotion. Let’s see how this can be done?
● Go to the Instagram app installed on your phone. While adding a sticker to a picture of videos in Instagram stories, a GIF option will appear.
● When you tap it, you can find several attractive gifs in the library powered by GIPHY.
● Tap add sticker button that appears on the top of the Instagram stories. Tap the ‘GIF’ icon; the library of trending gifs will appear.
● Look for the gif you need to add to your story. You also have a search option to find your favorite or trending gif.
● After selecting the desired gif, you can add it to your photo or video after resizing it as you desired.
● After finishing, tap on the ‘Your story’ icon.
So, this way, it is easy to create gif story instagram with just a few simple steps.
Part 2 Cute Instagram Stickers to Make Your Stories Aesthetic
Cute Instagram stickers are the best way to lift the creativity of your Instagram stories. Adding stickers are an amazing idea to add design to Instagram stories. Stickers make stories more creative and interesting. Some of the amazing stickers to beautify Instagram stories are:
01BOHO
Boho stickers are good when you search for new stickers. They add fun to the story and give an amazing look for any lifestyle picture over an Instagram story. Boho white is also one type of sticker where are of them are white. Applying white boho to the picture background highlights the space and looks good. One has so many options from cute stars, hearts, lines, and flowers.
02FOOPKLO
For those who want words and saying gif on instagram story, there are some cute pink stickers available. These can be searched as FOOPKLO. Pink flowers, clusters, sayings, hearts, and some more cute stickers are there which can make Instagram stories lovelier.
03HALEYIVERS
For those who are active Instagram users and update their stories every day, the old stickers may not entertain them. So, for those, there are HALEYIVERS stickers. Good morning, days, sunshine, coffee, stars, and hearts add a great style to the Instagram stories. So, next time you need some punch over Instagram stories add some HALEYIVERS stickers.
04OHLALALITA
Instagram story gif is one of the great ways to even express your thoughts and moods in a summarized way. So, for those who wish to add a short story on Instagram, OHLALALITA has the best stickers. Loaded with so many cute words such as Tank you, Made with love, chill, glow, bye-bye, Wow, and many more, it makes any story in just simple words.
05SCARLETPIN
Instagram story gifs are a gift to those who are food lovers. Now with some new additions of gifs from GIPHY, they can post their food stories over their Instagram stories. The range of stickers that can help them is SCARLETPIN. These consist of some bright and colorful stickers of food. Red strawberries, tea, leaves, and oranges are great stuff to include in the morning Instagram stories.
06CURSIVE
Gif for Instagram story is also available in attractive writings. CURSIVE is the most attractive form of writing stories. Popular and cute sayings can be checked on CURSIVE and can be included in the stories. They can be searched and remembered easily. Cursive phrases can be added to the Instagram stories that look visually appealing to the viewers.
07EMOJIS
Emojis are the most lovable stickers available and can be part of any Instagram story. Typing on emojis can be done easily and they can be searched on the search bar. Perfect emojis gifs can be applied to an Instagram story that suits the situation. It can be moved or resized as per the requirement. These emojis gifs add a fun element to the Instagram stories.
08PAINT & BRUSH
Instagram gif story can be made creative with paint and brush. Earlier the users can add text with plain background only. But, paint and brush have enhanced it. Now users can add paint behind the text to make it more engaging. They are simple yet very attractive when added to the stories.
Part 3 How to Create Custom Gifs for Instagram Stories
Funny and expressive Instagram stories of your own always win the hearts of followers. Custom-made gif for Instagram is a great tool for business owners as it brings volume to their business by increasing leads. Custom-made gifs over Instagram stories are eye-catching and thus people get interested in the business. This helps in creating a good brand image for the business.
So, some of the ways to create fascinating custom Gifs Instagram stories for self and business are:
01Pin Instagram stories
Visiting a place and letting people know where you are through Instagram stories is always loved by all. Now, this can be done attractively by using the Pin feature. One can pin on the pictures and videos over the Instagram stories to a particular place. This is the most interesting element to make an Instagram story catchy. It can be done easily by tapping and holding it till it shows a pin at the little bar. This was one can pin gif at the desired location. This gif can pop up at a certain location only. It can be applied to videos one has made of a certain location by moving the gif to a place where one desires.
02Using Gif to give life to any image
To make gif Instagram story aesthetic, adding some moves with sparkles will be the right option. An Instagram user can give life to a picture by including animated elements. Gif adds a fun and surprising element to any Instagram story. When movement in any picture is added through gif, it catches the attention of the viewers and they follow it. A business can make its content engaging with gifs and can achieve its goal.
03Gifs Instagram story to catch viewer’s attention
Gif can be used effectively to create attractive Instagram stories. These gifs are good for the business to highlight their important elements. Gifs like the link in bio, sound on, and swipe up are created for a call to action from the viewers. Adding arrows and signals through gif in the Instagram stories direct the people to spend some minutes on the stories and find something new.
04Highlighting text with gif effects
A customized Instagram story can be made by highlighting text through adding gifs. Sparkle, stars, and highlights gifs can be searched easily and can be applied to any Instagram story. By adding a gif, the text looks stunning and grabs the attention of the viewers. GIPHY has several text-based gifs which can take an ordinary text over the story at a great level. It can be searched by mentioning related keywords.
05Adding gifs to customize selfies
Selfies to Instagram stories are very common. But they can be made even better with some amazing gifs from GIPHY. One can add sunglasses, hats, jewelry, and other fun props to the selfies. Filters can be added by creating their own story through a gif.
06Filmora V11 – A GIF resource
Wondershare Filmora Video Editor (The Filmora Meme maker) : Some many apps and websites offer beautiful gifs to beautify Instagram stories. One of the places where Instagram users can find a wide collection of attractive gifs is Filmora V11. It is a user-friendly tool that has media editing features. It can be used to add sound, light effects, and beautiful gifs to Instagram stories.
Wondershare Filmora - Best Video Editor for Mac/Windows
5,481,435 people have downloaded it.
Build unique custom animations without breaking a sweat.
Focus on creating epic stories and leave the details to Filmora’s auto features.
Start a creative adventure with drag & drop effects and endless possibilities.
Filmora simplifies advanced features to save you time and effort.
Filmora cuts out repetition so you can move on to your next creative breakthrough.
For creating gifs, Filmora V11 can be used and it can be made in a few simple steps. Filmora V11 app is required to be installed on the system and media files can be imported there. Files can be dragged for creating gifs. Filters, stickers, and other effects can be added. They can be further customized as per the requirement of the users. After adding background effects, music, and sound, the gif can be previewed also. The media can be saved as GIFs and can be easily exported also. To customize gifs, the Filmora Meme maker can be used. Captions can be added to GIFs and can be customized by using templates available at Filmora.
So, next time you need to know how to add your own gif to Instagram story, go to Filmora V11. This is one of the great platforms to create some amazing custom gifs to add to Instagram stories. If you want to surprise your viewers with some interesting gifs, try Filmora V11.
● Key Takeaways from This Episode →
● Instagram stories are the most effective way to mark a great impression on the viewers. It is also one of the effective tools to lift any business. Best results can be obtained when attractive and interesting gifs are added to Instagram stories.
● Instagram stories gifs are becoming trendy and there are so many cute and amazing gif stickers available to create Instagram stories. Some of the widely used gifs and stickers are Boho, FOOPKLO, HALEYIVERS, OHLALALITA, and EMOJIS. Instagram users can explore these cute and funny stickers and add them to beautify their Instagram stories.
● Customized gif has spiced up the Instagram stories and amazed the people. This feature helps a business to influence people towards their work and attract more people. The content becomes more engaging and interesting through a customized gif.
6 Proven Ways to Dub Anime for Anime Voice Actor
6 Proven Ways to Dub Anime for Anime Voice Actor
Shanoon Cox
Mar 27, 2024• Proven solutions
Watching anime is one thing majority of the world has come to appreciate. Their engaging storylines, their emotional endings, and hooks, it’s pretty difficult not to like one unless, of course, it’s time for subtitling. Reading subtitles can be stressful and strenuous so most persons just prefer dubbed animes. Dubbed animes are those animes whose voiceovers have been changed to a more preferred language, usually English. Who wouldn’t want to watch their favorite anime dubbed in their language? With great anime voice actors becoming rampant, it’s now easy to get a dubbed version of your favorite anime movies.
6 Ways To Dub Anime For You
So, what if you want to become an anime voice actor so that you can start dubbing? That would be awesome, wouldn’t it? It’s not exactly very easy but it’s also not too hard to achieve. The following steps will help you master how to dub animes.
1. Be An Anime Fan (Know The Anime Culture)
To be able to do something, you have to understand how that thing works. Before you can become a good anime voice actor, you have to actually understand the anime culture. How do animes usually set up for particular genres? Study the storylines, the hooks, the emotion required for different kinds of scenes. You need to actually know your stuff before you can even start thinking about dubbing any anime. Don’t ever decide to become an anime voice actor if you don’t like animes. Most of the scenes may appear silly to you not to talk of the vocabulary which may just sound weird and annoying to one who is not a fan.
2. Train Your Voice Regularly
The next thing you need to do when you’re trying to become an anime voice actor is to train your voice. One thing is to use your natural voice, another thing is to tweak your voice to suit a role. Of course, that won’t come cheap. You should be able to learn and master how to use your voice on demand. Train your voice to sound the way you want, consistently. This is very important because, during dubbing, you’re going to get lines that require you to speak for two or more minutes.
3. Practice Anime Voice Acting Daily (Set Up A Home Studio)
This is almost the same as training your voice. Practicing to be a voice actor comes with a lot of demands, you may need to set up a home studio. Scratch that! You actually need to set up a home studio, this will help you successfully practice your voicing on various animes. You can easily pick any of your favorite anime and start dubbing it, to see how your voice would sound and if you’d be able to match a level of consistency.
4. Try to Network
No man is an island! In as much as you’re trying hard to become a good voice actor and dub your favorite anime. You should look out for people with similar objectives like you. There are lots of people who like you, want to become good voice actors as well. It may not necessarily be anime voicing, it may be for normal movies, commercials or cartoons but you’d be able to learn a thing or two by networking. Linking up with them and seeing how you can help each other.
5. Audition, Audition, Audition
There is no way you will become a voice actor if you don’t audition, is there? When you’re fully sure you can face the crowd with your voice then it’s time to go for auditions. Don’t get me wrong, you don’t actually have to be perfect before you go for auditions but make sure you know a thing or two about what you’re doing. Make sure you understand what needs to be done, make sure you have a good grasp of what you need to do. Apply for auditions at different places and confidently give them your best. You’re bound to get a gig.
6. Be Consistent And Never Give Up
If peradventure you don’t get selected for any of your auditions, it’s important you don’t give up. Stay active, remain consistent with your activeness, don’t allow any emotion to weigh you down. Just be sure that you know what you’re doing and keep at it, continue applying for auditions while mastering your voice. You’re bound to strike a great gig one day.
The Future Of Anime Dubbing
Anime dubbing like most technological advancement has come to stay, it’s alright to embrace it. The fact that anime dubbing is actually helping fans all over the world appreciate their favorite animes, even more, means, more attention should be paid to it. Of course, in recent years the number of great anime voice actors has increased. A lot of them are so good that they have two or three movies to work with at every point in time. The industry is still young and it would be amazing if you as a voice actor is able to work your way to the top here.
Conclusion
Like we said earlier, to be able to do anything, you have to actually know what it is you’re doing. Anime dubbing is fun and amazing when done right, the fact that it helps many anime lovers appreciate their favorite anime movies in their own language makes it worthwhile too. If you ever wish to become a voice actor, it’s good to be consistent, pay close attention to your training, don’t ever assume your voice is already perfect. If you do actually have a great voice, aim for more, master how to tweak your voice to sound differently. This way you will be able to land more gigs in the world of anime dubbing.
Shanoon Cox
Shanoon Cox is a writer and a lover of all things video.
Follow @Shanoon Cox
Shanoon Cox
Mar 27, 2024• Proven solutions
Watching anime is one thing majority of the world has come to appreciate. Their engaging storylines, their emotional endings, and hooks, it’s pretty difficult not to like one unless, of course, it’s time for subtitling. Reading subtitles can be stressful and strenuous so most persons just prefer dubbed animes. Dubbed animes are those animes whose voiceovers have been changed to a more preferred language, usually English. Who wouldn’t want to watch their favorite anime dubbed in their language? With great anime voice actors becoming rampant, it’s now easy to get a dubbed version of your favorite anime movies.
6 Ways To Dub Anime For You
So, what if you want to become an anime voice actor so that you can start dubbing? That would be awesome, wouldn’t it? It’s not exactly very easy but it’s also not too hard to achieve. The following steps will help you master how to dub animes.
1. Be An Anime Fan (Know The Anime Culture)
To be able to do something, you have to understand how that thing works. Before you can become a good anime voice actor, you have to actually understand the anime culture. How do animes usually set up for particular genres? Study the storylines, the hooks, the emotion required for different kinds of scenes. You need to actually know your stuff before you can even start thinking about dubbing any anime. Don’t ever decide to become an anime voice actor if you don’t like animes. Most of the scenes may appear silly to you not to talk of the vocabulary which may just sound weird and annoying to one who is not a fan.
2. Train Your Voice Regularly
The next thing you need to do when you’re trying to become an anime voice actor is to train your voice. One thing is to use your natural voice, another thing is to tweak your voice to suit a role. Of course, that won’t come cheap. You should be able to learn and master how to use your voice on demand. Train your voice to sound the way you want, consistently. This is very important because, during dubbing, you’re going to get lines that require you to speak for two or more minutes.
3. Practice Anime Voice Acting Daily (Set Up A Home Studio)
This is almost the same as training your voice. Practicing to be a voice actor comes with a lot of demands, you may need to set up a home studio. Scratch that! You actually need to set up a home studio, this will help you successfully practice your voicing on various animes. You can easily pick any of your favorite anime and start dubbing it, to see how your voice would sound and if you’d be able to match a level of consistency.
4. Try to Network
No man is an island! In as much as you’re trying hard to become a good voice actor and dub your favorite anime. You should look out for people with similar objectives like you. There are lots of people who like you, want to become good voice actors as well. It may not necessarily be anime voicing, it may be for normal movies, commercials or cartoons but you’d be able to learn a thing or two by networking. Linking up with them and seeing how you can help each other.
5. Audition, Audition, Audition
There is no way you will become a voice actor if you don’t audition, is there? When you’re fully sure you can face the crowd with your voice then it’s time to go for auditions. Don’t get me wrong, you don’t actually have to be perfect before you go for auditions but make sure you know a thing or two about what you’re doing. Make sure you understand what needs to be done, make sure you have a good grasp of what you need to do. Apply for auditions at different places and confidently give them your best. You’re bound to get a gig.
6. Be Consistent And Never Give Up
If peradventure you don’t get selected for any of your auditions, it’s important you don’t give up. Stay active, remain consistent with your activeness, don’t allow any emotion to weigh you down. Just be sure that you know what you’re doing and keep at it, continue applying for auditions while mastering your voice. You’re bound to strike a great gig one day.
The Future Of Anime Dubbing
Anime dubbing like most technological advancement has come to stay, it’s alright to embrace it. The fact that anime dubbing is actually helping fans all over the world appreciate their favorite animes, even more, means, more attention should be paid to it. Of course, in recent years the number of great anime voice actors has increased. A lot of them are so good that they have two or three movies to work with at every point in time. The industry is still young and it would be amazing if you as a voice actor is able to work your way to the top here.
Conclusion
Like we said earlier, to be able to do anything, you have to actually know what it is you’re doing. Anime dubbing is fun and amazing when done right, the fact that it helps many anime lovers appreciate their favorite anime movies in their own language makes it worthwhile too. If you ever wish to become a voice actor, it’s good to be consistent, pay close attention to your training, don’t ever assume your voice is already perfect. If you do actually have a great voice, aim for more, master how to tweak your voice to sound differently. This way you will be able to land more gigs in the world of anime dubbing.
Shanoon Cox
Shanoon Cox is a writer and a lover of all things video.
Follow @Shanoon Cox
Also read:
- Updated 15 Best Apps to Turn Photos Into Cartoons and Sketches
- New 2024 Approved How to Convert Video to GIF Fast & Easy
- Updated In 2024, How to Stop Animation From Looping in Unity
- 10 2D/3D Animation Tips & Tricks to Bring New Ideas to You
- Updated 2024 Approved How to Create an Adobe Collage?
- Updated Ideas of Learning How to Send WhatsApp Animated Gifs
- OBS Animated Lower Thirds Alternatives
- Updated 12 Websites with Triggered Animate on Scroll Examples
- New 2024 Approved Learn Easy Blender Rigging in Only 2 Minutes
- New Ways to Stop Animation From Looping in Unity
- In 2024, 5 Foolproof Amazing Anime Text to Speech Tips for Makers
- New Top 12 Illusion Gifs Top Picks
- New 6 Unexpected Ways Gif Animation Maker Can Affect Your Marketing
- Top 10 Best Photo to Animation Converters
- Updated The Top 20 Motion Graphics Companies & Studios for 2024
- Updated In 2024, Can I Do Animated Logo Design Without Design Skills?
- New Ways to Make Sure You Get the Most up to Date Cartoon Character Design Tips
- Updated Learn Disney Cartoon Drawing to See Disney Magic Moments for 2024
- Have You Seen the Facebook Cartoon App Everyones Using Lately for 2024
- Whats Your No. 1 Maker to Animate Your Logo Online Free for 2024
- Updated In 2024, 10 Amazing Whiteboard Animation Video Examples You Need to Bookmark
- New Ultimate Guide to Animated Characters Drawings for 2024
- New 10 2D/3D Animation Tips & Tricks to Bring New Ideas to You for 2024
- In 2024, Ways on How to Liven Up Your Animate Website on Scroll
- New 2024 Approved Tutorials for Animating Picture Online Without Learning From Scratch
- Updated In 2024, 10 Cartoon Photo Converters
- New In 2024, How to Combine Two/More GIFs Into One GIF Mergers Offered
- Tutorial Guide to Animate Pictures in Canva for 2024
- Want to Make a Meme GIF?
- Updated 2024 Approved Some Techniques for Creating Animated Logo That Few People Know About
- New The Top 20 Motion Graphics Companies & Studios for 2024
- 10 Classical Animated Cartoon Types With Examples
- Updated Why These 10 Top Text Motion Templates Are Worth Your Attention for 2024
- Updated Top 10 Sketch Animation Video Makers
- Updated In 2024, 10 Great MP4 to GIF Converters to Get Perfect-Made GIF
- New 2024 Approved Learn Simple Blender Rigging in Only 2 Minutes
- The Most Efficient Techniques to Make 3D Animation Character for 2024
- New 15 Best Pics Collage Apps Top Picks
- New 10 2D/3D Animation Tips & Tricks to Bring New Ideas to You
- New In 2024, 10 Best Convert Video Between GIF Software High Quality
- New 2024 Approved Best Guide for Beginners on 2D Animation Making
- Updated 10 Caricature Makers to Turn Your Photo to Caricature Effects
- Updated 2024 Approved 10 Popular Cartoon Characters That You Wont Want to Miss
- How to Create Free Photo Collage Frame in Minutes, In 2024
- Best Samsung Galaxy M14 4G Pattern Lock Removal Tools Remove Android Pattern Lock Without Losing Data
- In 2024, Easy Tutorial for Activating iCloud from Apple iPhone 14 Plus Safe and Legal
- In 2024, How to Change your Nokia C32 Location on Twitter | Dr.fone
- In 2024, How To Remove iCloud On Apple iPhone 13 Pro Smoothly
- In 2024, How to Transfer Everything from Apple iPhone 6s Plus to iPhone | Dr.fone
- In 2024, 6 Methods to Protect Yourself from Location Tracking on Apple iPhone 13 | Dr.fone
- New 2024 Approved Comprehensive Guide for Free Video Translator Downloading
- In 2024, Ways to stop parent tracking your Lava Blaze 2 | Dr.fone
- How to Easily Hard reset my Samsung Galaxy Z Flip 5 | Dr.fone
- How To Get Out of Recovery on iPhone 12 Pro Max? | Dr.fone
- How Do I Stop Someone From Tracking My Lenovo ThinkPhone? | Dr.fone
- How Can I Use a Fake GPS Without Mock Location On Vivo V30? | Dr.fone
- Can Life360 Track You When Your Oppo A78 is off? | Dr.fone
- In 2024, Best Infinix Hot 30i Pattern Lock Removal Tools Remove Android Pattern Lock Without Losing Data
- In 2024, 4 Ways to Sync Contacts from Apple iPhone 6 Plus to iPad Easily | Dr.fone
- Fake Android Location without Rooting For Your Honor Magic 6 Pro | Dr.fone
- Bypass Activation Lock On iPhone SE (2020) - 4 Easy Ways
- In 2024, How To Leave a Life360 Group On Apple iPhone 6 Without Anyone Knowing? | Dr.fone
- In 2024, Unlock Itel A05s Phone Password Without Factory Reset Full Guide Here
- How to get the dragon scale and evolution-enabled pokemon On Asus ROG Phone 7? | Dr.fone
- Dose Life360 Notify Me When Someone Checks My Location On Infinix Note 30 5G? | Dr.fone
- Ultimate Guide to Free PPTP VPN For Beginners On Samsung Galaxy A25 5G | Dr.fone
- How To Activate and Use Life360 Ghost Mode On Lava Yuva 3 Pro | Dr.fone
- In 2024, Top IMEI Unlokers for Your Oppo Reno 10 5G Phone
- How To Transfer Data From Apple iPhone 13 mini To Other iPhone 14 Pro devices? | Dr.fone
- In 2024, How and Where to Find a Shiny Stone Pokémon For Sony Xperia 1 V? | Dr.fone
- In 2024, Top 5 Tecno Spark Go (2023) Bypass FRP Tools for PC That Actually Work
- How to Mirror Your Infinix GT 10 Pro Screen to PC with Chromecast | Dr.fone
- How does the stardust trade cost In pokemon go On Samsung Galaxy A15 4G? | Dr.fone
- Can You Unlock iPhone 11 Pro After Forgetting the Passcode? | Dr.fone
- 2 Ways to Monitor ZTE Axon 40 Lite Activity | Dr.fone
- In 2024, How to Change Lock Screen Wallpaper on Samsung Galaxy A23 5G
- 7 Ways to Lock Apps on Apple iPhone X and iPad Securely | Dr.fone
- In 2024, How to Use Life360 on Windows PC For Samsung Galaxy Z Fold 5? | Dr.fone
- In 2024, Complete Tutorial to Use VPNa to Fake GPS Location On Motorola G24 Power | Dr.fone
- Full Guide to Catch 100 IV Pokémon Using a Map On Oppo Reno 9A | Dr.fone
- Authentication Error Occurred on Vivo X Flip? Here Are 10 Proven Fixes | Dr.fone
- How To Fix Unresponsive Phone Touchscreen Of Nokia C02 | Dr.fone
- In 2024, Rootjunky APK To Bypass Google FRP Lock For Itel P40
- In 2024, Is pgsharp legal when you are playing pokemon On Motorola Razr 40? | Dr.fone
- Title: 2D Character Animation Everything You Should Know About It for 2024
- Author: Elon
- Created at : 2024-06-23 02:09:38
- Updated at : 2024-06-24 02:09:38
- Link: https://animation-videos.techidaily.com/2d-character-animation-everything-you-should-know-about-it-for-2024/
- License: This work is licensed under CC BY-NC-SA 4.0.
