

5 Photoshop Alternatives to Animate Logo
5 Photoshop Alternatives to Animate Logo
5 Photoshop Alternatives to Animate Logo
An easy yet powerful editor
Numerous effects to choose from
Detailed tutorials provided by the official channel
Photoshop offers everything that you can use to create a high-quality animated logo and use it to maximize your brand visibility.
![]()
How can you animate your logo in Photoshop? For people who are not familiar with the photo editing tool, it’s always a bit challenging to get started with logo animation.
In this article
01 [Why Do You Need a Gif Logo](#Part 1)
02 [A Step-by-step Guide to Logo Animation in Photoshop](#Part 2)
03 [Most Effective Tactics to Animate Logo with These 5 Photoshop Alternatives](#Part 3)
Part 1 Why Do You Need a Gif Logo
Now, before we start with the guide to animate your logo in Photoshop, let’s first understand how an animation logo can help your brand. The truth is an animated logo has the desired uniqueness factor that’ll help your brand establish a strong digital presence. An animated logo will also set you apart in the crowd, considering other companies will be using simple one-dimensional logos.
Not to mention, you can also use an animated logo in your promotional videos and apply visual effects to enhance the overall production quality of the videos. In a nutshell, there are endless possibilities of using animated logos - all you have to do is unleash your creativity and animate a logo without any hassle.
Part 2 A Step-by-step Guide to Logo Animation in Photoshop
So, now that you know the top reasons why it’s important to use an animated logo, let’s start with the step-by-step guide to animate your logo in Photoshop. It’s worth understanding that animating a logo in Photoshop is not a challenging process. However, it may take a few minutes for you to get the job done because the process is quite time-consuming.
Step 1Open Adobe Photoshop
Open Adobe Photoshop on your computer. Click “File > Scripts” and then tap “Load Files into Stack”.
![]()
Step 2Browse
On the next screen, click “Browse” and load all the JPEG files that you want to use to animate the logo.
![]()
Step 3Timeline
Wait for pictures to load into Photoshop’s timeline. Then, click “Windows” and select “Timeline” from the drop-down menu.
![]()
Step 4Make Frames from Layers
Select all the layers and tap the little “Animation” icon. Click “Make Frames from Layers” to proceed further.
![]()
Step 5Adjust the time span
Select all the frames to adjust the time span for the animation.
Step 6Select looping options
Click on “Select Looping Options” and specify the number of times you want the animation to play itself in the loop.
![]()
Step 7Final export
Your GIF animation is ready for the final export. Simply click “File>Save for Web” and then choose the final output format to export the logo in GIF format.
Part 3 Most Effective Tactics to Animate Logo with These 4 Photoshop Alternatives
Even though Photoshop is a great software to create animated logos, it’s no secret that its complex UI might seem overwhelming for some users. If that’s the case, you can look for Photoshop alternatives and use them to animate your logo online. Here we have shared five of the best alternatives to Photoshop that offer all the essential tools to animate a logo with fewer complications. All these tools have an intuitive interface and allow users to create animated logos within a few minutes.
These Photoshop alternatives include:
01 Figma
![]()
Figma is undoubtedly one of the best editing tools that you can use to animate your logos for free. Even though the tool isn’t as feature-loaded as Photoshop, it’s still one of the best Photoshop alternatives you can use to create animated logos. The tool offers a user-friendly interface where everything you need is right on your screen. Since there aren’t too many hidden menus, you’ll find it quite easier to animate your logos in Figma. There are pre-installed animation templates and transitions that you can customize to meet your business requirements and accelerate the entire designing process.
Key Features:
● Intuitive User Interface
● Support for Team Collaboration
● Can be used for UX/UI designing too
Pros
Dedicated free version for one-time users
Perfect for Novice Designers
Can be used within a professional organization for advanced editing
Cons
You will not get all the features with the free model
If you are looking to design animated logos with keyframes, Figma may not be the right choice for the job
02 Canva
![]()
Canva is another popular online editing tool that’s designed to help users fulfill different editing needs right on their browsers. Whether you want to create a banner for an event or an animated logo for your website, Canva will help you get the job done in every situation.
Being a web-based tool, Canva supports cross-platform compatibility, which means you can access it on any device you want. There are even dedicated iOS and Android apps for Canva that’ll allow you to edit logos right on your smartphone. Basically, if you want to animate your logos online free, Canva is the most suitable solution. You can also use Canva if you are looking for a long-term logo maker.
Key Features:
●Cross-Platform Compatibility
●Thousands of built-in templates with customization support
●The media library gets updated regularly
Pros
All the basic features are available in the free version
One-account to access Canva on any device you want
Ideal for one-time use as well
Cons
When it comes to customization, Canva has limited features
You won’t find advanced editing options like Photoshop
03 Luminar
![]()
Luminar is a paid editing tool that comes with built-in AI support for high-quality editing. Basically, its AI feature can automatically analyze the pictures and suggest you with the best animation templates accordingly. While many users are skeptical about the AI-support, stay assured that it’ll prove to be helpful in 80% of the situations. And, even if you don’t like the suggested templates, you can always go back to the media library and pick a template by yourself.
With AI coming into the picture, Luminar instantly speeds up the entire editing process. You won’t have to spend several hours browsing through the template options. Simply select one of the suggested templates and you’ll be able to initiate the editing process instantly.
Key Features:
●An extensive built-in media library
●Dedicated AI support for precise editing
●Edit your RAW images and add logos easily
Pros
Luminar is an ideal choice for long-time users
Available for both Windows and macOS
Apply templates to multiple images with one click
Cons
With $99 price tag, Luminar is certainly expensive
In the beginning, you may find the user interface a bit overwhelming
04 Fotor
![]()
Fotor is also an online editing tool that can be used to animate your logos online for free. Being a simple online editor, you can’t expect Fotor to offer advanced editing features like some of the other tools we have mentioned in the list.
However, stay assured that when it comes to animating logos, Fotor has everything you’ll need to get the job done. The web-based tool offers 100,000 templates that are designed for different industries. You can choose any of these templates, customize them, and create bespoke animated logos for your brand.
Key Features:
● Different templates to choose from
● Easy drag-&-drop compatibility
● Ideal for first-time as well as professional users
Pros
Available for free
Perfect for social media managers
Customizable templates
Cons
Lacks advanced editing support
The premium version doesn’t have too many useful features
Key Takeaways from This Episode
● Animate your logo in Photoshop and make it visually appealing with 5-easy steps
● If you want to integrate your animated logo into a video, you can use Wondershare Filmora Pro to get the job done within a few minutes
● If you are a beginner, you can also use web-based editing tools to animate your logo online for free.
What Are Differences Between 2D And 3D Animation
What Are Differences Between 2D And 3D Animation
An easy yet powerful editor
Numerous effects to choose from
Detailed tutorials provided by the official channel
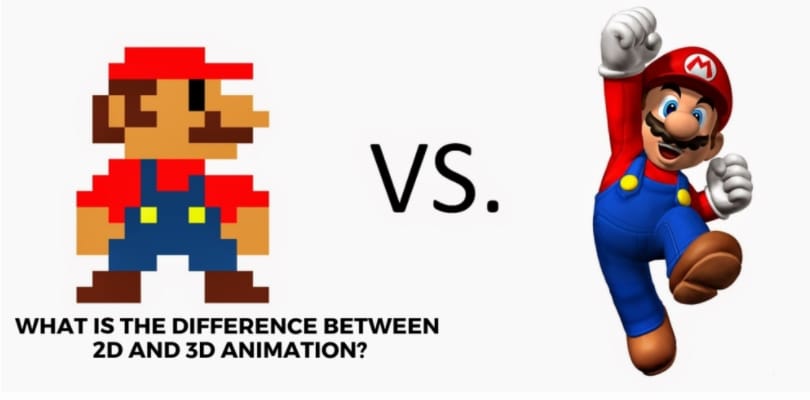
Creating an animation requires multiple processes and tasks to get that final result that we enjoy on the screen. Irrespective of the type of animations like stop-motion, sketch, computer, and others, all of them majorly falls under two main categories- 2D animation and 3D animation. The popular cartoons like Mickey Mouse, Tom & Jerry, and others that became an integral part of all childhood were 2D animations and with technological advancement and 3D animation in use, they are more like aged-veterans.
Toy Story was the first 3D animation movie and after that, there is no stopping. Though 3D animations are more interesting and engaging, they are fields where 2D animations work better. This article will help you to learn in detail about 2D 3D animation, their differences, uses, and other aspects.
In this article
01 [Definition of 2D Animation 3D Animation?](#Part 1)
02 [Key Differences Between 2D Animations and 3D Animations](#Part 2)
03 [Selecting Between 2D Animation and 3D Animation?](#Part 3)
04 [Merging 2D Animation and 3D Animation](#Part 4)
Part 1 Part Definition Of 2D And 3D Animation
012D Animation
The traditional method of animation is termed 2D animation and it has been in use for a long time. A 2D animated video has multiple images in different positions which when moved quickly one after the other simulates a movement. The flipping of the images creates an illusion of movement. Earlier 2D animations were created using hands but now there is advanced computer software that can create these animations in just a few simple clicks. The term 2D means 2 dimensional which means that an image for the animation can be moved in two-dimensional space that is X-axis and Y-axis.
023D Animation
In simplest terms, a 3D animation is an animation that is created in three-dimensional space which makes the characters and objects appear realistic and lively. Thus, a 3D animation has height, width as well as depth. These animations are more complex and the process of creating them is totally different from that of 2D animations. Though 3D animations are used in different industries and platforms these days, majorly they can be found for creating movies, games, and cartoons.
Part 2 Part Key Differences Between 2d Animations and 3d Animations
The major difference between a 2D animation and 3D animation lies in the final appearance. While a 2D animation appears like a flat animation which can be an image or a photograph at a fast movement while a 3D animation looks like real objects that can be seen from all angles and have their front, back, top, as well as the bottom.
The table below will differentiate both these animations on various parameters.
| Features/Type of Animation | 2D Animation | 3D Animation |
|---|---|---|
| Full-Form | Two-dimensional | Three-dimensional |
| Meaning | These animations with 2-dimensional objects appear to be moving when the images are moved at a fast speed. | The objects and characters in these animations look more realistic as their appear in 3-dimensional space. |
| Supported Aspects and axis | Length and height (X-axis and Y-axis) | Length, height, and width (X-axis, Y-axis and Z-axis) |
| Appearance | Appear as flat | Appear lively and realistic |
| Basic elements | It’s all about frames | The animation is all about movements |
| Axis | Images appear at X-axis, and Y axis | Objects appear at X-axis, Y-axis, and Z-axis. |
| Use and target audience | Used for social media sites, demos, animated whiteboard videos, and similar others. | Used for movies, cartoons, video games. |
| Use of software | Hand-drawn images or computer-generated images can be used. | Complex software is needed. |
| Cost | Cheaper than 3D animations | Expensive |
| Examples | Snow White, The Jungle Book, Mickey Mouse, Tom & Jerry, and more. | The Toy Story, Transformers, Incredibles, and more. |
Part 3 Selecting Between 2D Animation and 3D Animation?
Confused between 2D animation and 3D animation? Several factors can be considered to select between the two types of animations. Major ones are enlisted below.
● Target audience: For general explanation and use, 2D animations are a good choice as they are interesting, engaging, and also pocket-friendly. If the target audience is professional people that need in-depth and important information about something, 3D animations are a better choice.
● Availability of software: There are different software used for different types of animations. The availability of the software can also be a deciding factor for selecting between a 2D animation or 3D animation.
● Budget: This is another important factor to be considered. Since 3D animation requires more complex tools and procedures, creating them is expensive. So, depending on how much you are willing to spend, you can choose between the two.
Part 4 Part Merging 2D Animation and 3D Animation
Why choose one, when both can be used? Yes, to get the best of both worlds, 2D animations can be used along with 3D animations depending on the type of the project. Both the styles can be adjusted as per the requirements and for this, good professional software is needed.
We here suggest Wondershare Filmora Video Editor as the best tool as it not only comes equipped with all the latest features but the entire process is also quick and hassle-free. Majorly working as an excellent video editing software, the program supports multiple functions supporting animated videos. Using this Windows and Mac-based tool yon create dynamic animated videos and also edit them and customize them to suit your requirements.
For Win 7 or later (64-bit)
For macOS 10.12 or later
Key features of the software
● Create interesting and engaging animated and other videos using more than 100 media layers, composting tools, and dynamic effects.
● Apply motion elements, filters, and transitions for dynamic videos.
● Audio functions like background noise removal, audio equalizer, keyframe audio editing, and others are supported.
● Fast import, export, and rendering.
● Option to preview the files in high resolution.
● Features like fisheye correction, speed control, stabilization, advanced color correction, 3D LUTs, and others are supported.
● Additional supported functions include import from social media sites, portrait support, camera shake, audio-mixing, screen recording, auto-crop, and others.
● Windows and Mac support.
● Key Takeaways from This Episode →
● 2D and 3D animation are the two major types of animations created for different uses.
● A 2D animation appears in two-dimensional space while a 3D animation appears in a three-dimensional space and looks livelier and more realistic.
● Both 2D and 3D animations can be merged using professional software like Wondershare Filmora Video Editor that supports a wide range of other functions as well.
How to Cartoonize Photo Photoshop in Simple Steps
How to Cartoonize Photo Photoshop in Easy Steps
An easy yet powerful editor
Numerous effects to choose from
Detailed tutorials provided by the official channel
Cartoons, an already catchy entertainment source, can upgrade other media utilities on integration. Look through the easiest ways of creating cartoonize photo Photoshop stills!
In this article
01 [Types of Cartoon Effects in Photoshop](#Part 1)
02 [Easiest Ways to Cartoonize Photo in Photoshop](#Part 2)
03 [How to Use a Variety of Photoshop Special Effects to Create the Final Caricature Look](#Part 3)
Part 1 Types of Cartoon Effects in Photoshop
It is an absolute fun activity to explore your editing creativity in the realm of cartoonizing the otherwise ordinary still captures. Talking of the most convenient cartoon creator and editor applications, you can safely rely on the Photoshop Image Editor application to choose from a pool of cartoon editing effects for adding that spunky and funny element to your image files.
Presented in the following section, is a discussion of some of the most stunning and visibly amazing cartoon effects in the application’s Editor Library to cartoonize Photoshop images:
01Pop Art Photoshop Action
The effect is a predominantly preferred as a cartoon action Photoshop utility to caricaturize a normal image, along with customizing the same to change the colors and background of the original still capture for creating a brand new appearance with utmost ease. Apart from this, the aforesaid effect allows you to exclusively customize the globally acclaimed graphic masterpieces of Roy Lichtenstein. Working with the effect, you can edit a self-portrait or the favorite image of your pet to give the latter, a funny retro feel.

02Vintage Comic Creator
If the idea of sticking to just the creation of cartoon images is not enough to satisfy you, the Vintage Comic Creator effect allows you to expand your creativity level to work on cartoon based shape and text edits. You can use the effect to enhance an image logo or plain text with a comic book oriented text. A download of this cartoon effect template facilitates you with diversities of customizable layer styles, overlays and patterns.

03GTA Photoshop Action
This is a complete pleasure for the creative fan of Grand Theft Auto, the wicked chasing game series. Additional to creating a stark variety of edited cartoon stills, you are free to reinvent the aforesaid game’s most popular caricature edits, while using the GTA Photoshop Action editing filter. Launched by Indworks, the effect package consisting of 15 vibrant themes and 5 collage templates; promises a quick mimicry of your most cherished video and console games.

04Vector Paint Photoshop Action
The one is an amazing Photoshop effect for creating cartoon edits, which works through a merger of two different ingenious art themes or styles for transforming basic images into cartoonized stills.
The effect grants you the liberty to use varieties of art styles, such as, comic, photo retouching and energetic oil to obtain editing results comparable to that of any original photograph. The template is conveniently simple to use and assures you of quick results. All this, just at a nominal price of $6! Interesting, right?

05Ultra Realistic 3D Space Effect
Considering the fact of you being a space admirer, this one is the perfect image editor for you to add the vibrancy of stunning space elements and backgrounds within your cartoonized edits. The effect lets you play with the diverse range of customizable text and exciting caricature backgrounds. When downloading the template, you get a main setup file, a few editing examples and a web link to the free fonts present in the effect.

06Animated Zombie Grime Art Photoshop Action
Are you in love with the latest zombie grimes? If yes, then this action set is exclusive editor package for you. Working with the aforesaid image template, you can effortlessly add the perfect zombie theme to your cartoon edits, along with simultaneously creating a stunning animation, which you can use to enhance your video or GIF uploads on social media. Not forgetting the best part, you get a free access to this amazing utility.

Part 2 Easiest Ways to Cartoonize Photo in Photoshop
Having known about the amazing varieties of cartoonized editor templates in Photoshop, it is a natural instinct to feel motivated to create your own caricature images from normal capture stills. Addressing the concern of image transformation methods to turn a photo into a cartoon Photoshop, let us dive into some of the most affordable methods of creating cartoonized photos in the aforesaid editing application.
Talking of the most basic Photoshop tools for creating caricature images, you can start your editing spree with using the Graphic Tablet, Brush Tool, Layer Masks and a graphic pen to create amateur cartoonized edits from your still photographs, getting a full control on image tracing.
01Brush Tool
A few usage examples include working with a combination of the graphic tablet pen and the editor brushes to trace your image, using the brush in a masked or a fresh layer to avoid altering the actual image, and much more.
02Graphic Tablet
It is best to use the Photoshop Graphic Tablet for adhering to the concern of tracing cartoonized images. You can alternatively cater to the job with a trackpad, mouse, or even your hand. It is however, difficult to assure steady hand postures for image tracing, lest you are using a stylus pen.
03Pen Tool
Using the Pen Tool for cartoonizing your portrait, allows you to draw outlines along the desired figure within the image, along with its important elements, so that you can easily use these outlined paths to introduce different color blocks.
Similar to the Brush Tool, the Photoshop Pen utility grants you the freedom to vary the degree of detailing in your cartoon edit, from being highly expressive to only remaining around the shore. Working with the Pen Tool can, however be a bit tiring and time taking, with respect to the extent of detailing you wish to add to the caricature edits.
Additional to the aforementioned tools, you can also consider using the default image filters of the Photoshop application to get comparable results. This is an exclusively better option to choose, compared to the Pen Tool, when you are working without a Graphic Tablet. To get over the top realistic caricature renderings, you will need to supplement the use of Photoshop filters with the application’s editing channels and other adjustments.
Part 3 How to Use a Variety of Photoshop Special Effects to Create the Final Caricature Look
Considering the extensive discussion on the credibility of the Photoshop Image Editor application in the realm of creating stunning caricature images in high end resolution, let us proceed to learn about using the diversity of Photoshop’s special effects to get the last stage cartoonized appearance of ordinary still images.
User’s Guide to Create High End Cartoonized Look
The following tutorial is a stepwise explanation of the process to convert photo into cartoon Photoshop in the easiest possible way. Stick to the method for getting affordable results in a quick span.
Step 1: Download and Launch the Program
Visit the official website of Photoshop Image Editor for a free download of the software program in your system, followed by installing and launching the same in your device.
Step 2: Upload Your Image
On a successful launch of the editor program, you will be directed to the ‘Photoshop Editor’ window, where you are required to upload any desired still image from your device for creating a cartoonized edit. To do this, either simply add your image to the editor workspace using the ‘Drag and Drop’ method, or navigate to the ‘File’ tab in the top toolbar and click on ‘Open’ in the dropdown menu.
Step 3: Edge Enhancement
Once your image appears in the editor timeline, proceed to sharpen the edges of the face and body of the portrait. Start with navigating to and clicking on the ‘Filter’ option, followed by tapping on ‘Filter Gallery’ and selecting the ‘Artistic’ folder, where you need to choose the ‘Poster Edges’ option. Observe the effect of these setting on the portrait and make necessary changes.

Step 4: Background Setting
Ensure that the background and foreground of your image are set to white and black colors respectively. If not, proceed to adjust the same as required.

Step 5: Distorting the Edges
You now need to introduce some distortion in the edges of your portrait. Navigate to the ‘Filter’ option again, open the ‘Filter Gallery’ and choose ‘Torn Edges’ from the menu that drops down. Select the desired parameter values in accordance with your creative suitability.


Step 6: Using the Channels Panel
The next step is to select and copy your portrait using the ‘Ctrl + A’ and Ctrl + C commands respectively. Navigate to the ‘Channels’ panel at the right of the Photoshop workspace. At the panel’s bottom right, proceed with creating a new channel. It will be assigned the name ‘Alpha 1’ by Photoshop, which you are most welcome to change.


Step 7: Color Inversion
When you finish creating the channel, use the ‘Ctrl + V’ command to paste your portrait in the same. Proceed with inverting the image colors by navigating to the ‘Image’ option, followed by choosing the ‘Adjustment’ and ‘Invert’ options from the consecutive drop downs. Now, make a selection of the ‘White’ regions of your portrait by pressing the ‘Ctrl’ key and clicking on the ‘Alpha 1 Channel thumbnail.

Step 8: Layer Creation
Navigate to the ‘Layers’ panel at the right of the Photoshop workspace, and click on the ‘New Layer’ icon for creating a fresh layer. Fill the just created layer with black color, either by pressing ‘g’ from your system’s keyboard, or using the ‘Paint Bucket’ tool. Don’t forget to assign a suitable name to the layer.

Repeat the above process to create a separate layer and e fill the same with white color. The layer creation process is essential to separate the white and black colors of the actual image.

Step 10: Layer Dragging
In the ‘Layers’ panel, drag the ‘Black’ layer above the ‘White’ one.

Step 11: Creating Additional Layers
You are now required to create three more layers, with the same process as for the above two, for adding effects to the Skin, Clothes and Teeth/Eyes of the portrait. When you finish creation, assign suitable names to the layers, followed by dragging them below the ‘Black’ one within the ‘Layers’ panel.

Step 12: Color Selection and Application
Choose the respective colors for the clothes, skin and teeth/eyes of the cartoonized edit. To proceed with color application, navigate to the toolbar at the left of the Photoshop workspace and choose the ‘Brush Tool’. Finally, choose a particular layer and apply careful brush strokes to add color to the specific area of the portrait that you wish to edit. Follow the same process to add colors to the remaining layers to get the desired result in all areas of your cartoonized edit.

Step 13: Using the Gradient Tool
Navigate to the ‘Layers’ panel again and create a new ‘Gradient’ layer to further enhance your creation. You now need to select the ‘Gradient Tool’ from the toolbar at the left of the Photoshop workspace. The ‘Gradient Editor’ pops up with the continuously running ‘Gradient Bar’, as soon as you make the selection. Double click on the gradient boxes at both ends to select them, followed by making your color choices. Tap on ‘OK’ when you are satisfied with your work.

Step 14: Filling the Gradients
To proceed with gradient filling, press and hold the mouse button on the image at the bottom left and continue to drag the cursor to its top right corner. Leave the mouse and navigate to the ‘Layers’ panel for dragging and dropping the ‘Gradient’ layer above the ‘White’ layer.

You are now done with the process of creating a caricature edit from a normal still portrait. Your final image output will appear something like the following:

Cartoons, an already catchy entertainment source, can upgrade other media utilities on integration. Look through the easiest ways of creating cartoonize photo Photoshop stills!
In this article
01 [Types of Cartoon Effects in Photoshop](#Part 1)
02 [Easiest Ways to Cartoonize Photo in Photoshop](#Part 2)
03 [How to Use a Variety of Photoshop Special Effects to Create the Final Caricature Look](#Part 3)
Part 1 Types of Cartoon Effects in Photoshop
It is an absolute fun activity to explore your editing creativity in the realm of cartoonizing the otherwise ordinary still captures. Talking of the most convenient cartoon creator and editor applications, you can safely rely on the Photoshop Image Editor application to choose from a pool of cartoon editing effects for adding that spunky and funny element to your image files.
Presented in the following section, is a discussion of some of the most stunning and visibly amazing cartoon effects in the application’s Editor Library to cartoonize Photoshop images:
01Pop Art Photoshop Action
The effect is a predominantly preferred as a cartoon action Photoshop utility to caricaturize a normal image, along with customizing the same to change the colors and background of the original still capture for creating a brand new appearance with utmost ease. Apart from this, the aforesaid effect allows you to exclusively customize the globally acclaimed graphic masterpieces of Roy Lichtenstein. Working with the effect, you can edit a self-portrait or the favorite image of your pet to give the latter, a funny retro feel.
02Vintage Comic Creator
If the idea of sticking to just the creation of cartoon images is not enough to satisfy you, the Vintage Comic Creator effect allows you to expand your creativity level to work on cartoon based shape and text edits. You can use the effect to enhance an image logo or plain text with a comic book oriented text. A download of this cartoon effect template facilitates you with diversities of customizable layer styles, overlays and patterns.
03GTA Photoshop Action
This is a complete pleasure for the creative fan of Grand Theft Auto, the wicked chasing game series. Additional to creating a stark variety of edited cartoon stills, you are free to reinvent the aforesaid game’s most popular caricature edits, while using the GTA Photoshop Action editing filter. Launched by Indworks, the effect package consisting of 15 vibrant themes and 5 collage templates; promises a quick mimicry of your most cherished video and console games.
04Vector Paint Photoshop Action
The one is an amazing Photoshop effect for creating cartoon edits, which works through a merger of two different ingenious art themes or styles for transforming basic images into cartoonized stills.
The effect grants you the liberty to use varieties of art styles, such as, comic, photo retouching and energetic oil to obtain editing results comparable to that of any original photograph. The template is conveniently simple to use and assures you of quick results. All this, just at a nominal price of $6! Interesting, right?
05Ultra Realistic 3D Space Effect
Considering the fact of you being a space admirer, this one is the perfect image editor for you to add the vibrancy of stunning space elements and backgrounds within your cartoonized edits. The effect lets you play with the diverse range of customizable text and exciting caricature backgrounds. When downloading the template, you get a main setup file, a few editing examples and a web link to the free fonts present in the effect.
06Animated Zombie Grime Art Photoshop Action
Are you in love with the latest zombie grimes? If yes, then this action set is exclusive editor package for you. Working with the aforesaid image template, you can effortlessly add the perfect zombie theme to your cartoon edits, along with simultaneously creating a stunning animation, which you can use to enhance your video or GIF uploads on social media. Not forgetting the best part, you get a free access to this amazing utility.
Part 2 Easiest Ways to Cartoonize Photo in Photoshop
Having known about the amazing varieties of cartoonized editor templates in Photoshop, it is a natural instinct to feel motivated to create your own caricature images from normal capture stills. Addressing the concern of image transformation methods to turn a photo into a cartoon Photoshop, let us dive into some of the most affordable methods of creating cartoonized photos in the aforesaid editing application.
Talking of the most basic Photoshop tools for creating caricature images, you can start your editing spree with using the Graphic Tablet, Brush Tool, Layer Masks and a graphic pen to create amateur cartoonized edits from your still photographs, getting a full control on image tracing.
01Brush Tool
A few usage examples include working with a combination of the graphic tablet pen and the editor brushes to trace your image, using the brush in a masked or a fresh layer to avoid altering the actual image, and much more.
02Graphic Tablet
It is best to use the Photoshop Graphic Tablet for adhering to the concern of tracing cartoonized images. You can alternatively cater to the job with a trackpad, mouse, or even your hand. It is however, difficult to assure steady hand postures for image tracing, lest you are using a stylus pen.
03Pen Tool
Using the Pen Tool for cartoonizing your portrait, allows you to draw outlines along the desired figure within the image, along with its important elements, so that you can easily use these outlined paths to introduce different color blocks.
Similar to the Brush Tool, the Photoshop Pen utility grants you the freedom to vary the degree of detailing in your cartoon edit, from being highly expressive to only remaining around the shore. Working with the Pen Tool can, however be a bit tiring and time taking, with respect to the extent of detailing you wish to add to the caricature edits.
Additional to the aforementioned tools, you can also consider using the default image filters of the Photoshop application to get comparable results. This is an exclusively better option to choose, compared to the Pen Tool, when you are working without a Graphic Tablet. To get over the top realistic caricature renderings, you will need to supplement the use of Photoshop filters with the application’s editing channels and other adjustments.
Part 3 How to Use a Variety of Photoshop Special Effects to Create the Final Caricature Look
Considering the extensive discussion on the credibility of the Photoshop Image Editor application in the realm of creating stunning caricature images in high end resolution, let us proceed to learn about using the diversity of Photoshop’s special effects to get the last stage cartoonized appearance of ordinary still images.
User’s Guide to Create High End Cartoonized Look
The following tutorial is a stepwise explanation of the process to convert photo into cartoon Photoshop in the easiest possible way. Stick to the method for getting affordable results in a quick span.
Step 1: Download and Launch the Program
Visit the official website of Photoshop Image Editor for a free download of the software program in your system, followed by installing and launching the same in your device.
Step 2: Upload Your Image
On a successful launch of the editor program, you will be directed to the ‘Photoshop Editor’ window, where you are required to upload any desired still image from your device for creating a cartoonized edit. To do this, either simply add your image to the editor workspace using the ‘Drag and Drop’ method, or navigate to the ‘File’ tab in the top toolbar and click on ‘Open’ in the dropdown menu.
Step 3: Edge Enhancement
Once your image appears in the editor timeline, proceed to sharpen the edges of the face and body of the portrait. Start with navigating to and clicking on the ‘Filter’ option, followed by tapping on ‘Filter Gallery’ and selecting the ‘Artistic’ folder, where you need to choose the ‘Poster Edges’ option. Observe the effect of these setting on the portrait and make necessary changes.
Step 4: Background Setting
Ensure that the background and foreground of your image are set to white and black colors respectively. If not, proceed to adjust the same as required.
Step 5: Distorting the Edges
You now need to introduce some distortion in the edges of your portrait. Navigate to the ‘Filter’ option again, open the ‘Filter Gallery’ and choose ‘Torn Edges’ from the menu that drops down. Select the desired parameter values in accordance with your creative suitability.
Step 6: Using the Channels Panel
The next step is to select and copy your portrait using the ‘Ctrl + A’ and Ctrl + C commands respectively. Navigate to the ‘Channels’ panel at the right of the Photoshop workspace. At the panel’s bottom right, proceed with creating a new channel. It will be assigned the name ‘Alpha 1’ by Photoshop, which you are most welcome to change.
Step 7: Color Inversion
When you finish creating the channel, use the ‘Ctrl + V’ command to paste your portrait in the same. Proceed with inverting the image colors by navigating to the ‘Image’ option, followed by choosing the ‘Adjustment’ and ‘Invert’ options from the consecutive drop downs. Now, make a selection of the ‘White’ regions of your portrait by pressing the ‘Ctrl’ key and clicking on the ‘Alpha 1 Channel thumbnail.
Step 8: Layer Creation
Navigate to the ‘Layers’ panel at the right of the Photoshop workspace, and click on the ‘New Layer’ icon for creating a fresh layer. Fill the just created layer with black color, either by pressing ‘g’ from your system’s keyboard, or using the ‘Paint Bucket’ tool. Don’t forget to assign a suitable name to the layer.
Repeat the above process to create a separate layer and e fill the same with white color. The layer creation process is essential to separate the white and black colors of the actual image.
Step 10: Layer Dragging
In the ‘Layers’ panel, drag the ‘Black’ layer above the ‘White’ one.
Step 11: Creating Additional Layers
You are now required to create three more layers, with the same process as for the above two, for adding effects to the Skin, Clothes and Teeth/Eyes of the portrait. When you finish creation, assign suitable names to the layers, followed by dragging them below the ‘Black’ one within the ‘Layers’ panel.
Step 12: Color Selection and Application
Choose the respective colors for the clothes, skin and teeth/eyes of the cartoonized edit. To proceed with color application, navigate to the toolbar at the left of the Photoshop workspace and choose the ‘Brush Tool’. Finally, choose a particular layer and apply careful brush strokes to add color to the specific area of the portrait that you wish to edit. Follow the same process to add colors to the remaining layers to get the desired result in all areas of your cartoonized edit.
Step 13: Using the Gradient Tool
Navigate to the ‘Layers’ panel again and create a new ‘Gradient’ layer to further enhance your creation. You now need to select the ‘Gradient Tool’ from the toolbar at the left of the Photoshop workspace. The ‘Gradient Editor’ pops up with the continuously running ‘Gradient Bar’, as soon as you make the selection. Double click on the gradient boxes at both ends to select them, followed by making your color choices. Tap on ‘OK’ when you are satisfied with your work.
Step 14: Filling the Gradients
To proceed with gradient filling, press and hold the mouse button on the image at the bottom left and continue to drag the cursor to its top right corner. Leave the mouse and navigate to the ‘Layers’ panel for dragging and dropping the ‘Gradient’ layer above the ‘White’ layer.
You are now done with the process of creating a caricature edit from a normal still portrait. Your final image output will appear something like the following:
15 Iconic Cartoon Characters of All Time
14 Iconic Cartoon Characters of All Time
An easy yet powerful editor
Numerous effects to choose from
Detailed tutorials are provided by the official channel
The best part about cartoons is that there’s something for everyone. There are iconic cartoon characters that are humorous, cute, and cool.
Since Paste first published this list a decade ago, a lot has changed in the world of cartoons. New episodes of The Simpsons, Family Guy, South Park, and SpongeBob Squarepants get released regularly, but that’s only the tip of the iceberg. Traditional cable networks have spawned new and exciting animated characters and settings while streaming services have enabled even more creators to produce the animated shows they want.
We thought to update our list of the 12 most iconic cartoon characters of all time, considering the cultural influence, relatability, and significance these animated humans, animals, vegetables, and other creatures had within the sphere of animation in 2020. Many of these characters have gone beyond their cartoon origins into other media. Still, for this list, we’ll only look at them as they appear in cartoons, whether they’re from the program itself or related comics and books.
01Fred Flintstone
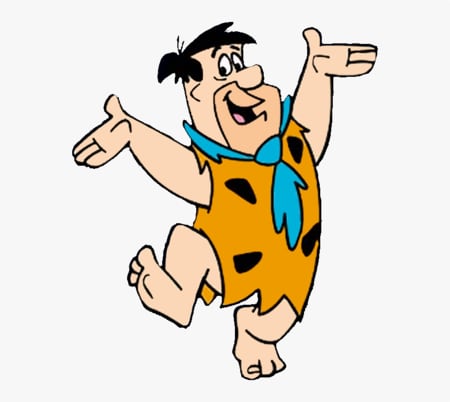
Created: 1960
Creators: William Hanna, Joseph Barbera
Voices: Jeff Bergman and Alan Reed, as well as a variety of others
Fred, the patriarch of his modern-day stone-age clan, was an outspoken supporter of cartoons. The original series was one of the most contentious shows on television in the 1960s, despite its benign appearance (the Flintstones are better recognized for their cereal and vitamin advertising).
Fred Flintstone, the iconic cartoon character, is not the best-drawn cartoon character ever. He is pleasant and faithful to his wife, Wilma, despite not being a terrific boxer. The character carries a lump of granite on his shoulders and shows no fear of jeopardizing his marriage and children. He’s still a hominid, a caveman with extraordinary strength and agility.
02Mickey Mouse
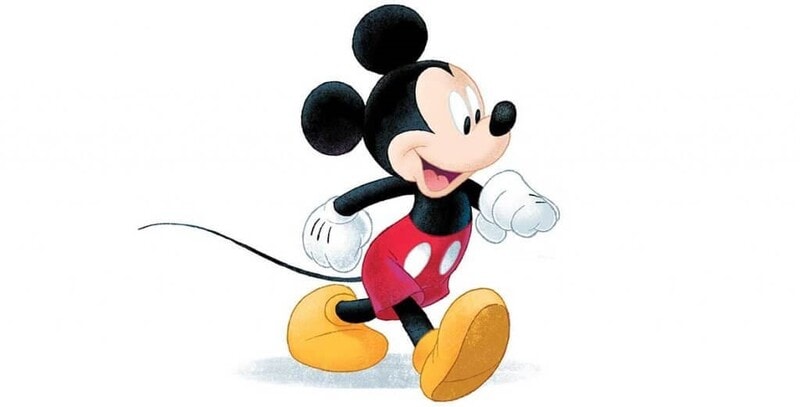
Created: 1928
Creators: Walt Disney, Ub Iwerks
Voices: Walt Disney, BretIwan, and other voices
Mickey Mouse, the Disney mascot, is easy to overlook. Without the joys of an adventurous, passionate mouse, there might not be a Disney kingdom. In 2024, nearly a century after Disney’s legendary Disney short “Steamboat Willie,” the public domain will glimpse the mouse.
Walt Disney initially produced the most iconic cartoon character Mickey Mouse in 1928. His unique red shorts and white gloves have helped him become one of the most well-known fictional characters in the world. He usually wears a white glove and a white cap, and his enormous, yellow shoes are a common sight. Mickey also sports a pair of white gloves and his white gloves and shorts. He also wears a giant red bow and his clothes, which makes him a versatile character.
03SpongeBob Squarepants

Created: 1999
Creator: Stephen Hillenburg
Voice by Tom Kenny
Although Sponge’s nautical nonsense was probably not to most parents’ liking, Tom Kenny’s renowned chuckle has become ingrained in viewers’ brains all across the world after two decades of programming.
For almost 30 years, the SpongeBob Squarepants series has been a hit. It’s a cartoon about Patrick, a yellow sea sponge which is enthusiastic about life. He works as a chef at the Krusty Krab and lives in a pineapple house. Patrick, who is also his best friend, is his best friend.
The characters are likable and harmless in general, while some of the songs in the show deal with contentious topics, many based on actual events. The show has been chastised for portraying kids as unpleasant, obnoxious, and even defiant and using many caustic languages. While the show is often entertaining, its messages can be contentious.
SpongeBob is a young adult who lives independently and works full-time despite his immaturity.
04Tom and Jerry
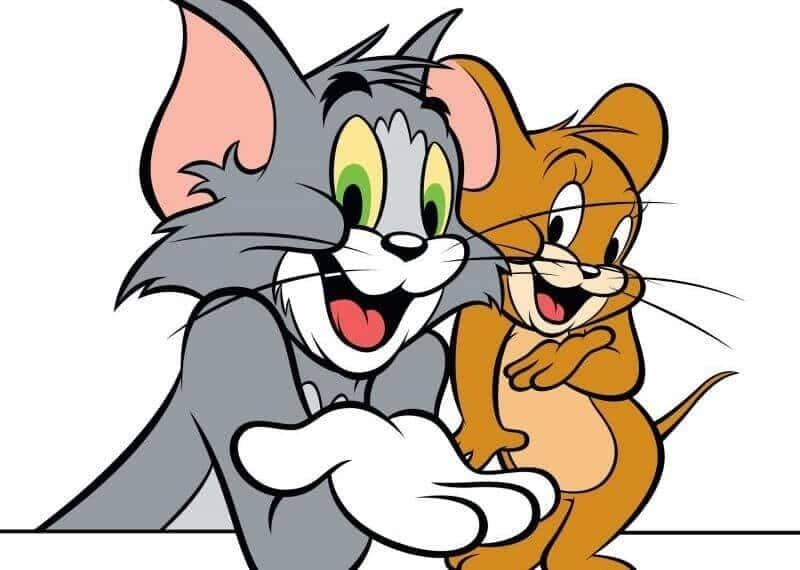
Created: 1941
Creators: William Hanna, Joseph Barbera
Voices: William Hanna and various other voices
The series, founded by William Hanna and Joseph Barbera in 1940, is perhaps most known for Metro-Goldwyn-161 Mayer’s theatrical short films.
Tom the cat and Jerry the mouse, the iconic cartoon characters star in the original shorts. They don’t always get along, but they’re usually delighted with each other and often laugh at their misfortunes. Each short features the two attempting to catch the other. This is a desperate attempt to make the other person unhappy, but it rarely works.
Tom and Jerry were minor characters in the early years of the show. There were a few distinctions between them and the human characters in the film. The first one focused more on the mouse than the human cast, but the second was more centered on the human.
05Homer Simpson
Created: 1987
Creator: Matt Groening
Voice: Dan Castellaneta
The Simpsons’ first two seasons centered on Bart. But it was genuinely stunning as the show became more Homer-centric. He is the average man at his most sluggish, hungry, dumb, intoxicated, and idiotic. Thanks to his tremendous heart, he is still the hero, hidden beneath all the doughnuts.
Homer is a talented pianist in addition to expressing his love for Marge. He can play the guitar and keyboard, and his barbershop music has garnered him a Grammy. His most remarkable musical gift is his powerful operatic voice, which he uses in his band, Babysitter Bandit. His singing voice has won him fans worldwide, and he has played in hundreds of bands.
06Charlie Brown and Snoopy (Peanuts)
Created: 1950
Creator: Charles M. Schulz
Voice: Bill Melendez, Peter Robbins and other.
Charlie Brown and Snoopy came to life through a few TV specials and later series, even though not all of the characters made it to television. Snoopy’s Red Baron fantasies and friendship with Woodstock were popular with children. They were also fans of Lucy’s crush. Charlie was well-liked by the older crowd. Charlie Brown, the hapless Charlie Brown, elicits as much sympathy as any animated character. We pull for him even though we know it will all be for naught.
Charlie Brown and Snoopy are part of the Peanuts Gang, an iconic group of cartoon characters. You’ve undoubtedly seen these two cartoon heroes previously if you haven’t heard of them. These two are from the well-known Peanuts cartoon series. They are famous children’s characters who are appreciated by many.
07Bugs Bunny (Looney Tunes)
Created: 1940
Creators: Ben Hardaway, Tex Avery
Voices: Mel Blanc, Jeff Bergman and other voices
The most fabulous cat cartoon in history is a rabbit, alternatively, a hare. This little taxonomic distinction went unmentioned in numerous shenanigans. Regardless of whether the rabbit was hunting with Elmer Fudd’s shotgun, Yosemite Samantha’s pistols, or Marvin Martian’s ACME Disintegration Gun, he maintained an enviable insouciance. The iconic visage of Warner Bros. had one flaw: terrible direction sense, particularly while digging across New Mexico.
Bugs Bunny is a late-thirties animated cartoon character created by Leon Schlesinger Productions. Mel Blanc provided his voice for him, and he has acted in several short films and television series. Many children were enthralled by the show, while the characters and stories fascinated others.
08Scooby-Doo and Shaggy Rogers
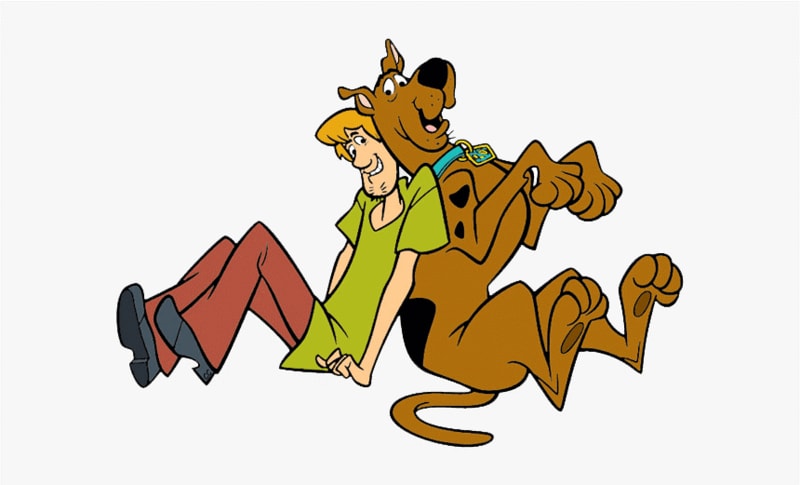
Created: 1969
Creators: Joe Ruby and Ken Spears
Voices: Don Messick, Casey Kasem and a variety of others
Scooby-Doo and Shaggy’s narrative has been a popular one for a long time. They have similar personalities and chemistry, as well as the same interests. They are close friends and have a passion for numerous types of food. They are mostly eating and lounging around, screaming in panic when presented with something frightening. They are the easiest to fall in love with. Despite all Scooby-countless Doo’s incarnations, this man-dog pair remains timeless.
Norville “Shaggy” Rogers is a fictitious character in the Scooby-Doo series. He is well known as the cowardly slacker with whom Scooby-Doo is constantly conversing. Scooby-Doo and Shaggy are the two primary characters in Mystery Incorporated. They both came from the same puppy farm.
09Winnie the Pooh

Created: 1926
Creators: A. A. Milne, E. H. Shepard
Voice: Sterling Holloway. Hal Smith. Jim Cummings
The Disney adventures of Winnie-the-Pooh were as famous as his books. Winnie-the-Pooh was famous for his lovely temperament and generous heart who also admitted to have a sweet tooth.
Winnie-the-Pooh, an anthropomorphic teddy bear, is one of the most well-known children’s books. A. Milne wrote the book, and E. H. Shepard illustrated it. Winnie’s friendship with Eeyore, Christopher Robin, Kanga, Rabbit, Piglet, Roo, Owl, and Tigger is depicted in the story.
10Pinky & the Brain
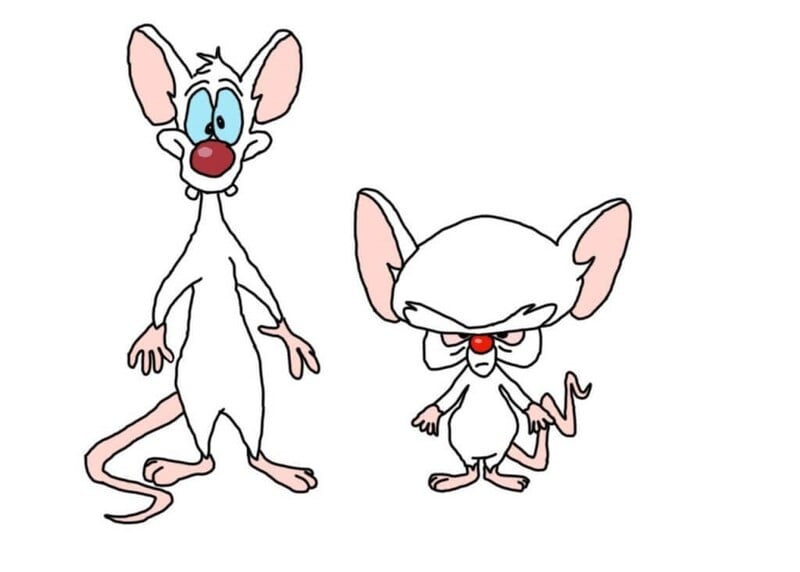
Created: 1995
Creator: Tom Ruegger
Voices: Rob Paulsen, Maurice LaMarche
While many iconic cartoon characters have desired to be rulers of the world, none could ever envision being a benign tyrant like The Brain. Pinky, The Brain’s not-so-reliable companion, may give him headaches, but his zeal is contagious, and his loyalty makes him easy to love.
11Blossom, Bubbles, and Buttercup (The Powerpuff Girls)

Created: 1998
Creator: Craig McCracken
Voices: Cathay Cavadini, Tara Strong, E. G. Daily, various others
The Powerpuff Girls, the iconic female cartoon characters and the ideal vanguard of “you can be pretty and yet kick-ass,” emerged on the 90s cartoon landscape eager to inspire and amuse a generation. The eventual lesson was that working together is the most robust play, regardless of who you identified with the most.
12Finn the Human and Jake the Dog (Adventure Time)
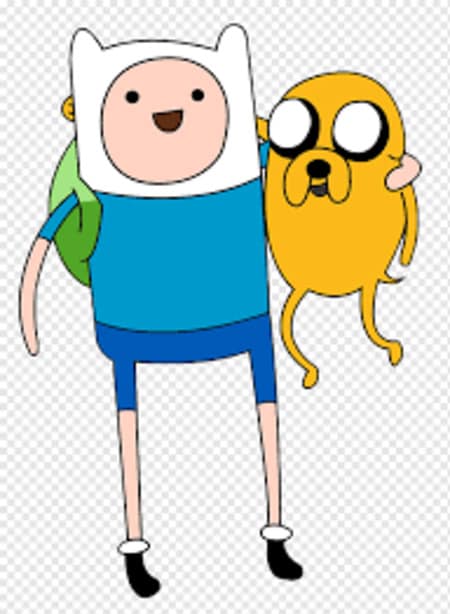
Created: 2010
Creator: Pendleton Ward
Voices: Jeremy Shada, John DiMaggio
This dynamic team, our two brave protagonists from the Land of Ooo, whose humor, sadness, loyalty, and bravery catapulted this fantastic, strange, emotionally deep series to must-see status for viewers of all ages, are impossible to ignore.
13BoJack Horseman
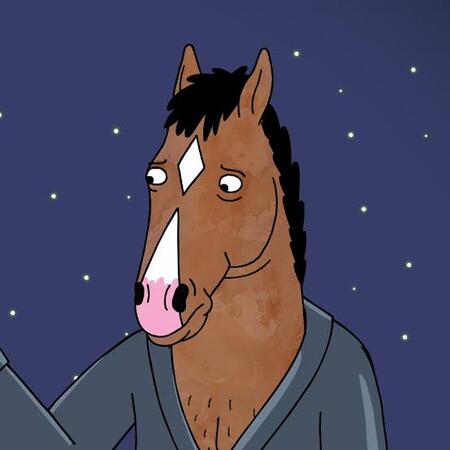
Created: 2014
Creator: Raphael Bob-Waksberg
Voice: Will Arnett
The redemption arc of Will Arnett’s anthropomorphized, misanthropic horse is one of the most nuanced and profoundly felt of any TV character. Even when he didn’t love himself, we could love him because he was damaged and created damage wherever he went. Never has a cartoon covered such complex and challenging subjects with such finesse. It was an added advantage that it was continuously funny, and at the center of it all was a washed-up ‘90s sitcom actor dealing in the aftermath of his success.
14Zuko (Avatar: The Last Airbender)

Created: 2005
Creators: Michael Dante DiMartino, Bryan Konietzko
Voice: Dante Basco
That’s right: Zuko, not Aang! Zuko does not appear to be the same character in the first and end episodes. The former is a haughty prince with a ponytail who can’t seem to keep his fury and angst in check. The latter is a more emotionally intelligent figure, embracing his uncle and pleading for forgiveness with tears in his eyes. However, when viewed in order, the transition between the two is seamless. Zuko’s narrative is tragic yet uplifting, shaped by both hate and love, making him one of the best characters in animation, if not all of television.15.Leonardo, Raphael, Michelangelo, and Donatello (Teenage Mutant Ninja Turtles)
15Teenage Mutant Ninja Turtles
Created: 1984
Creators: Kevin Eastman, Peter Laird
Voices: Cam Clarke, Barry Gordon, Rob Paulsen, Townsend Coleman, various others
For this list, we’ll concentrate on the original team, these radical pizza-eating ninja-style fighters with a rat for a sensei, yet tastefully named after some of history’s finest painters who became legendary for 90s youth. It’s impossible to choose the “best” iconic cartoon character in this soap because it depends on personal preference. They are, nonetheless, indispensable to pop culture history in all of their manifestations (even as a peak of “the show is for the toy”).
● Ending Thoughts →
● Cartoons give valuable lessons about life. People of all ages can benefit from these life lessons. While comics typically target children, this does not rule out the possibility that adults will like them. There is a slew of animated sitcoms aimed squarely at adults! This means that individuals of all ages can enjoy and love cartoons.
● Thus, we listed the most iconic cartoon characters that made your childhood more exciting. So, enjoy your choice of iconic cartoon characters and have fun.
The best part about cartoons is that there’s something for everyone. There are iconic cartoon characters that are humorous, cute, and cool.
Since Paste first published this list a decade ago, a lot has changed in the world of cartoons. New episodes of The Simpsons, Family Guy, South Park, and SpongeBob Squarepants get released regularly, but that’s only the tip of the iceberg. Traditional cable networks have spawned new and exciting animated characters and settings while streaming services have enabled even more creators to produce the animated shows they want.
We thought to update our list of the 12 most iconic cartoon characters of all time, considering the cultural influence, relatability, and significance these animated humans, animals, vegetables, and other creatures had within the sphere of animation in 2020. Many of these characters have gone beyond their cartoon origins into other media. Still, for this list, we’ll only look at them as they appear in cartoons, whether they’re from the program itself or related comics and books.
01Fred Flintstone
Created: 1960
Creators: William Hanna, Joseph Barbera
Voices: Jeff Bergman and Alan Reed, as well as a variety of others
Fred, the patriarch of his modern-day stone-age clan, was an outspoken supporter of cartoons. The original series was one of the most contentious shows on television in the 1960s, despite its benign appearance (the Flintstones are better recognized for their cereal and vitamin advertising).
Fred Flintstone, the iconic cartoon character, is not the best-drawn cartoon character ever. He is pleasant and faithful to his wife, Wilma, despite not being a terrific boxer. The character carries a lump of granite on his shoulders and shows no fear of jeopardizing his marriage and children. He’s still a hominid, a caveman with extraordinary strength and agility.
02Mickey Mouse
Created: 1928
Creators: Walt Disney, Ub Iwerks
Voices: Walt Disney, BretIwan, and other voices
Mickey Mouse, the Disney mascot, is easy to overlook. Without the joys of an adventurous, passionate mouse, there might not be a Disney kingdom. In 2024, nearly a century after Disney’s legendary Disney short “Steamboat Willie,” the public domain will glimpse the mouse.
Walt Disney initially produced the most iconic cartoon character Mickey Mouse in 1928. His unique red shorts and white gloves have helped him become one of the most well-known fictional characters in the world. He usually wears a white glove and a white cap, and his enormous, yellow shoes are a common sight. Mickey also sports a pair of white gloves and his white gloves and shorts. He also wears a giant red bow and his clothes, which makes him a versatile character.
03SpongeBob Squarepants
Created: 1999
Creator: Stephen Hillenburg
Voice by Tom Kenny
Although Sponge’s nautical nonsense was probably not to most parents’ liking, Tom Kenny’s renowned chuckle has become ingrained in viewers’ brains all across the world after two decades of programming.
For almost 30 years, the SpongeBob Squarepants series has been a hit. It’s a cartoon about Patrick, a yellow sea sponge which is enthusiastic about life. He works as a chef at the Krusty Krab and lives in a pineapple house. Patrick, who is also his best friend, is his best friend.
The characters are likable and harmless in general, while some of the songs in the show deal with contentious topics, many based on actual events. The show has been chastised for portraying kids as unpleasant, obnoxious, and even defiant and using many caustic languages. While the show is often entertaining, its messages can be contentious.
SpongeBob is a young adult who lives independently and works full-time despite his immaturity.
04Tom and Jerry
Created: 1941
Creators: William Hanna, Joseph Barbera
Voices: William Hanna and various other voices
The series, founded by William Hanna and Joseph Barbera in 1940, is perhaps most known for Metro-Goldwyn-161 Mayer’s theatrical short films.
Tom the cat and Jerry the mouse, the iconic cartoon characters star in the original shorts. They don’t always get along, but they’re usually delighted with each other and often laugh at their misfortunes. Each short features the two attempting to catch the other. This is a desperate attempt to make the other person unhappy, but it rarely works.
Tom and Jerry were minor characters in the early years of the show. There were a few distinctions between them and the human characters in the film. The first one focused more on the mouse than the human cast, but the second was more centered on the human.
05Homer Simpson
Created: 1987
Creator: Matt Groening
Voice: Dan Castellaneta
The Simpsons’ first two seasons centered on Bart. But it was genuinely stunning as the show became more Homer-centric. He is the average man at his most sluggish, hungry, dumb, intoxicated, and idiotic. Thanks to his tremendous heart, he is still the hero, hidden beneath all the doughnuts.
Homer is a talented pianist in addition to expressing his love for Marge. He can play the guitar and keyboard, and his barbershop music has garnered him a Grammy. His most remarkable musical gift is his powerful operatic voice, which he uses in his band, Babysitter Bandit. His singing voice has won him fans worldwide, and he has played in hundreds of bands.
06Charlie Brown and Snoopy (Peanuts)
Created: 1950
Creator: Charles M. Schulz
Voice: Bill Melendez, Peter Robbins and other.
Charlie Brown and Snoopy came to life through a few TV specials and later series, even though not all of the characters made it to television. Snoopy’s Red Baron fantasies and friendship with Woodstock were popular with children. They were also fans of Lucy’s crush. Charlie was well-liked by the older crowd. Charlie Brown, the hapless Charlie Brown, elicits as much sympathy as any animated character. We pull for him even though we know it will all be for naught.
Charlie Brown and Snoopy are part of the Peanuts Gang, an iconic group of cartoon characters. You’ve undoubtedly seen these two cartoon heroes previously if you haven’t heard of them. These two are from the well-known Peanuts cartoon series. They are famous children’s characters who are appreciated by many.
07Bugs Bunny (Looney Tunes)
Created: 1940
Creators: Ben Hardaway, Tex Avery
Voices: Mel Blanc, Jeff Bergman and other voices
The most fabulous cat cartoon in history is a rabbit, alternatively, a hare. This little taxonomic distinction went unmentioned in numerous shenanigans. Regardless of whether the rabbit was hunting with Elmer Fudd’s shotgun, Yosemite Samantha’s pistols, or Marvin Martian’s ACME Disintegration Gun, he maintained an enviable insouciance. The iconic visage of Warner Bros. had one flaw: terrible direction sense, particularly while digging across New Mexico.
Bugs Bunny is a late-thirties animated cartoon character created by Leon Schlesinger Productions. Mel Blanc provided his voice for him, and he has acted in several short films and television series. Many children were enthralled by the show, while the characters and stories fascinated others.
08Scooby-Doo and Shaggy Rogers
Created: 1969
Creators: Joe Ruby and Ken Spears
Voices: Don Messick, Casey Kasem and a variety of others
Scooby-Doo and Shaggy’s narrative has been a popular one for a long time. They have similar personalities and chemistry, as well as the same interests. They are close friends and have a passion for numerous types of food. They are mostly eating and lounging around, screaming in panic when presented with something frightening. They are the easiest to fall in love with. Despite all Scooby-countless Doo’s incarnations, this man-dog pair remains timeless.
Norville “Shaggy” Rogers is a fictitious character in the Scooby-Doo series. He is well known as the cowardly slacker with whom Scooby-Doo is constantly conversing. Scooby-Doo and Shaggy are the two primary characters in Mystery Incorporated. They both came from the same puppy farm.
09Winnie the Pooh
Created: 1926
Creators: A. A. Milne, E. H. Shepard
Voice: Sterling Holloway. Hal Smith. Jim Cummings
The Disney adventures of Winnie-the-Pooh were as famous as his books. Winnie-the-Pooh was famous for his lovely temperament and generous heart who also admitted to have a sweet tooth.
Winnie-the-Pooh, an anthropomorphic teddy bear, is one of the most well-known children’s books. A. Milne wrote the book, and E. H. Shepard illustrated it. Winnie’s friendship with Eeyore, Christopher Robin, Kanga, Rabbit, Piglet, Roo, Owl, and Tigger is depicted in the story.
10Pinky & the Brain
Created: 1995
Creator: Tom Ruegger
Voices: Rob Paulsen, Maurice LaMarche
While many iconic cartoon characters have desired to be rulers of the world, none could ever envision being a benign tyrant like The Brain. Pinky, The Brain’s not-so-reliable companion, may give him headaches, but his zeal is contagious, and his loyalty makes him easy to love.
11Blossom, Bubbles, and Buttercup (The Powerpuff Girls)
Created: 1998
Creator: Craig McCracken
Voices: Cathay Cavadini, Tara Strong, E. G. Daily, various others
The Powerpuff Girls, the iconic female cartoon characters and the ideal vanguard of “you can be pretty and yet kick-ass,” emerged on the 90s cartoon landscape eager to inspire and amuse a generation. The eventual lesson was that working together is the most robust play, regardless of who you identified with the most.
12Finn the Human and Jake the Dog (Adventure Time)
Created: 2010
Creator: Pendleton Ward
Voices: Jeremy Shada, John DiMaggio
This dynamic team, our two brave protagonists from the Land of Ooo, whose humor, sadness, loyalty, and bravery catapulted this fantastic, strange, emotionally deep series to must-see status for viewers of all ages, are impossible to ignore.
13BoJack Horseman
Created: 2014
Creator: Raphael Bob-Waksberg
Voice: Will Arnett
The redemption arc of Will Arnett’s anthropomorphized, misanthropic horse is one of the most nuanced and profoundly felt of any TV character. Even when he didn’t love himself, we could love him because he was damaged and created damage wherever he went. Never has a cartoon covered such complex and challenging subjects with such finesse. It was an added advantage that it was continuously funny, and at the center of it all was a washed-up ‘90s sitcom actor dealing in the aftermath of his success.
14Zuko (Avatar: The Last Airbender)
Created: 2005
Creators: Michael Dante DiMartino, Bryan Konietzko
Voice: Dante Basco
That’s right: Zuko, not Aang! Zuko does not appear to be the same character in the first and end episodes. The former is a haughty prince with a ponytail who can’t seem to keep his fury and angst in check. The latter is a more emotionally intelligent figure, embracing his uncle and pleading for forgiveness with tears in his eyes. However, when viewed in order, the transition between the two is seamless. Zuko’s narrative is tragic yet uplifting, shaped by both hate and love, making him one of the best characters in animation, if not all of television.15.Leonardo, Raphael, Michelangelo, and Donatello (Teenage Mutant Ninja Turtles)
15Teenage Mutant Ninja Turtles
Created: 1984
Creators: Kevin Eastman, Peter Laird
Voices: Cam Clarke, Barry Gordon, Rob Paulsen, Townsend Coleman, various others
For this list, we’ll concentrate on the original team, these radical pizza-eating ninja-style fighters with a rat for a sensei, yet tastefully named after some of history’s finest painters who became legendary for 90s youth. It’s impossible to choose the “best” iconic cartoon character in this soap because it depends on personal preference. They are, nonetheless, indispensable to pop culture history in all of their manifestations (even as a peak of “the show is for the toy”).
● Ending Thoughts →
● Cartoons give valuable lessons about life. People of all ages can benefit from these life lessons. While comics typically target children, this does not rule out the possibility that adults will like them. There is a slew of animated sitcoms aimed squarely at adults! This means that individuals of all ages can enjoy and love cartoons.
● Thus, we listed the most iconic cartoon characters that made your childhood more exciting. So, enjoy your choice of iconic cartoon characters and have fun.
Step-by-Step Guide to Send Gif WhatsApp on Android
Step-by-step Guide to Send Gif WhatsApp on Android
An easy yet powerful editor
Numerous effects to choose from
Detailed tutorials provided by the official channel
While chatting with your friends and dear ones on WhatsApp, you can not only send videos and images but also some GIFs. The GIF files will convey your mood and feelings using short animations.
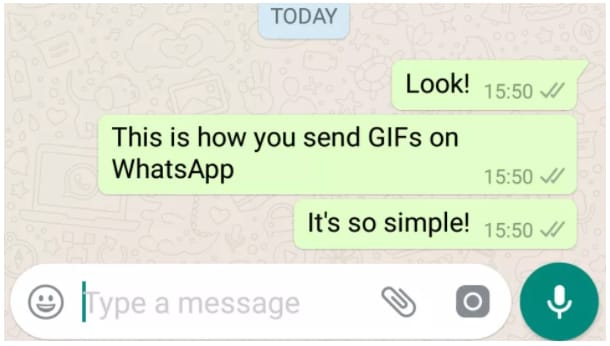
On your Android device, these files can be either selected from the collection available at WhatsApp or can be imported from Giphy. Additionally, you can also create your own customized WhatsApp GIFs Android using images or videos.
In this article
01 [How to send WhatsApp GIF on Android](#Part 1)
02 [How to create a custom GIF on WhatsApp Android](#Part 2)
03 [Create professional-looking GIF using Wondershare Filmora](#Part 3)
Part 1 How to send WhatsApp GIF on Android
To send GIFs to your contacts in WhatsApp it is important to ensure that you have the latest version of the messaging app installed on your phone. There is an integrated library of GIFs on your Android phone from where you can search like tom and jerry gif stickers for WhatsApp, peach and Goma gif for WhatsApp, and more.
Step 1.Launch WhatsApp on your Android device and open any conversation to which you wish to send a GIF.
Step 2.Click on the Emoji icon at the bottom left corner of the chat window.
Step 3.At the bottom middle of the screen, click on the GIF button and the list of options available at the integrated library will appear on the screen. You can even search for the desired GIF by entering the keyword at the search icon.
Step 4.Next, tap on the selected GIF to preview it. You can also add a message using Add a caption… button
Step 5.Finally, click on the green Send button (white paper plane icon) at the bottom-right corner. The GIF will be sent to your conversation.
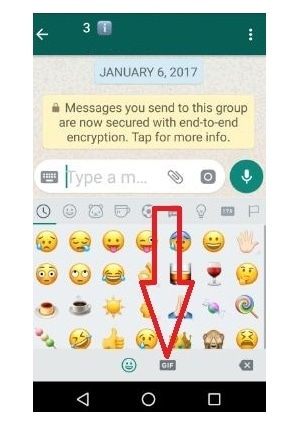
Part 2 How to create a custom GIF on WhatsApp Android
WhatsApp allows you to create a customized GIF using images and videos on your Android phone. The steps for the same are as follows
Step 1.Open the WhatsApp chat to whom you wish to send the customized GIF.
Step 2.At the bottom of the screen, click the camera icon. Either choose to record a desired video or import from the phone gallery to create a GIF.
Step 3.Once the video is added, trim it using the slider at the top. (To create a GIF, the video cannot be more than 5 seconds). You can even add a text message using Add a caption. option at the bottom of the screen.
Step 4.Next, click on the GIF button under the slider and then click on the send button at the bottom-right corner.
GIF created using the video will be sent to your contact.
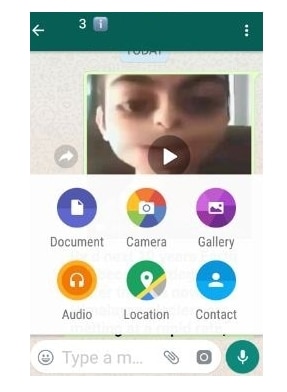
Part 3 Create professional-looking GIF using Wondershare Filmora Video Editor
Though WhatsApp allows creating GIFs using videos and images, the options for customizations are not there. So, to facilitate you creating professional-looking GIFs in no time, we suggest using Wondershare Filmora. Images and videos can be added to this versatile Windows and Mac-based tool for creating artistic animations. There are multiple options for customizing the file like adding elements, sound, text, and more.
Wondershare Filmora
Get started easily with Filmora’s powerful performance, intuitive interface, and countless effects!
Try It Free Try It Free Try It Free Learn More >

You can also speed up, slow down, rotate, crop, and perform other editing tasks. The software allows adding media files in all widely used formats like MO4, MOV, MKV, and more. The software has a user-friendly interface that makes it apt for users even without any prior experience in creating animations.
Steps to create a customized GIF WhstaApp Android using Wondershare Filmora
Step 1.Download, install and open the Wondershare Filmora software on your system. Browse and import the videos and images from your system from which you wish to create a GIF.
Step 2.After the files are added, drag and drop them to the timeline of the software at the bottom.
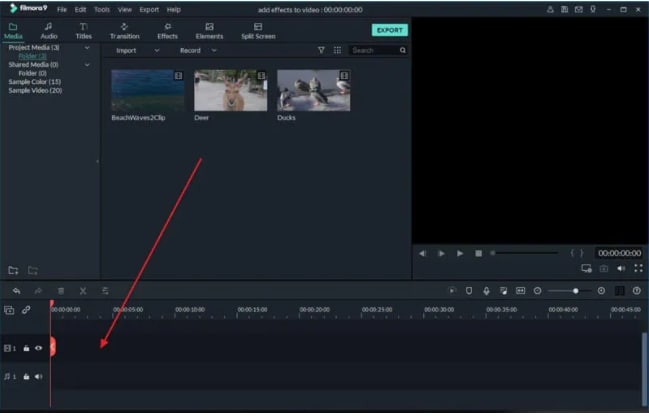
Step 3.Next comes the editing. Using multiple editing functions of the software you can rotate, crop, speed up, slow down, and perform a wide range of tasks as needed.
Step 4.You can even add the text messages to your animations and also choose the font and other parameters of the text.

Step 5.Once all the selections and editing are done, choose GIF at the Local tab to save your created media file as GIF. Finally, click on the EXPORT button to start processing and saving the file as GIF.
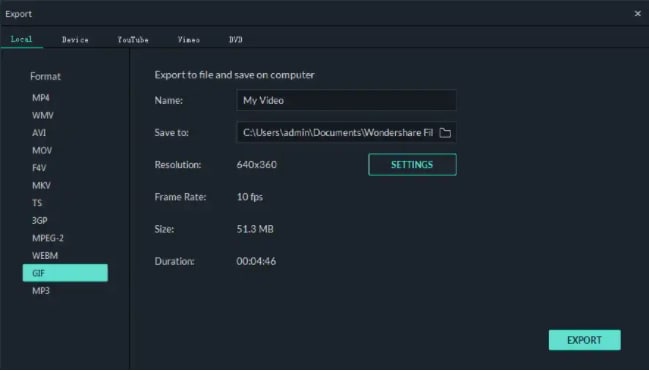
The created GIF can now be used for WhatsApp chat, social media sites, and other online sites.
● Key Takeaways from This Episode →
●GIF animations can be added to WhatsApp chats on your Android phone using an integrated library or GIPHY.
●WhatsApp also allows creating GIFs using videos and images on your device or by recording one.
●To create a professional and appealing GIF, Wondershare Filmora is the best tool. The software can also be used for several other video editing tasks.
While chatting with your friends and dear ones on WhatsApp, you can not only send videos and images but also some GIFs. The GIF files will convey your mood and feelings using short animations.
On your Android device, these files can be either selected from the collection available at WhatsApp or can be imported from Giphy. Additionally, you can also create your own customized WhatsApp GIFs Android using images or videos.
In this article
01 [How to send WhatsApp GIF on Android](#Part 1)
02 [How to create a custom GIF on WhatsApp Android](#Part 2)
03 [Create professional-looking GIF using Wondershare Filmora](#Part 3)
Part 1 How to send WhatsApp GIF on Android
To send GIFs to your contacts in WhatsApp it is important to ensure that you have the latest version of the messaging app installed on your phone. There is an integrated library of GIFs on your Android phone from where you can search like tom and jerry gif stickers for WhatsApp, peach and Goma gif for WhatsApp, and more.
Step 1.Launch WhatsApp on your Android device and open any conversation to which you wish to send a GIF.
Step 2.Click on the Emoji icon at the bottom left corner of the chat window.
Step 3.At the bottom middle of the screen, click on the GIF button and the list of options available at the integrated library will appear on the screen. You can even search for the desired GIF by entering the keyword at the search icon.
Step 4.Next, tap on the selected GIF to preview it. You can also add a message using Add a caption… button
Step 5.Finally, click on the green Send button (white paper plane icon) at the bottom-right corner. The GIF will be sent to your conversation.
Part 2 How to create a custom GIF on WhatsApp Android
WhatsApp allows you to create a customized GIF using images and videos on your Android phone. The steps for the same are as follows
Step 1.Open the WhatsApp chat to whom you wish to send the customized GIF.
Step 2.At the bottom of the screen, click the camera icon. Either choose to record a desired video or import from the phone gallery to create a GIF.
Step 3.Once the video is added, trim it using the slider at the top. (To create a GIF, the video cannot be more than 5 seconds). You can even add a text message using Add a caption. option at the bottom of the screen.
Step 4.Next, click on the GIF button under the slider and then click on the send button at the bottom-right corner.
GIF created using the video will be sent to your contact.
Part 3 Create professional-looking GIF using Wondershare Filmora Video Editor
Though WhatsApp allows creating GIFs using videos and images, the options for customizations are not there. So, to facilitate you creating professional-looking GIFs in no time, we suggest using Wondershare Filmora. Images and videos can be added to this versatile Windows and Mac-based tool for creating artistic animations. There are multiple options for customizing the file like adding elements, sound, text, and more.
Wondershare Filmora
Get started easily with Filmora’s powerful performance, intuitive interface, and countless effects!
Try It Free Try It Free Try It Free Learn More >
You can also speed up, slow down, rotate, crop, and perform other editing tasks. The software allows adding media files in all widely used formats like MO4, MOV, MKV, and more. The software has a user-friendly interface that makes it apt for users even without any prior experience in creating animations.
Steps to create a customized GIF WhstaApp Android using Wondershare Filmora
Step 1.Download, install and open the Wondershare Filmora software on your system. Browse and import the videos and images from your system from which you wish to create a GIF.
Step 2.After the files are added, drag and drop them to the timeline of the software at the bottom.
Step 3.Next comes the editing. Using multiple editing functions of the software you can rotate, crop, speed up, slow down, and perform a wide range of tasks as needed.
Step 4.You can even add the text messages to your animations and also choose the font and other parameters of the text.
Step 5.Once all the selections and editing are done, choose GIF at the Local tab to save your created media file as GIF. Finally, click on the EXPORT button to start processing and saving the file as GIF.
The created GIF can now be used for WhatsApp chat, social media sites, and other online sites.
● Key Takeaways from This Episode →
●GIF animations can be added to WhatsApp chats on your Android phone using an integrated library or GIPHY.
●WhatsApp also allows creating GIFs using videos and images on your device or by recording one.
●To create a professional and appealing GIF, Wondershare Filmora is the best tool. The software can also be used for several other video editing tasks.
Best Practices on Online 3D Avatar Creator
Best Practices on Online 3D Avatar Creator
An easy yet powerful editor
Numerous effects to choose from
Detailed tutorials provided by the official channel
Avatar will match your personality to your social media profiles, YouTube videos, Snapchat, and many others. With 3D Avatar makers online, designing an Avatar is about customizing the color, layout, typography, and other designs and instantly sharing your Avatar to the social media digital platform as easy as choosing a template, customizing, and sharing.
The new software involved in AR and VR technologies uses these realistically customized Avatars. The accurate representation of virtual reality will give a feeling of being in an absolute sense. Users will love to create an avatar representing themselves in the virtual spaces. Making an avatar does not mean you lock your personality; you can change it anytime. This Avatar is created by capturing a webcam, ensuring it is perfect. We will discuss many free 3D Avatar creators online.
In this article
01 [What is a 3D Avatar?](#Part 1)
02 [Best 10 Practices on How to Create an Avatar for Spatial](#Part 2)
03 [How to Create a Gallery in Spatial for Your Art (NFT and Non-NFT)](#Part 3)
04 [How to Build Your Own 3D Avatar Accurately?](#Part 4)
Part 1 What is a 3D Avatar?
In Computer graphics, Avatar is the virtual representation of the user. This can be in the 2D illustration used as a profile picture and 3D representation used in games, VR, and AR technologies. Lately, termed as “Picons,” which means personal icons, but not used now. The use of these avatars was first coined by Neal Stephenson in 1992, which is a stepping stone for the vast Metaverse Universe. A graphic representation by which users wish to represent themselves. It is a caricature of a person, not precisely a photography of that person, is a simple fancy cartoon and bizarre structure; however, the images of natural objects identify the shape and design.
They are widely in online games and websites. They are an integral part of online chat, messaging systems, blogs, and artificial intelligence, especially VR. There are many Online 3D Avatar Creators available, and we shall you get the right match.
01What is Avatar Social Media?
These days’ social media play an integral part in our lives personally and professionally. We can connect with friends and customers easily sitting at the desk. An Avatar can be a profile picture on social media such as Bitmoji. Most users use their photos, sometimes supplemented by digital frames. There are various definitions to represent Avatar-like on social media it is a tiny cartoon picture representing us or our business in social media. Even if it is small, it can significantly impact the people who visit our profile to contact us, so we need to make sure it accurately represents who we are by utilizing an avatar. Keeping a profile picture is very important in social media, which creates a great impression to the followers than visiting a default profile picture set by the applications. There are many free 3D Avatar creators online from which you can create a free 3D avatar and directly share it on your social media.
02Why Do You Need a 3d Avatar?
These 3D avatars show a sense of seriousness and trust. Customers and people who communicate with them directly using avatars feel as if they are physically present in front of them, which makes them joyful, confident, and satisfied. Intelligent technologies like IoT and Machine learning have converted their way of working with 3D avatars having the central part. This is the beginning of the Metaverse universe, where we will have 3D Avatars in malls as salespersons and waiters in restaurants, and many more.
Part 2 Best 10 Practices On How To Create An Avatar For Spatial
Avatars being the most exciting topic for us today, let us get into creating the best Avatar and 3D avatar creator online for free. Besides, we shall see the software and unique features available in it.
01What Are the Best Avatar Creator?
Creating an Avatar can be seen to be complicated, but it is not. You need not even use complex software to create avatars. Let us discuss some Best Avatar Creators in the market to date.
❶ Face Your Manga
Face Your Manga is a 3D Avatar creator Online. We have truly outstanding and most generally utilized Avatar creators getting going our list. Face Your Manga allows you to make a graphical cartoon version of yourself, and it offers a ton of customization features like skin tone, structure, and shape.
There are some default formats, yet you can change them if you feel more innovative. The site is simple to use and free, so you have nothing to lose to create a free 3D Avatar.
![]()
❷ Bitmoji
Bitmoji is the most popular and well-known option on this list, and it’s also the best option for having Animoji on Android! It’s the most popular application in the Play Store, with around 100 million downloads.
With Bitmoji, you can undoubtedly make a ton of stickers and emojis with your face, which means you’ll have the option to effectively and completely put yourself out there. It incorporates a face-like, laughing, crying face, and that’s just the beginning. This is a free 3D avatar creator online that you can get from the Play Store.
![]()
❸ BeFuncky
BeFuncky is a 3D Avatar creator online to edit your photo creatively. This is extraordinary for the people who need to make an Avatar taking motivation from an image without the expectation of making it too cartoony.
You can blow up colors, including a few genuinely fascinating impacts, or essentially change the contrast. Regardless, the site creates a free 3D Avatar loaded with choices!
![]()
❹ PickaFace
A genuinely excellent site we can suggest you use is PickaFace, as it is a 3D avatar creator online. It has a creative drawing style, extraordinary for the people after something more careful than most applications and sites offer.
Considering all the things it offers, including a ton of customization choices, we can say, PickaFace creates a free 3D avatar like no other subscription software.
![]()
❺ Doppelme
We have Doppelme among the best 3D Avatar maker online to finalize the list. The site is similar to other choices we’ve discussed, with numerous customization choices.
The figures and cartoons you create can be changed in any way you choose, whether for your symbol or your friends.
![]()
02Top 8 Practices On How To Create An Avatar For Spatial
To begin creating avatars in spatial, you only need to submit a single photo of yourself. Spatial believes that avatars will have a significant impact on the internet.
●Start by creating a Spatial Account for you using Google, Microsoft, or Slack accounts. The best practice in Spatial is to add good light and color to the Avatar.
●After this, you have to create an avatar with the first step with your webcam, make sure the photo is clear and has perfect light on it.
●Later in your profile, you will have an edit menu to edit your Avatar anytime.
Light is an essential feature in avatar creation. That will create a better light than artificial lightning.
●Spatial will begin to generate a 3D avatar of you once it has a good photo of you.
●You may modify the shirt, skin tone, and color. After you’ve used all of your ingenuity, click “Looks Good,” and you’re done.
●Next, you can customize your Avatar. There is the customization of body, shape for men, woman. Users love to make the Avatar look like themselves. You can make a hand body effect while using VR headsets if you are a hand talker. If joined from the web, you will have different movements with keyboards like dancing.
●Make changes to spatial VR avatar anytime and update. You can change the skin tone, color of the shirt, and your name. The realistic effects create a real presence in VR meetings.
❶ Spatial – Collaborate From Anywhere In Ar.
This is the launch film of Spatial, “A short real-time in Spatial,” a better way to build and work together, a way that brought us to sit next to each other face to face.
●Spatial is a collaborative computing environment that combines all the creativity and visualizes it in the room.
●All of your digital devices are seamlessly tied together into an infinite workspace.
●With a click, you can expand the world’s information with all the power.
●Using AR, infinite canvas pixels become tactile, letting you manipulate them like clay.
●You can sketch a drawing on paper and have them in front of you as a visual.
❷ Spatial Passthrough Prototype
●With this passthrough, you will feel a completely immersive experience.
●To avoid this, Facebook has partnered with spatial and Logitech for the K830 keyboard, which will help users prevent mixed sensations and provide a complete VR experience.
●Facebook says this will provide an infinite office experience.
●There are multiple customizable screens and multiple monitor setups.
●Companies have already collaborated with spatial to bring up infinite offices.
❸ Microsoft Build Keynote collaboration with Spatial
Microsoft and Teams have worked with Spatial.
●A Spatial option on the team’s channel allows you to enter a 2D meeting with avatars.
●To turn something into 3D, scan the QR code and put on the VR or AR Hololens glasses.
●Through Hololens, they can access data with Microsoft productivity apps.
●They can also adjust the position of the robot.
●The eye-tracking is good, which enables the avatars to convey user emoticon.
❹ Qualcomm Snapdragon Summit Keynote
The stage where the digital world is changing, where virtually everyone and everything is connected. We are moving into the world of VR, which is the next noble platform.
●We are all going to wear glasses for effective and interactive communication.
●Spatial tools are already used in companies like Purina to bring the teams together.
●Spatial allows all people on Oculus, Hololens, and even AR-capable smartphones to engage in one virtual environment.
●These are used in games like Pokémon.
●There will be a vast development in technology with these features.
❺ Hololens 2 Launch Keynote
●Hololens is very comfortable and fits like a hat.
●And it signs in as we put on the device.
●After recognizing your Hololens, recognize your hands and then the world.
●You can touch the holo, move it and even resize it.
●Hololens collaborated with Spatial with many more features involved in connecting people, playing games, etc.
❻ Spatial In the Wall Street Journal
●With Virtual reality headsets like Hololens and Oculus Quest with virtual reality platforms like Spatial, you can meet up and collaborate with colleagues and friends.
●You can switch to any world you choose using VR Headsets within a second.
●Before this pandemic, VR used in the market was forecasted at about 829 million in 2018.
●If you wear a holographic headset, you can feel like someone is there with you in the room, and it feels natural.
●Connecting through Spatial is very simple. You need to need to sign in through a Spatial account.
❼ Spatial on TED
This is a video of the Co-founder talking about the improvement of technologies and the transformative nature of Holographic Telepresence.
●The technology improvement from wired telephones to phones and now zoom meetings to VR and AR meetings.
●The troubles in ordinary meetings end through these VR technologies.
●TED has collaborated with Spatial to increase its market.
●TED is an online broadcast that focuses on the target audience with scripted logic.
●The seized extend how to use most of the Spatial features.
❼ AR Insider – A Publication about Spatial Computing
●AR insider profiles as the most significant innovation in VR technologies.
●This is the most crucial feature in Spatial Computing producing the best VR experiences.
●This is like a launchpad to update daily insights of Spatial computing.
●They collect data from top sources.
●It is also seen as a business angle because it has fun games in AR and VR and technical.
Part 3 How To Create A Gallery In Spatial For Your Art (Nft And Non-Nft)
Many artists and creators have been working in Spatial to show their talents on social platforms.
Provide the 3D models the stage they deserve.
You can directly drag/drop your files into Spatial directly.
NFT artists and collectors can import directly from the collections via the Metamask integration.
You can use the gorgeous environment in the library or use your 3D model of yours to set a unique customer environment.
The technologies will be helpful to create an Avatar and Digital Twins to humanize the remote work as companies move to the hybrid work methods.
The future of the world will look like a science fiction movie.
The AR and VR promise to revolutionize the workplace.
The digital twins will be the following way to show ourselves to the digital environment in a decade.
VR headsets are getting cost-efficient, and people are starting to use them. It has to be still improved to be more efficient and lighter.
Part 4 How to Build Your Own 3D Avatar Accurately?
Turning into an Avatar or Disney character is now accessible using AI software like Wondershare Wondershare Filmora Video Editor . Among the various trends in social media, creating an Avatar is getting trendy nowadays. Let us discuss the steps to create a 3D Avatar creator online.
For Win 7 or later (64-bit)
For macOS 10.12 or later
Step 1: To start learning to create a 3D avatar, you need to know how to make layers and stack them on each other.
Step 2: Later, you can “Liquify” the layers to form a mold for your Avatar.
Step 3: Before turning it into a cartoon, apply the skin smoothening effects to create a more realistic image.
Step 4: Now, you can apply details like eyes, nose, hairs, dress, and facial lines to your Avatars.
Step 5: You can change the color of any particular feature.
Compared to all other 3D Avatar creators online free, Wondershare Filmora Video Editor is the most user-friendly and efficient software.
● Key Takeaways from This Episode →
● Learned about multiple applications available for creating 3D Avatars
● Looked into the future world through Spatial
● Discussed the steps involved in making a 3D Avatar maker online using Wondershare Filmora Video Editor
Ways to Stop Animation From Looping in Unity
How to Stop Animation from Looping in Unity
An easy yet powerful editor
Numerous effects to choose from
Detailed tutorials provided by the official channel
Unity is an IDE interface all designed exclusively for game developers. However, you can do much more with Unity than game development. But, our main concern here is something else than this subject. You’re looking for easy tutorials on Unity stop animation!

And luckily, we’ve got you covered as we’ve briefly explained how to perform Unity stop animation from looping and the steps to make a smooth animation.
In this article
01 [What is Unity Used for?](#Part 1)
02 [How to Stop Animation Playing in Loop in Unity?](#Part 2)
03 [How to Smooth an Animation in Unity?](#Part 3)
Part 1 What is Unity Used for?
Unity is a software tool friendly to all the game developers out there. This tool is used by the large community of game developers to power and create their game development projects. And, the software is more of a professional means and not a simple pared-down ‘game builder .’Unity also offers one of the most significant inbuilt features like rendering, physics, and collision detection. Thus, one of the powerful aspects of Unity is that game developers need not go out of the box and create everything from scratch. Instead, they are available with the physics engine required to develop games quickly. Another robust feature of Unity is that it includes an excellent ‘Asset Store’ where developers can upload their creations and showcase them to the whole community. So, that’s Unity and its uses in a broader scope!
Before we take you through the next section, it’s important to mention that Unity is also known as cross-platform IDE, where IDE stands for ‘integrated development environment.’ So, it can be called more of an interface with access to all the tools and resources required to develop games.
Apart from the game development, Unity is known for other excellent usage purposes as:
● Simulations
● Animation
● Architectural Visualization
● Previsualization for Film
● Interactive Experiences
Among these features only, we’ll describe Unity stop animation from looping in detail.
Part 2 How to Stop Animation Playing in Loop in Unity?
As we said, we’ll describe to you the most accessible definition of how to stop Animation in Unity. Thus, there are simple steps that we’d like to define firsthand before explaining the whole procedure with an image-centric step-by-step guide.
So, those simple steps to stop motion animation in After Effects in the loop also go like below:
Step 1 Go to the Project tab and select Animation.
Step 2 Open the Inspector tab.
Step 3 Uncheck the checkbox Loop Time, and you’re good to go!
We’ll describe the same, i.e., Unity stop animation from looping through the step guide below.
In this guide, we’ll explain right from applying the Animation so that you’d understand better. So, let’s begin without any further ado!
01Step 1 Delete animation folder
We have already created an animation folder in the folder named as own Animation, so click that folder, click the animation folder, and then another folder along with as shown below. Hold the Shift key and click another folder. Then, right-click the Delete tab as depicted below.
Similarly, you can also delete the Animation if you wish.

02Step 2 Create an animation for the subject
Now, you may have different subjects. We’re creating Animation on Mobile Joystick for reference, as shown below.

Now, hit the Create tab on the Unity panel below. Then, proceed to save your Animation in the folder you’ve already created for the same.

03Step 3 Give positions to the animation
Firstly, hit the red-icon button used for recording, as shown below.

Give the position on the left side after you click the button. And, then, clicking almost near to 3you can give the position to the right-hand side as shown below.

Now, the animation has been set. You can see the animation from left to right if you click the Play button. So, here, you can see the results of infinite loop animation, which won’t stop.

You can follow two ways to stop this Animation in Unity from looping, and we’ll describe both methods below.
04Step 4 Stop animation Unity Way 1
Go to the animation folder where you’ve created the animation and click the New Animation icon as shown below.

Now, you have to uncheck the Loop Time tab on the top-right corner of the Unity panel.

05Step 5 Stop animation Unity Way 2
Alternatively, you can click the Animator tab on the top of the Unity panel and double-tap the New Animation button. Then, it will also delete or uncheck the loop time, as shown below.

These were all the steps to stop animation Unity.
Part 3 How to Smooth an Animation in Unity?
After done with Unity stop animation, it’s time to smooth your Unity animation. Again, we will describe it simply if you’re used to the Unity platform and then with a step guide with respective screenshots.
So, stay tuned until the end to reveal the easy steps of smoothing an animation in Unity.
Select the Dopesheet at the bottom of the animation window. Then, you need to switch to the ‘Curves’ view once you create your Animation in the Dopesheet. These animation curves help you accelerate and decelerate animations so that the movement and other things can stop and start smoothly.
So, let’s begin with the step guide tutorial on the same as follows:
For reference, take an example of a metronome object imported from Blender to Unity. Here, we’ve grouped all the pendulum objects under one rotation so that when we move the pendulum, it pivots to the correct point, as shown below.

01Add the animator
So, the first step begins with adding the Animator component to the parent object. You can do this by clicking the Add Component tab on the Unity panel’s left side, searching for Animator, and clicking the Animator.
You will also need a controller to control the animations. Go to your animation folder, right-click, and select Create> Animator Controller tab.

Let’s call or give it a name metronome animator as shown below.
Then, you need to drag this into your animator component. Again, you need to go to your animations folder, right-click, select Create> Animations tab.
Now, give this a name pendulum full swing.
02Open the animator tab
Now, open the animator tab, drag this pendulum swing animation to that panel, and double-tap the yellow-colored New Animation button.

03Create an animation
With the game object selected, the animated metronome pendulum, in this case, we’d like to animate the X component of the rotation. So, you need to click Add Property> Transform> Rotation tab and click the + sign on its right, as shown below.
Now, click the plus sign automatically to set two keyframes, one at the beginning and one at the end. Now, click on end select all, and then delete for now.

04Add keyframes to rotate the pendulum
With the first set of keyframes and the pendulum all way to the right, go halfway and change the rotation to the left on the left panel of Unity. Then, add another keyframe.

05Slow down the animation
As you can observe, the Animation of this pendulum is in a straight line and feels unnatural to the eyes. Thus, we’re required to smooth this Animation now! For this purpose, go to the Curves; you can see the pink properties of rotation as going from one side to another.

Now, you need to adjust these pink curves. Start by adding a key to one of its sides, as shown below. After that, it is all on you how slow or fasts you want these values to be.
Here, you’re all done smoothing the animation in Unity after learning the stop-animation Unity tutorial.
You can even stop motion animation on Photoshop with the above tutorial.
06Bonus Tip:
We want to introduce an excellent video editor software called Filmora Video Editor . It is from the house of Wondershare, a well-known software company worldwide.

Wondershare Filmora - Best Video Editor for Mac/Windows
5,481,435 people have downloaded it.
Build unique custom animations without breaking a sweat.
Focus on creating epic stories and leave the details to Filmora’s auto features.
Start a creative adventure with drag & drop effects and endless possibilities.
Filmora simplifies advanced features to save you time and effort.
Filmora cuts out repetition so you can move on to your next creative breakthrough.
With Filmora, you can easily add Animation and edit your videos to make them look world-class. The latest version and new updates are eye-candy and quick fix for beginner video editors.
So, please pay a visit to the Filmora website and check out its Mac and Windows version for free today.
● Key Takeaways from This Episode →
● Learning the concept and usage of Unity
● A tutorial on how to stop animation in Unity from looping
● A tutorial on how to smooth animation in Unity
● Introduction to Filmora, the top-most video editor software for beginners.
Unity is an IDE interface all designed exclusively for game developers. However, you can do much more with Unity than game development. But, our main concern here is something else than this subject. You’re looking for easy tutorials on Unity stop animation!
And luckily, we’ve got you covered as we’ve briefly explained how to perform Unity stop animation from looping and the steps to make a smooth animation.
In this article
01 [What is Unity Used for?](#Part 1)
02 [How to Stop Animation Playing in Loop in Unity?](#Part 2)
03 [How to Smooth an Animation in Unity?](#Part 3)
Part 1 What is Unity Used for?
Unity is a software tool friendly to all the game developers out there. This tool is used by the large community of game developers to power and create their game development projects. And, the software is more of a professional means and not a simple pared-down ‘game builder .’Unity also offers one of the most significant inbuilt features like rendering, physics, and collision detection. Thus, one of the powerful aspects of Unity is that game developers need not go out of the box and create everything from scratch. Instead, they are available with the physics engine required to develop games quickly. Another robust feature of Unity is that it includes an excellent ‘Asset Store’ where developers can upload their creations and showcase them to the whole community. So, that’s Unity and its uses in a broader scope!
Before we take you through the next section, it’s important to mention that Unity is also known as cross-platform IDE, where IDE stands for ‘integrated development environment.’ So, it can be called more of an interface with access to all the tools and resources required to develop games.
Apart from the game development, Unity is known for other excellent usage purposes as:
● Simulations
● Animation
● Architectural Visualization
● Previsualization for Film
● Interactive Experiences
Among these features only, we’ll describe Unity stop animation from looping in detail.
Part 2 How to Stop Animation Playing in Loop in Unity?
As we said, we’ll describe to you the most accessible definition of how to stop Animation in Unity. Thus, there are simple steps that we’d like to define firsthand before explaining the whole procedure with an image-centric step-by-step guide.
So, those simple steps to stop motion animation in After Effects in the loop also go like below:
Step 1 Go to the Project tab and select Animation.
Step 2 Open the Inspector tab.
Step 3 Uncheck the checkbox Loop Time, and you’re good to go!
We’ll describe the same, i.e., Unity stop animation from looping through the step guide below.
In this guide, we’ll explain right from applying the Animation so that you’d understand better. So, let’s begin without any further ado!
01Step 1 Delete animation folder
We have already created an animation folder in the folder named as own Animation, so click that folder, click the animation folder, and then another folder along with as shown below. Hold the Shift key and click another folder. Then, right-click the Delete tab as depicted below.
Similarly, you can also delete the Animation if you wish.
02Step 2 Create an animation for the subject
Now, you may have different subjects. We’re creating Animation on Mobile Joystick for reference, as shown below.
Now, hit the Create tab on the Unity panel below. Then, proceed to save your Animation in the folder you’ve already created for the same.
03Step 3 Give positions to the animation
Firstly, hit the red-icon button used for recording, as shown below.
Give the position on the left side after you click the button. And, then, clicking almost near to 3you can give the position to the right-hand side as shown below.
Now, the animation has been set. You can see the animation from left to right if you click the Play button. So, here, you can see the results of infinite loop animation, which won’t stop.
You can follow two ways to stop this Animation in Unity from looping, and we’ll describe both methods below.
04Step 4 Stop animation Unity Way 1
Go to the animation folder where you’ve created the animation and click the New Animation icon as shown below.
Now, you have to uncheck the Loop Time tab on the top-right corner of the Unity panel.
05Step 5 Stop animation Unity Way 2
Alternatively, you can click the Animator tab on the top of the Unity panel and double-tap the New Animation button. Then, it will also delete or uncheck the loop time, as shown below.
These were all the steps to stop animation Unity.
Part 3 How to Smooth an Animation in Unity?
After done with Unity stop animation, it’s time to smooth your Unity animation. Again, we will describe it simply if you’re used to the Unity platform and then with a step guide with respective screenshots.
So, stay tuned until the end to reveal the easy steps of smoothing an animation in Unity.
Select the Dopesheet at the bottom of the animation window. Then, you need to switch to the ‘Curves’ view once you create your Animation in the Dopesheet. These animation curves help you accelerate and decelerate animations so that the movement and other things can stop and start smoothly.
So, let’s begin with the step guide tutorial on the same as follows:
For reference, take an example of a metronome object imported from Blender to Unity. Here, we’ve grouped all the pendulum objects under one rotation so that when we move the pendulum, it pivots to the correct point, as shown below.
01Add the animator
So, the first step begins with adding the Animator component to the parent object. You can do this by clicking the Add Component tab on the Unity panel’s left side, searching for Animator, and clicking the Animator.
You will also need a controller to control the animations. Go to your animation folder, right-click, and select Create> Animator Controller tab.
Let’s call or give it a name metronome animator as shown below.
Then, you need to drag this into your animator component. Again, you need to go to your animations folder, right-click, select Create> Animations tab.
Now, give this a name pendulum full swing.
02Open the animator tab
Now, open the animator tab, drag this pendulum swing animation to that panel, and double-tap the yellow-colored New Animation button.
03Create an animation
With the game object selected, the animated metronome pendulum, in this case, we’d like to animate the X component of the rotation. So, you need to click Add Property> Transform> Rotation tab and click the + sign on its right, as shown below.
Now, click the plus sign automatically to set two keyframes, one at the beginning and one at the end. Now, click on end select all, and then delete for now.
04Add keyframes to rotate the pendulum
With the first set of keyframes and the pendulum all way to the right, go halfway and change the rotation to the left on the left panel of Unity. Then, add another keyframe.
05Slow down the animation
As you can observe, the Animation of this pendulum is in a straight line and feels unnatural to the eyes. Thus, we’re required to smooth this Animation now! For this purpose, go to the Curves; you can see the pink properties of rotation as going from one side to another.
Now, you need to adjust these pink curves. Start by adding a key to one of its sides, as shown below. After that, it is all on you how slow or fasts you want these values to be.
Here, you’re all done smoothing the animation in Unity after learning the stop-animation Unity tutorial.
You can even stop motion animation on Photoshop with the above tutorial.
06Bonus Tip:
We want to introduce an excellent video editor software called Filmora Video Editor . It is from the house of Wondershare, a well-known software company worldwide.
Wondershare Filmora - Best Video Editor for Mac/Windows
5,481,435 people have downloaded it.
Build unique custom animations without breaking a sweat.
Focus on creating epic stories and leave the details to Filmora’s auto features.
Start a creative adventure with drag & drop effects and endless possibilities.
Filmora simplifies advanced features to save you time and effort.
Filmora cuts out repetition so you can move on to your next creative breakthrough.
With Filmora, you can easily add Animation and edit your videos to make them look world-class. The latest version and new updates are eye-candy and quick fix for beginner video editors.
So, please pay a visit to the Filmora website and check out its Mac and Windows version for free today.
● Key Takeaways from This Episode →
● Learning the concept and usage of Unity
● A tutorial on how to stop animation in Unity from looping
● A tutorial on how to smooth animation in Unity
● Introduction to Filmora, the top-most video editor software for beginners.
Also read:
- New Before You Learn Facebook Slideshow 5 Things You Should Know
- Updated 10 Best Convert Video Between GIF Software High Quality for 2024
- In 2024, Top Claymation Shows That Make Your Memories Unforgettable
- 2024 Approved 10 Best Convert Video Between GIF Software High Quality
- Updated How to Create Slideshow in LinkedIn for 2024
- New In 2024, 4 Things You Should Know About Pinterest GIF
- New 2024 Approved Convert Animated GIF From Video
- Updated How to Send and Add Snapchat GIFs 100 The Easy Way
- Updated 2024 Approved Popular Tips on Learning Animate Rigging
- Updated Tips for GIF to Animated PNG for 2024
- Updated 2024 Approved 15 Horror Animes That Will Trigger a Heart Attack
- New Top 8 Anime Name & Title Generators Online-Get Cool Anime Names
- New What Are Differences Between 2D And 3D Animation for 2024
- New 2024 Approved 10 Cartoon Character Makers to Create Animated Characters
- Updated 2024 Approved 5 Must Try Ways to Add GIF in Text Message on Android
- Updated In 2024, Top 10 Classical Animated Cartoon Types With Examples
- New 2024 Approved 10 Cartoon Canvas Painting Ideas for Total Beginners
- How To Bypass Xiaomi Redmi K70 Pro FRP In 3 Different Ways
- In 2024, How to Bypass FRP from Asus ROG Phone 8?
- What Legendaries Are In Pokemon Platinum On Realme GT Neo 5? | Dr.fone
- All Must-Knows to Use Fake GPS GO Location Spoofer On Apple iPhone 7 Plus | Dr.fone
- In 2024, Step-by-Step Tutorial How To Bypass Itel P40+ FRP
- Remove OnePlus unlock screen
- In 2024, Pokemon Go Error 12 Failed to Detect Location On Lava Yuva 3? | Dr.fone
- How Do I Stop Someone From Tracking My Xiaomi Redmi Note 12 Pro 4G? | Dr.fone
- Top 11 Free Apps to Check IMEI on Samsung Galaxy A15 5G Phones
- In 2024, CatchEmAll Celebrate National Pokémon Day with Virtual Location On Honor Magic 5 Lite | Dr.fone
- Updated Power of AI Thumbnail Generators for 2024
- In 2024, How To Activate and Use Life360 Ghost Mode On HTC U23 Pro | Dr.fone
- In 2024, How Screen Mirroring Apple iPhone XR to TV or PC? | Dr.fone
- How to Remove iPhone 15 Pro Max SIM Lock?
- In 2024, Best Pokemons for PVP Matches in Pokemon Go For Honor 100 | Dr.fone
- In 2024, How To Unlink Your iPhone 11 From Your Apple ID
- Title: 5 Photoshop Alternatives to Animate Logo
- Author: Elon
- Created at : 2024-06-15 11:22:47
- Updated at : 2024-06-16 11:22:47
- Link: https://animation-videos.techidaily.com/5-photoshop-alternatives-to-animate-logo/
- License: This work is licensed under CC BY-NC-SA 4.0.
