
:max_bytes(150000):strip_icc():format(webp)/GettyImages-664800650-4349941504c24712b81975694798236b.jpg)
6 Unexpected Ways Gif Animation Maker That Affect Your Marketing
6 Unexpected Ways Gif Animation Maker That Affect Your Marketing
6 Unexpected Ways Gif Animation Maker Can Affect Your Marketing
An easy yet powerful editor
Numerous effects to choose from
Detailed tutorials provided by the official channel
Well, if what you’re looking for is a GIF animation maker or software for GIF Animation, we’ve got your back This article starts off with a list of some GIF animation maker tools that you can use to turn your videos into a GIF file (just to give you an idea of how those can help you move forward in your GIF marketing attempts more easily.)
Before ending in a quick rundown, a couple of reasons why GIFs are worth the investment in the first place.
In this article
01 [In What Ways Can You turn videos into a GIF?](#Part 1)
02 [How Gif Animation Maker Affect Your Marketing](#Part 2)
Part 1 In What Ways Can You turn videos into a GIF?
As promised, we’ll be starting off with the tools that you’ll need in order to create GIFs easily (or GIF Animation Maker tools, if you’d prefer). We’ve made sure to pick out a variety for you so that you won’t have to go looking elsewhere for other options We also included what people tend to like and dislike about each option so that you can make a choice as to what you think is the best GIF animation maker more easily.
01**Wondershare Filmora **
If what you’re looking for is software for GIF animation, then Filmora is your best bet This software is available for both Mac and Windows users (with options for both a perpetual license and subscription packages for you to choose from.) This is a video editing tool that is capable of making incredibly professional results. And, perhaps more importantly (considering the subject of this article), it will allow you easily turn a video into a 2D Animation GIF that you can use for your marketing
URL: https://filmora.wondershare.com/
What People Like About The Maker
●Comes with advanced video editing functions
●Easily turns videos into 2D Animation GIFs
●Produces High-Quality Results each time
What People Don’t Like About The Maker
●It is a software, which requires download and installation
●The FREE version is limited
●Must pay either a subscription fee or one-time fee for full access

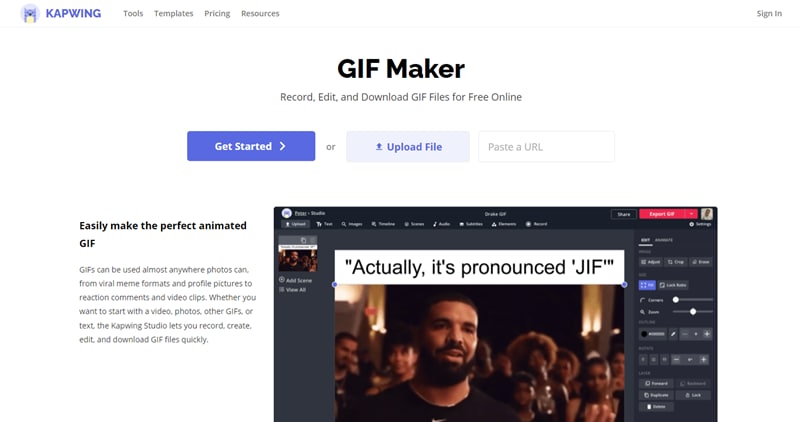
02Canva
If you’ve created marketing projects before, then you’ve no doubt already heard of Canva. This is what a lot of content creators use in order to easily create content for marketing online In this case, of course, we’re looking at it as an online GIF animation maker, one that, unlike Filmora, requires no download (but will require sign-up) for you to use. Canva has its own GIF Animation Maker that you can use (different from the regular Canva you might be more familiar with, as is shown in the UI screenshot below).
URL: https://www.canva.com/create/gif-maker/
What People Like About The Maker
●It is an online tool, no download or installation is required
●Built-in media library for convenient project creation
●Intuitive 2D Animation GIF interface
What People Don’t Like About The Maker
●Not as advanced when it comes to video editing functions
●Limited FREE trial version
●Must unlock Premium version (subscription-based) for full access

03PicMonkey
The next tool on this is another online GIF Animation maker, this time by the name of PicMonkey This tool is very similar to Canva in that many people know it primarily as a photo-editor tool that is great to use for creating content (as it comes with a built-in media library that you can use to quickly finish projects). But it still earned a spot on this list of ours because it allows users to create 2D animation GIFs as well
URL: https://www.picmonkey.com/
What People Like About The Maker
●Built-in media library with animated shapes and images
●GIF Animation editor and creator all-at-once
●FREE trial is available to test out its GIF animation maker functions
What People Don’t Like About The Maker
●In order to have full access, one must pay for the premium solution
●Custom animation is limited in scope
●No advanced video editing functions

04Kapwing
Kapwing is a free GIF animation creator that will allow you to create GIFs from videos easily The best part about is that it has a FREE version available for use (one that allows you to download finished video projects without watermarks so long as they are under 5 minutes). This should allow you to test out its GIF maker functions before you commit to their premium version (which is subscription-based).
URL: https://www.kapwing.com/gif-maker
What People Like About The Maker
●FREE to use with some limitations
●Quick and easy video-to-GIF conversion
●No watermark on images or video projects under 5 minutes
What People Don’t Like About The Maker
●Full access can only be unlocked by paying for the premium version
●Premium version is subscription-based and expensive
●There is an upload limit
05MakeAGif
MakeAGif is the last GIF animation maker on this list, and it just so happens that it’s one of the easiest to use as well This one is more of a converter tool in that it transforms already-finished videos into a GIF that you can share. A lot of people use it to convert their favorite videos from social media (YouTube, Facebook, etc.) into a GIF that they can share on other platforms.
URL: https://makeagif.com/video-to-gif
What People Like About The Maker
●Free to use with some limitations
●Quick and easy-to-use Video to GIF converter
●Converts pictures, YouTube videos, Facebook videos, etc. to GIF
What People Don’t Like About The Maker
●The tool is more limited in scope than the rest of the tools on this list
●The FREE version is limited
●Premium version requires paying a subscription fee
Part 2 How Gif Animation Maker Affect Your Marketing
Alright, now that you’ve been introduced to what we consider the best GIF Animation maker tools available right now (be they software or online tools), we can move on to actually discussing how you can use GIFs for your marketing efforts We’ve compiled six different ways here, but there are plenty of others, of course. It’s a very open subject.
01GIFs Are Easy to Share Ads
The best part of GIFs is that they are easily consumable media that you can share just about everywhere. For example, you can include them in your email marketing to bring a little life to what could have otherwise been a very dry message You can also have it play out on social media without prompting (different from videos, which the user usually has to play before it starts going.)
GIF LINK: https://media.giphy.com/media/fEkpR6rfmXmZHeVQ22/giphy.gif

02GIFs Can Be Used for Promoting Events
GIFs are also great for promoting events or holiday sales It’s basically just a moving 2D advertisement (like the one that is shown below). Eye-catching in a way that keeps you looking to catch the movement — in compared to if you were just looking at a still image (which might catch your attention for a moment, but usually bores you the next)
GIF LINK: https://media.giphy.com/media/WtUMnz9ZUuzwojWwij/giphy.gif
03GIFs Can Be Used for Call-to-Action Pop-Ups
Perhaps you’ve seen this already in some YouTube videos (see the GIF attached for an example), but a lot of content creators now include GIFs on their content to prompt their audience to complete an action — be it subscribing, sharing, downloading a link, buying a product, etc. It’s a great way of getting a message across in a way that is both fun and straightforward
GIF: https://media.giphy.com/media/73oSygWJFG9K1ha75z/giphy.gif
04GIFs Can Be Used to Set the Scene and Express Emotion
GIFs are also a great way to just generally set the scene or express emotion. Text is…very very difficult to make sound like anything but dry reading. Pictures are a little better, but GIFs??? Well, GIFs are great ‘moving’ pictures that offer you more leeway to set the scene by expressing emotion, intent, etc.
GIF: https://media.giphy.com/media/keizDG1zD7Q38yWm3x/giphy.gif
05GIFs Can Be Used to Tell a Story
You know the saying, “A picture can speak a thousand words?” Well, it’s true, but in comparison to GIFs??? Pictures definitely lose out in telling a story. See the attached GIF for example. With just one look, you can probably create an entire story in your head about the woman that is featured This can be very useful for future marketing prospects.
GIF: https://media.giphy.com/media/Kb5zI3B9D7cCulbNOg/giphy.gif
06GIFs Can Be Used to Explain or Share Instructions
In the same way that you can create long infographics to offer instructions or teach a lesson on a particular subject, GIFs can be used to educate your audience. Only, it’s a lot easier to use for this reason No complicated infographics formatting is required You can just put together several stills showing the step-by-step process or record a silent video like the one shown in the GIF below
GIF: https://media.giphy.com/media/FgiHOQyKUJmwg/giphy.gif
● Key Takeaways from This Episode →
● GIFs have been used for years in order to share fun moments and memes, but it has much more potential than that
● With a carefully designed GIF, not only can you catch the attention of your audience, but you can also keep that attention for much longer than you would have been able to if you were just sharing text or a still image Making it a perfect vessel for future marketing efforts
● Now, in order to make sure that you get a good story on your marketing efforts via GIF, we’ve listed some of the best GIF animation maker tools for you in the first part of this article
● A second part has also been added where we discussed all the different ways that you can use 2D Animation GIFs in your future marketing endeavors.
Well, if what you’re looking for is a GIF animation maker or software for GIF Animation, we’ve got your back This article starts off with a list of some GIF animation maker tools that you can use to turn your videos into a GIF file (just to give you an idea of how those can help you move forward in your GIF marketing attempts more easily.)
Before ending in a quick rundown, a couple of reasons why GIFs are worth the investment in the first place.
In this article
01 [In What Ways Can You turn videos into a GIF?](#Part 1)
02 [How Gif Animation Maker Affect Your Marketing](#Part 2)
Part 1 In What Ways Can You turn videos into a GIF?
As promised, we’ll be starting off with the tools that you’ll need in order to create GIFs easily (or GIF Animation Maker tools, if you’d prefer). We’ve made sure to pick out a variety for you so that you won’t have to go looking elsewhere for other options We also included what people tend to like and dislike about each option so that you can make a choice as to what you think is the best GIF animation maker more easily.
01**Wondershare Filmora **
If what you’re looking for is software for GIF animation, then Filmora is your best bet This software is available for both Mac and Windows users (with options for both a perpetual license and subscription packages for you to choose from.) This is a video editing tool that is capable of making incredibly professional results. And, perhaps more importantly (considering the subject of this article), it will allow you easily turn a video into a 2D Animation GIF that you can use for your marketing
URL: https://filmora.wondershare.com/
What People Like About The Maker
●Comes with advanced video editing functions
●Easily turns videos into 2D Animation GIFs
●Produces High-Quality Results each time
What People Don’t Like About The Maker
●It is a software, which requires download and installation
●The FREE version is limited
●Must pay either a subscription fee or one-time fee for full access
02Canva
If you’ve created marketing projects before, then you’ve no doubt already heard of Canva. This is what a lot of content creators use in order to easily create content for marketing online In this case, of course, we’re looking at it as an online GIF animation maker, one that, unlike Filmora, requires no download (but will require sign-up) for you to use. Canva has its own GIF Animation Maker that you can use (different from the regular Canva you might be more familiar with, as is shown in the UI screenshot below).
URL: https://www.canva.com/create/gif-maker/
What People Like About The Maker
●It is an online tool, no download or installation is required
●Built-in media library for convenient project creation
●Intuitive 2D Animation GIF interface
What People Don’t Like About The Maker
●Not as advanced when it comes to video editing functions
●Limited FREE trial version
●Must unlock Premium version (subscription-based) for full access
03PicMonkey
The next tool on this is another online GIF Animation maker, this time by the name of PicMonkey This tool is very similar to Canva in that many people know it primarily as a photo-editor tool that is great to use for creating content (as it comes with a built-in media library that you can use to quickly finish projects). But it still earned a spot on this list of ours because it allows users to create 2D animation GIFs as well
URL: https://www.picmonkey.com/
What People Like About The Maker
●Built-in media library with animated shapes and images
●GIF Animation editor and creator all-at-once
●FREE trial is available to test out its GIF animation maker functions
What People Don’t Like About The Maker
●In order to have full access, one must pay for the premium solution
●Custom animation is limited in scope
●No advanced video editing functions
04Kapwing
Kapwing is a free GIF animation creator that will allow you to create GIFs from videos easily The best part about is that it has a FREE version available for use (one that allows you to download finished video projects without watermarks so long as they are under 5 minutes). This should allow you to test out its GIF maker functions before you commit to their premium version (which is subscription-based).
URL: https://www.kapwing.com/gif-maker
What People Like About The Maker
●FREE to use with some limitations
●Quick and easy video-to-GIF conversion
●No watermark on images or video projects under 5 minutes
What People Don’t Like About The Maker
●Full access can only be unlocked by paying for the premium version
●Premium version is subscription-based and expensive
●There is an upload limit
05MakeAGif
MakeAGif is the last GIF animation maker on this list, and it just so happens that it’s one of the easiest to use as well This one is more of a converter tool in that it transforms already-finished videos into a GIF that you can share. A lot of people use it to convert their favorite videos from social media (YouTube, Facebook, etc.) into a GIF that they can share on other platforms.
URL: https://makeagif.com/video-to-gif
What People Like About The Maker
●Free to use with some limitations
●Quick and easy-to-use Video to GIF converter
●Converts pictures, YouTube videos, Facebook videos, etc. to GIF
What People Don’t Like About The Maker
●The tool is more limited in scope than the rest of the tools on this list
●The FREE version is limited
●Premium version requires paying a subscription fee
Part 2 How Gif Animation Maker Affect Your Marketing
Alright, now that you’ve been introduced to what we consider the best GIF Animation maker tools available right now (be they software or online tools), we can move on to actually discussing how you can use GIFs for your marketing efforts We’ve compiled six different ways here, but there are plenty of others, of course. It’s a very open subject.
01GIFs Are Easy to Share Ads
The best part of GIFs is that they are easily consumable media that you can share just about everywhere. For example, you can include them in your email marketing to bring a little life to what could have otherwise been a very dry message You can also have it play out on social media without prompting (different from videos, which the user usually has to play before it starts going.)
GIF LINK: https://media.giphy.com/media/fEkpR6rfmXmZHeVQ22/giphy.gif
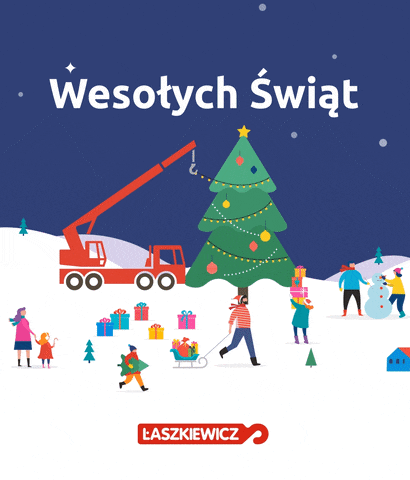
02GIFs Can Be Used for Promoting Events
GIFs are also great for promoting events or holiday sales It’s basically just a moving 2D advertisement (like the one that is shown below). Eye-catching in a way that keeps you looking to catch the movement — in compared to if you were just looking at a still image (which might catch your attention for a moment, but usually bores you the next)
GIF LINK: https://media.giphy.com/media/WtUMnz9ZUuzwojWwij/giphy.gif
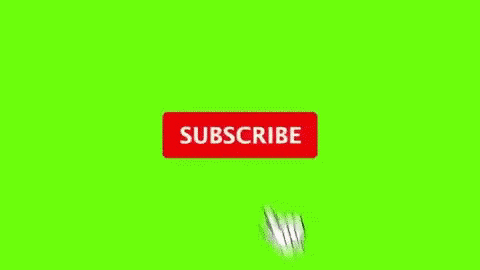
03GIFs Can Be Used for Call-to-Action Pop-Ups
Perhaps you’ve seen this already in some YouTube videos (see the GIF attached for an example), but a lot of content creators now include GIFs on their content to prompt their audience to complete an action — be it subscribing, sharing, downloading a link, buying a product, etc. It’s a great way of getting a message across in a way that is both fun and straightforward
GIF: https://media.giphy.com/media/73oSygWJFG9K1ha75z/giphy.gif
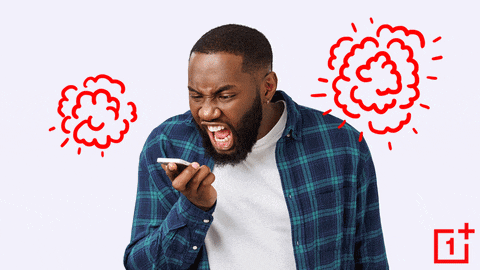
04GIFs Can Be Used to Set the Scene and Express Emotion
GIFs are also a great way to just generally set the scene or express emotion. Text is…very very difficult to make sound like anything but dry reading. Pictures are a little better, but GIFs??? Well, GIFs are great ‘moving’ pictures that offer you more leeway to set the scene by expressing emotion, intent, etc.
GIF: https://media.giphy.com/media/keizDG1zD7Q38yWm3x/giphy.gif
05GIFs Can Be Used to Tell a Story
You know the saying, “A picture can speak a thousand words?” Well, it’s true, but in comparison to GIFs??? Pictures definitely lose out in telling a story. See the attached GIF for example. With just one look, you can probably create an entire story in your head about the woman that is featured This can be very useful for future marketing prospects.
GIF: https://media.giphy.com/media/Kb5zI3B9D7cCulbNOg/giphy.gif
06GIFs Can Be Used to Explain or Share Instructions
In the same way that you can create long infographics to offer instructions or teach a lesson on a particular subject, GIFs can be used to educate your audience. Only, it’s a lot easier to use for this reason No complicated infographics formatting is required You can just put together several stills showing the step-by-step process or record a silent video like the one shown in the GIF below
GIF: https://media.giphy.com/media/FgiHOQyKUJmwg/giphy.gif
● Key Takeaways from This Episode →
● GIFs have been used for years in order to share fun moments and memes, but it has much more potential than that
● With a carefully designed GIF, not only can you catch the attention of your audience, but you can also keep that attention for much longer than you would have been able to if you were just sharing text or a still image Making it a perfect vessel for future marketing efforts
● Now, in order to make sure that you get a good story on your marketing efforts via GIF, we’ve listed some of the best GIF animation maker tools for you in the first part of this article
● A second part has also been added where we discussed all the different ways that you can use 2D Animation GIFs in your future marketing endeavors.
Well, if what you’re looking for is a GIF animation maker or software for GIF Animation, we’ve got your back This article starts off with a list of some GIF animation maker tools that you can use to turn your videos into a GIF file (just to give you an idea of how those can help you move forward in your GIF marketing attempts more easily.)
Before ending in a quick rundown, a couple of reasons why GIFs are worth the investment in the first place.
In this article
01 [In What Ways Can You turn videos into a GIF?](#Part 1)
02 [How Gif Animation Maker Affect Your Marketing](#Part 2)
Part 1 In What Ways Can You turn videos into a GIF?
As promised, we’ll be starting off with the tools that you’ll need in order to create GIFs easily (or GIF Animation Maker tools, if you’d prefer). We’ve made sure to pick out a variety for you so that you won’t have to go looking elsewhere for other options We also included what people tend to like and dislike about each option so that you can make a choice as to what you think is the best GIF animation maker more easily.
01**Wondershare Filmora **
If what you’re looking for is software for GIF animation, then Filmora is your best bet This software is available for both Mac and Windows users (with options for both a perpetual license and subscription packages for you to choose from.) This is a video editing tool that is capable of making incredibly professional results. And, perhaps more importantly (considering the subject of this article), it will allow you easily turn a video into a 2D Animation GIF that you can use for your marketing
URL: https://filmora.wondershare.com/
What People Like About The Maker
●Comes with advanced video editing functions
●Easily turns videos into 2D Animation GIFs
●Produces High-Quality Results each time
What People Don’t Like About The Maker
●It is a software, which requires download and installation
●The FREE version is limited
●Must pay either a subscription fee or one-time fee for full access
02Canva
If you’ve created marketing projects before, then you’ve no doubt already heard of Canva. This is what a lot of content creators use in order to easily create content for marketing online In this case, of course, we’re looking at it as an online GIF animation maker, one that, unlike Filmora, requires no download (but will require sign-up) for you to use. Canva has its own GIF Animation Maker that you can use (different from the regular Canva you might be more familiar with, as is shown in the UI screenshot below).
URL: https://www.canva.com/create/gif-maker/
What People Like About The Maker
●It is an online tool, no download or installation is required
●Built-in media library for convenient project creation
●Intuitive 2D Animation GIF interface
What People Don’t Like About The Maker
●Not as advanced when it comes to video editing functions
●Limited FREE trial version
●Must unlock Premium version (subscription-based) for full access
03PicMonkey
The next tool on this is another online GIF Animation maker, this time by the name of PicMonkey This tool is very similar to Canva in that many people know it primarily as a photo-editor tool that is great to use for creating content (as it comes with a built-in media library that you can use to quickly finish projects). But it still earned a spot on this list of ours because it allows users to create 2D animation GIFs as well
URL: https://www.picmonkey.com/
What People Like About The Maker
●Built-in media library with animated shapes and images
●GIF Animation editor and creator all-at-once
●FREE trial is available to test out its GIF animation maker functions
What People Don’t Like About The Maker
●In order to have full access, one must pay for the premium solution
●Custom animation is limited in scope
●No advanced video editing functions
04Kapwing
Kapwing is a free GIF animation creator that will allow you to create GIFs from videos easily The best part about is that it has a FREE version available for use (one that allows you to download finished video projects without watermarks so long as they are under 5 minutes). This should allow you to test out its GIF maker functions before you commit to their premium version (which is subscription-based).
URL: https://www.kapwing.com/gif-maker
What People Like About The Maker
●FREE to use with some limitations
●Quick and easy video-to-GIF conversion
●No watermark on images or video projects under 5 minutes
What People Don’t Like About The Maker
●Full access can only be unlocked by paying for the premium version
●Premium version is subscription-based and expensive
●There is an upload limit
05MakeAGif
MakeAGif is the last GIF animation maker on this list, and it just so happens that it’s one of the easiest to use as well This one is more of a converter tool in that it transforms already-finished videos into a GIF that you can share. A lot of people use it to convert their favorite videos from social media (YouTube, Facebook, etc.) into a GIF that they can share on other platforms.
URL: https://makeagif.com/video-to-gif
What People Like About The Maker
●Free to use with some limitations
●Quick and easy-to-use Video to GIF converter
●Converts pictures, YouTube videos, Facebook videos, etc. to GIF
What People Don’t Like About The Maker
●The tool is more limited in scope than the rest of the tools on this list
●The FREE version is limited
●Premium version requires paying a subscription fee
Part 2 How Gif Animation Maker Affect Your Marketing
Alright, now that you’ve been introduced to what we consider the best GIF Animation maker tools available right now (be they software or online tools), we can move on to actually discussing how you can use GIFs for your marketing efforts We’ve compiled six different ways here, but there are plenty of others, of course. It’s a very open subject.
01GIFs Are Easy to Share Ads
The best part of GIFs is that they are easily consumable media that you can share just about everywhere. For example, you can include them in your email marketing to bring a little life to what could have otherwise been a very dry message You can also have it play out on social media without prompting (different from videos, which the user usually has to play before it starts going.)
GIF LINK: https://media.giphy.com/media/fEkpR6rfmXmZHeVQ22/giphy.gif
02GIFs Can Be Used for Promoting Events
GIFs are also great for promoting events or holiday sales It’s basically just a moving 2D advertisement (like the one that is shown below). Eye-catching in a way that keeps you looking to catch the movement — in compared to if you were just looking at a still image (which might catch your attention for a moment, but usually bores you the next)
GIF LINK: https://media.giphy.com/media/WtUMnz9ZUuzwojWwij/giphy.gif
03GIFs Can Be Used for Call-to-Action Pop-Ups
Perhaps you’ve seen this already in some YouTube videos (see the GIF attached for an example), but a lot of content creators now include GIFs on their content to prompt their audience to complete an action — be it subscribing, sharing, downloading a link, buying a product, etc. It’s a great way of getting a message across in a way that is both fun and straightforward
GIF: https://media.giphy.com/media/73oSygWJFG9K1ha75z/giphy.gif
04GIFs Can Be Used to Set the Scene and Express Emotion
GIFs are also a great way to just generally set the scene or express emotion. Text is…very very difficult to make sound like anything but dry reading. Pictures are a little better, but GIFs??? Well, GIFs are great ‘moving’ pictures that offer you more leeway to set the scene by expressing emotion, intent, etc.
GIF: https://media.giphy.com/media/keizDG1zD7Q38yWm3x/giphy.gif
05GIFs Can Be Used to Tell a Story
You know the saying, “A picture can speak a thousand words?” Well, it’s true, but in comparison to GIFs??? Pictures definitely lose out in telling a story. See the attached GIF for example. With just one look, you can probably create an entire story in your head about the woman that is featured This can be very useful for future marketing prospects.
GIF: https://media.giphy.com/media/Kb5zI3B9D7cCulbNOg/giphy.gif
06GIFs Can Be Used to Explain or Share Instructions
In the same way that you can create long infographics to offer instructions or teach a lesson on a particular subject, GIFs can be used to educate your audience. Only, it’s a lot easier to use for this reason No complicated infographics formatting is required You can just put together several stills showing the step-by-step process or record a silent video like the one shown in the GIF below
GIF: https://media.giphy.com/media/FgiHOQyKUJmwg/giphy.gif
● Key Takeaways from This Episode →
● GIFs have been used for years in order to share fun moments and memes, but it has much more potential than that
● With a carefully designed GIF, not only can you catch the attention of your audience, but you can also keep that attention for much longer than you would have been able to if you were just sharing text or a still image Making it a perfect vessel for future marketing efforts
● Now, in order to make sure that you get a good story on your marketing efforts via GIF, we’ve listed some of the best GIF animation maker tools for you in the first part of this article
● A second part has also been added where we discussed all the different ways that you can use 2D Animation GIFs in your future marketing endeavors.
How to Cartoonize Photo Photoshop in Simple Steps
How to Cartoonize Photo Photoshop in Easy Steps
An easy yet powerful editor
Numerous effects to choose from
Detailed tutorials provided by the official channel
Cartoons, an already catchy entertainment source, can upgrade other media utilities on integration. Look through the easiest ways of creating cartoonize photo Photoshop stills!
In this article
01 [Types of Cartoon Effects in Photoshop](#Part 1)
02 [Easiest Ways to Cartoonize Photo in Photoshop](#Part 2)
03 [How to Use a Variety of Photoshop Special Effects to Create the Final Caricature Look](#Part 3)
Part 1 Types of Cartoon Effects in Photoshop
It is an absolute fun activity to explore your editing creativity in the realm of cartoonizing the otherwise ordinary still captures. Talking of the most convenient cartoon creator and editor applications, you can safely rely on the Photoshop Image Editor application to choose from a pool of cartoon editing effects for adding that spunky and funny element to your image files.
Presented in the following section, is a discussion of some of the most stunning and visibly amazing cartoon effects in the application’s Editor Library to cartoonize Photoshop images:
01Pop Art Photoshop Action
The effect is a predominantly preferred as a cartoon action Photoshop utility to caricaturize a normal image, along with customizing the same to change the colors and background of the original still capture for creating a brand new appearance with utmost ease. Apart from this, the aforesaid effect allows you to exclusively customize the globally acclaimed graphic masterpieces of Roy Lichtenstein. Working with the effect, you can edit a self-portrait or the favorite image of your pet to give the latter, a funny retro feel.

02Vintage Comic Creator
If the idea of sticking to just the creation of cartoon images is not enough to satisfy you, the Vintage Comic Creator effect allows you to expand your creativity level to work on cartoon based shape and text edits. You can use the effect to enhance an image logo or plain text with a comic book oriented text. A download of this cartoon effect template facilitates you with diversities of customizable layer styles, overlays and patterns.

03GTA Photoshop Action
This is a complete pleasure for the creative fan of Grand Theft Auto, the wicked chasing game series. Additional to creating a stark variety of edited cartoon stills, you are free to reinvent the aforesaid game’s most popular caricature edits, while using the GTA Photoshop Action editing filter. Launched by Indworks, the effect package consisting of 15 vibrant themes and 5 collage templates; promises a quick mimicry of your most cherished video and console games.

04Vector Paint Photoshop Action
The one is an amazing Photoshop effect for creating cartoon edits, which works through a merger of two different ingenious art themes or styles for transforming basic images into cartoonized stills.
The effect grants you the liberty to use varieties of art styles, such as, comic, photo retouching and energetic oil to obtain editing results comparable to that of any original photograph. The template is conveniently simple to use and assures you of quick results. All this, just at a nominal price of $6! Interesting, right?

05Ultra Realistic 3D Space Effect
Considering the fact of you being a space admirer, this one is the perfect image editor for you to add the vibrancy of stunning space elements and backgrounds within your cartoonized edits. The effect lets you play with the diverse range of customizable text and exciting caricature backgrounds. When downloading the template, you get a main setup file, a few editing examples and a web link to the free fonts present in the effect.

06Animated Zombie Grime Art Photoshop Action
Are you in love with the latest zombie grimes? If yes, then this action set is exclusive editor package for you. Working with the aforesaid image template, you can effortlessly add the perfect zombie theme to your cartoon edits, along with simultaneously creating a stunning animation, which you can use to enhance your video or GIF uploads on social media. Not forgetting the best part, you get a free access to this amazing utility.

Part 2 Easiest Ways to Cartoonize Photo in Photoshop
Having known about the amazing varieties of cartoonized editor templates in Photoshop, it is a natural instinct to feel motivated to create your own caricature images from normal capture stills. Addressing the concern of image transformation methods to turn a photo into a cartoon Photoshop, let us dive into some of the most affordable methods of creating cartoonized photos in the aforesaid editing application.
Talking of the most basic Photoshop tools for creating caricature images, you can start your editing spree with using the Graphic Tablet, Brush Tool, Layer Masks and a graphic pen to create amateur cartoonized edits from your still photographs, getting a full control on image tracing.
01Brush Tool
A few usage examples include working with a combination of the graphic tablet pen and the editor brushes to trace your image, using the brush in a masked or a fresh layer to avoid altering the actual image, and much more.
02Graphic Tablet
It is best to use the Photoshop Graphic Tablet for adhering to the concern of tracing cartoonized images. You can alternatively cater to the job with a trackpad, mouse, or even your hand. It is however, difficult to assure steady hand postures for image tracing, lest you are using a stylus pen.
03Pen Tool
Using the Pen Tool for cartoonizing your portrait, allows you to draw outlines along the desired figure within the image, along with its important elements, so that you can easily use these outlined paths to introduce different color blocks.
Similar to the Brush Tool, the Photoshop Pen utility grants you the freedom to vary the degree of detailing in your cartoon edit, from being highly expressive to only remaining around the shore. Working with the Pen Tool can, however be a bit tiring and time taking, with respect to the extent of detailing you wish to add to the caricature edits.
Additional to the aforementioned tools, you can also consider using the default image filters of the Photoshop application to get comparable results. This is an exclusively better option to choose, compared to the Pen Tool, when you are working without a Graphic Tablet. To get over the top realistic caricature renderings, you will need to supplement the use of Photoshop filters with the application’s editing channels and other adjustments.
Part 3 How to Use a Variety of Photoshop Special Effects to Create the Final Caricature Look
Considering the extensive discussion on the credibility of the Photoshop Image Editor application in the realm of creating stunning caricature images in high end resolution, let us proceed to learn about using the diversity of Photoshop’s special effects to get the last stage cartoonized appearance of ordinary still images.
User’s Guide to Create High End Cartoonized Look
The following tutorial is a stepwise explanation of the process to convert photo into cartoon Photoshop in the easiest possible way. Stick to the method for getting affordable results in a quick span.
Step 1: Download and Launch the Program
Visit the official website of Photoshop Image Editor for a free download of the software program in your system, followed by installing and launching the same in your device.
Step 2: Upload Your Image
On a successful launch of the editor program, you will be directed to the ‘Photoshop Editor’ window, where you are required to upload any desired still image from your device for creating a cartoonized edit. To do this, either simply add your image to the editor workspace using the ‘Drag and Drop’ method, or navigate to the ‘File’ tab in the top toolbar and click on ‘Open’ in the dropdown menu.
Step 3: Edge Enhancement
Once your image appears in the editor timeline, proceed to sharpen the edges of the face and body of the portrait. Start with navigating to and clicking on the ‘Filter’ option, followed by tapping on ‘Filter Gallery’ and selecting the ‘Artistic’ folder, where you need to choose the ‘Poster Edges’ option. Observe the effect of these setting on the portrait and make necessary changes.

Step 4: Background Setting
Ensure that the background and foreground of your image are set to white and black colors respectively. If not, proceed to adjust the same as required.

Step 5: Distorting the Edges
You now need to introduce some distortion in the edges of your portrait. Navigate to the ‘Filter’ option again, open the ‘Filter Gallery’ and choose ‘Torn Edges’ from the menu that drops down. Select the desired parameter values in accordance with your creative suitability.


Step 6: Using the Channels Panel
The next step is to select and copy your portrait using the ‘Ctrl + A’ and Ctrl + C commands respectively. Navigate to the ‘Channels’ panel at the right of the Photoshop workspace. At the panel’s bottom right, proceed with creating a new channel. It will be assigned the name ‘Alpha 1’ by Photoshop, which you are most welcome to change.


Step 7: Color Inversion
When you finish creating the channel, use the ‘Ctrl + V’ command to paste your portrait in the same. Proceed with inverting the image colors by navigating to the ‘Image’ option, followed by choosing the ‘Adjustment’ and ‘Invert’ options from the consecutive drop downs. Now, make a selection of the ‘White’ regions of your portrait by pressing the ‘Ctrl’ key and clicking on the ‘Alpha 1 Channel thumbnail.

Step 8: Layer Creation
Navigate to the ‘Layers’ panel at the right of the Photoshop workspace, and click on the ‘New Layer’ icon for creating a fresh layer. Fill the just created layer with black color, either by pressing ‘g’ from your system’s keyboard, or using the ‘Paint Bucket’ tool. Don’t forget to assign a suitable name to the layer.

Repeat the above process to create a separate layer and e fill the same with white color. The layer creation process is essential to separate the white and black colors of the actual image.

Step 10: Layer Dragging
In the ‘Layers’ panel, drag the ‘Black’ layer above the ‘White’ one.

Step 11: Creating Additional Layers
You are now required to create three more layers, with the same process as for the above two, for adding effects to the Skin, Clothes and Teeth/Eyes of the portrait. When you finish creation, assign suitable names to the layers, followed by dragging them below the ‘Black’ one within the ‘Layers’ panel.

Step 12: Color Selection and Application
Choose the respective colors for the clothes, skin and teeth/eyes of the cartoonized edit. To proceed with color application, navigate to the toolbar at the left of the Photoshop workspace and choose the ‘Brush Tool’. Finally, choose a particular layer and apply careful brush strokes to add color to the specific area of the portrait that you wish to edit. Follow the same process to add colors to the remaining layers to get the desired result in all areas of your cartoonized edit.

Step 13: Using the Gradient Tool
Navigate to the ‘Layers’ panel again and create a new ‘Gradient’ layer to further enhance your creation. You now need to select the ‘Gradient Tool’ from the toolbar at the left of the Photoshop workspace. The ‘Gradient Editor’ pops up with the continuously running ‘Gradient Bar’, as soon as you make the selection. Double click on the gradient boxes at both ends to select them, followed by making your color choices. Tap on ‘OK’ when you are satisfied with your work.

Step 14: Filling the Gradients
To proceed with gradient filling, press and hold the mouse button on the image at the bottom left and continue to drag the cursor to its top right corner. Leave the mouse and navigate to the ‘Layers’ panel for dragging and dropping the ‘Gradient’ layer above the ‘White’ layer.

You are now done with the process of creating a caricature edit from a normal still portrait. Your final image output will appear something like the following:

Cartoons, an already catchy entertainment source, can upgrade other media utilities on integration. Look through the easiest ways of creating cartoonize photo Photoshop stills!
In this article
01 [Types of Cartoon Effects in Photoshop](#Part 1)
02 [Easiest Ways to Cartoonize Photo in Photoshop](#Part 2)
03 [How to Use a Variety of Photoshop Special Effects to Create the Final Caricature Look](#Part 3)
Part 1 Types of Cartoon Effects in Photoshop
It is an absolute fun activity to explore your editing creativity in the realm of cartoonizing the otherwise ordinary still captures. Talking of the most convenient cartoon creator and editor applications, you can safely rely on the Photoshop Image Editor application to choose from a pool of cartoon editing effects for adding that spunky and funny element to your image files.
Presented in the following section, is a discussion of some of the most stunning and visibly amazing cartoon effects in the application’s Editor Library to cartoonize Photoshop images:
01Pop Art Photoshop Action
The effect is a predominantly preferred as a cartoon action Photoshop utility to caricaturize a normal image, along with customizing the same to change the colors and background of the original still capture for creating a brand new appearance with utmost ease. Apart from this, the aforesaid effect allows you to exclusively customize the globally acclaimed graphic masterpieces of Roy Lichtenstein. Working with the effect, you can edit a self-portrait or the favorite image of your pet to give the latter, a funny retro feel.
02Vintage Comic Creator
If the idea of sticking to just the creation of cartoon images is not enough to satisfy you, the Vintage Comic Creator effect allows you to expand your creativity level to work on cartoon based shape and text edits. You can use the effect to enhance an image logo or plain text with a comic book oriented text. A download of this cartoon effect template facilitates you with diversities of customizable layer styles, overlays and patterns.
03GTA Photoshop Action
This is a complete pleasure for the creative fan of Grand Theft Auto, the wicked chasing game series. Additional to creating a stark variety of edited cartoon stills, you are free to reinvent the aforesaid game’s most popular caricature edits, while using the GTA Photoshop Action editing filter. Launched by Indworks, the effect package consisting of 15 vibrant themes and 5 collage templates; promises a quick mimicry of your most cherished video and console games.
04Vector Paint Photoshop Action
The one is an amazing Photoshop effect for creating cartoon edits, which works through a merger of two different ingenious art themes or styles for transforming basic images into cartoonized stills.
The effect grants you the liberty to use varieties of art styles, such as, comic, photo retouching and energetic oil to obtain editing results comparable to that of any original photograph. The template is conveniently simple to use and assures you of quick results. All this, just at a nominal price of $6! Interesting, right?
05Ultra Realistic 3D Space Effect
Considering the fact of you being a space admirer, this one is the perfect image editor for you to add the vibrancy of stunning space elements and backgrounds within your cartoonized edits. The effect lets you play with the diverse range of customizable text and exciting caricature backgrounds. When downloading the template, you get a main setup file, a few editing examples and a web link to the free fonts present in the effect.
06Animated Zombie Grime Art Photoshop Action
Are you in love with the latest zombie grimes? If yes, then this action set is exclusive editor package for you. Working with the aforesaid image template, you can effortlessly add the perfect zombie theme to your cartoon edits, along with simultaneously creating a stunning animation, which you can use to enhance your video or GIF uploads on social media. Not forgetting the best part, you get a free access to this amazing utility.
Part 2 Easiest Ways to Cartoonize Photo in Photoshop
Having known about the amazing varieties of cartoonized editor templates in Photoshop, it is a natural instinct to feel motivated to create your own caricature images from normal capture stills. Addressing the concern of image transformation methods to turn a photo into a cartoon Photoshop, let us dive into some of the most affordable methods of creating cartoonized photos in the aforesaid editing application.
Talking of the most basic Photoshop tools for creating caricature images, you can start your editing spree with using the Graphic Tablet, Brush Tool, Layer Masks and a graphic pen to create amateur cartoonized edits from your still photographs, getting a full control on image tracing.
01Brush Tool
A few usage examples include working with a combination of the graphic tablet pen and the editor brushes to trace your image, using the brush in a masked or a fresh layer to avoid altering the actual image, and much more.
02Graphic Tablet
It is best to use the Photoshop Graphic Tablet for adhering to the concern of tracing cartoonized images. You can alternatively cater to the job with a trackpad, mouse, or even your hand. It is however, difficult to assure steady hand postures for image tracing, lest you are using a stylus pen.
03Pen Tool
Using the Pen Tool for cartoonizing your portrait, allows you to draw outlines along the desired figure within the image, along with its important elements, so that you can easily use these outlined paths to introduce different color blocks.
Similar to the Brush Tool, the Photoshop Pen utility grants you the freedom to vary the degree of detailing in your cartoon edit, from being highly expressive to only remaining around the shore. Working with the Pen Tool can, however be a bit tiring and time taking, with respect to the extent of detailing you wish to add to the caricature edits.
Additional to the aforementioned tools, you can also consider using the default image filters of the Photoshop application to get comparable results. This is an exclusively better option to choose, compared to the Pen Tool, when you are working without a Graphic Tablet. To get over the top realistic caricature renderings, you will need to supplement the use of Photoshop filters with the application’s editing channels and other adjustments.
Part 3 How to Use a Variety of Photoshop Special Effects to Create the Final Caricature Look
Considering the extensive discussion on the credibility of the Photoshop Image Editor application in the realm of creating stunning caricature images in high end resolution, let us proceed to learn about using the diversity of Photoshop’s special effects to get the last stage cartoonized appearance of ordinary still images.
User’s Guide to Create High End Cartoonized Look
The following tutorial is a stepwise explanation of the process to convert photo into cartoon Photoshop in the easiest possible way. Stick to the method for getting affordable results in a quick span.
Step 1: Download and Launch the Program
Visit the official website of Photoshop Image Editor for a free download of the software program in your system, followed by installing and launching the same in your device.
Step 2: Upload Your Image
On a successful launch of the editor program, you will be directed to the ‘Photoshop Editor’ window, where you are required to upload any desired still image from your device for creating a cartoonized edit. To do this, either simply add your image to the editor workspace using the ‘Drag and Drop’ method, or navigate to the ‘File’ tab in the top toolbar and click on ‘Open’ in the dropdown menu.
Step 3: Edge Enhancement
Once your image appears in the editor timeline, proceed to sharpen the edges of the face and body of the portrait. Start with navigating to and clicking on the ‘Filter’ option, followed by tapping on ‘Filter Gallery’ and selecting the ‘Artistic’ folder, where you need to choose the ‘Poster Edges’ option. Observe the effect of these setting on the portrait and make necessary changes.
Step 4: Background Setting
Ensure that the background and foreground of your image are set to white and black colors respectively. If not, proceed to adjust the same as required.
Step 5: Distorting the Edges
You now need to introduce some distortion in the edges of your portrait. Navigate to the ‘Filter’ option again, open the ‘Filter Gallery’ and choose ‘Torn Edges’ from the menu that drops down. Select the desired parameter values in accordance with your creative suitability.
Step 6: Using the Channels Panel
The next step is to select and copy your portrait using the ‘Ctrl + A’ and Ctrl + C commands respectively. Navigate to the ‘Channels’ panel at the right of the Photoshop workspace. At the panel’s bottom right, proceed with creating a new channel. It will be assigned the name ‘Alpha 1’ by Photoshop, which you are most welcome to change.
Step 7: Color Inversion
When you finish creating the channel, use the ‘Ctrl + V’ command to paste your portrait in the same. Proceed with inverting the image colors by navigating to the ‘Image’ option, followed by choosing the ‘Adjustment’ and ‘Invert’ options from the consecutive drop downs. Now, make a selection of the ‘White’ regions of your portrait by pressing the ‘Ctrl’ key and clicking on the ‘Alpha 1 Channel thumbnail.
Step 8: Layer Creation
Navigate to the ‘Layers’ panel at the right of the Photoshop workspace, and click on the ‘New Layer’ icon for creating a fresh layer. Fill the just created layer with black color, either by pressing ‘g’ from your system’s keyboard, or using the ‘Paint Bucket’ tool. Don’t forget to assign a suitable name to the layer.
Repeat the above process to create a separate layer and e fill the same with white color. The layer creation process is essential to separate the white and black colors of the actual image.
Step 10: Layer Dragging
In the ‘Layers’ panel, drag the ‘Black’ layer above the ‘White’ one.
Step 11: Creating Additional Layers
You are now required to create three more layers, with the same process as for the above two, for adding effects to the Skin, Clothes and Teeth/Eyes of the portrait. When you finish creation, assign suitable names to the layers, followed by dragging them below the ‘Black’ one within the ‘Layers’ panel.
Step 12: Color Selection and Application
Choose the respective colors for the clothes, skin and teeth/eyes of the cartoonized edit. To proceed with color application, navigate to the toolbar at the left of the Photoshop workspace and choose the ‘Brush Tool’. Finally, choose a particular layer and apply careful brush strokes to add color to the specific area of the portrait that you wish to edit. Follow the same process to add colors to the remaining layers to get the desired result in all areas of your cartoonized edit.
Step 13: Using the Gradient Tool
Navigate to the ‘Layers’ panel again and create a new ‘Gradient’ layer to further enhance your creation. You now need to select the ‘Gradient Tool’ from the toolbar at the left of the Photoshop workspace. The ‘Gradient Editor’ pops up with the continuously running ‘Gradient Bar’, as soon as you make the selection. Double click on the gradient boxes at both ends to select them, followed by making your color choices. Tap on ‘OK’ when you are satisfied with your work.
Step 14: Filling the Gradients
To proceed with gradient filling, press and hold the mouse button on the image at the bottom left and continue to drag the cursor to its top right corner. Leave the mouse and navigate to the ‘Layers’ panel for dragging and dropping the ‘Gradient’ layer above the ‘White’ layer.
You are now done with the process of creating a caricature edit from a normal still portrait. Your final image output will appear something like the following:
Top 8 Tools Tell You How to Make Slideshows for Instagram
Top 8 Tools Tell You How to Make Slideshows for Instagram
An easy yet powerful editor
Numerous effects to choose from
Detailed tutorials provided by the official channel
Instagram slideshows land among the latest social media trends of fun and entertainment. Learn how to attract jaw dropping peer attention with creating the same!
In this article
01 [When Should You Use an Instagram Slideshow?](#Part 1)
02 [How to Make an Instagram Slideshow with Music?](#Part 2)
03 [8 Best Instagram Slideshow Apps for Creating Outstanding Slideshow](#Part 3)
Part 1 When Should You Use an Instagram Slideshow?
Revolutions in technology has opened doors to a plenty of new and exciting means of information sharing, entertainment and communication. Playing its part in the game, Instagram slideshow has emerged as an exciting means of quick and impactful content sharing. Diving deeper into the discussion, let us talk about the different areas of working with an Instagram slide show in the following section:
01Explanatory Product Demonstrations and Stepwise Tutorials
Considering the diverse media collaboration entertained by this social media platform, you get the liberty to include 10 media files of videos and images while creating a slideshow on Instagram. This is an affordably sufficient media space to demonstrate your newly launched product in front of the target audience.
The aforesaid characteristic of a slideshow for Instagram can be put to another use of creating detailed, step by step guides and product usage tutorials to create an increased and confident customer reach and brand applicability. A few examples include the presentations of recipes by food blogs and chefs, or a detailed look of the day’s outfit by fashion bloggers.
02Interactive Storytelling or Recreate an Event
Gone are the times when stories and events were restricted to a single image or video with a limited scope of understanding and explanation. You can now work with a combination of multiple images and videos to create more vivid and graphical descriptions of stories, narratives and events.
You can work on creating an engaging slideshow for Instagram to tell an amazing story, voice a narration from the beginning to the end, or share your best moments with your cherished audience, which will surely give them the feel of enjoying the adventure along with you.
03Create a Collection
You can now use a slide show for Instagram to design and present a collection of manifold ideas and products within a single post. You can improvise the collection with displaying a series of related products, showcasing a summary of your different blog posts through the week, or simply present a list of your most reliable inspirations, resources and influencers.
04Exciting Video Teasers
If you have a scheduled video release to entertain your audience, try working with interactive slideshows for Instagram to create some sensational teaser content of the upcoming release to imbibe a natural sense of curiosity within your audience.
You can experiment with releasing a mini photoshoot tour of your filming set, share close up progression details, or include a cliffhanger in the end of your Instagram slideshow to ensure the retrieval of your audience towards watching the release of the actual big content. You can use these short teasers as effective means of creating a campaign buzz, while building a closer connect with your audience.
Part 2 How to Make an Instagram Slideshow with Music?
By now, you must have gathered enough knowledge regarding the credibility of Instagram slideshows in catering to a diversity of commercial, professional and personal content sharing needs. Considering the same, you may conveniently feel motivated to try hands at creating stunning slideshow presentations for Instagram on your own.
Adhering to the concern, let us move ahead with our discussion, while talking about how to make a slideshow for Instagram and supplement the same with adaptable background music to develop amazing content masterpieces and share them with social media peers, while grabbing their obvious attention.
While there are a number of choices in the software market to choose your Instagram slideshow creator tool, the FlexClip tool can be a reliable option. Read though the following section to learn the slideshow creation process in the program with a comprehensive and stepwise tutorial guide:
Step 1: Download the Slideshow Creator Tool
Visit the official website of FlexClip to download and install the slideshow maker software in your preferred device.

Step 2: Start from Scratch
After a successful installation, proceed to launch the tool in your system and wait till the software greets you with its welcome interface. Here, you will have to reach to and tap the ‘Start to Create’ button to begin with the slideshow creation process. You can also select a preset template to work on your slideshow if nothing new clicks in your mind.
Step 3: Select an Aspect Ratio
In the tool’s creator window, navigate to the ‘Options Panel’ at the left and click on ‘More’ to select a suitable aspect ratio. Picking the 9:16 ratio would be a good choice.

Step 4: Upload Your Media
In the same ‘Options Panel’, click on ‘Media’ for dragging and dropping the desired video and image files from your device to the program’s media timeline, followed by applying them to the tool’s storyboard. You can alternatively, choose to directly work with media pages of any preset slideshow template.

Step 5: Customize Your Media
You can now proceed to improvise your media files with amazing texts, filters, stickers, emojis, widgets, etc., by clicking on specific object categories from the ‘Options Panel’.

Step 6: Include Seamless Transitions
Proceed to uplift your creation to the next level with the application of stunning image and video transitions. Navigate to the ‘Options Panel’ and tap ‘Elements’. A variety of transition effects will be displayed to choose from. Select the one you like to add it to your slideshow.

Step 7: Add a Background Music
An in line background audio is the best way to set the mood of your slideshow. Choose to add the same to your creation for making a more engaging impact on the audience. Visit the ‘Options Panel’ again and click on ‘Music’ to open the program’s audio library and select a perfect background music from the huge variety of choices, to include in your slideshow.

Step 8: Preview Your Creation
When you have finished customizing your slideshow, navigate to the top right corner of the editor’s storyboard and hit the ‘Preview’ button to visualize and ensure that your slideshow has everything at the right place. You can continue editing if there is a need to make some changes.
Step 9: Time to Save and Share!
When you are happy with your work, consider saving it either to your device or Google Dropbox, from where you can easily upload the same to your Instagram handle.
Part 3 Best Instagram Slideshow Apps for Creating Outstanding Slideshow
Social media is the talk of the trend in today’s times, which has extended its boundaries to visibly everything around us. Speaking in the light of the fact, slideshow presentations are no exception. Social media platforms today have come up with amazing tools and applications to create and share a stunning slideshow Instagram story with utmost ease and within an affordable time span.
Now that you have developed a comprehensive understanding of the credibility of working with Instagram slideshows and their creation process with the inclusion of complementary background music, let us dive into learning about some of the best and most popular Instagram apps for creating awesome slideshow presentations in the following section:
01Filme Lite
This tool lands among the leading user preferences to work on creating slideshow presentations. The application software is packed with a heap of latest features that form the Instagram trends in current times.
Apart from complementing your slideshow creations with tons of features, this slideshow maker for Instagram grants you the liberty to include your most loved videos and images within your presentation and customize them with a diverse range of effects, along with adjusting their play duration within the slideshow. Additional to image and video customization, you are also allowed to choose the image transition style that perfectly suits your content arrangement within the slides.
Working with the tool, you can be sure of getting an unparalleled slideshow creation experience with a very interactive and user oriented design interface, that is simple enough to be easily understood and worked upon by a newbie to the creative world.
02VivaVideo
If you are working on a detailed presentation and wish to spark up your creation with stunning varieties of jaw dropping special effects, consider creating your PowerPoint slideshows in this application. The tool’s effect library is a storehouse of the most amazing special effects that promise of transforming your slideshow into a visual masterpiece.
You can separately apply these effects to each of the slideshow images or choose to work on a combination of selected effects to include within a single video. Apart from this, you are free to choose an apt background music for your presentation slides from the extensive audio library of the software. The bottom line is; you are assured to a complete fun experience while creating slideshows with this tool.
03Movavi
If you are familiar enough with the fundamental concepts and the trivial anecdotes of working with slideshow presentations and want to take your graphic creativity to the next level, you can try hands at using the Movavi slideshow creator software to design high end PowerPoint presentations of professional quality. The best thing about the tool is, it works online and does not require a software download for usage concerns.
Along with creating online slideshow presentations with ease, the tool permits you to create online videos within minutes and instantly download the same for specific usage. You can further, pop up your presentation slides with wonderful transition and animation effects and also make adjustments in the play duration of each slide. The tool lets you choose and add a perfect background music to your presentation from its conveniently vast audio library.
04Slideshow Lab
If you have just landed into the world of creating slideshow presentations and are looking for easy solutions on how to make a slideshow on Instagram, consider working with this software to polish your design creativity. The simple and user cohesive interface of the tool is best for beginners to understand and get customary with the creation process, that takes the minimum possible time to render an appreciable PowerPoint presentation.
Talking about the slideshow design process, you will need to start with selecting a set of desired images, followed by uploading the same into the tool’s slideshow creator timeline. The next step is to arrange the images in the sequential order of appearance, select an appealing background music and apply smooth image transitions. When you are done with everything, proceed to save the presentation to your device.
05MoShow
While you can choose to create stunning slideshow presentations with almost any class of images, the aforesaid app works best to render Instagram images into a top rated Instagram photo slideshow without compromising with the high resolution image quality of Instagram photos. The application integrates motion pictures and lighting effects to transform the otherwise regular images into lively still captures.
Considering the credibility of the tool in overall user experience, its indeed a thumbs up from graphic creators across the globe, thanks to its smart and interactive interface, in time performance and outstanding creation outputs.
06InVideo Editor
Put an end to your search of effective solutions on how to do a slideshow on Instagram with the InVideo Editor, a smart video and graphic editor that can also be employed to adhere to the requirement of creating amazing slideshow presentations from Instagram media. While the creation process hardly takes a few minutes, you can work with the application to explore your editing creativity to the finest levels. The tool works well with any of your MacOs and Windows compatible devices.
The editor’s effects library is loaded with tons of graphic transitions and filters that are dedicated to enhance the contents of your presentation with utmost ease. You can add creative modifications to the slideshow media, such as, cut, crop and trim videos and images and add the most convincing music, overlays, fonts, etc., and enjoy an additional free access to hundreds of stock videos and slideshow templates.
07LightMV
This one is an online slideshow creator utility that works well with almost any operating system including Windows, iOS, Android and Mac. Essentially a cloud centered editor program, this tool caters to your high quality slideshow creation needs in the most effective way. The design process is quite simple, where you only need to add the images and videos, design your presentation and wait till everything comes to place.
What’s more appealing factor about the tool is that you will never need to download the program in your device or purchase a subscription plan to use the application. All you need to do is land into the tool’s website in your favorite browser and tap on the ‘Slideshow’ option to begin with the creation process. You can select from a heap of preset stunning slideshow templates to create the most enhanced PowerPoint presentation.
08Fliptastic
The Fliptastic slideshow creator app is exclusively developed to adhere to the graphic design concerns of iOS users. This one is a no cost graphic utility with a plethora of versatile features and considerable user backup. The app’s effect library is packed with a unique set of slideshow design templates, transitions, background music choices and filters that work to compliment your presentation with the subtlest look ever.
Paying a bit extra attention to the audio inclusion within the slides, the app offers you a range of free music files to work with, while additionally allowing you to upload and use one from your device or the internet.
09Creating Instagram Slideshows With Filmora
Talking exclusively within the domain of video creation and editing, the credibility of the Wondershare Filmora Video Editor software needs no introduction. Moving ahead with our discussion, let us learn about the process of creating awesome Instagram slideshows with Filmora in the following section:
Step 1: Download and Install the Program
To begin with addressing the concern of how to make a slideshow on Instagram story, navigate to the official Wondershare website and download the Wondershare Filmora Video Editor to your preferred system and proceed to install the same.

Wondershare Filmora - Best Video Editor for Mac/Windows
5,481,435 people have downloaded it.
Build unique custom animations without breaking a sweat.
Focus on creating epic stories and leave the details to Filmora’s auto features.
Start a creative adventure with drag & drop effects and endless possibilities.
Filmora simplifies advanced features to save you time and effort.
Filmora cuts out repetition so you can move on to your next creative breakthrough.
Step 2: Import Your Media
Launch the editor program and wait for the latter’s welcome screen to appear. Here, you need to import the images, videos and other media files to the editor timeline for including them in your slideshow. It is recommended to collect all the image and video files into one single folder before opening a new slideshow design project.
In the editor’s welcome screen, navigate to the ‘Media’ tab at the top left corner and click on the same to open the ‘Import’ menu. From here, you need to choose the ‘Import a Media Folder’ option, followed by navigating to the folder that contains the to be imported media files. When you have reached to the required folder, select it and tap ‘OK’ to import the same into the project timeline. When all the files have been imported, you can see them in the ‘Project Media’ panel.

Step 3: Timeline Positioning of Media Files
Reach to the ‘File’ menu and choose ‘Preferences’ from the latter’s dropdown menu. In the ‘Preferences’ window, hit the ‘Editing’ tab and tap on ‘Photo Preferences’. From the drop down menu that follows, choose the ‘Crop to Fit’ option to adjust the aspect ratio of your imported images in line with the slideshow project. In case your images have the 9:16 vertical aspect ratio, select the ‘Fit’ option to make a proper screen fit.

You can proceed to include the image zoom and camera pan features within your project by clicking on the ‘Pan & Zoom’ option. You can further, modify the preset durations of transitions, effects and photos in the ‘Editing’ tab itself before adding them to the editor timeline. Another way of doing the same is to drag the ends of the media files inward or outward, post the timeline adding process.

When you have finished making the required adjustments, navigate back the ‘Media Panel’ to include the imported media files within the project timeline. You can either click on the files to add them, or choose to ‘Drag and Drop’ the same at a preferred place within the timeline.
When all the images and videos have been added, proceed to arrange them in the desired order of appearance in the slideshow, followed by adjusting their screen time and play durations through any of the methods explained above.
Step 4: Add Transitions to Eliminate Hard Cuts
The smooth play of a slideshow is often distorted by hard cuts, which can be escaped by applying smooth transition effects to the slides. Consider exploring the ‘Transitions’ tab of Filmora to choose from a diversity of easily customizable transition effects and place them at the intersection point of the respective slides in the project timeline.
Instead of applying the same transition to every slide, prefer choosing the one that exclusively suits the content arrangement and flow within particular slides. This would save your slideshow from getting a repetitive look.

Post the timeline adding of a transition, you can double click on the same to reach the ‘Transition Setting Window’, where you are allowed to customize the play duration and select its ‘Transition Mode’. Play durations can alternatively be customised in the project timeline by dragging the slider in a left or right direction.
Step 5: Add Overlays and Filters for an Improvised Colour Scheme
To enhance the thematic appeal of your slideshow, consider desaturating the colours of the included images with the extensive range of visual effects and overlays available in the ‘Effects’ tab of the software’s editing timeline. Opening the tab, you are exposed to a series of ‘Filter and Overlay’ categories, that have further subdivisions of Light Leaks, Sepia Tone and Lomography.
To add a particular effect, place it in the timeline track above the desired clip or image. Observe the changes in the ‘Preview Panel’ and proceed to adjust the effect settings if required, by double clicking on the particular effect.

Step 6: Include Motion Graphic Elements
To supplement your slideshow with elegant motion graphics, navigate to the ‘Elements’ tab in the editor timeline. From here, you can access and choose any suitable motion graphic template from a diversity of available choices, to include within the project timeline. The step is completely optional and you should pay attention to the style of content presentation and the cause of creation of your slideshow when choosing to add these elements to the same.

Step 7: Record Voiceovers and Create Soundtracks
To record a voiceover for your slideshow, navigate to the ‘Media’ tab and tap the ‘Record’ dropdown menu. Click on ‘Record Voiceover’ in the list of options that appears. The ‘Record Audio’ icon pops up and you now need to select a microphone to be used in the recording process. When you are ready, tap the ‘Record’ button to let the recording begin.

You can now see your voice recording appear in the ‘Media’ tab with the previously imported media files, ready to be placed within the audio track of the project timeline. Filmora’s audio library is a storehouse of free access music and audio effects. To add one to your slideshow, navigate and click on the ‘Audio’ tab to select from the extensive Rock, Young & Bright, Electronic, etc., music subcategories till you get the perfect match for your presentation.

Once you have selected all the music tracks, place them one by one on the project timeline and move ahead with adjusting their play durations.
Step 8: Export Your Creation
When you are satisfied with your work, you can export the slideshow directly from Filmora to a number of media sharing platforms. All you need to do is, navigate to and tap the ‘Export’ button in the top right corner of the editor screen and proceed to set the resolution and frame rate, and select the output file format of your created slideshow in the ‘Export Window’ that appears.

When you are ready with everything, click on the ‘Export’ button at the bottom right corner of the screen to share your slideshow across different platforms, including YouTube, Instagram, Vimeo, etc.
The time required by Filmora to render your slideshow on the chosen platform will depend on the output file size. Considering the fact that larger files require a much longer time to be rendered, it would be a smart decision to limit the file size of your slideshow within 500 MB.
● Ending Thoughts →
● Instagram slideshows are exciting means of diving into fun-filled entertainment with your social media peers.
● When looking for solutions on how to create a slideshow on Instagram, there are loads of choices in the software market.
● Talking of best creator alternatives, you can pick the Wondershare Filmora slideshow developer program to make an amazing Insta story slideshow.
Instagram slideshows land among the latest social media trends of fun and entertainment. Learn how to attract jaw dropping peer attention with creating the same!
In this article
01 [When Should You Use an Instagram Slideshow?](#Part 1)
02 [How to Make an Instagram Slideshow with Music?](#Part 2)
03 [8 Best Instagram Slideshow Apps for Creating Outstanding Slideshow](#Part 3)
Part 1 When Should You Use an Instagram Slideshow?
Revolutions in technology has opened doors to a plenty of new and exciting means of information sharing, entertainment and communication. Playing its part in the game, Instagram slideshow has emerged as an exciting means of quick and impactful content sharing. Diving deeper into the discussion, let us talk about the different areas of working with an Instagram slide show in the following section:
01Explanatory Product Demonstrations and Stepwise Tutorials
Considering the diverse media collaboration entertained by this social media platform, you get the liberty to include 10 media files of videos and images while creating a slideshow on Instagram. This is an affordably sufficient media space to demonstrate your newly launched product in front of the target audience.
The aforesaid characteristic of a slideshow for Instagram can be put to another use of creating detailed, step by step guides and product usage tutorials to create an increased and confident customer reach and brand applicability. A few examples include the presentations of recipes by food blogs and chefs, or a detailed look of the day’s outfit by fashion bloggers.
02Interactive Storytelling or Recreate an Event
Gone are the times when stories and events were restricted to a single image or video with a limited scope of understanding and explanation. You can now work with a combination of multiple images and videos to create more vivid and graphical descriptions of stories, narratives and events.
You can work on creating an engaging slideshow for Instagram to tell an amazing story, voice a narration from the beginning to the end, or share your best moments with your cherished audience, which will surely give them the feel of enjoying the adventure along with you.
03Create a Collection
You can now use a slide show for Instagram to design and present a collection of manifold ideas and products within a single post. You can improvise the collection with displaying a series of related products, showcasing a summary of your different blog posts through the week, or simply present a list of your most reliable inspirations, resources and influencers.
04Exciting Video Teasers
If you have a scheduled video release to entertain your audience, try working with interactive slideshows for Instagram to create some sensational teaser content of the upcoming release to imbibe a natural sense of curiosity within your audience.
You can experiment with releasing a mini photoshoot tour of your filming set, share close up progression details, or include a cliffhanger in the end of your Instagram slideshow to ensure the retrieval of your audience towards watching the release of the actual big content. You can use these short teasers as effective means of creating a campaign buzz, while building a closer connect with your audience.
Part 2 How to Make an Instagram Slideshow with Music?
By now, you must have gathered enough knowledge regarding the credibility of Instagram slideshows in catering to a diversity of commercial, professional and personal content sharing needs. Considering the same, you may conveniently feel motivated to try hands at creating stunning slideshow presentations for Instagram on your own.
Adhering to the concern, let us move ahead with our discussion, while talking about how to make a slideshow for Instagram and supplement the same with adaptable background music to develop amazing content masterpieces and share them with social media peers, while grabbing their obvious attention.
While there are a number of choices in the software market to choose your Instagram slideshow creator tool, the FlexClip tool can be a reliable option. Read though the following section to learn the slideshow creation process in the program with a comprehensive and stepwise tutorial guide:
Step 1: Download the Slideshow Creator Tool
Visit the official website of FlexClip to download and install the slideshow maker software in your preferred device.
Step 2: Start from Scratch
After a successful installation, proceed to launch the tool in your system and wait till the software greets you with its welcome interface. Here, you will have to reach to and tap the ‘Start to Create’ button to begin with the slideshow creation process. You can also select a preset template to work on your slideshow if nothing new clicks in your mind.
Step 3: Select an Aspect Ratio
In the tool’s creator window, navigate to the ‘Options Panel’ at the left and click on ‘More’ to select a suitable aspect ratio. Picking the 9:16 ratio would be a good choice.
Step 4: Upload Your Media
In the same ‘Options Panel’, click on ‘Media’ for dragging and dropping the desired video and image files from your device to the program’s media timeline, followed by applying them to the tool’s storyboard. You can alternatively, choose to directly work with media pages of any preset slideshow template.
Step 5: Customize Your Media
You can now proceed to improvise your media files with amazing texts, filters, stickers, emojis, widgets, etc., by clicking on specific object categories from the ‘Options Panel’.
Step 6: Include Seamless Transitions
Proceed to uplift your creation to the next level with the application of stunning image and video transitions. Navigate to the ‘Options Panel’ and tap ‘Elements’. A variety of transition effects will be displayed to choose from. Select the one you like to add it to your slideshow.
Step 7: Add a Background Music
An in line background audio is the best way to set the mood of your slideshow. Choose to add the same to your creation for making a more engaging impact on the audience. Visit the ‘Options Panel’ again and click on ‘Music’ to open the program’s audio library and select a perfect background music from the huge variety of choices, to include in your slideshow.
Step 8: Preview Your Creation
When you have finished customizing your slideshow, navigate to the top right corner of the editor’s storyboard and hit the ‘Preview’ button to visualize and ensure that your slideshow has everything at the right place. You can continue editing if there is a need to make some changes.
Step 9: Time to Save and Share!
When you are happy with your work, consider saving it either to your device or Google Dropbox, from where you can easily upload the same to your Instagram handle.
Part 3 Best Instagram Slideshow Apps for Creating Outstanding Slideshow
Social media is the talk of the trend in today’s times, which has extended its boundaries to visibly everything around us. Speaking in the light of the fact, slideshow presentations are no exception. Social media platforms today have come up with amazing tools and applications to create and share a stunning slideshow Instagram story with utmost ease and within an affordable time span.
Now that you have developed a comprehensive understanding of the credibility of working with Instagram slideshows and their creation process with the inclusion of complementary background music, let us dive into learning about some of the best and most popular Instagram apps for creating awesome slideshow presentations in the following section:
01Filme Lite
This tool lands among the leading user preferences to work on creating slideshow presentations. The application software is packed with a heap of latest features that form the Instagram trends in current times.
Apart from complementing your slideshow creations with tons of features, this slideshow maker for Instagram grants you the liberty to include your most loved videos and images within your presentation and customize them with a diverse range of effects, along with adjusting their play duration within the slideshow. Additional to image and video customization, you are also allowed to choose the image transition style that perfectly suits your content arrangement within the slides.
Working with the tool, you can be sure of getting an unparalleled slideshow creation experience with a very interactive and user oriented design interface, that is simple enough to be easily understood and worked upon by a newbie to the creative world.
02VivaVideo
If you are working on a detailed presentation and wish to spark up your creation with stunning varieties of jaw dropping special effects, consider creating your PowerPoint slideshows in this application. The tool’s effect library is a storehouse of the most amazing special effects that promise of transforming your slideshow into a visual masterpiece.
You can separately apply these effects to each of the slideshow images or choose to work on a combination of selected effects to include within a single video. Apart from this, you are free to choose an apt background music for your presentation slides from the extensive audio library of the software. The bottom line is; you are assured to a complete fun experience while creating slideshows with this tool.
03Movavi
If you are familiar enough with the fundamental concepts and the trivial anecdotes of working with slideshow presentations and want to take your graphic creativity to the next level, you can try hands at using the Movavi slideshow creator software to design high end PowerPoint presentations of professional quality. The best thing about the tool is, it works online and does not require a software download for usage concerns.
Along with creating online slideshow presentations with ease, the tool permits you to create online videos within minutes and instantly download the same for specific usage. You can further, pop up your presentation slides with wonderful transition and animation effects and also make adjustments in the play duration of each slide. The tool lets you choose and add a perfect background music to your presentation from its conveniently vast audio library.
04Slideshow Lab
If you have just landed into the world of creating slideshow presentations and are looking for easy solutions on how to make a slideshow on Instagram, consider working with this software to polish your design creativity. The simple and user cohesive interface of the tool is best for beginners to understand and get customary with the creation process, that takes the minimum possible time to render an appreciable PowerPoint presentation.
Talking about the slideshow design process, you will need to start with selecting a set of desired images, followed by uploading the same into the tool’s slideshow creator timeline. The next step is to arrange the images in the sequential order of appearance, select an appealing background music and apply smooth image transitions. When you are done with everything, proceed to save the presentation to your device.
05MoShow
While you can choose to create stunning slideshow presentations with almost any class of images, the aforesaid app works best to render Instagram images into a top rated Instagram photo slideshow without compromising with the high resolution image quality of Instagram photos. The application integrates motion pictures and lighting effects to transform the otherwise regular images into lively still captures.
Considering the credibility of the tool in overall user experience, its indeed a thumbs up from graphic creators across the globe, thanks to its smart and interactive interface, in time performance and outstanding creation outputs.
06InVideo Editor
Put an end to your search of effective solutions on how to do a slideshow on Instagram with the InVideo Editor, a smart video and graphic editor that can also be employed to adhere to the requirement of creating amazing slideshow presentations from Instagram media. While the creation process hardly takes a few minutes, you can work with the application to explore your editing creativity to the finest levels. The tool works well with any of your MacOs and Windows compatible devices.
The editor’s effects library is loaded with tons of graphic transitions and filters that are dedicated to enhance the contents of your presentation with utmost ease. You can add creative modifications to the slideshow media, such as, cut, crop and trim videos and images and add the most convincing music, overlays, fonts, etc., and enjoy an additional free access to hundreds of stock videos and slideshow templates.
07LightMV
This one is an online slideshow creator utility that works well with almost any operating system including Windows, iOS, Android and Mac. Essentially a cloud centered editor program, this tool caters to your high quality slideshow creation needs in the most effective way. The design process is quite simple, where you only need to add the images and videos, design your presentation and wait till everything comes to place.
What’s more appealing factor about the tool is that you will never need to download the program in your device or purchase a subscription plan to use the application. All you need to do is land into the tool’s website in your favorite browser and tap on the ‘Slideshow’ option to begin with the creation process. You can select from a heap of preset stunning slideshow templates to create the most enhanced PowerPoint presentation.
08Fliptastic
The Fliptastic slideshow creator app is exclusively developed to adhere to the graphic design concerns of iOS users. This one is a no cost graphic utility with a plethora of versatile features and considerable user backup. The app’s effect library is packed with a unique set of slideshow design templates, transitions, background music choices and filters that work to compliment your presentation with the subtlest look ever.
Paying a bit extra attention to the audio inclusion within the slides, the app offers you a range of free music files to work with, while additionally allowing you to upload and use one from your device or the internet.
09Creating Instagram Slideshows With Filmora
Talking exclusively within the domain of video creation and editing, the credibility of the Wondershare Filmora Video Editor software needs no introduction. Moving ahead with our discussion, let us learn about the process of creating awesome Instagram slideshows with Filmora in the following section:
Step 1: Download and Install the Program
To begin with addressing the concern of how to make a slideshow on Instagram story, navigate to the official Wondershare website and download the Wondershare Filmora Video Editor to your preferred system and proceed to install the same.
Wondershare Filmora - Best Video Editor for Mac/Windows
5,481,435 people have downloaded it.
Build unique custom animations without breaking a sweat.
Focus on creating epic stories and leave the details to Filmora’s auto features.
Start a creative adventure with drag & drop effects and endless possibilities.
Filmora simplifies advanced features to save you time and effort.
Filmora cuts out repetition so you can move on to your next creative breakthrough.
Step 2: Import Your Media
Launch the editor program and wait for the latter’s welcome screen to appear. Here, you need to import the images, videos and other media files to the editor timeline for including them in your slideshow. It is recommended to collect all the image and video files into one single folder before opening a new slideshow design project.
In the editor’s welcome screen, navigate to the ‘Media’ tab at the top left corner and click on the same to open the ‘Import’ menu. From here, you need to choose the ‘Import a Media Folder’ option, followed by navigating to the folder that contains the to be imported media files. When you have reached to the required folder, select it and tap ‘OK’ to import the same into the project timeline. When all the files have been imported, you can see them in the ‘Project Media’ panel.
Step 3: Timeline Positioning of Media Files
Reach to the ‘File’ menu and choose ‘Preferences’ from the latter’s dropdown menu. In the ‘Preferences’ window, hit the ‘Editing’ tab and tap on ‘Photo Preferences’. From the drop down menu that follows, choose the ‘Crop to Fit’ option to adjust the aspect ratio of your imported images in line with the slideshow project. In case your images have the 9:16 vertical aspect ratio, select the ‘Fit’ option to make a proper screen fit.
You can proceed to include the image zoom and camera pan features within your project by clicking on the ‘Pan & Zoom’ option. You can further, modify the preset durations of transitions, effects and photos in the ‘Editing’ tab itself before adding them to the editor timeline. Another way of doing the same is to drag the ends of the media files inward or outward, post the timeline adding process.
When you have finished making the required adjustments, navigate back the ‘Media Panel’ to include the imported media files within the project timeline. You can either click on the files to add them, or choose to ‘Drag and Drop’ the same at a preferred place within the timeline.
When all the images and videos have been added, proceed to arrange them in the desired order of appearance in the slideshow, followed by adjusting their screen time and play durations through any of the methods explained above.
Step 4: Add Transitions to Eliminate Hard Cuts
The smooth play of a slideshow is often distorted by hard cuts, which can be escaped by applying smooth transition effects to the slides. Consider exploring the ‘Transitions’ tab of Filmora to choose from a diversity of easily customizable transition effects and place them at the intersection point of the respective slides in the project timeline.
Instead of applying the same transition to every slide, prefer choosing the one that exclusively suits the content arrangement and flow within particular slides. This would save your slideshow from getting a repetitive look.
Post the timeline adding of a transition, you can double click on the same to reach the ‘Transition Setting Window’, where you are allowed to customize the play duration and select its ‘Transition Mode’. Play durations can alternatively be customised in the project timeline by dragging the slider in a left or right direction.
Step 5: Add Overlays and Filters for an Improvised Colour Scheme
To enhance the thematic appeal of your slideshow, consider desaturating the colours of the included images with the extensive range of visual effects and overlays available in the ‘Effects’ tab of the software’s editing timeline. Opening the tab, you are exposed to a series of ‘Filter and Overlay’ categories, that have further subdivisions of Light Leaks, Sepia Tone and Lomography.
To add a particular effect, place it in the timeline track above the desired clip or image. Observe the changes in the ‘Preview Panel’ and proceed to adjust the effect settings if required, by double clicking on the particular effect.
Step 6: Include Motion Graphic Elements
To supplement your slideshow with elegant motion graphics, navigate to the ‘Elements’ tab in the editor timeline. From here, you can access and choose any suitable motion graphic template from a diversity of available choices, to include within the project timeline. The step is completely optional and you should pay attention to the style of content presentation and the cause of creation of your slideshow when choosing to add these elements to the same.
Step 7: Record Voiceovers and Create Soundtracks
To record a voiceover for your slideshow, navigate to the ‘Media’ tab and tap the ‘Record’ dropdown menu. Click on ‘Record Voiceover’ in the list of options that appears. The ‘Record Audio’ icon pops up and you now need to select a microphone to be used in the recording process. When you are ready, tap the ‘Record’ button to let the recording begin.
You can now see your voice recording appear in the ‘Media’ tab with the previously imported media files, ready to be placed within the audio track of the project timeline. Filmora’s audio library is a storehouse of free access music and audio effects. To add one to your slideshow, navigate and click on the ‘Audio’ tab to select from the extensive Rock, Young & Bright, Electronic, etc., music subcategories till you get the perfect match for your presentation.
Once you have selected all the music tracks, place them one by one on the project timeline and move ahead with adjusting their play durations.
Step 8: Export Your Creation
When you are satisfied with your work, you can export the slideshow directly from Filmora to a number of media sharing platforms. All you need to do is, navigate to and tap the ‘Export’ button in the top right corner of the editor screen and proceed to set the resolution and frame rate, and select the output file format of your created slideshow in the ‘Export Window’ that appears.
When you are ready with everything, click on the ‘Export’ button at the bottom right corner of the screen to share your slideshow across different platforms, including YouTube, Instagram, Vimeo, etc.
The time required by Filmora to render your slideshow on the chosen platform will depend on the output file size. Considering the fact that larger files require a much longer time to be rendered, it would be a smart decision to limit the file size of your slideshow within 500 MB.
● Ending Thoughts →
● Instagram slideshows are exciting means of diving into fun-filled entertainment with your social media peers.
● When looking for solutions on how to create a slideshow on Instagram, there are loads of choices in the software market.
● Talking of best creator alternatives, you can pick the Wondershare Filmora slideshow developer program to make an amazing Insta story slideshow.
Most Effective Ways to Set WhatsApp Status
Most Effective Tactics to Set WhatsApp Status
An easy yet powerful editor
Numerous effects to choose from
Detailed tutorials provided by the official channel
People generally use images to be uploaded as their WhatsApp status and unknown to many, videos as well as GIFs can also be added as status.
This status remains on your profile for 24 hours and can be viewed only by people who are on your contact list. So, if you too looking for ways to add WhatsApp status GIF, keep reading.
In this article
01 [How to set an animated GIF as WhatsApp status from the phone gallery?](#Part 1)
02 [How to set an animated GIF as WhatsApp status using an app?](#Part 2)
03 [Setting WhatsApp GIF status using device internal camera](#Part 3)
04 [How to create an interesting GIF in a hassle-free manner using Wondershare Filmora](#Part 4)
Part 1 How to set an animated GIF as WhatsApp status from the phone gallery?
If the GIF that you wish to use as the WhatsApp status is present on your phone, you can add it directly from the phone gallery. The steps to get this task done are enlisted below.
Step 1. Launch WhatsApp on your phone and then click on the Status tab.
Step 2. Tap on the My status tab to add a new status. The camera app on the phone will open and you need to launch the phone gallery now.
Step 3. Choose the desired GIF from the gallery, click on it and then tap on the Send button to set it as your status.
The selected GIF will be set as your WhatsApp status.
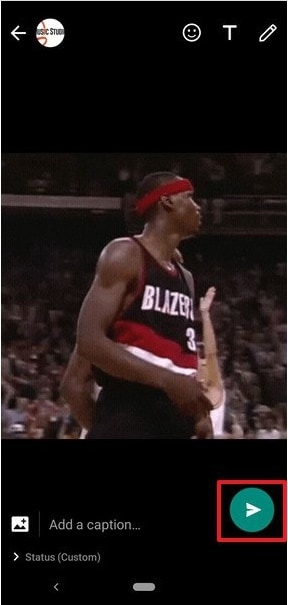
Part 2 How to set an animated GIF as WhatsApp status using an app?
Another way to add an animated GIF WhatsApp status is by using an app and for this, we recommend Giphy as the best tool. The steps to use the app for setting an animated status are as follows.
Step 1. Download, install and open the Giphy app on your phone.
Step 2. The main interface of the app will show multiple GIF options. You can also search your choice of animation based on categories or by using the search box.
Step 3. Next, click on the desired GIF to open it and see it in a larger frame.
Step 4. Under the selected GIF, click on the icon resembling a paper plane, and sharing options will appear.
Step 5. Choose the WhatsApp icon from the options available and then at the next menu, click on the My status option.
Step 6. Next, tap on the green arrow at the bottom-right corner to set GIF as WhatsApp status.
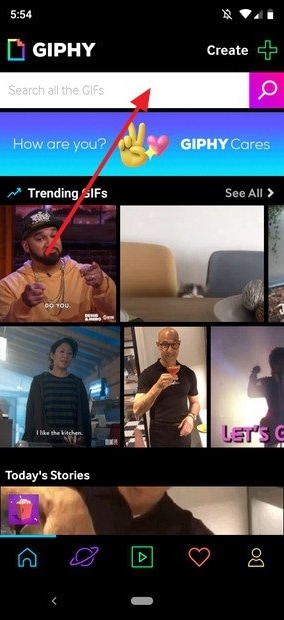
Part 3 Setting WhatsApp GIF status using device internal camera
Another way to add an animated GIF as WhatsApp status is using the internal camera of the device. The steps for the same are as follows.
Step 1. On your phone, launch WhatsApp and at the Status tab, click on the My Status option.
Step 2. The camera of the phone will get activated and now to start the video recording, you need to tap and hold the button that is used for taking the images.
Step 3. Record the video for which you wish to make an animation (video cannot be longer than 5 seconds).
Step 4. After the recording is done, you can adjust the duration using the slider and then choose to play the recorded video as GIF. Click on the Send button to share the video as WhatsApp Status.

Part 4 How to create an interesting GIF in a hassle-free manner using Wondershare Filmora Video Editor
If you wish to set your WhatsApp status as interesting GIF videos, you would need to download such animations online. Another way is to get customized GIF files and this professional tool will be required. If you too want to create your own customized animation in a hassle-free manner, we suggest using Wondershare Filmora. Not only WhatsApp status, but you can also use software for creating GIF animations for web pages, social media sites, ad banners, and other uses.
Wondershare Filmora
Get started easily with Filmora’s powerful performance, intuitive interface, and countless effects!
Try It Free Try It Free Try It Free Learn More >

Using Wondershare Filmora, artistic animations can be quickly created using an image as well as videos. The process is simple and does not require any advanced technical know-how. To create the desired GIF video, there are multiple options for customizations available like adding text, overlays, elements, and more.
Key features of the software
● Create GIF animations using videos and still images.
● Support all key video and image formats like FLV, MKV, MP4, and more.
● Allows customizing the animations by adding text, overlays, elements, and others.
● Quick and hassle-free tool for creating an interesting GIF.
● Windows and Mac support.
Steps to create GIF for WhatsApp status using Wondershare Filmora
Step 1. Launch Wondershare Filmora and add video or images from which you wish to create an animated GIF.
Step 2. Drag and drop the added media file to the timeline of the software.
Step 3. Next, edit and customize the added files using features like combine, crop, split, speed-up, slow, and more.
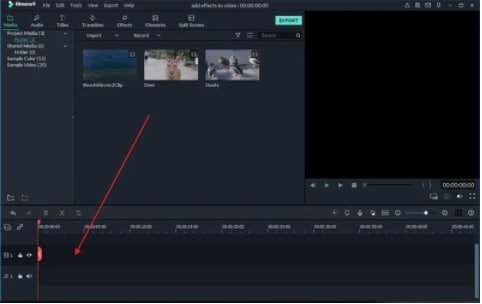
Step 4. You can also add text or elements like sound and others to the added files.
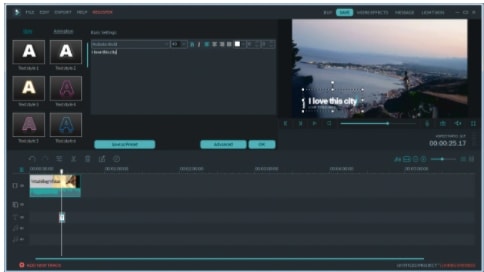
Step 5. Next, when all settings are done, choose GIF at the Local tab to save the media file as GIF. Choose the desired file name and the system location to save the file. Finally, click on the Export button.
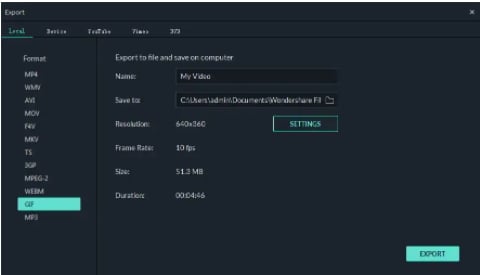
The created GIF animation will save to your selected folder and can be used as WhatsApp status, on social media sites, or for any other use as needed.
● Key Takeaways from This Episode →
●GIF animations can now be used as WhatsApp status.
●There are multiple ways to set GIF animations as WhatsApp status.
People generally use images to be uploaded as their WhatsApp status and unknown to many, videos as well as GIFs can also be added as status.
This status remains on your profile for 24 hours and can be viewed only by people who are on your contact list. So, if you too looking for ways to add WhatsApp status GIF, keep reading.
In this article
01 [How to set an animated GIF as WhatsApp status from the phone gallery?](#Part 1)
02 [How to set an animated GIF as WhatsApp status using an app?](#Part 2)
03 [Setting WhatsApp GIF status using device internal camera](#Part 3)
04 [How to create an interesting GIF in a hassle-free manner using Wondershare Filmora](#Part 4)
Part 1 How to set an animated GIF as WhatsApp status from the phone gallery?
If the GIF that you wish to use as the WhatsApp status is present on your phone, you can add it directly from the phone gallery. The steps to get this task done are enlisted below.
Step 1. Launch WhatsApp on your phone and then click on the Status tab.
Step 2. Tap on the My status tab to add a new status. The camera app on the phone will open and you need to launch the phone gallery now.
Step 3. Choose the desired GIF from the gallery, click on it and then tap on the Send button to set it as your status.
The selected GIF will be set as your WhatsApp status.
Part 2 How to set an animated GIF as WhatsApp status using an app?
Another way to add an animated GIF WhatsApp status is by using an app and for this, we recommend Giphy as the best tool. The steps to use the app for setting an animated status are as follows.
Step 1. Download, install and open the Giphy app on your phone.
Step 2. The main interface of the app will show multiple GIF options. You can also search your choice of animation based on categories or by using the search box.
Step 3. Next, click on the desired GIF to open it and see it in a larger frame.
Step 4. Under the selected GIF, click on the icon resembling a paper plane, and sharing options will appear.
Step 5. Choose the WhatsApp icon from the options available and then at the next menu, click on the My status option.
Step 6. Next, tap on the green arrow at the bottom-right corner to set GIF as WhatsApp status.
Part 3 Setting WhatsApp GIF status using device internal camera
Another way to add an animated GIF as WhatsApp status is using the internal camera of the device. The steps for the same are as follows.
Step 1. On your phone, launch WhatsApp and at the Status tab, click on the My Status option.
Step 2. The camera of the phone will get activated and now to start the video recording, you need to tap and hold the button that is used for taking the images.
Step 3. Record the video for which you wish to make an animation (video cannot be longer than 5 seconds).
Step 4. After the recording is done, you can adjust the duration using the slider and then choose to play the recorded video as GIF. Click on the Send button to share the video as WhatsApp Status.
Part 4 How to create an interesting GIF in a hassle-free manner using Wondershare Filmora Video Editor
If you wish to set your WhatsApp status as interesting GIF videos, you would need to download such animations online. Another way is to get customized GIF files and this professional tool will be required. If you too want to create your own customized animation in a hassle-free manner, we suggest using Wondershare Filmora. Not only WhatsApp status, but you can also use software for creating GIF animations for web pages, social media sites, ad banners, and other uses.
Wondershare Filmora
Get started easily with Filmora’s powerful performance, intuitive interface, and countless effects!
Try It Free Try It Free Try It Free Learn More >
Using Wondershare Filmora, artistic animations can be quickly created using an image as well as videos. The process is simple and does not require any advanced technical know-how. To create the desired GIF video, there are multiple options for customizations available like adding text, overlays, elements, and more.
Key features of the software
● Create GIF animations using videos and still images.
● Support all key video and image formats like FLV, MKV, MP4, and more.
● Allows customizing the animations by adding text, overlays, elements, and others.
● Quick and hassle-free tool for creating an interesting GIF.
● Windows and Mac support.
Steps to create GIF for WhatsApp status using Wondershare Filmora
Step 1. Launch Wondershare Filmora and add video or images from which you wish to create an animated GIF.
Step 2. Drag and drop the added media file to the timeline of the software.
Step 3. Next, edit and customize the added files using features like combine, crop, split, speed-up, slow, and more.
Step 4. You can also add text or elements like sound and others to the added files.
Step 5. Next, when all settings are done, choose GIF at the Local tab to save the media file as GIF. Choose the desired file name and the system location to save the file. Finally, click on the Export button.
The created GIF animation will save to your selected folder and can be used as WhatsApp status, on social media sites, or for any other use as needed.
● Key Takeaways from This Episode →
●GIF animations can now be used as WhatsApp status.
●There are multiple ways to set GIF animations as WhatsApp status.
Popular Female & Male Disney Cartoon Characters
Popular Female & Male Disney Cartoon Characters To Empower You
An easy yet powerful editor
Numerous effects to choose from
Detailed tutorials provided by the official channel
Making your Disney cartoons is easy with various applications. Learn about cute Disney princess cartoon characters. See new look of old Disney characters.
Cartoon characters are not only favorite to the small age group kids or toddlers, but they are loved by the elders also. We all have grown up watching our favorite cartoon characters like Cinderella, Jasmine-Aladdin, tom-jerry and snow white. These cartoon characters have been like a friend to the kids at their growing ages. Most of the Disney channel cartoon characters are known for their courage, strength, intelligence and many other attributes. These characters help the kids to learn so many things along with fun.
In this article
01 [Top Pick for the Cutest Female Disney Characters](#Part 1)
02 [The 5 Hottest Disney Animated Men](#Part 2)
03 [Is It Possible to Use Disney Cartoon Material in Filmora?](#Part 3)
Part 1 Top Pick for the Cutest Female Disney Characters
No doubt HD techniques and animations have brought some new and amazing cartoon characters that can make anyone fall in love with them. But the craziness of kids for old cartoon characters has not changed yet. You or your kid may not be familiar with all characters of cartoon world, so here is a compilation of some of the best and well-known cartoon characters in both male and female characters. Let**’**s see first female disney cartoon characters:
01Elsa-Frozen
Voice actor: Idina Menzel
Film’s Year of Release: 2013
Imdb Ratings: 6.8/10
Character Story Description: Elsa is one of the beautiful and strongest characters of Disney. The specialty of this cute character is that she can freeze anything and make ice. Not only pretty but she is also good at heart. The only thing which makes her different is that she cannot control her power, so she needs to be away from people. Her sister helps her to get back to normal state.
02Jasmine – Aladdin
Voice actor: Mena Massoud
Film’s Year of Release: 2019
Imdb Ratings: 6.9/10
Character Story Description: If Aladdin is favorite character of boys, Jasmine is adored by girls. Although from a royal family, she loves to do silly things that make her happy. Small girls love to dress up like Jasmine and act like her. She is no doubt a beautiful female Disney cartoon character.
033. Belle – The Beauty and the Beast
Voice actor: Emma Watson
Film’s Year of Release: 2017
Imdb Ratings: 7.1/10
Character Story Description: Belle is a sweet gild and fond of books. Being a simple and kind hearted does not make her weak and it**’**s not like she cannot protect herself. In the movie Gaston tries to be flirty with her, but she remained strong and kept him away from the home number of times. She always sees the good nature of a person than the appearance of a person.
04Snow White – Snow White and the Seven Dwarves
Voice actor: Adriana Caselotti
Film’s Year of Release: 1938
Imdb Ratings: 7.6/10
Character Story Description: Snow white is the first princess cartoon character from Disney that appears on the big screen. As her name suggest she is as beautiful like snow. But she has a bad step mother who hates her and tries to mess all the things related to snow white. The story is about how snow white gets a way to be free from her step mother and live happily ever.
05Helen Parr – The Incredibles
Voice actor: Holly Hunter
Film’s Year of Release: 2004
Imdb Ratings: 8.1/10
Character Story Description: Helen Parr in the movie has super power to be elastic as she wants. She can change her body shape to anything as she desires. She is having a special and powerful suit that she wears while fighting with the other supers. She is also known as Mrs. Incredible. Eventually her suit gets damages but she gets it back and once again becomes a super power**.**
Part 2 The 5 Hottest Disney Animated Men
Male Disney cartoon characters have varieties like some of them are king, while some are the super heroes and some are cute to be loved. With the changing trend of the cartoon world, kids are more inclined to super heroes and marvel heroes. But we have some of the top old Disney cartoon characters along with some new ones. Here is the list.
01Simba- The Lion King
Voice actor: Mathew Broderick
Film’s Year of Release: 1994
Imdb Ratings: 1/10
Character Story Description: Simba was the main character of the movie, which left the kingdom of his father thinking that he is the reason for his father death. The misconception of his father death was created by a bad character in the story called Uncle Scar. However, Nala, a popular cartoon character inside the movie encouraged Simba to return back and conquer the kingdom.
02Prince Eric- The Little Mermaid
Voice actor: Christopher Daniel Barnes
Film’s Year of Release: 1989
Imdb Ratings: 6/10
Character Story Description: Prince Eric is one of the sweetest cartoon characters of Disney. The movie narrates a story of mermaid who wishes to live her life with human and falls in love with Prince Eric. Eric is handsome and charming guy. He is unaware about the mysteries of sea world. His life chances when he was saved by mermaid Ariel in a storm. It**’**s all about how they fall in love with each other.
03Aladdin- Aladdin
Voice actor: Scott Weinger
Film’s Year of Release: 1992
Imdb Ratings: 8/10
Character Story Description: Aladdin is probably one of the cute disney cartoon characters. His charming smile makes him more attractive. The way he handles the adverse situations makes him a great hero. He inspires the people from his deeds. He has a magical lamp called genie that fulfill his wishes. He tries to impress the princess Jasmine and at last marries her.
04Hercules
Voice actor: Tate Donovan
Film’s Year of Release: 1997
Imdb Ratings: 3/10
Character Story Description: Hercules is a cartoon character with good physical structure. The way he reaches Mount Olympus is inspirational for the kids. Hercules is son of God, but he was taken away by Hades and was living a life of half god and half man. He is a strong man and fights with evil creatures in the earth.
05Tarzan-Tarzan
Voice actor: Tony Goldwyn
Film’s Year of Release: 1999
Imdb Ratings: 3/10
Character Story Description: The character of Tarzan is more like a Jungle man. He is an orphan, spend his childhood in jungle. His life turned when he moved away from jungle. He struggled to live a normal life. The story of this cartoon character is inspiring and motivates others. This character is so memorable and lovable.
Part 3 Is It Possible to Use Disney Cartoon Material in Wondershare Filmora Video Editor ?
For Win 7 or later (64-bit)
For macOS 10.12 or later
Now the kids of present time not only enjoy watching the cartoon characters but they love to draw them also. One can easily learn Disney cartoon characters to draw in simple and easy steps. There are number of applications which can be used to learn drawing your favorite Disney Cartoons. One of them is Filmora. Let**’**s know about it.
Introduction & Description: Filmora is amazing software used for making pictures, videos, animated pictures and video editing. It is a good application and software for those who love creativity. This software is very helpful in film making and performing necessary editing works. One can not only create pictures and videos but can also add special effects in them. The application can be easily downloaded and can be run on phones as well as personal computers. Trail version of the application can help the beginners to know more about the application and how useful it is.
Filmora can also be used for Disney cartoon characters drawing. There are various ways one can learn to draw Disney or other cartoon characters. Some of them are Cartoon Character Sketches, Drawing cartoons with colors and Disney cartoon characters drawing. Among all Disney cartoon drawing are the simplest and easy to learn as it uses only geometric shapes. Those who are beginners, they can start drawing Walt Disney cartoon characters from this application.
● Ending Thoughts →
● Cartoon characters are the most fascinating part of any person. They grow and get inspire with those cartoon characters. Although there are many cartoon characters, but disney cartoon characters names are always on the top of people favorite list. They are loved by everyone.
● The Disney cartoon characters are categorized into male and female characters. Disney princess cartoon characters and superheroes are some of the best one from Disney house. Some of female Disney cartoon characters are Elsa from Frozen, Jasmine from Aladin, Belle from The Beauty and the Beast and Helen Parr from The Incredibles. The best male animated cartoons Simba from the Lion King, Tarzan from the movie Tarzan and Aladdin.
● Filmora can be the best platform to learn and draw cartoons. The Disney cartoon characters can be used as a material for creating some amazing pictures and videos. One can easily download the application and learn to draw cartoon characters with free Video Tutorials.
A Beginner’s Guide to Tell You What 3D Animation Is
A Beginner’s Guide to Explain What 3D Animation Is
An easy yet powerful editor
Numerous effects to choose from
Detailed tutorials provided by the official channel
With present-day technology, 3D animation has reached all spheres be it entertainment, advertising, architecture, education, and much more. With the increasing use of 3D animation, there is a rise in the tools and programs used for creating such animations.
So, to help you get all the details about 3D animation, 3D modelling and animation process, best tools, tips, and tricks, keep reading the following parts.
In this article
01 [What Does 3D Animation Mean?](#Part 1)
02 [What is the Process of 3D Animation?](#Part 2)
03 [Types of 3D Animations](#Part 3)
04 [Top 5 3D Animation Software](#Part 4)
05 [Top Animation Tips and Tricks](#Part 5)
Part 1 What does 3D animation mean?
In simplest terms, animation is a process of manipulating the images so that they appear to be moving, and when this manipulation is done in three-dimensional space, it is called 3D animation. The objects and the models used for 3D animation can be rotated or moved like the real ones. Some tools can be used to scan real-life objects which can be then used as blueprints for creating animation 3D models.
The characters and the objects in 3D animations have to be moved to make them as realistic as possible. No matter, how interesting or perfect character you may create, if it does not move in an even manner, the overall effect will be ruined. The latest techniques and tools these days are capable of creating lifelike scenes.

Part 2 What is the process of 3D Animation?
Creating a 3D animation is a complex process involving several phases. Below listed are the main 3 phases for creating an animation.
01Modeling
The main thing for any 3D animation is its objects, models, or characters and this phase involves creating these objects. Since the objects are based on 3D computer models, the process is termed 3D modeling. A model by a computer appears like a mesh of geometric shapes including curves, points, lines, and more. These shapes do not look anywhere like real objects and only after when the textures and colors are added to them, they appear like real things.
02Layout and animation
The next step is layout and animation where characters are placed in the scenes and the animation of their movements is done using 3D animation tools. Initially, keyframes are created which are the start and the end pose of any animation, and then later other details like the effects, lighting, camerawork, and more are added to get the desired animation that appears on the screen.
03Rendering
The final step in the 3D creation process is rendering where the created animation is finalized as well as exported. To make sure that the final animation plays seamlessly and looks absolutely perfect, it is essential to check all the minute details.
After the production of 3D animation is done, next comes the post-production which is the phase where effects, music, and voiceovers are added and combined to make the entire animation look complete.

Part 3 Types of 3D animations
Now when we know what is a 3D animation and its process, we also need to know that different types of 3D animations are there. Some of the key ones are as below.
● 3D videos and movies
● 3D Virtual Reality
● Interactive 3D
● Digital 3D
● Clay Motion also termed Stop motion animation
● Pixilation
● Cell-shaded animation
● Paint-on-glass
● Pinscreen
Part 4 Top 5 3D Animation software
When it comes to 3D animation tools, the choices can be overwhelming and the list of promises claimed by the tools can be large. He, you need to shortlist the tools that best match your requirements as well as your skill sets. Below we have narrowed down the top 5 software of the category.
01Autodesk Maya
This is a top-rated animation, modeling, simulation, and rendering tool. Using this versatile tool, complex characters and animated videos can be created with all the needed effects.
Key features:
● Versatile 3D animation tool with support to a wide range of features.
● Available for download on Windows, Mac, and Linux systems.
● Allows creating complex characters, adding realistic effects, custom graphics, and more.
● Arnold’s feature of the tool allows switching between CPU and GPU.
● Animation features like fast-playback, time editing, graph editing, ghost editing, multiple modeling options, and others are supported.

02Blender
This is free and open-source software that can be used for creating 3D animations, motion graphics, computer games, and more. Since the tool has been in use for a long time, several artists keep adding to the tool.
Key features
● Free and open-source animation tool.
● Support to multiple platforms including Windows, Mac, and Linux.
● OpenGL interface which makes the functioning smooth.
● Comprehensive and robust set of tools for creating versatile animations. Some of these include automatic skilling, unwrapping texturing, envelope, skeleton, B-spline interpolated bones, sound synchronization, and more.
● Support input from motion-capture tools.

03Houdini
Used by reputed VFX companies like Pixar, Sony, Disney, and others, this is an excellent software that can be used for creating 3D animations, games, and others. With multi-platform support, it is a paid tool that also comes with a free learning edition.
Key features
● Feature-packed animation tool used by industry pioneers.
● Use node-based workflow for creating animations.
● Create biped and quadruped 3D objects using rigging tools.
● Comes with multiple plans to choose from as per budget and requirements.
● Offers a high level of flexibility and creativity.

04Cinema 4D
This professional animation creation software is known for its features and stability. With the availability of multiple tutorials and guides, learning the tool and its functions is easy.
Key features of the software
● Known to be an excellent tool for motion graphics, illustrations, and visualizations.
● Easy learning curve owing to the availability of tutorials, guides, and training materials. Access to free membership of Cineversity which is a training site.
● Comes with a 14-day free trial version along with a free education version for the teachers and students.
● Functions of the software are tested by QA and Beta testers that offer high stability.
● Support features like automatic keyframing, tag and expressions, effectors, and more.

05**Wondershare Filmora Video Editor **
If you are looking for software that is simple and easy to use but supports all advanced features this is one of the best choices. Available for Windows and Mac the tool also works as an excellent video editing tool.
Key features
● This easy 3D animation tool Allows creating sharp and lively animations using features like keyframing, motion-tracking, and others.
● Allows to add the preset motions or even customize your own animations.
● The speed, as well as the duration of the animation, can be changed using the ease-in and ease-out options.
● Make your videos lively with features like warp, distorting, masking, lights & flares, text& titles, and more.
● High-quality presets are available with features like auto-correction, color wheels, scopes, and more.
● Audio features supported like automatic audio sync, audio compression, audio transitions, and noise correction.
For Win 7 or later (64-bit)
For macOS 10.12 or later
Part 5 Top Animation Tips And Tricks
Though 3D animation requires a lot of technical know-how of the process, there are several tips and tricks that can make your task quicker, easier, and smoother. We have gathered a few such tips below.
01Make realistic objects by observing real life
The more you will observe real-life the more you will be able to imitate it into your animations for giving life to your objects, models, and characters. Having some knowledge about real-life, gravity, and similar topics will help you work on your animations more interactively.
02Evolve with latest techniques and technology
The tools, programs, and technology are progressing every day and to make the best use of the same, you need to evolve with the technology. To use the features and functions of the software you need to keep learning and growing.
03Go with the basic first
While working with the animations, it is very easy to get carried away with the process and get into the trap of looking for details. This will eventually move you away from your main track and will lead to a waste of time and effort. Thus, it is always advisable to go with the basics first and then move towards the detailing.
04Learn about the human emotions
Facial expressions are an important element of any 3D animation that brings life to characters. A good animation will portray good and complex emotions and thus it is important to study these emotions in detail so that they can be incorporated into your objects, models, and characters.

● Key Takeaways from This Episode →
● Animations created in 3-dimensional space are termed 3D animations.
● 3D animations involve pre-production, post-production, and several steps.
● For the smooth creation of 3D animations, several tips and tricks can be considered.
● A wide range of tools for creating 3D animations are available and one of the best tools in the category is Wondershare Filmora Video Editor that is effective and easy to use.
With present-day technology, 3D animation has reached all spheres be it entertainment, advertising, architecture, education, and much more. With the increasing use of 3D animation, there is a rise in the tools and programs used for creating such animations.
So, to help you get all the details about 3D animation, 3D modelling and animation process, best tools, tips, and tricks, keep reading the following parts.
In this article
01 [What Does 3D Animation Mean?](#Part 1)
02 [What is the Process of 3D Animation?](#Part 2)
03 [Types of 3D Animations](#Part 3)
04 [Top 5 3D Animation Software](#Part 4)
05 [Top Animation Tips and Tricks](#Part 5)
Part 1 What does 3D animation mean?
In simplest terms, animation is a process of manipulating the images so that they appear to be moving, and when this manipulation is done in three-dimensional space, it is called 3D animation. The objects and the models used for 3D animation can be rotated or moved like the real ones. Some tools can be used to scan real-life objects which can be then used as blueprints for creating animation 3D models.
The characters and the objects in 3D animations have to be moved to make them as realistic as possible. No matter, how interesting or perfect character you may create, if it does not move in an even manner, the overall effect will be ruined. The latest techniques and tools these days are capable of creating lifelike scenes.
Part 2 What is the process of 3D Animation?
Creating a 3D animation is a complex process involving several phases. Below listed are the main 3 phases for creating an animation.
01Modeling
The main thing for any 3D animation is its objects, models, or characters and this phase involves creating these objects. Since the objects are based on 3D computer models, the process is termed 3D modeling. A model by a computer appears like a mesh of geometric shapes including curves, points, lines, and more. These shapes do not look anywhere like real objects and only after when the textures and colors are added to them, they appear like real things.
02Layout and animation
The next step is layout and animation where characters are placed in the scenes and the animation of their movements is done using 3D animation tools. Initially, keyframes are created which are the start and the end pose of any animation, and then later other details like the effects, lighting, camerawork, and more are added to get the desired animation that appears on the screen.
03Rendering
The final step in the 3D creation process is rendering where the created animation is finalized as well as exported. To make sure that the final animation plays seamlessly and looks absolutely perfect, it is essential to check all the minute details.
After the production of 3D animation is done, next comes the post-production which is the phase where effects, music, and voiceovers are added and combined to make the entire animation look complete.
Part 3 Types of 3D animations
Now when we know what is a 3D animation and its process, we also need to know that different types of 3D animations are there. Some of the key ones are as below.
● 3D videos and movies
● 3D Virtual Reality
● Interactive 3D
● Digital 3D
● Clay Motion also termed Stop motion animation
● Pixilation
● Cell-shaded animation
● Paint-on-glass
● Pinscreen
Part 4 Top 5 3D Animation software
When it comes to 3D animation tools, the choices can be overwhelming and the list of promises claimed by the tools can be large. He, you need to shortlist the tools that best match your requirements as well as your skill sets. Below we have narrowed down the top 5 software of the category.
01Autodesk Maya
This is a top-rated animation, modeling, simulation, and rendering tool. Using this versatile tool, complex characters and animated videos can be created with all the needed effects.
Key features:
● Versatile 3D animation tool with support to a wide range of features.
● Available for download on Windows, Mac, and Linux systems.
● Allows creating complex characters, adding realistic effects, custom graphics, and more.
● Arnold’s feature of the tool allows switching between CPU and GPU.
● Animation features like fast-playback, time editing, graph editing, ghost editing, multiple modeling options, and others are supported.
02Blender
This is free and open-source software that can be used for creating 3D animations, motion graphics, computer games, and more. Since the tool has been in use for a long time, several artists keep adding to the tool.
Key features
● Free and open-source animation tool.
● Support to multiple platforms including Windows, Mac, and Linux.
● OpenGL interface which makes the functioning smooth.
● Comprehensive and robust set of tools for creating versatile animations. Some of these include automatic skilling, unwrapping texturing, envelope, skeleton, B-spline interpolated bones, sound synchronization, and more.
● Support input from motion-capture tools.
03Houdini
Used by reputed VFX companies like Pixar, Sony, Disney, and others, this is an excellent software that can be used for creating 3D animations, games, and others. With multi-platform support, it is a paid tool that also comes with a free learning edition.
Key features
● Feature-packed animation tool used by industry pioneers.
● Use node-based workflow for creating animations.
● Create biped and quadruped 3D objects using rigging tools.
● Comes with multiple plans to choose from as per budget and requirements.
● Offers a high level of flexibility and creativity.
04Cinema 4D
This professional animation creation software is known for its features and stability. With the availability of multiple tutorials and guides, learning the tool and its functions is easy.
Key features of the software
● Known to be an excellent tool for motion graphics, illustrations, and visualizations.
● Easy learning curve owing to the availability of tutorials, guides, and training materials. Access to free membership of Cineversity which is a training site.
● Comes with a 14-day free trial version along with a free education version for the teachers and students.
● Functions of the software are tested by QA and Beta testers that offer high stability.
● Support features like automatic keyframing, tag and expressions, effectors, and more.
05**Wondershare Filmora Video Editor **
If you are looking for software that is simple and easy to use but supports all advanced features this is one of the best choices. Available for Windows and Mac the tool also works as an excellent video editing tool.
Key features
● This easy 3D animation tool Allows creating sharp and lively animations using features like keyframing, motion-tracking, and others.
● Allows to add the preset motions or even customize your own animations.
● The speed, as well as the duration of the animation, can be changed using the ease-in and ease-out options.
● Make your videos lively with features like warp, distorting, masking, lights & flares, text& titles, and more.
● High-quality presets are available with features like auto-correction, color wheels, scopes, and more.
● Audio features supported like automatic audio sync, audio compression, audio transitions, and noise correction.
For Win 7 or later (64-bit)
For macOS 10.12 or later
Part 5 Top Animation Tips And Tricks
Though 3D animation requires a lot of technical know-how of the process, there are several tips and tricks that can make your task quicker, easier, and smoother. We have gathered a few such tips below.
01Make realistic objects by observing real life
The more you will observe real-life the more you will be able to imitate it into your animations for giving life to your objects, models, and characters. Having some knowledge about real-life, gravity, and similar topics will help you work on your animations more interactively.
02Evolve with latest techniques and technology
The tools, programs, and technology are progressing every day and to make the best use of the same, you need to evolve with the technology. To use the features and functions of the software you need to keep learning and growing.
03Go with the basic first
While working with the animations, it is very easy to get carried away with the process and get into the trap of looking for details. This will eventually move you away from your main track and will lead to a waste of time and effort. Thus, it is always advisable to go with the basics first and then move towards the detailing.
04Learn about the human emotions
Facial expressions are an important element of any 3D animation that brings life to characters. A good animation will portray good and complex emotions and thus it is important to study these emotions in detail so that they can be incorporated into your objects, models, and characters.
● Key Takeaways from This Episode →
● Animations created in 3-dimensional space are termed 3D animations.
● 3D animations involve pre-production, post-production, and several steps.
● For the smooth creation of 3D animations, several tips and tricks can be considered.
● A wide range of tools for creating 3D animations are available and one of the best tools in the category is Wondershare Filmora Video Editor that is effective and easy to use.
Learn All About Lip-Syncing in Animation
Learn all about Lip-Syncing in Animation
An easy yet powerful editor
Numerous effects to choose from
Detailed tutorials provided by the official channel
Lip syncing is one of the important parts of animations that need to be done perfectly. As children we have all enjoyed the special way in which Donald Duck or Mickey Mouse used to talk in cartoons, this is all because of the perfect lip-syncing.

Lip-sync animation tutorial are available that can assist you with the task.
In this article
01 [What is lip-syncing and its importance in animations?](#Part 1)
02 [Key factors to consider while lip-syncing in animations.](#Part 2)
03 [Best software for lip-syncing animations.](#Part 3)
04 [Best all-in-one video editing software for creating impressive animations.](#Part 4)
Part 1 What is Lip-syncing and Its Importance in Animations
In the simplest terms, lip-syncing can be termed as the process and way in which the sound is synchronized to the characters in animation. It is lip-syncing which brings life to the characters and makes them look talking. The process of lip-syncing in animations includes the dialogues and the mouth charts. The dialogues are broken into the phonetic syllables and the frames required for these syllables are then accessed.
Animations are moving and talking images and liveliness come from the dialogues that they speak. So, to make these talks appear real, flawless lip-syncing is very important.
Part 2 Key Factors to Consider While Lip-syncing in Animations
To make the lip-syncing in your animation look perfect several factors need to be taken care of. Some of these important ones are enlisted below.
01 Perfect Match of the Keyframes
The keyframes for the shapes of the words phrase by phrase needs to be perfect to make it look right. The right lip sync will have the correct timings from the mouth open to the mouth close.
02 Adding Body Language
To make the characters in your animations look real and lively, adding gestures and body language will play a huge role. Moreover, lip-syncing along with facial expressions will add to the overall richness of the animations.
03 Watch Yourself or Record Sample Videos
To get the correct lip-syncing for your animations, you can first try and practice by using a mirror or recording some trial videos. In these videos, you can speak and observe the jaw motion.
04 Use Blending
The technique of blending can also be used where the focus is on the most important shape of the mouth rather than each syllable. These shapes can then be blended and used in different ways and combinations.
05 Emphasize Eyes
Eyes need special focus as they can be used for expressing several emotions. Especially during the close-up shots in animations, a person looks at the eyes before the rest of the face.
06 Use the Apt Voice
No matter how perfectly the lip-syncing is done, it will not look good if the voice does not match the characters in your animations. So, make sure to select the voice that matches the looks and the personality of your characters.
Part 3 Best Software for Lip-syncing Animations
Lip sync in animations has become an easier and hassle-free task thanks to the advanced technology and several software and programs available. These 2D and 3D animation-supported tools allow syncing the mouth of the animated character with the dialogues and audio tracks. A few widely used tools for the task are enlisted below.
01 Anime Studio
This is a Windows and Mac-based professional software that supports multiple advanced functions like bone-rigging, automatic image tracing, integrated lip-synching, motion tracking, 3D shape design, character wizard, and many more. Using the vector-based tools of the software, you can add drawings and images for creating customized characters. There is a built-in character wizard that can be used for quick drawing and rigging the characters from the starting. Anime Studio allows recording the sound clip and then these can be synced to the animated characters. Several pre-set props, scenes, videos, stock audio, and characters are also available to choose from.

02 DAZ Studio
This is free-to-use software that can create impressive animations using multiple advanced features. The simple interface and functioning of the software make it apt even for users who have no prior experience in animations. The lip-sync feature of the software can be used to add audio to the created animations. Additional functions include morphing, adjusting different camera angles, plug-ins with advanced capabilities, and more.

03 Crazy Talk
To create impressive animations and add lip-syncing this is one of the popularly used tools. Quick to download, the software allows adding images and pictures to the tool, and then the head, mouth, and eye movement can be added along with lip-synced audio for creating impressive animations. The built-in timeline of the software offers you complete control over the animations, audio, and other parameters. Detailed customization options are supported including the teeth in the mouth of the character. The software is available for Windows and Mac systems.

04 Toon Boom Studio
To help you create rich animations for movies, games, learning, social media sites and any other purpose this is an apt tool to use. The software has a basic version for beginners while an advanced version for professionals. You can import media files in an array of formats like AI, JPEG, TGA, GIF, and others to create animations of your choice. Audio files in WAV, AIFF, and MP3 formats can be added to the created animations and the lip-sync analyzer tool can be used for that perfect syncing. Additional features include zoom-in, zoom-out, skeleton effect, support to the 3D background, multiple formats for exporting files, and more.

05 Crazy Talk Animator
This 2D animation tool can be used for creating rich animations by adding motion and different effects to your images. You can also create landscapes and scenes to further enhance the overall clip. Lip-sync to the animations is supported by the tool and you can even create marks for facial expression and use them to morph. Several tutorials and web resources are available for a better understanding of the tool and its functioning.

Adobe is also a good tool for all types of animation requirements and you can also check the adobe animate lip sync tutorial for your lip-syncing task.
Key Takeaways from This Episode
● Lip-syncing is an important and inevitable part of animations. Lip-syncing brings richness and liveliness to the clips.
● An array of tools and software are available that can help you effortlessly lip-sync animations.
● or all types of video editing needs and for creating animations, Wondershare Filmora works as an excellent all-in-one software.
Lip syncing is one of the important parts of animations that need to be done perfectly. As children we have all enjoyed the special way in which Donald Duck or Mickey Mouse used to talk in cartoons, this is all because of the perfect lip-syncing.
Lip-sync animation tutorial are available that can assist you with the task.
In this article
01 [What is lip-syncing and its importance in animations?](#Part 1)
02 [Key factors to consider while lip-syncing in animations.](#Part 2)
03 [Best software for lip-syncing animations.](#Part 3)
04 [Best all-in-one video editing software for creating impressive animations.](#Part 4)
Part 1 What is Lip-syncing and Its Importance in Animations
In the simplest terms, lip-syncing can be termed as the process and way in which the sound is synchronized to the characters in animation. It is lip-syncing which brings life to the characters and makes them look talking. The process of lip-syncing in animations includes the dialogues and the mouth charts. The dialogues are broken into the phonetic syllables and the frames required for these syllables are then accessed.
Animations are moving and talking images and liveliness come from the dialogues that they speak. So, to make these talks appear real, flawless lip-syncing is very important.
Part 2 Key Factors to Consider While Lip-syncing in Animations
To make the lip-syncing in your animation look perfect several factors need to be taken care of. Some of these important ones are enlisted below.
01 Perfect Match of the Keyframes
The keyframes for the shapes of the words phrase by phrase needs to be perfect to make it look right. The right lip sync will have the correct timings from the mouth open to the mouth close.
02 Adding Body Language
To make the characters in your animations look real and lively, adding gestures and body language will play a huge role. Moreover, lip-syncing along with facial expressions will add to the overall richness of the animations.
03 Watch Yourself or Record Sample Videos
To get the correct lip-syncing for your animations, you can first try and practice by using a mirror or recording some trial videos. In these videos, you can speak and observe the jaw motion.
04 Use Blending
The technique of blending can also be used where the focus is on the most important shape of the mouth rather than each syllable. These shapes can then be blended and used in different ways and combinations.
05 Emphasize Eyes
Eyes need special focus as they can be used for expressing several emotions. Especially during the close-up shots in animations, a person looks at the eyes before the rest of the face.
06 Use the Apt Voice
No matter how perfectly the lip-syncing is done, it will not look good if the voice does not match the characters in your animations. So, make sure to select the voice that matches the looks and the personality of your characters.
Part 3 Best Software for Lip-syncing Animations
Lip sync in animations has become an easier and hassle-free task thanks to the advanced technology and several software and programs available. These 2D and 3D animation-supported tools allow syncing the mouth of the animated character with the dialogues and audio tracks. A few widely used tools for the task are enlisted below.
01 Anime Studio
This is a Windows and Mac-based professional software that supports multiple advanced functions like bone-rigging, automatic image tracing, integrated lip-synching, motion tracking, 3D shape design, character wizard, and many more. Using the vector-based tools of the software, you can add drawings and images for creating customized characters. There is a built-in character wizard that can be used for quick drawing and rigging the characters from the starting. Anime Studio allows recording the sound clip and then these can be synced to the animated characters. Several pre-set props, scenes, videos, stock audio, and characters are also available to choose from.
02 DAZ Studio
This is free-to-use software that can create impressive animations using multiple advanced features. The simple interface and functioning of the software make it apt even for users who have no prior experience in animations. The lip-sync feature of the software can be used to add audio to the created animations. Additional functions include morphing, adjusting different camera angles, plug-ins with advanced capabilities, and more.
03 Crazy Talk
To create impressive animations and add lip-syncing this is one of the popularly used tools. Quick to download, the software allows adding images and pictures to the tool, and then the head, mouth, and eye movement can be added along with lip-synced audio for creating impressive animations. The built-in timeline of the software offers you complete control over the animations, audio, and other parameters. Detailed customization options are supported including the teeth in the mouth of the character. The software is available for Windows and Mac systems.
04 Toon Boom Studio
To help you create rich animations for movies, games, learning, social media sites and any other purpose this is an apt tool to use. The software has a basic version for beginners while an advanced version for professionals. You can import media files in an array of formats like AI, JPEG, TGA, GIF, and others to create animations of your choice. Audio files in WAV, AIFF, and MP3 formats can be added to the created animations and the lip-sync analyzer tool can be used for that perfect syncing. Additional features include zoom-in, zoom-out, skeleton effect, support to the 3D background, multiple formats for exporting files, and more.
05 Crazy Talk Animator
This 2D animation tool can be used for creating rich animations by adding motion and different effects to your images. You can also create landscapes and scenes to further enhance the overall clip. Lip-sync to the animations is supported by the tool and you can even create marks for facial expression and use them to morph. Several tutorials and web resources are available for a better understanding of the tool and its functioning.
Adobe is also a good tool for all types of animation requirements and you can also check the adobe animate lip sync tutorial for your lip-syncing task.
Key Takeaways from This Episode
● Lip-syncing is an important and inevitable part of animations. Lip-syncing brings richness and liveliness to the clips.
● An array of tools and software are available that can help you effortlessly lip-sync animations.
● or all types of video editing needs and for creating animations, Wondershare Filmora works as an excellent all-in-one software.
Also read:
- Updated 2024 Approved FREE Best Anime Streaming Sites to Download Anime
- The 15 Most Efficient Photo to Cartoon Apps for Android for 2024
- Updated 2024 Approved 18 Best Tools and Services to Create Animated Videos for Business 2023
- New DP Animation Maker Tutorial for Finding The Best Animated Profile Picture Maker for 2024
- In 2024, How to Make GIF Stickers for WhatsApp 100 The Simple Way
- New In 2024, How to Make Architecture Animation
- In 2024, FREE Best Anime Streaming Sites to Download Anime
- Updated 2024 Approved How to Make a Photoshop Collage in Simple Steps
- New In 2024, 12 Aesthetic GIF Instagram for Marketers
- New In 2024, Beginners Guide for Learning 3D Animation
- New 2024 Approved Some Must-Know Useful Lego Animation Ideas for You
- In 2024, How to Combine Two/More GIFs Into One GIF Mergers Offered
- Updated 2024 Approved How to Turn Yourself Into WhatsApp Cartoon
- New 2024 Approved Can I Still Do Animated Logo Design Without Design Skills?
- New How to Analyze an Editorial Cartoon
- 2024 Approved Stunning Ideas About Creating Personalised WhatsApp GIF Sticker
- Updated 2D Character Animation Everything You Should Know About It
- 2024 Approved Uncensored Top 10 + Free Streaming Sites
- Updated 2024 Approved Best Tips for Effortless Unity 3D Animation
- Learn How to Create Adobe 3D Animation for 2024
- Updated In 2024, How to Liven Up Your Animate Website on Scroll
- New Secret Source to Make a Stop Motion Puppet for 2024
- Updated How to Create Picsart Cartoon in Simple Ways for 2024
- Updated In 2024, The Best Boxing Streaming Websites for the Latest Match Coverage
- In 2024, Can I Remove the Apple Watch Activation Lock By Apple iPhone 12 Pro without the Previous Owner?
- Possible solutions to restore deleted music from Vivo Y36
- 7 Solutions to Fix Error Code 963 on Google Play Of HTC U23 | Dr.fone
- How to Stop My Spouse from Spying on My Oppo Find N3 Flip | Dr.fone
- In 2024, How to Change Lock Screen Wallpaper on Samsung Galaxy M54 5G
- How to Transfer Music from Xiaomi 13T Pro to iPod | Dr.fone
- Detailed guide of ispoofer for pogo installation On Poco X5 | Dr.fone
- In 2024, Tips and Tricks for Apple ID Locked Issue From iPhone 15 Pro Max
- Why Your WhatsApp Live Location is Not Updating and How to Fix on your HTC U23 Pro | Dr.fone
- How to Factory Reset Huawei P60 If I Forgot Security Code or Password? | Dr.fone
- In 2024, Everything To Know About Apple ID Password Requirements For Apple iPhone 6
- In 2024, How and Where to Find a Shiny Stone Pokémon For Lava Storm 5G? | Dr.fone
- 10 Free Location Spoofers to Fake GPS Location on your Poco M6 Pro 4G | Dr.fone
- In 2024, The Best iSpoofer Alternative to Try On Lava Agni 2 5G | Dr.fone
- How to Stop My Spouse from Spying on My Motorola Moto G Stylus (2023) | Dr.fone
- In 2024, A Comprehensive Guide to iCloud Unlock From iPhone 15 Plus Online
- 3 Solutions to Hard Reset OnePlus Nord 3 5G Phone Using PC | Dr.fone
- How to Simulate GPS Movement in AR games On Vivo V29e? | Dr.fone
- 11 Best Location Changers for Vivo G2 | Dr.fone
- In 2024, Hacks to do pokemon go trainer battles For Honor 100 | Dr.fone
- Ultimate Guide to Free PPTP VPN For Beginners On Oppo Find X6 | Dr.fone
- In 2024, How to Check Distance and Radius on Google Maps For your Motorola Moto G14 | Dr.fone
- Title: 6 Unexpected Ways Gif Animation Maker That Affect Your Marketing
- Author: Elon
- Created at : 2024-05-19 03:04:23
- Updated at : 2024-05-20 03:04:23
- Link: https://animation-videos.techidaily.com/6-unexpected-ways-gif-animation-maker-that-affect-your-marketing/
- License: This work is licensed under CC BY-NC-SA 4.0.
