
:max_bytes(150000):strip_icc():format(webp)/GettyImages-98471373-56a9ff935f9b58b7d0006b1a.jpg)
Adobe Auto Rigger Is AWESOME
Adobe Auto Rigger Is AWESOME
Adobe Auto Rigger is AWESOME
An easy yet powerful editor
Numerous effects to choose from
Detailed tutorials provided by the official channel
The Adobe Auto rigger is definitely something to look into if you want to quickly and easily prep 3D Animated Characters (without having to learn all the difficult ins and outs of Adobe 3D Rigging.) It’s a perfect tool for beginners.
Especially those that aren’t really looking to create big animated projects, just small animated characters or objects that they can use for their websites, video content, video game development, etc.
In this article
01 [What’s Adobe Auto Rigger?](#Part 1)
02 [How Do You Auto Rig a Character in Adobe?](#Part 2)
03 [Other AWESOME Auto Rigger Tools](#Part 3)
Part 1 What’s Adobe Auto Rigger?
Alright, so what is the Adobe Auto Rigger and how does it differ from Adobe Animate Advanced Rigging or Adobe After Effects Rigging? Is there any difference at all??? The simple answer? Yes, there is a definite difference.
It’s all thanks to the third-party tool, Mixamo, which will allow you to upload characters for auto rigging (basically bypassing the kind of work that is usually required for manually rigging and animating in Adobe Animate and After Effects.) We’ll talk more about this in the tutorial below. For now, all you need to know is that it takes care of setting up a character for you with only a few simple steps.
Thus, enabling you to quickly move forward in your projects if you wish. Whether you’re intending to create a quick little animation for your website, or jumping into a video editing software like Wondershare Filmora Video Editor (which is great professional software with everything you need to start creating high-quality content that you can share with your audience.)

Part 2 How Do You Auto Rig a Character in Adobe?
Now onto our promised tutorial. Here, we make use of the Adobe Auto Rigger, Mixamo, in order to demonstrate how you can bypass Adobe Rigging by making use of Mixamo’s auto-rigging functions or their pre-existing character models for creating your projects.
01Upload Your Own Character
To start, you’ll need to visit ‘Maximo.com’ and sign in with your Adobe ID (email and password required.)
You can also sign-up for free if you’d like. That option is available for those who may want to explore the available options first.
Once you’re logged in, go to the ‘Editor’ panel and prepare to upload a custom character for automatic rigging. This is assuming that you have a character design already prepared, of course. If not, then don’t worry. The next should help.

02(Optional) Browse for Downloadable Characters
The best part of Mixamo is that it has a rich library full of pre-rigged characters that you can use should you wish to. These can be found under the ‘Characters’ tab (shown in the image below.)
So, if you don’t have a character model prepared just yet or have no intention of diving too deeply into character design just in general, you don’t have to worry. You can just download one of the pre-rigged characters here and use them for your project.

03Rig a Custom Character
If you’ve decided to go forward with a custom character, after all, upload it to the Adobe Auto Rigger (shown in the image below.)
This is a very straightforward tool that you can use to place the most important markers on your figure (chin, wrists, elbows, knees, and groin). Once you’ve confirmed the placement of all these points, you can continue and come out of it with your Model auto-rigged and work-ready.

04Download Rigged Character and Begin Animation
It may take several minutes for the Adobe Auto Rigger to completely finish auto-rigging your project, so have a bit of patience. You’ll be taken back to the main interface when complete, and you’ll be able to download your now rigged model for use.
Part 3 Other AWESOME Auto Rigger Tools
Now, just in case you’re interested in other methods of automatically rigging outside of what we demonstrated above for rigging in Adobe Animate and After Effects… We’ve included some other add-ons and tools that you can use with other popular Animation software. They’re all a little bit different, so make sure to pay attention to the details provided (and watch the video attached too. As it should show you just what exactly each of these auto-rigging tools is capable of doing for you.)
01InstantRig - Auto Rigger
The first Auto Rigger on this list is ‘Instant Rig.’ This is a rigging tool for the Animation software called 3ds Max. More specifically, it’s a ‘modular rigging’ tool. That makes it very versatile, allowing you to determine the features of the character that you are working with based on their attributes (no matter how many fingers, toes, tails, ears, etc. they need.) The tool is particularly popular with game developers, as it is a quick and easy way of rigging game characters — whether they be humanoid or beastly in form. (A free version of the tool is available, but a full license will require a one-time fee of around $35.)
02Auto-Rig Pro
Next, we have the auto-rigging addon for the free, open-source Animation Software, Blender. This add-on can be used very similarly to the Adobe Animate Puppet Rig tools — and is free to use besides. The add-on has a ‘smart feature’ that is capable of automatically rigging up joints and bones of humanoid forms in an instant and can also be used for rigging up non-humanoid characters — albeit, it would have to be manual.
03Perseus Auto Rig - Maya
Next up, we have Perseus Auto Rig. This one works with Maya (which is a very popular professional software used by a lot of animation studios in the industry) and actually comes in three versions. There’s the Perseus ‘Biped Rigging’ license for humanoid characters, the Perseus ‘Facial Rigging’ license for rigging facial features, and the Perseus ‘Quadruped Rigging’ license for non-humanoid creatures.
04Auto Character Setup
Next is the auto-character set-up tool for MODO. This is a tool designed for rigging up bi-pedal characters — so mostly humanoid forms. But it does offer some flexibility as to the form that bipedal character takes. So, you can adjust it as needed if there’s something incongruous with your design and the auto-rigger itself.
05IKMAX
For our last tool for auto-rigging, we have IKMAX. This works for 3ds Max and Maya (both of which we’ve mentioned before. It’s very easy to use and adjust as needed — with sliders that you can fiddle around with the work through any problem areas if need be.
● Key Takeaways from This Episode →
● If you’re interested in introducing animations into your content but you don’t have the time or the patience to get too involved with Adobe Rigging (which is a complex subject to talk about even for some professional animators), the auto-rigging solutions are definitely something to consider.
● The Adobe Auto Rigger, Mixamo, is an especially exciting tool to try out. Not only is it incredibly easy to use, but it comes with pre-made character designs that you can play around with to start your experimentations into animation early.
● If Adobe is not your software of choice, don’t worry. There are other auto-rigging tools that you can try out if need be. We introduced at least five that you can use with some of the more popular alternative animation software in a list for you to look through.
The Adobe Auto rigger is definitely something to look into if you want to quickly and easily prep 3D Animated Characters (without having to learn all the difficult ins and outs of Adobe 3D Rigging.) It’s a perfect tool for beginners.
Especially those that aren’t really looking to create big animated projects, just small animated characters or objects that they can use for their websites, video content, video game development, etc.
In this article
01 [What’s Adobe Auto Rigger?](#Part 1)
02 [How Do You Auto Rig a Character in Adobe?](#Part 2)
03 [Other AWESOME Auto Rigger Tools](#Part 3)
Part 1 What’s Adobe Auto Rigger?
Alright, so what is the Adobe Auto Rigger and how does it differ from Adobe Animate Advanced Rigging or Adobe After Effects Rigging? Is there any difference at all??? The simple answer? Yes, there is a definite difference.
It’s all thanks to the third-party tool, Mixamo, which will allow you to upload characters for auto rigging (basically bypassing the kind of work that is usually required for manually rigging and animating in Adobe Animate and After Effects.) We’ll talk more about this in the tutorial below. For now, all you need to know is that it takes care of setting up a character for you with only a few simple steps.
Thus, enabling you to quickly move forward in your projects if you wish. Whether you’re intending to create a quick little animation for your website, or jumping into a video editing software like Wondershare Filmora Video Editor (which is great professional software with everything you need to start creating high-quality content that you can share with your audience.)
Part 2 How Do You Auto Rig a Character in Adobe?
Now onto our promised tutorial. Here, we make use of the Adobe Auto Rigger, Mixamo, in order to demonstrate how you can bypass Adobe Rigging by making use of Mixamo’s auto-rigging functions or their pre-existing character models for creating your projects.
01Upload Your Own Character
To start, you’ll need to visit ‘Maximo.com’ and sign in with your Adobe ID (email and password required.)
You can also sign-up for free if you’d like. That option is available for those who may want to explore the available options first.
Once you’re logged in, go to the ‘Editor’ panel and prepare to upload a custom character for automatic rigging. This is assuming that you have a character design already prepared, of course. If not, then don’t worry. The next should help.
02(Optional) Browse for Downloadable Characters
The best part of Mixamo is that it has a rich library full of pre-rigged characters that you can use should you wish to. These can be found under the ‘Characters’ tab (shown in the image below.)
So, if you don’t have a character model prepared just yet or have no intention of diving too deeply into character design just in general, you don’t have to worry. You can just download one of the pre-rigged characters here and use them for your project.
03Rig a Custom Character
If you’ve decided to go forward with a custom character, after all, upload it to the Adobe Auto Rigger (shown in the image below.)
This is a very straightforward tool that you can use to place the most important markers on your figure (chin, wrists, elbows, knees, and groin). Once you’ve confirmed the placement of all these points, you can continue and come out of it with your Model auto-rigged and work-ready.
04Download Rigged Character and Begin Animation
It may take several minutes for the Adobe Auto Rigger to completely finish auto-rigging your project, so have a bit of patience. You’ll be taken back to the main interface when complete, and you’ll be able to download your now rigged model for use.
Part 3 Other AWESOME Auto Rigger Tools
Now, just in case you’re interested in other methods of automatically rigging outside of what we demonstrated above for rigging in Adobe Animate and After Effects… We’ve included some other add-ons and tools that you can use with other popular Animation software. They’re all a little bit different, so make sure to pay attention to the details provided (and watch the video attached too. As it should show you just what exactly each of these auto-rigging tools is capable of doing for you.)
01InstantRig - Auto Rigger
The first Auto Rigger on this list is ‘Instant Rig.’ This is a rigging tool for the Animation software called 3ds Max. More specifically, it’s a ‘modular rigging’ tool. That makes it very versatile, allowing you to determine the features of the character that you are working with based on their attributes (no matter how many fingers, toes, tails, ears, etc. they need.) The tool is particularly popular with game developers, as it is a quick and easy way of rigging game characters — whether they be humanoid or beastly in form. (A free version of the tool is available, but a full license will require a one-time fee of around $35.)
02Auto-Rig Pro
Next, we have the auto-rigging addon for the free, open-source Animation Software, Blender. This add-on can be used very similarly to the Adobe Animate Puppet Rig tools — and is free to use besides. The add-on has a ‘smart feature’ that is capable of automatically rigging up joints and bones of humanoid forms in an instant and can also be used for rigging up non-humanoid characters — albeit, it would have to be manual.
03Perseus Auto Rig - Maya
Next up, we have Perseus Auto Rig. This one works with Maya (which is a very popular professional software used by a lot of animation studios in the industry) and actually comes in three versions. There’s the Perseus ‘Biped Rigging’ license for humanoid characters, the Perseus ‘Facial Rigging’ license for rigging facial features, and the Perseus ‘Quadruped Rigging’ license for non-humanoid creatures.
04Auto Character Setup
Next is the auto-character set-up tool for MODO. This is a tool designed for rigging up bi-pedal characters — so mostly humanoid forms. But it does offer some flexibility as to the form that bipedal character takes. So, you can adjust it as needed if there’s something incongruous with your design and the auto-rigger itself.
05IKMAX
For our last tool for auto-rigging, we have IKMAX. This works for 3ds Max and Maya (both of which we’ve mentioned before. It’s very easy to use and adjust as needed — with sliders that you can fiddle around with the work through any problem areas if need be.
● Key Takeaways from This Episode →
● If you’re interested in introducing animations into your content but you don’t have the time or the patience to get too involved with Adobe Rigging (which is a complex subject to talk about even for some professional animators), the auto-rigging solutions are definitely something to consider.
● The Adobe Auto Rigger, Mixamo, is an especially exciting tool to try out. Not only is it incredibly easy to use, but it comes with pre-made character designs that you can play around with to start your experimentations into animation early.
● If Adobe is not your software of choice, don’t worry. There are other auto-rigging tools that you can try out if need be. We introduced at least five that you can use with some of the more popular alternative animation software in a list for you to look through.
How To Turn Yourself Into Anime Character
How You Can Turn Yourself into Anime Character Using Anime Filter
An easy yet powerful editor
Numerous effects to choose from
Detailed tutorials provided by the official channel
Everyone is looking for the Anime Filter that allows you to turn yourself into an animated character. All in an effort to join in on the TikTok trend that’s been awakening the inner anime enthusiast in everyone.

In this post, we’ll be sharing with you all that we know about this elusive anime filter (along with some bonuses along the way)
In this article
01 [Let’s Figure out What’s Anime Filter First](#Part 1)
02 [More Tutorials on Anime Filter That You Should Not Miss](#Part 2)
Part 1 Let’s Figure out What’s Anime Filter First
01What is the Anime Filter on TikTok?
Okay, first off What even is this anime filter everyone is talking about and how can you use it to turn yourself into an animated character? We’ve attached a helpful YouTube Video below from @Kapwing who has a more comprehensive explanation for you.
But, as for the basics? It works just like most filters in that it can be used in both video and picture mode (allowing you to also make your own animated profile picture if you’d like). All you have to do is turn it on, and it’ll turn you into the most fitting anime character of your style immediately
02How to Get the TikTok Anime Filter?
Now to finally get down to business How exactly can you get the anime filter for your TikTok? Well, here’s the trick Despite having earned its popularity on TikTok, the Anime Style filter actually comes from Snapchat So, if you do want to animate yourself like you’ve seen all the other popular TikTok-ers do, you’ll need to record the video (or take the picture) on the Snapchat App first and then upload it to TikTok.
03A step-by-step breakdown of this process has been provided below (pictures included)
Step 1Download the Snapchat App
Alright, to start off with, you’ll need to download the Snapchat app on your smartphone (it’s available for both Android and iOS devices)

Step 2Open Snapchat App on your mobile device
Once you have the Snapchat app downloaded and installed on your device, open it

Step 3Search for the Anime Style Filter on Snapchat
Once you have the Snapchat app open, click on the search bar at the top of the interface, type ‘anime style’, and search
You might find that there are multiple versions of the filter (like as is shown in the image below), but the one that you need to select is the one titled Anime Style and created by Snapchat (it should appear first, as it does in the example)

Step 4Turn Yourself into an Animated Character
Finally You should be moved to the video recorder or the profile picture taker, where you can see yourself animated once and for all

Step 5Upload your anime filter-ed video to TikTok
Now, in order to get your Anime-fied self on TikTok, all you need to do is upload your video creation (either on your mobile device or your computer) We’ve provided a URL for you below that will take you directly to the TikTok upload page.

Part 2 More Tutorials on Anime Filter That You Should Not Miss
The Anime Style filter that we introduced in the previous section isn’t the only ‘animated’ filter available, of course It’s the one that caught the attention of a lot of people, thanks, in large part, to the participation of a couple of some of the bigger TikTok-ers on the platform. However, you can always expand your selection a bit by checking out some of the other interesting anime filters in the market:
0112 Anime Filters to Turn Yourself into an Anime Character
Anime Filter #1: Anime Style Realistic

In order to fix some of the more glaring issues with the regular Anime Style filter, Snapchat created a second filter, called Anime Style Realistic This one has a distinctively less anime style when it comes to looks. But it does allow for more skin colors, better hair integration, and accessories
Pros
FREE Snapchat lens that you can use at any time.
Works with most skin tones.
Better hair/accessory integration.
Cons
The style is more realistic than anime.
It is not available anywhere else; you’ll need to be on Snapchat to use it.
Not great at capturing motion.
This is a fun filter to use for those looking to spice up their timeline with something a little different (OR for those having a bad day and would like the almost-anonymity the filter can provide).
Anime Filter #2: Cartoon Style

Next, we have another Snapchat original lens called Cartoon Style This filter is more reminiscent of the older animated cartoon styles (think Pocahontas, Lilo & Stitch, etc.), but it doesn’t make it any less fun
Pros
FREE Snapchat lens.
Works with all skin tones.
Works with accessories.
Cons
More of a cartoon animated style than anime.
Not available anywhere else, you can only use it with Snapchat.
Not great at capturing motion.
Again, just like the Anime Filter, this is good for slapping on just to have fun or to sneakily erase a couple of blemishes
Anime Filter #3: Anime Filter

Now, although we mentioned that TikTok doesn’t have any anime-style filters, the Chinese version of it (surprisingly) does You can see it being used in the image above, rendering the user into an animated (albeit not classically Japanese animated) character.
Pros
Free Chinese TikTok filter.
Great at capturing motion.
Chinese animated drawing style.
Cons
Only available for the foreign version of the TikTok app.
Not the best with skin tones.
It doesn’t use the classic Japanese-animation style.
This has seen a popularity boost recently, with many TikTok users using it to show a ‘before’ and ‘after’ (like the image shown above), of their dance being animated.
Filter URL: https://www.douyin.com/
Anime Filter #4: Anime Eyes

This next filter is the first unofficial anime filter on this list. It was created by one of the users of Snapchat and can be found there if you want to use it This one doesn’t animate the whole face of the user, but it does apply a sticker of various ‘anime eyes’ that you can use as a semi-animated profile picture maker (free)
Pros
FREE Snapchat filter
Anime-eyes sticker to cover the eyes
Useful as an animated profile picture maker
Cons
Only available on the Snapchat app
Does not capture motion
Does not animate the entire face
This really is best used for profile pictures only You’ve probably seen it around as such, although some users also find it useful for hiding tired eyes
Anime Filter #5: Wondershare Filmora

If you’re looking to step up your game ‘editing-wise’ and give your pictures and videos an even more anime feel, then you can also consider the anime filters that the video editing tool, Wondershare Filmora Video Editor , offers. (You can also skip the pre-made filters altogether and create your own animated video with stickers and other effects.)
Pros
Variety of anime filters for videos
Comes with advanced video editing tools
Creates high-quality videos
Cons
Premium Software
No face animation
This particular option is for those looking for something a step above what everyone else is doing. All while allowing a more flexible experience
For Win 7 or later (64-bit)
For macOS 10.12 or later
Anime Filter #6: MHA Anime Filter (Instagram)

Continuing on from our trend of ‘out-there’ options, there’s also the MHA filter from Instagram This one has been especially popular with the anime fanbase as it offers plenty of opportunities for hilarious, pointed responses
Pros
FREE with Instagram
Anime-themed sticker
Trending on TikTok
Cons
Not a face animator filter
Not a profile picture animator
Limited anime options
It’s definitely not what you might have initially been looking for. But its popularity on TikTok is undeniable
Anime Filter #7: Anime Filter

Our second recommended anime-themed filter is the basic Anime Filter on Instagram This one flicks through dozens of some of the most popular animes to find out which one suits you best And, just like the previous, is currently trending on Tiktok
Pros
FREE with Instagram
Anime-themed sticker filter
Trending on TikTok
Cons
Sticker, not face animator
Available only on Instagram
Limited options
Anime Filter #8: Cartoon

This next animation filter pick of ours brings us back to Snapchat It’s called the Cartoon lens. And, just like our initial picks, it will change your pictures to that of a cartoon This one is closer to the cartoon-style popular around the 2000s (think Frozen & Tangled)
Pros
Available on Snapchat
Animated profile picture maker (free)
Works for various skin types
Cons
Not the best at motion capturing
Only available on Snapchat
Doesn’t use classic Japanese style
It’s not quite the anime filter that you’re probably looking for, but it does still work if all you want is a way of cartoon-ifying yourself to spice up your timeline It’ll clear up any blemishes too
Anime Filter #9: Comics Style

Again, we’re moving towards a different kind of animation style with this next filter from Snapchat, but the Comics Style filter does have its own promises of fun as well Especially for those who are long-time fans of American comics (or, even, your average modern-day Avengers fan)
Pros
FREE on Snapchat
Video face animator
Works with a variety of skin tones
Cons
Awkward with some face shapes
Does not work with all face accessories
Available only on Snapchat
Anime Filter #10: Cartoon 3D Style

Now, this might get confusing, but for our last picks, we actually have a set of filters all called Cartoon 3D Style But trust us They’re all different This first version is one you would probably relate more to the DreamWorks motion picture, Ratatouille
Pros
FREE profile picture animator on Snapchat
Compatible with a variety of face shapes
Compatible with a variety of skin tones
Cons
Set features (i.e., pointed nose)
Non-anime drawing style
Not compatible with some facial accessories
Anime Filter #11: Cartoon 3D Style

For our next Cartoon 3D Style lens from Snapchat, we have a face animator that can help you turn into something very close to another dreamwork’s motion picture (think the Despicable me or the Minions)
Pros
Cartoon style animator that is FREE to use
Great for motion capturing
Compatible with a variety of skin colors
Cons
Available only on Snapchat
Not compatible with certain face accessories
Limited face warping effect
Anime Filter #12: Cartoon 3D Style

And finally, for the last of our recommended anime filters, we have the Cartoon 3D Style lens from Snapchat that makes you look like your favorite Disney character (In this case, the obvious inspiration comes from Disney’s Frozen or Tangled)
Pros
Disney face animator that is FREE on Snapchat
Compatible with all skin tones
Trending on TikTok
Cons
It can only be used on Snapchat
Not great at capturing motion
02Steps to Download the Anime Filter App and Turn Yourself into an Anime Character
Now, if those filters weren’t enough for you, we’ve also included this next tutorial on how you can find apps on your mobile device that will allow you to get the same effect without having to use Snapchat, TikTok, or Instagram
Step 1Go to the App Store
The first step, of course, is to go to the app store on your mobile device.

Step 2Search for Anime Filter App
Next, search ‘Anime Filter’ on your phone’s app store.

Step 3Select Anime Filter App
There are multiple types of anime filter apps available in the market. Pick the one that you think will work best for you.

Step 4Install Anime Filter App
Finally, once you’ve found the anime filter app for you, install it.

Step 5Open Anime Filter App
The app that we used for our example, Anime Camera, offers several different animation styles However, this app does come with a subscription fee, so keep that in mind.

03Anime Filter Has a Sadly Unsurprising Problem
You might have noticed this while we were introducing all the different types of anime-style filters available, but the popular Anime Filter has its shortcomings. Which includes:
PROBLEM 1: Dark Skin Tones
The anime filter’s inability to capture darker skin tones accurately is one of the biggest issues users have with the filter.
PROBLEM 2: Hair Style
Hairstyle options are also very limited. And, as for black hairstyles? Well, the options are pretty much non-existent.
PROBLEM 3: Face Accessories
Do you wear glasses? How about piercings? Well, this won’t translate for you either, unfortunately
Key Takeaways from This Episode
● The Anime Filter is a hot, trending topic in platforms like Tiktok, Instagram, and Snapchat It’s also a fun way of engaging with the anime community
● There are other, similar face-animation filters available (The Cartoon 3D Styles, especially, were quite popular for a time)
● Unsurprisingly, the anime filter does have its problems… And it left a big chunk of the TikTok community pretty flabbergasted — and disappointed. But that didn’t stop them from joining in the fun to provide some empowering commentary
Everyone is looking for the Anime Filter that allows you to turn yourself into an animated character. All in an effort to join in on the TikTok trend that’s been awakening the inner anime enthusiast in everyone.
In this post, we’ll be sharing with you all that we know about this elusive anime filter (along with some bonuses along the way)
In this article
01 [Let’s Figure out What’s Anime Filter First](#Part 1)
02 [More Tutorials on Anime Filter That You Should Not Miss](#Part 2)
Part 1 Let’s Figure out What’s Anime Filter First
01What is the Anime Filter on TikTok?
Okay, first off What even is this anime filter everyone is talking about and how can you use it to turn yourself into an animated character? We’ve attached a helpful YouTube Video below from @Kapwing who has a more comprehensive explanation for you.
But, as for the basics? It works just like most filters in that it can be used in both video and picture mode (allowing you to also make your own animated profile picture if you’d like). All you have to do is turn it on, and it’ll turn you into the most fitting anime character of your style immediately
02How to Get the TikTok Anime Filter?
Now to finally get down to business How exactly can you get the anime filter for your TikTok? Well, here’s the trick Despite having earned its popularity on TikTok, the Anime Style filter actually comes from Snapchat So, if you do want to animate yourself like you’ve seen all the other popular TikTok-ers do, you’ll need to record the video (or take the picture) on the Snapchat App first and then upload it to TikTok.
03A step-by-step breakdown of this process has been provided below (pictures included)
Step 1Download the Snapchat App
Alright, to start off with, you’ll need to download the Snapchat app on your smartphone (it’s available for both Android and iOS devices)
Step 2Open Snapchat App on your mobile device
Once you have the Snapchat app downloaded and installed on your device, open it
Step 3Search for the Anime Style Filter on Snapchat
Once you have the Snapchat app open, click on the search bar at the top of the interface, type ‘anime style’, and search
You might find that there are multiple versions of the filter (like as is shown in the image below), but the one that you need to select is the one titled Anime Style and created by Snapchat (it should appear first, as it does in the example)
Step 4Turn Yourself into an Animated Character
Finally You should be moved to the video recorder or the profile picture taker, where you can see yourself animated once and for all
Step 5Upload your anime filter-ed video to TikTok
Now, in order to get your Anime-fied self on TikTok, all you need to do is upload your video creation (either on your mobile device or your computer) We’ve provided a URL for you below that will take you directly to the TikTok upload page.
Part 2 More Tutorials on Anime Filter That You Should Not Miss
The Anime Style filter that we introduced in the previous section isn’t the only ‘animated’ filter available, of course It’s the one that caught the attention of a lot of people, thanks, in large part, to the participation of a couple of some of the bigger TikTok-ers on the platform. However, you can always expand your selection a bit by checking out some of the other interesting anime filters in the market:
0112 Anime Filters to Turn Yourself into an Anime Character
Anime Filter #1: Anime Style Realistic
In order to fix some of the more glaring issues with the regular Anime Style filter, Snapchat created a second filter, called Anime Style Realistic This one has a distinctively less anime style when it comes to looks. But it does allow for more skin colors, better hair integration, and accessories
Pros
FREE Snapchat lens that you can use at any time.
Works with most skin tones.
Better hair/accessory integration.
Cons
The style is more realistic than anime.
It is not available anywhere else; you’ll need to be on Snapchat to use it.
Not great at capturing motion.
This is a fun filter to use for those looking to spice up their timeline with something a little different (OR for those having a bad day and would like the almost-anonymity the filter can provide).
Anime Filter #2: Cartoon Style
Next, we have another Snapchat original lens called Cartoon Style This filter is more reminiscent of the older animated cartoon styles (think Pocahontas, Lilo & Stitch, etc.), but it doesn’t make it any less fun
Pros
FREE Snapchat lens.
Works with all skin tones.
Works with accessories.
Cons
More of a cartoon animated style than anime.
Not available anywhere else, you can only use it with Snapchat.
Not great at capturing motion.
Again, just like the Anime Filter, this is good for slapping on just to have fun or to sneakily erase a couple of blemishes
Anime Filter #3: Anime Filter
Now, although we mentioned that TikTok doesn’t have any anime-style filters, the Chinese version of it (surprisingly) does You can see it being used in the image above, rendering the user into an animated (albeit not classically Japanese animated) character.
Pros
Free Chinese TikTok filter.
Great at capturing motion.
Chinese animated drawing style.
Cons
Only available for the foreign version of the TikTok app.
Not the best with skin tones.
It doesn’t use the classic Japanese-animation style.
This has seen a popularity boost recently, with many TikTok users using it to show a ‘before’ and ‘after’ (like the image shown above), of their dance being animated.
Filter URL: https://www.douyin.com/
Anime Filter #4: Anime Eyes
This next filter is the first unofficial anime filter on this list. It was created by one of the users of Snapchat and can be found there if you want to use it This one doesn’t animate the whole face of the user, but it does apply a sticker of various ‘anime eyes’ that you can use as a semi-animated profile picture maker (free)
Pros
FREE Snapchat filter
Anime-eyes sticker to cover the eyes
Useful as an animated profile picture maker
Cons
Only available on the Snapchat app
Does not capture motion
Does not animate the entire face
This really is best used for profile pictures only You’ve probably seen it around as such, although some users also find it useful for hiding tired eyes
Anime Filter #5: Wondershare Filmora
If you’re looking to step up your game ‘editing-wise’ and give your pictures and videos an even more anime feel, then you can also consider the anime filters that the video editing tool, Wondershare Filmora Video Editor , offers. (You can also skip the pre-made filters altogether and create your own animated video with stickers and other effects.)
Pros
Variety of anime filters for videos
Comes with advanced video editing tools
Creates high-quality videos
Cons
Premium Software
No face animation
This particular option is for those looking for something a step above what everyone else is doing. All while allowing a more flexible experience
For Win 7 or later (64-bit)
For macOS 10.12 or later
Anime Filter #6: MHA Anime Filter (Instagram)
Continuing on from our trend of ‘out-there’ options, there’s also the MHA filter from Instagram This one has been especially popular with the anime fanbase as it offers plenty of opportunities for hilarious, pointed responses
Pros
FREE with Instagram
Anime-themed sticker
Trending on TikTok
Cons
Not a face animator filter
Not a profile picture animator
Limited anime options
It’s definitely not what you might have initially been looking for. But its popularity on TikTok is undeniable
Anime Filter #7: Anime Filter
Our second recommended anime-themed filter is the basic Anime Filter on Instagram This one flicks through dozens of some of the most popular animes to find out which one suits you best And, just like the previous, is currently trending on Tiktok
Pros
FREE with Instagram
Anime-themed sticker filter
Trending on TikTok
Cons
Sticker, not face animator
Available only on Instagram
Limited options
Anime Filter #8: Cartoon
This next animation filter pick of ours brings us back to Snapchat It’s called the Cartoon lens. And, just like our initial picks, it will change your pictures to that of a cartoon This one is closer to the cartoon-style popular around the 2000s (think Frozen & Tangled)
Pros
Available on Snapchat
Animated profile picture maker (free)
Works for various skin types
Cons
Not the best at motion capturing
Only available on Snapchat
Doesn’t use classic Japanese style
It’s not quite the anime filter that you’re probably looking for, but it does still work if all you want is a way of cartoon-ifying yourself to spice up your timeline It’ll clear up any blemishes too
Anime Filter #9: Comics Style
Again, we’re moving towards a different kind of animation style with this next filter from Snapchat, but the Comics Style filter does have its own promises of fun as well Especially for those who are long-time fans of American comics (or, even, your average modern-day Avengers fan)
Pros
FREE on Snapchat
Video face animator
Works with a variety of skin tones
Cons
Awkward with some face shapes
Does not work with all face accessories
Available only on Snapchat
Anime Filter #10: Cartoon 3D Style
Now, this might get confusing, but for our last picks, we actually have a set of filters all called Cartoon 3D Style But trust us They’re all different This first version is one you would probably relate more to the DreamWorks motion picture, Ratatouille
Pros
FREE profile picture animator on Snapchat
Compatible with a variety of face shapes
Compatible with a variety of skin tones
Cons
Set features (i.e., pointed nose)
Non-anime drawing style
Not compatible with some facial accessories
Anime Filter #11: Cartoon 3D Style
For our next Cartoon 3D Style lens from Snapchat, we have a face animator that can help you turn into something very close to another dreamwork’s motion picture (think the Despicable me or the Minions)
Pros
Cartoon style animator that is FREE to use
Great for motion capturing
Compatible with a variety of skin colors
Cons
Available only on Snapchat
Not compatible with certain face accessories
Limited face warping effect
Anime Filter #12: Cartoon 3D Style
And finally, for the last of our recommended anime filters, we have the Cartoon 3D Style lens from Snapchat that makes you look like your favorite Disney character (In this case, the obvious inspiration comes from Disney’s Frozen or Tangled)
Pros
Disney face animator that is FREE on Snapchat
Compatible with all skin tones
Trending on TikTok
Cons
It can only be used on Snapchat
Not great at capturing motion
02Steps to Download the Anime Filter App and Turn Yourself into an Anime Character
Now, if those filters weren’t enough for you, we’ve also included this next tutorial on how you can find apps on your mobile device that will allow you to get the same effect without having to use Snapchat, TikTok, or Instagram
Step 1Go to the App Store
The first step, of course, is to go to the app store on your mobile device.
Step 2Search for Anime Filter App
Next, search ‘Anime Filter’ on your phone’s app store.
Step 3Select Anime Filter App
There are multiple types of anime filter apps available in the market. Pick the one that you think will work best for you.
Step 4Install Anime Filter App
Finally, once you’ve found the anime filter app for you, install it.
Step 5Open Anime Filter App
The app that we used for our example, Anime Camera, offers several different animation styles However, this app does come with a subscription fee, so keep that in mind.
03Anime Filter Has a Sadly Unsurprising Problem
You might have noticed this while we were introducing all the different types of anime-style filters available, but the popular Anime Filter has its shortcomings. Which includes:
PROBLEM 1: Dark Skin Tones
The anime filter’s inability to capture darker skin tones accurately is one of the biggest issues users have with the filter.
PROBLEM 2: Hair Style
Hairstyle options are also very limited. And, as for black hairstyles? Well, the options are pretty much non-existent.
PROBLEM 3: Face Accessories
Do you wear glasses? How about piercings? Well, this won’t translate for you either, unfortunately
Key Takeaways from This Episode
● The Anime Filter is a hot, trending topic in platforms like Tiktok, Instagram, and Snapchat It’s also a fun way of engaging with the anime community
● There are other, similar face-animation filters available (The Cartoon 3D Styles, especially, were quite popular for a time)
● Unsurprisingly, the anime filter does have its problems… And it left a big chunk of the TikTok community pretty flabbergasted — and disappointed. But that didn’t stop them from joining in the fun to provide some empowering commentary
Easy Shortcut to Convert Videos to Gifs on iPhone
Simple Shortcut to Convert Videos to Gifs on iPhone
An easy yet powerful editor
Numerous effects to choose from
Detailed tutorials provided by the official channel
To create iPhone video to GIF there are several third-party apps available. You can even choose the online sites for the task, but the editing and other options will be limited. The GIFs on your iPhone can be created using videos as well as Live photos.

One of the best ways to create a GIF is using the Shortcuts app that comes pre-installed on devices running on iOS 13 and later versions of the OS. The app has shortcuts to accomplish several tasks on your iPhone including GIF creation. Learn about using Shortcuts and other tools for creating a GIF on iPhone.
In this article
01 [How to make GIF from Video on iPhone using Shortcut App](#Part 1)
02 [How to save Live Photos as GIF on iPhone](#Part 2)
03 [How to save Live Photos as GIF on iPhone](#Part 3)
04 [How to save videos as live photos on your iPhone?](#Part 4)
05 [Best tool for creating GIFs and video editing on your Windows and Mac- Wondershare Filmora](#Part 5)
Part 1 How to make GIF from Video on iPhone using Shortcut App
One of the easiest ways to convert video GIF iPhone is by using the Shortcuts app. If you have deleted the app, you can reinstall it from the app store. Once the app is installed, you would next need to allow the untrusted shortcuts and for this go to Settings > Shortcuts> toggle Add Untrusted Shortcuts to add the shortcuts created by the user. The further steps for converting video to GIF iPhone are as follows.
Step 1. On your iPhone, download the Video to GIF shortcut. You can download it using iCloud or RoutineHub. Find the shortcut and click on Get Shortcut will let you check the action of the shortcut.
Move down and click on the red Add Untrusted Shortcut button that will add the shortcut for the library.

Step 2. Go to the My Shortcuts tab and click on the Video to GIF section. If you are using it for the first time, you need to grant permission to use the videos and photos. Click on the OK button and continue.

Step 3. Next, browse and add the video from which you wish to create the GIF. Since GIF animations are short, it is always recommended to use short videos.
Step 4. Video processing will start and during this, the Video to GIF shortcut will be greyed out.

Step 5. Once done, the preview of the GIF will appear on the screen. Finally, you can save the GIF to your Photos app on iPhone or can also share it through email, AirDrop, iMessage, and other third-party services as needed.

Part 2 How to save Live Photos as GIF on iPhone
Live Photo is an interesting feature of the iPhone where an image is captured in an animated form for a couple of seconds. These Live Photos can be easily converted to GIFs using the steps below.
Step 1. On your iPhone Photo app, open the Live Photo that you want to save as GIF.
Step 2. Darg the selected photo upwards and will see multiple effects options along with other image details.
Step 3 To save the selected image as GIF, choose Loop or Bounce animation. Once done, share the image on mail and other services listed or save it to the device.

Part 3 How to save Live Photo as video on iPhone
You can also convert your live photos to videos and then use them for making GIFs and for other uses. The steps for iPhone live photo to video are as follows.
Step 1. On your iPhone, open the Photos app and choose the Live Photo that you want to convert.
Step 2. Next, click on the share button at the bottom of the screen and multiple options will be seen.
Step 3. Scroll down and choose Save as Video option and with this, the live photo will be saved as a Video.
Additionally, you can also convert the LivePhotos to videos using the shortcut app.

Part 4 How to save videos as live photos on your iPhone?
If you need to convert your videos to live photos on iPhone, there are several third-party tools available and one of the widely used is IntoLive. Using this app, videos, as well as GIFs, can be converted into live photos.
Steps on how to turn a video into a live photo iPhone
Step 1. Download, install and launch the IntoLive app from the app store.
Step 2. Next, browse and add the desired video.
Step 3. If needed, the added video can be customized using several supported features.
Step 4. Next, click on the Make option at the top-right corner and then choose the repeats you want for a Live Photo.
Step 5. Finally, click on the Live Photo and your Live Photo will be saved to the device.

Part 5 Best tool for creating GIFs and video editing on your Windows and Mac- Wondershare Filmora
Above we have listed several ways to create GIFs on your iPhone and also to convert videos to LivePhotos and vice-versa. Installing different tools for different tasks is a hassle and also a time-consuming task. So, if you are looking for an all-in-one tool that allows you to create GIFs, and professionally edit your media files, Wondershare Filmora Video Editor is the best tool to consider. Available for quick download on your Windows and Mac system, this feature-packed software has an intuitive and user-friendly interface.
Wondershare Filmora
Get started easily with Filmora’s powerful performance, intuitive interface, and countless effects!
Try It Free Try It Free Try It Free Learn More >

Media files in all key formats are supported by the tool and there are multiple options for editing and video creation like splitting, rotating, cutting, adding effects, sounds, text, and other elements. In a few simple steps, your customized GIF and other professional-looking media files will be ready.
Steps to create GIF using Wondershare Filmora
Step 1. Launch the installed software on your system and add the video or images from the system.
Step 2. The added media files next need to be dragged and dropped to the timeline at the bottom of the interface.

Step 3. After the files are moved, you can customize them using several editing tools like rotate, crop, cut, and more.
Step 4. Next, add text, effects, sound, and other elements as needed.

Step 5. Finally choose to export the file and then from the Local tab, select the GIF option. Choose a file name and location and then finally click on the EXPORT button.

● Key Takeaways from This Episode →
●There are several ways to turn video into GIF iPhone.
●Using shortcuts is one of the most straightforward methods for creating GIFs using videos.
●You can also convert videos to LivePhoto and vice versa on your iPhone using third-party apps.
●Wondershare Filmora is an excellent software to make GIFs and professionally edit media files.
To create iPhone video to GIF there are several third-party apps available. You can even choose the online sites for the task, but the editing and other options will be limited. The GIFs on your iPhone can be created using videos as well as Live photos.
One of the best ways to create a GIF is using the Shortcuts app that comes pre-installed on devices running on iOS 13 and later versions of the OS. The app has shortcuts to accomplish several tasks on your iPhone including GIF creation. Learn about using Shortcuts and other tools for creating a GIF on iPhone.
In this article
01 [How to make GIF from Video on iPhone using Shortcut App](#Part 1)
02 [How to save Live Photos as GIF on iPhone](#Part 2)
03 [How to save Live Photos as GIF on iPhone](#Part 3)
04 [How to save videos as live photos on your iPhone?](#Part 4)
05 [Best tool for creating GIFs and video editing on your Windows and Mac- Wondershare Filmora](#Part 5)
Part 1 How to make GIF from Video on iPhone using Shortcut App
One of the easiest ways to convert video GIF iPhone is by using the Shortcuts app. If you have deleted the app, you can reinstall it from the app store. Once the app is installed, you would next need to allow the untrusted shortcuts and for this go to Settings > Shortcuts> toggle Add Untrusted Shortcuts to add the shortcuts created by the user. The further steps for converting video to GIF iPhone are as follows.
Step 1. On your iPhone, download the Video to GIF shortcut. You can download it using iCloud or RoutineHub. Find the shortcut and click on Get Shortcut will let you check the action of the shortcut.
Move down and click on the red Add Untrusted Shortcut button that will add the shortcut for the library.
Step 2. Go to the My Shortcuts tab and click on the Video to GIF section. If you are using it for the first time, you need to grant permission to use the videos and photos. Click on the OK button and continue.
Step 3. Next, browse and add the video from which you wish to create the GIF. Since GIF animations are short, it is always recommended to use short videos.
Step 4. Video processing will start and during this, the Video to GIF shortcut will be greyed out.
Step 5. Once done, the preview of the GIF will appear on the screen. Finally, you can save the GIF to your Photos app on iPhone or can also share it through email, AirDrop, iMessage, and other third-party services as needed.
Part 2 How to save Live Photos as GIF on iPhone
Live Photo is an interesting feature of the iPhone where an image is captured in an animated form for a couple of seconds. These Live Photos can be easily converted to GIFs using the steps below.
Step 1. On your iPhone Photo app, open the Live Photo that you want to save as GIF.
Step 2. Darg the selected photo upwards and will see multiple effects options along with other image details.
Step 3 To save the selected image as GIF, choose Loop or Bounce animation. Once done, share the image on mail and other services listed or save it to the device.
Part 3 How to save Live Photo as video on iPhone
You can also convert your live photos to videos and then use them for making GIFs and for other uses. The steps for iPhone live photo to video are as follows.
Step 1. On your iPhone, open the Photos app and choose the Live Photo that you want to convert.
Step 2. Next, click on the share button at the bottom of the screen and multiple options will be seen.
Step 3. Scroll down and choose Save as Video option and with this, the live photo will be saved as a Video.
Additionally, you can also convert the LivePhotos to videos using the shortcut app.
Part 4 How to save videos as live photos on your iPhone?
If you need to convert your videos to live photos on iPhone, there are several third-party tools available and one of the widely used is IntoLive. Using this app, videos, as well as GIFs, can be converted into live photos.
Steps on how to turn a video into a live photo iPhone
Step 1. Download, install and launch the IntoLive app from the app store.
Step 2. Next, browse and add the desired video.
Step 3. If needed, the added video can be customized using several supported features.
Step 4. Next, click on the Make option at the top-right corner and then choose the repeats you want for a Live Photo.
Step 5. Finally, click on the Live Photo and your Live Photo will be saved to the device.
Part 5 Best tool for creating GIFs and video editing on your Windows and Mac- Wondershare Filmora
Above we have listed several ways to create GIFs on your iPhone and also to convert videos to LivePhotos and vice-versa. Installing different tools for different tasks is a hassle and also a time-consuming task. So, if you are looking for an all-in-one tool that allows you to create GIFs, and professionally edit your media files, Wondershare Filmora Video Editor is the best tool to consider. Available for quick download on your Windows and Mac system, this feature-packed software has an intuitive and user-friendly interface.
Wondershare Filmora
Get started easily with Filmora’s powerful performance, intuitive interface, and countless effects!
Try It Free Try It Free Try It Free Learn More >
Media files in all key formats are supported by the tool and there are multiple options for editing and video creation like splitting, rotating, cutting, adding effects, sounds, text, and other elements. In a few simple steps, your customized GIF and other professional-looking media files will be ready.
Steps to create GIF using Wondershare Filmora
Step 1. Launch the installed software on your system and add the video or images from the system.
Step 2. The added media files next need to be dragged and dropped to the timeline at the bottom of the interface.
Step 3. After the files are moved, you can customize them using several editing tools like rotate, crop, cut, and more.
Step 4. Next, add text, effects, sound, and other elements as needed.
Step 5. Finally choose to export the file and then from the Local tab, select the GIF option. Choose a file name and location and then finally click on the EXPORT button.
● Key Takeaways from This Episode →
●There are several ways to turn video into GIF iPhone.
●Using shortcuts is one of the most straightforward methods for creating GIFs using videos.
●You can also convert videos to LivePhoto and vice versa on your iPhone using third-party apps.
●Wondershare Filmora is an excellent software to make GIFs and professionally edit media files.
Animate Graphics in Canva
Versatile Video Editor - Wondershare Filmora
An easy yet powerful editor
Numerous effects to choose from
Detailed tutorials provided by the official channel
Canva is a graphic design platform that allows users to create stunning designs for social media posts, presentations, assignments, recipe cards, birthday videos.
With the introduction of Canva’s animation feature, a whole new world of possibilities are open to the public. Also, with pre-designed templates from professional designers, content creation has never been easier than Canva.
Animations themselves have the option of being individually customized element by element. Canva animated graphics makes it easy to unleash your creative potential.
This article will explore how to animate graphics in Canva that can suit every occasion.
In this article
01 [Animate Your Graphic In Canva](#Part 1)
02 [Make A Moving Graphic In Canva](#Part 2)
03 [Pricing for Canva You Should Know](#Part 3)
Part 1 Animate Your Graphic In Canva
People can create animations in Canva in one of two ways. You can select an animation from one of the pre-existing animated templates. This is a time-saving option as it lets you customize ready-made templates to suit your needs
With the pre-set animation templates, you have the option to choose from among
● Invitations
● A4 Documents
● Instagram Post
● Facebook Post
● YouTube Thumbnails
● Presentation
● Flyer/Poster
● Instagram Logo
● Infographic
These options generate the ability to be presented in both portrait and landscape mode. The multitude of options makes it an ideal medium for you to create your animation. The animation options at Canva also come with the opportunity to animate an existing image.

You can choose to animate an existing design. With a few minor edits, you can have a polished and sophisticated post that’s bound to draw viewer attention and earn you kudos.
If this is the case, then you benefit from saving time and the expertise of a professional design team through Canva.
The second option is creating an animation by yourself. Creating your own animation offers you greater flexibility in executing your vision for the design. Without further ado, let’s look at how we can help this happen in the how to make a moving graphic in the Canva section.
Part 2 Make A Moving Graphic In Canva
Making a moving graphic in Canva is easy. Canva offers an “Animation” button that allows users to animate each element in the content. There are four areas that the graphic can touch upon for content. These areas are text, image, audio, and video.
Here’s how you can animate individual elements in Canva.
2.1 How to animate text in Canva?
With text, Canva offers three options. You can choose to create either a title text, a sub-heading text, or regular text for use. Play with different styles and fonts to find one that suits your design. You can also add details like stickers or illustrations to customize the design.
You are now ready to animate once you’re happy with the design. Text animations will help your text jump out from the background. Then choose the “Animate” option in the sidebar after clicking on the selected text.

Allow your font to move around your design with motion. Thanks to “animate,” you can choose between subtle, smooth movement and jagged and sudden motion. You can even mix and match animations for each word.
In Wondershare Filmora, a premier video editing software, the texts are available according to use. For instance, opening and ending credit texts as a template. With options for choosing subtitles, lower 3rds, and call-out templates.
Additionally, users can also save a particular setting as a “preset’. Which makes it easy to reuse the settings in future projects. You can also adjust the duration of the individual text display. It also has an animation option that allows animation of the text according to given presets.
2.2 How do you animate a picture in Canva?
Users have the ability to choose to animate just the image or animate other elements of the picture. They can also make use of options to edit the image using background remover. This allows seamless integration into the presentation.

Users can simply upload their photos. Choose a stock image or upload an image through your photo gallery to use in your design. You can also choose to use “frames,” which are available under the “Elements” tab in Canva.
Make your photo come alive by animating it. Choose from a variety of innovative animation possibilities by selecting the Animation tool. The duration of the animation can be changed using the stopwatch animation icon. It uses a slider to help in setting the duration of each animation. You can also adjust this manually.
2.3 How do you add music to animation in Canva?
Users can find a section dedicated to “Uploads,” allowing creators to use their audio content. The users can use a soundtrack from one of Canva’s audio libraries. This gives users control over their animation’s impact.
One difference between Canva and Wondershare Filmora is that Canva users can only use one audio per presentation. Filmora allows users to overlay multiple soundtracks to their timeline.
Users can also make use of the Audio Effects feature to create audio for “Echo,” “large room,” “small room,” “lobby,” and “phone.” The preview function can help users experience it live before applying the effect.
Filmora Pro’s Auto-Normalization of audio allows intelligent audio analysis and volume adjustment.
2.4 How do you animate video in Canva?
Canva offers presentations that are similar to the explainer-style videos on Youtube. With more modifications, you can convert the presentation to a video format. You can edit individual elements in the presentation to reflect the project details and outcomes.
You can also introduce transition effects to make the presentation a smooth video. Incorporating the three other elements will be a breeze to make a video with animation.

Another noteworthy thing in Canva is that users can upload their videos or use videos provided in the video library. You can also embed videos within a frame from the “Elements” section in Canva. You can trim the video input on the slide for time. It can be presented as a “loop” video.
Filmora offers all the essential video editing tools in addition to AI-powered features called Auto-Highlight and Auro-Reframe. Auto Highlight is a feature that extracts the highlights from a video clip autonomously.
This will save you time while cutting your movie. It also makes it easier to extract the best moments from the video.
Auto Reframe recognizes as well as crops the focal point of your footage, constantly retaining it in the frame. Your film’s primary action or object will never be out of focus within that technique.
Part 3 Pricing for Canva You Should Know
Canva can be used among a multitude of users and companies. The range of access is from a single person use to teams of fifty. It also allows for a custom selection of a number of people.
Canva can be used as free graphic design software. It does display all available options with a few possibilities marked off for Canva Pro users only.
Canva Pro allows up to 5 users per team. A subscription to Canva Pro costs US $119.99 per annum or US $12.99 per month. Pro users have access to unlimited content and newly released tools.
The only difference between Canva Pro and Canva Enterprise is that Canva Pro is for smaller teams. Canva Enterprise allows collaboration between larger teams and franchises.
Canva also offers free Canva Pro subscriptions to non-profit organizations. Students and teachers are offered a special discount for those in educational programs.
Wondershare Filmora
Get started easily with Filmora’s powerful performance, intuitive interface, and countless effects!
Try It Free Try It Free Try It Free Learn More >
AI Portrait – The best feature of Wondershare Filmora for gameplay editing
The AI Portrait is a new add-on in Wondershare Filmora. It can easily remove video backgrounds without using a green screen or chroma key, allowing you to add borders, glitch effects, pixelated, noise, or segmentation video effects.

Final Words
We’ve covered how to animate graphics in Canva. You can animate individual elements in Canva or automate it on the whole. Canva’s animate button is an automatic tool that revolutionizes the way traditional animation works.
Wondershare’s Filmora is the video editing tool that is easy to use and offer various animation options.
Canva is a graphic design platform that allows users to create stunning designs for social media posts, presentations, assignments, recipe cards, birthday videos.
With the introduction of Canva’s animation feature, a whole new world of possibilities are open to the public. Also, with pre-designed templates from professional designers, content creation has never been easier than Canva.
Animations themselves have the option of being individually customized element by element. Canva animated graphics makes it easy to unleash your creative potential.
This article will explore how to animate graphics in Canva that can suit every occasion.
In this article
01 [Animate Your Graphic In Canva](#Part 1)
02 [Make A Moving Graphic In Canva](#Part 2)
03 [Pricing for Canva You Should Know](#Part 3)
Part 1 Animate Your Graphic In Canva
People can create animations in Canva in one of two ways. You can select an animation from one of the pre-existing animated templates. This is a time-saving option as it lets you customize ready-made templates to suit your needs
With the pre-set animation templates, you have the option to choose from among
● Invitations
● A4 Documents
● Instagram Post
● Facebook Post
● YouTube Thumbnails
● Presentation
● Flyer/Poster
● Instagram Logo
● Infographic
These options generate the ability to be presented in both portrait and landscape mode. The multitude of options makes it an ideal medium for you to create your animation. The animation options at Canva also come with the opportunity to animate an existing image.
You can choose to animate an existing design. With a few minor edits, you can have a polished and sophisticated post that’s bound to draw viewer attention and earn you kudos.
If this is the case, then you benefit from saving time and the expertise of a professional design team through Canva.
The second option is creating an animation by yourself. Creating your own animation offers you greater flexibility in executing your vision for the design. Without further ado, let’s look at how we can help this happen in the how to make a moving graphic in the Canva section.
Part 2 Make A Moving Graphic In Canva
Making a moving graphic in Canva is easy. Canva offers an “Animation” button that allows users to animate each element in the content. There are four areas that the graphic can touch upon for content. These areas are text, image, audio, and video.
Here’s how you can animate individual elements in Canva.
2.1 How to animate text in Canva?
With text, Canva offers three options. You can choose to create either a title text, a sub-heading text, or regular text for use. Play with different styles and fonts to find one that suits your design. You can also add details like stickers or illustrations to customize the design.
You are now ready to animate once you’re happy with the design. Text animations will help your text jump out from the background. Then choose the “Animate” option in the sidebar after clicking on the selected text.
Allow your font to move around your design with motion. Thanks to “animate,” you can choose between subtle, smooth movement and jagged and sudden motion. You can even mix and match animations for each word.
In Wondershare Filmora, a premier video editing software, the texts are available according to use. For instance, opening and ending credit texts as a template. With options for choosing subtitles, lower 3rds, and call-out templates.
Additionally, users can also save a particular setting as a “preset’. Which makes it easy to reuse the settings in future projects. You can also adjust the duration of the individual text display. It also has an animation option that allows animation of the text according to given presets.
2.2 How do you animate a picture in Canva?
Users have the ability to choose to animate just the image or animate other elements of the picture. They can also make use of options to edit the image using background remover. This allows seamless integration into the presentation.
Users can simply upload their photos. Choose a stock image or upload an image through your photo gallery to use in your design. You can also choose to use “frames,” which are available under the “Elements” tab in Canva.
Make your photo come alive by animating it. Choose from a variety of innovative animation possibilities by selecting the Animation tool. The duration of the animation can be changed using the stopwatch animation icon. It uses a slider to help in setting the duration of each animation. You can also adjust this manually.
2.3 How do you add music to animation in Canva?
Users can find a section dedicated to “Uploads,” allowing creators to use their audio content. The users can use a soundtrack from one of Canva’s audio libraries. This gives users control over their animation’s impact.
One difference between Canva and Wondershare Filmora is that Canva users can only use one audio per presentation. Filmora allows users to overlay multiple soundtracks to their timeline.
Users can also make use of the Audio Effects feature to create audio for “Echo,” “large room,” “small room,” “lobby,” and “phone.” The preview function can help users experience it live before applying the effect.
Filmora Pro’s Auto-Normalization of audio allows intelligent audio analysis and volume adjustment.
2.4 How do you animate video in Canva?
Canva offers presentations that are similar to the explainer-style videos on Youtube. With more modifications, you can convert the presentation to a video format. You can edit individual elements in the presentation to reflect the project details and outcomes.
You can also introduce transition effects to make the presentation a smooth video. Incorporating the three other elements will be a breeze to make a video with animation.
Another noteworthy thing in Canva is that users can upload their videos or use videos provided in the video library. You can also embed videos within a frame from the “Elements” section in Canva. You can trim the video input on the slide for time. It can be presented as a “loop” video.
Filmora offers all the essential video editing tools in addition to AI-powered features called Auto-Highlight and Auro-Reframe. Auto Highlight is a feature that extracts the highlights from a video clip autonomously.
This will save you time while cutting your movie. It also makes it easier to extract the best moments from the video.
Auto Reframe recognizes as well as crops the focal point of your footage, constantly retaining it in the frame. Your film’s primary action or object will never be out of focus within that technique.
Part 3 Pricing for Canva You Should Know
Canva can be used among a multitude of users and companies. The range of access is from a single person use to teams of fifty. It also allows for a custom selection of a number of people.
Canva can be used as free graphic design software. It does display all available options with a few possibilities marked off for Canva Pro users only.
Canva Pro allows up to 5 users per team. A subscription to Canva Pro costs US $119.99 per annum or US $12.99 per month. Pro users have access to unlimited content and newly released tools.
The only difference between Canva Pro and Canva Enterprise is that Canva Pro is for smaller teams. Canva Enterprise allows collaboration between larger teams and franchises.
Canva also offers free Canva Pro subscriptions to non-profit organizations. Students and teachers are offered a special discount for those in educational programs.
Wondershare Filmora
Get started easily with Filmora’s powerful performance, intuitive interface, and countless effects!
Try It Free Try It Free Try It Free Learn More >
AI Portrait – The best feature of Wondershare Filmora for gameplay editing
The AI Portrait is a new add-on in Wondershare Filmora. It can easily remove video backgrounds without using a green screen or chroma key, allowing you to add borders, glitch effects, pixelated, noise, or segmentation video effects.
Final Words
We’ve covered how to animate graphics in Canva. You can animate individual elements in Canva or automate it on the whole. Canva’s animate button is an automatic tool that revolutionizes the way traditional animation works.
Wondershare’s Filmora is the video editing tool that is easy to use and offer various animation options.
10 Great Apps for Turning Funny Animated Images Into Comics
10 Great Apps for Turning Funny Animated Images into Comics
An easy yet powerful editor
Numerous effects to choose from
Detailed tutorials provided by the official channel
There are several apps available that can let you create interesting funny animated images, cartoons, and comics by adding speech bubbles, animations, and other effects.
In this article
01 [Top apps to turn pictures into cartoons](#Part 1)
02 [Best Alternative to Cartoon Apps- Wondershare Filmorapro](#Part 2)
03 [Key Takeaways](#Part 3)
Part 1 Top apps to turn pictures into cartoons
To add some fun elements to your regular images and make them even more interesting you can convert them into cartoons and comics. The task of conversion can seem to be difficult and tricky but with the availability of several apps and programs, you can achieve the desired results in just a few clicks.
With multiple options available, you are bound to get confused while selecting an app. Helping you with the same, we have shortlisted the top 10 apps in the category as below.
01 Prisma Photo Editor
Available for download on Android and iOS devices this is an excellent photo editing app that comes with over 300 art filters and animations. You can quickly convert your images into funny and interesting cartoons using the app in no time. Additionally, several image parameters like sharpness, exposure, brightness, and others can also be adjusted as needed.
02 Photo Lab Picture Editor
This is free to use app on the Google Play Store with the IAP option. With a 4.6 high rating, the app is simple to use and offers more than 900 funny and stylish effects that can be added to your images. You can choose from photo montages, animations, filters, and other effects that match your requirements. You can even add photo frames to make your image look impressive. Create professional-looking cartoons in no time using this wonderful app.
03 MomentCam Cartoons & Stickers
This free app on Google Play Store with a 4 rating is just perfect for creating interesting cartoons and emoticons using images. The process is simple and quick where you just need to add the image and create its personalized avatar. Interesting background can also be added to further enhance the cartoon. The app also gives you the option to share the created cartoon on social media sites.

04 ToonMe
Create cartoons using your selfies and other images on your phone in just a few clicks using this high-rated app on Google Play Store. The AI of the app allows the creation of interesting full-body cartoons as well as vector portrait templates. Multiple layouts and designs are also available to choose from. The interface is simple and the app is also available for download Apple Play Store.

05 Pixlr- Free Photo Editor
This is a widely used image editing app that is simple and free to use. A wide range of image editing features and filters are available with the app including cartoon filters that will let you unleash your creativity and design impressive cartoons and other images. Also available for iOS devices the app also facilitates sharing the created images over social media and emails. Additional features include auto-fix, double exposure, adjusting image tone, and others.
06 Painnt- Pro Art Filters
This feature-packed app on Google Store lets you create professional-looking art pieces from the images using filters and animations. With more than 1000 filters in several categories including cartoons, classical, abstract, and others you can have a creation of your choice. App uses AI and also has an option for preview and fine-tuning. You can even share your creations with the app community and over social networking sites.
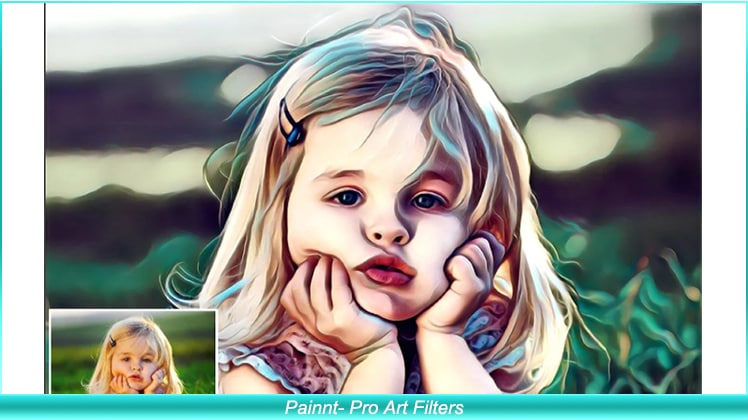
07 Clip2Comic & Caricature Maker
This is among the best app for iPhone users that allows creating funny and interesting cartoons, caricatures, and other artwork using images. Several other editing tools and filters are also available that support customizing high-quality and high-resolution images. Additionally, the app also supports editing the videos and converting them into animated clippings. The deformation filter further makes your creation look funny and interesting.
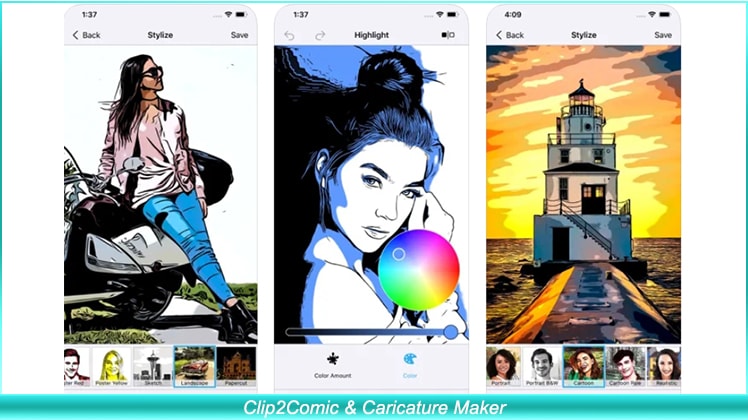
08 Deep Art Effects
This free app for Android and iOS devices comes with more than 100 effects and filters of different types including cartoon-based. Using the AI of the app, you can create impressive artwork in HD resolution. The app supports fast image processing and also supports sharing the artwork with the community. A paid premium version of the app is also available that has no ads, watermark, allows creating own filters, and has additional features.
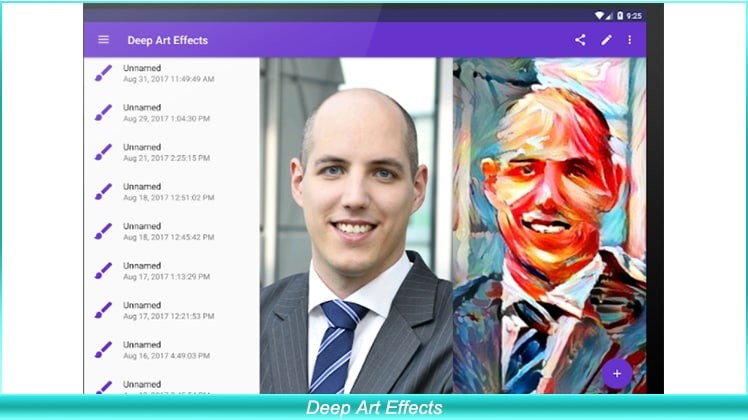
09 Cartoon Photo Editor
This free app for iOS devices will let you turn your images into cartoons like a pro. The app comes with more than 15 cartoon filters to choose from and you can even choose the art style as a retro cartoon, Minecraft, and others. The images from the device can be added to the app or you can even capture one using the camera. The created cartoons can also be shared over social media sites using the app. The pro-paid version offers additional features and functions.
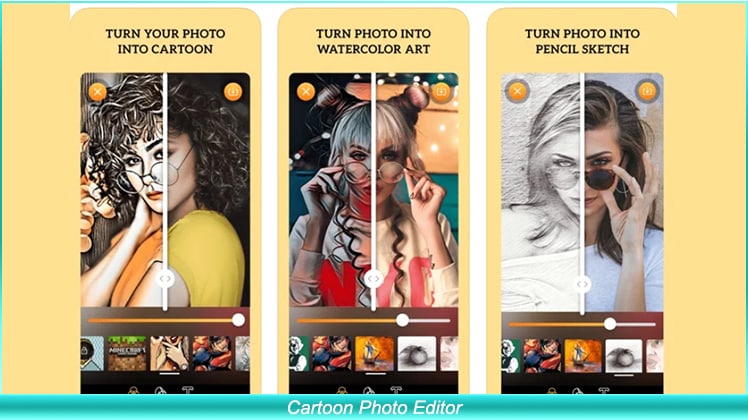
10 Comica- Comics and cartoon maker
As the name suggests, this is a comics and cartoon creating an app on Google Play Store. This lightweight app is free to use and comes with legit-looking effects and allows adding speech balloons. You can even create your memes using the app and take your creativity to a new level.

Key Takeaways from This Episode
● Check out the images on your smartphone or system that can be used for creating interesting cartoons.
● Analyze multiple apps and programs that can let you add cartoon and comic effects to your selected images.
● Finalize the tool that offers the best features, is simple to use, and can quickly convert your images to funny animated images and cartoons with added functionalities.
There are several apps available that can let you create interesting funny animated images, cartoons, and comics by adding speech bubbles, animations, and other effects.
In this article
01 [Top apps to turn pictures into cartoons](#Part 1)
02 [Best Alternative to Cartoon Apps- Wondershare Filmorapro](#Part 2)
03 [Key Takeaways](#Part 3)
Part 1 Top apps to turn pictures into cartoons
To add some fun elements to your regular images and make them even more interesting you can convert them into cartoons and comics. The task of conversion can seem to be difficult and tricky but with the availability of several apps and programs, you can achieve the desired results in just a few clicks.
With multiple options available, you are bound to get confused while selecting an app. Helping you with the same, we have shortlisted the top 10 apps in the category as below.
01 Prisma Photo Editor
Available for download on Android and iOS devices this is an excellent photo editing app that comes with over 300 art filters and animations. You can quickly convert your images into funny and interesting cartoons using the app in no time. Additionally, several image parameters like sharpness, exposure, brightness, and others can also be adjusted as needed.
02 Photo Lab Picture Editor
This is free to use app on the Google Play Store with the IAP option. With a 4.6 high rating, the app is simple to use and offers more than 900 funny and stylish effects that can be added to your images. You can choose from photo montages, animations, filters, and other effects that match your requirements. You can even add photo frames to make your image look impressive. Create professional-looking cartoons in no time using this wonderful app.
03 MomentCam Cartoons & Stickers
This free app on Google Play Store with a 4 rating is just perfect for creating interesting cartoons and emoticons using images. The process is simple and quick where you just need to add the image and create its personalized avatar. Interesting background can also be added to further enhance the cartoon. The app also gives you the option to share the created cartoon on social media sites.
04 ToonMe
Create cartoons using your selfies and other images on your phone in just a few clicks using this high-rated app on Google Play Store. The AI of the app allows the creation of interesting full-body cartoons as well as vector portrait templates. Multiple layouts and designs are also available to choose from. The interface is simple and the app is also available for download Apple Play Store.
05 Pixlr- Free Photo Editor
This is a widely used image editing app that is simple and free to use. A wide range of image editing features and filters are available with the app including cartoon filters that will let you unleash your creativity and design impressive cartoons and other images. Also available for iOS devices the app also facilitates sharing the created images over social media and emails. Additional features include auto-fix, double exposure, adjusting image tone, and others.
06 Painnt- Pro Art Filters
This feature-packed app on Google Store lets you create professional-looking art pieces from the images using filters and animations. With more than 1000 filters in several categories including cartoons, classical, abstract, and others you can have a creation of your choice. App uses AI and also has an option for preview and fine-tuning. You can even share your creations with the app community and over social networking sites.
07 Clip2Comic & Caricature Maker
This is among the best app for iPhone users that allows creating funny and interesting cartoons, caricatures, and other artwork using images. Several other editing tools and filters are also available that support customizing high-quality and high-resolution images. Additionally, the app also supports editing the videos and converting them into animated clippings. The deformation filter further makes your creation look funny and interesting.
08 Deep Art Effects
This free app for Android and iOS devices comes with more than 100 effects and filters of different types including cartoon-based. Using the AI of the app, you can create impressive artwork in HD resolution. The app supports fast image processing and also supports sharing the artwork with the community. A paid premium version of the app is also available that has no ads, watermark, allows creating own filters, and has additional features.
09 Cartoon Photo Editor
This free app for iOS devices will let you turn your images into cartoons like a pro. The app comes with more than 15 cartoon filters to choose from and you can even choose the art style as a retro cartoon, Minecraft, and others. The images from the device can be added to the app or you can even capture one using the camera. The created cartoons can also be shared over social media sites using the app. The pro-paid version offers additional features and functions.
10 Comica- Comics and cartoon maker
As the name suggests, this is a comics and cartoon creating an app on Google Play Store. This lightweight app is free to use and comes with legit-looking effects and allows adding speech balloons. You can even create your memes using the app and take your creativity to a new level.
Key Takeaways from This Episode
● Check out the images on your smartphone or system that can be used for creating interesting cartoons.
● Analyze multiple apps and programs that can let you add cartoon and comic effects to your selected images.
● Finalize the tool that offers the best features, is simple to use, and can quickly convert your images to funny animated images and cartoons with added functionalities.
10 Amazing Cartoon Music Examples You Need to Bookmark
10 Amazing Cartoon Music Examples You Need to Bookmark in 2022
An easy yet powerful editor
Numerous effects to choose from
Detailed tutorials provided by the official channel
If cartoon music turns you on, this is preferably the right place for you! Stay tuned to learn about the top 10 exciting alternatives of cartoon audios!
In this article
01 [Top 10 Cartoon Music](#Part 1)
02 [How to Add Cartoon Music in Video Editing Clips](#Part 2)
Part 1 Top 10 Cartoon Music
Talking of the fascinating and exciting world of cartoons, the subject is an evergreen source of entertainment for almost all age groups; after all, the essence of enjoying something cannot be limited within age boundaries. Diving into some specific details, the fundamental reason behind the extreme popularity of cartoon films and television series is, without any doubt, the stunning graphics and catchy background music.
Speaking of the sound credibility in particular, the following section presents a discussion on some of the choicest audio alternatives from cartoon media creations. If you have enjoyed the bliss of streaming those century old classic opera songs, you can easily relate to the entries in the upcoming list:
01Tales from the Vienna Woods
This was a masterpiece in the world of cartoon music, originally heard in the caricature series, A Corny Concerto in 1943, directed by Bob Clampett under the globally known Disney production house. The composition is essentially a repetition of Fantasia, which was released in 1940.
Talking about the exact music placement within the storyline, the inaugural audio segment, with a special emphasis on the ‘’wythm of woodwinds’’, when Porky Pig, the hero of the storyline, along with his obedient dog, traverses in search of Bugs.
Concerning on the popularity of the music, the latter has received positive music reviews from almost all the leading media critic platforms.
02The Blue Danube
Again an inclusion of the 1943 release, A corny Concerto, this was predominantly a comic version of the original track. It was used to complement the second stage of the storyline, where, a mother swan is seen humming the music to her little ones, giving the classic melody, the feel of a birdsong cover. As the audio swings in, the toddler Daffy Duck is seen paddling over an unwanted honking, while his mother is worried until everything ends up to be fine.
On the take of preference credibility, the music was quite well appreciated by the globally known media critics.
03Dance of the Comedians
This music piece originally belongs to the music album, The Bartered Bride, and was first used in Zoom and Bored in 1957, to uplift the combating theme of the cartoon series. While aptly supplementing the quest of Wile E. Coyote, the protagonist of the story, against Road Runner, his nasty opponent, the climax of the music turns out to be the most loved operas of Czech origin.
About the fan base of the audio snippet, the composition claimed welcoming responses from a worldwide audience.
04Minute Waltz in D-Flat
This one was an explicitly stunning piece of background audio, which was added to the Hyde and Hare cartoon series of 1955, to complement the latter’s storyline with the best suited sound effects.
Entering into the storyline, you will find Bugs, the cutest of rabbits, tends to locate a piano in Dr. Jekyll’s yard, and the latter being the most sophisticated lagomorph ever; begins to explore his musical skills on the instrument. Things however, take an unwanted turn when Mr. Hyde, the antagonist barges in with an attempt of destroying everything.
While the music piece came to be known as the favorite pick of Waltz lovers, the latter received considerable applaud from other media critics as well.
05Morning, Noon and Night in Vienna
This audio background was an exclusive media add-on to Baton Bunny, the 1959 released musical cartoon movies series, which was a further episode of Bugs’ journey that features this adorable, broad toothed rabbit, taking on a conducting task in the land of Vienna.
It is interesting to note that von Suppe, the developer of this music piece, also happened to work on a conducting profile, although on a comic note, the latter did not receive any appreciation for running behind odd smelling flies amid his performance!
Talking of the audience credibility, this one was a musical masterpiece, which received a large scale appreciation from listeners across the globe for featuring the most funny cartoon music ever!
06The Barber of Seville Overture
Like its aforesaid counterparts, this one was also an appreciated piece of audio, first heard in The Rabbit of Seville cartoon series, released in 1950. The musical luxury aims to compliment the combat Bugs, the adorable rabbit, against Elmer Fudd, the antagonist of the storyline, after the latter chases Bugs to a local stage. The music piece is a classic opera composition by Rossini that fails to miss out on a single beat or encounter a tempo breakdown.
The composition was fortunate enough to gain a positive critical acclaim from global audience as well as renowned critics of the artwork.
07Beethoven’s 7th
This music piece is an addition to the list of classic opera melodies by Beethoven. Talking of the inaugural release, the operatic audio was first heard in A Ham in a Role, the 1949 cartoon series. The storyline of the show talks of a speech fluent dog, longing for recognition in theatres commemorating the Shakespearean era, who is forced to lay back with his plans, thanks to the nasty pranks of the Goofy Gophers.
One of the antagonists attiring up like our poor dog, takes the credit of the efforts made by the latter and manages to get cast for a thrilling ghost scene in the Shakespearean tragedy of Hamlet.
Talking of the appreciation catered by the melody, the snippet was a somewhat strange composition, which made the critics, think of Beethoven being in a drunk state while creating the same.
08Traumerei Dreaming
This one is a short 38 seconds snippet on a tender theme, which runs to supplement the assumption of Bugs, the protagonist bunny as dead by Oalfish Canine, the latter’s newest opponent. The cult line of the music piece was gloomy enough to get a removal from the censor board, leading to a considerable edit of the audio before its theatrical showcase. The final audio was, however, still too heavy on the modernized audience to undertake.
As is evident, critics of the audio regard it to be a bit hefty, though the sound is somewhat appealing to opera lovers.
09Largo al Factotum
This high end opera was a rehearsal favorite of Giovanni Jones, the famous opera singer in The Long-Haired Hare, a well-known cartoon classic released in 1949. The star is supported in his streak by our adorable Bugs, who strums out loud on his banjo at a little distance.
All seemed well until Jones, in an annoyed state barges into break the poor rabbit’s instruments, while stretching him upwards through his long and pointed ears. The incident eventually transforms into war by the adorable bunny, who had been enraged by the time.
The music piece is catchy and captivating, considering the fact that it is a popular opera classic sung by a music star in the series.
10Johannes Brahms’ Hungarian Dances
This musical masterpiece was a part of the set of 21 Hungarian Dance compositions to supplement the country’s folk music. First heard in the cartoon series released under the name of Pigs in a Polka in 1943, the melody is essentially a miscellany of the aforesaid 21 music pieces, highlighting the catchiest elements from each.
Considering the fact that the musical delight is an assortment of some of the already best compositions, this excellent audio snippet was bound to receive a welcoming critical acclaim, and was greatly enjoyed by different sets of audiences across the world.
Part 2 How to Add Cartoon Music in Video Editing Clips
Having a significant insight of the stunning varieties of cartoon music, you can try hands at creating a masterpiece of your own by adding appealing caricature music to your video footage and clips. If you are concerned about the take away of the process, rest assured and see through the following section to understand the stepwise method to complement your video with appropriate cartoon music.
Before entering into the music adding process, let us have a formal acquaintance with Filmora, that is, the video editing software being used to cater to the aforesaid concern.
Wondershare Filmora Video Editor

Wondershare Filmora - Best Video Editor for Mac/Windows
5,481,435 people have downloaded it.
Build unique custom animations without breaking a sweat.
Focus on creating epic stories and leave the details to Filmora’s auto features.
Start a creative adventure with drag & drop effects and endless possibilities.
Filmora simplifies advanced features to save you time and effort.
Filmora cuts out repetition so you can move on to your next creative breakthrough.
To begin with, this one is the most reliable audio visual editing program, which you can use to add that extra spunk and a classic professional touch to your normal video footage. The software grants you complete liberty to explore your graphic editing skills and create visual masterpieces by choosing the perfect effects and filters from the latter’s extensive media library.
The program interface is the sweetest of all, making you cling to the editing fun in videos on a roll. Apart from this, the software is quick and smart, allowing you to create beautiful and stunning audio visual artworks within a few seconds.
User’s Guide to Add Cartoon Music to Video Clips in Filmora
Step 1: Download and Install Filmora
From the program’s official website, undertake a free download of Filmora into your MacOs or Windows supported PC or desktop.
Step 2: Import Your Video
After a successful installation of the Filmora Video Editor program in your system, proceed to launch the same in your device, followed by click on ‘Import’ in the app’s opening interface. This will allow you to select and upload any desired videos from your device to the program’s media album.
As an alternative, you can always prefer the ‘Drag and Drop’ method to upload selected video files. Your uploaded footage will be shown in the media panel at the left of the main editor window. Additional to video clips, you can also add still captures to complement them with appropriate audio.
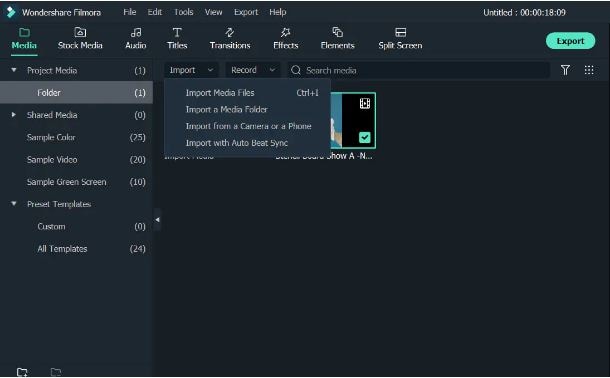
Step 3: Adding a Suitable Cartoon Music
Start with dragging the uploaded video files, one at a time, from Filmora’s media album to its timeline tracks. Take caution of the serial and non-redundant arrangement of the footage files in cohesion with the desired play sequence.
Next, proceed with adding the desired cartoon background music track above the already created video track, by using the conventional ‘Drag and Drop’ method. Check for any trimming requirements for adjusting the audio track length and position to be in concord with the video play time. While making position adjustments, you can simultaneously examine your changes in the editor’s ‘Preview Window’ and fine tune the same in real time.
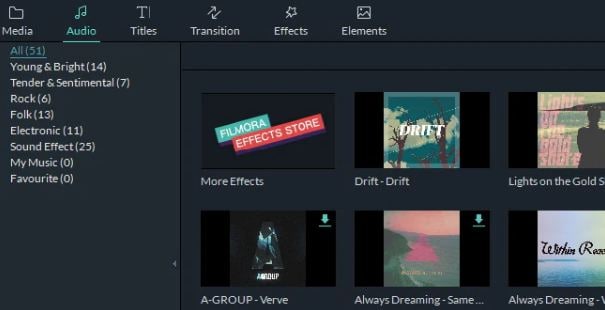
Step 4: Editing the Cartoon Music
To edit your music, open the audio editing panel by double clicking the music file in the editor’s audio track. The feature allows you to enhance your cartoon music track by adding a variety of sound effects, like, fade in, fade out, volume adjustment, pitch tuning and setting up the Audio Equalizer.
You can also try hands on making a slow motion or fast forward version of the footage by varying the audio speed, while applying the ‘Reverse Speed’ effect for a reverse playback of the audio.
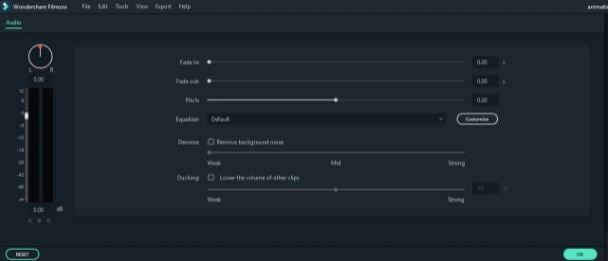
Step 5: Export Your Creation
When you are happy with your work, navigate to and click on the ‘Export’ tab at the bottom right corner of the program’s editor timeline. Save the edited cartoon music video to your device in any preferred file format in the pop-up window that appears next.
You can additionally create videos for iOS devices as well as upload your creations to various media sharing platforms, while also conveniently burning the same to a DVD for a television watch. For looping the cartoon music, just drag the audio clip to the exact length of the video footage.
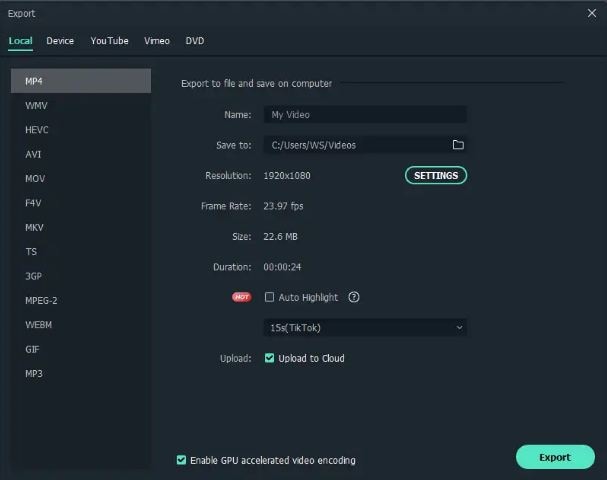
● Ending Thoughts →
● The extreme craze of cartoon music has achieved an evergreen essence over decades of release.
● Among the plethora of music varieties, some specific tracks have maintained a separate fan base.
● When experimenting on creating your own video edits with cartoon music, the Filmora Video Editor is the best tool you can pick.
If cartoon music turns you on, this is preferably the right place for you! Stay tuned to learn about the top 10 exciting alternatives of cartoon audios!
In this article
01 [Top 10 Cartoon Music](#Part 1)
02 [How to Add Cartoon Music in Video Editing Clips](#Part 2)
Part 1 Top 10 Cartoon Music
Talking of the fascinating and exciting world of cartoons, the subject is an evergreen source of entertainment for almost all age groups; after all, the essence of enjoying something cannot be limited within age boundaries. Diving into some specific details, the fundamental reason behind the extreme popularity of cartoon films and television series is, without any doubt, the stunning graphics and catchy background music.
Speaking of the sound credibility in particular, the following section presents a discussion on some of the choicest audio alternatives from cartoon media creations. If you have enjoyed the bliss of streaming those century old classic opera songs, you can easily relate to the entries in the upcoming list:
01Tales from the Vienna Woods
This was a masterpiece in the world of cartoon music, originally heard in the caricature series, A Corny Concerto in 1943, directed by Bob Clampett under the globally known Disney production house. The composition is essentially a repetition of Fantasia, which was released in 1940.
Talking about the exact music placement within the storyline, the inaugural audio segment, with a special emphasis on the ‘’wythm of woodwinds’’, when Porky Pig, the hero of the storyline, along with his obedient dog, traverses in search of Bugs.
Concerning on the popularity of the music, the latter has received positive music reviews from almost all the leading media critic platforms.
02The Blue Danube
Again an inclusion of the 1943 release, A corny Concerto, this was predominantly a comic version of the original track. It was used to complement the second stage of the storyline, where, a mother swan is seen humming the music to her little ones, giving the classic melody, the feel of a birdsong cover. As the audio swings in, the toddler Daffy Duck is seen paddling over an unwanted honking, while his mother is worried until everything ends up to be fine.
On the take of preference credibility, the music was quite well appreciated by the globally known media critics.
03Dance of the Comedians
This music piece originally belongs to the music album, The Bartered Bride, and was first used in Zoom and Bored in 1957, to uplift the combating theme of the cartoon series. While aptly supplementing the quest of Wile E. Coyote, the protagonist of the story, against Road Runner, his nasty opponent, the climax of the music turns out to be the most loved operas of Czech origin.
About the fan base of the audio snippet, the composition claimed welcoming responses from a worldwide audience.
04Minute Waltz in D-Flat
This one was an explicitly stunning piece of background audio, which was added to the Hyde and Hare cartoon series of 1955, to complement the latter’s storyline with the best suited sound effects.
Entering into the storyline, you will find Bugs, the cutest of rabbits, tends to locate a piano in Dr. Jekyll’s yard, and the latter being the most sophisticated lagomorph ever; begins to explore his musical skills on the instrument. Things however, take an unwanted turn when Mr. Hyde, the antagonist barges in with an attempt of destroying everything.
While the music piece came to be known as the favorite pick of Waltz lovers, the latter received considerable applaud from other media critics as well.
05Morning, Noon and Night in Vienna
This audio background was an exclusive media add-on to Baton Bunny, the 1959 released musical cartoon movies series, which was a further episode of Bugs’ journey that features this adorable, broad toothed rabbit, taking on a conducting task in the land of Vienna.
It is interesting to note that von Suppe, the developer of this music piece, also happened to work on a conducting profile, although on a comic note, the latter did not receive any appreciation for running behind odd smelling flies amid his performance!
Talking of the audience credibility, this one was a musical masterpiece, which received a large scale appreciation from listeners across the globe for featuring the most funny cartoon music ever!
06The Barber of Seville Overture
Like its aforesaid counterparts, this one was also an appreciated piece of audio, first heard in The Rabbit of Seville cartoon series, released in 1950. The musical luxury aims to compliment the combat Bugs, the adorable rabbit, against Elmer Fudd, the antagonist of the storyline, after the latter chases Bugs to a local stage. The music piece is a classic opera composition by Rossini that fails to miss out on a single beat or encounter a tempo breakdown.
The composition was fortunate enough to gain a positive critical acclaim from global audience as well as renowned critics of the artwork.
07Beethoven’s 7th
This music piece is an addition to the list of classic opera melodies by Beethoven. Talking of the inaugural release, the operatic audio was first heard in A Ham in a Role, the 1949 cartoon series. The storyline of the show talks of a speech fluent dog, longing for recognition in theatres commemorating the Shakespearean era, who is forced to lay back with his plans, thanks to the nasty pranks of the Goofy Gophers.
One of the antagonists attiring up like our poor dog, takes the credit of the efforts made by the latter and manages to get cast for a thrilling ghost scene in the Shakespearean tragedy of Hamlet.
Talking of the appreciation catered by the melody, the snippet was a somewhat strange composition, which made the critics, think of Beethoven being in a drunk state while creating the same.
08Traumerei Dreaming
This one is a short 38 seconds snippet on a tender theme, which runs to supplement the assumption of Bugs, the protagonist bunny as dead by Oalfish Canine, the latter’s newest opponent. The cult line of the music piece was gloomy enough to get a removal from the censor board, leading to a considerable edit of the audio before its theatrical showcase. The final audio was, however, still too heavy on the modernized audience to undertake.
As is evident, critics of the audio regard it to be a bit hefty, though the sound is somewhat appealing to opera lovers.
09Largo al Factotum
This high end opera was a rehearsal favorite of Giovanni Jones, the famous opera singer in The Long-Haired Hare, a well-known cartoon classic released in 1949. The star is supported in his streak by our adorable Bugs, who strums out loud on his banjo at a little distance.
All seemed well until Jones, in an annoyed state barges into break the poor rabbit’s instruments, while stretching him upwards through his long and pointed ears. The incident eventually transforms into war by the adorable bunny, who had been enraged by the time.
The music piece is catchy and captivating, considering the fact that it is a popular opera classic sung by a music star in the series.
10Johannes Brahms’ Hungarian Dances
This musical masterpiece was a part of the set of 21 Hungarian Dance compositions to supplement the country’s folk music. First heard in the cartoon series released under the name of Pigs in a Polka in 1943, the melody is essentially a miscellany of the aforesaid 21 music pieces, highlighting the catchiest elements from each.
Considering the fact that the musical delight is an assortment of some of the already best compositions, this excellent audio snippet was bound to receive a welcoming critical acclaim, and was greatly enjoyed by different sets of audiences across the world.
Part 2 How to Add Cartoon Music in Video Editing Clips
Having a significant insight of the stunning varieties of cartoon music, you can try hands at creating a masterpiece of your own by adding appealing caricature music to your video footage and clips. If you are concerned about the take away of the process, rest assured and see through the following section to understand the stepwise method to complement your video with appropriate cartoon music.
Before entering into the music adding process, let us have a formal acquaintance with Filmora, that is, the video editing software being used to cater to the aforesaid concern.
Wondershare Filmora Video Editor
Wondershare Filmora - Best Video Editor for Mac/Windows
5,481,435 people have downloaded it.
Build unique custom animations without breaking a sweat.
Focus on creating epic stories and leave the details to Filmora’s auto features.
Start a creative adventure with drag & drop effects and endless possibilities.
Filmora simplifies advanced features to save you time and effort.
Filmora cuts out repetition so you can move on to your next creative breakthrough.
To begin with, this one is the most reliable audio visual editing program, which you can use to add that extra spunk and a classic professional touch to your normal video footage. The software grants you complete liberty to explore your graphic editing skills and create visual masterpieces by choosing the perfect effects and filters from the latter’s extensive media library.
The program interface is the sweetest of all, making you cling to the editing fun in videos on a roll. Apart from this, the software is quick and smart, allowing you to create beautiful and stunning audio visual artworks within a few seconds.
User’s Guide to Add Cartoon Music to Video Clips in Filmora
Step 1: Download and Install Filmora
From the program’s official website, undertake a free download of Filmora into your MacOs or Windows supported PC or desktop.
Step 2: Import Your Video
After a successful installation of the Filmora Video Editor program in your system, proceed to launch the same in your device, followed by click on ‘Import’ in the app’s opening interface. This will allow you to select and upload any desired videos from your device to the program’s media album.
As an alternative, you can always prefer the ‘Drag and Drop’ method to upload selected video files. Your uploaded footage will be shown in the media panel at the left of the main editor window. Additional to video clips, you can also add still captures to complement them with appropriate audio.
Step 3: Adding a Suitable Cartoon Music
Start with dragging the uploaded video files, one at a time, from Filmora’s media album to its timeline tracks. Take caution of the serial and non-redundant arrangement of the footage files in cohesion with the desired play sequence.
Next, proceed with adding the desired cartoon background music track above the already created video track, by using the conventional ‘Drag and Drop’ method. Check for any trimming requirements for adjusting the audio track length and position to be in concord with the video play time. While making position adjustments, you can simultaneously examine your changes in the editor’s ‘Preview Window’ and fine tune the same in real time.
Step 4: Editing the Cartoon Music
To edit your music, open the audio editing panel by double clicking the music file in the editor’s audio track. The feature allows you to enhance your cartoon music track by adding a variety of sound effects, like, fade in, fade out, volume adjustment, pitch tuning and setting up the Audio Equalizer.
You can also try hands on making a slow motion or fast forward version of the footage by varying the audio speed, while applying the ‘Reverse Speed’ effect for a reverse playback of the audio.
Step 5: Export Your Creation
When you are happy with your work, navigate to and click on the ‘Export’ tab at the bottom right corner of the program’s editor timeline. Save the edited cartoon music video to your device in any preferred file format in the pop-up window that appears next.
You can additionally create videos for iOS devices as well as upload your creations to various media sharing platforms, while also conveniently burning the same to a DVD for a television watch. For looping the cartoon music, just drag the audio clip to the exact length of the video footage.
● Ending Thoughts →
● The extreme craze of cartoon music has achieved an evergreen essence over decades of release.
● Among the plethora of music varieties, some specific tracks have maintained a separate fan base.
● When experimenting on creating your own video edits with cartoon music, the Filmora Video Editor is the best tool you can pick.
Guide on Creating GIF in WhatsApp iPhone
2024 Guide on How to Create GIF in WhatsApp iPhone
An easy yet powerful editor
Numerous effects to choose from
Detailed tutorials provided by the official channel
Standing for Graphics Interchange Format, GIF is short animated images that you can see all over social media sites and other online platforms. These interesting animations can also be shared during your conversations on WhatsApp.

So, if you too are looking for ways to create as well as send GIFs on WhatsApp iPhone, you are on the right page. Keep reading to know all the possible ways to send WhatsApp GIFs on iPhone.
In this article
01 [How to send WhatsApp GIF from the integrated library on iPhone](#Part 1)
02 [How to send Live Photos as WhatsApp GIF on iPhone](#Part 2)
03 [How to create WhatsApp GIF using videos on iPhone](#Part 3)
04 [How to create excellent GIF effortlessly using Wondershare Filmora- All in One video editing software](#Part 4)
Part 1 How to send WhatsApp GIF from the integrated library on iPhone
If you have the latest version of WhatsApp installed on your phone, you can easily and quickly send the GIF from the integrated library having a collection of GIFs in several categories. The steps to send GIF in WhatsApp iPhone are as below.
Step 1. On your iPhone, launch WhatsApp and open the contact or a group to which you wish to send the GIF.
Step 2. Click on the Stickers icon at the typing section and then choose the GIF option at the bottom.
Step 3. Multiple GIFs in different categories will appear. You can further search for the desired GIF using a keyword at the search icon at the bottom-left corner. The list of the Recents and the Favorites can also be searched using their respective icons.
Note: To save any particular GIF in the favorites list, tap and hold the GIF and then click on Add To Favorites option.
StepTap on the selected GIF and then click on the Send icon at the bottom-right corner. Your WhatsApp GIF iPhone will be sent.

Part 2 How to send Live Photos as WhatsApp GIF on iPhone
Live Photos on your iPhone can also be sent as GIFs in WhatsApp conversations and the steps for the same are as below.
Note: The feature is available for users having iPhone 6 or later versions.
Step 1.Open the WhatsApp contact on your iPhone to whom you wish to send the GIF. Click on the + icon and then choose the option of Photo & Video Library.
Step 2. Search for the Live photo in your gallery and then press it. When the image pops out, slide upwards and then click on the Select as GIF option.
Step 3. Tap on the Send icon to share the selected Live photo as GIF.

Part 3 How to create WhatsApp GIF using videos on iPhone
In addition to the integrated library, you can also convert the videos on your iPhone to GIF and share them on WhatsApp. To be used as GIF, the length of the videos cannot be more than 6 seconds. Thus, for a larger video, you need to trim it to be under 6 seconds. Steps to get the task done are as follows.
Step 1.Launch WhatsApp on your iPhone and select the contact to which you want to share the GIF. Next, click on + sign and then choose Photo & Video Library option.
Step 2.Select the desired video from your phone gallery.
Step 3.After the video is added, an editing screen will open. Here you can trim the video to make it under 6 seconds using the slider at the top. Further changes can be made like adding a sticker, text, or making a freehand drawing.
Step 4.After all customizations are done, click on the GIF button.
Step 5.Finally, tap on the Send icon at the bottom-right corner to send the edited video as GIF.

Part 4 How to create excellent GIF effortlessly using Wondershare Filmora- All in One video editing software
WhatsApp in your iPhone has a built-in option to create GIFs using the videos on the device. Though the process is simple, the option for editing and customizations are limited. So, if you want to create GIFs using videos online and with advanced editing tools, we suggest using Wondershare Filmora Video Editor .
This all-in-one video editing software will let you edit and customize your files in several ways and in a few simple steps, your desired GIF will be ready.
Wondershare Filmora
Get started easily with Filmora’s powerful performance, intuitive interface, and countless effects!
Try It Free Try It Free Try It Free Learn More >
Key features of the software
● Add media files in all ley formats like MP4, MOV, MKV, PNG, and others to create GIFs.
● Simple and quick steps for creating the desired animation.
● Allows to customize the GIF using functions like slow-down, crop, rotate, and many more.
● Allows adding text, voice, and other elements.
● Option to share the created GIF to Vimeo, and YouTube directly.
● Software support to all latest Windows and Mac systems.
Steps to create WhatsApp GIF using Wondershare Filmora.
Step 1.Open the installed software on your system and import the desired images and videos from your system.
Step 2.Drag and drop the added videos and images to the timeline.

Step 3.Edit the file using features like crop, rotate, split, and others.
Step 4.Add text and other elements as needed.

Step 5.At the Local tab, save the customized media as GIF. Select the file name and the destination and then finally, click on the EXPORT button to start processing.
● Key Takeaways from This Episode →
●Gifs for WhatsApp iPhone can be added from the integrated library.
●Live Photos, as well as videos, can also be used to create and share them as GIF.
●For creating interesting and funny GIF in a hassle-free manner, Wondershare Filmora works as the best software.
Standing for Graphics Interchange Format, GIF is short animated images that you can see all over social media sites and other online platforms. These interesting animations can also be shared during your conversations on WhatsApp.
So, if you too are looking for ways to create as well as send GIFs on WhatsApp iPhone, you are on the right page. Keep reading to know all the possible ways to send WhatsApp GIFs on iPhone.
In this article
01 [How to send WhatsApp GIF from the integrated library on iPhone](#Part 1)
02 [How to send Live Photos as WhatsApp GIF on iPhone](#Part 2)
03 [How to create WhatsApp GIF using videos on iPhone](#Part 3)
04 [How to create excellent GIF effortlessly using Wondershare Filmora- All in One video editing software](#Part 4)
Part 1 How to send WhatsApp GIF from the integrated library on iPhone
If you have the latest version of WhatsApp installed on your phone, you can easily and quickly send the GIF from the integrated library having a collection of GIFs in several categories. The steps to send GIF in WhatsApp iPhone are as below.
Step 1. On your iPhone, launch WhatsApp and open the contact or a group to which you wish to send the GIF.
Step 2. Click on the Stickers icon at the typing section and then choose the GIF option at the bottom.
Step 3. Multiple GIFs in different categories will appear. You can further search for the desired GIF using a keyword at the search icon at the bottom-left corner. The list of the Recents and the Favorites can also be searched using their respective icons.
Note: To save any particular GIF in the favorites list, tap and hold the GIF and then click on Add To Favorites option.
StepTap on the selected GIF and then click on the Send icon at the bottom-right corner. Your WhatsApp GIF iPhone will be sent.
Part 2 How to send Live Photos as WhatsApp GIF on iPhone
Live Photos on your iPhone can also be sent as GIFs in WhatsApp conversations and the steps for the same are as below.
Note: The feature is available for users having iPhone 6 or later versions.
Step 1.Open the WhatsApp contact on your iPhone to whom you wish to send the GIF. Click on the + icon and then choose the option of Photo & Video Library.
Step 2. Search for the Live photo in your gallery and then press it. When the image pops out, slide upwards and then click on the Select as GIF option.
Step 3. Tap on the Send icon to share the selected Live photo as GIF.
Part 3 How to create WhatsApp GIF using videos on iPhone
In addition to the integrated library, you can also convert the videos on your iPhone to GIF and share them on WhatsApp. To be used as GIF, the length of the videos cannot be more than 6 seconds. Thus, for a larger video, you need to trim it to be under 6 seconds. Steps to get the task done are as follows.
Step 1.Launch WhatsApp on your iPhone and select the contact to which you want to share the GIF. Next, click on + sign and then choose Photo & Video Library option.
Step 2.Select the desired video from your phone gallery.
Step 3.After the video is added, an editing screen will open. Here you can trim the video to make it under 6 seconds using the slider at the top. Further changes can be made like adding a sticker, text, or making a freehand drawing.
Step 4.After all customizations are done, click on the GIF button.
Step 5.Finally, tap on the Send icon at the bottom-right corner to send the edited video as GIF.
Part 4 How to create excellent GIF effortlessly using Wondershare Filmora- All in One video editing software
WhatsApp in your iPhone has a built-in option to create GIFs using the videos on the device. Though the process is simple, the option for editing and customizations are limited. So, if you want to create GIFs using videos online and with advanced editing tools, we suggest using Wondershare Filmora Video Editor .
This all-in-one video editing software will let you edit and customize your files in several ways and in a few simple steps, your desired GIF will be ready.
Wondershare Filmora
Get started easily with Filmora’s powerful performance, intuitive interface, and countless effects!
Try It Free Try It Free Try It Free Learn More >
Key features of the software
● Add media files in all ley formats like MP4, MOV, MKV, PNG, and others to create GIFs.
● Simple and quick steps for creating the desired animation.
● Allows to customize the GIF using functions like slow-down, crop, rotate, and many more.
● Allows adding text, voice, and other elements.
● Option to share the created GIF to Vimeo, and YouTube directly.
● Software support to all latest Windows and Mac systems.
Steps to create WhatsApp GIF using Wondershare Filmora.
Step 1.Open the installed software on your system and import the desired images and videos from your system.
Step 2.Drag and drop the added videos and images to the timeline.
Step 3.Edit the file using features like crop, rotate, split, and others.
Step 4.Add text and other elements as needed.
Step 5.At the Local tab, save the customized media as GIF. Select the file name and the destination and then finally, click on the EXPORT button to start processing.
● Key Takeaways from This Episode →
●Gifs for WhatsApp iPhone can be added from the integrated library.
●Live Photos, as well as videos, can also be used to create and share them as GIF.
●For creating interesting and funny GIF in a hassle-free manner, Wondershare Filmora works as the best software.
Also read:
- In 2024, What Wikipedia Wont Tell You About Character Rigging
- FREE Top 10 Best Convert Video Between GIF and Software High Quality, 2024
- Learn All About 3D Logo Animation and Templates
- In 2024, 10 Awesome Moving Animation PowerPoint Techniques
- In 2024, Adobe Animate Riggings Tutorial for You
- Samples of Cartoon Character Face
- New 2024 Approved How to Create a Whiteboard Animation Video
- New 2024 Approved Top 10 Animated DP for WhatsApp
- Updated Top 10 Animated DP for WhatsApp for 2024
- 10 Trendy & Stylish Free Logo Animation Templates for 2024
- New Easy Shortcut to Convert Videos to Gifs on iPhone
- New Whats Rigging Animation and Why It Matters for 2024
- The 15 Most Efficient Photo to Cartoon Software for Android for 2024
- In 2024, How to Turn Yourself Into WhatsApp Cartoon
- Updated 2024 Approved Best 15 Classics Animated Cartoon Movies
- Updated 2024 Approved How to Make My Photo 3D Cartoon Online
- New 2024 Approved Types of Cartoon Styles You May Use for The Next Marketing Project
- New In 2024, How to Make Animated Videos for Business – an Ultimate Guide
- Tips That Show Anybody How to Get Awesome Background for Slideshow in PowerPoint for 2024
- Make Well Done Animated GIF
- Updated In 2024, 10 Classical Animated Cartoon Types With Examples
- Updated In 2024, Top 12 Video to GIF Converters High Quality to Check Out
- New How to Create Photo Collage Frame for Free in Minutes for 2024
- Popular Tips on Learning Animate Rigging for 2024
- New In 2024, 8 Blender 3D Animation Tutorials for Beginners
- 4 Things You Should Know About Pinterest GIF for 2024
- Updated In 2024, Nurturing the Spirit Through the Top 10 Intellectual Anime Websites
- New In 2024, How To Make Pinterest Slideshow in Simple Ways
- New How to Make an Animation With 7 Steps
- Top 10 Best Batman Anime Movies 2024 Updated
- New 2024 Approved How to Create YouTube Intro Animation Like a Pro
- Updated In 2024, 4 Things You Should Know About Pinterest GIF
- Best 10 Animated Templates in Canva
- In 2024, Have You Seen the Facebook Cartoon App Everyones Using Recently
- Updated 2024 Approved What Is A GIF
- Complete Guide to Send Gif WhatsApp on Android
- 2024 Approved Best 15 Anime Shows That Are Great to Binge Watch
- In 2024, Best 10 Animated Templates in Canva
- Updated In 2024, 5 Foolproof Amazing Anime Text to Speech Tips for Makers
- 2024 Approved 12 Best Stop Motion Studios Worth Recommending
- Whiteboard Animation Services Top 15 Animation Companies to Pick for 2024
- Updated In 2024, Learn Easy Blender Rigging in Only 2 Minutes
- Updated In 2024, 15 Best Collage Makers to Create Aesthetic Collages
- Updated How to Find 3D Animation Studio Meeting All Your Inspiring Needs
- New Techniques on Making After Effects 2D Animation for 2024
- 21 Top Free Anime Websites to Watch Anime Online-Anime for 2024
- New The Complete Guide to Whiteboard Animation
- How to Make 3D Cartoon of Yourself for 2024
- How and Where to Find a Shiny Stone Pokémon For Nokia C110? | Dr.fone
- Full Guide to Catch 100 IV Pokémon Using a Map On Vivo Y78+ | Dr.fone
- In 2024, Downloading SamFw FRP Tool 3.0 for Infinix Smart 7 HD
- In 2024, How to Unlock Apple iPhone 14 Pro with a Mask On
- In 2024, How Do I Stop Someone From Tracking My Vivo S18e? | Dr.fone
- How can I get more stardust in pokemon go On Apple iPhone 13 Pro? | Dr.fone
- How to Use Google Assistant on Your Lock Screen Of Poco X6 Pro Phone
- Can Life360 Track Or See Text Messages? What Can You Do with Life360 On Vivo Y36i? | Dr.fone
- In 2024, Effective Ways To Fix Checkra1n Error 31 On Apple iPhone 15 Pro Max
- How to Mirror Samsung Galaxy S23 to Mac? | Dr.fone
- How To Fix Unresponsive Phone Touchscreen Of Infinix Hot 40 Pro | Dr.fone
- A Guide Oppo Find X6 Wireless and Wired Screen Mirroring | Dr.fone
- 4 Ways to Transfer Music from Realme GT 3 to iPhone | Dr.fone
- Hard Resetting an Realme V30T Device Made Easy | Dr.fone
- In 2024, Easy Guide How To Bypass Infinix Zero 30 5G FRP Android 10/11/12/13
- In 2024, Solutions to Spy on Vivo V30 Lite 5G with and without jailbreak | Dr.fone
- How to Unlock Apple iPhone 12 mini When We Dont Have Apple ID or Password?
- Android Safe Mode - How to Turn off Safe Mode on Nubia Red Magic 9 Pro? | Dr.fone
- In 2024, How to Unlock ZTE Pattern Lock if Forgotten? 6 Ways
- In 2024, Your Account Has Been Disabled in the App Store and iTunes From Apple iPhone SE (2022)?
- 3uTools Virtual Location Not Working On Vivo Y78+? Fix Now | Dr.fone
- How to X100 Get Deleted Phone Number Back with Ease and Safety
- A Complete Guide To OEM Unlocking on Poco C55
- Guide on How To Change Your Apple ID Email Address On Apple iPhone 11
- 4 Most-Known Ways to Find Someone on Tinder For OnePlus Ace 2 by Name | Dr.fone
- Why Your Oppo Reno 11 Pro 5G Screen Might be Unresponsive and How to Fix It | Dr.fone
- All Must-Knows to Use Fake GPS GO Location Spoofer On Samsung Galaxy M34 5G | Dr.fone
- Is GSM Flasher ADB Legit? Full Review To Bypass Your Infinix Smart 8 HD Phone FRP Lock
- How to Cast Realme Narzo 60 5G to Computer for iPhone and Android? | Dr.fone
- In 2024, How To Change Your SIM PIN Code on Your Meizu 21 Phone
- What To Do if Your Itel P55 5G Auto Does Not Work | Dr.fone
- Fix App Not Available in Your Country Play Store Problem on Vivo Y17s | Dr.fone
- Strategies for Apps That Wont Download From Play Store On Meizu 21 | Dr.fone
- Will the iPogo Get You Banned and How to Solve It On Vivo Y100i | Dr.fone
- The Best Android Unlock Software For Lava Yuva 3 Pro Device Top 5 Picks to Remove Android Locks
- 4 Solutions to Fix Unfortunately Your App Has Stopped Error on OnePlus 12 | Dr.fone
- In 2024, Unlocking an iCloud Locked iPad and iPhone 13 Pro
- 3 Facts You Need to Know about Screen Mirroring Tecno Pova 5 | Dr.fone
- Why Your WhatsApp Live Location is Not Updating and How to Fix on your Motorola Edge 40 | Dr.fone
- How To Restore Missing Messages Files from Nokia G42 5G
- How To Activate and Use Life360 Ghost Mode On Tecno Spark 20 Pro+ | Dr.fone
- In 2024, How to Get and Use Pokemon Go Promo Codes On Poco F5 Pro 5G | Dr.fone
- In 2024, How to Unlock Apple ID Activation Lock From iPhone 6 Plus?
- In 2024, How to Use Google Assistant on Your Lock Screen Of Vivo V30 Phone
- Proven Ways to Fix There Was A Problem Parsing the Package on Lava Blaze 2 Pro | Dr.fone
- In 2024, How to Transfer Contacts from Lava Blaze 2 5G to iPhone XS/11 | Dr.fone
- Title: Adobe Auto Rigger Is AWESOME
- Author: Elon
- Created at : 2024-05-19 03:04:20
- Updated at : 2024-05-20 03:04:20
- Link: https://animation-videos.techidaily.com/adobe-auto-rigger-is-awesome/
- License: This work is licensed under CC BY-NC-SA 4.0.
