

Animate Pictures in Canva
Animate Pictures in Canva
Versatile Video Editor - Wondershare Filmora
An easy yet powerful editor
Numerous effects to choose from
Detailed tutorials provided by the official channel
With the rapid rise of social media worldwide, animated posts (like GIFs) are becoming famous. They have become a replacement to other modes like JPEG and .Png
Famous designing tools like Canva introduced an animation feature in the light of its popularity. The feature allows you to step up your social media game and creates animated visuals in a blink! It is also efficient for both professional and amateur users.
Besides social media content, Canva is also useful to design birthday cards, event invites, inspirational quotes, and more! Let’s learn about how to animate pictures in Canva in detail.
In this article
01 What Canva Pictures Can Be Used For?
02 How to Animate Pictures in Canva?
03 Tips: Animate Pictures In Video
Part 1: What Canva Pictures Can Be Used For?
Be it for marketing campaigns or projects, Canva is the best tool for all designing work. It is a foolproof platform where you do not need prior designing experience. Canva is useful for

Social media/Instagram Posts: You can build your Instagram presence by creating posts through Canva. It has multiple templates and features to make alluring Instagram posts. It also has drag-and-drop free images to add customized designs to the template.
Facebook Covers: You can make Facebook covers on Canva by choosing a layout and adding other elements. You can include colors, fonts, and pictures on the cover. Canva has templates for all themes, moods, and styles!
Event Invites: Canva has hundreds of free layouts and libraries to create event invites. You can choose the appropriate template and incorporate party-oriented photos, icons, stickers, illustrations, and graphics. It also has a personalizing option to add personal pictures and artwork in the editor.
Inspirational Quotes: Canva allows you to curate inspirational quotes and dispense motivation in people. It has templates to modify the elements like font size, text size, borders, images, and more!
Collages: It helps create a collage where you can combine multiple pictures in one frame. Canva offers various grids with a capacity of 12 pictures and different sizes.
Part 2: How to Animate Pictures in Canva?
Canva helps you add instant animation in presentations, social media posts, and more. To know how to animate images in Canva, follow the below steps:

Step 1: Add Static Elements
Start by creating an image through static elements. To make the design attractive, you can add sample texts, illustrations, doodles, and other entities.
Try to stimulate your creativity and come up with a layout beforehand. If possible, sketch on paper and replicate the same.
Step 2: Animate Your Design
Take a final glance at the layout. Make sure it’s perfect. Once all the elements are placed as per your design, it’s time to animate them. For that:
- Click on the white background page
- Go to the “Toolbar” section
- Select the “Animate” button
Step 3: Select Page Animation Style
Canva offers six animation styles, where five are for free users, and one is for pro users. To access the five animation styles, follow these steps.
- Press the “Animate” Button
- Select “Page Animations”
- There you will find options like Block, Pan, Fade, Rise, and Tumble
- Select the style as per your design
Step 4: Preview and Download
After selecting a page animation style, it will preview the effect. If you find it good, move on to downloading the GIF. Here’s how to do so
- Go to the “Toolbar” option (present on your upper right hand)
- Choose GIF as the file type
- Check the page number and verify if it’s correct
- Press the “Done” button
Step 5: Final GIF
After clicking on the “Done” button, your GIF will be downloaded. You will be able to see a display for five seconds. If you want to edit the image after this, click on the time button (near the “Animate” button).
So, that was all about how to animate a photo in Canva.
Drawbacks of Canva
Despite efficient features and easy interface, there are certain areas where Canva lacks. This includes
- It does not have any local file storage.
- As too many people use Canva, your template may look the same as others.
- Some of its best features are not free to access.
- The mobile app version lacks certain elements and features.
Out of all these drawbacks, repetitions of templates are a big issue. That’s because everyone wants their posts to look unique and irreplaceable. However, common Canva templates may prevent that from happening.
Fortunately, there are ways to combat such issues. Let’s learn about them in the next section.
Tips: Animate Pictures In Video
You can also animate pictures in the video to make them more lively. For that, you can use Wondershare Filmora Pro Video Editor. It’s also efficient if you don’t know how to animate a picture in Canva:
Wondershare Filmora Video Editor
Filmora by Wondershare is a video editing software that helps you build custom animations easily. It has auto features to make epic stories and posts.
Wondershare Filmora
Get started easily with Filmora’s powerful performance, intuitive interface, and countless effects Try It Free Try It Free Learn More about Filmora>

Its drag and drop effect makes designing simple and quick. Due to its outstanding attributes, options, and styles, Filmora has 77+ million happy users!
It’s a power-packed integration of functionality, performance, and more! In fact, it resolves the repeated template issue of Canva. The software has top-notch functions and innovative filters that add authenticity to the designs.
Till now, you learned about how to animate a picture on Canva. Now, let’s comprehend the right way to use Filmora for animating and adding images in the video.
Before using, make sure to update the software to its latest version. Follow separate methods for both Windows and Mac.
For Win
Step 1: Adding Image to Video Track
With Filmora, adding images to video is a matter of seconds! Start by:
- Identify the position where you want to add the image and place the Playhead there.
- Right-click on the picture from the media library. Click on the “Insert” option. Your image will be added. Select the “Append” option, if you want to add an image at the video end.

Note: How to Remove Black Bars around the Image?
- Go to “Settings” from the File section.
- Click on the “Editing” tab and select “Photo Placement.”
- Choose from the “Crop to Fit” or “Pan To Zoom” option. The black bars will be removed.
To add the image in between the video clip, split them. Now, add the image between the split parts.
Step 2: Add Images as Overlays
To add images as overlays, drag the image to a video track above the main track. The main track consists of your video.
Track 1 (or the track with a video clip) is the base of your video. If you add anything else, it will be displayed above this track as video track 2, 3, and so on. Overall, you can add 100 video tracks.
Step 3: Edit Your Image
If you know how to animate an image in Canva, editing images on Filmora is even easier. You can try the following methods:
Animate Your Images
- To add animation presets to the image, click on the image twice.
- Go to the “Animation Tab” and look for an animation preset.
- Drag the presets to the image for its effect

Make Image Color Adjustments
- Double-click on the image
- Go to the “Color” tab and then the “Color” section
- Customize the temperature, saturation, brightness, etc., as per your need.
- Press Ok.
Change Image Duration
You can increase the image duration to more than the default timing of 5 seconds. For that:
- Click on the image and select the “Duration” option.
- Go to the “Duration Setting” panel.
- Add the new duration timing.

Adjust Position, Rotate/Flip, and Opacity
- You can resize the image position through the circles and squares at the image edges.
- To flip or rotate the image, double-click on the picture. From the “Image Panel,” go to “Transform” and then click on “Rotate.” You can choose either “Horizontal Flip” or “Vertical Flip” to flip the images.
- Double-click on the image and click on the “Composting” option to add opacity. You can choose the blending mode or adjust the “Opacity” accordingly.

For Mac
Filmora for Mac comes with a drag and drop feature to add transitions, animated titles, and effects. You can start a new project from scratch by clicking on “New Project”. The entire process is the same as that for Windows users.
To apply animation in the images, use the motion effects option. For that,
- Click on the Image
- Go to Motion Tab
- Select a motion effect
- Double-click to apply the effect

Conclusion
So that’s how to animate photos in Canva. Hopefully, our steps will help you revamp your posts like a pro! If not Canva, you can use its alternative Filmora. It’s equally prominent, user-friendly, and feature-rich.
Versatile Video Editor - Wondershare Filmora
An easy yet powerful editor
Numerous effects to choose from
Detailed tutorials provided by the official channel
With the rapid rise of social media worldwide, animated posts (like GIFs) are becoming famous. They have become a replacement to other modes like JPEG and .Png
Famous designing tools like Canva introduced an animation feature in the light of its popularity. The feature allows you to step up your social media game and creates animated visuals in a blink! It is also efficient for both professional and amateur users.
Besides social media content, Canva is also useful to design birthday cards, event invites, inspirational quotes, and more! Let’s learn about how to animate pictures in Canva in detail.
In this article
01 What Canva Pictures Can Be Used For?
02 How to Animate Pictures in Canva?
03 Tips: Animate Pictures In Video
Part 1: What Canva Pictures Can Be Used For?
Be it for marketing campaigns or projects, Canva is the best tool for all designing work. It is a foolproof platform where you do not need prior designing experience. Canva is useful for
Social media/Instagram Posts: You can build your Instagram presence by creating posts through Canva. It has multiple templates and features to make alluring Instagram posts. It also has drag-and-drop free images to add customized designs to the template.
Facebook Covers: You can make Facebook covers on Canva by choosing a layout and adding other elements. You can include colors, fonts, and pictures on the cover. Canva has templates for all themes, moods, and styles!
Event Invites: Canva has hundreds of free layouts and libraries to create event invites. You can choose the appropriate template and incorporate party-oriented photos, icons, stickers, illustrations, and graphics. It also has a personalizing option to add personal pictures and artwork in the editor.
Inspirational Quotes: Canva allows you to curate inspirational quotes and dispense motivation in people. It has templates to modify the elements like font size, text size, borders, images, and more!
Collages: It helps create a collage where you can combine multiple pictures in one frame. Canva offers various grids with a capacity of 12 pictures and different sizes.
Part 2: How to Animate Pictures in Canva?
Canva helps you add instant animation in presentations, social media posts, and more. To know how to animate images in Canva, follow the below steps:
Step 1: Add Static Elements
Start by creating an image through static elements. To make the design attractive, you can add sample texts, illustrations, doodles, and other entities.
Try to stimulate your creativity and come up with a layout beforehand. If possible, sketch on paper and replicate the same.
Step 2: Animate Your Design
Take a final glance at the layout. Make sure it’s perfect. Once all the elements are placed as per your design, it’s time to animate them. For that:
- Click on the white background page
- Go to the “Toolbar” section
- Select the “Animate” button
Step 3: Select Page Animation Style
Canva offers six animation styles, where five are for free users, and one is for pro users. To access the five animation styles, follow these steps.
- Press the “Animate” Button
- Select “Page Animations”
- There you will find options like Block, Pan, Fade, Rise, and Tumble
- Select the style as per your design
Step 4: Preview and Download
After selecting a page animation style, it will preview the effect. If you find it good, move on to downloading the GIF. Here’s how to do so
- Go to the “Toolbar” option (present on your upper right hand)
- Choose GIF as the file type
- Check the page number and verify if it’s correct
- Press the “Done” button
Step 5: Final GIF
After clicking on the “Done” button, your GIF will be downloaded. You will be able to see a display for five seconds. If you want to edit the image after this, click on the time button (near the “Animate” button).
So, that was all about how to animate a photo in Canva.
Drawbacks of Canva
Despite efficient features and easy interface, there are certain areas where Canva lacks. This includes
- It does not have any local file storage.
- As too many people use Canva, your template may look the same as others.
- Some of its best features are not free to access.
- The mobile app version lacks certain elements and features.
Out of all these drawbacks, repetitions of templates are a big issue. That’s because everyone wants their posts to look unique and irreplaceable. However, common Canva templates may prevent that from happening.
Fortunately, there are ways to combat such issues. Let’s learn about them in the next section.
Tips: Animate Pictures In Video
You can also animate pictures in the video to make them more lively. For that, you can use Wondershare Filmora Pro Video Editor. It’s also efficient if you don’t know how to animate a picture in Canva:
Wondershare Filmora Video Editor
Filmora by Wondershare is a video editing software that helps you build custom animations easily. It has auto features to make epic stories and posts.
Wondershare Filmora
Get started easily with Filmora’s powerful performance, intuitive interface, and countless effects Try It Free Try It Free Learn More about Filmora>
Its drag and drop effect makes designing simple and quick. Due to its outstanding attributes, options, and styles, Filmora has 77+ million happy users!
It’s a power-packed integration of functionality, performance, and more! In fact, it resolves the repeated template issue of Canva. The software has top-notch functions and innovative filters that add authenticity to the designs.
Till now, you learned about how to animate a picture on Canva. Now, let’s comprehend the right way to use Filmora for animating and adding images in the video.
Before using, make sure to update the software to its latest version. Follow separate methods for both Windows and Mac.
For Win
Step 1: Adding Image to Video Track
With Filmora, adding images to video is a matter of seconds! Start by:
- Identify the position where you want to add the image and place the Playhead there.
- Right-click on the picture from the media library. Click on the “Insert” option. Your image will be added. Select the “Append” option, if you want to add an image at the video end.
Note: How to Remove Black Bars around the Image?
- Go to “Settings” from the File section.
- Click on the “Editing” tab and select “Photo Placement.”
- Choose from the “Crop to Fit” or “Pan To Zoom” option. The black bars will be removed.
To add the image in between the video clip, split them. Now, add the image between the split parts.
Step 2: Add Images as Overlays
To add images as overlays, drag the image to a video track above the main track. The main track consists of your video.
Track 1 (or the track with a video clip) is the base of your video. If you add anything else, it will be displayed above this track as video track 2, 3, and so on. Overall, you can add 100 video tracks.
Step 3: Edit Your Image
If you know how to animate an image in Canva, editing images on Filmora is even easier. You can try the following methods:
Animate Your Images
- To add animation presets to the image, click on the image twice.
- Go to the “Animation Tab” and look for an animation preset.
- Drag the presets to the image for its effect
Make Image Color Adjustments
- Double-click on the image
- Go to the “Color” tab and then the “Color” section
- Customize the temperature, saturation, brightness, etc., as per your need.
- Press Ok.
Change Image Duration
You can increase the image duration to more than the default timing of 5 seconds. For that:
- Click on the image and select the “Duration” option.
- Go to the “Duration Setting” panel.
- Add the new duration timing.
Adjust Position, Rotate/Flip, and Opacity
- You can resize the image position through the circles and squares at the image edges.
- To flip or rotate the image, double-click on the picture. From the “Image Panel,” go to “Transform” and then click on “Rotate.” You can choose either “Horizontal Flip” or “Vertical Flip” to flip the images.
- Double-click on the image and click on the “Composting” option to add opacity. You can choose the blending mode or adjust the “Opacity” accordingly.
For Mac
Filmora for Mac comes with a drag and drop feature to add transitions, animated titles, and effects. You can start a new project from scratch by clicking on “New Project”. The entire process is the same as that for Windows users.
To apply animation in the images, use the motion effects option. For that,
- Click on the Image
- Go to Motion Tab
- Select a motion effect
- Double-click to apply the effect
Conclusion
So that’s how to animate photos in Canva. Hopefully, our steps will help you revamp your posts like a pro! If not Canva, you can use its alternative Filmora. It’s equally prominent, user-friendly, and feature-rich.
Versatile Video Editor - Wondershare Filmora
An easy yet powerful editor
Numerous effects to choose from
Detailed tutorials provided by the official channel
Best Tips for Effortless Unity 3D Animation
Top Tips for Effortless Unity 3D Animation
An easy yet powerful editor
Numerous effects to choose from
Detailed tutorials provided by the official channel
Unity 3D animation will be our topic in this article. This will help develop your knowledge of the animation systems in Unity.
Unity 3D character animation is an enlisted brand name of Unity Technologies and game creation. With its peculiar highlights, strong evaluating, and extraordinary abilities for computer games, it has stood out enough to be noticed by the game development community.
In this article
01 [What’s Unity 3D Animation and Why is It Popular?](#Part 1)
02 [How to Create Animations in Unity 3D?](#Part 2)
Part 1 What’s Unity 3D Animation and Why is It Popular?
Animation Unity 3D is the most popular and powerful tool to animate any animation you like.
● Unity provides a more creative iteration platform to realize your vision as fast as possible.
● Unity has broader integration. It works out of the box and creates a real-time workflow custom-made for a project.
● Unity supports a more comprehensive production to make it possible to render shorts, videos, and films to create in days instead of months.
● Unity has an intelligent decision-making feature to discover the errors while doing the process and make corrections soon before it is too late.
● Unity animation 3Dhas a high creation scale like building, reusing and integrating to create more new projects quickly.
● Unity delivers smooth collaboration, allowing the artist to share the project and see their changes immediately, reducing error and miscommunications.
01Do You Think You Know What Unity Animation Is?
Animation unity 3D is a very vast tool with many new things to learn. Everyone can know Unity with proper basics, training, and experiences. There are various tutorials by Unity and many other people sharing their knowledge through the internet.
02Is Unity Good for 3D Animation?
Unity is used chiefly for Unity 3D skeletal animations and complex 3D animations like videos and games. There would be a retouch of Unity when you notice any video games or animation videos. It contains excellent inbuilt coding like C# and JavaScript for scripting. Easy and quick importing for audio, video, and text format as a complete package.
Part 2 How to Create Animations in Unity 3D?
Unity 3D animation highlights incorporate animations, complete control of movements, the occasion of animation playback, refined state machine hierarchies, transitions, mix shapes for facial animations.
01Fix 1: How to Animate Characters in Unity 3D
This YouTube channel explains more about Unity 3D. He starts with an introduction about Unity, tools about Unity 3D character animation like animation controller, looping animation, root motion, and different modes in animation with Unity 3D.
He focuses on Unity 3D character animation fundamentals and lets us understand how and why it works.
02Fix 2: Creating Character Animation in Unity
This video is all about creating procedural character animations in unity by using unity 3D skeletal animation. An archery game is the concept of this youtube video. He focuses on the movement of the bow to the target with rigging techniques.
Unity 3D Character animation mainly focuses on the avatar. Some default avatars, or others, can be imported as files into Unity.
03Fix 3: How to animate in Unity 3D
In this Unity tutorial, you’ll figure out how to animate from top to bottom the whole way. It will cover every one of the basics you want to get everything rolling with activity in Unity 3D.
04Fix 4: Unity 3D Animation for Beginners
This channel teaches Unity animation 3D to beginners, starting with importing a cube into the field and oscillating it. A brief video of 6 minutes but covers most of the tools and ideas about Unity.
05Fix 5: The Animator Controller
This tutorial is from the official Unity themselves explaining about Unity 3D character animation controller. Animation controllers are tools that determine the animations currently being played and blended. Unity channel demonstrates how to make animation controllers and apply different animations to different states.
06Fix 6: Creating simple and easy Animation
This tutorial by Jimmy Vegas on creating simple and easy animation using Unity 3D animation is approximately 7 minutes which explains unity version 2018.3 but mainly applies to almost all the new versions. The tutorial talks about simple animations and controls that will be helpful to learn many tools in unity.
Are you still looking for some other better 3D animation software? If you want to have many controls of 3D animation videos here, we introduce Wondershare Filmora. You simply have to create a white keyframe to start making an animation. Filmora offers six different keyframes to perform smooth and natural animation. And also, tools like autocorrect and auto mixer bring the animation to the next level. Various tutorial videos available on YouTube and Wondershare Filmora Video Editor wesbite have posted different manuals to guide the users.
For Win 7 or later (64-bit)
For macOS 10.12 or later
This video explains how to make an animation video in Fimora with a step-by-step procedure for defining the tools clearly. A 16 minutes video explained every process in many other videos that teach Filmora better and more informative.
Key Takeaways from This Episode
● We learned that Unity animation 3D is a toolset that enhances physics, entertainment, audio, graphic, interaction, and networking and has fast integrated game development speeds. Excellent and easy 3D grounded platform and audio engine. The disadvantage of Unity is it does not provide any source code, and performance issues are hard to find. It fines additional cost for a mobile pro license for practical deployments.
● Although there are many software’s available in the animation market, only a few can be trusted. So, whenever there is confusion regarding which 3D animation software to use, you can blindly choose Filmora. It has a wide range of assistance like preset animation effects, interface access, multiple tracks to add various videos, and totally as a package make Filmora the best alternative to Unity 3D skeletal animation. Just a little practice and experience can make you perfect.
How to Create a Whiteboard Animation Video
Whiteboard animation simply refers to the process of story telling using pictures and drawn resources on a whiteboard or a plane white surface. Its simply the creation of conventional story telling procedure where text, images, diagrams, figures, etc are drawn onto a white surface.
Whiteboard animation video usually work with audio, visual and most times a combination of both audio and visual to sell a particular information to the audience. Another name it has gotten over time which you may come across while surfing the internet is doodle videos.

In creating this type of videos, script writes are usually employed because of the dynamics involved in creating them. The major users of whiteboard animation video are business owners and people in the education fields. Other people make use of it but these two groups are the major users.
Whiteboard animation is important because it helps viewers remember the contents of what they watched better than looking at an image that contains a lot of information that may not always be organized.
Over time, whiteboard videos have become a more compelling and innovative method of dissemination information. They work so well because it’s a more relatable and fun way of making videos. It goes outside the conventional video making techniques and employs the animation standards which is fun to watch, engaging and still maintains the ability to effective pass the required information to the viewers.
Also, it uses a unique style to mix text, animations, and colors to drive the point home. Viewers are usually glued to their screen while watching it. The usual white background equally makes the information being displayed to effective contrast with each other. However, there is a recent movement from the usual white background to any color of choice while still maintaining the contrasting quality of the videos.
Finally, people tend to remember events or information if they are told as stories. This is one of the major objectives of whiteboard animation videos. They use graphics and animations to tell stories, sell products and services while maintaining the fun in it.
Whiteboard animation video usually takes time to create. Its not always as easy as it may seem. It takes dedication and patience before you perfect the video. if you’re new to this, its ok to not have that perfect video immediately. What matters is your will to grow and get better.
Below is an example of a whiteboard animation video created using Animaker. We’ll still look at the various software applications used for creating whiteboard animation videos.
How to Create Your Video
Step1 The first step to creating your whiteboard animation video is to know your topic of choice. Determining your choice topic is based on the purpose of the video. You have to know the reason why the video is being created in the first place to enable you decide the contents, the outlook, the font style and size and the colors to use.
Step2 The next step after you’ve getting your topic is execution of the idea. This involves having a script which usually involves the step-by-step procedure you are to follow to achieve your goal. Writing the script is arguable the most difficult process. However, once you get it right, all the other processes become relatively easy to execute. You might need to employ a professional script writer depending on your budget for the project.
Step3 After that, the next thing is to deicide whether or not to use your own voice or computer voice. This is also called a voice over. Most software provides a text to speech voice over option which usually comes with various alternatives. There is also another option of using your own voice to finish the project.
Step4 Add text, graphics and animation. This step is usually easier when you are working with the script already provided. You include the text, animations, figures, etc. sometimes you might need to import additional resources to complete this task. However, not all software provides for this.
Step5 Organize your work. In organizing your work, you must ensure that you voice over matches properly with what is on display. Check your spellings, grammar, composition and other ‘little’ details that may give your work a bad look.
Step6 Save your work and export. Once your done with your work, you have to save it on your local disk. This also means downloading the work from the website or software onto a local disk. You can now share the video on any social media of your choice. The most popular place to share it is on YouTube which is the most widely used video watching application.
Top 3 Whiteboard Animation Software
When considering which software is best for whiteboard animation creation needs, the most important factor to have at the back of your mind is flexibility and cost. Some software are really flexible to use but cost more than many people can afford. Others are cheap to purchase but do not have all the necessary resources needed to make a great video.
We’ll be looking at various software that combines cost effectiveness and flexibility. Note however that this list is not exhaustive of the software that combines these two features but are worthy of mention for the purpose of this article.
Filmora
At the top of our list is Filmora . This does not make them the best. However, they are relatively easy to use and have a combination of the two features mentioned above. Finally on our list is Filmora. This software offers much more than just whiteboard animation. It’s your go-to software for your video creation and video editing needs. One of the best parts of this software is that it supports 2D and 3D animation.

Free Download For Win 7 or later(64-bit)
Free Download For macOS 10.14 or later
Animaker
It has a lot of free resources which are made available to users after creating and account with them and verifying your email. However, like most other software, the juicy parts of it are locked and can be unlocked with a monthly or yearly subscription. They are 3 packages; Basic which cost $10 per month and $120 per year, starter package which cost $19 per month and $228 per year and the pro package which costs $49 per month and $588 per year.

This software is at the top of our list because the free resources it provides is adequate to make a decent whiteboard animation. Note that it comes with their watermark which cannot be removed without a paid subscription.
Doodly
Doodly is one of the most popular software applications for creating whiteboard videos. Its popularity comes from the fact that no prior skills is needed to use the software other than basic computer and internet usage. A lot of processes are already automated for users. If you’re a user that is concerned about quick responses from their customer care/support, doodly covers you. They have a record time response to issues from their users. Visit https://www.doodly.com/pricing/ to view their pricing.

Conclusion
If you’re wondering why you should chose whiteboard animation over the conventional video creating technique, then you should probably try it out. Animation easily captures the interest of viewers and the slide-by-slide transitioning equally makes it better. You can always try out other software applications to know the one that fits you best.
How to Create Your Video
Step1 The first step to creating your whiteboard animation video is to know your topic of choice. Determining your choice topic is based on the purpose of the video. You have to know the reason why the video is being created in the first place to enable you decide the contents, the outlook, the font style and size and the colors to use.
Step2 The next step after you’ve getting your topic is execution of the idea. This involves having a script which usually involves the step-by-step procedure you are to follow to achieve your goal. Writing the script is arguable the most difficult process. However, once you get it right, all the other processes become relatively easy to execute. You might need to employ a professional script writer depending on your budget for the project.
Step3 After that, the next thing is to deicide whether or not to use your own voice or computer voice. This is also called a voice over. Most software provides a text to speech voice over option which usually comes with various alternatives. There is also another option of using your own voice to finish the project.
Step4 Add text, graphics and animation. This step is usually easier when you are working with the script already provided. You include the text, animations, figures, etc. sometimes you might need to import additional resources to complete this task. However, not all software provides for this.
Step5 Organize your work. In organizing your work, you must ensure that you voice over matches properly with what is on display. Check your spellings, grammar, composition and other ‘little’ details that may give your work a bad look.
Step6 Save your work and export. Once your done with your work, you have to save it on your local disk. This also means downloading the work from the website or software onto a local disk. You can now share the video on any social media of your choice. The most popular place to share it is on YouTube which is the most widely used video watching application.
Top 3 Whiteboard Animation Software
When considering which software is best for whiteboard animation creation needs, the most important factor to have at the back of your mind is flexibility and cost. Some software are really flexible to use but cost more than many people can afford. Others are cheap to purchase but do not have all the necessary resources needed to make a great video.
We’ll be looking at various software that combines cost effectiveness and flexibility. Note however that this list is not exhaustive of the software that combines these two features but are worthy of mention for the purpose of this article.
Filmora
At the top of our list is Filmora . This does not make them the best. However, they are relatively easy to use and have a combination of the two features mentioned above. Finally on our list is Filmora. This software offers much more than just whiteboard animation. It’s your go-to software for your video creation and video editing needs. One of the best parts of this software is that it supports 2D and 3D animation.
Free Download For Win 7 or later(64-bit)
Free Download For macOS 10.14 or later
Animaker
It has a lot of free resources which are made available to users after creating and account with them and verifying your email. However, like most other software, the juicy parts of it are locked and can be unlocked with a monthly or yearly subscription. They are 3 packages; Basic which cost $10 per month and $120 per year, starter package which cost $19 per month and $228 per year and the pro package which costs $49 per month and $588 per year.
This software is at the top of our list because the free resources it provides is adequate to make a decent whiteboard animation. Note that it comes with their watermark which cannot be removed without a paid subscription.
Doodly
Doodly is one of the most popular software applications for creating whiteboard videos. Its popularity comes from the fact that no prior skills is needed to use the software other than basic computer and internet usage. A lot of processes are already automated for users. If you’re a user that is concerned about quick responses from their customer care/support, doodly covers you. They have a record time response to issues from their users. Visit https://www.doodly.com/pricing/ to view their pricing.
Conclusion
If you’re wondering why you should chose whiteboard animation over the conventional video creating technique, then you should probably try it out. Animation easily captures the interest of viewers and the slide-by-slide transitioning equally makes it better. You can always try out other software applications to know the one that fits you best.
Uncensored Top 10 + Free Streaming Sites
Top 10 Banned Anime Around the World and Why

Shanoon Cox
Mar 27, 2024• Proven solutions
There is hardly a genre that anime hasn’t conquered. While anime is super entertaining and fun to watch, it can get quite crazy and questionable. Yes, anime is animated but the content is mature. From violence to incest and other controversial issues, anime can be offensive sometimes. Due to this, some countries have banned anime shows for its viewers – especially for younger audiences.
Want to find out what anime shows they are and why they are banned? Well, you are in the right spot. Today, we will talk about the top 10 banned anime shows and why they are banned. So, let’s find out!
![]()
A cross-platform for making videos anywhere for all creators

Why your video editing isn’t good enough? How about some creative inspo?
- 100 Million+ Users
- 150+ Countries and Regions
- 4 Million+ Social Media Followers
- 5 Million+ Stock Media for Use
* Secure Download

Part 1: Top 10 Banned Anime List
Here is a list of the 10 banned animes you should know about and why they are banned:
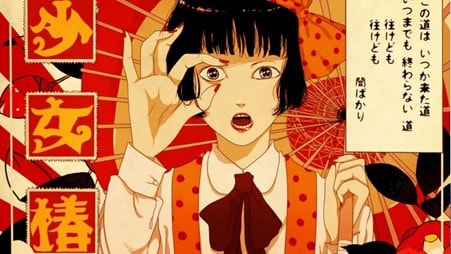
1. Shoujo Tsubaki (Banned Everywhere)
It has a very dark, depressing, and intense storyline and it is considered one of the most controversial anime movies ever. This is a 1992 anime film about a young girl whose mother dies. The girl meets a man who tells her he will help her if she ever needs anything. So, after her mother’s death, she goes to find the man and ends up at a circus where she gets abused and raped. Thus, Shoujo Tsubaki is about child sexual abuse with unbearable gore scenes. The horrific and disturbing visuals of this anime have left many viewers traumatized – so much so that the tapes of this film were also destroyed. Therefore, Shoujo Tsubaki is banned almost everywhere, including Japan itself.
2. Osomatsu-San (Banned in Japan)
Osomatsu-San is banned in Japan due to copyright issues. The series’ first episode had parodies of famous anime shows including Attack on Titan, Naruto, Sailor Moon, Dragon Ball Z, and more. Thus, due to copyright, the show’s first episode was removed from airing. It is still not available on mainstream anime websites. You can find the DVD version of the show, but even those do not have the first episode.

3. Excel Saga (Banned in Japan)
Excel Saga is based on a popular manga of the same name. It is about a secret ideological organization whose purpose is world domination. The entire Excel Saga is available to watch except for its last episode, called “Going Too Far” – very fitting indeed. It is even banned in its home country, Japan. The reason why this episode got banned is that it’s too long, violent, pornographic, and offensive. Fun fact: The Director of the show, Shinichi Watanabe, purposely got the last episode banned to make it daring and unforgettable. The last episode of Excel Saga is only available on DVD.

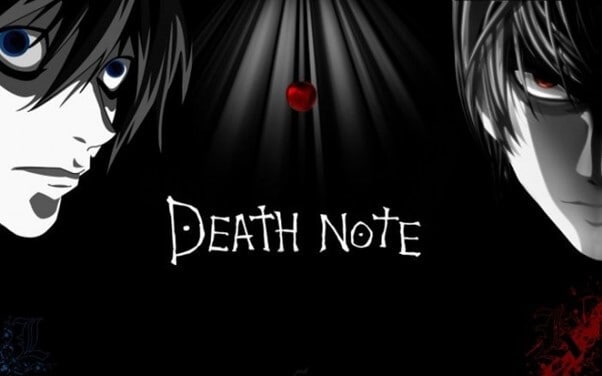
4. Death Note (Banned in China)
Death note is one of the most famous anime shows ever and while it’s gruesome, bloody and horrific, it is easily available on mainstream platforms, including Netflix. However, there is still a country that did not appreciate the dark premise of this show. Death Note is banned in China due to its theme. The show is about death, justice, murder and violence so it is considered as a corrupting influence on kids.
5. Attack on Titan (Banned in China)
Another cult-favorite anime on the lists is Attack on Titan. Due to its bloody, disgusting and disturbing visuals, it has been banned in China. While millions of viewers love this anime, China thinks this show portrays a lot of excessive violence which is very unhealthy for the younger audience. With that being said, if you are 18 and above, do not miss out on Attack on Titan. It is truly one of the best anime out there!

6. High School DxD (Banned in New Zealand)
With very high viewer ratings, it’s a bit of shock to see this show on the list. High School DxD follows the story of Issei Hyodo, a perverted high school kid who is killed on his very first date. But he gets reincarnated by Rias Gremory as a demon. Now, how come a show about angles and demons gets banned? Well, the premise of the show focuses on corrupt high school kids with a perverted mindset. This show is very sexual and shows a lot of nudity in certain scenes. This is why New Zealand has banned High School DxD for its sexual, harem themes based around high school kids.

7. Puni Puny Poemy (Banned in New Zealand)
Puni Puny Poemy sounds super cute and childish but don’t let the name fool you. Puni Puny Poemy is a spin-off inspired by Excel Saga – no wonder is it banned. This anime has a lot of sexual content surrounding very young characters. The nudity, explicit sexual scenes and harem inspired content is what makes this show so questionable. Thus, it is banned in New Zealand for being overly vulgar and sexual for young viewers. The show does not have a high viewership such as popular titles like Death Note or Attack on Titan, so many countries ignored it.
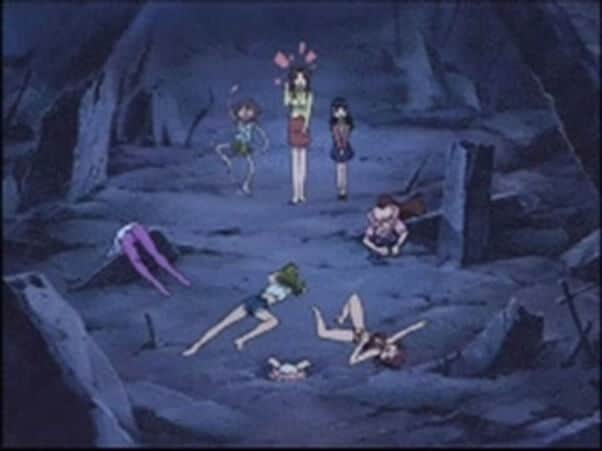
8. Hetalia: Axis Powers (Banned in South Korea)
Every character in this show represents a country and the role they played in World War II. Even though it is a comedy anime, it offended a few countries. South Korea actually banned the show on the grounds of “offensive stereotypes” and was called a “national crime” by the country. Hetalia: Axis Powers continued to air, the character and all the references to South Korea were completely removed due to backlash. The censored version of this anime is still available in some parts of the country.

9. Pokémon (Banned in Saudi Arabia)
Pokemon banned? Pokemon is perhaps THE most famous and innocent anime ever. It’s kid friendly and super clean. So, why is a show about Satoshi and his pocket monster banned? The religious authorities of Saudi Arabia declared that Pokemon promotes gambling and Jewish sentiments. Since then, there have been many conspiracy theories revolving around the show claiming it to be a Zionist conspiracy. Thus, it is banned in Saudi Arabia. Crazy right?
10. Kite (Banned in Norway)
Kite follows the story of a girl who uses bullets to kill people and make them explode. Now, you must be thinking that the violent nature of the show got it banned in Norway. Nope! not the case. Kite is banned in Norway due to a very graphic sexual assault scene on a minor. Norway has very strict laws against child pornography, thus the entire anime got banned. Similarly, the United States also censored and removed certain parts of the movie but it is not banned there.
Part 2: Where to Watch Anime Online for Free
If you live in any of the countries mentioned in the list above and want to watch the anime banned by your country, we have got you covered. Here are top 5 websites where you can watch anime online for free:
1. Crunchyroll
Crunchyroll has a wide range of anime shows and movies. This streaming service is available in different countries including the USA, UK, Canada, Australia and some Asian countries. From old anime shows to all the latest ones, you will find everything here. It allows you to watch and share anime on social media. It is also available in different languages with subtitles and dubbing. Crunchyroll also offers a premium version for an ad-free experience. The premium version also has a popular manga.
2. 9anime
9anime is a dedicated website for anime. It allows you to watch different types of animated content. From action, drama, and thriller to comedy, you can watch any anime show here. This website gives you access to all the popular anime shows, movies, and OVA (Original Video Animation). It is available across multiple countries including Canada, United States, United Kingdom, Australia, Netherlands, and some Asian countries. If it is not available in your country of origin, you can also access this website on a VPN.
3. 123anime
This is a great alternative to 9anime. This website is a free platform to watch anime online for free in HD quality. It is also mobile-friendly and loads video without buffering. You can watch all the famous anime shows and movies on 123anime such as Pokemon, One Piece, Death Note, Dragon Ball Z, Naruto, and more. It also allows you to download anime for free.
4. VIZ
VIZ is one of the most popular choices for manga and anime. From publishing, to animation and to entertainment licensing, VIZ handles it all. It offers all popular manga as well as all the latest anime series. From classic cult favorites to latest hits, VIZ has the best collection of anime shows and movies. You can save your favorite show on the website and create your own library to binge watch anime shows. All the shows also come with English subtitles.
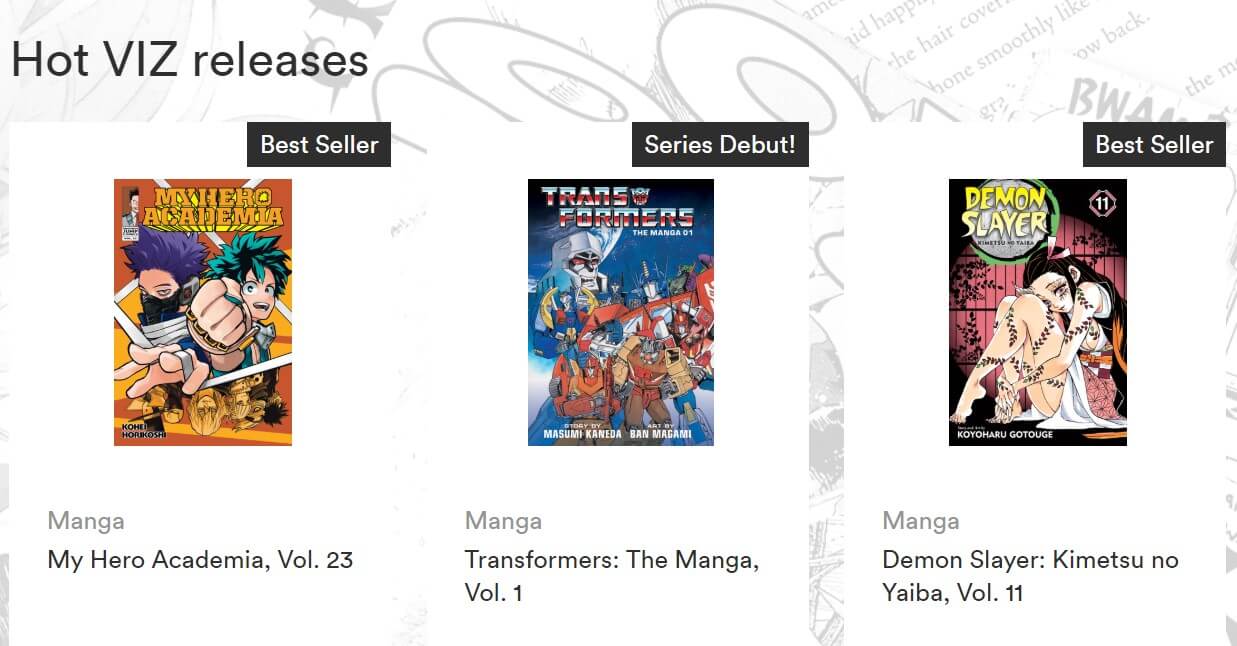
5. Animelab
AnimeLab is a website that offers a huge collection of all the popular anime. Plus, all the videos here are dubbed and subtitled. It also allows you to watch all the latest shows and releases as soon as they are aired. From action, thriller, adventure and horror to drama and comedy, you can watch all types of anime here. It is also compatible with all android and iPhone devices. AnimeLab is available in only two countries currently i.e., New Zealand and Australia. You can use VPN to watch in any other country.
While anime has entertained fans over the years, there are some anime shows that are very disturbing and offensive. They can toy with the psychology of the viewer and are often too inappropriate to handle. Such anime can be violent, sexual or gruesome. This is why some anime are banned in certain countries due to local laws, censorship, and copyright issues. In this article, we listed down top 10 banned anime shows and why they are banned. If you want to watch anime, especially banned anime, do check out the websites mentioned above. You will find all the anime shows you are looking for!
Shanoon Cox
Shanoon Cox is a writer and a lover of all things video.
Follow @Shanoon Cox
Shanoon Cox
Mar 27, 2024• Proven solutions
There is hardly a genre that anime hasn’t conquered. While anime is super entertaining and fun to watch, it can get quite crazy and questionable. Yes, anime is animated but the content is mature. From violence to incest and other controversial issues, anime can be offensive sometimes. Due to this, some countries have banned anime shows for its viewers – especially for younger audiences.
Want to find out what anime shows they are and why they are banned? Well, you are in the right spot. Today, we will talk about the top 10 banned anime shows and why they are banned. So, let’s find out!
![]()
A cross-platform for making videos anywhere for all creators
Why your video editing isn’t good enough? How about some creative inspo?
- 100 Million+ Users
- 150+ Countries and Regions
- 4 Million+ Social Media Followers
- 5 Million+ Stock Media for Use
* Secure Download
Part 1: Top 10 Banned Anime List
Here is a list of the 10 banned animes you should know about and why they are banned:
1. Shoujo Tsubaki (Banned Everywhere)
It has a very dark, depressing, and intense storyline and it is considered one of the most controversial anime movies ever. This is a 1992 anime film about a young girl whose mother dies. The girl meets a man who tells her he will help her if she ever needs anything. So, after her mother’s death, she goes to find the man and ends up at a circus where she gets abused and raped. Thus, Shoujo Tsubaki is about child sexual abuse with unbearable gore scenes. The horrific and disturbing visuals of this anime have left many viewers traumatized – so much so that the tapes of this film were also destroyed. Therefore, Shoujo Tsubaki is banned almost everywhere, including Japan itself.
2. Osomatsu-San (Banned in Japan)
Osomatsu-San is banned in Japan due to copyright issues. The series’ first episode had parodies of famous anime shows including Attack on Titan, Naruto, Sailor Moon, Dragon Ball Z, and more. Thus, due to copyright, the show’s first episode was removed from airing. It is still not available on mainstream anime websites. You can find the DVD version of the show, but even those do not have the first episode.
3. Excel Saga (Banned in Japan)
Excel Saga is based on a popular manga of the same name. It is about a secret ideological organization whose purpose is world domination. The entire Excel Saga is available to watch except for its last episode, called “Going Too Far” – very fitting indeed. It is even banned in its home country, Japan. The reason why this episode got banned is that it’s too long, violent, pornographic, and offensive. Fun fact: The Director of the show, Shinichi Watanabe, purposely got the last episode banned to make it daring and unforgettable. The last episode of Excel Saga is only available on DVD.
4. Death Note (Banned in China)
Death note is one of the most famous anime shows ever and while it’s gruesome, bloody and horrific, it is easily available on mainstream platforms, including Netflix. However, there is still a country that did not appreciate the dark premise of this show. Death Note is banned in China due to its theme. The show is about death, justice, murder and violence so it is considered as a corrupting influence on kids.
5. Attack on Titan (Banned in China)
Another cult-favorite anime on the lists is Attack on Titan. Due to its bloody, disgusting and disturbing visuals, it has been banned in China. While millions of viewers love this anime, China thinks this show portrays a lot of excessive violence which is very unhealthy for the younger audience. With that being said, if you are 18 and above, do not miss out on Attack on Titan. It is truly one of the best anime out there!
6. High School DxD (Banned in New Zealand)
With very high viewer ratings, it’s a bit of shock to see this show on the list. High School DxD follows the story of Issei Hyodo, a perverted high school kid who is killed on his very first date. But he gets reincarnated by Rias Gremory as a demon. Now, how come a show about angles and demons gets banned? Well, the premise of the show focuses on corrupt high school kids with a perverted mindset. This show is very sexual and shows a lot of nudity in certain scenes. This is why New Zealand has banned High School DxD for its sexual, harem themes based around high school kids.
7. Puni Puny Poemy (Banned in New Zealand)
Puni Puny Poemy sounds super cute and childish but don’t let the name fool you. Puni Puny Poemy is a spin-off inspired by Excel Saga – no wonder is it banned. This anime has a lot of sexual content surrounding very young characters. The nudity, explicit sexual scenes and harem inspired content is what makes this show so questionable. Thus, it is banned in New Zealand for being overly vulgar and sexual for young viewers. The show does not have a high viewership such as popular titles like Death Note or Attack on Titan, so many countries ignored it.
8. Hetalia: Axis Powers (Banned in South Korea)
Every character in this show represents a country and the role they played in World War II. Even though it is a comedy anime, it offended a few countries. South Korea actually banned the show on the grounds of “offensive stereotypes” and was called a “national crime” by the country. Hetalia: Axis Powers continued to air, the character and all the references to South Korea were completely removed due to backlash. The censored version of this anime is still available in some parts of the country.
9. Pokémon (Banned in Saudi Arabia)
Pokemon banned? Pokemon is perhaps THE most famous and innocent anime ever. It’s kid friendly and super clean. So, why is a show about Satoshi and his pocket monster banned? The religious authorities of Saudi Arabia declared that Pokemon promotes gambling and Jewish sentiments. Since then, there have been many conspiracy theories revolving around the show claiming it to be a Zionist conspiracy. Thus, it is banned in Saudi Arabia. Crazy right?
10. Kite (Banned in Norway)
Kite follows the story of a girl who uses bullets to kill people and make them explode. Now, you must be thinking that the violent nature of the show got it banned in Norway. Nope! not the case. Kite is banned in Norway due to a very graphic sexual assault scene on a minor. Norway has very strict laws against child pornography, thus the entire anime got banned. Similarly, the United States also censored and removed certain parts of the movie but it is not banned there.
Part 2: Where to Watch Anime Online for Free
If you live in any of the countries mentioned in the list above and want to watch the anime banned by your country, we have got you covered. Here are top 5 websites where you can watch anime online for free:
1. Crunchyroll
Crunchyroll has a wide range of anime shows and movies. This streaming service is available in different countries including the USA, UK, Canada, Australia and some Asian countries. From old anime shows to all the latest ones, you will find everything here. It allows you to watch and share anime on social media. It is also available in different languages with subtitles and dubbing. Crunchyroll also offers a premium version for an ad-free experience. The premium version also has a popular manga.
2. 9anime
9anime is a dedicated website for anime. It allows you to watch different types of animated content. From action, drama, and thriller to comedy, you can watch any anime show here. This website gives you access to all the popular anime shows, movies, and OVA (Original Video Animation). It is available across multiple countries including Canada, United States, United Kingdom, Australia, Netherlands, and some Asian countries. If it is not available in your country of origin, you can also access this website on a VPN.
3. 123anime
This is a great alternative to 9anime. This website is a free platform to watch anime online for free in HD quality. It is also mobile-friendly and loads video without buffering. You can watch all the famous anime shows and movies on 123anime such as Pokemon, One Piece, Death Note, Dragon Ball Z, Naruto, and more. It also allows you to download anime for free.
4. VIZ
VIZ is one of the most popular choices for manga and anime. From publishing, to animation and to entertainment licensing, VIZ handles it all. It offers all popular manga as well as all the latest anime series. From classic cult favorites to latest hits, VIZ has the best collection of anime shows and movies. You can save your favorite show on the website and create your own library to binge watch anime shows. All the shows also come with English subtitles.
5. Animelab
AnimeLab is a website that offers a huge collection of all the popular anime. Plus, all the videos here are dubbed and subtitled. It also allows you to watch all the latest shows and releases as soon as they are aired. From action, thriller, adventure and horror to drama and comedy, you can watch all types of anime here. It is also compatible with all android and iPhone devices. AnimeLab is available in only two countries currently i.e., New Zealand and Australia. You can use VPN to watch in any other country.
While anime has entertained fans over the years, there are some anime shows that are very disturbing and offensive. They can toy with the psychology of the viewer and are often too inappropriate to handle. Such anime can be violent, sexual or gruesome. This is why some anime are banned in certain countries due to local laws, censorship, and copyright issues. In this article, we listed down top 10 banned anime shows and why they are banned. If you want to watch anime, especially banned anime, do check out the websites mentioned above. You will find all the anime shows you are looking for!
Shanoon Cox
Shanoon Cox is a writer and a lover of all things video.
Follow @Shanoon Cox
How To Make Pinterest Slideshow in Simple Ways
How to Make Pinterest Slideshow in Simple Ways
An easy yet powerful editor
Numerous effects to choose from
Detailed tutorials provided by the official channel
Slideshows are a collection of images arranged together that an audience can quickly swipe through to view the content. Pinterest is known for its one-pin to one post feature. You cannot post more than one image or video in a pin.
Thus, business people could start sharing all of the images or products, services, or articles mostly because it can be stressful to do that. But with the Pinterest slideshow, you can now upload all the images you want to at once in one pin. Moreso, even have people view the pins simultaneously just by swiping through.
In this article
01 [How to display Pinterest’s latest pins in a slideshow?](#Part 1)
02 [How to upload multiple photos to Pinterest?](#Part 2)
03 [How to display Pinterest’s latest pins in a slideshow?](#Part 3)
Part 1 How to Display Pinterest Latest Pins in A Slideshow
Using Pinterest’s latest pins in a slideshow is another way to display the latest pins from any Pinterest user or blogger’s blog. Each image is linked to its pin page on Pinterest instead of the board or profile page if you use the Pinterest profile or board widget.
To install this widget, you need the user or board’s RSS feed URL, then use it as the input for a blogger slide show gadget.
Here are the tricky steps to follow for the Pinterest slide show;
Step 1: Constructing Pinterest RSS feed URL
The Pinterest RSS feed URL of a user is different from aboard.
● It would be the user’s profile URL + feed/RSS for a user. To get your Profile URL, click on your username in the top right corner of your screen, and you will see a URL in your web browser’s URL. That is your profile URL.
● For the board URL, you will get that after clicking on the board from the homepage. The URL would appear on your browser’s URL bar.

Step 2: Reformatting the feed for the slideshow gadget:
The RSS feed from step one is not very compatible with the blogger slideshow gadget. It accepts RSS feed in Media RSS format, but you can convert with Yahoo pipe. Simply plug in your feed URL in the Yahoo pipe URL.
You have to replace the value of the feed URL with the feed URL you got in step one and the pin count with the number of pins displayed on the slide show.
With this, you have successfully converted your feed URL to the media version of the Pinterest feed.
Step 3: Add the slideshow widget
Take the following step to add the slideshow widget.
Go to Dashboard > Layout and click on ‘Add A Gadget.’
Now Add, A Gadget window, scroll down and select Slideshow.

Under Source, select Other.

Put in the converted Pinterest RSS feed URL from step 2 into the Feed URL text box.
Click Save and view your blog.
Part 2 How to Upload Multiple Photos to Pinterest
If you want to display multiple photos of your product or share your brand story with pictures, then this is a feature you will grab. Pinterest allows you to display various products at a time. But first, you must also have a business account to do this.
When you upload multiple photos on Pinterest, they are known as carousel pins. This feature is a great advertising tool and will help you during the Pinterest slideshow.
This is because people would see your carousel on their home feed just like any other pin you have posted. They may also tap on the carousel and swipe through the different photos on the carousel. When the pinner saves it, they have kept the entire image.
Here is a step-by-step method to upload multiple photos to Pinterest.
Step 1: Log into your Pinterest
First, log into your Pinterest business account to access the feature. If you do not have a business account, it is elementary to do so. There is no need for you to enter any billing information if you are wondering about that. It is a straightforward process. Just open your account, click on the drop-down menu near your profile picture, see ‘convert to business,’ then upgrade your account, and you are good to go.
You should also ensure that the photos you want to upload are on your computer. If you have originally planned to use it to explain an article visually, then make sure the particular image that represents that article is correctly saved on your computer. The images should be 1:1 or 2:3 in ratio, and the format either ‘png’ or ‘jpeg.’
Add your pictures and upload. If you want to reorder your pin, you can replace or remove images within the carousel.

Step 2: Add Title
Add a title, description, and website of the carousel pin. Your title will be a snippet of what the blog post or article will be about or the recipe’s title. Your description should be the same as your Pinterest text, and you can also choose to let it appear only on your first image on your carousel pin.
Step 3: Select a Board
The last step is to select a board relevant to your carousel pin. Thus, you have your carousel pin and images. However, you cannot view this immediately as in a standard pin or video pin. But you can go back to your board to view your pin when it is ready.
Part 3 How to Make Pinterest Slideshow In 5 Simple Ways
Slideshows are a beautiful way to enhance your Pinterest account and generate more leads on your Profile. If you’ve been wondering if and how you can make slideshows on Pinterest, here’s a guaranteed step you can follow. But then Pinterest slideshows are instead referred to as a showcase.
However, to access this feature, you must first own a business account on Pinterest.
Here are five (5) simple ways you can make Slideshow on Pinterest:
Step 1: Go to your Pinterest Profile
Click settings next to your profile photo in the top right corner.

Step 2: Select Profile
When the Settings window appears, select Profile.

Step 3: Click Edit
Next to Featured Boards, click Edit.

Step 4: Select Boards
After clicking Edit for your Featured Boards, you’ll reach a screen where you may edit the boards you want to highlight. Select which boards you’d like to feature by clicking on each drop-down menu.
Opening a new Pinterest page is a good idea. Scroll down to Boards with the most Pin impressions under Analytics>Profile. These are the boards that I highlighted.

Step 5: Save
When you’ve decided which boards to include in your Featured, click Save.
● Bonus – Wondershare Filmora
With this feature, you can also tweak your Pinterest slides and make them look professional and befitting to your audience using Wondershare Filmora Video Editor .
For Win 7 or later (64-bit)
For macOS 10.12 or later
Wondershare Filmora is an online video editing software with several unique features, including split-screen, freeze-frame, loop images, and videos to help you create top-notch visual content for your brand. With features like the Chroma key, you can easily create special effects in your Pinterest slideshow background.
You can also use color match and video effects to enhance the quality of the slide.
● Ending Thoughts →
● Making a Pinterest slideshow can be confusing if you do not have the correct information. But if you do, it’ll be a great way to spice up your social media content and create more leads for your business.
● Pinterest is a social media platform that keeps growing and adding more features by the day. It is also increasing the number of users per day. Try out the simple steps stated on how to make a slideshow on Pinterest. Finally, by incorporating Filmora in your levelling up plans, you will be able to bring your brand in front of your target customer and present it nicely.
Slideshows are a collection of images arranged together that an audience can quickly swipe through to view the content. Pinterest is known for its one-pin to one post feature. You cannot post more than one image or video in a pin.
Thus, business people could start sharing all of the images or products, services, or articles mostly because it can be stressful to do that. But with the Pinterest slideshow, you can now upload all the images you want to at once in one pin. Moreso, even have people view the pins simultaneously just by swiping through.
In this article
01 [How to display Pinterest’s latest pins in a slideshow?](#Part 1)
02 [How to upload multiple photos to Pinterest?](#Part 2)
03 [How to display Pinterest’s latest pins in a slideshow?](#Part 3)
Part 1 How to Display Pinterest Latest Pins in A Slideshow
Using Pinterest’s latest pins in a slideshow is another way to display the latest pins from any Pinterest user or blogger’s blog. Each image is linked to its pin page on Pinterest instead of the board or profile page if you use the Pinterest profile or board widget.
To install this widget, you need the user or board’s RSS feed URL, then use it as the input for a blogger slide show gadget.
Here are the tricky steps to follow for the Pinterest slide show;
Step 1: Constructing Pinterest RSS feed URL
The Pinterest RSS feed URL of a user is different from aboard.
● It would be the user’s profile URL + feed/RSS for a user. To get your Profile URL, click on your username in the top right corner of your screen, and you will see a URL in your web browser’s URL. That is your profile URL.
● For the board URL, you will get that after clicking on the board from the homepage. The URL would appear on your browser’s URL bar.
Step 2: Reformatting the feed for the slideshow gadget:
The RSS feed from step one is not very compatible with the blogger slideshow gadget. It accepts RSS feed in Media RSS format, but you can convert with Yahoo pipe. Simply plug in your feed URL in the Yahoo pipe URL.
You have to replace the value of the feed URL with the feed URL you got in step one and the pin count with the number of pins displayed on the slide show.
With this, you have successfully converted your feed URL to the media version of the Pinterest feed.
Step 3: Add the slideshow widget
Take the following step to add the slideshow widget.
Go to Dashboard > Layout and click on ‘Add A Gadget.’
Now Add, A Gadget window, scroll down and select Slideshow.
Under Source, select Other.
Put in the converted Pinterest RSS feed URL from step 2 into the Feed URL text box.
Click Save and view your blog.
Part 2 How to Upload Multiple Photos to Pinterest
If you want to display multiple photos of your product or share your brand story with pictures, then this is a feature you will grab. Pinterest allows you to display various products at a time. But first, you must also have a business account to do this.
When you upload multiple photos on Pinterest, they are known as carousel pins. This feature is a great advertising tool and will help you during the Pinterest slideshow.
This is because people would see your carousel on their home feed just like any other pin you have posted. They may also tap on the carousel and swipe through the different photos on the carousel. When the pinner saves it, they have kept the entire image.
Here is a step-by-step method to upload multiple photos to Pinterest.
Step 1: Log into your Pinterest
First, log into your Pinterest business account to access the feature. If you do not have a business account, it is elementary to do so. There is no need for you to enter any billing information if you are wondering about that. It is a straightforward process. Just open your account, click on the drop-down menu near your profile picture, see ‘convert to business,’ then upgrade your account, and you are good to go.
You should also ensure that the photos you want to upload are on your computer. If you have originally planned to use it to explain an article visually, then make sure the particular image that represents that article is correctly saved on your computer. The images should be 1:1 or 2:3 in ratio, and the format either ‘png’ or ‘jpeg.’
Add your pictures and upload. If you want to reorder your pin, you can replace or remove images within the carousel.
Step 2: Add Title
Add a title, description, and website of the carousel pin. Your title will be a snippet of what the blog post or article will be about or the recipe’s title. Your description should be the same as your Pinterest text, and you can also choose to let it appear only on your first image on your carousel pin.
Step 3: Select a Board
The last step is to select a board relevant to your carousel pin. Thus, you have your carousel pin and images. However, you cannot view this immediately as in a standard pin or video pin. But you can go back to your board to view your pin when it is ready.
Part 3 How to Make Pinterest Slideshow In 5 Simple Ways
Slideshows are a beautiful way to enhance your Pinterest account and generate more leads on your Profile. If you’ve been wondering if and how you can make slideshows on Pinterest, here’s a guaranteed step you can follow. But then Pinterest slideshows are instead referred to as a showcase.
However, to access this feature, you must first own a business account on Pinterest.
Here are five (5) simple ways you can make Slideshow on Pinterest:
Step 1: Go to your Pinterest Profile
Click settings next to your profile photo in the top right corner.
Step 2: Select Profile
When the Settings window appears, select Profile.
Step 3: Click Edit
Next to Featured Boards, click Edit.
Step 4: Select Boards
After clicking Edit for your Featured Boards, you’ll reach a screen where you may edit the boards you want to highlight. Select which boards you’d like to feature by clicking on each drop-down menu.
Opening a new Pinterest page is a good idea. Scroll down to Boards with the most Pin impressions under Analytics>Profile. These are the boards that I highlighted.
Step 5: Save
When you’ve decided which boards to include in your Featured, click Save.
● Bonus – Wondershare Filmora
With this feature, you can also tweak your Pinterest slides and make them look professional and befitting to your audience using Wondershare Filmora Video Editor .
For Win 7 or later (64-bit)
For macOS 10.12 or later
Wondershare Filmora is an online video editing software with several unique features, including split-screen, freeze-frame, loop images, and videos to help you create top-notch visual content for your brand. With features like the Chroma key, you can easily create special effects in your Pinterest slideshow background.
You can also use color match and video effects to enhance the quality of the slide.
● Ending Thoughts →
● Making a Pinterest slideshow can be confusing if you do not have the correct information. But if you do, it’ll be a great way to spice up your social media content and create more leads for your business.
● Pinterest is a social media platform that keeps growing and adding more features by the day. It is also increasing the number of users per day. Try out the simple steps stated on how to make a slideshow on Pinterest. Finally, by incorporating Filmora in your levelling up plans, you will be able to bring your brand in front of your target customer and present it nicely.
How to Make a Video a Live Photo
How to Make a Video a Live Photo [2022]
An easy yet powerful editor
Numerous effects to choose from
Detailed tutorials provided by the official channel
Looking forward to turn your videos into live photos? Stay tuned to know how!
In this article
01 [How to Save Live Photos as a Video on iPhone/Ipad/Ipod](#Part 1)
02 [How to Turn a Video Into a Live Photo on iOS/Android](#Part 2)
Part 1 How to Save Live Photos as a Video on iPhone/Ipad/Ipod
Live photos are an amazing utility that allow you to save images as short moving snaps. Creating live photos is among the latest spunk of trendsetter stories, whether shared on social media platforms or created and saved just for fun, these definitely sound and look exciting, but that’s just one among the many things you can experiment on live photos.
Creating live photos takes you to a world of exciting features where you can explore your creativity in a number of ways, one of the easiest being turning live photos to videos. This comes handy when you need to share your live photos on platforms that do not have the compatibility to run live photos. If you are an iPhone user and wish to try your hands on experimenting with live photos, see through the following section of this article to learn how to turn live photo into video:
01Save as Video
Step 1: Launch the Photos App
In your iPhone, launch the ‘Photos’ app and navigate to ‘Albums’. All your live photos are present in the ‘Live Photos’ album.
Step 2: Format Selection
In latest versions (iOS 13v and above), you get a direct ‘Save as Video’ option in the ‘Photos’ application. Just click on that, and your live photo will be instantly saved in your iPhone gallery as a video. Here’s how you can use this feature:
● In the ‘Photos’ application, go to the ‘Live Photos’ album to select and open a desired live photo that you wish to convert to a video.
● Click on the ‘Share’ icon.

● Select ‘Save as Video’ from the drop down menu that displays sharing options.

Your created video will be saved in the ‘Photos’ application, next to the live photo you chose to turn into a video.
02iOS Shortcuts
This is a quicker way to save your live photos as videos in your iPhone. To use this feature, you first need to save the ‘Convert LivePhotos to Video’ shortcut in the ‘Shortcuts App’ gallery of your iPhone. You can do this by opening in your iOS internet browser.
Before using the above link, make sure to enable the ‘Allow Untrusted Shortcuts’ feature in your iPhone settings. You can do this as explained below:
● Reach to the ‘Settings’ application of your iPhone.
● Tap on ‘Shortcuts’ from the app’s welcome screen.
● Enable ‘Allow Untrusted Shortcuts’ with a toggle.

Having done that, here’s what you need to follow:
● Open the ‘Shortcuts’ application in your iOS device and tap the ‘Convert LivePhotos to Video’ shortcut.

● The ‘Live Photos’ album of your device opens up. Make a desired selection.

Your converted video gets automatically saved in the ‘Camera Roll’ folder of the ‘Photos’ application. Open the ‘Recents’ album to view your creation.
Part 2 How to Turn a Video Into a Live Photo on iOS/Android
Converting live photos to videos is fine, but going the other way round is all the more exciting and fun! You can even use these converted live photos as live screen wallpapers for your iOS and Android devices. If you are motivated to take up the excitement, look through the following methods to turn video into live photo:
01iOS Devices
Being an iOS user, you can choose among the following tools to convert video to live photo in your iPad, iPod or iPhone:
● Wondershare Filmora
Wondershare Filmora Video Editor is currently leading the software market among converter utilities that cater to various media conversion needs. This one is a free, smart, quick and convenient conversion tool that assures you of a hassle free video to live photo conversion in just a few clicks. What’s more interesting is, you don’t need to limit yourself with sticking to some particular video format, as Filmora conveniently supports almost all common ones.
Wondershare Filmora
Get started easily with Filmora’s powerful performance, intuitive interface, and countless effects Try It Free Try It Free Learn More >
● IntoLive
This one is a third party application that allows you to convert videos into live photos, quickly and conveniently. This tool works well with devices having iOS 12.0 and later versions. All you have to do is follow the steps mentioned below:
Step 1:
Download the ‘IntoLive’ application from the Apple App Store.

Step 2:
Launch the same on your iOS device and grant the permission to access its ‘Photos’ Album.

Step 3:
In the ‘Videos’ section, choose the desired video that you wish to turn into a live photo.

Step 4:
An editor window will open up. Here, you can edit (cut, crop, trim, etc.) and add desired effects or filters to your selected video. Click on ‘Make’ at the top right when you finish the editing process.

Step 5:
If you have the paid version of the app, you can take up multiple repeats of your live photo; else you can use the free version with no repeats.

Step 6:
Once you are satisfied with the result, click on ‘Save Live Photo’. This will save your created live photo in your device’s gallery.

02VideoToLive
This is a free converter you can choose to turn video into live photo. This is a quite popular tool among iPhone users worldwide and is suitable for iOS versions 11.2 and later. You also have the liberty to share your created live photos on social media with this converter. Take the following steps to begin the conversion process:

Step 1:
Download the application from the Apple App Store and launch it on your iOS device.
Step 2:
Choose a video from your device gallery to convert it into a live photo.
Step 3:
In the video editor screen, crop the video to the preferred section that has to be converted into live photo. You can add video frames to your edited clip from the upper section of the editor screen.
Step 4:
Click on ‘Convert’ at the top right corner to initiate the conversion process.
03Android Devices
Live photos are undoubtedly known to add spark to your cherished moments, but the notch that puts these off with Android devices is that you can enjoy live photos on these devices only as live wallpapers.
Being an iPhone exclusive utility, Android devices lack the flexibility to capture live images. However, you can see them move on being set as live screen wallpapers. A handy alternative to this is converting a turn video into live photo and use it as live wallpaper. Here’s how you can take up the conversion process:
● TurnLive- Live Wallpaper
This one is a convenient, third party tool that lets you turn video into live photo in just a few quick steps. You can either use this application for free, or upgrade to the paid version to enjoy its premium features. To make amazing live photos from videos using this tool, you need to take up the steps given below:

Step 1: App Installation
To begin, visit the Google Playstore in your Android device and download the TurnLive- Live Wallpaper application. Next, you need install and launch the app in your device and accept its terms of service.
Step 2: Select a Video
Once you are done, click on the ‘Live Photo’ icon in the bottom of the app’s opening screen to reach the video selection page. Here, you need to choose ‘Video to Live Wallpaper’ option and grant the required app permissions to access your device’s camera and gallery. Select a desired video from the ones saved in your device and click ‘Done’ at the top right.
Step 3: Edit Your Video
You will now get directed to the app’s editor window, where you need to trim the selected video within a time frame of 1-5 seconds. To do this, select a cover frame within the clip and click ‘Next’. You can now use the video slider at the bottom to trim the clip. Adding suitable video effects and filters is also possible with this tool.
Step 4: It’s Almost Done!
When you finish editing, click ‘Next’ and choose the number of repeats for the created live photo. Wait for the conversion to finish and click on ‘My Wallpapers’ to view your creation.
Step 5: Download Your Live Photo!
Click ‘Download’ and tap ‘Clear’ in the app’s prompt message to remove your device’s current screen wallpaper. Next, allow the app to access your system settings. Once this finishes, tap ‘Clear’ again to download your creation. You will now get directed to a black screen tagged ‘DayTime LWP’. Click on ‘Set Wallpaper’ in this screen to make your live photo, the current wallpaper of your Android device.
● Video Live Wallpaper
This is another free app that you can use to your videos into amazing live photos in just 4 quick steps. All you need to do is explained in the following steps:
Step 1: download the Application
Download the Video Live Wallpaper application in your Android device from Google Playstore and proceed for its installation and launch.

Step 2: Select Your Video
In the app’s opening screen, click ‘Choose Video’ and grant app permissions to access your device’s media. Browse your video gallery to select a desired video that you wish to convert into a live photo.

Step 3: Edit Your Video
You will now get directed to the app’s editor screen. Here, you can explore your editing creativity to edit the selected video. Once you are happy, click the picture icon at the top right corner.

Step 4: Your Live Wallpaper is Ready!
To set the created live photo as your device screen wallpaper, select ‘Set as Wallpaper’ at the bottom right.

● Key Takeaways from This Episode →
● From cherishing moments to sharing them on social media, live photos can do it all.
● Being an iPhone exclusive utility, you need to create these from videos to enjoy them on other platforms and devices.
● Filmora is the best video to live photo converters, available as an easy, quick and convenient conversion tool.
Looking forward to turn your videos into live photos? Stay tuned to know how!
In this article
01 [How to Save Live Photos as a Video on iPhone/Ipad/Ipod](#Part 1)
02 [How to Turn a Video Into a Live Photo on iOS/Android](#Part 2)
Part 1 How to Save Live Photos as a Video on iPhone/Ipad/Ipod
Live photos are an amazing utility that allow you to save images as short moving snaps. Creating live photos is among the latest spunk of trendsetter stories, whether shared on social media platforms or created and saved just for fun, these definitely sound and look exciting, but that’s just one among the many things you can experiment on live photos.
Creating live photos takes you to a world of exciting features where you can explore your creativity in a number of ways, one of the easiest being turning live photos to videos. This comes handy when you need to share your live photos on platforms that do not have the compatibility to run live photos. If you are an iPhone user and wish to try your hands on experimenting with live photos, see through the following section of this article to learn how to turn live photo into video:
01Save as Video
Step 1: Launch the Photos App
In your iPhone, launch the ‘Photos’ app and navigate to ‘Albums’. All your live photos are present in the ‘Live Photos’ album.
Step 2: Format Selection
In latest versions (iOS 13v and above), you get a direct ‘Save as Video’ option in the ‘Photos’ application. Just click on that, and your live photo will be instantly saved in your iPhone gallery as a video. Here’s how you can use this feature:
● In the ‘Photos’ application, go to the ‘Live Photos’ album to select and open a desired live photo that you wish to convert to a video.
● Click on the ‘Share’ icon.
● Select ‘Save as Video’ from the drop down menu that displays sharing options.
Your created video will be saved in the ‘Photos’ application, next to the live photo you chose to turn into a video.
02iOS Shortcuts
This is a quicker way to save your live photos as videos in your iPhone. To use this feature, you first need to save the ‘Convert LivePhotos to Video’ shortcut in the ‘Shortcuts App’ gallery of your iPhone. You can do this by opening in your iOS internet browser.
Before using the above link, make sure to enable the ‘Allow Untrusted Shortcuts’ feature in your iPhone settings. You can do this as explained below:
● Reach to the ‘Settings’ application of your iPhone.
● Tap on ‘Shortcuts’ from the app’s welcome screen.
● Enable ‘Allow Untrusted Shortcuts’ with a toggle.
Having done that, here’s what you need to follow:
● Open the ‘Shortcuts’ application in your iOS device and tap the ‘Convert LivePhotos to Video’ shortcut.
● The ‘Live Photos’ album of your device opens up. Make a desired selection.
Your converted video gets automatically saved in the ‘Camera Roll’ folder of the ‘Photos’ application. Open the ‘Recents’ album to view your creation.
Part 2 How to Turn a Video Into a Live Photo on iOS/Android
Converting live photos to videos is fine, but going the other way round is all the more exciting and fun! You can even use these converted live photos as live screen wallpapers for your iOS and Android devices. If you are motivated to take up the excitement, look through the following methods to turn video into live photo:
01iOS Devices
Being an iOS user, you can choose among the following tools to convert video to live photo in your iPad, iPod or iPhone:
● Wondershare Filmora
Wondershare Filmora Video Editor is currently leading the software market among converter utilities that cater to various media conversion needs. This one is a free, smart, quick and convenient conversion tool that assures you of a hassle free video to live photo conversion in just a few clicks. What’s more interesting is, you don’t need to limit yourself with sticking to some particular video format, as Filmora conveniently supports almost all common ones.
Wondershare Filmora
Get started easily with Filmora’s powerful performance, intuitive interface, and countless effects Try It Free Try It Free Learn More >
● IntoLive
This one is a third party application that allows you to convert videos into live photos, quickly and conveniently. This tool works well with devices having iOS 12.0 and later versions. All you have to do is follow the steps mentioned below:
Step 1:
Download the ‘IntoLive’ application from the Apple App Store.
Step 2:
Launch the same on your iOS device and grant the permission to access its ‘Photos’ Album.
Step 3:
In the ‘Videos’ section, choose the desired video that you wish to turn into a live photo.
Step 4:
An editor window will open up. Here, you can edit (cut, crop, trim, etc.) and add desired effects or filters to your selected video. Click on ‘Make’ at the top right when you finish the editing process.
Step 5:
If you have the paid version of the app, you can take up multiple repeats of your live photo; else you can use the free version with no repeats.
Step 6:
Once you are satisfied with the result, click on ‘Save Live Photo’. This will save your created live photo in your device’s gallery.
02VideoToLive
This is a free converter you can choose to turn video into live photo. This is a quite popular tool among iPhone users worldwide and is suitable for iOS versions 11.2 and later. You also have the liberty to share your created live photos on social media with this converter. Take the following steps to begin the conversion process:
Step 1:
Download the application from the Apple App Store and launch it on your iOS device.
Step 2:
Choose a video from your device gallery to convert it into a live photo.
Step 3:
In the video editor screen, crop the video to the preferred section that has to be converted into live photo. You can add video frames to your edited clip from the upper section of the editor screen.
Step 4:
Click on ‘Convert’ at the top right corner to initiate the conversion process.
03Android Devices
Live photos are undoubtedly known to add spark to your cherished moments, but the notch that puts these off with Android devices is that you can enjoy live photos on these devices only as live wallpapers.
Being an iPhone exclusive utility, Android devices lack the flexibility to capture live images. However, you can see them move on being set as live screen wallpapers. A handy alternative to this is converting a turn video into live photo and use it as live wallpaper. Here’s how you can take up the conversion process:
● TurnLive- Live Wallpaper
This one is a convenient, third party tool that lets you turn video into live photo in just a few quick steps. You can either use this application for free, or upgrade to the paid version to enjoy its premium features. To make amazing live photos from videos using this tool, you need to take up the steps given below:
Step 1: App Installation
To begin, visit the Google Playstore in your Android device and download the TurnLive- Live Wallpaper application. Next, you need install and launch the app in your device and accept its terms of service.
Step 2: Select a Video
Once you are done, click on the ‘Live Photo’ icon in the bottom of the app’s opening screen to reach the video selection page. Here, you need to choose ‘Video to Live Wallpaper’ option and grant the required app permissions to access your device’s camera and gallery. Select a desired video from the ones saved in your device and click ‘Done’ at the top right.
Step 3: Edit Your Video
You will now get directed to the app’s editor window, where you need to trim the selected video within a time frame of 1-5 seconds. To do this, select a cover frame within the clip and click ‘Next’. You can now use the video slider at the bottom to trim the clip. Adding suitable video effects and filters is also possible with this tool.
Step 4: It’s Almost Done!
When you finish editing, click ‘Next’ and choose the number of repeats for the created live photo. Wait for the conversion to finish and click on ‘My Wallpapers’ to view your creation.
Step 5: Download Your Live Photo!
Click ‘Download’ and tap ‘Clear’ in the app’s prompt message to remove your device’s current screen wallpaper. Next, allow the app to access your system settings. Once this finishes, tap ‘Clear’ again to download your creation. You will now get directed to a black screen tagged ‘DayTime LWP’. Click on ‘Set Wallpaper’ in this screen to make your live photo, the current wallpaper of your Android device.
● Video Live Wallpaper
This is another free app that you can use to your videos into amazing live photos in just 4 quick steps. All you need to do is explained in the following steps:
Step 1: download the Application
Download the Video Live Wallpaper application in your Android device from Google Playstore and proceed for its installation and launch.
Step 2: Select Your Video
In the app’s opening screen, click ‘Choose Video’ and grant app permissions to access your device’s media. Browse your video gallery to select a desired video that you wish to convert into a live photo.
Step 3: Edit Your Video
You will now get directed to the app’s editor screen. Here, you can explore your editing creativity to edit the selected video. Once you are happy, click the picture icon at the top right corner.
Step 4: Your Live Wallpaper is Ready!
To set the created live photo as your device screen wallpaper, select ‘Set as Wallpaper’ at the bottom right.
● Key Takeaways from This Episode →
● From cherishing moments to sharing them on social media, live photos can do it all.
● Being an iPhone exclusive utility, you need to create these from videos to enjoy them on other platforms and devices.
● Filmora is the best video to live photo converters, available as an easy, quick and convenient conversion tool.
A Beginner’s Guide to Explain What 3D Animation Is
A Beginner’s Guide to Explain What 3D Animation Is
An easy yet powerful editor
Numerous effects to choose from
Detailed tutorials provided by the official channel
With present-day technology, 3D animation has reached all spheres be it entertainment, advertising, architecture, education, and much more. With the increasing use of 3D animation, there is a rise in the tools and programs used for creating such animations.
So, to help you get all the details about 3D animation, 3D modelling and animation process, best tools, tips, and tricks, keep reading the following parts.
In this article
01 [What Does 3D Animation Mean?](#Part 1)
02 [What is the Process of 3D Animation?](#Part 2)
03 [Types of 3D Animations](#Part 3)
04 [Top 5 3D Animation Software](#Part 4)
05 [Top Animation Tips and Tricks](#Part 5)
Part 1 What does 3D animation mean?
In simplest terms, animation is a process of manipulating the images so that they appear to be moving, and when this manipulation is done in three-dimensional space, it is called 3D animation. The objects and the models used for 3D animation can be rotated or moved like the real ones. Some tools can be used to scan real-life objects which can be then used as blueprints for creating animation 3D models.
The characters and the objects in 3D animations have to be moved to make them as realistic as possible. No matter, how interesting or perfect character you may create, if it does not move in an even manner, the overall effect will be ruined. The latest techniques and tools these days are capable of creating lifelike scenes.

Part 2 What is the process of 3D Animation?
Creating a 3D animation is a complex process involving several phases. Below listed are the main 3 phases for creating an animation.
01Modeling
The main thing for any 3D animation is its objects, models, or characters and this phase involves creating these objects. Since the objects are based on 3D computer models, the process is termed 3D modeling. A model by a computer appears like a mesh of geometric shapes including curves, points, lines, and more. These shapes do not look anywhere like real objects and only after when the textures and colors are added to them, they appear like real things.
02Layout and animation
The next step is layout and animation where characters are placed in the scenes and the animation of their movements is done using 3D animation tools. Initially, keyframes are created which are the start and the end pose of any animation, and then later other details like the effects, lighting, camerawork, and more are added to get the desired animation that appears on the screen.
03Rendering
The final step in the 3D creation process is rendering where the created animation is finalized as well as exported. To make sure that the final animation plays seamlessly and looks absolutely perfect, it is essential to check all the minute details.
After the production of 3D animation is done, next comes the post-production which is the phase where effects, music, and voiceovers are added and combined to make the entire animation look complete.

Part 3 Types of 3D animations
Now when we know what is a 3D animation and its process, we also need to know that different types of 3D animations are there. Some of the key ones are as below.
● 3D videos and movies
● 3D Virtual Reality
● Interactive 3D
● Digital 3D
● Clay Motion also termed Stop motion animation
● Pixilation
● Cell-shaded animation
● Paint-on-glass
● Pinscreen
Part 4 Top 5 3D Animation software
When it comes to 3D animation tools, the choices can be overwhelming and the list of promises claimed by the tools can be large. He, you need to shortlist the tools that best match your requirements as well as your skill sets. Below we have narrowed down the top 5 software of the category.
01Autodesk Maya
This is a top-rated animation, modeling, simulation, and rendering tool. Using this versatile tool, complex characters and animated videos can be created with all the needed effects.
Key features:
● Versatile 3D animation tool with support to a wide range of features.
● Available for download on Windows, Mac, and Linux systems.
● Allows creating complex characters, adding realistic effects, custom graphics, and more.
● Arnold’s feature of the tool allows switching between CPU and GPU.
● Animation features like fast-playback, time editing, graph editing, ghost editing, multiple modeling options, and others are supported.

02Blender
This is free and open-source software that can be used for creating 3D animations, motion graphics, computer games, and more. Since the tool has been in use for a long time, several artists keep adding to the tool.
Key features
● Free and open-source animation tool.
● Support to multiple platforms including Windows, Mac, and Linux.
● OpenGL interface which makes the functioning smooth.
● Comprehensive and robust set of tools for creating versatile animations. Some of these include automatic skilling, unwrapping texturing, envelope, skeleton, B-spline interpolated bones, sound synchronization, and more.
● Support input from motion-capture tools.

03Houdini
Used by reputed VFX companies like Pixar, Sony, Disney, and others, this is an excellent software that can be used for creating 3D animations, games, and others. With multi-platform support, it is a paid tool that also comes with a free learning edition.
Key features
● Feature-packed animation tool used by industry pioneers.
● Use node-based workflow for creating animations.
● Create biped and quadruped 3D objects using rigging tools.
● Comes with multiple plans to choose from as per budget and requirements.
● Offers a high level of flexibility and creativity.

04Cinema 4D
This professional animation creation software is known for its features and stability. With the availability of multiple tutorials and guides, learning the tool and its functions is easy.
Key features of the software
● Known to be an excellent tool for motion graphics, illustrations, and visualizations.
● Easy learning curve owing to the availability of tutorials, guides, and training materials. Access to free membership of Cineversity which is a training site.
● Comes with a 14-day free trial version along with a free education version for the teachers and students.
● Functions of the software are tested by QA and Beta testers that offer high stability.
● Support features like automatic keyframing, tag and expressions, effectors, and more.

05** Wondershare Filmora Video Editor
If you are looking for software that is simple and easy to use but supports all advanced features this is one of the best choices. Available for Windows and Mac the tool also works as an excellent video editing tool.
Key features
● This easy 3D animation tool Allows creating sharp and lively animations using features like keyframing, motion-tracking, and others.
● Allows to add the preset motions or even customize your own animations.
● The speed, as well as the duration of the animation, can be changed using the ease-in and ease-out options.
● Make your videos lively with features like warp, distorting, masking, lights & flares, text& titles, and more.
● High-quality presets are available with features like auto-correction, color wheels, scopes, and more.
● Audio features supported like automatic audio sync, audio compression, audio transitions, and noise correction.
For Win 7 or later (64-bit)
For macOS 10.12 or later
Part 5 Top Animation Tips And Tricks
Though 3D animation requires a lot of technical know-how of the process, there are several tips and tricks that can make your task quicker, easier, and smoother. We have gathered a few such tips below.
01Make realistic objects by observing real life
The more you will observe real-life the more you will be able to imitate it into your animations for giving life to your objects, models, and characters. Having some knowledge about real-life, gravity, and similar topics will help you work on your animations more interactively.
02Evolve with latest techniques and technology
The tools, programs, and technology are progressing every day and to make the best use of the same, you need to evolve with the technology. To use the features and functions of the software you need to keep learning and growing.
03Go with the basic first
While working with the animations, it is very easy to get carried away with the process and get into the trap of looking for details. This will eventually move you away from your main track and will lead to a waste of time and effort. Thus, it is always advisable to go with the basics first and then move towards the detailing.
04Learn about the human emotions
Facial expressions are an important element of any 3D animation that brings life to characters. A good animation will portray good and complex emotions and thus it is important to study these emotions in detail so that they can be incorporated into your objects, models, and characters.

● Key Takeaways from This Episode →
● Animations created in 3-dimensional space are termed 3D animations.
● 3D animations involve pre-production, post-production, and several steps.
● For the smooth creation of 3D animations, several tips and tricks can be considered.
● A wide range of tools for creating 3D animations are available and one of the best tools in the category is Wondershare Filmora Video Editor that is effective and easy to use.
With present-day technology, 3D animation has reached all spheres be it entertainment, advertising, architecture, education, and much more. With the increasing use of 3D animation, there is a rise in the tools and programs used for creating such animations.
So, to help you get all the details about 3D animation, 3D modelling and animation process, best tools, tips, and tricks, keep reading the following parts.
In this article
01 [What Does 3D Animation Mean?](#Part 1)
02 [What is the Process of 3D Animation?](#Part 2)
03 [Types of 3D Animations](#Part 3)
04 [Top 5 3D Animation Software](#Part 4)
05 [Top Animation Tips and Tricks](#Part 5)
Part 1 What does 3D animation mean?
In simplest terms, animation is a process of manipulating the images so that they appear to be moving, and when this manipulation is done in three-dimensional space, it is called 3D animation. The objects and the models used for 3D animation can be rotated or moved like the real ones. Some tools can be used to scan real-life objects which can be then used as blueprints for creating animation 3D models.
The characters and the objects in 3D animations have to be moved to make them as realistic as possible. No matter, how interesting or perfect character you may create, if it does not move in an even manner, the overall effect will be ruined. The latest techniques and tools these days are capable of creating lifelike scenes.
Part 2 What is the process of 3D Animation?
Creating a 3D animation is a complex process involving several phases. Below listed are the main 3 phases for creating an animation.
01Modeling
The main thing for any 3D animation is its objects, models, or characters and this phase involves creating these objects. Since the objects are based on 3D computer models, the process is termed 3D modeling. A model by a computer appears like a mesh of geometric shapes including curves, points, lines, and more. These shapes do not look anywhere like real objects and only after when the textures and colors are added to them, they appear like real things.
02Layout and animation
The next step is layout and animation where characters are placed in the scenes and the animation of their movements is done using 3D animation tools. Initially, keyframes are created which are the start and the end pose of any animation, and then later other details like the effects, lighting, camerawork, and more are added to get the desired animation that appears on the screen.
03Rendering
The final step in the 3D creation process is rendering where the created animation is finalized as well as exported. To make sure that the final animation plays seamlessly and looks absolutely perfect, it is essential to check all the minute details.
After the production of 3D animation is done, next comes the post-production which is the phase where effects, music, and voiceovers are added and combined to make the entire animation look complete.
Part 3 Types of 3D animations
Now when we know what is a 3D animation and its process, we also need to know that different types of 3D animations are there. Some of the key ones are as below.
● 3D videos and movies
● 3D Virtual Reality
● Interactive 3D
● Digital 3D
● Clay Motion also termed Stop motion animation
● Pixilation
● Cell-shaded animation
● Paint-on-glass
● Pinscreen
Part 4 Top 5 3D Animation software
When it comes to 3D animation tools, the choices can be overwhelming and the list of promises claimed by the tools can be large. He, you need to shortlist the tools that best match your requirements as well as your skill sets. Below we have narrowed down the top 5 software of the category.
01Autodesk Maya
This is a top-rated animation, modeling, simulation, and rendering tool. Using this versatile tool, complex characters and animated videos can be created with all the needed effects.
Key features:
● Versatile 3D animation tool with support to a wide range of features.
● Available for download on Windows, Mac, and Linux systems.
● Allows creating complex characters, adding realistic effects, custom graphics, and more.
● Arnold’s feature of the tool allows switching between CPU and GPU.
● Animation features like fast-playback, time editing, graph editing, ghost editing, multiple modeling options, and others are supported.
02Blender
This is free and open-source software that can be used for creating 3D animations, motion graphics, computer games, and more. Since the tool has been in use for a long time, several artists keep adding to the tool.
Key features
● Free and open-source animation tool.
● Support to multiple platforms including Windows, Mac, and Linux.
● OpenGL interface which makes the functioning smooth.
● Comprehensive and robust set of tools for creating versatile animations. Some of these include automatic skilling, unwrapping texturing, envelope, skeleton, B-spline interpolated bones, sound synchronization, and more.
● Support input from motion-capture tools.
03Houdini
Used by reputed VFX companies like Pixar, Sony, Disney, and others, this is an excellent software that can be used for creating 3D animations, games, and others. With multi-platform support, it is a paid tool that also comes with a free learning edition.
Key features
● Feature-packed animation tool used by industry pioneers.
● Use node-based workflow for creating animations.
● Create biped and quadruped 3D objects using rigging tools.
● Comes with multiple plans to choose from as per budget and requirements.
● Offers a high level of flexibility and creativity.
04Cinema 4D
This professional animation creation software is known for its features and stability. With the availability of multiple tutorials and guides, learning the tool and its functions is easy.
Key features of the software
● Known to be an excellent tool for motion graphics, illustrations, and visualizations.
● Easy learning curve owing to the availability of tutorials, guides, and training materials. Access to free membership of Cineversity which is a training site.
● Comes with a 14-day free trial version along with a free education version for the teachers and students.
● Functions of the software are tested by QA and Beta testers that offer high stability.
● Support features like automatic keyframing, tag and expressions, effectors, and more.
05** Wondershare Filmora Video Editor
If you are looking for software that is simple and easy to use but supports all advanced features this is one of the best choices. Available for Windows and Mac the tool also works as an excellent video editing tool.
Key features
● This easy 3D animation tool Allows creating sharp and lively animations using features like keyframing, motion-tracking, and others.
● Allows to add the preset motions or even customize your own animations.
● The speed, as well as the duration of the animation, can be changed using the ease-in and ease-out options.
● Make your videos lively with features like warp, distorting, masking, lights & flares, text& titles, and more.
● High-quality presets are available with features like auto-correction, color wheels, scopes, and more.
● Audio features supported like automatic audio sync, audio compression, audio transitions, and noise correction.
For Win 7 or later (64-bit)
For macOS 10.12 or later
Part 5 Top Animation Tips And Tricks
Though 3D animation requires a lot of technical know-how of the process, there are several tips and tricks that can make your task quicker, easier, and smoother. We have gathered a few such tips below.
01Make realistic objects by observing real life
The more you will observe real-life the more you will be able to imitate it into your animations for giving life to your objects, models, and characters. Having some knowledge about real-life, gravity, and similar topics will help you work on your animations more interactively.
02Evolve with latest techniques and technology
The tools, programs, and technology are progressing every day and to make the best use of the same, you need to evolve with the technology. To use the features and functions of the software you need to keep learning and growing.
03Go with the basic first
While working with the animations, it is very easy to get carried away with the process and get into the trap of looking for details. This will eventually move you away from your main track and will lead to a waste of time and effort. Thus, it is always advisable to go with the basics first and then move towards the detailing.
04Learn about the human emotions
Facial expressions are an important element of any 3D animation that brings life to characters. A good animation will portray good and complex emotions and thus it is important to study these emotions in detail so that they can be incorporated into your objects, models, and characters.
● Key Takeaways from This Episode →
● Animations created in 3-dimensional space are termed 3D animations.
● 3D animations involve pre-production, post-production, and several steps.
● For the smooth creation of 3D animations, several tips and tricks can be considered.
● A wide range of tools for creating 3D animations are available and one of the best tools in the category is Wondershare Filmora Video Editor that is effective and easy to use.
Also read:
- New Thousands Already Found 15 Best Sites to Watch Cartoons Online Free And So Can You for 2024
- Updated 2024 Approved 10 Best Photoshop Cartoon Effects For Creatives
- Updated 2024 Approved Top Practices on Online 3D Avatar Creator
- New 2024 Approved 15 Best Collage Makers to Create Aesthetic Collages
- Ways to Master to Find 10 Best Free Animated Text Generator
- Updated Adobe Animate Text Effects Skills You Need to Know
- New How to Send and Add Snapchat GIFs 100 The Easy Way for 2024
- In 2024, Best 12 Evil Cartoon Characters of All Time
- Updated In 2024, Animate Graphics in Canva
- 2024 Approved 15 Forgotten Cartoon Characters of All Time
- New 2024 Approved 10 Amazing Whiteboard Animation Video Examples You Need to Bookmark
- Updated Learn Pencil2D Animation Tutorial Overview
- Best 15 Anime Shows That Are Great to Binge Watch for 2024
- Updated 2024 Approved Best Websites to Download Animated GIFs for Free-Free GIF Download
- Updated 2024 Approved 10 Cartoon Character Makers to Create Animated Characters
- New How to Create an Adobe Collage for 2024
- How to Downgrade Apple iPhone 11 Pro without Losing Any Data? | Dr.fone
- In 2024, How to Detect and Remove Spyware on Apple iPhone 7 Plus? | Dr.fone
- How to Transfer Apple iPhone 12 Data to iPhone 12 A Complete Guide | Dr.fone
- 10 Easy-to-Use FRP Bypass Tools for Unlocking Google Accounts On Tecno Spark 10 4G
- In 2024, How to Mirror Apple iPhone SE (2022) to Windows 10? | Dr.fone
- How To Simulate GPS Movement With Location Spoofer On Samsung Galaxy A54 5G? | Dr.fone
- In 2024, Is Fake GPS Location Spoofer a Good Choice On Samsung Galaxy A25 5G? | Dr.fone
- 4 Ways to Transfer Music from Nubia Red Magic 9 Pro+ to iPhone | Dr.fone
- Easily Unlock Your OnePlus Nord CE 3 Lite 5G Device SIM
- Full Guide to Bypass Itel A70 FRP
- In 2024, 9 Best Phone Monitoring Apps for Lava Blaze Pro 5G | Dr.fone
- Title: Animate Pictures in Canva
- Author: Elon
- Created at : 2024-06-23 02:10:03
- Updated at : 2024-06-24 02:10:03
- Link: https://animation-videos.techidaily.com/animate-pictures-in-canva/
- License: This work is licensed under CC BY-NC-SA 4.0.
