
:max_bytes(150000):strip_icc():format(webp)/GettyImages-971165690-1e0af1d9299f4fdba1225c2d20c739f2.jpg)
Complete Guide to Send Gif WhatsApp on Android for 2024
Complete Guide to Send Gif WhatsApp on Android
Step-by-step Guide to Send Gif WhatsApp on Android
An easy yet powerful editor
Numerous effects to choose from
Detailed tutorials provided by the official channel
While chatting with your friends and dear ones on WhatsApp, you can not only send videos and images but also some GIFs. The GIF files will convey your mood and feelings using short animations.
On your Android device, these files can be either selected from the collection available at WhatsApp or can be imported from Giphy. Additionally, you can also create your own customized WhatsApp GIFs Android using images or videos.
In this article
01 [How to send WhatsApp GIF on Android](#Part 1)
02 [How to create a custom GIF on WhatsApp Android](#Part 2)
03 [Create professional-looking GIF using Wondershare Filmora](#Part 3)
Part 1 How to send WhatsApp GIF on Android
To send GIFs to your contacts in WhatsApp it is important to ensure that you have the latest version of the messaging app installed on your phone. There is an integrated library of GIFs on your Android phone from where you can search like tom and jerry gif stickers for WhatsApp, peach and Goma gif for WhatsApp, and more.
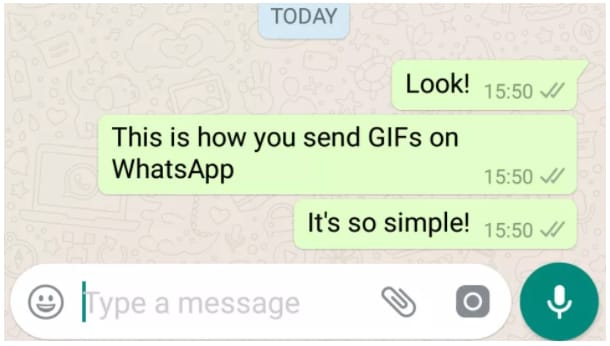
Step 1.Launch WhatsApp on your Android device and open any conversation to which you wish to send a GIF.
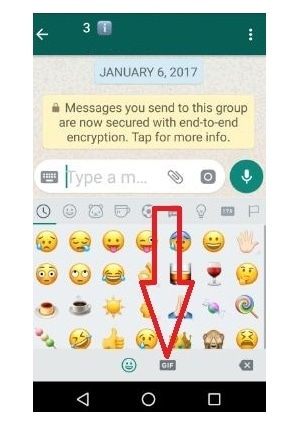
Step 2.Click on the Emoji icon at the bottom left corner of the chat window.
Step 3.At the bottom middle of the screen, click on the GIF button and the list of options available at the integrated library will appear on the screen. You can even search for the desired GIF by entering the keyword at the search icon.
Step 4.Next, tap on the selected GIF to preview it. You can also add a message using Add a caption… button
Step 5.Finally, click on the green Send button (white paper plane icon) at the bottom-right corner. The GIF will be sent to your conversation.
Part 2 How to create a custom GIF on WhatsApp Android
WhatsApp allows you to create a customized GIF using images and videos on your Android phone. The steps for the same are as follows
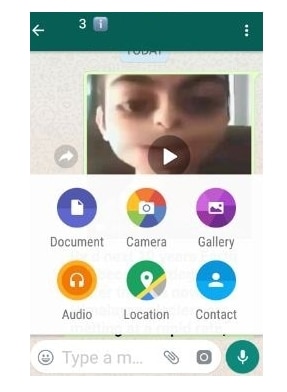
Step 1.Open the WhatsApp chat to whom you wish to send the customized GIF.
Step 2.At the bottom of the screen, click the camera icon. Either choose to record a desired video or import from the phone gallery to create a GIF.
Step 3.Once the video is added, trim it using the slider at the top. (To create a GIF, the video cannot be more than 5 seconds). You can even add a text message using Add a caption. option at the bottom of the screen.
Step 4.Next, click on the GIF button under the slider and then click on the send button at the bottom-right corner.
GIF created using the video will be sent to your contact.
Part 3 Create professional-looking GIF using Wondershare Filmora Video Editor
Though WhatsApp allows creating GIFs using videos and images, the options for customizations are not there. So, to facilitate you creating professional-looking GIFs in no time, we suggest using Wondershare Filmora. Images and videos can be added to this versatile Windows and Mac-based tool for creating artistic animations. There are multiple options for customizing the file like adding elements, sound, text, and more.
Wondershare Filmora
Get started easily with Filmora’s powerful performance, intuitive interface, and countless effects!
Try It Free Try It Free Try It Free Learn More >

You can also speed up, slow down, rotate, crop, and perform other editing tasks. The software allows adding media files in all widely used formats like MO4, MOV, MKV, and more. The software has a user-friendly interface that makes it apt for users even without any prior experience in creating animations.
Steps to create a customized GIF WhstaApp Android using Wondershare Filmora
Step 1.Download, install and open the Wondershare Filmora software on your system. Browse and import the videos and images from your system from which you wish to create a GIF.
Step 2.After the files are added, drag and drop them to the timeline of the software at the bottom.
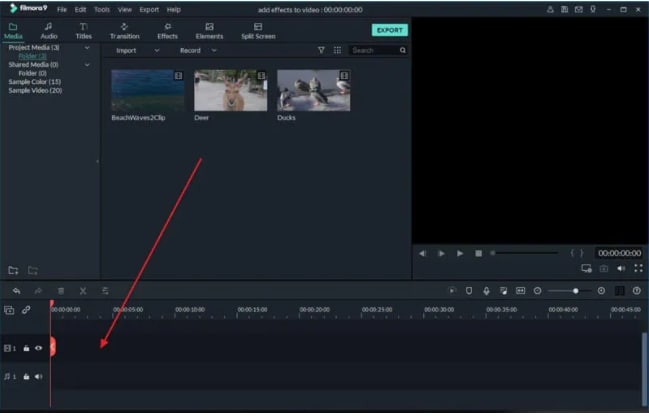
Step 3.Next comes the editing. Using multiple editing functions of the software you can rotate, crop, speed up, slow down, and perform a wide range of tasks as needed.
Step 4.You can even add the text messages to your animations and also choose the font and other parameters of the text.

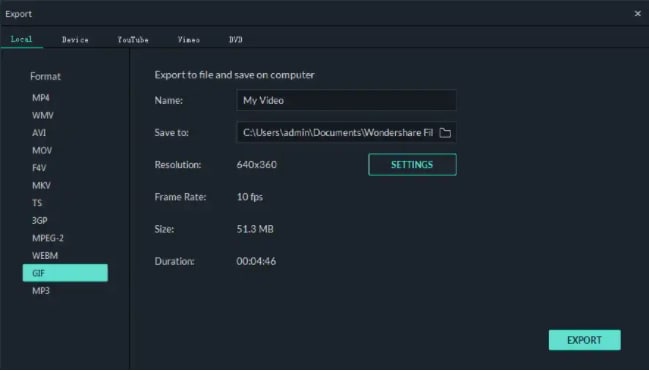
Step 5.Once all the selections and editing are done, choose GIF at the Local tab to save your created media file as GIF. Finally, click on the EXPORT button to start processing and saving the file as GIF.
The created GIF can now be used for WhatsApp chat, social media sites, and other online sites.
● Key Takeaways from This Episode →
●GIF animations can be added to WhatsApp chats on your Android phone using an integrated library or GIPHY.
●WhatsApp also allows creating GIFs using videos and images on your device or by recording one.
●To create a professional and appealing GIF, Wondershare Filmora is the best tool. The software can also be used for several other video editing tasks.
While chatting with your friends and dear ones on WhatsApp, you can not only send videos and images but also some GIFs. The GIF files will convey your mood and feelings using short animations.
On your Android device, these files can be either selected from the collection available at WhatsApp or can be imported from Giphy. Additionally, you can also create your own customized WhatsApp GIFs Android using images or videos.
In this article
01 [How to send WhatsApp GIF on Android](#Part 1)
02 [How to create a custom GIF on WhatsApp Android](#Part 2)
03 [Create professional-looking GIF using Wondershare Filmora](#Part 3)
Part 1 How to send WhatsApp GIF on Android
To send GIFs to your contacts in WhatsApp it is important to ensure that you have the latest version of the messaging app installed on your phone. There is an integrated library of GIFs on your Android phone from where you can search like tom and jerry gif stickers for WhatsApp, peach and Goma gif for WhatsApp, and more.
Step 1.Launch WhatsApp on your Android device and open any conversation to which you wish to send a GIF.
Step 2.Click on the Emoji icon at the bottom left corner of the chat window.
Step 3.At the bottom middle of the screen, click on the GIF button and the list of options available at the integrated library will appear on the screen. You can even search for the desired GIF by entering the keyword at the search icon.
Step 4.Next, tap on the selected GIF to preview it. You can also add a message using Add a caption… button
Step 5.Finally, click on the green Send button (white paper plane icon) at the bottom-right corner. The GIF will be sent to your conversation.
Part 2 How to create a custom GIF on WhatsApp Android
WhatsApp allows you to create a customized GIF using images and videos on your Android phone. The steps for the same are as follows
Step 1.Open the WhatsApp chat to whom you wish to send the customized GIF.
Step 2.At the bottom of the screen, click the camera icon. Either choose to record a desired video or import from the phone gallery to create a GIF.
Step 3.Once the video is added, trim it using the slider at the top. (To create a GIF, the video cannot be more than 5 seconds). You can even add a text message using Add a caption. option at the bottom of the screen.
Step 4.Next, click on the GIF button under the slider and then click on the send button at the bottom-right corner.
GIF created using the video will be sent to your contact.
Part 3 Create professional-looking GIF using Wondershare Filmora Video Editor
Though WhatsApp allows creating GIFs using videos and images, the options for customizations are not there. So, to facilitate you creating professional-looking GIFs in no time, we suggest using Wondershare Filmora. Images and videos can be added to this versatile Windows and Mac-based tool for creating artistic animations. There are multiple options for customizing the file like adding elements, sound, text, and more.
Wondershare Filmora
Get started easily with Filmora’s powerful performance, intuitive interface, and countless effects!
Try It Free Try It Free Try It Free Learn More >
You can also speed up, slow down, rotate, crop, and perform other editing tasks. The software allows adding media files in all widely used formats like MO4, MOV, MKV, and more. The software has a user-friendly interface that makes it apt for users even without any prior experience in creating animations.
Steps to create a customized GIF WhstaApp Android using Wondershare Filmora
Step 1.Download, install and open the Wondershare Filmora software on your system. Browse and import the videos and images from your system from which you wish to create a GIF.
Step 2.After the files are added, drag and drop them to the timeline of the software at the bottom.
Step 3.Next comes the editing. Using multiple editing functions of the software you can rotate, crop, speed up, slow down, and perform a wide range of tasks as needed.
Step 4.You can even add the text messages to your animations and also choose the font and other parameters of the text.
Step 5.Once all the selections and editing are done, choose GIF at the Local tab to save your created media file as GIF. Finally, click on the EXPORT button to start processing and saving the file as GIF.
The created GIF can now be used for WhatsApp chat, social media sites, and other online sites.
● Key Takeaways from This Episode →
●GIF animations can be added to WhatsApp chats on your Android phone using an integrated library or GIPHY.
●WhatsApp also allows creating GIFs using videos and images on your device or by recording one.
●To create a professional and appealing GIF, Wondershare Filmora is the best tool. The software can also be used for several other video editing tasks.
How to Turn Yourself Into a WhatsApp Cartoon
How to Turn Yourself Into a WhatsApp Cartoon
An easy yet powerful editor
Numerous effects to choose from
Detailed tutorials provided by the official channel
Let me ask you a question - how much fun would it be if you could create your own animated stickers and send them to your friends and family members on Whatsapp? I mean, it would make the entire conversation more fun and also add a personal element to the entire chat. Right? Well, to tell you the truth, it is possible to create Whatsapp cartoons and stickers, and the best part is you don’t need any technical expertise to get the job done.
Of course, for a long time, Whatsapp didn’t allow its users to use third-party animated stickers within the messenger. But, recently the messaging platform introduced a custom “stickers pack” feature that now allows people to upload their own stickers and create a dedicated sticker app.
You can also rely on several third-party sticker designer applications to get the job done. So, if you have been looking for a way to use your own face as an animated sticker in Whatsapp, continue reading. In this guide, we’ll walk you through different ways to create and upload a custom cartoon sticker in Whatsapp and make your Whatsapp chats more fun.
In this article
01 [How to Create Your Own Custom Animated Whatsapp Stickers](#Part 1)
02 [How to Create Custom Animated Whatsapp Stickers on Android and iPhone](#Part 2)
Part 1 How to Create Your Own Custom Animated Whatsapp Stickers
Now, before we go any further, I would like to point out that Whatsapp doesn’t allow users to directly create a custom cartoon sticker. There’s no AR feature that’ll turn your face into a cartoon character. So, to use a cartoon Whatsapp profile picture, you’ll have to rely on a third-party tool to get the job done. Based on which platform you use to access Whatsapp, you can choose a wide variety of Whatsapp animated sticker creators and use them to design custom cartoon stickers to make traditional Whatsapp conversations more fun.
One of the easiest ways to create custom stickers for Whatsapp is to use Wondershare Wondershare Filmora Video Editor . Filmora is a full-scale video editing software that’s specifically designed to help editors unleash their creativity and create stunning movies for different platforms.
For Win 7 or later (64-bit)
For macOS 10.12 or later
Filmora is among the most popular video editing tools that many creators use to edit high-quality YouTube vlogs and other types of videos for other platforms. However, Wondershare Filmora is not just a video editing tool. You can also use it to create custom cartoon animations and export them in the desired format within a few seconds. Filmora has a timeline-based interface that makes it relatively easier for editors to streamline the entire editing process while ensuring that none of the shots go missing.

Filmora also has a built-in media store - known as FilmStocks - where you can find hundreds of video effects, animations, animated characters, etc. FilmStocks also offers access to copyright-free music, allowing creators to use high-quality music in their videos without worrying about unexpected copyright strikes.
So, if you are looking for an all-in-one tool to create Whatsapp cartoon stickers, install Wondershare Filmora on your computer and start turning your face into an animated sticker.
Part 1 How to Create Custom Animated Whatsapp Stickers on Android and iPhone
One of the tools that can help you do the job is “Toon Me”. As the name implies, Toon Me is an online platform that’s designed to help users turn their faces into respective cartoon stickers. It’s designed by the developers at Photo Labs - an online platform that makes photo editing a hassle-free task. Since the tool is designed by expert developers, you can expect to get the best results in the end. And, the best part is creating custom cartoon characters using Toon Me is a relatively easy process.

All you have to do is download Toon Me on your phone and use the camera to create a Whatsapp cartoon sticker for yourself. The app is available on both Google Play Store and Apple’s App Store. It means regardless of the smartphone you’re using, Toon Me will allow you to design a Whatsapp cartoon sticker without any hassle.
Like Toon Me, there are dozens of other applications you can install on your smartphone to create personalized animated stickers. One such example is Sticker Maker. Sticker Maker is an Android application that’ll allow you to capture your face and turn it into an animated sticker. It’s compatible across different Android versions and runs smoothly on all Android models. So, if you own an Android device, here’s the step-by-step process to use Sticker Maker to turn your face into an animated sticker.
Step 1 - Start by installing Sticker Maker on your smartphone and launch the application to get started.
Step 2 - On its home screen, click the “Create a New Sticker Pack” option.
Step 3 - Give the sticker pack a name and then, press enter to proceed further.
Step 4 - At this point, you can either select one of the existing pictures from your Gallery or open the camera to click a fresh selfie. Either way, upload the picture and let the app convert it into a corresponding sticker.
Step 5 - You can upload 8-10 pictures at once and create the entire sticker pack instantly. And, once you have successfully created the sticker pack, simply click the “Add to Whatsapp” button.

That’s it; the selected sticker pack will get added to your Whatsapp’s sticker collection and you’ll be able to use them right away. That’s how quick and easy it is to create custom Whatsapp cartoons using different tools on your smartphone.
● Ending Thoughts →
● Using personalized Whatsapp cartoon stickers is a great way to make Whatsapp conversations fun.
● Wondershare Filmora is a feature-packed video editing software that’s designed to help creators create stunning videos and Whatsapp stickers. Its timeline-based interface and built-in media store will allow you to create stunning Whatsapp stickers without any hassle
● You can also download dedicated sticker maker applications on your iPhone or Android devices and use them directly to create visually appealing animated stickers for Whatsapp.
Let me ask you a question - how much fun would it be if you could create your own animated stickers and send them to your friends and family members on Whatsapp? I mean, it would make the entire conversation more fun and also add a personal element to the entire chat. Right? Well, to tell you the truth, it is possible to create Whatsapp cartoons and stickers, and the best part is you don’t need any technical expertise to get the job done.
Of course, for a long time, Whatsapp didn’t allow its users to use third-party animated stickers within the messenger. But, recently the messaging platform introduced a custom “stickers pack” feature that now allows people to upload their own stickers and create a dedicated sticker app.
You can also rely on several third-party sticker designer applications to get the job done. So, if you have been looking for a way to use your own face as an animated sticker in Whatsapp, continue reading. In this guide, we’ll walk you through different ways to create and upload a custom cartoon sticker in Whatsapp and make your Whatsapp chats more fun.
In this article
01 [How to Create Your Own Custom Animated Whatsapp Stickers](#Part 1)
02 [How to Create Custom Animated Whatsapp Stickers on Android and iPhone](#Part 2)
Part 1 How to Create Your Own Custom Animated Whatsapp Stickers
Now, before we go any further, I would like to point out that Whatsapp doesn’t allow users to directly create a custom cartoon sticker. There’s no AR feature that’ll turn your face into a cartoon character. So, to use a cartoon Whatsapp profile picture, you’ll have to rely on a third-party tool to get the job done. Based on which platform you use to access Whatsapp, you can choose a wide variety of Whatsapp animated sticker creators and use them to design custom cartoon stickers to make traditional Whatsapp conversations more fun.
One of the easiest ways to create custom stickers for Whatsapp is to use Wondershare Wondershare Filmora Video Editor . Filmora is a full-scale video editing software that’s specifically designed to help editors unleash their creativity and create stunning movies for different platforms.
For Win 7 or later (64-bit)
For macOS 10.12 or later
Filmora is among the most popular video editing tools that many creators use to edit high-quality YouTube vlogs and other types of videos for other platforms. However, Wondershare Filmora is not just a video editing tool. You can also use it to create custom cartoon animations and export them in the desired format within a few seconds. Filmora has a timeline-based interface that makes it relatively easier for editors to streamline the entire editing process while ensuring that none of the shots go missing.
Filmora also has a built-in media store - known as FilmStocks - where you can find hundreds of video effects, animations, animated characters, etc. FilmStocks also offers access to copyright-free music, allowing creators to use high-quality music in their videos without worrying about unexpected copyright strikes.
So, if you are looking for an all-in-one tool to create Whatsapp cartoon stickers, install Wondershare Filmora on your computer and start turning your face into an animated sticker.
Part 1 How to Create Custom Animated Whatsapp Stickers on Android and iPhone
One of the tools that can help you do the job is “Toon Me”. As the name implies, Toon Me is an online platform that’s designed to help users turn their faces into respective cartoon stickers. It’s designed by the developers at Photo Labs - an online platform that makes photo editing a hassle-free task. Since the tool is designed by expert developers, you can expect to get the best results in the end. And, the best part is creating custom cartoon characters using Toon Me is a relatively easy process.
All you have to do is download Toon Me on your phone and use the camera to create a Whatsapp cartoon sticker for yourself. The app is available on both Google Play Store and Apple’s App Store. It means regardless of the smartphone you’re using, Toon Me will allow you to design a Whatsapp cartoon sticker without any hassle.
Like Toon Me, there are dozens of other applications you can install on your smartphone to create personalized animated stickers. One such example is Sticker Maker. Sticker Maker is an Android application that’ll allow you to capture your face and turn it into an animated sticker. It’s compatible across different Android versions and runs smoothly on all Android models. So, if you own an Android device, here’s the step-by-step process to use Sticker Maker to turn your face into an animated sticker.
Step 1 - Start by installing Sticker Maker on your smartphone and launch the application to get started.
Step 2 - On its home screen, click the “Create a New Sticker Pack” option.
Step 3 - Give the sticker pack a name and then, press enter to proceed further.
Step 4 - At this point, you can either select one of the existing pictures from your Gallery or open the camera to click a fresh selfie. Either way, upload the picture and let the app convert it into a corresponding sticker.
Step 5 - You can upload 8-10 pictures at once and create the entire sticker pack instantly. And, once you have successfully created the sticker pack, simply click the “Add to Whatsapp” button.
That’s it; the selected sticker pack will get added to your Whatsapp’s sticker collection and you’ll be able to use them right away. That’s how quick and easy it is to create custom Whatsapp cartoons using different tools on your smartphone.
● Ending Thoughts →
● Using personalized Whatsapp cartoon stickers is a great way to make Whatsapp conversations fun.
● Wondershare Filmora is a feature-packed video editing software that’s designed to help creators create stunning videos and Whatsapp stickers. Its timeline-based interface and built-in media store will allow you to create stunning Whatsapp stickers without any hassle
● You can also download dedicated sticker maker applications on your iPhone or Android devices and use them directly to create visually appealing animated stickers for Whatsapp.
5 Foolproof Amazing Anime Text to Speech Tips
5 Foolproof Amazing Anime Text to Speech Tips for Makers
An easy yet powerful editor
Numerous effects to choose from
Detailed tutorials provided by the official channel
Our topic for today’s article is on that exact same subject. Or, rather, more specifically, anime text-to-speech.
For those who want more than the usual robotic text-to-speech AI that you see in more professional software. Learn more about all this below, we’ve prepared an entire guide for you!
In this article
01 [What is the Most Realistic Sounding Text to Speech & How to Do It?](#Part 1)
02 [How to Make Your Own Text to Speech Videos for Youtube](#Part 2)
03 [How to Get More Voices for Text to Speech?](#Part 3)
04 [Top 5 Tips on Anime Text to Speech](#Part 4)
Part 1 What is the Most Realistic Sounding Text to Speech & How to Do It?
To start off, we’ve included this little second on need-to-know information regarding text-to-speech. Starting with:
01How did text to speech get popular?
Perhaps unsurprisingly, the text-to-speech function was developed to increase accessibility for those who have trouble reading on screen-text. Either as a result of visual impairment, are blindness. However, with its emergence came popular programs like Audible, which introduced even those without accessibility problems to its convenience for multi-tasking purposes.
02How to get the most realistic sounding text to speech?
There are several ways you can increase the natural sound of your text-to-speech:
● You can choose a tone that suits your taste.
● You can choose a voice gender that you are more comfortable with.
● And you can increase the speed of the text to reduce the awkward, and unnatural pauses that occur after each word.
In the end, though, the best way to get realistic speech is to find a tool that offers high-quality audio options. Which is what we’ll be introducing in the latter sections:
Part 2 How to Make Your Own Text to Speech Videos for YouTube
If you want to create your own anime text-to-speech for your YouTube videos (which is popular with a lot of YouTubers these days), the process is about the same no matter what text-to-speech option you end up choosing in the end. For our examples below, we will be using Natural Readers though, which is a FREE tool, making it a good choice for those who are just looking to try it out.
Step 1: Compose Your Text
The first step is to compose your text! You might prefer to do this on Google Docs or Word, but a lot of text-to-speech tools do offer you a way of composing your text along with them (like the online tool Natural Readers):

Step 2: Choose Voice / Reader
Next, it’s time to choose the reader that you want your text to be read by!
Usually, there are options for different types of accents and languages offered. So, if you want your text to speech to match that of your desired anime characters, you should play around with these options to get the right one.

Step 3: Choose Reading Speed!
Next, it’s time to choose your desired reading speed!
Most readers start off at 1X speed on average, but we personally recommend going for at least 1.25X - 1.5X for an instantly more natural-sounding text-to-speech anime characters.

Step 4: Choose Output Format
And finally, to finish us off, it’s time to choose what output format you want your text-to-speech audio to be! To keep this simple for uploading to YouTube, we recommend sticking with MP3, which most editors accept.

Part 3 How to Get More Voices for Text to Speech?
If you think that the available cartoon characters text-to-speech voices you have are not quite doing it for your project, then you can always explore alternative, third-party options! There are many of these available. Although, you’ll have to check with your text-to-speech reader or maker to make sure that it allows for such a feat:
01Method 1: Windows Text-to-Speech Voices
If you’re looking to change your computer’s text-to-speech voice, then the place to look for this is on ‘Control Panel > Speech’. There, not only can you choose from a variety of different voice options, but you can also change voice speed and voice pitch (how high or low the pitch is), which is a great way of getting a very specific kind of tone for your anime text-to-speech creations.

02Method 2: Third-Party Voices (Screaming Bee)
Next is the third-party resource, Screaming Bee , which offers a good variety of text-to-speech voices that you can try out as well! Using this method will, of course, require downloading and applying these voices for your chosen text-to-speech reader. For example, if you want to use the Windows reader, go to the Control Panel > Speech page for the option to apply it there.

03Method 3: Third-Party Voices (Cepstral Voices)
Another resource that you can check out is Cepstral Voices . Just like Screaming Bee, it offers a range of text-to-speech voices that you can try out to see which one suits your taste most. This includes text-to-speech cartoon characters and text-to-speech anime characters voices!

Part 4 Top 5 Tips on Anime Text to Speech
Now, onto some more anime text-to-speech options that you can try in order to make your text-to-speech script sound exactly like your favorite cartoon or anime characters! For this list, we’ve not only included a description of each reader but also why you might want to try it out:
01Flixier
Flixier is the first anime text-to-speech maker on this list! It is not a free solution. You can try it out for FREE, but if you want to use it for its full capacity, then you’ll need to pay for one of their subscription packages, which start at $10 per month (for access to longer audios, unlimited projects, and more advanced export options.)
● Flixier comes with many different voice options.
● It is an online tool, so no download or installation is required.
● It comes with advanced team functionalities.

02Woord
Woord is our next pick because it works very efficiently at turning text into speech. All you need to do is plug in your text and it will convert it immediately! Much like Flixier, however, it is a freemium tool. So, while you can try it out for free, if you truly want to use it for creating professional projects, you’ll need to unlock one of its subscription packages (which start at $25 per month!)
● Instant text-to-speech maker.
● An online tool, no need for download or installation.
● Lots of natural-sounding voices to choose from.

03Speechelo
Speechelo is a bit different from the two text-to-speech makers on this list. However, that may just mean that it is a more preferable option for some. More specifically, it’s really more of a ‘voice-over-maker’. It does still use AI in order to create human-like voiceovers, with several different options to voice and language. The difference then lies in the fact that it is a one-time payment software that normally costs around $100. In this way, you can avoid long-term ongoing subscription plans. But it is a heavier commitment from the get-go.
● High-quality AI voices for creating realistic voice-overs.
● One-time payment only! No Subscription fees are needed.
● Works in several different languages.

04Cartoon Animator 4
Cartoon Animator 4 is a good option if you’re really looking for that anime or character style for your audio. It works just like your average text-to-speech maker, generally, although it does also offer a couple of more advanced features for those who are looking into animation.
● Free-to-use text-to-speech anime character
● Adjustable volume, pitch, and speed voice parameters.
● A wide variety of voice options to choose from.

05TTS Reader
TTSReader, much like Cartoon Animator 4, is a FREE online tool that you can use in order to create quick and easy text-to-speech audio for your cartoon/anime characters. It doesn’t have as many advanced features as some of the other tools out there, but it can get the job done if all you’re looking for is something easy to use.
● Available to use online for FREE.
● Variety of different voice options.
● Adjustable speed for voice.

Key Takeaways from This Episode
● If you’re looking to increase conversions with better-sounding voiceovers for your video content, then it’s important that you’re aware of all the different options out there!
● Most of these text-to-speech tools work in the same way, but you’ll notice that some of them offer more advanced tools than others.
● In the end, you’ll have to find one that works with your budget and learn how to play around with its settings to make sure that you are getting the most out of your text-to-speech maker.
Our topic for today’s article is on that exact same subject. Or, rather, more specifically, anime text-to-speech.
For those who want more than the usual robotic text-to-speech AI that you see in more professional software. Learn more about all this below, we’ve prepared an entire guide for you!
In this article
01 [What is the Most Realistic Sounding Text to Speech & How to Do It?](#Part 1)
02 [How to Make Your Own Text to Speech Videos for Youtube](#Part 2)
03 [How to Get More Voices for Text to Speech?](#Part 3)
04 [Top 5 Tips on Anime Text to Speech](#Part 4)
Part 1 What is the Most Realistic Sounding Text to Speech & How to Do It?
To start off, we’ve included this little second on need-to-know information regarding text-to-speech. Starting with:
01How did text to speech get popular?
Perhaps unsurprisingly, the text-to-speech function was developed to increase accessibility for those who have trouble reading on screen-text. Either as a result of visual impairment, are blindness. However, with its emergence came popular programs like Audible, which introduced even those without accessibility problems to its convenience for multi-tasking purposes.
02How to get the most realistic sounding text to speech?
There are several ways you can increase the natural sound of your text-to-speech:
● You can choose a tone that suits your taste.
● You can choose a voice gender that you are more comfortable with.
● And you can increase the speed of the text to reduce the awkward, and unnatural pauses that occur after each word.
In the end, though, the best way to get realistic speech is to find a tool that offers high-quality audio options. Which is what we’ll be introducing in the latter sections:
Part 2 How to Make Your Own Text to Speech Videos for YouTube
If you want to create your own anime text-to-speech for your YouTube videos (which is popular with a lot of YouTubers these days), the process is about the same no matter what text-to-speech option you end up choosing in the end. For our examples below, we will be using Natural Readers though, which is a FREE tool, making it a good choice for those who are just looking to try it out.
Step 1: Compose Your Text
The first step is to compose your text! You might prefer to do this on Google Docs or Word, but a lot of text-to-speech tools do offer you a way of composing your text along with them (like the online tool Natural Readers):
Step 2: Choose Voice / Reader
Next, it’s time to choose the reader that you want your text to be read by!
Usually, there are options for different types of accents and languages offered. So, if you want your text to speech to match that of your desired anime characters, you should play around with these options to get the right one.
Step 3: Choose Reading Speed!
Next, it’s time to choose your desired reading speed!
Most readers start off at 1X speed on average, but we personally recommend going for at least 1.25X - 1.5X for an instantly more natural-sounding text-to-speech anime characters.
Step 4: Choose Output Format
And finally, to finish us off, it’s time to choose what output format you want your text-to-speech audio to be! To keep this simple for uploading to YouTube, we recommend sticking with MP3, which most editors accept.
Part 3 How to Get More Voices for Text to Speech?
If you think that the available cartoon characters text-to-speech voices you have are not quite doing it for your project, then you can always explore alternative, third-party options! There are many of these available. Although, you’ll have to check with your text-to-speech reader or maker to make sure that it allows for such a feat:
01Method 1: Windows Text-to-Speech Voices
If you’re looking to change your computer’s text-to-speech voice, then the place to look for this is on ‘Control Panel > Speech’. There, not only can you choose from a variety of different voice options, but you can also change voice speed and voice pitch (how high or low the pitch is), which is a great way of getting a very specific kind of tone for your anime text-to-speech creations.
02Method 2: Third-Party Voices (Screaming Bee)
Next is the third-party resource, Screaming Bee , which offers a good variety of text-to-speech voices that you can try out as well! Using this method will, of course, require downloading and applying these voices for your chosen text-to-speech reader. For example, if you want to use the Windows reader, go to the Control Panel > Speech page for the option to apply it there.
03Method 3: Third-Party Voices (Cepstral Voices)
Another resource that you can check out is Cepstral Voices . Just like Screaming Bee, it offers a range of text-to-speech voices that you can try out to see which one suits your taste most. This includes text-to-speech cartoon characters and text-to-speech anime characters voices!
Part 4 Top 5 Tips on Anime Text to Speech
Now, onto some more anime text-to-speech options that you can try in order to make your text-to-speech script sound exactly like your favorite cartoon or anime characters! For this list, we’ve not only included a description of each reader but also why you might want to try it out:
01Flixier
Flixier is the first anime text-to-speech maker on this list! It is not a free solution. You can try it out for FREE, but if you want to use it for its full capacity, then you’ll need to pay for one of their subscription packages, which start at $10 per month (for access to longer audios, unlimited projects, and more advanced export options.)
● Flixier comes with many different voice options.
● It is an online tool, so no download or installation is required.
● It comes with advanced team functionalities.
02Woord
Woord is our next pick because it works very efficiently at turning text into speech. All you need to do is plug in your text and it will convert it immediately! Much like Flixier, however, it is a freemium tool. So, while you can try it out for free, if you truly want to use it for creating professional projects, you’ll need to unlock one of its subscription packages (which start at $25 per month!)
● Instant text-to-speech maker.
● An online tool, no need for download or installation.
● Lots of natural-sounding voices to choose from.
03Speechelo
Speechelo is a bit different from the two text-to-speech makers on this list. However, that may just mean that it is a more preferable option for some. More specifically, it’s really more of a ‘voice-over-maker’. It does still use AI in order to create human-like voiceovers, with several different options to voice and language. The difference then lies in the fact that it is a one-time payment software that normally costs around $100. In this way, you can avoid long-term ongoing subscription plans. But it is a heavier commitment from the get-go.
● High-quality AI voices for creating realistic voice-overs.
● One-time payment only! No Subscription fees are needed.
● Works in several different languages.
04Cartoon Animator 4
Cartoon Animator 4 is a good option if you’re really looking for that anime or character style for your audio. It works just like your average text-to-speech maker, generally, although it does also offer a couple of more advanced features for those who are looking into animation.
● Free-to-use text-to-speech anime character
● Adjustable volume, pitch, and speed voice parameters.
● A wide variety of voice options to choose from.
05TTS Reader
TTSReader, much like Cartoon Animator 4, is a FREE online tool that you can use in order to create quick and easy text-to-speech audio for your cartoon/anime characters. It doesn’t have as many advanced features as some of the other tools out there, but it can get the job done if all you’re looking for is something easy to use.
● Available to use online for FREE.
● Variety of different voice options.
● Adjustable speed for voice.
Key Takeaways from This Episode
● If you’re looking to increase conversions with better-sounding voiceovers for your video content, then it’s important that you’re aware of all the different options out there!
● Most of these text-to-speech tools work in the same way, but you’ll notice that some of them offer more advanced tools than others.
● In the end, you’ll have to find one that works with your budget and learn how to play around with its settings to make sure that you are getting the most out of your text-to-speech maker.
How to Reduce GIF Size and Best GIF Resizers
How to Reduce GIF Size and Best GIF Resizers

Shanoon Cox
Mar 27, 2024• Proven solutions
With the increasing popularity of Smartphones, people these days are experiencing all new things with lots of excitement. And GIFs are always the most interesting content for them. When we talk about limited band width and fast loading time solutions then GIFs are the first options in front of our eyes. These files use to have small size so they can be transferred and downloaded with ease and at faster rate. If you are interested to know about various resizing concepts related to GIFs then the article below can be helpful for you.
How to reduce GIF size?
There are so many things that contribute in managing overall size of GIFs. The list includes the colour count inside, dimensions of images that you have used for development of GIFs and number of frames included inside one GIF folder. In case if it is an animated GIF then size may increase accordingly. Somehow, if you become able to optimize your Gifs then it is much easier to share them over internet.
Photoshop is a great tool to edit your image, including gif images. Here we are going to show you how to make your GIF smaller in Photoshop.
1. Crop away any extra space around the image:
Image source: youtube.com
The very first task for users is to bring your GIF video file onto Photoshop timeline. Sometimes, it is not essential to update whole series of your GIF animation to the library, the GIF can be simply trimmed at timeline panel. One needs to turn on loop option and then be active enough to allocate the right place to trim your video.
2. Reduce dimensions of Output:

Image source: google.com
Those who are working on Photoshop CC 2017 version will be able to develop GIFs by simply executing Explore As option from menu. To do this, they need to move to files and then from drop down menu select Export as. Soon a menu will open where you need to choose your output file format as GIF and adjust weight and height parameter to reduce physical dimensions of your image.
In case if you are using Adobe Photoshop Elements 14 then on its interface, users need to move to File and then hit Save for Web option. It will help to open a Save for Web type dialogue box immediately, on this new window you can apply desired changes to physical dimensions of your content, reduce color information and apply dithering etc.
3. Adjust number of colors in image:
Image source: google.com
One of the most useful tricks for marketers is to optimize size of their GIF images by adjusting total number of colours to it. It can be done using color table tool that assists in easy selection and de-selection. This table use to contain about 256 unique colours and all of them use to contain 8 bit wide information. The best recommendation for good quality and small seize GIFs is to limit colours up to 64 only or keep then less than this. But sometimes your original videos may ask you for increment in color information.
Tips:
During GIF size reduction process, you will have to go through color number selections in the series of 256, 128, 64, 32, 16, 8, 4, 2, 1 etc. Use the smaller side of scale to get best results during optimization process.
- Users can also reduce number of frames in their GIFs.
- Never forget to avoid dithering as it may help to improve appearance of images.
- It is essential work with loss less compression algorithms otherwise huge loss in information will be carried out.
- Interlacing is not good option for your GIFs as it causes significant increase in overall file size.
Best GIF resizers
Those who are searching for some alternatives to Photoshop for creation of GIF images can move towards the list below:
2. FileOptimizer:
This is an advanced optimization tool for GIF sets as it can shrink output file using its multiple recompressing procedures. It can help to compress audio, video as well as other documents with popular file sizes like JPG, GMP, PNG and TIFF etc.
3. FileMinimizer Pictures:
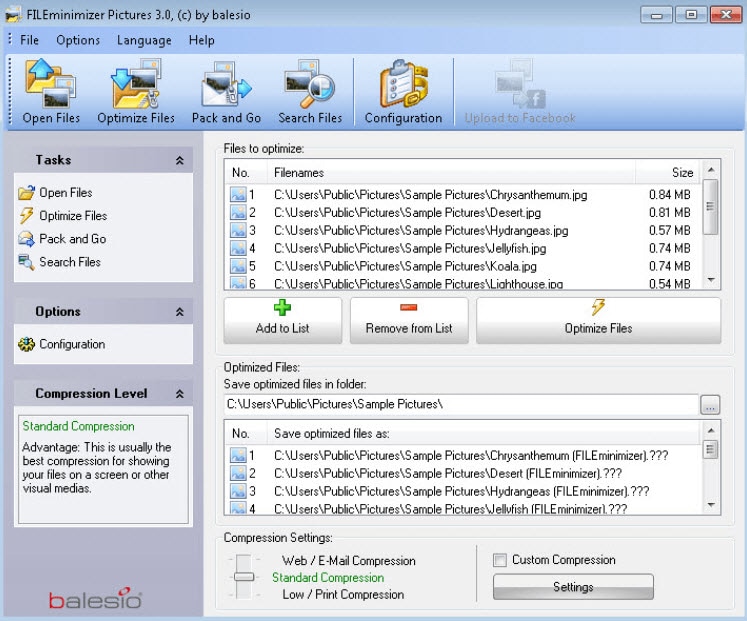
It can compress GIF images up to 98% with its classic optimization techniques. It generally follows 4 compression levels but sometimes may go through several levels to generate smaller GIFs but even without losing quality. It works only on Windows platform.
4. RIOT:
Here RIOT stands for Radical Image Optimization Tool that can adjust so many feature parameters for GIFs along with file size compressions. This optimizer makes use of matadeta settings, color information etc to reduce overall file size.
5. GifftingTool:
BY simply optimizing repetitive colours and pixels from GIF frames, this tool can easily provides loss less optimization solution. It can be used to adjust image cropping, reversing, merging, looping and filtering needs.
6. GIF Optimizer:
This is specially designed one click type GIF optimizer that can provide compression up to 90%. It also assists to reduce the total load time for GIF with reduction in file size.
7. Ezgif.com – Online:

This online GIF image editor can shrink your image by simply reducing its colour information. Users can easily minimize file size for about 30% using this tool that has features like crop, resize etc.
8. Conpressor.io – Online:
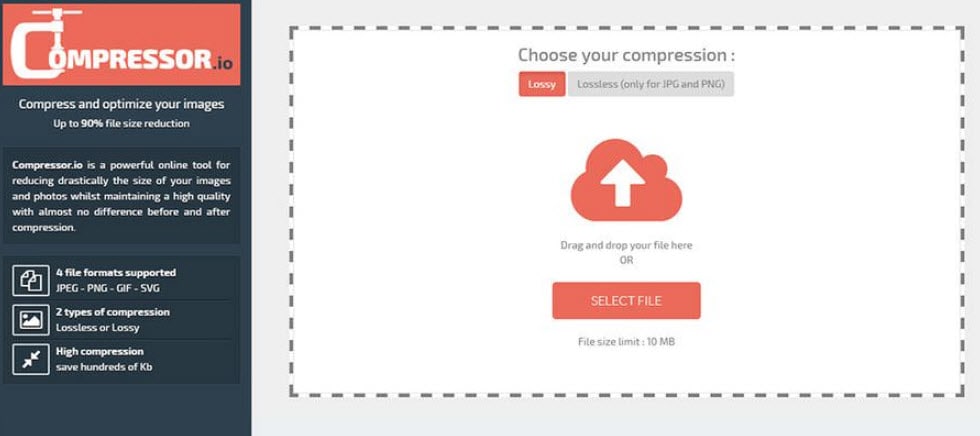
This online web app can assist users to compress their image to smallest size segment even without decaying overall quality. You can easily process SVG, PNG, GIF and JPG file formats over here.
9. Picasion.com – Online:

It helps to reduce overall weight of GIFs so that they can be easily uploaded over internet.
10. GIF Reducer:
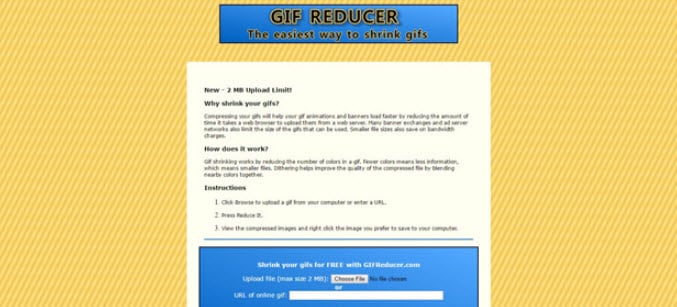
Reducer can easily shrink GIF file so that it web loading times can be increased instantly.
11. Resizeimage.net:
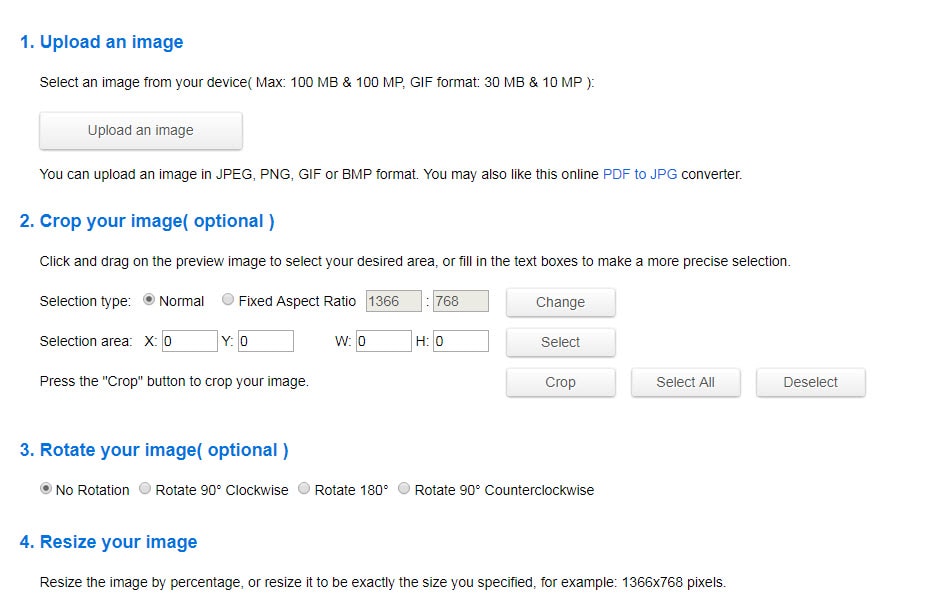
Use this tool to get impressive results for your GIF optimization and it can process almost all file formats to make things easily workable for users.
Conclusion
If you want to make a GIF online, Filmora meme maker is your ultimate solution. It helps you make image, GIF and video memes directly without watermark. It is totally FREE to use and no sign up. You can change text size, color and position to create caption when you are editing. You can also put text inside or outside in GIF. Just with a few clicks, your GIF is done . Try it now!
Shanoon Cox
Shanoon Cox is a writer and a lover of all things video.
Follow @Shanoon Cox
Shanoon Cox
Mar 27, 2024• Proven solutions
With the increasing popularity of Smartphones, people these days are experiencing all new things with lots of excitement. And GIFs are always the most interesting content for them. When we talk about limited band width and fast loading time solutions then GIFs are the first options in front of our eyes. These files use to have small size so they can be transferred and downloaded with ease and at faster rate. If you are interested to know about various resizing concepts related to GIFs then the article below can be helpful for you.
How to reduce GIF size?
There are so many things that contribute in managing overall size of GIFs. The list includes the colour count inside, dimensions of images that you have used for development of GIFs and number of frames included inside one GIF folder. In case if it is an animated GIF then size may increase accordingly. Somehow, if you become able to optimize your Gifs then it is much easier to share them over internet.
Photoshop is a great tool to edit your image, including gif images. Here we are going to show you how to make your GIF smaller in Photoshop.
1. Crop away any extra space around the image:
Image source: youtube.com
The very first task for users is to bring your GIF video file onto Photoshop timeline. Sometimes, it is not essential to update whole series of your GIF animation to the library, the GIF can be simply trimmed at timeline panel. One needs to turn on loop option and then be active enough to allocate the right place to trim your video.
2. Reduce dimensions of Output:
Image source: google.com
Those who are working on Photoshop CC 2017 version will be able to develop GIFs by simply executing Explore As option from menu. To do this, they need to move to files and then from drop down menu select Export as. Soon a menu will open where you need to choose your output file format as GIF and adjust weight and height parameter to reduce physical dimensions of your image.
In case if you are using Adobe Photoshop Elements 14 then on its interface, users need to move to File and then hit Save for Web option. It will help to open a Save for Web type dialogue box immediately, on this new window you can apply desired changes to physical dimensions of your content, reduce color information and apply dithering etc.
3. Adjust number of colors in image:
Image source: google.com
One of the most useful tricks for marketers is to optimize size of their GIF images by adjusting total number of colours to it. It can be done using color table tool that assists in easy selection and de-selection. This table use to contain about 256 unique colours and all of them use to contain 8 bit wide information. The best recommendation for good quality and small seize GIFs is to limit colours up to 64 only or keep then less than this. But sometimes your original videos may ask you for increment in color information.
Tips:
During GIF size reduction process, you will have to go through color number selections in the series of 256, 128, 64, 32, 16, 8, 4, 2, 1 etc. Use the smaller side of scale to get best results during optimization process.
- Users can also reduce number of frames in their GIFs.
- Never forget to avoid dithering as it may help to improve appearance of images.
- It is essential work with loss less compression algorithms otherwise huge loss in information will be carried out.
- Interlacing is not good option for your GIFs as it causes significant increase in overall file size.
Best GIF resizers
Those who are searching for some alternatives to Photoshop for creation of GIF images can move towards the list below:
2. FileOptimizer:
This is an advanced optimization tool for GIF sets as it can shrink output file using its multiple recompressing procedures. It can help to compress audio, video as well as other documents with popular file sizes like JPG, GMP, PNG and TIFF etc.
3. FileMinimizer Pictures:
It can compress GIF images up to 98% with its classic optimization techniques. It generally follows 4 compression levels but sometimes may go through several levels to generate smaller GIFs but even without losing quality. It works only on Windows platform.
4. RIOT:
Here RIOT stands for Radical Image Optimization Tool that can adjust so many feature parameters for GIFs along with file size compressions. This optimizer makes use of matadeta settings, color information etc to reduce overall file size.
5. GifftingTool:
BY simply optimizing repetitive colours and pixels from GIF frames, this tool can easily provides loss less optimization solution. It can be used to adjust image cropping, reversing, merging, looping and filtering needs.
6. GIF Optimizer:
This is specially designed one click type GIF optimizer that can provide compression up to 90%. It also assists to reduce the total load time for GIF with reduction in file size.
7. Ezgif.com – Online:
This online GIF image editor can shrink your image by simply reducing its colour information. Users can easily minimize file size for about 30% using this tool that has features like crop, resize etc.
8. Conpressor.io – Online:
This online web app can assist users to compress their image to smallest size segment even without decaying overall quality. You can easily process SVG, PNG, GIF and JPG file formats over here.
9. Picasion.com – Online:
It helps to reduce overall weight of GIFs so that they can be easily uploaded over internet.
10. GIF Reducer:
Reducer can easily shrink GIF file so that it web loading times can be increased instantly.
11. Resizeimage.net:
Use this tool to get impressive results for your GIF optimization and it can process almost all file formats to make things easily workable for users.
Conclusion
If you want to make a GIF online, Filmora meme maker is your ultimate solution. It helps you make image, GIF and video memes directly without watermark. It is totally FREE to use and no sign up. You can change text size, color and position to create caption when you are editing. You can also put text inside or outside in GIF. Just with a few clicks, your GIF is done . Try it now!
Shanoon Cox
Shanoon Cox is a writer and a lover of all things video.
Follow @Shanoon Cox
How to Make a Video a Live Photo
How to Make a Video a Live Photo [2022]
An easy yet powerful editor
Numerous effects to choose from
Detailed tutorials provided by the official channel
Looking forward to turn your videos into live photos? Stay tuned to know how!
In this article
01 [How to Save Live Photos as a Video on iPhone/Ipad/Ipod](#Part 1)
02 [How to Turn a Video Into a Live Photo on iOS/Android](#Part 2)
Part 1 How to Save Live Photos as a Video on iPhone/Ipad/Ipod
Live photos are an amazing utility that allow you to save images as short moving snaps. Creating live photos is among the latest spunk of trendsetter stories, whether shared on social media platforms or created and saved just for fun, these definitely sound and look exciting, but that’s just one among the many things you can experiment on live photos.
Creating live photos takes you to a world of exciting features where you can explore your creativity in a number of ways, one of the easiest being turning live photos to videos. This comes handy when you need to share your live photos on platforms that do not have the compatibility to run live photos. If you are an iPhone user and wish to try your hands on experimenting with live photos, see through the following section of this article to learn how to turn live photo into video:
01Save as Video
Step 1: Launch the Photos App
In your iPhone, launch the ‘Photos’ app and navigate to ‘Albums’. All your live photos are present in the ‘Live Photos’ album.
Step 2: Format Selection
In latest versions (iOS 13v and above), you get a direct ‘Save as Video’ option in the ‘Photos’ application. Just click on that, and your live photo will be instantly saved in your iPhone gallery as a video. Here’s how you can use this feature:
● In the ‘Photos’ application, go to the ‘Live Photos’ album to select and open a desired live photo that you wish to convert to a video.
● Click on the ‘Share’ icon.

● Select ‘Save as Video’ from the drop down menu that displays sharing options.

Your created video will be saved in the ‘Photos’ application, next to the live photo you chose to turn into a video.
02iOS Shortcuts
This is a quicker way to save your live photos as videos in your iPhone. To use this feature, you first need to save the ‘Convert LivePhotos to Video’ shortcut in the ‘Shortcuts App’ gallery of your iPhone. You can do this by opening in your iOS internet browser.
Before using the above link, make sure to enable the ‘Allow Untrusted Shortcuts’ feature in your iPhone settings. You can do this as explained below:
● Reach to the ‘Settings’ application of your iPhone.
● Tap on ‘Shortcuts’ from the app’s welcome screen.
● Enable ‘Allow Untrusted Shortcuts’ with a toggle.

Having done that, here’s what you need to follow:
● Open the ‘Shortcuts’ application in your iOS device and tap the ‘Convert LivePhotos to Video’ shortcut.

● The ‘Live Photos’ album of your device opens up. Make a desired selection.

Your converted video gets automatically saved in the ‘Camera Roll’ folder of the ‘Photos’ application. Open the ‘Recents’ album to view your creation.
Part 2 How to Turn a Video Into a Live Photo on iOS/Android
Converting live photos to videos is fine, but going the other way round is all the more exciting and fun! You can even use these converted live photos as live screen wallpapers for your iOS and Android devices. If you are motivated to take up the excitement, look through the following methods to turn video into live photo:
01iOS Devices
Being an iOS user, you can choose among the following tools to convert video to live photo in your iPad, iPod or iPhone:
● Wondershare Filmora
Wondershare Filmora Video Editor is currently leading the software market among converter utilities that cater to various media conversion needs. This one is a free, smart, quick and convenient conversion tool that assures you of a hassle free video to live photo conversion in just a few clicks. What’s more interesting is, you don’t need to limit yourself with sticking to some particular video format, as Filmora conveniently supports almost all common ones.
Wondershare Filmora
Get started easily with Filmora’s powerful performance, intuitive interface, and countless effects!
Try It Free Try It Free Try It Free Learn More >
● IntoLive
This one is a third party application that allows you to convert videos into live photos, quickly and conveniently. This tool works well with devices having iOS 12.0 and later versions. All you have to do is follow the steps mentioned below:
Step 1:
Download the ‘IntoLive’ application from the Apple App Store.

Step 2:
Launch the same on your iOS device and grant the permission to access its ‘Photos’ Album.

Step 3:
In the ‘Videos’ section, choose the desired video that you wish to turn into a live photo.

Step 4:
An editor window will open up. Here, you can edit (cut, crop, trim, etc.) and add desired effects or filters to your selected video. Click on ‘Make’ at the top right when you finish the editing process.

Step 5:
If you have the paid version of the app, you can take up multiple repeats of your live photo; else you can use the free version with no repeats.

Step 6:
Once you are satisfied with the result, click on ‘Save Live Photo’. This will save your created live photo in your device’s gallery.

02VideoToLive
This is a free converter you can choose to turn video into live photo. This is a quite popular tool among iPhone users worldwide and is suitable for iOS versions 11.2 and later. You also have the liberty to share your created live photos on social media with this converter. Take the following steps to begin the conversion process:

Step 1:
Download the application from the Apple App Store and launch it on your iOS device.
Step 2:
Choose a video from your device gallery to convert it into a live photo.
Step 3:
In the video editor screen, crop the video to the preferred section that has to be converted into live photo. You can add video frames to your edited clip from the upper section of the editor screen.
Step 4:
Click on ‘Convert’ at the top right corner to initiate the conversion process.
03Android Devices
Live photos are undoubtedly known to add spark to your cherished moments, but the notch that puts these off with Android devices is that you can enjoy live photos on these devices only as live wallpapers.
Being an iPhone exclusive utility, Android devices lack the flexibility to capture live images. However, you can see them move on being set as live screen wallpapers. A handy alternative to this is converting a turn video into live photo and use it as live wallpaper. Here’s how you can take up the conversion process:
● TurnLive- Live Wallpaper
This one is a convenient, third party tool that lets you turn video into live photo in just a few quick steps. You can either use this application for free, or upgrade to the paid version to enjoy its premium features. To make amazing live photos from videos using this tool, you need to take up the steps given below:

Step 1: App Installation
To begin, visit the Google Playstore in your Android device and download the TurnLive- Live Wallpaper application. Next, you need install and launch the app in your device and accept its terms of service.
Step 2: Select a Video
Once you are done, click on the ‘Live Photo’ icon in the bottom of the app’s opening screen to reach the video selection page. Here, you need to choose ‘Video to Live Wallpaper’ option and grant the required app permissions to access your device’s camera and gallery. Select a desired video from the ones saved in your device and click ‘Done’ at the top right.
Step 3: Edit Your Video
You will now get directed to the app’s editor window, where you need to trim the selected video within a time frame of 1-5 seconds. To do this, select a cover frame within the clip and click ‘Next’. You can now use the video slider at the bottom to trim the clip. Adding suitable video effects and filters is also possible with this tool.
Step 4: It’s Almost Done!
When you finish editing, click ‘Next’ and choose the number of repeats for the created live photo. Wait for the conversion to finish and click on ‘My Wallpapers’ to view your creation.
Step 5: Download Your Live Photo!
Click ‘Download’ and tap ‘Clear’ in the app’s prompt message to remove your device’s current screen wallpaper. Next, allow the app to access your system settings. Once this finishes, tap ‘Clear’ again to download your creation. You will now get directed to a black screen tagged ‘DayTime LWP’. Click on ‘Set Wallpaper’ in this screen to make your live photo, the current wallpaper of your Android device.
● Video Live Wallpaper
This is another free app that you can use to your videos into amazing live photos in just 4 quick steps. All you need to do is explained in the following steps:
Step 1: download the Application
Download the Video Live Wallpaper application in your Android device from Google Playstore and proceed for its installation and launch.

Step 2: Select Your Video
In the app’s opening screen, click ‘Choose Video’ and grant app permissions to access your device’s media. Browse your video gallery to select a desired video that you wish to convert into a live photo.

Step 3: Edit Your Video
You will now get directed to the app’s editor screen. Here, you can explore your editing creativity to edit the selected video. Once you are happy, click the picture icon at the top right corner.

Step 4: Your Live Wallpaper is Ready!
To set the created live photo as your device screen wallpaper, select ‘Set as Wallpaper’ at the bottom right.

● Key Takeaways from This Episode →
● From cherishing moments to sharing them on social media, live photos can do it all.
● Being an iPhone exclusive utility, you need to create these from videos to enjoy them on other platforms and devices.
● Filmora is the best video to live photo converters, available as an easy, quick and convenient conversion tool.
Looking forward to turn your videos into live photos? Stay tuned to know how!
In this article
01 [How to Save Live Photos as a Video on iPhone/Ipad/Ipod](#Part 1)
02 [How to Turn a Video Into a Live Photo on iOS/Android](#Part 2)
Part 1 How to Save Live Photos as a Video on iPhone/Ipad/Ipod
Live photos are an amazing utility that allow you to save images as short moving snaps. Creating live photos is among the latest spunk of trendsetter stories, whether shared on social media platforms or created and saved just for fun, these definitely sound and look exciting, but that’s just one among the many things you can experiment on live photos.
Creating live photos takes you to a world of exciting features where you can explore your creativity in a number of ways, one of the easiest being turning live photos to videos. This comes handy when you need to share your live photos on platforms that do not have the compatibility to run live photos. If you are an iPhone user and wish to try your hands on experimenting with live photos, see through the following section of this article to learn how to turn live photo into video:
01Save as Video
Step 1: Launch the Photos App
In your iPhone, launch the ‘Photos’ app and navigate to ‘Albums’. All your live photos are present in the ‘Live Photos’ album.
Step 2: Format Selection
In latest versions (iOS 13v and above), you get a direct ‘Save as Video’ option in the ‘Photos’ application. Just click on that, and your live photo will be instantly saved in your iPhone gallery as a video. Here’s how you can use this feature:
● In the ‘Photos’ application, go to the ‘Live Photos’ album to select and open a desired live photo that you wish to convert to a video.
● Click on the ‘Share’ icon.
● Select ‘Save as Video’ from the drop down menu that displays sharing options.
Your created video will be saved in the ‘Photos’ application, next to the live photo you chose to turn into a video.
02iOS Shortcuts
This is a quicker way to save your live photos as videos in your iPhone. To use this feature, you first need to save the ‘Convert LivePhotos to Video’ shortcut in the ‘Shortcuts App’ gallery of your iPhone. You can do this by opening in your iOS internet browser.
Before using the above link, make sure to enable the ‘Allow Untrusted Shortcuts’ feature in your iPhone settings. You can do this as explained below:
● Reach to the ‘Settings’ application of your iPhone.
● Tap on ‘Shortcuts’ from the app’s welcome screen.
● Enable ‘Allow Untrusted Shortcuts’ with a toggle.
Having done that, here’s what you need to follow:
● Open the ‘Shortcuts’ application in your iOS device and tap the ‘Convert LivePhotos to Video’ shortcut.
● The ‘Live Photos’ album of your device opens up. Make a desired selection.
Your converted video gets automatically saved in the ‘Camera Roll’ folder of the ‘Photos’ application. Open the ‘Recents’ album to view your creation.
Part 2 How to Turn a Video Into a Live Photo on iOS/Android
Converting live photos to videos is fine, but going the other way round is all the more exciting and fun! You can even use these converted live photos as live screen wallpapers for your iOS and Android devices. If you are motivated to take up the excitement, look through the following methods to turn video into live photo:
01iOS Devices
Being an iOS user, you can choose among the following tools to convert video to live photo in your iPad, iPod or iPhone:
● Wondershare Filmora
Wondershare Filmora Video Editor is currently leading the software market among converter utilities that cater to various media conversion needs. This one is a free, smart, quick and convenient conversion tool that assures you of a hassle free video to live photo conversion in just a few clicks. What’s more interesting is, you don’t need to limit yourself with sticking to some particular video format, as Filmora conveniently supports almost all common ones.
Wondershare Filmora
Get started easily with Filmora’s powerful performance, intuitive interface, and countless effects!
Try It Free Try It Free Try It Free Learn More >
● IntoLive
This one is a third party application that allows you to convert videos into live photos, quickly and conveniently. This tool works well with devices having iOS 12.0 and later versions. All you have to do is follow the steps mentioned below:
Step 1:
Download the ‘IntoLive’ application from the Apple App Store.
Step 2:
Launch the same on your iOS device and grant the permission to access its ‘Photos’ Album.
Step 3:
In the ‘Videos’ section, choose the desired video that you wish to turn into a live photo.
Step 4:
An editor window will open up. Here, you can edit (cut, crop, trim, etc.) and add desired effects or filters to your selected video. Click on ‘Make’ at the top right when you finish the editing process.
Step 5:
If you have the paid version of the app, you can take up multiple repeats of your live photo; else you can use the free version with no repeats.
Step 6:
Once you are satisfied with the result, click on ‘Save Live Photo’. This will save your created live photo in your device’s gallery.
02VideoToLive
This is a free converter you can choose to turn video into live photo. This is a quite popular tool among iPhone users worldwide and is suitable for iOS versions 11.2 and later. You also have the liberty to share your created live photos on social media with this converter. Take the following steps to begin the conversion process:
Step 1:
Download the application from the Apple App Store and launch it on your iOS device.
Step 2:
Choose a video from your device gallery to convert it into a live photo.
Step 3:
In the video editor screen, crop the video to the preferred section that has to be converted into live photo. You can add video frames to your edited clip from the upper section of the editor screen.
Step 4:
Click on ‘Convert’ at the top right corner to initiate the conversion process.
03Android Devices
Live photos are undoubtedly known to add spark to your cherished moments, but the notch that puts these off with Android devices is that you can enjoy live photos on these devices only as live wallpapers.
Being an iPhone exclusive utility, Android devices lack the flexibility to capture live images. However, you can see them move on being set as live screen wallpapers. A handy alternative to this is converting a turn video into live photo and use it as live wallpaper. Here’s how you can take up the conversion process:
● TurnLive- Live Wallpaper
This one is a convenient, third party tool that lets you turn video into live photo in just a few quick steps. You can either use this application for free, or upgrade to the paid version to enjoy its premium features. To make amazing live photos from videos using this tool, you need to take up the steps given below:
Step 1: App Installation
To begin, visit the Google Playstore in your Android device and download the TurnLive- Live Wallpaper application. Next, you need install and launch the app in your device and accept its terms of service.
Step 2: Select a Video
Once you are done, click on the ‘Live Photo’ icon in the bottom of the app’s opening screen to reach the video selection page. Here, you need to choose ‘Video to Live Wallpaper’ option and grant the required app permissions to access your device’s camera and gallery. Select a desired video from the ones saved in your device and click ‘Done’ at the top right.
Step 3: Edit Your Video
You will now get directed to the app’s editor window, where you need to trim the selected video within a time frame of 1-5 seconds. To do this, select a cover frame within the clip and click ‘Next’. You can now use the video slider at the bottom to trim the clip. Adding suitable video effects and filters is also possible with this tool.
Step 4: It’s Almost Done!
When you finish editing, click ‘Next’ and choose the number of repeats for the created live photo. Wait for the conversion to finish and click on ‘My Wallpapers’ to view your creation.
Step 5: Download Your Live Photo!
Click ‘Download’ and tap ‘Clear’ in the app’s prompt message to remove your device’s current screen wallpaper. Next, allow the app to access your system settings. Once this finishes, tap ‘Clear’ again to download your creation. You will now get directed to a black screen tagged ‘DayTime LWP’. Click on ‘Set Wallpaper’ in this screen to make your live photo, the current wallpaper of your Android device.
● Video Live Wallpaper
This is another free app that you can use to your videos into amazing live photos in just 4 quick steps. All you need to do is explained in the following steps:
Step 1: download the Application
Download the Video Live Wallpaper application in your Android device from Google Playstore and proceed for its installation and launch.
Step 2: Select Your Video
In the app’s opening screen, click ‘Choose Video’ and grant app permissions to access your device’s media. Browse your video gallery to select a desired video that you wish to convert into a live photo.
Step 3: Edit Your Video
You will now get directed to the app’s editor screen. Here, you can explore your editing creativity to edit the selected video. Once you are happy, click the picture icon at the top right corner.
Step 4: Your Live Wallpaper is Ready!
To set the created live photo as your device screen wallpaper, select ‘Set as Wallpaper’ at the bottom right.
● Key Takeaways from This Episode →
● From cherishing moments to sharing them on social media, live photos can do it all.
● Being an iPhone exclusive utility, you need to create these from videos to enjoy them on other platforms and devices.
● Filmora is the best video to live photo converters, available as an easy, quick and convenient conversion tool.
Best 10 Animoji Apps You Can Use to Edit Animoji
Best 10 Animoji Apps You Can Use to Edit Animoji
Shanoon Cox
Mar 27, 2024• Proven solutions
Animojis are animated emojis first developed by Apple for iOS users. Animojis are 3D avatars that can mimic and duplicate your facial expressions through the face ID camera system. They can make any conversation entertaining, convey your feelings more clearly and can be used across different social media networks. iPhones and some high-end Android phones have built-in animoji apps but this feature is not available on every device. Don’t worry if you do not have an expensive phone because there are many animoji apps for both Android and iOS.
Today, we will talk about the 10 best animoji apps to edit animoji on android and IOS. So, let’s begin!
Best 10 And Emoji Apps to Edit Animoji
Most of the smartphones today come with the facial recognition feature (also known as face ID). This means that any phone that features face ID can also be used to create and edit animoji. Thus, even if your phone does not come with a featured animoji app, you can download any one of the 10 best animoji apps down below!
Note: Some of these apps are available for Android only, while others are compatible with both Android and IOS.
- 1. Anymoji (Android)
- 2. Bitmoji (Android and iPhone)
- 3. Disney Emoji Blitz (Android and iPhone)
- 4. SuperMoji (Android and iOS)
- 5. Zepeto (Android and iOS)
- 6. Emoji Face Recorder (Android and iOS)
- 7. Mirror (Android and iPhone)
- 8. Mojipop (Android and iPhone)
- 9. Emoji Maker (Android)
- 10. Big Emoji (Android)
1.Anymoji (Android)
Anymoji is a 3D emoji, avatar, and cartoon creation and editing app. It offers an extensive library of face emoji avatars that can duplicate your facial expressions and mimic your voice. This animoji maker for Android allows you to create cool stories and posts for social media. The best part about this app is that it is free to download. Moreover, it does not require any registration or sign up. With over one million downloads on Google Play Store, anymoji has become the go-to app for 3D Avatar creation!
2.Bitmoji (Android and iPhone)
The bitmoji app is designed by Bitstrips that is acquired by Snapchat. It is one of the most popular emoji utility apps and web extensions. It allows you to create personalized emojis with a custom Avatar of yourself. You can use bitmoji to create and edit your own animated cartoons combined with a library of emotions, expressions, and stickers – all featuring YOU! The bitmoji app allows you to copy and paste your bitmojis virtually anywhere, including social media apps like Facebook, Instagram, or Snapchat.
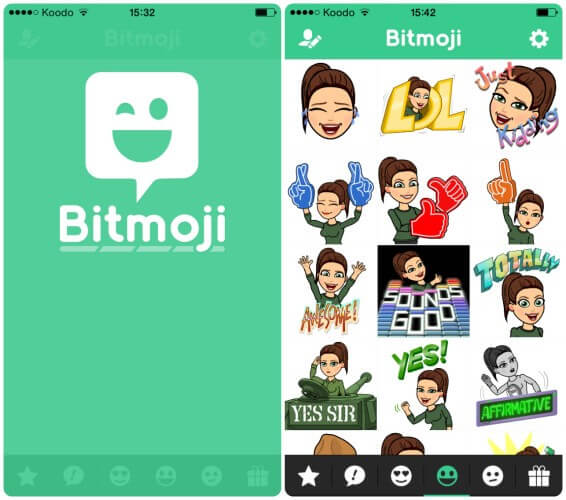
3.Disney Emoji Blitz (Android and iPhone)
Disney emoji black is an app that features hundreds of Disney Star Wars and Pixar emojis. It is not just an animoji maker but it also serves as a gaming app. You can virtually play with all your Disney characters here. From frozen Elsa to Aladdin’s genie, you can play with over 400 different Disney and Pixar characters. So, collect and chat with your favorite Disney characters through this fun emoji app!
4.SuperMoji (Android and iOS)
Supermoji is yet another popular and emoji app that allows you to create and edit funny emoticons and animojis. It supports both sound and videos and is compatible with both Android and IOS. Supermoji offers high quality animated emojis that you can control and animate with your gestures and facial expressions. 8 uses many popular animojis, including cat, alien, poop, chicken, and dog. One of the best things about this app is that it is also compatible with older devices, so even if you do not have the latest iOS or Android phone, you can still create animoji using this app.
5.Zepeto (Android and iOS)
Zepeto is created by SNOW corporation for both iOS and Android. It is a custom Avatar creation app that allows you to personalize your avatar with millions of options. From hairstyle to clothing and makeup, you can create a full custom version of yourself through this app. Zepeto reads and copies your facial expressions and creates a custom sticker for you. This app will save your animated stickers that can later be used during conversations on social media platforms. Moreover, you can also add special effects on the stickers and edit animoji whenever you want.
6.Emoji Face Recorder (Android and iOS)
Emoji face recorder is another popular and emoji app that allows you to create live avatars and selfies on your smartphone. This app includes different 3D stickers like zebra, Santa Claus, deer, octopus, panda, leopard, squirrel, etc. So, record your face and your expressions to different 3D models without any hassle now. You can share your stickers and gifs on social media apps and amuse your friends all day!
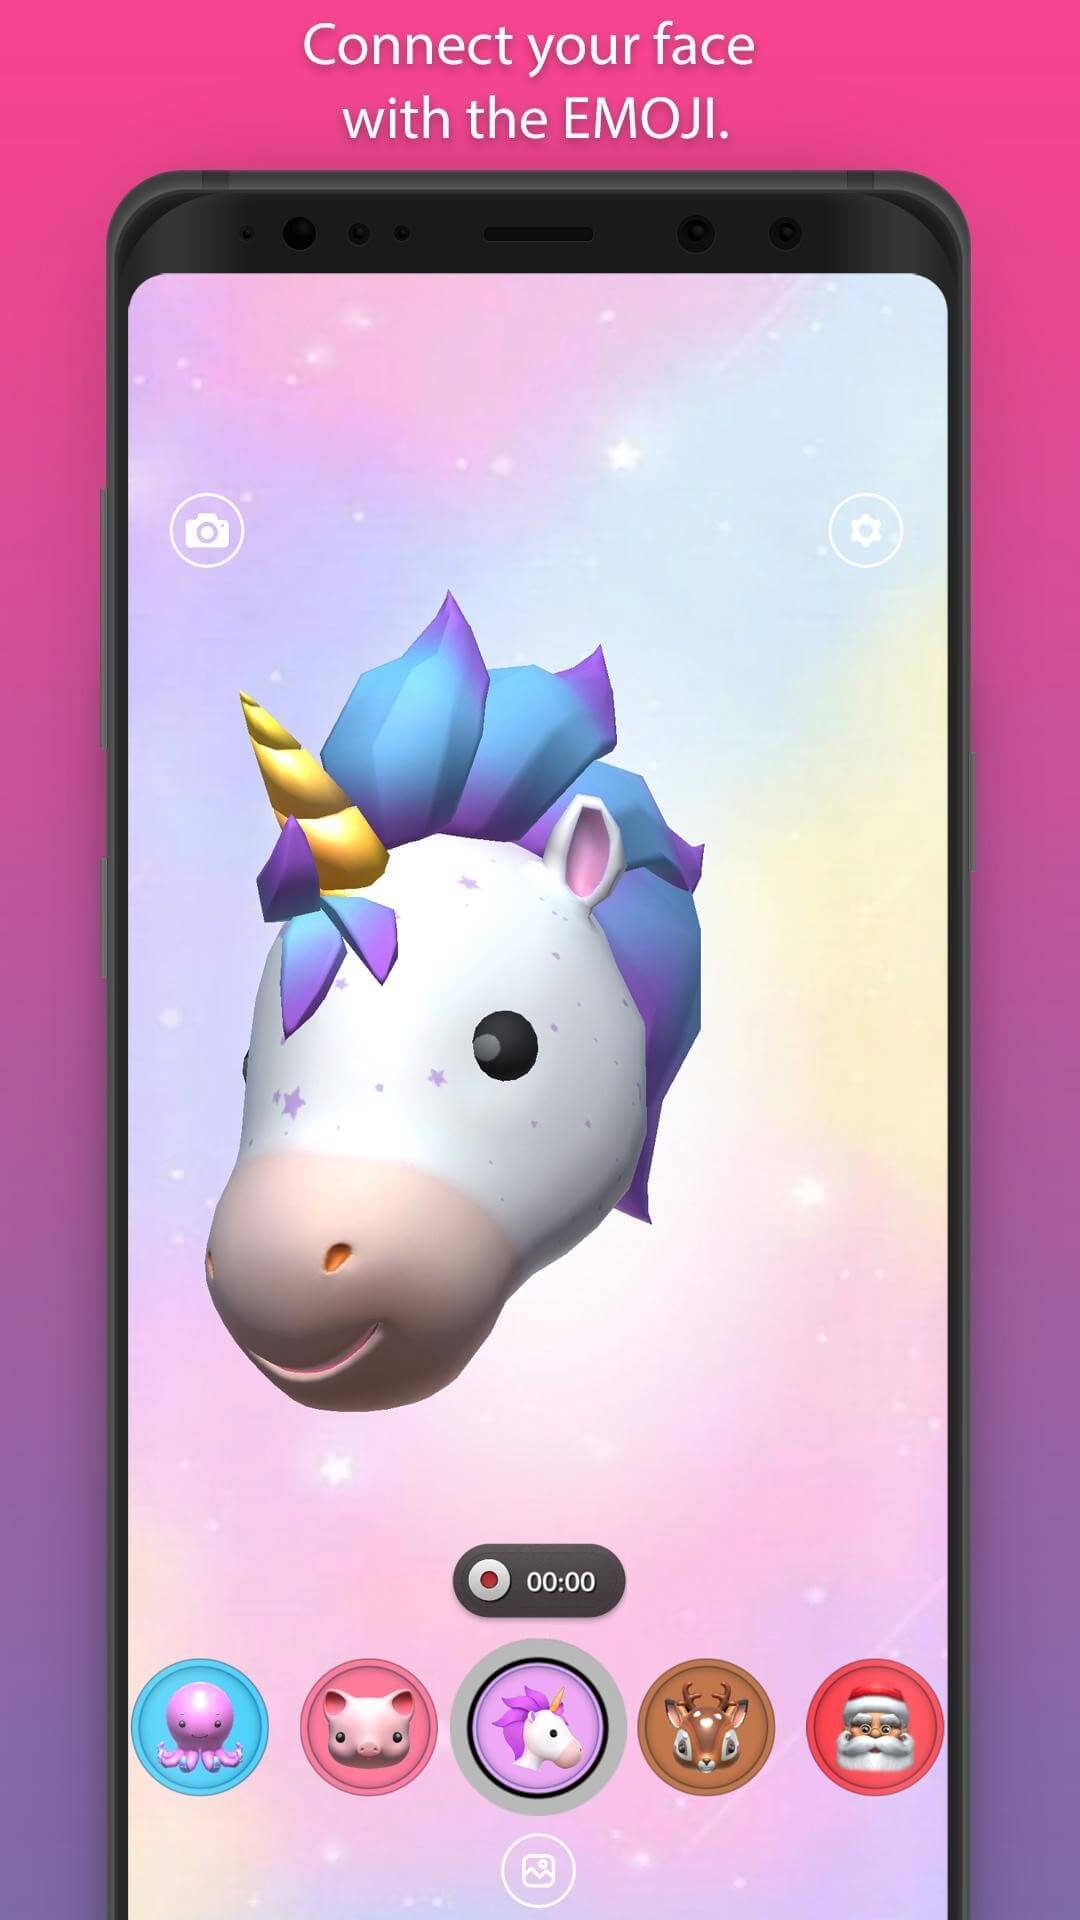
7.Mirror (Android and iPhone)
Mirror is a fun emoji maker that allows you to create funny animoji on your iPhone and iOS device. This app has more than 1500+ stickers that you can customize. Along with this, you can also use this app to create full 3D avatars of yourself with the real-time face swap option. You can share and send your personal emojis to friends and family on Messenger, WhatsApp, and Snapchat.

8.Mojipop (Android and iPhone)
Mojipop is an app that you can use to take a selfie and create your own avatars and stickers. This app has an advanced facial recognition feature, so it is very easy to create and edit animojis with Mojipop. You can share them on social media and use them in day-to-day conversations to make them more fun. It also allows you to create a personalized GIF sticker on this device.
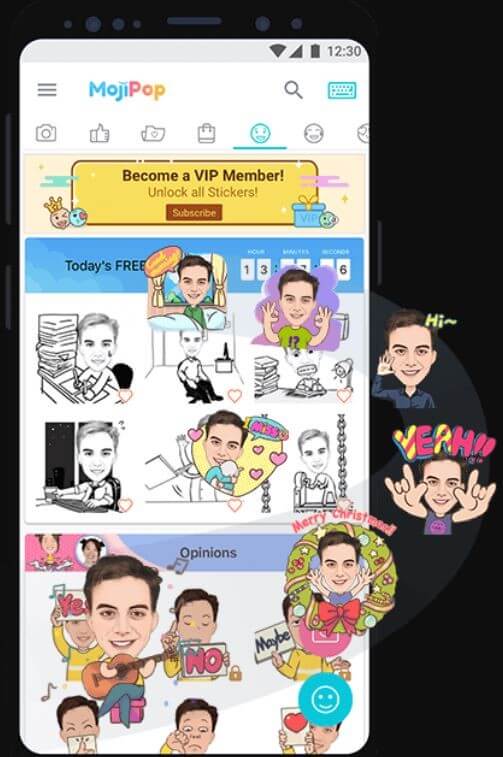
9.Emoji Maker (Android)
Emoji maker app can create free personal and animated phone emojis. It has many popular characters like a pig, fox, cat, panda, and other animated emojis. Moreover, you can also create your avatar by customizing your face, hair, body, and more. You can choose from a wide range of moods, expressions, and animated text as well. Emoji Maker app also allows you to send and receive animated emojis on your phone. This is a very simple 3D animated Avatar and sticker making app that anyone can easily use and express themselves!
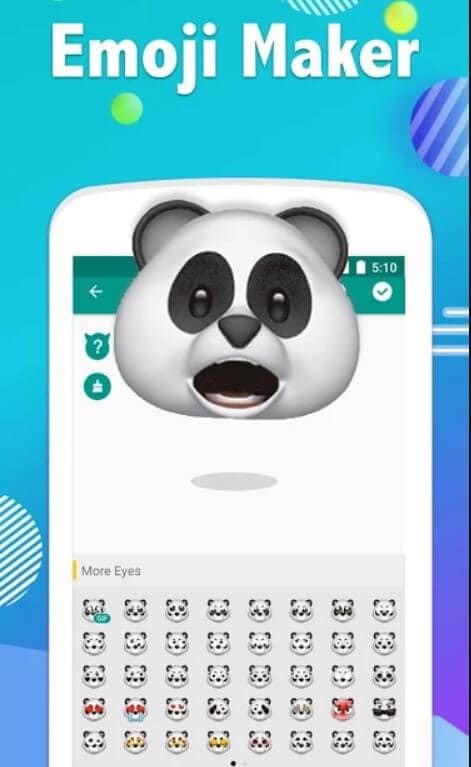
10.Big Emoji (Android)
big emoji is a 3D Avatar creator app for Android that can create your 3D avatars and animojis. This app has over 5000+ emojis and emoticons. It allows you to edit and customize emojis by changing the background, color, and other features. It is easy to use, and it is compatible with older devices as well. Like other emoji apps, Big Emoji also allows you to send and share custom emojis on social media apps like Messenger, Facebook, WhatsApp, and Snapchat.
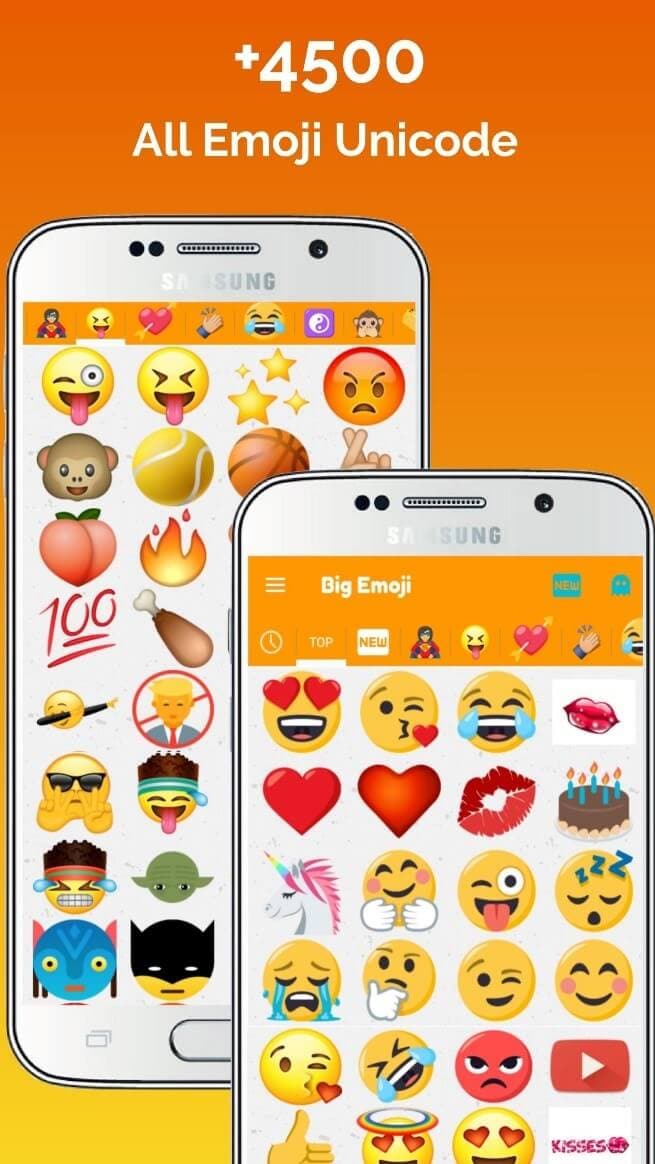
Bonus Tip-Add Animoji to Your Video with Wondershare Filmora
Filmora from Wondershare is one of the most popular video editing tools that comes with various cool features. It is user-friendly with an intuitive interface that makes the app suitable for beginners as well.
Filmora is the number one tool for all types of video editing , whether you create YouTube vlogs, Professional Videos, or TikToks. So, no matter what the purpose, Wondershare Filmora is the best tool to test your creativity.
How to Add Animoji in Video with Wondershare Filmora?
One of the best features of Wondershare Filmora is motion tracking. You can use this feature to add and edit emojis and animojis in any video. Motion tracking allows you to track the movement of something in a video to add images, text, stickers, or emojis.
Follow these steps to add animoji/emoji in your videos using the motion tracking feature in Wondershare Filmora:
Step 1: Download and Install Filmora
First of all, download and install Wondershare Filmora on your Mac or PC from the official website.


Step 2: Launch the Wondershare Filmora
Once you install the app, launch it on the desktop, and open the app.
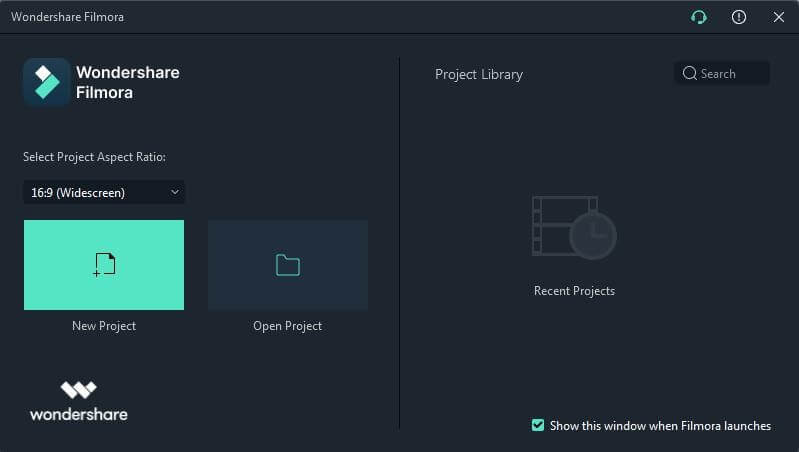
Step 3: Import Video
Now, click on the “Import Media Files Here” option on the welcome screen and import the video and emoji/animoji to the media library. Once the files are uploaded, they will appear on the left side of the screen in Media Tab.

Step 4: Add Emoji or Animoji to Video
Drag the video from the Media Tab and drop it onto a video track on the timeline. Now, to apply motion tracking, place the play-head at the beginning of the clip. The video tracking will start wherever the play-head.
Now, click on the icon in the timeline bar to enable the motion tracking tool. Once the tracking box appears, move it to select the object that you want to track. Now you can place the emoji or Animoji that you want to add. Go to the Media Tab and select the Animoji. Place it wherever you want to.
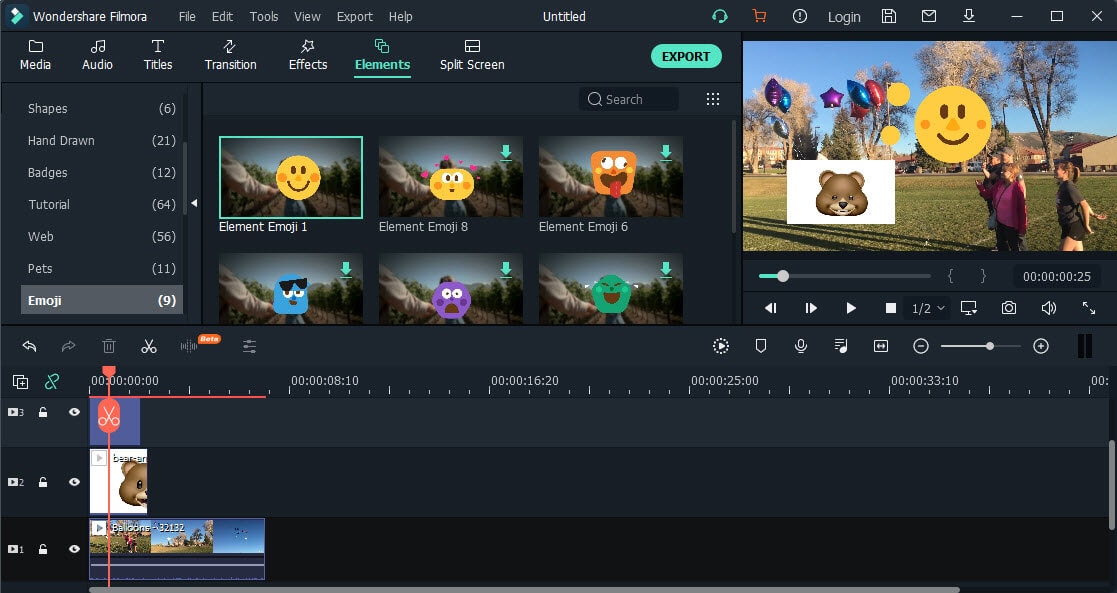
Step 5: Export Video
Click on the Export button and export your video to your computer or directly to a YouTube or Vimeo channel.
Conclusion
Modern communication is all about emojis and expressions. Nowadays, emojis and animojis have become an essential part of all our digital interactions and communications. From popular social media apps to smartphone keywords, emojis are present everywhere! If you don’t know how to create and edit animoji, use one of the 10 best animoji apps mentioned above!
Shanoon Cox
Shanoon Cox is a writer and a lover of all things video.
Follow @Shanoon Cox
Shanoon Cox
Mar 27, 2024• Proven solutions
Animojis are animated emojis first developed by Apple for iOS users. Animojis are 3D avatars that can mimic and duplicate your facial expressions through the face ID camera system. They can make any conversation entertaining, convey your feelings more clearly and can be used across different social media networks. iPhones and some high-end Android phones have built-in animoji apps but this feature is not available on every device. Don’t worry if you do not have an expensive phone because there are many animoji apps for both Android and iOS.
Today, we will talk about the 10 best animoji apps to edit animoji on android and IOS. So, let’s begin!
Best 10 And Emoji Apps to Edit Animoji
Most of the smartphones today come with the facial recognition feature (also known as face ID). This means that any phone that features face ID can also be used to create and edit animoji. Thus, even if your phone does not come with a featured animoji app, you can download any one of the 10 best animoji apps down below!
Note: Some of these apps are available for Android only, while others are compatible with both Android and IOS.
- 1. Anymoji (Android)
- 2. Bitmoji (Android and iPhone)
- 3. Disney Emoji Blitz (Android and iPhone)
- 4. SuperMoji (Android and iOS)
- 5. Zepeto (Android and iOS)
- 6. Emoji Face Recorder (Android and iOS)
- 7. Mirror (Android and iPhone)
- 8. Mojipop (Android and iPhone)
- 9. Emoji Maker (Android)
- 10. Big Emoji (Android)
1.Anymoji (Android)
Anymoji is a 3D emoji, avatar, and cartoon creation and editing app. It offers an extensive library of face emoji avatars that can duplicate your facial expressions and mimic your voice. This animoji maker for Android allows you to create cool stories and posts for social media. The best part about this app is that it is free to download. Moreover, it does not require any registration or sign up. With over one million downloads on Google Play Store, anymoji has become the go-to app for 3D Avatar creation!
2.Bitmoji (Android and iPhone)
The bitmoji app is designed by Bitstrips that is acquired by Snapchat. It is one of the most popular emoji utility apps and web extensions. It allows you to create personalized emojis with a custom Avatar of yourself. You can use bitmoji to create and edit your own animated cartoons combined with a library of emotions, expressions, and stickers – all featuring YOU! The bitmoji app allows you to copy and paste your bitmojis virtually anywhere, including social media apps like Facebook, Instagram, or Snapchat.
3.Disney Emoji Blitz (Android and iPhone)
Disney emoji black is an app that features hundreds of Disney Star Wars and Pixar emojis. It is not just an animoji maker but it also serves as a gaming app. You can virtually play with all your Disney characters here. From frozen Elsa to Aladdin’s genie, you can play with over 400 different Disney and Pixar characters. So, collect and chat with your favorite Disney characters through this fun emoji app!
4.SuperMoji (Android and iOS)
Supermoji is yet another popular and emoji app that allows you to create and edit funny emoticons and animojis. It supports both sound and videos and is compatible with both Android and IOS. Supermoji offers high quality animated emojis that you can control and animate with your gestures and facial expressions. 8 uses many popular animojis, including cat, alien, poop, chicken, and dog. One of the best things about this app is that it is also compatible with older devices, so even if you do not have the latest iOS or Android phone, you can still create animoji using this app.
5.Zepeto (Android and iOS)
Zepeto is created by SNOW corporation for both iOS and Android. It is a custom Avatar creation app that allows you to personalize your avatar with millions of options. From hairstyle to clothing and makeup, you can create a full custom version of yourself through this app. Zepeto reads and copies your facial expressions and creates a custom sticker for you. This app will save your animated stickers that can later be used during conversations on social media platforms. Moreover, you can also add special effects on the stickers and edit animoji whenever you want.
6.Emoji Face Recorder (Android and iOS)
Emoji face recorder is another popular and emoji app that allows you to create live avatars and selfies on your smartphone. This app includes different 3D stickers like zebra, Santa Claus, deer, octopus, panda, leopard, squirrel, etc. So, record your face and your expressions to different 3D models without any hassle now. You can share your stickers and gifs on social media apps and amuse your friends all day!
7.Mirror (Android and iPhone)
Mirror is a fun emoji maker that allows you to create funny animoji on your iPhone and iOS device. This app has more than 1500+ stickers that you can customize. Along with this, you can also use this app to create full 3D avatars of yourself with the real-time face swap option. You can share and send your personal emojis to friends and family on Messenger, WhatsApp, and Snapchat.
8.Mojipop (Android and iPhone)
Mojipop is an app that you can use to take a selfie and create your own avatars and stickers. This app has an advanced facial recognition feature, so it is very easy to create and edit animojis with Mojipop. You can share them on social media and use them in day-to-day conversations to make them more fun. It also allows you to create a personalized GIF sticker on this device.
9.Emoji Maker (Android)
Emoji maker app can create free personal and animated phone emojis. It has many popular characters like a pig, fox, cat, panda, and other animated emojis. Moreover, you can also create your avatar by customizing your face, hair, body, and more. You can choose from a wide range of moods, expressions, and animated text as well. Emoji Maker app also allows you to send and receive animated emojis on your phone. This is a very simple 3D animated Avatar and sticker making app that anyone can easily use and express themselves!
10.Big Emoji (Android)
big emoji is a 3D Avatar creator app for Android that can create your 3D avatars and animojis. This app has over 5000+ emojis and emoticons. It allows you to edit and customize emojis by changing the background, color, and other features. It is easy to use, and it is compatible with older devices as well. Like other emoji apps, Big Emoji also allows you to send and share custom emojis on social media apps like Messenger, Facebook, WhatsApp, and Snapchat.
Bonus Tip-Add Animoji to Your Video with Wondershare Filmora
Filmora from Wondershare is one of the most popular video editing tools that comes with various cool features. It is user-friendly with an intuitive interface that makes the app suitable for beginners as well.
Filmora is the number one tool for all types of video editing , whether you create YouTube vlogs, Professional Videos, or TikToks. So, no matter what the purpose, Wondershare Filmora is the best tool to test your creativity.
How to Add Animoji in Video with Wondershare Filmora?
One of the best features of Wondershare Filmora is motion tracking. You can use this feature to add and edit emojis and animojis in any video. Motion tracking allows you to track the movement of something in a video to add images, text, stickers, or emojis.
Follow these steps to add animoji/emoji in your videos using the motion tracking feature in Wondershare Filmora:
Step 1: Download and Install Filmora
First of all, download and install Wondershare Filmora on your Mac or PC from the official website.
Step 2: Launch the Wondershare Filmora
Once you install the app, launch it on the desktop, and open the app.
Step 3: Import Video
Now, click on the “Import Media Files Here” option on the welcome screen and import the video and emoji/animoji to the media library. Once the files are uploaded, they will appear on the left side of the screen in Media Tab.
Step 4: Add Emoji or Animoji to Video
Drag the video from the Media Tab and drop it onto a video track on the timeline. Now, to apply motion tracking, place the play-head at the beginning of the clip. The video tracking will start wherever the play-head.
Now, click on the icon in the timeline bar to enable the motion tracking tool. Once the tracking box appears, move it to select the object that you want to track. Now you can place the emoji or Animoji that you want to add. Go to the Media Tab and select the Animoji. Place it wherever you want to.
Step 5: Export Video
Click on the Export button and export your video to your computer or directly to a YouTube or Vimeo channel.
Conclusion
Modern communication is all about emojis and expressions. Nowadays, emojis and animojis have become an essential part of all our digital interactions and communications. From popular social media apps to smartphone keywords, emojis are present everywhere! If you don’t know how to create and edit animoji, use one of the 10 best animoji apps mentioned above!
Shanoon Cox
Shanoon Cox is a writer and a lover of all things video.
Follow @Shanoon Cox
6 Unexpected Ways Gif Animation Maker Can Affect Your Marketing
6 Unexpected Ways Gif Animation Maker Can Affect Your Marketing
An easy yet powerful editor
Numerous effects to choose from
Detailed tutorials provided by the official channel
Well, if what you’re looking for is a GIF animation maker or software for GIF Animation, we’ve got your back This article starts off with a list of some GIF animation maker tools that you can use to turn your videos into a GIF file (just to give you an idea of how those can help you move forward in your GIF marketing attempts more easily.)
Before ending in a quick rundown, a couple of reasons why GIFs are worth the investment in the first place.
In this article
01 [In What Ways Can You turn videos into a GIF?](#Part 1)
02 [How Gif Animation Maker Affect Your Marketing](#Part 2)
Part 1 In What Ways Can You turn videos into a GIF?
As promised, we’ll be starting off with the tools that you’ll need in order to create GIFs easily (or GIF Animation Maker tools, if you’d prefer). We’ve made sure to pick out a variety for you so that you won’t have to go looking elsewhere for other options We also included what people tend to like and dislike about each option so that you can make a choice as to what you think is the best GIF animation maker more easily.
01**Wondershare Filmora **
If what you’re looking for is software for GIF animation, then Filmora is your best bet This software is available for both Mac and Windows users (with options for both a perpetual license and subscription packages for you to choose from.) This is a video editing tool that is capable of making incredibly professional results. And, perhaps more importantly (considering the subject of this article), it will allow you easily turn a video into a 2D Animation GIF that you can use for your marketing
URL: https://filmora.wondershare.com/
What People Like About The Maker
●Comes with advanced video editing functions
●Easily turns videos into 2D Animation GIFs
●Produces High-Quality Results each time
What People Don’t Like About The Maker
●It is a software, which requires download and installation
●The FREE version is limited
●Must pay either a subscription fee or one-time fee for full access

02Canva
If you’ve created marketing projects before, then you’ve no doubt already heard of Canva. This is what a lot of content creators use in order to easily create content for marketing online In this case, of course, we’re looking at it as an online GIF animation maker, one that, unlike Filmora, requires no download (but will require sign-up) for you to use. Canva has its own GIF Animation Maker that you can use (different from the regular Canva you might be more familiar with, as is shown in the UI screenshot below).
URL: https://www.canva.com/create/gif-maker/
What People Like About The Maker
●It is an online tool, no download or installation is required
●Built-in media library for convenient project creation
●Intuitive 2D Animation GIF interface
What People Don’t Like About The Maker
●Not as advanced when it comes to video editing functions
●Limited FREE trial version
●Must unlock Premium version (subscription-based) for full access

03PicMonkey
The next tool on this is another online GIF Animation maker, this time by the name of PicMonkey This tool is very similar to Canva in that many people know it primarily as a photo-editor tool that is great to use for creating content (as it comes with a built-in media library that you can use to quickly finish projects). But it still earned a spot on this list of ours because it allows users to create 2D animation GIFs as well
URL: https://www.picmonkey.com/
What People Like About The Maker
●Built-in media library with animated shapes and images
●GIF Animation editor and creator all-at-once
●FREE trial is available to test out its GIF animation maker functions
What People Don’t Like About The Maker
●In order to have full access, one must pay for the premium solution
●Custom animation is limited in scope
●No advanced video editing functions

04Kapwing
Kapwing is a free GIF animation creator that will allow you to create GIFs from videos easily The best part about is that it has a FREE version available for use (one that allows you to download finished video projects without watermarks so long as they are under 5 minutes). This should allow you to test out its GIF maker functions before you commit to their premium version (which is subscription-based).
URL: https://www.kapwing.com/gif-maker
What People Like About The Maker
●FREE to use with some limitations
●Quick and easy video-to-GIF conversion
●No watermark on images or video projects under 5 minutes
What People Don’t Like About The Maker
●Full access can only be unlocked by paying for the premium version
●Premium version is subscription-based and expensive
●There is an upload limit
05MakeAGif
MakeAGif is the last GIF animation maker on this list, and it just so happens that it’s one of the easiest to use as well This one is more of a converter tool in that it transforms already-finished videos into a GIF that you can share. A lot of people use it to convert their favorite videos from social media (YouTube, Facebook, etc.) into a GIF that they can share on other platforms.
URL: https://makeagif.com/video-to-gif
What People Like About The Maker
●Free to use with some limitations
●Quick and easy-to-use Video to GIF converter
●Converts pictures, YouTube videos, Facebook videos, etc. to GIF
What People Don’t Like About The Maker
●The tool is more limited in scope than the rest of the tools on this list
●The FREE version is limited
●Premium version requires paying a subscription fee
Part 2 How Gif Animation Maker Affect Your Marketing
Alright, now that you’ve been introduced to what we consider the best GIF Animation maker tools available right now (be they software or online tools), we can move on to actually discussing how you can use GIFs for your marketing efforts We’ve compiled six different ways here, but there are plenty of others, of course. It’s a very open subject.
01GIFs Are Easy to Share Ads
The best part of GIFs is that they are easily consumable media that you can share just about everywhere. For example, you can include them in your email marketing to bring a little life to what could have otherwise been a very dry message You can also have it play out on social media without prompting (different from videos, which the user usually has to play before it starts going.)
GIF LINK: https://media.giphy.com/media/fEkpR6rfmXmZHeVQ22/giphy.gif

02GIFs Can Be Used for Promoting Events
GIFs are also great for promoting events or holiday sales It’s basically just a moving 2D advertisement (like the one that is shown below). Eye-catching in a way that keeps you looking to catch the movement — in compared to if you were just looking at a still image (which might catch your attention for a moment, but usually bores you the next)
GIF LINK: https://media.giphy.com/media/WtUMnz9ZUuzwojWwij/giphy.gif
03GIFs Can Be Used for Call-to-Action Pop-Ups
Perhaps you’ve seen this already in some YouTube videos (see the GIF attached for an example), but a lot of content creators now include GIFs on their content to prompt their audience to complete an action — be it subscribing, sharing, downloading a link, buying a product, etc. It’s a great way of getting a message across in a way that is both fun and straightforward
GIF: https://media.giphy.com/media/73oSygWJFG9K1ha75z/giphy.gif
04GIFs Can Be Used to Set the Scene and Express Emotion
GIFs are also a great way to just generally set the scene or express emotion. Text is…very very difficult to make sound like anything but dry reading. Pictures are a little better, but GIFs??? Well, GIFs are great ‘moving’ pictures that offer you more leeway to set the scene by expressing emotion, intent, etc.
GIF: https://media.giphy.com/media/keizDG1zD7Q38yWm3x/giphy.gif
05GIFs Can Be Used to Tell a Story
You know the saying, “A picture can speak a thousand words?” Well, it’s true, but in comparison to GIFs??? Pictures definitely lose out in telling a story. See the attached GIF for example. With just one look, you can probably create an entire story in your head about the woman that is featured This can be very useful for future marketing prospects.
GIF: https://media.giphy.com/media/Kb5zI3B9D7cCulbNOg/giphy.gif

06GIFs Can Be Used to Explain or Share Instructions
In the same way that you can create long infographics to offer instructions or teach a lesson on a particular subject, GIFs can be used to educate your audience. Only, it’s a lot easier to use for this reason No complicated infographics formatting is required You can just put together several stills showing the step-by-step process or record a silent video like the one shown in the GIF below
GIF: https://media.giphy.com/media/FgiHOQyKUJmwg/giphy.gif
● Key Takeaways from This Episode →
● GIFs have been used for years in order to share fun moments and memes, but it has much more potential than that
● With a carefully designed GIF, not only can you catch the attention of your audience, but you can also keep that attention for much longer than you would have been able to if you were just sharing text or a still image Making it a perfect vessel for future marketing efforts
● Now, in order to make sure that you get a good story on your marketing efforts via GIF, we’ve listed some of the best GIF animation maker tools for you in the first part of this article
● A second part has also been added where we discussed all the different ways that you can use 2D Animation GIFs in your future marketing endeavors.
Well, if what you’re looking for is a GIF animation maker or software for GIF Animation, we’ve got your back This article starts off with a list of some GIF animation maker tools that you can use to turn your videos into a GIF file (just to give you an idea of how those can help you move forward in your GIF marketing attempts more easily.)
Before ending in a quick rundown, a couple of reasons why GIFs are worth the investment in the first place.
In this article
01 [In What Ways Can You turn videos into a GIF?](#Part 1)
02 [How Gif Animation Maker Affect Your Marketing](#Part 2)
Part 1 In What Ways Can You turn videos into a GIF?
As promised, we’ll be starting off with the tools that you’ll need in order to create GIFs easily (or GIF Animation Maker tools, if you’d prefer). We’ve made sure to pick out a variety for you so that you won’t have to go looking elsewhere for other options We also included what people tend to like and dislike about each option so that you can make a choice as to what you think is the best GIF animation maker more easily.
01**Wondershare Filmora **
If what you’re looking for is software for GIF animation, then Filmora is your best bet This software is available for both Mac and Windows users (with options for both a perpetual license and subscription packages for you to choose from.) This is a video editing tool that is capable of making incredibly professional results. And, perhaps more importantly (considering the subject of this article), it will allow you easily turn a video into a 2D Animation GIF that you can use for your marketing
URL: https://filmora.wondershare.com/
What People Like About The Maker
●Comes with advanced video editing functions
●Easily turns videos into 2D Animation GIFs
●Produces High-Quality Results each time
What People Don’t Like About The Maker
●It is a software, which requires download and installation
●The FREE version is limited
●Must pay either a subscription fee or one-time fee for full access
02Canva
If you’ve created marketing projects before, then you’ve no doubt already heard of Canva. This is what a lot of content creators use in order to easily create content for marketing online In this case, of course, we’re looking at it as an online GIF animation maker, one that, unlike Filmora, requires no download (but will require sign-up) for you to use. Canva has its own GIF Animation Maker that you can use (different from the regular Canva you might be more familiar with, as is shown in the UI screenshot below).
URL: https://www.canva.com/create/gif-maker/
What People Like About The Maker
●It is an online tool, no download or installation is required
●Built-in media library for convenient project creation
●Intuitive 2D Animation GIF interface
What People Don’t Like About The Maker
●Not as advanced when it comes to video editing functions
●Limited FREE trial version
●Must unlock Premium version (subscription-based) for full access
03PicMonkey
The next tool on this is another online GIF Animation maker, this time by the name of PicMonkey This tool is very similar to Canva in that many people know it primarily as a photo-editor tool that is great to use for creating content (as it comes with a built-in media library that you can use to quickly finish projects). But it still earned a spot on this list of ours because it allows users to create 2D animation GIFs as well
URL: https://www.picmonkey.com/
What People Like About The Maker
●Built-in media library with animated shapes and images
●GIF Animation editor and creator all-at-once
●FREE trial is available to test out its GIF animation maker functions
What People Don’t Like About The Maker
●In order to have full access, one must pay for the premium solution
●Custom animation is limited in scope
●No advanced video editing functions
04Kapwing
Kapwing is a free GIF animation creator that will allow you to create GIFs from videos easily The best part about is that it has a FREE version available for use (one that allows you to download finished video projects without watermarks so long as they are under 5 minutes). This should allow you to test out its GIF maker functions before you commit to their premium version (which is subscription-based).
URL: https://www.kapwing.com/gif-maker
What People Like About The Maker
●FREE to use with some limitations
●Quick and easy video-to-GIF conversion
●No watermark on images or video projects under 5 minutes
What People Don’t Like About The Maker
●Full access can only be unlocked by paying for the premium version
●Premium version is subscription-based and expensive
●There is an upload limit
05MakeAGif
MakeAGif is the last GIF animation maker on this list, and it just so happens that it’s one of the easiest to use as well This one is more of a converter tool in that it transforms already-finished videos into a GIF that you can share. A lot of people use it to convert their favorite videos from social media (YouTube, Facebook, etc.) into a GIF that they can share on other platforms.
URL: https://makeagif.com/video-to-gif
What People Like About The Maker
●Free to use with some limitations
●Quick and easy-to-use Video to GIF converter
●Converts pictures, YouTube videos, Facebook videos, etc. to GIF
What People Don’t Like About The Maker
●The tool is more limited in scope than the rest of the tools on this list
●The FREE version is limited
●Premium version requires paying a subscription fee
Part 2 How Gif Animation Maker Affect Your Marketing
Alright, now that you’ve been introduced to what we consider the best GIF Animation maker tools available right now (be they software or online tools), we can move on to actually discussing how you can use GIFs for your marketing efforts We’ve compiled six different ways here, but there are plenty of others, of course. It’s a very open subject.
01GIFs Are Easy to Share Ads
The best part of GIFs is that they are easily consumable media that you can share just about everywhere. For example, you can include them in your email marketing to bring a little life to what could have otherwise been a very dry message You can also have it play out on social media without prompting (different from videos, which the user usually has to play before it starts going.)
GIF LINK: https://media.giphy.com/media/fEkpR6rfmXmZHeVQ22/giphy.gif
02GIFs Can Be Used for Promoting Events
GIFs are also great for promoting events or holiday sales It’s basically just a moving 2D advertisement (like the one that is shown below). Eye-catching in a way that keeps you looking to catch the movement — in compared to if you were just looking at a still image (which might catch your attention for a moment, but usually bores you the next)
GIF LINK: https://media.giphy.com/media/WtUMnz9ZUuzwojWwij/giphy.gif
03GIFs Can Be Used for Call-to-Action Pop-Ups
Perhaps you’ve seen this already in some YouTube videos (see the GIF attached for an example), but a lot of content creators now include GIFs on their content to prompt their audience to complete an action — be it subscribing, sharing, downloading a link, buying a product, etc. It’s a great way of getting a message across in a way that is both fun and straightforward
GIF: https://media.giphy.com/media/73oSygWJFG9K1ha75z/giphy.gif
04GIFs Can Be Used to Set the Scene and Express Emotion
GIFs are also a great way to just generally set the scene or express emotion. Text is…very very difficult to make sound like anything but dry reading. Pictures are a little better, but GIFs??? Well, GIFs are great ‘moving’ pictures that offer you more leeway to set the scene by expressing emotion, intent, etc.
GIF: https://media.giphy.com/media/keizDG1zD7Q38yWm3x/giphy.gif
05GIFs Can Be Used to Tell a Story
You know the saying, “A picture can speak a thousand words?” Well, it’s true, but in comparison to GIFs??? Pictures definitely lose out in telling a story. See the attached GIF for example. With just one look, you can probably create an entire story in your head about the woman that is featured This can be very useful for future marketing prospects.
GIF: https://media.giphy.com/media/Kb5zI3B9D7cCulbNOg/giphy.gif
06GIFs Can Be Used to Explain or Share Instructions
In the same way that you can create long infographics to offer instructions or teach a lesson on a particular subject, GIFs can be used to educate your audience. Only, it’s a lot easier to use for this reason No complicated infographics formatting is required You can just put together several stills showing the step-by-step process or record a silent video like the one shown in the GIF below
GIF: https://media.giphy.com/media/FgiHOQyKUJmwg/giphy.gif
● Key Takeaways from This Episode →
● GIFs have been used for years in order to share fun moments and memes, but it has much more potential than that
● With a carefully designed GIF, not only can you catch the attention of your audience, but you can also keep that attention for much longer than you would have been able to if you were just sharing text or a still image Making it a perfect vessel for future marketing efforts
● Now, in order to make sure that you get a good story on your marketing efforts via GIF, we’ve listed some of the best GIF animation maker tools for you in the first part of this article
● A second part has also been added where we discussed all the different ways that you can use 2D Animation GIFs in your future marketing endeavors.
Also read:
- 10 Caricature Makers to Turn Photo to Caricature Effects
- The Secret Sauce for Making GIF Instagram Story More Aesthetic for 2024
- 2024 Approved Obtain and Create Animated GIF Icons
- New How to Find 3D Animation Studio for 2024
- New Learn How to Create Adobe 3D Animation for 2024
- New Looking for Love Animated GIFs? Here Are 5 Free Sources For You for 2024
- 10 Popular Cartoon Characters That You Wont Want to Miss
- Updated In 2024, Ideas That Will Help You Out in Learning How to Send WhatsApp Animated Gifs
- 2024 Approved Best Websites to Download Animated GIFs for Free-Free GIF Download
- In 2024, Guide on Creating GIF in WhatsApp iPhone
- New 15 Best Video to GIF App on iPhone and Android
- New Best 15 Instant Classics Animated Cartoon Movies
- New In 2024, Tips That Show Anybody How to Get Awesome Background for Slideshow in PowerPoint
- Updated How to Make Animated Videos for Business – an Ultimate Guide
- Updated How to Create a Whiteboard Animation Video for 2024
- In 2024, Detailed Guide on Removing Apple iPhone 15 Activation Lock without Previous Owner?
- How To Stream Anything From Poco C50 to Apple TV | Dr.fone
- Complete Guide to Hard Reset Your Xiaomi Redmi Note 13 5G | Dr.fone
- How to Transfer Data from Oppo Find X7 to BlackBerry | Dr.fone
- Additional Tips About Sinnoh Stone For Vivo X100 | Dr.fone
- Realme Narzo 60x 5G Stuck on Screen – Finding Solutions For Stuck on Boot | Dr.fone
- New AI Script | Wondershare Virbo for 2024
- Does Airplane Mode Turn off GPS Location On Honor Magic5 Ultimate? | Dr.fone
- In 2024, How Can I Use a Fake GPS Without Mock Location On Poco C55? | Dr.fone
- Fix Apple iPhone 13 Pro Stuck on Data Transfer Verified Solution! | Dr.fone
- In 2024, Unova Stone Pokémon Go Evolution List and How Catch Them For Honor 90 GT | Dr.fone
- How to Factory Reset Honor Play 40C without Losing Data | Dr.fone
- How to Detect and Remove Spyware on Meizu 21? | Dr.fone
- Title: Complete Guide to Send Gif WhatsApp on Android for 2024
- Author: Elon
- Created at : 2024-05-19 03:04:50
- Updated at : 2024-05-20 03:04:50
- Link: https://animation-videos.techidaily.com/complete-guide-to-send-gif-whatsapp-on-android-for-2024/
- License: This work is licensed under CC BY-NC-SA 4.0.
