
:max_bytes(150000):strip_icc():format(webp)/best-instagram-captions-4171697-ae21b04e6866470c80a50c9bef1cc26e.png)
Creative Ways to Create iPhone Text GIF for 2024
Creative Ways to Create iPhone Text GIF
Creative Ways to Make iPhone Text GIF
An easy yet powerful editor
Numerous effects to choose from
Detailed tutorials provided by the official channel
GIFs add fun and humor to interactions via text messages. GIFs allow you to convey ideas, emotions, and thoughts in much more precise ways than an emoji would. iPhones operating on iOS 10 or later versions have an in-built GIF keyboard, making it super easy to add GIFs. iPhone text GIFs are readily accessible from GIF keyboards. Still, if you do not have one, you can resort to third-party applications like GIPHY and GIF keyboard for more prominent access to GIF libraries.

Let’s now delve into the different ways of adding GIFs in text messages on iPhone and directly sending them using the Messages app.
In this article
01 [How to Text a GIF: For iOS and Android](#Part 1)
02 [How to Text a GIF on an iPhone Using a Third-Party App](#Part 2)
03 [How to Send GIFs on iPhone](#Part 3)
Part 1 How to Text a GIF: For iOS and Android Users
iPhone text GIFs make texting more fun. Hence, we dedicated this part to teaching you how to use iPhone text GIFs to revitalize and better express yourself while texting.
On iPhone, there are two different ways to send iPhone text GIFs – employing the default keyboard or through the help of third-party apps. You can use the iOS default keyboard to search for GIFs in iMessage on iPhones directly. This applies to all iPhones running on iOS 10 and later versions. If your iPhone belongs to this category, follow the simple steps to add GIFs in text messages on iPhone:
01Sending GIFs using the iPhone Default Keyboard
Here’s how you can send iPhone text GIFs using the iOS default keyboard:
Step 1: On your iPhone, click on the iMessage app to open it.

Step 2: Click on the contact you want to send the GIF to from the list. If you have not previously sent a message to the contact, at the top right corner, click the Write icon represented as a square with a pencil, then enter the name of the contact you want to send the GIF to.

Step 3: Click the Images icon from the menu bar below the new message field. The image icon represents a white magnifying glass in the middle of a pink-colored circle.

Step 4: This pops up a GIF keyboard with the prompt, “Find images.” Browse through the library of GIFs to see recently used or popular GIFs. If you’re looking for a specific GIF, type in a search keyword into the Find images search bar to discover the results of GIFs that best match your request. For example, you may type “Compliments of the season” or “Grumpy,” depending on what you want.

Step 5: Scroll through the different GIFs on your screen to find the one that best fits your message. Click on it to automatically add it to your message in the text field. Peradventure you selected the wrong GIF, hit the small “x” icon at the top right corner of the GIF to delete it.

Step 6: Click the Send icon, represented as a blue arrow icon, to send your GIF.

You can add comments to a GIF just before sending it on the iMessage app. Type a message under the GIF before clicking “Send” to get the comment delivered together with the GIF.
From these simple steps, you can tell that sending a GIF from an iOS default keyboard is straightforward.
02Sending GIFs from an Android Device
Adding a GIF while using an Android phone is pretty much straightforward. Using the Gboard keyboard, follow the steps below to add a GIF on Android:
Step 1: Open the Message app and at the bottom of the screen, click the text bubble icon to enter the name of the person you’re texting in the contact field > Click Start.

Step 2: Click the smiley icon on the keyboard > Swipe to browse through GIFs and stickers or enter a search text to find your desired GIF.

Step 3: Select the GIF you want by clicking on it > Hit Send.
Part 2 How to Text a GIF on an iPhone Using a Third-Party App
Sending a GIF from an iPhone is also possible using third-party applications such as GIF Keyboard and GIPHY. These applications are built to add character to text messaging using animated objects called GIFs. Adding a GIF to your texts usually brings in some humor and life. You must have downloaded them from App Store and installed them on your iPhone to use these applications.
You can also visit third-party websites to send GIFs from there. For example, GIPHY supports searching and sending GIFs via iMessage.
Here are the steps to follow to search and send GIFs on iPhone text messages on iMessage using third-party tools:
Step 1: Search for your desired GIF on GIPHY or other GIF websites.

Step 2: Click on the GIF to open it.

Step 3: Long press on the GIF, and from the pop-up options, click Open.

Step 4: Launch Messages, click the Write icon and enter the person’s contact details you want to text.

Step 5: Click on the text box to bring up your iOS keyboard.

Step 6: Click on the text box again to add the paste option.

Step 7: When the GIF appears, click Paste.

Step 8: A preview of the GIF would appear on the text box. Hit Send when you’re ready to send the GIF.

If you use a GIF website other than GIPHY, the sent GIF may appear as a link rather than an image. If you’re okay with that, make sure the address of the shared animated image you end with the file extension, “.gif” if not, iMessage would not be able to load it.
Part 3 How to Send GIFs on iPhone
To save your file with .GIF extension, you need an application or software accessible online and offline. Indeed, many GIF creators are available in the market, both free and paid versions. However, Wondershare Filmora Video Editor is one of the preferable programs for video conversion to GIF. The software is intuitive and does not require any tech knowledge to use it. With this software, you can customize or create your GIFs while adding creative animation effects and texts to them. Filmora supports GIF creation from a variety of video formats including .mpeg, .dat, .mkv, .wmv, .mp4, .avi, and .evo.
Wondershare Filmora
Get started easily with Filmora’s powerful performance, intuitive interface, and countless effects!
Try It Free Try It Free Try It Free Learn More >

With Filmora, you can create and edit your GIFs with its in-built tools like rotation, color correction, cropping, speed alterations, merging, and lots more. What is more, you can also make a GIF online using Filmora online meme maker. This platform allows you to make videos, GIFs, and image memes without a watermark. You need no sign-up, and it is free to use. Create captions for your GIF while changing your text size, position, and color. Your text can be directly placed outside or inside the GIF and rotated to give it an artistic feel. When you finish creating, your GIF is ready to be used across all devices, including your iPhone.
If you’re unsure about how to use Wondershare Filmora for creating your GIF, below is a YouTube clip to guide you through the process for iPhone text GIFs.
● Key Takeaways from This Episode →
● How to create a GIF on an iPhone text and Android device.
● How to text a GIF using third-party tools like GIPHY and GIF Keyboard.
● The use of Wondershare Filmora to create GIFs with animated texts and outstanding edits.
●If you have stayed with us till this point, you’d have learned how to use your iOS default keyboard to send iPhone text GIFs effortlessly. You have also known how to send GIFs using the Gboard keyboard on your Android devices. Finally, you were introduced to Wondershare Filmora, a professional video editing software that allows you to create stunning GIFs in text messages for iPhone online and offline.
GIFs add fun and humor to interactions via text messages. GIFs allow you to convey ideas, emotions, and thoughts in much more precise ways than an emoji would. iPhones operating on iOS 10 or later versions have an in-built GIF keyboard, making it super easy to add GIFs. iPhone text GIFs are readily accessible from GIF keyboards. Still, if you do not have one, you can resort to third-party applications like GIPHY and GIF keyboard for more prominent access to GIF libraries.
Let’s now delve into the different ways of adding GIFs in text messages on iPhone and directly sending them using the Messages app.
In this article
01 [How to Text a GIF: For iOS and Android](#Part 1)
02 [How to Text a GIF on an iPhone Using a Third-Party App](#Part 2)
03 [How to Send GIFs on iPhone](#Part 3)
Part 1 How to Text a GIF: For iOS and Android Users
iPhone text GIFs make texting more fun. Hence, we dedicated this part to teaching you how to use iPhone text GIFs to revitalize and better express yourself while texting.
On iPhone, there are two different ways to send iPhone text GIFs – employing the default keyboard or through the help of third-party apps. You can use the iOS default keyboard to search for GIFs in iMessage on iPhones directly. This applies to all iPhones running on iOS 10 and later versions. If your iPhone belongs to this category, follow the simple steps to add GIFs in text messages on iPhone:
01Sending GIFs using the iPhone Default Keyboard
Here’s how you can send iPhone text GIFs using the iOS default keyboard:
Step 1: On your iPhone, click on the iMessage app to open it.
Step 2: Click on the contact you want to send the GIF to from the list. If you have not previously sent a message to the contact, at the top right corner, click the Write icon represented as a square with a pencil, then enter the name of the contact you want to send the GIF to.
Step 3: Click the Images icon from the menu bar below the new message field. The image icon represents a white magnifying glass in the middle of a pink-colored circle.
Step 4: This pops up a GIF keyboard with the prompt, “Find images.” Browse through the library of GIFs to see recently used or popular GIFs. If you’re looking for a specific GIF, type in a search keyword into the Find images search bar to discover the results of GIFs that best match your request. For example, you may type “Compliments of the season” or “Grumpy,” depending on what you want.
Step 5: Scroll through the different GIFs on your screen to find the one that best fits your message. Click on it to automatically add it to your message in the text field. Peradventure you selected the wrong GIF, hit the small “x” icon at the top right corner of the GIF to delete it.
Step 6: Click the Send icon, represented as a blue arrow icon, to send your GIF.
You can add comments to a GIF just before sending it on the iMessage app. Type a message under the GIF before clicking “Send” to get the comment delivered together with the GIF.
From these simple steps, you can tell that sending a GIF from an iOS default keyboard is straightforward.
02Sending GIFs from an Android Device
Adding a GIF while using an Android phone is pretty much straightforward. Using the Gboard keyboard, follow the steps below to add a GIF on Android:
Step 1: Open the Message app and at the bottom of the screen, click the text bubble icon to enter the name of the person you’re texting in the contact field > Click Start.
Step 2: Click the smiley icon on the keyboard > Swipe to browse through GIFs and stickers or enter a search text to find your desired GIF.
Step 3: Select the GIF you want by clicking on it > Hit Send.
Part 2 How to Text a GIF on an iPhone Using a Third-Party App
Sending a GIF from an iPhone is also possible using third-party applications such as GIF Keyboard and GIPHY. These applications are built to add character to text messaging using animated objects called GIFs. Adding a GIF to your texts usually brings in some humor and life. You must have downloaded them from App Store and installed them on your iPhone to use these applications.
You can also visit third-party websites to send GIFs from there. For example, GIPHY supports searching and sending GIFs via iMessage.
Here are the steps to follow to search and send GIFs on iPhone text messages on iMessage using third-party tools:
Step 1: Search for your desired GIF on GIPHY or other GIF websites.
Step 2: Click on the GIF to open it.
Step 3: Long press on the GIF, and from the pop-up options, click Open.
Step 4: Launch Messages, click the Write icon and enter the person’s contact details you want to text.
Step 5: Click on the text box to bring up your iOS keyboard.
Step 6: Click on the text box again to add the paste option.
Step 7: When the GIF appears, click Paste.
Step 8: A preview of the GIF would appear on the text box. Hit Send when you’re ready to send the GIF.
If you use a GIF website other than GIPHY, the sent GIF may appear as a link rather than an image. If you’re okay with that, make sure the address of the shared animated image you end with the file extension, “.gif” if not, iMessage would not be able to load it.
Part 3 How to Send GIFs on iPhone
To save your file with .GIF extension, you need an application or software accessible online and offline. Indeed, many GIF creators are available in the market, both free and paid versions. However, Wondershare Filmora Video Editor is one of the preferable programs for video conversion to GIF. The software is intuitive and does not require any tech knowledge to use it. With this software, you can customize or create your GIFs while adding creative animation effects and texts to them. Filmora supports GIF creation from a variety of video formats including .mpeg, .dat, .mkv, .wmv, .mp4, .avi, and .evo.
Wondershare Filmora
Get started easily with Filmora’s powerful performance, intuitive interface, and countless effects!
Try It Free Try It Free Try It Free Learn More >
With Filmora, you can create and edit your GIFs with its in-built tools like rotation, color correction, cropping, speed alterations, merging, and lots more. What is more, you can also make a GIF online using Filmora online meme maker. This platform allows you to make videos, GIFs, and image memes without a watermark. You need no sign-up, and it is free to use. Create captions for your GIF while changing your text size, position, and color. Your text can be directly placed outside or inside the GIF and rotated to give it an artistic feel. When you finish creating, your GIF is ready to be used across all devices, including your iPhone.
If you’re unsure about how to use Wondershare Filmora for creating your GIF, below is a YouTube clip to guide you through the process for iPhone text GIFs.
● Key Takeaways from This Episode →
● How to create a GIF on an iPhone text and Android device.
● How to text a GIF using third-party tools like GIPHY and GIF Keyboard.
● The use of Wondershare Filmora to create GIFs with animated texts and outstanding edits.
●If you have stayed with us till this point, you’d have learned how to use your iOS default keyboard to send iPhone text GIFs effortlessly. You have also known how to send GIFs using the Gboard keyboard on your Android devices. Finally, you were introduced to Wondershare Filmora, a professional video editing software that allows you to create stunning GIFs in text messages for iPhone online and offline.
Best 12 Evil Cartoon Characters of All Time
Top 12 Evil Cartoon Characters of All Time
An easy yet powerful editor
Numerous effects to choose from
Detailed tutorials provided by the official channel
The time when Incredible 2 hits thetheatres, family of Super-starshad to face off against the new villain ‘The Screen Slaver’, he was a villain who make use of hypnotism to get the people do what he want to. Perhaps, only the time will tell us if any upcoming bad-guy will be brutal enough to gets added in the list of great cartoon animated villains throughout the history.Your favourite cartoon superhero would not be a super hero without a villain to battle. So, it’s the villain who set the stage or fire and plot in a motion.Many cartoon evil cartoon characters from the past shown us their presence with genuinely memorable moments and crimes that were both exciting & exhilarating to watch on the screen.
Presenting you the list of fifteen most incredible villains of all time when it comes to cartoon characters.
01Cruella De Vil, From 101 Dalmatians
Name of the cartoon character: Cruella De Vil
Your next villain on the list alone includes the words like Devil, Cruel, Evil, but you don’t need to spell each one of them in order to prove how wicked and cruel this female character is. A person don’t need to be a pet lover to know about the obsession of scalping puppies for the fur in terms of sick & twisted, however for the evil cartoon character ‘Cruella De Vil’, it is not just the horrible hobby but also a whole way of life. Aside from having penchant for the puppy murders, she loves to sit in home alone. Cartoon Cruella devilis the central antagonist of the animated series one hundred and one Dalmatians. Her death’s head-face, schizoid black &white head of hairsas well as her cheekbones which looks similar to a holding position of double-pointed arrows inside her mouth are enough to kill you. Her satanic, go-for-broke craving to grab those spotted puppies are always ready to bring Goosebumps. Cruella Deville cartooncharacter is one of the scariest and fantastic characters of that era.
02Hades, Disney’s Hercules
Name of the cartoon character: Hades
James Woods’ anachronistic Hollywood style “sweetie baby” patter and fast-talking, probably is not that far-off exactly from what you would like to hear in real life for TinselTown. In one of the episode of spin-off TV series by Disney: Hercules featured Jafar’s ghost in Strangers on the Train-style of plot to switch the enemies, Aladdin for the Hercules. Hades cannot believe in his guest’s melodramatic-histrionics & then indulges in few more wisecracks at the Jafar’s expense.
03Tasmanian Devil
Name of the cartoon character: Taz
Tasmanian devil or Tazharbours a very special craving for the rabbits and talking about its cruel acts, he always love to crave for his favourite food ‘Bunny the rabbit’. He is a strong murderous-beast with jaws as brutal as a steel trap. With his ravenous appetite he is capable of eating tigers, buffaloes, lions, elephants, donkeys, giraffes, rhinoceroses,octopuses, moose and of course Rabbits. In the animated character “Ducking the Devil”, a warning is show which describe TASMANIAN DEVIL as the most powerful, evil-tempered, vicious brute who is hungry for food every single time. He comes among the list of Tassie devil cartoonfor his killing abilities.
04Gru, Despicable Me
Name of the cartoon character: Gru
Gru is the central character of the movie franchise ‘Despicable Me’ and he is both villain & hero at once. He never seems to put any of his loved ones in danger physically but his villainy comes more in terms of mega-pranks. Thanks to his latent cuddliness and goofball horde of Minions won’s the heart of millions.
05Jafar From Aladdin
Name of the cartoon character: Jafar
Jafar always managed to put himself one step away from other townspeople who are searching for Aladdin . He is Sultan’s evil advisor, and having lots of negative qualities that goes beyond his questionable facial-hair. In the entire episodes of Disney’s classic Aladdin, Jafar always attempts to overthrow sultan, and forces Princess Jasmine to marry him and even plans to kill Aladdin.
06Ren Hoek, The Ren and Stimpy Show
Name of the cartoon character: Ren Hoek
He is the evil cartoon character who tortures & kills animals, but why? Well, there is no reason behind it, he just love to murder poor animals & one of the episodes of ‘The Ren and Stimpy Show’ he nearly whacks somebody’s eyeballs out. With his psychotic characteristics he is still among the list of dangerously wicked villains of all time. He is theEvil dog cartoonfor all the puppies.
07Scar, The Lion King
Name of the cartoon character: Scar
He is the central most antagonist of the Disney’s 1994 most anticipated and most interesting animated feature movie, The Lion King. He is the 2ndson of Uru & Ahadi, who were in past, the King and the Queen of this Pride Lands. He is also a younger brother of Mufasa,&uncle of Simba.
He is yet another glib feline from the Disney’s villain and ready to show his evilness with famous song “Be Prepared”. With Jeremy Irons’ outstanding delivery & sarcastic personality is all you need to watch as Scar always imagines himself asa fuehrer in another famous song ‘Triumph of the Will-style’.
Scar look at the things with his sinister approach and even one step further by convincing his nephew Simba for his father’s death after murdering her younger brother to gain access to the throw of king.
With his gang of hyenas, he take over his new-kingdom & ruled the same with his wicked leadership skills which is as horrible as Scar’s morals. He is always ready to show you his sinful supervillain approach who destroys everything in and around you.
08Sher-Khan, The Jungle book
Name of the cartoon character: Sher-Khan
With George Sanders’s sophisticated, urbane voice the role of Sher-khan was one of the most brilliant performances anevil cat cartoon can ever have. It was the kind of performance that can’t be replicated. SherKhan’s above-it-all voice delivery is just an incredible as well as an interesting alternative to voiceless predator who usually threatening hero in this Disney film.
09Mojo Jojo, Powerpuff Girls
Name of the cartoon character: Mojo Jojo
He was the one with tough cookie, a booming voice &different diabolical schemes as compared to what he knew in terms of what next to do. The bad monkey of animated cartoon characters always in a hurry to ruin the lives of Powerpuff Girls for different occasions, & eventually succeeded in doing so in various episodes of ‘Powerpuff Girls’. A successful villain is always memorable, but one who is hyper-intelligent sometimes wins few more brownie points.
10The Joker, From Batman Animated Series
Name of the cartoon character: The Joker
He is the most anticipated TV villain that you can’t forget to add in the list, he is the villain of the villains. The Joker from the Batman animated series and comic books is the most iconic villains of all times. Every single iteration of this ‘Clown Prince of Crime’delivers a new reason to love him. You can’t end the list of evil cartoon characters from 90’s without including MR. J. He has an intent of turning the ‘Gotham City ’ into his petrifying playground. It takes immense pleasure to watch him in each & every single moment while torturing with his killing performance to others. He love to create chaos at each place where he goes.
11Maleficent, Sleeping Beauty
Name of the cartoon character: Maleficent
With her icy elegant looks and great entrance with a blaze of eldritch flame makes her a supreme contender of the most evil cartoon face. She has an impeccable fashion-sense also with spiky black &purple robes and not to forget her headpiece shaped-like set of elegantly curved-horns.
She is the self-described “mistress’ of all devils.With being a nasty babe, she is sarcastically evil with her taunts and tortures of shooting lightning-bolts at her own cartoonish-minions. She is the bad-ass and always manages to sneak-peak a naughty word into the Disney toon at the time of turning into one of the coolest-looking cartoon-dragons ever.
12The Evil Queen, Snow White
Name of the cartoon character: The Evil Queen
The evil queen’s performance in Snow white is way more than even the 21st century’s standards and she is still the scariest devil cartoon character. There is always a pair of ‘excellent’ shots in the Snow white movie that never fails to impress anyone. The elegant evil queen downs the area that will transform the queen into the withered hag with both foreground &background elements framing the queen, suddenly slides intothe opposite directions & at the end dissolve into the blur when the room starts to spin around her-this is something powerful multiplane-effect. She always manages to tell you about her evil acts with breath-taking moments of visually appealing storytelling.
The Final Words
● When we mix up golden ages of animation & villainy, we will get amazing galleries of animated baddies, this list also have those baddies with mix of emotions & love for them.
● The Devils described demonstrating us about the level of creativity.
● You can refurbish your classic moments with those characters from this list with successfully greatest villains.
Also keep this suggestion of learning about the ways to simply turn yourself into one of your favourite Evil anime character through the use of filters and little understanding of anime.
Relive your classic moments of evil anime characters with FilmoraVideo Editor App
Remembering your coolest Anime Characters? Wondershare Filmora Video Editor can let you achieve this by turning yourself into evil character in just few steps.
For Win 7 or later (64-bit)
For macOS 10.12 or later
Also, you can apply:
● Record your anime
● Enhancement to your video contents through multiple effects
● Make use of sound effects to give yourself an devil look and feel.
● Customize the anime or cartoon videos
● Apply different styles of video effects
Learn Pencil2D Animation Tutorial Overview
Animation is one of the trendiest technologies. The basics of animation were formulated in the 2000s from the moving page trick. The first few animators learned that animation is nothing but continuous switching of frames from one to another. One animated still is switched to another and then another in a quick sequence such that it makes a sequential moving frame. Today, animation has come a long way from where it started and today it is used for several commercials, tutorials, and even educational lecture videos. Pencil2D animation is an amazing animation tool that can be used by even neophytes. Want to learn more about 2d pencil animation and its super cool features? Well, you’re at the perfect place. Today we’ll be telling you more about pencil 2d animation and giving you a small overview of its usage.
In this article
01 [What is Pencil2D and How to Install?](#Part 1)
02 [Overview of the Application Interface](#Part 2)
03 [How to Create Animations with Pencil2D?](#Part 3)
Part 1 What is Pencil2D and How to Install?
2d pencil animation is popular open-source animation software. The software is pretty cool for those who are newly starting off with animation. The open-source software is available on all major operating systems including Windows, Mac OS, and Unix. Using this amazing software, we can make amazing cartoon characters using traditional cartoon-making techniques such as tracing drawing, skinning. Using this software, you can save animations in the native animation formats or extract the animation to PNG, JPG, or other formats. Wish to explore more about pencil 2d animation software? Follow the steps listed below in order to download the pencil2d animation software.
● Firstly, you need to ensure that your device has ample space on it.
● Next, you need to head to the official website of pencil2d.
● Further, you need to select your operating system. You can find different versions of the software, namely windows 7/8/10, windows XP/ Vista, Mac OS, and Linux
● Once downloaded, you need to start the installation setup. Note that this may take a while to download.
● Once downloaded, you can start familiarizing yourself with the software.
Part 2 Overview of the Application Interface
1. The brush tool
The brush tool must have reminded you of paint software in windows. The brush tool is a popular and highly utilitarian basic tool in Pencil2D animation software. You can either access it via the user interface or quickly access it by using the B key on your keyboard. As the name suggests, the brush tool is literally just a brush that allows you to draw and paint any sort of drawings of different shades, colors, and thickness. If you wish to change the color, you can find a color palette on the left side of the interface.

2. The eraser tool
You’ve a brush tool; it’s almost common sense that there’d be an eraser. The eraser tool has an eraser as its icon. If you wish to use the eraser, click on the eraser tool or simply click the E button on your keyboard. Once you’ve selected the tool, you need to simply hover over the parts you wish to erase.

3. Bucket tool
The bucket tool is another useful tool that you can find in the left tool pane of pencil 2d animation. The tool icon looks like a bucket and it is used to fill an entire area with a particular color. You can choose the color you’d like to fill from the color pallet available on the left side. Alternatively, you can also access the bucket tool by pressing the “K” key on your keyboard.

4. Custom colors
A cool feature that you can find on pencil 2d animation software is the custom color one. You can merge and mix colors according to your choice and create your own color. To do so, you need to click on the small color box that you’ll find at the top right of your screen. By doing so, a huge color wheel will appear on your screen. Now you can either enter values of the R, G, and B if you wish to merge different colors and make a new one or select a particular color from the huge color wheel that appears in front of you. These colors vary in gradient, shade, and a lot of different factors.

5. The Undo button
The Undo button is a highly useful functionality for the lazy ones who do not wish to erase the mistake they made. By undoing, the previous step gets reverted and you can start over again. The traditional undo shortcut, Ctrl+Z does work in the pencil 2d animation. Alternatively, you can also use the undo feature via the user interface. You can do so by heading over to the edit option in the topmost bar. The first option in the drop-down menu would be undo.

Part 3 How to Create Animations with Pencil2D?
Creating animations in pencil 2d is slightly sophisticated and certainly needs minimal practice. Follow the steps listed below in order to learn how to animate through pencil 2d to make your first animation.
1. Ensure that you’ve turned on your bitmap on the first frame
Animation works through quick switching of frame which makes it appear as though the object is in motion. By turning on the bitmap, pencil 2d animation ensures that you’ve no blank frames at the start of your animation.

2. Draw your animated character
Since you’re trying to animate, you need to have an animated character or object. Hence, the first step to making your first animation is by drawing the object or character that you wish to animate. Try to make the character as realistic as possible. To start with, maybe you can try animating just a stick figure; this is because animating a complex character is rather difficult for beginners.

3.The three circular buttons
Once you’re satisfied with the character you draw, you need to spot the 3 circular buttons which are arranged in the “+”,”-“,”+” order. By pressing the first “+” button, you can add an empty slide. If you click on the “-“ button, it will delete the most recent slide and if you click on the next “+” button, it will duplicate the current slide.

4.Repeat until you get an animation
Now that you know how to deal with multiple frames, you can continue creating frames and making the animated characters move by tweaking with the drawing in every frame. For instance, if you wish to show that the animated character is running, in one of the frames the left leg should be forward and in the next one, the right leg should be forward. Keep repeating this process of tweaking with frames until you’ve your desired animated video.

Now that we’ve seen the process of animation via Pencil2D, you must have realized that it’s pretty orthodox and complicated. Moreover, you cannot carry out rigging and other newer animation techniques. Hence, we introduce you to Wondershare Filmora Video Editor , your all in one animation making platform. Here you can animate without any hassle. Wondershare Filmora makes your job easier with multiple animation features, you needn’t even draw your animated character. You can simply import a custom-made character and rig the character. Further, you need not deal with multiple frames and personally pay attention to each frame. All in all, Filmora makes your job simple and your animations much more seamless.
For Win 7 or later (64-bit)
For macOS 10.12 or later
Key Takeaways from This Episode
● Animation is actively being used for multiple purposes.
● Today we took a look at one of the orthodox yet popular animation tools, Pencil2D.
● The Pencil2D animation tool offers you multiple functionalities and allows you to make animations.
● Next, we also took a look at Wondershare Filmora Pro, your one-stop shop for all animation needs. You can find multiple animation features here and it’s all so simple.
● What are you waiting for? Your next animation is just one click away.
02 [Overview of the Application Interface](#Part 2)
03 [How to Create Animations with Pencil2D?](#Part 3)
Part 1 What is Pencil2D and How to Install?
2d pencil animation is popular open-source animation software. The software is pretty cool for those who are newly starting off with animation. The open-source software is available on all major operating systems including Windows, Mac OS, and Unix. Using this amazing software, we can make amazing cartoon characters using traditional cartoon-making techniques such as tracing drawing, skinning. Using this software, you can save animations in the native animation formats or extract the animation to PNG, JPG, or other formats. Wish to explore more about pencil 2d animation software? Follow the steps listed below in order to download the pencil2d animation software.
● Firstly, you need to ensure that your device has ample space on it.
● Next, you need to head to the official website of pencil2d.
● Further, you need to select your operating system. You can find different versions of the software, namely windows 7/8/10, windows XP/ Vista, Mac OS, and Linux
● Once downloaded, you need to start the installation setup. Note that this may take a while to download.
● Once downloaded, you can start familiarizing yourself with the software.
Part 2 Overview of the Application Interface
1. The brush tool
The brush tool must have reminded you of paint software in windows. The brush tool is a popular and highly utilitarian basic tool in Pencil2D animation software. You can either access it via the user interface or quickly access it by using the B key on your keyboard. As the name suggests, the brush tool is literally just a brush that allows you to draw and paint any sort of drawings of different shades, colors, and thickness. If you wish to change the color, you can find a color palette on the left side of the interface.
2. The eraser tool
You’ve a brush tool; it’s almost common sense that there’d be an eraser. The eraser tool has an eraser as its icon. If you wish to use the eraser, click on the eraser tool or simply click the E button on your keyboard. Once you’ve selected the tool, you need to simply hover over the parts you wish to erase.
3. Bucket tool
The bucket tool is another useful tool that you can find in the left tool pane of pencil 2d animation. The tool icon looks like a bucket and it is used to fill an entire area with a particular color. You can choose the color you’d like to fill from the color pallet available on the left side. Alternatively, you can also access the bucket tool by pressing the “K” key on your keyboard.
4. Custom colors
A cool feature that you can find on pencil 2d animation software is the custom color one. You can merge and mix colors according to your choice and create your own color. To do so, you need to click on the small color box that you’ll find at the top right of your screen. By doing so, a huge color wheel will appear on your screen. Now you can either enter values of the R, G, and B if you wish to merge different colors and make a new one or select a particular color from the huge color wheel that appears in front of you. These colors vary in gradient, shade, and a lot of different factors.
5. The Undo button
The Undo button is a highly useful functionality for the lazy ones who do not wish to erase the mistake they made. By undoing, the previous step gets reverted and you can start over again. The traditional undo shortcut, Ctrl+Z does work in the pencil 2d animation. Alternatively, you can also use the undo feature via the user interface. You can do so by heading over to the edit option in the topmost bar. The first option in the drop-down menu would be undo.
Part 3 How to Create Animations with Pencil2D?
Creating animations in pencil 2d is slightly sophisticated and certainly needs minimal practice. Follow the steps listed below in order to learn how to animate through pencil 2d to make your first animation.
1. Ensure that you’ve turned on your bitmap on the first frame
Animation works through quick switching of frame which makes it appear as though the object is in motion. By turning on the bitmap, pencil 2d animation ensures that you’ve no blank frames at the start of your animation.
2. Draw your animated character
Since you’re trying to animate, you need to have an animated character or object. Hence, the first step to making your first animation is by drawing the object or character that you wish to animate. Try to make the character as realistic as possible. To start with, maybe you can try animating just a stick figure; this is because animating a complex character is rather difficult for beginners.
3.The three circular buttons
Once you’re satisfied with the character you draw, you need to spot the 3 circular buttons which are arranged in the “+”,”-“,”+” order. By pressing the first “+” button, you can add an empty slide. If you click on the “-“ button, it will delete the most recent slide and if you click on the next “+” button, it will duplicate the current slide.
4.Repeat until you get an animation
Now that you know how to deal with multiple frames, you can continue creating frames and making the animated characters move by tweaking with the drawing in every frame. For instance, if you wish to show that the animated character is running, in one of the frames the left leg should be forward and in the next one, the right leg should be forward. Keep repeating this process of tweaking with frames until you’ve your desired animated video.
Now that we’ve seen the process of animation via Pencil2D, you must have realized that it’s pretty orthodox and complicated. Moreover, you cannot carry out rigging and other newer animation techniques. Hence, we introduce you to Wondershare Filmora Video Editor , your all in one animation making platform. Here you can animate without any hassle. Wondershare Filmora makes your job easier with multiple animation features, you needn’t even draw your animated character. You can simply import a custom-made character and rig the character. Further, you need not deal with multiple frames and personally pay attention to each frame. All in all, Filmora makes your job simple and your animations much more seamless.
For Win 7 or later (64-bit)
For macOS 10.12 or later
Key Takeaways from This Episode
● Animation is actively being used for multiple purposes.
● Today we took a look at one of the orthodox yet popular animation tools, Pencil2D.
● The Pencil2D animation tool offers you multiple functionalities and allows you to make animations.
● Next, we also took a look at Wondershare Filmora Pro, your one-stop shop for all animation needs. You can find multiple animation features here and it’s all so simple.
● What are you waiting for? Your next animation is just one click away.
Ready to Animate Game Character From Scratch?
Are You Ready to Animate Game Character from Scratch?
An easy yet powerful editor
Numerous effects to choose from
Detailed tutorials provided by the official channel
As the popularity of animated video games is reaching new heights, demand for game animators are also going up. But, the Information regarding how to animate games is less or not sufficient enough.
In this article
01 [What is 2D & 3D Animation Game?](#Part 1)
02 [How Do You Animate Games?](#Part 2)
03 [How to Draw 2d & 3d Characters for Video Games?](#Part 3)
Part 1 What is 2D & 3D Animation Game?
Gaming animation is a blend of art and technology. It is one of those fields that require several technical skills. These are brilliant programming skills, understanding the basics of computer science, and practical technology know-how, collectively standing as the basic fundamental of Animation. Both 2D and 3D Animation changed the gaming experience forever and created an array of opportunities. But they differ in working and application.
01Working on 2D Animation
Flipbook can be a good example of the mechanism behind 2D Animation. After drawing a character or an object on the first page of a notebook, continue drawing for the next page and so on. Each removing should be a bit ahead or behind. When flipped swiftly, the series of drawings makes the character or object move.
The working of 2D Animation is not so different. But the detailing of the subject or the object cannot be minimal as a flipbook. 2D Animation demands more characters and more details while at the same time requiring smooth, visually appealing, and accurate detailing, which is a lot of pressure for the makers. Thanks to 2D making software, a week’s work can be taken care of in minutes or two.
02Working on 3D Animation
The working mechanism of 3D Animation is more complicated than 2D. It is a layered process that requires several skills. It also involves “rigged” and animated 3D models. In 3D, the initial sketch of the entire subject and object is the first step towards the animation procedure. The second step is to make a 3D model of the intended animated object. It was third, texturing of the 3D animated object. Rigging is the final step; it gives the 3D model the power and ability to move. Once rigging is done, the character is already for posing. Drop it to the scene and start your Animation.
Part 2 How Do You Animate Games?
01Do You Know How Hot Animated Games Are?
A practical example of how Animation has been handed down over the ages would be the case of ‘Anime’. It has persisted as one of the top cultural exports of Japan and has successfully completed more than 20 years of legacy. The name ‘anime’ practically is a shorter version of the word Animation.
You will find that the reasons for animate games to be so popular are in vast numbers. For example, the anime industry is valued at 19 billion USD, to begin with.
A brief overview of reasons why animate games are so popular:
● There is a Game for Everyone
Game animations are evolving which is why it is able to reach out to a majority of people’s interests.
● Unique Styles of Animation
Gaming animations have come a long way and they have a more individual appeal for all age groups.
● Game History
Gamers have something else to look forward to other than just gaming. There is a story behind every game.
● Customization
Players can customize their characters the way they wish to see themselves.
● Action
Gamers can fight in an action sequence or drive a Lamborghini in a high-speed car chase.
02How Do I Create My Own Game Character?
Designing a character starts with imaging a character in its suitable background or subject. If you are a big fan of fantasy games, your imaginations should not have any boundaries. But, in the case of a sports game, you might have to limit your imagination based on realistic features.
How to streamline wild ideas to get a brilliant character out of it?
● Get an idea
Decide whether the character in mind is the main character or what role, in particular, is it going to play in the game.
● Gender
Gender plays a crucial role in character creation. As it pre-decides certain character traits.
● Build personality
Every character has a specific goal. The personality of each character helps them to achieve their goal.
● Back-story
The personality traits of every character are derived from their back-story.
● Strength& Weakness
Each character should have something unique be it in their personality or in their strength.
● Define Relationship
It is important to imagine and define what relationship the characters have.
● Provide aesthetics
Visual Aesthetics is a realm that has no bounds in the art of gaming.
● Create more characters
Including other characters in relation to the protagonist of the game would make the game or the storyline more interesting.
Part 3 How to Draw 2d & 3d Characters for Video Games
01How to Make a 2d & 3d Game Character - Tutorial
First, we conceive an idea in our mind in an abstract form. But, creating a character from an initial sketch all the way to making it into a full-drawn animation is about developing details keeping the speed of work steady.
Detailed animate game tutorials available online:
● Create composition
Make it more defined and structured. A tip to immediately jump-start your imagination would be to see your character in different lights and shades.
● Refine the Character Sketch
Once you have the clay, it’s time to add form.
● Add References
Start looking for references that suit your character.
● Add Details
Now, it’s time to get into the details, like literally. Start breaking your character into blocks and pieces. Maybe not too literally.
02Learn to Animate Games That Are Underrated Now
With more advancement comes more banishment, which means more and types of games are fading out to obscurity. You can now animate games that are underrated and add a bit of your own flavor to them using software.
You can also apply 3D rendering techniques to apply light and shadow effects to your games.
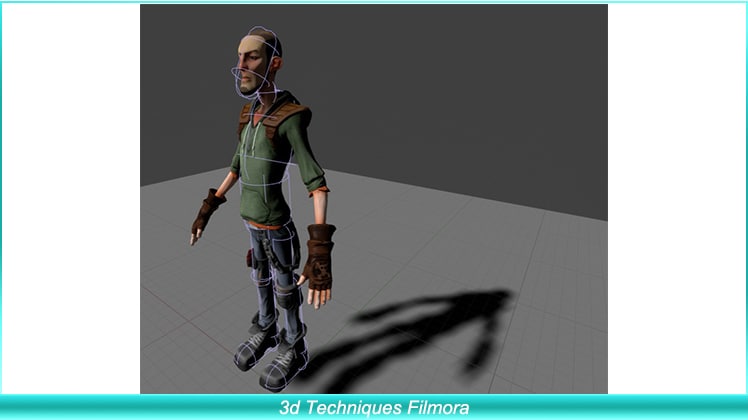
Stop motion is also a popular 2D gaming animation technique that is used in a number of underrated game models like cutout, Claymation, pixilation.
Motion graphics is amazing tool beginners have fun experimenting with. You can create engaging 2D game animations with motion graphic software like Adobe after effects. Make stunning adobe animation tutorials with the same.
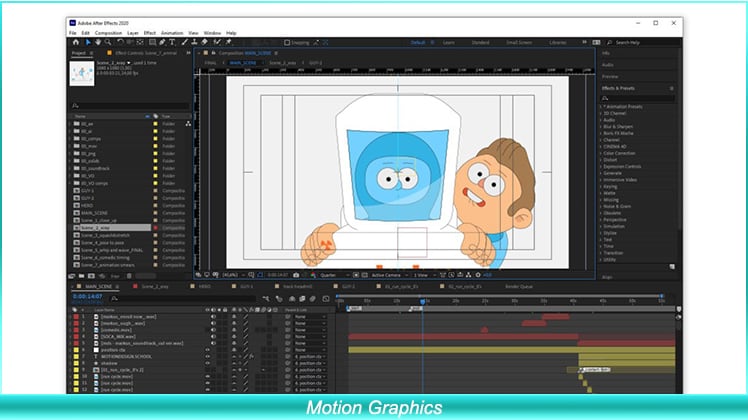
Key Takeaways from This Episode
● Both 2D and 3D Animation offer a separate flavor of the experience. 2D animations run on a definitive FPS and can be compared to a simple flipbook animation, while 3D Animation involves a process called rigging that gives the Animation several movements and abilities.
● Animated games have a global appeal because of their unique style, history, customization, and action features. Animating your own character requires you to pay attention to the details like personality, back story, gender, and aesthetics.
● You can start your animation process with 5 simple steps - concept, composition, sketch, reference, and detailing.
As the popularity of animated video games is reaching new heights, demand for game animators are also going up. But, the Information regarding how to animate games is less or not sufficient enough.
In this article
01 [What is 2D & 3D Animation Game?](#Part 1)
02 [How Do You Animate Games?](#Part 2)
03 [How to Draw 2d & 3d Characters for Video Games?](#Part 3)
Part 1 What is 2D & 3D Animation Game?
Gaming animation is a blend of art and technology. It is one of those fields that require several technical skills. These are brilliant programming skills, understanding the basics of computer science, and practical technology know-how, collectively standing as the basic fundamental of Animation. Both 2D and 3D Animation changed the gaming experience forever and created an array of opportunities. But they differ in working and application.
01Working on 2D Animation
Flipbook can be a good example of the mechanism behind 2D Animation. After drawing a character or an object on the first page of a notebook, continue drawing for the next page and so on. Each removing should be a bit ahead or behind. When flipped swiftly, the series of drawings makes the character or object move.
The working of 2D Animation is not so different. But the detailing of the subject or the object cannot be minimal as a flipbook. 2D Animation demands more characters and more details while at the same time requiring smooth, visually appealing, and accurate detailing, which is a lot of pressure for the makers. Thanks to 2D making software, a week’s work can be taken care of in minutes or two.
02Working on 3D Animation
The working mechanism of 3D Animation is more complicated than 2D. It is a layered process that requires several skills. It also involves “rigged” and animated 3D models. In 3D, the initial sketch of the entire subject and object is the first step towards the animation procedure. The second step is to make a 3D model of the intended animated object. It was third, texturing of the 3D animated object. Rigging is the final step; it gives the 3D model the power and ability to move. Once rigging is done, the character is already for posing. Drop it to the scene and start your Animation.
Part 2 How Do You Animate Games?
01Do You Know How Hot Animated Games Are?
A practical example of how Animation has been handed down over the ages would be the case of ‘Anime’. It has persisted as one of the top cultural exports of Japan and has successfully completed more than 20 years of legacy. The name ‘anime’ practically is a shorter version of the word Animation.
You will find that the reasons for animate games to be so popular are in vast numbers. For example, the anime industry is valued at 19 billion USD, to begin with.
A brief overview of reasons why animate games are so popular:
● There is a Game for Everyone
Game animations are evolving which is why it is able to reach out to a majority of people’s interests.
● Unique Styles of Animation
Gaming animations have come a long way and they have a more individual appeal for all age groups.
● Game History
Gamers have something else to look forward to other than just gaming. There is a story behind every game.
● Customization
Players can customize their characters the way they wish to see themselves.
● Action
Gamers can fight in an action sequence or drive a Lamborghini in a high-speed car chase.
02How Do I Create My Own Game Character?
Designing a character starts with imaging a character in its suitable background or subject. If you are a big fan of fantasy games, your imaginations should not have any boundaries. But, in the case of a sports game, you might have to limit your imagination based on realistic features.
How to streamline wild ideas to get a brilliant character out of it?
● Get an idea
Decide whether the character in mind is the main character or what role, in particular, is it going to play in the game.
● Gender
Gender plays a crucial role in character creation. As it pre-decides certain character traits.
● Build personality
Every character has a specific goal. The personality of each character helps them to achieve their goal.
● Back-story
The personality traits of every character are derived from their back-story.
● Strength& Weakness
Each character should have something unique be it in their personality or in their strength.
● Define Relationship
It is important to imagine and define what relationship the characters have.
● Provide aesthetics
Visual Aesthetics is a realm that has no bounds in the art of gaming.
● Create more characters
Including other characters in relation to the protagonist of the game would make the game or the storyline more interesting.
Part 3 How to Draw 2d & 3d Characters for Video Games
01How to Make a 2d & 3d Game Character - Tutorial
First, we conceive an idea in our mind in an abstract form. But, creating a character from an initial sketch all the way to making it into a full-drawn animation is about developing details keeping the speed of work steady.
Detailed animate game tutorials available online:
● Create composition
Make it more defined and structured. A tip to immediately jump-start your imagination would be to see your character in different lights and shades.
● Refine the Character Sketch
Once you have the clay, it’s time to add form.
● Add References
Start looking for references that suit your character.
● Add Details
Now, it’s time to get into the details, like literally. Start breaking your character into blocks and pieces. Maybe not too literally.
02Learn to Animate Games That Are Underrated Now
With more advancement comes more banishment, which means more and types of games are fading out to obscurity. You can now animate games that are underrated and add a bit of your own flavor to them using software.
You can also apply 3D rendering techniques to apply light and shadow effects to your games.
Stop motion is also a popular 2D gaming animation technique that is used in a number of underrated game models like cutout, Claymation, pixilation.
Motion graphics is amazing tool beginners have fun experimenting with. You can create engaging 2D game animations with motion graphic software like Adobe after effects. Make stunning adobe animation tutorials with the same.
Key Takeaways from This Episode
● Both 2D and 3D Animation offer a separate flavor of the experience. 2D animations run on a definitive FPS and can be compared to a simple flipbook animation, while 3D Animation involves a process called rigging that gives the Animation several movements and abilities.
● Animated games have a global appeal because of their unique style, history, customization, and action features. Animating your own character requires you to pay attention to the details like personality, back story, gender, and aesthetics.
● You can start your animation process with 5 simple steps - concept, composition, sketch, reference, and detailing.
How to Animate - Adobe Animate Tutorial for All
How to Animate - Adobe Animate Tutorial for All
An easy yet powerful editor
Numerous effects to choose from
Detailed tutorials provided by the official channel
Now, since the tool has too many elements to understand, it’s always a good strategy to start your journey with a dedicated Adobe Animate CC tutorial.
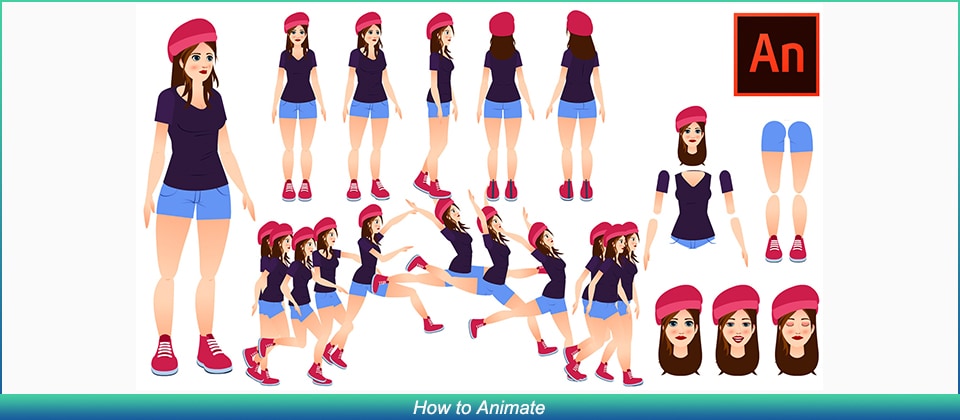
In today’s guide, we are going to introduce a few of these tutorials so that you can easily start creating animations in Adobe Animate CC, even if you have zero prior experience with the software.
In this article
01 [Adobe Animate CC tutorial](#Part 1)
02 [How Do You Animate in Adobe Animation?](#Part 2)
03 [Other Rare Tutorials for Self-learning to Learn How to Animate](#Part 3)
Part 1 Is Adobe Animate Good for Beginners?
When people start their careers as graphic designers, they always struggle to pick the right tool to accompany them during their journey. Since there are too many options to choose from, beginners always end up comparing a tool with other available options. They even weigh the pros and cons of each animation software individually to make the best decision. The same is the case with Adobe Animate. Many beginners want to know if Adobe Animate is the right animation software to get started as a professional graphic designer.
Since the Adobe community continues to grow rapidly, you’ll also be able to find a variety of Adobe Animate tutorials quite easily.
So, as far as beginner-friendliness is concerned, Adobe Animate is a complete winner that anyone can use to create stunning animations, designs, and templates right on their PCs.
Part 2 How Do You Animate in Adobe Animation?
1. Introduction to Adobe Animate
For complete beginners, there’s nothing better than a one-stop tutorial that provides a detailed insight into the basics of Adobe Animate and helps them get familiar with different elements of the software.
Well, this 2 hours 30 minutes long YouTube Adobe Animate tutorial by TipTut is what you need to start your journey with the software. The tutorial involves everything, starting from the simple setup to creating your first animation. You can either download this tutorial on your system or watch it online to understand the basic workflow of Adobe Animate.
Key Features:
● Learn how to set up a project in Adobe Animate.
● Adjusting the elements (such as frame rate) of your first animation.
● Completing your first animation using colors, gestures, and simple movement.
2. Creating HTML Banner Ads
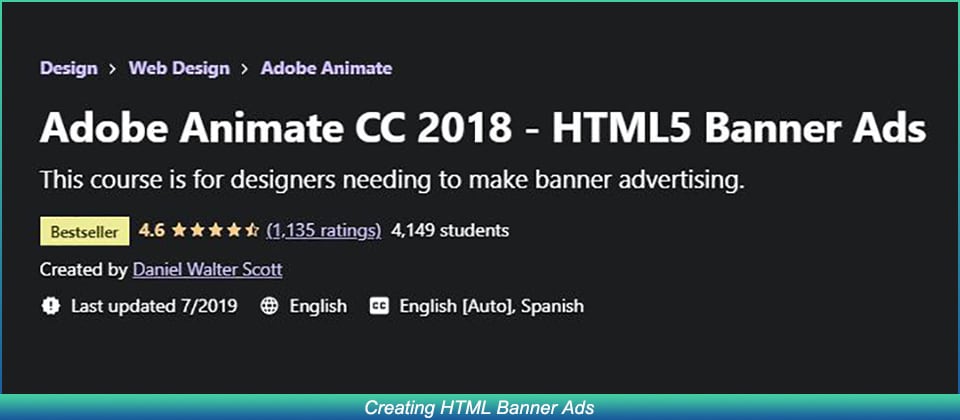
Apart from regular 2D animations, some designers also use Adobe Animate to create dedicated banner ads for their marketing campaigns using HTML 5. This will be a pretty useful Adobe Animate tutorial PDF for anyone who wants to join a marketing firm or plan exclusive marketing campaigns for his own products/services.
Key Features:
● Learn how to build HTML banner ads from scratch.
● Get familiar with the overall process of publishing a banner ad on platforms like Google AdWords.
● Understand how to keep the file size of a banner down to keep it optimized.
3. Animate CC Game Development
As we mentioned earlier, some people also use Adobe Animate to design games. If you want to follow the same career, this Adobe Animate CC tutorial is for you.
All the games developed in Adobe Animate are designed in HTML 5 and are usually web-based. By the end of this tutorial, you would have built a fully-functional game in Adobe Animate.
Key Features:
● Creating the game world.
● Understanding CreateJS Overview in Adobe Animate CC.
● Building in-game assets and configuring their unique features.
4. 2D Animation for Beginners
This is another useful Adobe Animate tutorial for all the beginners out there. Compiled by Walt Wonderwolk, the tutorial is separated into 12 parts in which he has explained different features of Adobe Animate in detail.
Key Features:
● Designing graphic vectors in Adobe Animate.
● Each feature is explained with a respective example.
● Learn how to add sounds to your animations to make them visually appealing.
5. Adobe Animate for Social Media
Being a feature-packed animation software, you can also use Adobe Animate to create content for your social media profiles. To do this, however, you must be familiar with all the necessary features of the tool. This 1.5 hours long tutorial will help you get familiar with features such as the tweening system that’ll help you turn regular social media posts into stunning animations.
Key Features:
● Designing simple assets and designs for social media.
● Exporting GIFs and Animated Videos.
● Customizing stills and motion graphics in Adobe Animate.
Key Takeaways from This Episode
● Adobe Animate boasts different applications, ranging from simple 2D animations to game designing
● Since Adobe Animation is an extensive software, it’ll always be a wise decision to get started with Adobe Animate tutorials.
● After you have compiled designs/animations in Adobe Animate, Wondershare Filmora Pro will help you enhance its overall quality.
Now, since the tool has too many elements to understand, it’s always a good strategy to start your journey with a dedicated Adobe Animate CC tutorial.
In today’s guide, we are going to introduce a few of these tutorials so that you can easily start creating animations in Adobe Animate CC, even if you have zero prior experience with the software.
In this article
01 [Adobe Animate CC tutorial](#Part 1)
02 [How Do You Animate in Adobe Animation?](#Part 2)
03 [Other Rare Tutorials for Self-learning to Learn How to Animate](#Part 3)
Part 1 Is Adobe Animate Good for Beginners?
When people start their careers as graphic designers, they always struggle to pick the right tool to accompany them during their journey. Since there are too many options to choose from, beginners always end up comparing a tool with other available options. They even weigh the pros and cons of each animation software individually to make the best decision. The same is the case with Adobe Animate. Many beginners want to know if Adobe Animate is the right animation software to get started as a professional graphic designer.
Since the Adobe community continues to grow rapidly, you’ll also be able to find a variety of Adobe Animate tutorials quite easily.
So, as far as beginner-friendliness is concerned, Adobe Animate is a complete winner that anyone can use to create stunning animations, designs, and templates right on their PCs.
Part 2 How Do You Animate in Adobe Animation?
1. Introduction to Adobe Animate
For complete beginners, there’s nothing better than a one-stop tutorial that provides a detailed insight into the basics of Adobe Animate and helps them get familiar with different elements of the software.
Well, this 2 hours 30 minutes long YouTube Adobe Animate tutorial by TipTut is what you need to start your journey with the software. The tutorial involves everything, starting from the simple setup to creating your first animation. You can either download this tutorial on your system or watch it online to understand the basic workflow of Adobe Animate.
Key Features:
● Learn how to set up a project in Adobe Animate.
● Adjusting the elements (such as frame rate) of your first animation.
● Completing your first animation using colors, gestures, and simple movement.
2. Creating HTML Banner Ads
Apart from regular 2D animations, some designers also use Adobe Animate to create dedicated banner ads for their marketing campaigns using HTML 5. This will be a pretty useful Adobe Animate tutorial PDF for anyone who wants to join a marketing firm or plan exclusive marketing campaigns for his own products/services.
Key Features:
● Learn how to build HTML banner ads from scratch.
● Get familiar with the overall process of publishing a banner ad on platforms like Google AdWords.
● Understand how to keep the file size of a banner down to keep it optimized.
3. Animate CC Game Development
As we mentioned earlier, some people also use Adobe Animate to design games. If you want to follow the same career, this Adobe Animate CC tutorial is for you.
All the games developed in Adobe Animate are designed in HTML 5 and are usually web-based. By the end of this tutorial, you would have built a fully-functional game in Adobe Animate.
Key Features:
● Creating the game world.
● Understanding CreateJS Overview in Adobe Animate CC.
● Building in-game assets and configuring their unique features.
4. 2D Animation for Beginners
This is another useful Adobe Animate tutorial for all the beginners out there. Compiled by Walt Wonderwolk, the tutorial is separated into 12 parts in which he has explained different features of Adobe Animate in detail.
Key Features:
● Designing graphic vectors in Adobe Animate.
● Each feature is explained with a respective example.
● Learn how to add sounds to your animations to make them visually appealing.
5. Adobe Animate for Social Media
Being a feature-packed animation software, you can also use Adobe Animate to create content for your social media profiles. To do this, however, you must be familiar with all the necessary features of the tool. This 1.5 hours long tutorial will help you get familiar with features such as the tweening system that’ll help you turn regular social media posts into stunning animations.
Key Features:
● Designing simple assets and designs for social media.
● Exporting GIFs and Animated Videos.
● Customizing stills and motion graphics in Adobe Animate.
Key Takeaways from This Episode
● Adobe Animate boasts different applications, ranging from simple 2D animations to game designing
● Since Adobe Animation is an extensive software, it’ll always be a wise decision to get started with Adobe Animate tutorials.
● After you have compiled designs/animations in Adobe Animate, Wondershare Filmora Pro will help you enhance its overall quality.
Top 10 Apps to Enhance Your Instagram Story Slideshow
Best 10 Apps to Enhance Your Instagram Story Slideshow
An easy yet powerful editor
Numerous effects to choose from
Detailed tutorials provided by the official channel
Instagram reels and stories have turned into convenient ways of exploring your video creation skills with fun. Read further to know about the top 10 apps to create amazing Insta story slideshows!
In this article
01 [What’s Instagram Story Slideshow](#Part 1)
02 [How to Use Instagram Slideshow?](#Part 2)
03 [Top 10 Apps for Making Instagram Story Slideshow (iOS & Android)](#Part 3)
04 [Tips for Enhancing Your Insta Story Slideshow](#Part 4)
Part 1 What’s Instagram Story Slideshow
With the growing influence of social media on the global life and work culture in today’s times, each and every event on such platforms becomes the new trend of the current IT impacted society. Speaking in the light of the newest developments, Instagram story slideshows have become the latest talk of the diverse range of social media communities across the web.
Since its entry into the communication galore, the Instagram application has emerged as an absolute favourite of social media freaks, thanks to its already captivating features. Moving ahead with its customary user appealing efforts, the latter has recently introduced the slideshow feature to upgrade and improvise its content stories and reels.
Working with the same, you can now integrate your otherwise simple and elementary Instagram stories into awesome slideshows. This visibly means that your conventional stories and reels on the app are now going to get that missing spark with a plethora of customizable motion graphic features. An Instagram story slideshow can work to earn you a huge number of followers, thus uplifting your social creativity quotient and entertainment appeal.
These creative 15 second snippets are appreciably the most amazing trends to increase your audience backup as a market organization, business enterprise, an influencer or as a rising star, all because of an excellent content presentation strategy and catchy outlook. Try hands at using this high end graphic presentation utility to attract the most awaited jaw dropping appreciation of your social media posts.
Part 2 How to Use Instagram Slideshow
Now that you are aware about the excitement and social buzz that your Instagram story slideshows can create with an immediate effect, the aforesaid reason is sufficient enough to motivate you towards diving deeper into the interesting ways of working with the feature to your maximum advantage. Adhering to the concern, let us proceed with learning about the most appealing trends to use an Instagram slideshow in the following section:
● Stepwise Tutorials and Visual Guides
The utility of Instagram slideshows to merge multiple images and videos together has blocked the interruption of additional feeds amid the content presentation, thus giving you the liberty to post a set of related videos and stills in one go, which can be of great help when you encounter a need to share tutorial videos, recipe follow ups and alike content that essentially requires a sequential presentation.
The Instagram stories slideshow can be useful to DIY creators who wish to demonstrate or guide their followers to create stunning examples of self-designed masterpieces. Posting step wise guides with clear cut instructions to work upon or use something, like that of a new product, can also be catered with an Instagram slideshow story.
● Product Advertising and Sale
If you are looking for impressive and cost effective solutions to launch your products among potential customers, consider taking the help of Instagram slideshows. The feature is known to deliver excellent results in the brand promotion of some particular products, such as jewelry and apparel design.
Jewelers, furniture retailers and textile designers can work with the slideshow to upload a series of images and videos for a clear and vivid demonstration of the product. Considering the fact that such commodities may greatly differ in their visual and actual appearance, the products can be shown through a variety of angles to facilitate viewers with the most comprehensive and an almost exact presentation of the different aspects that a product claims to have.
Part 3 Top 10 Apps for Making Instagram Story Slideshow (iOS & Android)
By now, you must have had a comprehensive understanding of the significance of Instagram story slideshows in uplifting different aspects of your content delivery, along with effectively addressing your diverse and large scale information sharing needs. Moving ahead with our discussion, let us browse through some of the best software solutions to create the most appealing Instagram story slideshows in the following section:
01SlideLab
Starting with the list the first application to look forward on creating over the top Instagram story slideshows with utmost ease. The software package is loaded with an extensive range of editing effects and filters, audio-visual transitions and supplementary design elements, that promise you of a high resolution, professional quality slideshow output.
Working with the software, you get the flexibility to conveniently customize the sequence in which the images would appear in the slideshow, with allowing a maximum screen display time of 3 seconds to each image. The created slideshows can be easily shared on various media handles and platforms, including Instagram, Facebook and YouTube.
While you can undertake a free trial of the tool, a paid subscription of the same costing $ 4.99 is required for accessing the complete range of features associated with the program. The software is however, exclusively compatible with iOS supported devices.
02VivaVideo
This one is an excellent video editor and graphic designer tool, which you can use to create and share amazing slideshows to complement your Instagram stories and feeds. Working with the aforesaid software program, you don’t need to worry about the concerns of device compatibility, as the program works well with your favorite MacOs and Windows supported systems and devices.
Talking of the specific features that the software promises to offer, you can use its built in camera to capture high resolution videos and supplement them with over 60 high end customization utilities, like sound effects and transitions, along with dubbing the video. The basic version of the tool is available for free usage and allows you to choose between the Pro and Quick modes, respectively for a high flexibility and an escalated automated response.
The free version is however, known to leave watermarks on the created videos, is stuffed with frequently appearing ads and permits a 5-minute presentation time. You can escape these hustles anytime by subscribing to the paid version of VivaVideo for $ 2.99.

03InShot
The InShot image and video editor program is another potential candidate to be employed as an Instagram story slideshow creator. The software’s effect library is packed with a heap of conveniently usable design elements and features to create the most beautiful Instagram slideshows. The app can be put to use for efficiently designing Instagram stories to address personal and professional concerns.
Some over the top features of the tool include, the flexibility to crop, trim, cut and merge video files, and uplift them with a range of effects, filters, transitions and backgrounds. The exclusive audio flexibility of the software allows you to add upbeat sound and music, while enabling a choice of fading music in and out.
The software additionally permits to adjust the speed control of your videos, making them run in a slow or fast motion as per the content requirement. There are also a variety of graphic elements, like, texts, emojis, stickers, etc., which you can add to your images and videos to make them more pronounced.

04StoryArt
Enjoying the highest user ratings on a number of leading software review platforms, the StoryArt software package lands among the most popular and preferred applications to work with creating slideshows for Instagram stories. The most appealing features of the software program include, an extensive range of more than 200 premade slideshow templates which can be directly edited to create amazing Instagram feeds and stories.
Other attractive features of the slideshow creator tool include, a plethora of design effects with varying diversities of fonts, colors, filters and around 20 elusive background themes, that are updated weekly with new additions. The program comes with a clean and responsive interface, is free to use and conforms with Windows and MacOs devices.
05Unfold
Unfold is quite a reliable software tool for creating elegant Instagram story slideshows from a storehouse of preset design templates, while adding a series of inline video and image editing effects to the same. The tool’s slideshow creator package comes with a mix of free and premium features, and does not require the account creation formality to begin working.
Major attractions of the program consist of 25 free and more than 60 premium slideshow design templates, 5 different font styles and upgraded text customizations, high resolution slideshow output and a direct share facility. You can prefer to download the software application from the various iOS and Android app stores, and work with the same on your preferred laptops, desktops and smartphones, without worrying about device compatibility.

06Canva
Canva is conveniently counted among the best Instagram slideshow maker tools and has the possibly the vastest inventory of over 60, 000 beautiful premade slideshow templates to create the mot captivating Instagram stories. Working with the tool, you are granted the liberty to select from a hoard of around 1 million stock images to set the most perfect background for the slideshow being created.
Additional features of the software comprise of high end image customization effects, fonts, transitions, texts and filters, with a never ending variety of frames, textures, icons, badges and stickers. If this is not enough, you get to access a diverse library of high end design elements, like, photo vignette, design grids, image enhancer and photo blur, to compliment your Instagram slideshow stories with the most cherished visual effects.
Talking of the platform cohesiveness, you can work with the tool through its desktop download as well as a free installation from any of the Android or Apple app stores.

07Adobe Spark
This one is a family of graphic design software and tools that conveniently boasts of its extensive credibility towards facilitating the creation of high resolution and engaging image and video slideshows to uplift the conventional feeds and stories of Instagram. Post the creation process, you can add a diversity of audio-visual effects, like, animations, sounds, fonts, text layouts, cutouts and design elements to further enhance your graphic artwork.
The application greets you with the most pleasing and easy to use workspace, which would never require you to be a graphic design expert to start working on the slideshows. If you are into creating video centered Instagram story slideshows, you can choose to work with animated videos and prefer to select the media from your device gallery as well as the software’s huge in-house video collection. The tool’s template library is a further amusement, with a countless number of story and message centered themes.
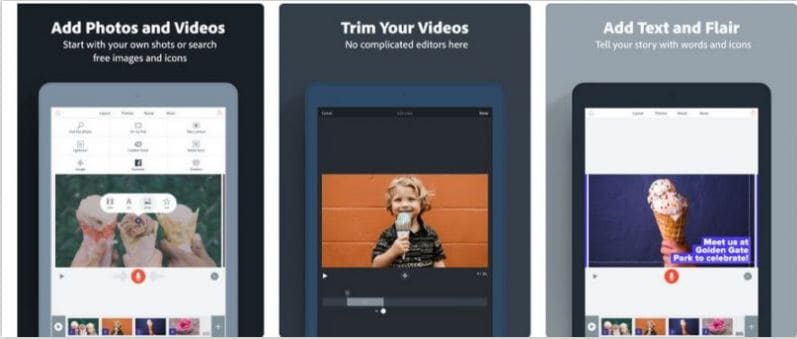
08PhotoGrid
If you are explicitly keen on creating video and photo collages for a jaw dropping Instagram story, consider working with the aforesaid application without a second thought. What’s more exciting is that the software comes with a huge set of over 300 pre made design templates to exclusively craft beautiful slideshows for Instagram stories on any iOS and Android device.
Talking of the app’s set of editing features, apart from being packed with multiple text fonts, over 60 image filters and 90 slideshow backgrounds, the most striking characteristic of the tool is, it permits you to clip an object from an image and remove the latter’s background. Other utilities of the software comprise of a real-time selfie camera, that clicks and automatically beautifies the captured image, beauty enhancing features that can apply and remove makeup from profile shots and selfies.
09Typorama
The next entry in the list is the Typorama software tool, which you can use to create text based slideshows for your Instagram stories. The software’s fonts library is full of elusive typographic designs to choose the best one that suits your content style and arrangement within the slideshow. When opting to work with this feature of the software, you will only need to select a suitable background and begin typing. That’s it!
Extending the text styling credibility of the tool a bit more, you can select from over 50 different typographic layouts and more than 100 typeface and font choices, a huge collection of story based quotes and a diversity of shadows, distortion effects and gradients to improvise your text. The program additionally consists of over 1000 stock templates, image filters, overlays and correction tools to enhance your slideshow background.
10Microsoft Hyperlapse
This one is an advanced slideshow creator program that allows you to design Instagram stories slideshow in time lapse. You can work with the tool to modify the slideshow speed up to 32 times ahead of the normal and create time lapse stories for a maximum of 20 minutes directly on your smartphone.
The app specializes in creating high end video slideshows for Instagram stories and feeds, while showing a great compatibility with high resolution videos. The working interface is super easy to understand and use, without requiring any over the top technical expertise. Feel free to use the app on any iOS or Android supported smartphone.
Part 4 Tips for Enhancing Your Insta Story Slideshow
By far, you have come a long way reading through the credibility, usage and tools to create Instagram story slideshow free of cost as well as though paid subscriptions. In the following section of this article, let us keep our focus on learning about some of the most amazing tips and tricks to upgrade your Insta story slideshow to the next level:
● A Compact Photo Album
Do you land among those social media freaks how want to share just every moment of your day with your peers, or are you confused on selecting the best photos and videos of a cherished event, vacation or bringing home a new utility and end up posting a heap of media on your social media handles?
If your answer is a guilty ‘Yes’, you can try on giving up the habit now by creating an Instagram story photo slideshow to share mini album of your most loved images from the event or vacation. You can use the feature to create a collection of amazing videos as well and share it too with your friends on social media without the guilt of becoming a feed-hog.
Want a practical experience of using Instagram slideshows? See through the following tutorial to understand the exact creation process:
Step 1: Choose the First Image
Begin with selecting the first image for your slideshow, just as you would ideally do for a normal, single image Instagram feed and long press the same.
Step 2: Confirming the Selection
Navigate to the bottom right corner of your selected image to locate a button similar to a photo slideshow. Tap the button to see a ‘1’ inscribed in a blue circle appear on your chosen image.
Step 3: Make Further Selections
You can now proceed to select other images or videos for the slideshow, in a similar fashion as the first one. You are allowed to include a maximum of 10 media files within the slideshow.
Step 4: Customize Your Creation
Tap the ‘Next’ button when you have finished making the required selections. The editor interface will now open to let you customize the selected images with a series of effects and filters, both one at a time, as well as the entire set altogether. You can also work with modifying the order of appearance of the photos and videos if required.
Step 5: The Final Touches
Once you are done with the editing process, continue to follow the remaining steps, as you would do to create a normal Instagram post. You can include captions, locations and tag your peers on the platform.
Step 6: Time to Share!
Your Instagram slideshow is ready to be posted. Upload it either to your feed or story to receive a hoard of likes and comments!
● Animated Text Overlays
If your Instagram story slideshows are missing out on the visual spunk, try complimenting their images and videos with animated transitions and text overlays. Short and quick animations are the best ways to enhance a slideshow story with an eye catching effect. Applying a variety of text overlays would help to keep the audience curious about the next visual delight.
● Prefer a Vertical Aspect Ratio
While the landscape mode tends to ward off certain portions of the visual media from a slideshow being played across multiple sized screens, using the portrait mode with a vertical aspect ratio suits best to almost every screen size. Taking care of this fact will ensure that your audience does not get distracted with the semi visible contents of the slideshow story.
● Choose Your Editing Effects Wisely
Regardless of the slideshow creation tool you prefer, there are a diversity of effects, templates, design elements and filters to uplift your craft with the perfect look. However, you should be cautious enough while making your choice so that the balance of colors, fonts and themes is affordably maintained, lest you would end up with a messy and loud Instagram story slideshow, that would not gather much appeal.
● Creating Instagram Story Slideshows with Wondershare Filmora
Wondershare Filmora Video Editor is the undisputed leader in creating awesome slideshows for Instagram stories, packed with a diverse number of graphic design tools. Beginning to discuss about the reserve of features that the software promises to offer, the app’s template library is a trunk of the most expressive and elegant slideshow backgrounds, themes and images.
For Win 7 or later (64-bit)
For macOS 10.12 or later
Moving further, the app has recently added the 1:1 aspect ratio to its image and video resolution alternatives to exclusively adhere to the slideshow design concern, allowing the perfect display of your craft across a variety of screen dimensions. Filmora, an advanced version of the basic Filmora editor program is known to most effectively cater to the concern of creating Instagram story slideshows.
Working with this slideshow creator program, you can explore your editing skills to your heart’s content and supplement the images and videos of your slideshow with the most expanded range of audio-visual effects, seamless animated transitions, text overlays, thematic backgrounds and creative image filters. The app comes to you absolutely free of cost and welcomes you with a pleasing and clean interface, and is compatible with all of your Mac, iOS and Windows supported devices and Android smartphones.
● Ending Thoughts →
● Instagram story slideshows are the newest trends of professional and commercial information sharing and personalized fun and entertainment.
● When looking through alternatives to create Instagram slideshow online or through an application software, there is a heap of creator tools.
● Pick the Wondershare Filmora slideshow creator program to design the most sparked up slideshows for your Instagram stories.
Instagram reels and stories have turned into convenient ways of exploring your video creation skills with fun. Read further to know about the top 10 apps to create amazing Insta story slideshows!
In this article
01 [What’s Instagram Story Slideshow](#Part 1)
02 [How to Use Instagram Slideshow?](#Part 2)
03 [Top 10 Apps for Making Instagram Story Slideshow (iOS & Android)](#Part 3)
04 [Tips for Enhancing Your Insta Story Slideshow](#Part 4)
Part 1 What’s Instagram Story Slideshow
With the growing influence of social media on the global life and work culture in today’s times, each and every event on such platforms becomes the new trend of the current IT impacted society. Speaking in the light of the newest developments, Instagram story slideshows have become the latest talk of the diverse range of social media communities across the web.
Since its entry into the communication galore, the Instagram application has emerged as an absolute favourite of social media freaks, thanks to its already captivating features. Moving ahead with its customary user appealing efforts, the latter has recently introduced the slideshow feature to upgrade and improvise its content stories and reels.
Working with the same, you can now integrate your otherwise simple and elementary Instagram stories into awesome slideshows. This visibly means that your conventional stories and reels on the app are now going to get that missing spark with a plethora of customizable motion graphic features. An Instagram story slideshow can work to earn you a huge number of followers, thus uplifting your social creativity quotient and entertainment appeal.
These creative 15 second snippets are appreciably the most amazing trends to increase your audience backup as a market organization, business enterprise, an influencer or as a rising star, all because of an excellent content presentation strategy and catchy outlook. Try hands at using this high end graphic presentation utility to attract the most awaited jaw dropping appreciation of your social media posts.
Part 2 How to Use Instagram Slideshow
Now that you are aware about the excitement and social buzz that your Instagram story slideshows can create with an immediate effect, the aforesaid reason is sufficient enough to motivate you towards diving deeper into the interesting ways of working with the feature to your maximum advantage. Adhering to the concern, let us proceed with learning about the most appealing trends to use an Instagram slideshow in the following section:
● Stepwise Tutorials and Visual Guides
The utility of Instagram slideshows to merge multiple images and videos together has blocked the interruption of additional feeds amid the content presentation, thus giving you the liberty to post a set of related videos and stills in one go, which can be of great help when you encounter a need to share tutorial videos, recipe follow ups and alike content that essentially requires a sequential presentation.
The Instagram stories slideshow can be useful to DIY creators who wish to demonstrate or guide their followers to create stunning examples of self-designed masterpieces. Posting step wise guides with clear cut instructions to work upon or use something, like that of a new product, can also be catered with an Instagram slideshow story.
● Product Advertising and Sale
If you are looking for impressive and cost effective solutions to launch your products among potential customers, consider taking the help of Instagram slideshows. The feature is known to deliver excellent results in the brand promotion of some particular products, such as jewelry and apparel design.
Jewelers, furniture retailers and textile designers can work with the slideshow to upload a series of images and videos for a clear and vivid demonstration of the product. Considering the fact that such commodities may greatly differ in their visual and actual appearance, the products can be shown through a variety of angles to facilitate viewers with the most comprehensive and an almost exact presentation of the different aspects that a product claims to have.
Part 3 Top 10 Apps for Making Instagram Story Slideshow (iOS & Android)
By now, you must have had a comprehensive understanding of the significance of Instagram story slideshows in uplifting different aspects of your content delivery, along with effectively addressing your diverse and large scale information sharing needs. Moving ahead with our discussion, let us browse through some of the best software solutions to create the most appealing Instagram story slideshows in the following section:
01SlideLab
Starting with the list the first application to look forward on creating over the top Instagram story slideshows with utmost ease. The software package is loaded with an extensive range of editing effects and filters, audio-visual transitions and supplementary design elements, that promise you of a high resolution, professional quality slideshow output.
Working with the software, you get the flexibility to conveniently customize the sequence in which the images would appear in the slideshow, with allowing a maximum screen display time of 3 seconds to each image. The created slideshows can be easily shared on various media handles and platforms, including Instagram, Facebook and YouTube.
While you can undertake a free trial of the tool, a paid subscription of the same costing $ 4.99 is required for accessing the complete range of features associated with the program. The software is however, exclusively compatible with iOS supported devices.
02VivaVideo
This one is an excellent video editor and graphic designer tool, which you can use to create and share amazing slideshows to complement your Instagram stories and feeds. Working with the aforesaid software program, you don’t need to worry about the concerns of device compatibility, as the program works well with your favorite MacOs and Windows supported systems and devices.
Talking of the specific features that the software promises to offer, you can use its built in camera to capture high resolution videos and supplement them with over 60 high end customization utilities, like sound effects and transitions, along with dubbing the video. The basic version of the tool is available for free usage and allows you to choose between the Pro and Quick modes, respectively for a high flexibility and an escalated automated response.
The free version is however, known to leave watermarks on the created videos, is stuffed with frequently appearing ads and permits a 5-minute presentation time. You can escape these hustles anytime by subscribing to the paid version of VivaVideo for $ 2.99.
03InShot
The InShot image and video editor program is another potential candidate to be employed as an Instagram story slideshow creator. The software’s effect library is packed with a heap of conveniently usable design elements and features to create the most beautiful Instagram slideshows. The app can be put to use for efficiently designing Instagram stories to address personal and professional concerns.
Some over the top features of the tool include, the flexibility to crop, trim, cut and merge video files, and uplift them with a range of effects, filters, transitions and backgrounds. The exclusive audio flexibility of the software allows you to add upbeat sound and music, while enabling a choice of fading music in and out.
The software additionally permits to adjust the speed control of your videos, making them run in a slow or fast motion as per the content requirement. There are also a variety of graphic elements, like, texts, emojis, stickers, etc., which you can add to your images and videos to make them more pronounced.
04StoryArt
Enjoying the highest user ratings on a number of leading software review platforms, the StoryArt software package lands among the most popular and preferred applications to work with creating slideshows for Instagram stories. The most appealing features of the software program include, an extensive range of more than 200 premade slideshow templates which can be directly edited to create amazing Instagram feeds and stories.
Other attractive features of the slideshow creator tool include, a plethora of design effects with varying diversities of fonts, colors, filters and around 20 elusive background themes, that are updated weekly with new additions. The program comes with a clean and responsive interface, is free to use and conforms with Windows and MacOs devices.
05Unfold
Unfold is quite a reliable software tool for creating elegant Instagram story slideshows from a storehouse of preset design templates, while adding a series of inline video and image editing effects to the same. The tool’s slideshow creator package comes with a mix of free and premium features, and does not require the account creation formality to begin working.
Major attractions of the program consist of 25 free and more than 60 premium slideshow design templates, 5 different font styles and upgraded text customizations, high resolution slideshow output and a direct share facility. You can prefer to download the software application from the various iOS and Android app stores, and work with the same on your preferred laptops, desktops and smartphones, without worrying about device compatibility.
06Canva
Canva is conveniently counted among the best Instagram slideshow maker tools and has the possibly the vastest inventory of over 60, 000 beautiful premade slideshow templates to create the mot captivating Instagram stories. Working with the tool, you are granted the liberty to select from a hoard of around 1 million stock images to set the most perfect background for the slideshow being created.
Additional features of the software comprise of high end image customization effects, fonts, transitions, texts and filters, with a never ending variety of frames, textures, icons, badges and stickers. If this is not enough, you get to access a diverse library of high end design elements, like, photo vignette, design grids, image enhancer and photo blur, to compliment your Instagram slideshow stories with the most cherished visual effects.
Talking of the platform cohesiveness, you can work with the tool through its desktop download as well as a free installation from any of the Android or Apple app stores.
07Adobe Spark
This one is a family of graphic design software and tools that conveniently boasts of its extensive credibility towards facilitating the creation of high resolution and engaging image and video slideshows to uplift the conventional feeds and stories of Instagram. Post the creation process, you can add a diversity of audio-visual effects, like, animations, sounds, fonts, text layouts, cutouts and design elements to further enhance your graphic artwork.
The application greets you with the most pleasing and easy to use workspace, which would never require you to be a graphic design expert to start working on the slideshows. If you are into creating video centered Instagram story slideshows, you can choose to work with animated videos and prefer to select the media from your device gallery as well as the software’s huge in-house video collection. The tool’s template library is a further amusement, with a countless number of story and message centered themes.
08PhotoGrid
If you are explicitly keen on creating video and photo collages for a jaw dropping Instagram story, consider working with the aforesaid application without a second thought. What’s more exciting is that the software comes with a huge set of over 300 pre made design templates to exclusively craft beautiful slideshows for Instagram stories on any iOS and Android device.
Talking of the app’s set of editing features, apart from being packed with multiple text fonts, over 60 image filters and 90 slideshow backgrounds, the most striking characteristic of the tool is, it permits you to clip an object from an image and remove the latter’s background. Other utilities of the software comprise of a real-time selfie camera, that clicks and automatically beautifies the captured image, beauty enhancing features that can apply and remove makeup from profile shots and selfies.
09Typorama
The next entry in the list is the Typorama software tool, which you can use to create text based slideshows for your Instagram stories. The software’s fonts library is full of elusive typographic designs to choose the best one that suits your content style and arrangement within the slideshow. When opting to work with this feature of the software, you will only need to select a suitable background and begin typing. That’s it!
Extending the text styling credibility of the tool a bit more, you can select from over 50 different typographic layouts and more than 100 typeface and font choices, a huge collection of story based quotes and a diversity of shadows, distortion effects and gradients to improvise your text. The program additionally consists of over 1000 stock templates, image filters, overlays and correction tools to enhance your slideshow background.
10Microsoft Hyperlapse
This one is an advanced slideshow creator program that allows you to design Instagram stories slideshow in time lapse. You can work with the tool to modify the slideshow speed up to 32 times ahead of the normal and create time lapse stories for a maximum of 20 minutes directly on your smartphone.
The app specializes in creating high end video slideshows for Instagram stories and feeds, while showing a great compatibility with high resolution videos. The working interface is super easy to understand and use, without requiring any over the top technical expertise. Feel free to use the app on any iOS or Android supported smartphone.
Part 4 Tips for Enhancing Your Insta Story Slideshow
By far, you have come a long way reading through the credibility, usage and tools to create Instagram story slideshow free of cost as well as though paid subscriptions. In the following section of this article, let us keep our focus on learning about some of the most amazing tips and tricks to upgrade your Insta story slideshow to the next level:
● A Compact Photo Album
Do you land among those social media freaks how want to share just every moment of your day with your peers, or are you confused on selecting the best photos and videos of a cherished event, vacation or bringing home a new utility and end up posting a heap of media on your social media handles?
If your answer is a guilty ‘Yes’, you can try on giving up the habit now by creating an Instagram story photo slideshow to share mini album of your most loved images from the event or vacation. You can use the feature to create a collection of amazing videos as well and share it too with your friends on social media without the guilt of becoming a feed-hog.
Want a practical experience of using Instagram slideshows? See through the following tutorial to understand the exact creation process:
Step 1: Choose the First Image
Begin with selecting the first image for your slideshow, just as you would ideally do for a normal, single image Instagram feed and long press the same.
Step 2: Confirming the Selection
Navigate to the bottom right corner of your selected image to locate a button similar to a photo slideshow. Tap the button to see a ‘1’ inscribed in a blue circle appear on your chosen image.
Step 3: Make Further Selections
You can now proceed to select other images or videos for the slideshow, in a similar fashion as the first one. You are allowed to include a maximum of 10 media files within the slideshow.
Step 4: Customize Your Creation
Tap the ‘Next’ button when you have finished making the required selections. The editor interface will now open to let you customize the selected images with a series of effects and filters, both one at a time, as well as the entire set altogether. You can also work with modifying the order of appearance of the photos and videos if required.
Step 5: The Final Touches
Once you are done with the editing process, continue to follow the remaining steps, as you would do to create a normal Instagram post. You can include captions, locations and tag your peers on the platform.
Step 6: Time to Share!
Your Instagram slideshow is ready to be posted. Upload it either to your feed or story to receive a hoard of likes and comments!
● Animated Text Overlays
If your Instagram story slideshows are missing out on the visual spunk, try complimenting their images and videos with animated transitions and text overlays. Short and quick animations are the best ways to enhance a slideshow story with an eye catching effect. Applying a variety of text overlays would help to keep the audience curious about the next visual delight.
● Prefer a Vertical Aspect Ratio
While the landscape mode tends to ward off certain portions of the visual media from a slideshow being played across multiple sized screens, using the portrait mode with a vertical aspect ratio suits best to almost every screen size. Taking care of this fact will ensure that your audience does not get distracted with the semi visible contents of the slideshow story.
● Choose Your Editing Effects Wisely
Regardless of the slideshow creation tool you prefer, there are a diversity of effects, templates, design elements and filters to uplift your craft with the perfect look. However, you should be cautious enough while making your choice so that the balance of colors, fonts and themes is affordably maintained, lest you would end up with a messy and loud Instagram story slideshow, that would not gather much appeal.
● Creating Instagram Story Slideshows with Wondershare Filmora
Wondershare Filmora Video Editor is the undisputed leader in creating awesome slideshows for Instagram stories, packed with a diverse number of graphic design tools. Beginning to discuss about the reserve of features that the software promises to offer, the app’s template library is a trunk of the most expressive and elegant slideshow backgrounds, themes and images.
For Win 7 or later (64-bit)
For macOS 10.12 or later
Moving further, the app has recently added the 1:1 aspect ratio to its image and video resolution alternatives to exclusively adhere to the slideshow design concern, allowing the perfect display of your craft across a variety of screen dimensions. Filmora, an advanced version of the basic Filmora editor program is known to most effectively cater to the concern of creating Instagram story slideshows.
Working with this slideshow creator program, you can explore your editing skills to your heart’s content and supplement the images and videos of your slideshow with the most expanded range of audio-visual effects, seamless animated transitions, text overlays, thematic backgrounds and creative image filters. The app comes to you absolutely free of cost and welcomes you with a pleasing and clean interface, and is compatible with all of your Mac, iOS and Windows supported devices and Android smartphones.
● Ending Thoughts →
● Instagram story slideshows are the newest trends of professional and commercial information sharing and personalized fun and entertainment.
● When looking through alternatives to create Instagram slideshow online or through an application software, there is a heap of creator tools.
● Pick the Wondershare Filmora slideshow creator program to design the most sparked up slideshows for your Instagram stories.
Tips That Show Anybody How to Get Awesome Background for Slideshow in PowerPoint
Tips That Show Anybody How to Get Awesome Background for Slideshow in Powerpoint
An easy yet powerful editor
Numerous effects to choose from
Detailed tutorials provided by the official channel
Amazing slideshow background are an absolute attention grabber in the realm of creative PowerPoint presentations. If you wish to upgrade yours with the same, be here to learn how!
In this article
01 [How to Add Video Background in PowerPoint?](#Part 1)
02 [How to Create Moving Backgrounds in Microsoft PowerPoint?](#Part 2)
03 [Some Tips for You to Get Awesome PowerPoint Backgrounds & Templates](#Part 3)
Part 1 How to Add Video Background in PowerPoint?
When the talk is about engaging means to deliver a precise information, PowerPoint slideshows are an absolute stunner. While these are already a captivating utility to present your thing, the output and audience engagement is at par with the inclusion of attractive design elements in the presentation. As is evident, there are enormous diversities of supplementary elements to complement your presentation, let us centre our discussion to the application of video background for slideshow in PowerPoint.
User’s Guide to Add Video Background in a PowerPoint Slideshow
The following section presents a detailed explanation of the steps to supplement your PowerPoint presentations with classic video backgrounds in just a few quick steps:
Step 1: Launch Your Presentation
Start with opening the desired PowerPoint presentation to which you want to add the video background, in any of your preferred devices.
Step 2: Add a Video to Your Slide
Browse through your presentation slides to locate the one you want to add the video background to. When you have made your choice, navigate to the PowerPoint toolbar at the top and hit the ‘Insert’ tab and choose the ‘Video’ option.
You will now be presented with 2 choices, either uploading a video from your device or insert one from the web by pasting its YouTube URL into the slide. If you are uploading a video from your device, proceed with selecting the desired video and tap ‘Insert’.

Step 3: Move and Resize Your Video
After uploading your video to the slide, you need to make suitable adjustments in its size and alignment to synchronize the same with the contents of the slide. To do this, drag the top left corner of the video to that of the slide to set the top alignment ratio. In the same way, move the bottom right corner of the video to be in sync with that of the slide. You will see the video occupying the entire slide at the end of the adjustment process.

Step 4: Set the Video Background
You will now need to set the video as the background of your slide, so that the latter’s contents are displayed over the video. You can do this by right clicking on the video and choosing the ‘Send to Back’ option from the dropdown that follows. This will cause the contents of your slide to get displayed over the video.

Step 5: Playback Edit and Customization Choices
Before proceeding towards making changes in the video playback and formatting, prefer taking a quick preview of your work till here. Once you are satisfied, navigate to the PowerPoint Toolbar at the top, hit the ‘Video Tools’ tab, followed by clicking on the ‘Playback’ tab.
It is recommended to introduce the following changes in your video for the most affordable slideshow output:
● Loop Your Video
Creating a video loop will facilitate you with an automatic replay of your video without the need to restart it every time with a click. You can loop your video by navigating to the ‘Video Options’ section and choose ‘Loop Until Stopped’ by clicking within the checkbox next to it. The background video will now continue to play until you switch to a different slide.
● Automatically Start Your Video
To avoid clicking on the slide amid your presentation for the video loop to begin, adjust the latter’s settings for an automatic start. Navigate to the ‘Start’ dropdown menu and select ‘Automatically’.
● Trim Your Video
You can work with some basic video editing tools in PowerPoint, like trimming and cropping your background video to a desired length. If you wish to ward off certain portions of your video, reach to and click o the ‘Trim Video’ button. Following this, drag the slider of the video to select the desired portions of the clip and exclude the rest.
You can further work with some more editing effects to create the perfect video backgrounds for your presentation slides in line with your specific preferences.

Step 6: Annotate Your Video Background
When you are done with the video editing process, take a preview of the same to ensure that everything is set in the proper order and at the proper place. Lastly, if you wish to add suitable text annotations to your video, you can do this with the ‘ClassPoint’ tool to write over the video background. All you need to do is select a preferred pen colour and start writing on your slide screen. You can further, save the annotations for a work record.

Part 2 How to Create Moving Backgrounds in Microsoft PowerPoint?
Moving PowerPoint slideshow background is another aspect of graphic creativity at its best, which can be used in a number of ways to grab considerable viewer attention. When choosing to add moving backgrounds to your presentation, the latter can aid in improving the style of content presentation, making your audience curious about how and what happens next.
Having learnt about the utility and creation process of video backgrounds in the PowerPoint presentation tool, let us extend our discussion to the method of creating a moving slide show background in the same in the following section:
User’s Guide to Create Moving Backgrounds for PowerPoint Presentations
Discussed below is an explanatory procedure for designing moving backgrounds with an awesome appearance for slideshow presentations in Microsoft PowerPoint:
Step 1: Open Your Presentation
To begin with, launch the PowerPoint tool in your preferred device and open the presentation on which you will be working to add the moving background. After the presentation gets loaded, navigate through the same and select the desired slide to proceed with the aforesaid task.
Step 2: Choose a Video Location
To add your desired video to the slide, navigate to the PowerPoint ribbon at the top and click on the ‘Insert’ tab. Select ‘Video’ from the list of options that appears, followed by choosing one of the ‘Online Video’ or ‘Video on My PC’ options from the video selection prompt. It is further recommended to select a video in the MP4 format, as the latter gives best results of moving and video backgrounds.
Step 3: Insert Your Video
Choose the second option in the selection prompt to upload a video from your device. You will now be asked to browse through your device and locate the desired video in the ‘Insert Video’ dialog box that appears. Select your video and tap the ‘Insert’ button to add your video.
To upload videos from an online source, choose the ‘Online Video’ option in the selection prompt and proceed to search the video from PowerPoint or paste its embed code to recover the video. The chosen video will begin to download and can be added to the PowerPoint presentation after the download process comes to an end.

Step 4: Playback Editing and Video Customization
Before proceeding further, consider paying your video once by clicking on the ‘Start’ button. You can also add different effects, trim and crop or add a bookmark to your video by navigating to and clicking on the ‘Video Tools’ tab, followed by selecting the ‘Format’ option. To work with the start and playback options for the video, click on ‘Playback’ in the dropdown menu of the ‘Video Tools’ tab.

Part 3 Some Tips for You to Get Awesome PowerPoint Backgrounds & Templates
Now that you have developed a comprehensive understanding of the utility of adding video and moving background for slideshow presentation, let us look through some easy tips and tricks to conveniently access the top rated and the most popular PowerPoint slideshow templates and backgrounds in the following section:
01Cool Slide Backgrounds
Slideshow presentations in PowerPoint are supplemented with a visual spark through amazing and vibrant backgrounds that are a sign of excellent graphic creativity. When working with a PowerPoint presentation of your own, do take the liberty to use some cool slide backgrounds to your creative advantage.
When the talk is about complementing your presentation with a cohesive and upbeat background, you can either select the most suitable one from a heap of pre made slideshow templates available both in the PowerPoint slideshow creator tool as well as across the web. However, if you wish to take the excitement to another level, try hands at creating an awesome and cool backgrounds for PowerPoint slides of your own!
Talking about some really cool tips and tricks to design a slideshow presentation background in PowerPoint, start with including some specific shapes and color overlays to the background capture, experiment with a polygon background, work on enhancing the background image with classic and artistic effects and apply a mix of colors, textures and patterns to give a classy look to your slideshow backgrounds.

02Professional Slideshow Backgrounds
If you are aiming at creating a PowerPoint slideshow presentation with a business centered design approach, you will need to cut down on some extra elements that you would ideally choose to include in a personal purpose based slideshow. Paying attention to the fact that business and corporate centered presentations should be simple, subtle and to the point, it would be an intelligent step to avoid adding too many expressive elements in the background.
Whether you are creating a professional slideshow background of your own or working with a pre designed template, take care to include a complementary play of a light background theme with a maximum of 2 balancing shades.
Avoid too much vibrancy and abstain from applying over the top effects and quick transitions, lest your presentation may look a bit too crowed. If your slides have lot of written content, prefer using a white color background text in a professional font style.
If you have decided on picking a pre made template, you can browse through a diversity of suggestions across the web, while keeping the aforesaid constraints in mind. Consider taking a look at the figure given below to have a more comprehensive understating of the prerequisites of selecting a professional sideshow background template:

03Happy Birthday Slide Backgrounds
Birthday parties are the most appealing synonyms of fun and entertainment. If you are into the profession of organizing events that renders smiling and happy faces, slideshow presentations could be of great help to you in discussing about services, types of social gentries and event targets with your clients.
When looking through different options to select the perfect birthday template, either for a professional event, or just to go down the memory lane of your most cherished moments, take caution to search for a vibrant alternative with colorful images, different background designs and party oriented cool themes, wide aspect ratio with high screen resolution for a mass display and conveniently editable graphics.
If you are creating a happy birthday slide background of your own, there are variety of realms to explore your graphic design creativity, owing to the fact that the subject of creation is highly expressive and multi-dimensional. While you are free to extend your creativity to the next level, do pay attention to the above constraints for a more elusive and outstanding creation output, while maintaining the fun and entertainment quotient intact.

04Wedding Slide Backgrounds
Considering the fact that wedding events are pronounced means of fun, leisure, enjoyment and beautiful memories, anything that aims to be a part of the celebrations, should be equally ecstatic and engaging. Infusing festive occasions with technology, slideshow based wedding invitations and moment captures are the top rated modern trends of celebrating this significant life event.
If you are keen on designing the perfect slideshow presentation for wedding invitations, photo albums and thank you cards, prefer to choose a wedding slide background template with aesthetic layout and flowing element inclusions, like that of floral borders and scented candles. Look though the elements of a subtle thematic setup with soothing color combinations, preferably in complementary pastel shades, like pink and white.
Talking of template customizability, the latter should have placeholders to include names of the bride and groom, the wedding date and venue, and of course the wedding photographs. The beautiful slide background template should have enough design space to include the most elusive play of text colors and fonts to suit specific preferences of creating special memories of a cherished event.

05Slideshow Backgrounds and Templates in Filmora
When looking for the most convenient lead to an extensive variety of beautiful slideshow templates and background, the template library of Wondershare Filmora Video Editor slideshow creator program can be your most affordable destination. The aforesaid software library is known to possess the best and most perfect template choices to suit the creation constraints of almost every slideshow presentation style and objective you can possibly think of.
For Win 7 or later (64-bit)
For macOS 10.12 or later
The elusive templates are further supplemented with a plethora of design flexibilities and customization features that are all set to deliver you the most appreciable creation output. Stressing a bit on the template customization choices of the software, you can work with the tool to uplift your slideshow backgrounds with artistic image effects and overlays, annotate them with beautiful text formations in a variety of colors, fonts and sizes and lots more.
Moving a bit deeper into the creative aspect, you can upgrade the visual style of your presentations with the most perfect and seamless image and video transitions and text animations. The bottom line is, working with the aforesaid slideshow creator program, you are entitled to get jaw dropping applaud from your audience, while making a confident and a content delivery through your slideshow presentation.

● Ending Thoughts →
● Using an expressive and complementing background in your slideshow presentation uplifts its visual credibility in captivating your audience.
● Browsing through the web, you get to access a vast range of amazing slideshow backgrounds and templates to make your presentation, a visual masterpiece.
● When looking for the most distributed storehouse of slideshow backgrounds and templates, the Wondershare Filmora library is your ultimate solution.
Amazing slideshow background are an absolute attention grabber in the realm of creative PowerPoint presentations. If you wish to upgrade yours with the same, be here to learn how!
In this article
01 [How to Add Video Background in PowerPoint?](#Part 1)
02 [How to Create Moving Backgrounds in Microsoft PowerPoint?](#Part 2)
03 [Some Tips for You to Get Awesome PowerPoint Backgrounds & Templates](#Part 3)
Part 1 How to Add Video Background in PowerPoint?
When the talk is about engaging means to deliver a precise information, PowerPoint slideshows are an absolute stunner. While these are already a captivating utility to present your thing, the output and audience engagement is at par with the inclusion of attractive design elements in the presentation. As is evident, there are enormous diversities of supplementary elements to complement your presentation, let us centre our discussion to the application of video background for slideshow in PowerPoint.
User’s Guide to Add Video Background in a PowerPoint Slideshow
The following section presents a detailed explanation of the steps to supplement your PowerPoint presentations with classic video backgrounds in just a few quick steps:
Step 1: Launch Your Presentation
Start with opening the desired PowerPoint presentation to which you want to add the video background, in any of your preferred devices.
Step 2: Add a Video to Your Slide
Browse through your presentation slides to locate the one you want to add the video background to. When you have made your choice, navigate to the PowerPoint toolbar at the top and hit the ‘Insert’ tab and choose the ‘Video’ option.
You will now be presented with 2 choices, either uploading a video from your device or insert one from the web by pasting its YouTube URL into the slide. If you are uploading a video from your device, proceed with selecting the desired video and tap ‘Insert’.
Step 3: Move and Resize Your Video
After uploading your video to the slide, you need to make suitable adjustments in its size and alignment to synchronize the same with the contents of the slide. To do this, drag the top left corner of the video to that of the slide to set the top alignment ratio. In the same way, move the bottom right corner of the video to be in sync with that of the slide. You will see the video occupying the entire slide at the end of the adjustment process.
Step 4: Set the Video Background
You will now need to set the video as the background of your slide, so that the latter’s contents are displayed over the video. You can do this by right clicking on the video and choosing the ‘Send to Back’ option from the dropdown that follows. This will cause the contents of your slide to get displayed over the video.
Step 5: Playback Edit and Customization Choices
Before proceeding towards making changes in the video playback and formatting, prefer taking a quick preview of your work till here. Once you are satisfied, navigate to the PowerPoint Toolbar at the top, hit the ‘Video Tools’ tab, followed by clicking on the ‘Playback’ tab.
It is recommended to introduce the following changes in your video for the most affordable slideshow output:
● Loop Your Video
Creating a video loop will facilitate you with an automatic replay of your video without the need to restart it every time with a click. You can loop your video by navigating to the ‘Video Options’ section and choose ‘Loop Until Stopped’ by clicking within the checkbox next to it. The background video will now continue to play until you switch to a different slide.
● Automatically Start Your Video
To avoid clicking on the slide amid your presentation for the video loop to begin, adjust the latter’s settings for an automatic start. Navigate to the ‘Start’ dropdown menu and select ‘Automatically’.
● Trim Your Video
You can work with some basic video editing tools in PowerPoint, like trimming and cropping your background video to a desired length. If you wish to ward off certain portions of your video, reach to and click o the ‘Trim Video’ button. Following this, drag the slider of the video to select the desired portions of the clip and exclude the rest.
You can further work with some more editing effects to create the perfect video backgrounds for your presentation slides in line with your specific preferences.
Step 6: Annotate Your Video Background
When you are done with the video editing process, take a preview of the same to ensure that everything is set in the proper order and at the proper place. Lastly, if you wish to add suitable text annotations to your video, you can do this with the ‘ClassPoint’ tool to write over the video background. All you need to do is select a preferred pen colour and start writing on your slide screen. You can further, save the annotations for a work record.
Part 2 How to Create Moving Backgrounds in Microsoft PowerPoint?
Moving PowerPoint slideshow background is another aspect of graphic creativity at its best, which can be used in a number of ways to grab considerable viewer attention. When choosing to add moving backgrounds to your presentation, the latter can aid in improving the style of content presentation, making your audience curious about how and what happens next.
Having learnt about the utility and creation process of video backgrounds in the PowerPoint presentation tool, let us extend our discussion to the method of creating a moving slide show background in the same in the following section:
User’s Guide to Create Moving Backgrounds for PowerPoint Presentations
Discussed below is an explanatory procedure for designing moving backgrounds with an awesome appearance for slideshow presentations in Microsoft PowerPoint:
Step 1: Open Your Presentation
To begin with, launch the PowerPoint tool in your preferred device and open the presentation on which you will be working to add the moving background. After the presentation gets loaded, navigate through the same and select the desired slide to proceed with the aforesaid task.
Step 2: Choose a Video Location
To add your desired video to the slide, navigate to the PowerPoint ribbon at the top and click on the ‘Insert’ tab. Select ‘Video’ from the list of options that appears, followed by choosing one of the ‘Online Video’ or ‘Video on My PC’ options from the video selection prompt. It is further recommended to select a video in the MP4 format, as the latter gives best results of moving and video backgrounds.
Step 3: Insert Your Video
Choose the second option in the selection prompt to upload a video from your device. You will now be asked to browse through your device and locate the desired video in the ‘Insert Video’ dialog box that appears. Select your video and tap the ‘Insert’ button to add your video.
To upload videos from an online source, choose the ‘Online Video’ option in the selection prompt and proceed to search the video from PowerPoint or paste its embed code to recover the video. The chosen video will begin to download and can be added to the PowerPoint presentation after the download process comes to an end.
Step 4: Playback Editing and Video Customization
Before proceeding further, consider paying your video once by clicking on the ‘Start’ button. You can also add different effects, trim and crop or add a bookmark to your video by navigating to and clicking on the ‘Video Tools’ tab, followed by selecting the ‘Format’ option. To work with the start and playback options for the video, click on ‘Playback’ in the dropdown menu of the ‘Video Tools’ tab.
Part 3 Some Tips for You to Get Awesome PowerPoint Backgrounds & Templates
Now that you have developed a comprehensive understanding of the utility of adding video and moving background for slideshow presentation, let us look through some easy tips and tricks to conveniently access the top rated and the most popular PowerPoint slideshow templates and backgrounds in the following section:
01Cool Slide Backgrounds
Slideshow presentations in PowerPoint are supplemented with a visual spark through amazing and vibrant backgrounds that are a sign of excellent graphic creativity. When working with a PowerPoint presentation of your own, do take the liberty to use some cool slide backgrounds to your creative advantage.
When the talk is about complementing your presentation with a cohesive and upbeat background, you can either select the most suitable one from a heap of pre made slideshow templates available both in the PowerPoint slideshow creator tool as well as across the web. However, if you wish to take the excitement to another level, try hands at creating an awesome and cool backgrounds for PowerPoint slides of your own!
Talking about some really cool tips and tricks to design a slideshow presentation background in PowerPoint, start with including some specific shapes and color overlays to the background capture, experiment with a polygon background, work on enhancing the background image with classic and artistic effects and apply a mix of colors, textures and patterns to give a classy look to your slideshow backgrounds.
02Professional Slideshow Backgrounds
If you are aiming at creating a PowerPoint slideshow presentation with a business centered design approach, you will need to cut down on some extra elements that you would ideally choose to include in a personal purpose based slideshow. Paying attention to the fact that business and corporate centered presentations should be simple, subtle and to the point, it would be an intelligent step to avoid adding too many expressive elements in the background.
Whether you are creating a professional slideshow background of your own or working with a pre designed template, take care to include a complementary play of a light background theme with a maximum of 2 balancing shades.
Avoid too much vibrancy and abstain from applying over the top effects and quick transitions, lest your presentation may look a bit too crowed. If your slides have lot of written content, prefer using a white color background text in a professional font style.
If you have decided on picking a pre made template, you can browse through a diversity of suggestions across the web, while keeping the aforesaid constraints in mind. Consider taking a look at the figure given below to have a more comprehensive understating of the prerequisites of selecting a professional sideshow background template:
03Happy Birthday Slide Backgrounds
Birthday parties are the most appealing synonyms of fun and entertainment. If you are into the profession of organizing events that renders smiling and happy faces, slideshow presentations could be of great help to you in discussing about services, types of social gentries and event targets with your clients.
When looking through different options to select the perfect birthday template, either for a professional event, or just to go down the memory lane of your most cherished moments, take caution to search for a vibrant alternative with colorful images, different background designs and party oriented cool themes, wide aspect ratio with high screen resolution for a mass display and conveniently editable graphics.
If you are creating a happy birthday slide background of your own, there are variety of realms to explore your graphic design creativity, owing to the fact that the subject of creation is highly expressive and multi-dimensional. While you are free to extend your creativity to the next level, do pay attention to the above constraints for a more elusive and outstanding creation output, while maintaining the fun and entertainment quotient intact.
04Wedding Slide Backgrounds
Considering the fact that wedding events are pronounced means of fun, leisure, enjoyment and beautiful memories, anything that aims to be a part of the celebrations, should be equally ecstatic and engaging. Infusing festive occasions with technology, slideshow based wedding invitations and moment captures are the top rated modern trends of celebrating this significant life event.
If you are keen on designing the perfect slideshow presentation for wedding invitations, photo albums and thank you cards, prefer to choose a wedding slide background template with aesthetic layout and flowing element inclusions, like that of floral borders and scented candles. Look though the elements of a subtle thematic setup with soothing color combinations, preferably in complementary pastel shades, like pink and white.
Talking of template customizability, the latter should have placeholders to include names of the bride and groom, the wedding date and venue, and of course the wedding photographs. The beautiful slide background template should have enough design space to include the most elusive play of text colors and fonts to suit specific preferences of creating special memories of a cherished event.
05Slideshow Backgrounds and Templates in Filmora
When looking for the most convenient lead to an extensive variety of beautiful slideshow templates and background, the template library of Wondershare Filmora Video Editor slideshow creator program can be your most affordable destination. The aforesaid software library is known to possess the best and most perfect template choices to suit the creation constraints of almost every slideshow presentation style and objective you can possibly think of.
For Win 7 or later (64-bit)
For macOS 10.12 or later
The elusive templates are further supplemented with a plethora of design flexibilities and customization features that are all set to deliver you the most appreciable creation output. Stressing a bit on the template customization choices of the software, you can work with the tool to uplift your slideshow backgrounds with artistic image effects and overlays, annotate them with beautiful text formations in a variety of colors, fonts and sizes and lots more.
Moving a bit deeper into the creative aspect, you can upgrade the visual style of your presentations with the most perfect and seamless image and video transitions and text animations. The bottom line is, working with the aforesaid slideshow creator program, you are entitled to get jaw dropping applaud from your audience, while making a confident and a content delivery through your slideshow presentation.
● Ending Thoughts →
● Using an expressive and complementing background in your slideshow presentation uplifts its visual credibility in captivating your audience.
● Browsing through the web, you get to access a vast range of amazing slideshow backgrounds and templates to make your presentation, a visual masterpiece.
● When looking for the most distributed storehouse of slideshow backgrounds and templates, the Wondershare Filmora library is your ultimate solution.
Also read:
- 10 Best Romance Anime Movies You Need to Watch for 2024
- New In 2024, How to Make GIF Stickers for WhatsApp 100 The Easy Way
- 2024 Approved How to Make a Video a Live Photo
- New In 2024, How to Find Some Different Ways to Animated Cartoon of Yourself
- In 2024, Create Animated Video on Canva
- 15 Best Stop Motion Animation Kits to Fuel Creativity for 2024
- New In 2024, How to Draw Cartoons Step by Step with This Guide
- New 12 Top Stop Motion Studios Worth Recommending for 2024
- Updated In 2024, Tutorials to Make Animated Images
- How to Make Photo Motion Effect Online?
- Updated Animate Graphics in Canva for 2024
- 2024 Approved Best Canva 10 Animated Templates
- Updated In 2024, How to Make Photo 3D Cartoon Online
- Updated How to Find Some Different Ways to Animated Cartoon of Yourself for 2024
- New Top 10 Popular Cartoons You Forgot Existed
- Updated In 2024, Obtain and Create Animated GIF Icons
- New Great Guide for Beginners on 2D Animation Making for 2024
- In 2024, 12 Aesthetic GIF Instagram for Marketers and Creatives
- 2024 Approved 12 Animation Video Maker That Can Triple Conversion Rates
- Cartoon Fundamentals How to Learn Cartoon Characters Sketch Quickly
- Updated 2024 Approved Techniques for Making After Effects 2D Animation
- In 2024, Finding Some Different Ways to Animated Cartoon of Yourself
- Updated 5 Foolproof Amazing Anime Text to Speech Tips
- New How to Create Free Photo Collage Frame in Minutes for 2024
- Updated In 2024, Best GIF Maker Software for Windows and Mac
- Best Claymation Shows That Make Your Memories Unforgettable for 2024
- New In 2024, Best 10 Apps to Enhance Your Instagram Story Slideshow
- New 2024 Approved Best 10 Animated Templates in Canva
- New 2024 Approved Best 10 Old Cartoons From Cartoon Network That You Miss
- New How to Find & Make Animated Christmas GIFs for 2024
- New In 2024, How to Make GIF Stickers for WhatsApp 100 The Simple Way
- New 2024 Approved Samples of Cartoon Character Face to Inspire You
- New In 2024, 5 Different Animation Styles A Simple but Complete Guide
- Updated 2024 Approved A Beginners Guide to Tell You What 3D Animation Is
- Updated 2024 Approved Best 15 2D Animation Software Free That Worth to Try
- How to Combine Multiple GIFs Into One with GIF Combiner
- Updated In 2024, Adobe Animate Text Effects Skills You Need to Know
- New Ways to Stop Animation From Looping in Unity for 2024
- How to Turn Yourself Into a WhatsApp Cartoon
- You Can Turn a TikTok Into a GIF Now for 2024
- New In 2024, Whats the Best 10 Photo Animator Templates That Bring Your Images to Life?
- Updated 10 Cartoon Canvas Painting Ideas for Total Beginners
- 2024 Approved Tutorial on Making Unity 2D Animation
- New 2024 Approved Have You Seen the Facebook Cartoon App Everyones Using Recently
- Updated Simple Guide to Create New and Exciting Blackboard Animation for 2024
- Updated 2024 Approved Animate Graphics in Canva
- How to Cast Xiaomi Redmi Note 13 Pro 5G to Computer for iPhone and Android? | Dr.fone
- In 2024, 11 Best Pokemon Go Spoofers for GPS Spoofing on Apple iPhone 7 | Dr.fone
- Full Guide to Fix iToolab AnyGO Not Working On Vivo V30 Lite 5G | Dr.fone
- Why Does iTools Virtual Location Not Work For Apple iPhone 12/iPad? Solved | Dr.fone
- How to restore wiped call history on Motorola Edge 2023?
- Different Methods for Resetting Nubia Red Magic 8S Pro+ Phones with Screen Locked and Not | Dr.fone
- In 2024, For People Wanting to Mock GPS on Samsung Galaxy F15 5G Devices | Dr.fone
- The Best Methods to Unlock the iPhone Locked to Owner for Apple iPhone 6 Plus
- Ways To Find Unlocking Codes For Oppo A58 4G Phones
- Full Guide to Hard Reset Your Vivo X90S | Dr.fone
- 4 solution to get rid of pokemon fail to detect location On Oppo Find X7 Ultra | Dr.fone
- How and Where to Find a Shiny Stone Pokémon For Samsung Galaxy A14 4G? | Dr.fone
- Fixes for Apps Keep Crashing on Huawei Nova Y91 | Dr.fone
- Best Methods for Samsung Galaxy XCover 6 Pro Tactical Edition Wont Turn On | Dr.fone
- Itel S23+ Video Recovery - Recover Deleted Videos from Itel S23+
- What are Location Permissions Life360 On Nubia Red Magic 8S Pro+? | Dr.fone
- Hacks to do pokemon go trainer battles For Nokia C210 | Dr.fone
- How To Bypass the Required Apple Store Verification For Apple iPhone 13 Pro Max | Dr.fone
- How to Factory Reset Infinix Hot 30i If I Forgot Security Code or Password? | Dr.fone
- In 2024, A Comprehensive Guide to iPhone 12 Blacklist Removal Tips and Tools
- The 6 Best SIM Unlock Services That Actually Work On Your Samsung Galaxy S23 FE Device
- Hard Reset Vivo Y78+ (T1) Edition in 3 Efficient Ways | Dr.fone
- The Top 5 Android Apps That Use Fingerprint Sensor to Lock Your Apps On Vivo
- In 2024, Turning Off Two Factor Authentication On iPhone 12 Pro? 5 Tips You Must Know
- How to Remove Activation Lock On the iPhone 14 Pro Without Previous Owner?
- In 2024, 3 Ways for Android Pokemon Go Spoofing On Oppo Find X7 | Dr.fone
- How To Use Allshare Cast To Turn On Screen Mirroring On Vivo V29e | Dr.fone
- Realme V30 Stuck on Screen – Finding Solutions For Stuck on Boot | Dr.fone
- How to Change GPS Location on Nokia C12 Plus Easily & Safely | Dr.fone
- In 2024, What Pokémon Evolve with A Dawn Stone For Samsung Galaxy Z Flip 5? | Dr.fone
- Title: Creative Ways to Create iPhone Text GIF for 2024
- Author: Elon
- Created at : 2024-05-19 03:04:56
- Updated at : 2024-05-20 03:04:56
- Link: https://animation-videos.techidaily.com/creative-ways-to-create-iphone-text-gif-for-2024/
- License: This work is licensed under CC BY-NC-SA 4.0.
