
:max_bytes(150000):strip_icc():format(webp)/GettyImages-140173628BetsieVanDerMeer-5927117e5f9b5859509a476c.jpg)
DP Animation Maker Tutorial for Finding The Best Animated Profile Picture Maker
DP Animation Maker Tutorial for Finding The Best Animated Profile Picture Maker
DP Animation Maker Tutorial for Finding The Best Animated Profile Picture Maker
An easy yet powerful editor
Numerous effects to choose from
Detailed tutorials provided by the official channel
Social media is getting more and more competitive, and it’s crucial to make a good first impression. Animated profile pictures grab the user’s attention and give the added boost that helps you become different in a good way.
This article will show you the ten top animated profile picture makers using which you can create awesome profile pictures with ease.
In this article
01 [What does “PFP” mean?](#Part 1)
02 [The 10 Best Animated Profile Picture Makers for Making awesome profile pictures](#Part 2)
03 [What Happens if You Make Animated Video Instead of Pictures?](#Part 3)
Part 1 What does “PFP” mean?
PFP stands for “Picture For Profile” or, more commonly, “Profile Picture.” It is the first thing people see when they visit your profile on a social networking website. The profile owners typically upload their own images on Facebook, Twitter, Instagram, WhatsApp, and others at different times during the year or when anything significant happens.
Adding a photo gives your followers a chance to put a face to the name and an idea of what you look like. This allows them to better relate to you and creates a strong foundation for conversations and any other type of interactions.
Part 2 The 10 Best Animated Profile Picture Makers for Making awesome profile pictures
Animated profile pictures add fun and steal the show when you add them to your social accounts. What’s more, it can be much easier to create a WhatsApp animated profile picture when you’re using the right tool. Here in this post, we present you with the ten best animated profile picture makers for your reference and use.
01Canva
Canva lets you make an animated profile picture as simple as “drag and drop” without any creativity. Canva’s unique WYSIWYG animation technique makes it very straightforward to create your own avatar - making awesome animated gifs has never been simpler.
The UI is simple enough that even the smallest of details are well thought out. The captions are editable, so you easily customize the words appearing in each awesome gif.
Canva, one of the best animated profile picture makers, is a great alternative for those who prefer to work and create using the browser and without downloading and installing any software. You can also access Canva directly from any mobile device or tablet, making it convenient for you to share creative greetings and social media posts with your friends and loved ones.

●Pros:
● A near-unlimited number of stunning pre-built templates for a wide range of usage
● Beautiful and easy-to-use application interface
● The tool gets frequent bug fixes and updates with the latest features and even more templates
Cons:
● The free plan comes with a pretty meager cloud storage capacity
● No vector design is possible
● Lack of the ability to connect more than one Facebook login for those who handle personal and business pages separately
02Placeit
Are you looking for an easy way to make a simple but effective WhatsApp animated profile picture? Go to Placeit.net, and be creative with its wide range of customizable attractive pre-built templates.
Templates are hand-drawn and professionally designed. With thousands of animated templates, you can create a profile picture in a jiffy. Placeit lets you post fun and exciting photos that attract attention and grow your fanbase in no time.
Make your profile picture come to life with this one-of-a-kind animated profile picture maker! Using its proprietary image editor, you will be able to spread smiles, laughter, surprise, and much more right in seconds.

Pros:
● The overall UI is fairly streamlined – making an animated profile picture should take more than just a few clicks
● From color schemes to changing text fonts – everything is customizable
● Templates are ultra-high-quality
Cons:
● A bit expensive monthly plan
● Pay-per-item cost is definitely not affordable
● No option to add your own custom font
03PicMonkey
PicMonkey is a powerful yet simple online photo editor that lets you showcase your creativity and brand through animated profile pictures, cover photos, advertisements of all kinds, and more. In addition to its easy-to-learn features, PicMonkey offers endless possibilities for amateurs and professionals alike!
To be a meaningful part of the social media world, creating your own profile picture is not only fun but also a smart way to show your individuality. And with PicMonkey’s image editor, crafting the perfect profile picture doesn’t have to be complicated. With over 15 million users, PicMonkey is a leading photo editing software that has been helping individuals create drool-worthy designs in minutes.

Pros:
● The interface is user-friendly, and the tool offers an easy-to-learn feature set
● With a plethora of customizable in-built templates, you can generate some fresh animated profile pictures every time you try the app
● The developer keeps the tool updated with new resources and features always
Cons:
● You cannot work on more than one template simultaneously
● Lacks a proper and detailed user guide with useful tips
● Without paying for the Pro version, you can’t access some super-handy basic features
04Powerpuff Yourself
Are you looking for an easy way to make your own avatar? Powerpuff Yourself is a user-friendly tool that produces realistic anime avatars based on your photos. The features that you can expect are –
● Anime avatars, each with six different skin tones.
● Female or male avatars,
● Unique background based on your answers to the questions, and
● About 70 different hairstyles.
Make your very own anime avatar with this cute animated profile picture generator by simply selecting mouth, eyes, glasses, hair, and dress for your preferred character. After choosing the scene for the background, answer some questions about yourself and press the button to create your avatar!

Pros:
● Choose from a variety of combinations of face, eyes, hairstyles, clothes, and accessories
● Share your fresh customized avatar with just a single click
● Available in all major languages
Cons:
● No option to upload your own custom design
● The generated avatar can’t be white-labeled as the end result gets saved with the CN logo
● While the background can be animated, you are not allowed to animate the main character
05Pixlr
Change the way you see yourself on social networks With Pixlr. It is a free online profile picture maker, tablet, and mobile photo editor with all the amazing editing features one can expect only from professional tools like Photoshop. Ever wonder how your photos would look in black-and-white or what that flower in your hand looks like as a cartoon? Go to pixlr.com, log in with Facebook to create your free account, and you will be surprised by what you can do with its host of powerful self-edit features.
Complete your online persona with the help of Pixlr, now available on browser, Android, and iOS! Use the Pixlr app to take a picture and then, with a few taps or mouse clicks, enhance and decorate it. Add funny text, use special effects filters, crop and rotate, remove red-eye - it’s all there in one app! Make an impact with your profile picture and be recognized as an expert in your field.

Pros:
● Offers a simple yet powerful browser-based graphics editing experience
● A great collection of multipurpose templates designed to keep the modern social platforms in mind
● Plenty of super useful features are available in the free version
Cons:
● Some annoying glitches in the middle of editing while shifting from one tab to another
● A fair number of options work slowly due to bugs that need to be ironed out
● The doodle tool offers no “brush” feature
06Animate Me
Animate Me is a new application for iPhone that assists you with creating animated images. It has an easy-to-use interface to make animations with photos so that you can design your own animated image in a jiffy without any hassle.
The tool has two modes to create images. One of the modes is Edit mode, where you can edit your work immediately after you finish drawing. And another is Camera mode, which allows you to make a hand-drawn animation out of videos already shot. This dp animation maker tutorial can be easy for you to understand.
Touch, draw and share your animation - with Animate Me, there is no longer any need for professional graphics tools. Create animation from your photos, GIF files, or live camera action with just a touch, and share it with family and friends by email, message or post it to your Facebook wall.

Pros:
● Straightforward user interface
● Add images from your device or Facebook album or choose one from the app’s pre-built collection
● Add exciting cool features and cute sounds to your images
Cons:
● The free version of the tool has a limited number of options
● Frequent updates come with new bugs
● Some users complained of “bad words” even in the kid’s voice
07Picstun
Do you want to make awesome animated videos with your photos easily? Picstun is the best photo animator app in the Android market which can add powerful video effects to a picture free and instantaneously. It produces beautiful cartoon effects for your photos and video, allowing you to tell animated video stories in gorgeous styles instead of sharing static pictures.
You can learn this simple yet professional photo animator easily. Users of PicStun are able to create an animated video with a variety of over 3,000 pictures in various topics and animation effects.
The best thing about this application is that you can use your gallery images, too, on which the animation will be superimposed. There are many other nifty features in this next-generation picture animation maker tool. For instance, adding text, effects, music, and more right onto your pictures is possible directly from the application interface.

Pros:
● A wide range of animation effects are available
● Allows you to preview the result before you finally save it and share the same with the world
● One-click social network sharing
Cons:
● The application often crashes when trying to import multiple images into it
● A limited number of effects beg for an update with fresh animation possibilities
● Lacks proper instructions for the new users
08Loopsie
Loopsie allows you to create picture animation using your own photos. Add emojis, text, drawings, and speech bubbles to your photos in a matter of seconds to create amazing GIF images that can be used for messages or for sharing.
Are you tired of boring photos? This animated profile picture maker lets you animate your images! Just add one of the characters to your photo and give them an animated life. Loopsie supports video creation too! Add video clips and photos, pick a theme for your video, and Loopsie will do the work for you. Now, you can also hashtag on Facebook or Twitter to show off your design like the pros!

Pros:
● An easy-to-use interface offers a short learning curve
● The resolutions of end-results are readily social media compatible
● Can share on all major social networking sites directly within the app
Cons:
● While it allows the user to import their own videos, they get ranked randomly inside the app
● A new user can find it a little difficult to use the software without enough instruction set
● Recent updates added too many gimmicky filters without actually improving the experience much
09PFPmaker
PFPmaker is the original animated profile picture maker that allows adding eye-catching animations to your profile images on major social platforms like Instagram, Facebook, Twitter, and more. With PFPMaker, creating personalized animated gifs of yourself is a piece of cake. Simply decide what you want in your animation, upload some images (or take from the in-built collection inside the app), and PFPMaker will make it happen.
Increase your brand awareness, get more likes and shares, and drive more traffic to your website - all by making custom animated profile pictures using PFPmaker. Now you can create a professional identity in a matter of seconds and acquire new followers, fans, or customers!

Pros:
● Generates strikingly gorgeous animated profile images in seconds
● Its AI-powered background removal tool works awesomely well
● Loads of customization option makes this a cool nifty tool
Cons:
● No native Android or iOS app is available; everything is browser-based
● Competitors offer more animation possibilities
● While users can request a specific feature, it gets implemented rarely
10Animated GIF Maker
Animated GIF Maker is an online tool to create animated gif pictures from the user’s photos and images. The tool can convert image files up to 6MB in size, with a maximum of 5 frames. However, files greater than 3MB in size will not be displayed on the result page
Make a photo animation! Upload your own images, and Animated Gif Maker will merge them into a cool animated GIF. You can use this tool to create an animated profile picture for your social page or just have fun making short videos with your friends’ photos. Adjust the file format, resize the image and add text to your new animated picture – whatever way you want to customize the result is possible by this little tool!

Pros:
● Allows a user to upload more than one file at the same time
● Images can be converted into multiple formats easily
● Cropping and resizing the uploaded pictures is a breeze
Cons:
● File upload size restricted to 6 MB
● No native smartphone app
● The browser-based interface offers limited functionalities
Key Takeaways from This Episode
● Keeping your Facebook, Twitter, and other social profile photos fresh is vital if you want to make a good impression.
● Or perhaps you just want to have an image that is up to date and relevant. But have you ever tried to use an animated profile picture maker?
● If not, this is the right time you choose from one of our preferred tools from this article and surprise your friends with your new whatsapp animated profile picture today.
Social media is getting more and more competitive, and it’s crucial to make a good first impression. Animated profile pictures grab the user’s attention and give the added boost that helps you become different in a good way.
This article will show you the ten top animated profile picture makers using which you can create awesome profile pictures with ease.
In this article
01 [What does “PFP” mean?](#Part 1)
02 [The 10 Best Animated Profile Picture Makers for Making awesome profile pictures](#Part 2)
03 [What Happens if You Make Animated Video Instead of Pictures?](#Part 3)
Part 1 What does “PFP” mean?
PFP stands for “Picture For Profile” or, more commonly, “Profile Picture.” It is the first thing people see when they visit your profile on a social networking website. The profile owners typically upload their own images on Facebook, Twitter, Instagram, WhatsApp, and others at different times during the year or when anything significant happens.
Adding a photo gives your followers a chance to put a face to the name and an idea of what you look like. This allows them to better relate to you and creates a strong foundation for conversations and any other type of interactions.
Part 2 The 10 Best Animated Profile Picture Makers for Making awesome profile pictures
Animated profile pictures add fun and steal the show when you add them to your social accounts. What’s more, it can be much easier to create a WhatsApp animated profile picture when you’re using the right tool. Here in this post, we present you with the ten best animated profile picture makers for your reference and use.
01Canva
Canva lets you make an animated profile picture as simple as “drag and drop” without any creativity. Canva’s unique WYSIWYG animation technique makes it very straightforward to create your own avatar - making awesome animated gifs has never been simpler.
The UI is simple enough that even the smallest of details are well thought out. The captions are editable, so you easily customize the words appearing in each awesome gif.
Canva, one of the best animated profile picture makers, is a great alternative for those who prefer to work and create using the browser and without downloading and installing any software. You can also access Canva directly from any mobile device or tablet, making it convenient for you to share creative greetings and social media posts with your friends and loved ones.
●Pros:
● A near-unlimited number of stunning pre-built templates for a wide range of usage
● Beautiful and easy-to-use application interface
● The tool gets frequent bug fixes and updates with the latest features and even more templates
Cons:
● The free plan comes with a pretty meager cloud storage capacity
● No vector design is possible
● Lack of the ability to connect more than one Facebook login for those who handle personal and business pages separately
02Placeit
Are you looking for an easy way to make a simple but effective WhatsApp animated profile picture? Go to Placeit.net, and be creative with its wide range of customizable attractive pre-built templates.
Templates are hand-drawn and professionally designed. With thousands of animated templates, you can create a profile picture in a jiffy. Placeit lets you post fun and exciting photos that attract attention and grow your fanbase in no time.
Make your profile picture come to life with this one-of-a-kind animated profile picture maker! Using its proprietary image editor, you will be able to spread smiles, laughter, surprise, and much more right in seconds.
Pros:
● The overall UI is fairly streamlined – making an animated profile picture should take more than just a few clicks
● From color schemes to changing text fonts – everything is customizable
● Templates are ultra-high-quality
Cons:
● A bit expensive monthly plan
● Pay-per-item cost is definitely not affordable
● No option to add your own custom font
03PicMonkey
PicMonkey is a powerful yet simple online photo editor that lets you showcase your creativity and brand through animated profile pictures, cover photos, advertisements of all kinds, and more. In addition to its easy-to-learn features, PicMonkey offers endless possibilities for amateurs and professionals alike!
To be a meaningful part of the social media world, creating your own profile picture is not only fun but also a smart way to show your individuality. And with PicMonkey’s image editor, crafting the perfect profile picture doesn’t have to be complicated. With over 15 million users, PicMonkey is a leading photo editing software that has been helping individuals create drool-worthy designs in minutes.
Pros:
● The interface is user-friendly, and the tool offers an easy-to-learn feature set
● With a plethora of customizable in-built templates, you can generate some fresh animated profile pictures every time you try the app
● The developer keeps the tool updated with new resources and features always
Cons:
● You cannot work on more than one template simultaneously
● Lacks a proper and detailed user guide with useful tips
● Without paying for the Pro version, you can’t access some super-handy basic features
04Powerpuff Yourself
Are you looking for an easy way to make your own avatar? Powerpuff Yourself is a user-friendly tool that produces realistic anime avatars based on your photos. The features that you can expect are –
● Anime avatars, each with six different skin tones.
● Female or male avatars,
● Unique background based on your answers to the questions, and
● About 70 different hairstyles.
Make your very own anime avatar with this cute animated profile picture generator by simply selecting mouth, eyes, glasses, hair, and dress for your preferred character. After choosing the scene for the background, answer some questions about yourself and press the button to create your avatar!
Pros:
● Choose from a variety of combinations of face, eyes, hairstyles, clothes, and accessories
● Share your fresh customized avatar with just a single click
● Available in all major languages
Cons:
● No option to upload your own custom design
● The generated avatar can’t be white-labeled as the end result gets saved with the CN logo
● While the background can be animated, you are not allowed to animate the main character
05Pixlr
Change the way you see yourself on social networks With Pixlr. It is a free online profile picture maker, tablet, and mobile photo editor with all the amazing editing features one can expect only from professional tools like Photoshop. Ever wonder how your photos would look in black-and-white or what that flower in your hand looks like as a cartoon? Go to pixlr.com, log in with Facebook to create your free account, and you will be surprised by what you can do with its host of powerful self-edit features.
Complete your online persona with the help of Pixlr, now available on browser, Android, and iOS! Use the Pixlr app to take a picture and then, with a few taps or mouse clicks, enhance and decorate it. Add funny text, use special effects filters, crop and rotate, remove red-eye - it’s all there in one app! Make an impact with your profile picture and be recognized as an expert in your field.
Pros:
● Offers a simple yet powerful browser-based graphics editing experience
● A great collection of multipurpose templates designed to keep the modern social platforms in mind
● Plenty of super useful features are available in the free version
Cons:
● Some annoying glitches in the middle of editing while shifting from one tab to another
● A fair number of options work slowly due to bugs that need to be ironed out
● The doodle tool offers no “brush” feature
06Animate Me
Animate Me is a new application for iPhone that assists you with creating animated images. It has an easy-to-use interface to make animations with photos so that you can design your own animated image in a jiffy without any hassle.
The tool has two modes to create images. One of the modes is Edit mode, where you can edit your work immediately after you finish drawing. And another is Camera mode, which allows you to make a hand-drawn animation out of videos already shot. This dp animation maker tutorial can be easy for you to understand.
Touch, draw and share your animation - with Animate Me, there is no longer any need for professional graphics tools. Create animation from your photos, GIF files, or live camera action with just a touch, and share it with family and friends by email, message or post it to your Facebook wall.
Pros:
● Straightforward user interface
● Add images from your device or Facebook album or choose one from the app’s pre-built collection
● Add exciting cool features and cute sounds to your images
Cons:
● The free version of the tool has a limited number of options
● Frequent updates come with new bugs
● Some users complained of “bad words” even in the kid’s voice
07Picstun
Do you want to make awesome animated videos with your photos easily? Picstun is the best photo animator app in the Android market which can add powerful video effects to a picture free and instantaneously. It produces beautiful cartoon effects for your photos and video, allowing you to tell animated video stories in gorgeous styles instead of sharing static pictures.
You can learn this simple yet professional photo animator easily. Users of PicStun are able to create an animated video with a variety of over 3,000 pictures in various topics and animation effects.
The best thing about this application is that you can use your gallery images, too, on which the animation will be superimposed. There are many other nifty features in this next-generation picture animation maker tool. For instance, adding text, effects, music, and more right onto your pictures is possible directly from the application interface.
Pros:
● A wide range of animation effects are available
● Allows you to preview the result before you finally save it and share the same with the world
● One-click social network sharing
Cons:
● The application often crashes when trying to import multiple images into it
● A limited number of effects beg for an update with fresh animation possibilities
● Lacks proper instructions for the new users
08Loopsie
Loopsie allows you to create picture animation using your own photos. Add emojis, text, drawings, and speech bubbles to your photos in a matter of seconds to create amazing GIF images that can be used for messages or for sharing.
Are you tired of boring photos? This animated profile picture maker lets you animate your images! Just add one of the characters to your photo and give them an animated life. Loopsie supports video creation too! Add video clips and photos, pick a theme for your video, and Loopsie will do the work for you. Now, you can also hashtag on Facebook or Twitter to show off your design like the pros!
Pros:
● An easy-to-use interface offers a short learning curve
● The resolutions of end-results are readily social media compatible
● Can share on all major social networking sites directly within the app
Cons:
● While it allows the user to import their own videos, they get ranked randomly inside the app
● A new user can find it a little difficult to use the software without enough instruction set
● Recent updates added too many gimmicky filters without actually improving the experience much
09PFPmaker
PFPmaker is the original animated profile picture maker that allows adding eye-catching animations to your profile images on major social platforms like Instagram, Facebook, Twitter, and more. With PFPMaker, creating personalized animated gifs of yourself is a piece of cake. Simply decide what you want in your animation, upload some images (or take from the in-built collection inside the app), and PFPMaker will make it happen.
Increase your brand awareness, get more likes and shares, and drive more traffic to your website - all by making custom animated profile pictures using PFPmaker. Now you can create a professional identity in a matter of seconds and acquire new followers, fans, or customers!
Pros:
● Generates strikingly gorgeous animated profile images in seconds
● Its AI-powered background removal tool works awesomely well
● Loads of customization option makes this a cool nifty tool
Cons:
● No native Android or iOS app is available; everything is browser-based
● Competitors offer more animation possibilities
● While users can request a specific feature, it gets implemented rarely
10Animated GIF Maker
Animated GIF Maker is an online tool to create animated gif pictures from the user’s photos and images. The tool can convert image files up to 6MB in size, with a maximum of 5 frames. However, files greater than 3MB in size will not be displayed on the result page
Make a photo animation! Upload your own images, and Animated Gif Maker will merge them into a cool animated GIF. You can use this tool to create an animated profile picture for your social page or just have fun making short videos with your friends’ photos. Adjust the file format, resize the image and add text to your new animated picture – whatever way you want to customize the result is possible by this little tool!
Pros:
● Allows a user to upload more than one file at the same time
● Images can be converted into multiple formats easily
● Cropping and resizing the uploaded pictures is a breeze
Cons:
● File upload size restricted to 6 MB
● No native smartphone app
● The browser-based interface offers limited functionalities
Key Takeaways from This Episode
● Keeping your Facebook, Twitter, and other social profile photos fresh is vital if you want to make a good impression.
● Or perhaps you just want to have an image that is up to date and relevant. But have you ever tried to use an animated profile picture maker?
● If not, this is the right time you choose from one of our preferred tools from this article and surprise your friends with your new whatsapp animated profile picture today.
Tips That Show Anybody How to Get Awesome Background for Slideshow in PowerPoint
Tips That Show Anybody How to Get Awesome Background for Slideshow in Powerpoint
An easy yet powerful editor
Numerous effects to choose from
Detailed tutorials provided by the official channel
Amazing slideshow background are an absolute attention grabber in the realm of creative PowerPoint presentations. If you wish to upgrade yours with the same, be here to learn how!
In this article
01 [How to Add Video Background in PowerPoint?](#Part 1)
02 [How to Create Moving Backgrounds in Microsoft PowerPoint?](#Part 2)
03 [Some Tips for You to Get Awesome PowerPoint Backgrounds & Templates](#Part 3)
Part 1 How to Add Video Background in PowerPoint?
When the talk is about engaging means to deliver a precise information, PowerPoint slideshows are an absolute stunner. While these are already a captivating utility to present your thing, the output and audience engagement is at par with the inclusion of attractive design elements in the presentation. As is evident, there are enormous diversities of supplementary elements to complement your presentation, let us centre our discussion to the application of video background for slideshow in PowerPoint.
User’s Guide to Add Video Background in a PowerPoint Slideshow
The following section presents a detailed explanation of the steps to supplement your PowerPoint presentations with classic video backgrounds in just a few quick steps:
Step 1: Launch Your Presentation
Start with opening the desired PowerPoint presentation to which you want to add the video background, in any of your preferred devices.
Step 2: Add a Video to Your Slide
Browse through your presentation slides to locate the one you want to add the video background to. When you have made your choice, navigate to the PowerPoint toolbar at the top and hit the ‘Insert’ tab and choose the ‘Video’ option.
You will now be presented with 2 choices, either uploading a video from your device or insert one from the web by pasting its YouTube URL into the slide. If you are uploading a video from your device, proceed with selecting the desired video and tap ‘Insert’.

Step 3: Move and Resize Your Video
After uploading your video to the slide, you need to make suitable adjustments in its size and alignment to synchronize the same with the contents of the slide. To do this, drag the top left corner of the video to that of the slide to set the top alignment ratio. In the same way, move the bottom right corner of the video to be in sync with that of the slide. You will see the video occupying the entire slide at the end of the adjustment process.

Step 4: Set the Video Background
You will now need to set the video as the background of your slide, so that the latter’s contents are displayed over the video. You can do this by right clicking on the video and choosing the ‘Send to Back’ option from the dropdown that follows. This will cause the contents of your slide to get displayed over the video.

Step 5: Playback Edit and Customization Choices
Before proceeding towards making changes in the video playback and formatting, prefer taking a quick preview of your work till here. Once you are satisfied, navigate to the PowerPoint Toolbar at the top, hit the ‘Video Tools’ tab, followed by clicking on the ‘Playback’ tab.
It is recommended to introduce the following changes in your video for the most affordable slideshow output:
● Loop Your Video
Creating a video loop will facilitate you with an automatic replay of your video without the need to restart it every time with a click. You can loop your video by navigating to the ‘Video Options’ section and choose ‘Loop Until Stopped’ by clicking within the checkbox next to it. The background video will now continue to play until you switch to a different slide.
● Automatically Start Your Video
To avoid clicking on the slide amid your presentation for the video loop to begin, adjust the latter’s settings for an automatic start. Navigate to the ‘Start’ dropdown menu and select ‘Automatically’.
● Trim Your Video
You can work with some basic video editing tools in PowerPoint, like trimming and cropping your background video to a desired length. If you wish to ward off certain portions of your video, reach to and click o the ‘Trim Video’ button. Following this, drag the slider of the video to select the desired portions of the clip and exclude the rest.
You can further work with some more editing effects to create the perfect video backgrounds for your presentation slides in line with your specific preferences.

Step 6: Annotate Your Video Background
When you are done with the video editing process, take a preview of the same to ensure that everything is set in the proper order and at the proper place. Lastly, if you wish to add suitable text annotations to your video, you can do this with the ‘ClassPoint’ tool to write over the video background. All you need to do is select a preferred pen colour and start writing on your slide screen. You can further, save the annotations for a work record.

Part 2 How to Create Moving Backgrounds in Microsoft PowerPoint?
Moving PowerPoint slideshow background is another aspect of graphic creativity at its best, which can be used in a number of ways to grab considerable viewer attention. When choosing to add moving backgrounds to your presentation, the latter can aid in improving the style of content presentation, making your audience curious about how and what happens next.
Having learnt about the utility and creation process of video backgrounds in the PowerPoint presentation tool, let us extend our discussion to the method of creating a moving slide show background in the same in the following section:
User’s Guide to Create Moving Backgrounds for PowerPoint Presentations
Discussed below is an explanatory procedure for designing moving backgrounds with an awesome appearance for slideshow presentations in Microsoft PowerPoint:
Step 1: Open Your Presentation
To begin with, launch the PowerPoint tool in your preferred device and open the presentation on which you will be working to add the moving background. After the presentation gets loaded, navigate through the same and select the desired slide to proceed with the aforesaid task.
Step 2: Choose a Video Location
To add your desired video to the slide, navigate to the PowerPoint ribbon at the top and click on the ‘Insert’ tab. Select ‘Video’ from the list of options that appears, followed by choosing one of the ‘Online Video’ or ‘Video on My PC’ options from the video selection prompt. It is further recommended to select a video in the MP4 format, as the latter gives best results of moving and video backgrounds.
Step 3: Insert Your Video
Choose the second option in the selection prompt to upload a video from your device. You will now be asked to browse through your device and locate the desired video in the ‘Insert Video’ dialog box that appears. Select your video and tap the ‘Insert’ button to add your video.
To upload videos from an online source, choose the ‘Online Video’ option in the selection prompt and proceed to search the video from PowerPoint or paste its embed code to recover the video. The chosen video will begin to download and can be added to the PowerPoint presentation after the download process comes to an end.

Step 4: Playback Editing and Video Customization
Before proceeding further, consider paying your video once by clicking on the ‘Start’ button. You can also add different effects, trim and crop or add a bookmark to your video by navigating to and clicking on the ‘Video Tools’ tab, followed by selecting the ‘Format’ option. To work with the start and playback options for the video, click on ‘Playback’ in the dropdown menu of the ‘Video Tools’ tab.

Part 3 Some Tips for You to Get Awesome PowerPoint Backgrounds & Templates
Now that you have developed a comprehensive understanding of the utility of adding video and moving background for slideshow presentation, let us look through some easy tips and tricks to conveniently access the top rated and the most popular PowerPoint slideshow templates and backgrounds in the following section:
01Cool Slide Backgrounds
Slideshow presentations in PowerPoint are supplemented with a visual spark through amazing and vibrant backgrounds that are a sign of excellent graphic creativity. When working with a PowerPoint presentation of your own, do take the liberty to use some cool slide backgrounds to your creative advantage.
When the talk is about complementing your presentation with a cohesive and upbeat background, you can either select the most suitable one from a heap of pre made slideshow templates available both in the PowerPoint slideshow creator tool as well as across the web. However, if you wish to take the excitement to another level, try hands at creating an awesome and cool backgrounds for PowerPoint slides of your own!
Talking about some really cool tips and tricks to design a slideshow presentation background in PowerPoint, start with including some specific shapes and color overlays to the background capture, experiment with a polygon background, work on enhancing the background image with classic and artistic effects and apply a mix of colors, textures and patterns to give a classy look to your slideshow backgrounds.

02Professional Slideshow Backgrounds
If you are aiming at creating a PowerPoint slideshow presentation with a business centered design approach, you will need to cut down on some extra elements that you would ideally choose to include in a personal purpose based slideshow. Paying attention to the fact that business and corporate centered presentations should be simple, subtle and to the point, it would be an intelligent step to avoid adding too many expressive elements in the background.
Whether you are creating a professional slideshow background of your own or working with a pre designed template, take care to include a complementary play of a light background theme with a maximum of 2 balancing shades.
Avoid too much vibrancy and abstain from applying over the top effects and quick transitions, lest your presentation may look a bit too crowed. If your slides have lot of written content, prefer using a white color background text in a professional font style.
If you have decided on picking a pre made template, you can browse through a diversity of suggestions across the web, while keeping the aforesaid constraints in mind. Consider taking a look at the figure given below to have a more comprehensive understating of the prerequisites of selecting a professional sideshow background template:

03Happy Birthday Slide Backgrounds
Birthday parties are the most appealing synonyms of fun and entertainment. If you are into the profession of organizing events that renders smiling and happy faces, slideshow presentations could be of great help to you in discussing about services, types of social gentries and event targets with your clients.
When looking through different options to select the perfect birthday template, either for a professional event, or just to go down the memory lane of your most cherished moments, take caution to search for a vibrant alternative with colorful images, different background designs and party oriented cool themes, wide aspect ratio with high screen resolution for a mass display and conveniently editable graphics.
If you are creating a happy birthday slide background of your own, there are variety of realms to explore your graphic design creativity, owing to the fact that the subject of creation is highly expressive and multi-dimensional. While you are free to extend your creativity to the next level, do pay attention to the above constraints for a more elusive and outstanding creation output, while maintaining the fun and entertainment quotient intact.

04Wedding Slide Backgrounds
Considering the fact that wedding events are pronounced means of fun, leisure, enjoyment and beautiful memories, anything that aims to be a part of the celebrations, should be equally ecstatic and engaging. Infusing festive occasions with technology, slideshow based wedding invitations and moment captures are the top rated modern trends of celebrating this significant life event.
If you are keen on designing the perfect slideshow presentation for wedding invitations, photo albums and thank you cards, prefer to choose a wedding slide background template with aesthetic layout and flowing element inclusions, like that of floral borders and scented candles. Look though the elements of a subtle thematic setup with soothing color combinations, preferably in complementary pastel shades, like pink and white.
Talking of template customizability, the latter should have placeholders to include names of the bride and groom, the wedding date and venue, and of course the wedding photographs. The beautiful slide background template should have enough design space to include the most elusive play of text colors and fonts to suit specific preferences of creating special memories of a cherished event.

05Slideshow Backgrounds and Templates in Filmora
When looking for the most convenient lead to an extensive variety of beautiful slideshow templates and background, the template library of Wondershare Filmora Video Editor slideshow creator program can be your most affordable destination. The aforesaid software library is known to possess the best and most perfect template choices to suit the creation constraints of almost every slideshow presentation style and objective you can possibly think of.
For Win 7 or later (64-bit)
For macOS 10.12 or later
The elusive templates are further supplemented with a plethora of design flexibilities and customization features that are all set to deliver you the most appreciable creation output. Stressing a bit on the template customization choices of the software, you can work with the tool to uplift your slideshow backgrounds with artistic image effects and overlays, annotate them with beautiful text formations in a variety of colors, fonts and sizes and lots more.
Moving a bit deeper into the creative aspect, you can upgrade the visual style of your presentations with the most perfect and seamless image and video transitions and text animations. The bottom line is, working with the aforesaid slideshow creator program, you are entitled to get jaw dropping applaud from your audience, while making a confident and a content delivery through your slideshow presentation.

● Ending Thoughts →
● Using an expressive and complementing background in your slideshow presentation uplifts its visual credibility in captivating your audience.
● Browsing through the web, you get to access a vast range of amazing slideshow backgrounds and templates to make your presentation, a visual masterpiece.
● When looking for the most distributed storehouse of slideshow backgrounds and templates, the Wondershare Filmora library is your ultimate solution.
Amazing slideshow background are an absolute attention grabber in the realm of creative PowerPoint presentations. If you wish to upgrade yours with the same, be here to learn how!
In this article
01 [How to Add Video Background in PowerPoint?](#Part 1)
02 [How to Create Moving Backgrounds in Microsoft PowerPoint?](#Part 2)
03 [Some Tips for You to Get Awesome PowerPoint Backgrounds & Templates](#Part 3)
Part 1 How to Add Video Background in PowerPoint?
When the talk is about engaging means to deliver a precise information, PowerPoint slideshows are an absolute stunner. While these are already a captivating utility to present your thing, the output and audience engagement is at par with the inclusion of attractive design elements in the presentation. As is evident, there are enormous diversities of supplementary elements to complement your presentation, let us centre our discussion to the application of video background for slideshow in PowerPoint.
User’s Guide to Add Video Background in a PowerPoint Slideshow
The following section presents a detailed explanation of the steps to supplement your PowerPoint presentations with classic video backgrounds in just a few quick steps:
Step 1: Launch Your Presentation
Start with opening the desired PowerPoint presentation to which you want to add the video background, in any of your preferred devices.
Step 2: Add a Video to Your Slide
Browse through your presentation slides to locate the one you want to add the video background to. When you have made your choice, navigate to the PowerPoint toolbar at the top and hit the ‘Insert’ tab and choose the ‘Video’ option.
You will now be presented with 2 choices, either uploading a video from your device or insert one from the web by pasting its YouTube URL into the slide. If you are uploading a video from your device, proceed with selecting the desired video and tap ‘Insert’.
Step 3: Move and Resize Your Video
After uploading your video to the slide, you need to make suitable adjustments in its size and alignment to synchronize the same with the contents of the slide. To do this, drag the top left corner of the video to that of the slide to set the top alignment ratio. In the same way, move the bottom right corner of the video to be in sync with that of the slide. You will see the video occupying the entire slide at the end of the adjustment process.
Step 4: Set the Video Background
You will now need to set the video as the background of your slide, so that the latter’s contents are displayed over the video. You can do this by right clicking on the video and choosing the ‘Send to Back’ option from the dropdown that follows. This will cause the contents of your slide to get displayed over the video.
Step 5: Playback Edit and Customization Choices
Before proceeding towards making changes in the video playback and formatting, prefer taking a quick preview of your work till here. Once you are satisfied, navigate to the PowerPoint Toolbar at the top, hit the ‘Video Tools’ tab, followed by clicking on the ‘Playback’ tab.
It is recommended to introduce the following changes in your video for the most affordable slideshow output:
● Loop Your Video
Creating a video loop will facilitate you with an automatic replay of your video without the need to restart it every time with a click. You can loop your video by navigating to the ‘Video Options’ section and choose ‘Loop Until Stopped’ by clicking within the checkbox next to it. The background video will now continue to play until you switch to a different slide.
● Automatically Start Your Video
To avoid clicking on the slide amid your presentation for the video loop to begin, adjust the latter’s settings for an automatic start. Navigate to the ‘Start’ dropdown menu and select ‘Automatically’.
● Trim Your Video
You can work with some basic video editing tools in PowerPoint, like trimming and cropping your background video to a desired length. If you wish to ward off certain portions of your video, reach to and click o the ‘Trim Video’ button. Following this, drag the slider of the video to select the desired portions of the clip and exclude the rest.
You can further work with some more editing effects to create the perfect video backgrounds for your presentation slides in line with your specific preferences.
Step 6: Annotate Your Video Background
When you are done with the video editing process, take a preview of the same to ensure that everything is set in the proper order and at the proper place. Lastly, if you wish to add suitable text annotations to your video, you can do this with the ‘ClassPoint’ tool to write over the video background. All you need to do is select a preferred pen colour and start writing on your slide screen. You can further, save the annotations for a work record.
Part 2 How to Create Moving Backgrounds in Microsoft PowerPoint?
Moving PowerPoint slideshow background is another aspect of graphic creativity at its best, which can be used in a number of ways to grab considerable viewer attention. When choosing to add moving backgrounds to your presentation, the latter can aid in improving the style of content presentation, making your audience curious about how and what happens next.
Having learnt about the utility and creation process of video backgrounds in the PowerPoint presentation tool, let us extend our discussion to the method of creating a moving slide show background in the same in the following section:
User’s Guide to Create Moving Backgrounds for PowerPoint Presentations
Discussed below is an explanatory procedure for designing moving backgrounds with an awesome appearance for slideshow presentations in Microsoft PowerPoint:
Step 1: Open Your Presentation
To begin with, launch the PowerPoint tool in your preferred device and open the presentation on which you will be working to add the moving background. After the presentation gets loaded, navigate through the same and select the desired slide to proceed with the aforesaid task.
Step 2: Choose a Video Location
To add your desired video to the slide, navigate to the PowerPoint ribbon at the top and click on the ‘Insert’ tab. Select ‘Video’ from the list of options that appears, followed by choosing one of the ‘Online Video’ or ‘Video on My PC’ options from the video selection prompt. It is further recommended to select a video in the MP4 format, as the latter gives best results of moving and video backgrounds.
Step 3: Insert Your Video
Choose the second option in the selection prompt to upload a video from your device. You will now be asked to browse through your device and locate the desired video in the ‘Insert Video’ dialog box that appears. Select your video and tap the ‘Insert’ button to add your video.
To upload videos from an online source, choose the ‘Online Video’ option in the selection prompt and proceed to search the video from PowerPoint or paste its embed code to recover the video. The chosen video will begin to download and can be added to the PowerPoint presentation after the download process comes to an end.
Step 4: Playback Editing and Video Customization
Before proceeding further, consider paying your video once by clicking on the ‘Start’ button. You can also add different effects, trim and crop or add a bookmark to your video by navigating to and clicking on the ‘Video Tools’ tab, followed by selecting the ‘Format’ option. To work with the start and playback options for the video, click on ‘Playback’ in the dropdown menu of the ‘Video Tools’ tab.
Part 3 Some Tips for You to Get Awesome PowerPoint Backgrounds & Templates
Now that you have developed a comprehensive understanding of the utility of adding video and moving background for slideshow presentation, let us look through some easy tips and tricks to conveniently access the top rated and the most popular PowerPoint slideshow templates and backgrounds in the following section:
01Cool Slide Backgrounds
Slideshow presentations in PowerPoint are supplemented with a visual spark through amazing and vibrant backgrounds that are a sign of excellent graphic creativity. When working with a PowerPoint presentation of your own, do take the liberty to use some cool slide backgrounds to your creative advantage.
When the talk is about complementing your presentation with a cohesive and upbeat background, you can either select the most suitable one from a heap of pre made slideshow templates available both in the PowerPoint slideshow creator tool as well as across the web. However, if you wish to take the excitement to another level, try hands at creating an awesome and cool backgrounds for PowerPoint slides of your own!
Talking about some really cool tips and tricks to design a slideshow presentation background in PowerPoint, start with including some specific shapes and color overlays to the background capture, experiment with a polygon background, work on enhancing the background image with classic and artistic effects and apply a mix of colors, textures and patterns to give a classy look to your slideshow backgrounds.
02Professional Slideshow Backgrounds
If you are aiming at creating a PowerPoint slideshow presentation with a business centered design approach, you will need to cut down on some extra elements that you would ideally choose to include in a personal purpose based slideshow. Paying attention to the fact that business and corporate centered presentations should be simple, subtle and to the point, it would be an intelligent step to avoid adding too many expressive elements in the background.
Whether you are creating a professional slideshow background of your own or working with a pre designed template, take care to include a complementary play of a light background theme with a maximum of 2 balancing shades.
Avoid too much vibrancy and abstain from applying over the top effects and quick transitions, lest your presentation may look a bit too crowed. If your slides have lot of written content, prefer using a white color background text in a professional font style.
If you have decided on picking a pre made template, you can browse through a diversity of suggestions across the web, while keeping the aforesaid constraints in mind. Consider taking a look at the figure given below to have a more comprehensive understating of the prerequisites of selecting a professional sideshow background template:
03Happy Birthday Slide Backgrounds
Birthday parties are the most appealing synonyms of fun and entertainment. If you are into the profession of organizing events that renders smiling and happy faces, slideshow presentations could be of great help to you in discussing about services, types of social gentries and event targets with your clients.
When looking through different options to select the perfect birthday template, either for a professional event, or just to go down the memory lane of your most cherished moments, take caution to search for a vibrant alternative with colorful images, different background designs and party oriented cool themes, wide aspect ratio with high screen resolution for a mass display and conveniently editable graphics.
If you are creating a happy birthday slide background of your own, there are variety of realms to explore your graphic design creativity, owing to the fact that the subject of creation is highly expressive and multi-dimensional. While you are free to extend your creativity to the next level, do pay attention to the above constraints for a more elusive and outstanding creation output, while maintaining the fun and entertainment quotient intact.
04Wedding Slide Backgrounds
Considering the fact that wedding events are pronounced means of fun, leisure, enjoyment and beautiful memories, anything that aims to be a part of the celebrations, should be equally ecstatic and engaging. Infusing festive occasions with technology, slideshow based wedding invitations and moment captures are the top rated modern trends of celebrating this significant life event.
If you are keen on designing the perfect slideshow presentation for wedding invitations, photo albums and thank you cards, prefer to choose a wedding slide background template with aesthetic layout and flowing element inclusions, like that of floral borders and scented candles. Look though the elements of a subtle thematic setup with soothing color combinations, preferably in complementary pastel shades, like pink and white.
Talking of template customizability, the latter should have placeholders to include names of the bride and groom, the wedding date and venue, and of course the wedding photographs. The beautiful slide background template should have enough design space to include the most elusive play of text colors and fonts to suit specific preferences of creating special memories of a cherished event.
05Slideshow Backgrounds and Templates in Filmora
When looking for the most convenient lead to an extensive variety of beautiful slideshow templates and background, the template library of Wondershare Filmora Video Editor slideshow creator program can be your most affordable destination. The aforesaid software library is known to possess the best and most perfect template choices to suit the creation constraints of almost every slideshow presentation style and objective you can possibly think of.
For Win 7 or later (64-bit)
For macOS 10.12 or later
The elusive templates are further supplemented with a plethora of design flexibilities and customization features that are all set to deliver you the most appreciable creation output. Stressing a bit on the template customization choices of the software, you can work with the tool to uplift your slideshow backgrounds with artistic image effects and overlays, annotate them with beautiful text formations in a variety of colors, fonts and sizes and lots more.
Moving a bit deeper into the creative aspect, you can upgrade the visual style of your presentations with the most perfect and seamless image and video transitions and text animations. The bottom line is, working with the aforesaid slideshow creator program, you are entitled to get jaw dropping applaud from your audience, while making a confident and a content delivery through your slideshow presentation.
● Ending Thoughts →
● Using an expressive and complementing background in your slideshow presentation uplifts its visual credibility in captivating your audience.
● Browsing through the web, you get to access a vast range of amazing slideshow backgrounds and templates to make your presentation, a visual masterpiece.
● When looking for the most distributed storehouse of slideshow backgrounds and templates, the Wondershare Filmora library is your ultimate solution.
Why These 10 Top Text Motion Templates Are Worth Your Attention
Why These 10+ Top Text Motion Templates Are Worth Your Attention
An easy yet powerful editor
Numerous effects to choose from
Detailed tutorials provided by the official channel
If you’re looking to add some ‘text in motion‘ to your video projects, then you’ve come to the right place! We’ve listed some of our favorite Text Motion After Effects and Text Motion Graphics Premiere Pro templates that you can use to get a head start in the realm of adding motion into text! (As a bonus, we’ve also included an overview on text motion and some of the best text motion graphics tutorials that you can refer to when trying out the templates we’ve recommended.)
In this article
01 [What’s Text Motion?](#Part 1)
02 [10 Best Text Motion After Effects](#Part 2)
03 [Tutorials for Making Great Text Motion](#Part 3)
Part 1 What’s Text Motion?
Alright, first of all, let’s answer the big question! Text Motion, what is it and why should you be adding it to your projects ASAP? Well, in regards to the former, the answer is simple: text motion graphics is literally text animation that you can add to your projects to give it an extra bit of life and make it more show-stealing!
In regards to the latter, the answer is in its description! After all, why wouldn’t you want your projects to be able to capture more attention?

Have a look at the screenshot above that we included of an example project on the video editor, Wondershare Filmora . As you can see, we inserted text in motion at the very start. And despite being a still screenshot of said text motion graphics, the preview is eye-catching even when paused!
This is the kind of project that you can do yourself with the right templates and the right video editor. We’ve got your back on the first in the list coming up. And, as for the second, we recommend that you try out Filmora! It is, as you can see, quite an expansive software. One that will allow you to truly make the most of the text motion graphics you’ll be able to create at the end of this article.
Part 2 10 Best Text Motion After Effects
Alright, now let’s move on to our promised Text Motion Graphics After Effects and Text Motion Graphics Premiere Pro templates. We’ve tried our best to pick a variety out for you so that you can have a good selection to choose from! You should also take the time to explore the different platforms where these templates are offered in case you end up needing a different look!
01Clean and Elegant Corporate Identity – Text Reveal (Mogrt)
The first on this list is the ‘Clean and Elegant Corporate Identity — Text Reveal’ by Mogrt. The title is quite explanatory in and of itself, but just in case you’re confused, it’s a template that was designed for professionals and brands to establish their corporate identity. The font is very modern in design, and it comes with several flare variations so that the reveal works out in the way that you want it to.
Other aspects, like the shadow blur, opacity, particle size (for the reveal), and text glossiness are also adjustable and can be changed at will based on your standards.
02Multipurpose Clean 3D Text to Title
The next text motion template is the ‘Multipurpose Clean 3D Text to Title’ also created by Mogrt. This one is text motion graphics that you can use for Premiere Pro and, with proper customization, and be used for just about anything that you want! It’s a very multi-purpose kind of graphic, one that you can maybe sneak in as an advert or for announcing celebrations or anniversaries!
As a final note, if you want to use this graphic as text motion for after effects , it is available for that as well!
03Simple Motion Text | Premiere Pro
This next template, the ‘Simple Motion Text’ graphic, is one that is available for both Premiere Pro and After Effects (though the link we’ve provided is for the Premiere Pro version!) As the name implies, the animation is quite simple, which may be exactly what you want, in any case. It certainly makes it very versatile (especially as you can change font style and color as you will). Making it the perfect template for a beginner that’s just starting out and doesn’t want anything too complicated.
0430 Glitch Text Presets For Premiere Pro | Mogrt
This next template, the ‘30 Glitch Text Presets’ by Mogrt is a Premiere Pro exclusive! It’s also quite fun in its particulars. As a template, it’s not as versatile as the one that we introduced previously, since the ‘glitch’ effect gives off quite the unique vibes, but that doesn’t make it any less potent at catching the eyes of your audience!
The best part, in this case, is that it comes with 30 pre-sets, all with fitting glitch sound effects (included in the pack) that you can use. Of course, there are other customization functions as well, including font style, color, transparency, and so on.
05Comic Bubbles MOGRT
Again, this next templated, called ‘Comic Bubbles’, kind of has its own unique vibe, making it inflexible in some ways but also more fun if that’s the kind of look that you’re looking for. Which, in this case, are literal ‘Comic’ text bubbles, like you would see in your old 90s comic (loud, pop-y, and with lots of bright colors!) The only difference from that to this is that these comic text bubbles move, allowing you to create ‘punchy’ text in between animated projects.
For your reference, there are 80 different comic bubbles included in the pack. All of which are easy to customize and will allow you to adjust colors, text, and transition effects (have a look at the video that we’ve linked if you want to see it in action!)
06Smoke To Text Reveal (Mogrt)
This next template, ‘Smoke to Text Reveal’ is another one that serves a very particular need. To help with visualization, the text motion graphics are at first obscured by smoke before it bubbles up into a crisp, modern text reveal! It’s perfect for those looking for underwater-themed text motion graphics. Or those who want to serve a hint of mystery with the smoke effect.
This is Text Motion Graphics - Premiere Pro. And the best part about it is that you can customize the text and the background at will — allowing you to truly make the template your own and make the most out of the smoke-to-reveal effect.
07Text Messages Toolkit
Want to appeal to the Gen Z audience? Then, the ‘text messages toolkit’ might be a fun text motion graphics for you to try. As you can perhaps surmise from the name, it’s a template that you can use in order to create ‘text message’ interactions. It’s customizable too! You can change the text box color, size, transparency, and just have a ball pimping it out of that’s what you want.
08Large Text Title Block
With the ‘large text title block’ template, you have the flexibility of the naturally more modern and minimalistic design, allowing you to use it for a wide variety of different projects. It works especially well for advertisements, if you’re wondering about potential uses, or as transition graphics between text to video!
09Blueprint Titles
Want something that’s a little quirkier? Or, perhaps, instructional? Then the ‘Blueprint Titles’ template is one that you can consider. As you can perhaps guess from the name, it allows you to create text motion graphics in a style that is similar to the kind of blueprints you usually see when working with design or architecture.
10Dynamic Minimalism
Sometimes, simple really is best! And, this next template, the ‘Dynamic Minimalism’ text motion after effects and text motion graphics premiere pro template is one that you might want in your arsenal just for the sake of your simpler projects! The kit comes with 30 different animations, as well as other customization functions that you can play around with to add a little personality to what are otherwise very minimalistic designs.
Part 3 Tutorials for Making Great Text Motion
For the last part of this article, we’ll be introducing some tutorials that you can refer to while trying out the templates that we recommended! We’ve pulled all of this from YouTube so that you can start learning immediately! And, of course, a variety has been chosen so that you can get your info from more than one source.
01Smooth Professional Text Animation in Premiere Pro - TUTORIAL
The first tutorial we have for you was created by Ignace Aleya on YouTube. This tutorial is a ‘Premiere Pro’ tutorial that focuses on helping beginners and intermediate users alike in understanding the ways of text motion graphics. He offers some pretty good pointers and tricks on keeping the quality of your work high. And the way that he shares his knowledge is pretty solid too! Allowing you to both watch and enjoy the video.
02Easy Title Motion Graphics
This next tutorial is about text motion graphics while working in Adobe After Effects. Like the previous tutorial, it will teach you the basics of using templates! It was posted by SonduckFilm, and the video covers five different “Easy Title Motion Graphics” as examples! Altogether, it’s a great choice if what you’re looking for is tips on making the most out of the templates we introduced on our list.
03Basic Logo Animations
Next, we have a tutorial from the YouTube content creator, Broken! This one is on the subject of both simple and complex logo animations that you can create when working on establishing a brand. It’s a great video for beginners and is quite informative on the subject of customization.
● Key Takeaways from This Episode →
● What is text motion and why do you need to start using it for your own projects ASAP? Well, text motion graphics are, basically, text animation! They’re eye-catching and informative at the same time, making them a great vessel for getting a message across to your audience.
● If you want to start creating text motion graphics yourself, we suggest starting with templates first! At least then, you’ll be able to make yourself comfortable while learning about the opportunities available to you.
● There are many different templates out there that you can try. Some are multi-purpose, some not. We’ve chosen a variety to introduce to you in of this article! Complete with a list of some tutorials in that you can refer to no matter what kind of project you’re working on.
If you’re looking to add some ‘text in motion‘ to your video projects, then you’ve come to the right place! We’ve listed some of our favorite Text Motion After Effects and Text Motion Graphics Premiere Pro templates that you can use to get a head start in the realm of adding motion into text! (As a bonus, we’ve also included an overview on text motion and some of the best text motion graphics tutorials that you can refer to when trying out the templates we’ve recommended.)
In this article
01 [What’s Text Motion?](#Part 1)
02 [10 Best Text Motion After Effects](#Part 2)
03 [Tutorials for Making Great Text Motion](#Part 3)
Part 1 What’s Text Motion?
Alright, first of all, let’s answer the big question! Text Motion, what is it and why should you be adding it to your projects ASAP? Well, in regards to the former, the answer is simple: text motion graphics is literally text animation that you can add to your projects to give it an extra bit of life and make it more show-stealing!
In regards to the latter, the answer is in its description! After all, why wouldn’t you want your projects to be able to capture more attention?
Have a look at the screenshot above that we included of an example project on the video editor, Wondershare Filmora . As you can see, we inserted text in motion at the very start. And despite being a still screenshot of said text motion graphics, the preview is eye-catching even when paused!
This is the kind of project that you can do yourself with the right templates and the right video editor. We’ve got your back on the first in the list coming up. And, as for the second, we recommend that you try out Filmora! It is, as you can see, quite an expansive software. One that will allow you to truly make the most of the text motion graphics you’ll be able to create at the end of this article.
Part 2 10 Best Text Motion After Effects
Alright, now let’s move on to our promised Text Motion Graphics After Effects and Text Motion Graphics Premiere Pro templates. We’ve tried our best to pick a variety out for you so that you can have a good selection to choose from! You should also take the time to explore the different platforms where these templates are offered in case you end up needing a different look!
01Clean and Elegant Corporate Identity – Text Reveal (Mogrt)
The first on this list is the ‘Clean and Elegant Corporate Identity — Text Reveal’ by Mogrt. The title is quite explanatory in and of itself, but just in case you’re confused, it’s a template that was designed for professionals and brands to establish their corporate identity. The font is very modern in design, and it comes with several flare variations so that the reveal works out in the way that you want it to.
Other aspects, like the shadow blur, opacity, particle size (for the reveal), and text glossiness are also adjustable and can be changed at will based on your standards.
02Multipurpose Clean 3D Text to Title
The next text motion template is the ‘Multipurpose Clean 3D Text to Title’ also created by Mogrt. This one is text motion graphics that you can use for Premiere Pro and, with proper customization, and be used for just about anything that you want! It’s a very multi-purpose kind of graphic, one that you can maybe sneak in as an advert or for announcing celebrations or anniversaries!
As a final note, if you want to use this graphic as text motion for after effects , it is available for that as well!
03Simple Motion Text | Premiere Pro
This next template, the ‘Simple Motion Text’ graphic, is one that is available for both Premiere Pro and After Effects (though the link we’ve provided is for the Premiere Pro version!) As the name implies, the animation is quite simple, which may be exactly what you want, in any case. It certainly makes it very versatile (especially as you can change font style and color as you will). Making it the perfect template for a beginner that’s just starting out and doesn’t want anything too complicated.
0430 Glitch Text Presets For Premiere Pro | Mogrt
This next template, the ‘30 Glitch Text Presets’ by Mogrt is a Premiere Pro exclusive! It’s also quite fun in its particulars. As a template, it’s not as versatile as the one that we introduced previously, since the ‘glitch’ effect gives off quite the unique vibes, but that doesn’t make it any less potent at catching the eyes of your audience!
The best part, in this case, is that it comes with 30 pre-sets, all with fitting glitch sound effects (included in the pack) that you can use. Of course, there are other customization functions as well, including font style, color, transparency, and so on.
05Comic Bubbles MOGRT
Again, this next templated, called ‘Comic Bubbles’, kind of has its own unique vibe, making it inflexible in some ways but also more fun if that’s the kind of look that you’re looking for. Which, in this case, are literal ‘Comic’ text bubbles, like you would see in your old 90s comic (loud, pop-y, and with lots of bright colors!) The only difference from that to this is that these comic text bubbles move, allowing you to create ‘punchy’ text in between animated projects.
For your reference, there are 80 different comic bubbles included in the pack. All of which are easy to customize and will allow you to adjust colors, text, and transition effects (have a look at the video that we’ve linked if you want to see it in action!)
06Smoke To Text Reveal (Mogrt)
This next template, ‘Smoke to Text Reveal’ is another one that serves a very particular need. To help with visualization, the text motion graphics are at first obscured by smoke before it bubbles up into a crisp, modern text reveal! It’s perfect for those looking for underwater-themed text motion graphics. Or those who want to serve a hint of mystery with the smoke effect.
This is Text Motion Graphics - Premiere Pro. And the best part about it is that you can customize the text and the background at will — allowing you to truly make the template your own and make the most out of the smoke-to-reveal effect.
07Text Messages Toolkit
Want to appeal to the Gen Z audience? Then, the ‘text messages toolkit’ might be a fun text motion graphics for you to try. As you can perhaps surmise from the name, it’s a template that you can use in order to create ‘text message’ interactions. It’s customizable too! You can change the text box color, size, transparency, and just have a ball pimping it out of that’s what you want.
08Large Text Title Block
With the ‘large text title block’ template, you have the flexibility of the naturally more modern and minimalistic design, allowing you to use it for a wide variety of different projects. It works especially well for advertisements, if you’re wondering about potential uses, or as transition graphics between text to video!
09Blueprint Titles
Want something that’s a little quirkier? Or, perhaps, instructional? Then the ‘Blueprint Titles’ template is one that you can consider. As you can perhaps guess from the name, it allows you to create text motion graphics in a style that is similar to the kind of blueprints you usually see when working with design or architecture.
10Dynamic Minimalism
Sometimes, simple really is best! And, this next template, the ‘Dynamic Minimalism’ text motion after effects and text motion graphics premiere pro template is one that you might want in your arsenal just for the sake of your simpler projects! The kit comes with 30 different animations, as well as other customization functions that you can play around with to add a little personality to what are otherwise very minimalistic designs.
Part 3 Tutorials for Making Great Text Motion
For the last part of this article, we’ll be introducing some tutorials that you can refer to while trying out the templates that we recommended! We’ve pulled all of this from YouTube so that you can start learning immediately! And, of course, a variety has been chosen so that you can get your info from more than one source.
01Smooth Professional Text Animation in Premiere Pro - TUTORIAL
The first tutorial we have for you was created by Ignace Aleya on YouTube. This tutorial is a ‘Premiere Pro’ tutorial that focuses on helping beginners and intermediate users alike in understanding the ways of text motion graphics. He offers some pretty good pointers and tricks on keeping the quality of your work high. And the way that he shares his knowledge is pretty solid too! Allowing you to both watch and enjoy the video.
02Easy Title Motion Graphics
This next tutorial is about text motion graphics while working in Adobe After Effects. Like the previous tutorial, it will teach you the basics of using templates! It was posted by SonduckFilm, and the video covers five different “Easy Title Motion Graphics” as examples! Altogether, it’s a great choice if what you’re looking for is tips on making the most out of the templates we introduced on our list.
03Basic Logo Animations
Next, we have a tutorial from the YouTube content creator, Broken! This one is on the subject of both simple and complex logo animations that you can create when working on establishing a brand. It’s a great video for beginners and is quite informative on the subject of customization.
● Key Takeaways from This Episode →
● What is text motion and why do you need to start using it for your own projects ASAP? Well, text motion graphics are, basically, text animation! They’re eye-catching and informative at the same time, making them a great vessel for getting a message across to your audience.
● If you want to start creating text motion graphics yourself, we suggest starting with templates first! At least then, you’ll be able to make yourself comfortable while learning about the opportunities available to you.
● There are many different templates out there that you can try. Some are multi-purpose, some not. We’ve chosen a variety to introduce to you in of this article! Complete with a list of some tutorials in that you can refer to no matter what kind of project you’re working on.
Samples of Cartoon Character Face
Samples of Cartoon Character Face to Inspire You
An easy yet powerful editor
Numerous effects to choose from
Detailed tutorials provided by the official channel
Being able to draw facial features is an essential skill for any animator. Whether you are a beginner at drawing faces or an experienced cartoon artist that has been drawing for years, this is a skill that can gradually improve with time. With the implementation and use of simple shapes, creating various facial features and cartoon styles can be done quickly.
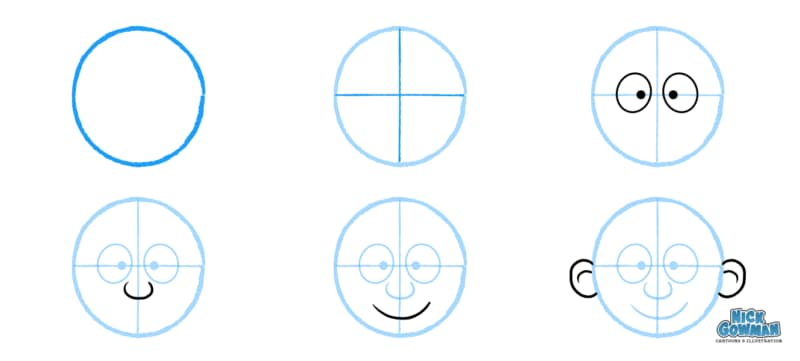
The methods of creating funny face cartoon characters are suitable for everyone, even if they do not have a single day of illustrating experience. These methods presented in this article are easily accessible to provide you with different results depending on your budget and your desired outcome.
The act of drawing cartoon faces can be effortless, and in this article, we will give you some fundamental samples of how you can draw cartoon faces of your own.
In this article
01 [Learn to Understand the Core of Cartoon Style](#Part 1)
02 [Top 12 Cartoon Face Examples](#Part 2)
03 [How to Draw a Cartoon Face - For Beginners](#Part 3)
04 [How to Easily Turn Yourself into a Cartoon](#Part 4)
Part 1 Learn to Understand the Core of Cartoon Style
First, you need to simplify the different parts of the cartoon character face to pick up on very subtle facial expressions and features. For example, the eyes’ shape and size will help determine if the person is feeling sad, excited, happy, excited, or sad. In addition, the amount of lift under a person’s eyebrows can help determine whether a person is mad or not.
These facial expressions are crucial to how a person communicates. It has got to the point that we can read someone’s face without truly understanding which parts of the face convey that emotion. However, these days we get exposed to everyday adaptations of facial expressions, especially with the invention of Instagram, Snapchat, and cartoon face filters.
Consequently, cartoons are a combination of different shapes that are being put together and are not difficult if the focus is on each shape individually and the process breaks down step by step.
Cartoons are a mixture of different shapes put together. It’s not difficult if you focus on each shape individually and break down the process step by step.
Finally, understanding these unconscious and subtle differences in facial expressions is crucial when planning out an animated character. Afterward, when understood, you can simplify the features to be recognizable by your audience.
Part 2 Top 12 Cartoon Face Examples
Cartoon character faces are gaining immense importance in design art due to their universality. Cartoon faces can represent people in several situations and add a comic or satirical twist to dull topics by highlighting their importance. However, drawing cartoon faces require a lot of skill and differentiation, and graphic designers, while working on basic and universal templates, always try and introduce unique elements.
Here are the top 10 examples of cartoon character faces you can choose from when you want to make your designs:
01Men and Women
This sketch features different facial expressions made by older men and women.
02Stretch and Squash
This photo shows the difference between squashing and stretching the face and provides references for extreme squash and extreme stretch.

03Dramatic Expressions
The expressions drawn here are super fun and dramatic. However, it is a great way to have fun and practice how to draw facial expressions simultaneously.
04Quick Expressive Sketches
With this, you can practice how to draw different facial expressions by doing quick sketches like this one. Perhaps you do not need to pay attention to perfection.
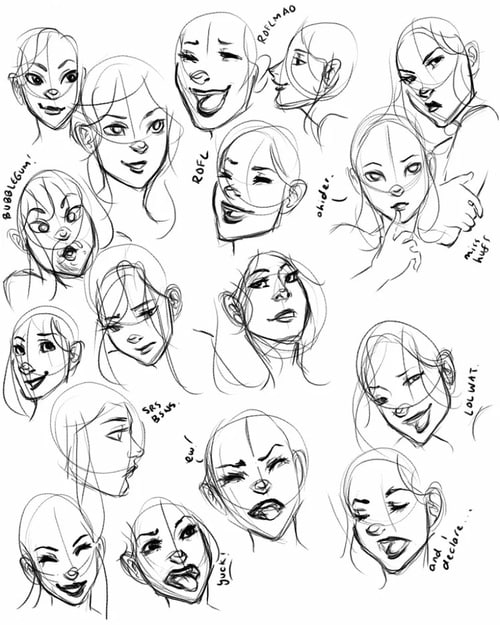
05This Is Good This Is Better
With this facial expression, you can see a good look and an even better expression. It shows the difference that subtle changes can make to your facial expressions**.**
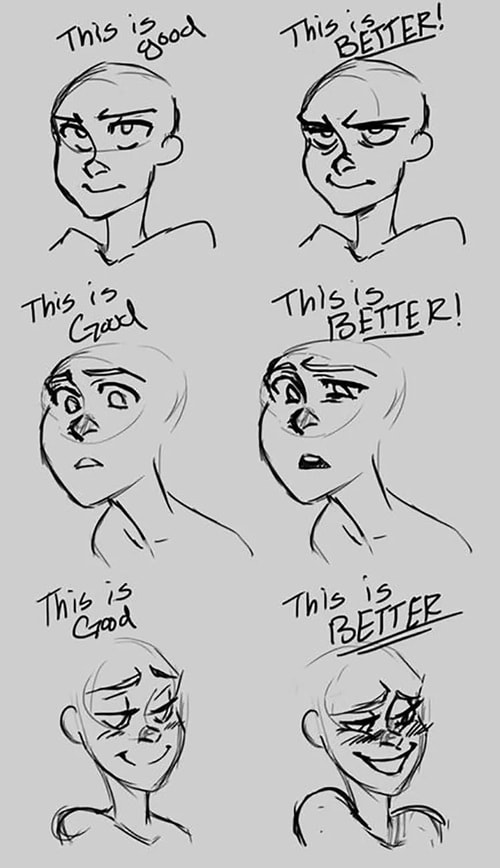
06Male and Female Expressions
This includes both male and female expressions to express the facial reaction of both genders, like some funny cartoon characters face.
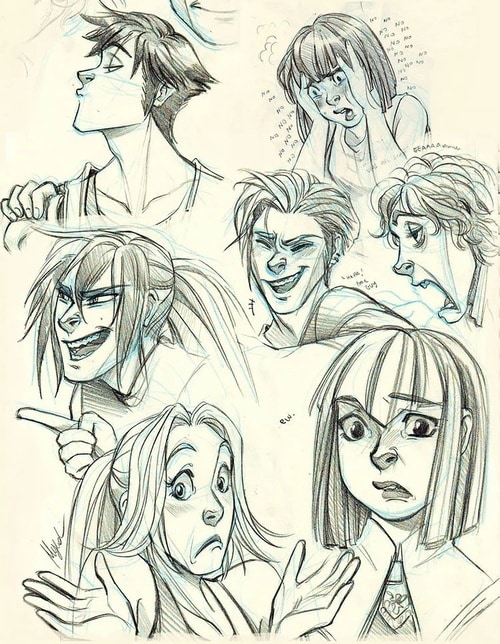
07Quick Sketches
This type of facial expression will help you get better at drawing cartoons, and you can use do some quick sketches every day.

08Jay Leno’s facial expression
Here, it is being exaggerated on a few of his most prominent facial features, including his chin. It is kind of a fat face cartoon character.
09Robert Pattinson Facials
In this photo, his head shape was distorted to show the thinness of his face, and his big hair also accentuates this prominent feature further.
10A,I,U,O,AE,M Facials
With this, you can practice how to draw your facial expression by pronouncing a, i, u, o, ae, m.

Part 3 How to Draw a Cartoon Face - For Beginners
Here, we have written down 7-step to follow on how to draw a cartoon character face as a beginner effectively.
● Step 1: Plan and Prepare
This is the first step is to plan out exactly what this character will convery through its expression while drawing a cartoon character.
● Step 2: Drawing A Cartoon Head
Next is time to start sketching out the shape of the head based on the plan you have made. Whatsoever shape you decide to use for your character, start with a circle to serve as the basic shape for the head.
● Step 3: Drawing Cartoon Eyes
Now, you need to draw the eye of the character, which is a crucial step because the eye is the essential part of their expression. To get the character’s eyes in the right place, you should carefully sketch the horizontal or vertical dimension lines.
● Step 4: Drawing A Cartoon Nose
The simpler the nose is, the better it looks in a cartoon. Ensure to keep a proper ratio between the mouth, eyes, and nose so that it does not look too crowded together.
● Step 5: Shaping the Face
In shaping the face, one needs to be mindful of the character, which will help to determine how to shape the jawline and head. For example, for a girl, the face should be narrower and have the chin come to a bit of a point at the end, whereas, for a boy, it requires that the face is a bit bolder and focuses more on the definition of the jawline.
● Step 6: Drawing A Cartoon Mouth
The mouth is another essential part of the cartoon character’s expression and a key indicator of how the character is feeling. It portrays whether you want the character to smile, frown, yell, be nervous, or be neutral.
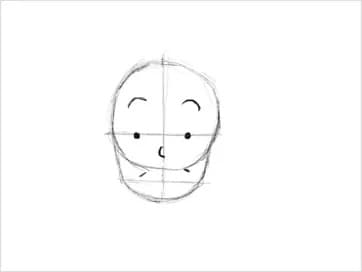
● Step 7: Drawing Cartoon Hair
Next, you need to draw the cartoon hair, and, in some cases, the cartoon hair is a significant part of their appearance as it is a way to convey your character’s personality, appearance, style, or gender.
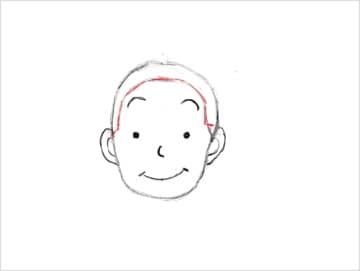
● Step 8: Coloring
Another part requires you to paint your character to improve the texture and make it beautiful.
Part 4 How to Easily Turn Yourself into a Cartoon
Are you looking to turn yourself into a cartoon? This is very necessary as it provides you with a great way to integrate diverse characters into your brand’s marketing while simultaneously keeping your content personalized.
However, after converting a picture to a cartoon character face, you can decide to animate it, and the best tool is Wondershare Filmora Video Editor . Animation is a great way to advertise your business, especially during times like these. it is a clever way for leaders, CEOs, and managers to connect with their remote workers and boost engagement, company culture, and ultimately work morale. Filmora is also a great tool to create creative and powerful animation with tons of follow-come effect that enables you to carry it out effectively and efficiently. In this section, we will guide you on how to turn yourself into a cartoon easily:
Step 1: Visit Powtoon.com and sign up for a free account, then click on the “build your character” option from the dropdown menu.
Step 2: Next is to select the cartoon gender you want.
Step 3: Finally, you can customize your character’s facial features such as skin, hair, color, clothes, and animated gestures.

Step 4: Once you are satisfied with the result, you can save it on your device or share it on social media
For Win 7 or later (64-bit)
For macOS 10.12 or later
● Ending Thoughts →
● Thus, we saw how to easily cartoon your character’s face via some samples to help you out. With the method listed above, you can easily use it to create a square-faced cartoon character or draw a fat face cartoon character.
● This article also explained how to cartoon yourself. However, to cartoon your video or create a cartoon animated video, we recommend that you use Filmora, its keyframing feature to help you carry this out effectively.
Being able to draw facial features is an essential skill for any animator. Whether you are a beginner at drawing faces or an experienced cartoon artist that has been drawing for years, this is a skill that can gradually improve with time. With the implementation and use of simple shapes, creating various facial features and cartoon styles can be done quickly.
The methods of creating funny face cartoon characters are suitable for everyone, even if they do not have a single day of illustrating experience. These methods presented in this article are easily accessible to provide you with different results depending on your budget and your desired outcome.
The act of drawing cartoon faces can be effortless, and in this article, we will give you some fundamental samples of how you can draw cartoon faces of your own.
In this article
01 [Learn to Understand the Core of Cartoon Style](#Part 1)
02 [Top 12 Cartoon Face Examples](#Part 2)
03 [How to Draw a Cartoon Face - For Beginners](#Part 3)
04 [How to Easily Turn Yourself into a Cartoon](#Part 4)
Part 1 Learn to Understand the Core of Cartoon Style
First, you need to simplify the different parts of the cartoon character face to pick up on very subtle facial expressions and features. For example, the eyes’ shape and size will help determine if the person is feeling sad, excited, happy, excited, or sad. In addition, the amount of lift under a person’s eyebrows can help determine whether a person is mad or not.
These facial expressions are crucial to how a person communicates. It has got to the point that we can read someone’s face without truly understanding which parts of the face convey that emotion. However, these days we get exposed to everyday adaptations of facial expressions, especially with the invention of Instagram, Snapchat, and cartoon face filters.
Consequently, cartoons are a combination of different shapes that are being put together and are not difficult if the focus is on each shape individually and the process breaks down step by step.
Cartoons are a mixture of different shapes put together. It’s not difficult if you focus on each shape individually and break down the process step by step.
Finally, understanding these unconscious and subtle differences in facial expressions is crucial when planning out an animated character. Afterward, when understood, you can simplify the features to be recognizable by your audience.
Part 2 Top 12 Cartoon Face Examples
Cartoon character faces are gaining immense importance in design art due to their universality. Cartoon faces can represent people in several situations and add a comic or satirical twist to dull topics by highlighting their importance. However, drawing cartoon faces require a lot of skill and differentiation, and graphic designers, while working on basic and universal templates, always try and introduce unique elements.
Here are the top 10 examples of cartoon character faces you can choose from when you want to make your designs:
01Men and Women
This sketch features different facial expressions made by older men and women.
02Stretch and Squash
This photo shows the difference between squashing and stretching the face and provides references for extreme squash and extreme stretch.
03Dramatic Expressions
The expressions drawn here are super fun and dramatic. However, it is a great way to have fun and practice how to draw facial expressions simultaneously.
04Quick Expressive Sketches
With this, you can practice how to draw different facial expressions by doing quick sketches like this one. Perhaps you do not need to pay attention to perfection.
05This Is Good This Is Better
With this facial expression, you can see a good look and an even better expression. It shows the difference that subtle changes can make to your facial expressions**.**
06Male and Female Expressions
This includes both male and female expressions to express the facial reaction of both genders, like some funny cartoon characters face.
07Quick Sketches
This type of facial expression will help you get better at drawing cartoons, and you can use do some quick sketches every day.
08Jay Leno’s facial expression
Here, it is being exaggerated on a few of his most prominent facial features, including his chin. It is kind of a fat face cartoon character.
09Robert Pattinson Facials
In this photo, his head shape was distorted to show the thinness of his face, and his big hair also accentuates this prominent feature further.
10A,I,U,O,AE,M Facials
With this, you can practice how to draw your facial expression by pronouncing a, i, u, o, ae, m.
Part 3 How to Draw a Cartoon Face - For Beginners
Here, we have written down 7-step to follow on how to draw a cartoon character face as a beginner effectively.
● Step 1: Plan and Prepare
This is the first step is to plan out exactly what this character will convery through its expression while drawing a cartoon character.
● Step 2: Drawing A Cartoon Head
Next is time to start sketching out the shape of the head based on the plan you have made. Whatsoever shape you decide to use for your character, start with a circle to serve as the basic shape for the head.
● Step 3: Drawing Cartoon Eyes
Now, you need to draw the eye of the character, which is a crucial step because the eye is the essential part of their expression. To get the character’s eyes in the right place, you should carefully sketch the horizontal or vertical dimension lines.
● Step 4: Drawing A Cartoon Nose
The simpler the nose is, the better it looks in a cartoon. Ensure to keep a proper ratio between the mouth, eyes, and nose so that it does not look too crowded together.
● Step 5: Shaping the Face
In shaping the face, one needs to be mindful of the character, which will help to determine how to shape the jawline and head. For example, for a girl, the face should be narrower and have the chin come to a bit of a point at the end, whereas, for a boy, it requires that the face is a bit bolder and focuses more on the definition of the jawline.
● Step 6: Drawing A Cartoon Mouth
The mouth is another essential part of the cartoon character’s expression and a key indicator of how the character is feeling. It portrays whether you want the character to smile, frown, yell, be nervous, or be neutral.
● Step 7: Drawing Cartoon Hair
Next, you need to draw the cartoon hair, and, in some cases, the cartoon hair is a significant part of their appearance as it is a way to convey your character’s personality, appearance, style, or gender.
● Step 8: Coloring
Another part requires you to paint your character to improve the texture and make it beautiful.
Part 4 How to Easily Turn Yourself into a Cartoon
Are you looking to turn yourself into a cartoon? This is very necessary as it provides you with a great way to integrate diverse characters into your brand’s marketing while simultaneously keeping your content personalized.
However, after converting a picture to a cartoon character face, you can decide to animate it, and the best tool is Wondershare Filmora Video Editor . Animation is a great way to advertise your business, especially during times like these. it is a clever way for leaders, CEOs, and managers to connect with their remote workers and boost engagement, company culture, and ultimately work morale. Filmora is also a great tool to create creative and powerful animation with tons of follow-come effect that enables you to carry it out effectively and efficiently. In this section, we will guide you on how to turn yourself into a cartoon easily:
Step 1: Visit Powtoon.com and sign up for a free account, then click on the “build your character” option from the dropdown menu.
Step 2: Next is to select the cartoon gender you want.
Step 3: Finally, you can customize your character’s facial features such as skin, hair, color, clothes, and animated gestures.
Step 4: Once you are satisfied with the result, you can save it on your device or share it on social media
For Win 7 or later (64-bit)
For macOS 10.12 or later
● Ending Thoughts →
● Thus, we saw how to easily cartoon your character’s face via some samples to help you out. With the method listed above, you can easily use it to create a square-faced cartoon character or draw a fat face cartoon character.
● This article also explained how to cartoon yourself. However, to cartoon your video or create a cartoon animated video, we recommend that you use Filmora, its keyframing feature to help you carry this out effectively.
Beginner Tutorial on Making Unity 2D Animation
Beginner Tutorial on Making Unity 2D Animation
An easy yet powerful editor
Numerous effects to choose from
Detailed tutorials provided by the official channel
Now, ideally, Unity is considered to be a suitable tool for 3D games that have too many animated elements. But, this doesn’t mean that you cannot design 2D animations with Unity.
In this guide, we are going to show you how to get started with 2D animations in Unity and incorporate them into your games to enhance the overall gameplay.
In this article
01 [Can Unity Be Used for 2D Animation?](#Part 1)
02 [How Do You Make a 2D Animation in Unity?](#Part 2)
Part 1 Can Unity Be Used for 2D Animation?
First, things first; can Unity be used for 2D animations. The answer is Yes! Being a full-scale gaming engine, developers/designers can use Unity to create stunning Unity 2D animations for their games. The tool has dedicated 2D animation packages that contain all the elements you’ll need to create high-quality 2D animations for your games.
Keep in mind that for each object, you’ll have to create a separate 2D sprite sheet and use it to configure the 2D animation. However, there are other 2D animation packages that you can install, using sprite sheets is the most common method to get the job done. The latest versions of Unity also offer a dedicated Stripe library where you can add multiple Stripe Sheets and it becomes relatively easier to manage them.
With the Sprite library, 2D animations with Unity becomes a hassle-free job. Designers can even manage dozens of 2D animations without any hassle. The Sprite editor will also let you control the overall movement of different moving objects in your animation and make it look more sleek. In general, if you are planning to create 2D animations for your videos or even a dedicated mobile game, Unity can be a suitable software for the job.
Part 2 How Do You Make a 2D Animation in Unity?
To create a 2D animation with Unity, the first step would be to create a dedicated Sprite sheet. Now, you can use a wide variety of third-party programs to create the desired Sprite sheet. In general, it depends on the project requirements and the personal preferences of the designer himself. However, whichever tool you use to create the Stripe sheets, make sure that the final image is a transparent PNG file as it’ll make your job much easier while animating objects in Unity.
After you have successfully designed the stripe (a transparent image file) in an external application, the next step would be to import it to Unity. When you import the Stripe file, make sure to create a separate Sprite folder so that you can easily manage all these files in one place. Also, a dedicated Stripe folder will allow you to keep a check on each Stripe file in a hassle-free manner.

While importing 2D animations into Unity, you can also configure its settings to ensure that it matches the overall game design. Ideally, we recommend keeping the Pixels Per Unit to the same size as all your visual components. This will allow you to maintain the desired consistency throughout the project and make it visually enticing.
Now, before proceeding any further, make sure to switch to the “Stripe Editor” window. With the “Stripe Editor”, you’ll be able to control the overall settings of each animation individually and control the movement to make it look crisper. In the Stripe window, you can also adjust the slice settings and save your work to avoid any potential data loss.
At this point, you can move towards creating the 2D animation with Unity. To do this, you’ll have to bring both the Animation and the Animator tabs to UnityParts editing panel. You can make them visible by tapping the “Windows” option on your screen.

That’s it; a timeline-based editing panel will appear on your screen. From here onwards, you can get started with animating the object. Each animation will depend on your specific game requirements. So, feel free to unleash your creativity and use different elements of Unity to bring your 2D animations to life.
Part 3 Part 3 Creating 2D Animations for Your Videos - An Effective Solution for Video Editors
Now, when it comes to creating 2D animations for videos, you may not want to use a tool like Unity to get the job done. Why? Because Unity is more suitable for animating objects for games. Not to mention, Unity has a steep learning curve and if you are not an experienced Unity developer, you may fail to create a 2D animation properly.
So, if you only need a 2D animation for videos, we have a better alternative for the job. Instead of Unity, you can use Wondershare Filmora Video Editor for the job. It’s a full-scale video editing software that’s specifically designed to edit high-quality videos. Whether you are a YouTube or simply edit videos for your clients, using Wondershare Filmora will help you showcase your creativity more effectively.

Filmora has a built-in media library that offers a plethora of ready-to-use animation templates as well as video effects. You can import these animations into your video with a single click and enhance the overall quality of the video to drive better engagement. These animations are also customizable, which means you can tweak their appearance to match the overall theme of your video itself. The media player also offers audio effects that’ll make your videos more dramatic.
And, finally, you’ll also find a wide variety of advanced editing options such as keyframing, motion detection, and green screen editing. All these features will allow you to uplift the production quality of your videos and engage potential viewers more effectively.
For Win 7 or later (64-bit)
For macOS 10.12 or later
A few key features of Filmora that make it the most reliable video editing software include:
● Thousands of ready-to-use animation templates and video effects
● Easy-to-use timeline-based editing panel
● Dedicated audio editor to control the sound quality
● Cross-platform compatibility
So, if you are also planning to launch a high-scale video for YouTube or any other platform by adding
Key Takeaways from This Episode
● Creating 2D animations with Unity is possible, however, you must be an expert game developer with extensive experience in Unity game development
● To create Unity 2D animations, you’ll have to use Sprite Sheets and then import them into Unity to turn them into animation.
● Now, if you are a regular video editor and only want to create 2D animations for videos, you can also use full-scale software such as Wondershare Filmora Pro.
Now, ideally, Unity is considered to be a suitable tool for 3D games that have too many animated elements. But, this doesn’t mean that you cannot design 2D animations with Unity.
In this guide, we are going to show you how to get started with 2D animations in Unity and incorporate them into your games to enhance the overall gameplay.
In this article
01 [Can Unity Be Used for 2D Animation?](#Part 1)
02 [How Do You Make a 2D Animation in Unity?](#Part 2)
Part 1 Can Unity Be Used for 2D Animation?
First, things first; can Unity be used for 2D animations. The answer is Yes! Being a full-scale gaming engine, developers/designers can use Unity to create stunning Unity 2D animations for their games. The tool has dedicated 2D animation packages that contain all the elements you’ll need to create high-quality 2D animations for your games.
Keep in mind that for each object, you’ll have to create a separate 2D sprite sheet and use it to configure the 2D animation. However, there are other 2D animation packages that you can install, using sprite sheets is the most common method to get the job done. The latest versions of Unity also offer a dedicated Stripe library where you can add multiple Stripe Sheets and it becomes relatively easier to manage them.
With the Sprite library, 2D animations with Unity becomes a hassle-free job. Designers can even manage dozens of 2D animations without any hassle. The Sprite editor will also let you control the overall movement of different moving objects in your animation and make it look more sleek. In general, if you are planning to create 2D animations for your videos or even a dedicated mobile game, Unity can be a suitable software for the job.
Part 2 How Do You Make a 2D Animation in Unity?
To create a 2D animation with Unity, the first step would be to create a dedicated Sprite sheet. Now, you can use a wide variety of third-party programs to create the desired Sprite sheet. In general, it depends on the project requirements and the personal preferences of the designer himself. However, whichever tool you use to create the Stripe sheets, make sure that the final image is a transparent PNG file as it’ll make your job much easier while animating objects in Unity.
After you have successfully designed the stripe (a transparent image file) in an external application, the next step would be to import it to Unity. When you import the Stripe file, make sure to create a separate Sprite folder so that you can easily manage all these files in one place. Also, a dedicated Stripe folder will allow you to keep a check on each Stripe file in a hassle-free manner.
While importing 2D animations into Unity, you can also configure its settings to ensure that it matches the overall game design. Ideally, we recommend keeping the Pixels Per Unit to the same size as all your visual components. This will allow you to maintain the desired consistency throughout the project and make it visually enticing.
Now, before proceeding any further, make sure to switch to the “Stripe Editor” window. With the “Stripe Editor”, you’ll be able to control the overall settings of each animation individually and control the movement to make it look crisper. In the Stripe window, you can also adjust the slice settings and save your work to avoid any potential data loss.
At this point, you can move towards creating the 2D animation with Unity. To do this, you’ll have to bring both the Animation and the Animator tabs to UnityParts editing panel. You can make them visible by tapping the “Windows” option on your screen.
That’s it; a timeline-based editing panel will appear on your screen. From here onwards, you can get started with animating the object. Each animation will depend on your specific game requirements. So, feel free to unleash your creativity and use different elements of Unity to bring your 2D animations to life.
Part 3 Part 3 Creating 2D Animations for Your Videos - An Effective Solution for Video Editors
Now, when it comes to creating 2D animations for videos, you may not want to use a tool like Unity to get the job done. Why? Because Unity is more suitable for animating objects for games. Not to mention, Unity has a steep learning curve and if you are not an experienced Unity developer, you may fail to create a 2D animation properly.
So, if you only need a 2D animation for videos, we have a better alternative for the job. Instead of Unity, you can use Wondershare Filmora Video Editor for the job. It’s a full-scale video editing software that’s specifically designed to edit high-quality videos. Whether you are a YouTube or simply edit videos for your clients, using Wondershare Filmora will help you showcase your creativity more effectively.
Filmora has a built-in media library that offers a plethora of ready-to-use animation templates as well as video effects. You can import these animations into your video with a single click and enhance the overall quality of the video to drive better engagement. These animations are also customizable, which means you can tweak their appearance to match the overall theme of your video itself. The media player also offers audio effects that’ll make your videos more dramatic.
And, finally, you’ll also find a wide variety of advanced editing options such as keyframing, motion detection, and green screen editing. All these features will allow you to uplift the production quality of your videos and engage potential viewers more effectively.
For Win 7 or later (64-bit)
For macOS 10.12 or later
A few key features of Filmora that make it the most reliable video editing software include:
● Thousands of ready-to-use animation templates and video effects
● Easy-to-use timeline-based editing panel
● Dedicated audio editor to control the sound quality
● Cross-platform compatibility
So, if you are also planning to launch a high-scale video for YouTube or any other platform by adding
Key Takeaways from This Episode
● Creating 2D animations with Unity is possible, however, you must be an expert game developer with extensive experience in Unity game development
● To create Unity 2D animations, you’ll have to use Sprite Sheets and then import them into Unity to turn them into animation.
● Now, if you are a regular video editor and only want to create 2D animations for videos, you can also use full-scale software such as Wondershare Filmora Pro.
What’s Rigging Animation and Why It Matters
What’s Rigging Animation and Why It Matters
An easy yet powerful editor
Numerous effects to choose from
Detailed tutorials provided by the official channel
Today there is a lot pre-made skeletons you can use and reuse as many times as you want, making only a few minor adjustments to the base design. If your creativity is sparking like firecrackers, then a rig can make it look more defined and/or realistic.
Not convinced? Let’s talk more about Rigging Animation.
In this article
01 [What is Rigging Animation](#Part 1)
02 [The Ultimate Collection for Free Maya Rigs [2022]](#Part 2)
Part 1 What is Rigging Animation
01Why Your Animators Need to Know How to Rig
Walk into any professional animation studio toady, you would notice unfamiliar skeleton figures in at least one of the screens.
This is called skeleton animation and is a major technique used in creating animated models that give us that 36vibe of the character in movies. It helps animators in controlling its movement just like a puppet. Hidden call back to the Matrix.
What you see in most movies or games, are characters and models who supported by a network of digital mechanical skeletons all rigged to move in a certain way.
02How Does Rigging Work?
The process of rigging is usually the second step in a long line of other methods applied after creating a model.
There is a series of interdependent bones that need to be constructed which is representation of the skeletal structure which is the basic goal in rigging animation.
With the right digital animation software you can reposition, repurpose and scale these bones in more ways than one.
The next step would involve recording the different movements of these bones on a timeline. This part of the process is called keyframing in animation.
These simple steps are actually more intricate than they actually are. Each movement acts as trigger to another set of movements like how the shoulder bone is connected to the forearm of our body.
This movement of the model becomes even more realistic once its weight scale has been determined. Painting weight can be considered to be the most unnerving challenge in the entire process.
Which is where Inverse Kinematics can help in making things 5easier by just reversing forward kinematic movements.
All of these aspects of rigging makes it possible to help animation mimic real life movements.
03How is Rigging Used?
Rigging is a technique which has only started gaining more prominence in recent times due to how crucial it is to the gaming and animation movie industry.
Not only is it used on characters but all mechanical objects in animations can also be rigged. With the help of a computerized program physicality is added to the bone structure and is recorded through a series of frames. These recording are then played back.
There are other applications to the and modelling process which goes beyond the entertainment industry such as giving virtual medical demonstrations or modeling a product.
This entire process can get much more repetitive and complex when it comes to rigging something as dynamic as the human face.
04Intro to Rigging Software
You might already be aware by now that there are some major animation software on the market that can provide you with just about every tool you need to make jaw dropping rigger animations.
Software like Blender, Cinema 4D, Maya and Houdini employs fantastic Skeletal Animation and digital motion capturing techniques. They open the doors to more realistic animations that can be used to create far more interactive and personalized digital worlds.
Maya and 3Ds Max is used to do real time animation rigging and is considered by most to be the industry standard by most animators.
Blender on the other hand is a free to use software. Though not quite as strong as Maya, it is an open source software which is equipped with everything you need to rig and animate models.
You can import completed animated files onto game engines and all types of other applications. The most common format for importing animated files is .fbx.
Part 2 The Ultimate Collection for Free Maya Rigs [2022]
01How’s Maya Rigs?
To tell the truth, every year you have spent on learning animation would come into great use in making your imagination come to life. Maya is probably the one software which gives you credit for just knowing it.
Maya has several levels of features you need to practice before you can call yourself a Maya master.
The best way to get your hands practiced on animating on Maya is by becoming well versed with all the stats and proportions while working with rigs. You would surely need to get your hands on high quality rig packages that makes the learning experience even more worth it.
With time, you would get better at understanding of the specifics of building a structure you would be showing in the final result. However getting stuck with the wrong type of rig can end up making your animating experience counterintuitive.
Here is a list of Maya Rigs you can start on right away;
02Best Free Maya Rigs of 2022
● Basic Rigs

Understanding the Basic Functionality of inanimate objects is a clear place to start in animation rigging. It helps you get a strong grasp over animation principals like bouncing a ball, before moving on to more challenging rigging packages.
● Ultimate Rigs
As you keep trying out different basic rigging functionalities, you eventually would need an ultimate rigging pack which is a complete set of all basic rigs. It is a great option to download and have this as a backup.
● Flour Sack
The Flour Sack free Rig is old school trainer pack. It simplifies your understanding character emotions by applying posing and adding weight to an object with a whimsical undefined structure.
● Wall E

If you are easily familiar with this character then you should remember how beautifully Wall-E was able express himself. It certainly is a step up on your journey to improving motion capture techniques. Try making your own Dreamworks style animation with Filmora from Wondershare where you can pair your animations with a few amazing film editing tools.
● JuiceBox
Another favored animation teaching prop is the Juice Box. It follows similar principals like the Flour Sack but the straw adds a different dimension to it. This is where an animator can try out more ways to get creative without a simple straw getting in their way.
● The Walking Egg
An egg shaped mechanical quadruped robot who has the ability to contract its legs into its body. Its legs are probably its best feature since it is lockable at then joints. A fun part of this robot is that its screen eyes can turn into guns.
● Cartoon Chameleon
This chameleon has all basic body and facial functions needed by a quadruped. It is a funny whimsical character similar to ‘Pasacal’ from the movie “Tangled” which you can play with. Its tongue is a special feature although you may need to work on its control.
● Judy Hopps
Time to master the art of animating emotions and Judy with her amazing big round eyes can easily be adjusted with the help of floating controllers. The dynamic features of this rig has micro facial controls which you practice with.
● Roboter 2.0.1
Interested in Robots? Try playing with this humanoid figure but be warned that it might not feel as easy to replicate natural human body motion. It might take some practice but you can try taking on the initial steps by practicing on a robot rig. At least you can excuse any minor imperfections.
● Bony and Beefy
The next challenge would be to master this incredibly advanced rig. There are various different body specifications which you will need to be familiar with. This rig gives you a fair advantage by already toggling all visibility controls.
● Key Takeaways from This Episode →
● Rigging is a fantastic way to learn the foundations of animations and how it all ties into the final result. It involves creating skeletal animations of bones that share parental relationship with each other; one bone moves an entire set. You can record these movements and then play them over timeline.
● You can practice rigging with both simple and advanced animations. Complex rigging structures like facial features may require separate project of its own. There are various rigging software like Blender and Maya which provides you with everything you need to carry out a successful rigging process.
● Get started with rigging animation by practicing on free Maya Rigs. Find out which rig suits you best according to your skills level.
Today there is a lot pre-made skeletons you can use and reuse as many times as you want, making only a few minor adjustments to the base design. If your creativity is sparking like firecrackers, then a rig can make it look more defined and/or realistic.
Not convinced? Let’s talk more about Rigging Animation.
In this article
01 [What is Rigging Animation](#Part 1)
02 [The Ultimate Collection for Free Maya Rigs [2022]](#Part 2)
Part 1 What is Rigging Animation
01Why Your Animators Need to Know How to Rig
Walk into any professional animation studio toady, you would notice unfamiliar skeleton figures in at least one of the screens.
This is called skeleton animation and is a major technique used in creating animated models that give us that 36vibe of the character in movies. It helps animators in controlling its movement just like a puppet. Hidden call back to the Matrix.
What you see in most movies or games, are characters and models who supported by a network of digital mechanical skeletons all rigged to move in a certain way.
02How Does Rigging Work?
The process of rigging is usually the second step in a long line of other methods applied after creating a model.
There is a series of interdependent bones that need to be constructed which is representation of the skeletal structure which is the basic goal in rigging animation.
With the right digital animation software you can reposition, repurpose and scale these bones in more ways than one.
The next step would involve recording the different movements of these bones on a timeline. This part of the process is called keyframing in animation.
These simple steps are actually more intricate than they actually are. Each movement acts as trigger to another set of movements like how the shoulder bone is connected to the forearm of our body.
This movement of the model becomes even more realistic once its weight scale has been determined. Painting weight can be considered to be the most unnerving challenge in the entire process.
Which is where Inverse Kinematics can help in making things 5easier by just reversing forward kinematic movements.
All of these aspects of rigging makes it possible to help animation mimic real life movements.
03How is Rigging Used?
Rigging is a technique which has only started gaining more prominence in recent times due to how crucial it is to the gaming and animation movie industry.
Not only is it used on characters but all mechanical objects in animations can also be rigged. With the help of a computerized program physicality is added to the bone structure and is recorded through a series of frames. These recording are then played back.
There are other applications to the and modelling process which goes beyond the entertainment industry such as giving virtual medical demonstrations or modeling a product.
This entire process can get much more repetitive and complex when it comes to rigging something as dynamic as the human face.
04Intro to Rigging Software
You might already be aware by now that there are some major animation software on the market that can provide you with just about every tool you need to make jaw dropping rigger animations.
Software like Blender, Cinema 4D, Maya and Houdini employs fantastic Skeletal Animation and digital motion capturing techniques. They open the doors to more realistic animations that can be used to create far more interactive and personalized digital worlds.
Maya and 3Ds Max is used to do real time animation rigging and is considered by most to be the industry standard by most animators.
Blender on the other hand is a free to use software. Though not quite as strong as Maya, it is an open source software which is equipped with everything you need to rig and animate models.
You can import completed animated files onto game engines and all types of other applications. The most common format for importing animated files is .fbx.
Part 2 The Ultimate Collection for Free Maya Rigs [2022]
01How’s Maya Rigs?
To tell the truth, every year you have spent on learning animation would come into great use in making your imagination come to life. Maya is probably the one software which gives you credit for just knowing it.
Maya has several levels of features you need to practice before you can call yourself a Maya master.
The best way to get your hands practiced on animating on Maya is by becoming well versed with all the stats and proportions while working with rigs. You would surely need to get your hands on high quality rig packages that makes the learning experience even more worth it.
With time, you would get better at understanding of the specifics of building a structure you would be showing in the final result. However getting stuck with the wrong type of rig can end up making your animating experience counterintuitive.
Here is a list of Maya Rigs you can start on right away;
02Best Free Maya Rigs of 2022
● Basic Rigs
Understanding the Basic Functionality of inanimate objects is a clear place to start in animation rigging. It helps you get a strong grasp over animation principals like bouncing a ball, before moving on to more challenging rigging packages.
● Ultimate Rigs
As you keep trying out different basic rigging functionalities, you eventually would need an ultimate rigging pack which is a complete set of all basic rigs. It is a great option to download and have this as a backup.
● Flour Sack
The Flour Sack free Rig is old school trainer pack. It simplifies your understanding character emotions by applying posing and adding weight to an object with a whimsical undefined structure.
● Wall E
If you are easily familiar with this character then you should remember how beautifully Wall-E was able express himself. It certainly is a step up on your journey to improving motion capture techniques. Try making your own Dreamworks style animation with Filmora from Wondershare where you can pair your animations with a few amazing film editing tools.
● JuiceBox
Another favored animation teaching prop is the Juice Box. It follows similar principals like the Flour Sack but the straw adds a different dimension to it. This is where an animator can try out more ways to get creative without a simple straw getting in their way.
● The Walking Egg
An egg shaped mechanical quadruped robot who has the ability to contract its legs into its body. Its legs are probably its best feature since it is lockable at then joints. A fun part of this robot is that its screen eyes can turn into guns.
● Cartoon Chameleon
This chameleon has all basic body and facial functions needed by a quadruped. It is a funny whimsical character similar to ‘Pasacal’ from the movie “Tangled” which you can play with. Its tongue is a special feature although you may need to work on its control.
● Judy Hopps
Time to master the art of animating emotions and Judy with her amazing big round eyes can easily be adjusted with the help of floating controllers. The dynamic features of this rig has micro facial controls which you practice with.
● Roboter 2.0.1
Interested in Robots? Try playing with this humanoid figure but be warned that it might not feel as easy to replicate natural human body motion. It might take some practice but you can try taking on the initial steps by practicing on a robot rig. At least you can excuse any minor imperfections.
● Bony and Beefy
The next challenge would be to master this incredibly advanced rig. There are various different body specifications which you will need to be familiar with. This rig gives you a fair advantage by already toggling all visibility controls.
● Key Takeaways from This Episode →
● Rigging is a fantastic way to learn the foundations of animations and how it all ties into the final result. It involves creating skeletal animations of bones that share parental relationship with each other; one bone moves an entire set. You can record these movements and then play them over timeline.
● You can practice rigging with both simple and advanced animations. Complex rigging structures like facial features may require separate project of its own. There are various rigging software like Blender and Maya which provides you with everything you need to carry out a successful rigging process.
● Get started with rigging animation by practicing on free Maya Rigs. Find out which rig suits you best according to your skills level.
Best 12 Video to GIF Converters [High Quality] to Check Out
Top 12 Video to GIF Converters [High Quality] to Check Out
An easy yet powerful editor
Numerous effects to choose from
Detailed tutorials provided by the official channel
GIFs are images with looping animations for a few seconds and are used a lot over social media sites and other online platforms. There are several sites from where you can download readymade GIFs.
Alternatively, there are countless tools using which customized GIFs can be created from videos. So, if you too are looking for video to GIF converter high quality keep reading.
In this article
01 [The Difference Between A Video And A Gif](#Part 1)
02 [Top 12 Video to GIF Converters](#Part 2)
Part 1 The Difference Between A Video And A Gif
A GIF is a lot in use these days over social media platforms, and other online sites. Standing for Graphics Interchange Format, a GIF is basically a looping animation or a video that has a sequence of frames or images.
Though a lot of people can consider a GIF as a short video, there are a few key differences between the two. The first one lies in the name extension. A GIF file is saved as .gif while a video can be saved into several formats like .mp4, .mov, and more.
A video contains visual information having good quality frames as well as sound while a GIF is a short animation that uses some specific information created from a sequence of frames. Moreover, a GIF does not have a sound and the size is also very small.
Part 2 Top 12 Video to GIF Converters
An array of online and desktop tools is available to convert video to GIF high quality. We have shortlisted the top ones as below.
01**Wondershare Filmora Video Editor **
If you are looking for software that lets you create an excellent GIF in a hassle-free manner, Wondershare Filmora is the best choice. This professional software comes with multiple editing and customization capabilities for creating a desired animated file. You can not only create GIFs, but perform a host of additional functions using the tool like video editing, music editing, and more. Once downloaded on your Windows or Mac systems, the software is all set to work as desired without any limitations.
Wondershare Filmora
Get started easily with Filmora’s powerful performance, intuitive interface, and countless effects!
Try It Free Try It Free Try It Free Learn More >

Pros:
● Support to almost all media formats for high quality video to GIF conversion.
● A wide range of editing and customization options are supported.
● Works as a complete video editing tool.
Cons:
● Paid software
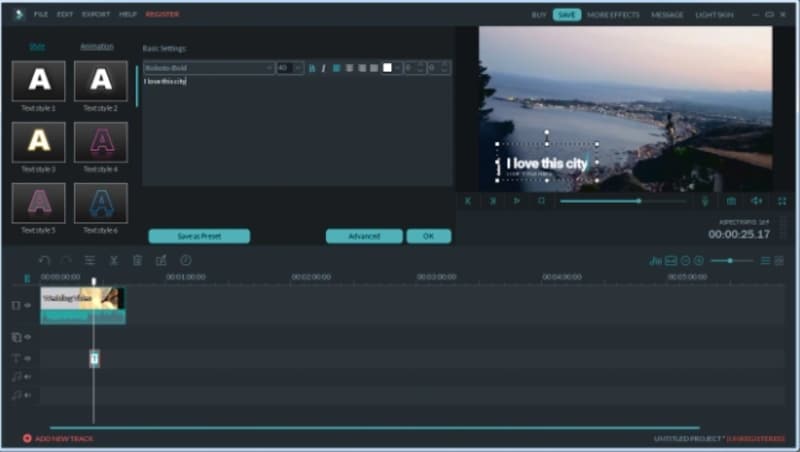
02Giphy
When it comes to GIFs, GIPHY is one of the most widely used tools. The tool allows you to create GIFs not only from the locally saved videos but also from YouTube, Vimeo, and other third-party platforms. There are multiple features for creating GIFs using this tool like selecting the length of the GIF, adding captions, text, frame of the GIF, and more. Not only videos, but the software also allows creating GIFs using multiple static photos.
Pros:
● Create GIFs from local as well as online videos
● User-friendly interface
● Support to multiple platforms and OS
Cons:
● The searching function is not very effective.
● Need to sign-up to use the tool.
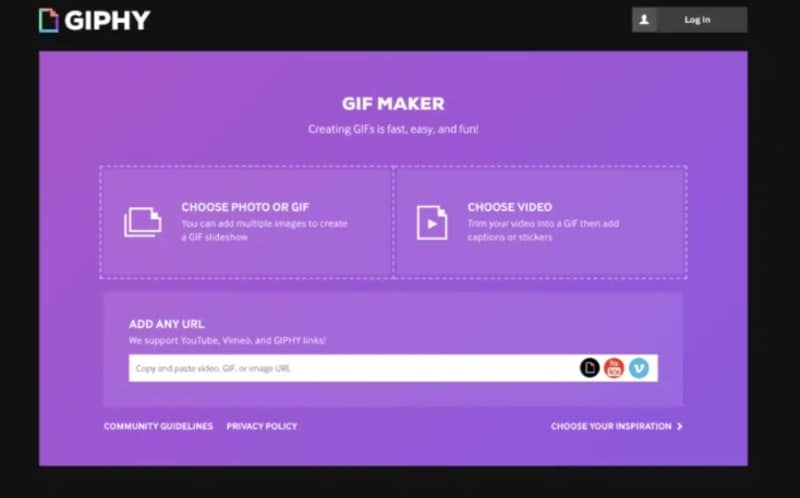
03Adobe Creative Cloud Express
This is a free video conversion tool that allows creating a GIF from videos in an array of formats. The tool gives you the freedom to choose your GIF size option that includes square, portrait, and landscape. Additionally, you can also select the quality of the GIF. Tools for adjusting and editing several parameters of the GIF are also supported by the software.
Pros:
● Allows creating GIFs in 3 size and multiple quality
● Created GIFs can be shared directly to social networking sites.
● Several editing options are available.
Cons:
● Issues of lags and bugs occasionally
● There are no guides
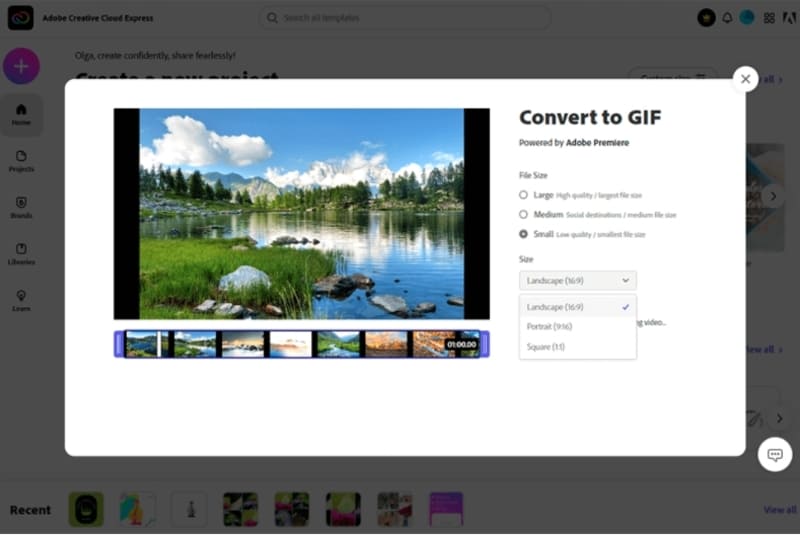
04Movavi
This is a reliable and widely used video editing tool that supports multiple functions including video to GIF conversion. Several useful functions are supported by the software like batch file processing, easy and quick GIF creation, editing options, and more. The tool is available for multiple platforms as well as for different OS.
Pros:
● Support to a wide range of formats
● Multiple editing options
● Available for different platforms and OS
Cons:
● Need to purchase the software after the limited trial period expires.
● The rendering is slow.
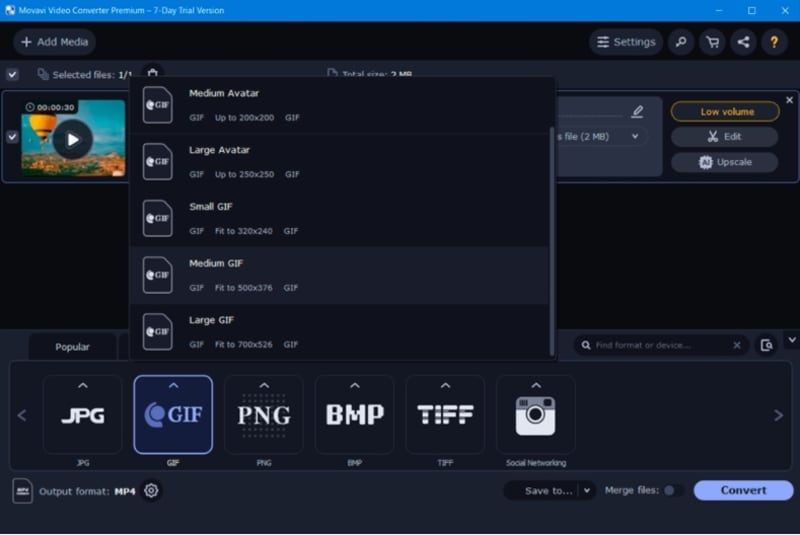
05MakeAGIF
As the name suggests this software is a GIF-making tool that not only converts your videos into a GIF but virtually anything like a collection of pictures, YouTube clips, Facebook clips, and much more. Using the tool you can add captions, stickers, and a lot of other filters to the created GIF. You can even adjust the speed of the GIF and also select the start and the stop time.
Pros:
● Allows creating a GIF from videos, images, URLs, clips, and others.
● Multiple options for GIF customization are available.
● Offers a huge library of GIFs as well.
Cons:
● The free version processes files with a watermark.
● The site has annoying ads.
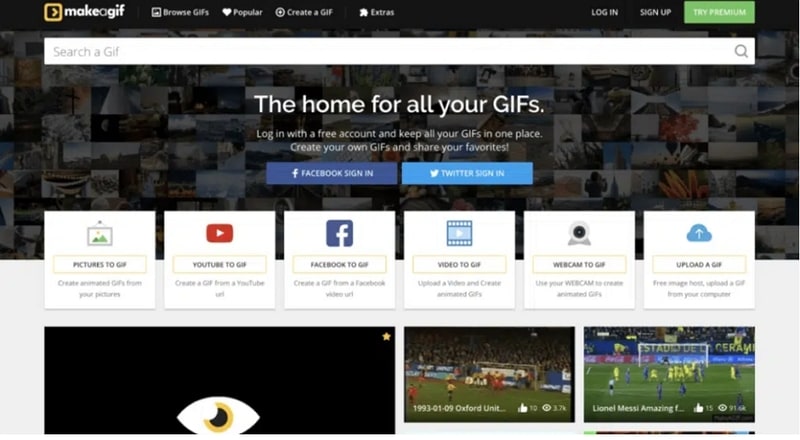
06Freemore Video to GIF Converter
Using this software, videos can be converted into GIFs in a few simple steps. You can also select the frames and also adjust the height and the width of the frames as needed. All key video formats like MP4, MOV, MPEG, and others are supported by the tool. The interface of the tool is simple and the process of creating a GIF is fast.
Pros:
● Free to use software
● Support to multiple video formats
● Allows selecting the exact frames and the width and height of the GIF.
Cons:
● No support for Mac systems.
● Limited customization options as compared to other sites.
07VideoSolo Video Converter Ultimate
Multiple options for creating a GIF are supported by this software that also lets you convert your videos as well as edit them. Using the editing options, you can choose a specific part of the clip, trim a longer video, or can also join multiple clips for creating a GIF. Using the software you can adjust the color grading, saturation, contrast, and other parameters. Also, you can add a picture or text to the GIF to make it look interesting.
Pros:
● Support to a wide range of formats
● Multiple editing options.
● Fast processing speed.
Cons:
● Locating features can be a complicated task.
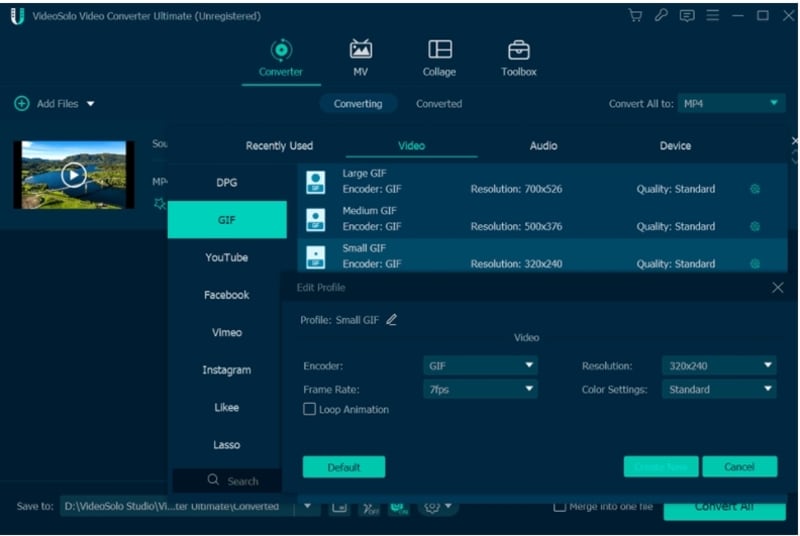
08Ezgif
This is a free online tool for creating GIFs and needs no software download or installation. Simple to use, the program allows adding videos in key formats like MP4, MOV, 3GP, and others for creating a GIF. Local video as well as its URL can be added. The tool allows to trim the unnecessary parts of the video and if not specified the GIF is created using the first 5 seconds of the file.
Pros:
● Free to use online tool.
● Add local videos or online URLs for creating a GIF.
● Allows to trim and crop the added files.
Cons:
● Internet dependency
● The maximum supported file size is 100MB.
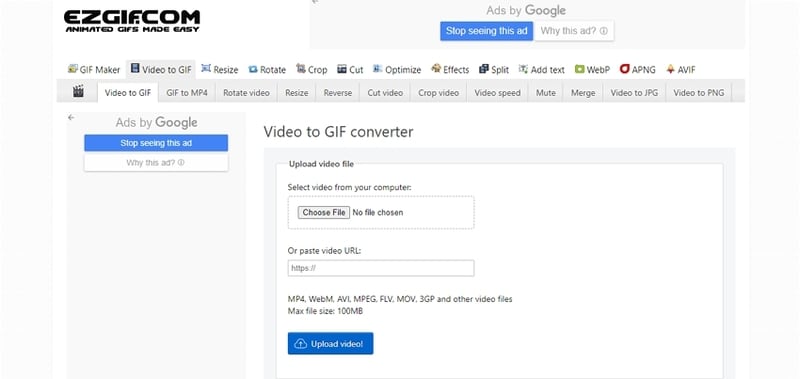
09FlexClip GIF Maker
Using this browser-based tool, videos and images can be quickly converted to GIFs. All the popular media formats are supported by the tool for processing and the interface is user-friendly. Transitions and captions can also be added to GIFs to make them eye-catchy. Other customization options include adjusting the frame, speed, and other parameters.
● No software download or installation is needed.
● Support a wide range of formats.
● Multiple customization options are supported.
Cons:
● Limitation to the video size that can be added.
● Dependency on internet connectivity.
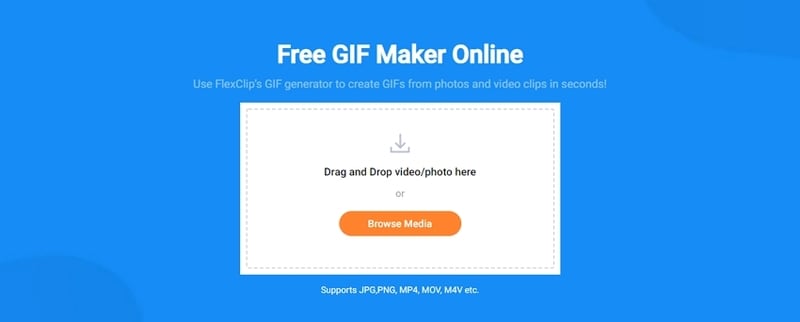
10Convertio
This is a popular online tool that supports video conversion to an array of formats including GIF. Not only local, videos from Google Drive as well as Dropbox can also be added to the interface for processing. If you want a simple tool to create a GIF without much customization and editing, Convertio is the best. The processed files can be saved to the local device or cloud storage.
Pros:
● Add videos from the local device, Google Drive, as well as Dropbox.
● Simple user-interface.
● Processed files can be downloaded and saved to the system as well as the cloud.
Cons:
● The file size limitation of 100MB.
● No option to edit or choose any file specification.
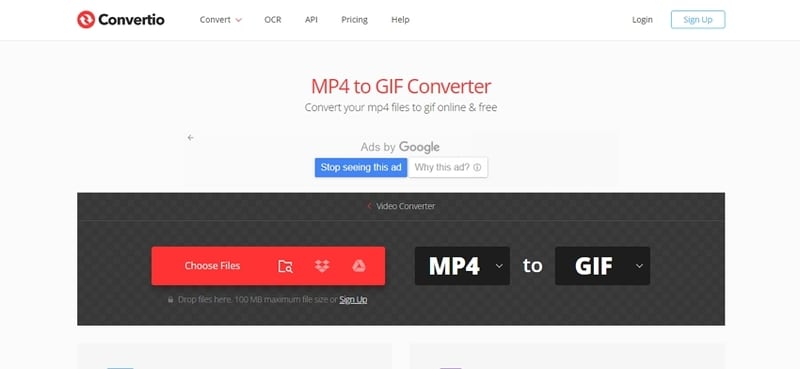
11Zamzar
For a free and quick conversion of videos to GIF, this is an excellent online tool to consider. The process is user-friendly where you just have to add the video or its link and choose GIF as the target format. The tool will automatically convert the added video to a GIF that can be downloaded to the system or can also be sent through an email.
Pros:
● Free and simple to use the tool.
● Support to multiple video formats.
● Processed GIFs can be saved locally or the link can be sent through an email.
Cons:
● Maximum file size support is 50MB.
● No option for selecting any file parameters.
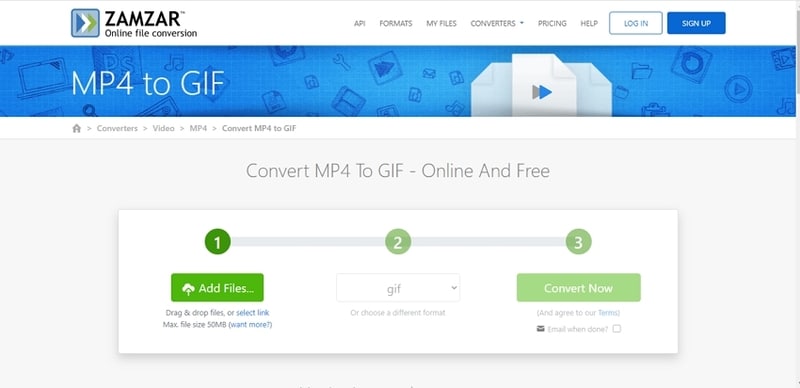
12ImgFlip
Using this online tool, videos and images can be converted to a GIF file quickly. You can either add the media files from your system or also use their link. The tool supports multiple editing and customization options like selecting the size, trimming the video, selecting FPS, adding titles, rotating, and more. You can also save the template of the created file for future use.
Pros:
● GIFs can be created from videos and images.
● Multiple file customization and editing options are supported.
● Multiple options to save, download, and share the created GIF.
Cons:
● The file size limitation of 100MB.
● Internet dependency.
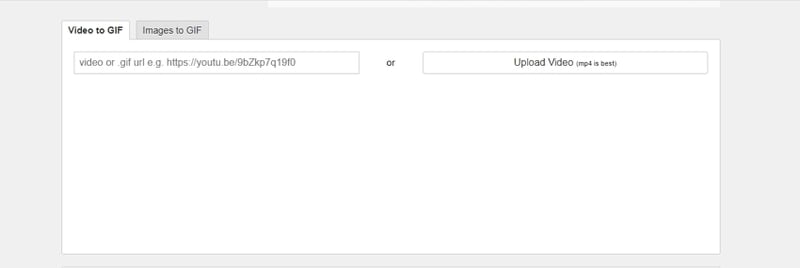
● Key Takeaways from This Episode →
●GIFs are a lot in use these days to express emotion, feelings, or a situation.
●There are several online as well as desktop tools available to convert video to GIF without losing quality.
●Wondershare Filmora is one of the best tools in the category that is simple yet functional and results in high-quality GIF files.
GIFs are images with looping animations for a few seconds and are used a lot over social media sites and other online platforms. There are several sites from where you can download readymade GIFs.
Alternatively, there are countless tools using which customized GIFs can be created from videos. So, if you too are looking for video to GIF converter high quality keep reading.
In this article
01 [The Difference Between A Video And A Gif](#Part 1)
02 [Top 12 Video to GIF Converters](#Part 2)
Part 1 The Difference Between A Video And A Gif
A GIF is a lot in use these days over social media platforms, and other online sites. Standing for Graphics Interchange Format, a GIF is basically a looping animation or a video that has a sequence of frames or images.
Though a lot of people can consider a GIF as a short video, there are a few key differences between the two. The first one lies in the name extension. A GIF file is saved as .gif while a video can be saved into several formats like .mp4, .mov, and more.
A video contains visual information having good quality frames as well as sound while a GIF is a short animation that uses some specific information created from a sequence of frames. Moreover, a GIF does not have a sound and the size is also very small.
Part 2 Top 12 Video to GIF Converters
An array of online and desktop tools is available to convert video to GIF high quality. We have shortlisted the top ones as below.
01**Wondershare Filmora Video Editor **
If you are looking for software that lets you create an excellent GIF in a hassle-free manner, Wondershare Filmora is the best choice. This professional software comes with multiple editing and customization capabilities for creating a desired animated file. You can not only create GIFs, but perform a host of additional functions using the tool like video editing, music editing, and more. Once downloaded on your Windows or Mac systems, the software is all set to work as desired without any limitations.
Wondershare Filmora
Get started easily with Filmora’s powerful performance, intuitive interface, and countless effects!
Try It Free Try It Free Try It Free Learn More >
Pros:
● Support to almost all media formats for high quality video to GIF conversion.
● A wide range of editing and customization options are supported.
● Works as a complete video editing tool.
Cons:
● Paid software
02Giphy
When it comes to GIFs, GIPHY is one of the most widely used tools. The tool allows you to create GIFs not only from the locally saved videos but also from YouTube, Vimeo, and other third-party platforms. There are multiple features for creating GIFs using this tool like selecting the length of the GIF, adding captions, text, frame of the GIF, and more. Not only videos, but the software also allows creating GIFs using multiple static photos.
Pros:
● Create GIFs from local as well as online videos
● User-friendly interface
● Support to multiple platforms and OS
Cons:
● The searching function is not very effective.
● Need to sign-up to use the tool.
03Adobe Creative Cloud Express
This is a free video conversion tool that allows creating a GIF from videos in an array of formats. The tool gives you the freedom to choose your GIF size option that includes square, portrait, and landscape. Additionally, you can also select the quality of the GIF. Tools for adjusting and editing several parameters of the GIF are also supported by the software.
Pros:
● Allows creating GIFs in 3 size and multiple quality
● Created GIFs can be shared directly to social networking sites.
● Several editing options are available.
Cons:
● Issues of lags and bugs occasionally
● There are no guides
04Movavi
This is a reliable and widely used video editing tool that supports multiple functions including video to GIF conversion. Several useful functions are supported by the software like batch file processing, easy and quick GIF creation, editing options, and more. The tool is available for multiple platforms as well as for different OS.
Pros:
● Support to a wide range of formats
● Multiple editing options
● Available for different platforms and OS
Cons:
● Need to purchase the software after the limited trial period expires.
● The rendering is slow.
05MakeAGIF
As the name suggests this software is a GIF-making tool that not only converts your videos into a GIF but virtually anything like a collection of pictures, YouTube clips, Facebook clips, and much more. Using the tool you can add captions, stickers, and a lot of other filters to the created GIF. You can even adjust the speed of the GIF and also select the start and the stop time.
Pros:
● Allows creating a GIF from videos, images, URLs, clips, and others.
● Multiple options for GIF customization are available.
● Offers a huge library of GIFs as well.
Cons:
● The free version processes files with a watermark.
● The site has annoying ads.
06Freemore Video to GIF Converter
Using this software, videos can be converted into GIFs in a few simple steps. You can also select the frames and also adjust the height and the width of the frames as needed. All key video formats like MP4, MOV, MPEG, and others are supported by the tool. The interface of the tool is simple and the process of creating a GIF is fast.
Pros:
● Free to use software
● Support to multiple video formats
● Allows selecting the exact frames and the width and height of the GIF.
Cons:
● No support for Mac systems.
● Limited customization options as compared to other sites.
07VideoSolo Video Converter Ultimate
Multiple options for creating a GIF are supported by this software that also lets you convert your videos as well as edit them. Using the editing options, you can choose a specific part of the clip, trim a longer video, or can also join multiple clips for creating a GIF. Using the software you can adjust the color grading, saturation, contrast, and other parameters. Also, you can add a picture or text to the GIF to make it look interesting.
Pros:
● Support to a wide range of formats
● Multiple editing options.
● Fast processing speed.
Cons:
● Locating features can be a complicated task.
08Ezgif
This is a free online tool for creating GIFs and needs no software download or installation. Simple to use, the program allows adding videos in key formats like MP4, MOV, 3GP, and others for creating a GIF. Local video as well as its URL can be added. The tool allows to trim the unnecessary parts of the video and if not specified the GIF is created using the first 5 seconds of the file.
Pros:
● Free to use online tool.
● Add local videos or online URLs for creating a GIF.
● Allows to trim and crop the added files.
Cons:
● Internet dependency
● The maximum supported file size is 100MB.
09FlexClip GIF Maker
Using this browser-based tool, videos and images can be quickly converted to GIFs. All the popular media formats are supported by the tool for processing and the interface is user-friendly. Transitions and captions can also be added to GIFs to make them eye-catchy. Other customization options include adjusting the frame, speed, and other parameters.
● No software download or installation is needed.
● Support a wide range of formats.
● Multiple customization options are supported.
Cons:
● Limitation to the video size that can be added.
● Dependency on internet connectivity.
10Convertio
This is a popular online tool that supports video conversion to an array of formats including GIF. Not only local, videos from Google Drive as well as Dropbox can also be added to the interface for processing. If you want a simple tool to create a GIF without much customization and editing, Convertio is the best. The processed files can be saved to the local device or cloud storage.
Pros:
● Add videos from the local device, Google Drive, as well as Dropbox.
● Simple user-interface.
● Processed files can be downloaded and saved to the system as well as the cloud.
Cons:
● The file size limitation of 100MB.
● No option to edit or choose any file specification.
11Zamzar
For a free and quick conversion of videos to GIF, this is an excellent online tool to consider. The process is user-friendly where you just have to add the video or its link and choose GIF as the target format. The tool will automatically convert the added video to a GIF that can be downloaded to the system or can also be sent through an email.
Pros:
● Free and simple to use the tool.
● Support to multiple video formats.
● Processed GIFs can be saved locally or the link can be sent through an email.
Cons:
● Maximum file size support is 50MB.
● No option for selecting any file parameters.
12ImgFlip
Using this online tool, videos and images can be converted to a GIF file quickly. You can either add the media files from your system or also use their link. The tool supports multiple editing and customization options like selecting the size, trimming the video, selecting FPS, adding titles, rotating, and more. You can also save the template of the created file for future use.
Pros:
● GIFs can be created from videos and images.
● Multiple file customization and editing options are supported.
● Multiple options to save, download, and share the created GIF.
Cons:
● The file size limitation of 100MB.
● Internet dependency.
● Key Takeaways from This Episode →
●GIFs are a lot in use these days to express emotion, feelings, or a situation.
●There are several online as well as desktop tools available to convert video to GIF without losing quality.
●Wondershare Filmora is one of the best tools in the category that is simple yet functional and results in high-quality GIF files.
Also read:
- Updated In 2024, The Most Efficient Techniques to Make 3D Animation Character
- New 10 Best Convert Video Between GIF Software High Quality
- New Learn What Are Differences Between 2D And 3D Animation
- Updated 2024 Approved The Most Efficient Techniques to Make 3D Animation Character
- Updated How to Animate - Adobe Animate Tutorial for All
- 2024 Approved Easy Cartoon Characters Drawing Tutorials for You Who Are Learning to Draw
- What Is Still Motion Animation for 2024
- 10 Stunning Stop Motion Movies You Should Not Miss
- How To Animate Graphics in Canva
- Updated Can I Still Do Animated Logo Design Without Design Skills?
- New In 2024, Ways on How to Get Started in Stop Motion Claymation
- 2024 Approved 6 Types of Animation You May Like
- New In 2024, Best 10 3D Text Animation Templates
- Tips on How to Learn Graphics Animation for 2024
- New 10 Cartoon Photo Converters for 2024
- Updated In 2024, What Make Aesthetic Cartoon Drawing More Understandable
- Updated How to Create an Adobe Collage for 2024
- New Incredible Ways to Find Suitable Animated Graphic Maker
- New In 2024, How to Convert Animated GIF From Video
- Updated Samples of Cartoon Character Face
- Updated How to Create Benime Whiteboard Animation in Android
- New In 2024, How to Create Slideshow in LinkedIn
- New 10 Awesome Moving Animation PowerPoint Techniques
- In 2024, Can I Do Animated Logo Design Without Design Skills?
- Updated In 2024, Tutorial on Making Unity 2D Animation
- Updated In 2024, 10 Must-Use MP4 to GIF Converters to Get Perfect-Made GIF
- Updated 5 Free Animated Gif Sources You Must Check for 2024
- New How to Animate - Adobe Animate Tutorias
- Updated In 2024, How I Animate Discord Profile Pictures (& You Can Too)
- New Before You Learn Facebook Slideshow 5 Things You Should Know How-TOS for 2024
- New 10 Most Memorable Japanese Cat Cartoons for 2024
- New 2024 Approved 10 Best Romance Anime Movies You Need to Watch
- Which is the Best Fake GPS Joystick App On Tecno Spark 10 Pro? | Dr.fone
- Full Guide on Mirroring Your Vivo X100 Pro to Your PC/Mac | Dr.fone
- In 2024, Your Account Has Been Disabled in the App Store and iTunes From iPhone 13 Pro?
- In 2024, How Can I Use a Fake GPS Without Mock Location On Tecno Spark 10C? | Dr.fone
- In 2024, Learn How To Lock Stolen Your Apple iPhone 6s Properly | Dr.fone
- In 2024, How to Hide/Fake Snapchat Location on Your Oppo Reno 11F 5G | Dr.fone
- Solved Photos Disappeared from iPhone 8 Suddenly | Stellar
- In 2024, The Updated Method to Bypass Samsung Galaxy A14 4G FRP
- Fake the Location to Get Around the MLB Blackouts on Infinix Note 30 VIP | Dr.fone
- iPogo will be the new iSpoofer On Samsung Galaxy A14 4G? | Dr.fone
- How to Unlock Vivo V27 Pro Bootloader Easily
- How Can I Catch the Regional Pokémon without Traveling On Asus ROG Phone 7 | Dr.fone
- In 2024, How to Fake GPS on Android without Mock Location For your Tecno Spark 20C | Dr.fone
- In 2024, 5 Quick Methods to Bypass Asus ROG Phone 7 Ultimate FRP
- How to Fix Android App Not Installed Error on Realme 11 Pro Quickly? | Dr.fone
- In 2024, How to Change Your Samsung Galaxy F54 5G Location on life360 Without Anyone Knowing? | Dr.fone
- How to Unlock Apple ID Activation Lock On Apple iPhone 13 Pro?
- In 2024, How to Unlock AT&T Apple iPhone 6 Plus with 3 Methods
- Play Store Stuck on Downloading Of Vivo Y28 5G? 7 Ways to Resolve | Dr.fone
- How To Restore a Bricked Nokia C32 Back to Operation | Dr.fone
- In 2024, The Most Useful Tips for Pokemon Go Ultra League On Samsung Galaxy Z Flip 5 | Dr.fone
- Sign a PDF v1.7 document with electronic signature tool
- The Best Android Unlock Software For Vivo Y100 Device Top 5 Picks to Remove Android Locks
- Top 10 Fixes for Phone Keep Disconnecting from Wi-Fi On OnePlus Nord N30 SE | Dr.fone
- Title: DP Animation Maker Tutorial for Finding The Best Animated Profile Picture Maker
- Author: Elon
- Created at : 2024-05-19 03:04:23
- Updated at : 2024-05-20 03:04:23
- Link: https://animation-videos.techidaily.com/dp-animation-maker-tutorial-for-finding-the-best-animated-profile-picture-maker/
- License: This work is licensed under CC BY-NC-SA 4.0.
