
:max_bytes(150000):strip_icc():format(webp)/how-to-choose-your-ideal-phonecase-ca91460721b143b0b0ae61b5baf11b3c.jpg)
How To Animate Graphics in Canva for 2024
How To Animate Graphics in Canva
Versatile Video Editor - Wondershare Filmora
An easy yet powerful editor
Numerous effects to choose from
Detailed tutorials provided by the official channel
Canva is a graphic design platform that allows users to create stunning designs for social media posts, presentations, assignments, recipe cards, birthday videos.
With the introduction of Canva’s animation feature, a whole new world of possibilities are open to the public. Also, with pre-designed templates from professional designers, content creation has never been easier than Canva.
Animations themselves have the option of being individually customized element by element. Canva animated graphics makes it easy to unleash your creative potential.
This article will explore how to animate graphics in Canva that can suit every occasion.
In this article
01 [Animate Your Graphic In Canva](#Part 1)
02 [Make A Moving Graphic In Canva](#Part 2)
03 [Pricing for Canva You Should Know](#Part 3)
Part 1 Animate Your Graphic In Canva
People can create animations in Canva in one of two ways. You can select an animation from one of the pre-existing animated templates. This is a time-saving option as it lets you customize ready-made templates to suit your needs
With the pre-set animation templates, you have the option to choose from among
● Invitations
● A4 Documents
● Instagram Post
● Facebook Post
● YouTube Thumbnails
● Presentation
● Flyer/Poster
● Instagram Logo
● Infographic
These options generate the ability to be presented in both portrait and landscape mode. The multitude of options makes it an ideal medium for you to create your animation. The animation options at Canva also come with the opportunity to animate an existing image.

You can choose to animate an existing design. With a few minor edits, you can have a polished and sophisticated post that’s bound to draw viewer attention and earn you kudos.
If this is the case, then you benefit from saving time and the expertise of a professional design team through Canva.
The second option is creating an animation by yourself. Creating your own animation offers you greater flexibility in executing your vision for the design. Without further ado, let’s look at how we can help this happen in the how to make a moving graphic in the Canva section.
Part 2 Make A Moving Graphic In Canva
Making a moving graphic in Canva is easy. Canva offers an “Animation” button that allows users to animate each element in the content. There are four areas that the graphic can touch upon for content. These areas are text, image, audio, and video.
Here’s how you can animate individual elements in Canva.
2.1 How to animate text in Canva?
With text, Canva offers three options. You can choose to create either a title text, a sub-heading text, or regular text for use. Play with different styles and fonts to find one that suits your design. You can also add details like stickers or illustrations to customize the design.
You are now ready to animate once you’re happy with the design. Text animations will help your text jump out from the background. Then choose the “Animate” option in the sidebar after clicking on the selected text.

Allow your font to move around your design with motion. Thanks to “animate,” you can choose between subtle, smooth movement and jagged and sudden motion. You can even mix and match animations for each word.
In Wondershare Filmora, a premier video editing software, the texts are available according to use. For instance, opening and ending credit texts as a template. With options for choosing subtitles, lower 3rds, and call-out templates.
Additionally, users can also save a particular setting as a “preset’. Which makes it easy to reuse the settings in future projects. You can also adjust the duration of the individual text display. It also has an animation option that allows animation of the text according to given presets.
2.2 How do you animate a picture in Canva?
Users have the ability to choose to animate just the image or animate other elements of the picture. They can also make use of options to edit the image using background remover. This allows seamless integration into the presentation.

Users can simply upload their photos. Choose a stock image or upload an image through your photo gallery to use in your design. You can also choose to use “frames,” which are available under the “Elements” tab in Canva.
Make your photo come alive by animating it. Choose from a variety of innovative animation possibilities by selecting the Animation tool. The duration of the animation can be changed using the stopwatch animation icon. It uses a slider to help in setting the duration of each animation. You can also adjust this manually.
2.3 How do you add music to animation in Canva?
Users can find a section dedicated to “Uploads,” allowing creators to use their audio content. The users can use a soundtrack from one of Canva’s audio libraries. This gives users control over their animation’s impact.
One difference between Canva and Wondershare Filmora is that Canva users can only use one audio per presentation. Filmora allows users to overlay multiple soundtracks to their timeline.
Users can also make use of the Audio Effects feature to create audio for “Echo,” “large room,” “small room,” “lobby,” and “phone.” The preview function can help users experience it live before applying the effect.
Filmora Pro’s Auto-Normalization of audio allows intelligent audio analysis and volume adjustment.
2.4 How do you animate video in Canva?
Canva offers presentations that are similar to the explainer-style videos on Youtube. With more modifications, you can convert the presentation to a video format. You can edit individual elements in the presentation to reflect the project details and outcomes.
You can also introduce transition effects to make the presentation a smooth video. Incorporating the three other elements will be a breeze to make a video with animation.

Another noteworthy thing in Canva is that users can upload their videos or use videos provided in the video library. You can also embed videos within a frame from the “Elements” section in Canva. You can trim the video input on the slide for time. It can be presented as a “loop” video.
Filmora offers all the essential video editing tools in addition to AI-powered features called Auto-Highlight and Auro-Reframe. Auto Highlight is a feature that extracts the highlights from a video clip autonomously.
This will save you time while cutting your movie. It also makes it easier to extract the best moments from the video.
Auto Reframe recognizes as well as crops the focal point of your footage, constantly retaining it in the frame. Your film’s primary action or object will never be out of focus within that technique.
Part 3 Pricing for Canva You Should Know
Canva can be used among a multitude of users and companies. The range of access is from a single person use to teams of fifty. It also allows for a custom selection of a number of people.
Canva can be used as free graphic design software. It does display all available options with a few possibilities marked off for Canva Pro users only.
Canva Pro allows up to 5 users per team. A subscription to Canva Pro costs US $119.99 per annum or US $12.99 per month. Pro users have access to unlimited content and newly released tools.
The only difference between Canva Pro and Canva Enterprise is that Canva Pro is for smaller teams. Canva Enterprise allows collaboration between larger teams and franchises.
Canva also offers free Canva Pro subscriptions to non-profit organizations. Students and teachers are offered a special discount for those in educational programs.
Wondershare Filmora
Get started easily with Filmora’s powerful performance, intuitive interface, and countless effects!
Try It Free Try It Free Try It Free Learn More >

AI Portrait – The best feature of Wondershare Filmora for gameplay editing
The AI Portrait is a new add-on in Wondershare Filmora. It can easily remove video backgrounds without using a green screen or chroma key, allowing you to add borders, glitch effects, pixelated, noise, or segmentation video effects.

Final Words
We’ve covered how to animate graphics in Canva. You can animate individual elements in Canva or automate it on the whole. Canva’s animate button is an automatic tool that revolutionizes the way traditional animation works.
Wondershare’s Filmora is the video editing tool that is easy to use and offer various animation options.
Canva is a graphic design platform that allows users to create stunning designs for social media posts, presentations, assignments, recipe cards, birthday videos.
With the introduction of Canva’s animation feature, a whole new world of possibilities are open to the public. Also, with pre-designed templates from professional designers, content creation has never been easier than Canva.
Animations themselves have the option of being individually customized element by element. Canva animated graphics makes it easy to unleash your creative potential.
This article will explore how to animate graphics in Canva that can suit every occasion.
In this article
01 [Animate Your Graphic In Canva](#Part 1)
02 [Make A Moving Graphic In Canva](#Part 2)
03 [Pricing for Canva You Should Know](#Part 3)
Part 1 Animate Your Graphic In Canva
People can create animations in Canva in one of two ways. You can select an animation from one of the pre-existing animated templates. This is a time-saving option as it lets you customize ready-made templates to suit your needs
With the pre-set animation templates, you have the option to choose from among
● Invitations
● A4 Documents
● Instagram Post
● Facebook Post
● YouTube Thumbnails
● Presentation
● Flyer/Poster
● Instagram Logo
● Infographic
These options generate the ability to be presented in both portrait and landscape mode. The multitude of options makes it an ideal medium for you to create your animation. The animation options at Canva also come with the opportunity to animate an existing image.
You can choose to animate an existing design. With a few minor edits, you can have a polished and sophisticated post that’s bound to draw viewer attention and earn you kudos.
If this is the case, then you benefit from saving time and the expertise of a professional design team through Canva.
The second option is creating an animation by yourself. Creating your own animation offers you greater flexibility in executing your vision for the design. Without further ado, let’s look at how we can help this happen in the how to make a moving graphic in the Canva section.
Part 2 Make A Moving Graphic In Canva
Making a moving graphic in Canva is easy. Canva offers an “Animation” button that allows users to animate each element in the content. There are four areas that the graphic can touch upon for content. These areas are text, image, audio, and video.
Here’s how you can animate individual elements in Canva.
2.1 How to animate text in Canva?
With text, Canva offers three options. You can choose to create either a title text, a sub-heading text, or regular text for use. Play with different styles and fonts to find one that suits your design. You can also add details like stickers or illustrations to customize the design.
You are now ready to animate once you’re happy with the design. Text animations will help your text jump out from the background. Then choose the “Animate” option in the sidebar after clicking on the selected text.
Allow your font to move around your design with motion. Thanks to “animate,” you can choose between subtle, smooth movement and jagged and sudden motion. You can even mix and match animations for each word.
In Wondershare Filmora, a premier video editing software, the texts are available according to use. For instance, opening and ending credit texts as a template. With options for choosing subtitles, lower 3rds, and call-out templates.
Additionally, users can also save a particular setting as a “preset’. Which makes it easy to reuse the settings in future projects. You can also adjust the duration of the individual text display. It also has an animation option that allows animation of the text according to given presets.
2.2 How do you animate a picture in Canva?
Users have the ability to choose to animate just the image or animate other elements of the picture. They can also make use of options to edit the image using background remover. This allows seamless integration into the presentation.
Users can simply upload their photos. Choose a stock image or upload an image through your photo gallery to use in your design. You can also choose to use “frames,” which are available under the “Elements” tab in Canva.
Make your photo come alive by animating it. Choose from a variety of innovative animation possibilities by selecting the Animation tool. The duration of the animation can be changed using the stopwatch animation icon. It uses a slider to help in setting the duration of each animation. You can also adjust this manually.
2.3 How do you add music to animation in Canva?
Users can find a section dedicated to “Uploads,” allowing creators to use their audio content. The users can use a soundtrack from one of Canva’s audio libraries. This gives users control over their animation’s impact.
One difference between Canva and Wondershare Filmora is that Canva users can only use one audio per presentation. Filmora allows users to overlay multiple soundtracks to their timeline.
Users can also make use of the Audio Effects feature to create audio for “Echo,” “large room,” “small room,” “lobby,” and “phone.” The preview function can help users experience it live before applying the effect.
Filmora Pro’s Auto-Normalization of audio allows intelligent audio analysis and volume adjustment.
2.4 How do you animate video in Canva?
Canva offers presentations that are similar to the explainer-style videos on Youtube. With more modifications, you can convert the presentation to a video format. You can edit individual elements in the presentation to reflect the project details and outcomes.
You can also introduce transition effects to make the presentation a smooth video. Incorporating the three other elements will be a breeze to make a video with animation.
Another noteworthy thing in Canva is that users can upload their videos or use videos provided in the video library. You can also embed videos within a frame from the “Elements” section in Canva. You can trim the video input on the slide for time. It can be presented as a “loop” video.
Filmora offers all the essential video editing tools in addition to AI-powered features called Auto-Highlight and Auro-Reframe. Auto Highlight is a feature that extracts the highlights from a video clip autonomously.
This will save you time while cutting your movie. It also makes it easier to extract the best moments from the video.
Auto Reframe recognizes as well as crops the focal point of your footage, constantly retaining it in the frame. Your film’s primary action or object will never be out of focus within that technique.
Part 3 Pricing for Canva You Should Know
Canva can be used among a multitude of users and companies. The range of access is from a single person use to teams of fifty. It also allows for a custom selection of a number of people.
Canva can be used as free graphic design software. It does display all available options with a few possibilities marked off for Canva Pro users only.
Canva Pro allows up to 5 users per team. A subscription to Canva Pro costs US $119.99 per annum or US $12.99 per month. Pro users have access to unlimited content and newly released tools.
The only difference between Canva Pro and Canva Enterprise is that Canva Pro is for smaller teams. Canva Enterprise allows collaboration between larger teams and franchises.
Canva also offers free Canva Pro subscriptions to non-profit organizations. Students and teachers are offered a special discount for those in educational programs.
Wondershare Filmora
Get started easily with Filmora’s powerful performance, intuitive interface, and countless effects!
Try It Free Try It Free Try It Free Learn More >
AI Portrait – The best feature of Wondershare Filmora for gameplay editing
The AI Portrait is a new add-on in Wondershare Filmora. It can easily remove video backgrounds without using a green screen or chroma key, allowing you to add borders, glitch effects, pixelated, noise, or segmentation video effects.
Final Words
We’ve covered how to animate graphics in Canva. You can animate individual elements in Canva or automate it on the whole. Canva’s animate button is an automatic tool that revolutionizes the way traditional animation works.
Wondershare’s Filmora is the video editing tool that is easy to use and offer various animation options.
How to Make Whiteboard Animation Videos
Whiteboard animation simply refers to the process of story telling using pictures and drawn resources on a whiteboard or a plane white surface. Its simply the creation of conventional story telling procedure where text, images, diagrams, figures, etc are drawn onto a white surface.
Whiteboard animation video usually work with audio, visual and most times a combination of both audio and visual to sell a particular information to the audience. Another name it has gotten over time which you may come across while surfing the internet is doodle videos.

In creating this type of videos, script writes are usually employed because of the dynamics involved in creating them. The major users of whiteboard animation video are business owners and people in the education fields. Other people make use of it but these two groups are the major users.
Whiteboard animation is important because it helps viewers remember the contents of what they watched better than looking at an image that contains a lot of information that may not always be organized.
Over time, whiteboard videos have become a more compelling and innovative method of dissemination information. They work so well because it’s a more relatable and fun way of making videos. It goes outside the conventional video making techniques and employs the animation standards which is fun to watch, engaging and still maintains the ability to effective pass the required information to the viewers.
Also, it uses a unique style to mix text, animations, and colors to drive the point home. Viewers are usually glued to their screen while watching it. The usual white background equally makes the information being displayed to effective contrast with each other. However, there is a recent movement from the usual white background to any color of choice while still maintaining the contrasting quality of the videos.
Finally, people tend to remember events or information if they are told as stories. This is one of the major objectives of whiteboard animation videos. They use graphics and animations to tell stories, sell products and services while maintaining the fun in it.
Whiteboard animation video usually takes time to create. Its not always as easy as it may seem. It takes dedication and patience before you perfect the video. if you’re new to this, its ok to not have that perfect video immediately. What matters is your will to grow and get better.
Below is an example of a whiteboard animation video created using Animaker. We’ll still look at the various software applications used for creating whiteboard animation videos.
How to Create Your Video
Step1 The first step to creating your whiteboard animation video is to know your topic of choice. Determining your choice topic is based on the purpose of the video. You have to know the reason why the video is being created in the first place to enable you decide the contents, the outlook, the font style and size and the colors to use.
Step2 The next step after you’ve getting your topic is execution of the idea. This involves having a script which usually involves the step-by-step procedure you are to follow to achieve your goal. Writing the script is arguable the most difficult process. However, once you get it right, all the other processes become relatively easy to execute. You might need to employ a professional script writer depending on your budget for the project.
Step3 After that, the next thing is to deicide whether or not to use your own voice or computer voice. This is also called a voice over. Most software provides a text to speech voice over option which usually comes with various alternatives. There is also another option of using your own voice to finish the project.
Step4 Add text, graphics and animation. This step is usually easier when you are working with the script already provided. You include the text, animations, figures, etc. sometimes you might need to import additional resources to complete this task. However, not all software provides for this.
Step5 Organize your work. In organizing your work, you must ensure that you voice over matches properly with what is on display. Check your spellings, grammar, composition and other ‘little’ details that may give your work a bad look.
Step6 Save your work and export. Once your done with your work, you have to save it on your local disk. This also means downloading the work from the website or software onto a local disk. You can now share the video on any social media of your choice. The most popular place to share it is on YouTube which is the most widely used video watching application.
Top 3 Whiteboard Animation Software
When considering which software is best for whiteboard animation creation needs, the most important factor to have at the back of your mind is flexibility and cost. Some software are really flexible to use but cost more than many people can afford. Others are cheap to purchase but do not have all the necessary resources needed to make a great video.
We’ll be looking at various software that combines cost effectiveness and flexibility. Note however that this list is not exhaustive of the software that combines these two features but are worthy of mention for the purpose of this article.
Filmora
At the top of our list is Filmora . This does not make them the best. However, they are relatively easy to use and have a combination of the two features mentioned above. Finally on our list is Filmora. This software offers much more than just whiteboard animation. It’s your go-to software for your video creation and video editing needs. One of the best parts of this software is that it supports 2D and 3D animation.

Free Download For Win 7 or later(64-bit)
Free Download For macOS 10.14 or later
Animaker
It has a lot of free resources which are made available to users after creating and account with them and verifying your email. However, like most other software, the juicy parts of it are locked and can be unlocked with a monthly or yearly subscription. They are 3 packages; Basic which cost $10 per month and $120 per year, starter package which cost $19 per month and $228 per year and the pro package which costs $49 per month and $588 per year.

This software is at the top of our list because the free resources it provides is adequate to make a decent whiteboard animation. Note that it comes with their watermark which cannot be removed without a paid subscription.
Doodly
Doodly is one of the most popular software applications for creating whiteboard videos. Its popularity comes from the fact that no prior skills is needed to use the software other than basic computer and internet usage. A lot of processes are already automated for users. If you’re a user that is concerned about quick responses from their customer care/support, doodly covers you. They have a record time response to issues from their users. Visit https://www.doodly.com/pricing/ to view their pricing.

Conclusion
If you’re wondering why you should chose whiteboard animation over the conventional video creating technique, then you should probably try it out. Animation easily captures the interest of viewers and the slide-by-slide transitioning equally makes it better. You can always try out other software applications to know the one that fits you best.
How to Create Your Video
Step1 The first step to creating your whiteboard animation video is to know your topic of choice. Determining your choice topic is based on the purpose of the video. You have to know the reason why the video is being created in the first place to enable you decide the contents, the outlook, the font style and size and the colors to use.
Step2 The next step after you’ve getting your topic is execution of the idea. This involves having a script which usually involves the step-by-step procedure you are to follow to achieve your goal. Writing the script is arguable the most difficult process. However, once you get it right, all the other processes become relatively easy to execute. You might need to employ a professional script writer depending on your budget for the project.
Step3 After that, the next thing is to deicide whether or not to use your own voice or computer voice. This is also called a voice over. Most software provides a text to speech voice over option which usually comes with various alternatives. There is also another option of using your own voice to finish the project.
Step4 Add text, graphics and animation. This step is usually easier when you are working with the script already provided. You include the text, animations, figures, etc. sometimes you might need to import additional resources to complete this task. However, not all software provides for this.
Step5 Organize your work. In organizing your work, you must ensure that you voice over matches properly with what is on display. Check your spellings, grammar, composition and other ‘little’ details that may give your work a bad look.
Step6 Save your work and export. Once your done with your work, you have to save it on your local disk. This also means downloading the work from the website or software onto a local disk. You can now share the video on any social media of your choice. The most popular place to share it is on YouTube which is the most widely used video watching application.
Top 3 Whiteboard Animation Software
When considering which software is best for whiteboard animation creation needs, the most important factor to have at the back of your mind is flexibility and cost. Some software are really flexible to use but cost more than many people can afford. Others are cheap to purchase but do not have all the necessary resources needed to make a great video.
We’ll be looking at various software that combines cost effectiveness and flexibility. Note however that this list is not exhaustive of the software that combines these two features but are worthy of mention for the purpose of this article.
Filmora
At the top of our list is Filmora . This does not make them the best. However, they are relatively easy to use and have a combination of the two features mentioned above. Finally on our list is Filmora. This software offers much more than just whiteboard animation. It’s your go-to software for your video creation and video editing needs. One of the best parts of this software is that it supports 2D and 3D animation.
Free Download For Win 7 or later(64-bit)
Free Download For macOS 10.14 or later
Animaker
It has a lot of free resources which are made available to users after creating and account with them and verifying your email. However, like most other software, the juicy parts of it are locked and can be unlocked with a monthly or yearly subscription. They are 3 packages; Basic which cost $10 per month and $120 per year, starter package which cost $19 per month and $228 per year and the pro package which costs $49 per month and $588 per year.
This software is at the top of our list because the free resources it provides is adequate to make a decent whiteboard animation. Note that it comes with their watermark which cannot be removed without a paid subscription.
Doodly
Doodly is one of the most popular software applications for creating whiteboard videos. Its popularity comes from the fact that no prior skills is needed to use the software other than basic computer and internet usage. A lot of processes are already automated for users. If you’re a user that is concerned about quick responses from their customer care/support, doodly covers you. They have a record time response to issues from their users. Visit https://www.doodly.com/pricing/ to view their pricing.
Conclusion
If you’re wondering why you should chose whiteboard animation over the conventional video creating technique, then you should probably try it out. Animation easily captures the interest of viewers and the slide-by-slide transitioning equally makes it better. You can always try out other software applications to know the one that fits you best.
How to Create Your Own Avatar Free
How to Create Your Own Avatar Free
An easy yet powerful editor
Numerous effects to choose from
Detailed tutorials provided by the official channel
As a profile image, you can use your Facebook avatar. You can choose from a range of faces, hairstyles, and costumes for your avatar.
This article will help in creating your own avatar app and let you understand how to make your own my little pony avatar.
In this article
01 [Avatar Maker Tutorial | Create your Avatar for Free](#Part 1)
02 [5 Apps to Build Your Avatar](#Part 2)
Part 1 Avatar Maker Tutorial | Create your Avatar for Free
Adobe Creative Cloud Express is an online tool to make your own avatars for free. With Adobe, you can create a handcrafted avatar to match your personality for your social media profiles, YouTube videos, and so much more. Adobe lets you think out of the box, easy as choosing a template and sharing. Let us discuss the steps to create your own avatar for free using Adobe.
![]()
01Step 1: Start with Inspiration
You can never start from an empty canvas; there are several templates available you can choose any one of them by browsing with color, aesthetic, mood, and many other categories to have an idea of creating an avatar. Once you find a suitable graphic, you can click or tap on it starts editing as a document in the editor.
![]()
02Step 2: Remix
You can customize your avatar templates in a variety of ways. Change the font and copy. Substitute your photos for the imagery. Alternatively, you can use Creative Cloud Express to search through thousands of free pictures. Design your own by spending as little time as you wish.
![]()
03Step 3: Amplify Up the Flair
You can be as creative as you can by adding flair and personality to your projects with design assets. Add animated text and GIF to your project in one tap. They have cleared all the other technical issues to focus on your style and message.
![]()
04Step 4: Resize
The days where you have to remember the dimension of the image are gone. Once you have selected the design, you can modify and resize using the Auto magical resize available feature. Duplicate the project, select “Hit Resize,” and choose the platform to adapt it, and our AI will take care of the rest. Enjoy sharing it on other media.
[Well, this feature is a premium feature, so if you wish to access it, you need to do a subscription.]
![]()
05Step 5: Save and Share
Once you have applied all your creativity to your project, click on the “Publish” button and share your creations. Creative Cloud saves your project in your profile so that you can revisit and edit your projects whenever required.
Explore these professional templates to make your own avatar-free. Browse for themes like logos, icons, personalized fonts, and other elements to create an authentic look.
![]()
Part 2 5 Apps to Build Your Avatars
Having your avatar as your profile picture is freaking excellent and fun. There are many apps to create your avatars; let’s discuss some of them.
01Boo App–3D Avatar Emoji
Boo creates 3D characters that look similar to you within minutes. There are plenty of outfit options that can be customized separately for your styles to match your daily fashion. With this app, make your own avatars for free.
Highlights
●It offers a ton of features like skin tones, hair colors, eye colors, and hairstyles
●It assists in making your own my little pony avatar to give a unique style.
●New items are updated regularly.
Limits
●Limited color options
●Background glitch
●Sometimes after clicking the color option, it gets changed.
Review/Ratings
It has a rating of about 4.4 and many good reviews from users.
02Faceq
This application provides multiple facial features and an extensive trendy wardrobe. Even the tiniest characteristics on the face, such as beauty marks, facial hair, and brows, are essential. Hair accessories to make you own my little pony avatar. It looks as beautiful as when you apply your creativity to the maximum level.
Highlights
●Inclusive of many tabs for obvious face form, hairdo, and attire.
●Add more life to your avatars like text bubbles, hand gestures, etc.
●Multiple facial features
Limits
●Limited makeup options
●More dressing options expected
●Some slogans may be inappropriate
Ratings/Review
It has a rating of 3.1
03 SuperMe
This application is mainly for girls, and it offers 1000+ facial expressions and more materials. You can create and share animated videos of your avatars with the world and chat with people to make new friends. You can use this application to create my animated avatar.
Highlights
●There are 100 animations facilities where you can randomly apply by a simple handshake.
●A straightforward procedure to use.
●Multiple Facial expressions.
Limits
●You need to buy coins. It would be good if available for free.
●Primarily for girls
●The limitation of this application is that the language is still in its original language (Chinese).
Ratings/Review
This app has a rating of about 4
04Zmoji
Zmoji, a personal emoji creator, enables chatting with multiple versions of yours, and thus this way, you can make your own my little pony avatar. There are many unique features introduced to create a more appropriate.
Highlights
●It has a simple interface.
●It allows you to build a vivid cartoon avatar that matches your style quickly.
●It has Emoji Keyboard, which will enable you to send emojis directly from your keyboard in iMessage and third-party apps.
Limits
●The app also requires a subscription for some activities, which is disappointing.
●The subscription cost is high.
Ratings/Reviews
This app has a review of about 4.6
05Wondershare Wondershare Filmora Video Editor
To create my animated avatar, you can choose Wondershare Wondershare Filmora Video Editor . It is something magical that allows you to do anything with your photo. Of course, including changing to an avatar or a cartoon character. In this journal, you will see many different ways to make your own avatar for free, but Wondershare Filmora Video Editor offers to be all. It contains many templates, font styles, animation effects, wardrobes, and what less. Wondershare Filmora Video Editor is easier to use; with a few steps, you can create an avatar representing you more accurately than any other software could do.
It just goes with creating layers, liquefying, smoothening and additional features. And simply, you can share it to any social media directly from the software. Wondershare Wondershare Filmora Video Editor is mainly used to create my animated avatar.
Highlights
●Simple and easy interface.
●User friendly
●Multitude of features
Limits
●Advanced version need a subscription
Reviews
4.4 as per user reviews
For Win 7 or later (64-bit)
For macOS 10.12 or later
● Key Takeaways from This Episode →
● Understanding Adobe Creative Cloud Express
● Five different Apps used in creating my animated avatar
● Compared to all other online tools and programs, Wondershare Wondershare Filmora Video Editor is superior.
Top 10 Video to GIF Converters: Top Picks
Best 10 Video to GIF Converters: Top Picks
An easy yet powerful editor
Numerous effects to choose from
Detailed tutorials provided by the official channel
Having trouble converting your videos to GIF? Browse the top 10 converters to sort this out!
In this article
01 [Why GIFs are Widely Used and Popular?](#Part 1)
02 [Top 10 Ways to Turn Video into GIF](#Part 2)
Part 1 Why GIFs are Widely Used and Popular?
If you take a poll on the watch preference of GIF versus videos, most of votes you get would be in favor of watching GIFs. There are obvious reasons to the fact that anyone would prefer watching a GIF over a video, irrespective of its length. Some major ones that make it quite annoying to watch videos include the following:
● To begin with, you need to turn the video on and off, depending on your choice of watching a video or surfing through stories and feeds, failing which you get to hear additional sounds through your feed from the already running video. You further need to stop the music or go for a volume control in case you are not interested to watch the video.
● Most of the videos you run turn up to be irrelevant or uninteresting through the middle, but you don’t have a choice to make bit adjustments. If however possible, the method is not quite convenient. You may need to visit a different site in case you run a video that is not integrated with webpage of your searched content, wait for the portal’s interface to load or watch an advertisement.
● GIFs, on the other hand, do not require pausing or turning off, and run automatically. You also don’t need to mute any sounds. These ensure to-the-point message delivery and don’t divert your attention from the primary content you visit the webpage for.
Owing to the above, most of us are now much interested to convert videos to GIFs for an exact, impactful and to the point content creation and sharing. See through the next sections of this article to learn about the best video to GIF conversion tools and software.
Part 1 Top 10 Ways to Turn Video into GIF
Considering the credibility of GIFs, you may often require to convert your long videos into short and content specific GIFs. Given below are the 10 best methods to cater to the need of video to GIF conversion:
01Filmora
Wondershare Filmora Video Editor is one among the most popular and easy methods to convert videos to GIFs. It is compatible with almost all common video formats and is loaded with a plethora of exciting effects and editing tools. Take the following steps to create GIFs from videos using this application:
Wondershare Filmora
Get started easily with Filmora’s powerful performance, intuitive interface, and countless effects!
Try It Free Try It Free Try It Free Learn More >

Step 1: Import Your Video
Launch Filmora and import your desired video in the app’s welcome window. To do this, click on ‘New Project’ followed by ‘Import’ option from the drop down menu to add your video to the Filmora.

Step 2: Timeline Dragging
Add your video to the app’s timeline using the ‘Drag and Drop’ method. You can also extract video frames by taking screenshots and merge these images into your GIF from the media library.

Step 3: Explore Your Editing Skills
You can now edit the imported video in the timeline using a range of interesting effects. Crop, trim, split or make speed adjustments to give your video a catchy look.

Step 4: Include Messages
Try adding texts and supplementary elements to deliver impactful messages through your creation.

Step 5: It’s Time to Share!
Click ‘Export’ to save your GIF to your device. You are now ready to post your work in your social communities to get the most deserved attention of your peers!

02YouTube to GIF
This one is a simple and user-friendly video to GIF converter. You can convert videos to GIFs from your PC or other online platforms with this converter. The converter allows you to play with a variety of editing effects to make your creation more interesting. All you need to do is the following:
● In the video URL bar, type ‘gif’ after ‘www.’ and you will be redirected to converter’s working window. Set the GIF time interval or apply specific effects using the tools from the panel in the left of the working window.


● To set the video time frame, highlight it in the video timeline. Set the desired interval using the ‘Start Time’ and ‘End Time’ options.

● To add a new visual effect, select it from the menu. Below the video timeline, a row of parameters will get displayed. Set the effect parameters to make desired changes.
● Click ‘Create GIF’. In the ‘Settings’ menu, you can rename and add tags to your creation and even make it private.

● That’s it! You can download your GIF now. You may get a converter purchase offer for enabling advanced features. While most users prefer sticking to the free version, it is up to you whether to decline or accept the purchase offer.
● The ‘Download’ feature is exclusive to registered users. However, if you don’t prefer creating an account, just open the GIF download link in a separate tab’s ‘Direct Link’ row. Alternatively, you can replace ‘gif’ with ‘conv’ in the video URL bar and choose ‘Convert to GIF’. However, this process may take some extra minutes.

03Giphy GIF Maker
This is an editing tool that you can use to convert video to GIF online. This one is a reliable converter tool with a user-cohesive interface. It is a simple video editor that is available to you for free. All you need to do is mentioned below:
Step 1: Load your Video
Go to the official app website and paste your desired video link in the search bar. Your video gets uploaded to the app’s editor screen. Specify the time frame and check out your GIF’s preview.

Step 2: Let’s Go Editing!
Select ‘Continue to Decorate’ to edit your GIF with texts, effects, frames and filters. You can even go for a straight upload if your video doesn’t require customization.

Step 3: Time to Share!
Select ‘Continue to Upload’ and add required tags. Tap ‘Upload to Giphy’ to make a social media post or add it to the app’s website through a specific share code.
04Wondershare TunesGo
This is an effective video to GIF creator tool, loaded with extensive features. You can use this application to convert videos, live photos and multiple snaps into interesting GIFs. TunesGo gives you the freedom to edit your work in your own style with a variety of effects. Here’s what you need to do:

Step 1: Launch TunesGo
Download, install and launch the app into your PC. You may be asked for a device connection setup, but you can skip that in case GIF creation is your only requirement.

Step 2: Upload your Video
In the app’s welcome screen, navigate to ‘Toolbox’ at the top. From the drop down interface, choose ‘GIF Maker’. In the new window that pops-up next, click on ‘Add’ to upload the desired video to the app from your PC.

Step 3: Let’s Create!
Set the required time frame for your GIF in the app’s timeline and tap the ‘Create GIF’ button to start the conversion process. On completion, your work gets automatically saved in the ‘Pictures’ folder in your PC. You can also customize your target location.

05Vimeo
Vimeo is also a quick, 3-stepvideo to GIF converter. However, you need to have a Vimeo account to take up the conversion process. This is an easy and hassle free GIF creator, that adheres to your creation needs within minutes. Here’s what you need to do:
Step 1: Upload Your Video
Log in to your Vimeo account. In the opening window, select ’Upload’ from the toolbar at the top. ‘Drag and Drop’ or click ‘Choose Files’ to upload the desired video from your device.

Step 2: Create Your GIF
After you are done uploading the video, select ‘Create a GIF’ from the sidebar at the left. You will be directed to the GIF Editor window. Select a loop section from the video and set a time frame of maximum 6 seconds in the video timeline. Now click ‘Create GIF’.


Step 3: Export Your Creation
Your GIF is ready to download and share. You can also embed your GIF by generating embed codes for specific platforms.
06 Adobe Photoshop
This one is one f the most popular editing applications you can use to make GIF out of video. It’s simple and user-friendly interface does not require you to possess a Photoshop mastery for the conversion purpose. Here’s what you need to follow:
Step 1: Search Your Video
Find a video of your choice from a desired platform. In case you want a YouTube video, add ‘ss’ prior to the video’s service name in YouTube’s URL bar.
STEP 2: Edit Your Video
Use any preferable video splitters and editors to crop, trim and add interesting effects to your video and set a maximum time frame of 3 seconds.
Step 3: Create GIF
Open your edited video in Adobe Photoshop and tap ‘File Import-Video frames into layers’.

Step 4: Adjust Settings
Make required setting adjustments and click on ‘File-Save for Web’. Try adjusting image resolution and color range if your file size exceeds 10 MB.

Step 5: Save Your Work
In the ’Files’ tab at the top, select ‘Save’ and choose the ‘.gif’ extension in the ‘File Type’ dialog box to save your creation to your PC.
07Convertio
This converter provides a simple, 3-step process to create GIF from video. Either use it as a browser extension or download it from Google Chrome Webstore. Take the following steps to convert videos to GIF online.
● Upload your desired video to the service timeline. You can either choose files directly or ‘Drag and Drop’ them from your device.
● Select ‘Convert’ to make GIF from your uploaded video.
● Tap ‘Download’ to save your creation.

You can use this service to make different format conversions. However, this converter does not allow you to edit or add effects your GIF.
08MakeAGif
You can use this tool as a GIF video maker online to create, exchange and share GIFs on different platforms. Additionally, you also get the flexibility to use already saved images in your device to add them to your GIF. The app’s basic version allows you to create GIFs without watermarks. To add watermarks, you will need an account on the app. To convert videos to GIFs using this tool, you should take the following steps:
Step 1: Upload Your Video
In the app’s welcome screen, click on ‘Video to GIF’ and upload a desired video in the editor timeline. Add effects and make speed and time frame adjustments. When satisfied, tap ‘Continue to Publishing’.

Step 2: Add Names and Tags
In the publishing window, give a suitable name and add required tags to your edited video to make it easily identifiable. When you are done, click on ‘Create a GIF’ from the bottom right.

Step 3: Ready to Share!
You can now share your created GIF across social media platforms.

09Adobe Premiere
Similar to Adobe Photoshop, Adobe Premiere too is quite a preferred application for creating GIFs from videos. This is a simple, quick and free application that converts your videos to GIFs in a span of few minutes. Here’s what you need to do to go about the process:

Step 1: Edit your Video
Add a video of your choice in the Adobe Premiere timeline and play with your editing creativity to add desired effects and filters to it. Make sure to set requisite time frames to your edit.

Step 2: Prepare an Export
Click into the app’s video timeline, and prepare a file export using the following path:
File> Export> Media

Step 3: Settings Adjustments
In the Media Export window, navigate to the ‘Format’ tab. From the drop down menu, choose ‘Animated GIF’. Here, you can add your gif file, select its target destination and adjust the required settings.

Step 4: Export Your Work
Click ‘Export’ to share your creation on social media or click on ‘Queue’ to send your GIF to a specific media encoder.

1010. Movavi Video Converter
This is one of the latest video converter software you can rely on to make GIF from video files. This software allows you to create top quality animated GIFs and is compatible with a variety of video formats. Using this converter, you can create amazing GIFs in 5 quick steps: here’s what you need to follow:
Step 1: Download and Install the Software
To begin, download the converter software from its official site and adhere to the user instructions to install the same in your system.
Step 2: Upload Your Video
In the software’s opening window, click on ‘Add Media’ followed by ‘Add Video’ and select a desired video from your system to upload on the Movavi video timeline.

Step 3: Trim Your Video
Select ‘Edit’ from the right of your video file. In the editing window, specify the initial cut of the video by displacing the marker to the desired point. Click on ‘Scissors’ to add multiple cut points to your video. You can even drag the cut points around the editor timeline. Choose the unvented sections and click ‘Trash Can’. When the result satisfies you, click ‘Done’.

Step 4: Choose a Conversion Format
Navigate to the ‘Images’ tab and select ‘GIF’ and set an adequate size for the GIF. Here, you can adjust quality, frame size and rate and resize method using the ‘Cogwheel’ tool.

Step 5: Let’s Get Converting!
Tap ‘Convert’ and wait for the conversion to finish. You will be automatically directed to the folder where your converted files get saved.

● Key Takeaways from This Episode →
● GIFs are short, to the point and convenient to access, providing exact and impactful message delivery.
● The software market is flooded with a variety of editing tools to convert your dull videos to catchy GIFs.
● Filmora is a quick and smart editing tool that envisages your GIF creating experience with a range of exciting features.
Having trouble converting your videos to GIF? Browse the top 10 converters to sort this out!
In this article
01 [Why GIFs are Widely Used and Popular?](#Part 1)
02 [Top 10 Ways to Turn Video into GIF](#Part 2)
Part 1 Why GIFs are Widely Used and Popular?
If you take a poll on the watch preference of GIF versus videos, most of votes you get would be in favor of watching GIFs. There are obvious reasons to the fact that anyone would prefer watching a GIF over a video, irrespective of its length. Some major ones that make it quite annoying to watch videos include the following:
● To begin with, you need to turn the video on and off, depending on your choice of watching a video or surfing through stories and feeds, failing which you get to hear additional sounds through your feed from the already running video. You further need to stop the music or go for a volume control in case you are not interested to watch the video.
● Most of the videos you run turn up to be irrelevant or uninteresting through the middle, but you don’t have a choice to make bit adjustments. If however possible, the method is not quite convenient. You may need to visit a different site in case you run a video that is not integrated with webpage of your searched content, wait for the portal’s interface to load or watch an advertisement.
● GIFs, on the other hand, do not require pausing or turning off, and run automatically. You also don’t need to mute any sounds. These ensure to-the-point message delivery and don’t divert your attention from the primary content you visit the webpage for.
Owing to the above, most of us are now much interested to convert videos to GIFs for an exact, impactful and to the point content creation and sharing. See through the next sections of this article to learn about the best video to GIF conversion tools and software.
Part 1 Top 10 Ways to Turn Video into GIF
Considering the credibility of GIFs, you may often require to convert your long videos into short and content specific GIFs. Given below are the 10 best methods to cater to the need of video to GIF conversion:
01Filmora
Wondershare Filmora Video Editor is one among the most popular and easy methods to convert videos to GIFs. It is compatible with almost all common video formats and is loaded with a plethora of exciting effects and editing tools. Take the following steps to create GIFs from videos using this application:
Wondershare Filmora
Get started easily with Filmora’s powerful performance, intuitive interface, and countless effects!
Try It Free Try It Free Try It Free Learn More >
Step 1: Import Your Video
Launch Filmora and import your desired video in the app’s welcome window. To do this, click on ‘New Project’ followed by ‘Import’ option from the drop down menu to add your video to the Filmora.
Step 2: Timeline Dragging
Add your video to the app’s timeline using the ‘Drag and Drop’ method. You can also extract video frames by taking screenshots and merge these images into your GIF from the media library.
Step 3: Explore Your Editing Skills
You can now edit the imported video in the timeline using a range of interesting effects. Crop, trim, split or make speed adjustments to give your video a catchy look.
Step 4: Include Messages
Try adding texts and supplementary elements to deliver impactful messages through your creation.
Step 5: It’s Time to Share!
Click ‘Export’ to save your GIF to your device. You are now ready to post your work in your social communities to get the most deserved attention of your peers!
02YouTube to GIF
This one is a simple and user-friendly video to GIF converter. You can convert videos to GIFs from your PC or other online platforms with this converter. The converter allows you to play with a variety of editing effects to make your creation more interesting. All you need to do is the following:
● In the video URL bar, type ‘gif’ after ‘www.’ and you will be redirected to converter’s working window. Set the GIF time interval or apply specific effects using the tools from the panel in the left of the working window.
● To set the video time frame, highlight it in the video timeline. Set the desired interval using the ‘Start Time’ and ‘End Time’ options.
● To add a new visual effect, select it from the menu. Below the video timeline, a row of parameters will get displayed. Set the effect parameters to make desired changes.
● Click ‘Create GIF’. In the ‘Settings’ menu, you can rename and add tags to your creation and even make it private.
● That’s it! You can download your GIF now. You may get a converter purchase offer for enabling advanced features. While most users prefer sticking to the free version, it is up to you whether to decline or accept the purchase offer.
● The ‘Download’ feature is exclusive to registered users. However, if you don’t prefer creating an account, just open the GIF download link in a separate tab’s ‘Direct Link’ row. Alternatively, you can replace ‘gif’ with ‘conv’ in the video URL bar and choose ‘Convert to GIF’. However, this process may take some extra minutes.
03Giphy GIF Maker
This is an editing tool that you can use to convert video to GIF online. This one is a reliable converter tool with a user-cohesive interface. It is a simple video editor that is available to you for free. All you need to do is mentioned below:
Step 1: Load your Video
Go to the official app website and paste your desired video link in the search bar. Your video gets uploaded to the app’s editor screen. Specify the time frame and check out your GIF’s preview.
Step 2: Let’s Go Editing!
Select ‘Continue to Decorate’ to edit your GIF with texts, effects, frames and filters. You can even go for a straight upload if your video doesn’t require customization.
Step 3: Time to Share!
Select ‘Continue to Upload’ and add required tags. Tap ‘Upload to Giphy’ to make a social media post or add it to the app’s website through a specific share code.
04Wondershare TunesGo
This is an effective video to GIF creator tool, loaded with extensive features. You can use this application to convert videos, live photos and multiple snaps into interesting GIFs. TunesGo gives you the freedom to edit your work in your own style with a variety of effects. Here’s what you need to do:
Step 1: Launch TunesGo
Download, install and launch the app into your PC. You may be asked for a device connection setup, but you can skip that in case GIF creation is your only requirement.
Step 2: Upload your Video
In the app’s welcome screen, navigate to ‘Toolbox’ at the top. From the drop down interface, choose ‘GIF Maker’. In the new window that pops-up next, click on ‘Add’ to upload the desired video to the app from your PC.
Step 3: Let’s Create!
Set the required time frame for your GIF in the app’s timeline and tap the ‘Create GIF’ button to start the conversion process. On completion, your work gets automatically saved in the ‘Pictures’ folder in your PC. You can also customize your target location.
05Vimeo
Vimeo is also a quick, 3-stepvideo to GIF converter. However, you need to have a Vimeo account to take up the conversion process. This is an easy and hassle free GIF creator, that adheres to your creation needs within minutes. Here’s what you need to do:
Step 1: Upload Your Video
Log in to your Vimeo account. In the opening window, select ’Upload’ from the toolbar at the top. ‘Drag and Drop’ or click ‘Choose Files’ to upload the desired video from your device.
Step 2: Create Your GIF
After you are done uploading the video, select ‘Create a GIF’ from the sidebar at the left. You will be directed to the GIF Editor window. Select a loop section from the video and set a time frame of maximum 6 seconds in the video timeline. Now click ‘Create GIF’.
Step 3: Export Your Creation
Your GIF is ready to download and share. You can also embed your GIF by generating embed codes for specific platforms.
06 Adobe Photoshop
This one is one f the most popular editing applications you can use to make GIF out of video. It’s simple and user-friendly interface does not require you to possess a Photoshop mastery for the conversion purpose. Here’s what you need to follow:
Step 1: Search Your Video
Find a video of your choice from a desired platform. In case you want a YouTube video, add ‘ss’ prior to the video’s service name in YouTube’s URL bar.
STEP 2: Edit Your Video
Use any preferable video splitters and editors to crop, trim and add interesting effects to your video and set a maximum time frame of 3 seconds.
Step 3: Create GIF
Open your edited video in Adobe Photoshop and tap ‘File Import-Video frames into layers’.
Step 4: Adjust Settings
Make required setting adjustments and click on ‘File-Save for Web’. Try adjusting image resolution and color range if your file size exceeds 10 MB.
Step 5: Save Your Work
In the ’Files’ tab at the top, select ‘Save’ and choose the ‘.gif’ extension in the ‘File Type’ dialog box to save your creation to your PC.
07Convertio
This converter provides a simple, 3-step process to create GIF from video. Either use it as a browser extension or download it from Google Chrome Webstore. Take the following steps to convert videos to GIF online.
● Upload your desired video to the service timeline. You can either choose files directly or ‘Drag and Drop’ them from your device.
● Select ‘Convert’ to make GIF from your uploaded video.
● Tap ‘Download’ to save your creation.
You can use this service to make different format conversions. However, this converter does not allow you to edit or add effects your GIF.
08MakeAGif
You can use this tool as a GIF video maker online to create, exchange and share GIFs on different platforms. Additionally, you also get the flexibility to use already saved images in your device to add them to your GIF. The app’s basic version allows you to create GIFs without watermarks. To add watermarks, you will need an account on the app. To convert videos to GIFs using this tool, you should take the following steps:
Step 1: Upload Your Video
In the app’s welcome screen, click on ‘Video to GIF’ and upload a desired video in the editor timeline. Add effects and make speed and time frame adjustments. When satisfied, tap ‘Continue to Publishing’.
Step 2: Add Names and Tags
In the publishing window, give a suitable name and add required tags to your edited video to make it easily identifiable. When you are done, click on ‘Create a GIF’ from the bottom right.
Step 3: Ready to Share!
You can now share your created GIF across social media platforms.
09Adobe Premiere
Similar to Adobe Photoshop, Adobe Premiere too is quite a preferred application for creating GIFs from videos. This is a simple, quick and free application that converts your videos to GIFs in a span of few minutes. Here’s what you need to do to go about the process:
Step 1: Edit your Video
Add a video of your choice in the Adobe Premiere timeline and play with your editing creativity to add desired effects and filters to it. Make sure to set requisite time frames to your edit.
Step 2: Prepare an Export
Click into the app’s video timeline, and prepare a file export using the following path:
File> Export> Media
Step 3: Settings Adjustments
In the Media Export window, navigate to the ‘Format’ tab. From the drop down menu, choose ‘Animated GIF’. Here, you can add your gif file, select its target destination and adjust the required settings.
Step 4: Export Your Work
Click ‘Export’ to share your creation on social media or click on ‘Queue’ to send your GIF to a specific media encoder.
1010. Movavi Video Converter
This is one of the latest video converter software you can rely on to make GIF from video files. This software allows you to create top quality animated GIFs and is compatible with a variety of video formats. Using this converter, you can create amazing GIFs in 5 quick steps: here’s what you need to follow:
Step 1: Download and Install the Software
To begin, download the converter software from its official site and adhere to the user instructions to install the same in your system.
Step 2: Upload Your Video
In the software’s opening window, click on ‘Add Media’ followed by ‘Add Video’ and select a desired video from your system to upload on the Movavi video timeline.
Step 3: Trim Your Video
Select ‘Edit’ from the right of your video file. In the editing window, specify the initial cut of the video by displacing the marker to the desired point. Click on ‘Scissors’ to add multiple cut points to your video. You can even drag the cut points around the editor timeline. Choose the unvented sections and click ‘Trash Can’. When the result satisfies you, click ‘Done’.
Step 4: Choose a Conversion Format
Navigate to the ‘Images’ tab and select ‘GIF’ and set an adequate size for the GIF. Here, you can adjust quality, frame size and rate and resize method using the ‘Cogwheel’ tool.
Step 5: Let’s Get Converting!
Tap ‘Convert’ and wait for the conversion to finish. You will be automatically directed to the folder where your converted files get saved.
● Key Takeaways from This Episode →
● GIFs are short, to the point and convenient to access, providing exact and impactful message delivery.
● The software market is flooded with a variety of editing tools to convert your dull videos to catchy GIFs.
● Filmora is a quick and smart editing tool that envisages your GIF creating experience with a range of exciting features.
Top Tips for Effortless Unity 3D Animation
Top Tips for Effortless Unity 3D Animation
An easy yet powerful editor
Numerous effects to choose from
Detailed tutorials provided by the official channel
Unity 3D animation will be our topic in this article. This will help develop your knowledge of the animation systems in Unity.
Unity 3D character animation is an enlisted brand name of Unity Technologies and game creation. With its peculiar highlights, strong evaluating, and extraordinary abilities for computer games, it has stood out enough to be noticed by the game development community.
In this article
01 [What’s Unity 3D Animation and Why is It Popular?](#Part 1)
02 [How to Create Animations in Unity 3D?](#Part 2)
Part 1 What’s Unity 3D Animation and Why is It Popular?
Animation Unity 3D is the most popular and powerful tool to animate any animation you like.
● Unity provides a more creative iteration platform to realize your vision as fast as possible.
● Unity has broader integration. It works out of the box and creates a real-time workflow custom-made for a project.
● Unity supports a more comprehensive production to make it possible to render shorts, videos, and films to create in days instead of months.
● Unity has an intelligent decision-making feature to discover the errors while doing the process and make corrections soon before it is too late.
● Unity animation 3Dhas a high creation scale like building, reusing and integrating to create more new projects quickly.
● Unity delivers smooth collaboration, allowing the artist to share the project and see their changes immediately, reducing error and miscommunications.
01Do You Think You Know What Unity Animation Is?
Animation unity 3D is a very vast tool with many new things to learn. Everyone can know Unity with proper basics, training, and experiences. There are various tutorials by Unity and many other people sharing their knowledge through the internet.
02Is Unity Good for 3D Animation?
Unity is used chiefly for Unity 3D skeletal animations and complex 3D animations like videos and games. There would be a retouch of Unity when you notice any video games or animation videos. It contains excellent inbuilt coding like C# and JavaScript for scripting. Easy and quick importing for audio, video, and text format as a complete package.
Part 2 How to Create Animations in Unity 3D?
Unity 3D animation highlights incorporate animations, complete control of movements, the occasion of animation playback, refined state machine hierarchies, transitions, mix shapes for facial animations.
01Fix 1: How to Animate Characters in Unity 3D
This YouTube channel explains more about Unity 3D. He starts with an introduction about Unity, tools about Unity 3D character animation like animation controller, looping animation, root motion, and different modes in animation with Unity 3D.
He focuses on Unity 3D character animation fundamentals and lets us understand how and why it works.
02Fix 2: Creating Character Animation in Unity
This video is all about creating procedural character animations in unity by using unity 3D skeletal animation. An archery game is the concept of this youtube video. He focuses on the movement of the bow to the target with rigging techniques.
Unity 3D Character animation mainly focuses on the avatar. Some default avatars, or others, can be imported as files into Unity.
03Fix 3: How to animate in Unity 3D
In this Unity tutorial, you’ll figure out how to animate from top to bottom the whole way. It will cover every one of the basics you want to get everything rolling with activity in Unity 3D.
04Fix 4: Unity 3D Animation for Beginners
This channel teaches Unity animation 3D to beginners, starting with importing a cube into the field and oscillating it. A brief video of 6 minutes but covers most of the tools and ideas about Unity.
05Fix 5: The Animator Controller
This tutorial is from the official Unity themselves explaining about Unity 3D character animation controller. Animation controllers are tools that determine the animations currently being played and blended. Unity channel demonstrates how to make animation controllers and apply different animations to different states.
06Fix 6: Creating simple and easy Animation
This tutorial by Jimmy Vegas on creating simple and easy animation using Unity 3D animation is approximately 7 minutes which explains unity version 2018.3 but mainly applies to almost all the new versions. The tutorial talks about simple animations and controls that will be helpful to learn many tools in unity.
Are you still looking for some other better 3D animation software? If you want to have many controls of 3D animation videos here, we introduce Wondershare Filmora. You simply have to create a white keyframe to start making an animation. Filmora offers six different keyframes to perform smooth and natural animation. And also, tools like autocorrect and auto mixer bring the animation to the next level. Various tutorial videos available on YouTube and Wondershare Filmora Video Editor wesbite have posted different manuals to guide the users.
For Win 7 or later (64-bit)
For macOS 10.12 or later
This video explains how to make an animation video in Fimora with a step-by-step procedure for defining the tools clearly. A 16 minutes video explained every process in many other videos that teach Filmora better and more informative.
Key Takeaways from This Episode
● We learned that Unity animation 3D is a toolset that enhances physics, entertainment, audio, graphic, interaction, and networking and has fast integrated game development speeds. Excellent and easy 3D grounded platform and audio engine. The disadvantage of Unity is it does not provide any source code, and performance issues are hard to find. It fines additional cost for a mobile pro license for practical deployments.
● Although there are many software’s available in the animation market, only a few can be trusted. So, whenever there is confusion regarding which 3D animation software to use, you can blindly choose Filmora. It has a wide range of assistance like preset animation effects, interface access, multiple tracks to add various videos, and totally as a package make Filmora the best alternative to Unity 3D skeletal animation. Just a little practice and experience can make you perfect.
Ways You Can Master to Make Claymation Videos
Ways You Can Master to Make Claymation Videos
An easy yet powerful editor
Numerous effects to choose from
Detailed tutorials provided by the official channel
Claymation videos appear to be more appealing as compared to other graphical or pictorial videos we create. However, some people still believe that making such a video is not their forte and that they cannot achieve mastery in the field.
So, if you have the same question and want to learn how to make a claymation video quickly and easily, stay tuned with us. In this article, we are covering all the relevant details to help you create the best claymation video possible and the outcome will be as expected. Let’s get started!
In this article
01 [What is Claymation and How It Works](#Part 1)
02 [History of Claymation Movies](#Part 2)
03 [6 Best Claymation Videos of All Time](#Part 3)
04 [How to Make Claymation Videos](#Part 4)
Part 1 What is Claymation and How It Works
With the name Claymation, you might be thinking that there is a use of clay in creating such videos. Well, you are right. These videos are representations of stop-motion animation, which is created with the help of plasticine clay.
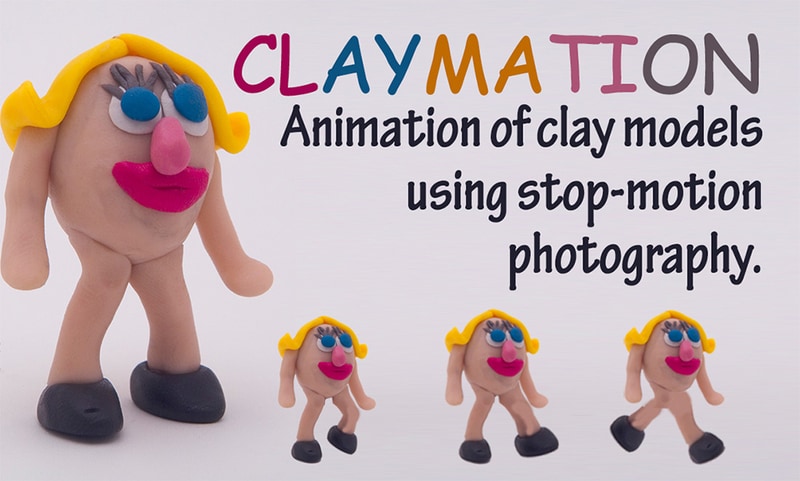
The use of platicsine is not only restricted to the animated characters, but these are also considered for creating the ultimate surroundings. The videos are recorded in such a manner that synchronization must be established with background and character, and viewers will be able to enjoy the same. After creating the videos, they are played in quick succession to get the right appearance of the movement.
Part 2 History of Claymation Movies
01The Beginning of Claymation Movies
Well, you will be surprised to know that the Claymation videos came into existence after the introduction of plasticine. It was founded in 189and since then, clamaytion videos have been able to find their way to silver screens. In earlier times, people used to dip their toes into color and then try to create artwork. But with innovation, the process has been changed and the oldest known extant clay animation film is Long Live the Bull (1926) by Joseph Sunn. The main procedure for creating this film is Claymation.

In the 190as well, there were some productions going on considering the claymation work, and some turned out to be successful, while some had no existence after that. For example, “Animated Putty” (1911), a historic feature by Walter R. Booth, dates back. So, yes, one can consider that this has existed for a very long time.
025 Famous Claymation Examples Over the Years
If we start exploring through some of the best examples of the past, you will be surprised to know that there are some claymation videos that still hit the top of the list of best movies around. These are as follows:
● The Nightmare Before Christmas
● The Life Aquatic with Steve Zissou
● Coraline
● The PJs
And there are some more that excel at utilizing claymation and teaching users how to make a claymation video. Some movies belong to the comedy genre, and some are related to fiction only through having a combination of friendship and others.
03A Look into the Art of Claymation for Film and Video Projects
Claymation has been around for a long time, and it’s becoming more popular. Small projects and big budget features alike are finding new and innovative ways to combine traditional models with other digital filmmaking methodologies like character animation, green screens, etc.
You can see that the team behind Missing Link went to great lengths to create an incredible looking production. They used both practical rigging systems and green screens as props. They used live-action footage and computer animation for more complex water and action sequences. All of them make it more appealing to the audience.
There are a lot of different ways you might want to get into claymation. Hand-drawn stop animation has seen an increase in popularity lately, with people looking for new ways to explore it. Drawing frames by hand is a really satisfying experience, not only because you have the chance to explore your interests and have some fun with them, but also because it pushes you creatively to explore new limits.
So yes, it is right to conclude that there is a great scope for claymation video production and one must be aware of claymation animators to try their hands on it.
Part 3 6 Best Claymation Videos of All Time
People have the curiosity to know the best claymation videos all the time. Well, according to us, the videos you can consider are as follows:
01The Boxtrolls
The Boxtrolls turned out to be one of the best Claymation movies produced to date.The response that was received was not overwhelming, but it came up with a unique setting of clay models and the animation given to this movie was perfect. Also, it received the chance to be premiered during the Venice Film Festival 2014.
02Paranorman
Paranorman is among those claymation movies which cannot be the result of the dark effort put in by the producers. This movie focuses on children. It has different characters integrated, and the printed faces for each character have been utilized. This movie set good records, and children were very happy after seeing it on screen.
03Chicken run
Chicken Run was not the well-known Claymation video of the time, which was intended to be original cinematic peace. There was collaboration between Dreamworks and others to get this exceptional movie available on screen. The storey was so heart-touching, it’s no wonder it received a good response. Due to the availability of technology at that time, this movie was not able to set good records, but after it, most people are aware of the same.
04Consuming Spirits
Consuming spirits come into consideration in 201and it is a story about three residents of a small rust belt town. They are somewhere, living an interconnected life, and things are not fine with them. Also, they are confused about how to fix things for a better lifestyle.

05A town called panic
A town called Panic came into existence in 200and it is an animated movie about a cowboy and an Indian. They are planning to construct a barbecue pit for the birthday but are facing a lot of difficulties in doing so. But somehow they managed to do so. The concept of this movie is quite different as compared to other Claymation movies.
06The Year without a Santa Claus
The Year without a Santa Claus came into existence in 200This movie is focused on the spot where Santa Claus has taken off for the year and others are trying to save Christmas after this announcement. There is a lot more integrated in this movie to watch.
Part 4 How to Make Claymation Videos
If you are looking forward to trying your hands on claymation videos, do it now as this is very simple. For this, you only require a claymation animator like Wondershare Filmora Video Editor for the same. But before choosing it out, be sure to know the steps that will help you make the video easily.
Wondershare Filmora
Get started easily with Filmora’s powerful performance, intuitive interface, and countless effects!
Try It Free Try It Free Try It Free Learn More >
The steps you need to follow are:
Step 1 Make yourself available to the Claymation Animator (you can use Filmora for this task) and sign up for it.
Step 2 Now, to start the project, you need to lockout the photos that are under consideration for creating the project.
Step 3 Arrange all the photos in a sequential order or say whatever you want, and do the editing, considering the speed and other effects.
Step 4 After setting up the effects, review the same for finalization.
Step 5 After finalizing the effects, save the same.
These are the simple steps to follow if you want to create Claymation videos.
Well, as we have discussed Filmora, this is one of the best tools available to help you create claymation videos easily. This tool has an easy-to-use and navigate interface and will assist you in achieving your desired results.
Also, you will be happy to know that an abundance of features have been added to it, making it one of the most considerable tools to have. So, yes, if you are looking for how to create claymation videos, try it now and be ready to get the expected outcome.
● Key Takeaways from This Episode →
● Claymation videos are getting more digitalized.
● Filmora is one of the best claymation animators to use.
● Claymation videos can be edited easily and customised by the user easily.
Claymation videos appear to be more appealing as compared to other graphical or pictorial videos we create. However, some people still believe that making such a video is not their forte and that they cannot achieve mastery in the field.
So, if you have the same question and want to learn how to make a claymation video quickly and easily, stay tuned with us. In this article, we are covering all the relevant details to help you create the best claymation video possible and the outcome will be as expected. Let’s get started!
In this article
01 [What is Claymation and How It Works](#Part 1)
02 [History of Claymation Movies](#Part 2)
03 [6 Best Claymation Videos of All Time](#Part 3)
04 [How to Make Claymation Videos](#Part 4)
Part 1 What is Claymation and How It Works
With the name Claymation, you might be thinking that there is a use of clay in creating such videos. Well, you are right. These videos are representations of stop-motion animation, which is created with the help of plasticine clay.
The use of platicsine is not only restricted to the animated characters, but these are also considered for creating the ultimate surroundings. The videos are recorded in such a manner that synchronization must be established with background and character, and viewers will be able to enjoy the same. After creating the videos, they are played in quick succession to get the right appearance of the movement.
Part 2 History of Claymation Movies
01The Beginning of Claymation Movies
Well, you will be surprised to know that the Claymation videos came into existence after the introduction of plasticine. It was founded in 189and since then, clamaytion videos have been able to find their way to silver screens. In earlier times, people used to dip their toes into color and then try to create artwork. But with innovation, the process has been changed and the oldest known extant clay animation film is Long Live the Bull (1926) by Joseph Sunn. The main procedure for creating this film is Claymation.
In the 190as well, there were some productions going on considering the claymation work, and some turned out to be successful, while some had no existence after that. For example, “Animated Putty” (1911), a historic feature by Walter R. Booth, dates back. So, yes, one can consider that this has existed for a very long time.
025 Famous Claymation Examples Over the Years
If we start exploring through some of the best examples of the past, you will be surprised to know that there are some claymation videos that still hit the top of the list of best movies around. These are as follows:
● The Nightmare Before Christmas
● The Life Aquatic with Steve Zissou
● Coraline
● The PJs
And there are some more that excel at utilizing claymation and teaching users how to make a claymation video. Some movies belong to the comedy genre, and some are related to fiction only through having a combination of friendship and others.
03A Look into the Art of Claymation for Film and Video Projects
Claymation has been around for a long time, and it’s becoming more popular. Small projects and big budget features alike are finding new and innovative ways to combine traditional models with other digital filmmaking methodologies like character animation, green screens, etc.
You can see that the team behind Missing Link went to great lengths to create an incredible looking production. They used both practical rigging systems and green screens as props. They used live-action footage and computer animation for more complex water and action sequences. All of them make it more appealing to the audience.
There are a lot of different ways you might want to get into claymation. Hand-drawn stop animation has seen an increase in popularity lately, with people looking for new ways to explore it. Drawing frames by hand is a really satisfying experience, not only because you have the chance to explore your interests and have some fun with them, but also because it pushes you creatively to explore new limits.
So yes, it is right to conclude that there is a great scope for claymation video production and one must be aware of claymation animators to try their hands on it.
Part 3 6 Best Claymation Videos of All Time
People have the curiosity to know the best claymation videos all the time. Well, according to us, the videos you can consider are as follows:
01The Boxtrolls
The Boxtrolls turned out to be one of the best Claymation movies produced to date.The response that was received was not overwhelming, but it came up with a unique setting of clay models and the animation given to this movie was perfect. Also, it received the chance to be premiered during the Venice Film Festival 2014.
02Paranorman
Paranorman is among those claymation movies which cannot be the result of the dark effort put in by the producers. This movie focuses on children. It has different characters integrated, and the printed faces for each character have been utilized. This movie set good records, and children were very happy after seeing it on screen.
03Chicken run
Chicken Run was not the well-known Claymation video of the time, which was intended to be original cinematic peace. There was collaboration between Dreamworks and others to get this exceptional movie available on screen. The storey was so heart-touching, it’s no wonder it received a good response. Due to the availability of technology at that time, this movie was not able to set good records, but after it, most people are aware of the same.
04Consuming Spirits
Consuming spirits come into consideration in 201and it is a story about three residents of a small rust belt town. They are somewhere, living an interconnected life, and things are not fine with them. Also, they are confused about how to fix things for a better lifestyle.
05A town called panic
A town called Panic came into existence in 200and it is an animated movie about a cowboy and an Indian. They are planning to construct a barbecue pit for the birthday but are facing a lot of difficulties in doing so. But somehow they managed to do so. The concept of this movie is quite different as compared to other Claymation movies.
06The Year without a Santa Claus
The Year without a Santa Claus came into existence in 200This movie is focused on the spot where Santa Claus has taken off for the year and others are trying to save Christmas after this announcement. There is a lot more integrated in this movie to watch.
Part 4 How to Make Claymation Videos
If you are looking forward to trying your hands on claymation videos, do it now as this is very simple. For this, you only require a claymation animator like Wondershare Filmora Video Editor for the same. But before choosing it out, be sure to know the steps that will help you make the video easily.
Wondershare Filmora
Get started easily with Filmora’s powerful performance, intuitive interface, and countless effects!
Try It Free Try It Free Try It Free Learn More >
The steps you need to follow are:
Step 1 Make yourself available to the Claymation Animator (you can use Filmora for this task) and sign up for it.
Step 2 Now, to start the project, you need to lockout the photos that are under consideration for creating the project.
Step 3 Arrange all the photos in a sequential order or say whatever you want, and do the editing, considering the speed and other effects.
Step 4 After setting up the effects, review the same for finalization.
Step 5 After finalizing the effects, save the same.
These are the simple steps to follow if you want to create Claymation videos.
Well, as we have discussed Filmora, this is one of the best tools available to help you create claymation videos easily. This tool has an easy-to-use and navigate interface and will assist you in achieving your desired results.
Also, you will be happy to know that an abundance of features have been added to it, making it one of the most considerable tools to have. So, yes, if you are looking for how to create claymation videos, try it now and be ready to get the expected outcome.
● Key Takeaways from This Episode →
● Claymation videos are getting more digitalized.
● Filmora is one of the best claymation animators to use.
● Claymation videos can be edited easily and customised by the user easily.
What Is A GIF
What Is A GIF

Shanoon Cox
Mar 27, 2024• Proven solutions
GIF stands for Graphic Interchange Format and this animated graphic image can be usually found on web pages. They appear like a twirling icon or a banner or just have few letters that go larger like a magic. Note that animated GIF file is actually specified as a GIF89a and this single file use to contain so many images inside a particular folder. The fact is that this group of images use to follow an endless loop on screen and it creates a feel like document never ends and frames keep on arriving on screen. In few cases, it may follow one or two looped sequences and then animation stops automatically. These animated GIF files are commonly used on social media platform as well as for web ad banners.

What is a GIF?
As we already discussed, GIF stands for Graphic Interchange Format. It is a useful file extension for an animated raster file and is second most popular image file format throughout the world. You might be aware that JPEG is on first ranking at World Wide Web.
In technical terms, GIF makes sue of LZW compression algorithm whose owner is Unisys. Note that, Unisys follows particular licensing statements so users need to have license before using GIF images. But in regular practices, most of the web developers or file downloader’s keep on ignoring this licensing term and they are using it freely. Hence GIF’s have proposed a patent free kind of replacement via PNG.
If you want to make GIF online, Filmora meme maker is your ultimate solution. It helps you make image, GIF and video memes directly without watermark. It is totally FREE to use and no sign up. You can change text size, color and position to create caption when you are editing. You can also put text inside or outside in GIF. Try it now!
Application of GIF
You may easily find numerous GIF files on social media. These day’s people are using them commonly to entertain audience on their pages or channels. They are also being used for active conversations in comments or replies. Many people are utilizing GIFs just to convey unique reactions on internet at different channels. They are commonly used for illustrations and one of the most prominent applications is in the business world for marketing needs. It can help to explain your business products with entertainment and increased user engagement. The artistic world of GIFs can easily boost your customers online.
Many big brands these days are using GIF files to add a breathtaking moment to internet for their targeted audience and these small sized files are definitely do miracles. Actually popularity of GIF’s and their ability to deliver content interactively has revolutionized the world. That is why GIFs these days use to define Lexicon of internet and Oxford dictionary has recently decided to add this GIF to their list of words. In the world of art, GIF images have received great attention and most of art galleries or popular institutions are making use of GIFs to showcase incredible art work of their talented graphic artists.
How to make a GIF?
Now you might be interested to create your own GIF. Actually market is loaded with so many tools to do so. You can make use of Adobe Photoshop too or some other popular software are KickmyGraphics, Photoscape, Microsoft GIF Animator etc. If we talk about online tools then gifmaker.me, Ezgif.com and Giphy are the common options. It is also much easier to find GIF creator applications for smartphones, the list of some popular applications include: Gif Studio, Gif Me Camera air GIFBOOM for Android users whereas iPhone users can download GIFX, Daycap, MyFace When, Giffer etc.
It is possible to develop gifs from collection of still images or even from moving videos and this task is much easier that anyone can perform. In order to execute this task with ease, we would like to recommend Wondershare Filmora for you. The reason behind this recommendation is the simple and most interactive interface of this software tool. Using Filmora, you can easily combine number of stills into GIFs or turn small videos into GIFs. The more interesting thing is that Filmora also allows easy customization of Gifs as users can add overlays, elements and text etc to their GIFs using Filmora platform.


How to make GIFs with Wondershare Filmora
Here are few simple to execute steps to accomplish this task:
1. Import media files
The very first task for users is to import some editable video file or collection of photos to timeline of Wondershare Filmora. This software tool extends support to more than 150 media file formats so you can easily upload any of your image ranging somewhere between png, jpg, avi, mpeg, wav, mkv, mp4 or wmv etc.
2. Drag to timeline
Users can simply drag their video/image file and drop it on Filmora timeline. Once your file reaches there then it can be edited using wide range of tools.

3. Edit media files
There are unlimited editing options with so many interesting features of Filmora. Users can easily pick anything like slow down, speed up, combine, rotate, split, crop etc. to develop eye catching video as per available content.
4. Add text effect to GIF files
It is right time to update text based information to your GIFs. Few small messages always appear good in GIFs.

5. Save and export
Once you are done with all these steps then simply save your file with GIF extension and it is now ready to get uploaded on social media platforms.

Check this video tutorial to know more details:
Download Mac Version ](https://tools.techidaily.com/wondershare/filmora/download/ )
Shanoon Cox
Shanoon Cox is a writer and a lover of all things video.
Follow @Shanoon Cox
Shanoon Cox
Mar 27, 2024• Proven solutions
GIF stands for Graphic Interchange Format and this animated graphic image can be usually found on web pages. They appear like a twirling icon or a banner or just have few letters that go larger like a magic. Note that animated GIF file is actually specified as a GIF89a and this single file use to contain so many images inside a particular folder. The fact is that this group of images use to follow an endless loop on screen and it creates a feel like document never ends and frames keep on arriving on screen. In few cases, it may follow one or two looped sequences and then animation stops automatically. These animated GIF files are commonly used on social media platform as well as for web ad banners.
What is a GIF?
As we already discussed, GIF stands for Graphic Interchange Format. It is a useful file extension for an animated raster file and is second most popular image file format throughout the world. You might be aware that JPEG is on first ranking at World Wide Web.
In technical terms, GIF makes sue of LZW compression algorithm whose owner is Unisys. Note that, Unisys follows particular licensing statements so users need to have license before using GIF images. But in regular practices, most of the web developers or file downloader’s keep on ignoring this licensing term and they are using it freely. Hence GIF’s have proposed a patent free kind of replacement via PNG.
If you want to make GIF online, Filmora meme maker is your ultimate solution. It helps you make image, GIF and video memes directly without watermark. It is totally FREE to use and no sign up. You can change text size, color and position to create caption when you are editing. You can also put text inside or outside in GIF. Try it now!
Application of GIF
You may easily find numerous GIF files on social media. These day’s people are using them commonly to entertain audience on their pages or channels. They are also being used for active conversations in comments or replies. Many people are utilizing GIFs just to convey unique reactions on internet at different channels. They are commonly used for illustrations and one of the most prominent applications is in the business world for marketing needs. It can help to explain your business products with entertainment and increased user engagement. The artistic world of GIFs can easily boost your customers online.
Many big brands these days are using GIF files to add a breathtaking moment to internet for their targeted audience and these small sized files are definitely do miracles. Actually popularity of GIF’s and their ability to deliver content interactively has revolutionized the world. That is why GIFs these days use to define Lexicon of internet and Oxford dictionary has recently decided to add this GIF to their list of words. In the world of art, GIF images have received great attention and most of art galleries or popular institutions are making use of GIFs to showcase incredible art work of their talented graphic artists.
How to make a GIF?
Now you might be interested to create your own GIF. Actually market is loaded with so many tools to do so. You can make use of Adobe Photoshop too or some other popular software are KickmyGraphics, Photoscape, Microsoft GIF Animator etc. If we talk about online tools then gifmaker.me, Ezgif.com and Giphy are the common options. It is also much easier to find GIF creator applications for smartphones, the list of some popular applications include: Gif Studio, Gif Me Camera air GIFBOOM for Android users whereas iPhone users can download GIFX, Daycap, MyFace When, Giffer etc.
It is possible to develop gifs from collection of still images or even from moving videos and this task is much easier that anyone can perform. In order to execute this task with ease, we would like to recommend Wondershare Filmora for you. The reason behind this recommendation is the simple and most interactive interface of this software tool. Using Filmora, you can easily combine number of stills into GIFs or turn small videos into GIFs. The more interesting thing is that Filmora also allows easy customization of Gifs as users can add overlays, elements and text etc to their GIFs using Filmora platform.
How to make GIFs with Wondershare Filmora
Here are few simple to execute steps to accomplish this task:
1. Import media files
The very first task for users is to import some editable video file or collection of photos to timeline of Wondershare Filmora. This software tool extends support to more than 150 media file formats so you can easily upload any of your image ranging somewhere between png, jpg, avi, mpeg, wav, mkv, mp4 or wmv etc.
2. Drag to timeline
Users can simply drag their video/image file and drop it on Filmora timeline. Once your file reaches there then it can be edited using wide range of tools.
3. Edit media files
There are unlimited editing options with so many interesting features of Filmora. Users can easily pick anything like slow down, speed up, combine, rotate, split, crop etc. to develop eye catching video as per available content.
4. Add text effect to GIF files
It is right time to update text based information to your GIFs. Few small messages always appear good in GIFs.
5. Save and export
Once you are done with all these steps then simply save your file with GIF extension and it is now ready to get uploaded on social media platforms.
Check this video tutorial to know more details:
Download Mac Version ](https://tools.techidaily.com/wondershare/filmora/download/ )
Shanoon Cox
Shanoon Cox is a writer and a lover of all things video.
Follow @Shanoon Cox
Also read:
- Updated 10 Scary Anime Girls That Will Make You Creepy for 2024
- How to Make GIF Stickers for WhatsApp 100 The Easy Way
- Updated How to Become a Motion Graphic Designer for 2024
- 5 Best Adobe Animate Courses & Classes
- New In 2024, 8 Blender 3D Animation Tutorials
- Updated 2024 Approved How to Cartoonize Photo Photoshop in Easy Steps
- Updated All About Types of Motion Graphics for 2024
- Adobe Auto Rigger Is AWESOME
- 2024 Approved Learn How to Create Adobe 3D Animation
- New 2024 Approved Whats Your No. 1 Maker to Animate Your Logo Online Free
- New 2024 Approved The Best 8 Places for High-Quality Royalty Free Gifs
- Ways on How to Liven Up Your Animate Website on Scroll
- In 2024, What Is Still Motion Animation?
- Updated 2024 Approved How to Make Creative Animation Videos
- New In 2024, 18 Best Tools and Services to Create Animated Videos for Your Business
- Updated Interesting Fundamentals and Ultimate Guide to Animated Characters Drawings for 2024
- 2024 Approved Some Must-Know Useful Lego Animation Ideas
- Updated 15 Best Collage Makers to Create Aesthetic Collages
- Updated Whiteboard Animation Services Top 15 Animation Companies to Pick
- 10 Best Tools to Make Pic Collage for Windows
- New In 2024, Best 10 Old Cartoons From Cartoon Network That You Miss
- 2024 Approved How-To Guide Secret Shortcut to Adobe Animate Character Tutorial
- Best Pokemons for PVP Matches in Pokemon Go For Realme GT 5 | Dr.fone
- New Master Amazon Live Features, Pro Tips and Future Trends
- In 2024, Fixing Foneazy MockGo Not Working On Vivo Y17s | Dr.fone
- Easy steps to recover deleted music from Motorola Moto G34 5G
- In 2024, Top 7 Skype Hacker to Hack Any Skype Account On your Gionee F3 Pro | Dr.fone
- 6 Proven Ways to Unlock Huawei Nova Y71 Phone When You Forget the Password
- How to Spy on Text Messages from Computer & Motorola Defy 2 | Dr.fone
- In 2024, Overview of the Best Oppo A59 5G Screen Mirroring App | Dr.fone
- Top 4 Android System Repair Software for Infinix Note 30 5G Bricked Devices | Dr.fone
- In 2024, How to Track a Lost Samsung Galaxy F15 5G for Free? | Dr.fone
- Fixing Persistent Pandora Crashes on OnePlus Ace 2 | Dr.fone
- Title: How To Animate Graphics in Canva for 2024
- Author: Elon
- Created at : 2024-05-19 03:04:50
- Updated at : 2024-05-20 03:04:50
- Link: https://animation-videos.techidaily.com/how-to-animate-graphics-in-canva-for-2024/
- License: This work is licensed under CC BY-NC-SA 4.0.
