
:max_bytes(150000):strip_icc():format(webp)/Flack-6b3c3167132c467db22bae39689c44ef.jpg)
How to Cartoonize Photo Photoshop in Easy Steps
How to Cartoonize Photo Photoshop in Easy Steps
How to Cartoonize Photo Photoshop in Easy Steps
An easy yet powerful editor
Numerous effects to choose from
Detailed tutorials provided by the official channel
Cartoons, an already catchy entertainment source, can upgrade other media utilities on integration. Look through the easiest ways of creating cartoonize photo Photoshop stills!
In this article
01 [Types of Cartoon Effects in Photoshop](#Part 1)
02 [Easiest Ways to Cartoonize Photo in Photoshop](#Part 2)
03 [How to Use a Variety of Photoshop Special Effects to Create the Final Caricature Look](#Part 3)
Part 1 Types of Cartoon Effects in Photoshop
It is an absolute fun activity to explore your editing creativity in the realm of cartoonizing the otherwise ordinary still captures. Talking of the most convenient cartoon creator and editor applications, you can safely rely on the Photoshop Image Editor application to choose from a pool of cartoon editing effects for adding that spunky and funny element to your image files.
Presented in the following section, is a discussion of some of the most stunning and visibly amazing cartoon effects in the application’s Editor Library to cartoonize Photoshop images:
01Pop Art Photoshop Action
The effect is a predominantly preferred as a cartoon action Photoshop utility to caricaturize a normal image, along with customizing the same to change the colors and background of the original still capture for creating a brand new appearance with utmost ease. Apart from this, the aforesaid effect allows you to exclusively customize the globally acclaimed graphic masterpieces of Roy Lichtenstein. Working with the effect, you can edit a self-portrait or the favorite image of your pet to give the latter, a funny retro feel.

02Vintage Comic Creator
If the idea of sticking to just the creation of cartoon images is not enough to satisfy you, the Vintage Comic Creator effect allows you to expand your creativity level to work on cartoon based shape and text edits. You can use the effect to enhance an image logo or plain text with a comic book oriented text. A download of this cartoon effect template facilitates you with diversities of customizable layer styles, overlays and patterns.

03GTA Photoshop Action
This is a complete pleasure for the creative fan of Grand Theft Auto, the wicked chasing game series. Additional to creating a stark variety of edited cartoon stills, you are free to reinvent the aforesaid game’s most popular caricature edits, while using the GTA Photoshop Action editing filter. Launched by Indworks, the effect package consisting of 15 vibrant themes and 5 collage templates; promises a quick mimicry of your most cherished video and console games.

04Vector Paint Photoshop Action
The one is an amazing Photoshop effect for creating cartoon edits, which works through a merger of two different ingenious art themes or styles for transforming basic images into cartoonized stills.
The effect grants you the liberty to use varieties of art styles, such as, comic, photo retouching and energetic oil to obtain editing results comparable to that of any original photograph. The template is conveniently simple to use and assures you of quick results. All this, just at a nominal price of $6! Interesting, right?

05Ultra Realistic 3D Space Effect
Considering the fact of you being a space admirer, this one is the perfect image editor for you to add the vibrancy of stunning space elements and backgrounds within your cartoonized edits. The effect lets you play with the diverse range of customizable text and exciting caricature backgrounds. When downloading the template, you get a main setup file, a few editing examples and a web link to the free fonts present in the effect.

06Animated Zombie Grime Art Photoshop Action
Are you in love with the latest zombie grimes? If yes, then this action set is exclusive editor package for you. Working with the aforesaid image template, you can effortlessly add the perfect zombie theme to your cartoon edits, along with simultaneously creating a stunning animation, which you can use to enhance your video or GIF uploads on social media. Not forgetting the best part, you get a free access to this amazing utility.

Part 2 Easiest Ways to Cartoonize Photo in Photoshop
Having known about the amazing varieties of cartoonized editor templates in Photoshop, it is a natural instinct to feel motivated to create your own caricature images from normal capture stills. Addressing the concern of image transformation methods to turn a photo into a cartoon Photoshop, let us dive into some of the most affordable methods of creating cartoonized photos in the aforesaid editing application.
Talking of the most basic Photoshop tools for creating caricature images, you can start your editing spree with using the Graphic Tablet, Brush Tool, Layer Masks and a graphic pen to create amateur cartoonized edits from your still photographs, getting a full control on image tracing.
01Brush Tool
A few usage examples include working with a combination of the graphic tablet pen and the editor brushes to trace your image, using the brush in a masked or a fresh layer to avoid altering the actual image, and much more.
02Graphic Tablet
It is best to use the Photoshop Graphic Tablet for adhering to the concern of tracing cartoonized images. You can alternatively cater to the job with a trackpad, mouse, or even your hand. It is however, difficult to assure steady hand postures for image tracing, lest you are using a stylus pen.
03Pen Tool
Using the Pen Tool for cartoonizing your portrait, allows you to draw outlines along the desired figure within the image, along with its important elements, so that you can easily use these outlined paths to introduce different color blocks.
Similar to the Brush Tool, the Photoshop Pen utility grants you the freedom to vary the degree of detailing in your cartoon edit, from being highly expressive to only remaining around the shore. Working with the Pen Tool can, however be a bit tiring and time taking, with respect to the extent of detailing you wish to add to the caricature edits.
Additional to the aforementioned tools, you can also consider using the default image filters of the Photoshop application to get comparable results. This is an exclusively better option to choose, compared to the Pen Tool, when you are working without a Graphic Tablet. To get over the top realistic caricature renderings, you will need to supplement the use of Photoshop filters with the application’s editing channels and other adjustments.
Part 3 How to Use a Variety of Photoshop Special Effects to Create the Final Caricature Look
Considering the extensive discussion on the credibility of the Photoshop Image Editor application in the realm of creating stunning caricature images in high end resolution, let us proceed to learn about using the diversity of Photoshop’s special effects to get the last stage cartoonized appearance of ordinary still images.
User’s Guide to Create High End Cartoonized Look
The following tutorial is a stepwise explanation of the process to convert photo into cartoon Photoshop in the easiest possible way. Stick to the method for getting affordable results in a quick span.
Step 1: Download and Launch the Program
Visit the official website of Photoshop Image Editor for a free download of the software program in your system, followed by installing and launching the same in your device.
Step 2: Upload Your Image
On a successful launch of the editor program, you will be directed to the ‘Photoshop Editor’ window, where you are required to upload any desired still image from your device for creating a cartoonized edit. To do this, either simply add your image to the editor workspace using the ‘Drag and Drop’ method, or navigate to the ‘File’ tab in the top toolbar and click on ‘Open’ in the dropdown menu.
Step 3: Edge Enhancement
Once your image appears in the editor timeline, proceed to sharpen the edges of the face and body of the portrait. Start with navigating to and clicking on the ‘Filter’ option, followed by tapping on ‘Filter Gallery’ and selecting the ‘Artistic’ folder, where you need to choose the ‘Poster Edges’ option. Observe the effect of these setting on the portrait and make necessary changes.

Step 4: Background Setting
Ensure that the background and foreground of your image are set to white and black colors respectively. If not, proceed to adjust the same as required.

Step 5: Distorting the Edges
You now need to introduce some distortion in the edges of your portrait. Navigate to the ‘Filter’ option again, open the ‘Filter Gallery’ and choose ‘Torn Edges’ from the menu that drops down. Select the desired parameter values in accordance with your creative suitability.


Step 6: Using the Channels Panel
The next step is to select and copy your portrait using the ‘Ctrl + A’ and Ctrl + C commands respectively. Navigate to the ‘Channels’ panel at the right of the Photoshop workspace. At the panel’s bottom right, proceed with creating a new channel. It will be assigned the name ‘Alpha 1’ by Photoshop, which you are most welcome to change.


Step 7: Color Inversion
When you finish creating the channel, use the ‘Ctrl + V’ command to paste your portrait in the same. Proceed with inverting the image colors by navigating to the ‘Image’ option, followed by choosing the ‘Adjustment’ and ‘Invert’ options from the consecutive drop downs. Now, make a selection of the ‘White’ regions of your portrait by pressing the ‘Ctrl’ key and clicking on the ‘Alpha 1 Channel thumbnail.

Step 8: Layer Creation
Navigate to the ‘Layers’ panel at the right of the Photoshop workspace, and click on the ‘New Layer’ icon for creating a fresh layer. Fill the just created layer with black color, either by pressing ‘g’ from your system’s keyboard, or using the ‘Paint Bucket’ tool. Don’t forget to assign a suitable name to the layer.

Repeat the above process to create a separate layer and e fill the same with white color. The layer creation process is essential to separate the white and black colors of the actual image.

Step 10: Layer Dragging
In the ‘Layers’ panel, drag the ‘Black’ layer above the ‘White’ one.

Step 11: Creating Additional Layers
You are now required to create three more layers, with the same process as for the above two, for adding effects to the Skin, Clothes and Teeth/Eyes of the portrait. When you finish creation, assign suitable names to the layers, followed by dragging them below the ‘Black’ one within the ‘Layers’ panel.

Step 12: Color Selection and Application
Choose the respective colors for the clothes, skin and teeth/eyes of the cartoonized edit. To proceed with color application, navigate to the toolbar at the left of the Photoshop workspace and choose the ‘Brush Tool’. Finally, choose a particular layer and apply careful brush strokes to add color to the specific area of the portrait that you wish to edit. Follow the same process to add colors to the remaining layers to get the desired result in all areas of your cartoonized edit.

Step 13: Using the Gradient Tool
Navigate to the ‘Layers’ panel again and create a new ‘Gradient’ layer to further enhance your creation. You now need to select the ‘Gradient Tool’ from the toolbar at the left of the Photoshop workspace. The ‘Gradient Editor’ pops up with the continuously running ‘Gradient Bar’, as soon as you make the selection. Double click on the gradient boxes at both ends to select them, followed by making your color choices. Tap on ‘OK’ when you are satisfied with your work.

Step 14: Filling the Gradients
To proceed with gradient filling, press and hold the mouse button on the image at the bottom left and continue to drag the cursor to its top right corner. Leave the mouse and navigate to the ‘Layers’ panel for dragging and dropping the ‘Gradient’ layer above the ‘White’ layer.

You are now done with the process of creating a caricature edit from a normal still portrait. Your final image output will appear something like the following:

Cartoons, an already catchy entertainment source, can upgrade other media utilities on integration. Look through the easiest ways of creating cartoonize photo Photoshop stills!
In this article
01 [Types of Cartoon Effects in Photoshop](#Part 1)
02 [Easiest Ways to Cartoonize Photo in Photoshop](#Part 2)
03 [How to Use a Variety of Photoshop Special Effects to Create the Final Caricature Look](#Part 3)
Part 1 Types of Cartoon Effects in Photoshop
It is an absolute fun activity to explore your editing creativity in the realm of cartoonizing the otherwise ordinary still captures. Talking of the most convenient cartoon creator and editor applications, you can safely rely on the Photoshop Image Editor application to choose from a pool of cartoon editing effects for adding that spunky and funny element to your image files.
Presented in the following section, is a discussion of some of the most stunning and visibly amazing cartoon effects in the application’s Editor Library to cartoonize Photoshop images:
01Pop Art Photoshop Action
The effect is a predominantly preferred as a cartoon action Photoshop utility to caricaturize a normal image, along with customizing the same to change the colors and background of the original still capture for creating a brand new appearance with utmost ease. Apart from this, the aforesaid effect allows you to exclusively customize the globally acclaimed graphic masterpieces of Roy Lichtenstein. Working with the effect, you can edit a self-portrait or the favorite image of your pet to give the latter, a funny retro feel.
02Vintage Comic Creator
If the idea of sticking to just the creation of cartoon images is not enough to satisfy you, the Vintage Comic Creator effect allows you to expand your creativity level to work on cartoon based shape and text edits. You can use the effect to enhance an image logo or plain text with a comic book oriented text. A download of this cartoon effect template facilitates you with diversities of customizable layer styles, overlays and patterns.
03GTA Photoshop Action
This is a complete pleasure for the creative fan of Grand Theft Auto, the wicked chasing game series. Additional to creating a stark variety of edited cartoon stills, you are free to reinvent the aforesaid game’s most popular caricature edits, while using the GTA Photoshop Action editing filter. Launched by Indworks, the effect package consisting of 15 vibrant themes and 5 collage templates; promises a quick mimicry of your most cherished video and console games.
04Vector Paint Photoshop Action
The one is an amazing Photoshop effect for creating cartoon edits, which works through a merger of two different ingenious art themes or styles for transforming basic images into cartoonized stills.
The effect grants you the liberty to use varieties of art styles, such as, comic, photo retouching and energetic oil to obtain editing results comparable to that of any original photograph. The template is conveniently simple to use and assures you of quick results. All this, just at a nominal price of $6! Interesting, right?
05Ultra Realistic 3D Space Effect
Considering the fact of you being a space admirer, this one is the perfect image editor for you to add the vibrancy of stunning space elements and backgrounds within your cartoonized edits. The effect lets you play with the diverse range of customizable text and exciting caricature backgrounds. When downloading the template, you get a main setup file, a few editing examples and a web link to the free fonts present in the effect.
06Animated Zombie Grime Art Photoshop Action
Are you in love with the latest zombie grimes? If yes, then this action set is exclusive editor package for you. Working with the aforesaid image template, you can effortlessly add the perfect zombie theme to your cartoon edits, along with simultaneously creating a stunning animation, which you can use to enhance your video or GIF uploads on social media. Not forgetting the best part, you get a free access to this amazing utility.
Part 2 Easiest Ways to Cartoonize Photo in Photoshop
Having known about the amazing varieties of cartoonized editor templates in Photoshop, it is a natural instinct to feel motivated to create your own caricature images from normal capture stills. Addressing the concern of image transformation methods to turn a photo into a cartoon Photoshop, let us dive into some of the most affordable methods of creating cartoonized photos in the aforesaid editing application.
Talking of the most basic Photoshop tools for creating caricature images, you can start your editing spree with using the Graphic Tablet, Brush Tool, Layer Masks and a graphic pen to create amateur cartoonized edits from your still photographs, getting a full control on image tracing.
01Brush Tool
A few usage examples include working with a combination of the graphic tablet pen and the editor brushes to trace your image, using the brush in a masked or a fresh layer to avoid altering the actual image, and much more.
02Graphic Tablet
It is best to use the Photoshop Graphic Tablet for adhering to the concern of tracing cartoonized images. You can alternatively cater to the job with a trackpad, mouse, or even your hand. It is however, difficult to assure steady hand postures for image tracing, lest you are using a stylus pen.
03Pen Tool
Using the Pen Tool for cartoonizing your portrait, allows you to draw outlines along the desired figure within the image, along with its important elements, so that you can easily use these outlined paths to introduce different color blocks.
Similar to the Brush Tool, the Photoshop Pen utility grants you the freedom to vary the degree of detailing in your cartoon edit, from being highly expressive to only remaining around the shore. Working with the Pen Tool can, however be a bit tiring and time taking, with respect to the extent of detailing you wish to add to the caricature edits.
Additional to the aforementioned tools, you can also consider using the default image filters of the Photoshop application to get comparable results. This is an exclusively better option to choose, compared to the Pen Tool, when you are working without a Graphic Tablet. To get over the top realistic caricature renderings, you will need to supplement the use of Photoshop filters with the application’s editing channels and other adjustments.
Part 3 How to Use a Variety of Photoshop Special Effects to Create the Final Caricature Look
Considering the extensive discussion on the credibility of the Photoshop Image Editor application in the realm of creating stunning caricature images in high end resolution, let us proceed to learn about using the diversity of Photoshop’s special effects to get the last stage cartoonized appearance of ordinary still images.
User’s Guide to Create High End Cartoonized Look
The following tutorial is a stepwise explanation of the process to convert photo into cartoon Photoshop in the easiest possible way. Stick to the method for getting affordable results in a quick span.
Step 1: Download and Launch the Program
Visit the official website of Photoshop Image Editor for a free download of the software program in your system, followed by installing and launching the same in your device.
Step 2: Upload Your Image
On a successful launch of the editor program, you will be directed to the ‘Photoshop Editor’ window, where you are required to upload any desired still image from your device for creating a cartoonized edit. To do this, either simply add your image to the editor workspace using the ‘Drag and Drop’ method, or navigate to the ‘File’ tab in the top toolbar and click on ‘Open’ in the dropdown menu.
Step 3: Edge Enhancement
Once your image appears in the editor timeline, proceed to sharpen the edges of the face and body of the portrait. Start with navigating to and clicking on the ‘Filter’ option, followed by tapping on ‘Filter Gallery’ and selecting the ‘Artistic’ folder, where you need to choose the ‘Poster Edges’ option. Observe the effect of these setting on the portrait and make necessary changes.
Step 4: Background Setting
Ensure that the background and foreground of your image are set to white and black colors respectively. If not, proceed to adjust the same as required.
Step 5: Distorting the Edges
You now need to introduce some distortion in the edges of your portrait. Navigate to the ‘Filter’ option again, open the ‘Filter Gallery’ and choose ‘Torn Edges’ from the menu that drops down. Select the desired parameter values in accordance with your creative suitability.
Step 6: Using the Channels Panel
The next step is to select and copy your portrait using the ‘Ctrl + A’ and Ctrl + C commands respectively. Navigate to the ‘Channels’ panel at the right of the Photoshop workspace. At the panel’s bottom right, proceed with creating a new channel. It will be assigned the name ‘Alpha 1’ by Photoshop, which you are most welcome to change.
Step 7: Color Inversion
When you finish creating the channel, use the ‘Ctrl + V’ command to paste your portrait in the same. Proceed with inverting the image colors by navigating to the ‘Image’ option, followed by choosing the ‘Adjustment’ and ‘Invert’ options from the consecutive drop downs. Now, make a selection of the ‘White’ regions of your portrait by pressing the ‘Ctrl’ key and clicking on the ‘Alpha 1 Channel thumbnail.
Step 8: Layer Creation
Navigate to the ‘Layers’ panel at the right of the Photoshop workspace, and click on the ‘New Layer’ icon for creating a fresh layer. Fill the just created layer with black color, either by pressing ‘g’ from your system’s keyboard, or using the ‘Paint Bucket’ tool. Don’t forget to assign a suitable name to the layer.
Repeat the above process to create a separate layer and e fill the same with white color. The layer creation process is essential to separate the white and black colors of the actual image.
Step 10: Layer Dragging
In the ‘Layers’ panel, drag the ‘Black’ layer above the ‘White’ one.
Step 11: Creating Additional Layers
You are now required to create three more layers, with the same process as for the above two, for adding effects to the Skin, Clothes and Teeth/Eyes of the portrait. When you finish creation, assign suitable names to the layers, followed by dragging them below the ‘Black’ one within the ‘Layers’ panel.
Step 12: Color Selection and Application
Choose the respective colors for the clothes, skin and teeth/eyes of the cartoonized edit. To proceed with color application, navigate to the toolbar at the left of the Photoshop workspace and choose the ‘Brush Tool’. Finally, choose a particular layer and apply careful brush strokes to add color to the specific area of the portrait that you wish to edit. Follow the same process to add colors to the remaining layers to get the desired result in all areas of your cartoonized edit.
Step 13: Using the Gradient Tool
Navigate to the ‘Layers’ panel again and create a new ‘Gradient’ layer to further enhance your creation. You now need to select the ‘Gradient Tool’ from the toolbar at the left of the Photoshop workspace. The ‘Gradient Editor’ pops up with the continuously running ‘Gradient Bar’, as soon as you make the selection. Double click on the gradient boxes at both ends to select them, followed by making your color choices. Tap on ‘OK’ when you are satisfied with your work.
Step 14: Filling the Gradients
To proceed with gradient filling, press and hold the mouse button on the image at the bottom left and continue to drag the cursor to its top right corner. Leave the mouse and navigate to the ‘Layers’ panel for dragging and dropping the ‘Gradient’ layer above the ‘White’ layer.
You are now done with the process of creating a caricature edit from a normal still portrait. Your final image output will appear something like the following:
Ways to Make Sure You Get the Most up to Date Cartoon Character Design Tips
Ways to Make Sure You Get the Most up to Date Cartoon Character Design Tips
An easy yet powerful editor
Numerous effects to choose from
Detailed tutorials provided by the official channel
Making an overall excellent and unique character design cartoon art style is sometimes hard. The truth is that everyone has a favorite cartoon character, but the question is, how does this character come to life? While you are about to start copying other well-known cartoon or comic characters, you will eventually branch out and come with your own. In addition, there are several ways to come up with ideas for cartoon characters’ concept art to draw. Any of these ways can get you started on populating your world of cartoons.
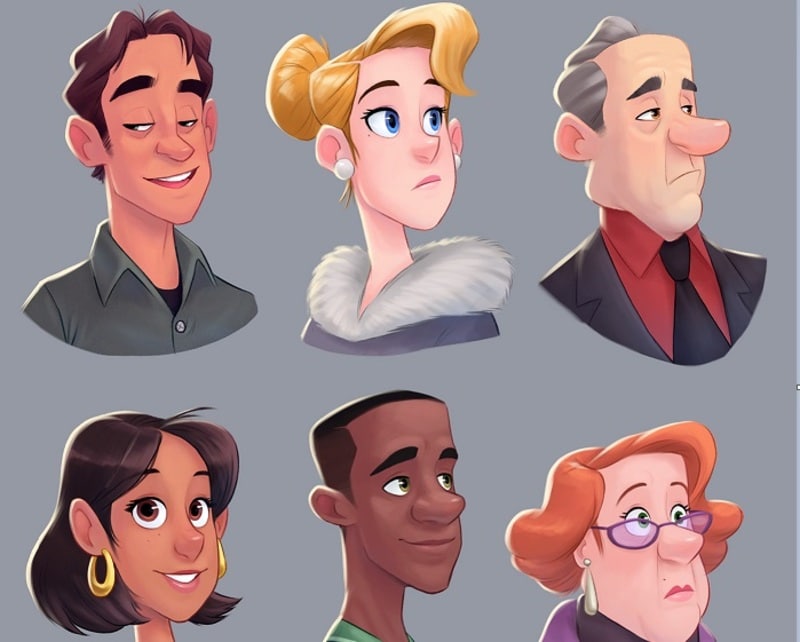
More so, the process of tackling your character design is often full of hurdles. This process requires a lot of creative thinking to create one’s character from the beginning, although many well-known characters from films, advertising, and cartoons look straightforward. But need to exert a vast amount of skill and effort to make them effective.
In this article
01 [10 Tips for Brilliant Cartoon Character Design](#Part 1)
02 [How to Apply Cartoon Character Design to Filmora Video Editing?](#Part 2)
Part 1 Tips for Brilliant Cartoon Character Design
As a cartoon character designer, here are 10 tips you need to put in place to make a brilliant cartoon character design. They are;
● Do not lose the magic
Make sure you try not to polish all the charm from your characters. Many character designers usually begin their project with a sketch and agree that this is often where the essence of the character gets captured. Therefore, when you start working up a design, make sure you do not lose that magic.
The first thing is to decide what you are trying to communicate and then create loose sketches with flow, acting, and movement. As soon as you tighten up the drawing, some of the dynamics will automatically loosen, so it is crucial to have as much life in the early stages as possible. In addition, movement is all but impossible to add later. Thus, you need to ensure that it is in the initial sketch.
● Avoid reference material
Although inspiration needs to come from somewhere, the aim is to create something original, and you shouldn’t have the reference material right in front of you as you work.
Also, if you take a look at something and when you try and hazily remember it in your mind, that is when you can end up making something new, rather than making a pastiche of something.
● Make research on other characters
For guidance purposes, it can be much help when you try to deconstruct why certain character designs work and why some do not work. Also, there is no shortage of research material to be found, as illustrated characters are appearing everywhere like stickers on fruit, TV commercials, shop signs, cereal boxes, animations on mobile phones, etc. Make sure you study these character designs and think about what makes some successful and the particular thing you like about them.
● Also, take a look elsewhere
It is also a great idea to look beyond some character designs when hunting for inspiration because most times, when you begin a project, you might start with the feeling to evoke. The process usually starts with the designer taking a video of himself as a reference and capturing something of the character’s posture or idea’s movement.
● Try not to lose sight of the original idea
It is elementary to allow your favorite designs to influence you subconsciously. Sometimes when you look back at your initial artworks, it will bring back the feeling you had when you were creating them, and the project you are trying to develop will shift back on track.
● Exaggerate
When you exaggerate the defining features of your character design, it will help it appear larger than real life. Also, exaggerated features help viewers identify the characters’ essential qualities. Exaggeration is key in cartoon caricatures and also helps emphasize certain personality traits. In addition, if your character is strong, try not to give it normal-sized bulging arms, but soup them up so that they are five times as big as they should be. Note that the technique of exaggeration can also apply to characteristics.
● Decide the aim of your character design
When creating a character design, consider your audience as character designs mainly aim at young children, typically designed around bright colors and basic shapes. Also, commissioned character designs are no less creative but are usually more restrictive. Most clients usually have specific needs but want you to do your ‘thing.’ Usually, you need to break down the core features and personality. For example, if the eyes are essential, you will focus the whole design around the face, making this the key element that stands out.
● Make your character distinctive
Whether you are creating a monkey, monster, or robot, you can guarantee that there will be a hundred other similar creations out there. Therefore, your character design is required to be exciting and robust in a visual sense to captivate people’s attention.
● Create clear silhouettes
A silhouette is required to help you understand the character’s gesture which is another good way to differentiate your character and improve its pose. This lets you see how the character ‘reads’ and requires you to make the gesture clearer. It answers the question of; can things be simplified? Do you have a basic understanding of character, emotions, and how the line of action works? In addition, try not to overlap everything and keep the limbs separately.
● Consider line quality
Finally, curved and straight curved lines read by your eyes are at different speeds. The lines drawn are from which your character design is composed can go some way to describing it. Soft, thick, round, and even lines may suggest acute and approachable character, whereas sharp, uneven, scratchy lines may indicate an erratic and uneasy character.
Part 3 How to Apply Cartoon Character Design to Filmora Video Editing?
You can cartoon your character background design in your Video Editing turn a video into a cartoon depending on your device. If you are working on your mobile phone, then you can convert any number of your social media accounts that include film or photos to some degree. The detail or performance level will not be great most of the time.
But if you wish to do it professionally using your PC, then the best video to the cartoon software program for both Windows and Mac is Filmora. Filmora is the best software to convert video to a Cartoon background easily. It will enable you the requisite tools that will act as the right approach to create cartoon characters with appropriate locations and video.
The Wondershare Filmora Video Editor professional video editing software allows you to turn your videos into cartoons easily. The process by which videos get converted into cartoon style on Filmora is straightforward.
Step 1: Import the videos into Filmora
From the official website of Filmora, you will get the link to download, install and launch. Then from the main interface, import your video to it.
Step 2: Add the Cartoon effect under Stylize
You can add different effects or use the Stylize animation effects to your cartoon character.
Step 3: Adjust the cartoon settings and do some basic color corrections to perfect the cartoon result.
Go through different settings to provide the exemplary cartoon character, its background, and full-fledged video edited with Filmora.
For Win 7 or later (64-bit)
For macOS 10.12 or later
● Ending Thoughts →
● This article explained all you require to get the most up-to-date cartoon character design tips. A section of the report gave a list of the information you need to put in place to achieve this. Another area recommended the best video to cartoon editing tools used by cartoon character designers to get the most out of their character design.
● Also, Filmora acts as the right tool to cover up all the necessary editing you might need to create your cartoon character with related background and artistic pieces of equipment.
Making an overall excellent and unique character design cartoon art style is sometimes hard. The truth is that everyone has a favorite cartoon character, but the question is, how does this character come to life? While you are about to start copying other well-known cartoon or comic characters, you will eventually branch out and come with your own. In addition, there are several ways to come up with ideas for cartoon characters’ concept art to draw. Any of these ways can get you started on populating your world of cartoons.
More so, the process of tackling your character design is often full of hurdles. This process requires a lot of creative thinking to create one’s character from the beginning, although many well-known characters from films, advertising, and cartoons look straightforward. But need to exert a vast amount of skill and effort to make them effective.
In this article
01 [10 Tips for Brilliant Cartoon Character Design](#Part 1)
02 [How to Apply Cartoon Character Design to Filmora Video Editing?](#Part 2)
Part 1 Tips for Brilliant Cartoon Character Design
As a cartoon character designer, here are 10 tips you need to put in place to make a brilliant cartoon character design. They are;
● Do not lose the magic
Make sure you try not to polish all the charm from your characters. Many character designers usually begin their project with a sketch and agree that this is often where the essence of the character gets captured. Therefore, when you start working up a design, make sure you do not lose that magic.
The first thing is to decide what you are trying to communicate and then create loose sketches with flow, acting, and movement. As soon as you tighten up the drawing, some of the dynamics will automatically loosen, so it is crucial to have as much life in the early stages as possible. In addition, movement is all but impossible to add later. Thus, you need to ensure that it is in the initial sketch.
● Avoid reference material
Although inspiration needs to come from somewhere, the aim is to create something original, and you shouldn’t have the reference material right in front of you as you work.
Also, if you take a look at something and when you try and hazily remember it in your mind, that is when you can end up making something new, rather than making a pastiche of something.
● Make research on other characters
For guidance purposes, it can be much help when you try to deconstruct why certain character designs work and why some do not work. Also, there is no shortage of research material to be found, as illustrated characters are appearing everywhere like stickers on fruit, TV commercials, shop signs, cereal boxes, animations on mobile phones, etc. Make sure you study these character designs and think about what makes some successful and the particular thing you like about them.
● Also, take a look elsewhere
It is also a great idea to look beyond some character designs when hunting for inspiration because most times, when you begin a project, you might start with the feeling to evoke. The process usually starts with the designer taking a video of himself as a reference and capturing something of the character’s posture or idea’s movement.
● Try not to lose sight of the original idea
It is elementary to allow your favorite designs to influence you subconsciously. Sometimes when you look back at your initial artworks, it will bring back the feeling you had when you were creating them, and the project you are trying to develop will shift back on track.
● Exaggerate
When you exaggerate the defining features of your character design, it will help it appear larger than real life. Also, exaggerated features help viewers identify the characters’ essential qualities. Exaggeration is key in cartoon caricatures and also helps emphasize certain personality traits. In addition, if your character is strong, try not to give it normal-sized bulging arms, but soup them up so that they are five times as big as they should be. Note that the technique of exaggeration can also apply to characteristics.
● Decide the aim of your character design
When creating a character design, consider your audience as character designs mainly aim at young children, typically designed around bright colors and basic shapes. Also, commissioned character designs are no less creative but are usually more restrictive. Most clients usually have specific needs but want you to do your ‘thing.’ Usually, you need to break down the core features and personality. For example, if the eyes are essential, you will focus the whole design around the face, making this the key element that stands out.
● Make your character distinctive
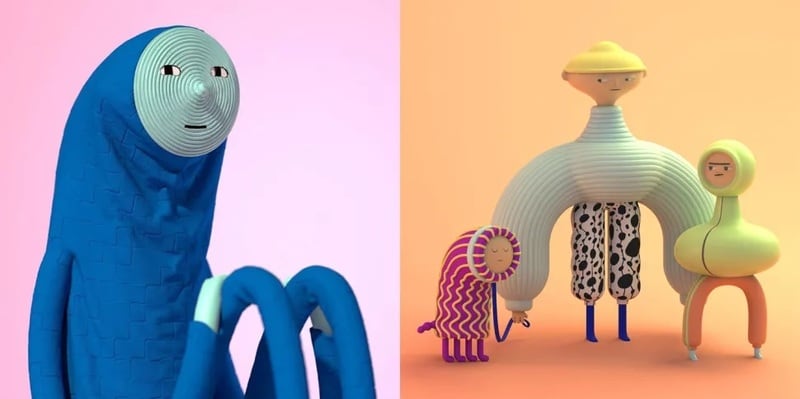
Whether you are creating a monkey, monster, or robot, you can guarantee that there will be a hundred other similar creations out there. Therefore, your character design is required to be exciting and robust in a visual sense to captivate people’s attention.
● Create clear silhouettes
A silhouette is required to help you understand the character’s gesture which is another good way to differentiate your character and improve its pose. This lets you see how the character ‘reads’ and requires you to make the gesture clearer. It answers the question of; can things be simplified? Do you have a basic understanding of character, emotions, and how the line of action works? In addition, try not to overlap everything and keep the limbs separately.
● Consider line quality
Finally, curved and straight curved lines read by your eyes are at different speeds. The lines drawn are from which your character design is composed can go some way to describing it. Soft, thick, round, and even lines may suggest acute and approachable character, whereas sharp, uneven, scratchy lines may indicate an erratic and uneasy character.
Part 3 How to Apply Cartoon Character Design to Filmora Video Editing?
You can cartoon your character background design in your Video Editing turn a video into a cartoon depending on your device. If you are working on your mobile phone, then you can convert any number of your social media accounts that include film or photos to some degree. The detail or performance level will not be great most of the time.
But if you wish to do it professionally using your PC, then the best video to the cartoon software program for both Windows and Mac is Filmora. Filmora is the best software to convert video to a Cartoon background easily. It will enable you the requisite tools that will act as the right approach to create cartoon characters with appropriate locations and video.
The Wondershare Filmora Video Editor professional video editing software allows you to turn your videos into cartoons easily. The process by which videos get converted into cartoon style on Filmora is straightforward.
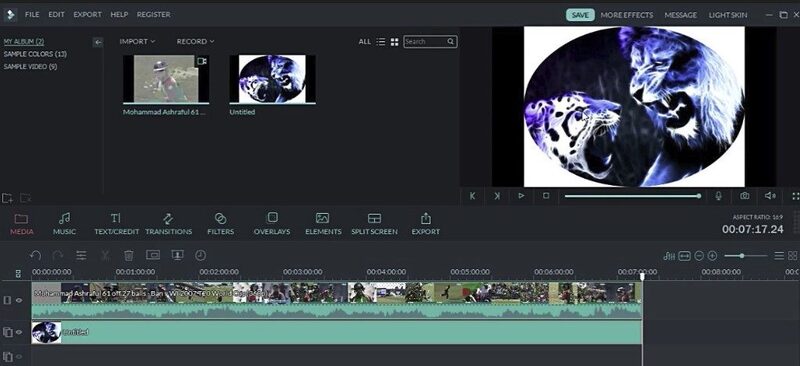
Step 1: Import the videos into Filmora
From the official website of Filmora, you will get the link to download, install and launch. Then from the main interface, import your video to it.
Step 2: Add the Cartoon effect under Stylize
You can add different effects or use the Stylize animation effects to your cartoon character.
Step 3: Adjust the cartoon settings and do some basic color corrections to perfect the cartoon result.
Go through different settings to provide the exemplary cartoon character, its background, and full-fledged video edited with Filmora.
For Win 7 or later (64-bit)
For macOS 10.12 or later
● Ending Thoughts →
● This article explained all you require to get the most up-to-date cartoon character design tips. A section of the report gave a list of the information you need to put in place to achieve this. Another area recommended the best video to cartoon editing tools used by cartoon character designers to get the most out of their character design.
● Also, Filmora acts as the right tool to cover up all the necessary editing you might need to create your cartoon character with related background and artistic pieces of equipment.
Making an overall excellent and unique character design cartoon art style is sometimes hard. The truth is that everyone has a favorite cartoon character, but the question is, how does this character come to life? While you are about to start copying other well-known cartoon or comic characters, you will eventually branch out and come with your own. In addition, there are several ways to come up with ideas for cartoon characters’ concept art to draw. Any of these ways can get you started on populating your world of cartoons.
More so, the process of tackling your character design is often full of hurdles. This process requires a lot of creative thinking to create one’s character from the beginning, although many well-known characters from films, advertising, and cartoons look straightforward. But need to exert a vast amount of skill and effort to make them effective.
In this article
01 [10 Tips for Brilliant Cartoon Character Design](#Part 1)
02 [How to Apply Cartoon Character Design to Filmora Video Editing?](#Part 2)
Part 1 Tips for Brilliant Cartoon Character Design
As a cartoon character designer, here are 10 tips you need to put in place to make a brilliant cartoon character design. They are;
● Do not lose the magic
Make sure you try not to polish all the charm from your characters. Many character designers usually begin their project with a sketch and agree that this is often where the essence of the character gets captured. Therefore, when you start working up a design, make sure you do not lose that magic.
The first thing is to decide what you are trying to communicate and then create loose sketches with flow, acting, and movement. As soon as you tighten up the drawing, some of the dynamics will automatically loosen, so it is crucial to have as much life in the early stages as possible. In addition, movement is all but impossible to add later. Thus, you need to ensure that it is in the initial sketch.
● Avoid reference material
Although inspiration needs to come from somewhere, the aim is to create something original, and you shouldn’t have the reference material right in front of you as you work.
Also, if you take a look at something and when you try and hazily remember it in your mind, that is when you can end up making something new, rather than making a pastiche of something.
● Make research on other characters
For guidance purposes, it can be much help when you try to deconstruct why certain character designs work and why some do not work. Also, there is no shortage of research material to be found, as illustrated characters are appearing everywhere like stickers on fruit, TV commercials, shop signs, cereal boxes, animations on mobile phones, etc. Make sure you study these character designs and think about what makes some successful and the particular thing you like about them.
● Also, take a look elsewhere
It is also a great idea to look beyond some character designs when hunting for inspiration because most times, when you begin a project, you might start with the feeling to evoke. The process usually starts with the designer taking a video of himself as a reference and capturing something of the character’s posture or idea’s movement.
● Try not to lose sight of the original idea
It is elementary to allow your favorite designs to influence you subconsciously. Sometimes when you look back at your initial artworks, it will bring back the feeling you had when you were creating them, and the project you are trying to develop will shift back on track.
● Exaggerate
When you exaggerate the defining features of your character design, it will help it appear larger than real life. Also, exaggerated features help viewers identify the characters’ essential qualities. Exaggeration is key in cartoon caricatures and also helps emphasize certain personality traits. In addition, if your character is strong, try not to give it normal-sized bulging arms, but soup them up so that they are five times as big as they should be. Note that the technique of exaggeration can also apply to characteristics.
● Decide the aim of your character design
When creating a character design, consider your audience as character designs mainly aim at young children, typically designed around bright colors and basic shapes. Also, commissioned character designs are no less creative but are usually more restrictive. Most clients usually have specific needs but want you to do your ‘thing.’ Usually, you need to break down the core features and personality. For example, if the eyes are essential, you will focus the whole design around the face, making this the key element that stands out.
● Make your character distinctive
Whether you are creating a monkey, monster, or robot, you can guarantee that there will be a hundred other similar creations out there. Therefore, your character design is required to be exciting and robust in a visual sense to captivate people’s attention.
● Create clear silhouettes
A silhouette is required to help you understand the character’s gesture which is another good way to differentiate your character and improve its pose. This lets you see how the character ‘reads’ and requires you to make the gesture clearer. It answers the question of; can things be simplified? Do you have a basic understanding of character, emotions, and how the line of action works? In addition, try not to overlap everything and keep the limbs separately.
● Consider line quality
Finally, curved and straight curved lines read by your eyes are at different speeds. The lines drawn are from which your character design is composed can go some way to describing it. Soft, thick, round, and even lines may suggest acute and approachable character, whereas sharp, uneven, scratchy lines may indicate an erratic and uneasy character.
Part 3 How to Apply Cartoon Character Design to Filmora Video Editing?
You can cartoon your character background design in your Video Editing turn a video into a cartoon depending on your device. If you are working on your mobile phone, then you can convert any number of your social media accounts that include film or photos to some degree. The detail or performance level will not be great most of the time.
But if you wish to do it professionally using your PC, then the best video to the cartoon software program for both Windows and Mac is Filmora. Filmora is the best software to convert video to a Cartoon background easily. It will enable you the requisite tools that will act as the right approach to create cartoon characters with appropriate locations and video.
The Wondershare Filmora Video Editor professional video editing software allows you to turn your videos into cartoons easily. The process by which videos get converted into cartoon style on Filmora is straightforward.
Step 1: Import the videos into Filmora
From the official website of Filmora, you will get the link to download, install and launch. Then from the main interface, import your video to it.
Step 2: Add the Cartoon effect under Stylize
You can add different effects or use the Stylize animation effects to your cartoon character.
Step 3: Adjust the cartoon settings and do some basic color corrections to perfect the cartoon result.
Go through different settings to provide the exemplary cartoon character, its background, and full-fledged video edited with Filmora.
For Win 7 or later (64-bit)
For macOS 10.12 or later
● Ending Thoughts →
● This article explained all you require to get the most up-to-date cartoon character design tips. A section of the report gave a list of the information you need to put in place to achieve this. Another area recommended the best video to cartoon editing tools used by cartoon character designers to get the most out of their character design.
● Also, Filmora acts as the right tool to cover up all the necessary editing you might need to create your cartoon character with related background and artistic pieces of equipment.
What Is Anime? [Anime VS Manga VS Cartoon]
What is Anime? [Anime VS Manga VS Cartoon]

Shanoon Cox
Mar 27, 2024• Proven solutions
You may have heard of Anime. What is Anime? Anime, Manga, and Cartoons all are the exquisite openings of little portals into the other worlds that will entertain, delight, and educate you at the same time. They are the forms of art and words creating a unique medium for sharing the realities of the world, spirituality, and ideas.
The digital world has grown so immensely, and then Amine, Manga, and Cartoon have become popular in the whole world that people often confuse these terms. To understand them better and to decode the myth of anime, manga, and cartoon, we’ll go deeper into each and see what anime is, and show the differences in anime, manga, and cartoon.
- Part 1: What is Anime?
- Part 2: What is Manga?
- Part 3: What is Cartoon?
- Part 4: Differences between Anime, Manga, and Cartoon
Part 1: What is Anime?
Anime is the Japanese form of animation – word for word. This scrupulous style and form of animation originated in Japan characterized by its vivid imagination and bright color usage. The thematic elements of fantasy and fiction combined with science give this style its unique look and feel. This meticulously thought and designed animation is nowadays produced all around the world intending its huge fanbase not just in the Japanese but all over the world.
The story is behind the word anime is interesting – the Japanese animēshiyon is a loanword from English animation, which then made its journey back to English as anime. So, the Japanese borrowed it from English and the English took it back modified. This modified version of animation became the basis of many popular TV shows and movies that excite people to know more about anime.
Note
Subbed Anime and Dubbed Anime
There are two common ways to enjoy the anime world, subbed anime and dubbed anime. A “sub” is an anime-type that is shown in its original Japanese voice with subtitles of another language (mostly English). While the “dub” anime is the one that is released with a new re-scripted voice – voice actors speaking another language recorded as voiceover to make it suitable for a worldwide audience.
Though the topic is often a debatable topic among anime fandom. I’ll just highlight my thoughts on both versions. As anime is mostly Japanese creation and watching them in the western world required either an English subtitle or dubbed over by English-speaking voice actors.
Anime hardcore fans or purists argue the original voice and theme of the anime should not be altered to keep the original imaginative flair and theme of the series. While the dubbed anime released with a re-scripted voice track translated into English or any other language for that matter to allow a larger audience to enjoy the anime series without the hassle of reading through the subtitles.
Part 2: What is Manga?
Manga, on the other hand, is the Japanese version of comic books and graphic novels. It has the same detailed and amplified facial features with a vivid and bright color combination. The Japanese word manga came from man-, meaning aimless, while, -ga, means pictures. So, it means aimless pictures.
Manga is unlike the usual superhero comics such as Marvel Comics or D.C. Comics written by many writers and editorial boards. Manga is more detailed and complete like novels that often are the vision of a single author. Mostly following the lives of seemingly ordinary people to develop an interesting and engaging experience – a cliffhanger.
Part 3: What is Cartoon?
The word cartoon comes from the Italian word cartoon meaning a large sheet of card or paper. The word cartoon generally signifies a visual art as animation or a funny drawing while in a historical perspective it can refer to a preparatory drawing for an oil painting, fresco, or tapestry. A cartoon in literal meaning is a caricature intended as satire or a one-dimensional non-realistic or semi-realistic portrayal.
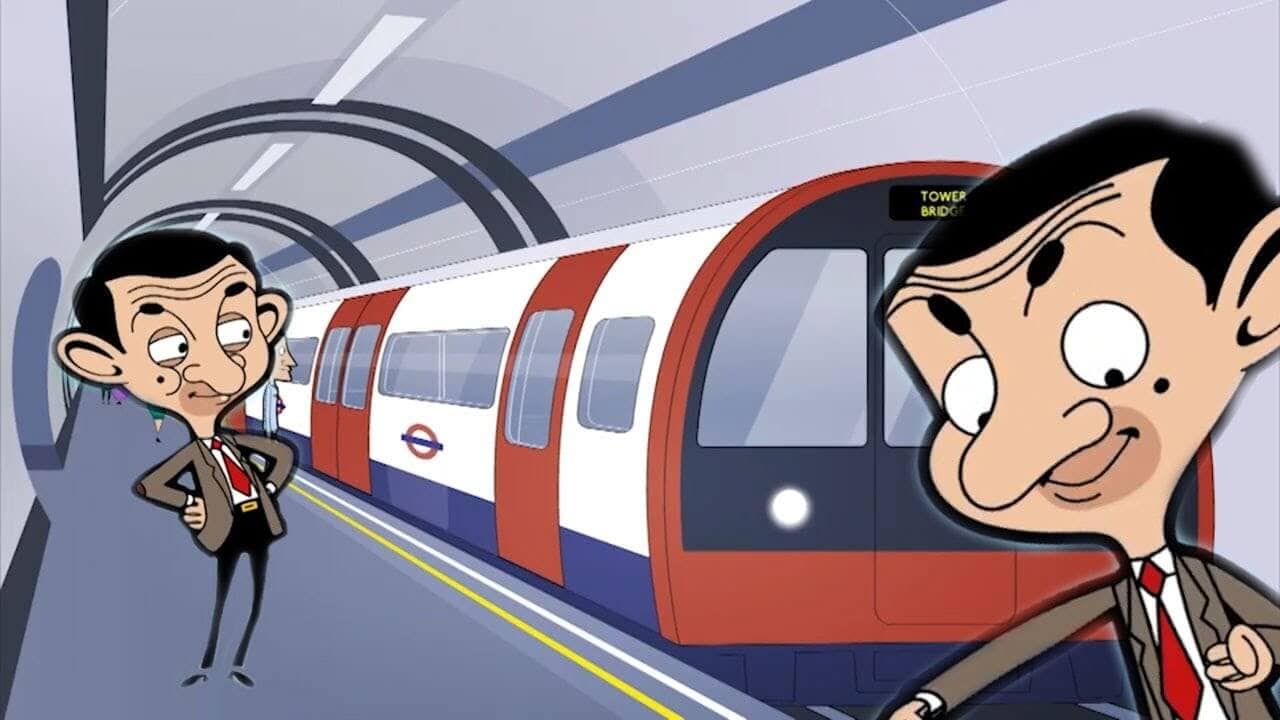
Image resource: Mr. Bean Cartoon World
Did you see Mr Bean Cartoon? A cartoon can be animated, a motion picture of a sequence of illustrations causing it to feel like a moving caricature. In the 19th century, cartoons were humorous illustrations in magazines and newspapers transforming into comic strips and animated films in the early 20th century, as we know them now.
Part 4: Differences between Anime, Manga, and Cartoon
Here we will talk about the differences between anime, manga, and cartoon from the following three aspects:
1. Relation
To effectively understand the difference between anime and manga you need to remember this little trick for anime vs manga,
- Most manga can be never converted to an anime series. But numerous manga serves as a basis for anime. Put in another way – anime is mostly, but not always, is the animated form of manga.
- Anime and manga are character-oriented where characters have goals in life that play a large thematic role in their life and the stories revolve around that.
- However, the cartoon vs manga and anime is another story altogether,
- In the western world comics and novels became animated cartoons with the advent of the digital age. In Japanese and wider Asia, the manga which is the Japanese version of comics and print cartoons turned into animated cartoons – anime.
2. Content
- Anime is a distinctive art form with diverse production techniques, it amalgamates graphic art, cinematography, characterization, and other imaginative techniques. Anime is hand-drawn, which separates it from reality into the fiction realm that provides an ideal path for the fantasy world.
- Manga showcases an illuminative and vivid imagination of the creator in the form of magazines and publications. The content incites the reader to engage deep into the artistic world of the creator.
- A cartoon is also a form of art, including and not limited to humorous illustrations, political and satirical drawings, and animated films. From art to entertainment, and political commentary, cartoons play an essential role in influencing the world.
3. Style
- While the western design cartoon has its specific features and details and the Japanese manga and anime have their rich history and imaginative flair to them. On the whole, they are part of the same family of art and human illustration techniques developed to showcase the tingling visualization of the creator.
Conclusion
The Japanese storytelling is so rich and vibrant filled with dynamic characters and caricatures which serve as the best entertaining setting for both children and adults. All of these art forms have their dedicated audience which reveres one or the other. Creators that depict their vivid imagination into eloquent and exquisite characters conveying some message and thought-provoking idea. So, altogether none is better than the other and there are millions and millions of people reading and watching all these forms of artistic mastery. Just pick the one you love!
You may also like: Best Anime Websites to Watch Anime for Free >>
Shanoon Cox
Shanoon Cox is a writer and a lover of all things video.
Follow @Shanoon Cox
Shanoon Cox
Mar 27, 2024• Proven solutions
You may have heard of Anime. What is Anime? Anime, Manga, and Cartoons all are the exquisite openings of little portals into the other worlds that will entertain, delight, and educate you at the same time. They are the forms of art and words creating a unique medium for sharing the realities of the world, spirituality, and ideas.
The digital world has grown so immensely, and then Amine, Manga, and Cartoon have become popular in the whole world that people often confuse these terms. To understand them better and to decode the myth of anime, manga, and cartoon, we’ll go deeper into each and see what anime is, and show the differences in anime, manga, and cartoon.
- Part 1: What is Anime?
- Part 2: What is Manga?
- Part 3: What is Cartoon?
- Part 4: Differences between Anime, Manga, and Cartoon
Part 1: What is Anime?
Anime is the Japanese form of animation – word for word. This scrupulous style and form of animation originated in Japan characterized by its vivid imagination and bright color usage. The thematic elements of fantasy and fiction combined with science give this style its unique look and feel. This meticulously thought and designed animation is nowadays produced all around the world intending its huge fanbase not just in the Japanese but all over the world.
The story is behind the word anime is interesting – the Japanese animēshiyon is a loanword from English animation, which then made its journey back to English as anime. So, the Japanese borrowed it from English and the English took it back modified. This modified version of animation became the basis of many popular TV shows and movies that excite people to know more about anime.
Note
Subbed Anime and Dubbed Anime
There are two common ways to enjoy the anime world, subbed anime and dubbed anime. A “sub” is an anime-type that is shown in its original Japanese voice with subtitles of another language (mostly English). While the “dub” anime is the one that is released with a new re-scripted voice – voice actors speaking another language recorded as voiceover to make it suitable for a worldwide audience.
Though the topic is often a debatable topic among anime fandom. I’ll just highlight my thoughts on both versions. As anime is mostly Japanese creation and watching them in the western world required either an English subtitle or dubbed over by English-speaking voice actors.
Anime hardcore fans or purists argue the original voice and theme of the anime should not be altered to keep the original imaginative flair and theme of the series. While the dubbed anime released with a re-scripted voice track translated into English or any other language for that matter to allow a larger audience to enjoy the anime series without the hassle of reading through the subtitles.
Part 2: What is Manga?
Manga, on the other hand, is the Japanese version of comic books and graphic novels. It has the same detailed and amplified facial features with a vivid and bright color combination. The Japanese word manga came from man-, meaning aimless, while, -ga, means pictures. So, it means aimless pictures.
Manga is unlike the usual superhero comics such as Marvel Comics or D.C. Comics written by many writers and editorial boards. Manga is more detailed and complete like novels that often are the vision of a single author. Mostly following the lives of seemingly ordinary people to develop an interesting and engaging experience – a cliffhanger.
Part 3: What is Cartoon?
The word cartoon comes from the Italian word cartoon meaning a large sheet of card or paper. The word cartoon generally signifies a visual art as animation or a funny drawing while in a historical perspective it can refer to a preparatory drawing for an oil painting, fresco, or tapestry. A cartoon in literal meaning is a caricature intended as satire or a one-dimensional non-realistic or semi-realistic portrayal.
Image resource: Mr. Bean Cartoon World
Did you see Mr Bean Cartoon? A cartoon can be animated, a motion picture of a sequence of illustrations causing it to feel like a moving caricature. In the 19th century, cartoons were humorous illustrations in magazines and newspapers transforming into comic strips and animated films in the early 20th century, as we know them now.
Part 4: Differences between Anime, Manga, and Cartoon
Here we will talk about the differences between anime, manga, and cartoon from the following three aspects:
1. Relation
To effectively understand the difference between anime and manga you need to remember this little trick for anime vs manga,
- Most manga can be never converted to an anime series. But numerous manga serves as a basis for anime. Put in another way – anime is mostly, but not always, is the animated form of manga.
- Anime and manga are character-oriented where characters have goals in life that play a large thematic role in their life and the stories revolve around that.
- However, the cartoon vs manga and anime is another story altogether,
- In the western world comics and novels became animated cartoons with the advent of the digital age. In Japanese and wider Asia, the manga which is the Japanese version of comics and print cartoons turned into animated cartoons – anime.
2. Content
- Anime is a distinctive art form with diverse production techniques, it amalgamates graphic art, cinematography, characterization, and other imaginative techniques. Anime is hand-drawn, which separates it from reality into the fiction realm that provides an ideal path for the fantasy world.
- Manga showcases an illuminative and vivid imagination of the creator in the form of magazines and publications. The content incites the reader to engage deep into the artistic world of the creator.
- A cartoon is also a form of art, including and not limited to humorous illustrations, political and satirical drawings, and animated films. From art to entertainment, and political commentary, cartoons play an essential role in influencing the world.
3. Style
- While the western design cartoon has its specific features and details and the Japanese manga and anime have their rich history and imaginative flair to them. On the whole, they are part of the same family of art and human illustration techniques developed to showcase the tingling visualization of the creator.
Conclusion
The Japanese storytelling is so rich and vibrant filled with dynamic characters and caricatures which serve as the best entertaining setting for both children and adults. All of these art forms have their dedicated audience which reveres one or the other. Creators that depict their vivid imagination into eloquent and exquisite characters conveying some message and thought-provoking idea. So, altogether none is better than the other and there are millions and millions of people reading and watching all these forms of artistic mastery. Just pick the one you love!
You may also like: Best Anime Websites to Watch Anime for Free >>
Shanoon Cox
Shanoon Cox is a writer and a lover of all things video.
Follow @Shanoon Cox
Best 10 Animoji Apps You Can Use to Edit Animoji
Best 10 Animoji Apps You Can Use to Edit Animoji
Shanoon Cox
Mar 27, 2024• Proven solutions
Animojis are animated emojis first developed by Apple for iOS users. Animojis are 3D avatars that can mimic and duplicate your facial expressions through the face ID camera system. They can make any conversation entertaining, convey your feelings more clearly and can be used across different social media networks. iPhones and some high-end Android phones have built-in animoji apps but this feature is not available on every device. Don’t worry if you do not have an expensive phone because there are many animoji apps for both Android and iOS.
Today, we will talk about the 10 best animoji apps to edit animoji on android and IOS. So, let’s begin!
Best 10 And Emoji Apps to Edit Animoji
Most of the smartphones today come with the facial recognition feature (also known as face ID). This means that any phone that features face ID can also be used to create and edit animoji. Thus, even if your phone does not come with a featured animoji app, you can download any one of the 10 best animoji apps down below!
Note: Some of these apps are available for Android only, while others are compatible with both Android and IOS.
- 1. Anymoji (Android)
- 2. Bitmoji (Android and iPhone)
- 3. Disney Emoji Blitz (Android and iPhone)
- 4. SuperMoji (Android and iOS)
- 5. Zepeto (Android and iOS)
- 6. Emoji Face Recorder (Android and iOS)
- 7. Mirror (Android and iPhone)
- 8. Mojipop (Android and iPhone)
- 9. Emoji Maker (Android)
- 10. Big Emoji (Android)
1.Anymoji (Android)
Anymoji is a 3D emoji, avatar, and cartoon creation and editing app. It offers an extensive library of face emoji avatars that can duplicate your facial expressions and mimic your voice. This animoji maker for Android allows you to create cool stories and posts for social media. The best part about this app is that it is free to download. Moreover, it does not require any registration or sign up. With over one million downloads on Google Play Store, anymoji has become the go-to app for 3D Avatar creation!
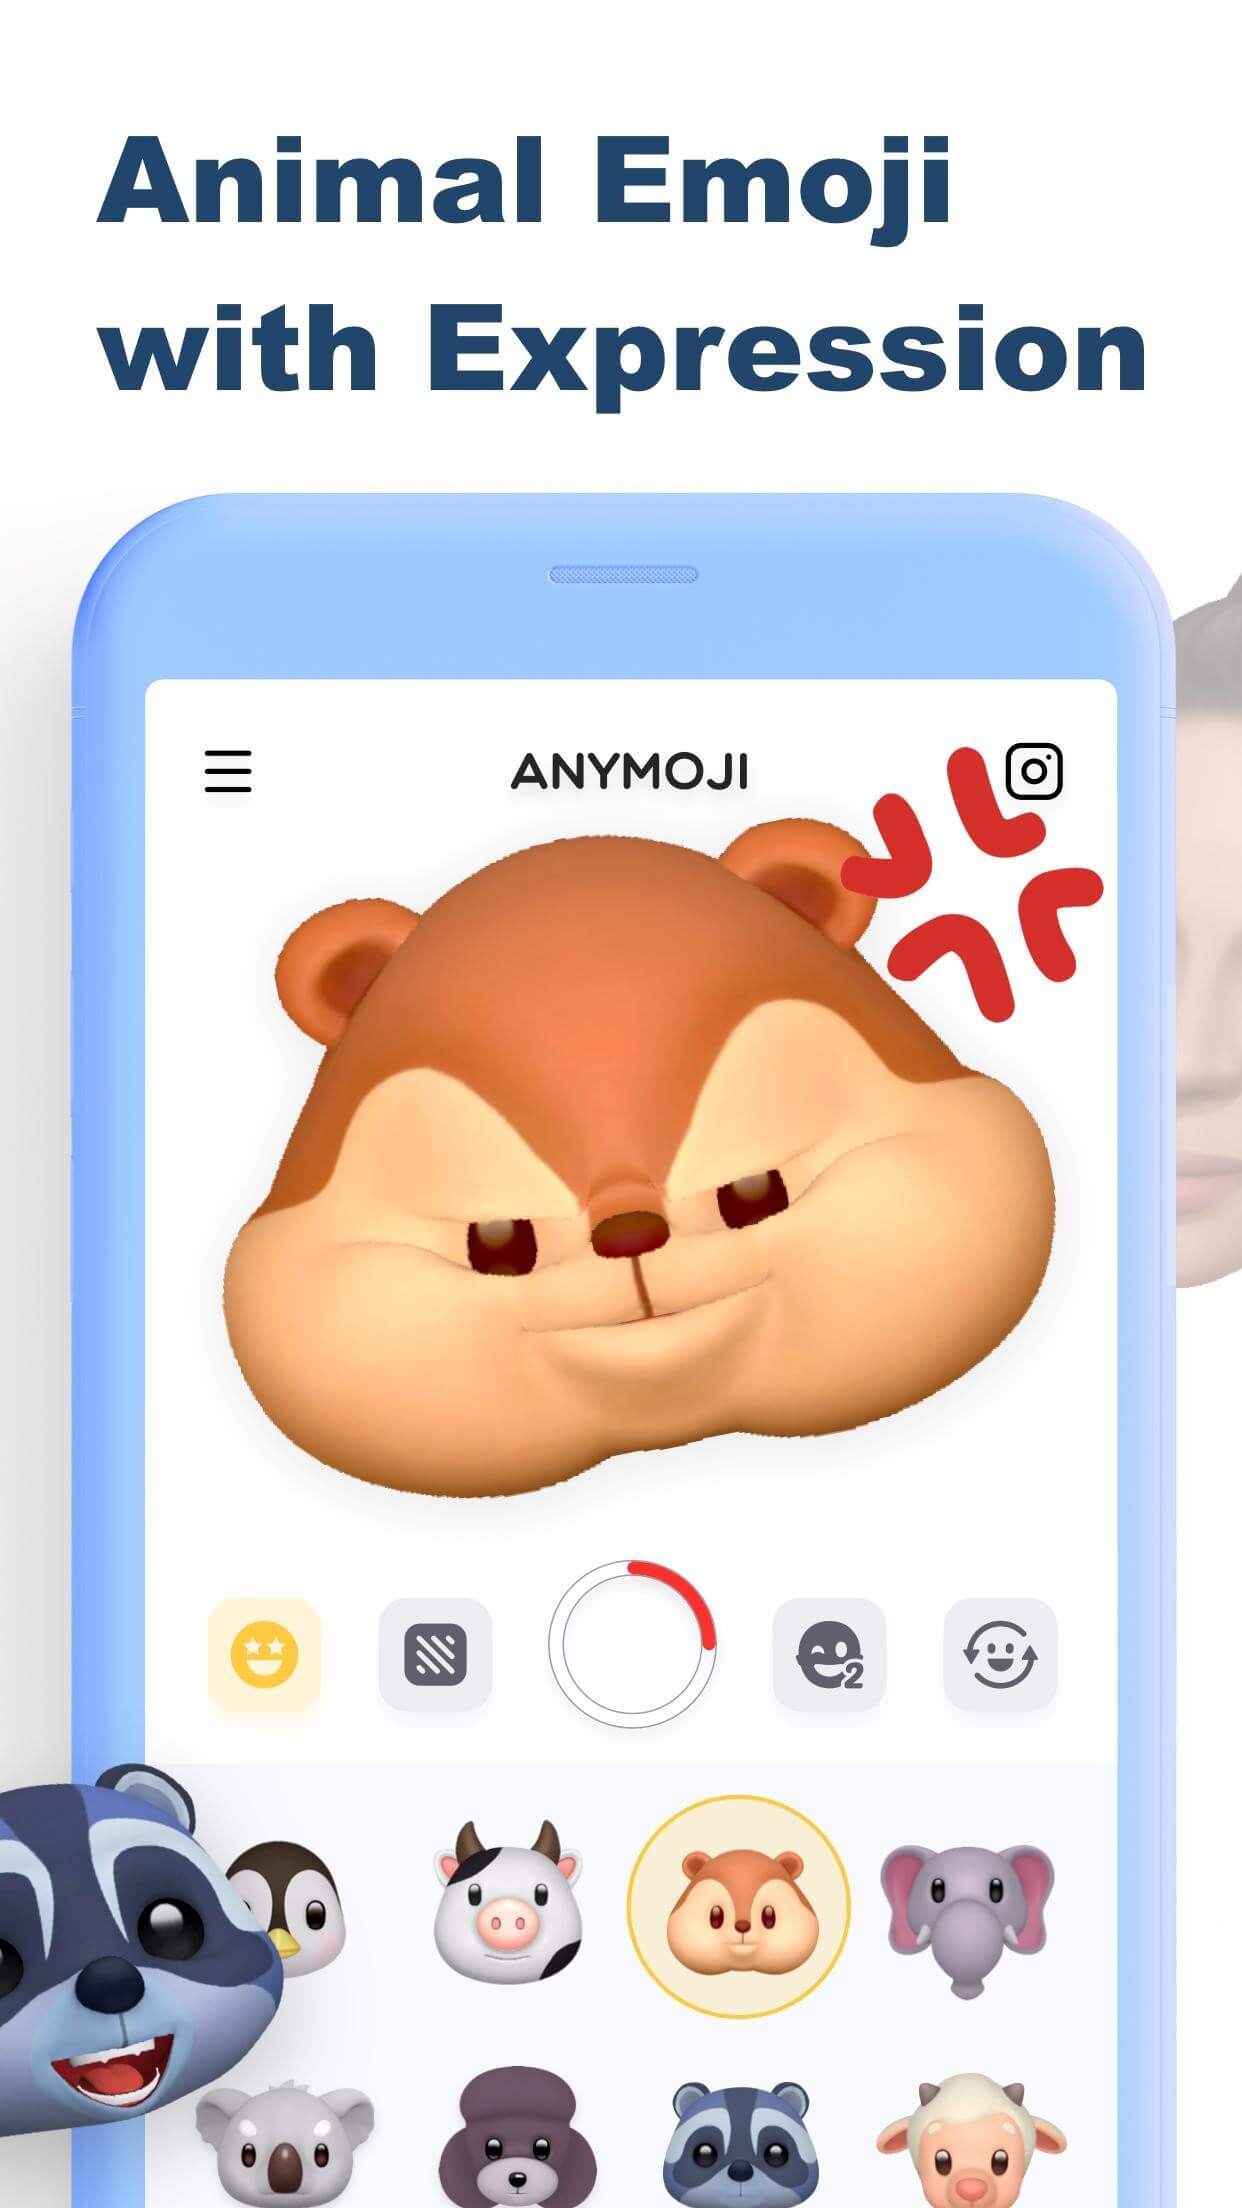
2.Bitmoji (Android and iPhone)
The bitmoji app is designed by Bitstrips that is acquired by Snapchat. It is one of the most popular emoji utility apps and web extensions. It allows you to create personalized emojis with a custom Avatar of yourself. You can use bitmoji to create and edit your own animated cartoons combined with a library of emotions, expressions, and stickers – all featuring YOU! The bitmoji app allows you to copy and paste your bitmojis virtually anywhere, including social media apps like Facebook, Instagram, or Snapchat.
3.Disney Emoji Blitz (Android and iPhone)
Disney emoji black is an app that features hundreds of Disney Star Wars and Pixar emojis. It is not just an animoji maker but it also serves as a gaming app. You can virtually play with all your Disney characters here. From frozen Elsa to Aladdin’s genie, you can play with over 400 different Disney and Pixar characters. So, collect and chat with your favorite Disney characters through this fun emoji app!
4.SuperMoji (Android and iOS)
Supermoji is yet another popular and emoji app that allows you to create and edit funny emoticons and animojis. It supports both sound and videos and is compatible with both Android and IOS. Supermoji offers high quality animated emojis that you can control and animate with your gestures and facial expressions. 8 uses many popular animojis, including cat, alien, poop, chicken, and dog. One of the best things about this app is that it is also compatible with older devices, so even if you do not have the latest iOS or Android phone, you can still create animoji using this app.
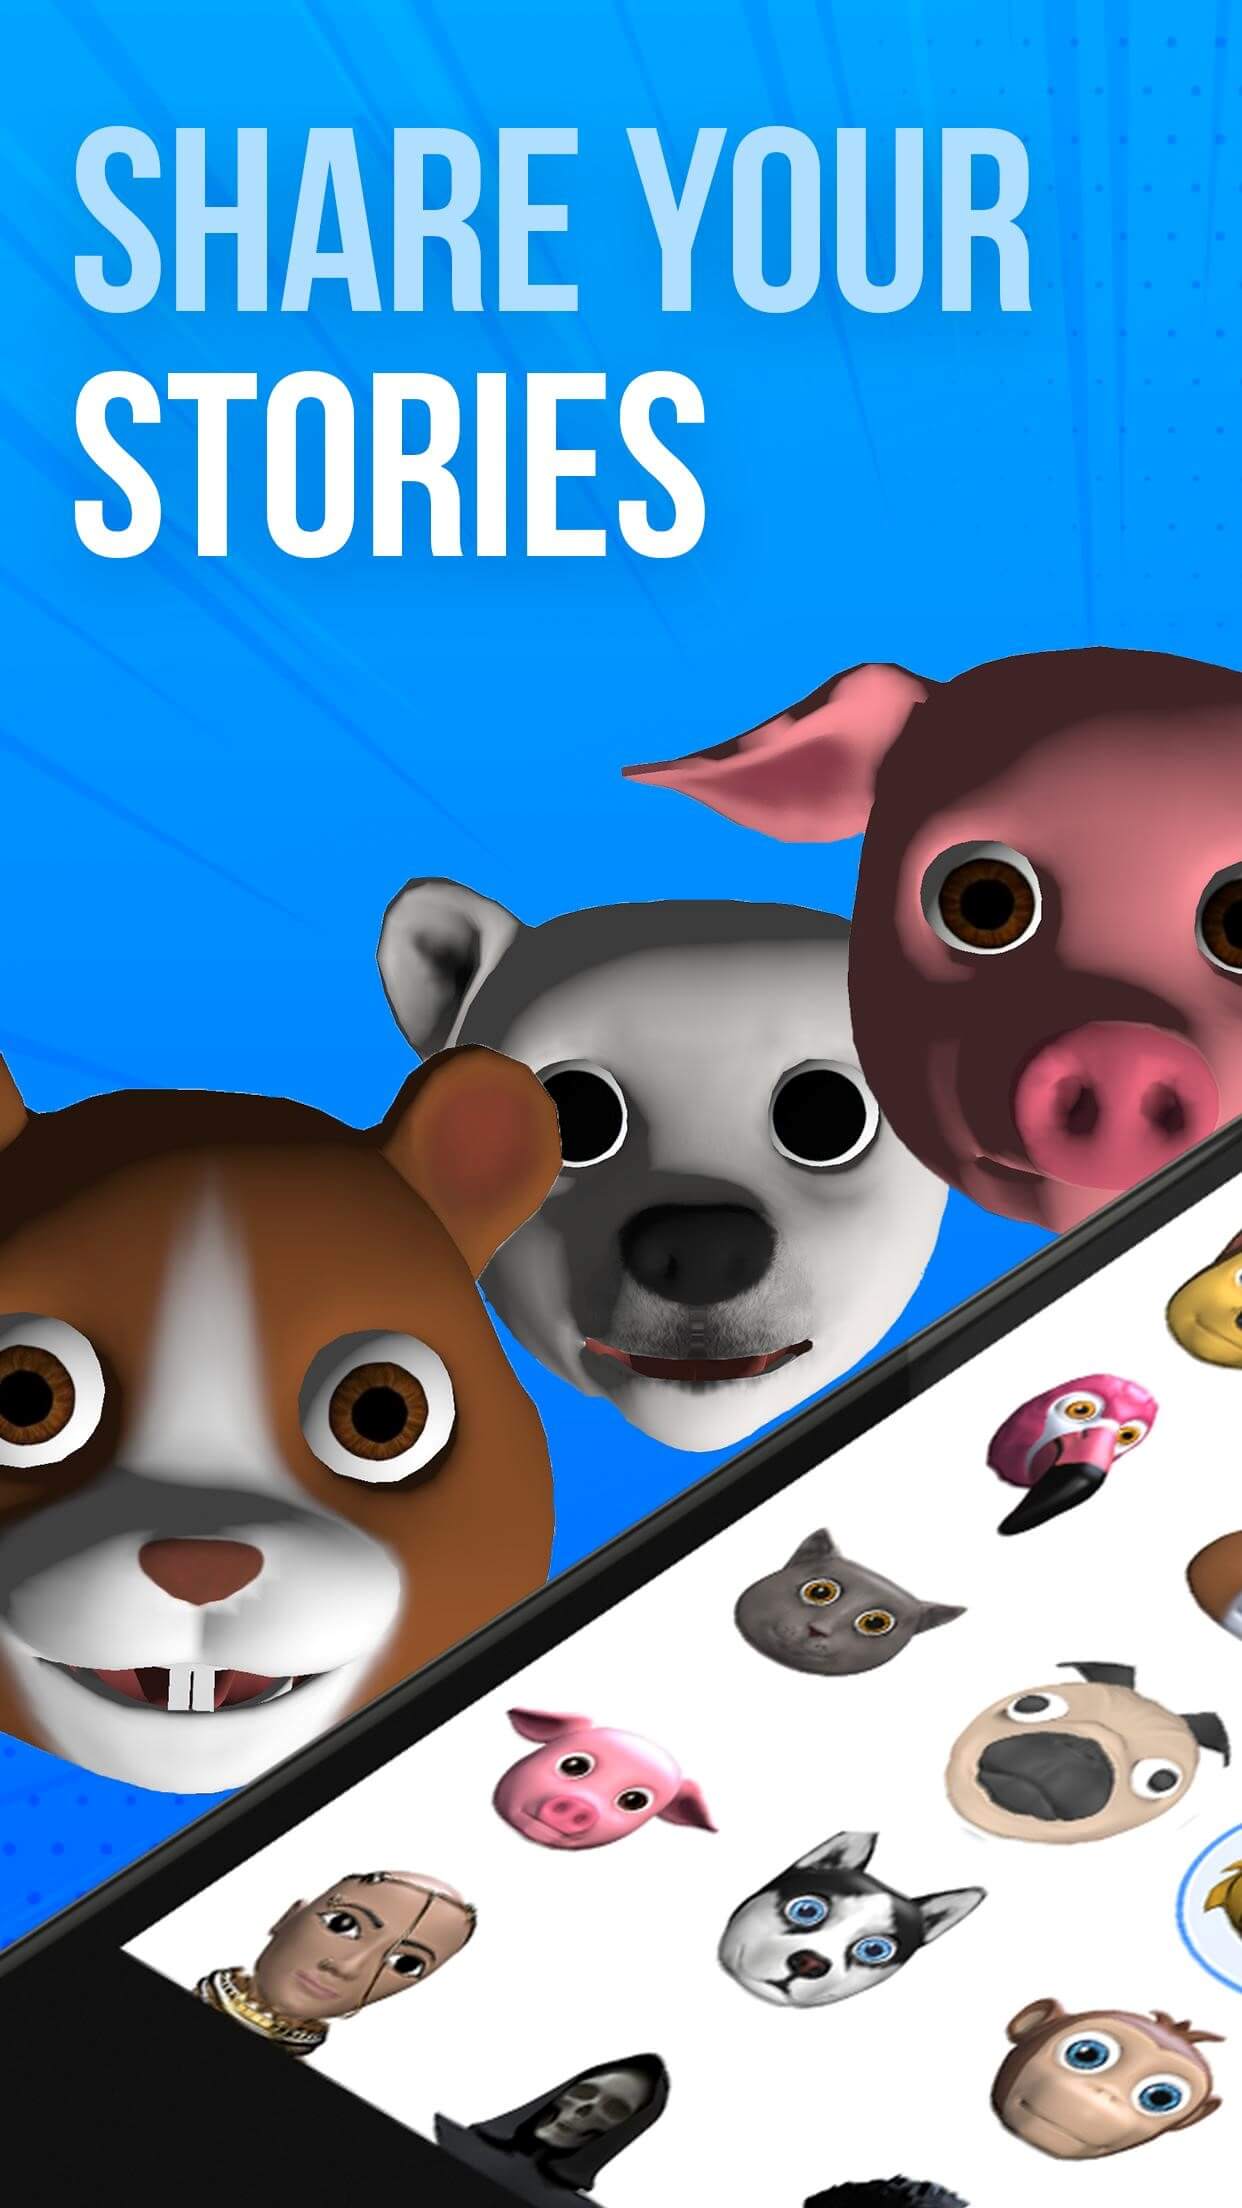
5.Zepeto (Android and iOS)
Zepeto is created by SNOW corporation for both iOS and Android. It is a custom Avatar creation app that allows you to personalize your avatar with millions of options. From hairstyle to clothing and makeup, you can create a full custom version of yourself through this app. Zepeto reads and copies your facial expressions and creates a custom sticker for you. This app will save your animated stickers that can later be used during conversations on social media platforms. Moreover, you can also add special effects on the stickers and edit animoji whenever you want.
6.Emoji Face Recorder (Android and iOS)
Emoji face recorder is another popular and emoji app that allows you to create live avatars and selfies on your smartphone. This app includes different 3D stickers like zebra, Santa Claus, deer, octopus, panda, leopard, squirrel, etc. So, record your face and your expressions to different 3D models without any hassle now. You can share your stickers and gifs on social media apps and amuse your friends all day!
7.Mirror (Android and iPhone)
Mirror is a fun emoji maker that allows you to create funny animoji on your iPhone and iOS device. This app has more than 1500+ stickers that you can customize. Along with this, you can also use this app to create full 3D avatars of yourself with the real-time face swap option. You can share and send your personal emojis to friends and family on Messenger, WhatsApp, and Snapchat.

8.Mojipop (Android and iPhone)
Mojipop is an app that you can use to take a selfie and create your own avatars and stickers. This app has an advanced facial recognition feature, so it is very easy to create and edit animojis with Mojipop. You can share them on social media and use them in day-to-day conversations to make them more fun. It also allows you to create a personalized GIF sticker on this device.
9.Emoji Maker (Android)
Emoji maker app can create free personal and animated phone emojis. It has many popular characters like a pig, fox, cat, panda, and other animated emojis. Moreover, you can also create your avatar by customizing your face, hair, body, and more. You can choose from a wide range of moods, expressions, and animated text as well. Emoji Maker app also allows you to send and receive animated emojis on your phone. This is a very simple 3D animated Avatar and sticker making app that anyone can easily use and express themselves!
10.Big Emoji (Android)
big emoji is a 3D Avatar creator app for Android that can create your 3D avatars and animojis. This app has over 5000+ emojis and emoticons. It allows you to edit and customize emojis by changing the background, color, and other features. It is easy to use, and it is compatible with older devices as well. Like other emoji apps, Big Emoji also allows you to send and share custom emojis on social media apps like Messenger, Facebook, WhatsApp, and Snapchat.
Bonus Tip-Add Animoji to Your Video with Wondershare Filmora
Filmora from Wondershare is one of the most popular video editing tools that comes with various cool features. It is user-friendly with an intuitive interface that makes the app suitable for beginners as well.
Filmora is the number one tool for all types of video editing , whether you create YouTube vlogs, Professional Videos, or TikToks. So, no matter what the purpose, Wondershare Filmora is the best tool to test your creativity.
How to Add Animoji in Video with Wondershare Filmora?
One of the best features of Wondershare Filmora is motion tracking. You can use this feature to add and edit emojis and animojis in any video. Motion tracking allows you to track the movement of something in a video to add images, text, stickers, or emojis.
Follow these steps to add animoji/emoji in your videos using the motion tracking feature in Wondershare Filmora:
Step 1: Download and Install Filmora
First of all, download and install Wondershare Filmora on your Mac or PC from the official website.


Step 2: Launch the Wondershare Filmora
Once you install the app, launch it on the desktop, and open the app.
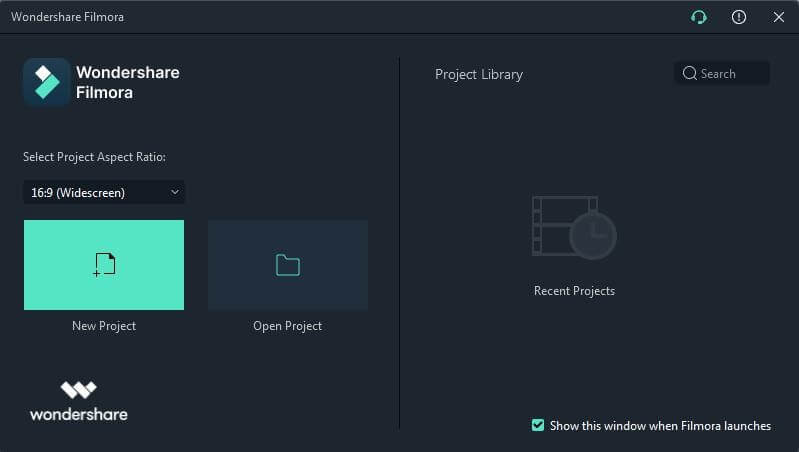
Step 3: Import Video
Now, click on the “Import Media Files Here” option on the welcome screen and import the video and emoji/animoji to the media library. Once the files are uploaded, they will appear on the left side of the screen in Media Tab.

Step 4: Add Emoji or Animoji to Video
Drag the video from the Media Tab and drop it onto a video track on the timeline. Now, to apply motion tracking, place the play-head at the beginning of the clip. The video tracking will start wherever the play-head.
Now, click on the icon in the timeline bar to enable the motion tracking tool. Once the tracking box appears, move it to select the object that you want to track. Now you can place the emoji or Animoji that you want to add. Go to the Media Tab and select the Animoji. Place it wherever you want to.
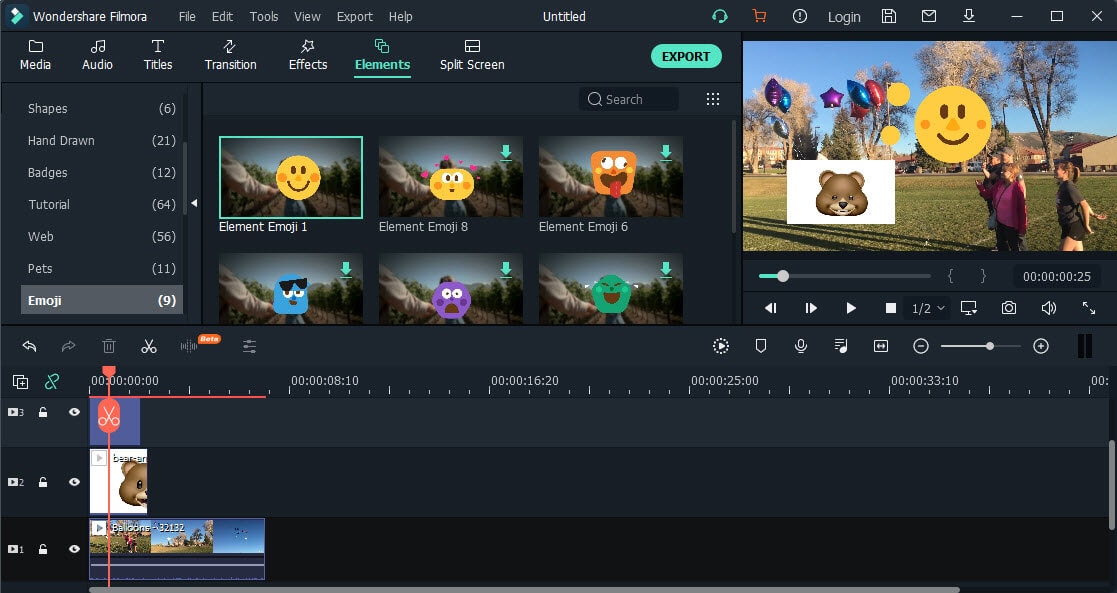
Step 5: Export Video
Click on the Export button and export your video to your computer or directly to a YouTube or Vimeo channel.
Conclusion
Modern communication is all about emojis and expressions. Nowadays, emojis and animojis have become an essential part of all our digital interactions and communications. From popular social media apps to smartphone keywords, emojis are present everywhere! If you don’t know how to create and edit animoji, use one of the 10 best animoji apps mentioned above!
Shanoon Cox
Shanoon Cox is a writer and a lover of all things video.
Follow @Shanoon Cox
Shanoon Cox
Mar 27, 2024• Proven solutions
Animojis are animated emojis first developed by Apple for iOS users. Animojis are 3D avatars that can mimic and duplicate your facial expressions through the face ID camera system. They can make any conversation entertaining, convey your feelings more clearly and can be used across different social media networks. iPhones and some high-end Android phones have built-in animoji apps but this feature is not available on every device. Don’t worry if you do not have an expensive phone because there are many animoji apps for both Android and iOS.
Today, we will talk about the 10 best animoji apps to edit animoji on android and IOS. So, let’s begin!
Best 10 And Emoji Apps to Edit Animoji
Most of the smartphones today come with the facial recognition feature (also known as face ID). This means that any phone that features face ID can also be used to create and edit animoji. Thus, even if your phone does not come with a featured animoji app, you can download any one of the 10 best animoji apps down below!
Note: Some of these apps are available for Android only, while others are compatible with both Android and IOS.
- 1. Anymoji (Android)
- 2. Bitmoji (Android and iPhone)
- 3. Disney Emoji Blitz (Android and iPhone)
- 4. SuperMoji (Android and iOS)
- 5. Zepeto (Android and iOS)
- 6. Emoji Face Recorder (Android and iOS)
- 7. Mirror (Android and iPhone)
- 8. Mojipop (Android and iPhone)
- 9. Emoji Maker (Android)
- 10. Big Emoji (Android)
1.Anymoji (Android)
Anymoji is a 3D emoji, avatar, and cartoon creation and editing app. It offers an extensive library of face emoji avatars that can duplicate your facial expressions and mimic your voice. This animoji maker for Android allows you to create cool stories and posts for social media. The best part about this app is that it is free to download. Moreover, it does not require any registration or sign up. With over one million downloads on Google Play Store, anymoji has become the go-to app for 3D Avatar creation!
2.Bitmoji (Android and iPhone)
The bitmoji app is designed by Bitstrips that is acquired by Snapchat. It is one of the most popular emoji utility apps and web extensions. It allows you to create personalized emojis with a custom Avatar of yourself. You can use bitmoji to create and edit your own animated cartoons combined with a library of emotions, expressions, and stickers – all featuring YOU! The bitmoji app allows you to copy and paste your bitmojis virtually anywhere, including social media apps like Facebook, Instagram, or Snapchat.
3.Disney Emoji Blitz (Android and iPhone)
Disney emoji black is an app that features hundreds of Disney Star Wars and Pixar emojis. It is not just an animoji maker but it also serves as a gaming app. You can virtually play with all your Disney characters here. From frozen Elsa to Aladdin’s genie, you can play with over 400 different Disney and Pixar characters. So, collect and chat with your favorite Disney characters through this fun emoji app!
4.SuperMoji (Android and iOS)
Supermoji is yet another popular and emoji app that allows you to create and edit funny emoticons and animojis. It supports both sound and videos and is compatible with both Android and IOS. Supermoji offers high quality animated emojis that you can control and animate with your gestures and facial expressions. 8 uses many popular animojis, including cat, alien, poop, chicken, and dog. One of the best things about this app is that it is also compatible with older devices, so even if you do not have the latest iOS or Android phone, you can still create animoji using this app.
5.Zepeto (Android and iOS)
Zepeto is created by SNOW corporation for both iOS and Android. It is a custom Avatar creation app that allows you to personalize your avatar with millions of options. From hairstyle to clothing and makeup, you can create a full custom version of yourself through this app. Zepeto reads and copies your facial expressions and creates a custom sticker for you. This app will save your animated stickers that can later be used during conversations on social media platforms. Moreover, you can also add special effects on the stickers and edit animoji whenever you want.
6.Emoji Face Recorder (Android and iOS)
Emoji face recorder is another popular and emoji app that allows you to create live avatars and selfies on your smartphone. This app includes different 3D stickers like zebra, Santa Claus, deer, octopus, panda, leopard, squirrel, etc. So, record your face and your expressions to different 3D models without any hassle now. You can share your stickers and gifs on social media apps and amuse your friends all day!
7.Mirror (Android and iPhone)
Mirror is a fun emoji maker that allows you to create funny animoji on your iPhone and iOS device. This app has more than 1500+ stickers that you can customize. Along with this, you can also use this app to create full 3D avatars of yourself with the real-time face swap option. You can share and send your personal emojis to friends and family on Messenger, WhatsApp, and Snapchat.
8.Mojipop (Android and iPhone)
Mojipop is an app that you can use to take a selfie and create your own avatars and stickers. This app has an advanced facial recognition feature, so it is very easy to create and edit animojis with Mojipop. You can share them on social media and use them in day-to-day conversations to make them more fun. It also allows you to create a personalized GIF sticker on this device.
9.Emoji Maker (Android)
Emoji maker app can create free personal and animated phone emojis. It has many popular characters like a pig, fox, cat, panda, and other animated emojis. Moreover, you can also create your avatar by customizing your face, hair, body, and more. You can choose from a wide range of moods, expressions, and animated text as well. Emoji Maker app also allows you to send and receive animated emojis on your phone. This is a very simple 3D animated Avatar and sticker making app that anyone can easily use and express themselves!
10.Big Emoji (Android)
big emoji is a 3D Avatar creator app for Android that can create your 3D avatars and animojis. This app has over 5000+ emojis and emoticons. It allows you to edit and customize emojis by changing the background, color, and other features. It is easy to use, and it is compatible with older devices as well. Like other emoji apps, Big Emoji also allows you to send and share custom emojis on social media apps like Messenger, Facebook, WhatsApp, and Snapchat.
Bonus Tip-Add Animoji to Your Video with Wondershare Filmora
Filmora from Wondershare is one of the most popular video editing tools that comes with various cool features. It is user-friendly with an intuitive interface that makes the app suitable for beginners as well.
Filmora is the number one tool for all types of video editing , whether you create YouTube vlogs, Professional Videos, or TikToks. So, no matter what the purpose, Wondershare Filmora is the best tool to test your creativity.
How to Add Animoji in Video with Wondershare Filmora?
One of the best features of Wondershare Filmora is motion tracking. You can use this feature to add and edit emojis and animojis in any video. Motion tracking allows you to track the movement of something in a video to add images, text, stickers, or emojis.
Follow these steps to add animoji/emoji in your videos using the motion tracking feature in Wondershare Filmora:
Step 1: Download and Install Filmora
First of all, download and install Wondershare Filmora on your Mac or PC from the official website.
Step 2: Launch the Wondershare Filmora
Once you install the app, launch it on the desktop, and open the app.
Step 3: Import Video
Now, click on the “Import Media Files Here” option on the welcome screen and import the video and emoji/animoji to the media library. Once the files are uploaded, they will appear on the left side of the screen in Media Tab.
Step 4: Add Emoji or Animoji to Video
Drag the video from the Media Tab and drop it onto a video track on the timeline. Now, to apply motion tracking, place the play-head at the beginning of the clip. The video tracking will start wherever the play-head.
Now, click on the icon in the timeline bar to enable the motion tracking tool. Once the tracking box appears, move it to select the object that you want to track. Now you can place the emoji or Animoji that you want to add. Go to the Media Tab and select the Animoji. Place it wherever you want to.
Step 5: Export Video
Click on the Export button and export your video to your computer or directly to a YouTube or Vimeo channel.
Conclusion
Modern communication is all about emojis and expressions. Nowadays, emojis and animojis have become an essential part of all our digital interactions and communications. From popular social media apps to smartphone keywords, emojis are present everywhere! If you don’t know how to create and edit animoji, use one of the 10 best animoji apps mentioned above!
Shanoon Cox
Shanoon Cox is a writer and a lover of all things video.
Follow @Shanoon Cox
Learn All About Lip-Syncing in Animation
Learn all about Lip-Syncing in Animation
An easy yet powerful editor
Numerous effects to choose from
Detailed tutorials provided by the official channel
Lip syncing is one of the important parts of animations that need to be done perfectly. As children we have all enjoyed the special way in which Donald Duck or Mickey Mouse used to talk in cartoons, this is all because of the perfect lip-syncing.

Lip-sync animation tutorial are available that can assist you with the task.
In this article
01 [What is lip-syncing and its importance in animations?](#Part 1)
02 [Key factors to consider while lip-syncing in animations.](#Part 2)
03 [Best software for lip-syncing animations.](#Part 3)
04 [Best all-in-one video editing software for creating impressive animations.](#Part 4)
Part 1 What is Lip-syncing and Its Importance in Animations
In the simplest terms, lip-syncing can be termed as the process and way in which the sound is synchronized to the characters in animation. It is lip-syncing which brings life to the characters and makes them look talking. The process of lip-syncing in animations includes the dialogues and the mouth charts. The dialogues are broken into the phonetic syllables and the frames required for these syllables are then accessed.
Animations are moving and talking images and liveliness come from the dialogues that they speak. So, to make these talks appear real, flawless lip-syncing is very important.
Part 2 Key Factors to Consider While Lip-syncing in Animations
To make the lip-syncing in your animation look perfect several factors need to be taken care of. Some of these important ones are enlisted below.
01 Perfect Match of the Keyframes
The keyframes for the shapes of the words phrase by phrase needs to be perfect to make it look right. The right lip sync will have the correct timings from the mouth open to the mouth close.
02 Adding Body Language
To make the characters in your animations look real and lively, adding gestures and body language will play a huge role. Moreover, lip-syncing along with facial expressions will add to the overall richness of the animations.
03 Watch Yourself or Record Sample Videos
To get the correct lip-syncing for your animations, you can first try and practice by using a mirror or recording some trial videos. In these videos, you can speak and observe the jaw motion.
04 Use Blending
The technique of blending can also be used where the focus is on the most important shape of the mouth rather than each syllable. These shapes can then be blended and used in different ways and combinations.
05 Emphasize Eyes
Eyes need special focus as they can be used for expressing several emotions. Especially during the close-up shots in animations, a person looks at the eyes before the rest of the face.
06 Use the Apt Voice
No matter how perfectly the lip-syncing is done, it will not look good if the voice does not match the characters in your animations. So, make sure to select the voice that matches the looks and the personality of your characters.
Part 3 Best Software for Lip-syncing Animations
Lip sync in animations has become an easier and hassle-free task thanks to the advanced technology and several software and programs available. These 2D and 3D animation-supported tools allow syncing the mouth of the animated character with the dialogues and audio tracks. A few widely used tools for the task are enlisted below.
01 Anime Studio
This is a Windows and Mac-based professional software that supports multiple advanced functions like bone-rigging, automatic image tracing, integrated lip-synching, motion tracking, 3D shape design, character wizard, and many more. Using the vector-based tools of the software, you can add drawings and images for creating customized characters. There is a built-in character wizard that can be used for quick drawing and rigging the characters from the starting. Anime Studio allows recording the sound clip and then these can be synced to the animated characters. Several pre-set props, scenes, videos, stock audio, and characters are also available to choose from.

02 DAZ Studio
This is free-to-use software that can create impressive animations using multiple advanced features. The simple interface and functioning of the software make it apt even for users who have no prior experience in animations. The lip-sync feature of the software can be used to add audio to the created animations. Additional functions include morphing, adjusting different camera angles, plug-ins with advanced capabilities, and more.

03 Crazy Talk
To create impressive animations and add lip-syncing this is one of the popularly used tools. Quick to download, the software allows adding images and pictures to the tool, and then the head, mouth, and eye movement can be added along with lip-synced audio for creating impressive animations. The built-in timeline of the software offers you complete control over the animations, audio, and other parameters. Detailed customization options are supported including the teeth in the mouth of the character. The software is available for Windows and Mac systems.

04 Toon Boom Studio
To help you create rich animations for movies, games, learning, social media sites and any other purpose this is an apt tool to use. The software has a basic version for beginners while an advanced version for professionals. You can import media files in an array of formats like AI, JPEG, TGA, GIF, and others to create animations of your choice. Audio files in WAV, AIFF, and MP3 formats can be added to the created animations and the lip-sync analyzer tool can be used for that perfect syncing. Additional features include zoom-in, zoom-out, skeleton effect, support to the 3D background, multiple formats for exporting files, and more.

05 Crazy Talk Animator
This 2D animation tool can be used for creating rich animations by adding motion and different effects to your images. You can also create landscapes and scenes to further enhance the overall clip. Lip-sync to the animations is supported by the tool and you can even create marks for facial expression and use them to morph. Several tutorials and web resources are available for a better understanding of the tool and its functioning.

Adobe is also a good tool for all types of animation requirements and you can also check the adobe animate lip sync tutorial for your lip-syncing task.
Key Takeaways from This Episode
● Lip-syncing is an important and inevitable part of animations. Lip-syncing brings richness and liveliness to the clips.
● An array of tools and software are available that can help you effortlessly lip-sync animations.
● or all types of video editing needs and for creating animations, Wondershare Filmora works as an excellent all-in-one software.
Lip syncing is one of the important parts of animations that need to be done perfectly. As children we have all enjoyed the special way in which Donald Duck or Mickey Mouse used to talk in cartoons, this is all because of the perfect lip-syncing.
Lip-sync animation tutorial are available that can assist you with the task.
In this article
01 [What is lip-syncing and its importance in animations?](#Part 1)
02 [Key factors to consider while lip-syncing in animations.](#Part 2)
03 [Best software for lip-syncing animations.](#Part 3)
04 [Best all-in-one video editing software for creating impressive animations.](#Part 4)
Part 1 What is Lip-syncing and Its Importance in Animations
In the simplest terms, lip-syncing can be termed as the process and way in which the sound is synchronized to the characters in animation. It is lip-syncing which brings life to the characters and makes them look talking. The process of lip-syncing in animations includes the dialogues and the mouth charts. The dialogues are broken into the phonetic syllables and the frames required for these syllables are then accessed.
Animations are moving and talking images and liveliness come from the dialogues that they speak. So, to make these talks appear real, flawless lip-syncing is very important.
Part 2 Key Factors to Consider While Lip-syncing in Animations
To make the lip-syncing in your animation look perfect several factors need to be taken care of. Some of these important ones are enlisted below.
01 Perfect Match of the Keyframes
The keyframes for the shapes of the words phrase by phrase needs to be perfect to make it look right. The right lip sync will have the correct timings from the mouth open to the mouth close.
02 Adding Body Language
To make the characters in your animations look real and lively, adding gestures and body language will play a huge role. Moreover, lip-syncing along with facial expressions will add to the overall richness of the animations.
03 Watch Yourself or Record Sample Videos
To get the correct lip-syncing for your animations, you can first try and practice by using a mirror or recording some trial videos. In these videos, you can speak and observe the jaw motion.
04 Use Blending
The technique of blending can also be used where the focus is on the most important shape of the mouth rather than each syllable. These shapes can then be blended and used in different ways and combinations.
05 Emphasize Eyes
Eyes need special focus as they can be used for expressing several emotions. Especially during the close-up shots in animations, a person looks at the eyes before the rest of the face.
06 Use the Apt Voice
No matter how perfectly the lip-syncing is done, it will not look good if the voice does not match the characters in your animations. So, make sure to select the voice that matches the looks and the personality of your characters.
Part 3 Best Software for Lip-syncing Animations
Lip sync in animations has become an easier and hassle-free task thanks to the advanced technology and several software and programs available. These 2D and 3D animation-supported tools allow syncing the mouth of the animated character with the dialogues and audio tracks. A few widely used tools for the task are enlisted below.
01 Anime Studio
This is a Windows and Mac-based professional software that supports multiple advanced functions like bone-rigging, automatic image tracing, integrated lip-synching, motion tracking, 3D shape design, character wizard, and many more. Using the vector-based tools of the software, you can add drawings and images for creating customized characters. There is a built-in character wizard that can be used for quick drawing and rigging the characters from the starting. Anime Studio allows recording the sound clip and then these can be synced to the animated characters. Several pre-set props, scenes, videos, stock audio, and characters are also available to choose from.
02 DAZ Studio
This is free-to-use software that can create impressive animations using multiple advanced features. The simple interface and functioning of the software make it apt even for users who have no prior experience in animations. The lip-sync feature of the software can be used to add audio to the created animations. Additional functions include morphing, adjusting different camera angles, plug-ins with advanced capabilities, and more.
03 Crazy Talk
To create impressive animations and add lip-syncing this is one of the popularly used tools. Quick to download, the software allows adding images and pictures to the tool, and then the head, mouth, and eye movement can be added along with lip-synced audio for creating impressive animations. The built-in timeline of the software offers you complete control over the animations, audio, and other parameters. Detailed customization options are supported including the teeth in the mouth of the character. The software is available for Windows and Mac systems.
04 Toon Boom Studio
To help you create rich animations for movies, games, learning, social media sites and any other purpose this is an apt tool to use. The software has a basic version for beginners while an advanced version for professionals. You can import media files in an array of formats like AI, JPEG, TGA, GIF, and others to create animations of your choice. Audio files in WAV, AIFF, and MP3 formats can be added to the created animations and the lip-sync analyzer tool can be used for that perfect syncing. Additional features include zoom-in, zoom-out, skeleton effect, support to the 3D background, multiple formats for exporting files, and more.
05 Crazy Talk Animator
This 2D animation tool can be used for creating rich animations by adding motion and different effects to your images. You can also create landscapes and scenes to further enhance the overall clip. Lip-sync to the animations is supported by the tool and you can even create marks for facial expression and use them to morph. Several tutorials and web resources are available for a better understanding of the tool and its functioning.
Adobe is also a good tool for all types of animation requirements and you can also check the adobe animate lip sync tutorial for your lip-syncing task.
Key Takeaways from This Episode
● Lip-syncing is an important and inevitable part of animations. Lip-syncing brings richness and liveliness to the clips.
● An array of tools and software are available that can help you effortlessly lip-sync animations.
● or all types of video editing needs and for creating animations, Wondershare Filmora works as an excellent all-in-one software.
How to Make GIF Stickers for WhatsApp 100% The Simple Way
How to Make GIF Stickers for WhatsApp 100% The Easy Way
An easy yet powerful editor
Numerous effects to choose from
Detailed tutorials provided by the official channel
Wish your dear friends and loved ones on their special days using some interesting WhatsApp stickers. There is an integrated library of these stickers in different categories on your Android as well as iPhone.

Still, if you want a more personalized one, you can create a customized sticker using videos on your phone or using third-party apps and tools. Learn about how to use the integrated stickers and create customized in the following parts of the topic.
In this article
01 [Using stickers from integrated library](#Part 1)
02 [Best tools to create animated GIF sticker – Wondershare Filmora](#Part 2)
03 [Using iPhone and Android videos to make GIF stickers](#Part 3)
Part 1 Using stickers from integrated library
WhatsApp on your Android and iPhone has a decent collection of stickers that can send to your contacts. You simply need to look for the sticker in the desired category and send it and the steps for adding GIFs to WhatsApp are listed below.
Step 1. Open the WhatsApp contact to which you wish to send the sticker. To open the animation library on your Android device, tap on the emoji icon and choose the GIF option. On an iPhone, the library opens by clicking on the sticker icon.
Step 2. Search and select the desired sticker from the available options.
Step 3. To finally share the selected one, click on the sticker and then on the Send button.

Part 2 Best tools to create animated GIF sticker – Wondershare Filmora
If you are in search of a tool that lets you create a professional-looking animated GIF easily Wondershare Filmora Video Editor is the best WhatsApp GIF maker tool. This software once downloaded on your Windows or Mac system, is all set to look after multiple video editing tasks including GIF creation.
Wondershare Filmora
Get started easily with Filmora’s powerful performance, intuitive interface, and countless effects!
Try It Free Try It Free Try It Free Learn More >

Your videos in MP4, MKV, MOV, and several other key formats can be converted to a GIF file using the program and multiple options for editing are available as well like crop, trim, add effects, add texts, and more.
The intuitive interface of the software makes it easy to use even by non-techy people.
Steps on how to make WhatsApp GIF sticker using Wondershare Filmora
**Step 1.**On your Windows or Mac, download, install, and launch the Wondershare software and then import the video files from which GIF has to be created.
Step 2. The added files have to be now dragged and dropped to the timeline.

Step 3. Editing tools for customization can be used.
**Step 4.**For further personalization by adding text, effects, and more the related functions can be used.

Step 5. Next, choose the GIF option as the target file format from the Local tab. Select the file name and the location. Clicking on the EXPORT button will start the processing.

Part 3 Using iPhone and Android videos to make GIF stickers
If you do not wish to use any third-party tools, basic stickers can also be created using the videos on your Android and iPhone. A video cannot be more than 6 seconds in length to be used as a GIF and thus longer videos need to be trimmed.
Steps on how to make a GIF stickers for WhatsApp
Step 1. Launch the WhatsApp contact to which you wish to send the GIF. Add the video from the device gallery by clicking on the camera button. A video using the camera can also be recorded.
Note: Ensure that video length is not more than 6 seconds. If it is more, use the slider at the top to trim the video.
Step 2. Next, you can add the text using the Caption option.
Step 3. Now to convert this video into a GIF click on the GIF button under the video and then tap on the Send button to share this animation with the contact.

● Key Takeaways from This Episode →
●WhatsApp has an integrated library of GIF stickers in a wide range of categories.
●For creating customized stickers, Wondershare Filmora works as the best software as it is simple, quick, and has multiple editing options.
●Using the videos from the gallery, GIF stickers can also be created on your Android and iPhone.
Wish your dear friends and loved ones on their special days using some interesting WhatsApp stickers. There is an integrated library of these stickers in different categories on your Android as well as iPhone.
Still, if you want a more personalized one, you can create a customized sticker using videos on your phone or using third-party apps and tools. Learn about how to use the integrated stickers and create customized in the following parts of the topic.
In this article
01 [Using stickers from integrated library](#Part 1)
02 [Best tools to create animated GIF sticker – Wondershare Filmora](#Part 2)
03 [Using iPhone and Android videos to make GIF stickers](#Part 3)
Part 1 Using stickers from integrated library
WhatsApp on your Android and iPhone has a decent collection of stickers that can send to your contacts. You simply need to look for the sticker in the desired category and send it and the steps for adding GIFs to WhatsApp are listed below.
Step 1. Open the WhatsApp contact to which you wish to send the sticker. To open the animation library on your Android device, tap on the emoji icon and choose the GIF option. On an iPhone, the library opens by clicking on the sticker icon.
Step 2. Search and select the desired sticker from the available options.
Step 3. To finally share the selected one, click on the sticker and then on the Send button.
Part 2 Best tools to create animated GIF sticker – Wondershare Filmora
If you are in search of a tool that lets you create a professional-looking animated GIF easily Wondershare Filmora Video Editor is the best WhatsApp GIF maker tool. This software once downloaded on your Windows or Mac system, is all set to look after multiple video editing tasks including GIF creation.
Wondershare Filmora
Get started easily with Filmora’s powerful performance, intuitive interface, and countless effects!
Try It Free Try It Free Try It Free Learn More >
Your videos in MP4, MKV, MOV, and several other key formats can be converted to a GIF file using the program and multiple options for editing are available as well like crop, trim, add effects, add texts, and more.
The intuitive interface of the software makes it easy to use even by non-techy people.
Steps on how to make WhatsApp GIF sticker using Wondershare Filmora
**Step 1.**On your Windows or Mac, download, install, and launch the Wondershare software and then import the video files from which GIF has to be created.
Step 2. The added files have to be now dragged and dropped to the timeline.
Step 3. Editing tools for customization can be used.
**Step 4.**For further personalization by adding text, effects, and more the related functions can be used.
Step 5. Next, choose the GIF option as the target file format from the Local tab. Select the file name and the location. Clicking on the EXPORT button will start the processing.
Part 3 Using iPhone and Android videos to make GIF stickers
If you do not wish to use any third-party tools, basic stickers can also be created using the videos on your Android and iPhone. A video cannot be more than 6 seconds in length to be used as a GIF and thus longer videos need to be trimmed.
Steps on how to make a GIF stickers for WhatsApp
Step 1. Launch the WhatsApp contact to which you wish to send the GIF. Add the video from the device gallery by clicking on the camera button. A video using the camera can also be recorded.
Note: Ensure that video length is not more than 6 seconds. If it is more, use the slider at the top to trim the video.
Step 2. Next, you can add the text using the Caption option.
Step 3. Now to convert this video into a GIF click on the GIF button under the video and then tap on the Send button to share this animation with the contact.
● Key Takeaways from This Episode →
●WhatsApp has an integrated library of GIF stickers in a wide range of categories.
●For creating customized stickers, Wondershare Filmora works as the best software as it is simple, quick, and has multiple editing options.
●Using the videos from the gallery, GIF stickers can also be created on your Android and iPhone.
Tips for Animated Collage Maker
Versatile Video Editor - Wondershare Filmora
An easy yet powerful editor
Numerous effects to choose from
Detailed tutorials provided by the official channel
Using collections of pictures, you can create a collage and animate it to excite the audience. The animated collage maker eases this task and aids in creating the collage as a pro editor. Manually, you would have seen many images pasted on a single sheet conveying a meaningful message overall. A similar scenario happens when you do them digitally. You can build a collage with the help of a wide range of images. Mostly these are used to excite the viewers during special occasions like parties, anniversaries.

For the official purpose, the animated collage occupies the business webpages to enlighten the website visitors about the products and services. The animated collage has dual purposes that meet your personal and professional needs. In this article, you will learn about the animated collage making tools in detail and the best way in creating them efficiently. Choose the best program that satisfies your needs with more customizing properties. Scroll down to discover the best applications to build a collage that serves your needs precisely.
In this article
01 What is an animated collage maker?
02 Best 4 animated collage maker tools
Part 1: What is an animated collage maker?
The animated collage maker is a sophisticated program that imports the desired images into the working space and animate them using the in-built options. Before applying the animations to the collage, you can edit the images and bring the best out of your captures. The animated collage will convey a meaningful message to the audience. Here, you can add texts, pictures to express your emotions in the animation. If you closely watch the digital market, you will come across a wide range of applications serving this animation as per your requirements.

Every tool is unique and comprised of intellectual animation effects to include in your files to acquire the desired outcomes. You can also try collage making with the captured videos too. Any media files are sufficient to create a collage to attract the audience. Check for the compatibility of file formats when you choose any tool to perform this activity.
Part 2: Best 4 animated collage maker tools
In this section, you will learn about the unique tools that assist in making a collage using the media files and inserting your favorite animations to enhance interaction with the viewers. Every application is unique and they provide different elements to serve your design needs. Both the professionals and newbie users can try the below-discussed tools without any hesitation. They offer a simple environment and you can work on your images confidently to build interactive files for your needs.
The below discussion gives you valuable insights on the tools and the efficient way to employ them while creating a meaningful collage for your requirements. Surf them carefully and try the app that inspires you a lot.
2.1 Photos.google.com
The Google platform serves you with the making of collages using the captured media files. Step into this environment to create a collage for your needs hassle-free. First, go to photos.google.com and log in to your Google account. Then, click Utilities and press ‘Create new -> Animation or Collage’. Add the images from its storage space and tap the ‘Create’ button. It is a simple method and you can create a collage in no time. Without downloading any application, you can build an animated collage for your requirements. You can use any number of images during the making of the collage process.

There are options to include videos too. You can choose the perfect files as per your desires. It is a built-in application provided by Google to build their collage by including the stored images or videos in this virtual space.
**2.2 Canva
The Canva is an incredible program that offers excellent editing options on the media files. You can either make a video or image collage using this platform. While making the collage, you can add texts to convey a thousand meanings to the audience. Use the animated collage files to narrate stories based on your theme. Canva is widely used by professionals and you can use it to create a collage for official and personal use. The fabulous template collections give you a wow feeling when you step into the working space. The sophisticated environment and the controls are explicitly visible for quick reach.

To create a collage using Canva, launch the application and choose the base template for this process from its libraries. Then, navigate the folders and select the media files to upload them into this design interface. Next, customize it by adding stickers, changing the colors, inserting texts to add flavors to the existing content. Edit the videos with basic customizing options like trim, crop, and rotate. Finally, tap the create a video collage button to build an animated collage file in MP4 format. Download it and use them on any platform flawlessly.
**2.3 Filmora
The Filmora is a sophisticated tool that creates miracles with the media files. You can use this application as an editor in modifying the details precisely to enhance its appearance. Using the image and video files you can create a wide range of GIFs and other animated images in no time. This platform offers excellent editing options to grab the attention of the audience. It serves as a reliable program for professionals to make the best out of the captured images.
Wondershare Filmora - Best Video Editor for Mac/Windows
5,481,435 people have downloaded it.
Unleash your imagination while customizing the media files
It has a simple interface and aids you in personalizing the pictures limitlessly.
The built-in templates and toolbox excite you when performing miraculous changes to your images and videos.
Export and import the files effortlessly despite file sizes and locations.
The availability of the tutorials guides even a newbie to use all its functionalities precisely.
You can use the customizing elements to animate the GIFs and include texts and overlays as per your needs. It is an excellent application that performs beyond your expectations.
**2.4 Kizoa
It is an online **animated collage maker that serves you with dozens of templates. You can either create a collage from scratch or use the in-built templates to make your work easy. Step into its website and log in to build your favorite collage using the collection of media files. Choose the templates and upload the images or videos. You can add some effects to enhance its movements and finally click the create button to complete the process. Make an instant share to desired media platform using the export option. It is a fabulous online tool that offers you a comfortable space to bring wonders to your images. Create an interactive and animated collage to entertain the audience to the core. Use this program without any hesitation because the automated wizard will guide you to proceed forward with the respective pop-up messages.

These are the ideal and productive animated collage maker tools that excel in the digital space. They are reliable and you can opt for them even without any second thought. The online and offline programs aid in making the best out of the captured media files. Choose the one that meets your needs and proceed with the making of the animated collage to entertain your guests during special occasions.
**Conclusion
Thus, this article had given you enlightening insights about the best - animated collage makers at the online platform. The above-discussed applications are highly performable and they serve your needs without any excuses. Use the Filmora app to perform multitasking on your media files and add extra detail to your animated images or videos with the help of the in-built elements. Stay connected with this article to discover new horizons about the collage maker tools.
Using collections of pictures, you can create a collage and animate it to excite the audience. The animated collage maker eases this task and aids in creating the collage as a pro editor. Manually, you would have seen many images pasted on a single sheet conveying a meaningful message overall. A similar scenario happens when you do them digitally. You can build a collage with the help of a wide range of images. Mostly these are used to excite the viewers during special occasions like parties, anniversaries.
For the official purpose, the animated collage occupies the business webpages to enlighten the website visitors about the products and services. The animated collage has dual purposes that meet your personal and professional needs. In this article, you will learn about the animated collage making tools in detail and the best way in creating them efficiently. Choose the best program that satisfies your needs with more customizing properties. Scroll down to discover the best applications to build a collage that serves your needs precisely.
In this article
01 What is an animated collage maker?
02 Best 4 animated collage maker tools
Part 1: What is an animated collage maker?
The animated collage maker is a sophisticated program that imports the desired images into the working space and animate them using the in-built options. Before applying the animations to the collage, you can edit the images and bring the best out of your captures. The animated collage will convey a meaningful message to the audience. Here, you can add texts, pictures to express your emotions in the animation. If you closely watch the digital market, you will come across a wide range of applications serving this animation as per your requirements.
Every tool is unique and comprised of intellectual animation effects to include in your files to acquire the desired outcomes. You can also try collage making with the captured videos too. Any media files are sufficient to create a collage to attract the audience. Check for the compatibility of file formats when you choose any tool to perform this activity.
Part 2: Best 4 animated collage maker tools
In this section, you will learn about the unique tools that assist in making a collage using the media files and inserting your favorite animations to enhance interaction with the viewers. Every application is unique and they provide different elements to serve your design needs. Both the professionals and newbie users can try the below-discussed tools without any hesitation. They offer a simple environment and you can work on your images confidently to build interactive files for your needs.
The below discussion gives you valuable insights on the tools and the efficient way to employ them while creating a meaningful collage for your requirements. Surf them carefully and try the app that inspires you a lot.
2.1 Photos.google.com
The Google platform serves you with the making of collages using the captured media files. Step into this environment to create a collage for your needs hassle-free. First, go to photos.google.com and log in to your Google account. Then, click Utilities and press ‘Create new -> Animation or Collage’. Add the images from its storage space and tap the ‘Create’ button. It is a simple method and you can create a collage in no time. Without downloading any application, you can build an animated collage for your requirements. You can use any number of images during the making of the collage process.
There are options to include videos too. You can choose the perfect files as per your desires. It is a built-in application provided by Google to build their collage by including the stored images or videos in this virtual space.
**2.2 Canva
The Canva is an incredible program that offers excellent editing options on the media files. You can either make a video or image collage using this platform. While making the collage, you can add texts to convey a thousand meanings to the audience. Use the animated collage files to narrate stories based on your theme. Canva is widely used by professionals and you can use it to create a collage for official and personal use. The fabulous template collections give you a wow feeling when you step into the working space. The sophisticated environment and the controls are explicitly visible for quick reach.
To create a collage using Canva, launch the application and choose the base template for this process from its libraries. Then, navigate the folders and select the media files to upload them into this design interface. Next, customize it by adding stickers, changing the colors, inserting texts to add flavors to the existing content. Edit the videos with basic customizing options like trim, crop, and rotate. Finally, tap the create a video collage button to build an animated collage file in MP4 format. Download it and use them on any platform flawlessly.
**2.3 Filmora
The Filmora is a sophisticated tool that creates miracles with the media files. You can use this application as an editor in modifying the details precisely to enhance its appearance. Using the image and video files you can create a wide range of GIFs and other animated images in no time. This platform offers excellent editing options to grab the attention of the audience. It serves as a reliable program for professionals to make the best out of the captured images.
Wondershare Filmora - Best Video Editor for Mac/Windows
5,481,435 people have downloaded it.
Unleash your imagination while customizing the media files
It has a simple interface and aids you in personalizing the pictures limitlessly.
The built-in templates and toolbox excite you when performing miraculous changes to your images and videos.
Export and import the files effortlessly despite file sizes and locations.
The availability of the tutorials guides even a newbie to use all its functionalities precisely.
You can use the customizing elements to animate the GIFs and include texts and overlays as per your needs. It is an excellent application that performs beyond your expectations.
**2.4 Kizoa
It is an online **animated collage maker that serves you with dozens of templates. You can either create a collage from scratch or use the in-built templates to make your work easy. Step into its website and log in to build your favorite collage using the collection of media files. Choose the templates and upload the images or videos. You can add some effects to enhance its movements and finally click the create button to complete the process. Make an instant share to desired media platform using the export option. It is a fabulous online tool that offers you a comfortable space to bring wonders to your images. Create an interactive and animated collage to entertain the audience to the core. Use this program without any hesitation because the automated wizard will guide you to proceed forward with the respective pop-up messages.
These are the ideal and productive animated collage maker tools that excel in the digital space. They are reliable and you can opt for them even without any second thought. The online and offline programs aid in making the best out of the captured media files. Choose the one that meets your needs and proceed with the making of the animated collage to entertain your guests during special occasions.
**Conclusion
Thus, this article had given you enlightening insights about the best - animated collage makers at the online platform. The above-discussed applications are highly performable and they serve your needs without any excuses. Use the Filmora app to perform multitasking on your media files and add extra detail to your animated images or videos with the help of the in-built elements. Stay connected with this article to discover new horizons about the collage maker tools.
Stunning Ideas About Creating Personalised WhatsApp GIF Sticker
Stunning Ideas About Creating Personalised WhatsApp GIF Sticker
An easy yet powerful editor
Numerous effects to choose from
Detailed tutorials provided by the official channel
WhatsApp has become the most popularly and widely used medium for text conversation and with the reach of the platform increasing every day, new features are added from time to time to keep the users hooked. In the same line, WhatsApp now allows creating customized animated GIF stickers to be used in the chats.
Animated stickers will let you express your feeling and thoughts through animations which will surely make the conversation more interesting. These stickers can be created on your Android as well as iPhone. The article below will help you to know the detailed process to create GIF sticker WhatsApp and also how these stickers can be used in your videos to make the videos more entertaining.
In this article
01 [How to Create Custom Animated WhatsApp Stickers on Android and iPhone](#Part 1)
02 [How to Use Custom Stickers in Filmora?](#Part 2)
Part 1 How to Create Custom Animated WhatsApp Stickers on Android and iPhone
Animated third-party stickers cannot be added directly to WhatsApp and thus you can create a customized one. To create these GIF stickers for WhatsApp, you would need the help of third-party apps.
For Android devices, one such popular app is the Sticker Maker app. For iPhone, we suggest using Sticker Maker Studio app.
Once these apps are installed on your device, GIF stickers can be made in no time.
Steps to make sticker GIF WhatsApp on Android phone
Step 1. Download, install and open the Sticker maker app on your Android device.
Step 2. Tap on the “Create a new sticker pack” option on your app.
Step 3. Give the desired name to your sticker pack and click on the Create button.
Step 4. To add the animated stickers, click on the created sticker pack.
Step 5. Next, click on the first box, and then from the menu choose the Select file option.

Step 6. Next, choose the video from your phone from which you wish to create a sticker. You can even add a GIF file. After the media file is added, the app will compress it and will turn it into an animated sticker automatically.
Step 7. Now, you need to add 3 animated stickers to the other boxes of the sticker app (as mentioned in step 5).
Note: Multiple stickers can be added using the same process.
Step 8. Click on the “Add to WhatsApp” button after a minimum of 3 stickers are added to the pack.
Step 9. Now, your stickers are ready. Open the WhatsApp chat and launch the sticker panel where you can see your created GIF stickers. Choose the sticker you want, add it to your chat, and send it.

Steps to make WhatsApp Sticker GIF on iPhone
Step 1. On your iPhone, download, install and launch the Sticker Maker Studio app from the app store.
Step 2. Choose the sticker pack and also the name of the author at the respective boxes and then click on the Create button.
Step 3. Next, click on the new sticker pack that is created.

Step 4. Multiple boxes will now appear from which you need to choose the first one and then
select the Files option.
Step 5. Choose the desired Video from your device from which sticker has to be created. You can also create GIF to WhatsApp sticker. Other stickers to the pack can be added similarly. The app will automatically convert the added file to a sticker.
Step 6. After the stickers are added (at least 3), click on the Add to WhatsApp button at the generated Tray icon.

Note: If you see your tray icon to be blank, click on it else there will be issues adding the stickers to the WhatsApp chat later. A tray icon can be selected from the images.
Step 7. Next, you will be asked if you wish to open WhatsApp, click on Okay.
Step 8. Now, to add the animated GIF stickers to WhatsApp, you need to click on the Save button and your stickers are ready to be used in the chat.

Part 2 How to Use Custom Stickers in Wondershare Filmora Video Editor ?
For Win 7 or later (64-bit)
For macOS 10.12 or later
Why use your customized GIF stickers only in WhatsApp chats when they can be used in Videos as well? Yes, using Wondershare Filmora software you can use your customized animated stickers in your videos as well to make them more eye-catchy and interesting. Additionally, you can also add the effects to your videos using the software.
Wondershare Filmora is a feature-packed that allows creating stunning and professional-looking videos using its wide range of functions like motion tracking, adding effects, color matching, noise enhancement, keyframe animations, adding captions, and much more.
The user-friendly interface makes the tool apt even for beginners.
Steps to add GIF animations to videos using Wondershare Filmora
Step 1. On your Windows or Mac system, launch the software and choose Media > Import> Import Media Files on the main interface.

Step 2. Next, choose and add the created animated sticker to the software interface. Alternatively, you can also select the sticker from Elements. Drag and drop the added sticker to the video.

Step 3. To adjust the parameters like the size and the rotation of the sticker, you need to double-click on the sticker at the timeline. Additionally, color adjustments can also be made and if needed, you can also add 3D motion.

Step 4. To change the size and the location of the sticker, you need to drag it accordingly in
the viewer panel.
Step 5. Next, at the Local tab, choose the video format, resolution, and desktop folder. Finally, click on the Export button to start processing.
Note: The created video can also be saved to DVD or can be uploaded to YouTube and Vimeo directly using the software.

● Key Takeaways from This Episode →
●The latest GIF sticker feature of WhatsApp allows adding interesting animations to your chats.
●To create customized GIF stickers on Android and iPhone, third-party apps have to be used.
●The customized stickers can also be added to your videos using Wondershare Filmora.
WhatsApp has become the most popularly and widely used medium for text conversation and with the reach of the platform increasing every day, new features are added from time to time to keep the users hooked. In the same line, WhatsApp now allows creating customized animated GIF stickers to be used in the chats.
Animated stickers will let you express your feeling and thoughts through animations which will surely make the conversation more interesting. These stickers can be created on your Android as well as iPhone. The article below will help you to know the detailed process to create GIF sticker WhatsApp and also how these stickers can be used in your videos to make the videos more entertaining.
In this article
01 [How to Create Custom Animated WhatsApp Stickers on Android and iPhone](#Part 1)
02 [How to Use Custom Stickers in Filmora?](#Part 2)
Part 1 How to Create Custom Animated WhatsApp Stickers on Android and iPhone
Animated third-party stickers cannot be added directly to WhatsApp and thus you can create a customized one. To create these GIF stickers for WhatsApp, you would need the help of third-party apps.
For Android devices, one such popular app is the Sticker Maker app. For iPhone, we suggest using Sticker Maker Studio app.
Once these apps are installed on your device, GIF stickers can be made in no time.
Steps to make sticker GIF WhatsApp on Android phone
Step 1. Download, install and open the Sticker maker app on your Android device.
Step 2. Tap on the “Create a new sticker pack” option on your app.
Step 3. Give the desired name to your sticker pack and click on the Create button.
Step 4. To add the animated stickers, click on the created sticker pack.
Step 5. Next, click on the first box, and then from the menu choose the Select file option.
Step 6. Next, choose the video from your phone from which you wish to create a sticker. You can even add a GIF file. After the media file is added, the app will compress it and will turn it into an animated sticker automatically.
Step 7. Now, you need to add 3 animated stickers to the other boxes of the sticker app (as mentioned in step 5).
Note: Multiple stickers can be added using the same process.
Step 8. Click on the “Add to WhatsApp” button after a minimum of 3 stickers are added to the pack.
Step 9. Now, your stickers are ready. Open the WhatsApp chat and launch the sticker panel where you can see your created GIF stickers. Choose the sticker you want, add it to your chat, and send it.
Steps to make WhatsApp Sticker GIF on iPhone
Step 1. On your iPhone, download, install and launch the Sticker Maker Studio app from the app store.
Step 2. Choose the sticker pack and also the name of the author at the respective boxes and then click on the Create button.
Step 3. Next, click on the new sticker pack that is created.
Step 4. Multiple boxes will now appear from which you need to choose the first one and then
select the Files option.
Step 5. Choose the desired Video from your device from which sticker has to be created. You can also create GIF to WhatsApp sticker. Other stickers to the pack can be added similarly. The app will automatically convert the added file to a sticker.
Step 6. After the stickers are added (at least 3), click on the Add to WhatsApp button at the generated Tray icon.
Note: If you see your tray icon to be blank, click on it else there will be issues adding the stickers to the WhatsApp chat later. A tray icon can be selected from the images.
Step 7. Next, you will be asked if you wish to open WhatsApp, click on Okay.
Step 8. Now, to add the animated GIF stickers to WhatsApp, you need to click on the Save button and your stickers are ready to be used in the chat.
Part 2 How to Use Custom Stickers in Wondershare Filmora Video Editor ?
For Win 7 or later (64-bit)
For macOS 10.12 or later
Why use your customized GIF stickers only in WhatsApp chats when they can be used in Videos as well? Yes, using Wondershare Filmora software you can use your customized animated stickers in your videos as well to make them more eye-catchy and interesting. Additionally, you can also add the effects to your videos using the software.
Wondershare Filmora is a feature-packed that allows creating stunning and professional-looking videos using its wide range of functions like motion tracking, adding effects, color matching, noise enhancement, keyframe animations, adding captions, and much more.
The user-friendly interface makes the tool apt even for beginners.
Steps to add GIF animations to videos using Wondershare Filmora
Step 1. On your Windows or Mac system, launch the software and choose Media > Import> Import Media Files on the main interface.
Step 2. Next, choose and add the created animated sticker to the software interface. Alternatively, you can also select the sticker from Elements. Drag and drop the added sticker to the video.
Step 3. To adjust the parameters like the size and the rotation of the sticker, you need to double-click on the sticker at the timeline. Additionally, color adjustments can also be made and if needed, you can also add 3D motion.
Step 4. To change the size and the location of the sticker, you need to drag it accordingly in
the viewer panel.
Step 5. Next, at the Local tab, choose the video format, resolution, and desktop folder. Finally, click on the Export button to start processing.
Note: The created video can also be saved to DVD or can be uploaded to YouTube and Vimeo directly using the software.
● Key Takeaways from This Episode →
●The latest GIF sticker feature of WhatsApp allows adding interesting animations to your chats.
●To create customized GIF stickers on Android and iPhone, third-party apps have to be used.
●The customized stickers can also be added to your videos using Wondershare Filmora.
15 Horror Animes That Will Trigger a Heart Attack
15 Horror Animes That Will Trigger a Heart Attack
Shanoon Cox
Mar 27, 2024• Proven solutions
Horror anime is a sub-genre of anime series. It is based on scary stories, often featuring bloody and grotesque scenes, not for the faint of heart—the horror anime series range from emotional murder mysteries to violent paranormal thrillers.
People who like to experience the thrill of a good scare generally prefer watching horror anime series. The best horror anime can actually terrify you, and many people enjoy being scared. Since there are a lot of scary anime series on the web, you might have trouble finding the best horror anime to pass your weekend. If that’s the case, dive right in and get prepared to be scared.
Best 15 Horror Animes of All Time
Here, we have picked out some of the best horror anime series of all time that are definitely going to creep you out. Test your bravery and watch a terrifying horror anime from our list.
1. Monster
Monster is a horror anime series based on a popular Manga by Naoki Urasawa. It is an impressive thriller based on a top-notch brain surgeon working in a hospital. The young surgeon is faced with an ethical dilemma when forced to abandon the surgery of a boy to save a mayor’s life. But Dr. Tenma chooses to save the boy. This scary anime unfolds as Tenma, at the pinnacle of his medical career, is haunted by a series of death that involves the boy he saved all those years ago. This is the best horror anime series featuring a psychopath’s killing streak.
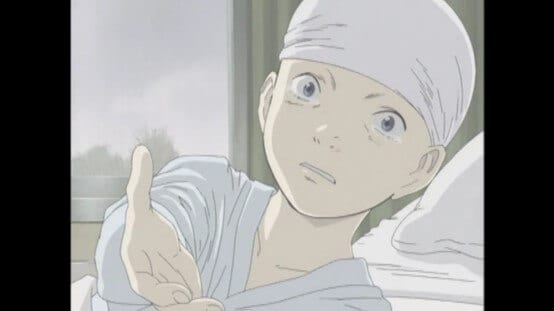 </p
</p
2. Hell Girl
This horror anime series revolves around the subject of hate, revenge, and vengeance. With every new episode of this horror anime, you will witness a new story. The plot is unique and based on supernatural powers. Through a mysterious website, people are able to exact revenge on their tormentors, but there is always a price to pay. In the list of the best horror anime series, Hell Girl takes the lead due to thrilling scenes with the fusion of emotional storylines. As opposed to many horror anime series, this one isn’t very gory, but it portrays horror through the plot, showing the evil side of humans.
 </p
</p
3. Corpse Party
A very gruesome and horror anime is Corpse Party. This horror anime series is based on just 4 episodes, all of which are filled with terror. As the students of Kisaragi Academy perform a ritual on the grounds of their school, they are taken into another dimension where they end up in the Heavenly Host Elementary whose students and staff were murdered years ago. The terrifying ghosts and gory corpses in this scary anime are enough to terrify anyone. It is short and action-packed, guaranteeing that every scene is full of terror.
 </p
</p
4. Another
Another is the best horror anime series with terrifying deaths, much like seen in the movie’ Final Destination’. As the death curse takes the lives of the students of a class, the protagonist, a newly transferred student Kouichi, and a girl with an eye patch must get to the bottom of this. The horror anime slowly unravels scary truths about the incident that resulted in the death of Mei Misaki. Together, Kouichi and Mei try to dig out the root of the problem. Every scene is packed with suspense and horror, keep viewers scared and glued to the screens.
 </p
</p
5. Shiki
Based on the hot topic of vampires, this horror anime takes vampire stories to the next level. Shiki is an excellent scary movie with a twisting plot that follows the lives of the villagers facing the vampire curse. As the dead rise, a young doctor takes it upon himself to uncover the reality. This chilling yet adventurous horror anime is an amazing watch with a great storyline that is gripping and suspenseful, all at the same time.
 </p
</p
6. The Promised Neverland
This horror anime has a very emotional plot. The kids of Grace Field House Orphanage are very happy and content until one day, some of them break the most important rule. When the kids go out of the orphanage, they discover the truth and the sinister future awaiting them. From cheerful kids to responsible, brave kids, this is the best horror anime that keeps the viewers glued to the screens. As the kids try to escape their deadly fate, will they be able to go free or end up becoming demon food?
 </p
</p
7. Parasyte: The Maxim
As the name suggests, this horror anime series is based on a parasite that takes over human hosts. In this horror anime, the parasite is an alien species. However, this anime revolves around the protagonist, whose hand is taken over by Migi, also an alien. But as the other parasites go on a deadly streak, opening their heads and eating any human that stands in their way, the boy and Migi try to fight them off. This is a very compelling yet gory and scary anime showing gruesome murders and action scenes to keep you on edge at all times.
 </p
</p
8. Perfect Blue
Perfect Blue has been categorized as one of the best horror anime based on reality. This is an epic psychological thriller with scenes that are mind-bending. As a pop singer switches her career to become an actress, an obsessed stalker becomes a nightmare for her. She is exposed, and every move she makes is being watched. Mysterious murders start surrounding her, and she starts losing her mind. The lines between delusion and reality are blurred. This horror anime is also an excellent suspense thriller that will keep you guessing what the next move will be.
 </p
</p
9. Mononoke
Mononoke has a unique visual appeal as it is themed on old Japanese culture with vibrant animations. The protagonist, commonly known as the ‘Medicine Seller,’ goes around feudal Japan looking for evil, known as Mononoke. Somehow, the medicine seller has a special power and a sword to slay the evil. But the twist is that the medicine seller must first learn the details about the Mononoke. Unless he discovers its true form and reason, he cannot have the sword to end it. This horror anime unfolds in a very thrilling manner as the protagonist uncovers the evil and saves feudal Japan.
 </p
</p
10. Tokyo Ghoul
One of the greatest horror anime series ever, Tokyo Ghoul features an amazing storyline. When the college student Ken falls victim to his ghoul date, he is saved by doctors. But, his rebirth is as a hybrid of humans and ghouls. This horror anime series is not for the faint-hearted as it shows grotesque scenes of body horror as the ghouls devour human flesh. However, Tokyo Ghoul also portrays how Ken is forced to control his flesh-eating desires. Would the hybrid lean more towards his human trait or the evil side? We recommend watching this very scary anime to find out how Ken survives as a hybrid and does he give in to his ghoul nature?
 </p
</p
11. Elfen Lied
This horror anime is about a mutant human born, Lucy. The extremely powerful mutant, Diclonius, is being experimented upon when one day she has had enough. As she finally breaks free of captivity, it results in a huge bloodbath and a terrifying battle. With time, Lucy tries to adjust to the world. Given her dual personality, it is hard to hide her true nature. This horror anime series is packed with bloody scenes and violence, yet it also displays moments of emotional attachments and friendships when Lucy’s adorable personality is dominant.
 </p
</p
12. Ghost Hunt
As can be guessed by the name, this horror anime series is based on ghost hunting. It doesn’t involve many bloody or gory scenes, but it definitely has terrifying scenes. A group of adventurous people teamed up with the psychic research facility are investigating the paranormal activities in a building when they are faced with horrifying paranormal beings. This is a story about finding out the truth, sticking together, and making it out of the building alive. This isn’t the most horror anime on the list, but it does give very scary and creepy vibes as the team stumbles upon deadly beings.
 </p
</p
13. Higurashi When They Cry
The start of this horror anime is unlike any other. One might think it is a cheerful school drama, but it’s actually the best horror anime based on a murder mystery. The students in a rural village start killing each other in grotesque ways, and there are even scenes of torture and bloody violence. The viewer must figure out what suddenly took over the village to cause such gruesome murders. If you are looking for a good scare, this horror anime will be your best pick with its thriller-packed scenes. Are the murderers possessed, or is it something else? Watch this scary anime if you have the guts and find out.
 </p
</p
14. Shoujo Tsubaki
Shoujo Tsubaki is an adult horror anime that revolves around the life of an orphan girl. Midori is tricked by a circus master to join his show, but a horrifying future awaits her. She is raped and abused continually and is about to give up when a magician joins the club. As she sees a ray of hope, will she be able to escape her horrid fate? With a heart-wrenching storyline, this horror anime is a great watch to feel the chills of being alone and tortured.
 </p
</p
15. Angels of Death
The Angels of Death is a very intriguing horror anime that shows an amnesiac girl awaking in the basement of an abandoned building. As she tries to escape the building, she is met with psychotic killers and crazy people on each floor. However, Rachel and the serial killer Zack strike up a relationship in which Zack promises to kill her if she helps him escape the building. This scary anime certainly has some bone-chilling and gory scenes to get you creeped out.
 </p
</p
Bonus Tip-The Best Anime Movie Recorder-Wondershare Filmora
Wondershare Filmora is a powerful video editor that is perfect for both beginners and professional editors. It has tons of editing tools that are fully customizable and also offer presets to help users quickly add professional-grade cinematic effects to their videos.
With Filmora, it is easy to apply motion tracking, color grading, motion blur, green screen effect, and much more. The creative possibilities at Filmora are endless. And most of these tools are very intuitive to use. Better yet, Filmora allows users to share their videos directly to social media.
In addition, you can also use Filmora to record your favorite horror anime, make edits, add captions, and share with your friends. You can record your screen and adjust advanced settings that will allow you to set a timer, select the screen size, audio source, and much more. You can also select whether you want to display the cursor and choose its color. With a Hot Key, you can stop recording instantly, and the file will be immediately saved to your PC.
After recording, you can make further edits to the video by adding captions or special effects to enhance it. In short, with Filmora, you can record with ease and make wonderful edits to the video.
Are Horror Animes Really Horrifying?
The horror anime series are hand-drawn illustrations, and it is quite possible to portray supernatural, horrifying, and unusual creatures with ease. From our list, you will see that among the best horror anime series, most of them feature otherworldly creatures that are both terrifying and creepy to look at.
In addition, the extremely graphic nature of a scary anime further adds to its ability to scare viewers. Violence, bloodbath, and cannibalism is a common theme in majority of the scary anime series, serving as the perfect way to portray bone-chilling horror scenes.
Try out our list to find your best horror anime series and have a good scare.
Shanoon Cox
Shanoon Cox is a writer and a lover of all things video.
Follow @Shanoon Cox
Shanoon Cox
Mar 27, 2024• Proven solutions
Horror anime is a sub-genre of anime series. It is based on scary stories, often featuring bloody and grotesque scenes, not for the faint of heart—the horror anime series range from emotional murder mysteries to violent paranormal thrillers.
People who like to experience the thrill of a good scare generally prefer watching horror anime series. The best horror anime can actually terrify you, and many people enjoy being scared. Since there are a lot of scary anime series on the web, you might have trouble finding the best horror anime to pass your weekend. If that’s the case, dive right in and get prepared to be scared.
Best 15 Horror Animes of All Time
Here, we have picked out some of the best horror anime series of all time that are definitely going to creep you out. Test your bravery and watch a terrifying horror anime from our list.
1. Monster
Monster is a horror anime series based on a popular Manga by Naoki Urasawa. It is an impressive thriller based on a top-notch brain surgeon working in a hospital. The young surgeon is faced with an ethical dilemma when forced to abandon the surgery of a boy to save a mayor’s life. But Dr. Tenma chooses to save the boy. This scary anime unfolds as Tenma, at the pinnacle of his medical career, is haunted by a series of death that involves the boy he saved all those years ago. This is the best horror anime series featuring a psychopath’s killing streak.
</p
2. Hell Girl
This horror anime series revolves around the subject of hate, revenge, and vengeance. With every new episode of this horror anime, you will witness a new story. The plot is unique and based on supernatural powers. Through a mysterious website, people are able to exact revenge on their tormentors, but there is always a price to pay. In the list of the best horror anime series, Hell Girl takes the lead due to thrilling scenes with the fusion of emotional storylines. As opposed to many horror anime series, this one isn’t very gory, but it portrays horror through the plot, showing the evil side of humans.
</p
3. Corpse Party
A very gruesome and horror anime is Corpse Party. This horror anime series is based on just 4 episodes, all of which are filled with terror. As the students of Kisaragi Academy perform a ritual on the grounds of their school, they are taken into another dimension where they end up in the Heavenly Host Elementary whose students and staff were murdered years ago. The terrifying ghosts and gory corpses in this scary anime are enough to terrify anyone. It is short and action-packed, guaranteeing that every scene is full of terror.
</p
4. Another
Another is the best horror anime series with terrifying deaths, much like seen in the movie’ Final Destination’. As the death curse takes the lives of the students of a class, the protagonist, a newly transferred student Kouichi, and a girl with an eye patch must get to the bottom of this. The horror anime slowly unravels scary truths about the incident that resulted in the death of Mei Misaki. Together, Kouichi and Mei try to dig out the root of the problem. Every scene is packed with suspense and horror, keep viewers scared and glued to the screens.
</p
5. Shiki
Based on the hot topic of vampires, this horror anime takes vampire stories to the next level. Shiki is an excellent scary movie with a twisting plot that follows the lives of the villagers facing the vampire curse. As the dead rise, a young doctor takes it upon himself to uncover the reality. This chilling yet adventurous horror anime is an amazing watch with a great storyline that is gripping and suspenseful, all at the same time.
</p
6. The Promised Neverland
This horror anime has a very emotional plot. The kids of Grace Field House Orphanage are very happy and content until one day, some of them break the most important rule. When the kids go out of the orphanage, they discover the truth and the sinister future awaiting them. From cheerful kids to responsible, brave kids, this is the best horror anime that keeps the viewers glued to the screens. As the kids try to escape their deadly fate, will they be able to go free or end up becoming demon food?
</p
7. Parasyte: The Maxim
As the name suggests, this horror anime series is based on a parasite that takes over human hosts. In this horror anime, the parasite is an alien species. However, this anime revolves around the protagonist, whose hand is taken over by Migi, also an alien. But as the other parasites go on a deadly streak, opening their heads and eating any human that stands in their way, the boy and Migi try to fight them off. This is a very compelling yet gory and scary anime showing gruesome murders and action scenes to keep you on edge at all times.
</p
8. Perfect Blue
Perfect Blue has been categorized as one of the best horror anime based on reality. This is an epic psychological thriller with scenes that are mind-bending. As a pop singer switches her career to become an actress, an obsessed stalker becomes a nightmare for her. She is exposed, and every move she makes is being watched. Mysterious murders start surrounding her, and she starts losing her mind. The lines between delusion and reality are blurred. This horror anime is also an excellent suspense thriller that will keep you guessing what the next move will be.
</p
9. Mononoke
Mononoke has a unique visual appeal as it is themed on old Japanese culture with vibrant animations. The protagonist, commonly known as the ‘Medicine Seller,’ goes around feudal Japan looking for evil, known as Mononoke. Somehow, the medicine seller has a special power and a sword to slay the evil. But the twist is that the medicine seller must first learn the details about the Mononoke. Unless he discovers its true form and reason, he cannot have the sword to end it. This horror anime unfolds in a very thrilling manner as the protagonist uncovers the evil and saves feudal Japan.
</p
10. Tokyo Ghoul
One of the greatest horror anime series ever, Tokyo Ghoul features an amazing storyline. When the college student Ken falls victim to his ghoul date, he is saved by doctors. But, his rebirth is as a hybrid of humans and ghouls. This horror anime series is not for the faint-hearted as it shows grotesque scenes of body horror as the ghouls devour human flesh. However, Tokyo Ghoul also portrays how Ken is forced to control his flesh-eating desires. Would the hybrid lean more towards his human trait or the evil side? We recommend watching this very scary anime to find out how Ken survives as a hybrid and does he give in to his ghoul nature?
</p
11. Elfen Lied
This horror anime is about a mutant human born, Lucy. The extremely powerful mutant, Diclonius, is being experimented upon when one day she has had enough. As she finally breaks free of captivity, it results in a huge bloodbath and a terrifying battle. With time, Lucy tries to adjust to the world. Given her dual personality, it is hard to hide her true nature. This horror anime series is packed with bloody scenes and violence, yet it also displays moments of emotional attachments and friendships when Lucy’s adorable personality is dominant.
</p
12. Ghost Hunt
As can be guessed by the name, this horror anime series is based on ghost hunting. It doesn’t involve many bloody or gory scenes, but it definitely has terrifying scenes. A group of adventurous people teamed up with the psychic research facility are investigating the paranormal activities in a building when they are faced with horrifying paranormal beings. This is a story about finding out the truth, sticking together, and making it out of the building alive. This isn’t the most horror anime on the list, but it does give very scary and creepy vibes as the team stumbles upon deadly beings.
</p
13. Higurashi When They Cry
The start of this horror anime is unlike any other. One might think it is a cheerful school drama, but it’s actually the best horror anime based on a murder mystery. The students in a rural village start killing each other in grotesque ways, and there are even scenes of torture and bloody violence. The viewer must figure out what suddenly took over the village to cause such gruesome murders. If you are looking for a good scare, this horror anime will be your best pick with its thriller-packed scenes. Are the murderers possessed, or is it something else? Watch this scary anime if you have the guts and find out.
</p
14. Shoujo Tsubaki
Shoujo Tsubaki is an adult horror anime that revolves around the life of an orphan girl. Midori is tricked by a circus master to join his show, but a horrifying future awaits her. She is raped and abused continually and is about to give up when a magician joins the club. As she sees a ray of hope, will she be able to escape her horrid fate? With a heart-wrenching storyline, this horror anime is a great watch to feel the chills of being alone and tortured.
</p
15. Angels of Death
The Angels of Death is a very intriguing horror anime that shows an amnesiac girl awaking in the basement of an abandoned building. As she tries to escape the building, she is met with psychotic killers and crazy people on each floor. However, Rachel and the serial killer Zack strike up a relationship in which Zack promises to kill her if she helps him escape the building. This scary anime certainly has some bone-chilling and gory scenes to get you creeped out.
</p
Bonus Tip-The Best Anime Movie Recorder-Wondershare Filmora
Wondershare Filmora is a powerful video editor that is perfect for both beginners and professional editors. It has tons of editing tools that are fully customizable and also offer presets to help users quickly add professional-grade cinematic effects to their videos.
With Filmora, it is easy to apply motion tracking, color grading, motion blur, green screen effect, and much more. The creative possibilities at Filmora are endless. And most of these tools are very intuitive to use. Better yet, Filmora allows users to share their videos directly to social media.
In addition, you can also use Filmora to record your favorite horror anime, make edits, add captions, and share with your friends. You can record your screen and adjust advanced settings that will allow you to set a timer, select the screen size, audio source, and much more. You can also select whether you want to display the cursor and choose its color. With a Hot Key, you can stop recording instantly, and the file will be immediately saved to your PC.
After recording, you can make further edits to the video by adding captions or special effects to enhance it. In short, with Filmora, you can record with ease and make wonderful edits to the video.
Are Horror Animes Really Horrifying?
The horror anime series are hand-drawn illustrations, and it is quite possible to portray supernatural, horrifying, and unusual creatures with ease. From our list, you will see that among the best horror anime series, most of them feature otherworldly creatures that are both terrifying and creepy to look at.
In addition, the extremely graphic nature of a scary anime further adds to its ability to scare viewers. Violence, bloodbath, and cannibalism is a common theme in majority of the scary anime series, serving as the perfect way to portray bone-chilling horror scenes.
Try out our list to find your best horror anime series and have a good scare.
Shanoon Cox
Shanoon Cox is a writer and a lover of all things video.
Follow @Shanoon Cox
Also read:
- 5 Techniques You Never Heard of for Converting MP4 to GIF in Photoshop
- Updated What Wikipedia Wont Tell You About Character Rigging for 2024
- 2024 Approved Best 10 3D Text Animation Templates
- Updated In 2024, 10 Best Photoshop Cartoon Effects For Creatives
- New In 2024, How to Create YouTube Intro Animation Like a Pro
- In 2024, 10 Great Apps to Turn Funny Animated Images Into Comics
- New How to Make Animated Videos for Business – an Ultimate Guide
- New In 2024, Stunning Ideas About Creating Personalised WhatsApp GIF Sticker
- The 15 Most Efficient Photo to Cartoon Software for Android for 2024
- New A Beginners Guide to Explain What 3D Animation Is
- Top 12 Video to GIF Converters High Quality to Check Out for 2024
- Updated How to Make Photo 3D Cartoon Online
- Updated Top 10 Banned Anime Around the World and Why for 2024
- Updated What Is Anime? Anime VS Manga VS Cartoon
- New 2024 Approved Best Tips for Effortless Unity 3D Animation
- Updated In-Depth Study of Cartoon Painting Starts From Learning to Draw It
- New Can I Still Do Animated Logo Design Without Design Skills for 2024
- New The 10 Most Adorable Aesthetic Cartoon Characters
- Animated Collage Maker Tips for 2024
- New In 2024, Christmas Is Coming! How to Find & Make Animated Christmas GIFs?
- Updated Tutorials for Animating Picture Online Without Learning From Scratch for 2024
- The Most Efficient Techniques for You to Make 3D Animation Character for 2024
- New 2024 Approved How To Animate Graphics in Canva
- In 2024, How To Make Pinterest Slideshow in Simple Ways
- Updated In 2024, Adobe Rigger Is AWESOME
- Updated In 2024, 10 Scary Anime Girls That Will Make You Creepy
- In 2024, 10 Classical Animated Cartoon Types With Examples
- Updated Epic Formula to Animate Photos From These 10 Animate Pictures App for 2024
- Updated 2024 Approved Tips for Learning Graphics Animation
- New 2024 Approved 15 Top Collage Makers to Create Aesthetic Collages
- 10 Stunning Stop Motion Movies You Should Not Miss for 2024
- 2024 Approved How to Create Picsart Cartoon in Simple Ways
- In 2024, How to Make Your Own GIF on WhatsApp in Simple Ways
- New In 2024, Tutorial on Making Unity 2D Animation
- Updated 15 Best Stop Motion Animation Kits to Fuel Creativity (2024 Guide)
- Updated What Is the Best Collage Photo Grid Maker - Experts Choice
- In 2024, Ways to Create an Animated Sticky Navbar
- Updated How To Create Pinterest Slideshow in Simple Ways
- New Learn Disney Cartoon Drawing to See More Disney Magic Moments
- How To Bypass Nokia C110 FRP In 3 Different Ways
- How to Find iSpoofer Pro Activation Key On Nubia Z50 Ultra? | Dr.fone
- In 2024, How Do You Unlock your iPhone 13 Pro? Learn All 4 Methods
- How to Soft Reset Realme 12 Pro+ 5G phone? | Dr.fone
- How To Remove Screen Lock PIN On ZTE Axon 40 Lite Like A Pro 5 Easy Ways
- In 2024, How To Leave a Life360 Group On Oppo F23 5G Without Anyone Knowing? | Dr.fone
- Everything To Know About Apple ID Password Requirements For Apple iPhone 15
- 3 Solutions to Hard Reset Vivo Y100A Phone Using PC | Dr.fone
- In 2024, The 6 Best SIM Unlock Services That Actually Work On Your Vivo X90S Device
- Best Realme 12 Pro 5G Pattern Lock Removal Tools Remove Android Pattern Lock Without Losing Data
- In 2024, Sim Unlock Nokia G22 Phones without Code 2 Ways to Remove Android Sim Lock
- In 2024, 5 Easy Ways to Copy Contacts from Poco F5 5G to iPhone 14 and 15 | Dr.fone
- In 2024, How to use Snapchat Location Spoofer to Protect Your Privacy On Tecno Spark 20 Pro+? | Dr.fone
- How to Unlock Poco C55 Phone without Google Account?
- Three Solutions to Hard Reset Samsung Galaxy S23 Tactical Edition? | Dr.fone
- How To Restore Missing Contacts Files from Honor Magic 6 Pro.
- Title: How to Cartoonize Photo Photoshop in Easy Steps
- Author: Elon
- Created at : 2024-05-19 03:04:24
- Updated at : 2024-05-20 03:04:24
- Link: https://animation-videos.techidaily.com/how-to-cartoonize-photo-photoshop-in-easy-steps/
- License: This work is licensed under CC BY-NC-SA 4.0.
