
:max_bytes(150000):strip_icc():format(webp)/Twitter-and-X-4c4103f6bc3c42e0b7197b60a50317ca.jpg)
How to Cartoonize Photo Photoshop in Easy Steps for 2024
How to Cartoonize Photo Photoshop in Easy Steps
How to Cartoonize Photo Photoshop in Easy Steps
An easy yet powerful editor
Numerous effects to choose from
Detailed tutorials provided by the official channel
Cartoons, an already catchy entertainment source, can upgrade other media utilities on integration. Look through the easiest ways of creating cartoonize photo Photoshop stills!
In this article
01 [Types of Cartoon Effects in Photoshop](#Part 1)
02 [Easiest Ways to Cartoonize Photo in Photoshop](#Part 2)
03 [How to Use a Variety of Photoshop Special Effects to Create the Final Caricature Look](#Part 3)
Part 1 Types of Cartoon Effects in Photoshop
It is an absolute fun activity to explore your editing creativity in the realm of cartoonizing the otherwise ordinary still captures. Talking of the most convenient cartoon creator and editor applications, you can safely rely on the Photoshop Image Editor application to choose from a pool of cartoon editing effects for adding that spunky and funny element to your image files.
Presented in the following section, is a discussion of some of the most stunning and visibly amazing cartoon effects in the application’s Editor Library to cartoonize Photoshop images:
01Pop Art Photoshop Action
The effect is a predominantly preferred as a cartoon action Photoshop utility to caricaturize a normal image, along with customizing the same to change the colors and background of the original still capture for creating a brand new appearance with utmost ease. Apart from this, the aforesaid effect allows you to exclusively customize the globally acclaimed graphic masterpieces of Roy Lichtenstein. Working with the effect, you can edit a self-portrait or the favorite image of your pet to give the latter, a funny retro feel.

02Vintage Comic Creator
If the idea of sticking to just the creation of cartoon images is not enough to satisfy you, the Vintage Comic Creator effect allows you to expand your creativity level to work on cartoon based shape and text edits. You can use the effect to enhance an image logo or plain text with a comic book oriented text. A download of this cartoon effect template facilitates you with diversities of customizable layer styles, overlays and patterns.

03GTA Photoshop Action
This is a complete pleasure for the creative fan of Grand Theft Auto, the wicked chasing game series. Additional to creating a stark variety of edited cartoon stills, you are free to reinvent the aforesaid game’s most popular caricature edits, while using the GTA Photoshop Action editing filter. Launched by Indworks, the effect package consisting of 15 vibrant themes and 5 collage templates; promises a quick mimicry of your most cherished video and console games.

04Vector Paint Photoshop Action
The one is an amazing Photoshop effect for creating cartoon edits, which works through a merger of two different ingenious art themes or styles for transforming basic images into cartoonized stills.
The effect grants you the liberty to use varieties of art styles, such as, comic, photo retouching and energetic oil to obtain editing results comparable to that of any original photograph. The template is conveniently simple to use and assures you of quick results. All this, just at a nominal price of $6! Interesting, right?

05Ultra Realistic 3D Space Effect
Considering the fact of you being a space admirer, this one is the perfect image editor for you to add the vibrancy of stunning space elements and backgrounds within your cartoonized edits. The effect lets you play with the diverse range of customizable text and exciting caricature backgrounds. When downloading the template, you get a main setup file, a few editing examples and a web link to the free fonts present in the effect.

06Animated Zombie Grime Art Photoshop Action
Are you in love with the latest zombie grimes? If yes, then this action set is exclusive editor package for you. Working with the aforesaid image template, you can effortlessly add the perfect zombie theme to your cartoon edits, along with simultaneously creating a stunning animation, which you can use to enhance your video or GIF uploads on social media. Not forgetting the best part, you get a free access to this amazing utility.

Part 2 Easiest Ways to Cartoonize Photo in Photoshop
Having known about the amazing varieties of cartoonized editor templates in Photoshop, it is a natural instinct to feel motivated to create your own caricature images from normal capture stills. Addressing the concern of image transformation methods to turn a photo into a cartoon Photoshop, let us dive into some of the most affordable methods of creating cartoonized photos in the aforesaid editing application.
Talking of the most basic Photoshop tools for creating caricature images, you can start your editing spree with using the Graphic Tablet, Brush Tool, Layer Masks and a graphic pen to create amateur cartoonized edits from your still photographs, getting a full control on image tracing.
01Brush Tool
A few usage examples include working with a combination of the graphic tablet pen and the editor brushes to trace your image, using the brush in a masked or a fresh layer to avoid altering the actual image, and much more.
02Graphic Tablet
It is best to use the Photoshop Graphic Tablet for adhering to the concern of tracing cartoonized images. You can alternatively cater to the job with a trackpad, mouse, or even your hand. It is however, difficult to assure steady hand postures for image tracing, lest you are using a stylus pen.
03Pen Tool
Using the Pen Tool for cartoonizing your portrait, allows you to draw outlines along the desired figure within the image, along with its important elements, so that you can easily use these outlined paths to introduce different color blocks.
Similar to the Brush Tool, the Photoshop Pen utility grants you the freedom to vary the degree of detailing in your cartoon edit, from being highly expressive to only remaining around the shore. Working with the Pen Tool can, however be a bit tiring and time taking, with respect to the extent of detailing you wish to add to the caricature edits.
Additional to the aforementioned tools, you can also consider using the default image filters of the Photoshop application to get comparable results. This is an exclusively better option to choose, compared to the Pen Tool, when you are working without a Graphic Tablet. To get over the top realistic caricature renderings, you will need to supplement the use of Photoshop filters with the application’s editing channels and other adjustments.
Part 3 How to Use a Variety of Photoshop Special Effects to Create the Final Caricature Look
Considering the extensive discussion on the credibility of the Photoshop Image Editor application in the realm of creating stunning caricature images in high end resolution, let us proceed to learn about using the diversity of Photoshop’s special effects to get the last stage cartoonized appearance of ordinary still images.
User’s Guide to Create High End Cartoonized Look
The following tutorial is a stepwise explanation of the process to convert photo into cartoon Photoshop in the easiest possible way. Stick to the method for getting affordable results in a quick span.
Step 1: Download and Launch the Program
Visit the official website of Photoshop Image Editor for a free download of the software program in your system, followed by installing and launching the same in your device.
Step 2: Upload Your Image
On a successful launch of the editor program, you will be directed to the ‘Photoshop Editor’ window, where you are required to upload any desired still image from your device for creating a cartoonized edit. To do this, either simply add your image to the editor workspace using the ‘Drag and Drop’ method, or navigate to the ‘File’ tab in the top toolbar and click on ‘Open’ in the dropdown menu.
Step 3: Edge Enhancement
Once your image appears in the editor timeline, proceed to sharpen the edges of the face and body of the portrait. Start with navigating to and clicking on the ‘Filter’ option, followed by tapping on ‘Filter Gallery’ and selecting the ‘Artistic’ folder, where you need to choose the ‘Poster Edges’ option. Observe the effect of these setting on the portrait and make necessary changes.

Step 4: Background Setting
Ensure that the background and foreground of your image are set to white and black colors respectively. If not, proceed to adjust the same as required.

Step 5: Distorting the Edges
You now need to introduce some distortion in the edges of your portrait. Navigate to the ‘Filter’ option again, open the ‘Filter Gallery’ and choose ‘Torn Edges’ from the menu that drops down. Select the desired parameter values in accordance with your creative suitability.


Step 6: Using the Channels Panel
The next step is to select and copy your portrait using the ‘Ctrl + A’ and Ctrl + C commands respectively. Navigate to the ‘Channels’ panel at the right of the Photoshop workspace. At the panel’s bottom right, proceed with creating a new channel. It will be assigned the name ‘Alpha 1’ by Photoshop, which you are most welcome to change.


Step 7: Color Inversion
When you finish creating the channel, use the ‘Ctrl + V’ command to paste your portrait in the same. Proceed with inverting the image colors by navigating to the ‘Image’ option, followed by choosing the ‘Adjustment’ and ‘Invert’ options from the consecutive drop downs. Now, make a selection of the ‘White’ regions of your portrait by pressing the ‘Ctrl’ key and clicking on the ‘Alpha 1 Channel thumbnail.

Step 8: Layer Creation
Navigate to the ‘Layers’ panel at the right of the Photoshop workspace, and click on the ‘New Layer’ icon for creating a fresh layer. Fill the just created layer with black color, either by pressing ‘g’ from your system’s keyboard, or using the ‘Paint Bucket’ tool. Don’t forget to assign a suitable name to the layer.

Repeat the above process to create a separate layer and e fill the same with white color. The layer creation process is essential to separate the white and black colors of the actual image.

Step 10: Layer Dragging
In the ‘Layers’ panel, drag the ‘Black’ layer above the ‘White’ one.

Step 11: Creating Additional Layers
You are now required to create three more layers, with the same process as for the above two, for adding effects to the Skin, Clothes and Teeth/Eyes of the portrait. When you finish creation, assign suitable names to the layers, followed by dragging them below the ‘Black’ one within the ‘Layers’ panel.

Step 12: Color Selection and Application
Choose the respective colors for the clothes, skin and teeth/eyes of the cartoonized edit. To proceed with color application, navigate to the toolbar at the left of the Photoshop workspace and choose the ‘Brush Tool’. Finally, choose a particular layer and apply careful brush strokes to add color to the specific area of the portrait that you wish to edit. Follow the same process to add colors to the remaining layers to get the desired result in all areas of your cartoonized edit.

Step 13: Using the Gradient Tool
Navigate to the ‘Layers’ panel again and create a new ‘Gradient’ layer to further enhance your creation. You now need to select the ‘Gradient Tool’ from the toolbar at the left of the Photoshop workspace. The ‘Gradient Editor’ pops up with the continuously running ‘Gradient Bar’, as soon as you make the selection. Double click on the gradient boxes at both ends to select them, followed by making your color choices. Tap on ‘OK’ when you are satisfied with your work.

Step 14: Filling the Gradients
To proceed with gradient filling, press and hold the mouse button on the image at the bottom left and continue to drag the cursor to its top right corner. Leave the mouse and navigate to the ‘Layers’ panel for dragging and dropping the ‘Gradient’ layer above the ‘White’ layer.

You are now done with the process of creating a caricature edit from a normal still portrait. Your final image output will appear something like the following:

Cartoons, an already catchy entertainment source, can upgrade other media utilities on integration. Look through the easiest ways of creating cartoonize photo Photoshop stills!
In this article
01 [Types of Cartoon Effects in Photoshop](#Part 1)
02 [Easiest Ways to Cartoonize Photo in Photoshop](#Part 2)
03 [How to Use a Variety of Photoshop Special Effects to Create the Final Caricature Look](#Part 3)
Part 1 Types of Cartoon Effects in Photoshop
It is an absolute fun activity to explore your editing creativity in the realm of cartoonizing the otherwise ordinary still captures. Talking of the most convenient cartoon creator and editor applications, you can safely rely on the Photoshop Image Editor application to choose from a pool of cartoon editing effects for adding that spunky and funny element to your image files.
Presented in the following section, is a discussion of some of the most stunning and visibly amazing cartoon effects in the application’s Editor Library to cartoonize Photoshop images:
01Pop Art Photoshop Action
The effect is a predominantly preferred as a cartoon action Photoshop utility to caricaturize a normal image, along with customizing the same to change the colors and background of the original still capture for creating a brand new appearance with utmost ease. Apart from this, the aforesaid effect allows you to exclusively customize the globally acclaimed graphic masterpieces of Roy Lichtenstein. Working with the effect, you can edit a self-portrait or the favorite image of your pet to give the latter, a funny retro feel.
02Vintage Comic Creator
If the idea of sticking to just the creation of cartoon images is not enough to satisfy you, the Vintage Comic Creator effect allows you to expand your creativity level to work on cartoon based shape and text edits. You can use the effect to enhance an image logo or plain text with a comic book oriented text. A download of this cartoon effect template facilitates you with diversities of customizable layer styles, overlays and patterns.
03GTA Photoshop Action
This is a complete pleasure for the creative fan of Grand Theft Auto, the wicked chasing game series. Additional to creating a stark variety of edited cartoon stills, you are free to reinvent the aforesaid game’s most popular caricature edits, while using the GTA Photoshop Action editing filter. Launched by Indworks, the effect package consisting of 15 vibrant themes and 5 collage templates; promises a quick mimicry of your most cherished video and console games.
04Vector Paint Photoshop Action
The one is an amazing Photoshop effect for creating cartoon edits, which works through a merger of two different ingenious art themes or styles for transforming basic images into cartoonized stills.
The effect grants you the liberty to use varieties of art styles, such as, comic, photo retouching and energetic oil to obtain editing results comparable to that of any original photograph. The template is conveniently simple to use and assures you of quick results. All this, just at a nominal price of $6! Interesting, right?
05Ultra Realistic 3D Space Effect
Considering the fact of you being a space admirer, this one is the perfect image editor for you to add the vibrancy of stunning space elements and backgrounds within your cartoonized edits. The effect lets you play with the diverse range of customizable text and exciting caricature backgrounds. When downloading the template, you get a main setup file, a few editing examples and a web link to the free fonts present in the effect.
06Animated Zombie Grime Art Photoshop Action
Are you in love with the latest zombie grimes? If yes, then this action set is exclusive editor package for you. Working with the aforesaid image template, you can effortlessly add the perfect zombie theme to your cartoon edits, along with simultaneously creating a stunning animation, which you can use to enhance your video or GIF uploads on social media. Not forgetting the best part, you get a free access to this amazing utility.
Part 2 Easiest Ways to Cartoonize Photo in Photoshop
Having known about the amazing varieties of cartoonized editor templates in Photoshop, it is a natural instinct to feel motivated to create your own caricature images from normal capture stills. Addressing the concern of image transformation methods to turn a photo into a cartoon Photoshop, let us dive into some of the most affordable methods of creating cartoonized photos in the aforesaid editing application.
Talking of the most basic Photoshop tools for creating caricature images, you can start your editing spree with using the Graphic Tablet, Brush Tool, Layer Masks and a graphic pen to create amateur cartoonized edits from your still photographs, getting a full control on image tracing.
01Brush Tool
A few usage examples include working with a combination of the graphic tablet pen and the editor brushes to trace your image, using the brush in a masked or a fresh layer to avoid altering the actual image, and much more.
02Graphic Tablet
It is best to use the Photoshop Graphic Tablet for adhering to the concern of tracing cartoonized images. You can alternatively cater to the job with a trackpad, mouse, or even your hand. It is however, difficult to assure steady hand postures for image tracing, lest you are using a stylus pen.
03Pen Tool
Using the Pen Tool for cartoonizing your portrait, allows you to draw outlines along the desired figure within the image, along with its important elements, so that you can easily use these outlined paths to introduce different color blocks.
Similar to the Brush Tool, the Photoshop Pen utility grants you the freedom to vary the degree of detailing in your cartoon edit, from being highly expressive to only remaining around the shore. Working with the Pen Tool can, however be a bit tiring and time taking, with respect to the extent of detailing you wish to add to the caricature edits.
Additional to the aforementioned tools, you can also consider using the default image filters of the Photoshop application to get comparable results. This is an exclusively better option to choose, compared to the Pen Tool, when you are working without a Graphic Tablet. To get over the top realistic caricature renderings, you will need to supplement the use of Photoshop filters with the application’s editing channels and other adjustments.
Part 3 How to Use a Variety of Photoshop Special Effects to Create the Final Caricature Look
Considering the extensive discussion on the credibility of the Photoshop Image Editor application in the realm of creating stunning caricature images in high end resolution, let us proceed to learn about using the diversity of Photoshop’s special effects to get the last stage cartoonized appearance of ordinary still images.
User’s Guide to Create High End Cartoonized Look
The following tutorial is a stepwise explanation of the process to convert photo into cartoon Photoshop in the easiest possible way. Stick to the method for getting affordable results in a quick span.
Step 1: Download and Launch the Program
Visit the official website of Photoshop Image Editor for a free download of the software program in your system, followed by installing and launching the same in your device.
Step 2: Upload Your Image
On a successful launch of the editor program, you will be directed to the ‘Photoshop Editor’ window, where you are required to upload any desired still image from your device for creating a cartoonized edit. To do this, either simply add your image to the editor workspace using the ‘Drag and Drop’ method, or navigate to the ‘File’ tab in the top toolbar and click on ‘Open’ in the dropdown menu.
Step 3: Edge Enhancement
Once your image appears in the editor timeline, proceed to sharpen the edges of the face and body of the portrait. Start with navigating to and clicking on the ‘Filter’ option, followed by tapping on ‘Filter Gallery’ and selecting the ‘Artistic’ folder, where you need to choose the ‘Poster Edges’ option. Observe the effect of these setting on the portrait and make necessary changes.
Step 4: Background Setting
Ensure that the background and foreground of your image are set to white and black colors respectively. If not, proceed to adjust the same as required.
Step 5: Distorting the Edges
You now need to introduce some distortion in the edges of your portrait. Navigate to the ‘Filter’ option again, open the ‘Filter Gallery’ and choose ‘Torn Edges’ from the menu that drops down. Select the desired parameter values in accordance with your creative suitability.
Step 6: Using the Channels Panel
The next step is to select and copy your portrait using the ‘Ctrl + A’ and Ctrl + C commands respectively. Navigate to the ‘Channels’ panel at the right of the Photoshop workspace. At the panel’s bottom right, proceed with creating a new channel. It will be assigned the name ‘Alpha 1’ by Photoshop, which you are most welcome to change.
Step 7: Color Inversion
When you finish creating the channel, use the ‘Ctrl + V’ command to paste your portrait in the same. Proceed with inverting the image colors by navigating to the ‘Image’ option, followed by choosing the ‘Adjustment’ and ‘Invert’ options from the consecutive drop downs. Now, make a selection of the ‘White’ regions of your portrait by pressing the ‘Ctrl’ key and clicking on the ‘Alpha 1 Channel thumbnail.
Step 8: Layer Creation
Navigate to the ‘Layers’ panel at the right of the Photoshop workspace, and click on the ‘New Layer’ icon for creating a fresh layer. Fill the just created layer with black color, either by pressing ‘g’ from your system’s keyboard, or using the ‘Paint Bucket’ tool. Don’t forget to assign a suitable name to the layer.
Repeat the above process to create a separate layer and e fill the same with white color. The layer creation process is essential to separate the white and black colors of the actual image.
Step 10: Layer Dragging
In the ‘Layers’ panel, drag the ‘Black’ layer above the ‘White’ one.
Step 11: Creating Additional Layers
You are now required to create three more layers, with the same process as for the above two, for adding effects to the Skin, Clothes and Teeth/Eyes of the portrait. When you finish creation, assign suitable names to the layers, followed by dragging them below the ‘Black’ one within the ‘Layers’ panel.
Step 12: Color Selection and Application
Choose the respective colors for the clothes, skin and teeth/eyes of the cartoonized edit. To proceed with color application, navigate to the toolbar at the left of the Photoshop workspace and choose the ‘Brush Tool’. Finally, choose a particular layer and apply careful brush strokes to add color to the specific area of the portrait that you wish to edit. Follow the same process to add colors to the remaining layers to get the desired result in all areas of your cartoonized edit.
Step 13: Using the Gradient Tool
Navigate to the ‘Layers’ panel again and create a new ‘Gradient’ layer to further enhance your creation. You now need to select the ‘Gradient Tool’ from the toolbar at the left of the Photoshop workspace. The ‘Gradient Editor’ pops up with the continuously running ‘Gradient Bar’, as soon as you make the selection. Double click on the gradient boxes at both ends to select them, followed by making your color choices. Tap on ‘OK’ when you are satisfied with your work.
Step 14: Filling the Gradients
To proceed with gradient filling, press and hold the mouse button on the image at the bottom left and continue to drag the cursor to its top right corner. Leave the mouse and navigate to the ‘Layers’ panel for dragging and dropping the ‘Gradient’ layer above the ‘White’ layer.
You are now done with the process of creating a caricature edit from a normal still portrait. Your final image output will appear something like the following:
15 Best Stop Motion Animation Kits to Fuel Creativity
15 Best Stop Motion Animation Kits to Fuel Creativity (2024 Guide)
An easy yet powerful editor
Numerous effects to choose from
Detailed tutorials provided by the official channel
Stop motion animation is becoming more famous by the year, and it’s not even a surprising thing. Creating animated films takes objects, either soft clay items or dolls with joints, and manipulates them.
If you wish to make this type of animation, then you want to find the best Stop Motion Animation Kits that you can find. Some options out there are even free. This article will share the eight best options for stop motion animation software, separating them by whether they are for Macs or PC.
In this article
01 [15 Best Stop Motion Animation Kits](#Part 1)
02 [How to Pick the Best Animation Kits for Kids?](#Part 2)
Part 1 15 Best Stop Motion Animation Kits
After introducing you to the concept of Stop Motion Animation Kits, we’ve gathered a list of the top Stop Motion Animation Kits that best suits the kids as follows:
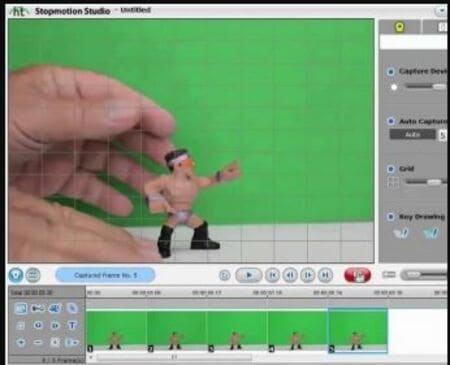
01Hue Animation Studio
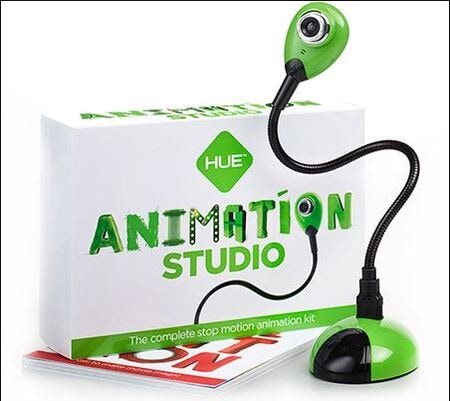
The Hue Animation Studio kit is unique because it can be helpful with any clay or toys you may have. The equipment is ideal for animations featuring anything from Playmobil toys, Lego, or even clay animations.
Features
● The kit includes the guidebook,
● It includes a HUE HD USB camera with a microphone.
● The kit Consists of a license of Stop Motion Animation software.
● There’s a mini stage with a green screen and background.
● The system requirements are Windows or Mac OS 10.5+.
Pros
● Less learning curve
● With an HD camera
● Easy to create time-lapse videos and special effects
Cons
● Old-fashioned interface
● Not ideal for beginners
● Requires a license to buy
02LEGO Make Your Own Movie Activity Kit
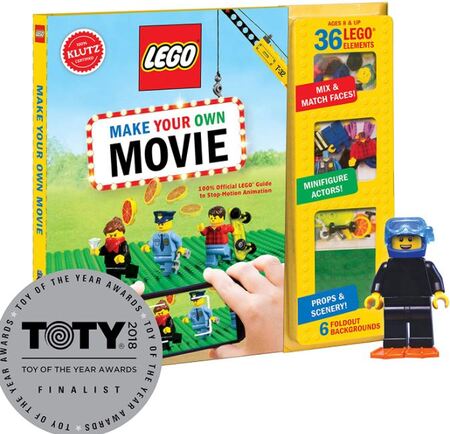
LEGO is one of the top players in the animation industry, and its Stop Motion Animation kit is phenomenal to the mark. The kit offers a complete guide to making your stop motion animations and includes several props and other goodies, as described in the Features below.
Features
● Includes an 8pages book to use while animating.
● It contains official LEGO props and Minifigures.
● You get punch-out animation frames.
● It involves foldout paper backgrounds.
● Best applicable to kids above eight years.
Pros
● Good for beginners
● Great accessories
● Informative book
Cons
● Only basics in the book
● Not all the accessories are there
● No app available
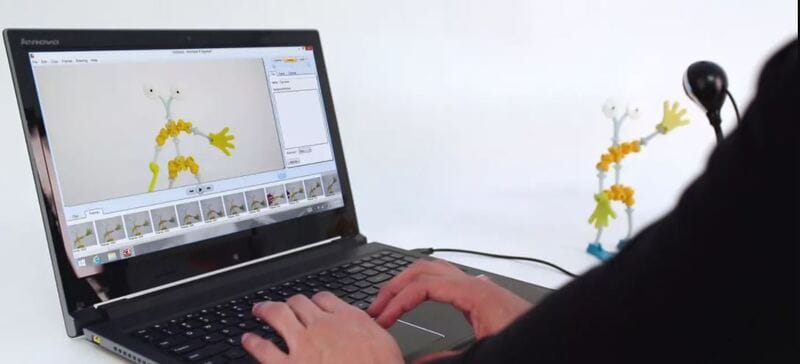
03I Can Animate It Studio
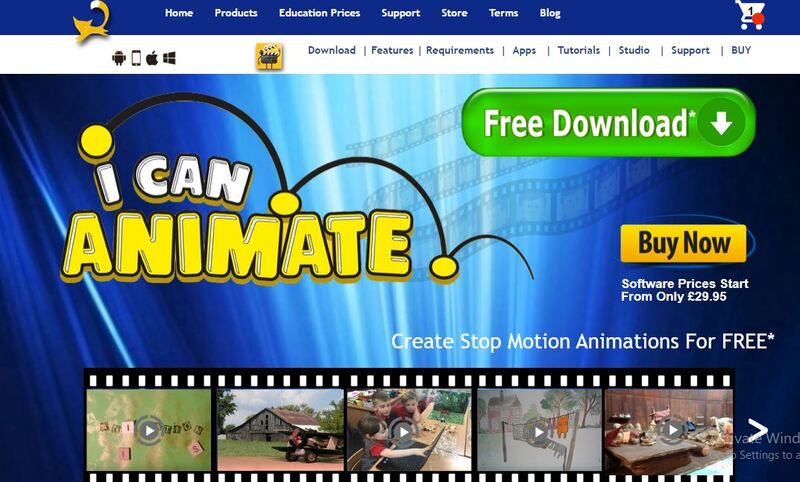
I Can Animate It Studio is another Stop Motion Animation kit by Kudlian. However, the kit looks a little offbeat since it doesn’t come with a guide. However, Kudlian offers instructions and guidelines online to simplify the tasks.
Features
● This animation kit includes a separate webcam for shooting.
● It has an onion skin feature for getting the best results at animation.
● Involves an element to edit with a green screen.
● It also helps create stop-frame animation by creating drawings.
● Compatible with both Windows and Mac OS.
Pros
● Available as App
● Interactive user interface
● Easy to create cute videos
Cons
● Difficult to use the animator pack
● Slow processing
● May need to pay for premium Features
04ZuAnimation Kit

Zuis among the best stop motion animation kits developed by HUE’s initial software. And, it’s the kit that is already usual with kids. So, it generally means that it will involve less learning curve comparatively. And, it has some tiny Features which may leave all other toys in the category.
Features
● A lifetime software with two perpetual licenses.
● Includes a green screen for keying background.
● It Consists of an animation handbook to offer you fantastic tips and advice.
● It contains a webcam with a metal base.
● You get a modeling clay to design characters and a mini set to hold them.
Pros
● Good pack of sound effects, artwork, and more
● Interactive interface
● With animation handbook
Cons
● Some defects with cameras, so check them earlier
● Lack of video signals
● Limited animation Features
05Stop Motion Explosion Animation Kit
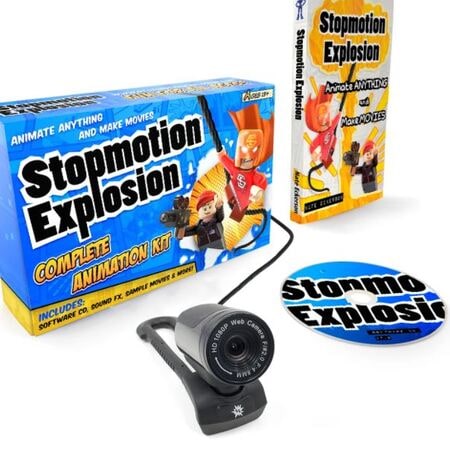
The Stop Motion Explosion complete HD stop motion animation is another rival in the industry for the big competitors playing out. The kit also contains an inbuilt microphone to record your audio. And, there’s a precious 29pages book included to provide you a lot. Let’s see more of its Features below.
Features
● It comes with an HD camera and flexible stand with a microphone and manual zoom control.
● It contains a CD with animation software.
● The kit involves a quick start guide.
● It includes lots of free tutorials.
● It Consists of a 29pages book with in-depth information.
Pros
● Interactive user interface
● Contains guided information book
● Lots of free tutorials
Cons
● Lack of fast processing
● Need to use the app alongside book
● High learning curve
06EyeThink BusyBody Animation Toy
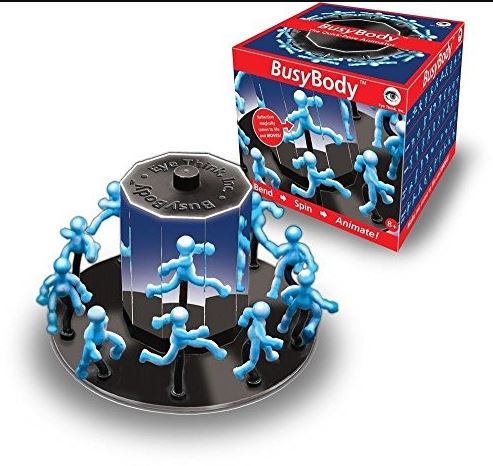
As the name also signifies, the kit is pretty different from other stop motion animation kits. It’s one of the coolest of its kind also occupied with the attention of Victorian children in the days gone by. The kit doesn’t include any camera. Instead, it works on the principle of ‘persistence of vision.’ Please scroll below to reveal more of its Features.
Features
● You will get a central snipping base with mirrors.
● It contains bendable figures for easy posing.
● It includes a complete hands-on stop motion animation kit without any complications.
● Includes instructions to give you detailed images on how to pose figures.
● Works on the principle of ‘persistence of vision’ without any camera.
Pros
● Easy to use with good accessibility
● Scalable to younger kids
● Works without a camera
Cons
● More of subjective task
● Maybe hard to understand
● A very different concept of animation
07OgoBild Animate It
Brought to you from Gromet and Wallace’s creators, this is a super simple Stop Motion Animation kit. It includes hundreds of Construction pieces to begin with. Also, you will get a webcam and stop motion animation software ideally geared towards kids aged 8-years old.
Features
● Compatible with the Windows operating system.
● It contains a camera with an articulated stand to capture from better angles.
● It includes an easy upload to YouTube feature for social sharing.
Pros
● Good for social sharing
● Better accessories
● Ideal for beginners
Cons
● A pretty confusing interface
● Only compatible with Windows
● Slow processing software
08Dragonframe 5
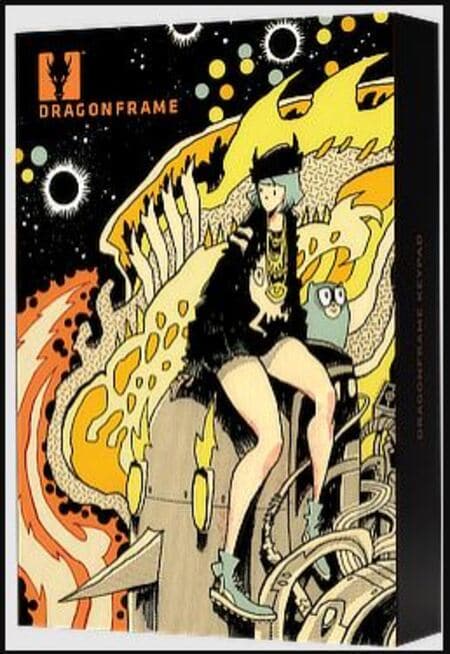
Again, this stop-animation kit isn’t that fancy, but it can compete with all the rivals out there. It only contains Software, though, with a list of functions including Cinematography, Animation, vector-based drawings, and much more.
Features
● It includes Animation and Cinematography tools.
● It contains a frame-based timeline editor.
● Dragonframe 5 includes a lip-sync system for the best audio recording.
● It includes Motion Control and Vector-based drawing tools.
● This kit Consists of a configurable X-sheet.
Pros
● Lots of functions
● Not just a toy
● Friendly and effective to deal with.
Cons
● Too hard for the young kids
● Expensive
● Confusing interface
09VidBox Stop Motion Studio
VidBox Stop Motion Studio has similar software to Dragonframe but it is more suitable for younger kids. Well, you can readily go for this kit if you already have a camera. It also contains the option to upload creations to Facebook and YouTube directly.
Features
● It can create output in different formats, including WMV, MPEG HD resolution, etc.
● It contains an adjustable frame rate to control the video’s speed.
● The Chroma binding effect creates the best setting for the background.
● It includes DSLR camera support.
● It contains Image Editor, String Removal, and Overlay Frames tool to add special effects.
Pros
● It gives detailed instructions
● Too basic Features
● Difficult to handle toys
Cons
● Too much info is intimidating
● Slow process
● Some issues with the Chroma effect
10Animation Studio by Helen Piercy – A Book
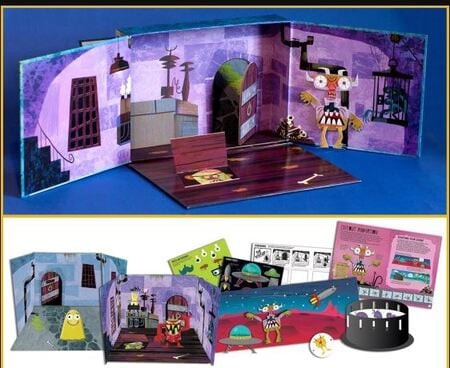
As the name suggests, this stop motion studio book isby Helen Piercy, an animator with lots of experience in the field. You will also get all the required Features, such as editing the green screen and more. In addition, tutorials regarding and techniques on puppets are also in the kit.
Features
● You get a mini stage set.
● It involves a press-out puppet monster with movable parts.
● It contains storyboard samples and sheets.
● The book contains an engaging animation handbook.
● It Consists of a variety of press-out props.
Pros
● A highly informative book
● Contains easy to understand animation scenes
● Various and techniques
Cons
● Hard to understand info
● Only a book
● It cannot get you through real practical
11- Minecraft Stop Motion Animation Studio
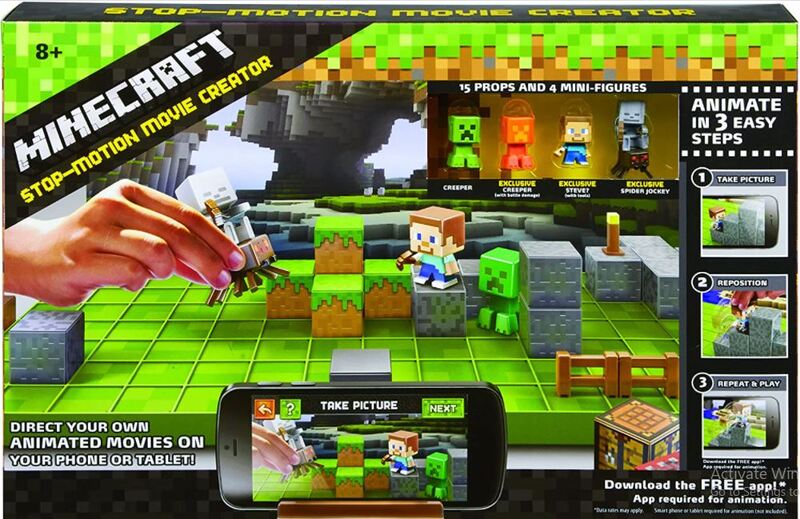
Though it seems usual to many kids out, there are valid reasons behind that. First, it is different from other Stop Motion Animation kits as it is available in an app rather than any software. Thus, you can use it on a tablet or phone and edit whatever you shoot.
Features
● It includes a variety of props.
● It contains six different backgrounds.
● This kit involves one movie stage.
● It Consists of a device holder.
● Minecraft contains 1additional accessories.
Pros
● No need of a powerful PC
● Lots of accessories
● With different backgrounds
Cons
● The app contains compatibility issues
● Less number of props in quantity
● Lack of software integration
12- Zing StikBot Zanimation Studio Pro
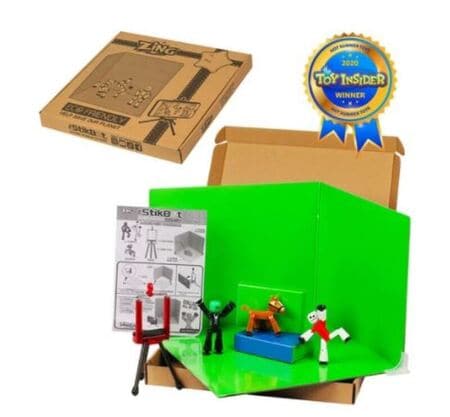
This stop animation kit is a reasonably priced and excellent little package. With this kit, however, you will need your camera. You can manipulate this kit into different poses as the figures have small suction cups on the feet and hands.
Features
● It includes two posable StikBot figures.
● Works on an animation app to record frames.
● It contains a Blue screen or reversible green screen stage.
● It Consists of a tripod stand for a tablet or smartphone camera.
Pros
Simple software
Lots of functions
Included software
Cons
● Lack of app availability
● Not compatible with Linux systems
● Only for Windows and Mac
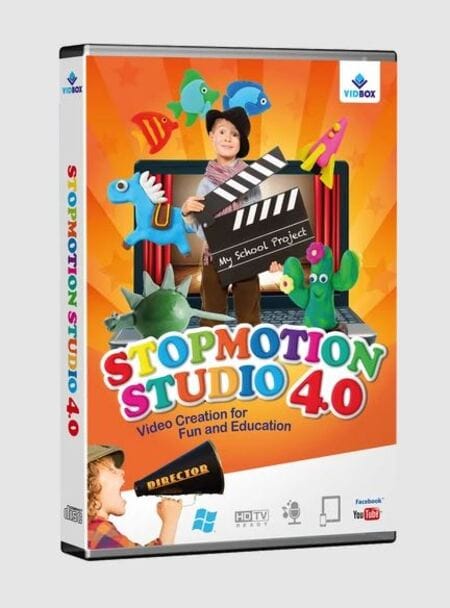
13- Honestech Stop Motion Studio 4.0
It’s a great entry-level stop motion animation kit that includes a blue or green screen. It also contains accessible Features for background editing, sound effects, background music, etc. Given below are more of its parts.
● A super simple editing interface is appealing to beginner kids.
● String Removal feature for more delicacy and effects.
● Chroma Key and Audio Recording.
● YouTube/Facebook upload feature.
● DSLR camera support.
Pros
● The great Chroma keying feature
● Simple user interface
● Lots of other Features
Cons
● Not for advanced kids
● A bit slow software
● Certain issues with camera integration
14- Crayola Color Alive Easy Animation Studio
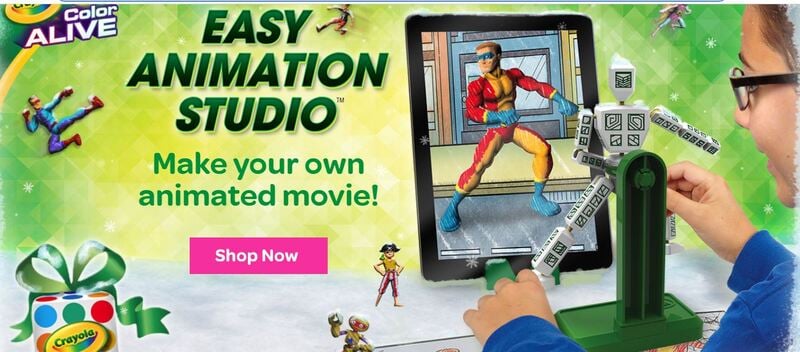
It’s another basic Stop Motion Animation kit to easily create custom animated videos by kids. It also includes easy drawing coloring book characters. And, there are tracking markers to make the job easier for kids.
Features
● Design and color characters pose and capture.
● It includes a stand and mannequin.
● It contains a 30-page booklet with the required information.
● It is compatible with Android and iOS.
● Crayola contains 1twistable color pencils with the device’s stand.
Pros
● Ideal for beginners
● Detailed info book
● Great accessories
Cons
● Slow processing UI
● Inefficient tracking markers
● The app may run certain compatibility issues
15- Claytoon Clay Project Studio
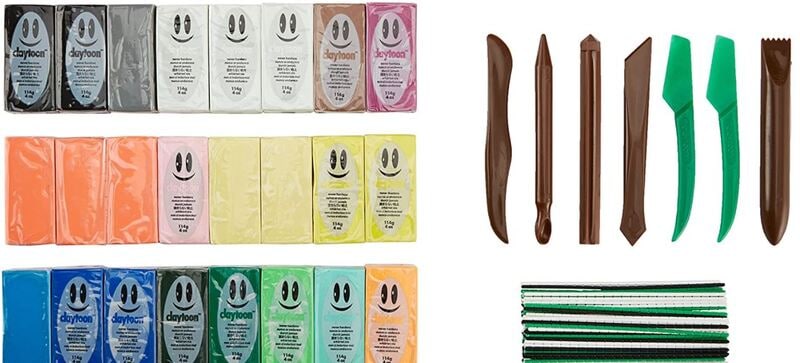
Young kids can easily use this Clay Studio and create impressive figures for their stop motion animation. It has bright colored clays, which are non-hardening and thus suitable for animation projects. And, there’s a good choice in colors with valuable instructions, index cards, and accessories.
Features
● Non-hardening clay material
● Brilliant color range to create amazing characters
● Intermixable clays
● Simple to follow instruction cards
● 5 modeling tools and clay knife
Pros
● Hard clay
● Perfect colors
● Professional for adult usage
Cons
● Maybe be crumbled clays
● Oily material
● It may not contain all the desired colors
Part 2 How to pick the best animation kits for kids?
Below are the factors you need to Consider before buying Stop Motion Animation kits. So, let’s dive into each element in detail.
01Recommended Age
Producing something creative with a Stop Motion Animation kit will be a lengthy process that will involve patience and some informational content to use the Kits properly. So while selecting the best Animation Kit, keep in mind the Recommended Age that the company has specified. If the product is for the young generation, the younger ones might have difficulty using the product.
02Different forms of Kits
You may check a few of them with different Features for the best stop animation kits. However, the significant difference between them is whether they come as complete kits or not. If you buy a complete kit, you will have a camera and other elements with the product.
The only thing you will require other than the entire animation kit would be a computer for software purposes. Moreover, you can also select Kits that do not come with a camera individually.
For this, you must use a smartphone to record the video. Conclusively, the kits present on the market are zoetrope-type kits. However, they are not available with electronics. So you won’t be able to create full films with this one.
03Extra Features
As extra Features, you get Props and full-on sets included with some of the kits. These allow you to create the scenes that you are looking for. You can also transform the orientation of some of the props, which gives you extra functionality.
04Apps
When you’re in the hustle to create a Stop Motion Animation, you need a few things. One of them is the smartphone or a camera. At the same time, the other one will be the App on your phone that will help you merge everything the way you wish it to be.
Some of the companies out there will create their apps, and it will assist you with different integration procedures, but if the kit you select is not available with a dedicated app. There are a lot of good apps on the market right now that you can go for. These 3rd party apps are unique and will get your job done too.
05 Software
You will either need an App or Proper Software for the putting-together part. This Software will need hardware such as either a laptop or a PC. Before deciding on an animation kit, make sure you know the system requirements if the kit is only supported through software.
06Bonus: Create an easy stop motion video via Wondershare Filmora Video Editor
In old times, making stop motion videos was a very hectic task, and sometimes it could take several days to make such videos. With the advancement of technology and editing software like Filmora, it has become effortless. All you need is a camera and video editing software to create your stop motion animations.
For Win 7 or later (64-bit)
For macOS 10.12 or later
Let’s dig deep into the stop motion animations and learn how to create these videos on your own.
07Steps For Making Stop-Motion Video
If you want to create your stop motion animation, follow this step-by-guide.
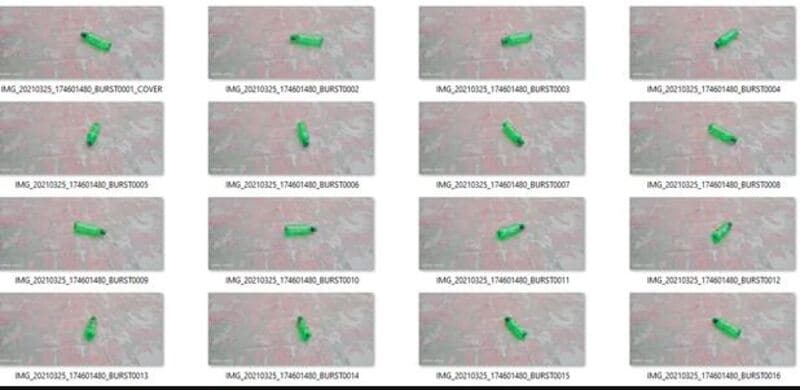
● Capture The Shots
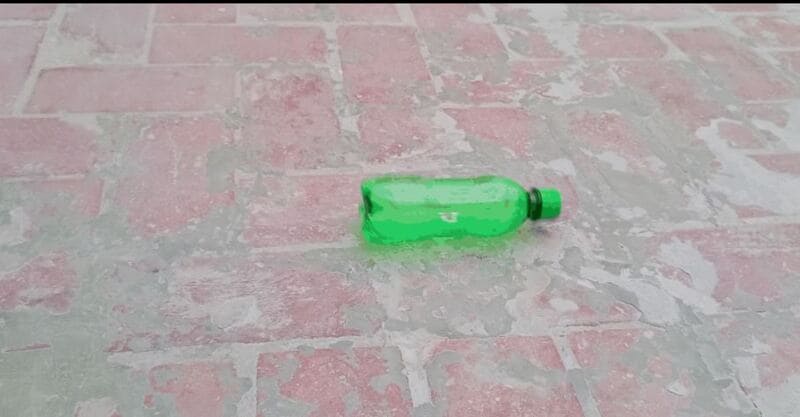
Move an object and capture its movement frame by frame. Suppose we are making a stop motion video of bottle spin. Place your camera in a steady place, and bring your object in the frame. Move your object slightly and take a shot. Keep doing this until you have at least 12,23or photos of the object’s movement. We took the bottle spin only as an example. You can create your ideas here.
● Download And Start Filmora X
If you haven’t downloaded the Filmora in your system, download it from their official website. If it is already on your PC, then run the program.
● Choose The Suitable Frame Rate In Project Settings.
Begin a new project by hitting the File and selecting the full-wide resolution.
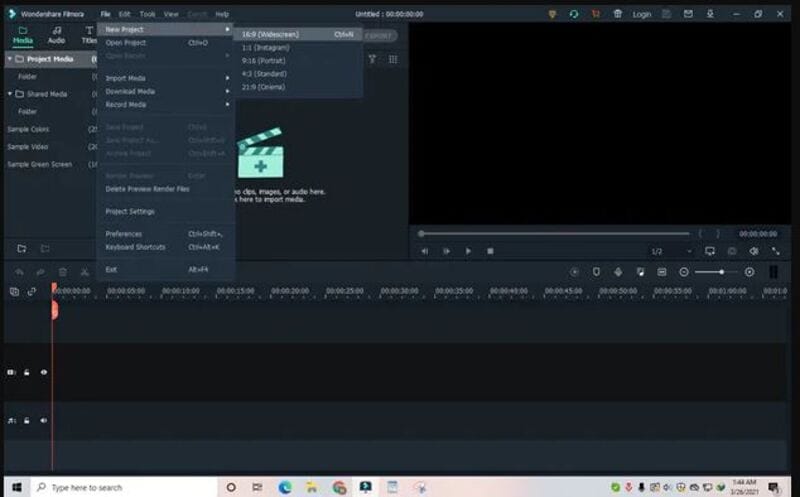
Once you select the resolution, click on the File and go to project settings.
Now select the frame rate you captured the video, i.e., 236etc. If you didn’t Consider the frame rate when taking shots, you could select 24.

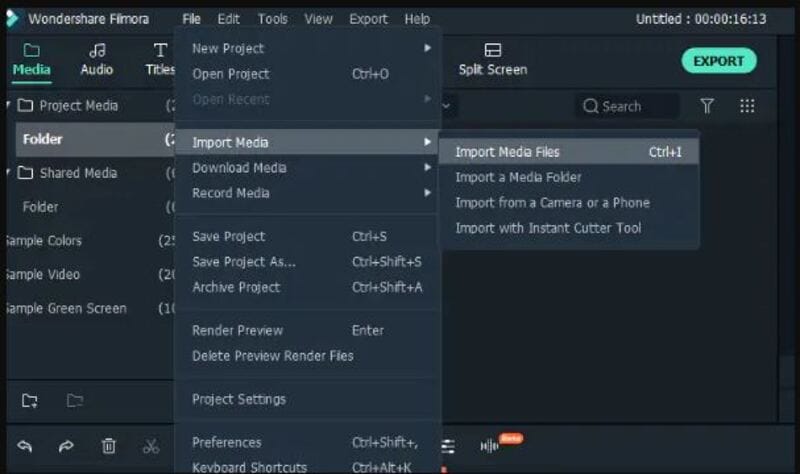
● Import The Media Files
Once you have done with the settings above, import the captured images using the import option from the file menu.
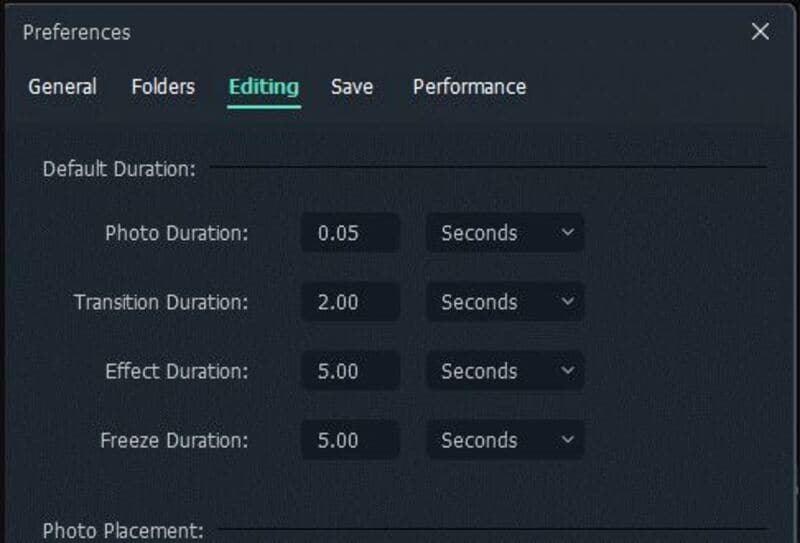
● Adjust the Preferences
Go to File and click select preferences from the menu or press the shortcut key Ctrl+Shift+,
A window will appear on your screen. Click on editing and adjust the photo duration anywhere between 0.2 - 0.5 seconds.
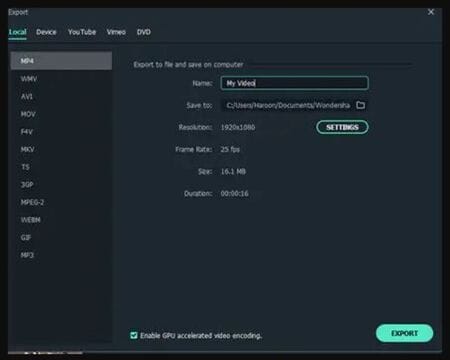
● Create and Export.
Once you complete all the settings mentioned above, import all images timeline-track, and click on play, you will notice that your stop motion animation has been created.
Now click on the export button, select the desired video format, export the video, and share it with your friends.
Ok, this is very easy. It’s just time-Consuming if you want to make a big enough project. Here is the result.
Filmora is one of the most straightforward software you can use to create your stop motion animation videos. This magic can be easily created by following the steps mentioned above, even if you have no video editing experience.
● Key Takeaways from This Episode →
● Stop-motion animation kits are a form of art, and with all of the access we have to such technology via our computers, it is a big deal to get started with it. Most of them include Stop Motion animation starter kits as well. That’s why you want to be sure that you look at everything in depth and see what you like. Then, determine which kits will be best for your purposes and see why it makes such a big difference for you and everything you want to accomplish in the long run.
Stop motion animation is becoming more famous by the year, and it’s not even a surprising thing. Creating animated films takes objects, either soft clay items or dolls with joints, and manipulates them.
If you wish to make this type of animation, then you want to find the best Stop Motion Animation Kits that you can find. Some options out there are even free. This article will share the eight best options for stop motion animation software, separating them by whether they are for Macs or PC.
In this article
01 [15 Best Stop Motion Animation Kits](#Part 1)
02 [How to Pick the Best Animation Kits for Kids?](#Part 2)
Part 1 15 Best Stop Motion Animation Kits
After introducing you to the concept of Stop Motion Animation Kits, we’ve gathered a list of the top Stop Motion Animation Kits that best suits the kids as follows:
01Hue Animation Studio
The Hue Animation Studio kit is unique because it can be helpful with any clay or toys you may have. The equipment is ideal for animations featuring anything from Playmobil toys, Lego, or even clay animations.
Features
● The kit includes the guidebook,
● It includes a HUE HD USB camera with a microphone.
● The kit Consists of a license of Stop Motion Animation software.
● There’s a mini stage with a green screen and background.
● The system requirements are Windows or Mac OS 10.5+.
Pros
● Less learning curve
● With an HD camera
● Easy to create time-lapse videos and special effects
Cons
● Old-fashioned interface
● Not ideal for beginners
● Requires a license to buy
02LEGO Make Your Own Movie Activity Kit
LEGO is one of the top players in the animation industry, and its Stop Motion Animation kit is phenomenal to the mark. The kit offers a complete guide to making your stop motion animations and includes several props and other goodies, as described in the Features below.
Features
● Includes an 8pages book to use while animating.
● It contains official LEGO props and Minifigures.
● You get punch-out animation frames.
● It involves foldout paper backgrounds.
● Best applicable to kids above eight years.
Pros
● Good for beginners
● Great accessories
● Informative book
Cons
● Only basics in the book
● Not all the accessories are there
● No app available
03I Can Animate It Studio
I Can Animate It Studio is another Stop Motion Animation kit by Kudlian. However, the kit looks a little offbeat since it doesn’t come with a guide. However, Kudlian offers instructions and guidelines online to simplify the tasks.
Features
● This animation kit includes a separate webcam for shooting.
● It has an onion skin feature for getting the best results at animation.
● Involves an element to edit with a green screen.
● It also helps create stop-frame animation by creating drawings.
● Compatible with both Windows and Mac OS.
Pros
● Available as App
● Interactive user interface
● Easy to create cute videos
Cons
● Difficult to use the animator pack
● Slow processing
● May need to pay for premium Features
04ZuAnimation Kit
Zuis among the best stop motion animation kits developed by HUE’s initial software. And, it’s the kit that is already usual with kids. So, it generally means that it will involve less learning curve comparatively. And, it has some tiny Features which may leave all other toys in the category.
Features
● A lifetime software with two perpetual licenses.
● Includes a green screen for keying background.
● It Consists of an animation handbook to offer you fantastic tips and advice.
● It contains a webcam with a metal base.
● You get a modeling clay to design characters and a mini set to hold them.
Pros
● Good pack of sound effects, artwork, and more
● Interactive interface
● With animation handbook
Cons
● Some defects with cameras, so check them earlier
● Lack of video signals
● Limited animation Features
05Stop Motion Explosion Animation Kit
The Stop Motion Explosion complete HD stop motion animation is another rival in the industry for the big competitors playing out. The kit also contains an inbuilt microphone to record your audio. And, there’s a precious 29pages book included to provide you a lot. Let’s see more of its Features below.
Features
● It comes with an HD camera and flexible stand with a microphone and manual zoom control.
● It contains a CD with animation software.
● The kit involves a quick start guide.
● It includes lots of free tutorials.
● It Consists of a 29pages book with in-depth information.
Pros
● Interactive user interface
● Contains guided information book
● Lots of free tutorials
Cons
● Lack of fast processing
● Need to use the app alongside book
● High learning curve
06EyeThink BusyBody Animation Toy
As the name also signifies, the kit is pretty different from other stop motion animation kits. It’s one of the coolest of its kind also occupied with the attention of Victorian children in the days gone by. The kit doesn’t include any camera. Instead, it works on the principle of ‘persistence of vision.’ Please scroll below to reveal more of its Features.
Features
● You will get a central snipping base with mirrors.
● It contains bendable figures for easy posing.
● It includes a complete hands-on stop motion animation kit without any complications.
● Includes instructions to give you detailed images on how to pose figures.
● Works on the principle of ‘persistence of vision’ without any camera.
Pros
● Easy to use with good accessibility
● Scalable to younger kids
● Works without a camera
Cons
● More of subjective task
● Maybe hard to understand
● A very different concept of animation
07OgoBild Animate It
Brought to you from Gromet and Wallace’s creators, this is a super simple Stop Motion Animation kit. It includes hundreds of Construction pieces to begin with. Also, you will get a webcam and stop motion animation software ideally geared towards kids aged 8-years old.
Features
● Compatible with the Windows operating system.
● It contains a camera with an articulated stand to capture from better angles.
● It includes an easy upload to YouTube feature for social sharing.
Pros
● Good for social sharing
● Better accessories
● Ideal for beginners
Cons
● A pretty confusing interface
● Only compatible with Windows
● Slow processing software
08Dragonframe 5
Again, this stop-animation kit isn’t that fancy, but it can compete with all the rivals out there. It only contains Software, though, with a list of functions including Cinematography, Animation, vector-based drawings, and much more.
Features
● It includes Animation and Cinematography tools.
● It contains a frame-based timeline editor.
● Dragonframe 5 includes a lip-sync system for the best audio recording.
● It includes Motion Control and Vector-based drawing tools.
● This kit Consists of a configurable X-sheet.
Pros
● Lots of functions
● Not just a toy
● Friendly and effective to deal with.
Cons
● Too hard for the young kids
● Expensive
● Confusing interface
09VidBox Stop Motion Studio
VidBox Stop Motion Studio has similar software to Dragonframe but it is more suitable for younger kids. Well, you can readily go for this kit if you already have a camera. It also contains the option to upload creations to Facebook and YouTube directly.
Features
● It can create output in different formats, including WMV, MPEG HD resolution, etc.
● It contains an adjustable frame rate to control the video’s speed.
● The Chroma binding effect creates the best setting for the background.
● It includes DSLR camera support.
● It contains Image Editor, String Removal, and Overlay Frames tool to add special effects.
Pros
● It gives detailed instructions
● Too basic Features
● Difficult to handle toys
Cons
● Too much info is intimidating
● Slow process
● Some issues with the Chroma effect
10Animation Studio by Helen Piercy – A Book
As the name suggests, this stop motion studio book isby Helen Piercy, an animator with lots of experience in the field. You will also get all the required Features, such as editing the green screen and more. In addition, tutorials regarding and techniques on puppets are also in the kit.
Features
● You get a mini stage set.
● It involves a press-out puppet monster with movable parts.
● It contains storyboard samples and sheets.
● The book contains an engaging animation handbook.
● It Consists of a variety of press-out props.
Pros
● A highly informative book
● Contains easy to understand animation scenes
● Various and techniques
Cons
● Hard to understand info
● Only a book
● It cannot get you through real practical
11- Minecraft Stop Motion Animation Studio
Though it seems usual to many kids out, there are valid reasons behind that. First, it is different from other Stop Motion Animation kits as it is available in an app rather than any software. Thus, you can use it on a tablet or phone and edit whatever you shoot.
Features
● It includes a variety of props.
● It contains six different backgrounds.
● This kit involves one movie stage.
● It Consists of a device holder.
● Minecraft contains 1additional accessories.
Pros
● No need of a powerful PC
● Lots of accessories
● With different backgrounds
Cons
● The app contains compatibility issues
● Less number of props in quantity
● Lack of software integration
12- Zing StikBot Zanimation Studio Pro
This stop animation kit is a reasonably priced and excellent little package. With this kit, however, you will need your camera. You can manipulate this kit into different poses as the figures have small suction cups on the feet and hands.
Features
● It includes two posable StikBot figures.
● Works on an animation app to record frames.
● It contains a Blue screen or reversible green screen stage.
● It Consists of a tripod stand for a tablet or smartphone camera.
Pros
Simple software
Lots of functions
Included software
Cons
● Lack of app availability
● Not compatible with Linux systems
● Only for Windows and Mac
13- Honestech Stop Motion Studio 4.0
It’s a great entry-level stop motion animation kit that includes a blue or green screen. It also contains accessible Features for background editing, sound effects, background music, etc. Given below are more of its parts.
● A super simple editing interface is appealing to beginner kids.
● String Removal feature for more delicacy and effects.
● Chroma Key and Audio Recording.
● YouTube/Facebook upload feature.
● DSLR camera support.
Pros
● The great Chroma keying feature
● Simple user interface
● Lots of other Features
Cons
● Not for advanced kids
● A bit slow software
● Certain issues with camera integration
14- Crayola Color Alive Easy Animation Studio
It’s another basic Stop Motion Animation kit to easily create custom animated videos by kids. It also includes easy drawing coloring book characters. And, there are tracking markers to make the job easier for kids.
Features
● Design and color characters pose and capture.
● It includes a stand and mannequin.
● It contains a 30-page booklet with the required information.
● It is compatible with Android and iOS.
● Crayola contains 1twistable color pencils with the device’s stand.
Pros
● Ideal for beginners
● Detailed info book
● Great accessories
Cons
● Slow processing UI
● Inefficient tracking markers
● The app may run certain compatibility issues
15- Claytoon Clay Project Studio
Young kids can easily use this Clay Studio and create impressive figures for their stop motion animation. It has bright colored clays, which are non-hardening and thus suitable for animation projects. And, there’s a good choice in colors with valuable instructions, index cards, and accessories.
Features
● Non-hardening clay material
● Brilliant color range to create amazing characters
● Intermixable clays
● Simple to follow instruction cards
● 5 modeling tools and clay knife
Pros
● Hard clay
● Perfect colors
● Professional for adult usage
Cons
● Maybe be crumbled clays
● Oily material
● It may not contain all the desired colors
Part 2 How to pick the best animation kits for kids?
Below are the factors you need to Consider before buying Stop Motion Animation kits. So, let’s dive into each element in detail.
01Recommended Age
Producing something creative with a Stop Motion Animation kit will be a lengthy process that will involve patience and some informational content to use the Kits properly. So while selecting the best Animation Kit, keep in mind the Recommended Age that the company has specified. If the product is for the young generation, the younger ones might have difficulty using the product.
02Different forms of Kits
You may check a few of them with different Features for the best stop animation kits. However, the significant difference between them is whether they come as complete kits or not. If you buy a complete kit, you will have a camera and other elements with the product.
The only thing you will require other than the entire animation kit would be a computer for software purposes. Moreover, you can also select Kits that do not come with a camera individually.
For this, you must use a smartphone to record the video. Conclusively, the kits present on the market are zoetrope-type kits. However, they are not available with electronics. So you won’t be able to create full films with this one.
03Extra Features
As extra Features, you get Props and full-on sets included with some of the kits. These allow you to create the scenes that you are looking for. You can also transform the orientation of some of the props, which gives you extra functionality.
04Apps
When you’re in the hustle to create a Stop Motion Animation, you need a few things. One of them is the smartphone or a camera. At the same time, the other one will be the App on your phone that will help you merge everything the way you wish it to be.
Some of the companies out there will create their apps, and it will assist you with different integration procedures, but if the kit you select is not available with a dedicated app. There are a lot of good apps on the market right now that you can go for. These 3rd party apps are unique and will get your job done too.
05 Software
You will either need an App or Proper Software for the putting-together part. This Software will need hardware such as either a laptop or a PC. Before deciding on an animation kit, make sure you know the system requirements if the kit is only supported through software.
06Bonus: Create an easy stop motion video via Wondershare Filmora Video Editor
In old times, making stop motion videos was a very hectic task, and sometimes it could take several days to make such videos. With the advancement of technology and editing software like Filmora, it has become effortless. All you need is a camera and video editing software to create your stop motion animations.
For Win 7 or later (64-bit)
For macOS 10.12 or later
Let’s dig deep into the stop motion animations and learn how to create these videos on your own.
07Steps For Making Stop-Motion Video
If you want to create your stop motion animation, follow this step-by-guide.
● Capture The Shots
Move an object and capture its movement frame by frame. Suppose we are making a stop motion video of bottle spin. Place your camera in a steady place, and bring your object in the frame. Move your object slightly and take a shot. Keep doing this until you have at least 12,23or photos of the object’s movement. We took the bottle spin only as an example. You can create your ideas here.
● Download And Start Filmora X
If you haven’t downloaded the Filmora in your system, download it from their official website. If it is already on your PC, then run the program.
● Choose The Suitable Frame Rate In Project Settings.
Begin a new project by hitting the File and selecting the full-wide resolution.
Once you select the resolution, click on the File and go to project settings.
Now select the frame rate you captured the video, i.e., 236etc. If you didn’t Consider the frame rate when taking shots, you could select 24.
● Import The Media Files
Once you have done with the settings above, import the captured images using the import option from the file menu.
● Adjust the Preferences
Go to File and click select preferences from the menu or press the shortcut key Ctrl+Shift+,
A window will appear on your screen. Click on editing and adjust the photo duration anywhere between 0.2 - 0.5 seconds.
● Create and Export.
Once you complete all the settings mentioned above, import all images timeline-track, and click on play, you will notice that your stop motion animation has been created.
Now click on the export button, select the desired video format, export the video, and share it with your friends.
Ok, this is very easy. It’s just time-Consuming if you want to make a big enough project. Here is the result.
Filmora is one of the most straightforward software you can use to create your stop motion animation videos. This magic can be easily created by following the steps mentioned above, even if you have no video editing experience.
● Key Takeaways from This Episode →
● Stop-motion animation kits are a form of art, and with all of the access we have to such technology via our computers, it is a big deal to get started with it. Most of them include Stop Motion animation starter kits as well. That’s why you want to be sure that you look at everything in depth and see what you like. Then, determine which kits will be best for your purposes and see why it makes such a big difference for you and everything you want to accomplish in the long run.
The Art of Comics - Learn How to Do Funny Cartoon Drawings
The Art of Comics - Learn How to Do Funny Cartoon Drawings
An easy yet powerful editor
Numerous effects to choose from
Detailed tutorials provided by the official channel
Whether you want to use a simple short video or an accessible online lesson, you will find everything that you need to learn how to create comic cartoon drawing on this website. This website article contains all the tutorials you need, ranging from your favorite wild animals, places, objects, farm animals, characters, vehicles, and food.

Do not forget that practicing is the key to success, so don’t hesitate to try several drawing lessons to help you improve your abilities. Start today to learn how to draw funny cartoons online at your own pace and comfort with this step-by-step tutorial.
In this article
01 [How to Draw Funny Cartoon Faces](#Part 1)
02 [How to Draw Your Own Cartoon Character](#Part 2)
Part 1 How to Draw Funny Cartoon Faces
Drawing funny faces in cartoons is very easy compared to other drawing styles or drawing complete parts of the comic. All that is need is practice and experiment with different combinations of shapes. This article will guide on how to draw funny cartoon faces of various types using six other steps:
Step 1: To begin, you need to first draw the face outline by drawing the following;
● Any Perfect type of round shape like a circle.
● Any pear shapes
● An upside-down triangle
● A quadrilateral like a trapezium, a square, or any of your choice

Step 2: To draw the nose in the middle of the face, draw somewhere any of the following;
● A round shape that is bulgy
● A U-shape
● A V-shape
● A small dash.

Step 3: Next is that you draw two round shapes for the eyes, and each of them should have a smaller round or dot (for the pupil), which is above the nose. This eye can be in the shape of any of the following;
● Two large circles
● An ovals
● A curvy “M,” like the one you can see in the “McDonalds” logo.

Step 4: You can draw the mouth just below the nose and draw any of the shapes from the list given below. In addition, to make the mouth funnier, you should then add teeth by either drawing a small square sticking out inside the mouth from the upper side, at the roof of the mouth, or a straight horizontal line which is across the mouth and several vertical lines used to form a grid having two rows and many columns.
● A U-shaped curve that is large
● A triangle like a right-angled one which is most preferred
● A circle or an oval shape
● A rectangle shapes
● A straight line shapes

Step 5: You can add any other “extra fittings” such as the ears (in cartoons, ears generally considered to be ‘extra’), wrinkles, collar, hat, hair, etc.

Step 6: Finally, your cartoon face drawing is ready! You can also add different colors to the picture with different funky shades to make it attractive.

Part 2 How to Draw Your Own Cartoon Character
Are you bored? Why not take up a pencil and draw your cartoon comic drawing character? Note that drawing will be a relief from boredom, and it also helps your creativity fly very high.
However, you can easily add some colors and designs or even animate your cartoon character using this free software known as Filmora. Wondershare Filmora Video Editor is the best software to make you cartoon your picture or animate your cartoon characters with tons of filters and effects and its keyframing feature, which allows this with ease.
For Win 7 or later (64-bit)
For macOS 10.12 or later
Read this article on how to draw the perfect cartoon character yourself:
Step 1: The first is to have an idea of what you want to draw, i.e., the picture you want to draw. You can pick any character to draw from your favorite website or WeeWorld.com.
● First, you draw the face but make sure you don’t add a nose but do a black outline.
● Next, you can draw the other features but make sure you don’t use colored pencils. Only use your main writing utensil.
● Then, remember to use your imagination to add the clothes and hairstyle.
● Finally, you can delete any unwanted lines and color with artist utensils, such as crayons, paintbrushes, colored pencils, etc. Also, remember that you can add some detail to your character to make it pop out and be beautiful.

Step 2: Now you have officially made your cartoon, how does it feel?

Step 3: Next, you want to go back and draw again, but this time, not an imitation.

Step 4: Pick up a new piece of paper to be used to draw another character. But this time, you need to change the features. You can decide to make the eyes bigger, neon skin, and maybe crazy hair. You can try clothes that you would love to wear, or ones you wish you could get. Also, try to change the size around to make the features look different and add a nose, and then you can finally color your creation.

Step 5: Now, you can compare the two drawings to notice the difference. You will realize that one is an imitation while the other is all you! Now, you can grab a new piece of notebook paper.

Step 6: Next is that you begin to jot down different ideas. For example, you may want to draw a cute little puppy or a cute baby. Sometimes you can decide that your cartoon could be about a talking apple or something different.

Step 7: Grab another piece of paper and draw any other character you can imagine. You can try using a Sharpie marker for the outline by carefully tracing the pencil. Then you can erase any stray marks on the piece of paper. Next, you can also use any writing utensils like markers, crayons, colored pencils, pastels, or even paint, as it also works well.

Step 8: You can grab your notebook sheet again and then jot down any idea of a comic series. Also, make a plot or funny lines that you could use or any other characters.

Step 9: Next, you fold the blank sheet of paper and make it into about four lines. And then you can draw your main character by just using a pencil first.

Step 10: You can then draw the other characters and all the basic outlines in the drawing.

Step 11: Next is that you can draw the furniture and background, such as trees or anything else, to beautify your drawing.

Step 12: You can go back and add details and outline with Sharpie or black marker and delete any stray marks. You can also color if wanted.

Step 13: Next is for you to add dialogue and actively work with your character drawing.

Step 14: Finally, and there you have it. Congratulation! You now have your perfect, awesome, beautiful, and YOUR cartoon.

● Ending Thoughts →
● This article explained all you need to know about learning how to do funny cartoon drawings very quickly. You can also use these methods to create funny cat cartoon drawings or any other drawing you want for cat lovers.
● However, you can decide to animate your graphic using the best software to carry it out quickly, i.e., Filmora.
Whether you want to use a simple short video or an accessible online lesson, you will find everything that you need to learn how to create comic cartoon drawing on this website. This website article contains all the tutorials you need, ranging from your favorite wild animals, places, objects, farm animals, characters, vehicles, and food.
Do not forget that practicing is the key to success, so don’t hesitate to try several drawing lessons to help you improve your abilities. Start today to learn how to draw funny cartoons online at your own pace and comfort with this step-by-step tutorial.
In this article
01 [How to Draw Funny Cartoon Faces](#Part 1)
02 [How to Draw Your Own Cartoon Character](#Part 2)
Part 1 How to Draw Funny Cartoon Faces
Drawing funny faces in cartoons is very easy compared to other drawing styles or drawing complete parts of the comic. All that is need is practice and experiment with different combinations of shapes. This article will guide on how to draw funny cartoon faces of various types using six other steps:
Step 1: To begin, you need to first draw the face outline by drawing the following;
● Any Perfect type of round shape like a circle.
● Any pear shapes
● An upside-down triangle
● A quadrilateral like a trapezium, a square, or any of your choice
Step 2: To draw the nose in the middle of the face, draw somewhere any of the following;
● A round shape that is bulgy
● A U-shape
● A V-shape
● A small dash.
Step 3: Next is that you draw two round shapes for the eyes, and each of them should have a smaller round or dot (for the pupil), which is above the nose. This eye can be in the shape of any of the following;
● Two large circles
● An ovals
● A curvy “M,” like the one you can see in the “McDonalds” logo.
Step 4: You can draw the mouth just below the nose and draw any of the shapes from the list given below. In addition, to make the mouth funnier, you should then add teeth by either drawing a small square sticking out inside the mouth from the upper side, at the roof of the mouth, or a straight horizontal line which is across the mouth and several vertical lines used to form a grid having two rows and many columns.
● A U-shaped curve that is large
● A triangle like a right-angled one which is most preferred
● A circle or an oval shape
● A rectangle shapes
● A straight line shapes
Step 5: You can add any other “extra fittings” such as the ears (in cartoons, ears generally considered to be ‘extra’), wrinkles, collar, hat, hair, etc.
Step 6: Finally, your cartoon face drawing is ready! You can also add different colors to the picture with different funky shades to make it attractive.
Part 2 How to Draw Your Own Cartoon Character
Are you bored? Why not take up a pencil and draw your cartoon comic drawing character? Note that drawing will be a relief from boredom, and it also helps your creativity fly very high.
However, you can easily add some colors and designs or even animate your cartoon character using this free software known as Filmora. Wondershare Filmora Video Editor is the best software to make you cartoon your picture or animate your cartoon characters with tons of filters and effects and its keyframing feature, which allows this with ease.
For Win 7 or later (64-bit)
For macOS 10.12 or later
Read this article on how to draw the perfect cartoon character yourself:
Step 1: The first is to have an idea of what you want to draw, i.e., the picture you want to draw. You can pick any character to draw from your favorite website or WeeWorld.com.
● First, you draw the face but make sure you don’t add a nose but do a black outline.
● Next, you can draw the other features but make sure you don’t use colored pencils. Only use your main writing utensil.
● Then, remember to use your imagination to add the clothes and hairstyle.
● Finally, you can delete any unwanted lines and color with artist utensils, such as crayons, paintbrushes, colored pencils, etc. Also, remember that you can add some detail to your character to make it pop out and be beautiful.
Step 2: Now you have officially made your cartoon, how does it feel?
Step 3: Next, you want to go back and draw again, but this time, not an imitation.
Step 4: Pick up a new piece of paper to be used to draw another character. But this time, you need to change the features. You can decide to make the eyes bigger, neon skin, and maybe crazy hair. You can try clothes that you would love to wear, or ones you wish you could get. Also, try to change the size around to make the features look different and add a nose, and then you can finally color your creation.
Step 5: Now, you can compare the two drawings to notice the difference. You will realize that one is an imitation while the other is all you! Now, you can grab a new piece of notebook paper.
Step 6: Next is that you begin to jot down different ideas. For example, you may want to draw a cute little puppy or a cute baby. Sometimes you can decide that your cartoon could be about a talking apple or something different.
Step 7: Grab another piece of paper and draw any other character you can imagine. You can try using a Sharpie marker for the outline by carefully tracing the pencil. Then you can erase any stray marks on the piece of paper. Next, you can also use any writing utensils like markers, crayons, colored pencils, pastels, or even paint, as it also works well.
Step 8: You can grab your notebook sheet again and then jot down any idea of a comic series. Also, make a plot or funny lines that you could use or any other characters.
Step 9: Next, you fold the blank sheet of paper and make it into about four lines. And then you can draw your main character by just using a pencil first.
Step 10: You can then draw the other characters and all the basic outlines in the drawing.
Step 11: Next is that you can draw the furniture and background, such as trees or anything else, to beautify your drawing.
Step 12: You can go back and add details and outline with Sharpie or black marker and delete any stray marks. You can also color if wanted.
Step 13: Next is for you to add dialogue and actively work with your character drawing.
Step 14: Finally, and there you have it. Congratulation! You now have your perfect, awesome, beautiful, and YOUR cartoon.
● Ending Thoughts →
● This article explained all you need to know about learning how to do funny cartoon drawings very quickly. You can also use these methods to create funny cat cartoon drawings or any other drawing you want for cat lovers.
● However, you can decide to animate your graphic using the best software to carry it out quickly, i.e., Filmora.
How to Stop Animation From Looping in Unity
How to Stop Animation from Looping in Unity
An easy yet powerful editor
Numerous effects to choose from
Detailed tutorials provided by the official channel
Unity is an IDE interface all designed exclusively for game developers. However, you can do much more with Unity than game development. But, our main concern here is something else than this subject. You’re looking for easy tutorials on Unity stop animation!

And luckily, we’ve got you covered as we’ve briefly explained how to perform Unity stop animation from looping and the steps to make a smooth animation.
In this article
01 [What is Unity Used for?](#Part 1)
02 [How to Stop Animation Playing in Loop in Unity?](#Part 2)
03 [How to Smooth an Animation in Unity?](#Part 3)
Part 1 What is Unity Used for?
Unity is a software tool friendly to all the game developers out there. This tool is used by the large community of game developers to power and create their game development projects. And, the software is more of a professional means and not a simple pared-down ‘game builder .’Unity also offers one of the most significant inbuilt features like rendering, physics, and collision detection. Thus, one of the powerful aspects of Unity is that game developers need not go out of the box and create everything from scratch. Instead, they are available with the physics engine required to develop games quickly. Another robust feature of Unity is that it includes an excellent ‘Asset Store’ where developers can upload their creations and showcase them to the whole community. So, that’s Unity and its uses in a broader scope!
Before we take you through the next section, it’s important to mention that Unity is also known as cross-platform IDE, where IDE stands for ‘integrated development environment.’ So, it can be called more of an interface with access to all the tools and resources required to develop games.
Apart from the game development, Unity is known for other excellent usage purposes as:
● Simulations
● Animation
● Architectural Visualization
● Previsualization for Film
● Interactive Experiences
Among these features only, we’ll describe Unity stop animation from looping in detail.
Part 2 How to Stop Animation Playing in Loop in Unity?
As we said, we’ll describe to you the most accessible definition of how to stop Animation in Unity. Thus, there are simple steps that we’d like to define firsthand before explaining the whole procedure with an image-centric step-by-step guide.
So, those simple steps to stop motion animation in After Effects in the loop also go like below:
Step 1 Go to the Project tab and select Animation.
Step 2 Open the Inspector tab.
Step 3 Uncheck the checkbox Loop Time, and you’re good to go!
We’ll describe the same, i.e., Unity stop animation from looping through the step guide below.
In this guide, we’ll explain right from applying the Animation so that you’d understand better. So, let’s begin without any further ado!
01Step 1 Delete animation folder
We have already created an animation folder in the folder named as own Animation, so click that folder, click the animation folder, and then another folder along with as shown below. Hold the Shift key and click another folder. Then, right-click the Delete tab as depicted below.
Similarly, you can also delete the Animation if you wish.

02Step 2 Create an animation for the subject
Now, you may have different subjects. We’re creating Animation on Mobile Joystick for reference, as shown below.

Now, hit the Create tab on the Unity panel below. Then, proceed to save your Animation in the folder you’ve already created for the same.

03Step 3 Give positions to the animation
Firstly, hit the red-icon button used for recording, as shown below.

Give the position on the left side after you click the button. And, then, clicking almost near to 3you can give the position to the right-hand side as shown below.

Now, the animation has been set. You can see the animation from left to right if you click the Play button. So, here, you can see the results of infinite loop animation, which won’t stop.

You can follow two ways to stop this Animation in Unity from looping, and we’ll describe both methods below.
04Step 4 Stop animation Unity Way 1
Go to the animation folder where you’ve created the animation and click the New Animation icon as shown below.

Now, you have to uncheck the Loop Time tab on the top-right corner of the Unity panel.

05Step 5 Stop animation Unity Way 2
Alternatively, you can click the Animator tab on the top of the Unity panel and double-tap the New Animation button. Then, it will also delete or uncheck the loop time, as shown below.

These were all the steps to stop animation Unity.
Part 3 How to Smooth an Animation in Unity?
After done with Unity stop animation, it’s time to smooth your Unity animation. Again, we will describe it simply if you’re used to the Unity platform and then with a step guide with respective screenshots.
So, stay tuned until the end to reveal the easy steps of smoothing an animation in Unity.
Select the Dopesheet at the bottom of the animation window. Then, you need to switch to the ‘Curves’ view once you create your Animation in the Dopesheet. These animation curves help you accelerate and decelerate animations so that the movement and other things can stop and start smoothly.
So, let’s begin with the step guide tutorial on the same as follows:
For reference, take an example of a metronome object imported from Blender to Unity. Here, we’ve grouped all the pendulum objects under one rotation so that when we move the pendulum, it pivots to the correct point, as shown below.

01Add the animator
So, the first step begins with adding the Animator component to the parent object. You can do this by clicking the Add Component tab on the Unity panel’s left side, searching for Animator, and clicking the Animator.
You will also need a controller to control the animations. Go to your animation folder, right-click, and select Create> Animator Controller tab.

Let’s call or give it a name metronome animator as shown below.
Then, you need to drag this into your animator component. Again, you need to go to your animations folder, right-click, select Create> Animations tab.
Now, give this a name pendulum full swing.
02Open the animator tab
Now, open the animator tab, drag this pendulum swing animation to that panel, and double-tap the yellow-colored New Animation button.

03Create an animation
With the game object selected, the animated metronome pendulum, in this case, we’d like to animate the X component of the rotation. So, you need to click Add Property> Transform> Rotation tab and click the + sign on its right, as shown below.
Now, click the plus sign automatically to set two keyframes, one at the beginning and one at the end. Now, click on end select all, and then delete for now.

04Add keyframes to rotate the pendulum
With the first set of keyframes and the pendulum all way to the right, go halfway and change the rotation to the left on the left panel of Unity. Then, add another keyframe.

05Slow down the animation
As you can observe, the Animation of this pendulum is in a straight line and feels unnatural to the eyes. Thus, we’re required to smooth this Animation now! For this purpose, go to the Curves; you can see the pink properties of rotation as going from one side to another.

Now, you need to adjust these pink curves. Start by adding a key to one of its sides, as shown below. After that, it is all on you how slow or fasts you want these values to be.
Here, you’re all done smoothing the animation in Unity after learning the stop-animation Unity tutorial.
You can even stop motion animation on Photoshop with the above tutorial.
06Bonus Tip:
We want to introduce an excellent video editor software called Filmora Video Editor . It is from the house of Wondershare, a well-known software company worldwide.

Wondershare Filmora - Best Video Editor for Mac/Windows
5,481,435 people have downloaded it.
Build unique custom animations without breaking a sweat.
Focus on creating epic stories and leave the details to Filmora’s auto features.
Start a creative adventure with drag & drop effects and endless possibilities.
Filmora simplifies advanced features to save you time and effort.
Filmora cuts out repetition so you can move on to your next creative breakthrough.
With Filmora, you can easily add Animation and edit your videos to make them look world-class. The latest version and new updates are eye-candy and quick fix for beginner video editors.
So, please pay a visit to the Filmora website and check out its Mac and Windows version for free today.
● Key Takeaways from This Episode →
● Learning the concept and usage of Unity
● A tutorial on how to stop animation in Unity from looping
● A tutorial on how to smooth animation in Unity
● Introduction to Filmora, the top-most video editor software for beginners.
Unity is an IDE interface all designed exclusively for game developers. However, you can do much more with Unity than game development. But, our main concern here is something else than this subject. You’re looking for easy tutorials on Unity stop animation!
And luckily, we’ve got you covered as we’ve briefly explained how to perform Unity stop animation from looping and the steps to make a smooth animation.
In this article
01 [What is Unity Used for?](#Part 1)
02 [How to Stop Animation Playing in Loop in Unity?](#Part 2)
03 [How to Smooth an Animation in Unity?](#Part 3)
Part 1 What is Unity Used for?
Unity is a software tool friendly to all the game developers out there. This tool is used by the large community of game developers to power and create their game development projects. And, the software is more of a professional means and not a simple pared-down ‘game builder .’Unity also offers one of the most significant inbuilt features like rendering, physics, and collision detection. Thus, one of the powerful aspects of Unity is that game developers need not go out of the box and create everything from scratch. Instead, they are available with the physics engine required to develop games quickly. Another robust feature of Unity is that it includes an excellent ‘Asset Store’ where developers can upload their creations and showcase them to the whole community. So, that’s Unity and its uses in a broader scope!
Before we take you through the next section, it’s important to mention that Unity is also known as cross-platform IDE, where IDE stands for ‘integrated development environment.’ So, it can be called more of an interface with access to all the tools and resources required to develop games.
Apart from the game development, Unity is known for other excellent usage purposes as:
● Simulations
● Animation
● Architectural Visualization
● Previsualization for Film
● Interactive Experiences
Among these features only, we’ll describe Unity stop animation from looping in detail.
Part 2 How to Stop Animation Playing in Loop in Unity?
As we said, we’ll describe to you the most accessible definition of how to stop Animation in Unity. Thus, there are simple steps that we’d like to define firsthand before explaining the whole procedure with an image-centric step-by-step guide.
So, those simple steps to stop motion animation in After Effects in the loop also go like below:
Step 1 Go to the Project tab and select Animation.
Step 2 Open the Inspector tab.
Step 3 Uncheck the checkbox Loop Time, and you’re good to go!
We’ll describe the same, i.e., Unity stop animation from looping through the step guide below.
In this guide, we’ll explain right from applying the Animation so that you’d understand better. So, let’s begin without any further ado!
01Step 1 Delete animation folder
We have already created an animation folder in the folder named as own Animation, so click that folder, click the animation folder, and then another folder along with as shown below. Hold the Shift key and click another folder. Then, right-click the Delete tab as depicted below.
Similarly, you can also delete the Animation if you wish.
02Step 2 Create an animation for the subject
Now, you may have different subjects. We’re creating Animation on Mobile Joystick for reference, as shown below.
Now, hit the Create tab on the Unity panel below. Then, proceed to save your Animation in the folder you’ve already created for the same.
03Step 3 Give positions to the animation
Firstly, hit the red-icon button used for recording, as shown below.
Give the position on the left side after you click the button. And, then, clicking almost near to 3you can give the position to the right-hand side as shown below.
Now, the animation has been set. You can see the animation from left to right if you click the Play button. So, here, you can see the results of infinite loop animation, which won’t stop.
You can follow two ways to stop this Animation in Unity from looping, and we’ll describe both methods below.
04Step 4 Stop animation Unity Way 1
Go to the animation folder where you’ve created the animation and click the New Animation icon as shown below.
Now, you have to uncheck the Loop Time tab on the top-right corner of the Unity panel.
05Step 5 Stop animation Unity Way 2
Alternatively, you can click the Animator tab on the top of the Unity panel and double-tap the New Animation button. Then, it will also delete or uncheck the loop time, as shown below.
These were all the steps to stop animation Unity.
Part 3 How to Smooth an Animation in Unity?
After done with Unity stop animation, it’s time to smooth your Unity animation. Again, we will describe it simply if you’re used to the Unity platform and then with a step guide with respective screenshots.
So, stay tuned until the end to reveal the easy steps of smoothing an animation in Unity.
Select the Dopesheet at the bottom of the animation window. Then, you need to switch to the ‘Curves’ view once you create your Animation in the Dopesheet. These animation curves help you accelerate and decelerate animations so that the movement and other things can stop and start smoothly.
So, let’s begin with the step guide tutorial on the same as follows:
For reference, take an example of a metronome object imported from Blender to Unity. Here, we’ve grouped all the pendulum objects under one rotation so that when we move the pendulum, it pivots to the correct point, as shown below.
01Add the animator
So, the first step begins with adding the Animator component to the parent object. You can do this by clicking the Add Component tab on the Unity panel’s left side, searching for Animator, and clicking the Animator.
You will also need a controller to control the animations. Go to your animation folder, right-click, and select Create> Animator Controller tab.
Let’s call or give it a name metronome animator as shown below.
Then, you need to drag this into your animator component. Again, you need to go to your animations folder, right-click, select Create> Animations tab.
Now, give this a name pendulum full swing.
02Open the animator tab
Now, open the animator tab, drag this pendulum swing animation to that panel, and double-tap the yellow-colored New Animation button.
03Create an animation
With the game object selected, the animated metronome pendulum, in this case, we’d like to animate the X component of the rotation. So, you need to click Add Property> Transform> Rotation tab and click the + sign on its right, as shown below.
Now, click the plus sign automatically to set two keyframes, one at the beginning and one at the end. Now, click on end select all, and then delete for now.
04Add keyframes to rotate the pendulum
With the first set of keyframes and the pendulum all way to the right, go halfway and change the rotation to the left on the left panel of Unity. Then, add another keyframe.
05Slow down the animation
As you can observe, the Animation of this pendulum is in a straight line and feels unnatural to the eyes. Thus, we’re required to smooth this Animation now! For this purpose, go to the Curves; you can see the pink properties of rotation as going from one side to another.
Now, you need to adjust these pink curves. Start by adding a key to one of its sides, as shown below. After that, it is all on you how slow or fasts you want these values to be.
Here, you’re all done smoothing the animation in Unity after learning the stop-animation Unity tutorial.
You can even stop motion animation on Photoshop with the above tutorial.
06Bonus Tip:
We want to introduce an excellent video editor software called Filmora Video Editor . It is from the house of Wondershare, a well-known software company worldwide.
Wondershare Filmora - Best Video Editor for Mac/Windows
5,481,435 people have downloaded it.
Build unique custom animations without breaking a sweat.
Focus on creating epic stories and leave the details to Filmora’s auto features.
Start a creative adventure with drag & drop effects and endless possibilities.
Filmora simplifies advanced features to save you time and effort.
Filmora cuts out repetition so you can move on to your next creative breakthrough.
With Filmora, you can easily add Animation and edit your videos to make them look world-class. The latest version and new updates are eye-candy and quick fix for beginner video editors.
So, please pay a visit to the Filmora website and check out its Mac and Windows version for free today.
● Key Takeaways from This Episode →
● Learning the concept and usage of Unity
● A tutorial on how to stop animation in Unity from looping
● A tutorial on how to smooth animation in Unity
● Introduction to Filmora, the top-most video editor software for beginners.
What Are Differences Between 2D And 3D Animation
What Are Differences Between 2D And 3D Animation
An easy yet powerful editor
Numerous effects to choose from
Detailed tutorials provided by the official channel
Creating an animation requires multiple processes and tasks to get that final result that we enjoy on the screen. Irrespective of the type of animations like stop-motion, sketch, computer, and others, all of them majorly falls under two main categories- 2D animation and 3D animation. The popular cartoons like Mickey Mouse, Tom & Jerry, and others that became an integral part of all childhood were 2D animations and with technological advancement and 3D animation in use, they are more like aged-veterans.
Toy Story was the first 3D animation movie and after that, there is no stopping. Though 3D animations are more interesting and engaging, they are fields where 2D animations work better. This article will help you to learn in detail about 2D 3D animation, their differences, uses, and other aspects.
In this article
01 [Definition of 2D Animation 3D Animation?](#Part 1)
02 [Key Differences Between 2D Animations and 3D Animations](#Part 2)
03 [Selecting Between 2D Animation and 3D Animation?](#Part 3)
04 [Merging 2D Animation and 3D Animation](#Part 4)
Part 1 Part Definition Of 2D And 3D Animation
012D Animation
The traditional method of animation is termed 2D animation and it has been in use for a long time. A 2D animated video has multiple images in different positions which when moved quickly one after the other simulates a movement. The flipping of the images creates an illusion of movement. Earlier 2D animations were created using hands but now there is advanced computer software that can create these animations in just a few simple clicks. The term 2D means 2 dimensional which means that an image for the animation can be moved in two-dimensional space that is X-axis and Y-axis.
023D Animation
In simplest terms, a 3D animation is an animation that is created in three-dimensional space which makes the characters and objects appear realistic and lively. Thus, a 3D animation has height, width as well as depth. These animations are more complex and the process of creating them is totally different from that of 2D animations. Though 3D animations are used in different industries and platforms these days, majorly they can be found for creating movies, games, and cartoons.
Part 2 Part Key Differences Between 2d Animations and 3d Animations
The major difference between a 2D animation and 3D animation lies in the final appearance. While a 2D animation appears like a flat animation which can be an image or a photograph at a fast movement while a 3D animation looks like real objects that can be seen from all angles and have their front, back, top, as well as the bottom.
The table below will differentiate both these animations on various parameters.
| Features/Type of Animation | 2D Animation | 3D Animation |
|---|---|---|
| Full-Form | Two-dimensional | Three-dimensional |
| Meaning | These animations with 2-dimensional objects appear to be moving when the images are moved at a fast speed. | The objects and characters in these animations look more realistic as their appear in 3-dimensional space. |
| Supported Aspects and axis | Length and height (X-axis and Y-axis) | Length, height, and width (X-axis, Y-axis and Z-axis) |
| Appearance | Appear as flat | Appear lively and realistic |
| Basic elements | It’s all about frames | The animation is all about movements |
| Axis | Images appear at X-axis, and Y axis | Objects appear at X-axis, Y-axis, and Z-axis. |
| Use and target audience | Used for social media sites, demos, animated whiteboard videos, and similar others. | Used for movies, cartoons, video games. |
| Use of software | Hand-drawn images or computer-generated images can be used. | Complex software is needed. |
| Cost | Cheaper than 3D animations | Expensive |
| Examples | Snow White, The Jungle Book, Mickey Mouse, Tom & Jerry, and more. | The Toy Story, Transformers, Incredibles, and more. |
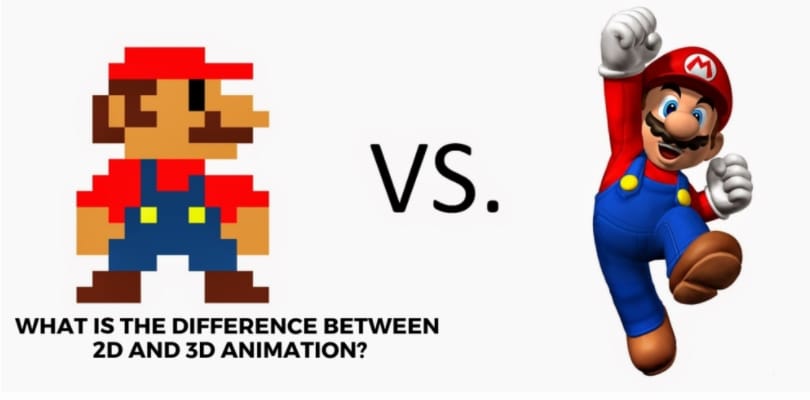
Part 3 Selecting Between 2D Animation and 3D Animation?
Confused between 2D animation and 3D animation? Several factors can be considered to select between the two types of animations. Major ones are enlisted below.
● Target audience: For general explanation and use, 2D animations are a good choice as they are interesting, engaging, and also pocket-friendly. If the target audience is professional people that need in-depth and important information about something, 3D animations are a better choice.
● Availability of software: There are different software used for different types of animations. The availability of the software can also be a deciding factor for selecting between a 2D animation or 3D animation.
● Budget: This is another important factor to be considered. Since 3D animation requires more complex tools and procedures, creating them is expensive. So, depending on how much you are willing to spend, you can choose between the two.
Part 4 Part Merging 2D Animation and 3D Animation
Why choose one, when both can be used? Yes, to get the best of both worlds, 2D animations can be used along with 3D animations depending on the type of the project. Both the styles can be adjusted as per the requirements and for this, good professional software is needed.
We here suggest Wondershare Filmora Video Editor as the best tool as it not only comes equipped with all the latest features but the entire process is also quick and hassle-free. Majorly working as an excellent video editing software, the program supports multiple functions supporting animated videos. Using this Windows and Mac-based tool yon create dynamic animated videos and also edit them and customize them to suit your requirements.
For Win 7 or later (64-bit)
For macOS 10.12 or later
Key features of the software
● Create interesting and engaging animated and other videos using more than 100 media layers, composting tools, and dynamic effects.
● Apply motion elements, filters, and transitions for dynamic videos.
● Audio functions like background noise removal, audio equalizer, keyframe audio editing, and others are supported.
● Fast import, export, and rendering.
● Option to preview the files in high resolution.
● Features like fisheye correction, speed control, stabilization, advanced color correction, 3D LUTs, and others are supported.
● Additional supported functions include import from social media sites, portrait support, camera shake, audio-mixing, screen recording, auto-crop, and others.
● Windows and Mac support.
● Key Takeaways from This Episode →
● 2D and 3D animation are the two major types of animations created for different uses.
● A 2D animation appears in two-dimensional space while a 3D animation appears in a three-dimensional space and looks livelier and more realistic.
● Both 2D and 3D animations can be merged using professional software like Wondershare Filmora Video Editor that supports a wide range of other functions as well.
Creating an animation requires multiple processes and tasks to get that final result that we enjoy on the screen. Irrespective of the type of animations like stop-motion, sketch, computer, and others, all of them majorly falls under two main categories- 2D animation and 3D animation. The popular cartoons like Mickey Mouse, Tom & Jerry, and others that became an integral part of all childhood were 2D animations and with technological advancement and 3D animation in use, they are more like aged-veterans.
Toy Story was the first 3D animation movie and after that, there is no stopping. Though 3D animations are more interesting and engaging, they are fields where 2D animations work better. This article will help you to learn in detail about 2D 3D animation, their differences, uses, and other aspects.
In this article
01 [Definition of 2D Animation 3D Animation?](#Part 1)
02 [Key Differences Between 2D Animations and 3D Animations](#Part 2)
03 [Selecting Between 2D Animation and 3D Animation?](#Part 3)
04 [Merging 2D Animation and 3D Animation](#Part 4)
Part 1 Part Definition Of 2D And 3D Animation
012D Animation
The traditional method of animation is termed 2D animation and it has been in use for a long time. A 2D animated video has multiple images in different positions which when moved quickly one after the other simulates a movement. The flipping of the images creates an illusion of movement. Earlier 2D animations were created using hands but now there is advanced computer software that can create these animations in just a few simple clicks. The term 2D means 2 dimensional which means that an image for the animation can be moved in two-dimensional space that is X-axis and Y-axis.
023D Animation
In simplest terms, a 3D animation is an animation that is created in three-dimensional space which makes the characters and objects appear realistic and lively. Thus, a 3D animation has height, width as well as depth. These animations are more complex and the process of creating them is totally different from that of 2D animations. Though 3D animations are used in different industries and platforms these days, majorly they can be found for creating movies, games, and cartoons.
Part 2 Part Key Differences Between 2d Animations and 3d Animations
The major difference between a 2D animation and 3D animation lies in the final appearance. While a 2D animation appears like a flat animation which can be an image or a photograph at a fast movement while a 3D animation looks like real objects that can be seen from all angles and have their front, back, top, as well as the bottom.
The table below will differentiate both these animations on various parameters.
| Features/Type of Animation | 2D Animation | 3D Animation |
|---|---|---|
| Full-Form | Two-dimensional | Three-dimensional |
| Meaning | These animations with 2-dimensional objects appear to be moving when the images are moved at a fast speed. | The objects and characters in these animations look more realistic as their appear in 3-dimensional space. |
| Supported Aspects and axis | Length and height (X-axis and Y-axis) | Length, height, and width (X-axis, Y-axis and Z-axis) |
| Appearance | Appear as flat | Appear lively and realistic |
| Basic elements | It’s all about frames | The animation is all about movements |
| Axis | Images appear at X-axis, and Y axis | Objects appear at X-axis, Y-axis, and Z-axis. |
| Use and target audience | Used for social media sites, demos, animated whiteboard videos, and similar others. | Used for movies, cartoons, video games. |
| Use of software | Hand-drawn images or computer-generated images can be used. | Complex software is needed. |
| Cost | Cheaper than 3D animations | Expensive |
| Examples | Snow White, The Jungle Book, Mickey Mouse, Tom & Jerry, and more. | The Toy Story, Transformers, Incredibles, and more. |
Part 3 Selecting Between 2D Animation and 3D Animation?
Confused between 2D animation and 3D animation? Several factors can be considered to select between the two types of animations. Major ones are enlisted below.
● Target audience: For general explanation and use, 2D animations are a good choice as they are interesting, engaging, and also pocket-friendly. If the target audience is professional people that need in-depth and important information about something, 3D animations are a better choice.
● Availability of software: There are different software used for different types of animations. The availability of the software can also be a deciding factor for selecting between a 2D animation or 3D animation.
● Budget: This is another important factor to be considered. Since 3D animation requires more complex tools and procedures, creating them is expensive. So, depending on how much you are willing to spend, you can choose between the two.
Part 4 Part Merging 2D Animation and 3D Animation
Why choose one, when both can be used? Yes, to get the best of both worlds, 2D animations can be used along with 3D animations depending on the type of the project. Both the styles can be adjusted as per the requirements and for this, good professional software is needed.
We here suggest Wondershare Filmora Video Editor as the best tool as it not only comes equipped with all the latest features but the entire process is also quick and hassle-free. Majorly working as an excellent video editing software, the program supports multiple functions supporting animated videos. Using this Windows and Mac-based tool yon create dynamic animated videos and also edit them and customize them to suit your requirements.
For Win 7 or later (64-bit)
For macOS 10.12 or later
Key features of the software
● Create interesting and engaging animated and other videos using more than 100 media layers, composting tools, and dynamic effects.
● Apply motion elements, filters, and transitions for dynamic videos.
● Audio functions like background noise removal, audio equalizer, keyframe audio editing, and others are supported.
● Fast import, export, and rendering.
● Option to preview the files in high resolution.
● Features like fisheye correction, speed control, stabilization, advanced color correction, 3D LUTs, and others are supported.
● Additional supported functions include import from social media sites, portrait support, camera shake, audio-mixing, screen recording, auto-crop, and others.
● Windows and Mac support.
● Key Takeaways from This Episode →
● 2D and 3D animation are the two major types of animations created for different uses.
● A 2D animation appears in two-dimensional space while a 3D animation appears in a three-dimensional space and looks livelier and more realistic.
● Both 2D and 3D animations can be merged using professional software like Wondershare Filmora Video Editor that supports a wide range of other functions as well.
You Can Turn a TikTok Into a GIF Now. Here’s How
You Can Turn a TikTok Into a GIF Now. Here’s How
An easy yet powerful editor
Numerous effects to choose from
Detailed tutorials provided by the official channel
Want to add sharing flexibility to TikTok videos? Convert them into GIFs!
In this article
01 [What is GIF TikTok?](#Part 1)
02 [How to Make a GIF From a TikTok Video](#Part 2)
Part 1 What Is TikTok GIF?
In today’s IT enhanced lifestyle, having a profound reach on social media is the new name of popularity. Everyone out there is profusely keen on creating and sharing a plethora of content varieties; memes, videos, animations and what not, across social communities. However, TikTok videos lag behind in this race; often lack the ‘Share’ flexibility.
To match up, there are solutions to convert TikTok video into GIFs. A TikTok GIF is a short, impactful and to the point clip that’s here to share fun and exciting content in the most interesting ways. If you have a bunch of TikTok videos to share with your peers, but missing out on an effective sharing solution, you can conveniently look forward to convert those videos into catchy and interesting GIFs that will definitely hold the attention of your viewers.
Feel motivated? See through the rest of this article to know some quick and easy TikTok to GIF conversion tools and software!
Part 2 How to Make a GIF From a TikTok Video
When looking through solutions to create GIF TikTok videos, you will find a pool of methods and tools available on the internet. All you need to do is select the best one for yourself and get started with converting TikTok Videos into GIFs. Given below are some of the best solutions adhering to the aforesaid concern:
01Filmora
Wondershare Filmora Video Editor is one of the best application software to create a TikTok GIF. This is a simple and smart converter application that caters to your concern in just a few minutes. What’s best is that this app is absolutely free to use and is compatible with your PC, smartphone and a variety of other devices. Here’s how you can use Filmora to convert your TikTok videos into GIFs:

Step 1: Import Your Video
Start with importing a desired TikTok video file to the Filmora timeline. You can also ‘Drag and Drop’ the video file to the editor timeline. Using this application, you have the flexibility to import your clip in almost any video format.

Step 2: Edit Your Clip
Suited to your content preferences, you can edit and enhance your clips with a variety of effects, like, cut, trim, rotate, split, etc., and make appropriate speed adjustments. You can even include text messages to make your GIF more impactful.

Wondershare Filmora
Get started easily with Filmora’s powerful performance, intuitive interface, and countless effects!
Try It Free Try It Free Try It Free Learn More >

Step 3: Let’s Save and Share!
When you are happy, save your work using the .gif file extension. That’s it! You are ready to share your creation with your social media peers.

02TikTok’s Inbuilt GIF Converter
TikTok allows you to directly convert its videos into GIFs. You can use the TikTok application in your smartphone to take up the conversion process. All you need to do is follow the steps given below:
Step 1: Select Your TikTok Video
To get started, open the TikTok application in your smartphone and select the video you want to convert into GIF.
Step 2: Share the Video
Click the ‘Share’ icon at the right of the video screen.

Step 3: Format Selection
Scroll down to the bottom of the screen and choose the ‘Share as GIF’ option. This will automatically convert your TikTok video into GIF in a few seconds.

Step 4: Save and Export
Click on the ‘Save Image’ option to save the GIF in your phone’s gallery. You can also export your creation to different social media platforms.
03Wondershare UniConverter
This one is a handy toolbox loaded with a variety of features that allow you to play with your video creativity. Using this tool, you can quickly create GIF for TikTok and also fix the size and duration of the same. This software supports almost all video formats and comes with an inbuilt editor that you can use to add effects and make your GIFs all the more interesting. This is compatible with your Windows or MacOS PC.
Take the following steps to create GIFs from TikTok videos using this software:

Step 1: Download and Launch the Application
Download the Wondershare UniConverter application to your PC from the software’s official website.
Step 2: Open GIF Maker
In the app’s welcome screen, navigate to the ‘Toolbox’ tab and select ‘GIF Maker’ from the panel that gets displayed.
Step 3: Upload Your TikTok Video
In the next pop-up window, select ‘Video to GIF’ and click on the (+) icon in the centre. You can also click on ‘Add Files’ in the top left and choose a saved TikTok video from your PC to upload.

Step 4: Trim Your Video
Trim the uploaded video to the desired portion from where you wish to create the GIF and set adequate time frames for the same. You can even drag the video thumbnail slider to trim the video.

Step 5: Let’s Get Creating!
Set the final size and frame rate from the ‘Output Size’ and ‘Frame Rate’ tabs respectively. To save your creation, browse and choose the desired system folder by clicking on the ‘Save to:’ tab. Lastly, select ‘Create GIF’ to start the conversion process.

04Kapwing GIF Maker
There may be instances where you cannot save or share TikTok videos. To cut the rush in such cases, you can use Kapwing’s GIF Maker to convert videos from TikTok to GIF online. This one is a free video editing tool that works with almost all internet enabled smartphones and supports almost all common video formats. Here’s what you need to do for making GIFs from TikTok videos using this tool:
Step 1: Copy a Video Link
Search your desired TikTok video and click on the ‘Share’ icon. In the drop down menu, select ‘Copy Link’ to save the video link in your device memory. Once this happens, you will get a confirmation message that says, ‘Copied’.

Step 2: Open GIF Maker
Open the GIF Maker tool in your browser and paste the saved TikTok video link in the editor’s URL bar. This will automatically redirect you to the Kapwing Studio, where you have the liberty to trim, crop or split your video clip to the desired time frame. It is better to set a play span of 3-5 seconds.
You can trim the clip by dragging its ends or introduce cuts at specific points using the split button above the editor timeline. To make volume adjustments, select the video layer and click on ‘Edit Video’ and move the adjuster circle to the left or right to decrease, increase and mute the video volume.


Step 3: Download and Share Your Creation
To save your work, tap ‘Export Video’ at the top and select ‘Export as GIF’ from the drop down menu. Wait for the conversion process to finish and click ‘Download’. This will save the GIF to your device.
You will find a watermark at the corner of your clip. Click ‘Sign In to Remove the Watermark’ to remove it. A workspace for the present and later projects will be created, where you can save you work for a couple of days with Kapwing’s free version. To export your work to social media, click ‘Share’. You can even host your creation on websites. Just copy the video link and select ‘Embed’.

05TT Downloader
This one is another online tool you can use to create GIFs from TikTok videos. This is a quick converter tool that transforms TikTok videos to GIFs in 5 easy steps within minutes. It is a browser tool and does not require a software download. All you need to do is explained in the following steps:

Step 1:
Visit the official site of the tool.
Step 2:
Select ‘TikTok to GIF’ to get redirected to the TikTok to GIF Converter home page.
Step 3:
Copy and paste the desired TikTok video link in the converter’s URL bar. To proceed further, click on ‘Get Video’.

Step 4:
Trim your clip within a time frame of 1-10 seconds.
Step 5:
Click ‘Done’ to initiate the conversion process. Once it finishes, you can download the converted GIF to your device.
06MiniTool MovieMaker
You can prefer this tool to convert TikTok videos in your PC into GIFs. This tool gives you the liberty to trim, cut, reverse and rotate GIFs and even add text and filters to them. Here’s how you can use this tool to transform TikTok videos into interesting GIFs:
Step 1:
Download and install this GIF maker tool in your PC. Launch the same when you are done with the installation process.
Step 2:
In the converter window, import and add your desired TikTok clip into the converter timeline.

Step 3:
You are now free to edit and add text to your video.
Step 4:
Once you finish, tap ‘Export’ and choose your output format as GIF.
Step 5:
Hit ‘Export’ to let the conversion process begin.
● Key Takeaways from This Episode →
● TikTok videos often lack the save and share features, which is an obvious necessity of today’s social outlook.
● Varieties of online tools and software are available for converting TikTok videos to GIFs to increase the sharing flexibility.
● Filmora is a quick and intelligent choice to take up the conversion process within a catch of few clicks.
Want to add sharing flexibility to TikTok videos? Convert them into GIFs!
In this article
01 [What is GIF TikTok?](#Part 1)
02 [How to Make a GIF From a TikTok Video](#Part 2)
Part 1 What Is TikTok GIF?
In today’s IT enhanced lifestyle, having a profound reach on social media is the new name of popularity. Everyone out there is profusely keen on creating and sharing a plethora of content varieties; memes, videos, animations and what not, across social communities. However, TikTok videos lag behind in this race; often lack the ‘Share’ flexibility.
To match up, there are solutions to convert TikTok video into GIFs. A TikTok GIF is a short, impactful and to the point clip that’s here to share fun and exciting content in the most interesting ways. If you have a bunch of TikTok videos to share with your peers, but missing out on an effective sharing solution, you can conveniently look forward to convert those videos into catchy and interesting GIFs that will definitely hold the attention of your viewers.
Feel motivated? See through the rest of this article to know some quick and easy TikTok to GIF conversion tools and software!
Part 2 How to Make a GIF From a TikTok Video
When looking through solutions to create GIF TikTok videos, you will find a pool of methods and tools available on the internet. All you need to do is select the best one for yourself and get started with converting TikTok Videos into GIFs. Given below are some of the best solutions adhering to the aforesaid concern:
01Filmora
Wondershare Filmora Video Editor is one of the best application software to create a TikTok GIF. This is a simple and smart converter application that caters to your concern in just a few minutes. What’s best is that this app is absolutely free to use and is compatible with your PC, smartphone and a variety of other devices. Here’s how you can use Filmora to convert your TikTok videos into GIFs:
Step 1: Import Your Video
Start with importing a desired TikTok video file to the Filmora timeline. You can also ‘Drag and Drop’ the video file to the editor timeline. Using this application, you have the flexibility to import your clip in almost any video format.
Step 2: Edit Your Clip
Suited to your content preferences, you can edit and enhance your clips with a variety of effects, like, cut, trim, rotate, split, etc., and make appropriate speed adjustments. You can even include text messages to make your GIF more impactful.
Wondershare Filmora
Get started easily with Filmora’s powerful performance, intuitive interface, and countless effects!
Try It Free Try It Free Try It Free Learn More >
Step 3: Let’s Save and Share!
When you are happy, save your work using the .gif file extension. That’s it! You are ready to share your creation with your social media peers.
02TikTok’s Inbuilt GIF Converter
TikTok allows you to directly convert its videos into GIFs. You can use the TikTok application in your smartphone to take up the conversion process. All you need to do is follow the steps given below:
Step 1: Select Your TikTok Video
To get started, open the TikTok application in your smartphone and select the video you want to convert into GIF.
Step 2: Share the Video
Click the ‘Share’ icon at the right of the video screen.
Step 3: Format Selection
Scroll down to the bottom of the screen and choose the ‘Share as GIF’ option. This will automatically convert your TikTok video into GIF in a few seconds.
Step 4: Save and Export
Click on the ‘Save Image’ option to save the GIF in your phone’s gallery. You can also export your creation to different social media platforms.
03Wondershare UniConverter
This one is a handy toolbox loaded with a variety of features that allow you to play with your video creativity. Using this tool, you can quickly create GIF for TikTok and also fix the size and duration of the same. This software supports almost all video formats and comes with an inbuilt editor that you can use to add effects and make your GIFs all the more interesting. This is compatible with your Windows or MacOS PC.
Take the following steps to create GIFs from TikTok videos using this software:
Step 1: Download and Launch the Application
Download the Wondershare UniConverter application to your PC from the software’s official website.
Step 2: Open GIF Maker
In the app’s welcome screen, navigate to the ‘Toolbox’ tab and select ‘GIF Maker’ from the panel that gets displayed.
Step 3: Upload Your TikTok Video
In the next pop-up window, select ‘Video to GIF’ and click on the (+) icon in the centre. You can also click on ‘Add Files’ in the top left and choose a saved TikTok video from your PC to upload.
Step 4: Trim Your Video
Trim the uploaded video to the desired portion from where you wish to create the GIF and set adequate time frames for the same. You can even drag the video thumbnail slider to trim the video.
Step 5: Let’s Get Creating!
Set the final size and frame rate from the ‘Output Size’ and ‘Frame Rate’ tabs respectively. To save your creation, browse and choose the desired system folder by clicking on the ‘Save to:’ tab. Lastly, select ‘Create GIF’ to start the conversion process.
04Kapwing GIF Maker
There may be instances where you cannot save or share TikTok videos. To cut the rush in such cases, you can use Kapwing’s GIF Maker to convert videos from TikTok to GIF online. This one is a free video editing tool that works with almost all internet enabled smartphones and supports almost all common video formats. Here’s what you need to do for making GIFs from TikTok videos using this tool:
Step 1: Copy a Video Link
Search your desired TikTok video and click on the ‘Share’ icon. In the drop down menu, select ‘Copy Link’ to save the video link in your device memory. Once this happens, you will get a confirmation message that says, ‘Copied’.
Step 2: Open GIF Maker
Open the GIF Maker tool in your browser and paste the saved TikTok video link in the editor’s URL bar. This will automatically redirect you to the Kapwing Studio, where you have the liberty to trim, crop or split your video clip to the desired time frame. It is better to set a play span of 3-5 seconds.
You can trim the clip by dragging its ends or introduce cuts at specific points using the split button above the editor timeline. To make volume adjustments, select the video layer and click on ‘Edit Video’ and move the adjuster circle to the left or right to decrease, increase and mute the video volume.
Step 3: Download and Share Your Creation
To save your work, tap ‘Export Video’ at the top and select ‘Export as GIF’ from the drop down menu. Wait for the conversion process to finish and click ‘Download’. This will save the GIF to your device.
You will find a watermark at the corner of your clip. Click ‘Sign In to Remove the Watermark’ to remove it. A workspace for the present and later projects will be created, where you can save you work for a couple of days with Kapwing’s free version. To export your work to social media, click ‘Share’. You can even host your creation on websites. Just copy the video link and select ‘Embed’.
05TT Downloader
This one is another online tool you can use to create GIFs from TikTok videos. This is a quick converter tool that transforms TikTok videos to GIFs in 5 easy steps within minutes. It is a browser tool and does not require a software download. All you need to do is explained in the following steps:
Step 1:
Visit the official site of the tool.
Step 2:
Select ‘TikTok to GIF’ to get redirected to the TikTok to GIF Converter home page.
Step 3:
Copy and paste the desired TikTok video link in the converter’s URL bar. To proceed further, click on ‘Get Video’.
Step 4:
Trim your clip within a time frame of 1-10 seconds.
Step 5:
Click ‘Done’ to initiate the conversion process. Once it finishes, you can download the converted GIF to your device.
06MiniTool MovieMaker
You can prefer this tool to convert TikTok videos in your PC into GIFs. This tool gives you the liberty to trim, cut, reverse and rotate GIFs and even add text and filters to them. Here’s how you can use this tool to transform TikTok videos into interesting GIFs:
Step 1:
Download and install this GIF maker tool in your PC. Launch the same when you are done with the installation process.
Step 2:
In the converter window, import and add your desired TikTok clip into the converter timeline.
Step 3:
You are now free to edit and add text to your video.
Step 4:
Once you finish, tap ‘Export’ and choose your output format as GIF.
Step 5:
Hit ‘Export’ to let the conversion process begin.
● Key Takeaways from This Episode →
● TikTok videos often lack the save and share features, which is an obvious necessity of today’s social outlook.
● Varieties of online tools and software are available for converting TikTok videos to GIFs to increase the sharing flexibility.
● Filmora is a quick and intelligent choice to take up the conversion process within a catch of few clicks.
Ready to Animate Game Character From Scratch?
Are You Ready to Animate Game Character from Scratch?
An easy yet powerful editor
Numerous effects to choose from
Detailed tutorials provided by the official channel
As the popularity of animated video games is reaching new heights, demand for game animators are also going up. But, the Information regarding how to animate games is less or not sufficient enough.
In this article
01 [What is 2D & 3D Animation Game?](#Part 1)
02 [How Do You Animate Games?](#Part 2)
03 [How to Draw 2d & 3d Characters for Video Games?](#Part 3)
Part 1 What is 2D & 3D Animation Game?
Gaming animation is a blend of art and technology. It is one of those fields that require several technical skills. These are brilliant programming skills, understanding the basics of computer science, and practical technology know-how, collectively standing as the basic fundamental of Animation. Both 2D and 3D Animation changed the gaming experience forever and created an array of opportunities. But they differ in working and application.
01Working on 2D Animation
Flipbook can be a good example of the mechanism behind 2D Animation. After drawing a character or an object on the first page of a notebook, continue drawing for the next page and so on. Each removing should be a bit ahead or behind. When flipped swiftly, the series of drawings makes the character or object move.
The working of 2D Animation is not so different. But the detailing of the subject or the object cannot be minimal as a flipbook. 2D Animation demands more characters and more details while at the same time requiring smooth, visually appealing, and accurate detailing, which is a lot of pressure for the makers. Thanks to 2D making software, a week’s work can be taken care of in minutes or two.
02Working on 3D Animation
The working mechanism of 3D Animation is more complicated than 2D. It is a layered process that requires several skills. It also involves “rigged” and animated 3D models. In 3D, the initial sketch of the entire subject and object is the first step towards the animation procedure. The second step is to make a 3D model of the intended animated object. It was third, texturing of the 3D animated object. Rigging is the final step; it gives the 3D model the power and ability to move. Once rigging is done, the character is already for posing. Drop it to the scene and start your Animation.
Part 2 How Do You Animate Games?
01Do You Know How Hot Animated Games Are?
A practical example of how Animation has been handed down over the ages would be the case of ‘Anime’. It has persisted as one of the top cultural exports of Japan and has successfully completed more than 20 years of legacy. The name ‘anime’ practically is a shorter version of the word Animation.
You will find that the reasons for animate games to be so popular are in vast numbers. For example, the anime industry is valued at 19 billion USD, to begin with.
A brief overview of reasons why animate games are so popular:
● There is a Game for Everyone
Game animations are evolving which is why it is able to reach out to a majority of people’s interests.
● Unique Styles of Animation
Gaming animations have come a long way and they have a more individual appeal for all age groups.
● Game History
Gamers have something else to look forward to other than just gaming. There is a story behind every game.
● Customization
Players can customize their characters the way they wish to see themselves.
● Action
Gamers can fight in an action sequence or drive a Lamborghini in a high-speed car chase.
02How Do I Create My Own Game Character?
Designing a character starts with imaging a character in its suitable background or subject. If you are a big fan of fantasy games, your imaginations should not have any boundaries. But, in the case of a sports game, you might have to limit your imagination based on realistic features.
How to streamline wild ideas to get a brilliant character out of it?
● Get an idea
Decide whether the character in mind is the main character or what role, in particular, is it going to play in the game.
● Gender
Gender plays a crucial role in character creation. As it pre-decides certain character traits.
● Build personality
Every character has a specific goal. The personality of each character helps them to achieve their goal.
● Back-story
The personality traits of every character are derived from their back-story.
● Strength& Weakness
Each character should have something unique be it in their personality or in their strength.
● Define Relationship
It is important to imagine and define what relationship the characters have.
● Provide aesthetics
Visual Aesthetics is a realm that has no bounds in the art of gaming.
● Create more characters
Including other characters in relation to the protagonist of the game would make the game or the storyline more interesting.
Part 3 How to Draw 2d & 3d Characters for Video Games
01How to Make a 2d & 3d Game Character - Tutorial
First, we conceive an idea in our mind in an abstract form. But, creating a character from an initial sketch all the way to making it into a full-drawn animation is about developing details keeping the speed of work steady.
Detailed animate game tutorials available online:
● Create composition
Make it more defined and structured. A tip to immediately jump-start your imagination would be to see your character in different lights and shades.
● Refine the Character Sketch
Once you have the clay, it’s time to add form.
● Add References
Start looking for references that suit your character.
● Add Details
Now, it’s time to get into the details, like literally. Start breaking your character into blocks and pieces. Maybe not too literally.
02Learn to Animate Games That Are Underrated Now
With more advancement comes more banishment, which means more and types of games are fading out to obscurity. You can now animate games that are underrated and add a bit of your own flavor to them using software.
You can also apply 3D rendering techniques to apply light and shadow effects to your games.
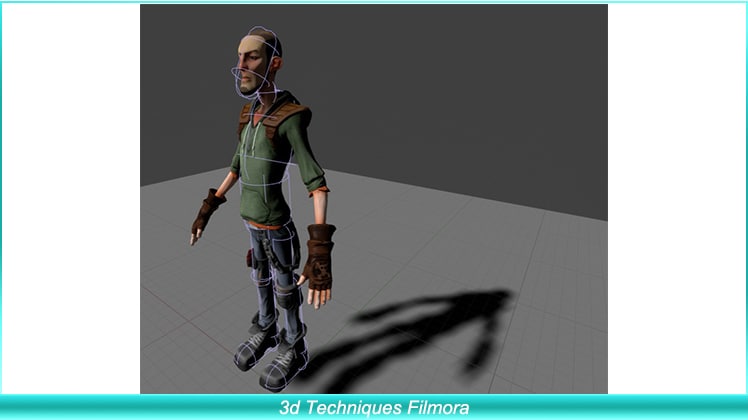
Stop motion is also a popular 2D gaming animation technique that is used in a number of underrated game models like cutout, Claymation, pixilation.
Motion graphics is amazing tool beginners have fun experimenting with. You can create engaging 2D game animations with motion graphic software like Adobe after effects. Make stunning adobe animation tutorials with the same.
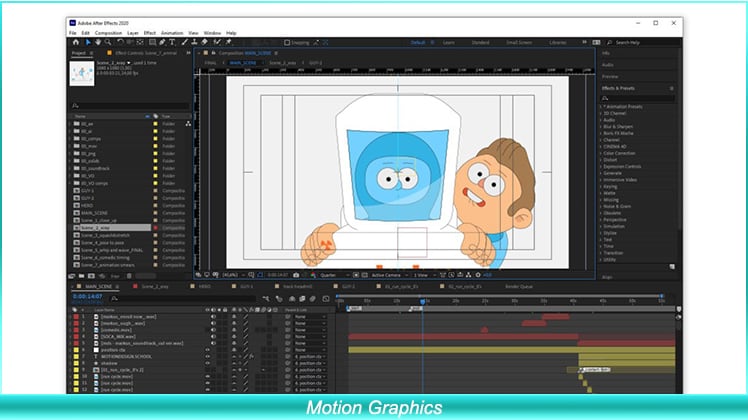
Key Takeaways from This Episode
● Both 2D and 3D Animation offer a separate flavor of the experience. 2D animations run on a definitive FPS and can be compared to a simple flipbook animation, while 3D Animation involves a process called rigging that gives the Animation several movements and abilities.
● Animated games have a global appeal because of their unique style, history, customization, and action features. Animating your own character requires you to pay attention to the details like personality, back story, gender, and aesthetics.
● You can start your animation process with 5 simple steps - concept, composition, sketch, reference, and detailing.
As the popularity of animated video games is reaching new heights, demand for game animators are also going up. But, the Information regarding how to animate games is less or not sufficient enough.
In this article
01 [What is 2D & 3D Animation Game?](#Part 1)
02 [How Do You Animate Games?](#Part 2)
03 [How to Draw 2d & 3d Characters for Video Games?](#Part 3)
Part 1 What is 2D & 3D Animation Game?
Gaming animation is a blend of art and technology. It is one of those fields that require several technical skills. These are brilliant programming skills, understanding the basics of computer science, and practical technology know-how, collectively standing as the basic fundamental of Animation. Both 2D and 3D Animation changed the gaming experience forever and created an array of opportunities. But they differ in working and application.
01Working on 2D Animation
Flipbook can be a good example of the mechanism behind 2D Animation. After drawing a character or an object on the first page of a notebook, continue drawing for the next page and so on. Each removing should be a bit ahead or behind. When flipped swiftly, the series of drawings makes the character or object move.
The working of 2D Animation is not so different. But the detailing of the subject or the object cannot be minimal as a flipbook. 2D Animation demands more characters and more details while at the same time requiring smooth, visually appealing, and accurate detailing, which is a lot of pressure for the makers. Thanks to 2D making software, a week’s work can be taken care of in minutes or two.
02Working on 3D Animation
The working mechanism of 3D Animation is more complicated than 2D. It is a layered process that requires several skills. It also involves “rigged” and animated 3D models. In 3D, the initial sketch of the entire subject and object is the first step towards the animation procedure. The second step is to make a 3D model of the intended animated object. It was third, texturing of the 3D animated object. Rigging is the final step; it gives the 3D model the power and ability to move. Once rigging is done, the character is already for posing. Drop it to the scene and start your Animation.
Part 2 How Do You Animate Games?
01Do You Know How Hot Animated Games Are?
A practical example of how Animation has been handed down over the ages would be the case of ‘Anime’. It has persisted as one of the top cultural exports of Japan and has successfully completed more than 20 years of legacy. The name ‘anime’ practically is a shorter version of the word Animation.
You will find that the reasons for animate games to be so popular are in vast numbers. For example, the anime industry is valued at 19 billion USD, to begin with.
A brief overview of reasons why animate games are so popular:
● There is a Game for Everyone
Game animations are evolving which is why it is able to reach out to a majority of people’s interests.
● Unique Styles of Animation
Gaming animations have come a long way and they have a more individual appeal for all age groups.
● Game History
Gamers have something else to look forward to other than just gaming. There is a story behind every game.
● Customization
Players can customize their characters the way they wish to see themselves.
● Action
Gamers can fight in an action sequence or drive a Lamborghini in a high-speed car chase.
02How Do I Create My Own Game Character?
Designing a character starts with imaging a character in its suitable background or subject. If you are a big fan of fantasy games, your imaginations should not have any boundaries. But, in the case of a sports game, you might have to limit your imagination based on realistic features.
How to streamline wild ideas to get a brilliant character out of it?
● Get an idea
Decide whether the character in mind is the main character or what role, in particular, is it going to play in the game.
● Gender
Gender plays a crucial role in character creation. As it pre-decides certain character traits.
● Build personality
Every character has a specific goal. The personality of each character helps them to achieve their goal.
● Back-story
The personality traits of every character are derived from their back-story.
● Strength& Weakness
Each character should have something unique be it in their personality or in their strength.
● Define Relationship
It is important to imagine and define what relationship the characters have.
● Provide aesthetics
Visual Aesthetics is a realm that has no bounds in the art of gaming.
● Create more characters
Including other characters in relation to the protagonist of the game would make the game or the storyline more interesting.
Part 3 How to Draw 2d & 3d Characters for Video Games
01How to Make a 2d & 3d Game Character - Tutorial
First, we conceive an idea in our mind in an abstract form. But, creating a character from an initial sketch all the way to making it into a full-drawn animation is about developing details keeping the speed of work steady.
Detailed animate game tutorials available online:
● Create composition
Make it more defined and structured. A tip to immediately jump-start your imagination would be to see your character in different lights and shades.
● Refine the Character Sketch
Once you have the clay, it’s time to add form.
● Add References
Start looking for references that suit your character.
● Add Details
Now, it’s time to get into the details, like literally. Start breaking your character into blocks and pieces. Maybe not too literally.
02Learn to Animate Games That Are Underrated Now
With more advancement comes more banishment, which means more and types of games are fading out to obscurity. You can now animate games that are underrated and add a bit of your own flavor to them using software.
You can also apply 3D rendering techniques to apply light and shadow effects to your games.
Stop motion is also a popular 2D gaming animation technique that is used in a number of underrated game models like cutout, Claymation, pixilation.
Motion graphics is amazing tool beginners have fun experimenting with. You can create engaging 2D game animations with motion graphic software like Adobe after effects. Make stunning adobe animation tutorials with the same.
Key Takeaways from This Episode
● Both 2D and 3D Animation offer a separate flavor of the experience. 2D animations run on a definitive FPS and can be compared to a simple flipbook animation, while 3D Animation involves a process called rigging that gives the Animation several movements and abilities.
● Animated games have a global appeal because of their unique style, history, customization, and action features. Animating your own character requires you to pay attention to the details like personality, back story, gender, and aesthetics.
● You can start your animation process with 5 simple steps - concept, composition, sketch, reference, and detailing.
Also read:
- Updated Tips for GIF to Animated PNG
- New Secrets to Make 2D Game Animation for 2024
- 6 Unexpected Ways Gif Animation Maker That Affect Your Marketing for 2024
- Updated Tips for Animated Collage Maker
- Updated 15 Top Pics Collage Apps for 2024
- New The Secret Sauce for Making GIF Instagram Story More Aesthetic
- Updated 2024 Approved Best 10 3D Text Animation Templates
- 2024 Approved How to Draw Cartoons Step by Step with This Guide
- New Whiteboard Animation Services Top 15 Animation Companies to Pick
- New 2024 Approved Tips on How to Learn Graphics Animation
- 2024 Approved 10 Best Tools to Make Pic Collage for Windows
- You Can Turn a TikTok Into a GIF Now for 2024
- New Best 10 Photo Animator Templates
- Updated Best 10 Anime Websites to Watch Dubbed Anime Free
- 2024 Approved 10 Caricature Makers to Turn Photo to Caricature Effects
- How to Create an Adobe Collage, In 2024
- New Top 10 Best Batman Anime Movies 2024 Updated
- Updated In 2024, Top 10 Video to GIF Converters Top Picks
- New How to Make a Video a Live Photo 2023 for 2024
- Updated 2024 Approved Best 15 Instant Classics Animated Cartoon Movies
- New How to Convert Video to GIF Fast & Easy
- New 2024 Approved Best Practices on Online 3D Avatar Creator
- 12 Aesthetic GIF Instagram for Marketers for 2024
- 2024 Approved DP Animation Maker Tutorial for Finding The Best Animated Profile Picture Maker
- Ultimate Guide to Animated Characters Drawings for 2024
- In 2024, Learn About Lip-Syncing in Animation
- Updated How to Animate Image on Scroll
- In 2024, 6 Ways To Transfer Contacts From Realme Narzo 60x 5G to iPhone | Dr.fone
- In 2024, How to Reset a Infinix Note 30i Phone that is Locked?
- In 2024, 4 Ways to Transfer Music from Samsung Galaxy A24 to iPhone | Dr.fone
- What You Need To Know To Improve Your Itel P55 5G Hard Reset | Dr.fone
- In 2024, 4 Ways to Transfer Music from Vivo Y100A to iPhone | Dr.fone
- Forgot Your Apple ID Password and Email From iPhone 8 Plus? Heres the Best Fixes
- Easy Guide How To Bypass Itel P40+ FRP Android 10/11/12/13
- Detailed Review of doctorSIM Unlock Service For iPhone 8 | Dr.fone
- How To Transfer WhatsApp From Apple iPhone 15 to other iPhone 13 devices? | Dr.fone
- Here are Some Pro Tips for Pokemon Go PvP Battles On Motorola Razr 40 Ultra | Dr.fone
- Cannot play MKV files on Galaxy F54 5G
- How To Pause Life360 Location Sharing For Honor X50 GT | Dr.fone
- Easy Guide How To Bypass HTC U23 FRP Android 10/11/12/13
- Reasons for Vivo Y200 Stuck on Startup Screen and Ways To Fix Them | Dr.fone
- In 2024, How to Fix iPad or Apple iPhone 8 Plus Stuck On Activation Lock?
- How to identify missing or malfunctioning drivers with Windows Device Manager in Windows 10
- Full Guide to Fix iToolab AnyGO Not Working On Honor Magic Vs 2 | Dr.fone
- In 2024, How to Screen Mirroring Oppo Reno 9A? | Dr.fone
- How to Track WhatsApp Messages on Oppo A59 5G Without Them Knowing? | Dr.fone
- In 2024, How to Change Netflix Location to Get More Country Version On Honor 90 Lite | Dr.fone
- In 2024, A Perfect Guide To Remove or Disable Google Smart Lock On Realme C67 4G
- Title: How to Cartoonize Photo Photoshop in Easy Steps for 2024
- Author: Elon
- Created at : 2024-05-19 03:04:50
- Updated at : 2024-05-20 03:04:50
- Link: https://animation-videos.techidaily.com/how-to-cartoonize-photo-photoshop-in-easy-steps-for-2024/
- License: This work is licensed under CC BY-NC-SA 4.0.
