
:max_bytes(150000):strip_icc():format(webp)/GettyImages-475157855-5b24021b04d1cf00369d7e11-5c66f1c04cedfd00010a2553.jpg)
How to Insert a GIF Into Powerpoint for 2024
How to Insert a GIF Into Powerpoint
How to Insert a GIF into Powerpoint

Shanoon Cox
Mar 27, 2024• Proven solutions
Microsoft Powerpoint has been on the Internet for quite some time now. People who use this application make a common mistake of using too many slides with huge amounts of text and that is a major turnoff for the audience. Huge text is seen as a disaster. You should be able to convey an interesting story to your attentive audience without explaining every single detail on your slides for your presentation. Using a GIF to explain complicate things or just set it as a background can be much interesting.
You may also like: Top 26 Best Free GIF Makers Online >>
Why we need to insert GIF into the Powerpoint
- It allows us to instantly grab the audience’s short attention span.
- It allows the presentation to answer a lot of preconceived notion from the audience with less words.
- It is a good guide to bring up a pressing issue.
Tips when adding gif to your Powerpoint presentation
- Keep it easy to follow along.
- Make use of humor
- Combine GIF images with your text together.
Part 1: Make GIFs by yourself
There are many animated gif images on the internet, you can also make one by yourself. Wondershare Filmora is a powerful editing tools that allow you to convert video into GIF images, no matter what kind of video formats you got, including MKV, FLV, WMV, MP4, etc. You can also add advanced elements, animations, text, overlays to personlize your GIFs.
However, if you want to make a GIF online, Filmora meme maker is your ultimate solution. It helps you make image, GIF and video memes directly without watermark. It is totally FREE to use and no sign up. You can change text size, color and position to create caption when you are editing. You can also put text inside or outside in GIF. Just with a few clicks, your GIF is done . Try it now!
 Download Mac Version ](https://tools.techidaily.com/wondershare/filmora/download/ )
Part 2: How to Insert a GIF into Powerpoint
There are three main methods on using Microsoft Powerpoint to your advantage when you are trying to insert a GIF image into your presentation.
Method 1: Powerpoint Picture Insert Utility
Select the Insert tab located at the top of the Powerpoint application.
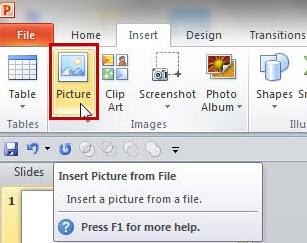
The next step is to select the Picture icon located in the Images ribbon area located also at the top of the computer window. Look for the image that you desire to add to the Powerpoint slide, then make sure to double click on the file to successfully insert your image.
You also have the option to move the GIF image on the page by clicking and dragging the image to the location that you want to place the picture.
Method 2: Copy and Paste
A helpful step is to first locate your desired GIF image, using Control + C to copy it first. Then, paste your image on the Powerpoint slide by pressing Control + V.
You can also highlight the file name, and then use the drag and drop feature to put your image directly into the Powerpoint slide of your choice.
Method 3: Embedding GIF’s from the web
The final method is to embed GIF images on the Internet into a Powerpoint slide. You can achieve this function by using the Insert Ribbon’s Pictures icon.
Select Pictures, then write in the image URL directly in the File input box. Then, select Insert. The Powerpoint application will download the GIF image that you selected into the current Powerpoint slide for your presentation. The GIF image is still available for you to access anytime if you are not connected to the Internet. It is due to being embedded.
Here we recommend the method 1 and 2, the method 3 will take a little time while Powerpoint downloading the GIF picture.
Customize the GIFs in Powerpoint
There are some important ways to customize your GIF images in the Powerpoint application.
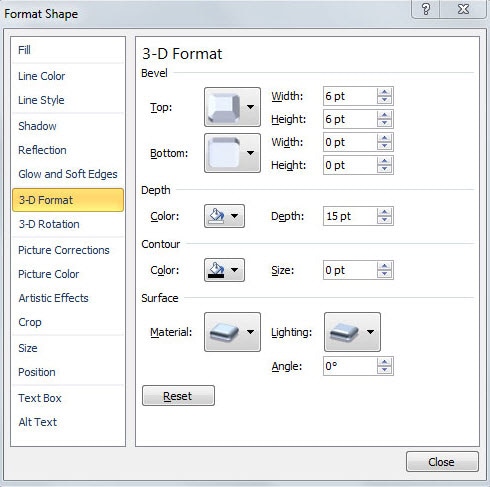
If you desire on changing the physical size of your GIF file or changing the appearance of the image, you can right click on your desired image and select Format Pictures. It will open up a brand new Format Picture window that will have a good variety of image editing menus at your fingertips at the left side of the computer window.
There is a feature where you can change the brightness and contrast on your images by selecting the Picture Corrections icon. Experiment and have fun.
Shanoon Cox
Shanoon Cox is a writer and a lover of all things video.
Follow @Shanoon Cox
Shanoon Cox
Mar 27, 2024• Proven solutions
Microsoft Powerpoint has been on the Internet for quite some time now. People who use this application make a common mistake of using too many slides with huge amounts of text and that is a major turnoff for the audience. Huge text is seen as a disaster. You should be able to convey an interesting story to your attentive audience without explaining every single detail on your slides for your presentation. Using a GIF to explain complicate things or just set it as a background can be much interesting.
You may also like: Top 26 Best Free GIF Makers Online >>
Why we need to insert GIF into the Powerpoint
- It allows us to instantly grab the audience’s short attention span.
- It allows the presentation to answer a lot of preconceived notion from the audience with less words.
- It is a good guide to bring up a pressing issue.
Tips when adding gif to your Powerpoint presentation
- Keep it easy to follow along.
- Make use of humor
- Combine GIF images with your text together.
Part 1: Make GIFs by yourself
There are many animated gif images on the internet, you can also make one by yourself. Wondershare Filmora is a powerful editing tools that allow you to convert video into GIF images, no matter what kind of video formats you got, including MKV, FLV, WMV, MP4, etc. You can also add advanced elements, animations, text, overlays to personlize your GIFs.
However, if you want to make a GIF online, Filmora meme maker is your ultimate solution. It helps you make image, GIF and video memes directly without watermark. It is totally FREE to use and no sign up. You can change text size, color and position to create caption when you are editing. You can also put text inside or outside in GIF. Just with a few clicks, your GIF is done . Try it now!
Download Mac Version ](https://tools.techidaily.com/wondershare/filmora/download/ )
Part 2: How to Insert a GIF into Powerpoint
There are three main methods on using Microsoft Powerpoint to your advantage when you are trying to insert a GIF image into your presentation.
Method 1: Powerpoint Picture Insert Utility
Select the Insert tab located at the top of the Powerpoint application.
The next step is to select the Picture icon located in the Images ribbon area located also at the top of the computer window. Look for the image that you desire to add to the Powerpoint slide, then make sure to double click on the file to successfully insert your image.
You also have the option to move the GIF image on the page by clicking and dragging the image to the location that you want to place the picture.
Method 2: Copy and Paste
A helpful step is to first locate your desired GIF image, using Control + C to copy it first. Then, paste your image on the Powerpoint slide by pressing Control + V.
You can also highlight the file name, and then use the drag and drop feature to put your image directly into the Powerpoint slide of your choice.
Method 3: Embedding GIF’s from the web
The final method is to embed GIF images on the Internet into a Powerpoint slide. You can achieve this function by using the Insert Ribbon’s Pictures icon.
Select Pictures, then write in the image URL directly in the File input box. Then, select Insert. The Powerpoint application will download the GIF image that you selected into the current Powerpoint slide for your presentation. The GIF image is still available for you to access anytime if you are not connected to the Internet. It is due to being embedded.
Here we recommend the method 1 and 2, the method 3 will take a little time while Powerpoint downloading the GIF picture.
Customize the GIFs in Powerpoint
There are some important ways to customize your GIF images in the Powerpoint application.
If you desire on changing the physical size of your GIF file or changing the appearance of the image, you can right click on your desired image and select Format Pictures. It will open up a brand new Format Picture window that will have a good variety of image editing menus at your fingertips at the left side of the computer window.
There is a feature where you can change the brightness and contrast on your images by selecting the Picture Corrections icon. Experiment and have fun.
Shanoon Cox
Shanoon Cox is a writer and a lover of all things video.
Follow @Shanoon Cox
That Will Make Aesthetic Cartoon Drawing More Understandable
That Will Make Aesthetic Cartoon Drawing More Understandable
An easy yet powerful editor
Numerous effects to choose from
Detailed tutorials provided by the official channel
When you are trying to make an aesthetic drawings cartoon, the primary thing to focus on is the composition. Composition is the combination, arrangement, and organization of objects within the borders of drawing space. To have a great aesthetic cartoon drawing, you must focus on bringing the eyes of the viewer toward your center of interest within an aesthetically-pleasing composition. When we create illustrations, we are often concerned with putting in a lot of details that will overload the image and lose the meaning that we originally wanted it to convey.

We engage our audience and viewer more by composing a perfect aesthetic drawing. In addition, many rules define a good composition drawing, but these rules are mainly guidelines. Also pay attention to your personal preferences and instincts. In this guide, we’ll teach you how to make an excellent aesthetic cartoon painting more understandable.
In this article
01 [Canvas Aesthetic Painting Ideas](#Part 1)
02 [Blender Aesthetic Painting Ideas](#Part 2)
03 [How to Create Super-Detailed Aesthetic Cartoon Painting](#Part 3)
Part 1 Canvas Aesthetic Painting Ideas
There are times you do not need to be a famous painter or an art professional to create beautiful wall art. Canvas painting is an all-in-one application for all skill levels, from beginners to experts. It also provides you with different painting ideas ranging from beach scenes to abstract designs to create pieces that look stunning and professional.
We have compiled a list of canvas aesthetic painting ideas to help you begin your journey as an aesthetic cartoon painter. Look through the images to determine which ones match the style of painting you wish to add to your drawing and get inspiration to create your designs.
01Disney Canvas Art
These are aesthetic cartoon painting ideas relating to 2020 Disney Canvas Art. You can get ideas from this to begin your journey into the world of painting.

02Hippie Painting Canva Art
If you are also looking for other aesthetic cartoon painting ideas to choose from, you can select from this 2020 Cute Canvas Paintings “Hippie Painting” Canvas Art.

03Spongebob Painting
These painting ideas are a part of the Canvas Aesthetic Cartoon Painting ideas of 2020 called Spongebob Painting Disney Canvas Art.

04Babs Bunny Pa Et Mini Lerret
These are a painting about “Babs Bunny Pa Et Mini Lerret.” A 2020 Mini Canvas Art Hippie Painting Canvas idea that you can choose from

Part 2 Blender Aesthetic Painting Ideas
Blender is an accessible and open-source 3D creation suite that supports the entirety of the 3D pipeline modeling, rigging, animation, simulation, compositing rendering, motion tracking, video editing, and 2D animation pipeline. It is a fact that this is one of the best open-source software you can choose from to make your aesthetic cartoon drawing.
It is entirely free software, and various artists can use it to start digging in and playing with it. Here are some of the blender aesthetic cartoon painting ideas you can choose from:
01Princess Ira and Amina
This is a fictional aesthetic drawing cartoon of an African princess having gold gifted powers with her face painting inspired by Nigerian traditional face decorations. However, her crown is adorned with crosses, crystals, and chains which incorporate several elements from different cultural designs available from all over the world to portray unity.

02Survival Knife Weekly Drills 045
This was a design painting inspired based on BUCK KNIVES in pain texturing and focuses on making a practical game-ready asset.

03Radiance
This is a blender aesthetic cartoon painting idea of a graduation project made for the Concept Art specialized cursus at New3dge School.

04 The character looks dev
This blender cartoon painting’s inspiration came from Edward, the short film’s main character. It is a work in progress but a lovely painting that can inspire you.
Part 3 How to Create Super-Detailed Aesthetic Cartoon Painting
To create a super detailed aesthetic cartoon drawing, you do not need to be a trained artist, nor do you need a fancy cartoon picture maker. All you need to create a cartoon painting photo is a simple and Free picture from a cartoon editor to help you carry out the task more effectively.
However, you can also convert your cartoon paint into creative animation using Wondershare Filmora Video Editor . Filmora is a powerful all-in-one tool for editing that you can use to that can be used for free to animate your cartoon with its tons of effects, filters, and keyframing features that can help you carry this out effectively.
For Win 7 or later (64-bit)
For macOS 10.12 or later
Here is how to create a super detailed aesthetic cartoon painting:

Step 1: Open the Picsart editor on your desktop browser and click on the new project
Step 2: Next is to click on Upload to select the photo that you want to cartoon paint from the computer library of your hard drive
Step 2: Click on the toolbar, select the effect feature from the dropdown above your photo, and click on Magic to view all available one-click cartoon filters. However, almost all of the Magic effects on this editor will help you achieve an aesthetic cartoon photo effect.
Step 4: Click on Adjust and Blend above your photo workspace on the editor. This will help you manually adjust the effects (color burn, fade, saturation, brightness, etc.).
Step 5: Preview your result and once you are happy with the new cartoon photo painting, click on the Share button and download it from the top right corner of the editor to save it on your device.
● Ending Thoughts →
● This article explained creating and gave inspiration and ideas for the aesthetic cartoon painting you can choose from to make yours. In addition, the report also recommends Filmora as an influential editor if you intend to create an animation from your cartoon painting due to its tons of features.
● So, now you can start building your aesthetic drawings and cartoons!
When you are trying to make an aesthetic drawings cartoon, the primary thing to focus on is the composition. Composition is the combination, arrangement, and organization of objects within the borders of drawing space. To have a great aesthetic cartoon drawing, you must focus on bringing the eyes of the viewer toward your center of interest within an aesthetically-pleasing composition. When we create illustrations, we are often concerned with putting in a lot of details that will overload the image and lose the meaning that we originally wanted it to convey.
We engage our audience and viewer more by composing a perfect aesthetic drawing. In addition, many rules define a good composition drawing, but these rules are mainly guidelines. Also pay attention to your personal preferences and instincts. In this guide, we’ll teach you how to make an excellent aesthetic cartoon painting more understandable.
In this article
01 [Canvas Aesthetic Painting Ideas](#Part 1)
02 [Blender Aesthetic Painting Ideas](#Part 2)
03 [How to Create Super-Detailed Aesthetic Cartoon Painting](#Part 3)
Part 1 Canvas Aesthetic Painting Ideas
There are times you do not need to be a famous painter or an art professional to create beautiful wall art. Canvas painting is an all-in-one application for all skill levels, from beginners to experts. It also provides you with different painting ideas ranging from beach scenes to abstract designs to create pieces that look stunning and professional.
We have compiled a list of canvas aesthetic painting ideas to help you begin your journey as an aesthetic cartoon painter. Look through the images to determine which ones match the style of painting you wish to add to your drawing and get inspiration to create your designs.
01Disney Canvas Art
These are aesthetic cartoon painting ideas relating to 2020 Disney Canvas Art. You can get ideas from this to begin your journey into the world of painting.
02Hippie Painting Canva Art
If you are also looking for other aesthetic cartoon painting ideas to choose from, you can select from this 2020 Cute Canvas Paintings “Hippie Painting” Canvas Art.
03Spongebob Painting
These painting ideas are a part of the Canvas Aesthetic Cartoon Painting ideas of 2020 called Spongebob Painting Disney Canvas Art.
04Babs Bunny Pa Et Mini Lerret
These are a painting about “Babs Bunny Pa Et Mini Lerret.” A 2020 Mini Canvas Art Hippie Painting Canvas idea that you can choose from
Part 2 Blender Aesthetic Painting Ideas
Blender is an accessible and open-source 3D creation suite that supports the entirety of the 3D pipeline modeling, rigging, animation, simulation, compositing rendering, motion tracking, video editing, and 2D animation pipeline. It is a fact that this is one of the best open-source software you can choose from to make your aesthetic cartoon drawing.
It is entirely free software, and various artists can use it to start digging in and playing with it. Here are some of the blender aesthetic cartoon painting ideas you can choose from:
01Princess Ira and Amina
This is a fictional aesthetic drawing cartoon of an African princess having gold gifted powers with her face painting inspired by Nigerian traditional face decorations. However, her crown is adorned with crosses, crystals, and chains which incorporate several elements from different cultural designs available from all over the world to portray unity.
02Survival Knife Weekly Drills 045
This was a design painting inspired based on BUCK KNIVES in pain texturing and focuses on making a practical game-ready asset.
03Radiance
This is a blender aesthetic cartoon painting idea of a graduation project made for the Concept Art specialized cursus at New3dge School.
04 The character looks dev
This blender cartoon painting’s inspiration came from Edward, the short film’s main character. It is a work in progress but a lovely painting that can inspire you.
Part 3 How to Create Super-Detailed Aesthetic Cartoon Painting
To create a super detailed aesthetic cartoon drawing, you do not need to be a trained artist, nor do you need a fancy cartoon picture maker. All you need to create a cartoon painting photo is a simple and Free picture from a cartoon editor to help you carry out the task more effectively.
However, you can also convert your cartoon paint into creative animation using Wondershare Filmora Video Editor . Filmora is a powerful all-in-one tool for editing that you can use to that can be used for free to animate your cartoon with its tons of effects, filters, and keyframing features that can help you carry this out effectively.
For Win 7 or later (64-bit)
For macOS 10.12 or later
Here is how to create a super detailed aesthetic cartoon painting:
Step 1: Open the Picsart editor on your desktop browser and click on the new project
Step 2: Next is to click on Upload to select the photo that you want to cartoon paint from the computer library of your hard drive
Step 2: Click on the toolbar, select the effect feature from the dropdown above your photo, and click on Magic to view all available one-click cartoon filters. However, almost all of the Magic effects on this editor will help you achieve an aesthetic cartoon photo effect.
Step 4: Click on Adjust and Blend above your photo workspace on the editor. This will help you manually adjust the effects (color burn, fade, saturation, brightness, etc.).
Step 5: Preview your result and once you are happy with the new cartoon photo painting, click on the Share button and download it from the top right corner of the editor to save it on your device.
● Ending Thoughts →
● This article explained creating and gave inspiration and ideas for the aesthetic cartoon painting you can choose from to make yours. In addition, the report also recommends Filmora as an influential editor if you intend to create an animation from your cartoon painting due to its tons of features.
● So, now you can start building your aesthetic drawings and cartoons!
Learn Disney Cartoon Drawing to See Disney Magic Moments
Learn Disney Cartoon Drawing to See More Disney Magic Moments
An easy yet powerful editor
Numerous effects to choose from
Detailed tutorials provided by the official channel
How to Draw a Disney Caricature

Disney-Inspired Ipad Drawing Class for Beginners
In this article
01 [How to Draw a Disney Caricature](#Part 1)
02 [Disney-Inspired Ipad Drawing Class for Beginners](#Part 2)
Part 1 How to Draw a Disney Caricature
Below is the step-by-step guide to making a Disney cartoon drawing with colors from the comfort of your home:
01How to Draw Mickey

Unarguably, Mickey Mouse is one of the most famous anime characters globally. This character was created in 1928 and is a famous Disney cartoon drawing by animators. Here are straightforward steps to help you draw a Mickey Mouse:
Step 1: Sketch the general but carefully observed features of Mickey Mouse, including the position of ears, body shape (reverse C shape), body proportions including eyes, limbs, and arms, length of arms, button on his pants, and angle on the hands.
Step 2: Take your pencil and paper, and using gentle and weak strokes, make a simple sketch of the head, neck, belly, and limbs.

Step 3: Draw contours of the mouth, ears, and nose.

Step 4: Specify the face features like a smiling opened mouth, tip of the nose, and eyes.

Step 5: Draw the hands carefully, observing the length of both arms and their proportion to the size of the character’s head.

Step 6: Sketch the outline contours of the shoes, the legs, and the pants.

Step 7: Sketch the final outline contour of the body, then erase excess lines where necessary. Add the two buttons on Mickey mouse pants.

Step 8: Draw his nose’s tail, tongue, and ellipse.

Step 9: First, use a 2B or 4B or any soft black color pencil to color the black parts.

Step 10: Depending on your preference, you can color with water, acrylic paints, or pastels.

02How to Draw Captain America
Follow these simple steps to make a Disney cartoon drawing of Captain America:
Step 1: Draw the head and chest
Draw the outlines of his masked face using smooth lines. Draw a curved line across his face to divide his face from his mask. Draw a large letter A and add tiny wings beside it on his forehead. Draw his mouth, eyes, and nose. Use curved lines to indicate his shoulder and chest, then draw a star on his chest.

Step 2: Draw his arm and waist
Draw a curved line on the shoulder to represent the bicep, then draw his gloved arm curled to form a fist. Draw curved lines beneath the chest to represent his muscular weight, then draw the pouches on his belt and use more curved lines to draw his waist.

Step 3: Draw his legs
Here, we shall portray Captain America in action. Use curved lines to show his extended right leg with boots. The left leg should appear more petite.

Step 4: Draw his shield
Against his right arm, carefully draw a flattened circular shape. You can achieve this by drawing concentric circles with a large star in the middle. Draw his arm poking out from behind his shield.

Step 5: Include the final details
Add some vertical lines across his waist and some details on his boots.

Step 6: Colour Captain America
Using colors of the American flag, color your drawing with red, white, and blue colors.

03How to Draw Stitch
Stitch is a bulletproof and fireproof alien from the Lilo and Stitch animations. Here’s how you can draw Stitch:
Step 1: Draw a circle that would form Stitch’s head

Step 2: Using a long curved line, draw an irregular peanut shape beneath the head to represent its body.

Step 3: To form its light underbelly, enclose a small shape parallel to the outline of Stitch’s body using a long curved line. On the chest region, draw a series of small “V” shapes to indicate the presence of fur.

Step 4: Draw Stitch’s arm using curved lines for the upper arm and another pair for the lower arm. Draw his bent hands and fingers using short lines. At the tip of its fingers, draw small pointed triangles to represent its claws.

Step 5: Erase the guidelines from Stitch’s arm

Step 6: Draw Stitch’s outstretched arm using a pair of curved lines and small “C” shaped lines to represent the fingers. Use short lines to connect the fingers. Draw small “V” shapes at the tip of the fingers for the triangular claws.

Step 7: Use a pair of curved lines to sketch each leg, then enclose the toes using C-shaped lines

Step 8: Sketch the ears using long curved lines to indicate the base and folds. Sketch the fur on top of Stitch’s head using a series of curved lines.

Step 9: Draw a big circle for the nose and use curved lines to indicate the nostrils. For the eyes, draw irregular rounded shapes, one within the other. Sketch too long curved lines to show the mouth and small blonde triangles for the teeth. Above the eyes and nose, draw curved lines.

Step 10: Use different shades of blue to colour Stitch.

Part 2 Disney-Inspired Ipad Drawing Class for Beginner
Here is a list of classes for beginners interested in drawing Disney characters.
01Dive into the world of Animation with a Disney-Inspired Ipad Drawing Course

This Disney-inspired lesson focuses on real-life scenarios that are beautiful and adorable. Create your everyday settings by sketching backgrounds and outfitting figures.
It will assist you in developing a straightforward approach to drawing cartoon characters through experimentation and time. Follow along and sketch characters, then make your new character.
02Drawing Faces: A Beginner‘s Guide

Ira Marcks, a graphic novelist, will teach you everything you need to know about drawing faces. Are you completely new when it comes to drawing? No worries; follow along with Ira’s bite-sized lectures, and you’ll be ready to delve into a class project by the end of the course.
Do you prefer to set your speed and work at it? If yes, then extend your learning beyond the classroom, download Ira’s Drawing Faces Book.
03Disney Inspired Drawings: Faces and Expressions

Learners will look at sketching a cartoon image of themselves or people they know while exploring the specific traits of Disney-style characters in this one-time live drawing lesson.
Learners will collaborate with the teacher while working on their art projects. This is a technique class, so the focus will be on the process and working towards a finished goal. Nevertheless, a piece may get completed outside of class.
This program is for students who have a basic understanding of drawing and proportion, are open to artistic growth, and are comfortable appearing on camera and sharing their work in a small group setting. All to help each other, and the classroom environment will support all students.
04Free Art Lessons By The Parks’ Imagineers
This lesson will teach how to create your theme park, design virtual landscapes, and even sketch unique costumes!
You’ll also learn how to draw characters from Frozen 2 like Anna and Elsa and classics like Mickey Mouse, Daisy Duck, Pluto, and others.
Your class experience can be enjoyable when using an easy-to-use tool like Wondershare Filmora.
Wondershare Filmora Video Editor is a robust and easy-to-use video editor for users of all skill levels, from beginner to advanced. Its advanced tools, adjustable keyframing, smoothing effects, and motion blur will considerably assist you in creating a high-quality animation video. Furthermore, the auto color correction and audio mixing will elevate your 2D animation film to new heights. Filmora is the best solution if you want more productivity, control, and customization options for your Disney cartoon drawings and animation.
For Win 7 or later (64-bit)
For macOS 10.12 or later
● Ending Thoughts →
● How to make a Disney cartoon drawing
● A step-by-step guide to drawing your favorite Disney cartoon drawing with colors
● How to use Filmora to create animations
● Different Disney-inspired beginner classes for iPad users.
How to Draw a Disney Caricature
Disney-Inspired Ipad Drawing Class for Beginners
In this article
01 [How to Draw a Disney Caricature](#Part 1)
02 [Disney-Inspired Ipad Drawing Class for Beginners](#Part 2)
Part 1 How to Draw a Disney Caricature
Below is the step-by-step guide to making a Disney cartoon drawing with colors from the comfort of your home:
01How to Draw Mickey
Unarguably, Mickey Mouse is one of the most famous anime characters globally. This character was created in 1928 and is a famous Disney cartoon drawing by animators. Here are straightforward steps to help you draw a Mickey Mouse:
Step 1: Sketch the general but carefully observed features of Mickey Mouse, including the position of ears, body shape (reverse C shape), body proportions including eyes, limbs, and arms, length of arms, button on his pants, and angle on the hands.
Step 2: Take your pencil and paper, and using gentle and weak strokes, make a simple sketch of the head, neck, belly, and limbs.
Step 3: Draw contours of the mouth, ears, and nose.
Step 4: Specify the face features like a smiling opened mouth, tip of the nose, and eyes.
Step 5: Draw the hands carefully, observing the length of both arms and their proportion to the size of the character’s head.
Step 6: Sketch the outline contours of the shoes, the legs, and the pants.
Step 7: Sketch the final outline contour of the body, then erase excess lines where necessary. Add the two buttons on Mickey mouse pants.
Step 8: Draw his nose’s tail, tongue, and ellipse.
Step 9: First, use a 2B or 4B or any soft black color pencil to color the black parts.
Step 10: Depending on your preference, you can color with water, acrylic paints, or pastels.
02How to Draw Captain America
Follow these simple steps to make a Disney cartoon drawing of Captain America:
Step 1: Draw the head and chest
Draw the outlines of his masked face using smooth lines. Draw a curved line across his face to divide his face from his mask. Draw a large letter A and add tiny wings beside it on his forehead. Draw his mouth, eyes, and nose. Use curved lines to indicate his shoulder and chest, then draw a star on his chest.
Step 2: Draw his arm and waist
Draw a curved line on the shoulder to represent the bicep, then draw his gloved arm curled to form a fist. Draw curved lines beneath the chest to represent his muscular weight, then draw the pouches on his belt and use more curved lines to draw his waist.
Step 3: Draw his legs
Here, we shall portray Captain America in action. Use curved lines to show his extended right leg with boots. The left leg should appear more petite.
Step 4: Draw his shield
Against his right arm, carefully draw a flattened circular shape. You can achieve this by drawing concentric circles with a large star in the middle. Draw his arm poking out from behind his shield.
Step 5: Include the final details
Add some vertical lines across his waist and some details on his boots.
Step 6: Colour Captain America
Using colors of the American flag, color your drawing with red, white, and blue colors.
03How to Draw Stitch
Stitch is a bulletproof and fireproof alien from the Lilo and Stitch animations. Here’s how you can draw Stitch:
Step 1: Draw a circle that would form Stitch’s head
Step 2: Using a long curved line, draw an irregular peanut shape beneath the head to represent its body.
Step 3: To form its light underbelly, enclose a small shape parallel to the outline of Stitch’s body using a long curved line. On the chest region, draw a series of small “V” shapes to indicate the presence of fur.
Step 4: Draw Stitch’s arm using curved lines for the upper arm and another pair for the lower arm. Draw his bent hands and fingers using short lines. At the tip of its fingers, draw small pointed triangles to represent its claws.
Step 5: Erase the guidelines from Stitch’s arm
Step 6: Draw Stitch’s outstretched arm using a pair of curved lines and small “C” shaped lines to represent the fingers. Use short lines to connect the fingers. Draw small “V” shapes at the tip of the fingers for the triangular claws.
Step 7: Use a pair of curved lines to sketch each leg, then enclose the toes using C-shaped lines
Step 8: Sketch the ears using long curved lines to indicate the base and folds. Sketch the fur on top of Stitch’s head using a series of curved lines.
Step 9: Draw a big circle for the nose and use curved lines to indicate the nostrils. For the eyes, draw irregular rounded shapes, one within the other. Sketch too long curved lines to show the mouth and small blonde triangles for the teeth. Above the eyes and nose, draw curved lines.
Step 10: Use different shades of blue to colour Stitch.
Part 2 Disney-Inspired Ipad Drawing Class for Beginner
Here is a list of classes for beginners interested in drawing Disney characters.
01Dive into the world of Animation with a Disney-Inspired Ipad Drawing Course
This Disney-inspired lesson focuses on real-life scenarios that are beautiful and adorable. Create your everyday settings by sketching backgrounds and outfitting figures.
It will assist you in developing a straightforward approach to drawing cartoon characters through experimentation and time. Follow along and sketch characters, then make your new character.
02Drawing Faces: A Beginner‘s Guide
Ira Marcks, a graphic novelist, will teach you everything you need to know about drawing faces. Are you completely new when it comes to drawing? No worries; follow along with Ira’s bite-sized lectures, and you’ll be ready to delve into a class project by the end of the course.
Do you prefer to set your speed and work at it? If yes, then extend your learning beyond the classroom, download Ira’s Drawing Faces Book.
03Disney Inspired Drawings: Faces and Expressions
Learners will look at sketching a cartoon image of themselves or people they know while exploring the specific traits of Disney-style characters in this one-time live drawing lesson.
Learners will collaborate with the teacher while working on their art projects. This is a technique class, so the focus will be on the process and working towards a finished goal. Nevertheless, a piece may get completed outside of class.
This program is for students who have a basic understanding of drawing and proportion, are open to artistic growth, and are comfortable appearing on camera and sharing their work in a small group setting. All to help each other, and the classroom environment will support all students.
04Free Art Lessons By The Parks’ Imagineers
This lesson will teach how to create your theme park, design virtual landscapes, and even sketch unique costumes!
You’ll also learn how to draw characters from Frozen 2 like Anna and Elsa and classics like Mickey Mouse, Daisy Duck, Pluto, and others.
Your class experience can be enjoyable when using an easy-to-use tool like Wondershare Filmora.
Wondershare Filmora Video Editor is a robust and easy-to-use video editor for users of all skill levels, from beginner to advanced. Its advanced tools, adjustable keyframing, smoothing effects, and motion blur will considerably assist you in creating a high-quality animation video. Furthermore, the auto color correction and audio mixing will elevate your 2D animation film to new heights. Filmora is the best solution if you want more productivity, control, and customization options for your Disney cartoon drawings and animation.
For Win 7 or later (64-bit)
For macOS 10.12 or later
● Ending Thoughts →
● How to make a Disney cartoon drawing
● A step-by-step guide to drawing your favorite Disney cartoon drawing with colors
● How to use Filmora to create animations
● Different Disney-inspired beginner classes for iPad users.
10 Great MP4 to GIF Converters to Get Perfect-Made GIF
10 Must-Use MP4 to GIF Converters to Get Perfect-Made GIF
An easy yet powerful editor
Numerous effects to choose from
Detailed tutorials provided by the official channel
GIFs are becoming more common day by day. They are used for a wide range of purposes, from chatting and expressing emotions on social media to promoting products and services. GIFs are image formats that are relatively easy to download and upload and easy to convey messages and thoughts to a wide range of people. On the other hand, MP4 are video files that contain audio. These files are large and require special requirements to run and work properly.
There are a lot of advantages of using GIF files, like they are easy to make and store, help create animations quickly, and convey messages and emotions more conveniently. With the increasing usage of GIF files, it has become important to know and understand the tools used to convert the MP4 files into GIF formats.
In this article
01 [5 Offline MP4 to GIF Converters](#Part 1)
02 [5 Online MP4 to GIF Converters](#Part 2)
Part 1 5 Offline MP4 to GIF Converters
Offline MP4 to GIF converter is the best option as it helps to create GIF files quickly and easily, without any quality loss. The following offline converters can be used effectively to turn MP4 into GIF formats very easily and quickly:
01Any GIF Animator
Any GIF Animator is one of the great offline tools used for converting videos to GIF files very quickly. It can easily convert the videos into attractive GIFs in seconds.
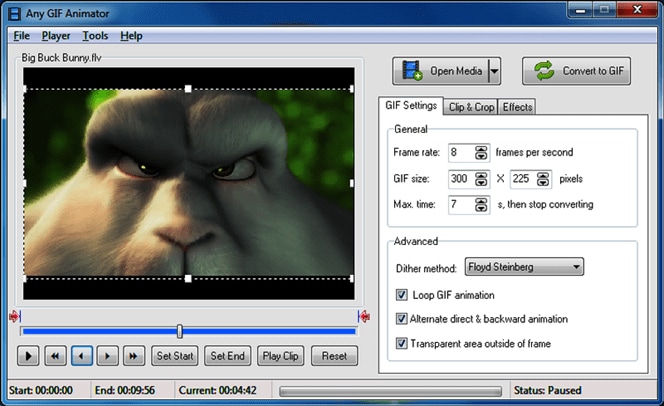
Key Features:
● It has a very easy-to-use interface for user convenience.
● It sustains a considerable number of video formats.
● It allows the users to edit converted GIFs like adding frames, forward and backward looping, etc.
● It will enable you to edit the files imported from DVDs and WebCam recorded files.
● It has an in-built animation wizard.
Pros:
● It works for both Mac as well as Windows
● Any GIF Animator can be downloaded freely.
● It can convert both videos as well as images.
Cons:
● It crashes at times while processing the videos.
● Uploading the files takes a longer time than usual.
02DVDFab
DVDFab is another offline tool that converts the files from MP4 to GIF in very little time without compromising the quality of the outcome.

Key Features:
● It supports a large number of video formats.
● It has a user-friendly interface.
● It can be used for both Mac & Windows.
● It is a great multimedia solution software.
● It comes with affordable pricing.
Pros:
● It is quick & easy to use.
● It delivers high-quality outputs.
● It allows the users to completely control the looping, frequency, and size of the files.
Cons:
● Being a multimedia software, it requires learning.
● Complete beginners can get confused.
03Wondershare TunesGo
TunesGo was developed by one of the most trusted software companies – Wondershare. It is a great tool used to make GIFs from MP4 files.
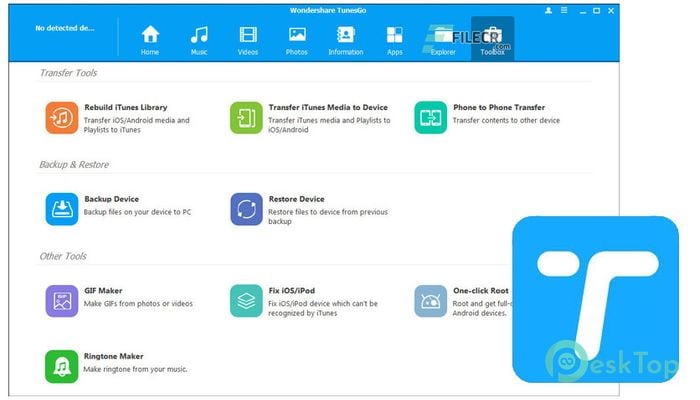
Key Features:
● Developed by one of the most trusted software development companies.
● Compatible for all iOS devices.
● A user-friendly interface is suitable for complete beginners.
● A trial version is available.
● Works faster and delivers high-resolution output.
Pros:
● Supports; almost all types of video formats.
● It permits you to edit the videos before converting.
● It can also convert images and live videos to GIFs.
Cons:
● It is costly.
● It doesn’t allow you to edit Smart playlists.
04KickMyGraphics
It is another powerful offline tool to convert MP4 to high-quality GIF files. It allows users to convert different formats of videos and images into GIFs.
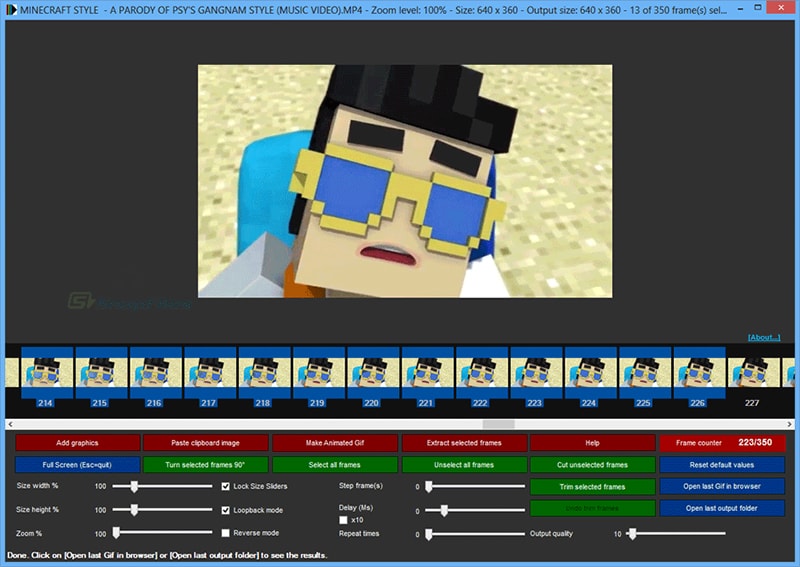
Key Features:
● Compatibility lies with Mac and Windows both.
● Users can instantly upload various video formats like MPG, MP4, AVI, etc.
● Users can directly upload considerable image formats like JPG, PNG, BMP, etc.
● It has a user-friendly interface.
● It is a freeware offline GIF converter.
Pros:
● It has an in-built editing tool for easy customization.
● It supports direct recording of the animated GIFs.
● It also allows you to use different editing features like the loop, pan, reverse, etc.
Cons:
● Its usage is somehow complicated for beginners.
● It doesn’t support all types of video formats.
05Movavi
It is tremendous offline software that can be downloaded for Mac & PC. It helps in converting the MP4 to GIFs very quickly and easily.
Key Features:
● Mac and Windows are completely supported.
● It allows the users to edit their creations.
● It is also available for all android devices.
● It converts the files very quickly without compromising the quality of the content.
● It is an excellent tool for converting and editing GIFs.
Pros:
● Easy and beneficial for beginners
● Compatible with video formats like MOV, MP4, MPG, AVI, etc.
● It has an in-built AI feature to upscale the output quality.
Cons:
● It has fundamental video editing features.
● It doesn’t allow to copy-paste the video effect while editing.
Part 2 5 Online MP4 to GIF Converters
Online tools for converting files from MP4 to GIF are effortless and convenient because they can be used on any operating system. The following given are some of the great online tools to convert MP4 to GIF with ease and convenience:
01GIF Maker by Giphy
Giphy is known as the king of the online GIF maker tools. It is a GIF converter great tool with around 300 million users daily using it. It allows the users to convert the GIFs by pasting the video links from third-party websites like YouTube.
Key Features:
● Being an online tool, it is compatible with all types of devices.
● It is elementary to use for all types of users.
● It allows the users to add stickers and captions to their GIFs.
● No fee for this so you can use it free of cost.
● It is a website, so it doesn’t require to be downloaded.
Pros:
● Straightforward and quick to use.
● It delivers a high-resolution output with many customization features.
● It can also convert the GIFs using the links of videos from third-party hosting like YouTube.
Cons:
● Speed of the internet connection matters.
● It comes with a limited edition of colors.
02**Wondershare Filmora Video Editor **
Filmora is one of the best online video editing tools created by Wondershare. Filmora can be used to convert files from MP4 to GIF very effectively and efficiently.
For Win 7 or later (64-bit)
For macOS 10.12 or later
Wondershare Filmora
Get started easily with Filmora’s powerful performance, intuitive interface, and countless effects!
Try It Free Try It Free Try It Free Learn More >

Key Features:
● Fully compatible with any operating system.
● It is a great video editing software with many features like adding music, subtitles, etc.
● It can be also be downloaded on Mac and Windows OS.
● It comes with an annual premium subscription for $51.99.
● It can also be purchased with a one-time fee of $79.99.
Pros:
● It has great video editing features.
● It can convert a large number of video formats to high-resolution GIF files.
● You can customize your GIFs as per your requirements using this tool.
Cons:
● Being an all-in-one video editing tool, this can be much more if you just need GIF creations.
● You cannot remove the watermark and use many editing features if you use a trial version.
03CloudConvert
CloudConvert is another easy-to-use MP4 to GIF converter online. It converts all types of video files into GIFs in a concise time.
Key Features:
● It is easy to use.
● It converts MP4 to GIF very quickly.
● It is free of cost.
● It doesn’t require third-party installation.
● It uses compression algorithms.
Pros:
● It is an open-source converter.
● It allows you to add texts.
● It helps in creating GIFs for web publishing.
Cons:
● Complicated for large files.
● Requires; steady internet connection.
04Convertio
Convertio is another online GIF converter that anyone can use. You just need to upload the MP4 file using Dropbox and hit the ‘Convert’ button.
Key Features:
● Effortless and anyone can easily use it.
● One can easily upload files from Dropbox and Google Drive.
● It also has a drag and drops component for uploading the files.
● It is entirely free to use.
● It is online and doesn’t require any installation.
Pros:
● It converts MP4 to GIF very quickly.
● It delivers high-quality output.
● User-friendly interface.
Cons:
● It doesn’t allow the users to edit their GIFs.
● It doesn’t have the customizing feature and is not user-specific.
05Ezgif
Ezgif is free of cost and an easy-to-use online tool that helps you create GIFs in two easy steps, i.e., upload and convert.
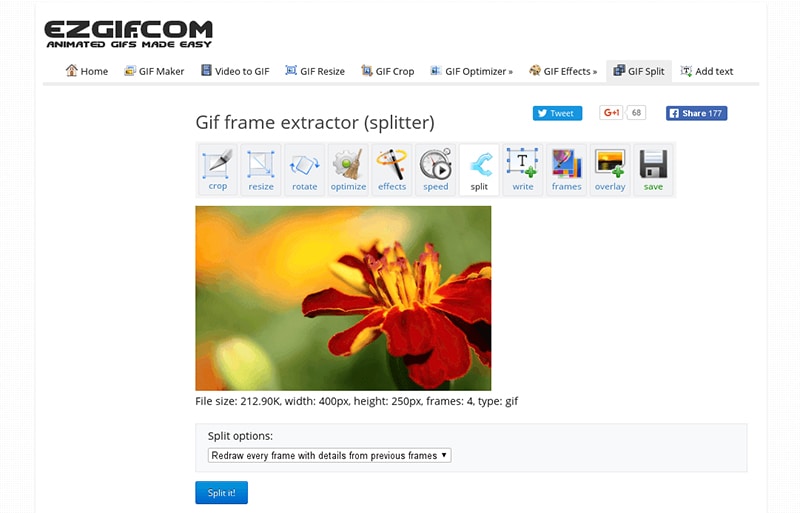
Key Features:
● It is an online tool compatible with both Mac and Windows.
● No download and installation required.
● It is a freeware program.
● It maintains the quality of the outcome.
● It converts GIFs very quickly.
Pros:
● User-friendly and can be used by all.
● It has amazing features that assist you while you convert MP4 to GIF.
● It is not complicated for beginners.
Cons:
● It has limited editing features.
● Only 3 minutes video can be done at maximum.
● Key Takeaways from This Episode →
●The demand for GIF files increases with each passing day due to its many advantages. As a result, many people are looking for easy MP4 to GIF converters that are easy and convenient to use.
●Above mentioned online and offline converters can quickly help you turn MP4 into GIF files without compromising the quality of the graphics.
●These converters are readily available and can easily be used on both Mac and Windows with many conveniences.
●They can help you convert the MP4 files into GIF format very quickly, no matter how large the video size is. GIFs being smaller in size and easily transferrable provide many advantages to the users.
GIFs are becoming more common day by day. They are used for a wide range of purposes, from chatting and expressing emotions on social media to promoting products and services. GIFs are image formats that are relatively easy to download and upload and easy to convey messages and thoughts to a wide range of people. On the other hand, MP4 are video files that contain audio. These files are large and require special requirements to run and work properly.
There are a lot of advantages of using GIF files, like they are easy to make and store, help create animations quickly, and convey messages and emotions more conveniently. With the increasing usage of GIF files, it has become important to know and understand the tools used to convert the MP4 files into GIF formats.
In this article
01 [5 Offline MP4 to GIF Converters](#Part 1)
02 [5 Online MP4 to GIF Converters](#Part 2)
Part 1 5 Offline MP4 to GIF Converters
Offline MP4 to GIF converter is the best option as it helps to create GIF files quickly and easily, without any quality loss. The following offline converters can be used effectively to turn MP4 into GIF formats very easily and quickly:
01Any GIF Animator
Any GIF Animator is one of the great offline tools used for converting videos to GIF files very quickly. It can easily convert the videos into attractive GIFs in seconds.
Key Features:
● It has a very easy-to-use interface for user convenience.
● It sustains a considerable number of video formats.
● It allows the users to edit converted GIFs like adding frames, forward and backward looping, etc.
● It will enable you to edit the files imported from DVDs and WebCam recorded files.
● It has an in-built animation wizard.
Pros:
● It works for both Mac as well as Windows
● Any GIF Animator can be downloaded freely.
● It can convert both videos as well as images.
Cons:
● It crashes at times while processing the videos.
● Uploading the files takes a longer time than usual.
02DVDFab
DVDFab is another offline tool that converts the files from MP4 to GIF in very little time without compromising the quality of the outcome.
Key Features:
● It supports a large number of video formats.
● It has a user-friendly interface.
● It can be used for both Mac & Windows.
● It is a great multimedia solution software.
● It comes with affordable pricing.
Pros:
● It is quick & easy to use.
● It delivers high-quality outputs.
● It allows the users to completely control the looping, frequency, and size of the files.
Cons:
● Being a multimedia software, it requires learning.
● Complete beginners can get confused.
03Wondershare TunesGo
TunesGo was developed by one of the most trusted software companies – Wondershare. It is a great tool used to make GIFs from MP4 files.
Key Features:
● Developed by one of the most trusted software development companies.
● Compatible for all iOS devices.
● A user-friendly interface is suitable for complete beginners.
● A trial version is available.
● Works faster and delivers high-resolution output.
Pros:
● Supports; almost all types of video formats.
● It permits you to edit the videos before converting.
● It can also convert images and live videos to GIFs.
Cons:
● It is costly.
● It doesn’t allow you to edit Smart playlists.
04KickMyGraphics
It is another powerful offline tool to convert MP4 to high-quality GIF files. It allows users to convert different formats of videos and images into GIFs.
Key Features:
● Compatibility lies with Mac and Windows both.
● Users can instantly upload various video formats like MPG, MP4, AVI, etc.
● Users can directly upload considerable image formats like JPG, PNG, BMP, etc.
● It has a user-friendly interface.
● It is a freeware offline GIF converter.
Pros:
● It has an in-built editing tool for easy customization.
● It supports direct recording of the animated GIFs.
● It also allows you to use different editing features like the loop, pan, reverse, etc.
Cons:
● Its usage is somehow complicated for beginners.
● It doesn’t support all types of video formats.
05Movavi
It is tremendous offline software that can be downloaded for Mac & PC. It helps in converting the MP4 to GIFs very quickly and easily.
Key Features:
● Mac and Windows are completely supported.
● It allows the users to edit their creations.
● It is also available for all android devices.
● It converts the files very quickly without compromising the quality of the content.
● It is an excellent tool for converting and editing GIFs.
Pros:
● Easy and beneficial for beginners
● Compatible with video formats like MOV, MP4, MPG, AVI, etc.
● It has an in-built AI feature to upscale the output quality.
Cons:
● It has fundamental video editing features.
● It doesn’t allow to copy-paste the video effect while editing.
Part 2 5 Online MP4 to GIF Converters
Online tools for converting files from MP4 to GIF are effortless and convenient because they can be used on any operating system. The following given are some of the great online tools to convert MP4 to GIF with ease and convenience:
01GIF Maker by Giphy
Giphy is known as the king of the online GIF maker tools. It is a GIF converter great tool with around 300 million users daily using it. It allows the users to convert the GIFs by pasting the video links from third-party websites like YouTube.
Key Features:
● Being an online tool, it is compatible with all types of devices.
● It is elementary to use for all types of users.
● It allows the users to add stickers and captions to their GIFs.
● No fee for this so you can use it free of cost.
● It is a website, so it doesn’t require to be downloaded.
Pros:
● Straightforward and quick to use.
● It delivers a high-resolution output with many customization features.
● It can also convert the GIFs using the links of videos from third-party hosting like YouTube.
Cons:
● Speed of the internet connection matters.
● It comes with a limited edition of colors.
02**Wondershare Filmora Video Editor **
Filmora is one of the best online video editing tools created by Wondershare. Filmora can be used to convert files from MP4 to GIF very effectively and efficiently.
For Win 7 or later (64-bit)
For macOS 10.12 or later
Wondershare Filmora
Get started easily with Filmora’s powerful performance, intuitive interface, and countless effects!
Try It Free Try It Free Try It Free Learn More >
Key Features:
● Fully compatible with any operating system.
● It is a great video editing software with many features like adding music, subtitles, etc.
● It can be also be downloaded on Mac and Windows OS.
● It comes with an annual premium subscription for $51.99.
● It can also be purchased with a one-time fee of $79.99.
Pros:
● It has great video editing features.
● It can convert a large number of video formats to high-resolution GIF files.
● You can customize your GIFs as per your requirements using this tool.
Cons:
● Being an all-in-one video editing tool, this can be much more if you just need GIF creations.
● You cannot remove the watermark and use many editing features if you use a trial version.
03CloudConvert
CloudConvert is another easy-to-use MP4 to GIF converter online. It converts all types of video files into GIFs in a concise time.
Key Features:
● It is easy to use.
● It converts MP4 to GIF very quickly.
● It is free of cost.
● It doesn’t require third-party installation.
● It uses compression algorithms.
Pros:
● It is an open-source converter.
● It allows you to add texts.
● It helps in creating GIFs for web publishing.
Cons:
● Complicated for large files.
● Requires; steady internet connection.
04Convertio
Convertio is another online GIF converter that anyone can use. You just need to upload the MP4 file using Dropbox and hit the ‘Convert’ button.
Key Features:
● Effortless and anyone can easily use it.
● One can easily upload files from Dropbox and Google Drive.
● It also has a drag and drops component for uploading the files.
● It is entirely free to use.
● It is online and doesn’t require any installation.
Pros:
● It converts MP4 to GIF very quickly.
● It delivers high-quality output.
● User-friendly interface.
Cons:
● It doesn’t allow the users to edit their GIFs.
● It doesn’t have the customizing feature and is not user-specific.
05Ezgif
Ezgif is free of cost and an easy-to-use online tool that helps you create GIFs in two easy steps, i.e., upload and convert.
Key Features:
● It is an online tool compatible with both Mac and Windows.
● No download and installation required.
● It is a freeware program.
● It maintains the quality of the outcome.
● It converts GIFs very quickly.
Pros:
● User-friendly and can be used by all.
● It has amazing features that assist you while you convert MP4 to GIF.
● It is not complicated for beginners.
Cons:
● It has limited editing features.
● Only 3 minutes video can be done at maximum.
● Key Takeaways from This Episode →
●The demand for GIF files increases with each passing day due to its many advantages. As a result, many people are looking for easy MP4 to GIF converters that are easy and convenient to use.
●Above mentioned online and offline converters can quickly help you turn MP4 into GIF files without compromising the quality of the graphics.
●These converters are readily available and can easily be used on both Mac and Windows with many conveniences.
●They can help you convert the MP4 files into GIF format very quickly, no matter how large the video size is. GIFs being smaller in size and easily transferrable provide many advantages to the users.
Top 10 Animated Photo Collage Apps You Should Know
Versatile Video Editor - Wondershare Filmora
An easy yet powerful editor
Numerous effects to choose from
Detailed tutorials provided by the official channel
What if you wish to animate images, adding movement to stationary objects in time? Well, there are apps for these purposes!
Videos and GIFs are a mainstay of social media. These days it’s rare to see a still photo online. The simplicity with which you can add filter and movement effects to your images has identified a proliferation of these online animated photos.
So what if you wish to apply animation to a still image? There are many apps for such purposes. Given below is a selection of the best apps you can use to animate images on both Android and iPhone devices with the help of animated photo collage apps.
In this article
01 [Top 10 Animated Photo Collage Apps ](#Part 1)
02 [Wondershare Filmora: The Advanced Editing App of 2022!](#Part 2)
Part 1 Top 10 Animated Photo Collage Apps
We’ve compiled an index of the top 10 animated collage apps compatible with photo enthusiasts and photographers at every level of expertise. Most of these amazing apps are available for both iOS and Android, so there are numerous options no matter what device you’re using.
Before showcasing your collage-making skills, gather the perfect images from your last photography project.
1. GIPHY
The GIPHY is the mega search engine for all things related to GIFs.
Here, you can easily upload and find reaction memes for anything under the sun; GIPHY is also available with a mobile app. It also helps you to frame your GIFs and animate photos. Then, you can upload them by using the inbuilt animation tools on the platform.
It consists of a sticker maker (available for iPhone X and later), and you can also add captions to your animated images or shoot your short videos.
2. Motionleap
Motionleap is also an ideal animated photo collage app, and for a good reason. This app is highly reviewed, with 250,000 plus ratings of five stars in the Play Store.
Motionleap is a free animated photo collage app, although there’s a subscription and Pro version, too. Also, it doesn’t put a watermark over your image when you download it to your phone.
The app’s primary goal is animating still images and converting them into short, concise, and looping videos. Programming directional cues can easily do it into your image by dragging your thumb across the screen.
You can also freeze certain image sections and apply filters on top of your picture to frame an atmosphere within your image.
Unluckily, Motionleap saves your animated still photos in video format unless you’ve paid for a Pro account.
3. Movepic

Movepic is almost similar to Motionleap in that it animates images, but you can make a massive chunk of this animation with its inbuilt filters and overlays.
The only limitation is that you wouldn’t be able to remove the watermark without updating it to a VIP account. Movepic also saves your pictures automatically as a movie file than within a GIFformat.
4. ImgPlay
ImgPlay is another ideal animated collage maker app you can use to animate images. It creates ready-to-use animated images for the web and consists of easy-to-understand yet advanced controls. Unfortunately, it also adds a watermark on your image—one that you can’t remove unless you update to a complete account.
The process of making animated images online and GIFs can be in a couple of different ways within ImgPlay itself. You can use still photographs side-by-side, use burst images, or even videos.
5. Zoetropic
If you wish to animate your photo within a few minutes only, Zoetropic is for you. Though its functions aren’t as extensive as other apps we’ve mentioned, it does the job pretty well.
To get started, you choose your images and then select motion points. Next, you mask or stabilize the areas you want to keep still. Finally, you choose your overlays and animations. You can also change colors and add tags.
On the downside, it has limited the number of effects you can access on a free account. However, you might find what you’re considering if you are looking for a prompt manner to animate a photo online.
6. StoryZ
Despite its unattractive user interface, StoryZ is one of the useful apps on this list. It works excellent with still photographs to animate them effectively via various programmed paths of movements, overlays, and color filters—a lot of which are free and unique. It also automatically saves your files as GIFs.
One of the most incredible things about StoryZ is cutting the watermark from your image if you preview a quick ad before saving the file.
7. Lumyer
Lumyer is one of the useful animated photo collage apps on our list, which lets you add hundreds and thousands of effects to your pictures to animate them. So whether you wish to include sparkle or subtle weather effects, seasonal animations for Christmas and Halloween, or all-out scene transformations like appearing on a rollercoaster, Lumyer can do it.
If you’re okay with the watermark, Lumyer is a good choice, but otherwise, you may prefer one of our other recommended photo animation college apps.
8. VIMAGE 3D
VIMAGE got recognized with Google Play award in 2018. It can make some pretty good-looking animated photos in just a few clicks. There’s a wide variety of animations, filters, and sounds to select among a bundle of options.
You don’t even need to select the object because VIMAGE detects and replaces it for you quite automatically.
Similar to these apps, you do need to pay to remove the watermark, get access to the full effects library, and you can export your photos online in up to 2560p resolution.
9. Photo Bender
Photo Bender is an Android-specific animated photo collage app that helps you warp to animate photos digitally by coloring your image by stretching it, bending it, and using brushes. You can then export your transformed images as GIFs, JPEGs, MP4s, and PNGs.
While this app doesn’t contain ratings like others on this list, it is highly rated, so it’s still worth a look.
10. Werble
The primary purpose of Werble is to animate your images, and while the basic account is free, in-app purchases are also available. Most of Werble’s animations come through different filter effects that you can add on top of your images.
A downside to Werble is that it saves these images entirely automatically as GIFs, so they’re ready to use online. The limitation? However, you need to pay to cut the watermark that they place on your image. That watermark is huge enough to be disturbing.
Part 2 Wondershare Filmora: The Advanced Editing App of 2022
If you are tired of considering various animated photo collage apps, here is a section to introduce you to the best alternative with a reliable yet powerful video editor.
Filmora : This platform comes entirely loaded with advanced social integration options and editing functions. You can enjoy premium preloaded video editing services on your mobile devices with this tool. For video customization requirements, you can imply multiple caption options, title editing facilities, and advanced animation effects.
Filmora Features
- Filmora is available for both Android as well as iOS devices without any login.
- Filmora assists users in importing camera roll, Instagram, Google Plus, and Facebook collections with simplicity.
- This software tool contains different advanced features and highlights the missing components of the above-listed animated collage maker apps.
- You can add watermarks to all created videos.
- Above all, now share videos directly shared via Instagram, Facebook, WhatsApp, Email, Vimeo, YouTube, etc.
This advanced editing tool, Wondershare Filmora, can efficiently serve all your requirements. The good part is that it syncs well with iOS and Android devices so that you can access it anywhere with simplicity.
Also, Filmora provides is compatible with 4K videos, which is the most outstanding merit for developing informative video sessions and tutorials. Its ability to work offline with principal functions will simplify your editing tasks even when the internet connection is still an issue.
Wondershare Filmora
Get started easily with Filmora’s powerful performance, intuitive interface, and countless effects!
Try It Free Try It Free Try It Free Learn More >
AI Portrait – The best feature of Wondershare Filmora for gameplay editing
The AI Portrait is a new add-on in Wondershare Filmora. It can easily remove video backgrounds without using a green screen or chroma key, allowing you to add borders, glitch effects, pixelated, noise, or segmentation video effects.

Conclusion
Now that we’ve run through some great animated photo collage apps that can enliven your images, you can choose the ones you’re wandering to try out. They all follow roughly a similar concept, so you should select the ones you think will work best for such needs.
Gone are the days when you had to necessarily use a robust desktop computer to edit your videos and images. You can go forward to efficiently perform the same operation all from your smartphone with significant effects by using the Wondershare Filmora.
What if you wish to animate images, adding movement to stationary objects in time? Well, there are apps for these purposes!
Videos and GIFs are a mainstay of social media. These days it’s rare to see a still photo online. The simplicity with which you can add filter and movement effects to your images has identified a proliferation of these online animated photos.
So what if you wish to apply animation to a still image? There are many apps for such purposes. Given below is a selection of the best apps you can use to animate images on both Android and iPhone devices with the help of animated photo collage apps.
In this article
01 [Top 10 Animated Photo Collage Apps ](#Part 1)
02 [Wondershare Filmora: The Advanced Editing App of 2022!](#Part 2)
Part 1 Top 10 Animated Photo Collage Apps
We’ve compiled an index of the top 10 animated collage apps compatible with photo enthusiasts and photographers at every level of expertise. Most of these amazing apps are available for both iOS and Android, so there are numerous options no matter what device you’re using.
Before showcasing your collage-making skills, gather the perfect images from your last photography project.
1. GIPHY
The GIPHY is the mega search engine for all things related to GIFs.
Here, you can easily upload and find reaction memes for anything under the sun; GIPHY is also available with a mobile app. It also helps you to frame your GIFs and animate photos. Then, you can upload them by using the inbuilt animation tools on the platform.
It consists of a sticker maker (available for iPhone X and later), and you can also add captions to your animated images or shoot your short videos.
2. Motionleap
Motionleap is also an ideal animated photo collage app, and for a good reason. This app is highly reviewed, with 250,000 plus ratings of five stars in the Play Store.
Motionleap is a free animated photo collage app, although there’s a subscription and Pro version, too. Also, it doesn’t put a watermark over your image when you download it to your phone.
The app’s primary goal is animating still images and converting them into short, concise, and looping videos. Programming directional cues can easily do it into your image by dragging your thumb across the screen.
You can also freeze certain image sections and apply filters on top of your picture to frame an atmosphere within your image.
Unluckily, Motionleap saves your animated still photos in video format unless you’ve paid for a Pro account.
3. Movepic
Movepic is almost similar to Motionleap in that it animates images, but you can make a massive chunk of this animation with its inbuilt filters and overlays.
The only limitation is that you wouldn’t be able to remove the watermark without updating it to a VIP account. Movepic also saves your pictures automatically as a movie file than within a GIFformat.
4. ImgPlay
ImgPlay is another ideal animated collage maker app you can use to animate images. It creates ready-to-use animated images for the web and consists of easy-to-understand yet advanced controls. Unfortunately, it also adds a watermark on your image—one that you can’t remove unless you update to a complete account.
The process of making animated images online and GIFs can be in a couple of different ways within ImgPlay itself. You can use still photographs side-by-side, use burst images, or even videos.
5. Zoetropic
If you wish to animate your photo within a few minutes only, Zoetropic is for you. Though its functions aren’t as extensive as other apps we’ve mentioned, it does the job pretty well.
To get started, you choose your images and then select motion points. Next, you mask or stabilize the areas you want to keep still. Finally, you choose your overlays and animations. You can also change colors and add tags.
On the downside, it has limited the number of effects you can access on a free account. However, you might find what you’re considering if you are looking for a prompt manner to animate a photo online.
6. StoryZ
Despite its unattractive user interface, StoryZ is one of the useful apps on this list. It works excellent with still photographs to animate them effectively via various programmed paths of movements, overlays, and color filters—a lot of which are free and unique. It also automatically saves your files as GIFs.
One of the most incredible things about StoryZ is cutting the watermark from your image if you preview a quick ad before saving the file.
7. Lumyer
Lumyer is one of the useful animated photo collage apps on our list, which lets you add hundreds and thousands of effects to your pictures to animate them. So whether you wish to include sparkle or subtle weather effects, seasonal animations for Christmas and Halloween, or all-out scene transformations like appearing on a rollercoaster, Lumyer can do it.
If you’re okay with the watermark, Lumyer is a good choice, but otherwise, you may prefer one of our other recommended photo animation college apps.
8. VIMAGE 3D
VIMAGE got recognized with Google Play award in 2018. It can make some pretty good-looking animated photos in just a few clicks. There’s a wide variety of animations, filters, and sounds to select among a bundle of options.
You don’t even need to select the object because VIMAGE detects and replaces it for you quite automatically.
Similar to these apps, you do need to pay to remove the watermark, get access to the full effects library, and you can export your photos online in up to 2560p resolution.
9. Photo Bender
Photo Bender is an Android-specific animated photo collage app that helps you warp to animate photos digitally by coloring your image by stretching it, bending it, and using brushes. You can then export your transformed images as GIFs, JPEGs, MP4s, and PNGs.
While this app doesn’t contain ratings like others on this list, it is highly rated, so it’s still worth a look.
10. Werble
The primary purpose of Werble is to animate your images, and while the basic account is free, in-app purchases are also available. Most of Werble’s animations come through different filter effects that you can add on top of your images.
A downside to Werble is that it saves these images entirely automatically as GIFs, so they’re ready to use online. The limitation? However, you need to pay to cut the watermark that they place on your image. That watermark is huge enough to be disturbing.
Part 2 Wondershare Filmora: The Advanced Editing App of 2022
If you are tired of considering various animated photo collage apps, here is a section to introduce you to the best alternative with a reliable yet powerful video editor.
Filmora : This platform comes entirely loaded with advanced social integration options and editing functions. You can enjoy premium preloaded video editing services on your mobile devices with this tool. For video customization requirements, you can imply multiple caption options, title editing facilities, and advanced animation effects.
Filmora Features
- Filmora is available for both Android as well as iOS devices without any login.
- Filmora assists users in importing camera roll, Instagram, Google Plus, and Facebook collections with simplicity.
- This software tool contains different advanced features and highlights the missing components of the above-listed animated collage maker apps.
- You can add watermarks to all created videos.
- Above all, now share videos directly shared via Instagram, Facebook, WhatsApp, Email, Vimeo, YouTube, etc.
This advanced editing tool, Wondershare Filmora, can efficiently serve all your requirements. The good part is that it syncs well with iOS and Android devices so that you can access it anywhere with simplicity.
Also, Filmora provides is compatible with 4K videos, which is the most outstanding merit for developing informative video sessions and tutorials. Its ability to work offline with principal functions will simplify your editing tasks even when the internet connection is still an issue.
Wondershare Filmora
Get started easily with Filmora’s powerful performance, intuitive interface, and countless effects!
Try It Free Try It Free Try It Free Learn More >
AI Portrait – The best feature of Wondershare Filmora for gameplay editing
The AI Portrait is a new add-on in Wondershare Filmora. It can easily remove video backgrounds without using a green screen or chroma key, allowing you to add borders, glitch effects, pixelated, noise, or segmentation video effects.
Conclusion
Now that we’ve run through some great animated photo collage apps that can enliven your images, you can choose the ones you’re wandering to try out. They all follow roughly a similar concept, so you should select the ones you think will work best for such needs.
Gone are the days when you had to necessarily use a robust desktop computer to edit your videos and images. You can go forward to efficiently perform the same operation all from your smartphone with significant effects by using the Wondershare Filmora.
10 Photoshop Cartoon Effects For Creatives
10 Photoshop Cartoon Effects For Creatives
An easy yet powerful editor
Numerous effects to choose from
Detailed tutorials provided by the official channel
Whether cartoon lover or not, photo cartoon effects is admired by everyone nowadays. People want to use Photoshop cartoon effects.
Using Photoshop applications lets, you know that editing and applying effects are often time-consuming. Adjusting the color, resizing the image, applying effects is lengthy, requires focus, and sometimes may be boring. Thus, we have some Photoshop cartoon effects that will save your time and provide you with desired results.
In this article
01 [11 Best Photoshop Cartoon Effects](#Part 1)
02 [How To Create A Photo To Cartoon Effect In A Photoshop](#Part 2)
Part 1 Best Photoshop Cartoon Effects
If you prefer to download the cartoon effect app or want to edit the photo online without editing, here’s is a list of some of the best Photoshop or Premiere Pro cartoon effects:
01Vintage Comic Creator
Vintage Comic Creator allows users to add After Effects in cartoon effects in photographs and texts. This can be the best choice if you want to add some shape effects, color, and change texture.
Along with cartoon edit text, an individual can also download overlays, pattern styles, and layer styles to make it comic book text. All the downloaded versions of templates are popular and editable as per the user’s requirement.
02Ultra Realistic 3D Space effect
Are you a space lover and looking for space inspires cartoon edits? Here’s a Solution. Ultra Realistic 3D Space cartoon effect allows the users to create editable fun cartoon text and Space themes.
Since it provides a variety of themes and ideas doesn’t limit the user when it comes to editing.
It provides you with a file with an example to make it easy to apply the cartoon effect online according to your wish.
03Animated Zombie Grime Art Photoshop action
To the fans of all the zombie movies, here’s something you should try out!
Animated Zombie Grime Art provides features in which users can edit their photographs with zombie cartoon effects and experience how they will look like a zombie with zero effort. It also provides the option to create and save GIFs or videos. One can easily use them on their social media accounts.
04Cartoon art Photoshop action
A quick and easy online cartoon effect helps individuals edit their photographs into paintings or cartoon characters. With only a few simple actions, users can easily edit their pictures. It provides editing in paintings, cartoons, oil pastels, oil paintings, etc.
05Soft Photoshop cartoon effects
Soft Photoshop cartoon effects help the users edit the photos into cartoon effects and allow them to add smooth effects to them. With just one click, you can add different colors to your image can adjust the brightness, contrast, highlight, texture, etc. It includes layers and smart filters, thus providing various editing options.
06Gimp cartoon effect
It is one of the fastest methods to edit your photographs into cartoon effects. Within a single click, you can cartoonify your pictures. With the help of the Gimp cartoon effect, the user can readjust brightness, contrast, light, etc. You can try soft burn, burn and overlay and can invert colors. It provides different filters with special effects that users can use free of cost.
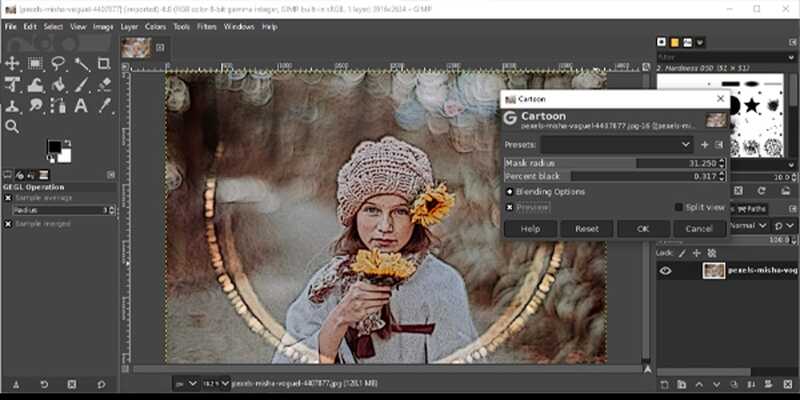
07Pop art Photoshop action
Pop art Photoshop action easily converts any photograph into a retro cartoon photo effect. It transforms the picture into a cartoon customized painting within one click. Users can enjoy the features of adjusting colors and can change the background according to their wishes.

08Cell shader Photoshop action
If you want to convert photos into cartoon effects and at the same time want to apply cell shading, then here’s a magic photo cartoon effect. Cartooning your picture along with cell shading can be time-consuming sometimes. Cell shader Photoshop allows the user to shade the image with a single click. You can try it on any picture.
093D cartoon text effect
This cartoon effect app helped change the text or the style of the text by adding specific animations or filters. It includes different forms and types in which users can edit the text and make it look fantastic. This 3D animation you can use in your document in animation or simple editing.
10Filmora cartoon effects
With Wondershare Filmora Video Editor , users can take a new picture or add a photo from their phone’s gallery. Once the image is ready for editing, you should tap on the Apply Cartoon Effect button. It contains 12 different cartoon photo effect styles; thus, users can choose any style they want to insert in their picture. You can also add motion to images, videos, and unlimited editing features with the latest updates.
For Win 7 or later (64-bit)
For macOS 10.12 or later
11 Caricature maker Photoshop action
You can turn your photographs into caricatures and make them look awesome. With the help of this After Effects, cartoon animation converts a simple picture into a fun carriage with just one click. You can adjust colors, size, and shape and add more features.
Part 2 How To Create A Photo To Cartoon Effect In A Photoshop
Below is a guide that will help you know more about Photoshop’s cartoon effect.
● Step 1: Select Image
Now, choose an image you want to cartoonize.
● Step 2: Apply Filter-Sharpen
Go to Filter to sharpen the image. Select the Gaussian Blur from the Remove drop-down list
Press OK.
● Step 3: Apply Filter-Stylize
Go to Filter, then apply stylization and Oil paint.
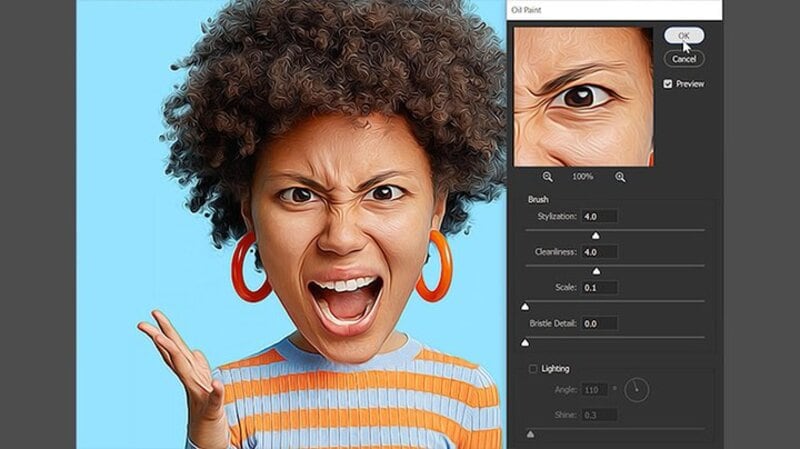
● Step 4: Choose Poster Edges
Choose from the list of effects on the filter gallery, click on Poster Edges and click OK.
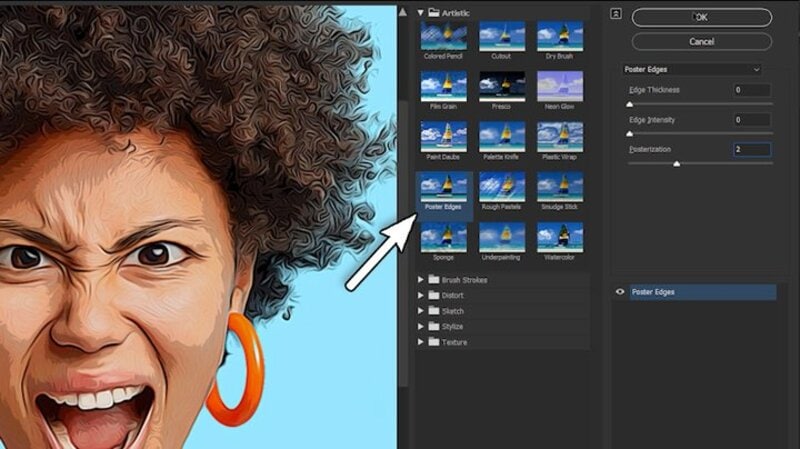
● Step 5: Blur
It will start to resemble a cartoon, but there’s still more to do, so use the Filter > Blur Menu to add a Surface Blur. Set the Threshold to 15 pixels and the Radius to 12 pixels. This effect gives the skin a considerably smoother and cleaner appearance. Select OK.
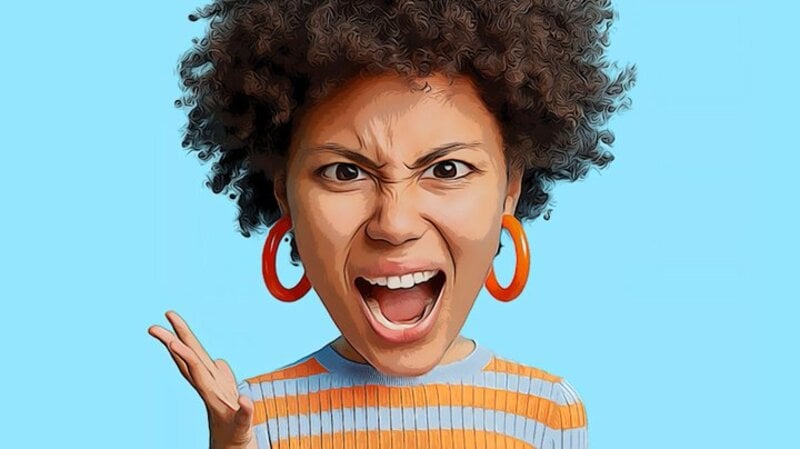
● Step 6: Unsharp Mask
You can add some sharpness and increase particular highlights by going to Filter > Sharpen > Unsharp Mask.
Unhide the second Smart Object layer and change its blending mode to Overlay. Then, reduce the layer’s Opacity to 55 percent.
Now, it will start to resemble a cartoon, but there’s still more to do, so use the Filter > Blur Menu to add a Surface Blur. Set the Threshold to 12 pixels and the Radius to 12 pixels.
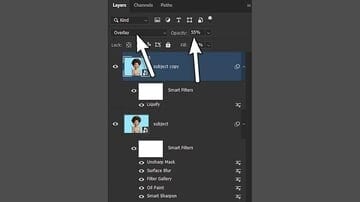
● Step 7: Apply the Oil paint filter again
Return to Filter > Filter Gallery and select Poster Edges once more. These will draw attention to certain aspects of the portrait.
Choose the Oil Paint Filter from Filter > Stylize. Select OK.
● Step 8: Double-click on Filter Gallery
Click OK after double-clicking the Filter Gallery Smart Filter already on this layer.
Carry on with the same steps for the Oil Paint Filter.
Select OK.
● Step 9: Choose the Raw filter option
Let’s take this photo cartoon effect to the next level with a simple method! To make a Stamp Visible Layer, choose the very top layer and press Control-Shift-Alt-E. When you wish to merge all the layers in a document onto a new layer, this shortcut comes in handy.
Lastly, convert the new layer to a Smart Object by right-clicking on it.
Select the Camera Raw Filter option from the Filter menu.
● Ending Thoughts →
● After visiting this article, I’m sure you have plenty of options for cartoon effects according to your choice. In this technological world, it’s hard to find the Photoshop cartoon effect of your desire, which helps save time.
● The above is one of the best After Effects cartoon animations you can use as a cartoon lover. Besides, you can also try out our recommended Filmora – the editor in vogue for its world-class editing features to help enhance your data.
Whether cartoon lover or not, photo cartoon effects is admired by everyone nowadays. People want to use Photoshop cartoon effects.
Using Photoshop applications lets, you know that editing and applying effects are often time-consuming. Adjusting the color, resizing the image, applying effects is lengthy, requires focus, and sometimes may be boring. Thus, we have some Photoshop cartoon effects that will save your time and provide you with desired results.
In this article
01 [11 Best Photoshop Cartoon Effects](#Part 1)
02 [How To Create A Photo To Cartoon Effect In A Photoshop](#Part 2)
Part 1 Best Photoshop Cartoon Effects
If you prefer to download the cartoon effect app or want to edit the photo online without editing, here’s is a list of some of the best Photoshop or Premiere Pro cartoon effects:
01Vintage Comic Creator
Vintage Comic Creator allows users to add After Effects in cartoon effects in photographs and texts. This can be the best choice if you want to add some shape effects, color, and change texture.
Along with cartoon edit text, an individual can also download overlays, pattern styles, and layer styles to make it comic book text. All the downloaded versions of templates are popular and editable as per the user’s requirement.
02Ultra Realistic 3D Space effect
Are you a space lover and looking for space inspires cartoon edits? Here’s a Solution. Ultra Realistic 3D Space cartoon effect allows the users to create editable fun cartoon text and Space themes.
Since it provides a variety of themes and ideas doesn’t limit the user when it comes to editing.
It provides you with a file with an example to make it easy to apply the cartoon effect online according to your wish.
03Animated Zombie Grime Art Photoshop action
To the fans of all the zombie movies, here’s something you should try out!
Animated Zombie Grime Art provides features in which users can edit their photographs with zombie cartoon effects and experience how they will look like a zombie with zero effort. It also provides the option to create and save GIFs or videos. One can easily use them on their social media accounts.
04Cartoon art Photoshop action
A quick and easy online cartoon effect helps individuals edit their photographs into paintings or cartoon characters. With only a few simple actions, users can easily edit their pictures. It provides editing in paintings, cartoons, oil pastels, oil paintings, etc.
05Soft Photoshop cartoon effects
Soft Photoshop cartoon effects help the users edit the photos into cartoon effects and allow them to add smooth effects to them. With just one click, you can add different colors to your image can adjust the brightness, contrast, highlight, texture, etc. It includes layers and smart filters, thus providing various editing options.
06Gimp cartoon effect
It is one of the fastest methods to edit your photographs into cartoon effects. Within a single click, you can cartoonify your pictures. With the help of the Gimp cartoon effect, the user can readjust brightness, contrast, light, etc. You can try soft burn, burn and overlay and can invert colors. It provides different filters with special effects that users can use free of cost.
07Pop art Photoshop action
Pop art Photoshop action easily converts any photograph into a retro cartoon photo effect. It transforms the picture into a cartoon customized painting within one click. Users can enjoy the features of adjusting colors and can change the background according to their wishes.
08Cell shader Photoshop action
If you want to convert photos into cartoon effects and at the same time want to apply cell shading, then here’s a magic photo cartoon effect. Cartooning your picture along with cell shading can be time-consuming sometimes. Cell shader Photoshop allows the user to shade the image with a single click. You can try it on any picture.
093D cartoon text effect
This cartoon effect app helped change the text or the style of the text by adding specific animations or filters. It includes different forms and types in which users can edit the text and make it look fantastic. This 3D animation you can use in your document in animation or simple editing.
10Filmora cartoon effects
With Wondershare Filmora Video Editor , users can take a new picture or add a photo from their phone’s gallery. Once the image is ready for editing, you should tap on the Apply Cartoon Effect button. It contains 12 different cartoon photo effect styles; thus, users can choose any style they want to insert in their picture. You can also add motion to images, videos, and unlimited editing features with the latest updates.
For Win 7 or later (64-bit)
For macOS 10.12 or later
11 Caricature maker Photoshop action
You can turn your photographs into caricatures and make them look awesome. With the help of this After Effects, cartoon animation converts a simple picture into a fun carriage with just one click. You can adjust colors, size, and shape and add more features.
Part 2 How To Create A Photo To Cartoon Effect In A Photoshop
Below is a guide that will help you know more about Photoshop’s cartoon effect.
● Step 1: Select Image
Now, choose an image you want to cartoonize.
● Step 2: Apply Filter-Sharpen
Go to Filter to sharpen the image. Select the Gaussian Blur from the Remove drop-down list
Press OK.
● Step 3: Apply Filter-Stylize
Go to Filter, then apply stylization and Oil paint.
● Step 4: Choose Poster Edges
Choose from the list of effects on the filter gallery, click on Poster Edges and click OK.
● Step 5: Blur
It will start to resemble a cartoon, but there’s still more to do, so use the Filter > Blur Menu to add a Surface Blur. Set the Threshold to 15 pixels and the Radius to 12 pixels. This effect gives the skin a considerably smoother and cleaner appearance. Select OK.
● Step 6: Unsharp Mask
You can add some sharpness and increase particular highlights by going to Filter > Sharpen > Unsharp Mask.
Unhide the second Smart Object layer and change its blending mode to Overlay. Then, reduce the layer’s Opacity to 55 percent.
Now, it will start to resemble a cartoon, but there’s still more to do, so use the Filter > Blur Menu to add a Surface Blur. Set the Threshold to 12 pixels and the Radius to 12 pixels.
● Step 7: Apply the Oil paint filter again
Return to Filter > Filter Gallery and select Poster Edges once more. These will draw attention to certain aspects of the portrait.
Choose the Oil Paint Filter from Filter > Stylize. Select OK.
● Step 8: Double-click on Filter Gallery
Click OK after double-clicking the Filter Gallery Smart Filter already on this layer.
Carry on with the same steps for the Oil Paint Filter.
Select OK.
● Step 9: Choose the Raw filter option
Let’s take this photo cartoon effect to the next level with a simple method! To make a Stamp Visible Layer, choose the very top layer and press Control-Shift-Alt-E. When you wish to merge all the layers in a document onto a new layer, this shortcut comes in handy.
Lastly, convert the new layer to a Smart Object by right-clicking on it.
Select the Camera Raw Filter option from the Filter menu.
● Ending Thoughts →
● After visiting this article, I’m sure you have plenty of options for cartoon effects according to your choice. In this technological world, it’s hard to find the Photoshop cartoon effect of your desire, which helps save time.
● The above is one of the best After Effects cartoon animations you can use as a cartoon lover. Besides, you can also try out our recommended Filmora – the editor in vogue for its world-class editing features to help enhance your data.
Also read:
- Updated Top 10 3D Text Animation Templates
- New Tips to Create Animated Social Media Posts in Canva for 2024
- Updated 2024 Approved What Is the Best Collage Photo Grid Maker - Experts Choice
- New 10 Top Tools to Make Pic Collage for Windows for 2024
- 15 Best Sites to Watch Cartoons Online Free And So Can You
- Updated Top 10 Websites to Download Anime Subtitles for Free
- Updated 2024 Approved How to Convert Animated GIF From Video
- New 2024 Approved 10 Caricature Makers to Turn Photo to Caricature Effects
- In 2024, Learn Disney Cartoon Drawing to See More Disney Magic Moments
- In 2024, How to Reduce GIF Size and Best GIF Resizers
- New In 2024, How to Create Benime Whiteboard Animation in Android
- 2024 Approved 10 Must Watch Netflix Cartoon Series
- How to Make Animation Characters with the Best Character Creators for 2024
- That Will Make Aesthetic Cartoon Drawing More Understandable for 2024
- Updated In 2024, Top 10 Classical Animated Cartoon Types With Examples
- New 10 Best Romance Anime Movies You Need to Watch
- Updated 2024 Approved Before You Learn 3D Animation Things You Should Know
- New In 2024, Simple Guide to Create New and Exciting Blackboard Animation
- 5 Websites with Animated Logos That Catch Your Eyes for 2024
- Updated Learn How to Do Funny Cartoon Drawings for 2024
- New 2024 Approved The Best Free 12 GIF Meme Maker at a Glance
- New 5 Different Animation Styles A Simple but Complete Guide for 2024
- Updated 2024 Approved How to Find & Make Animated Christmas GIFs?
- Updated Ways to Create Animated Clipart in PowerPoint for 2024
- Animated Collage Maker Tips for 2024
- Updated How to Create Benime Whiteboard Animation in Android
- In 2024, How to Create Free Photo Collage Frame in Minutes?
- New 2024 Approved 5 Websites with Animated Logos That Can Catch Your Eyes
- Is Blender 2D Animation As Awesome As 3D?
- New In 2024, 10 Classical Animated Cartoon Types With Examples
- Updated 2024 Approved Top 4 Websites to Get Anime Footage for Free
- 10 of the Best Disney Animated Shows for 2024
- How to Remove a Previously Synced Google Account from Your Realme 11 Pro
- Wondering the Best Alternative to Hola On Nokia G42 5G? Here Is the Answer | Dr.fone
- In 2024, How To Remove Screen Lock PIN On Nubia Like A Pro 5 Easy Ways
- In 2024, Pokémon Go Cooldown Chart On Samsung Galaxy A05s | Dr.fone
- How to Transfer Videos from Tecno Spark 10 5G to iPad | Dr.fone
- The Most Effective Ways to Bypass Apple iPhone 6s Plus Activation Lock
- In 2024, How to Migrate Android Data From Samsung Galaxy S23 Ultra to New Android Phone? | Dr.fone
- Updated What Is AI Voice, In 2024
- My Videos Arent Playing on Nubia Red Magic 9 Pro+ – What Can I Do? | Dr.fone
- How to Come up With the Best Pokemon Team On Vivo Y200? | Dr.fone
- In 2024, How to Show Wi-Fi Password on Itel P40
- Troubleshooting Error Connecting to the Apple ID Server From Apple iPhone 7
- In 2024, 3 Easy Methods to Unlock iCloud Locked Apple iPhone 15 Pro Max/iPad/iPod
- The Easiest Methods to Hard Reset Nubia Red Magic 8S Pro+ | Dr.fone
- In 2024, Effortless Ways to Transfer Data from Your Apple iPhone SE (2020) to iPhone 15 | Dr.fone
- Google Play Services Wont Update? 12 Fixes are Here on Lava Yuva 3 Pro | Dr.fone
- In 2024, 3 Ways to Export Contacts from Apple iPhone 13 Pro to Excel CSV & vCard Easily | Dr.fone
- Ways To Find Unlocking Codes For Xiaomi Redmi Note 12 Pro+ 5G Phones
- How to Unlock Disabled Apple iPhone 6 Plus/iPad Without Computer | Dr.fone
- How to Repair a Damaged video file of Realme C51?
- Remove FRP Lock on Gionee F3 Pro
- Proven Ways in How To Hide Location on Life360 For Samsung Galaxy F14 5G | Dr.fone
- Unlocking an iCloud Locked iPad and Apple iPhone 12 Pro Max
- Easy Fixes How To Recover Forgotten iCloud Password On your iPhone 11 Pro Max
- 4 Methods to Turn off Life 360 On Vivo Y200 without Anyone Knowing | Dr.fone
- How to Manually Install a Driver in Windows 10 & 7
- In 2024, How to Change Your Oppo Find X7 Ultra Location on life360 Without Anyone Knowing? | Dr.fone
- How To Delete iCloud Account Remove Your Apple ID Permanently On iPhone 11 Pro
- Different Methods for Resetting Infinix Hot 40i Phones with Screen Locked and Not | Dr.fone
- In 2024, Top 10 Fingerprint Lock Apps to Lock Your Vivo X100 Pro Phone
- The Top 5 Android Apps That Use Fingerprint Sensor to Lock Your Apps On Vivo Y36i
- Title: How to Insert a GIF Into Powerpoint for 2024
- Author: Elon
- Created at : 2024-05-19 03:04:52
- Updated at : 2024-05-20 03:04:52
- Link: https://animation-videos.techidaily.com/how-to-insert-a-gif-into-powerpoint-for-2024/
- License: This work is licensed under CC BY-NC-SA 4.0.
