
:max_bytes(150000):strip_icc():format(webp)/best-instagram-captions-4171697-ae21b04e6866470c80a50c9bef1cc26e.png)
How to Make 3D Cartoon of Yourself
How to Make 3D Cartoon of Yourself
How to Make a 3D Cartoon of Yourself
An easy yet powerful editor
Numerous effects to choose from
Detailed tutorials provided by the official channel
From among the several trends that emerged on Social Media, making a 3D cartoon of yourself is probably the most popular.
Learning how to make 3D cartoons may just be in the height of demand in the near future.
In this article
01 [What is AI Artist? Plus how to cartoon yourself with it ](#Part 1)
02 [How to Create a 3D Cartoon of Yourself for Meta ](#Part 2)
03 [How to make 3D Cartoon From a Photo ](#Part 3)
04 [Five 3D cartoon Disney-Fied yourself apps ](#Part 4)
05 [More New Useful Tools to Upgrade Your Animation/Cartoon](#Part 5)
Part 1 What is AI Artist? Plus how to cartoon yourself with it
We all remember the Cartoon filter challenge on Facebook, right? Everyone was excited to transform themselves into a cartoon. The options of making personalized cartoon representations of yourself was pretty limited back then. With the Voila AI artist app you can choose at least 3 different cartoon variations of yourself.

The Voila AI artist app can be downloaded from the Apple App store and Android Play Store. You can use the app for free but for faster editing and an ad free experience, you will need to upgrade to the paid version. Other than just creating a cartoon of yourself, you can also create renaissance portraits and caricatures.
● Step 1: Download the Voila AI artist App for your device, and complete the installation process. Allow the app to access your Phone’s Camera rolling permission.
● Step 2: Select the style option you want to use. What we are using here is 3D cartoon (other options: 2D Cartoon, Caricature & and the rest). Touch the arrow and start.
● Step 3: Now, with your camera roll open, click a new one or choose from your gallery. You can also find a celebrities option where you can search for celebrities. This generates a four-grid choice. If you are using the free version, then be prepared to encounter one or two ads. After a few seconds, you can exit out and get back to your images.
● Step 4: You will receive a composite grid of four options; your original image, plus three cartoon representations (Royalty 3D, Baby 3D & Cartoon 3D). Here, you can select the option you like the most and start editing. Locate the up arrow button to immediately share on your preferred social media or simply save a copy in your device.
If the AI artist app has any paid and premium version, upon subscribing you will get ad free & watermark free animated representations.
Part 2 How to Create a 3D Cartoon of Yourself for Meta
Facebook only recently rebranded themselves as Meta. This has now started the rush to create a live virtual interaction space, and big companies like Microsoft and Nvidia are now competing with each other to bridge the gap.
Soon, activities like convening meetings, attending live events or even dating online would take place in virtual environments. So best be prepared for the future by creating a 3D avatar for yourself.
Your virtual avatar would be able to interact with the real world through a virtual platform by using VR headsets and other tech. Sensing your virtual presence would be almost the same as the real world for your peers and colleagues. You can attend a meeting without ever having to travel.
The process behind creating a 3D cartoon of yourself for Meta platforms starts by establishing a facial rig which is like a framework for the cartoon animations to sit on. These days, most apps come with automatic FACS facial rigging which is why certain Instagram filters like the Puppy nose filter was possible.
Presently, creating a complete 3D virtual model of yourself is a bit complicated to do on your own but soon this service will be automated in an app for you.
Part 3 How to make 3D Cartoon From a Photo
Photoshop is no doubt one of the most influential digital assets that allow you to do virtually anything with your photos. Of course, this includes turning your photos into 3D cartoon.
There are advanced techniques and tools you can use to retouch your image to achieve an animated like look for your portraits.
Of course, you can find multiple Photoshop hacks online but the following guide can give you an easy to follow idea of how to go about creating your own 3D cartoon out of an image.

Note; These steps are to be perceived as a simplified overview of your objectives when editing on Photoshop;
● To start out on turning your image into a 3D character, you need to learn how to create layers and then stack them on each other.
● You can then ‘liquify’ these layers to form a mould for your image.
● Apply skin softening techniques to take away the realistic features of the photo before working on turning it into a cartoon.
● Now you can start focus on applying the details to features like eyes, hair, nose and facial lines on your cartoon image.
● You can also change the colour of any individual features on your image. This method is applicable in making caricatures of your photo as well.
Part 4 Five 3D cartoon Disney-Fied yourself apps
Vibrant colours, gorgeous large eyes and shiny hair – pretty much sums up every Disney character you have ever seen. Now, everyone is obsessed with making their own Disney avatar and for good reason. You can use it as filter or upload it on your profile. Here are some of the most in-trend AI powered 3D Disneyfied apps you can use;
01Voila AI Artist

The Voila AI Artist app was released back in March of 2021 and has been the rage among Disneyfied apps. To clarify, the app has nothing to do with the Disney animation company but is perceived by users as the most successful app for disneyfication. Its on-board AI can create 3D and 2D renderings for your image along with hand drawn caricatures. You can download the app on App Store and Google Play.
02ToonMe

The next best app on our Disneyfied list is ToonMe. It also uses AI to turn photos into Disney Characters. The app keeps updating new cartoonish filters which you can use over your images. There are various other features which you can try as well like recreating your photos into classic vectors. The results are of extraordinary quality and can be uploaded on Instagram. You can download the app for free from Play store and App store.
03Snapchat

Snapchat has been around for some time now so you might already have it on your phone. Snapchat offers a vast range of filters and effects that of course includes Disneyfied filters and 3D cartoon images. You can look for them on the Snapchat search bar. New filters keep popping up every day which you can apply over your own images.
04Prisma

Prisma is a notoriously well know pop photo editor – which means it makes your photos ‘pop’. You can use it to edit photos on both Android and iPhone. It also comes with its own range of filters for turning your photos into cartoon images. There are hundreds of variations to choose from so you will definitely be spoilt for choices.
05Clip2Comic Cartoon

This app is only available on the App stores and is well known among iPhone users for turning photos into cartoons and caricatures. It is not exactly a Disneyfied app but it has a plethora of filters and a combination of editing tools to help personalize your 3D photos and comics. You can also directly upload these photos to your Social Media Accounts.
Key Takeaways from This Episode
● With the help of AI and other amazing features, you can use your everyday pictures to make a 3D cartoon of yourself.
● The Metaverse is her and soon we all will be interacting in a virtual space. So best learn how to rig your face with an animation filter.
● Apps like Voila AI artist, you can disneyfy your images quite easily. Explore dozens of such filters and effects with Disneyfied apps.
From among the several trends that emerged on Social Media, making a 3D cartoon of yourself is probably the most popular.
Learning how to make 3D cartoons may just be in the height of demand in the near future.
In this article
01 [What is AI Artist? Plus how to cartoon yourself with it ](#Part 1)
02 [How to Create a 3D Cartoon of Yourself for Meta ](#Part 2)
03 [How to make 3D Cartoon From a Photo ](#Part 3)
04 [Five 3D cartoon Disney-Fied yourself apps ](#Part 4)
05 [More New Useful Tools to Upgrade Your Animation/Cartoon](#Part 5)
Part 1 What is AI Artist? Plus how to cartoon yourself with it
We all remember the Cartoon filter challenge on Facebook, right? Everyone was excited to transform themselves into a cartoon. The options of making personalized cartoon representations of yourself was pretty limited back then. With the Voila AI artist app you can choose at least 3 different cartoon variations of yourself.
The Voila AI artist app can be downloaded from the Apple App store and Android Play Store. You can use the app for free but for faster editing and an ad free experience, you will need to upgrade to the paid version. Other than just creating a cartoon of yourself, you can also create renaissance portraits and caricatures.
● Step 1: Download the Voila AI artist App for your device, and complete the installation process. Allow the app to access your Phone’s Camera rolling permission.
● Step 2: Select the style option you want to use. What we are using here is 3D cartoon (other options: 2D Cartoon, Caricature & and the rest). Touch the arrow and start.
● Step 3: Now, with your camera roll open, click a new one or choose from your gallery. You can also find a celebrities option where you can search for celebrities. This generates a four-grid choice. If you are using the free version, then be prepared to encounter one or two ads. After a few seconds, you can exit out and get back to your images.
● Step 4: You will receive a composite grid of four options; your original image, plus three cartoon representations (Royalty 3D, Baby 3D & Cartoon 3D). Here, you can select the option you like the most and start editing. Locate the up arrow button to immediately share on your preferred social media or simply save a copy in your device.
If the AI artist app has any paid and premium version, upon subscribing you will get ad free & watermark free animated representations.
Part 2 How to Create a 3D Cartoon of Yourself for Meta
Facebook only recently rebranded themselves as Meta. This has now started the rush to create a live virtual interaction space, and big companies like Microsoft and Nvidia are now competing with each other to bridge the gap.
Soon, activities like convening meetings, attending live events or even dating online would take place in virtual environments. So best be prepared for the future by creating a 3D avatar for yourself.
Your virtual avatar would be able to interact with the real world through a virtual platform by using VR headsets and other tech. Sensing your virtual presence would be almost the same as the real world for your peers and colleagues. You can attend a meeting without ever having to travel.
The process behind creating a 3D cartoon of yourself for Meta platforms starts by establishing a facial rig which is like a framework for the cartoon animations to sit on. These days, most apps come with automatic FACS facial rigging which is why certain Instagram filters like the Puppy nose filter was possible.
Presently, creating a complete 3D virtual model of yourself is a bit complicated to do on your own but soon this service will be automated in an app for you.
Part 3 How to make 3D Cartoon From a Photo
Photoshop is no doubt one of the most influential digital assets that allow you to do virtually anything with your photos. Of course, this includes turning your photos into 3D cartoon.
There are advanced techniques and tools you can use to retouch your image to achieve an animated like look for your portraits.
Of course, you can find multiple Photoshop hacks online but the following guide can give you an easy to follow idea of how to go about creating your own 3D cartoon out of an image.
Note; These steps are to be perceived as a simplified overview of your objectives when editing on Photoshop;
● To start out on turning your image into a 3D character, you need to learn how to create layers and then stack them on each other.
● You can then ‘liquify’ these layers to form a mould for your image.
● Apply skin softening techniques to take away the realistic features of the photo before working on turning it into a cartoon.
● Now you can start focus on applying the details to features like eyes, hair, nose and facial lines on your cartoon image.
● You can also change the colour of any individual features on your image. This method is applicable in making caricatures of your photo as well.
Part 4 Five 3D cartoon Disney-Fied yourself apps
Vibrant colours, gorgeous large eyes and shiny hair – pretty much sums up every Disney character you have ever seen. Now, everyone is obsessed with making their own Disney avatar and for good reason. You can use it as filter or upload it on your profile. Here are some of the most in-trend AI powered 3D Disneyfied apps you can use;
01Voila AI Artist
The Voila AI Artist app was released back in March of 2021 and has been the rage among Disneyfied apps. To clarify, the app has nothing to do with the Disney animation company but is perceived by users as the most successful app for disneyfication. Its on-board AI can create 3D and 2D renderings for your image along with hand drawn caricatures. You can download the app on App Store and Google Play.
02ToonMe
The next best app on our Disneyfied list is ToonMe. It also uses AI to turn photos into Disney Characters. The app keeps updating new cartoonish filters which you can use over your images. There are various other features which you can try as well like recreating your photos into classic vectors. The results are of extraordinary quality and can be uploaded on Instagram. You can download the app for free from Play store and App store.
03Snapchat
Snapchat has been around for some time now so you might already have it on your phone. Snapchat offers a vast range of filters and effects that of course includes Disneyfied filters and 3D cartoon images. You can look for them on the Snapchat search bar. New filters keep popping up every day which you can apply over your own images.
04Prisma
Prisma is a notoriously well know pop photo editor – which means it makes your photos ‘pop’. You can use it to edit photos on both Android and iPhone. It also comes with its own range of filters for turning your photos into cartoon images. There are hundreds of variations to choose from so you will definitely be spoilt for choices.
05Clip2Comic Cartoon
This app is only available on the App stores and is well known among iPhone users for turning photos into cartoons and caricatures. It is not exactly a Disneyfied app but it has a plethora of filters and a combination of editing tools to help personalize your 3D photos and comics. You can also directly upload these photos to your Social Media Accounts.
Key Takeaways from This Episode
● With the help of AI and other amazing features, you can use your everyday pictures to make a 3D cartoon of yourself.
● The Metaverse is her and soon we all will be interacting in a virtual space. So best learn how to rig your face with an animation filter.
● Apps like Voila AI artist, you can disneyfy your images quite easily. Explore dozens of such filters and effects with Disneyfied apps.
Techniques on How to Make After Effects 2D Animation
Adobe After Effects is probably the most versatile software you can add to your arsenal of skills on your journey to learn After Effects 2D animation. Both beginners and professionals can brush up their animation skills on After Effects with some help from tutorials and videos. When it comes to experimenting with visual effects, motion graphics, and 3D composting, Adobe After Effects is recommended as an industry-standard software. So it should come as no surprise that there is a surplus of After Effects tutorials and information on the internet. To help simplify things, here’s a compiled list of Adobe After Effects courses along with a few tips to get started.
In this article
01 [Practical Online 2D Animation Courses](#Part 1)
02 [How to Create 2D Motion Graphics with After Effects](#Part 2)
03 [5 Best Animation After Effects that you must know](#Part 3)
04 [5 Character Animation Tools for After Effects](#Part 4)
Part 1 Practical Online 2D Animation Courses
Learning After Effects need not be complicated. You can use this tool to help you create amazing designs from your sheer imagination. Here is a list of the best courses which are self-paced so you don’t need to worry about fitting them into your schedule. Some of these courses are primarily for beginners who are seeking to orient themselves to the basics. While other courses have recent insights into the latest techniques curated by the industry experts. The courses in this list are diverse and are from different platforms like Domestika, Coursera, Adobe, and YouTube.
1. Getting Started - Adobe
The official Adobe learning site has its own course for introducing After Effects. After all, the software is a product of Adobe itself. This tutorial is purely for complete beginners and is designed to briefly introduce the interface and basic functioning of Adobe After Effects. It takes you through the manual control and menu options which you will need to familiarize yourself with.
2. The Basics – YouTube
This free-to-watch After Effects tutorial is presented by a very passionate photographer and YouTuber Peter Meckinnon. He walks you through the various elements the Adobe interface puts at your disposal. These elements are quite artistically introduced by Peter as he animates a basic title project on Adobe.
3. How to Animate a line - YouTube
When you are introduced to a vast world of possibilities, it can be a bit overwhelming. Which is why starting from the very basics is always a good idea. This next YouTube tutorial shows you step by step how to animate a line on Adobe After Effects from one point to another.
4. Introduction and Advanced After Effects – Domestika
Domestika is an online learning platform that is great for freelancers and independent artists who can purchase self-paced lessons on topics like graphic design and animation. The Introduction and Advanced After Effects tutorials by Carlos Zensuke Albarran are a comprehensive bundle of lessons that quench your thirst for 2D effects animation a bit further.
5. Typography Animation – Domestika
The mark of a professional is his specialization. As you gain more experience in practicing Adobe After Effects, you can begin trying out more bold and stylistic animations with simple typographic techniques. It would not only make you more confident as a motion graphics designer but also equip you with fluid skills as a freelancer. Typographic motion graphics is a cash cow for many After Effect animators.
6. Vectorial Animation – Domestika
Cartoonist animated videos and motion designs are quite interesting to animate. Vectorial 2D animation is quite popular among YouTube tutorials and explainer videos. They make for excellent corporate animations. You can find an amazing Domestika tutorial on Vectorial that walks you through in simple steps on Frame by Frame style animations.
7. Getting Started with Motion Graphics - Coursera
Coursera is another amazing online learning platform for gaining access to Beginner to Advanced courses on Adobe After Effects. This one tutorial introduces you to Beginner level motion graphics where you can learn from short self-paced videos.
8. Getting Started with Motion Graphics - SkillShare
SkillShare is another amazing online learning platform for gaining access to Beginner to Advanced courses on Adobe After Effects. This one tutorial introduces you to Beginner level motion graphics where you can learn from short self-paced videos. It is guided by a leading professional in motion graphics and visual effects who covers all the bases alongside hands-projects.
9. Make Simple Logo Intro in After Effects – YouTube
Creating Intros for your videos is probably the most cost-effective marketing gizmos employed today. This free tutorial on YouTube from Tech Infusion is a simple-to-follow video that sheds some light on how to create eye-catching intros that instantly catches your audience’s attention.
10. Work with Composition - Adobe
Working with After Effects is all about creating gorgeous compositions that pop. This Adobe tutorial equips you with the basics of creating animation on Adobe After Effects with multiple layers and keyframes.
Part 2 How to Create 2D Motion Graphics with After Effects
The astonishing world of intriguing after-effects is vast. Whether you do it as a profession or simply as a hobby, learning how to add after-effects to your 2d motion graphics is always an amazing idea. Worried how you’d understand the tools to add after-effects to your animation? Well, we’ve got you covered! Today we’ll be looking at how you can add after-effects to your 2d animation.

●To make a new 2D graphics in after effects, you need to make a new composition. To do so, head to the composition menu in the menu bar. Upon clicking on the composition menu, a new drop-down menu would open up. From the drop-down menu, click on “new composition”.

●A new setting box would pop up, in this settings box you can alter the settings of the composition. If you do not wish to change any setting, simply click on “ok” and proceed ahead.

●Next, you need to find the tool panel in the main menu bar. Upon clicking on it, a new drop-down menu will appear, click on “star tool”. We’re simply taking the star shape, for instance, alternatively, you can select and another shape too…

●Once you’ve selected the shape you want, draw by clicking your mouse and dragging

●Click on the shape and the layers will appear on the left of your screen. From the popped up screen, click on “properties”. Here you can find multiple animation options and you can even edit frame by frame. Add frames at regular intervals and move according to your wish

Part 3 5 Best Animation After Effects that you must know
1. Stacking animation – YouTube
Stacking animation is an excellent and simple trick that can make any animation look cool and complex. The stacking animation is nothing but the use of the stacking template multiple times. To do so, you just need to duplicate a few of the base layers. Next, you need to offset the duplicated frames by a few frames and finally add some effects. The Adding of stacking animation will result in a slight extension of your animation layers. You can further customize your frames by adding effects or color to enhance the animation.

2. Light sweeps
An advantage of using the after effects software is that it offers several drag and drop features which you can simply drag and drop to your animation to enhance its looks. A light sweep animation is one such animation that can add great value to your animation. You can add this effect by following the steps given below
●Head to “effects” from your main interface
●Here you need to find “generate”
●Now from the list of drag and drop animations, drag and drop “light sweeps” onto your workspace
You can then change and customize almost any aspect of the animation simply by clicking on it and changing the settings

3. Quick shape animation
This is a very cool trick that you can use on your 2d objects! This includes the creation of your own layer(you can use any 2d shape). Further, you need to duplicate your shape and the stagger the animation. This gives the entire animation an interesting and engaging effect. The trick is very resourceful while dealing with 2d objects.

4. Animate your background
When your entire animation looks slightly basic and you wish to give your animation a zest, this trick is highly useful! If you’re working with colored backgrounds, this animation trick can help make it more attractive. This animation is simply just adding motion to your background making it look like it’s moving in or out.

5. Graphics reflection
Although this method is slightly complicated, it could enhance the animation by leaps and bounds. To do so, you need to write a fancy text of your choice, then you need to duplicate this text, and further, you need to flip it vertically. To make it look more realistic, you can add the blur effect. This will make it look like the duplicated text is a reflection of the original text

Part 4 5 Character Animation Tools for After Effects
1. Rubber hose 2
Rubber hose is one of the primitive tools for adding animations. This is mainly because it was found in the early 2000s and back then, animations had wobbly legs and an absurd body structure. This tool has several cool inbuilt functions that make the animation so much simpler. The robust tool. makes animation pretty simple and hassle-free. Rubber hose 2 is an advanced version of rubber hose, it has several advanced features. The plug-in is however not free, you’d need to purchase it at $45 in order to gain a lifetime access.
2. Duik
Duik is one of the most advanced and comprehensive character animation tools in the market. It was initially launched in 2008, but since then there’s been a vast improvement in the tool’s features and today it’s one of the picks to perform animation using rigging and other animation techniques. Duik has several tools that make the animation so convenient. The tool has features such as auto rig, which helps save time while animating. Other tools include effects such as bones, rigging, various filters, and effects.
3. Joystick ‘n sliders
Joystick’n sliders is another highly utilitarian tool for animators. Along with key animation features such as rigging and boning, the tool has other cool and highly useful features to make your animation interesting! The user interface of this tool is a big plus, the simplicity of the user interface makes the tool perfect for beginners and advanced level animators. The tool is simple to use and has a plethora of cool features which could help you make your animation highly engaging.
4. Puppet tool 3
Puppet tool 3 is an after effects plugin that could help you create character animations. The plug-in is different from the in-built puppet tool in after effects. The puppet tool inbuilt into after effects are the Rigging tool for animation, however using the inbuilt tool is slightly sophisticated. Puppet tool 3 is not an individual tool but works in coordination with the inbuilt the puppet tool. Since using the inbuilt tool was complex, puppet tool 3 made it simple. Apart from rigging, the plugin also allows you to work with a few additional features. You can buy the plug-in for only $39.95!
5. Adobe animate character
Adobe character animation is the in-house plugin of Adobe to animate characters. However, the tool is probably still in development. Adobe has been working on releasing this tool for a while now, and in the latest version of after effects, Adobe added the beta version of the character animator. Character animator is probably the most efficient and advanced animation tool. It uses facial recognition for animations and allows you to perform almost all basic animations. The software is perfect when you’re trying to create a complex animated character.
Key Takeaways from This Episode
● Today we’ve dwelled a lot into animation and the tools available for animation.
● We’ve seen how animation could be enhanced using the inbuilt tools available in Adobe after effects.
● We’ve also gone a step further and seen the external plugin tools that you can use to make character animations and highly advanced 2d effects ok animations.
● We’ve also taken an overview on how to create a simple basic 2d motion animation, all in all, we’ve gone from understanding the beginner level animation to understanding advanced animation
02 [How to Create 2D Motion Graphics with After Effects](#Part 2)
03 [5 Best Animation After Effects that you must know](#Part 3)
04 [5 Character Animation Tools for After Effects](#Part 4)
Part 1 Practical Online 2D Animation Courses
Learning After Effects need not be complicated. You can use this tool to help you create amazing designs from your sheer imagination. Here is a list of the best courses which are self-paced so you don’t need to worry about fitting them into your schedule. Some of these courses are primarily for beginners who are seeking to orient themselves to the basics. While other courses have recent insights into the latest techniques curated by the industry experts. The courses in this list are diverse and are from different platforms like Domestika, Coursera, Adobe, and YouTube.
1. Getting Started - Adobe
The official Adobe learning site has its own course for introducing After Effects. After all, the software is a product of Adobe itself. This tutorial is purely for complete beginners and is designed to briefly introduce the interface and basic functioning of Adobe After Effects. It takes you through the manual control and menu options which you will need to familiarize yourself with.
2. The Basics – YouTube
This free-to-watch After Effects tutorial is presented by a very passionate photographer and YouTuber Peter Meckinnon. He walks you through the various elements the Adobe interface puts at your disposal. These elements are quite artistically introduced by Peter as he animates a basic title project on Adobe.
3. How to Animate a line - YouTube
When you are introduced to a vast world of possibilities, it can be a bit overwhelming. Which is why starting from the very basics is always a good idea. This next YouTube tutorial shows you step by step how to animate a line on Adobe After Effects from one point to another.
4. Introduction and Advanced After Effects – Domestika
Domestika is an online learning platform that is great for freelancers and independent artists who can purchase self-paced lessons on topics like graphic design and animation. The Introduction and Advanced After Effects tutorials by Carlos Zensuke Albarran are a comprehensive bundle of lessons that quench your thirst for 2D effects animation a bit further.
5. Typography Animation – Domestika
The mark of a professional is his specialization. As you gain more experience in practicing Adobe After Effects, you can begin trying out more bold and stylistic animations with simple typographic techniques. It would not only make you more confident as a motion graphics designer but also equip you with fluid skills as a freelancer. Typographic motion graphics is a cash cow for many After Effect animators.
6. Vectorial Animation – Domestika
Cartoonist animated videos and motion designs are quite interesting to animate. Vectorial 2D animation is quite popular among YouTube tutorials and explainer videos. They make for excellent corporate animations. You can find an amazing Domestika tutorial on Vectorial that walks you through in simple steps on Frame by Frame style animations.
7. Getting Started with Motion Graphics - Coursera
Coursera is another amazing online learning platform for gaining access to Beginner to Advanced courses on Adobe After Effects. This one tutorial introduces you to Beginner level motion graphics where you can learn from short self-paced videos.
8. Getting Started with Motion Graphics - SkillShare
SkillShare is another amazing online learning platform for gaining access to Beginner to Advanced courses on Adobe After Effects. This one tutorial introduces you to Beginner level motion graphics where you can learn from short self-paced videos. It is guided by a leading professional in motion graphics and visual effects who covers all the bases alongside hands-projects.
9. Make Simple Logo Intro in After Effects – YouTube
Creating Intros for your videos is probably the most cost-effective marketing gizmos employed today. This free tutorial on YouTube from Tech Infusion is a simple-to-follow video that sheds some light on how to create eye-catching intros that instantly catches your audience’s attention.
10. Work with Composition - Adobe
Working with After Effects is all about creating gorgeous compositions that pop. This Adobe tutorial equips you with the basics of creating animation on Adobe After Effects with multiple layers and keyframes.
Part 2 How to Create 2D Motion Graphics with After Effects
The astonishing world of intriguing after-effects is vast. Whether you do it as a profession or simply as a hobby, learning how to add after-effects to your 2d motion graphics is always an amazing idea. Worried how you’d understand the tools to add after-effects to your animation? Well, we’ve got you covered! Today we’ll be looking at how you can add after-effects to your 2d animation.
●To make a new 2D graphics in after effects, you need to make a new composition. To do so, head to the composition menu in the menu bar. Upon clicking on the composition menu, a new drop-down menu would open up. From the drop-down menu, click on “new composition”.
●A new setting box would pop up, in this settings box you can alter the settings of the composition. If you do not wish to change any setting, simply click on “ok” and proceed ahead.
●Next, you need to find the tool panel in the main menu bar. Upon clicking on it, a new drop-down menu will appear, click on “star tool”. We’re simply taking the star shape, for instance, alternatively, you can select and another shape too…
●Once you’ve selected the shape you want, draw by clicking your mouse and dragging
●Click on the shape and the layers will appear on the left of your screen. From the popped up screen, click on “properties”. Here you can find multiple animation options and you can even edit frame by frame. Add frames at regular intervals and move according to your wish
Part 3 5 Best Animation After Effects that you must know
1. Stacking animation – YouTube
Stacking animation is an excellent and simple trick that can make any animation look cool and complex. The stacking animation is nothing but the use of the stacking template multiple times. To do so, you just need to duplicate a few of the base layers. Next, you need to offset the duplicated frames by a few frames and finally add some effects. The Adding of stacking animation will result in a slight extension of your animation layers. You can further customize your frames by adding effects or color to enhance the animation.
2. Light sweeps
An advantage of using the after effects software is that it offers several drag and drop features which you can simply drag and drop to your animation to enhance its looks. A light sweep animation is one such animation that can add great value to your animation. You can add this effect by following the steps given below
●Head to “effects” from your main interface
●Here you need to find “generate”
●Now from the list of drag and drop animations, drag and drop “light sweeps” onto your workspace
You can then change and customize almost any aspect of the animation simply by clicking on it and changing the settings
3. Quick shape animation
This is a very cool trick that you can use on your 2d objects! This includes the creation of your own layer(you can use any 2d shape). Further, you need to duplicate your shape and the stagger the animation. This gives the entire animation an interesting and engaging effect. The trick is very resourceful while dealing with 2d objects.
4. Animate your background
When your entire animation looks slightly basic and you wish to give your animation a zest, this trick is highly useful! If you’re working with colored backgrounds, this animation trick can help make it more attractive. This animation is simply just adding motion to your background making it look like it’s moving in or out.
5. Graphics reflection
Although this method is slightly complicated, it could enhance the animation by leaps and bounds. To do so, you need to write a fancy text of your choice, then you need to duplicate this text, and further, you need to flip it vertically. To make it look more realistic, you can add the blur effect. This will make it look like the duplicated text is a reflection of the original text
Part 4 5 Character Animation Tools for After Effects
1. Rubber hose 2
Rubber hose is one of the primitive tools for adding animations. This is mainly because it was found in the early 2000s and back then, animations had wobbly legs and an absurd body structure. This tool has several cool inbuilt functions that make the animation so much simpler. The robust tool. makes animation pretty simple and hassle-free. Rubber hose 2 is an advanced version of rubber hose, it has several advanced features. The plug-in is however not free, you’d need to purchase it at $45 in order to gain a lifetime access.
2. Duik
Duik is one of the most advanced and comprehensive character animation tools in the market. It was initially launched in 2008, but since then there’s been a vast improvement in the tool’s features and today it’s one of the picks to perform animation using rigging and other animation techniques. Duik has several tools that make the animation so convenient. The tool has features such as auto rig, which helps save time while animating. Other tools include effects such as bones, rigging, various filters, and effects.
3. Joystick ‘n sliders
Joystick’n sliders is another highly utilitarian tool for animators. Along with key animation features such as rigging and boning, the tool has other cool and highly useful features to make your animation interesting! The user interface of this tool is a big plus, the simplicity of the user interface makes the tool perfect for beginners and advanced level animators. The tool is simple to use and has a plethora of cool features which could help you make your animation highly engaging.
4. Puppet tool 3
Puppet tool 3 is an after effects plugin that could help you create character animations. The plug-in is different from the in-built puppet tool in after effects. The puppet tool inbuilt into after effects are the Rigging tool for animation, however using the inbuilt tool is slightly sophisticated. Puppet tool 3 is not an individual tool but works in coordination with the inbuilt the puppet tool. Since using the inbuilt tool was complex, puppet tool 3 made it simple. Apart from rigging, the plugin also allows you to work with a few additional features. You can buy the plug-in for only $39.95!
5. Adobe animate character
Adobe character animation is the in-house plugin of Adobe to animate characters. However, the tool is probably still in development. Adobe has been working on releasing this tool for a while now, and in the latest version of after effects, Adobe added the beta version of the character animator. Character animator is probably the most efficient and advanced animation tool. It uses facial recognition for animations and allows you to perform almost all basic animations. The software is perfect when you’re trying to create a complex animated character.
Key Takeaways from This Episode
● Today we’ve dwelled a lot into animation and the tools available for animation.
● We’ve seen how animation could be enhanced using the inbuilt tools available in Adobe after effects.
● We’ve also gone a step further and seen the external plugin tools that you can use to make character animations and highly advanced 2d effects ok animations.
● We’ve also taken an overview on how to create a simple basic 2d motion animation, all in all, we’ve gone from understanding the beginner level animation to understanding advanced animation
Best 15 Instant Classics Animated Cartoon Movies
Best 15 Instant Classics Animated Cartoon Movies
An easy yet powerful editor
Numerous effects to choose from
Detailed tutorials provided by the official channel
The animated characters let an individual experience a world that has certain things that hardly exist in reality.
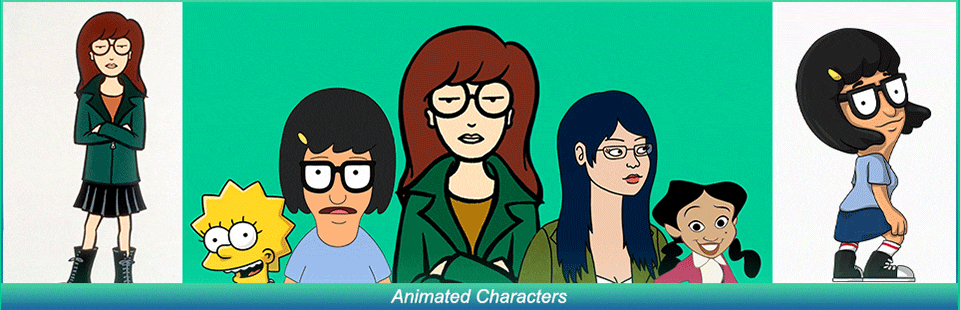
Here we will share all the relatable details about the particular movie that will be helpful in deciding whether you wish to watch it or not.
In this article
01 [Which is the Best Animated Movie Ever?](#Part 1)
02 [We know how to animate. Do you?](#Part 2)
Part 1 Which is the Best Animated Movie Ever?
Let’s have a look at the best 15 classical animated cartoon movies that you should watch if you are an animation movie lover.
01 Toy Story 4
Toy Story 4 was released on June 21, 2019 in the United States and will be available for streaming on October 1, 2019.The IMDb rating for Toy Story 4 was 7.7 out of 10, and the Rotten Tomatoes rating was 97%. This movie ranks first among all the animated movies available till date. This is a movie from Walt Disney, and its gross revenue was $434 million.

02 Spider-Man: into the spider verse
Spider-Man: Into the Spider Verse was released in theatres on December 14, 2018 and started streaming on March 19, 2019. The IMDB rating for this movie is 8.4 out of 10 and the Rotten Tomatoes rating is 97%. This movie is from Sony Pictures Entertainment and Columbia Pictures. The gross revenue was $190.2 million.

03 Inside Out
Inside Out was released worldwide in theatres on June 19, 2015 and started streaming on November 3, 2015. This movie received an 8.1 IMDB rating out of 10, and the Rotten Tomatoes rating was 98%. It is from Walt Disney and has a gross revenue of $2 million.

04 COCO
Coco was released in theatres on November 22, 2017 and started streaming on February 13, 2018. The IMDB rating for this movie is 8.4 out of 10 and the Rotten Tomatoes rating is 97%. This movie is from Walt Disney. The gross revenue was $210.5 million.

05 Snow White and the Seven Dwarfs
Snow White and the Seven Dwarfs (1937) was released in theatres in 1937 and started streaming on Nov. 16, 2004. The IMDB rating for this movie is 7.6 out of 10 and the Rotten Tomatoes rating is 98%. This movie is from Walt Disney.

06 Incredibles 2
Incredibles 2 (2018) was released in theatres on June 15, 2018 and became available for streaming on November 6, 2018.The IMDB rating for this movie is 7.6 out of 10 and the Rotten Tomatoes rating is 97%. This movie is from Walt Disney. The gross revenue was $608.6 million.

07 Zootopia (2016)
Zootopia (2016) was released in theatres on March 4, 2016 and started streaming on June 7, 2016. The IMDB rating for this movie is 8.0 out of 10 and the Rotten Tomatoes rating is 98%. This movie is from Walt Disney. The gross revenue was $200 million.

08 Paddington 2 (2018)
Paddington 2 (2018) was released in theatres on Jan. 1, 2018 and started streaming on Apr. 24, 2018. The IMDB rating for this movie is 7.8 out of 10 and the Rotten Tomatoes rating is 99%. This movie is from Warner Bros. Pictures. The gross revenue was $38.4 million.

09 Up
Up was released in theatres on May 29, 2009 and started streaming on Nov. 10, 2009. The IMDB rating for this movie is 8.2 out of 10 and the Rotten Tomatoes rating is 98%. This movie is from Walt Disney and Pixar Animation Studios. The gross revenue was $78.2 million.

10 Toy Story 2 (1999)
Toy Story 2 (1999) was released in theatres on December 24, 1999 and started streaming on March 23, 2010. The IMDB rating for this movie is 7.9 out of 10 and the Rotten Tomatoes rating is 100%. This movie is from Walt Disney Pictures. The gross revenue was $245.9 million.

11 Toy Story 3 (2010)
Toy Story 3 (2010) was released in theatres on June 18, 2010 and started streaming on Nov. 2, 2010. The IMDB rating for this movie is 8.2 out of 10 and the Rotten Tomatoes rating is 98%. This movie is from Walt Disney. The gross revenue was $415.0 million.

12 Finding Dory (2016)
Finding Dory (2016) was released in theatres on June 17, 2016 and started streaming on Nov. 15, 2016. The IMDB rating for this movie is 7.3 out of 10 and the Rotten Tomatoes rating is 94%. This movie is from Sony Pictures Entertainment and Columbia Pictures. The gross revenue was $486.2 million.

13 Finding Nemo (2003)
Finding Nemo (2003) was released in theatres on May 30, 2003 and started streaming on Nov. 4, 2003. The IMDB rating for this movie is 8.1 out of 10 and the Rotten Tomatoes rating is 99%. This movie is from Walt Disney Pictures. The gross revenue was $110.2 million.

13 Pinocchio (1940)
Pinocchio (1940) was released in theatres on February 9, 1940 and started streaming on December 3, 2002. The IMDB rating for this movie is 8.4 out of 10 and the Rotten Tomatoes rating is 100%. This movie is from Walt Disney Pictures. The gross revenue was $18.7 million.

13 The LEGO Movie (2014)
The LEGO Movie (2014) was released in theatres on February 7, 2014 and started streaming on June 17, 2014. The IMDB rating for this movie is 7.7 out of 10 and the Rotten Tomatoes rating is 96%. This movie is from Warner Bros. Pictures. The gross revenue was $257.8 million.
The animated characters let an individual experience a world that has certain things that hardly exist in reality.
Here we will share all the relatable details about the particular movie that will be helpful in deciding whether you wish to watch it or not.
In this article
01 [Which is the Best Animated Movie Ever?](#Part 1)
02 [We know how to animate. Do you?](#Part 2)
Part 1 Which is the Best Animated Movie Ever?
Let’s have a look at the best 15 classical animated cartoon movies that you should watch if you are an animation movie lover.
01 Toy Story 4
Toy Story 4 was released on June 21, 2019 in the United States and will be available for streaming on October 1, 2019.The IMDb rating for Toy Story 4 was 7.7 out of 10, and the Rotten Tomatoes rating was 97%. This movie ranks first among all the animated movies available till date. This is a movie from Walt Disney, and its gross revenue was $434 million.
02 Spider-Man: into the spider verse
Spider-Man: Into the Spider Verse was released in theatres on December 14, 2018 and started streaming on March 19, 2019. The IMDB rating for this movie is 8.4 out of 10 and the Rotten Tomatoes rating is 97%. This movie is from Sony Pictures Entertainment and Columbia Pictures. The gross revenue was $190.2 million.
03 Inside Out
Inside Out was released worldwide in theatres on June 19, 2015 and started streaming on November 3, 2015. This movie received an 8.1 IMDB rating out of 10, and the Rotten Tomatoes rating was 98%. It is from Walt Disney and has a gross revenue of $2 million.
04 COCO
Coco was released in theatres on November 22, 2017 and started streaming on February 13, 2018. The IMDB rating for this movie is 8.4 out of 10 and the Rotten Tomatoes rating is 97%. This movie is from Walt Disney. The gross revenue was $210.5 million.
05 Snow White and the Seven Dwarfs
Snow White and the Seven Dwarfs (1937) was released in theatres in 1937 and started streaming on Nov. 16, 2004. The IMDB rating for this movie is 7.6 out of 10 and the Rotten Tomatoes rating is 98%. This movie is from Walt Disney.
06 Incredibles 2
Incredibles 2 (2018) was released in theatres on June 15, 2018 and became available for streaming on November 6, 2018.The IMDB rating for this movie is 7.6 out of 10 and the Rotten Tomatoes rating is 97%. This movie is from Walt Disney. The gross revenue was $608.6 million.
07 Zootopia (2016)
Zootopia (2016) was released in theatres on March 4, 2016 and started streaming on June 7, 2016. The IMDB rating for this movie is 8.0 out of 10 and the Rotten Tomatoes rating is 98%. This movie is from Walt Disney. The gross revenue was $200 million.
08 Paddington 2 (2018)
Paddington 2 (2018) was released in theatres on Jan. 1, 2018 and started streaming on Apr. 24, 2018. The IMDB rating for this movie is 7.8 out of 10 and the Rotten Tomatoes rating is 99%. This movie is from Warner Bros. Pictures. The gross revenue was $38.4 million.
09 Up
Up was released in theatres on May 29, 2009 and started streaming on Nov. 10, 2009. The IMDB rating for this movie is 8.2 out of 10 and the Rotten Tomatoes rating is 98%. This movie is from Walt Disney and Pixar Animation Studios. The gross revenue was $78.2 million.
10 Toy Story 2 (1999)
Toy Story 2 (1999) was released in theatres on December 24, 1999 and started streaming on March 23, 2010. The IMDB rating for this movie is 7.9 out of 10 and the Rotten Tomatoes rating is 100%. This movie is from Walt Disney Pictures. The gross revenue was $245.9 million.
11 Toy Story 3 (2010)
Toy Story 3 (2010) was released in theatres on June 18, 2010 and started streaming on Nov. 2, 2010. The IMDB rating for this movie is 8.2 out of 10 and the Rotten Tomatoes rating is 98%. This movie is from Walt Disney. The gross revenue was $415.0 million.
12 Finding Dory (2016)
Finding Dory (2016) was released in theatres on June 17, 2016 and started streaming on Nov. 15, 2016. The IMDB rating for this movie is 7.3 out of 10 and the Rotten Tomatoes rating is 94%. This movie is from Sony Pictures Entertainment and Columbia Pictures. The gross revenue was $486.2 million.
13 Finding Nemo (2003)
Finding Nemo (2003) was released in theatres on May 30, 2003 and started streaming on Nov. 4, 2003. The IMDB rating for this movie is 8.1 out of 10 and the Rotten Tomatoes rating is 99%. This movie is from Walt Disney Pictures. The gross revenue was $110.2 million.
13 Pinocchio (1940)
Pinocchio (1940) was released in theatres on February 9, 1940 and started streaming on December 3, 2002. The IMDB rating for this movie is 8.4 out of 10 and the Rotten Tomatoes rating is 100%. This movie is from Walt Disney Pictures. The gross revenue was $18.7 million.
13 The LEGO Movie (2014)
The LEGO Movie (2014) was released in theatres on February 7, 2014 and started streaming on June 17, 2014. The IMDB rating for this movie is 7.7 out of 10 and the Rotten Tomatoes rating is 96%. This movie is from Warner Bros. Pictures. The gross revenue was $257.8 million.
How to Cartoonize Photo Photoshop in Simple Steps
How to Cartoonize Photo Photoshop in Easy Steps
An easy yet powerful editor
Numerous effects to choose from
Detailed tutorials provided by the official channel
Cartoons, an already catchy entertainment source, can upgrade other media utilities on integration. Look through the easiest ways of creating cartoonize photo Photoshop stills!
In this article
01 [Types of Cartoon Effects in Photoshop](#Part 1)
02 [Easiest Ways to Cartoonize Photo in Photoshop](#Part 2)
03 [How to Use a Variety of Photoshop Special Effects to Create the Final Caricature Look](#Part 3)
Part 1 Types of Cartoon Effects in Photoshop
It is an absolute fun activity to explore your editing creativity in the realm of cartoonizing the otherwise ordinary still captures. Talking of the most convenient cartoon creator and editor applications, you can safely rely on the Photoshop Image Editor application to choose from a pool of cartoon editing effects for adding that spunky and funny element to your image files.
Presented in the following section, is a discussion of some of the most stunning and visibly amazing cartoon effects in the application’s Editor Library to cartoonize Photoshop images:
01Pop Art Photoshop Action
The effect is a predominantly preferred as a cartoon action Photoshop utility to caricaturize a normal image, along with customizing the same to change the colors and background of the original still capture for creating a brand new appearance with utmost ease. Apart from this, the aforesaid effect allows you to exclusively customize the globally acclaimed graphic masterpieces of Roy Lichtenstein. Working with the effect, you can edit a self-portrait or the favorite image of your pet to give the latter, a funny retro feel.

02Vintage Comic Creator
If the idea of sticking to just the creation of cartoon images is not enough to satisfy you, the Vintage Comic Creator effect allows you to expand your creativity level to work on cartoon based shape and text edits. You can use the effect to enhance an image logo or plain text with a comic book oriented text. A download of this cartoon effect template facilitates you with diversities of customizable layer styles, overlays and patterns.

03GTA Photoshop Action
This is a complete pleasure for the creative fan of Grand Theft Auto, the wicked chasing game series. Additional to creating a stark variety of edited cartoon stills, you are free to reinvent the aforesaid game’s most popular caricature edits, while using the GTA Photoshop Action editing filter. Launched by Indworks, the effect package consisting of 15 vibrant themes and 5 collage templates; promises a quick mimicry of your most cherished video and console games.

04Vector Paint Photoshop Action
The one is an amazing Photoshop effect for creating cartoon edits, which works through a merger of two different ingenious art themes or styles for transforming basic images into cartoonized stills.
The effect grants you the liberty to use varieties of art styles, such as, comic, photo retouching and energetic oil to obtain editing results comparable to that of any original photograph. The template is conveniently simple to use and assures you of quick results. All this, just at a nominal price of $6! Interesting, right?

05Ultra Realistic 3D Space Effect
Considering the fact of you being a space admirer, this one is the perfect image editor for you to add the vibrancy of stunning space elements and backgrounds within your cartoonized edits. The effect lets you play with the diverse range of customizable text and exciting caricature backgrounds. When downloading the template, you get a main setup file, a few editing examples and a web link to the free fonts present in the effect.

06Animated Zombie Grime Art Photoshop Action
Are you in love with the latest zombie grimes? If yes, then this action set is exclusive editor package for you. Working with the aforesaid image template, you can effortlessly add the perfect zombie theme to your cartoon edits, along with simultaneously creating a stunning animation, which you can use to enhance your video or GIF uploads on social media. Not forgetting the best part, you get a free access to this amazing utility.

Part 2 Easiest Ways to Cartoonize Photo in Photoshop
Having known about the amazing varieties of cartoonized editor templates in Photoshop, it is a natural instinct to feel motivated to create your own caricature images from normal capture stills. Addressing the concern of image transformation methods to turn a photo into a cartoon Photoshop, let us dive into some of the most affordable methods of creating cartoonized photos in the aforesaid editing application.
Talking of the most basic Photoshop tools for creating caricature images, you can start your editing spree with using the Graphic Tablet, Brush Tool, Layer Masks and a graphic pen to create amateur cartoonized edits from your still photographs, getting a full control on image tracing.
01Brush Tool
A few usage examples include working with a combination of the graphic tablet pen and the editor brushes to trace your image, using the brush in a masked or a fresh layer to avoid altering the actual image, and much more.
02Graphic Tablet
It is best to use the Photoshop Graphic Tablet for adhering to the concern of tracing cartoonized images. You can alternatively cater to the job with a trackpad, mouse, or even your hand. It is however, difficult to assure steady hand postures for image tracing, lest you are using a stylus pen.
03Pen Tool
Using the Pen Tool for cartoonizing your portrait, allows you to draw outlines along the desired figure within the image, along with its important elements, so that you can easily use these outlined paths to introduce different color blocks.
Similar to the Brush Tool, the Photoshop Pen utility grants you the freedom to vary the degree of detailing in your cartoon edit, from being highly expressive to only remaining around the shore. Working with the Pen Tool can, however be a bit tiring and time taking, with respect to the extent of detailing you wish to add to the caricature edits.
Additional to the aforementioned tools, you can also consider using the default image filters of the Photoshop application to get comparable results. This is an exclusively better option to choose, compared to the Pen Tool, when you are working without a Graphic Tablet. To get over the top realistic caricature renderings, you will need to supplement the use of Photoshop filters with the application’s editing channels and other adjustments.
Part 3 How to Use a Variety of Photoshop Special Effects to Create the Final Caricature Look
Considering the extensive discussion on the credibility of the Photoshop Image Editor application in the realm of creating stunning caricature images in high end resolution, let us proceed to learn about using the diversity of Photoshop’s special effects to get the last stage cartoonized appearance of ordinary still images.
User’s Guide to Create High End Cartoonized Look
The following tutorial is a stepwise explanation of the process to convert photo into cartoon Photoshop in the easiest possible way. Stick to the method for getting affordable results in a quick span.
Step 1: Download and Launch the Program
Visit the official website of Photoshop Image Editor for a free download of the software program in your system, followed by installing and launching the same in your device.
Step 2: Upload Your Image
On a successful launch of the editor program, you will be directed to the ‘Photoshop Editor’ window, where you are required to upload any desired still image from your device for creating a cartoonized edit. To do this, either simply add your image to the editor workspace using the ‘Drag and Drop’ method, or navigate to the ‘File’ tab in the top toolbar and click on ‘Open’ in the dropdown menu.
Step 3: Edge Enhancement
Once your image appears in the editor timeline, proceed to sharpen the edges of the face and body of the portrait. Start with navigating to and clicking on the ‘Filter’ option, followed by tapping on ‘Filter Gallery’ and selecting the ‘Artistic’ folder, where you need to choose the ‘Poster Edges’ option. Observe the effect of these setting on the portrait and make necessary changes.

Step 4: Background Setting
Ensure that the background and foreground of your image are set to white and black colors respectively. If not, proceed to adjust the same as required.

Step 5: Distorting the Edges
You now need to introduce some distortion in the edges of your portrait. Navigate to the ‘Filter’ option again, open the ‘Filter Gallery’ and choose ‘Torn Edges’ from the menu that drops down. Select the desired parameter values in accordance with your creative suitability.


Step 6: Using the Channels Panel
The next step is to select and copy your portrait using the ‘Ctrl + A’ and Ctrl + C commands respectively. Navigate to the ‘Channels’ panel at the right of the Photoshop workspace. At the panel’s bottom right, proceed with creating a new channel. It will be assigned the name ‘Alpha 1’ by Photoshop, which you are most welcome to change.


Step 7: Color Inversion
When you finish creating the channel, use the ‘Ctrl + V’ command to paste your portrait in the same. Proceed with inverting the image colors by navigating to the ‘Image’ option, followed by choosing the ‘Adjustment’ and ‘Invert’ options from the consecutive drop downs. Now, make a selection of the ‘White’ regions of your portrait by pressing the ‘Ctrl’ key and clicking on the ‘Alpha 1 Channel thumbnail.

Step 8: Layer Creation
Navigate to the ‘Layers’ panel at the right of the Photoshop workspace, and click on the ‘New Layer’ icon for creating a fresh layer. Fill the just created layer with black color, either by pressing ‘g’ from your system’s keyboard, or using the ‘Paint Bucket’ tool. Don’t forget to assign a suitable name to the layer.

Repeat the above process to create a separate layer and e fill the same with white color. The layer creation process is essential to separate the white and black colors of the actual image.

Step 10: Layer Dragging
In the ‘Layers’ panel, drag the ‘Black’ layer above the ‘White’ one.

Step 11: Creating Additional Layers
You are now required to create three more layers, with the same process as for the above two, for adding effects to the Skin, Clothes and Teeth/Eyes of the portrait. When you finish creation, assign suitable names to the layers, followed by dragging them below the ‘Black’ one within the ‘Layers’ panel.

Step 12: Color Selection and Application
Choose the respective colors for the clothes, skin and teeth/eyes of the cartoonized edit. To proceed with color application, navigate to the toolbar at the left of the Photoshop workspace and choose the ‘Brush Tool’. Finally, choose a particular layer and apply careful brush strokes to add color to the specific area of the portrait that you wish to edit. Follow the same process to add colors to the remaining layers to get the desired result in all areas of your cartoonized edit.

Step 13: Using the Gradient Tool
Navigate to the ‘Layers’ panel again and create a new ‘Gradient’ layer to further enhance your creation. You now need to select the ‘Gradient Tool’ from the toolbar at the left of the Photoshop workspace. The ‘Gradient Editor’ pops up with the continuously running ‘Gradient Bar’, as soon as you make the selection. Double click on the gradient boxes at both ends to select them, followed by making your color choices. Tap on ‘OK’ when you are satisfied with your work.

Step 14: Filling the Gradients
To proceed with gradient filling, press and hold the mouse button on the image at the bottom left and continue to drag the cursor to its top right corner. Leave the mouse and navigate to the ‘Layers’ panel for dragging and dropping the ‘Gradient’ layer above the ‘White’ layer.

You are now done with the process of creating a caricature edit from a normal still portrait. Your final image output will appear something like the following:

Cartoons, an already catchy entertainment source, can upgrade other media utilities on integration. Look through the easiest ways of creating cartoonize photo Photoshop stills!
In this article
01 [Types of Cartoon Effects in Photoshop](#Part 1)
02 [Easiest Ways to Cartoonize Photo in Photoshop](#Part 2)
03 [How to Use a Variety of Photoshop Special Effects to Create the Final Caricature Look](#Part 3)
Part 1 Types of Cartoon Effects in Photoshop
It is an absolute fun activity to explore your editing creativity in the realm of cartoonizing the otherwise ordinary still captures. Talking of the most convenient cartoon creator and editor applications, you can safely rely on the Photoshop Image Editor application to choose from a pool of cartoon editing effects for adding that spunky and funny element to your image files.
Presented in the following section, is a discussion of some of the most stunning and visibly amazing cartoon effects in the application’s Editor Library to cartoonize Photoshop images:
01Pop Art Photoshop Action
The effect is a predominantly preferred as a cartoon action Photoshop utility to caricaturize a normal image, along with customizing the same to change the colors and background of the original still capture for creating a brand new appearance with utmost ease. Apart from this, the aforesaid effect allows you to exclusively customize the globally acclaimed graphic masterpieces of Roy Lichtenstein. Working with the effect, you can edit a self-portrait or the favorite image of your pet to give the latter, a funny retro feel.
02Vintage Comic Creator
If the idea of sticking to just the creation of cartoon images is not enough to satisfy you, the Vintage Comic Creator effect allows you to expand your creativity level to work on cartoon based shape and text edits. You can use the effect to enhance an image logo or plain text with a comic book oriented text. A download of this cartoon effect template facilitates you with diversities of customizable layer styles, overlays and patterns.
03GTA Photoshop Action
This is a complete pleasure for the creative fan of Grand Theft Auto, the wicked chasing game series. Additional to creating a stark variety of edited cartoon stills, you are free to reinvent the aforesaid game’s most popular caricature edits, while using the GTA Photoshop Action editing filter. Launched by Indworks, the effect package consisting of 15 vibrant themes and 5 collage templates; promises a quick mimicry of your most cherished video and console games.
04Vector Paint Photoshop Action
The one is an amazing Photoshop effect for creating cartoon edits, which works through a merger of two different ingenious art themes or styles for transforming basic images into cartoonized stills.
The effect grants you the liberty to use varieties of art styles, such as, comic, photo retouching and energetic oil to obtain editing results comparable to that of any original photograph. The template is conveniently simple to use and assures you of quick results. All this, just at a nominal price of $6! Interesting, right?
05Ultra Realistic 3D Space Effect
Considering the fact of you being a space admirer, this one is the perfect image editor for you to add the vibrancy of stunning space elements and backgrounds within your cartoonized edits. The effect lets you play with the diverse range of customizable text and exciting caricature backgrounds. When downloading the template, you get a main setup file, a few editing examples and a web link to the free fonts present in the effect.
06Animated Zombie Grime Art Photoshop Action
Are you in love with the latest zombie grimes? If yes, then this action set is exclusive editor package for you. Working with the aforesaid image template, you can effortlessly add the perfect zombie theme to your cartoon edits, along with simultaneously creating a stunning animation, which you can use to enhance your video or GIF uploads on social media. Not forgetting the best part, you get a free access to this amazing utility.
Part 2 Easiest Ways to Cartoonize Photo in Photoshop
Having known about the amazing varieties of cartoonized editor templates in Photoshop, it is a natural instinct to feel motivated to create your own caricature images from normal capture stills. Addressing the concern of image transformation methods to turn a photo into a cartoon Photoshop, let us dive into some of the most affordable methods of creating cartoonized photos in the aforesaid editing application.
Talking of the most basic Photoshop tools for creating caricature images, you can start your editing spree with using the Graphic Tablet, Brush Tool, Layer Masks and a graphic pen to create amateur cartoonized edits from your still photographs, getting a full control on image tracing.
01Brush Tool
A few usage examples include working with a combination of the graphic tablet pen and the editor brushes to trace your image, using the brush in a masked or a fresh layer to avoid altering the actual image, and much more.
02Graphic Tablet
It is best to use the Photoshop Graphic Tablet for adhering to the concern of tracing cartoonized images. You can alternatively cater to the job with a trackpad, mouse, or even your hand. It is however, difficult to assure steady hand postures for image tracing, lest you are using a stylus pen.
03Pen Tool
Using the Pen Tool for cartoonizing your portrait, allows you to draw outlines along the desired figure within the image, along with its important elements, so that you can easily use these outlined paths to introduce different color blocks.
Similar to the Brush Tool, the Photoshop Pen utility grants you the freedom to vary the degree of detailing in your cartoon edit, from being highly expressive to only remaining around the shore. Working with the Pen Tool can, however be a bit tiring and time taking, with respect to the extent of detailing you wish to add to the caricature edits.
Additional to the aforementioned tools, you can also consider using the default image filters of the Photoshop application to get comparable results. This is an exclusively better option to choose, compared to the Pen Tool, when you are working without a Graphic Tablet. To get over the top realistic caricature renderings, you will need to supplement the use of Photoshop filters with the application’s editing channels and other adjustments.
Part 3 How to Use a Variety of Photoshop Special Effects to Create the Final Caricature Look
Considering the extensive discussion on the credibility of the Photoshop Image Editor application in the realm of creating stunning caricature images in high end resolution, let us proceed to learn about using the diversity of Photoshop’s special effects to get the last stage cartoonized appearance of ordinary still images.
User’s Guide to Create High End Cartoonized Look
The following tutorial is a stepwise explanation of the process to convert photo into cartoon Photoshop in the easiest possible way. Stick to the method for getting affordable results in a quick span.
Step 1: Download and Launch the Program
Visit the official website of Photoshop Image Editor for a free download of the software program in your system, followed by installing and launching the same in your device.
Step 2: Upload Your Image
On a successful launch of the editor program, you will be directed to the ‘Photoshop Editor’ window, where you are required to upload any desired still image from your device for creating a cartoonized edit. To do this, either simply add your image to the editor workspace using the ‘Drag and Drop’ method, or navigate to the ‘File’ tab in the top toolbar and click on ‘Open’ in the dropdown menu.
Step 3: Edge Enhancement
Once your image appears in the editor timeline, proceed to sharpen the edges of the face and body of the portrait. Start with navigating to and clicking on the ‘Filter’ option, followed by tapping on ‘Filter Gallery’ and selecting the ‘Artistic’ folder, where you need to choose the ‘Poster Edges’ option. Observe the effect of these setting on the portrait and make necessary changes.
Step 4: Background Setting
Ensure that the background and foreground of your image are set to white and black colors respectively. If not, proceed to adjust the same as required.
Step 5: Distorting the Edges
You now need to introduce some distortion in the edges of your portrait. Navigate to the ‘Filter’ option again, open the ‘Filter Gallery’ and choose ‘Torn Edges’ from the menu that drops down. Select the desired parameter values in accordance with your creative suitability.
Step 6: Using the Channels Panel
The next step is to select and copy your portrait using the ‘Ctrl + A’ and Ctrl + C commands respectively. Navigate to the ‘Channels’ panel at the right of the Photoshop workspace. At the panel’s bottom right, proceed with creating a new channel. It will be assigned the name ‘Alpha 1’ by Photoshop, which you are most welcome to change.
Step 7: Color Inversion
When you finish creating the channel, use the ‘Ctrl + V’ command to paste your portrait in the same. Proceed with inverting the image colors by navigating to the ‘Image’ option, followed by choosing the ‘Adjustment’ and ‘Invert’ options from the consecutive drop downs. Now, make a selection of the ‘White’ regions of your portrait by pressing the ‘Ctrl’ key and clicking on the ‘Alpha 1 Channel thumbnail.
Step 8: Layer Creation
Navigate to the ‘Layers’ panel at the right of the Photoshop workspace, and click on the ‘New Layer’ icon for creating a fresh layer. Fill the just created layer with black color, either by pressing ‘g’ from your system’s keyboard, or using the ‘Paint Bucket’ tool. Don’t forget to assign a suitable name to the layer.
Repeat the above process to create a separate layer and e fill the same with white color. The layer creation process is essential to separate the white and black colors of the actual image.
Step 10: Layer Dragging
In the ‘Layers’ panel, drag the ‘Black’ layer above the ‘White’ one.
Step 11: Creating Additional Layers
You are now required to create three more layers, with the same process as for the above two, for adding effects to the Skin, Clothes and Teeth/Eyes of the portrait. When you finish creation, assign suitable names to the layers, followed by dragging them below the ‘Black’ one within the ‘Layers’ panel.
Step 12: Color Selection and Application
Choose the respective colors for the clothes, skin and teeth/eyes of the cartoonized edit. To proceed with color application, navigate to the toolbar at the left of the Photoshop workspace and choose the ‘Brush Tool’. Finally, choose a particular layer and apply careful brush strokes to add color to the specific area of the portrait that you wish to edit. Follow the same process to add colors to the remaining layers to get the desired result in all areas of your cartoonized edit.
Step 13: Using the Gradient Tool
Navigate to the ‘Layers’ panel again and create a new ‘Gradient’ layer to further enhance your creation. You now need to select the ‘Gradient Tool’ from the toolbar at the left of the Photoshop workspace. The ‘Gradient Editor’ pops up with the continuously running ‘Gradient Bar’, as soon as you make the selection. Double click on the gradient boxes at both ends to select them, followed by making your color choices. Tap on ‘OK’ when you are satisfied with your work.
Step 14: Filling the Gradients
To proceed with gradient filling, press and hold the mouse button on the image at the bottom left and continue to drag the cursor to its top right corner. Leave the mouse and navigate to the ‘Layers’ panel for dragging and dropping the ‘Gradient’ layer above the ‘White’ layer.
You are now done with the process of creating a caricature edit from a normal still portrait. Your final image output will appear something like the following:
Easy Cartoon Characters Drawing Tutorials for You Beginners
Easy Cartoon Characters Drawing Tutorials for You Who Are Learning to Draw
An easy yet powerful editor
Numerous effects to choose from
Detailed tutorials provided by the official channel
Learning the art of cartoon characters drawing? We can help! Cartoon characters drawing is no rocket science, ABCD: Anybody Can Draw!

We are as excited as you as we bring to you a few of the best drawing tutorials!
In this article
01 [Double Your Results with Learning Cartoon Drawing Styles First](#Part 1)
02 [Best 6 Cartoon Characters Anyone Can Draw (with Free Video Tutorials)](#Part 2)
03 [Easy Cartoon Characters to Draw Step by Step](#Part 3)
Part 1 Double Your Results with Learning Cartoon Drawing Styles First
01 Cartoon Character Sketches
Sketching is one of the most popular art forms. Sketching can be done for real-life people or celebrities or we can also make sketches of imaginary characters and cartoons. Sketching is generally made of pencil and does not involve the usage of colors.

02 Cartoon Characters Drawing with Color
Cartoon characters can be made with color to make them more attractive. This is another popular form of art that cartoonists follow. You can explore several methods of coloring and try making your cartoon colorful.

03 Disney Cartoon Characters Drawing
Disney cartoon character drawing is probably one of the simplest. This is because they have a predefined size and are mostly symmetric. Disney cartoon characters generally use common geometric shapes such as circles, ovals, and squares. Hence making it a beginner-friendly choice!

Part 2 Best 6 Cartoon Characters Anyone Can Draw (with Free Video Tutorials)
01 Roger the alien
Roger the alien is one of the simplest cartoon characters to draw. This children’s classic cartoon character always intrigues children due to its bizarre shape. It fixes the image of an outer space characters in a child’s mind(If they exist).
What makes it easy to draw?
● The oval-shaped head is easy to draw since it is not very detailed.
● The character does not have any hair, hair is one of the more difficult parts to draw.
● The body features aren’t very prominent, hence making the character easy to draw.
Challenges you may encounter
● If you are a first-timer, then you may find it challenging to draw fingers and the toes.
● Getting the weird alien head shape might be a little difficult and may take you a few attempts.
● Making the two eyes exactly similar to each other may be challenging for a few of you.
02 Wakko Warner
What makes it easy to draw?
● The character generally has geometrical shapes and hence you can use shape tracers to draw a few parts.
● The appealing appearance of the character makes it interesting to draw.
● The eyes are not very difficult to recreate.
Challenges you may encounter
● The eyes are not very difficult to recreate.
● The shape of the mouth and the tongue that is sticking out is slightly complex.
● Perfecting the shape of the hair is a little challenging.
03 Cosmo
What makes it easy to draw?
● We recommend you to try this character out mainly because of its uniqueness.
● The eyes are not very complicated to draw.
● The body resembles a stick image and is hence simple to draw.
Challenges you may encounter
● The shape of the crown needs to be perfect, especially because of the tilt the crown has.
● The fingers are challenging to draw.
● The hair has a distinct shape, this shape needs to come out perfectly.
04 Courage the cowardly dog
What makes it easy to draw?
● Firstly, it’s one of the most favorite cartoons, hence it will ensure to keep you interested in the drawing.
● The hands and legs resemble stick figures and are simple to draw.
● The body structure is simple.
Challenges you may encounter
● Drawing a cartoon animal instead of a human being might be intriguing for beginners.
● The large eyes, which is one of the characteristic features needs to be perfect.
● The design of the ears is the trickiest part and could be difficult to draw.
05 Tom And Jerry
When we think of cartoons, the first few names that probably come to our mind are tom and jerry. This duo of a grumpy cat and a mysterious mouse has left an everlasting impact on the world of cartoons. The duo is famous throughout the world and is loved throughout age groups
Why do we recommend you to try your hands on this?
● This is a classic cartoon that almost everyone loves.
● There are several resources on the internet to help you draw the cartoon characters.
● The characters need not be perfect, even a close resemblance to them would be sufficient for the viewers to identify them due to their fame.
Challenges you may encounter
● You need to be careful with the proportion of sizes of tom and jerry.
● The structures of tom and jerry are not very simple to draw.
● Perfecting the grumpy expression on tom’s face and a frightened expression on jerry’s face is challenging.
05 Catdog
Catdog is another very interesting character. Who’d have imagined a cat and a dog morphed in a single body? Well, imagination has no end to it as they say! Catdog is a yellow cat and dog in a single body, it looks cute and at the same time intriguing.
Why do we recommend you try your hands on this?
● The cartoon character is mainly composed of geometrical shapes.
● The character is vividly colorful.
● The bright yellow color is super attractive and hence makes drawing catdog very fun.
Challenges you may encounter
● The character is illusional, you might have difficulty while deciding how to even look at it.
● The cat and dog faces are not very different from each other and have minute differences while drawing you need to be careful about having a distinct difference between the two faces.
Now that we’ve taken our baby steps towards understanding the art of drawing cartoons.
Key Takeaways from This Episode
● That’s a lot of knowledge for today, isn’t it? Today we’ve seen the basics of drawing cartoon characters.
● We also got our hands dirty by exploring a few easy cartoon characters that you could draw.
● Further, we saw the basic steps that you would need to take in order to draw the face of any cartoon character! All in all, we learned everything we needed to know to draw our first cartoon! What are you waiting for? Go try out drawing your first cartoon today!
Learning the art of cartoon characters drawing? We can help! Cartoon characters drawing is no rocket science, ABCD: Anybody Can Draw!
We are as excited as you as we bring to you a few of the best drawing tutorials!
In this article
01 [Double Your Results with Learning Cartoon Drawing Styles First](#Part 1)
02 [Best 6 Cartoon Characters Anyone Can Draw (with Free Video Tutorials)](#Part 2)
03 [Easy Cartoon Characters to Draw Step by Step](#Part 3)
Part 1 Double Your Results with Learning Cartoon Drawing Styles First
01 Cartoon Character Sketches
Sketching is one of the most popular art forms. Sketching can be done for real-life people or celebrities or we can also make sketches of imaginary characters and cartoons. Sketching is generally made of pencil and does not involve the usage of colors.
02 Cartoon Characters Drawing with Color
Cartoon characters can be made with color to make them more attractive. This is another popular form of art that cartoonists follow. You can explore several methods of coloring and try making your cartoon colorful.
03 Disney Cartoon Characters Drawing
Disney cartoon character drawing is probably one of the simplest. This is because they have a predefined size and are mostly symmetric. Disney cartoon characters generally use common geometric shapes such as circles, ovals, and squares. Hence making it a beginner-friendly choice!
Part 2 Best 6 Cartoon Characters Anyone Can Draw (with Free Video Tutorials)
01 Roger the alien
Roger the alien is one of the simplest cartoon characters to draw. This children’s classic cartoon character always intrigues children due to its bizarre shape. It fixes the image of an outer space characters in a child’s mind(If they exist).
What makes it easy to draw?
● The oval-shaped head is easy to draw since it is not very detailed.
● The character does not have any hair, hair is one of the more difficult parts to draw.
● The body features aren’t very prominent, hence making the character easy to draw.
Challenges you may encounter
● If you are a first-timer, then you may find it challenging to draw fingers and the toes.
● Getting the weird alien head shape might be a little difficult and may take you a few attempts.
● Making the two eyes exactly similar to each other may be challenging for a few of you.
02 Wakko Warner
What makes it easy to draw?
● The character generally has geometrical shapes and hence you can use shape tracers to draw a few parts.
● The appealing appearance of the character makes it interesting to draw.
● The eyes are not very difficult to recreate.
Challenges you may encounter
● The eyes are not very difficult to recreate.
● The shape of the mouth and the tongue that is sticking out is slightly complex.
● Perfecting the shape of the hair is a little challenging.
03 Cosmo
What makes it easy to draw?
● We recommend you to try this character out mainly because of its uniqueness.
● The eyes are not very complicated to draw.
● The body resembles a stick image and is hence simple to draw.
Challenges you may encounter
● The shape of the crown needs to be perfect, especially because of the tilt the crown has.
● The fingers are challenging to draw.
● The hair has a distinct shape, this shape needs to come out perfectly.
04 Courage the cowardly dog
What makes it easy to draw?
● Firstly, it’s one of the most favorite cartoons, hence it will ensure to keep you interested in the drawing.
● The hands and legs resemble stick figures and are simple to draw.
● The body structure is simple.
Challenges you may encounter
● Drawing a cartoon animal instead of a human being might be intriguing for beginners.
● The large eyes, which is one of the characteristic features needs to be perfect.
● The design of the ears is the trickiest part and could be difficult to draw.
05 Tom And Jerry
When we think of cartoons, the first few names that probably come to our mind are tom and jerry. This duo of a grumpy cat and a mysterious mouse has left an everlasting impact on the world of cartoons. The duo is famous throughout the world and is loved throughout age groups
Why do we recommend you to try your hands on this?
● This is a classic cartoon that almost everyone loves.
● There are several resources on the internet to help you draw the cartoon characters.
● The characters need not be perfect, even a close resemblance to them would be sufficient for the viewers to identify them due to their fame.
Challenges you may encounter
● You need to be careful with the proportion of sizes of tom and jerry.
● The structures of tom and jerry are not very simple to draw.
● Perfecting the grumpy expression on tom’s face and a frightened expression on jerry’s face is challenging.
05 Catdog
Catdog is another very interesting character. Who’d have imagined a cat and a dog morphed in a single body? Well, imagination has no end to it as they say! Catdog is a yellow cat and dog in a single body, it looks cute and at the same time intriguing.
Why do we recommend you try your hands on this?
● The cartoon character is mainly composed of geometrical shapes.
● The character is vividly colorful.
● The bright yellow color is super attractive and hence makes drawing catdog very fun.
Challenges you may encounter
● The character is illusional, you might have difficulty while deciding how to even look at it.
● The cat and dog faces are not very different from each other and have minute differences while drawing you need to be careful about having a distinct difference between the two faces.
Now that we’ve taken our baby steps towards understanding the art of drawing cartoons.
Key Takeaways from This Episode
● That’s a lot of knowledge for today, isn’t it? Today we’ve seen the basics of drawing cartoon characters.
● We also got our hands dirty by exploring a few easy cartoon characters that you could draw.
● Further, we saw the basic steps that you would need to take in order to draw the face of any cartoon character! All in all, we learned everything we needed to know to draw our first cartoon! What are you waiting for? Go try out drawing your first cartoon today!
How to Make Creative Animation Videos
Animation can explain whatever the mind of man can conceive – Walt Disney. Animation video is a craft in which images go through the process of conspiring, layout addition, and photographic chronology to create an illusion of action. In this article, let’s learn the importance of video animations and when and why to use this technique.
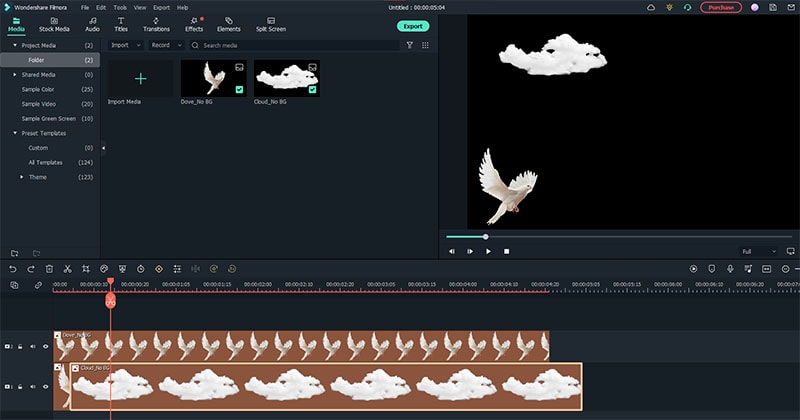
What are Video Animation and its importance?
Video as a marketing tool has become more popular but also more important. In this article, you can read more about why media marketing is getting more essential in comparison to text marketing. Therefore, an explainer video with Animation is an amazing way to show your target audience who you are, where you stand for, what you do and how you can solve the customer’s problem.
Video animation is an engaging technique that can help you comprehensively tell your story. Animated meaning can be better comprehended as a simulation of motion created by showing a series of pictures. Animated videos for a business catch the viewers and make for an enjoyable story-telling experience.
Often, animation videos are used to explain a concept or process. It’s straightforward to make these videos appealing and likable as you can primarily create them however you want. It can take longer to get the point across when people explain how to do something. Animations not only trigger emotions but spark conversations as well.
What are most common types of Animation?
The purpose of this article is to take you through the complexity of the different types of animation styles and methods. It also covers the track you should take (and what that path entails) to become an animator for each of the five types.
This guide is not about learning how to animate. But instead, it breaks down the five types of Animation available to you and what you’ll need to start animating: best software, schools, and courses.
Motion Graphics (Key framing): Motion graphics focus on making dynamic and exciting presentations of moving text logos and fundamental illustrations.
- Motion graphics can be 2D and 3D, and you’ll find them everywhere in news, sporting videos, the news, and other TV productions.
- Correct character animation is generally outside the scope of motion graphics, but many core animation principles also apply to motion graphics.
- Creating Motion Graphics depends on the plan used since video editing software often have different user interface or settings, but the idea is the same. Motion Graphics usually involves animating texts, pictures, or video clips using keyframing that is tweened to make a smooth motion between frames.
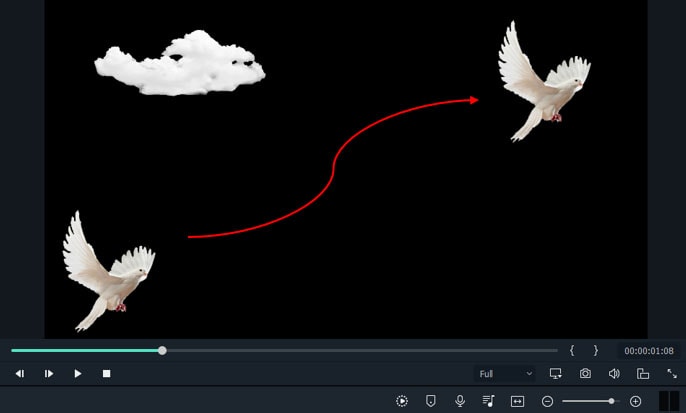
Traditional Animation: This is the classic type of Animation you’re probably most well known with. In the past, animators drew characters frame by frame, and then those pictures were moved onto transparent sheets for painting. That’s where the term animation comes from.
They started scanning drawings into the computer for digital coloring. The important thing is that hand-drawn animators still create their animation frame by frame using the same method and concept as in those old days of paper and cels.
How to Use Motion Graphics Animation in Filmora
Keyframes specify the start or end of a transition in a shot. A series of keyframes can give the semblance of the movement of an object. Keyframes include parameters such as Position, Scale, Opacity, and Rotation. These values can be changed and customized to make animations using keyframing.
Wondershare Filmora makes it really easy to use. Even learners or novices can use keyframe animation to create extraordinary videos. Plus, the keyframe templates are an added satisfaction. If you have limited time and need a quick fix, using Presets in the Animation tab is your best bet.
For this example, we’ll walk you through using Keyframes on the short video clip to make your Animation using Wondershare Filmora.
Free Download For Win 7 or later(64-bit)
Free Download For macOS 10.14 or later
Step1 Launch Wondershare Filmora from your system and select New Project.

Step2 Import your selected images. In this case I imported no background images to have a clear view on how key framing works.
Step3 Drag or add the image on the Timeline Panel.
In this case I use a dove and a cloud to demo the Motion graphics animation
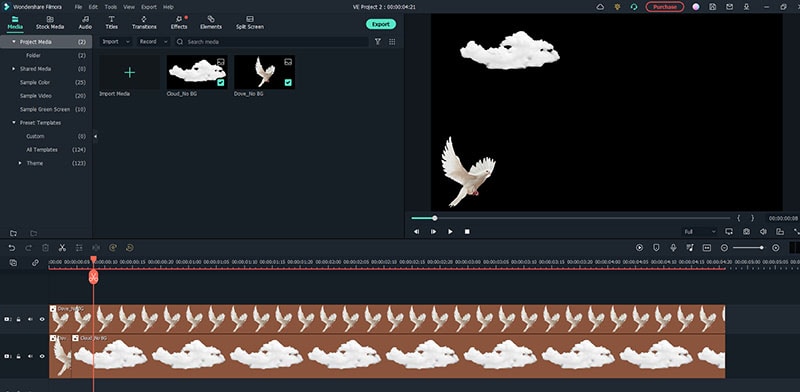
Step4 Double click the image then the Animation tab will display. Here, there are available presets, either the latest or the Legacy Animation, as indicated on the display that you can use.
There is also a tab if you want to customize your animations which requires premium account.
- Fade In
- Fade Out
- Pause
- Slide right
- Slide up
- Vortex In
- Vortex Out
- Zoom In
- Zoom Out
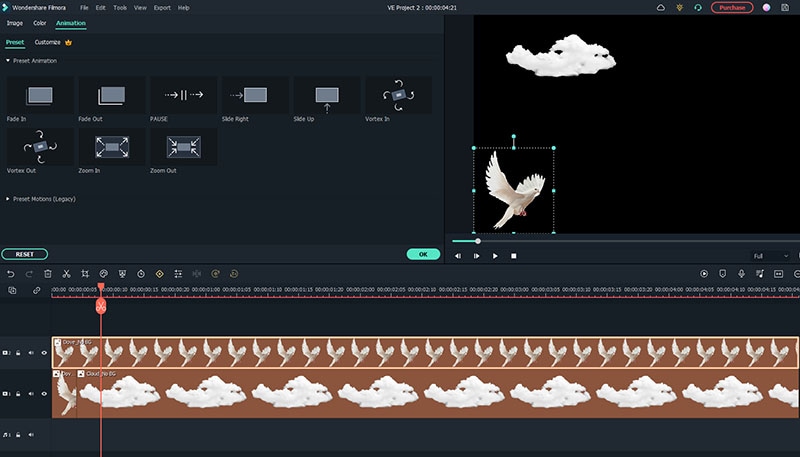
Step5 Select any animation you want by double-clicking the presets. In this case, I selected a slight right preset, and you will notice that the start arrow and end arrow indicator are displayed.
In the Timeline panel, you have an option to customize the start and end of the Preset. Just drag the arrow keys on either side to reach the keyframe you wish to change. Just simple.
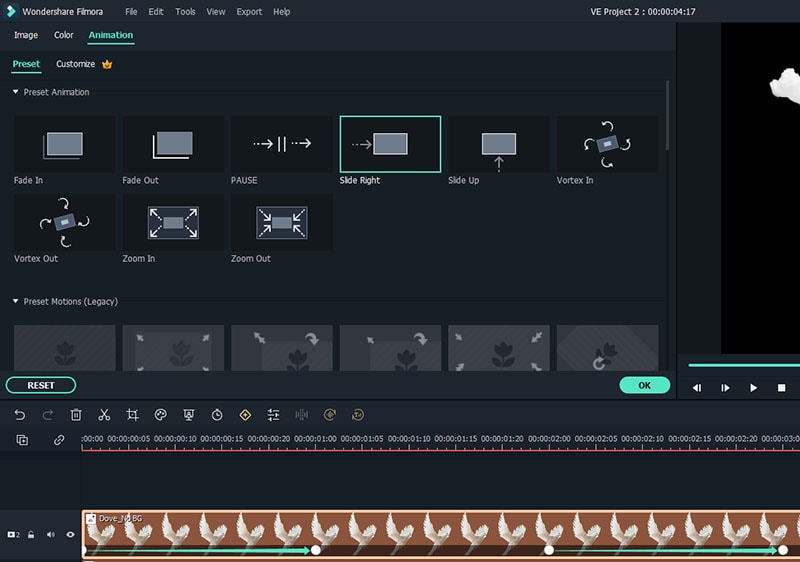
You can also do it on the cloud image that we’ve added.
Takeaway
Keyframing can bring steady images to life by introducing animations. With the super-easy keyframing tool in Filmora, you can now make invigorating videos. From easy to complex key framing. The customization property lets you unbind your creativity and take your editing to a professional level. Make your logo pop by adding keyframe animations. Better yet, you can also animate text.
No matter what industry you’re in, Animation can be relevant. Small start-ups to giant corporations use animation videos, too. Animation videos help to explain tricky processes or concepts, sell a product, or even to gain recognition for a product. Everyone resonates with Animation in some way or another. Almost everyone has watched cartoons or animations in their life, so these tend to grab attention more effectively.
We all love animation. From the animated cartoons we watched as kids to the latest and hottest animated music video, there’s something about seeing visuals come alive that captivates and inspires us. But video animation isn’t just for children, and it isn’t just for the entertainment value only.
Free Download For macOS 10.14 or later
Step1 Launch Wondershare Filmora from your system and select New Project.
Step2 Import your selected images. In this case I imported no background images to have a clear view on how key framing works.
Step3 Drag or add the image on the Timeline Panel.
In this case I use a dove and a cloud to demo the Motion graphics animation
Step4 Double click the image then the Animation tab will display. Here, there are available presets, either the latest or the Legacy Animation, as indicated on the display that you can use.
There is also a tab if you want to customize your animations which requires premium account.
- Fade In
- Fade Out
- Pause
- Slide right
- Slide up
- Vortex In
- Vortex Out
- Zoom In
- Zoom Out
Step5 Select any animation you want by double-clicking the presets. In this case, I selected a slight right preset, and you will notice that the start arrow and end arrow indicator are displayed.
In the Timeline panel, you have an option to customize the start and end of the Preset. Just drag the arrow keys on either side to reach the keyframe you wish to change. Just simple.
You can also do it on the cloud image that we’ve added.
Takeaway
Keyframing can bring steady images to life by introducing animations. With the super-easy keyframing tool in Filmora, you can now make invigorating videos. From easy to complex key framing. The customization property lets you unbind your creativity and take your editing to a professional level. Make your logo pop by adding keyframe animations. Better yet, you can also animate text.
No matter what industry you’re in, Animation can be relevant. Small start-ups to giant corporations use animation videos, too. Animation videos help to explain tricky processes or concepts, sell a product, or even to gain recognition for a product. Everyone resonates with Animation in some way or another. Almost everyone has watched cartoons or animations in their life, so these tend to grab attention more effectively.
We all love animation. From the animated cartoons we watched as kids to the latest and hottest animated music video, there’s something about seeing visuals come alive that captivates and inspires us. But video animation isn’t just for children, and it isn’t just for the entertainment value only.
Best 10 Animated Photo Collage Apps
Versatile Video Editor - Wondershare Filmora
An easy yet powerful editor
Numerous effects to choose from
Detailed tutorials provided by the official channel
What if you wish to animate images, adding movement to stationary objects in time? Well, there are apps for these purposes!
Videos and GIFs are a mainstay of social media. These days it’s rare to see a still photo online. The simplicity with which you can add filter and movement effects to your images has identified a proliferation of these online animated photos.
So what if you wish to apply animation to a still image? There are many apps for such purposes. Given below is a selection of the best apps you can use to animate images on both Android and iPhone devices with the help of animated photo collage apps.
In this article
01 [Top 10 Animated Photo Collage Apps ](#Part 1)
02 [Wondershare Filmora: The Advanced Editing App of 2022!](#Part 2)
Part 1 Top 10 Animated Photo Collage Apps
We’ve compiled an index of the top 10 animated collage apps compatible with photo enthusiasts and photographers at every level of expertise. Most of these amazing apps are available for both iOS and Android, so there are numerous options no matter what device you’re using.
Before showcasing your collage-making skills, gather the perfect images from your last photography project.
1. GIPHY
The GIPHY is the mega search engine for all things related to GIFs.
Here, you can easily upload and find reaction memes for anything under the sun; GIPHY is also available with a mobile app. It also helps you to frame your GIFs and animate photos. Then, you can upload them by using the inbuilt animation tools on the platform.
It consists of a sticker maker (available for iPhone X and later), and you can also add captions to your animated images or shoot your short videos.
2. Motionleap
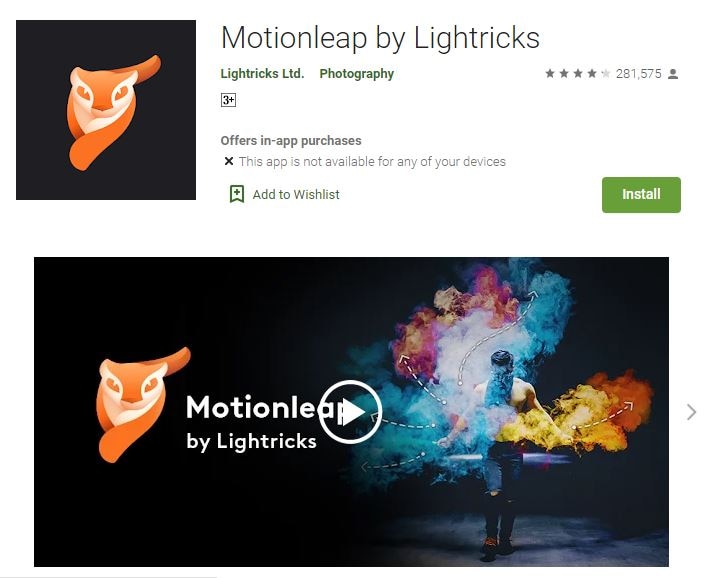
Motionleap is also an ideal animated photo collage app, and for a good reason. This app is highly reviewed, with 250,000 plus ratings of five stars in the Play Store.
Motionleap is a free animated photo collage app, although there’s a subscription and Pro version, too. Also, it doesn’t put a watermark over your image when you download it to your phone.
The app’s primary goal is animating still images and converting them into short, concise, and looping videos. Programming directional cues can easily do it into your image by dragging your thumb across the screen.
You can also freeze certain image sections and apply filters on top of your picture to frame an atmosphere within your image.
Unluckily, Motionleap saves your animated still photos in video format unless you’ve paid for a Pro account.
3. Movepic

Movepic is almost similar to Motionleap in that it animates images, but you can make a massive chunk of this animation with its inbuilt filters and overlays.
The only limitation is that you wouldn’t be able to remove the watermark without updating it to a VIP account. Movepic also saves your pictures automatically as a movie file than within a GIFformat.
4. ImgPlay
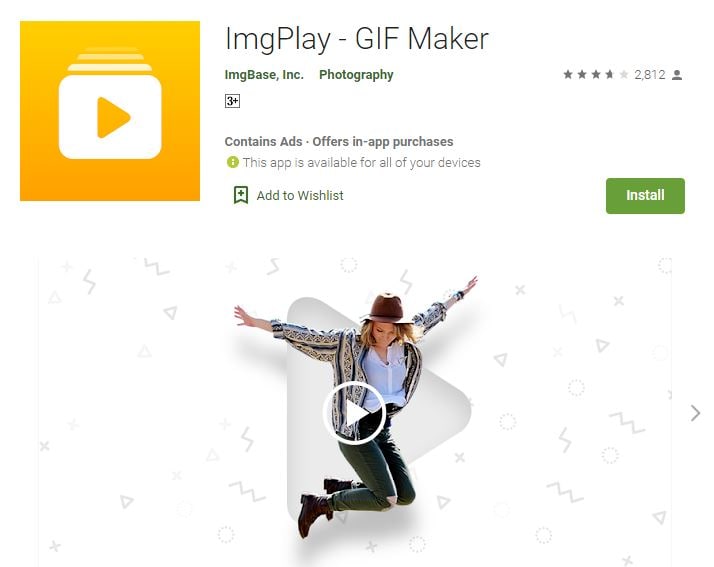
ImgPlay is another ideal animated collage maker app you can use to animate images. It creates ready-to-use animated images for the web and consists of easy-to-understand yet advanced controls. Unfortunately, it also adds a watermark on your image—one that you can’t remove unless you update to a complete account.
The process of making animated images online and GIFs can be in a couple of different ways within ImgPlay itself. You can use still photographs side-by-side, use burst images, or even videos.
5. Zoetropic
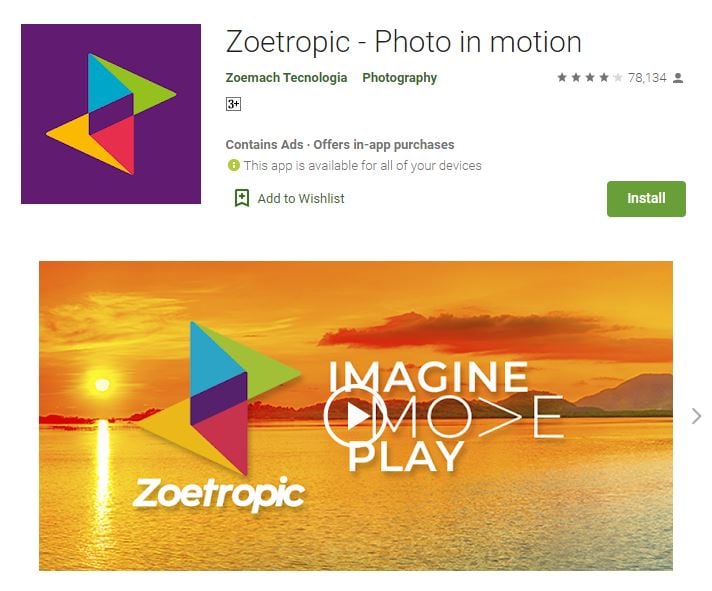
If you wish to animate your photo within a few minutes only, Zoetropic is for you. Though its functions aren’t as extensive as other apps we’ve mentioned, it does the job pretty well.
To get started, you choose your images and then select motion points. Next, you mask or stabilize the areas you want to keep still. Finally, you choose your overlays and animations. You can also change colors and add tags.
On the downside, it has limited the number of effects you can access on a free account. However, you might find what you’re considering if you are looking for a prompt manner to animate a photo online.
6. StoryZ
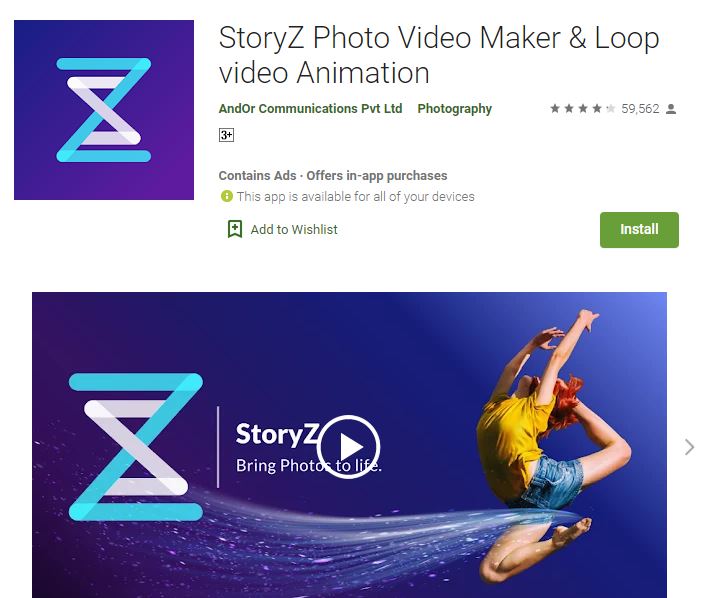
Despite its unattractive user interface, StoryZ is one of the useful apps on this list. It works excellent with still photographs to animate them effectively via various programmed paths of movements, overlays, and color filters—a lot of which are free and unique. It also automatically saves your files as GIFs.
One of the most incredible things about StoryZ is cutting the watermark from your image if you preview a quick ad before saving the file.
7. Lumyer
Lumyer is one of the useful animated photo collage apps on our list, which lets you add hundreds and thousands of effects to your pictures to animate them. So whether you wish to include sparkle or subtle weather effects, seasonal animations for Christmas and Halloween, or all-out scene transformations like appearing on a rollercoaster, Lumyer can do it.
If you’re okay with the watermark, Lumyer is a good choice, but otherwise, you may prefer one of our other recommended photo animation college apps.
8. VIMAGE 3D
VIMAGE got recognized with Google Play award in 2018. It can make some pretty good-looking animated photos in just a few clicks. There’s a wide variety of animations, filters, and sounds to select among a bundle of options.
You don’t even need to select the object because VIMAGE detects and replaces it for you quite automatically.
Similar to these apps, you do need to pay to remove the watermark, get access to the full effects library, and you can export your photos online in up to 2560p resolution.
9. Photo Bender
Photo Bender is an Android-specific animated photo collage app that helps you warp to animate photos digitally by coloring your image by stretching it, bending it, and using brushes. You can then export your transformed images as GIFs, JPEGs, MP4s, and PNGs.
While this app doesn’t contain ratings like others on this list, it is highly rated, so it’s still worth a look.
10. Werble
The primary purpose of Werble is to animate your images, and while the basic account is free, in-app purchases are also available. Most of Werble’s animations come through different filter effects that you can add on top of your images.
A downside to Werble is that it saves these images entirely automatically as GIFs, so they’re ready to use online. The limitation? However, you need to pay to cut the watermark that they place on your image. That watermark is huge enough to be disturbing.
Part 2 Wondershare Filmora: The Advanced Editing App of 2022
If you are tired of considering various animated photo collage apps, here is a section to introduce you to the best alternative with a reliable yet powerful video editor.
Filmora : This platform comes entirely loaded with advanced social integration options and editing functions. You can enjoy premium preloaded video editing services on your mobile devices with this tool. For video customization requirements, you can imply multiple caption options, title editing facilities, and advanced animation effects.
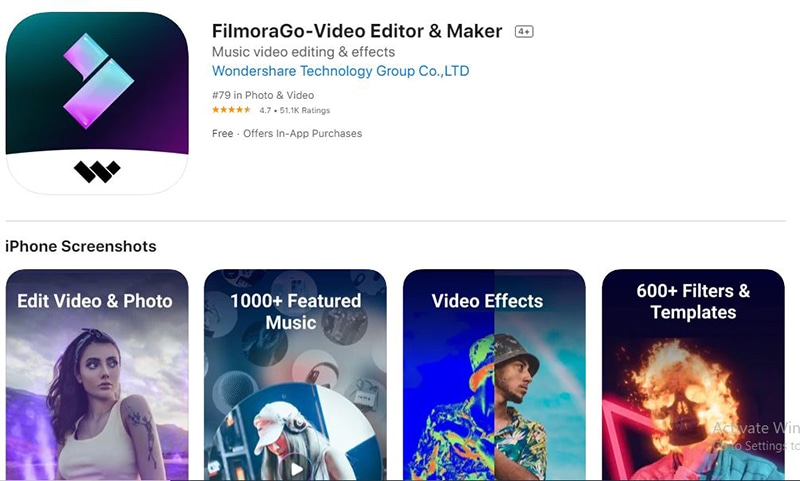
Filmora Features
- Filmora is available for both Android as well as iOS devices without any login.
- Filmora assists users in importing camera roll, Instagram, Google Plus, and Facebook collections with simplicity.
- This software tool contains different advanced features and highlights the missing components of the above-listed animated collage maker apps.
- You can add watermarks to all created videos.
- Above all, now share videos directly shared via Instagram, Facebook, WhatsApp, Email, Vimeo, YouTube, etc.
This advanced editing tool, Wondershare Filmora, can efficiently serve all your requirements. The good part is that it syncs well with iOS and Android devices so that you can access it anywhere with simplicity.
Also, Filmora provides is compatible with 4K videos, which is the most outstanding merit for developing informative video sessions and tutorials. Its ability to work offline with principal functions will simplify your editing tasks even when the internet connection is still an issue.
Wondershare Filmora
Get started easily with Filmora’s powerful performance, intuitive interface, and countless effects!
Try It Free Try It Free Try It Free Learn More >

AI Portrait – The best feature of Wondershare Filmora for gameplay editing
The AI Portrait is a new add-on in Wondershare Filmora. It can easily remove video backgrounds without using a green screen or chroma key, allowing you to add borders, glitch effects, pixelated, noise, or segmentation video effects.

Conclusion
Now that we’ve run through some great animated photo collage apps that can enliven your images, you can choose the ones you’re wandering to try out. They all follow roughly a similar concept, so you should select the ones you think will work best for such needs.
Gone are the days when you had to necessarily use a robust desktop computer to edit your videos and images. You can go forward to efficiently perform the same operation all from your smartphone with significant effects by using the Wondershare Filmora.
What if you wish to animate images, adding movement to stationary objects in time? Well, there are apps for these purposes!
Videos and GIFs are a mainstay of social media. These days it’s rare to see a still photo online. The simplicity with which you can add filter and movement effects to your images has identified a proliferation of these online animated photos.
So what if you wish to apply animation to a still image? There are many apps for such purposes. Given below is a selection of the best apps you can use to animate images on both Android and iPhone devices with the help of animated photo collage apps.
In this article
01 [Top 10 Animated Photo Collage Apps ](#Part 1)
02 [Wondershare Filmora: The Advanced Editing App of 2022!](#Part 2)
Part 1 Top 10 Animated Photo Collage Apps
We’ve compiled an index of the top 10 animated collage apps compatible with photo enthusiasts and photographers at every level of expertise. Most of these amazing apps are available for both iOS and Android, so there are numerous options no matter what device you’re using.
Before showcasing your collage-making skills, gather the perfect images from your last photography project.
1. GIPHY
The GIPHY is the mega search engine for all things related to GIFs.
Here, you can easily upload and find reaction memes for anything under the sun; GIPHY is also available with a mobile app. It also helps you to frame your GIFs and animate photos. Then, you can upload them by using the inbuilt animation tools on the platform.
It consists of a sticker maker (available for iPhone X and later), and you can also add captions to your animated images or shoot your short videos.
2. Motionleap
Motionleap is also an ideal animated photo collage app, and for a good reason. This app is highly reviewed, with 250,000 plus ratings of five stars in the Play Store.
Motionleap is a free animated photo collage app, although there’s a subscription and Pro version, too. Also, it doesn’t put a watermark over your image when you download it to your phone.
The app’s primary goal is animating still images and converting them into short, concise, and looping videos. Programming directional cues can easily do it into your image by dragging your thumb across the screen.
You can also freeze certain image sections and apply filters on top of your picture to frame an atmosphere within your image.
Unluckily, Motionleap saves your animated still photos in video format unless you’ve paid for a Pro account.
3. Movepic
Movepic is almost similar to Motionleap in that it animates images, but you can make a massive chunk of this animation with its inbuilt filters and overlays.
The only limitation is that you wouldn’t be able to remove the watermark without updating it to a VIP account. Movepic also saves your pictures automatically as a movie file than within a GIFformat.
4. ImgPlay
ImgPlay is another ideal animated collage maker app you can use to animate images. It creates ready-to-use animated images for the web and consists of easy-to-understand yet advanced controls. Unfortunately, it also adds a watermark on your image—one that you can’t remove unless you update to a complete account.
The process of making animated images online and GIFs can be in a couple of different ways within ImgPlay itself. You can use still photographs side-by-side, use burst images, or even videos.
5. Zoetropic
If you wish to animate your photo within a few minutes only, Zoetropic is for you. Though its functions aren’t as extensive as other apps we’ve mentioned, it does the job pretty well.
To get started, you choose your images and then select motion points. Next, you mask or stabilize the areas you want to keep still. Finally, you choose your overlays and animations. You can also change colors and add tags.
On the downside, it has limited the number of effects you can access on a free account. However, you might find what you’re considering if you are looking for a prompt manner to animate a photo online.
6. StoryZ
Despite its unattractive user interface, StoryZ is one of the useful apps on this list. It works excellent with still photographs to animate them effectively via various programmed paths of movements, overlays, and color filters—a lot of which are free and unique. It also automatically saves your files as GIFs.
One of the most incredible things about StoryZ is cutting the watermark from your image if you preview a quick ad before saving the file.
7. Lumyer
Lumyer is one of the useful animated photo collage apps on our list, which lets you add hundreds and thousands of effects to your pictures to animate them. So whether you wish to include sparkle or subtle weather effects, seasonal animations for Christmas and Halloween, or all-out scene transformations like appearing on a rollercoaster, Lumyer can do it.
If you’re okay with the watermark, Lumyer is a good choice, but otherwise, you may prefer one of our other recommended photo animation college apps.
8. VIMAGE 3D
VIMAGE got recognized with Google Play award in 2018. It can make some pretty good-looking animated photos in just a few clicks. There’s a wide variety of animations, filters, and sounds to select among a bundle of options.
You don’t even need to select the object because VIMAGE detects and replaces it for you quite automatically.
Similar to these apps, you do need to pay to remove the watermark, get access to the full effects library, and you can export your photos online in up to 2560p resolution.
9. Photo Bender
Photo Bender is an Android-specific animated photo collage app that helps you warp to animate photos digitally by coloring your image by stretching it, bending it, and using brushes. You can then export your transformed images as GIFs, JPEGs, MP4s, and PNGs.
While this app doesn’t contain ratings like others on this list, it is highly rated, so it’s still worth a look.
10. Werble
The primary purpose of Werble is to animate your images, and while the basic account is free, in-app purchases are also available. Most of Werble’s animations come through different filter effects that you can add on top of your images.
A downside to Werble is that it saves these images entirely automatically as GIFs, so they’re ready to use online. The limitation? However, you need to pay to cut the watermark that they place on your image. That watermark is huge enough to be disturbing.
Part 2 Wondershare Filmora: The Advanced Editing App of 2022
If you are tired of considering various animated photo collage apps, here is a section to introduce you to the best alternative with a reliable yet powerful video editor.
Filmora : This platform comes entirely loaded with advanced social integration options and editing functions. You can enjoy premium preloaded video editing services on your mobile devices with this tool. For video customization requirements, you can imply multiple caption options, title editing facilities, and advanced animation effects.
Filmora Features
- Filmora is available for both Android as well as iOS devices without any login.
- Filmora assists users in importing camera roll, Instagram, Google Plus, and Facebook collections with simplicity.
- This software tool contains different advanced features and highlights the missing components of the above-listed animated collage maker apps.
- You can add watermarks to all created videos.
- Above all, now share videos directly shared via Instagram, Facebook, WhatsApp, Email, Vimeo, YouTube, etc.
This advanced editing tool, Wondershare Filmora, can efficiently serve all your requirements. The good part is that it syncs well with iOS and Android devices so that you can access it anywhere with simplicity.
Also, Filmora provides is compatible with 4K videos, which is the most outstanding merit for developing informative video sessions and tutorials. Its ability to work offline with principal functions will simplify your editing tasks even when the internet connection is still an issue.
Wondershare Filmora
Get started easily with Filmora’s powerful performance, intuitive interface, and countless effects!
Try It Free Try It Free Try It Free Learn More >
AI Portrait – The best feature of Wondershare Filmora for gameplay editing
The AI Portrait is a new add-on in Wondershare Filmora. It can easily remove video backgrounds without using a green screen or chroma key, allowing you to add borders, glitch effects, pixelated, noise, or segmentation video effects.
Conclusion
Now that we’ve run through some great animated photo collage apps that can enliven your images, you can choose the ones you’re wandering to try out. They all follow roughly a similar concept, so you should select the ones you think will work best for such needs.
Gone are the days when you had to necessarily use a robust desktop computer to edit your videos and images. You can go forward to efficiently perform the same operation all from your smartphone with significant effects by using the Wondershare Filmora.
Also read:
- Updated 2024 Approved Popular Female & Male Disney Cartoon Characters
- 2024 Approved Create or Find Good Morning/Night GIFs
- Updated How to Combine Two/More GIFs Into One GIF Mergers Offered for 2024
- Create Animated Social Media Posts in Canva for 2024
- Updated 2024 Approved How to Make Animation Characters with the Best Character Creators
- New How to Liven Up Your Animate Website on Scroll for 2024
- New Best 10 Animoji Apps You Can Use to Edit Animoji
- Updated In 2024, Obtain and Create Animated GIF Icons
- New 6 Proven Ways to Dub Anime for Anime Voice Actor
- New In 2024, Make Well Done Animated GIF
- All About 3D Medical Animation And Its Uses
- New Interesting Fundamentals and Ultimate Guide to Animated Characters Drawings
- New In 2024, 15 Types of Cartoon Drawing Styles with Examples
- New Techniques on Making After Effects 2D Animation for 2024
- New 2024 Approved Animate Graphics in Canva
- New 2024 Approved The 15 Best Apps to Turn Photos Into Cartoons and Sketches
- How to Animate Image on Scroll and Text on Scroll, In 2024
- Updated In 2024, Learn How to Do Funny Cartoon Drawings
- 2024 Approved How to Make a Video a Live Photo
- New 2024 Approved How to Send and Add Snapchat GIFs 100 The Easy Way
- New Top 10 Best Photo to Animation Converters That Give You an Advantage for 2024
- New Tips on How to Get Awesome Background for Slideshow in PowerPoint
- New In 2024, How to Create an Adobe Collage?
- Popular Tips on Learning Animate Rigging
- Handy Tips From Adobe Animate Rigging Tutorial for All Learners
- In 2024, Mastering Android Device Manager The Ultimate Guide to Unlocking Your ZTE Axon 40 Lite Device
- In 2024, iSpoofer is not working On Oppo A2? Fixed | Dr.fone
- Best Vivo V29 Pattern Lock Removal Tools Remove Android Pattern Lock Without Losing Data
- The way to recover deleted photos on Moto G04 without backup.
- In 2024, Unlock Samsung Galaxy S24 Phone Password Without Factory Reset Full Guide Here
- How to restore wiped videos on Infinix Smart 8
- Remove Vivo Y27 4G unlock screen
- In 2024, Best 5 AI-Powered Script to Video Makers
- In 2024, The Magnificent Art of Pokemon Go Streaming On Vivo Y100 5G? | Dr.fone
- In 2024, 9 Mind-Blowing Tricks to Hatch Eggs in Pokemon Go Without Walking On Vivo X90S | Dr.fone
- Title: How to Make 3D Cartoon of Yourself
- Author: Elon
- Created at : 2024-04-21 09:30:23
- Updated at : 2024-04-22 09:30:23
- Link: https://animation-videos.techidaily.com/how-to-make-3d-cartoon-of-yourself/
- License: This work is licensed under CC BY-NC-SA 4.0.
