
:max_bytes(150000):strip_icc():format(webp)/GettyImages-184415451-9f59b82b64ac421cad0f28540a515b5f.jpg)
In 2024, 15 Best Collage Makers to Create Aesthetic Collages
15 Top Collage Makers to Create Aesthetic Collages
15 Best Collage Makers to Create Aesthetic Collages
An easy yet powerful editor
Numerous effects to choose from
Detailed tutorials provided by the official channel
It is rightly said that a picture is worth a thousand words and what if there are multiple pictures? It becomes a story!! Creating collages have been popular among people for a long and with high-end cameras, mobile phones, and excellent tools the task has become even easier and quicker.
So, if you too are willing to create an aesthetic collage for yourself or loved ones, there is no dearth of collage-making tools. So, to prevent you from the hassles of selecting one such tool, we have shortlisted the popular ones.
In this article
01 [Need for a collage-making tool?](#Part 1)
02 [Top 15 collage makers to create aesthetic collages](#Part 2)
03 [Best software to create video collages and edit videos professionally – Wondershare Filmora](#Part 3)
Part 1 Need for a collage-making tool?
Though aesthetic collage wallpaper making may sound simple, it is an artwork to create an impressive-looking collage. Adjusting the images in the right format, cropping their sizes, setting a background, setting colors, adding text are some of the many factors that go into the making of a visually appealing collage. So now, all these considerations can be taken care of by a good collage-making tool. All you need to do is pick up your choice of images, select a template and let the tool do its work.
In no time, a collage of your choice will be ready.
Part 2 Top 15 collage makers to create aesthetic collages
There is a wide range of online, desktop, and app-based collage-making tools available that can be selected based on your requirements. Check out the most popular ones as below.
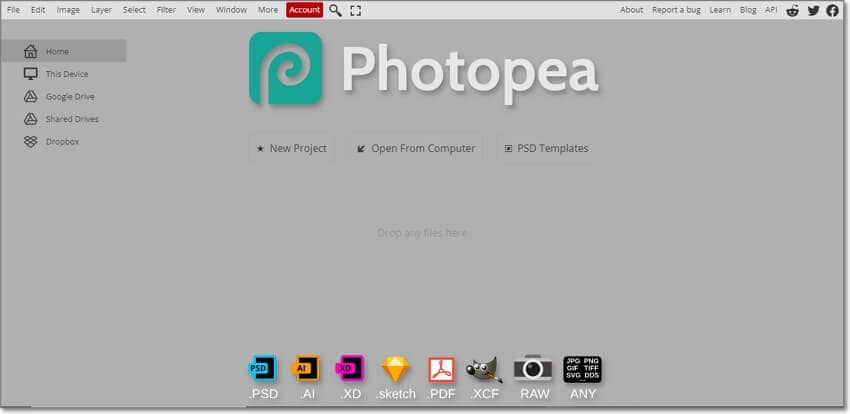
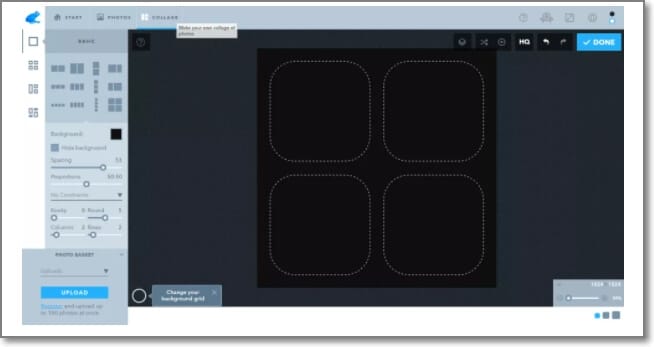
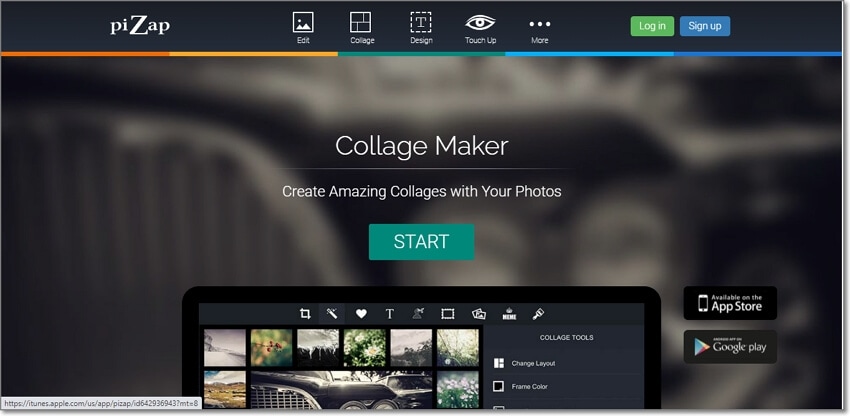
01Free Collage Maker Online
This is a free-to-use online tool that can be used for creating impressive aesthetic wallpaper collage quickly. The tool gives you the option to either choose your own layout or use one of the readymade templates. Multiple editing options are supported like adjust9ing exposure, contrast, shadows, white balance, and more. You can even turn, rotate, and distort the images. Using this online tool, you can even add the text and also customize it. A wide range of formats is supported by a tool like RAW, JPEG, PSD, PNG, and others.
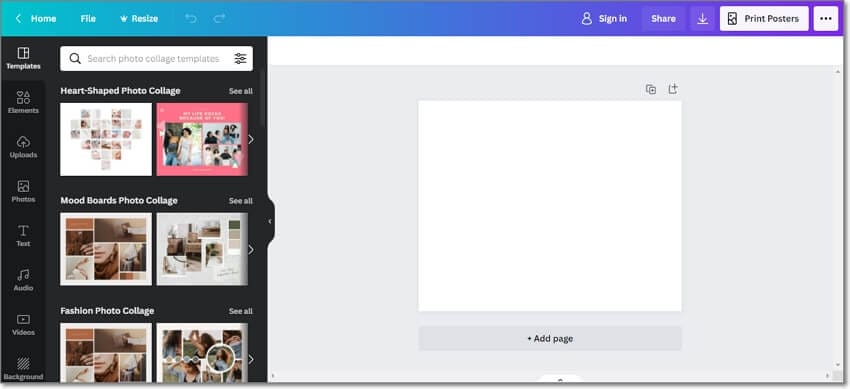
022. Canva
This is a widely used online tool that supports multiple functions including image collage creation and image editing. The tool allows adding images in all popular formats for creating a collage using several templates. The position of the photos, font of the text, shades, and other parameters can be adjusted as required. The tool also has a huge collection of images in different categories that can also be used for making aesthetic photo collage. Created collages can be saved in JPEG, PDF, and PNG format.
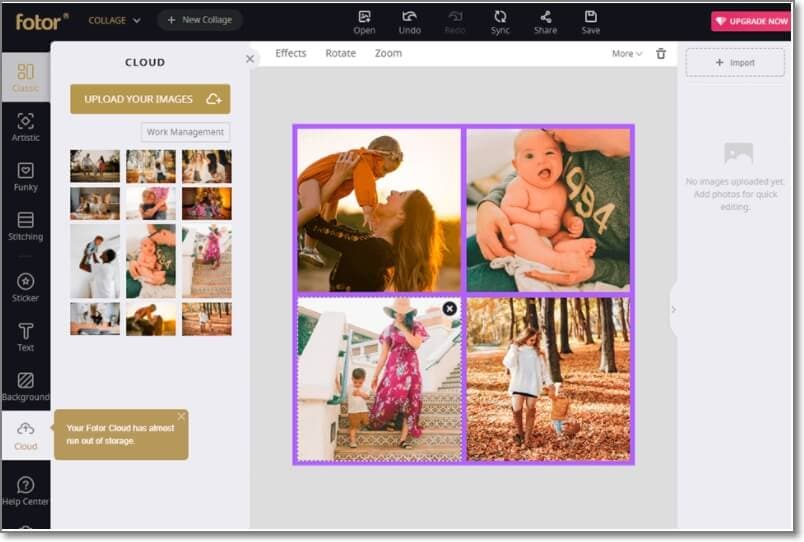
03Fotor
Creating high-quality trendy photo collages is easy and quick using this online tool that supports all popular image formats. There are several grids and template options available for you to create the desired collage. Stickers and text can be added to the created collage to add some fun elements. Several adjustments can be made like frame width, rounded corners, background color, aspect ratio, adding filters, effects, and more. With multiple features, the interface becomes quite confusing.
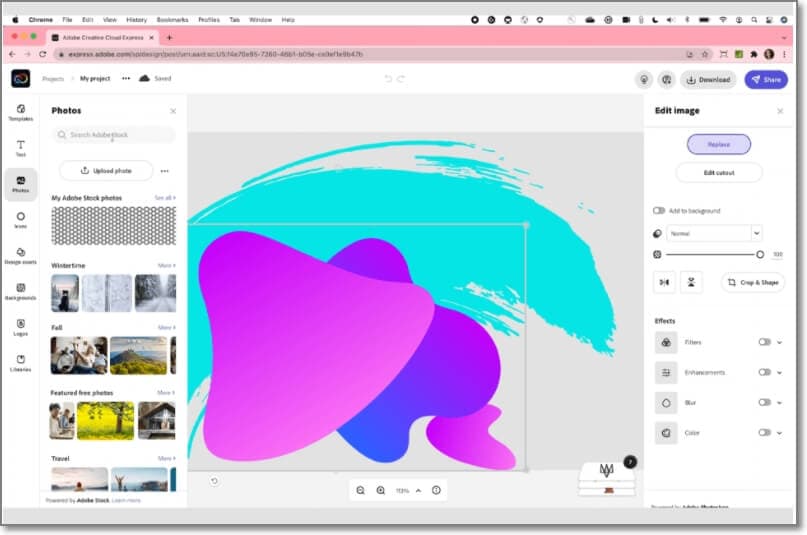
04Adobe Creative Cloud Express
Adobe is one of the most widely used tools when it comes to images and videos and creating a picture collage is one of the supported features. Using the online version of this tool, collages can be created quickly and only a free sign-up is needed. In addition to your images, you can even choose from the wide collection of royalty-free pictures. Theme-based templates are available to match your requirements and for customization, all basic editing features are supported. You can even add texts, filters, and effects to your collages.
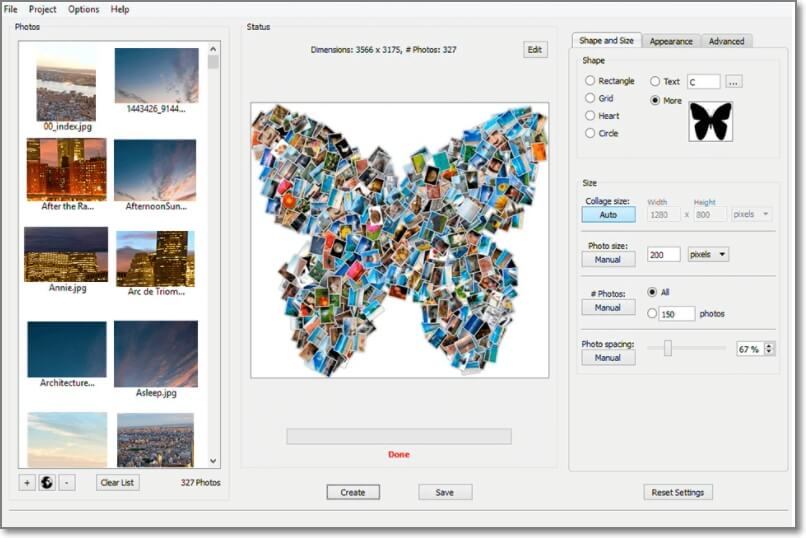
05Shape Collage
This automatic collage maker lets you create the desired collage in just a few simple steps. The interface is simple and all the basic editing functions for customization are supported. You can change the background, frame, the distance between the images, and several other factors. The tool is available to be used as desktop software, an online program, and also as an app that can be downloaded on a phone.
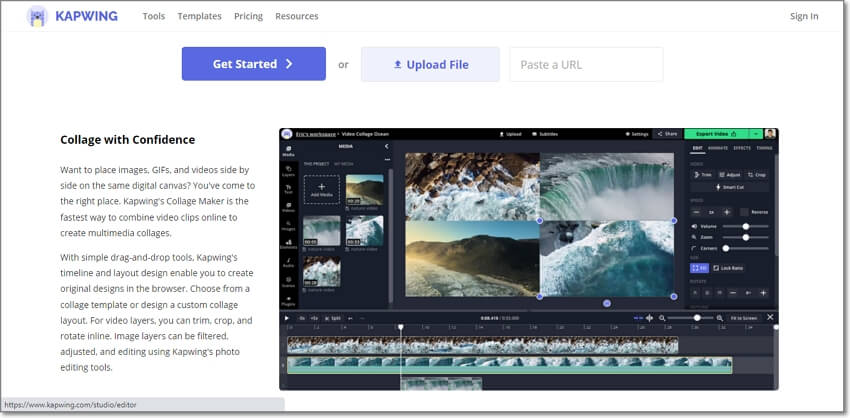
06Kapwing Collage Maker
Using this free online tool, collages can be made using images, videos, GIFs, as well as music files. The tool allows you to choose either a blank canvas or choose from multiple templates available at the site. The drag and drop features are supported and there are multiple editing options as well. The free version has a watermark on the created collages which can be removed after creating a free account. The created collage can be saved to the system or its URL can be obtained.
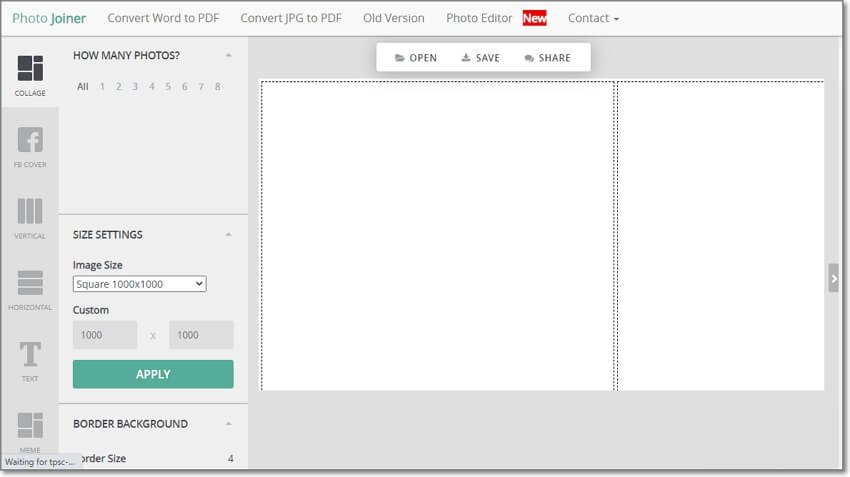
07Photo Joiner
As the name suggests, this is a photo joining tool that works from your browser and allows creating a picture collage. The interface is user-friendly and the work process is smooth where you just need to add the images, choose the layout, add text, and make required settings to create your choice of a template. The tool allows changing the image size, as well as the background. Using the tool, you can also create an FB cover in a simple step.
08Ribbet
This is a widely used photo editing tool that performs an array of additional features as well including collage making. The tool is available in a free as well as a premium paid version. The interface is smart and comes packed in with all basic collage-making functions. Decent templates are available to choose from with the option to adjust the size, edit exposure, lighting, and other parameters.
09BeFunky
Creating aesthetic, funky, and all types of different collages is quick and easy using this online tool. A variety of customizable layout options are available at the site to match your requirements. The images can be enhanced by changing the background color, pattern, adding fonts, effects, filters, and more. The free version of the tool supports basic functions while for more advanced options you need to purchase the premium plan. The tool is also available as an app for Android and iOS devices.
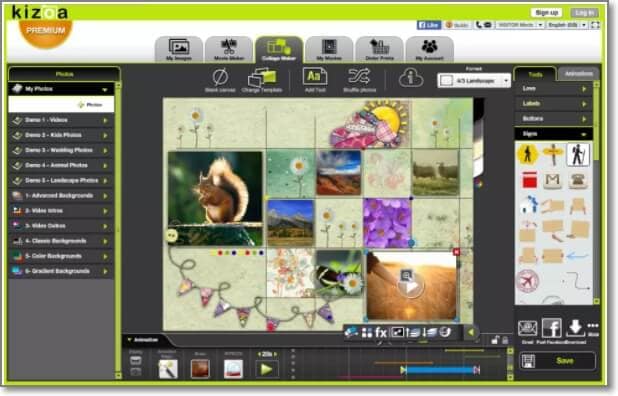
10Kizoa
This is a free online slideshow maker that allows creating a slideshow in different aspect ratios which is suitable for all types of platforms and screen sizes. An array of static and animated templates is available and you can even add multiple effects, text, and other elements to customize the collage as desired. There is also a paid version of the tool with added features and functions.
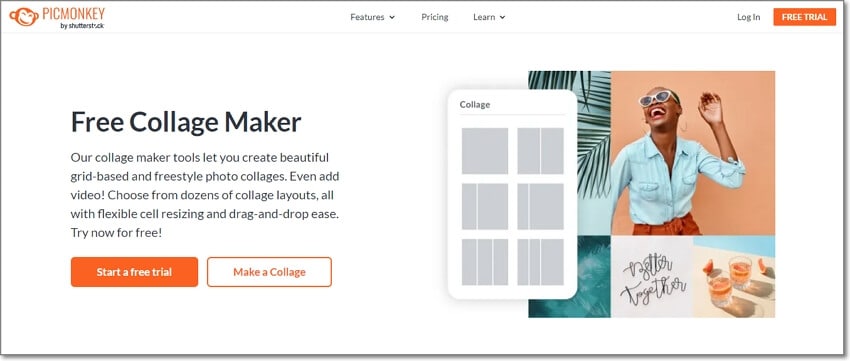
11PicMonkey
This is another popular name when it comes to collage-making tools. The tool allows creating freestyle as well as grid-based collages and in addition to the images, you can even add videos. Hundreds of collage layouts are available that can be further customized as needed. The function of auto-cell resizing adjusts all the images to the grids perfectly. Apart from your media files, you can even choose from the free stock of images and videos available at the site.
12piZap
Just like its interesting name, this online tool allows you to create interesting collages. The interface is intuitive and there are multiple templates to choose from. Further, the templates can be customized using an editing tool, adding filters, texts, effects, and other elements. The Facebook banner template is one of the interesting and useful features. For ad-free experience and additional functions, the pro-paid version can be selected.
13FotoJet
Using this browser-based tool you can create collages, posters, photo cards, YouTube banners, fun images, Facebook covers, and others. The templates in different categories are available to match your themes and create interesting collages. You can even choose to create a classic collage to keep it simple. Upgrading the tool to the paid version offers additional resources and features.

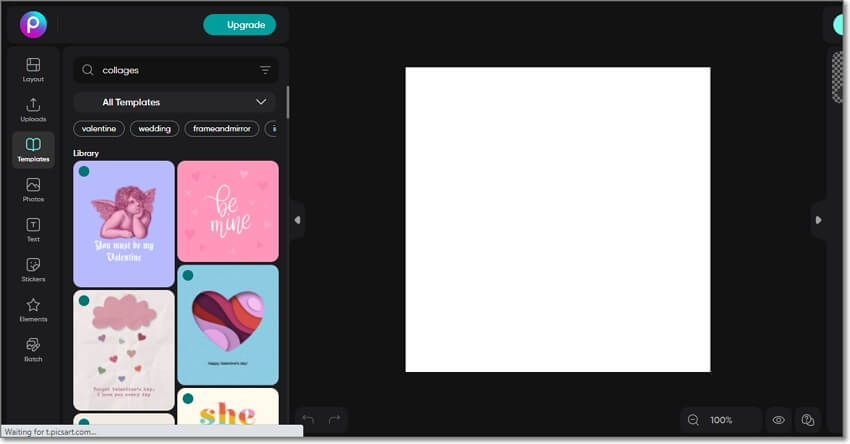
14Picsart Collage Maker
This is another simple to use free online collage-making tool that can create aesthetic and other types of collages. The interface of the tool is clean which makes the working smooth and quick and the images can be added from your system as well as from your social media accounts. Multiple effects, filters, clip-art, and other elements can be added to make the collage look impressive.
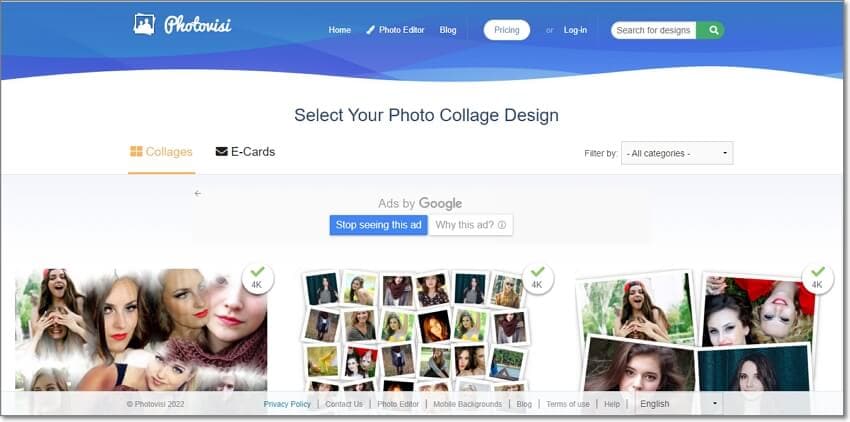
15Photovisi
Using this free online collage-making tool, you will have access to templates in different categories like abstract, magic, love, nature, and many categories more. You can even create Facebook covers, E-cards, and YouTube channel banners using the program. An array of built-in effects is available to customize the file and the tool also offers collaboration options. The created collage can be saved locally or can also be shared through an email.
Part 3 Best software to create video collages and edit videos professionally – Wondershare Filmora
Above we have listed the best tools for creating image collages and a few of them also has a feature to add videos. If you are want to create a video collage and looking for a tool that can edit your videos professionally, Wondershare Filmora is the best tool to consider. The animated split screen effect of the software allows you to view your videos on a split-screen thus making it look like a collage.
For all types of video editing requirements, this is an excellent tool available for download on Windows and Mac systems.
For Win 7 or later (64-bit)
For macOS 10.12 or later
● Key Takeaways from This Episode →
● To create aesthetics and other types of collages, a wide range of collage-maker tools are available.
● Choose from desktop tools, online programs, or apps as needed.
● To edit videos and create decent video collages, Wondershare Filmora is an excellent tool.
It is rightly said that a picture is worth a thousand words and what if there are multiple pictures? It becomes a story!! Creating collages have been popular among people for a long and with high-end cameras, mobile phones, and excellent tools the task has become even easier and quicker.
So, if you too are willing to create an aesthetic collage for yourself or loved ones, there is no dearth of collage-making tools. So, to prevent you from the hassles of selecting one such tool, we have shortlisted the popular ones.
In this article
01 [Need for a collage-making tool?](#Part 1)
02 [Top 15 collage makers to create aesthetic collages](#Part 2)
03 [Best software to create video collages and edit videos professionally – Wondershare Filmora](#Part 3)
Part 1 Need for a collage-making tool?
Though aesthetic collage wallpaper making may sound simple, it is an artwork to create an impressive-looking collage. Adjusting the images in the right format, cropping their sizes, setting a background, setting colors, adding text are some of the many factors that go into the making of a visually appealing collage. So now, all these considerations can be taken care of by a good collage-making tool. All you need to do is pick up your choice of images, select a template and let the tool do its work.
In no time, a collage of your choice will be ready.
Part 2 Top 15 collage makers to create aesthetic collages
There is a wide range of online, desktop, and app-based collage-making tools available that can be selected based on your requirements. Check out the most popular ones as below.
01Free Collage Maker Online
This is a free-to-use online tool that can be used for creating impressive aesthetic wallpaper collage quickly. The tool gives you the option to either choose your own layout or use one of the readymade templates. Multiple editing options are supported like adjust9ing exposure, contrast, shadows, white balance, and more. You can even turn, rotate, and distort the images. Using this online tool, you can even add the text and also customize it. A wide range of formats is supported by a tool like RAW, JPEG, PSD, PNG, and others.
022. Canva
This is a widely used online tool that supports multiple functions including image collage creation and image editing. The tool allows adding images in all popular formats for creating a collage using several templates. The position of the photos, font of the text, shades, and other parameters can be adjusted as required. The tool also has a huge collection of images in different categories that can also be used for making aesthetic photo collage. Created collages can be saved in JPEG, PDF, and PNG format.
03Fotor
Creating high-quality trendy photo collages is easy and quick using this online tool that supports all popular image formats. There are several grids and template options available for you to create the desired collage. Stickers and text can be added to the created collage to add some fun elements. Several adjustments can be made like frame width, rounded corners, background color, aspect ratio, adding filters, effects, and more. With multiple features, the interface becomes quite confusing.
04Adobe Creative Cloud Express
Adobe is one of the most widely used tools when it comes to images and videos and creating a picture collage is one of the supported features. Using the online version of this tool, collages can be created quickly and only a free sign-up is needed. In addition to your images, you can even choose from the wide collection of royalty-free pictures. Theme-based templates are available to match your requirements and for customization, all basic editing features are supported. You can even add texts, filters, and effects to your collages.
05Shape Collage
This automatic collage maker lets you create the desired collage in just a few simple steps. The interface is simple and all the basic editing functions for customization are supported. You can change the background, frame, the distance between the images, and several other factors. The tool is available to be used as desktop software, an online program, and also as an app that can be downloaded on a phone.
06Kapwing Collage Maker
Using this free online tool, collages can be made using images, videos, GIFs, as well as music files. The tool allows you to choose either a blank canvas or choose from multiple templates available at the site. The drag and drop features are supported and there are multiple editing options as well. The free version has a watermark on the created collages which can be removed after creating a free account. The created collage can be saved to the system or its URL can be obtained.
07Photo Joiner
As the name suggests, this is a photo joining tool that works from your browser and allows creating a picture collage. The interface is user-friendly and the work process is smooth where you just need to add the images, choose the layout, add text, and make required settings to create your choice of a template. The tool allows changing the image size, as well as the background. Using the tool, you can also create an FB cover in a simple step.
08Ribbet
This is a widely used photo editing tool that performs an array of additional features as well including collage making. The tool is available in a free as well as a premium paid version. The interface is smart and comes packed in with all basic collage-making functions. Decent templates are available to choose from with the option to adjust the size, edit exposure, lighting, and other parameters.
09BeFunky
Creating aesthetic, funky, and all types of different collages is quick and easy using this online tool. A variety of customizable layout options are available at the site to match your requirements. The images can be enhanced by changing the background color, pattern, adding fonts, effects, filters, and more. The free version of the tool supports basic functions while for more advanced options you need to purchase the premium plan. The tool is also available as an app for Android and iOS devices.
10Kizoa
This is a free online slideshow maker that allows creating a slideshow in different aspect ratios which is suitable for all types of platforms and screen sizes. An array of static and animated templates is available and you can even add multiple effects, text, and other elements to customize the collage as desired. There is also a paid version of the tool with added features and functions.
11PicMonkey
This is another popular name when it comes to collage-making tools. The tool allows creating freestyle as well as grid-based collages and in addition to the images, you can even add videos. Hundreds of collage layouts are available that can be further customized as needed. The function of auto-cell resizing adjusts all the images to the grids perfectly. Apart from your media files, you can even choose from the free stock of images and videos available at the site.
12piZap
Just like its interesting name, this online tool allows you to create interesting collages. The interface is intuitive and there are multiple templates to choose from. Further, the templates can be customized using an editing tool, adding filters, texts, effects, and other elements. The Facebook banner template is one of the interesting and useful features. For ad-free experience and additional functions, the pro-paid version can be selected.
13FotoJet
Using this browser-based tool you can create collages, posters, photo cards, YouTube banners, fun images, Facebook covers, and others. The templates in different categories are available to match your themes and create interesting collages. You can even choose to create a classic collage to keep it simple. Upgrading the tool to the paid version offers additional resources and features.
14Picsart Collage Maker
This is another simple to use free online collage-making tool that can create aesthetic and other types of collages. The interface of the tool is clean which makes the working smooth and quick and the images can be added from your system as well as from your social media accounts. Multiple effects, filters, clip-art, and other elements can be added to make the collage look impressive.
15Photovisi
Using this free online collage-making tool, you will have access to templates in different categories like abstract, magic, love, nature, and many categories more. You can even create Facebook covers, E-cards, and YouTube channel banners using the program. An array of built-in effects is available to customize the file and the tool also offers collaboration options. The created collage can be saved locally or can also be shared through an email.
Part 3 Best software to create video collages and edit videos professionally – Wondershare Filmora
Above we have listed the best tools for creating image collages and a few of them also has a feature to add videos. If you are want to create a video collage and looking for a tool that can edit your videos professionally, Wondershare Filmora is the best tool to consider. The animated split screen effect of the software allows you to view your videos on a split-screen thus making it look like a collage.
For all types of video editing requirements, this is an excellent tool available for download on Windows and Mac systems.
For Win 7 or later (64-bit)
For macOS 10.12 or later
● Key Takeaways from This Episode →
● To create aesthetics and other types of collages, a wide range of collage-maker tools are available.
● Choose from desktop tools, online programs, or apps as needed.
● To edit videos and create decent video collages, Wondershare Filmora is an excellent tool.
Techniques for Creating Animated Logo That Few People Know About
Some Techniques for Creating Animated Logo That Few People Know About
An easy yet powerful editor
Numerous effects to choose from
Detailed tutorials provided by the official channel
How you present your brand on the digital landscape has a huge impact on your company’s overall conversions.
![]()
This guide will walk you through different procedures for creating an animated logo using different solutions.
In this article
01 [Are There Wow Factors in Your Branding with Animation Effects?](#Part 1)
02 [How to Make an Animated Logo: a Step-by-step Guide](#Part 2)
03 [5 Steps to Animate Your Logo](#Part 3)
04 [What is the Best Software to Animate a Logo?](#Part 4)
05 [Want to Explore More Advanced Animation Skills?](#Part 5)
Part 1 Are There Wow Factors in Your Branding with Animation Effects?
As we mentioned in the earlier paragraph, an animated logo can do wonders for your digital presence. How? When you publish an animated logo on your website or any other social media profile, it’ll automatically help you garner the attention from website visitors. Creating an animated logo will also make it easier for the customers to remember your business days after they visited your website.
However, when you are creating an animated logo, it’ll be crucial to follow a few tips to achieve the best results. Here are a few factors that’ll help you create the best animated logo.
● Always start with a simple research to analyze the customer behavior
● Instead of starting with the final design, take your time and work on a few sketches at the beginning
● Understand where you are going to publish the logo and then, choose the right color-scheme accordingly
● When it comes to animated logos, overdoing the animations can also damage the overall visual appearance of your logo
Part 2 How to Make an Animated Logo: a Step-by-step Guide
So, now that we’ve explained the importance of animated logos, let’s start with the step-by-step process of creating an animated logo using different solutions. First, we’ll take a look at some of the premade logo templates that you can integrate and customize to speed up the entire process.
01Vortex Logo Reveal
If you want to use your animated logo in a dedicated video, Vortex logo reveal can be an ideal choice for the job. The template contains a 3-5 seconds animation that’ll reveal your actual logo in a suspenseful manner.
023D Logo Animation
This is a pre-made animated logo template in After Effects that you can integrate with a single tap. The template simply shatters the logo into pieces after the initial reveal to create a dramatic effect for the viewers.
03Gold Luxury Logo Reveal
If you’re worried that using 3D-effects might overdo the animations, you can use this simple gold luxury logo reveal template. As compared to the previous two templates, this one has a simple animation and will help you convey your message more effectively.
04Waving 3D Logo Reveal
This logo is a widely popular AE animated logo template that many users buy to make their logos more appealing. The template utilizes motion graphics and a clean animation to reveal the actual brand logo while keeping the viewers engaged throughout the process.
05Infinite Zoom Logo Reveal
Want to reveal your animated logo in a unique manner? This template has got you covered. The After Effects logo template will allow you to use different pictures to reveal the logo with the traditional zoom-out transition. You can use all the pictures that represent your brand to add the required business values to your logo.
06Space Animation
Space animation is another After Effects template that’s ideal for brands who want to reveal their brand logo in a visually appealing manner. Different stars in the cosmos will combine together to represent your logo and leave a great first impression on the viewers.
Part 3 5 Steps to Animate Your Logo
Now, let’s move towards the next phase of creating an animated logo, i.e., animating the logo itself. It doesn’t matter which software you use to get the job done, you can adhere to the following steps to achieve the best results and create a visually stunning animated logo.
01Prepare the Simple Logo
In every situation, you’ll first have to prepare the simple one-dimension logo that you’ve been using so far. To create this logo, you can use a wide variety of tools such as Adobe Photoshop or even a simple logo maker such as Canva. Keep in mind that you should implement all the customization on the design during this stage only.
02Import the Logo File
The next step towards creating the animated logo is to simply import your logo file into the tool that you want to use to do the job. For instance, if you are planning to use Adobe After Effects, simply click “File > Open” and select the logo file to load it into AE’s editing panel. Once the file is successfully imported, you can move towards the next step.
03Choose the Right Animation Template
Now, you can proceed towards choosing the right animation template for your animated logo. It doesn’t matter which software you’re using for creating an animated logo, you’ll find dozens of built-in templates that can be integrated into the design with one click. Choose any of these templates and move towards the next step.
04Apply the Keyframes
After you’ve successfully imported the file and chosen a dedicated animation template, the next step would be to apply the keyframes. In tools like After Effects, you’ll find a built-in slider that’ll allow you to adjust the keyframes to customize the animation.
05Make the Final Adjustments
Finally, make the final adjustments to the animation. For instance, you can customize the color scheme or color-grade the logo for better visual appearance. You can also add other objects on top of the design to enhance the overall quality of the logo.
Part 4 What is the Best Software to Animate a Logo?
Here are the top three software you can use to get started with your animated logo and complete the process.
01Pixteller
![]()
Pixteller is an online logo maker designed to allow users to animate their logos in an easy-to-use interface. Even if you are not an experienced designer, you’ll find it pretty easy to animate the logo using Pixteller. The tool has a plethora of built-in templates that’ll allow you to edit your logo without any hassle.
02Crello
![]()
Crello is another easy-to-use online tool you can use to animate your logos without any technical skills. Being a web-based software, you can use Crello anywhere you want. In every situation, it’ll allow you to design a visually appealing logo with high-quality animation.
03Adobe After Effects
![]()
Now, if you are an experienced designer and are familiar with the Adobe ecosystem, After Effects is the most reliable tool to get the job done. Even though AE has a pretty complicated user interface, it’ll allow you to design a stunning logo animation, especially if you are familiar with all its editing tools.
Key Takeaways from This Episode
● Creating an animated logo is one of the most reliable ways to boost your brand visibility and attract new customers
● While creating an animated logo, it’s crucial to follow a dedicated process to attain the best results
● To use animated logos in your promotional videos, you can use Filmora Pro and its built-in features to get the job done.
Samples of Cartoon Character Face to Inspire You
Samples of Cartoon Character Face to Inspire You
An easy yet powerful editor
Numerous effects to choose from
Detailed tutorials provided by the official channel
Being able to draw facial features is an essential skill for any animator. Whether you are a beginner at drawing faces or an experienced cartoon artist that has been drawing for years, this is a skill that can gradually improve with time. With the implementation and use of simple shapes, creating various facial features and cartoon styles can be done quickly.
The methods of creating funny face cartoon characters are suitable for everyone, even if they do not have a single day of illustrating experience. These methods presented in this article are easily accessible to provide you with different results depending on your budget and your desired outcome.
The act of drawing cartoon faces can be effortless, and in this article, we will give you some fundamental samples of how you can draw cartoon faces of your own.
In this article
01 [Learn to Understand the Core of Cartoon Style](#Part 1)
02 [Top 12 Cartoon Face Examples](#Part 2)
03 [How to Draw a Cartoon Face - For Beginners](#Part 3)
04 [How to Easily Turn Yourself into a Cartoon](#Part 4)
Part 1 Learn to Understand the Core of Cartoon Style
First, you need to simplify the different parts of the cartoon character face to pick up on very subtle facial expressions and features. For example, the eyes’ shape and size will help determine if the person is feeling sad, excited, happy, excited, or sad. In addition, the amount of lift under a person’s eyebrows can help determine whether a person is mad or not.
These facial expressions are crucial to how a person communicates. It has got to the point that we can read someone’s face without truly understanding which parts of the face convey that emotion. However, these days we get exposed to everyday adaptations of facial expressions, especially with the invention of Instagram, Snapchat, and cartoon face filters.
Consequently, cartoons are a combination of different shapes that are being put together and are not difficult if the focus is on each shape individually and the process breaks down step by step.
Cartoons are a mixture of different shapes put together. It’s not difficult if you focus on each shape individually and break down the process step by step.
Finally, understanding these unconscious and subtle differences in facial expressions is crucial when planning out an animated character. Afterward, when understood, you can simplify the features to be recognizable by your audience.
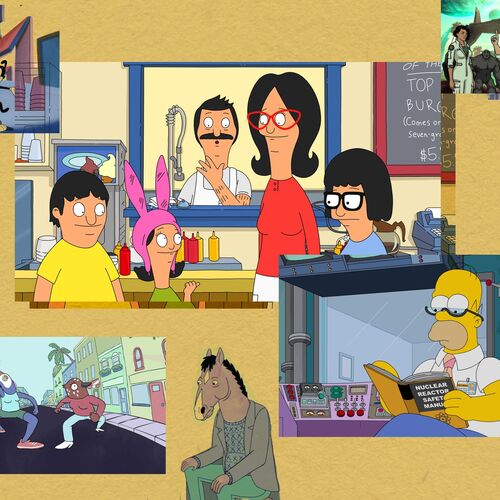
Part 2 Top 12 Cartoon Face Examples
Cartoon character faces are gaining immense importance in design art due to their universality. Cartoon faces can represent people in several situations and add a comic or satirical twist to dull topics by highlighting their importance. However, drawing cartoon faces require a lot of skill and differentiation, and graphic designers, while working on basic and universal templates, always try and introduce unique elements.
Here are the top 10 examples of cartoon character faces you can choose from when you want to make your designs:
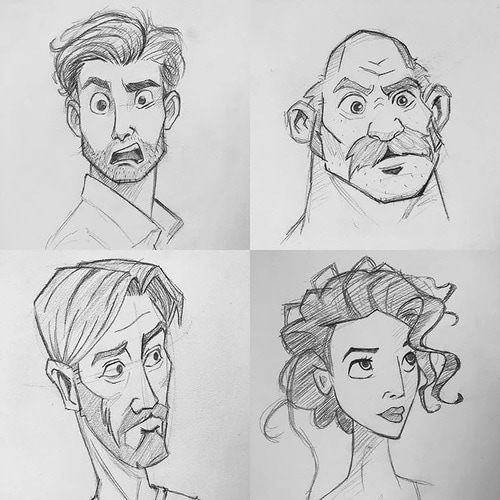
01Men and Women
This sketch features different facial expressions made by older men and women.
02Stretch and Squash
This photo shows the difference between squashing and stretching the face and provides references for extreme squash and extreme stretch.

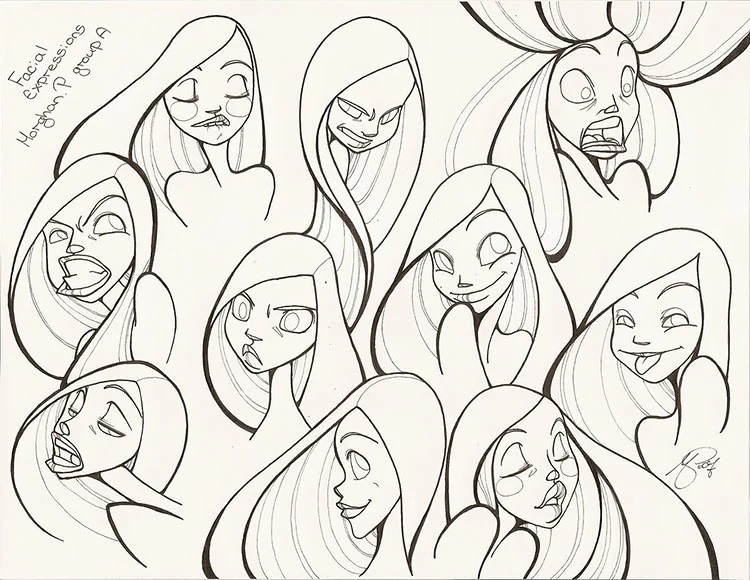
03Dramatic Expressions
The expressions drawn here are super fun and dramatic. However, it is a great way to have fun and practice how to draw facial expressions simultaneously.
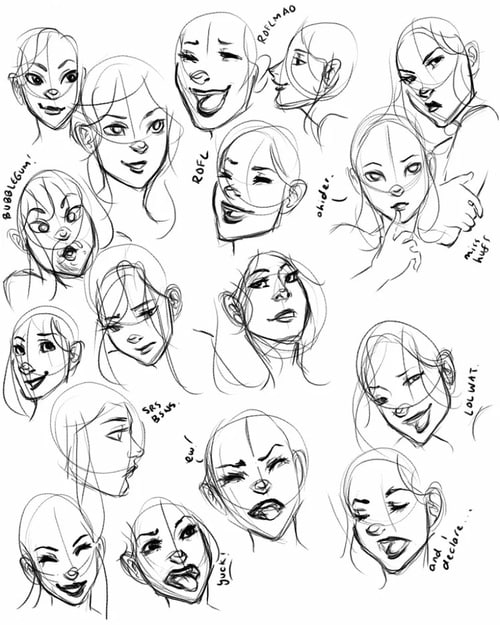
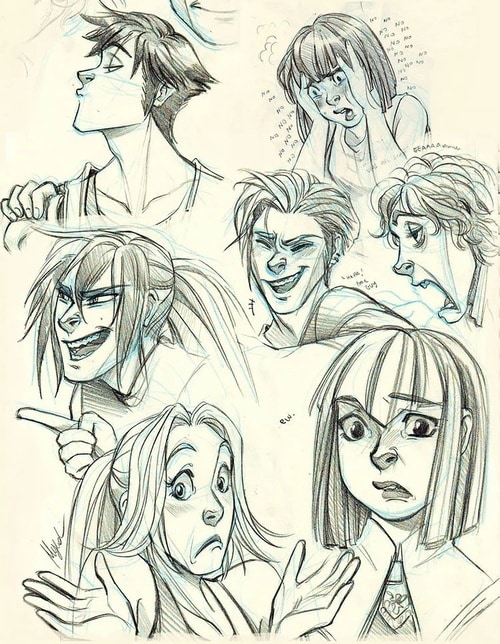
04Quick Expressive Sketches
With this, you can practice how to draw different facial expressions by doing quick sketches like this one. Perhaps you do not need to pay attention to perfection.
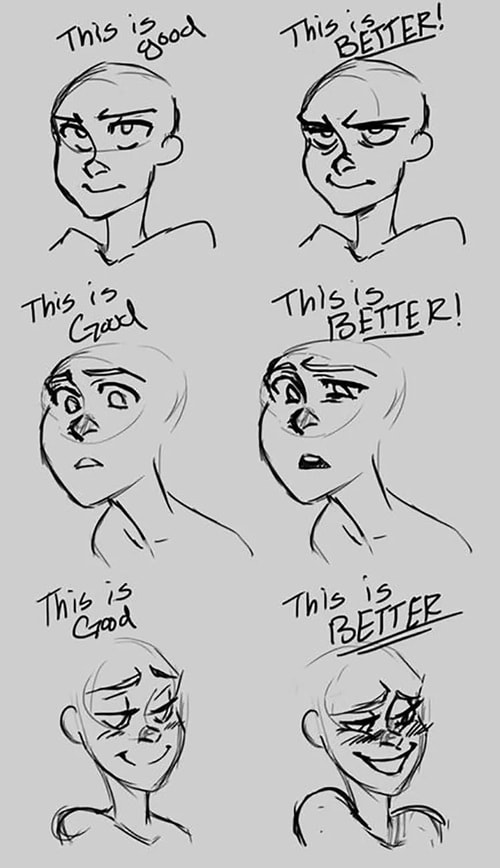
05This Is Good This Is Better
With this facial expression, you can see a good look and an even better expression. It shows the difference that subtle changes can make to your facial expressions**.**
06Male and Female Expressions
This includes both male and female expressions to express the facial reaction of both genders, like some funny cartoon characters face.
07Quick Sketches
This type of facial expression will help you get better at drawing cartoons, and you can use do some quick sketches every day.

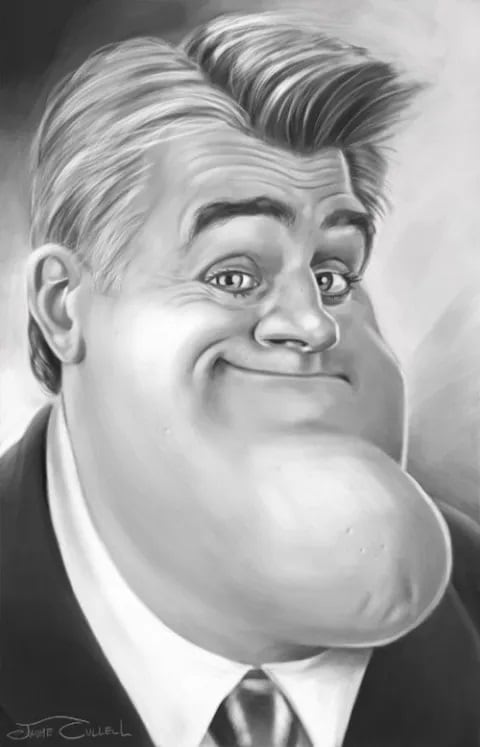
08Jay Leno’s facial expression
Here, it is being exaggerated on a few of his most prominent facial features, including his chin. It is kind of a fat face cartoon character.
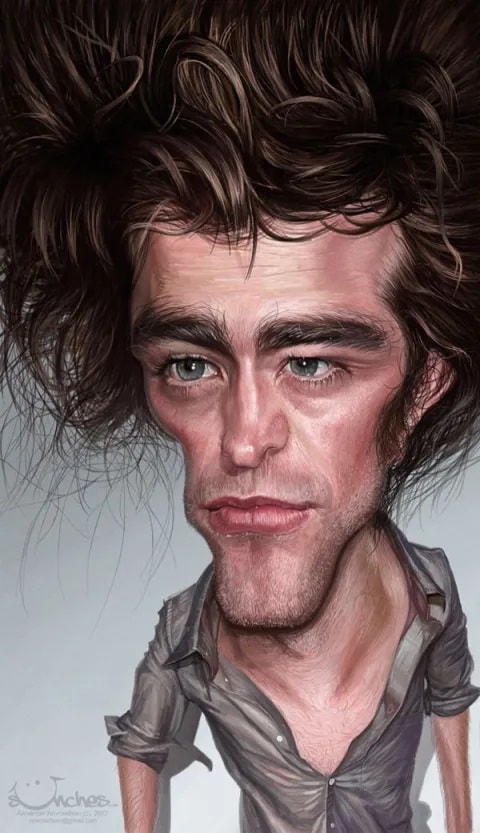
09Robert Pattinson Facials
In this photo, his head shape was distorted to show the thinness of his face, and his big hair also accentuates this prominent feature further.
10A,I,U,O,AE,M Facials
With this, you can practice how to draw your facial expression by pronouncing a, i, u, o, ae, m.

Part 3 How to Draw a Cartoon Face - For Beginners
Here, we have written down 7-step to follow on how to draw a cartoon character face as a beginner effectively.
● Step 1: Plan and Prepare
This is the first step is to plan out exactly what this character will convery through its expression while drawing a cartoon character.
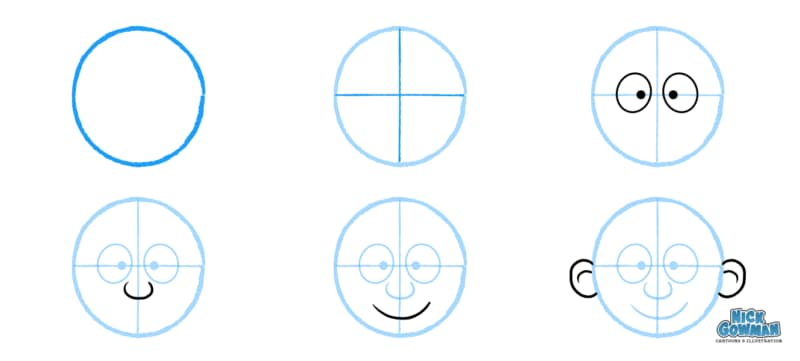
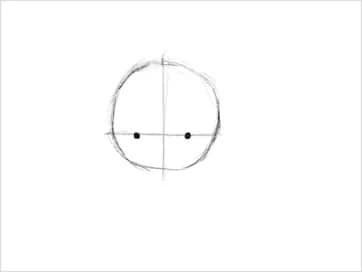
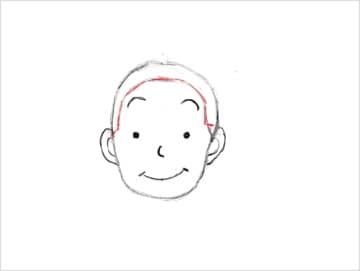
● Step 2: Drawing A Cartoon Head
Next is time to start sketching out the shape of the head based on the plan you have made. Whatsoever shape you decide to use for your character, start with a circle to serve as the basic shape for the head.
● Step 3: Drawing Cartoon Eyes
Now, you need to draw the eye of the character, which is a crucial step because the eye is the essential part of their expression. To get the character’s eyes in the right place, you should carefully sketch the horizontal or vertical dimension lines.
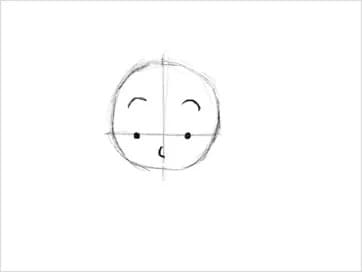
● Step 4: Drawing A Cartoon Nose
The simpler the nose is, the better it looks in a cartoon. Ensure to keep a proper ratio between the mouth, eyes, and nose so that it does not look too crowded together.
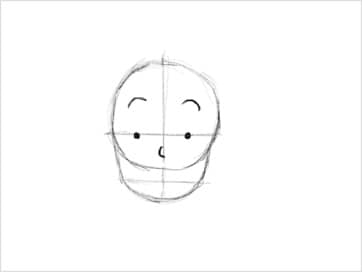
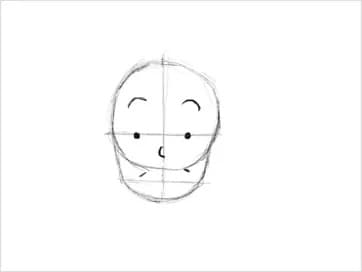
● Step 5: Shaping the Face
In shaping the face, one needs to be mindful of the character, which will help to determine how to shape the jawline and head. For example, for a girl, the face should be narrower and have the chin come to a bit of a point at the end, whereas, for a boy, it requires that the face is a bit bolder and focuses more on the definition of the jawline.
● Step 6: Drawing A Cartoon Mouth
The mouth is another essential part of the cartoon character’s expression and a key indicator of how the character is feeling. It portrays whether you want the character to smile, frown, yell, be nervous, or be neutral.
● Step 7: Drawing Cartoon Hair
Next, you need to draw the cartoon hair, and, in some cases, the cartoon hair is a significant part of their appearance as it is a way to convey your character’s personality, appearance, style, or gender.
● Step 8: Coloring
Another part requires you to paint your character to improve the texture and make it beautiful.
Part 4 How to Easily Turn Yourself into a Cartoon
Are you looking to turn yourself into a cartoon? This is very necessary as it provides you with a great way to integrate diverse characters into your brand’s marketing while simultaneously keeping your content personalized.
However, after converting a picture to a cartoon character face, you can decide to animate it, and the best tool is Wondershare Filmora Video Editor . Animation is a great way to advertise your business, especially during times like these. it is a clever way for leaders, CEOs, and managers to connect with their remote workers and boost engagement, company culture, and ultimately work morale. Filmora is also a great tool to create creative and powerful animation with tons of follow-come effect that enables you to carry it out effectively and efficiently. In this section, we will guide you on how to turn yourself into a cartoon easily:
Step 1: Visit Powtoon.com and sign up for a free account, then click on the “build your character” option from the dropdown menu.
Step 2: Next is to select the cartoon gender you want.
Step 3: Finally, you can customize your character’s facial features such as skin, hair, color, clothes, and animated gestures.

Step 4: Once you are satisfied with the result, you can save it on your device or share it on social media
For Win 7 or later (64-bit)
For macOS 10.12 or later
● Ending Thoughts →
● Thus, we saw how to easily cartoon your character’s face via some samples to help you out. With the method listed above, you can easily use it to create a square-faced cartoon character or draw a fat face cartoon character.
● This article also explained how to cartoon yourself. However, to cartoon your video or create a cartoon animated video, we recommend that you use Filmora, its keyframing feature to help you carry this out effectively.
Being able to draw facial features is an essential skill for any animator. Whether you are a beginner at drawing faces or an experienced cartoon artist that has been drawing for years, this is a skill that can gradually improve with time. With the implementation and use of simple shapes, creating various facial features and cartoon styles can be done quickly.
The methods of creating funny face cartoon characters are suitable for everyone, even if they do not have a single day of illustrating experience. These methods presented in this article are easily accessible to provide you with different results depending on your budget and your desired outcome.
The act of drawing cartoon faces can be effortless, and in this article, we will give you some fundamental samples of how you can draw cartoon faces of your own.
In this article
01 [Learn to Understand the Core of Cartoon Style](#Part 1)
02 [Top 12 Cartoon Face Examples](#Part 2)
03 [How to Draw a Cartoon Face - For Beginners](#Part 3)
04 [How to Easily Turn Yourself into a Cartoon](#Part 4)
Part 1 Learn to Understand the Core of Cartoon Style
First, you need to simplify the different parts of the cartoon character face to pick up on very subtle facial expressions and features. For example, the eyes’ shape and size will help determine if the person is feeling sad, excited, happy, excited, or sad. In addition, the amount of lift under a person’s eyebrows can help determine whether a person is mad or not.
These facial expressions are crucial to how a person communicates. It has got to the point that we can read someone’s face without truly understanding which parts of the face convey that emotion. However, these days we get exposed to everyday adaptations of facial expressions, especially with the invention of Instagram, Snapchat, and cartoon face filters.
Consequently, cartoons are a combination of different shapes that are being put together and are not difficult if the focus is on each shape individually and the process breaks down step by step.
Cartoons are a mixture of different shapes put together. It’s not difficult if you focus on each shape individually and break down the process step by step.
Finally, understanding these unconscious and subtle differences in facial expressions is crucial when planning out an animated character. Afterward, when understood, you can simplify the features to be recognizable by your audience.
Part 2 Top 12 Cartoon Face Examples
Cartoon character faces are gaining immense importance in design art due to their universality. Cartoon faces can represent people in several situations and add a comic or satirical twist to dull topics by highlighting their importance. However, drawing cartoon faces require a lot of skill and differentiation, and graphic designers, while working on basic and universal templates, always try and introduce unique elements.
Here are the top 10 examples of cartoon character faces you can choose from when you want to make your designs:
01Men and Women
This sketch features different facial expressions made by older men and women.
02Stretch and Squash
This photo shows the difference between squashing and stretching the face and provides references for extreme squash and extreme stretch.
03Dramatic Expressions
The expressions drawn here are super fun and dramatic. However, it is a great way to have fun and practice how to draw facial expressions simultaneously.
04Quick Expressive Sketches
With this, you can practice how to draw different facial expressions by doing quick sketches like this one. Perhaps you do not need to pay attention to perfection.
05This Is Good This Is Better
With this facial expression, you can see a good look and an even better expression. It shows the difference that subtle changes can make to your facial expressions**.**
06Male and Female Expressions
This includes both male and female expressions to express the facial reaction of both genders, like some funny cartoon characters face.
07Quick Sketches
This type of facial expression will help you get better at drawing cartoons, and you can use do some quick sketches every day.
08Jay Leno’s facial expression
Here, it is being exaggerated on a few of his most prominent facial features, including his chin. It is kind of a fat face cartoon character.
09Robert Pattinson Facials
In this photo, his head shape was distorted to show the thinness of his face, and his big hair also accentuates this prominent feature further.
10A,I,U,O,AE,M Facials
With this, you can practice how to draw your facial expression by pronouncing a, i, u, o, ae, m.
Part 3 How to Draw a Cartoon Face - For Beginners
Here, we have written down 7-step to follow on how to draw a cartoon character face as a beginner effectively.
● Step 1: Plan and Prepare
This is the first step is to plan out exactly what this character will convery through its expression while drawing a cartoon character.
● Step 2: Drawing A Cartoon Head
Next is time to start sketching out the shape of the head based on the plan you have made. Whatsoever shape you decide to use for your character, start with a circle to serve as the basic shape for the head.
● Step 3: Drawing Cartoon Eyes
Now, you need to draw the eye of the character, which is a crucial step because the eye is the essential part of their expression. To get the character’s eyes in the right place, you should carefully sketch the horizontal or vertical dimension lines.
● Step 4: Drawing A Cartoon Nose
The simpler the nose is, the better it looks in a cartoon. Ensure to keep a proper ratio between the mouth, eyes, and nose so that it does not look too crowded together.
● Step 5: Shaping the Face
In shaping the face, one needs to be mindful of the character, which will help to determine how to shape the jawline and head. For example, for a girl, the face should be narrower and have the chin come to a bit of a point at the end, whereas, for a boy, it requires that the face is a bit bolder and focuses more on the definition of the jawline.
● Step 6: Drawing A Cartoon Mouth
The mouth is another essential part of the cartoon character’s expression and a key indicator of how the character is feeling. It portrays whether you want the character to smile, frown, yell, be nervous, or be neutral.
● Step 7: Drawing Cartoon Hair
Next, you need to draw the cartoon hair, and, in some cases, the cartoon hair is a significant part of their appearance as it is a way to convey your character’s personality, appearance, style, or gender.
● Step 8: Coloring
Another part requires you to paint your character to improve the texture and make it beautiful.
Part 4 How to Easily Turn Yourself into a Cartoon
Are you looking to turn yourself into a cartoon? This is very necessary as it provides you with a great way to integrate diverse characters into your brand’s marketing while simultaneously keeping your content personalized.
However, after converting a picture to a cartoon character face, you can decide to animate it, and the best tool is Wondershare Filmora Video Editor . Animation is a great way to advertise your business, especially during times like these. it is a clever way for leaders, CEOs, and managers to connect with their remote workers and boost engagement, company culture, and ultimately work morale. Filmora is also a great tool to create creative and powerful animation with tons of follow-come effect that enables you to carry it out effectively and efficiently. In this section, we will guide you on how to turn yourself into a cartoon easily:
Step 1: Visit Powtoon.com and sign up for a free account, then click on the “build your character” option from the dropdown menu.
Step 2: Next is to select the cartoon gender you want.
Step 3: Finally, you can customize your character’s facial features such as skin, hair, color, clothes, and animated gestures.
Step 4: Once you are satisfied with the result, you can save it on your device or share it on social media
For Win 7 or later (64-bit)
For macOS 10.12 or later
● Ending Thoughts →
● Thus, we saw how to easily cartoon your character’s face via some samples to help you out. With the method listed above, you can easily use it to create a square-faced cartoon character or draw a fat face cartoon character.
● This article also explained how to cartoon yourself. However, to cartoon your video or create a cartoon animated video, we recommend that you use Filmora, its keyframing feature to help you carry this out effectively.
How to Create YouTube Intro Animation Like a Pro
How to Create a YouTube Intro Animation like a Pro
An easy yet powerful editor
Numerous effects to choose from
Detailed tutorials provided by the official channel
YouTube video intro animation is the short introductory clips and plays at the beginning of a YouTube video. YouTube intro videos as in almost everywhere, most times probably without giving them a second chance or understanding what their purpose is. There is no difference in YouTube videos, as without a proper setup, even if the content is excellent, your audience is not likely to hang around.
There is some free animation intro for YouTube that you can choose from to create your own YouTube intro. In this article, we will show a comprehensive guide on how to get an intro animation template free download and create your own free YouTube animation intro like a professional. So, let’s move on to explore how is the YouTube intro animation download process works using YouTube Intro Animation Makers through this article.
In this article
01 [What is YouTube Intro Animation?](#Part 1)
02 [How does YouTube Intro Animation Maker works?](#Part 2)
03 [5 of YouTube Intro Animation examples (2022)](#Part 3)
04 [How to Create a YouTube Intro Animation FAST](#Part 4)
Part 1 What is YouTube Intro Animation?
An animation video for YouTube intro is a short animated clip usually 5 to seconds in length and plays before the main YouTube video content. The intro YouTube animation is the primary step to creating your online persona and branding your content on YouTube. You can get YouTube intro animation for free online and include them in your YouTube content. A YouTube intro easily and quickly provides viewers insight into what they should expect from the channel. It is used to familiarize the viewer with the channel’s theme, feel, and look, which gives them context before reaching the main content.
Intro animation YouTube is sometimes called video bumpers, as they catch viewers’ attention and help reinforce your brand. In the general video, intros boost the video quality. You can also get a good video intro from intro animation free download websites for your YouTube content.
Part 2 How do YouTube Intro Animation Maker works?
You can create compelling, engaging, and best intro animation on YouTube by using free animation intro for YouTube or creating a YouTube intro animation by yourself. You don’t need be a pro in video editing or a creator to make animated video intros for your YouTube channel if you have the best intro animation software to create intro videos like a professional. Here are some benefits of YouTube intro animation maker and how it works:
● A YouTube intro animation maker has a built-in editor in your browser
● A YouTube intro animation maker is affordable, fast, and easy to use
● A YouTube intro animation maker can broadcast-quality logo animation and intros
● A YouTube intro animation maker has a wide variety of templates to make your YouTube animation intro
Using a YouTube intro animation maker, you are ready to create unskippable YouTube intros using the most versatile tool to turn your viewers into lifelong channel subscribers.
Part 3 5 of YouTube Intro Animation examples (2022)
To be successful on YouTube, capture and retain your viewers’ attention and increase your conversions. The best method to achieve this is by using an excellent YouTube animated intro to create a lasting impression to make your video worth watching. You can also get Professional YouTube animated intro from intro animation download websites. This action will look at 5 make YouTube intro animation examples and ideas from where you can draw your inspiration in 2022.
01Ted Talk
Ted Talk, free fire intro animation, is a perfect example of a beautiful and captured sequence that helps to tell the audience what the brand is all about and their ideas and worth spreading. The good news about this intro is that you don’t need to be a professional, hire an animator, or invest in any flashy or expensive animation to show your brand on YouTube.
To achieve this intro, all you require is some intro animation in After Effects template free that can work for your brand so that you’ll be able to retain your audience and make them wanting to come back for more.
02Jazza

Jazza is a perfect example of free intro animation templates that you can use all over again to showcase your brand. The main idea for making a gaming intro animation video free download is to bring about an attractive, eye-capturing video intro through it.
This intro communicates a passion for teaching people to paint, animate, and draw. This same template can also create a vlog animation intro for the Jazza language lesson website, as it is a tremendous sequential presentation that represents Jazza mission.
03Salma Jafra
Salma Jafra Video intro tells a short story about the video’s main takeaways and includes an 8 seconds vlog intro animation sequence. Everything, including a brand color, is purple, which helps the audience recognize our videos on YouTube.
In addition to the free animation for YouTube intro, she plugged in her content to the end of the video or outro to generate enough traffic and adhere to SEO guidelines to ensure that the targeted audience finds the videos.
04SciShow
SciShow enables viewers to understand the brand and the kind of free YouTube intro animation video. The main trick of the video is to instantly grab viewers’ attention and convince them that the video is for them.
This intro animation video free download is a perfect example of how you can introduce your theme, tone, and brand name into your YouTube animation intro video download. This type of intro allows viewers to know what to expect quickly, and superb animation and design show off the value of production. Examples of a brand that can benefit from this type of YouTube animation intro download template is sleep studies.
05”Pump Red” Cinema Template

“Pump Red” Cinema Template is perfect for capturing reviewers’ imagination with an eye-catching, captivating, and intelligent video intro. By following the examples in this Minecraft animation intro template, you are more likely to retain your visitors or viewers from the moment they hit the play button on your YouTube video by using a catching soundtrack, on-brand messaging, and exciting visuals.
Part 4 How to Create a YouTube Intro Animation FAST
Whether you are using any streaming channel, YouTube, or selling videos on any e-commerce website, making animation for YouTube intro plays a vital role in promoting your brand. With it, creating an introduction may not seem as complicated as it sounds.
The section explains in detail how to make a YouTube intro animation free with the Wondershare Filmora Video Editor video editor from animated intro download templates or create a custom intro from scratch even if there is no existing footage or image to begin with. The following method will guide you through the process, and then you can keep your video saved for reuse in all creations to maintain consistency and give your brand a unique identity:
Wondershare Filmora
Get started easily with Filmora’s powerful performance, intuitive interface, and countless effects!
Try It Free Try It Free Try It Free Learn More >

01Step Launch Intro Animation Software
Launch Wondershare Filmora Video Editor editor, add intro background to Filmora by going to the media tab at the top and selecting any sample colors category from the left pane. All the solid and gradient colors in the media library are available at the right, then over the mouse to the color title you want to use as a background and click on the + icon in the middle to add it to the timeline.
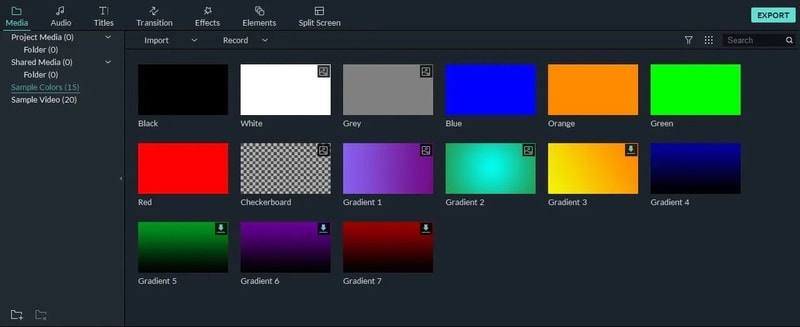
02Step Add Different effects
Add sound effects or audio to YouTube animated intro to make it more recognizable. In Wondershare Filmora Video Editor , visit the built-in audio library by double-clicking the audio thumbnail from the library and listening to the soundtrack. Repeat the process to find the perfect sound effects or background music for your video intro. D-and-drop the audio to the video.

03Step Adding Branding Element
In the animated video intro, add the company name, branding element, and channel name to create brand awareness by clicking on the title tab and hovering the mouse to the text you want to use. Then drag and drop it to track above the video.
Go to the Effects tab and select category from the top left pane. Click and drag your preferred effects from the library effects to the timeline.
04Step Export
Once you finish creating your animated video intro with all the required ingredients, go to Export at the top center area of the interface to export the animated video intro, and once done, share it on social media.
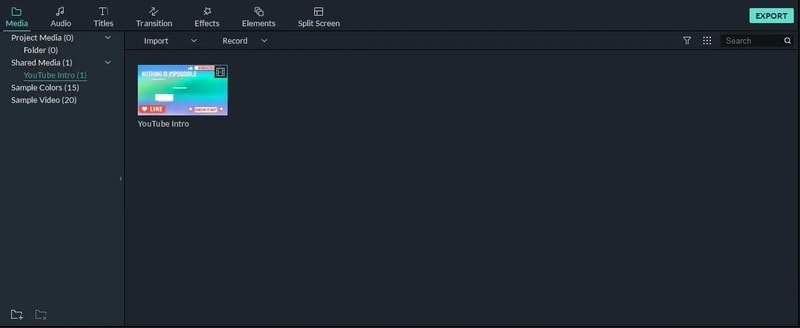
To make YouTube intro animation templates free download with Filmora templates, follow the steps listed below:
Step Select Effects
Log onto the Filmora effects page on filmstock with the same wsid used on Filmora and select the effect you want
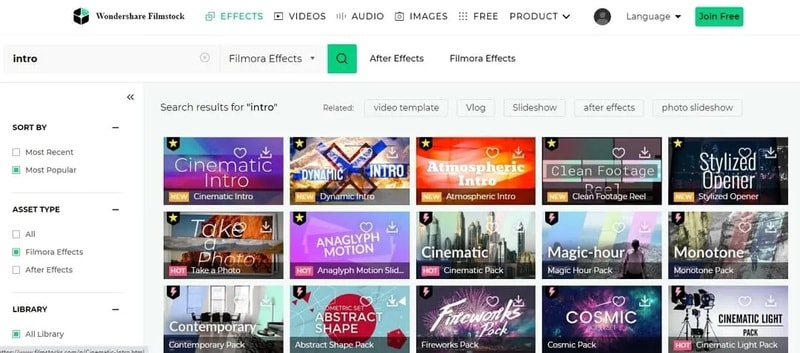
Step Select template
Select the preferred intro templates by clicking on the download now and following the instructions on the screen to attend a download template. After downloading, see in red cycle under the transition, titles, and filter based on the element included in the effect part. Add this downloaded title or transition to the animated intro video.
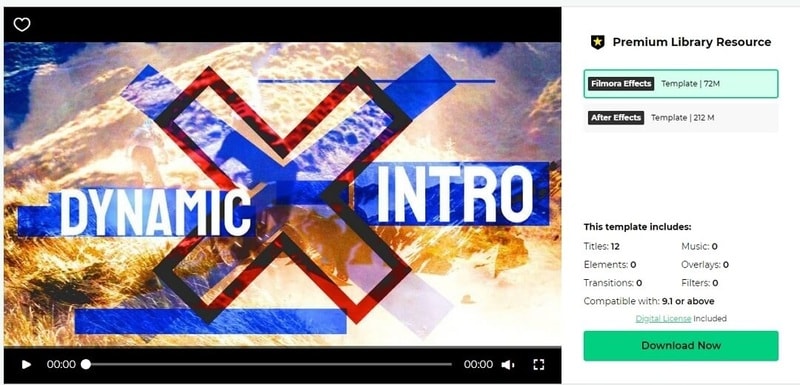
Step Finalization
Delete your animated video intro from the templates that you selected.
● Key Takeaways from This Episode →
● Introduction about what is YouTube Intro?
● How Intro Animation Maker works with examples.
● The process to develop your own YouTube intro animation for free with Wondershare Filmora Video Editor .
YouTube video intro animation is the short introductory clips and plays at the beginning of a YouTube video. YouTube intro videos as in almost everywhere, most times probably without giving them a second chance or understanding what their purpose is. There is no difference in YouTube videos, as without a proper setup, even if the content is excellent, your audience is not likely to hang around.
There is some free animation intro for YouTube that you can choose from to create your own YouTube intro. In this article, we will show a comprehensive guide on how to get an intro animation template free download and create your own free YouTube animation intro like a professional. So, let’s move on to explore how is the YouTube intro animation download process works using YouTube Intro Animation Makers through this article.
In this article
01 [What is YouTube Intro Animation?](#Part 1)
02 [How does YouTube Intro Animation Maker works?](#Part 2)
03 [5 of YouTube Intro Animation examples (2022)](#Part 3)
04 [How to Create a YouTube Intro Animation FAST](#Part 4)
Part 1 What is YouTube Intro Animation?
An animation video for YouTube intro is a short animated clip usually 5 to seconds in length and plays before the main YouTube video content. The intro YouTube animation is the primary step to creating your online persona and branding your content on YouTube. You can get YouTube intro animation for free online and include them in your YouTube content. A YouTube intro easily and quickly provides viewers insight into what they should expect from the channel. It is used to familiarize the viewer with the channel’s theme, feel, and look, which gives them context before reaching the main content.
Intro animation YouTube is sometimes called video bumpers, as they catch viewers’ attention and help reinforce your brand. In the general video, intros boost the video quality. You can also get a good video intro from intro animation free download websites for your YouTube content.
Part 2 How do YouTube Intro Animation Maker works?
You can create compelling, engaging, and best intro animation on YouTube by using free animation intro for YouTube or creating a YouTube intro animation by yourself. You don’t need be a pro in video editing or a creator to make animated video intros for your YouTube channel if you have the best intro animation software to create intro videos like a professional. Here are some benefits of YouTube intro animation maker and how it works:
● A YouTube intro animation maker has a built-in editor in your browser
● A YouTube intro animation maker is affordable, fast, and easy to use
● A YouTube intro animation maker can broadcast-quality logo animation and intros
● A YouTube intro animation maker has a wide variety of templates to make your YouTube animation intro
Using a YouTube intro animation maker, you are ready to create unskippable YouTube intros using the most versatile tool to turn your viewers into lifelong channel subscribers.
Part 3 5 of YouTube Intro Animation examples (2022)
To be successful on YouTube, capture and retain your viewers’ attention and increase your conversions. The best method to achieve this is by using an excellent YouTube animated intro to create a lasting impression to make your video worth watching. You can also get Professional YouTube animated intro from intro animation download websites. This action will look at 5 make YouTube intro animation examples and ideas from where you can draw your inspiration in 2022.
01Ted Talk
Ted Talk, free fire intro animation, is a perfect example of a beautiful and captured sequence that helps to tell the audience what the brand is all about and their ideas and worth spreading. The good news about this intro is that you don’t need to be a professional, hire an animator, or invest in any flashy or expensive animation to show your brand on YouTube.
To achieve this intro, all you require is some intro animation in After Effects template free that can work for your brand so that you’ll be able to retain your audience and make them wanting to come back for more.
02Jazza
Jazza is a perfect example of free intro animation templates that you can use all over again to showcase your brand. The main idea for making a gaming intro animation video free download is to bring about an attractive, eye-capturing video intro through it.
This intro communicates a passion for teaching people to paint, animate, and draw. This same template can also create a vlog animation intro for the Jazza language lesson website, as it is a tremendous sequential presentation that represents Jazza mission.
03Salma Jafra
Salma Jafra Video intro tells a short story about the video’s main takeaways and includes an 8 seconds vlog intro animation sequence. Everything, including a brand color, is purple, which helps the audience recognize our videos on YouTube.
In addition to the free animation for YouTube intro, she plugged in her content to the end of the video or outro to generate enough traffic and adhere to SEO guidelines to ensure that the targeted audience finds the videos.
04SciShow
SciShow enables viewers to understand the brand and the kind of free YouTube intro animation video. The main trick of the video is to instantly grab viewers’ attention and convince them that the video is for them.
This intro animation video free download is a perfect example of how you can introduce your theme, tone, and brand name into your YouTube animation intro video download. This type of intro allows viewers to know what to expect quickly, and superb animation and design show off the value of production. Examples of a brand that can benefit from this type of YouTube animation intro download template is sleep studies.
05”Pump Red” Cinema Template
“Pump Red” Cinema Template is perfect for capturing reviewers’ imagination with an eye-catching, captivating, and intelligent video intro. By following the examples in this Minecraft animation intro template, you are more likely to retain your visitors or viewers from the moment they hit the play button on your YouTube video by using a catching soundtrack, on-brand messaging, and exciting visuals.
Part 4 How to Create a YouTube Intro Animation FAST
Whether you are using any streaming channel, YouTube, or selling videos on any e-commerce website, making animation for YouTube intro plays a vital role in promoting your brand. With it, creating an introduction may not seem as complicated as it sounds.
The section explains in detail how to make a YouTube intro animation free with the Wondershare Filmora Video Editor video editor from animated intro download templates or create a custom intro from scratch even if there is no existing footage or image to begin with. The following method will guide you through the process, and then you can keep your video saved for reuse in all creations to maintain consistency and give your brand a unique identity:
Wondershare Filmora
Get started easily with Filmora’s powerful performance, intuitive interface, and countless effects!
Try It Free Try It Free Try It Free Learn More >
01Step Launch Intro Animation Software
Launch Wondershare Filmora Video Editor editor, add intro background to Filmora by going to the media tab at the top and selecting any sample colors category from the left pane. All the solid and gradient colors in the media library are available at the right, then over the mouse to the color title you want to use as a background and click on the + icon in the middle to add it to the timeline.
02Step Add Different effects
Add sound effects or audio to YouTube animated intro to make it more recognizable. In Wondershare Filmora Video Editor , visit the built-in audio library by double-clicking the audio thumbnail from the library and listening to the soundtrack. Repeat the process to find the perfect sound effects or background music for your video intro. D-and-drop the audio to the video.
03Step Adding Branding Element
In the animated video intro, add the company name, branding element, and channel name to create brand awareness by clicking on the title tab and hovering the mouse to the text you want to use. Then drag and drop it to track above the video.
Go to the Effects tab and select category from the top left pane. Click and drag your preferred effects from the library effects to the timeline.
04Step Export
Once you finish creating your animated video intro with all the required ingredients, go to Export at the top center area of the interface to export the animated video intro, and once done, share it on social media.
To make YouTube intro animation templates free download with Filmora templates, follow the steps listed below:
Step Select Effects
Log onto the Filmora effects page on filmstock with the same wsid used on Filmora and select the effect you want
Step Select template
Select the preferred intro templates by clicking on the download now and following the instructions on the screen to attend a download template. After downloading, see in red cycle under the transition, titles, and filter based on the element included in the effect part. Add this downloaded title or transition to the animated intro video.
Step Finalization
Delete your animated video intro from the templates that you selected.
● Key Takeaways from This Episode →
● Introduction about what is YouTube Intro?
● How Intro Animation Maker works with examples.
● The process to develop your own YouTube intro animation for free with Wondershare Filmora Video Editor .
How to Cartoonize Photo Photoshop in Simple Steps
How to Cartoonize Photo Photoshop in Easy Steps
An easy yet powerful editor
Numerous effects to choose from
Detailed tutorials provided by the official channel
Cartoons, an already catchy entertainment source, can upgrade other media utilities on integration. Look through the easiest ways of creating cartoonize photo Photoshop stills!
In this article
01 [Types of Cartoon Effects in Photoshop](#Part 1)
02 [Easiest Ways to Cartoonize Photo in Photoshop](#Part 2)
03 [How to Use a Variety of Photoshop Special Effects to Create the Final Caricature Look](#Part 3)
Part 1 Types of Cartoon Effects in Photoshop
It is an absolute fun activity to explore your editing creativity in the realm of cartoonizing the otherwise ordinary still captures. Talking of the most convenient cartoon creator and editor applications, you can safely rely on the Photoshop Image Editor application to choose from a pool of cartoon editing effects for adding that spunky and funny element to your image files.
Presented in the following section, is a discussion of some of the most stunning and visibly amazing cartoon effects in the application’s Editor Library to cartoonize Photoshop images:
01Pop Art Photoshop Action
The effect is a predominantly preferred as a cartoon action Photoshop utility to caricaturize a normal image, along with customizing the same to change the colors and background of the original still capture for creating a brand new appearance with utmost ease. Apart from this, the aforesaid effect allows you to exclusively customize the globally acclaimed graphic masterpieces of Roy Lichtenstein. Working with the effect, you can edit a self-portrait or the favorite image of your pet to give the latter, a funny retro feel.

02Vintage Comic Creator
If the idea of sticking to just the creation of cartoon images is not enough to satisfy you, the Vintage Comic Creator effect allows you to expand your creativity level to work on cartoon based shape and text edits. You can use the effect to enhance an image logo or plain text with a comic book oriented text. A download of this cartoon effect template facilitates you with diversities of customizable layer styles, overlays and patterns.

03GTA Photoshop Action
This is a complete pleasure for the creative fan of Grand Theft Auto, the wicked chasing game series. Additional to creating a stark variety of edited cartoon stills, you are free to reinvent the aforesaid game’s most popular caricature edits, while using the GTA Photoshop Action editing filter. Launched by Indworks, the effect package consisting of 15 vibrant themes and 5 collage templates; promises a quick mimicry of your most cherished video and console games.

04Vector Paint Photoshop Action
The one is an amazing Photoshop effect for creating cartoon edits, which works through a merger of two different ingenious art themes or styles for transforming basic images into cartoonized stills.
The effect grants you the liberty to use varieties of art styles, such as, comic, photo retouching and energetic oil to obtain editing results comparable to that of any original photograph. The template is conveniently simple to use and assures you of quick results. All this, just at a nominal price of $6! Interesting, right?

05Ultra Realistic 3D Space Effect
Considering the fact of you being a space admirer, this one is the perfect image editor for you to add the vibrancy of stunning space elements and backgrounds within your cartoonized edits. The effect lets you play with the diverse range of customizable text and exciting caricature backgrounds. When downloading the template, you get a main setup file, a few editing examples and a web link to the free fonts present in the effect.

06Animated Zombie Grime Art Photoshop Action
Are you in love with the latest zombie grimes? If yes, then this action set is exclusive editor package for you. Working with the aforesaid image template, you can effortlessly add the perfect zombie theme to your cartoon edits, along with simultaneously creating a stunning animation, which you can use to enhance your video or GIF uploads on social media. Not forgetting the best part, you get a free access to this amazing utility.

Part 2 Easiest Ways to Cartoonize Photo in Photoshop
Having known about the amazing varieties of cartoonized editor templates in Photoshop, it is a natural instinct to feel motivated to create your own caricature images from normal capture stills. Addressing the concern of image transformation methods to turn a photo into a cartoon Photoshop, let us dive into some of the most affordable methods of creating cartoonized photos in the aforesaid editing application.
Talking of the most basic Photoshop tools for creating caricature images, you can start your editing spree with using the Graphic Tablet, Brush Tool, Layer Masks and a graphic pen to create amateur cartoonized edits from your still photographs, getting a full control on image tracing.
01Brush Tool
A few usage examples include working with a combination of the graphic tablet pen and the editor brushes to trace your image, using the brush in a masked or a fresh layer to avoid altering the actual image, and much more.
02Graphic Tablet
It is best to use the Photoshop Graphic Tablet for adhering to the concern of tracing cartoonized images. You can alternatively cater to the job with a trackpad, mouse, or even your hand. It is however, difficult to assure steady hand postures for image tracing, lest you are using a stylus pen.
03Pen Tool
Using the Pen Tool for cartoonizing your portrait, allows you to draw outlines along the desired figure within the image, along with its important elements, so that you can easily use these outlined paths to introduce different color blocks.
Similar to the Brush Tool, the Photoshop Pen utility grants you the freedom to vary the degree of detailing in your cartoon edit, from being highly expressive to only remaining around the shore. Working with the Pen Tool can, however be a bit tiring and time taking, with respect to the extent of detailing you wish to add to the caricature edits.
Additional to the aforementioned tools, you can also consider using the default image filters of the Photoshop application to get comparable results. This is an exclusively better option to choose, compared to the Pen Tool, when you are working without a Graphic Tablet. To get over the top realistic caricature renderings, you will need to supplement the use of Photoshop filters with the application’s editing channels and other adjustments.
Part 3 How to Use a Variety of Photoshop Special Effects to Create the Final Caricature Look
Considering the extensive discussion on the credibility of the Photoshop Image Editor application in the realm of creating stunning caricature images in high end resolution, let us proceed to learn about using the diversity of Photoshop’s special effects to get the last stage cartoonized appearance of ordinary still images.
User’s Guide to Create High End Cartoonized Look
The following tutorial is a stepwise explanation of the process to convert photo into cartoon Photoshop in the easiest possible way. Stick to the method for getting affordable results in a quick span.
Step 1: Download and Launch the Program
Visit the official website of Photoshop Image Editor for a free download of the software program in your system, followed by installing and launching the same in your device.
Step 2: Upload Your Image
On a successful launch of the editor program, you will be directed to the ‘Photoshop Editor’ window, where you are required to upload any desired still image from your device for creating a cartoonized edit. To do this, either simply add your image to the editor workspace using the ‘Drag and Drop’ method, or navigate to the ‘File’ tab in the top toolbar and click on ‘Open’ in the dropdown menu.
Step 3: Edge Enhancement
Once your image appears in the editor timeline, proceed to sharpen the edges of the face and body of the portrait. Start with navigating to and clicking on the ‘Filter’ option, followed by tapping on ‘Filter Gallery’ and selecting the ‘Artistic’ folder, where you need to choose the ‘Poster Edges’ option. Observe the effect of these setting on the portrait and make necessary changes.

Step 4: Background Setting
Ensure that the background and foreground of your image are set to white and black colors respectively. If not, proceed to adjust the same as required.

Step 5: Distorting the Edges
You now need to introduce some distortion in the edges of your portrait. Navigate to the ‘Filter’ option again, open the ‘Filter Gallery’ and choose ‘Torn Edges’ from the menu that drops down. Select the desired parameter values in accordance with your creative suitability.


Step 6: Using the Channels Panel
The next step is to select and copy your portrait using the ‘Ctrl + A’ and Ctrl + C commands respectively. Navigate to the ‘Channels’ panel at the right of the Photoshop workspace. At the panel’s bottom right, proceed with creating a new channel. It will be assigned the name ‘Alpha 1’ by Photoshop, which you are most welcome to change.


Step 7: Color Inversion
When you finish creating the channel, use the ‘Ctrl + V’ command to paste your portrait in the same. Proceed with inverting the image colors by navigating to the ‘Image’ option, followed by choosing the ‘Adjustment’ and ‘Invert’ options from the consecutive drop downs. Now, make a selection of the ‘White’ regions of your portrait by pressing the ‘Ctrl’ key and clicking on the ‘Alpha 1 Channel thumbnail.

Step 8: Layer Creation
Navigate to the ‘Layers’ panel at the right of the Photoshop workspace, and click on the ‘New Layer’ icon for creating a fresh layer. Fill the just created layer with black color, either by pressing ‘g’ from your system’s keyboard, or using the ‘Paint Bucket’ tool. Don’t forget to assign a suitable name to the layer.

Repeat the above process to create a separate layer and e fill the same with white color. The layer creation process is essential to separate the white and black colors of the actual image.

Step 10: Layer Dragging
In the ‘Layers’ panel, drag the ‘Black’ layer above the ‘White’ one.

Step 11: Creating Additional Layers
You are now required to create three more layers, with the same process as for the above two, for adding effects to the Skin, Clothes and Teeth/Eyes of the portrait. When you finish creation, assign suitable names to the layers, followed by dragging them below the ‘Black’ one within the ‘Layers’ panel.

Step 12: Color Selection and Application
Choose the respective colors for the clothes, skin and teeth/eyes of the cartoonized edit. To proceed with color application, navigate to the toolbar at the left of the Photoshop workspace and choose the ‘Brush Tool’. Finally, choose a particular layer and apply careful brush strokes to add color to the specific area of the portrait that you wish to edit. Follow the same process to add colors to the remaining layers to get the desired result in all areas of your cartoonized edit.

Step 13: Using the Gradient Tool
Navigate to the ‘Layers’ panel again and create a new ‘Gradient’ layer to further enhance your creation. You now need to select the ‘Gradient Tool’ from the toolbar at the left of the Photoshop workspace. The ‘Gradient Editor’ pops up with the continuously running ‘Gradient Bar’, as soon as you make the selection. Double click on the gradient boxes at both ends to select them, followed by making your color choices. Tap on ‘OK’ when you are satisfied with your work.

Step 14: Filling the Gradients
To proceed with gradient filling, press and hold the mouse button on the image at the bottom left and continue to drag the cursor to its top right corner. Leave the mouse and navigate to the ‘Layers’ panel for dragging and dropping the ‘Gradient’ layer above the ‘White’ layer.

You are now done with the process of creating a caricature edit from a normal still portrait. Your final image output will appear something like the following:

Cartoons, an already catchy entertainment source, can upgrade other media utilities on integration. Look through the easiest ways of creating cartoonize photo Photoshop stills!
In this article
01 [Types of Cartoon Effects in Photoshop](#Part 1)
02 [Easiest Ways to Cartoonize Photo in Photoshop](#Part 2)
03 [How to Use a Variety of Photoshop Special Effects to Create the Final Caricature Look](#Part 3)
Part 1 Types of Cartoon Effects in Photoshop
It is an absolute fun activity to explore your editing creativity in the realm of cartoonizing the otherwise ordinary still captures. Talking of the most convenient cartoon creator and editor applications, you can safely rely on the Photoshop Image Editor application to choose from a pool of cartoon editing effects for adding that spunky and funny element to your image files.
Presented in the following section, is a discussion of some of the most stunning and visibly amazing cartoon effects in the application’s Editor Library to cartoonize Photoshop images:
01Pop Art Photoshop Action
The effect is a predominantly preferred as a cartoon action Photoshop utility to caricaturize a normal image, along with customizing the same to change the colors and background of the original still capture for creating a brand new appearance with utmost ease. Apart from this, the aforesaid effect allows you to exclusively customize the globally acclaimed graphic masterpieces of Roy Lichtenstein. Working with the effect, you can edit a self-portrait or the favorite image of your pet to give the latter, a funny retro feel.
02Vintage Comic Creator
If the idea of sticking to just the creation of cartoon images is not enough to satisfy you, the Vintage Comic Creator effect allows you to expand your creativity level to work on cartoon based shape and text edits. You can use the effect to enhance an image logo or plain text with a comic book oriented text. A download of this cartoon effect template facilitates you with diversities of customizable layer styles, overlays and patterns.
03GTA Photoshop Action
This is a complete pleasure for the creative fan of Grand Theft Auto, the wicked chasing game series. Additional to creating a stark variety of edited cartoon stills, you are free to reinvent the aforesaid game’s most popular caricature edits, while using the GTA Photoshop Action editing filter. Launched by Indworks, the effect package consisting of 15 vibrant themes and 5 collage templates; promises a quick mimicry of your most cherished video and console games.
04Vector Paint Photoshop Action
The one is an amazing Photoshop effect for creating cartoon edits, which works through a merger of two different ingenious art themes or styles for transforming basic images into cartoonized stills.
The effect grants you the liberty to use varieties of art styles, such as, comic, photo retouching and energetic oil to obtain editing results comparable to that of any original photograph. The template is conveniently simple to use and assures you of quick results. All this, just at a nominal price of $6! Interesting, right?
05Ultra Realistic 3D Space Effect
Considering the fact of you being a space admirer, this one is the perfect image editor for you to add the vibrancy of stunning space elements and backgrounds within your cartoonized edits. The effect lets you play with the diverse range of customizable text and exciting caricature backgrounds. When downloading the template, you get a main setup file, a few editing examples and a web link to the free fonts present in the effect.
06Animated Zombie Grime Art Photoshop Action
Are you in love with the latest zombie grimes? If yes, then this action set is exclusive editor package for you. Working with the aforesaid image template, you can effortlessly add the perfect zombie theme to your cartoon edits, along with simultaneously creating a stunning animation, which you can use to enhance your video or GIF uploads on social media. Not forgetting the best part, you get a free access to this amazing utility.
Part 2 Easiest Ways to Cartoonize Photo in Photoshop
Having known about the amazing varieties of cartoonized editor templates in Photoshop, it is a natural instinct to feel motivated to create your own caricature images from normal capture stills. Addressing the concern of image transformation methods to turn a photo into a cartoon Photoshop, let us dive into some of the most affordable methods of creating cartoonized photos in the aforesaid editing application.
Talking of the most basic Photoshop tools for creating caricature images, you can start your editing spree with using the Graphic Tablet, Brush Tool, Layer Masks and a graphic pen to create amateur cartoonized edits from your still photographs, getting a full control on image tracing.
01Brush Tool
A few usage examples include working with a combination of the graphic tablet pen and the editor brushes to trace your image, using the brush in a masked or a fresh layer to avoid altering the actual image, and much more.
02Graphic Tablet
It is best to use the Photoshop Graphic Tablet for adhering to the concern of tracing cartoonized images. You can alternatively cater to the job with a trackpad, mouse, or even your hand. It is however, difficult to assure steady hand postures for image tracing, lest you are using a stylus pen.
03Pen Tool
Using the Pen Tool for cartoonizing your portrait, allows you to draw outlines along the desired figure within the image, along with its important elements, so that you can easily use these outlined paths to introduce different color blocks.
Similar to the Brush Tool, the Photoshop Pen utility grants you the freedom to vary the degree of detailing in your cartoon edit, from being highly expressive to only remaining around the shore. Working with the Pen Tool can, however be a bit tiring and time taking, with respect to the extent of detailing you wish to add to the caricature edits.
Additional to the aforementioned tools, you can also consider using the default image filters of the Photoshop application to get comparable results. This is an exclusively better option to choose, compared to the Pen Tool, when you are working without a Graphic Tablet. To get over the top realistic caricature renderings, you will need to supplement the use of Photoshop filters with the application’s editing channels and other adjustments.
Part 3 How to Use a Variety of Photoshop Special Effects to Create the Final Caricature Look
Considering the extensive discussion on the credibility of the Photoshop Image Editor application in the realm of creating stunning caricature images in high end resolution, let us proceed to learn about using the diversity of Photoshop’s special effects to get the last stage cartoonized appearance of ordinary still images.
User’s Guide to Create High End Cartoonized Look
The following tutorial is a stepwise explanation of the process to convert photo into cartoon Photoshop in the easiest possible way. Stick to the method for getting affordable results in a quick span.
Step 1: Download and Launch the Program
Visit the official website of Photoshop Image Editor for a free download of the software program in your system, followed by installing and launching the same in your device.
Step 2: Upload Your Image
On a successful launch of the editor program, you will be directed to the ‘Photoshop Editor’ window, where you are required to upload any desired still image from your device for creating a cartoonized edit. To do this, either simply add your image to the editor workspace using the ‘Drag and Drop’ method, or navigate to the ‘File’ tab in the top toolbar and click on ‘Open’ in the dropdown menu.
Step 3: Edge Enhancement
Once your image appears in the editor timeline, proceed to sharpen the edges of the face and body of the portrait. Start with navigating to and clicking on the ‘Filter’ option, followed by tapping on ‘Filter Gallery’ and selecting the ‘Artistic’ folder, where you need to choose the ‘Poster Edges’ option. Observe the effect of these setting on the portrait and make necessary changes.
Step 4: Background Setting
Ensure that the background and foreground of your image are set to white and black colors respectively. If not, proceed to adjust the same as required.
Step 5: Distorting the Edges
You now need to introduce some distortion in the edges of your portrait. Navigate to the ‘Filter’ option again, open the ‘Filter Gallery’ and choose ‘Torn Edges’ from the menu that drops down. Select the desired parameter values in accordance with your creative suitability.
Step 6: Using the Channels Panel
The next step is to select and copy your portrait using the ‘Ctrl + A’ and Ctrl + C commands respectively. Navigate to the ‘Channels’ panel at the right of the Photoshop workspace. At the panel’s bottom right, proceed with creating a new channel. It will be assigned the name ‘Alpha 1’ by Photoshop, which you are most welcome to change.
Step 7: Color Inversion
When you finish creating the channel, use the ‘Ctrl + V’ command to paste your portrait in the same. Proceed with inverting the image colors by navigating to the ‘Image’ option, followed by choosing the ‘Adjustment’ and ‘Invert’ options from the consecutive drop downs. Now, make a selection of the ‘White’ regions of your portrait by pressing the ‘Ctrl’ key and clicking on the ‘Alpha 1 Channel thumbnail.
Step 8: Layer Creation
Navigate to the ‘Layers’ panel at the right of the Photoshop workspace, and click on the ‘New Layer’ icon for creating a fresh layer. Fill the just created layer with black color, either by pressing ‘g’ from your system’s keyboard, or using the ‘Paint Bucket’ tool. Don’t forget to assign a suitable name to the layer.
Repeat the above process to create a separate layer and e fill the same with white color. The layer creation process is essential to separate the white and black colors of the actual image.
Step 10: Layer Dragging
In the ‘Layers’ panel, drag the ‘Black’ layer above the ‘White’ one.
Step 11: Creating Additional Layers
You are now required to create three more layers, with the same process as for the above two, for adding effects to the Skin, Clothes and Teeth/Eyes of the portrait. When you finish creation, assign suitable names to the layers, followed by dragging them below the ‘Black’ one within the ‘Layers’ panel.
Step 12: Color Selection and Application
Choose the respective colors for the clothes, skin and teeth/eyes of the cartoonized edit. To proceed with color application, navigate to the toolbar at the left of the Photoshop workspace and choose the ‘Brush Tool’. Finally, choose a particular layer and apply careful brush strokes to add color to the specific area of the portrait that you wish to edit. Follow the same process to add colors to the remaining layers to get the desired result in all areas of your cartoonized edit.
Step 13: Using the Gradient Tool
Navigate to the ‘Layers’ panel again and create a new ‘Gradient’ layer to further enhance your creation. You now need to select the ‘Gradient Tool’ from the toolbar at the left of the Photoshop workspace. The ‘Gradient Editor’ pops up with the continuously running ‘Gradient Bar’, as soon as you make the selection. Double click on the gradient boxes at both ends to select them, followed by making your color choices. Tap on ‘OK’ when you are satisfied with your work.
Step 14: Filling the Gradients
To proceed with gradient filling, press and hold the mouse button on the image at the bottom left and continue to drag the cursor to its top right corner. Leave the mouse and navigate to the ‘Layers’ panel for dragging and dropping the ‘Gradient’ layer above the ‘White’ layer.
You are now done with the process of creating a caricature edit from a normal still portrait. Your final image output will appear something like the following:
Best GIF Maker Software for Windows and Mac
Best GIF Maker Software for Windows and Mac

Shanoon Cox
Mar 27, 2024• Proven solutions
GIFs can delivery stories with effectiveness and added emotions. When we view that sequence of memories with animations then they add a different feeling to viewer’s heart. The best part is that these GIF creations use to be light weight files that mean they can be easily shared on other platforms. You can easily send them to popular social media sites or prefer to share them via Whatsapp and even using MMS. If you are working on a desktop and need a compatible GIF creator tool then here are few user friendly desktop application suggestions for you. You can easily pick any of these tools and start creating your own animated GIF to impress your friends around.
GIF Maker Software for Windows and Mac
The article below contains details about 10 most popular GIF makers where first five are compatible with Windows platform and rest are dedicated to Mac devices. Using these advanced software tools, you can easily create animated GIF from sequence of images or from videos that are downloaded from internet. It is also possible to adjust timing between frames or users can also customize frame rotation effects, loop animations, or apply overlays. These software tools can support almost all file types like TIF, TGA, PNG BMP, GIF and JPG etc. Some of these software tools are also able to process webcam results instantly and will save files in form of high quality GIFs. If you are ready to develop your own GIF image then read the reviews below and choose your tool to get best results.
A. Best GIF Maker For Windows
Best Recommendation
If you are not satisfied with the collection discussed above then professionals recommend Wondershare Filmora as most trustworthy tool for your GIF conversion needs. This software can work on Windows as well as Mac devices with full feature support.
If you want to make GIF easily, Filmora will also offer you an online solution for making a GIF. Filmora meme maker can help you make image, GIF and video memes directly without watermark. It is totally FREE and no sign up. You can change text size, color and position to create caption. You can also put text inside or outside in GIF. Try it now!
 Download Mac Version ](https://tools.techidaily.com/wondershare/filmora/download/ )
Key Features:
- This interactive interface can process more than 150 file formats with ease
- It can easily convert any video file into GIF format.
- Wondershare Filmora can be used to adjust frame size, captions, resolution of images while adding classic animation effects and advanced filters to processes images.
1. Photoscape

Here is your personal GIF creator tool that possesses abilities of a multi-purpose photo editor. This tool comes with so many advanced capabilities like it can behave as a raw converter, screen capturer, editor, viewer or can also rename details. Photoscape is commonly used for GIF image creation where users can easily set timings between frames.
Pros:
- It is much easier to use with intuitive interface.
- Offers adjustable canvas size along with easy customization capabilities for photo alignment, background colour and transition effects.
Cons:
- It can create bug trouble if you want to process large size files.
2. Microsoft GIF Animator
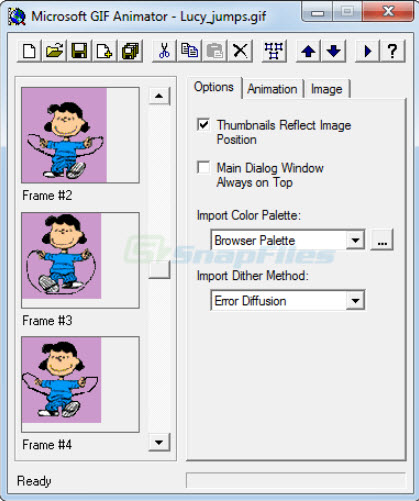
This software is also available free of cost and it can generate animated GIF files instantly. Its drag and drop type media interface can assist users in easy processing of large number of files. Further, you can easily set time duration of frames, set transparency, re order images and make changes for looping effect.
Pros:
- Its drag and drop feature provides it higher ranking.
- One can easily customize all detailed like transparency, frame order, time duration etc.
Cons:
- Microsoft has now stopped designing this software.
3. SSuite GIF Animator

SSuite GIF animator can be used to develop high quality GIF images within very less time. It can easily process raw files in form of BMP, JPEG and JPG extension whereas frame interval can be manually reduced up to few milliseconds. Created GIFs can be further used for easy sharing on other social media websites.
Pros:
- Interactive and simple GUI.
- Takes lesser time for installation and small space in your device memory.
Cons:
- Supported limited file formats and has limited functions.
4. KickMyGraphics

KickMyGraphics is an easy to use GIF animator and allows users to work with a slider so that frames can be adjusted with desired timing sequence. It also assists in other professional level settings such as out quality, zoom and transparency etc. It is also possible to rotate any selected frame with 90 degree motion.
Pros:
- Offers 90 degree image rotation facility.
- Comes with professional level settings.
Cons:
- Complicated for beginners.
5. GiftedMotion

This open source and interactive GIF animation developer application is available for free on Window platforms. It can be used process set of images as well as videos with additional animation effects. Note that, your system must have Java preinstalled if you want to run GiftedMotion on it.
Pros:
- It does not demand installation and download file size is also very small.
- Offers preview facility.
Cons:
- Limited features with time consuming image loading process.
B. Best GIF maker For Mac
1. PicGIF - $19.99:
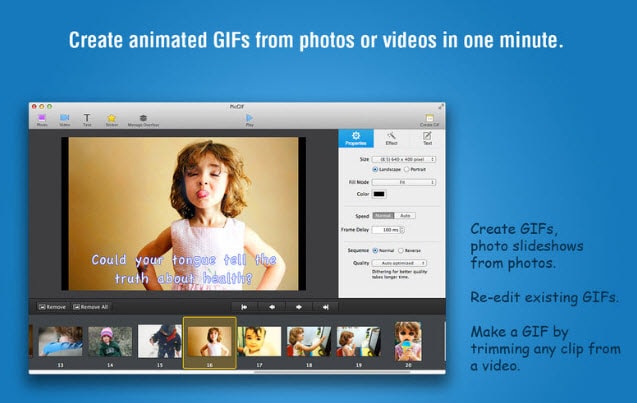
This paid software tool can be used to turn sequence of snapshots into high quality animated GIFs within few seconds. Users can also re-edit their changes in existing GIF files by adjusting its size, text formatting and speed etc. It is also possible to transfer variety of short videos into animated smooth GIFs. It allows users personalize graphics with so many special image effects and color settings.
2. GIPHY Capture – Free:
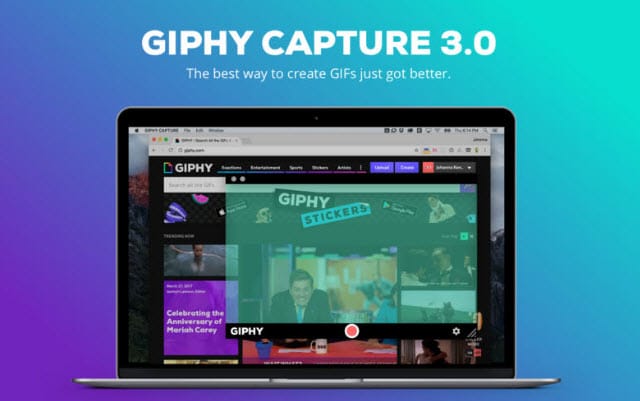
Giphy Capture is available for free for all Mac users and it offers wide range of powerful, intuitive yet simple to use feature set. There are so many incredible things that you can manage in this single platform while editing your GIF sequences. It can easily capture your screen while processing all images with adjustable size, captions and text values. Finally the created GIFs can be easily shared with friends on social media.
3. Image GIF:

This simple and easy to use application can do many miracles for you. You can simply drag and drop lots of image files to this platform and then process them on timeline with advanced feature set. The animation effects and file control capabilities are really interesting that allow easy modification over content. Image GIF is best solution for beginners as it possesses intuitive and user friendly interface.
Shanoon Cox
Shanoon Cox is a writer and a lover of all things video.
Follow @Shanoon Cox
Shanoon Cox
Mar 27, 2024• Proven solutions
GIFs can delivery stories with effectiveness and added emotions. When we view that sequence of memories with animations then they add a different feeling to viewer’s heart. The best part is that these GIF creations use to be light weight files that mean they can be easily shared on other platforms. You can easily send them to popular social media sites or prefer to share them via Whatsapp and even using MMS. If you are working on a desktop and need a compatible GIF creator tool then here are few user friendly desktop application suggestions for you. You can easily pick any of these tools and start creating your own animated GIF to impress your friends around.
GIF Maker Software for Windows and Mac
The article below contains details about 10 most popular GIF makers where first five are compatible with Windows platform and rest are dedicated to Mac devices. Using these advanced software tools, you can easily create animated GIF from sequence of images or from videos that are downloaded from internet. It is also possible to adjust timing between frames or users can also customize frame rotation effects, loop animations, or apply overlays. These software tools can support almost all file types like TIF, TGA, PNG BMP, GIF and JPG etc. Some of these software tools are also able to process webcam results instantly and will save files in form of high quality GIFs. If you are ready to develop your own GIF image then read the reviews below and choose your tool to get best results.
A. Best GIF Maker For Windows
Best Recommendation
If you are not satisfied with the collection discussed above then professionals recommend Wondershare Filmora as most trustworthy tool for your GIF conversion needs. This software can work on Windows as well as Mac devices with full feature support.
If you want to make GIF easily, Filmora will also offer you an online solution for making a GIF. Filmora meme maker can help you make image, GIF and video memes directly without watermark. It is totally FREE and no sign up. You can change text size, color and position to create caption. You can also put text inside or outside in GIF. Try it now!
Download Mac Version ](https://tools.techidaily.com/wondershare/filmora/download/ )
Key Features:
- This interactive interface can process more than 150 file formats with ease
- It can easily convert any video file into GIF format.
- Wondershare Filmora can be used to adjust frame size, captions, resolution of images while adding classic animation effects and advanced filters to processes images.
1. Photoscape
Here is your personal GIF creator tool that possesses abilities of a multi-purpose photo editor. This tool comes with so many advanced capabilities like it can behave as a raw converter, screen capturer, editor, viewer or can also rename details. Photoscape is commonly used for GIF image creation where users can easily set timings between frames.
Pros:
- It is much easier to use with intuitive interface.
- Offers adjustable canvas size along with easy customization capabilities for photo alignment, background colour and transition effects.
Cons:
- It can create bug trouble if you want to process large size files.
2. Microsoft GIF Animator
This software is also available free of cost and it can generate animated GIF files instantly. Its drag and drop type media interface can assist users in easy processing of large number of files. Further, you can easily set time duration of frames, set transparency, re order images and make changes for looping effect.
Pros:
- Its drag and drop feature provides it higher ranking.
- One can easily customize all detailed like transparency, frame order, time duration etc.
Cons:
- Microsoft has now stopped designing this software.
3. SSuite GIF Animator
SSuite GIF animator can be used to develop high quality GIF images within very less time. It can easily process raw files in form of BMP, JPEG and JPG extension whereas frame interval can be manually reduced up to few milliseconds. Created GIFs can be further used for easy sharing on other social media websites.
Pros:
- Interactive and simple GUI.
- Takes lesser time for installation and small space in your device memory.
Cons:
- Supported limited file formats and has limited functions.
4. KickMyGraphics
KickMyGraphics is an easy to use GIF animator and allows users to work with a slider so that frames can be adjusted with desired timing sequence. It also assists in other professional level settings such as out quality, zoom and transparency etc. It is also possible to rotate any selected frame with 90 degree motion.
Pros:
- Offers 90 degree image rotation facility.
- Comes with professional level settings.
Cons:
- Complicated for beginners.
5. GiftedMotion
This open source and interactive GIF animation developer application is available for free on Window platforms. It can be used process set of images as well as videos with additional animation effects. Note that, your system must have Java preinstalled if you want to run GiftedMotion on it.
Pros:
- It does not demand installation and download file size is also very small.
- Offers preview facility.
Cons:
- Limited features with time consuming image loading process.
B. Best GIF maker For Mac
1. PicGIF - $19.99:
This paid software tool can be used to turn sequence of snapshots into high quality animated GIFs within few seconds. Users can also re-edit their changes in existing GIF files by adjusting its size, text formatting and speed etc. It is also possible to transfer variety of short videos into animated smooth GIFs. It allows users personalize graphics with so many special image effects and color settings.
2. GIPHY Capture – Free:
Giphy Capture is available for free for all Mac users and it offers wide range of powerful, intuitive yet simple to use feature set. There are so many incredible things that you can manage in this single platform while editing your GIF sequences. It can easily capture your screen while processing all images with adjustable size, captions and text values. Finally the created GIFs can be easily shared with friends on social media.
3. Image GIF:
This simple and easy to use application can do many miracles for you. You can simply drag and drop lots of image files to this platform and then process them on timeline with advanced feature set. The animation effects and file control capabilities are really interesting that allow easy modification over content. Image GIF is best solution for beginners as it possesses intuitive and user friendly interface.
Shanoon Cox
Shanoon Cox is a writer and a lover of all things video.
Follow @Shanoon Cox
Top 10 Sketch Animation Video Makers
The Best 10 Sketch Animation Video Makers
An easy yet powerful editor
Numerous effects to choose from
Detailed tutorials provided by the official channel
Sketch animation has been in style for a very long time, and there is no doubt that it is a time-consuming process. But the sketch animation maker available these days helps us a lot. Are you aware of all these? Do you know how these are helping us currently?
Don’t worry if you are unaware because here we are discussing the same in detail and will help you to get the best tool for the same too. Let’s get started!
In this article
01 [What is a Sketch Animation?](#Part 1)
02 [How to Create Sketch Animation Videos with 10 Best Software](#Part 2)
03 [How to Make Sketch Animations](#Part 3)
Part 1 What is a Sketch Animation?
A sketch animation is a series of sketches that bring an idea to life. The drawings are usually rough and not perfect, but they are enough to tell a story. Sketch animations are used for many purposes, from advertising to product design. They can be used as a way to show a process or a product design in an easy-to-understand way.
Sketch animations can also be used for marketing purposes, such as explaining the features of a new product or promoting it with humour or through storytelling.
But to be someone who knows how to create the best sketches or videos, one needs to try their hands on the best sketch animation video maker too. One cannot achieve the desired results unless and until they are aware of a tool.
Part 2 How to Create Sketch Animation Videos with Best Software
In this section, we are discussing the best software to help you with Sketchup animation easily. All this software will cater to your needs for creating the best animations seamlessly. These are as follows:
01Animaker
Animaker is the most famous name in the list of software when you are looking for a whiteboard sketch animation maker. It features a drag and drop animation option, helping you to create the content easily. It is a suitable tool for professionals and beginners alike. It also offers thousands of templates that can be customised as per the needs of the user. You can simply utilise the stock videos and photos for better results.

Pros:
● Easy to use.
● The results are delivered quickly.
● It is suitable for professionals and beginners alike.
Cons:
● Some users complain about its interface.
● Sometimes video creation takes a lot of time.
02Renderforest video maker
Renderforest video maker is the best platform for all those who are looking to create sketch animation and other videos. It provides a free plan, and the same is available limitlessly for users. It features thousands of stock clips and a library of music tracks for creating the content seamlessly.

Pros:
● Easy to use.
● Different features are integrated.
● Impressive interface.
Cons:
● complaint about the content’s quality
03Powtoon
Powtoon is among the best visual communication platforms available, helping in creating short videos with animation. It features professionally designed templates along with some additional tools, including clips, audio, characters, and so on, which a user can utilize while creating the animation video. It comes up with paid and free options, and users can utilize any of them.

Pros:
● Easy to use.
● Templates are innovative.
● It makes engaging content.
Cons:
● Some find it difficult to use.
04Vyond
Vyond is among the best sketch animation makers and offers a free trial to all users. This is especially true for professionals with all the skills. Some pre-built templates are also there to help users create the content seamlessly. It features royalty-free music along with some stock characters that can be utilised in the content.

Pros:
● Good video creation tool.
● Many functions are integrated.
● One can upload content directly and get the animation.
Cons:
● Not for beginners,
05Keyshot
Keyshot is the best sketch animation software available these days. It features file formats along with some photorealistic rendering. The outcome created with it appears to be a real animation, and users can also add on some interactive visual studio. It also comes with a free trial, so users can use it and analyse whether they want to go for the paid version or not.

Pros:
● Innovative interface
● Support for two different extensions of models.
● A library of materials and textures is available.
Cons:
● Utilizing all the features seems to be difficult.
063ds Max Design
3ds Max design is the best sketch animation software for users when they are looking to create sketch animations. The best part is that it offers realistic animation behaviour along with all the sophisticated particle effects. There are certain third-party extensions that are available that a user can integrate for better results.

Pros:
● Third-party extensions are available.
● Realistic animation behaviour
● Procedural tools are available.
Cons:
● Beginners find it difficult to use.
07Moovly
Moovly is a cloud-based software with a drag and drop interface. Whenever you are looking to create sketch animations, this tool will help you out with it. It also has millions of free stock images and other content available, helping in creating the content as a user requires.

Pros:
● Simple to use
● Innovative interface
● Limitless features
Cons:
● The interface appears to be buggy sometimes.
08Harmony
Harmony is also among the best reproduction animation software available, which is helpful in creating the content with special lighting, shading, and special effects. There are certain options and features available to help in creating the content with the texture and sound management options. It comes in free and paid versions, and the free trial version will help users analyse whether they want to go for it or not.

Pros:
● Easy to use.
● Clean interface.
● Bugs free.
Cons:
● Beginners find it difficult to use.
09Modo
Modo is the best modeling, rendering, texturing, and sketch animation software available. Whenever you are looking for a sketch animation maker, this tool will definitely hit the top. The navigation through the software is really very easy, and users can get the outcome immediately as they want.

Pros:
● Navigation throughout is easy.
● The interface is innovative.
● by 7 community is available to help in case of issues
Cons:
● Outcome delivered bit lately.
10Cinema 4D
Cinema is among the software available for sketch animation that has an innovative interface along with some additional features. It comes with object tracking and some cartoon styling features that help users get the outcome they want. A free trial option is also integrated for convenience.

Pros:
● Easy to use.
● Additional layouts are integrated.
● Mouse shortcuts are easy to use.
Cons:
● Beginners find it difficult to use.
Part 3 How to Make Sketch Animations
Well, when it comes to making sketch animations, users are confused about the steps that they need to follow for the same. Well, do know that the steps are very simple to follow and one can easily complete the task with a few steps. The steps needed to be followed are:
01Step 1 Write and record the script
Writing and recording the script is the primary step a user needs to follow. It is helpful in analyzing where to start and how they want the animation sketch to come out. Get the organizational structures available and then integrate them according to the recorded script.
02Step 2 Create a storyboard
Get the storyboard or, say, the sketch animation maker like Filmora, available and start keeping the recorded stuff over the same in the best manner possible. After implementing the changes, test the same.
03Step 3 Draw it out
After managing all the things, it is integral to sketch the same. The tools are integrated into the software like Filmora, helping you to put things accordingly. You can also do the customizations required if required.
04Step 4 Scanning and editing
Now you need to scan the complete content and do any editing required. This part is among the most crucial ones because, after finalizing the outcome, you will not be able to do the editing. However, if you want to do the editing, you need to repeat the entire process. Check things out mindfully.
05Step 5 Play Filmora once more
When you are done editing the images and creating the sketch animation, put them on Filmora for the final results.
Wondershare Filmora Video Editor is one of the efficient tools available for users to create sketch animated videos easily. This tool has all the advanced features integrated, making the task easy to achieve. Also, it features a customization option, helping users to add on or extract things or effects easily and rapidly.
Wondershare Filmora
Get started easily with Filmora’s powerful performance, intuitive interface, and countless effects!
Try It Free Try It Free Try It Free Learn More >
● Key Takeaways from This Episode →
● Sketch animation is a new art form used for many purposes.
● Filmora is one of the best sketch animation video makers.
● Sketch animsation tools are best for us for creating the desired outcome.
Sketch animation has been in style for a very long time, and there is no doubt that it is a time-consuming process. But the sketch animation maker available these days helps us a lot. Are you aware of all these? Do you know how these are helping us currently?
Don’t worry if you are unaware because here we are discussing the same in detail and will help you to get the best tool for the same too. Let’s get started!
In this article
01 [What is a Sketch Animation?](#Part 1)
02 [How to Create Sketch Animation Videos with 10 Best Software](#Part 2)
03 [How to Make Sketch Animations](#Part 3)
Part 1 What is a Sketch Animation?
A sketch animation is a series of sketches that bring an idea to life. The drawings are usually rough and not perfect, but they are enough to tell a story. Sketch animations are used for many purposes, from advertising to product design. They can be used as a way to show a process or a product design in an easy-to-understand way.
Sketch animations can also be used for marketing purposes, such as explaining the features of a new product or promoting it with humour or through storytelling.
But to be someone who knows how to create the best sketches or videos, one needs to try their hands on the best sketch animation video maker too. One cannot achieve the desired results unless and until they are aware of a tool.
Part 2 How to Create Sketch Animation Videos with Best Software
In this section, we are discussing the best software to help you with Sketchup animation easily. All this software will cater to your needs for creating the best animations seamlessly. These are as follows:
01Animaker
Animaker is the most famous name in the list of software when you are looking for a whiteboard sketch animation maker. It features a drag and drop animation option, helping you to create the content easily. It is a suitable tool for professionals and beginners alike. It also offers thousands of templates that can be customised as per the needs of the user. You can simply utilise the stock videos and photos for better results.
Pros:
● Easy to use.
● The results are delivered quickly.
● It is suitable for professionals and beginners alike.
Cons:
● Some users complain about its interface.
● Sometimes video creation takes a lot of time.
02Renderforest video maker
Renderforest video maker is the best platform for all those who are looking to create sketch animation and other videos. It provides a free plan, and the same is available limitlessly for users. It features thousands of stock clips and a library of music tracks for creating the content seamlessly.
Pros:
● Easy to use.
● Different features are integrated.
● Impressive interface.
Cons:
● complaint about the content’s quality
03Powtoon
Powtoon is among the best visual communication platforms available, helping in creating short videos with animation. It features professionally designed templates along with some additional tools, including clips, audio, characters, and so on, which a user can utilize while creating the animation video. It comes up with paid and free options, and users can utilize any of them.
Pros:
● Easy to use.
● Templates are innovative.
● It makes engaging content.
Cons:
● Some find it difficult to use.
04Vyond
Vyond is among the best sketch animation makers and offers a free trial to all users. This is especially true for professionals with all the skills. Some pre-built templates are also there to help users create the content seamlessly. It features royalty-free music along with some stock characters that can be utilised in the content.
Pros:
● Good video creation tool.
● Many functions are integrated.
● One can upload content directly and get the animation.
Cons:
● Not for beginners,
05Keyshot
Keyshot is the best sketch animation software available these days. It features file formats along with some photorealistic rendering. The outcome created with it appears to be a real animation, and users can also add on some interactive visual studio. It also comes with a free trial, so users can use it and analyse whether they want to go for the paid version or not.
Pros:
● Innovative interface
● Support for two different extensions of models.
● A library of materials and textures is available.
Cons:
● Utilizing all the features seems to be difficult.
063ds Max Design
3ds Max design is the best sketch animation software for users when they are looking to create sketch animations. The best part is that it offers realistic animation behaviour along with all the sophisticated particle effects. There are certain third-party extensions that are available that a user can integrate for better results.
Pros:
● Third-party extensions are available.
● Realistic animation behaviour
● Procedural tools are available.
Cons:
● Beginners find it difficult to use.
07Moovly
Moovly is a cloud-based software with a drag and drop interface. Whenever you are looking to create sketch animations, this tool will help you out with it. It also has millions of free stock images and other content available, helping in creating the content as a user requires.
Pros:
● Simple to use
● Innovative interface
● Limitless features
Cons:
● The interface appears to be buggy sometimes.
08Harmony
Harmony is also among the best reproduction animation software available, which is helpful in creating the content with special lighting, shading, and special effects. There are certain options and features available to help in creating the content with the texture and sound management options. It comes in free and paid versions, and the free trial version will help users analyse whether they want to go for it or not.
Pros:
● Easy to use.
● Clean interface.
● Bugs free.
Cons:
● Beginners find it difficult to use.
09Modo
Modo is the best modeling, rendering, texturing, and sketch animation software available. Whenever you are looking for a sketch animation maker, this tool will definitely hit the top. The navigation through the software is really very easy, and users can get the outcome immediately as they want.
Pros:
● Navigation throughout is easy.
● The interface is innovative.
● by 7 community is available to help in case of issues
Cons:
● Outcome delivered bit lately.
10Cinema 4D
Cinema is among the software available for sketch animation that has an innovative interface along with some additional features. It comes with object tracking and some cartoon styling features that help users get the outcome they want. A free trial option is also integrated for convenience.
Pros:
● Easy to use.
● Additional layouts are integrated.
● Mouse shortcuts are easy to use.
Cons:
● Beginners find it difficult to use.
Part 3 How to Make Sketch Animations
Well, when it comes to making sketch animations, users are confused about the steps that they need to follow for the same. Well, do know that the steps are very simple to follow and one can easily complete the task with a few steps. The steps needed to be followed are:
01Step 1 Write and record the script
Writing and recording the script is the primary step a user needs to follow. It is helpful in analyzing where to start and how they want the animation sketch to come out. Get the organizational structures available and then integrate them according to the recorded script.
02Step 2 Create a storyboard
Get the storyboard or, say, the sketch animation maker like Filmora, available and start keeping the recorded stuff over the same in the best manner possible. After implementing the changes, test the same.
03Step 3 Draw it out
After managing all the things, it is integral to sketch the same. The tools are integrated into the software like Filmora, helping you to put things accordingly. You can also do the customizations required if required.
04Step 4 Scanning and editing
Now you need to scan the complete content and do any editing required. This part is among the most crucial ones because, after finalizing the outcome, you will not be able to do the editing. However, if you want to do the editing, you need to repeat the entire process. Check things out mindfully.
05Step 5 Play Filmora once more
When you are done editing the images and creating the sketch animation, put them on Filmora for the final results.
Wondershare Filmora Video Editor is one of the efficient tools available for users to create sketch animated videos easily. This tool has all the advanced features integrated, making the task easy to achieve. Also, it features a customization option, helping users to add on or extract things or effects easily and rapidly.
Wondershare Filmora
Get started easily with Filmora’s powerful performance, intuitive interface, and countless effects!
Try It Free Try It Free Try It Free Learn More >
● Key Takeaways from This Episode →
● Sketch animation is a new art form used for many purposes.
● Filmora is one of the best sketch animation video makers.
● Sketch animsation tools are best for us for creating the desired outcome.
Also read:
- New The Ultimate Cheatsheet to 15 Adobe Animate Alternatives
- In 2024, Tips for Learning Graphics Animation
- New The Best 8 Places for High-Quality Royalty Free Gifs
- New Ready to Animate Game Character From Scratch for 2024
- New Beginners Guide for Learning 3D Animation
- Updated 2024 Approved Ways to Get the Most up to Date Cartoon Character Design Tips
- 2024 Approved How to Make Your Characters Interactive in Unity Animation Rigging
- Updated 2024 Approved How to Find 3D Animation Studio Meeting All Your Inspiring Needs
- New Whats Rigging Animation
- New Simple Guide to Create New and Exciting Blackboard Animation for 2024
- New How to Make My Photo 3D Cartoon Online
- Updated Step-by-Step Guide to Send Gif WhatsApp on Android for 2024
- New 2024 Approved Animate Photo Online with These Awesome Tools
- New 2024 Approved How to Make Animated Videos for Business – an Ultimate Guide
- New Something About Types of Motion Graphics
- 2024 Approved Everything You Need to Know About Becoming a Motion Graphic Designer
- Updated Top 15 2D Animation Software Free That Worth to Try
- New In 2024, Top 12 Illusion Gifs Top Picks
- Updated Some Must-Know Useful Lego Animation Ideas for 2024
- In 2024, Best GIF Maker Software for Windows and Mac
- New In 2024, 15 Top Video to GIF App on iPhone and Android
- New In 2024, Ways to Master to Find 10 Best Free Animated Text Generator
- Updated In 2024, Create Animated Social Media Posts in Canva
- Updated 10 Great Moving Animation PowerPoint Techniques
- 2024 Approved Best Websites to Download Animated GIFs for Free
- In 2024, All About 3D Medical Animation And Its Uses
- New Tips for Animated Collage Maker
- In 2024, Tips to Create Animated Social Media Posts in Canva
- Updated Secrets to Make 2D Game Animation for 2024
- 10 Best Animation Makers for Kids to Have Fun for 2024
- What Wikipedia Wont Tell You Specifically About Character Rigging
- 2024 Approved What Is Motion Graphics
- Whats Music Video GIF & How to Add Music to GIF Files
- Apps to Animate Still Pictures Which Could Make Your Pictures Become Internet Sensation for 2024
- 15 Forgotten Cartoon Characters of All Time for 2024
- In 2024, Full Guide to Fix iToolab AnyGO Not Working On Samsung Galaxy M14 5G | Dr.fone
- Methods to Change GPS Location On Xiaomi 14 | Dr.fone
- How to Fix Android.Process.Media Has Stopped on Motorola Moto E13 | Dr.fone
- How to Intercept Text Messages on Realme 12 5G | Dr.fone
- How To Track IMEI Number Of Motorola G24 Power Through Google Earth?
- Troubleshooting Error Connecting to the Apple ID Server From iPhone 8
- In 2024, Complete Guide on Unlocking Apple iPhone 7 Plus with a Broken Screen? | Dr.fone
- 8 Best Apps for Screen Mirroring OnePlus Ace 2V PC | Dr.fone
- In 2024, How to Change/Add Location Filters on Snapchat For your Apple iPhone 6 Plus | Dr.fone
- How to Rescue Lost Messages from Y78+ (T1) Edition
- Tips And Tricks To Tell if Your iPhone 14 Pro Max Is Unlocked
- In 2024, Preparation to Beat Giovani in Pokemon Go For OnePlus 12R | Dr.fone
- How to use Pokemon Go Joystick on Apple iPhone XS Max? | Dr.fone
- How to Fix My Xiaomi Redmi A2+ Location Is Wrong | Dr.fone
- How to Easily Hard reset my Oppo F23 5G | Dr.fone
- How to Reset ZTE Blade A73 5G without Losing Data | Dr.fone
- Cellular Network Not Available for Voice Calls On Xiaomi 13T Pro | Dr.fone
- In 2024, How to Screen Mirroring Nokia XR21? | Dr.fone
- Which Pokémon can Evolve with a Moon Stone For Apple iPhone 15? | Dr.fone
- All Things You Need to Know about Wipe Data/Factory Reset For Samsung Galaxy S23 | Dr.fone
- How to recover old videos from your Infinix
- Updated 2024 Approved What Is an AI Artist?
- In 2024, How to Transfer Contacts from Xiaomi Redmi Note 12R to Other Android Devices Devices? | Dr.fone
- The Ultimate Guide to Unlocking Your iPhone 13 Pro Max on MetroPCS
- In 2024, Complete Tutorial to Use VPNa to Fake GPS Location On Poco F5 5G | Dr.fone
- Things You Should Know When Unlocking Total Wireless Of iPhone 12 Pro Max
- Fake the Location to Get Around the MLB Blackouts on Apple iPhone 14 | Dr.fone
- The Best iSpoofer Alternative to Try On Realme 12+ 5G | Dr.fone
- In 2024, Latest way to get Shiny Meltan Box in Pokémon Go Mystery Box On Google Pixel Fold | Dr.fone
- Methods to Change GPS Location On Infinix Note 30 Pro | Dr.fone
- How and Where to Find a Shiny Stone Pokémon For Vivo S17t? | Dr.fone
- How to Fake Snapchat Location without Jailbreak On Apple iPhone SE (2022) | Dr.fone
- Title: In 2024, 15 Best Collage Makers to Create Aesthetic Collages
- Author: Elon
- Created at : 2024-05-19 03:04:30
- Updated at : 2024-05-20 03:04:30
- Link: https://animation-videos.techidaily.com/in-2024-15-best-collage-makers-to-create-aesthetic-collages/
- License: This work is licensed under CC BY-NC-SA 4.0.
