

In 2024, 5 Best Adobe Animate Courses & Classes | Beginners Complete Tutorial
5 Best Adobe Animate Courses & Classes | Beginners Complete Tutorial
5 Best Adobe Animate Courses & Classes | Beginners Complete Tutorial
An easy yet powerful editor
Numerous effects to choose from
Detailed tutorials provided by official channel
Professional animation is hence one of the fields that has a bright future. Willing to learn more about animation?

Don’t worry! We’ve got you covered, follow this article and find out more about the best 5 Adobe animate courses.
In this article
01 [What is Adobe Animate CC?](#Part 1)
02 [Top 8 FULL ADOBE ANIMATE COURSES | Beginners Complete Tutorial](#Part 2)
03 [How to Quickly Learn the Skills of Adobe Animate Course](#Part 3)
Part 1 What is Adobe Animate CC?
1. Who should take Adobe Animate course?
Learning is never bound. Anyone willing to learn can put in effort and time. As long as you wish to learn, and have an interest in it you can take it up. Those of you who wish to make a career in animation are highly recommended to take up this course. The Adobe animate course can help you kickstart your career as a professional animator.
2. Are there prerequisites to Adobe Animate course?
Animation is one such field that does not require a lot of prerequisites. In fact, even a beginner who has absolutely no idea about animation can take up the adobe animate course.
Part 2 Top 5 FULL ADOBE ANIMATE COURSES | Beginners Complete Tutorial
1. Adobe animate CC 2018- HTML5 Banner Ads
Adobe animate CC 2018- HTML5 Banner Ads is one of the most comprehensive courses on adobe animate. It teaches you several relevant skills associated with animation and marketing (one of the primary applications of animation).

Skills you will learn:
● Basics of HTML5 banner ads using adobe animate
● Understanding the importance of Adobe animate CC in web advertisements
● Through this course, you’d become an expert at publishing ad networks
● The course will help you explore tools and techniques related to banner advertising
Udemy: Udemy Duration: About 5 hours
Pros
The course is beginner-friendly; it helps you advance your career in animation from scratch.
The course covers even complex concepts.
You receive a course completion certificate
Cons
The course is paid and you need to pay a nominal fee in order to access the lecture videos.
The course is monotonous i.e. there is no live teaching.
2. 2D animation for beginners with adobe animate, Walt Wonderwolk
If you’re looking for a well-designed course that covers almost all the necessary concepts, then this course is just the right one for you. Through this course, you can learn all about Adobe animate. All the primary concepts are explained in detail in this course.

Skills you will learn:
● All the primary concepts of computer-generated animations using Adobe animate.
● You will learn important concepts such as eases, symbols, vector drawings, tweens, and key frames.
● You will also learn how to add sound to your animation
● You will gain hands-on knowledge about drawing, composition, and animation of characters.
Udemy: skillshare
Pros
The course is great for beginners to start learning about Adobe animate
The course covers fundamental concepts of animation
Cons
You need a skillshare membership in order to access the lecture videos.
You need to pay in order to get a skillshare membership
You do not get a course completion certificate
3. Rigging and animating in Adobe animate
Looking for a quick crash course about Adobe animate? Well, this course is perfect for you. As the name suggests, in this course you shall learn all about rigging and animating 2d characters.

Skills you will learn:
● rigging and animating adobe animate
● Through this course, you will know how to efficiently animate any character
● Discover the utilization of vectors and images for rigging
● You will get a clear understanding of important concepts such as layer parenting, motion tweening, and symbols.
Udemy: Udemy Duration: around 4 hours
Pros
You will learn the major concepts of animation.
You will learn about rigging in detail, one of the core concepts of animation.
The course is available on Udemy, one of the most accessible platforms.
Cons
The course is not free, you need to pay a nominal amount to access the course.
It is not a renowned course.
The course is not Beginner friendly, it needs you to have some understanding of animation.
4. Learning Adobe Animate CC: Animation, LinkedIn learning
LinkedIn’s new platform, LinkedIn learning has several professional courses. Learning Adobe animate CC is one of the courses available on LinkedIn learning. It teaches you all about digital transformations. By the end of this course, you will be able to create a handy bit of animation.

Skills you will learn:
● Fundamentals of digital animation on Adobe animate CC
● Understanding and implementation of concepts such as keyframes, symbols, tweening, and drawing tools.
● Understand about the creation of natural effects and shape tweens.
● Adding music and sound effects to your animation.
Udemy: LinkedIn learning Duration: Around 3 hours
Pros
The course duration is considerably shorter.
All the primary concepts of animation are given importance in this course.
You get additional quizzes and study material along with the lecture videos
Cons
You need to have an active LinkedIn learning membership.
You need to pay for the LinkedIn learning membership.
The course is fast-paced, you need to grasp the concepts quickly.
5. Animate a walk cycle frame by frame in Adobe animate
This hands-on course is perfect for those who prefer experimenting as they watch the lecture videos. The course teaches you how to animate 2D and 3D characters smoothly. As you near the end of this course, you will have a clear understanding of how animation works and how to animate a hand-drawn character from scratch.

Skills you will learn:
● You will learn how to animate a hand-drawn character from scratch.
● You shall learn how to set up a working canvas and design a character.
● You will learn about the essential features of designing such as color fills, overlapping actions, shadows, and cleanup strokes.
Udemy: skillshare
Pros
The course focuses on the design aspect of animated characters.
The course gives you a hands-on experience with animation tools.
The course helps you learn how to create creative hand drawn characters.
Cons
You need an active skillshare membership to access the lecture videos
Skillshare membership is a paid one.
There are courses from more popular counterparts such as Udemy.
Part 3 How to Quickly Learn the Skills of Adobe Animate Course
Now that you’ve decided to get your hands dirty by dwelling into animation, you must give Wondershare Filmora Pro a try. What’s Wondershare Filmora ?
It’s essentially a one-stop shop for all your video editing needs. From video editing to rigging Wwondershare Filmora Pro has got it all. Using this platform, even a beginner can create exquisite animated videos.
The platform offers you several tools that are easy to use.
Even a neophyte could easily create beautiful animations by using Wondershare Filmora Pro. Using Wondershare Filmora Pro, you can not only animate characters but also define their motion, add sound effects, and edit videos. Filmora Pro offers you animation tools that are easier to operate and resultantly help you make amazing animated videos.
Wondershare Filmora
Get started easily with Filmora’s powerful performance, intuitive interface, and countless effects!
Try It Free Try It Free Try It Free Learn More >

Key Takeaways from This Episode
● As we see, today we’ve taken a look at a few of the best Adobe animate courses.
● Each of the courses can help you learn the basics of animation.
● Animation is indeed one of the budding fields, and with these fruitful courses, you can learn all about animation and possibly begin your journey as a freelancer or a professional in animation.
● Through these courses, you can create animated advertisement videos with ease. Wondershare Filmora Pro however can make your job easier by offering you amazing tools for generating animated videos!<
● Well, on this note we shall take leave! Wishing you good luck on your journey as an animator!
Professional animation is hence one of the fields that has a bright future. Willing to learn more about animation?
Don’t worry! We’ve got you covered, follow this article and find out more about the best 5 Adobe animate courses.
In this article
01 [What is Adobe Animate CC?](#Part 1)
02 [Top 8 FULL ADOBE ANIMATE COURSES | Beginners Complete Tutorial](#Part 2)
03 [How to Quickly Learn the Skills of Adobe Animate Course](#Part 3)
Part 1 What is Adobe Animate CC?
1. Who should take Adobe Animate course?
Learning is never bound. Anyone willing to learn can put in effort and time. As long as you wish to learn, and have an interest in it you can take it up. Those of you who wish to make a career in animation are highly recommended to take up this course. The Adobe animate course can help you kickstart your career as a professional animator.
2. Are there prerequisites to Adobe Animate course?
Animation is one such field that does not require a lot of prerequisites. In fact, even a beginner who has absolutely no idea about animation can take up the adobe animate course.
Part 2 Top 5 FULL ADOBE ANIMATE COURSES | Beginners Complete Tutorial
1. Adobe animate CC 2018- HTML5 Banner Ads
Adobe animate CC 2018- HTML5 Banner Ads is one of the most comprehensive courses on adobe animate. It teaches you several relevant skills associated with animation and marketing (one of the primary applications of animation).
Skills you will learn:
● Basics of HTML5 banner ads using adobe animate
● Understanding the importance of Adobe animate CC in web advertisements
● Through this course, you’d become an expert at publishing ad networks
● The course will help you explore tools and techniques related to banner advertising
Udemy: Udemy Duration: About 5 hours
Pros
The course is beginner-friendly; it helps you advance your career in animation from scratch.
The course covers even complex concepts.
You receive a course completion certificate
Cons
The course is paid and you need to pay a nominal fee in order to access the lecture videos.
The course is monotonous i.e. there is no live teaching.
2. 2D animation for beginners with adobe animate, Walt Wonderwolk
If you’re looking for a well-designed course that covers almost all the necessary concepts, then this course is just the right one for you. Through this course, you can learn all about Adobe animate. All the primary concepts are explained in detail in this course.
Skills you will learn:
● All the primary concepts of computer-generated animations using Adobe animate.
● You will learn important concepts such as eases, symbols, vector drawings, tweens, and key frames.
● You will also learn how to add sound to your animation
● You will gain hands-on knowledge about drawing, composition, and animation of characters.
Udemy: skillshare
Pros
The course is great for beginners to start learning about Adobe animate
The course covers fundamental concepts of animation
Cons
You need a skillshare membership in order to access the lecture videos.
You need to pay in order to get a skillshare membership
You do not get a course completion certificate
3. Rigging and animating in Adobe animate
Looking for a quick crash course about Adobe animate? Well, this course is perfect for you. As the name suggests, in this course you shall learn all about rigging and animating 2d characters.
Skills you will learn:
● rigging and animating adobe animate
● Through this course, you will know how to efficiently animate any character
● Discover the utilization of vectors and images for rigging
● You will get a clear understanding of important concepts such as layer parenting, motion tweening, and symbols.
Udemy: Udemy Duration: around 4 hours
Pros
You will learn the major concepts of animation.
You will learn about rigging in detail, one of the core concepts of animation.
The course is available on Udemy, one of the most accessible platforms.
Cons
The course is not free, you need to pay a nominal amount to access the course.
It is not a renowned course.
The course is not Beginner friendly, it needs you to have some understanding of animation.
4. Learning Adobe Animate CC: Animation, LinkedIn learning
LinkedIn’s new platform, LinkedIn learning has several professional courses. Learning Adobe animate CC is one of the courses available on LinkedIn learning. It teaches you all about digital transformations. By the end of this course, you will be able to create a handy bit of animation.
Skills you will learn:
● Fundamentals of digital animation on Adobe animate CC
● Understanding and implementation of concepts such as keyframes, symbols, tweening, and drawing tools.
● Understand about the creation of natural effects and shape tweens.
● Adding music and sound effects to your animation.
Udemy: LinkedIn learning Duration: Around 3 hours
Pros
The course duration is considerably shorter.
All the primary concepts of animation are given importance in this course.
You get additional quizzes and study material along with the lecture videos
Cons
You need to have an active LinkedIn learning membership.
You need to pay for the LinkedIn learning membership.
The course is fast-paced, you need to grasp the concepts quickly.
5. Animate a walk cycle frame by frame in Adobe animate
This hands-on course is perfect for those who prefer experimenting as they watch the lecture videos. The course teaches you how to animate 2D and 3D characters smoothly. As you near the end of this course, you will have a clear understanding of how animation works and how to animate a hand-drawn character from scratch.
Skills you will learn:
● You will learn how to animate a hand-drawn character from scratch.
● You shall learn how to set up a working canvas and design a character.
● You will learn about the essential features of designing such as color fills, overlapping actions, shadows, and cleanup strokes.
Udemy: skillshare
Pros
The course focuses on the design aspect of animated characters.
The course gives you a hands-on experience with animation tools.
The course helps you learn how to create creative hand drawn characters.
Cons
You need an active skillshare membership to access the lecture videos
Skillshare membership is a paid one.
There are courses from more popular counterparts such as Udemy.
Part 3 How to Quickly Learn the Skills of Adobe Animate Course
Now that you’ve decided to get your hands dirty by dwelling into animation, you must give Wondershare Filmora Pro a try. What’s Wondershare Filmora ?
It’s essentially a one-stop shop for all your video editing needs. From video editing to rigging Wwondershare Filmora Pro has got it all. Using this platform, even a beginner can create exquisite animated videos.
The platform offers you several tools that are easy to use.
Even a neophyte could easily create beautiful animations by using Wondershare Filmora Pro. Using Wondershare Filmora Pro, you can not only animate characters but also define their motion, add sound effects, and edit videos. Filmora Pro offers you animation tools that are easier to operate and resultantly help you make amazing animated videos.
Wondershare Filmora
Get started easily with Filmora’s powerful performance, intuitive interface, and countless effects!
Try It Free Try It Free Try It Free Learn More >
Key Takeaways from This Episode
● As we see, today we’ve taken a look at a few of the best Adobe animate courses.
● Each of the courses can help you learn the basics of animation.
● Animation is indeed one of the budding fields, and with these fruitful courses, you can learn all about animation and possibly begin your journey as a freelancer or a professional in animation.
● Through these courses, you can create animated advertisement videos with ease. Wondershare Filmora Pro however can make your job easier by offering you amazing tools for generating animated videos!<
● Well, on this note we shall take leave! Wishing you good luck on your journey as an animator!
Incredible Ways to Find Suitable Animated Graphic Maker
Incredible Ways to Find Suitable Animated Graphic Maker
An easy yet powerful editor
Numerous effects to choose from
Detailed tutorials provided by the official channel
Are you an enthusiast of animations, too? Do you, too, want to create something fun and exciting and show your skills through animation?
It is a hundred percent possible, with the animated graphic maker software available in the present times. Let us know more about this fantastic world of animation and the suitable animated graphic maker that will make your animation dreams and skills more enhanced and proficient in no time!
In this article
01 [Facts About Animated Graphics You Need to Know](#Part 1)
02 [Why You Should Use Animated Graphics in Your Marketing](#Part 2)
03 [Why You Should Use Animated Graphics in Your Marketing](#Part 3)
Part 1 Facts About Animated Graphics You Need to Know
There are specific facts that are important for you to know if you want to work with animations and use graphic animated tools. The facts are as follows.
01 Can Vector Graphics Be Animated?
Precisely, yes. Vector graphics can readily be animated, and that, too, is better than pixels. Animation or movement in animations occurs due to either of the two components- pixels and vectors. One can readily be animated in vector graphics. There are software tools available that can assist in the animation of vector graphics ideally. Thus, with the help of various software, creating animated vector graphics is now effortless and fun!

02 How Do I Animate a Still Image Online?
The process to animate static images online is no big deal at all. You just have to be familiar with the various software that is available for this work. Along with being familiar with the software, you also have to know how each of them works. If you know how the animation tools in the software you are going to use, it becomes an effortless and easy task to animate still images online.
You can animate static images online with the help of some renowned software or app like - Wondershare Filmora, Plotagraph, StoryZ, GIFMaker.me, PixaMotion, Movepic, Photo Motion, and 3Dthis. Each of these software ideally provides you with all the tools and functions that you can choose for animating still images online.
Wondershare Filmora
Power Up Your Story with Filmora. Professional video editing is made easy.
03 How Do You Make Animated Vector Graphics?
There are specific steps involved that help you in creating animated graphics. And the steps are as follows.
Steps for creating animated graphics:
● Isolating the vector
This step involves the selection of the vector image that you want to animate.
● Making duplicates of the vector image
You need to duplicate the vector image that you have chosen to animate. The duplication will help you reflect the movement in the image.
● Making changes in the frames
Proceed to make minor changes in each of the frames to reflect movement in the images.
● Wash it, rinse it and continue the cycle
Make a duplication of the artboard. Then, perform the changes the same as done previously. And repeat this cycle.
● Copy the large artboard
Copy the large artboard to the software you are using for animation. And then utilize the available tools of animation in the software for animating vector graphics.

Part 2 Why You Should Use Animated Graphics in Your Marketing?
In a very precise way, we can answer as animated graphics propagate and amplify awareness of the brands that integrate their utility. However, this is a general way of answering the important question. There are several reasons that make it necessary and beneficial for you to integrate animated graphics for websites for marketing your brand name. And they are as follows.
01 Eye-catching
One of the most important reasons for your marketing to include animated graphics is that they catch the attention of the audience more than any other method of marketing. They are interesting and fun, and that is the feature that attracts the attention of the audience. They get to see your brand in a more exciting and exciting way. Consequently, marketing your brand becomes ideally effective.

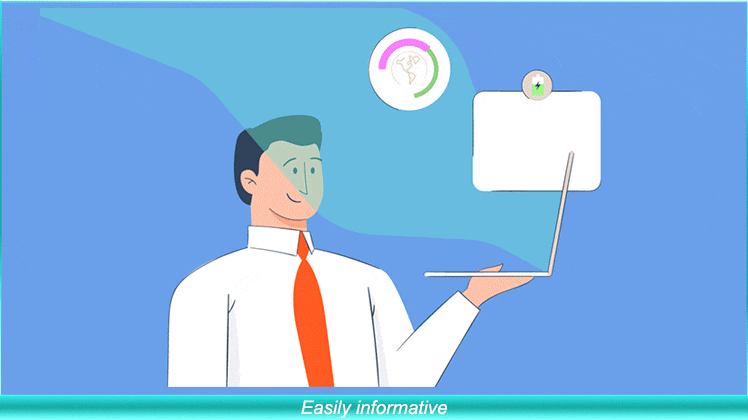
02 Easily informative
The motive for marketing is to inform the audience and other people about different information about your brand or company. Often, conveying information about your brands, services, and products becomes uninteresting for the audience. To make it more appealing, animated graphics can do the perfect job. They are fascinating to watch and deliver all the required information in a new and novel way. This does not bore the audience. Instead, if the animations are unique and exciting, people can actually be interested in watching them at will.
03 Customize it based on your needs
Graphic animations can be created based on the requirements of your marketing. And it is not just about the needs; it can be based on the audience genre you have. For example, if your products or services are meant for the kids, the animation will be made according to those factors that appeal to the kids. If your brand is for senior citizens, the animations will be different. Most importantly, if your brand shifts its audience genre, animations can also be created in the genre that you are choosing to serve at present. Thus, the customization ability of graphics animation offers flexibility in marketing.

03 A most efficient method of marketing
Graphic animation delivers the required promotional information in no time and in the most attractive way possible. Thus, there can be no other method of marketing as efficient and quick as graphics animation.
Part 3How to Create Animated Graphics That Stand out?
Well, the aspect of animation has attained the attention of thousands of enthusiasts all around the globe. And so, you will find numerous people making animations. And for this reason, there is numerous animation software available too on the internet. But, what can you do to design your animation to stand out? There are a few software for graphic animation that are better than the rest. And one of them is Wondershare Filmora. It is one of the top software. And it will readily and effortlessly help you integrate your animation skills and make your animations unique among the crowd.
What are the key features of this software?
● Professional quality animation tools
Do you believe that you possess immense animation skills? Then, no other software can be as motivational for you as Filmora Pro because its tools and features help you create professional-quality animation. You can readily create animated graphics for youtube from this software.
● Option for import and export
There is no occurrence of graphics hardware acceleration while you export a file from Filmora Pro.
● Easy user interface
The tools present in this software for animation are of professional quality. You can make animations that will look highly proficient. But, that does not make this software a difficult-to-use tool.
Filmora Features →
● Limitless video tracks
● Availability in Windows and well Mac
● Auto color correction
Filmora Features →
● Audio Noise Reduction
● Motion Graphics animation support
● Automatic Audio Sync
Key Takeaways from This Episode
● This was all about the different aspects of choosing a suitable animated graphic maker.
● You can readily opt for one of the several free animated graphics maker software available.
● But, if you want to avail yourself of the best, Filmora is the best go-to software for animated graphic making and exploring your animation skills.


Are you an enthusiast of animations, too? Do you, too, want to create something fun and exciting and show your skills through animation?
It is a hundred percent possible, with the animated graphic maker software available in the present times. Let us know more about this fantastic world of animation and the suitable animated graphic maker that will make your animation dreams and skills more enhanced and proficient in no time!
In this article
01 [Facts About Animated Graphics You Need to Know](#Part 1)
02 [Why You Should Use Animated Graphics in Your Marketing](#Part 2)
03 [Why You Should Use Animated Graphics in Your Marketing](#Part 3)
Part 1 Facts About Animated Graphics You Need to Know
There are specific facts that are important for you to know if you want to work with animations and use graphic animated tools. The facts are as follows.
01 Can Vector Graphics Be Animated?
Precisely, yes. Vector graphics can readily be animated, and that, too, is better than pixels. Animation or movement in animations occurs due to either of the two components- pixels and vectors. One can readily be animated in vector graphics. There are software tools available that can assist in the animation of vector graphics ideally. Thus, with the help of various software, creating animated vector graphics is now effortless and fun!
02 How Do I Animate a Still Image Online?
The process to animate static images online is no big deal at all. You just have to be familiar with the various software that is available for this work. Along with being familiar with the software, you also have to know how each of them works. If you know how the animation tools in the software you are going to use, it becomes an effortless and easy task to animate still images online.
You can animate static images online with the help of some renowned software or app like - Wondershare Filmora, Plotagraph, StoryZ, GIFMaker.me, PixaMotion, Movepic, Photo Motion, and 3Dthis. Each of these software ideally provides you with all the tools and functions that you can choose for animating still images online.
Wondershare Filmora
Power Up Your Story with Filmora. Professional video editing is made easy.
03 How Do You Make Animated Vector Graphics?
There are specific steps involved that help you in creating animated graphics. And the steps are as follows.
Steps for creating animated graphics:
● Isolating the vector
This step involves the selection of the vector image that you want to animate.
● Making duplicates of the vector image
You need to duplicate the vector image that you have chosen to animate. The duplication will help you reflect the movement in the image.
● Making changes in the frames
Proceed to make minor changes in each of the frames to reflect movement in the images.
● Wash it, rinse it and continue the cycle
Make a duplication of the artboard. Then, perform the changes the same as done previously. And repeat this cycle.
● Copy the large artboard
Copy the large artboard to the software you are using for animation. And then utilize the available tools of animation in the software for animating vector graphics.
Part 2 Why You Should Use Animated Graphics in Your Marketing?
In a very precise way, we can answer as animated graphics propagate and amplify awareness of the brands that integrate their utility. However, this is a general way of answering the important question. There are several reasons that make it necessary and beneficial for you to integrate animated graphics for websites for marketing your brand name. And they are as follows.
01 Eye-catching
One of the most important reasons for your marketing to include animated graphics is that they catch the attention of the audience more than any other method of marketing. They are interesting and fun, and that is the feature that attracts the attention of the audience. They get to see your brand in a more exciting and exciting way. Consequently, marketing your brand becomes ideally effective.
02 Easily informative
The motive for marketing is to inform the audience and other people about different information about your brand or company. Often, conveying information about your brands, services, and products becomes uninteresting for the audience. To make it more appealing, animated graphics can do the perfect job. They are fascinating to watch and deliver all the required information in a new and novel way. This does not bore the audience. Instead, if the animations are unique and exciting, people can actually be interested in watching them at will.
03 Customize it based on your needs
Graphic animations can be created based on the requirements of your marketing. And it is not just about the needs; it can be based on the audience genre you have. For example, if your products or services are meant for the kids, the animation will be made according to those factors that appeal to the kids. If your brand is for senior citizens, the animations will be different. Most importantly, if your brand shifts its audience genre, animations can also be created in the genre that you are choosing to serve at present. Thus, the customization ability of graphics animation offers flexibility in marketing.
03 A most efficient method of marketing
Graphic animation delivers the required promotional information in no time and in the most attractive way possible. Thus, there can be no other method of marketing as efficient and quick as graphics animation.
Part 3How to Create Animated Graphics That Stand out?
Well, the aspect of animation has attained the attention of thousands of enthusiasts all around the globe. And so, you will find numerous people making animations. And for this reason, there is numerous animation software available too on the internet. But, what can you do to design your animation to stand out? There are a few software for graphic animation that are better than the rest. And one of them is Wondershare Filmora. It is one of the top software. And it will readily and effortlessly help you integrate your animation skills and make your animations unique among the crowd.
What are the key features of this software?
● Professional quality animation tools
Do you believe that you possess immense animation skills? Then, no other software can be as motivational for you as Filmora Pro because its tools and features help you create professional-quality animation. You can readily create animated graphics for youtube from this software.
● Option for import and export
There is no occurrence of graphics hardware acceleration while you export a file from Filmora Pro.
● Easy user interface
The tools present in this software for animation are of professional quality. You can make animations that will look highly proficient. But, that does not make this software a difficult-to-use tool.
Filmora Features →
● Limitless video tracks
● Availability in Windows and well Mac
● Auto color correction
Filmora Features →
● Audio Noise Reduction
● Motion Graphics animation support
● Automatic Audio Sync
Key Takeaways from This Episode
● This was all about the different aspects of choosing a suitable animated graphic maker.
● You can readily opt for one of the several free animated graphics maker software available.
● But, if you want to avail yourself of the best, Filmora is the best go-to software for animated graphic making and exploring your animation skills.
All About 3D Medical Animation And Its Uses
All About 3D Medical Animation And Its Uses
An easy yet powerful editor
Numerous effects to choose from
Detailed tutorials provided by the official channel
You can see the use of 3D animation in all spheres of life including the medical field. More and more professionals in the field of the healthcare industry are now using 3D animations for several different tasks like education, communication, marketing, and more.

So, if you too are keen to learn about 3D medical animation videos, their uses, popular companies, and other details, you are reading on the right page.
In this article
01 [What is 3D Medical Animation?](#Part 1)
02 [Uses of 3D Medical Animations](#Part 2)
03 [Benefits of Using 3D Medical Animations](#Part 3)
04 [Top 3D Animation Companies](#Part 4)
05 [The Best Tool to Edit Your 3D Medical Animated Video – Wondershare Filmora](#Part 4)
Part 1 What is 3D Medical Animation?
A 3D medical animation can be termed as an animation that is used for different tasks in the healthcare and medical industry. These animations are used for several different tasks like explaining and detailing the concepts to the patients, compelling the investors, training professionals, marketing devices and drugs, and more. Depending on the target audience, the animations can be created by taking the help of specialized industries or using animated software.
Part 2 Uses Of 3D Medical Animations
3D animations have proved to be useful in the healthcare and medical industry in several ways. Below we have gathered some of the key benefits of the same.
01Using As A Mode Of Communication With Patients
Communication with the patients is one of the major uses of 3D animation in the healthcare field. Using animations, the communication with the patients can be enhanced in several ways. Explaining complex medical conditions and procedures to patients is difficult and here the animations help to a great extent. Going through animation will make a patient well prepared to see the doctor and learn about his/her medical condition or procedure to be performed. Patients do not have medical knowledge and these animations help them to know their condition, scenario, and procedure in a simple way that they can understand.
02Training Of Medical Professionals
Medical professionals need to keep themselves updated with the latest trends and practices and for this, they need to undergo training from time to time. 3D animations for the topics to be studied help them in better understanding the concepts and the procedures. Moreover, animations also help in e-learning.
03Educating New Professionals
For the new students using 3D animations is a great way to teach complex medical topics which otherwise explaining them orally or visually are not that effective. Animations can be used to educate about different topics like the anatomy of a human body, medical procedures, drug mechanisms, use of devices, and more.
04Used As A Marketing Tool
Since the presentation of medical information is difficult, marketing in the healthcare industry is quite a challenge. Moreover, the investors do not possess any medical know-how and the task of marketing becomes even more difficult. Thus, using 3D medical animations can be helpful here to explain the products, devices, and other things. Marketing of medicines to patients can also be done using animated mascots and characters.
05Marketing To Medical Professional
While marketing products and devices to medical professionals is not difficult in terms of knowledge or know-how as they are from the medical background. But with multiple marketing teams approaching them, time is a limitation and thus presentation needs to be short yet informative which can be achieved through the use of animations. Moreover, these animations can be sent to professionals through emails or by sharing a website link.

Part 3 Benefits Of Using 3D Medical Animations
Above we have discussed several fields and uses of 3D medical animations. Several factors make these animations useful.
●Helps in offering an in-depth and detailed explanation of complex subjects.
●Offers broad scope of explanation and especially subjects that cannot be explained easily through images or orally.
●Visual presentations offer better recall of the topic and details.
●Engagement through animations is enhanced and better.
●3D medical animations look professional and thus appear to be more reliable.
●Animations can be created to cater to a wider audience and people for different subjects.
Part 4 Top 3D Animation Companies
Creating 3D medical animation is not like creating any other 3D animation as it not only requires technical know-how but also in-depth knowledge of the medical field. Thus, for creating 3D medical animations, take help from the companies that specialize in this field to create 3D medical animation videos. Below we have shortlisted some of the popular 3D medical animation company.
●DG Medical Animations
●The SGNY Group
●Fusion Medical Animation
●TMBA Inc
●Pixeldust Studios
●Indigo Productions
●Nanobot Medical Animation Studio
●MultiVision Digital
●ICom Creative
●INVIVO
●JLab Animation
These companies offer different 3D medical animation services and depending on your requirements, you can choose the best suitable one.

Part 5 The Best Tool To Edit Your 3d Medical Animated Video – Wondershare Wondershare Filmora Video Editor
Even if you have got a 3D medical animation video created by a professional company, several times, the need may arise to edit and customize it. In such situations, you would need a professional tool that can help in editing the video without affecting the quality and other details. Wondershare Wondershare Filmora Video Editor is one such excellent software that can be used for the task. This Windows and Mac-based tool comes with a feature-packed built-in editor that can let you edit the files quickly and in a hassle-free manner. Additionally, you can also create decent animations using multiple features of the software.
The interface is simple and user-friendly that making the task of video creation and editing simple.
Key features of the software
● Allows creating dynamic and lively videos using over 100 layers of media.
● Allows complete editing and customization of the video using the editor.
● Animations using keyframing and other features can be created.
● Enhance audio using features like background noise reduction, keyframe audio editing, audio equalizer, and more.
● Support to features likes stabilization, fisheye correction, speed controlling, advanced color correction, 3D LUTs, and more.
● Support to Windows and Mac.
For Win 7 or later (64-bit)
For macOS 10.12 or later
● Key Takeaways from This Episode →
● The use of 3D medical animation in the healthcare and medical industry has increased manifold.
● The 3D medical animations are used for communication with patients, training, marketing, educations, and other uses.
● Several professional and specialized industries can help you create 3D medical animations.
● To edit the created videos and create other decent ones, Wondershare Wondershare Filmora Video Editor works as a great option.
You can see the use of 3D animation in all spheres of life including the medical field. More and more professionals in the field of the healthcare industry are now using 3D animations for several different tasks like education, communication, marketing, and more.
So, if you too are keen to learn about 3D medical animation videos, their uses, popular companies, and other details, you are reading on the right page.
In this article
01 [What is 3D Medical Animation?](#Part 1)
02 [Uses of 3D Medical Animations](#Part 2)
03 [Benefits of Using 3D Medical Animations](#Part 3)
04 [Top 3D Animation Companies](#Part 4)
05 [The Best Tool to Edit Your 3D Medical Animated Video – Wondershare Filmora](#Part 4)
Part 1 What is 3D Medical Animation?
A 3D medical animation can be termed as an animation that is used for different tasks in the healthcare and medical industry. These animations are used for several different tasks like explaining and detailing the concepts to the patients, compelling the investors, training professionals, marketing devices and drugs, and more. Depending on the target audience, the animations can be created by taking the help of specialized industries or using animated software.
Part 2 Uses Of 3D Medical Animations
3D animations have proved to be useful in the healthcare and medical industry in several ways. Below we have gathered some of the key benefits of the same.
01Using As A Mode Of Communication With Patients
Communication with the patients is one of the major uses of 3D animation in the healthcare field. Using animations, the communication with the patients can be enhanced in several ways. Explaining complex medical conditions and procedures to patients is difficult and here the animations help to a great extent. Going through animation will make a patient well prepared to see the doctor and learn about his/her medical condition or procedure to be performed. Patients do not have medical knowledge and these animations help them to know their condition, scenario, and procedure in a simple way that they can understand.
02Training Of Medical Professionals
Medical professionals need to keep themselves updated with the latest trends and practices and for this, they need to undergo training from time to time. 3D animations for the topics to be studied help them in better understanding the concepts and the procedures. Moreover, animations also help in e-learning.
03Educating New Professionals
For the new students using 3D animations is a great way to teach complex medical topics which otherwise explaining them orally or visually are not that effective. Animations can be used to educate about different topics like the anatomy of a human body, medical procedures, drug mechanisms, use of devices, and more.
04Used As A Marketing Tool
Since the presentation of medical information is difficult, marketing in the healthcare industry is quite a challenge. Moreover, the investors do not possess any medical know-how and the task of marketing becomes even more difficult. Thus, using 3D medical animations can be helpful here to explain the products, devices, and other things. Marketing of medicines to patients can also be done using animated mascots and characters.
05Marketing To Medical Professional
While marketing products and devices to medical professionals is not difficult in terms of knowledge or know-how as they are from the medical background. But with multiple marketing teams approaching them, time is a limitation and thus presentation needs to be short yet informative which can be achieved through the use of animations. Moreover, these animations can be sent to professionals through emails or by sharing a website link.
Part 3 Benefits Of Using 3D Medical Animations
Above we have discussed several fields and uses of 3D medical animations. Several factors make these animations useful.
●Helps in offering an in-depth and detailed explanation of complex subjects.
●Offers broad scope of explanation and especially subjects that cannot be explained easily through images or orally.
●Visual presentations offer better recall of the topic and details.
●Engagement through animations is enhanced and better.
●3D medical animations look professional and thus appear to be more reliable.
●Animations can be created to cater to a wider audience and people for different subjects.
Part 4 Top 3D Animation Companies
Creating 3D medical animation is not like creating any other 3D animation as it not only requires technical know-how but also in-depth knowledge of the medical field. Thus, for creating 3D medical animations, take help from the companies that specialize in this field to create 3D medical animation videos. Below we have shortlisted some of the popular 3D medical animation company.
●DG Medical Animations
●The SGNY Group
●Fusion Medical Animation
●TMBA Inc
●Pixeldust Studios
●Indigo Productions
●Nanobot Medical Animation Studio
●MultiVision Digital
●ICom Creative
●INVIVO
●JLab Animation
These companies offer different 3D medical animation services and depending on your requirements, you can choose the best suitable one.
Part 5 The Best Tool To Edit Your 3d Medical Animated Video – Wondershare Wondershare Filmora Video Editor
Even if you have got a 3D medical animation video created by a professional company, several times, the need may arise to edit and customize it. In such situations, you would need a professional tool that can help in editing the video without affecting the quality and other details. Wondershare Wondershare Filmora Video Editor is one such excellent software that can be used for the task. This Windows and Mac-based tool comes with a feature-packed built-in editor that can let you edit the files quickly and in a hassle-free manner. Additionally, you can also create decent animations using multiple features of the software.
The interface is simple and user-friendly that making the task of video creation and editing simple.
Key features of the software
● Allows creating dynamic and lively videos using over 100 layers of media.
● Allows complete editing and customization of the video using the editor.
● Animations using keyframing and other features can be created.
● Enhance audio using features like background noise reduction, keyframe audio editing, audio equalizer, and more.
● Support to features likes stabilization, fisheye correction, speed controlling, advanced color correction, 3D LUTs, and more.
● Support to Windows and Mac.
For Win 7 or later (64-bit)
For macOS 10.12 or later
● Key Takeaways from This Episode →
● The use of 3D medical animation in the healthcare and medical industry has increased manifold.
● The 3D medical animations are used for communication with patients, training, marketing, educations, and other uses.
● Several professional and specialized industries can help you create 3D medical animations.
● To edit the created videos and create other decent ones, Wondershare Wondershare Filmora Video Editor works as a great option.
In-Depth Study of Cartoon Painting Starts From Learning to Draw It
In-depth Study of Cartoon Painting Starts from Learning to Draw It
An easy yet powerful editor
Numerous effects to choose from
Detailed tutorials provided by the official channel
Cartoon painting is slowly becoming popular due to its many benefits, especially easy cartoon canvas painting. For instance, it is pretty eye-grabbing, especially if your audience is children.

Thanks to the animation aspect, it has become relatively cheap to do advertisements with cartoons instead of real people.
In this article
01 [What Are Good Cartoons to Draw?](#Part 1)
02 [How Do You Draw a Cartoon Character for Beginners?](#Part 2)
03 [Is There Anything else You Can Do to Draw Cartoons More Quickly?](#Part 3)
Part 1 What Are Good Cartoons to Draw?
As far as good cartoons are concerned, expect about 5 popular types. These cartoons to draw include:
01 Illustrative Cartoons
They are the most suitable cartoons to draw when portraying particular ideas directly and simply.
The cartoons are primarily used in advertisements, teaching aids, and explaining stories. They also have text that explains them further.
It explains why they are common in school books, making them perfect for explaining content or subject.

02 Animated Cartoons
It is important to note that these cartoons are drawn using computers despite looking as if they are hand-drawn. One thing that makes them stand out is that they seem to be in action and movement.
As much as that’s how they seem from the viewer’s perspective, that’s far from the truth. They are just drawn in series, and since the first one will differ from the second one, there is that illusion of movement created.

03 Comic Strips or Panels
In most cases, these are regular features characterized by established or known characters and usually displayed in newspapers.
Just like the animated cartoons, they are showcased in series to tell or illustrate a story. The series of panels have words said by the various characters.
The words are usually in balloons, and a single comic strip may cover a single or double page of a newspaper.

04 Gag Cartoons
As the name gag suggests, these cartoons revolve around jokes. These single-paneled cartoons often make fun of human beings.
Through overstatements, humor resonates from what is drawn. They can either serve as entertainment or point out, if not make fun of, people, especially their mistakes and faults. Besides the cartoon, expect a caption that’s often a single sentence.

05 Editorial or Political Cartoons
These cartoons are also made for the newspapers. Expect them to be a single drawing on an editorial page. It sheds more light on a particular newspaper’s editorial comment.
As much as some have captions, that’s not always the case. Just like the gag cartoons, they ridicule people, but the editorial ones focus on celebrities.

Part 2 How Do You Draw a Cartoon Character for Beginners?
Even cartoon painting experts were once beginners. So, feel encouraged because you stand a chance also to become an expert in the long run. All you need to do is take the first step. Fortunately, we are here to hold your hand as you do so. So. Without further ado, let’s get started.
01 Cartoon Painting of a Young Character
These are the steps you need to follow when doing so:
Step 1Start with the face
The face is significant, especially when it comes to cartoon painting. It has complex as well as simple parts. For example, the face itself is pretty basic since you will need to begin with a circle.
After that, draw a horizontal and vertical line and ensure that they intersect in the middle.

Step 2Draw the eyes by drawing
Draw the eyes by drawing an oval and ensuring that the top side is slightly tilting to the side.
Do the same thing on the other side since the norm is a pair of eyes. The gap between the two should also be sensible.

Step 3Draw eyebrows
On the upper side of the eye, ensure that the lines are slightly thick. The eyebrows also need to be placed above the eyes, slightly above the thick line representing the eyelashes.

Step 4Draw jaw
After that, start shaping the jaw. Keep in mind that it plays a huge role in determining whether the character will look thin or fat. Additionally, how you draw the jaw determines whether the character will be old or young and how old or young the person will look.

Step 5Draw nose
Design the nose and ensure that you don’t put many details. The good thing about the nose is that a tip is enough to serve the purpose. Another common approach when drawing the nose is doing so as if you are viewing it from the side.

Step 6Draw mouth
Next, draw the mouth and consider the age of your character as you do so. If it is a child, despite the gender, stick to simplicity. You should also avoid drawing the lips. Preferably, go for the good, expressive trace since it never disappoints.

Step 7Draw ears
Proceed to the ears and in relation to whether the character is facing the camera or not. If your character is looking at the camera, you should see the front side view. Therefore, it won’t make sense to display the internal cavities in this case.

Step 8Draw haircut
Proceed to the ears and in relation to whether the character is facing the camera or not. If your character is looking at the camera, you should see the front side view. Therefore, it won’t make sense to display the internal cavities in this case.
As scary as it may look, you need not be an expert to make the haircut look perfect. Additionally, there is no constant way of drawing the haircut, and you are at liberty to practice as much creativity as possible.
Nevertheless, please don’t take it lightly since it can be quite descriptive. For instance, the hair is used to tell the personality of a character. Practice makes perfect, and you better keep doing it until you get it right. Ensure that what you draw shows the age and character of the cartoons to draw as perfectly as possible.
So far, our focus has been on a young character. However, that’s not always the case explaining why we will look at a cartoon painting of an old character.

02 Cartoon Paintings of an Old Character
If you want your character to look old, this is the way to go:
Step 1Old character draw a face
The face is no different from that of a young character. Start with the eyes and add their pupils, eyebrows and don’t forget to add wrinkles.
Since the character is old compared to the previous one, ensure that the eyebrows are thick. They should occupy more space of the forehead.

Step 2Old character make the chin
Make the chin longer too.

Step 3Old character draw the nose
Ensure that the nose design looks wider and larger since the character is old. To achieve that, make the nose look close to the eyes

Step 4Old character exaggerates mustache
Skip the mouth bit and instead go for a big, exaggerated mustache. That’s one common characteristic of an old character, especially male.

Step 5Draw hair
When it comes to hair, bald and side hair will play the trick perfectly. The nose is no different from that of a young character.

03 Cartoon Painting of a Female Character
So far, our focus has been on a male character. So, what do you do if you want to create a female one instead? These are some of the steps to follow as you do so.
The procedure is not that different. However, consider that women’s facial structures are more delicate than those of their male counterparts. Some of the things that stand out include long hair, a small nose, a thin chin, thin eyebrows, and large, expressive eyelashes. Large pupils will also do, especially if you are good at drawing.

Key Takeaways from This Episode
● There are five major types of cartoons to draw, animation, editorial, gag, illustrative and comic strips.
● Cartoon painting is not that hard, especially if you have a guide on how to go about it.
● If that turns out to be difficult, you can always go for the Filmora pro.
Cartoon painting is slowly becoming popular due to its many benefits, especially easy cartoon canvas painting. For instance, it is pretty eye-grabbing, especially if your audience is children.
Thanks to the animation aspect, it has become relatively cheap to do advertisements with cartoons instead of real people.
In this article
01 [What Are Good Cartoons to Draw?](#Part 1)
02 [How Do You Draw a Cartoon Character for Beginners?](#Part 2)
03 [Is There Anything else You Can Do to Draw Cartoons More Quickly?](#Part 3)
Part 1 What Are Good Cartoons to Draw?
As far as good cartoons are concerned, expect about 5 popular types. These cartoons to draw include:
01 Illustrative Cartoons
They are the most suitable cartoons to draw when portraying particular ideas directly and simply.
The cartoons are primarily used in advertisements, teaching aids, and explaining stories. They also have text that explains them further.
It explains why they are common in school books, making them perfect for explaining content or subject.
02 Animated Cartoons
It is important to note that these cartoons are drawn using computers despite looking as if they are hand-drawn. One thing that makes them stand out is that they seem to be in action and movement.
As much as that’s how they seem from the viewer’s perspective, that’s far from the truth. They are just drawn in series, and since the first one will differ from the second one, there is that illusion of movement created.
03 Comic Strips or Panels
In most cases, these are regular features characterized by established or known characters and usually displayed in newspapers.
Just like the animated cartoons, they are showcased in series to tell or illustrate a story. The series of panels have words said by the various characters.
The words are usually in balloons, and a single comic strip may cover a single or double page of a newspaper.
04 Gag Cartoons
As the name gag suggests, these cartoons revolve around jokes. These single-paneled cartoons often make fun of human beings.
Through overstatements, humor resonates from what is drawn. They can either serve as entertainment or point out, if not make fun of, people, especially their mistakes and faults. Besides the cartoon, expect a caption that’s often a single sentence.
05 Editorial or Political Cartoons
These cartoons are also made for the newspapers. Expect them to be a single drawing on an editorial page. It sheds more light on a particular newspaper’s editorial comment.
As much as some have captions, that’s not always the case. Just like the gag cartoons, they ridicule people, but the editorial ones focus on celebrities.
Part 2 How Do You Draw a Cartoon Character for Beginners?
Even cartoon painting experts were once beginners. So, feel encouraged because you stand a chance also to become an expert in the long run. All you need to do is take the first step. Fortunately, we are here to hold your hand as you do so. So. Without further ado, let’s get started.
01 Cartoon Painting of a Young Character
These are the steps you need to follow when doing so:
Step 1Start with the face
The face is significant, especially when it comes to cartoon painting. It has complex as well as simple parts. For example, the face itself is pretty basic since you will need to begin with a circle.
After that, draw a horizontal and vertical line and ensure that they intersect in the middle.
Step 2Draw the eyes by drawing
Draw the eyes by drawing an oval and ensuring that the top side is slightly tilting to the side.
Do the same thing on the other side since the norm is a pair of eyes. The gap between the two should also be sensible.
Step 3Draw eyebrows
On the upper side of the eye, ensure that the lines are slightly thick. The eyebrows also need to be placed above the eyes, slightly above the thick line representing the eyelashes.
Step 4Draw jaw
After that, start shaping the jaw. Keep in mind that it plays a huge role in determining whether the character will look thin or fat. Additionally, how you draw the jaw determines whether the character will be old or young and how old or young the person will look.
Step 5Draw nose
Design the nose and ensure that you don’t put many details. The good thing about the nose is that a tip is enough to serve the purpose. Another common approach when drawing the nose is doing so as if you are viewing it from the side.
Step 6Draw mouth
Next, draw the mouth and consider the age of your character as you do so. If it is a child, despite the gender, stick to simplicity. You should also avoid drawing the lips. Preferably, go for the good, expressive trace since it never disappoints.
Step 7Draw ears
Proceed to the ears and in relation to whether the character is facing the camera or not. If your character is looking at the camera, you should see the front side view. Therefore, it won’t make sense to display the internal cavities in this case.
Step 8Draw haircut
Proceed to the ears and in relation to whether the character is facing the camera or not. If your character is looking at the camera, you should see the front side view. Therefore, it won’t make sense to display the internal cavities in this case.
As scary as it may look, you need not be an expert to make the haircut look perfect. Additionally, there is no constant way of drawing the haircut, and you are at liberty to practice as much creativity as possible.
Nevertheless, please don’t take it lightly since it can be quite descriptive. For instance, the hair is used to tell the personality of a character. Practice makes perfect, and you better keep doing it until you get it right. Ensure that what you draw shows the age and character of the cartoons to draw as perfectly as possible.
So far, our focus has been on a young character. However, that’s not always the case explaining why we will look at a cartoon painting of an old character.
02 Cartoon Paintings of an Old Character
If you want your character to look old, this is the way to go:
Step 1Old character draw a face
The face is no different from that of a young character. Start with the eyes and add their pupils, eyebrows and don’t forget to add wrinkles.
Since the character is old compared to the previous one, ensure that the eyebrows are thick. They should occupy more space of the forehead.
Step 2Old character make the chin
Make the chin longer too.
Step 3Old character draw the nose
Ensure that the nose design looks wider and larger since the character is old. To achieve that, make the nose look close to the eyes
Step 4Old character exaggerates mustache
Skip the mouth bit and instead go for a big, exaggerated mustache. That’s one common characteristic of an old character, especially male.
Step 5Draw hair
When it comes to hair, bald and side hair will play the trick perfectly. The nose is no different from that of a young character.
03 Cartoon Painting of a Female Character
So far, our focus has been on a male character. So, what do you do if you want to create a female one instead? These are some of the steps to follow as you do so.
The procedure is not that different. However, consider that women’s facial structures are more delicate than those of their male counterparts. Some of the things that stand out include long hair, a small nose, a thin chin, thin eyebrows, and large, expressive eyelashes. Large pupils will also do, especially if you are good at drawing.
Key Takeaways from This Episode
● There are five major types of cartoons to draw, animation, editorial, gag, illustrative and comic strips.
● Cartoon painting is not that hard, especially if you have a guide on how to go about it.
● If that turns out to be difficult, you can always go for the Filmora pro.
Ways on How to Get Started in Stop Motion Claymation
How to Get Started in Stop Motion Claymation
An easy yet powerful editor
Numerous effects to choose from
Detailed tutorials provided by the official channel
Stop Motion Claymation is not a new concept. It has been floating around the media industry since the 1950 and many creators have utilized it to tell their stories to the world. If you haven’t heard about claymations so far, you are not alone. Unfortunately, a wide range of the global population is unfamiliar with the concept of stop motion claymation.

But, if you are someone who wants to get into animation, but don’t have an expensive budget, claymations can be a great tool to share your story with the world and attract a global audience. In this guide, we are going to talk about claymations, some of the most popular claymation websites, and the best ways to get started with stop motion claymation. So, if you also want to explore your creative side and be unique with the approach, continue reading. By the end of this guide, you’ll be running out to buy clay and make some high-quality clay stop-motion animations.
In this article
01 [Ways to Make Stop Motion Videos with Clay Using Your Phone](#Part 1)
02 [How to Edit a Stop Motion Claymation Animation ](#Part 2)
03 [Best 5 Clay for Stop Motion and Ways to Get Started](#Part 3)
Part 1 Ways to Make Stop Motion Videos with Clay Using Your Phone
So, now that you are familiar with the basic concept of clay stop animation, let’s understand how you can get started with claymation animations. Ideally, if you are an absolute beginner, you would want to start by understanding the dynamics of creating clay models first. Whether you are going to create a animation or a simple stop motion clip, the models will play a major role in the story and it would be important that these models look appealing.
When it comes to capturing the motion, you don’t need any expensive cameras. You can easily shoot the entire motion on your phone as well. Today, even the basic smartphones come with recording features and they are enough to capture the movement of your clay models. However, if you want to keep the production quality as high as possible, make sure to invest in a decent tripod. A tripod will ensure that your stop motion claymation doesn’t feel jerky at all.
After you have crafted the clay models and purchased the tripod, the next step would be to write down a script for the animation. Whether you are creating a short video or a 3-hour long movie, a script will ensure that you don’t miss out on any important scenes while recording the animation. There are multiple script writing software you can find online that’ll speed up the entire process. However, as a beginner, you can also pen down your script in a regular MS Word document. Lack of resources should never come between your creativity.
Once the script is final, the next phase would be to record the stop motion animation claymation. This is the stage where you have to be extra careful because you’ll practically be recording the storyline of your animation. Simply fire up the smartphone’s camera and start shooting each frame one-by-one. Keep in mind that shooting a stop motion animation is pretty time-consuming and it can even take up to 5-7 hours to get the job done. So, make sure to grab your cup of coffee and stay patient throughout the process.
Part 2 How to Edit a Stop Motion Claymation Animation
At this point, you would have several hundred photographs and a script in mind to make your stop motion claymation. So, the next part would be to turn these raw images into an animation. To do this, you can use different types of video editing applications. However, we recommend using Wondershare Wondershare Filmora Video Editor for the job.
It’s a full-scale cross-platform video editing tool that’s designed to help creators showcase their creativity by turning RAW images/clips into visually engaging videos. Filmora is targeted towards a wide variety of creators such as YouTubers, social media influencers, production artists, and even animators. For an animator, Filmora is nothing short of an oasis.
The tool comes with a built-in media library where you’ll find hundreds of ready-to-use animation templates. These templates could be integrated into your video with a single click. The best part is all these templates are fully customizable, which means you can modify them to meet the overall theme of your claymation.
Filmora boasts a timeline-based interface that makes the editing process a hassle-free task, especially when you have hundreds of images to edit. You can simply bring all the images to the timeline and merge them together to make a stunning animation within a few minutes. The tool also comes with a dedicated audio editing panel where you can add the voiceover or background tracks to bring life to your stop animation claymation. If you have edited any videos in the past, you may already know that the audio is the backbone for any video, even if you are editing a stop motion animation using clay.
Here’s a quick recap of all the features that make Wondershare Filmora an ideal video editing software for stop motion claymation animation.
● Timeline based user interface for more convenient editing
● Built-in media library to find graphic, animation, and audio templates
● Export videos directly to YouTube and other social media platforms
● Available for both Windows and macOS
So, if you are also ready with your clay models and smartphone’s camera, get started with the shooting process and use Filmora to turn the RAW images to a visually enticing stop motion claymation.
Part 3 Best 5 Clay for Stop Motion and Ways to Get Started
In case you are getting serious about stop motion claymations, you would also want to understand which clays are best for such animations. To be honest, you can find dozens of clays in the market. But, not every clay is worth using in a claymation. Here are 5 of the best clays for stop motion animations you can use in your projects.
01Puppet Putty
Puppet Putty is one of the most popular clay brands that’s specifically marketed towards claymation fanatics. As compared to other available options, the Puppet Putty is comparatively softer, which means you can easily mold it into different shapes using your hands only. While the Puppet Putty works great by itself, you can also combine it with other types of clay to make your clay models more appealing.
02Van Aken
Van Aken is another popular clay brand that’s ideal for claymation animations. It’s one of the inexpensive clays and that’s the reason why many claymation fanatics use it to create clay models for their projects. One of the best features of the Van Aken clay is that it’s available in different colors, which means you can get creative with your models by mixing different color combinations. Some animators also mix Van Aken with Pupper Putty to make the characters look more stunning under the perfect lighting conditions.
03Sargent Art
Sargent Art is a brand that primarily designs clays for sculpting. However, you can also use it to create clay models for your claymations. Sargent Art’s clay has the perfect blend of Wax and Oil, which makes it quite easier for the animator to sculpt different models.
04Sculpey
Sculpey is a clay brand that designs polymer-based clays that are relatively better than the traditional ceramic mud clays. This type of clay is made up of plastic and it’s comparatively more pliable than any regular clay. And, once you have your sculpture ready, you can simply place the cay model in an oven and make it rock solid within a few minutes.
05Plastilina
Finally, Plastilina is also a great option for stop motion claymation models. You can use Plastilina to design parts of the model that need to look as natural as possible. For example, you can use Plastilina to create parts such as teeth, eyes, and tongue so that your animation characters don’t contain any distortions.
● Key Takeaways from This Episode →
● Stop motion claymation animations are a great way to create stunning animations and share your creative stories with the world.
● To get started with claymations, you’ll need the right type of clay, an editing software like Wondershare Filmora Video Editor , and a storyline.
● There are different types of clays you can use to create clay models for your animations. To make your animations look more natural, you can also mix different types of clays together. This will also allow you to create personalized color combinations for your animation projects.
Stop Motion Claymation is not a new concept. It has been floating around the media industry since the 1950 and many creators have utilized it to tell their stories to the world. If you haven’t heard about claymations so far, you are not alone. Unfortunately, a wide range of the global population is unfamiliar with the concept of stop motion claymation.
But, if you are someone who wants to get into animation, but don’t have an expensive budget, claymations can be a great tool to share your story with the world and attract a global audience. In this guide, we are going to talk about claymations, some of the most popular claymation websites, and the best ways to get started with stop motion claymation. So, if you also want to explore your creative side and be unique with the approach, continue reading. By the end of this guide, you’ll be running out to buy clay and make some high-quality clay stop-motion animations.
In this article
01 [Ways to Make Stop Motion Videos with Clay Using Your Phone](#Part 1)
02 [How to Edit a Stop Motion Claymation Animation ](#Part 2)
03 [Best 5 Clay for Stop Motion and Ways to Get Started](#Part 3)
Part 1 Ways to Make Stop Motion Videos with Clay Using Your Phone
So, now that you are familiar with the basic concept of clay stop animation, let’s understand how you can get started with claymation animations. Ideally, if you are an absolute beginner, you would want to start by understanding the dynamics of creating clay models first. Whether you are going to create a animation or a simple stop motion clip, the models will play a major role in the story and it would be important that these models look appealing.
When it comes to capturing the motion, you don’t need any expensive cameras. You can easily shoot the entire motion on your phone as well. Today, even the basic smartphones come with recording features and they are enough to capture the movement of your clay models. However, if you want to keep the production quality as high as possible, make sure to invest in a decent tripod. A tripod will ensure that your stop motion claymation doesn’t feel jerky at all.
After you have crafted the clay models and purchased the tripod, the next step would be to write down a script for the animation. Whether you are creating a short video or a 3-hour long movie, a script will ensure that you don’t miss out on any important scenes while recording the animation. There are multiple script writing software you can find online that’ll speed up the entire process. However, as a beginner, you can also pen down your script in a regular MS Word document. Lack of resources should never come between your creativity.
Once the script is final, the next phase would be to record the stop motion animation claymation. This is the stage where you have to be extra careful because you’ll practically be recording the storyline of your animation. Simply fire up the smartphone’s camera and start shooting each frame one-by-one. Keep in mind that shooting a stop motion animation is pretty time-consuming and it can even take up to 5-7 hours to get the job done. So, make sure to grab your cup of coffee and stay patient throughout the process.
Part 2 How to Edit a Stop Motion Claymation Animation
At this point, you would have several hundred photographs and a script in mind to make your stop motion claymation. So, the next part would be to turn these raw images into an animation. To do this, you can use different types of video editing applications. However, we recommend using Wondershare Wondershare Filmora Video Editor for the job.
It’s a full-scale cross-platform video editing tool that’s designed to help creators showcase their creativity by turning RAW images/clips into visually engaging videos. Filmora is targeted towards a wide variety of creators such as YouTubers, social media influencers, production artists, and even animators. For an animator, Filmora is nothing short of an oasis.
The tool comes with a built-in media library where you’ll find hundreds of ready-to-use animation templates. These templates could be integrated into your video with a single click. The best part is all these templates are fully customizable, which means you can modify them to meet the overall theme of your claymation.
Filmora boasts a timeline-based interface that makes the editing process a hassle-free task, especially when you have hundreds of images to edit. You can simply bring all the images to the timeline and merge them together to make a stunning animation within a few minutes. The tool also comes with a dedicated audio editing panel where you can add the voiceover or background tracks to bring life to your stop animation claymation. If you have edited any videos in the past, you may already know that the audio is the backbone for any video, even if you are editing a stop motion animation using clay.
Here’s a quick recap of all the features that make Wondershare Filmora an ideal video editing software for stop motion claymation animation.
● Timeline based user interface for more convenient editing
● Built-in media library to find graphic, animation, and audio templates
● Export videos directly to YouTube and other social media platforms
● Available for both Windows and macOS
So, if you are also ready with your clay models and smartphone’s camera, get started with the shooting process and use Filmora to turn the RAW images to a visually enticing stop motion claymation.
Part 3 Best 5 Clay for Stop Motion and Ways to Get Started
In case you are getting serious about stop motion claymations, you would also want to understand which clays are best for such animations. To be honest, you can find dozens of clays in the market. But, not every clay is worth using in a claymation. Here are 5 of the best clays for stop motion animations you can use in your projects.
01Puppet Putty
Puppet Putty is one of the most popular clay brands that’s specifically marketed towards claymation fanatics. As compared to other available options, the Puppet Putty is comparatively softer, which means you can easily mold it into different shapes using your hands only. While the Puppet Putty works great by itself, you can also combine it with other types of clay to make your clay models more appealing.
02Van Aken
Van Aken is another popular clay brand that’s ideal for claymation animations. It’s one of the inexpensive clays and that’s the reason why many claymation fanatics use it to create clay models for their projects. One of the best features of the Van Aken clay is that it’s available in different colors, which means you can get creative with your models by mixing different color combinations. Some animators also mix Van Aken with Pupper Putty to make the characters look more stunning under the perfect lighting conditions.
03Sargent Art
Sargent Art is a brand that primarily designs clays for sculpting. However, you can also use it to create clay models for your claymations. Sargent Art’s clay has the perfect blend of Wax and Oil, which makes it quite easier for the animator to sculpt different models.
04Sculpey
Sculpey is a clay brand that designs polymer-based clays that are relatively better than the traditional ceramic mud clays. This type of clay is made up of plastic and it’s comparatively more pliable than any regular clay. And, once you have your sculpture ready, you can simply place the cay model in an oven and make it rock solid within a few minutes.
05Plastilina
Finally, Plastilina is also a great option for stop motion claymation models. You can use Plastilina to design parts of the model that need to look as natural as possible. For example, you can use Plastilina to create parts such as teeth, eyes, and tongue so that your animation characters don’t contain any distortions.
● Key Takeaways from This Episode →
● Stop motion claymation animations are a great way to create stunning animations and share your creative stories with the world.
● To get started with claymations, you’ll need the right type of clay, an editing software like Wondershare Filmora Video Editor , and a storyline.
● There are different types of clays you can use to create clay models for your animations. To make your animations look more natural, you can also mix different types of clays together. This will also allow you to create personalized color combinations for your animation projects.
Tutorials to Make Animated Images
Tutorials to Make Animated Images – Even if You’re Just Starting out
An easy yet powerful editor
Numerous effects to choose from
Detailed tutorials provided by the official channel
Not to mention, if you animate pictures, you’ll be able to stand apart in the crowd and maximize your brand exposure. By creating animated happy birthday images, you’ll be able to bring life to the still images.
In this guide, we’ll walk you through different ways to make animated images. Read this guide and you’ll be able to animate your images without any hassle.
In this article
01 [What are Animated Pictures?](#Part 1)
02 [Is It Possible to Animate Pictures On Your Own?](#Part 2)
03 [5 Best Tools to Make Animated Pictures](#Part 3)
Part 1 What are Animated Pictures?
For readers who aren’t familiar with animated images, here’s what you need to know. An animated image (also referred to as GIF) is designed by adding motion to a still image. Remember all the funny cat memes you see on Instagram? Well, they are a great example of animated images.
However, it’s important to understand that the applications of animated images aren’t only limited to social media and marketing. You can even animate your family photos and add life to those 20-year old pictures you’ve been saving forever. Not to mention, you can also create animated images of your favorite superhero movie. Love the Justice League starcast? Simply pick your favorite superhero and you’ll get stunning Justice League animated images.
Part 2 Is It Possible to Animate Pictures On Your Own?
When it comes to animating images, the majority of users want to know if it’s at all possible to create animated images by themselves. Even though animating an image is a tedious task, it’s safe to say that you can do it without any external help.
Of course, if you choose a tool like Adobe Photoshop to do the job, you’ll be out of luck because of the steep learning curve. But, there are hundreds of other alternatives you can use to animate pictures. There are ready-to-use 3D photo animators online that’ll allow you to animate any image within a few seconds. These tools are equipped with pre-installed animation templates that you can apply to any image and bring life to them.
Part 3 4 Best Tools to Make Animated Pictures
So, now that you know the key benefits of animated pictures, let’s take a look at the seven best tools you can use to create stunning animated images. To ensure we provide you with a diverse list of photo animators, we have included both platform-dependent and cross-platform solutions to the list.
01Motion Leap
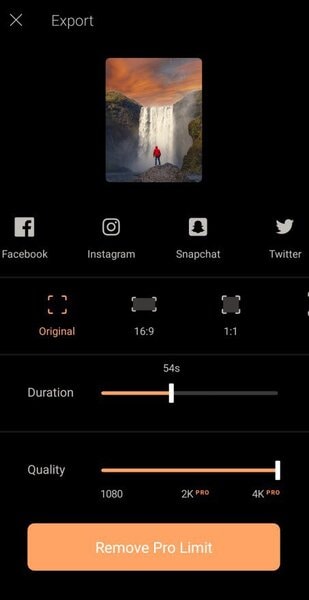
Motion Leap is a free 3D motion graphics generator that works on the Android platform. The tool offers an easy-to-use interface that editors can utilize to turn their still images into dedicated videos that play in loop. One of the major advantages of using Motion Leap for animating images is that it doesn’t leave a watermark on your pictures, even if you are using the free version of the tool. In fact, the free version offers all the necessary tools you’ll need to create animated pictures.
Since Motion Leap works on mobile, you don’t have to fire up your laptop every time you want to create an animated picture. Simply launch the app on your smartphone and you’ll be able to animate pictures right away. As of now, the only downside of Motion Leap is that it doesn’t save the output in GIF format, unless you have purchased the premium version.
Key Features:
● Add motion graphics by simply dragging objects on your screen
● Freeze specific areas within the image and apply dedicated filters
● Built-in editing panel to adjust different elements such as exposure, contrast, highlights, etc.
● Motion Leap is affordable
02Animate Me
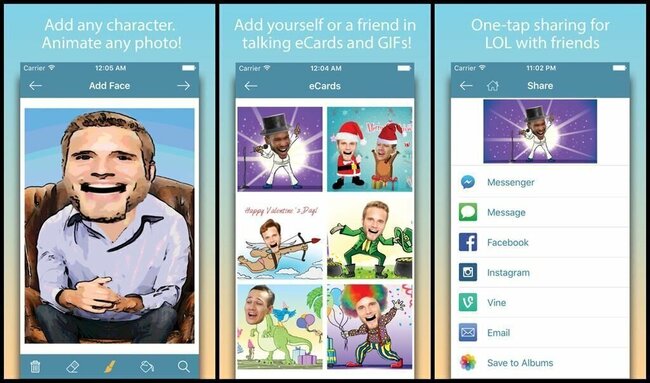
Animate Me is an exclusive iOS 3D photo animator that you can install on your iDevices and animate different types of images instantly. Though the app isn’t targeted towards professional marketers, it’s a fun tool if you want to animate your family photos or create happy birthday animated images. The app is available for free, which means you can create fun animated pictures without paying a single penny.
In addition to animating pictures, you can also use Animate Me to animate videos and create visually appealing eCards. In case you don’t know, e-Cards are used to communicate with others in a fun manner. With dozens of built-in e-card templates, you’ll be able to create high-quality e-cards right away. These templates support complete customization - so you can also use your face to customize the e-card.
Key Features of Animate Me:
● Hundreds of ready-to-use e-card templates
● Add sound effects to the characters used in an e-card
● Animate images and videos right on your smartphone
03Gyazo
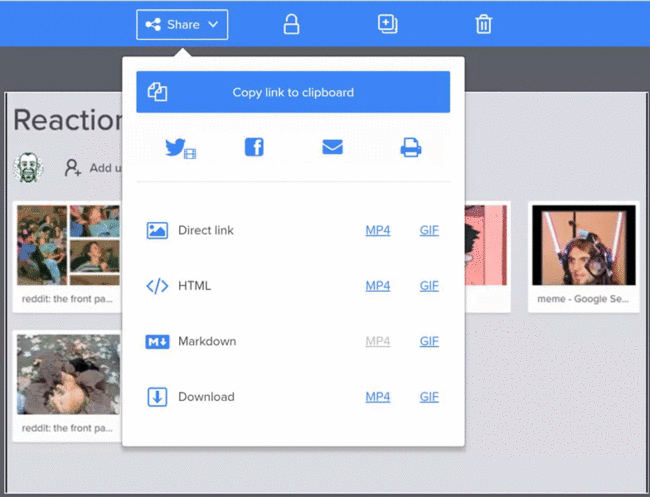
Gyazo is a desktop-based screen capture tool that’s primarily designed to capture full or a specific portion of the screen. The tool is available for Windows, macOS, and Linux, which means you can use it across all desktop platforms without any hassle.
Apart from capturing screens, you can also use Gyazo to turn screen captures into dedicated GIFs with a single click. It’s worth noting that you won’t get any advanced editing options like other tools mentioned in the list, but Gyazo is still a reliable tool for users who want to animate screenshots.
Key Features:
● Capture screens and turn them into GIFs
● Animate pictures for free
● Available for Windows, macOS, and Linux
04GIFmaker.me
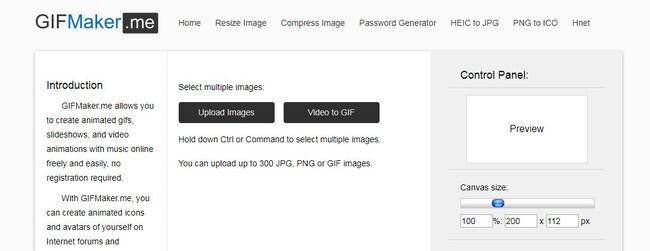
GIFMaker.me is an online 3D photo animator that’s primarily designed to turn regular images into GIFs. Being an online tool, you have the liberty to access GIFmaker.me across different platforms, be it mobile or desktop. The online editor offers an easy-to-use interface and provides an array of built-in features that you can use to create stunning GIFs.
All you have to do is decide the motion by dragging the subjects across the screen and the tool will automatically replicate it in a loop. Apart from creating GIFs from still images, you can also use GIFmaker to add animations to your videos. The tool has several ready-to-use animation templates that you can apply to your videos with the simple drag-&-drop functionality.
Key Features:
● Merge multiple images to create a custom GIF
● Reduce the size or reverse the motion of a particular GIF
● No sign-in required. You can start creating animated images directly with GIFmaker.me
Key Takeaways from This Episode
● Animated pictures can be used in different situations, be it for marketing purposes or simply for fun
● With dedicated tools, you can animate pictures all by yourself - without any professional assistance
● Wondershare Filmora Pro is an ideal video editing tool that provides a plethora of animation templates that you can apply to both videos and images.
Not to mention, if you animate pictures, you’ll be able to stand apart in the crowd and maximize your brand exposure. By creating animated happy birthday images, you’ll be able to bring life to the still images.
In this guide, we’ll walk you through different ways to make animated images. Read this guide and you’ll be able to animate your images without any hassle.
In this article
01 [What are Animated Pictures?](#Part 1)
02 [Is It Possible to Animate Pictures On Your Own?](#Part 2)
03 [5 Best Tools to Make Animated Pictures](#Part 3)
Part 1 What are Animated Pictures?
For readers who aren’t familiar with animated images, here’s what you need to know. An animated image (also referred to as GIF) is designed by adding motion to a still image. Remember all the funny cat memes you see on Instagram? Well, they are a great example of animated images.
However, it’s important to understand that the applications of animated images aren’t only limited to social media and marketing. You can even animate your family photos and add life to those 20-year old pictures you’ve been saving forever. Not to mention, you can also create animated images of your favorite superhero movie. Love the Justice League starcast? Simply pick your favorite superhero and you’ll get stunning Justice League animated images.
Part 2 Is It Possible to Animate Pictures On Your Own?
When it comes to animating images, the majority of users want to know if it’s at all possible to create animated images by themselves. Even though animating an image is a tedious task, it’s safe to say that you can do it without any external help.
Of course, if you choose a tool like Adobe Photoshop to do the job, you’ll be out of luck because of the steep learning curve. But, there are hundreds of other alternatives you can use to animate pictures. There are ready-to-use 3D photo animators online that’ll allow you to animate any image within a few seconds. These tools are equipped with pre-installed animation templates that you can apply to any image and bring life to them.
Part 3 4 Best Tools to Make Animated Pictures
So, now that you know the key benefits of animated pictures, let’s take a look at the seven best tools you can use to create stunning animated images. To ensure we provide you with a diverse list of photo animators, we have included both platform-dependent and cross-platform solutions to the list.
01Motion Leap
Motion Leap is a free 3D motion graphics generator that works on the Android platform. The tool offers an easy-to-use interface that editors can utilize to turn their still images into dedicated videos that play in loop. One of the major advantages of using Motion Leap for animating images is that it doesn’t leave a watermark on your pictures, even if you are using the free version of the tool. In fact, the free version offers all the necessary tools you’ll need to create animated pictures.
Since Motion Leap works on mobile, you don’t have to fire up your laptop every time you want to create an animated picture. Simply launch the app on your smartphone and you’ll be able to animate pictures right away. As of now, the only downside of Motion Leap is that it doesn’t save the output in GIF format, unless you have purchased the premium version.
Key Features:
● Add motion graphics by simply dragging objects on your screen
● Freeze specific areas within the image and apply dedicated filters
● Built-in editing panel to adjust different elements such as exposure, contrast, highlights, etc.
● Motion Leap is affordable
02Animate Me
Animate Me is an exclusive iOS 3D photo animator that you can install on your iDevices and animate different types of images instantly. Though the app isn’t targeted towards professional marketers, it’s a fun tool if you want to animate your family photos or create happy birthday animated images. The app is available for free, which means you can create fun animated pictures without paying a single penny.
In addition to animating pictures, you can also use Animate Me to animate videos and create visually appealing eCards. In case you don’t know, e-Cards are used to communicate with others in a fun manner. With dozens of built-in e-card templates, you’ll be able to create high-quality e-cards right away. These templates support complete customization - so you can also use your face to customize the e-card.
Key Features of Animate Me:
● Hundreds of ready-to-use e-card templates
● Add sound effects to the characters used in an e-card
● Animate images and videos right on your smartphone
03Gyazo
Gyazo is a desktop-based screen capture tool that’s primarily designed to capture full or a specific portion of the screen. The tool is available for Windows, macOS, and Linux, which means you can use it across all desktop platforms without any hassle.
Apart from capturing screens, you can also use Gyazo to turn screen captures into dedicated GIFs with a single click. It’s worth noting that you won’t get any advanced editing options like other tools mentioned in the list, but Gyazo is still a reliable tool for users who want to animate screenshots.
Key Features:
● Capture screens and turn them into GIFs
● Animate pictures for free
● Available for Windows, macOS, and Linux
04GIFmaker.me
GIFMaker.me is an online 3D photo animator that’s primarily designed to turn regular images into GIFs. Being an online tool, you have the liberty to access GIFmaker.me across different platforms, be it mobile or desktop. The online editor offers an easy-to-use interface and provides an array of built-in features that you can use to create stunning GIFs.
All you have to do is decide the motion by dragging the subjects across the screen and the tool will automatically replicate it in a loop. Apart from creating GIFs from still images, you can also use GIFmaker to add animations to your videos. The tool has several ready-to-use animation templates that you can apply to your videos with the simple drag-&-drop functionality.
Key Features:
● Merge multiple images to create a custom GIF
● Reduce the size or reverse the motion of a particular GIF
● No sign-in required. You can start creating animated images directly with GIFmaker.me
Key Takeaways from This Episode
● Animated pictures can be used in different situations, be it for marketing purposes or simply for fun
● With dedicated tools, you can animate pictures all by yourself - without any professional assistance
● Wondershare Filmora Pro is an ideal video editing tool that provides a plethora of animation templates that you can apply to both videos and images.
Tips for Canva Animated Elements
Versatile Video Editor - Wondershare Filmora
An easy yet powerful editor
Numerous effects to choose from
Detailed tutorials provided by the official channel
Thanks to the progress of graphic design, users are no longer simply satisfied with everyday designs, no matter how complex the design itself. They want innovation, they want a fresh and mesmerizing new idea. This becomes increasingly harder to achieve and helps push the boundaries of what designers want.
This is where motion can come into play. Movement in graphic design has emerged as a recent design trend. This is where users benefit from valuable tips for Canva animated elements.
Without further ado, let’s dive into everything you need to know to design animated elements in Canva.
In this article
01 [What is Canva?](#Part 1)
02 [Animate An Element In Canva ](#Part 2)
03 [Make Elements Move In Canva](#Part 3)
04 [How About Making Animated Elements On Video](#Part 4)
Part 1 What is Canva?
Canva has become a buzzword in the designing and animation world. It’s a graphic design platform that allows users to create graphic designs for social media, for presentations, documents, cards for any memorable occasion. It was founded by Melanie Perkins, an Australian technology entrepreneur.
Canva has become a buzzword in the designing and animation world. It’s a graphic design platform that allows users to create graphic designs for social media, for presentations, documents, cards for any memorable occasion. It was founded by Melanie Perkins, an Australian technology entrepreneur.
It allows users to work individually or across teams. With real-time live changes made available, Canva is pushing the boundary of what is possible and making it more accessible. With the introduction of animated elements in Canva, the possibilities for design horizons have expanded significantly.
Part 2 Animate An Element In Canva
There are one of two ways to go about creating an animation. You can work off an existing template or create a custom template. If you’re wondering how to animate individual elements in Canva then this guide is for you.
The first step to animation is building your custom static design. For that you need to go to Canva and select “Create a Design” option. Once you do, select the type of content you’re attempting to create- from Instagram posts to a presentation or an A4 document.
Think of the text font you’re going to use.

Then you should look into adding elements that suit your text on the design.

You can upload photographs into your creation with the upload button. This also extends to uploading audio that you want to use on video clips.

Once you’re done with these steps, you should have a customized static design that you can use. Let’s now look at how to animate individual elements in Canva. These elements are the text, the image, audio, and video.
2.1 Image
To add an image to Canva, you need to upload it in the ‘Upload’ tab on Canva. Once you do, the image can then be selected for display on your presentation.
For images, you can also choose to frame them within the “elements” tab. There are two kinds of elements. One which allows photographs to be embedded in them and ones which don’t. You can choose any element as a frame for your embedded image.
The next thing is to choose the “Animate” button. This will open up different options for animation features. The animate button allows a preview of what each animation does in real-time.

The ones with the crown are premium features exclusive to Canva Pro, the paid subscription.
2.2 Text
Add in the text you want to see to the image. The text can be in any style that you choose. Canva offers a variety of fonts that you can use to customize the color, size, and duration of the display.

2.3 Video
If you’re ready to take your content creation skills to the next level, this section is for you. You have the option of adding videos to Canva as well. Just load the video you have on hand to the Canva “Uploads” section. Introduce the video clip to the design.
Another way to embed the video is by using an element and embedding your video within it.
With video, you also have options like cropping, adjusting the playback. With playback, you can choose “Autoplay Video” and “Loop Video.” These are basic options for how the video can be played. The crop function allows you to trim the video to any point in time.
On top of this, you can use the animate button, which can create options for how the video is introduced to the backdrop.

If you want to remove the animation, you need to go to the “Animate” button and select the ‘None’ option to delete the animation from the design.
You can opt to animate either just the elements or you can animate the slide on the whole with “Page Animations.”
Part 3 Make Elements Move In Canva
How To Arrange The Order Of An Animation?
The brilliant thing about Canva is that you can decide the order you want to create your animation. The component elements of a Canva backdrop are the text, audio, images, video. These form the basis for the animated elements in Canva.
You can work on whichever component feels more accessible to you. Canva also allows users to make videos for title sequences and end-cards for video sharing platforms.
How to Change The Duration Of Animated Graphic In Canva
Once you’ve added a video element to your presentation, you’ll notice that the timer disappears from the production. This is because the presentation only lasts the duration of the video.
If you go to the next slide of the presentation, you can often notice a timer available. It has a default duration of five seconds. If you click on the clock symbol, a menu with “Timing” will appear with a slider. You can adjust the timing from 0.1 seconds up to a maximum of 30 seconds.
Part 4 How About Making Animated Elements On Video
If you’ve decided Canva is not the tool for you, you can choose any video editing software to make your animation.
Wondershare Filmora is the tool that can help you level up your content creation. It allows users to increase precision and provides professional video editing options.
AI Portrait – The best feature of Wondershare Filmora for gameplay editing
The AI Portrait is a new add-on in Wondershare Filmora. It can easily remove video backgrounds without using a green screen or chroma key, allowing you to add borders, glitch effects, pixelated, noise, or segmentation video effects.

Conclusion
Now that you understand how to build an animation and the software required, you should differentiate between average and extraordinary editing tools.
Filmora and Canva are the best editing tools in this case. Like you can animate individual elements Canva, you can do the same in the other tool also. It may be used to produce animation videos by introducing keyframes, resulting in a seamless and realistic animation. Aside from that, using color correction and an audio processor can help take your animations to the next tier.
Download it today to make your videos better.
Thanks to the progress of graphic design, users are no longer simply satisfied with everyday designs, no matter how complex the design itself. They want innovation, they want a fresh and mesmerizing new idea. This becomes increasingly harder to achieve and helps push the boundaries of what designers want.
This is where motion can come into play. Movement in graphic design has emerged as a recent design trend. This is where users benefit from valuable tips for Canva animated elements.
Without further ado, let’s dive into everything you need to know to design animated elements in Canva.
In this article
01 [What is Canva?](#Part 1)
02 [Animate An Element In Canva ](#Part 2)
03 [Make Elements Move In Canva](#Part 3)
04 [How About Making Animated Elements On Video](#Part 4)
Part 1 What is Canva?
Canva has become a buzzword in the designing and animation world. It’s a graphic design platform that allows users to create graphic designs for social media, for presentations, documents, cards for any memorable occasion. It was founded by Melanie Perkins, an Australian technology entrepreneur.
Canva has become a buzzword in the designing and animation world. It’s a graphic design platform that allows users to create graphic designs for social media, for presentations, documents, cards for any memorable occasion. It was founded by Melanie Perkins, an Australian technology entrepreneur.
It allows users to work individually or across teams. With real-time live changes made available, Canva is pushing the boundary of what is possible and making it more accessible. With the introduction of animated elements in Canva, the possibilities for design horizons have expanded significantly.
Part 2 Animate An Element In Canva
There are one of two ways to go about creating an animation. You can work off an existing template or create a custom template. If you’re wondering how to animate individual elements in Canva then this guide is for you.
The first step to animation is building your custom static design. For that you need to go to Canva and select “Create a Design” option. Once you do, select the type of content you’re attempting to create- from Instagram posts to a presentation or an A4 document.
Think of the text font you’re going to use.
Then you should look into adding elements that suit your text on the design.
You can upload photographs into your creation with the upload button. This also extends to uploading audio that you want to use on video clips.
Once you’re done with these steps, you should have a customized static design that you can use. Let’s now look at how to animate individual elements in Canva. These elements are the text, the image, audio, and video.
2.1 Image
To add an image to Canva, you need to upload it in the ‘Upload’ tab on Canva. Once you do, the image can then be selected for display on your presentation.
For images, you can also choose to frame them within the “elements” tab. There are two kinds of elements. One which allows photographs to be embedded in them and ones which don’t. You can choose any element as a frame for your embedded image.
The next thing is to choose the “Animate” button. This will open up different options for animation features. The animate button allows a preview of what each animation does in real-time.
The ones with the crown are premium features exclusive to Canva Pro, the paid subscription.
2.2 Text
Add in the text you want to see to the image. The text can be in any style that you choose. Canva offers a variety of fonts that you can use to customize the color, size, and duration of the display.
2.3 Video
If you’re ready to take your content creation skills to the next level, this section is for you. You have the option of adding videos to Canva as well. Just load the video you have on hand to the Canva “Uploads” section. Introduce the video clip to the design.
Another way to embed the video is by using an element and embedding your video within it.
With video, you also have options like cropping, adjusting the playback. With playback, you can choose “Autoplay Video” and “Loop Video.” These are basic options for how the video can be played. The crop function allows you to trim the video to any point in time.
On top of this, you can use the animate button, which can create options for how the video is introduced to the backdrop.
If you want to remove the animation, you need to go to the “Animate” button and select the ‘None’ option to delete the animation from the design.
You can opt to animate either just the elements or you can animate the slide on the whole with “Page Animations.”
Part 3 Make Elements Move In Canva
How To Arrange The Order Of An Animation?
The brilliant thing about Canva is that you can decide the order you want to create your animation. The component elements of a Canva backdrop are the text, audio, images, video. These form the basis for the animated elements in Canva.
You can work on whichever component feels more accessible to you. Canva also allows users to make videos for title sequences and end-cards for video sharing platforms.
How to Change The Duration Of Animated Graphic In Canva
Once you’ve added a video element to your presentation, you’ll notice that the timer disappears from the production. This is because the presentation only lasts the duration of the video.
If you go to the next slide of the presentation, you can often notice a timer available. It has a default duration of five seconds. If you click on the clock symbol, a menu with “Timing” will appear with a slider. You can adjust the timing from 0.1 seconds up to a maximum of 30 seconds.
Part 4 How About Making Animated Elements On Video
If you’ve decided Canva is not the tool for you, you can choose any video editing software to make your animation.
Wondershare Filmora is the tool that can help you level up your content creation. It allows users to increase precision and provides professional video editing options.
AI Portrait – The best feature of Wondershare Filmora for gameplay editing
The AI Portrait is a new add-on in Wondershare Filmora. It can easily remove video backgrounds without using a green screen or chroma key, allowing you to add borders, glitch effects, pixelated, noise, or segmentation video effects.
Conclusion
Now that you understand how to build an animation and the software required, you should differentiate between average and extraordinary editing tools.
Filmora and Canva are the best editing tools in this case. Like you can animate individual elements Canva, you can do the same in the other tool also. It may be used to produce animation videos by introducing keyframes, resulting in a seamless and realistic animation. Aside from that, using color correction and an audio processor can help take your animations to the next tier.
Download it today to make your videos better.
Also read:
- New In 2024, Top Claymation Shows That Make Your Memories Unforgettable
- 2024 Approved Learn What Are Differences Between 2D And 3D Animation
- Updated Top 10 Sketch Animation Video Makers
- 2024 Approved Christmas Is Coming! How to Find & Make Animated Christmas GIFs?
- New What Is Anime? Anime VS Manga VS Cartoon
- Top 3 Ways to Create Gif with Great 3D Gif Maker for 2024
- 2024 Approved Best 15 Anime Shows That Are Great to Binge Watch
- New 2024 Approved The Best 8 Places for High-Quality Royalty Free Gifs (Paid and Free)
- Updated In 2024, 12 Aesthetic GIF Instagram for Marketers and Creatives
- 10 Photoshop Cartoon Effects For Creatives
- New In 2024, Top 10 Cartoon Canvas Painting Ideas for Total Beginners
- Updated 8 Free GIF Animators to Make Your Own GIF for 2024
- Updated Samples of Cartoon Character Face
- New How To Make Pinterest Slideshow in Simple Ways
- New 15 Top Collage Makers to Create Aesthetic Collages for 2024
- In 2024, How to Create a Whiteboard Animation Video
- Updated 2024 Approved How to Make Well Done Animated GIF By Yourself?
- New 2024 Approved How to Combine Multiple GIFs Into One with GIF Combiner
- New 21 Top Free Anime Websites to Watch Anime Online-Anime for 2024
- New Top 8 Anime Name Generators Online-Get Cool Anime Names for 2024
- New Top 15 2D Animation Software Free That Worth to Try for 2024
- Updated Techniques for Creating Animated Logo That Few People Know About for 2024
- Updated 2024 Approved 12 Best Stop Motion Studios Worth Recommending
- In 2024, Step-by-Step Guide to Send Gif WhatsApp on Android
- How to Transfer Data from Infinix Note 30i to Other Android Devices? | Dr.fone
- How To Transfer WhatsApp From Apple iPhone SE to Android/iOS? | Dr.fone
- In 2024, Top 10 Fingerprint Lock Apps to Lock Your Vivo Y100i Power 5G Phone
- In 2024, How to use Pokemon Go Joystick on Tecno Pova 5 Pro? | Dr.fone
- In 2024, How To Unlock A Found Apple iPhone 14? | Dr.fone
- In 2024, How to use Pokemon Go Joystick on Honor 80 Pro Straight Screen Edition? | Dr.fone
- In 2024, A Step-by-Step Guide on Using ADB and Fastboot to Remove FRP Lock from your Huawei P60
- The Ultimate Guide to Vivo Y100 Pattern Lock Screen Everything You Need to Know
- How to Retrieve Deleted Calendar Events iPhone? | Stellar
- Why is iPogo not working On Xiaomi Civi 3? Fixed | Dr.fone
- In 2024, Can I use iTools gpx file to catch the rare Pokemon On Samsung Galaxy S24 Ultra | Dr.fone
- new 2024 Approved How To Use Korean to English Video Translators for Creators
- Pokemon Go Error 12 Failed to Detect Location On Oppo A78 5G? | Dr.fone
- How to Change Lock Screen Wallpaper on Xiaomi Redmi 13C
- How To Recover Lost Data from iPhone 14 Pro? | Dr.fone
- In 2024, 10 Fake GPS Location Apps on Android Of your Asus ROG Phone 7 Ultimate | Dr.fone
- How and Where to Find a Shiny Stone Pokémon For OnePlus Nord 3 5G? | Dr.fone
- How to Screen Mirroring Xiaomi 14 Pro? | Dr.fone
- In 2024, Unlock Your Oppo A38 Phone with Ease The 3 Best Lock Screen Removal Tools
- How To Bypass Vivo Y56 5G FRP In 3 Different Ways
- Title: In 2024, 5 Best Adobe Animate Courses & Classes | Beginners Complete Tutorial
- Author: Elon
- Created at : 2024-06-08 05:08:11
- Updated at : 2024-06-09 05:08:11
- Link: https://animation-videos.techidaily.com/in-2024-5-best-adobe-animate-courses-and-classes-beginners-complete-tutorial/
- License: This work is licensed under CC BY-NC-SA 4.0.
