
:max_bytes(150000):strip_icc():format(webp)/the-17-best-graphic-design-software-2024-1dd6c15b34124b25b65e4b096e4e6ba4.jpg)
In 2024, All About 3D Medical Animation
All About 3D Medical Animation
All About 3D Medical Animation And Its Uses
An easy yet powerful editor
Numerous effects to choose from
Detailed tutorials provided by the official channel
You can see the use of 3D animation in all spheres of life including the medical field. More and more professionals in the field of the healthcare industry are now using 3D animations for several different tasks like education, communication, marketing, and more.

So, if you too are keen to learn about 3D medical animation videos, their uses, popular companies, and other details, you are reading on the right page.
In this article
01 [What is 3D Medical Animation?](#Part 1)
02 [Uses of 3D Medical Animations](#Part 2)
03 [Benefits of Using 3D Medical Animations](#Part 3)
04 [Top 3D Animation Companies](#Part 4)
05 [The Best Tool to Edit Your 3D Medical Animated Video – Wondershare Filmora](#Part 4)
Part 1 What is 3D Medical Animation?
A 3D medical animation can be termed as an animation that is used for different tasks in the healthcare and medical industry. These animations are used for several different tasks like explaining and detailing the concepts to the patients, compelling the investors, training professionals, marketing devices and drugs, and more. Depending on the target audience, the animations can be created by taking the help of specialized industries or using animated software.
Part 2 Uses Of 3D Medical Animations
3D animations have proved to be useful in the healthcare and medical industry in several ways. Below we have gathered some of the key benefits of the same.
01Using As A Mode Of Communication With Patients
Communication with the patients is one of the major uses of 3D animation in the healthcare field. Using animations, the communication with the patients can be enhanced in several ways. Explaining complex medical conditions and procedures to patients is difficult and here the animations help to a great extent. Going through animation will make a patient well prepared to see the doctor and learn about his/her medical condition or procedure to be performed. Patients do not have medical knowledge and these animations help them to know their condition, scenario, and procedure in a simple way that they can understand.
02Training Of Medical Professionals
Medical professionals need to keep themselves updated with the latest trends and practices and for this, they need to undergo training from time to time. 3D animations for the topics to be studied help them in better understanding the concepts and the procedures. Moreover, animations also help in e-learning.
03Educating New Professionals
For the new students using 3D animations is a great way to teach complex medical topics which otherwise explaining them orally or visually are not that effective. Animations can be used to educate about different topics like the anatomy of a human body, medical procedures, drug mechanisms, use of devices, and more.
04Used As A Marketing Tool
Since the presentation of medical information is difficult, marketing in the healthcare industry is quite a challenge. Moreover, the investors do not possess any medical know-how and the task of marketing becomes even more difficult. Thus, using 3D medical animations can be helpful here to explain the products, devices, and other things. Marketing of medicines to patients can also be done using animated mascots and characters.
05Marketing To Medical Professional
While marketing products and devices to medical professionals is not difficult in terms of knowledge or know-how as they are from the medical background. But with multiple marketing teams approaching them, time is a limitation and thus presentation needs to be short yet informative which can be achieved through the use of animations. Moreover, these animations can be sent to professionals through emails or by sharing a website link.

Part 3 Benefits Of Using 3D Medical Animations
Above we have discussed several fields and uses of 3D medical animations. Several factors make these animations useful.
●Helps in offering an in-depth and detailed explanation of complex subjects.
●Offers broad scope of explanation and especially subjects that cannot be explained easily through images or orally.
●Visual presentations offer better recall of the topic and details.
●Engagement through animations is enhanced and better.
●3D medical animations look professional and thus appear to be more reliable.
●Animations can be created to cater to a wider audience and people for different subjects.
Part 4 Top 3D Animation Companies
Creating 3D medical animation is not like creating any other 3D animation as it not only requires technical know-how but also in-depth knowledge of the medical field. Thus, for creating 3D medical animations, take help from the companies that specialize in this field to create 3D medical animation videos. Below we have shortlisted some of the popular 3D medical animation company.
●DG Medical Animations
●The SGNY Group
●Fusion Medical Animation
●TMBA Inc
●Pixeldust Studios
●Indigo Productions
●Nanobot Medical Animation Studio
●MultiVision Digital
●ICom Creative
●INVIVO
●JLab Animation
These companies offer different 3D medical animation services and depending on your requirements, you can choose the best suitable one.

Part 5 The Best Tool To Edit Your 3d Medical Animated Video – Wondershare Wondershare Filmora Video Editor
Even if you have got a 3D medical animation video created by a professional company, several times, the need may arise to edit and customize it. In such situations, you would need a professional tool that can help in editing the video without affecting the quality and other details. Wondershare Wondershare Filmora Video Editor is one such excellent software that can be used for the task. This Windows and Mac-based tool comes with a feature-packed built-in editor that can let you edit the files quickly and in a hassle-free manner. Additionally, you can also create decent animations using multiple features of the software.
The interface is simple and user-friendly that making the task of video creation and editing simple.
Key features of the software
● Allows creating dynamic and lively videos using over 100 layers of media.
● Allows complete editing and customization of the video using the editor.
● Animations using keyframing and other features can be created.
● Enhance audio using features like background noise reduction, keyframe audio editing, audio equalizer, and more.
● Support to features likes stabilization, fisheye correction, speed controlling, advanced color correction, 3D LUTs, and more.
● Support to Windows and Mac.
For Win 7 or later (64-bit)
For macOS 10.12 or later
● Key Takeaways from This Episode →
● The use of 3D medical animation in the healthcare and medical industry has increased manifold.
● The 3D medical animations are used for communication with patients, training, marketing, educations, and other uses.
● Several professional and specialized industries can help you create 3D medical animations.
● To edit the created videos and create other decent ones, Wondershare Wondershare Filmora Video Editor works as a great option.
You can see the use of 3D animation in all spheres of life including the medical field. More and more professionals in the field of the healthcare industry are now using 3D animations for several different tasks like education, communication, marketing, and more.
So, if you too are keen to learn about 3D medical animation videos, their uses, popular companies, and other details, you are reading on the right page.
In this article
01 [What is 3D Medical Animation?](#Part 1)
02 [Uses of 3D Medical Animations](#Part 2)
03 [Benefits of Using 3D Medical Animations](#Part 3)
04 [Top 3D Animation Companies](#Part 4)
05 [The Best Tool to Edit Your 3D Medical Animated Video – Wondershare Filmora](#Part 4)
Part 1 What is 3D Medical Animation?
A 3D medical animation can be termed as an animation that is used for different tasks in the healthcare and medical industry. These animations are used for several different tasks like explaining and detailing the concepts to the patients, compelling the investors, training professionals, marketing devices and drugs, and more. Depending on the target audience, the animations can be created by taking the help of specialized industries or using animated software.
Part 2 Uses Of 3D Medical Animations
3D animations have proved to be useful in the healthcare and medical industry in several ways. Below we have gathered some of the key benefits of the same.
01Using As A Mode Of Communication With Patients
Communication with the patients is one of the major uses of 3D animation in the healthcare field. Using animations, the communication with the patients can be enhanced in several ways. Explaining complex medical conditions and procedures to patients is difficult and here the animations help to a great extent. Going through animation will make a patient well prepared to see the doctor and learn about his/her medical condition or procedure to be performed. Patients do not have medical knowledge and these animations help them to know their condition, scenario, and procedure in a simple way that they can understand.
02Training Of Medical Professionals
Medical professionals need to keep themselves updated with the latest trends and practices and for this, they need to undergo training from time to time. 3D animations for the topics to be studied help them in better understanding the concepts and the procedures. Moreover, animations also help in e-learning.
03Educating New Professionals
For the new students using 3D animations is a great way to teach complex medical topics which otherwise explaining them orally or visually are not that effective. Animations can be used to educate about different topics like the anatomy of a human body, medical procedures, drug mechanisms, use of devices, and more.
04Used As A Marketing Tool
Since the presentation of medical information is difficult, marketing in the healthcare industry is quite a challenge. Moreover, the investors do not possess any medical know-how and the task of marketing becomes even more difficult. Thus, using 3D medical animations can be helpful here to explain the products, devices, and other things. Marketing of medicines to patients can also be done using animated mascots and characters.
05Marketing To Medical Professional
While marketing products and devices to medical professionals is not difficult in terms of knowledge or know-how as they are from the medical background. But with multiple marketing teams approaching them, time is a limitation and thus presentation needs to be short yet informative which can be achieved through the use of animations. Moreover, these animations can be sent to professionals through emails or by sharing a website link.
Part 3 Benefits Of Using 3D Medical Animations
Above we have discussed several fields and uses of 3D medical animations. Several factors make these animations useful.
●Helps in offering an in-depth and detailed explanation of complex subjects.
●Offers broad scope of explanation and especially subjects that cannot be explained easily through images or orally.
●Visual presentations offer better recall of the topic and details.
●Engagement through animations is enhanced and better.
●3D medical animations look professional and thus appear to be more reliable.
●Animations can be created to cater to a wider audience and people for different subjects.
Part 4 Top 3D Animation Companies
Creating 3D medical animation is not like creating any other 3D animation as it not only requires technical know-how but also in-depth knowledge of the medical field. Thus, for creating 3D medical animations, take help from the companies that specialize in this field to create 3D medical animation videos. Below we have shortlisted some of the popular 3D medical animation company.
●DG Medical Animations
●The SGNY Group
●Fusion Medical Animation
●TMBA Inc
●Pixeldust Studios
●Indigo Productions
●Nanobot Medical Animation Studio
●MultiVision Digital
●ICom Creative
●INVIVO
●JLab Animation
These companies offer different 3D medical animation services and depending on your requirements, you can choose the best suitable one.
Part 5 The Best Tool To Edit Your 3d Medical Animated Video – Wondershare Wondershare Filmora Video Editor
Even if you have got a 3D medical animation video created by a professional company, several times, the need may arise to edit and customize it. In such situations, you would need a professional tool that can help in editing the video without affecting the quality and other details. Wondershare Wondershare Filmora Video Editor is one such excellent software that can be used for the task. This Windows and Mac-based tool comes with a feature-packed built-in editor that can let you edit the files quickly and in a hassle-free manner. Additionally, you can also create decent animations using multiple features of the software.
The interface is simple and user-friendly that making the task of video creation and editing simple.
Key features of the software
● Allows creating dynamic and lively videos using over 100 layers of media.
● Allows complete editing and customization of the video using the editor.
● Animations using keyframing and other features can be created.
● Enhance audio using features like background noise reduction, keyframe audio editing, audio equalizer, and more.
● Support to features likes stabilization, fisheye correction, speed controlling, advanced color correction, 3D LUTs, and more.
● Support to Windows and Mac.
For Win 7 or later (64-bit)
For macOS 10.12 or later
● Key Takeaways from This Episode →
● The use of 3D medical animation in the healthcare and medical industry has increased manifold.
● The 3D medical animations are used for communication with patients, training, marketing, educations, and other uses.
● Several professional and specialized industries can help you create 3D medical animations.
● To edit the created videos and create other decent ones, Wondershare Wondershare Filmora Video Editor works as a great option.
Pencil2D Animation Tutorial Overview
Animation is one of the trendiest technologies. The basics of animation were formulated in the 2000s from the moving page trick. The first few animators learned that animation is nothing but continuous switching of frames from one to another. One animated still is switched to another and then another in a quick sequence such that it makes a sequential moving frame. Today, animation has come a long way from where it started and today it is used for several commercials, tutorials, and even educational lecture videos. Pencil2D animation is an amazing animation tool that can be used by even neophytes. Want to learn more about 2d pencil animation and its super cool features? Well, you’re at the perfect place. Today we’ll be telling you more about pencil 2d animation and giving you a small overview of its usage.
In this article
01 [What is Pencil2D and How to Install?](#Part 1)
02 [Overview of the Application Interface](#Part 2)
03 [How to Create Animations with Pencil2D?](#Part 3)
Part 1 What is Pencil2D and How to Install?
2d pencil animation is popular open-source animation software. The software is pretty cool for those who are newly starting off with animation. The open-source software is available on all major operating systems including Windows, Mac OS, and Unix. Using this amazing software, we can make amazing cartoon characters using traditional cartoon-making techniques such as tracing drawing, skinning. Using this software, you can save animations in the native animation formats or extract the animation to PNG, JPG, or other formats. Wish to explore more about pencil 2d animation software? Follow the steps listed below in order to download the pencil2d animation software.
● Firstly, you need to ensure that your device has ample space on it.
● Next, you need to head to the official website of pencil2d.
● Further, you need to select your operating system. You can find different versions of the software, namely windows 7/8/10, windows XP/ Vista, Mac OS, and Linux
● Once downloaded, you need to start the installation setup. Note that this may take a while to download.
● Once downloaded, you can start familiarizing yourself with the software.
Part 2 Overview of the Application Interface
1. The brush tool
The brush tool must have reminded you of paint software in windows. The brush tool is a popular and highly utilitarian basic tool in Pencil2D animation software. You can either access it via the user interface or quickly access it by using the B key on your keyboard. As the name suggests, the brush tool is literally just a brush that allows you to draw and paint any sort of drawings of different shades, colors, and thickness. If you wish to change the color, you can find a color palette on the left side of the interface.

2. The eraser tool
You’ve a brush tool; it’s almost common sense that there’d be an eraser. The eraser tool has an eraser as its icon. If you wish to use the eraser, click on the eraser tool or simply click the E button on your keyboard. Once you’ve selected the tool, you need to simply hover over the parts you wish to erase.

3. Bucket tool
The bucket tool is another useful tool that you can find in the left tool pane of pencil 2d animation. The tool icon looks like a bucket and it is used to fill an entire area with a particular color. You can choose the color you’d like to fill from the color pallet available on the left side. Alternatively, you can also access the bucket tool by pressing the “K” key on your keyboard.

4. Custom colors
A cool feature that you can find on pencil 2d animation software is the custom color one. You can merge and mix colors according to your choice and create your own color. To do so, you need to click on the small color box that you’ll find at the top right of your screen. By doing so, a huge color wheel will appear on your screen. Now you can either enter values of the R, G, and B if you wish to merge different colors and make a new one or select a particular color from the huge color wheel that appears in front of you. These colors vary in gradient, shade, and a lot of different factors.

5. The Undo button
The Undo button is a highly useful functionality for the lazy ones who do not wish to erase the mistake they made. By undoing, the previous step gets reverted and you can start over again. The traditional undo shortcut, Ctrl+Z does work in the pencil 2d animation. Alternatively, you can also use the undo feature via the user interface. You can do so by heading over to the edit option in the topmost bar. The first option in the drop-down menu would be undo.

Part 3 How to Create Animations with Pencil2D?
Creating animations in pencil 2d is slightly sophisticated and certainly needs minimal practice. Follow the steps listed below in order to learn how to animate through pencil 2d to make your first animation.
1. Ensure that you’ve turned on your bitmap on the first frame
Animation works through quick switching of frame which makes it appear as though the object is in motion. By turning on the bitmap, pencil 2d animation ensures that you’ve no blank frames at the start of your animation.

2. Draw your animated character
Since you’re trying to animate, you need to have an animated character or object. Hence, the first step to making your first animation is by drawing the object or character that you wish to animate. Try to make the character as realistic as possible. To start with, maybe you can try animating just a stick figure; this is because animating a complex character is rather difficult for beginners.

3.The three circular buttons
Once you’re satisfied with the character you draw, you need to spot the 3 circular buttons which are arranged in the “+”,”-“,”+” order. By pressing the first “+” button, you can add an empty slide. If you click on the “-“ button, it will delete the most recent slide and if you click on the next “+” button, it will duplicate the current slide.

4.Repeat until you get an animation
Now that you know how to deal with multiple frames, you can continue creating frames and making the animated characters move by tweaking with the drawing in every frame. For instance, if you wish to show that the animated character is running, in one of the frames the left leg should be forward and in the next one, the right leg should be forward. Keep repeating this process of tweaking with frames until you’ve your desired animated video.

Now that we’ve seen the process of animation via Pencil2D, you must have realized that it’s pretty orthodox and complicated. Moreover, you cannot carry out rigging and other newer animation techniques. Hence, we introduce you to Wondershare Filmora Video Editor , your all in one animation making platform. Here you can animate without any hassle. Wondershare Filmora makes your job easier with multiple animation features, you needn’t even draw your animated character. You can simply import a custom-made character and rig the character. Further, you need not deal with multiple frames and personally pay attention to each frame. All in all, Filmora makes your job simple and your animations much more seamless.
For Win 7 or later (64-bit)
For macOS 10.12 or later
Key Takeaways from This Episode
● Animation is actively being used for multiple purposes.
● Today we took a look at one of the orthodox yet popular animation tools, Pencil2D.
● The Pencil2D animation tool offers you multiple functionalities and allows you to make animations.
● Next, we also took a look at Wondershare Filmora Pro, your one-stop shop for all animation needs. You can find multiple animation features here and it’s all so simple.
● What are you waiting for? Your next animation is just one click away.
02 [Overview of the Application Interface](#Part 2)
03 [How to Create Animations with Pencil2D?](#Part 3)
Part 1 What is Pencil2D and How to Install?
2d pencil animation is popular open-source animation software. The software is pretty cool for those who are newly starting off with animation. The open-source software is available on all major operating systems including Windows, Mac OS, and Unix. Using this amazing software, we can make amazing cartoon characters using traditional cartoon-making techniques such as tracing drawing, skinning. Using this software, you can save animations in the native animation formats or extract the animation to PNG, JPG, or other formats. Wish to explore more about pencil 2d animation software? Follow the steps listed below in order to download the pencil2d animation software.
● Firstly, you need to ensure that your device has ample space on it.
● Next, you need to head to the official website of pencil2d.
● Further, you need to select your operating system. You can find different versions of the software, namely windows 7/8/10, windows XP/ Vista, Mac OS, and Linux
● Once downloaded, you need to start the installation setup. Note that this may take a while to download.
● Once downloaded, you can start familiarizing yourself with the software.
Part 2 Overview of the Application Interface
1. The brush tool
The brush tool must have reminded you of paint software in windows. The brush tool is a popular and highly utilitarian basic tool in Pencil2D animation software. You can either access it via the user interface or quickly access it by using the B key on your keyboard. As the name suggests, the brush tool is literally just a brush that allows you to draw and paint any sort of drawings of different shades, colors, and thickness. If you wish to change the color, you can find a color palette on the left side of the interface.
2. The eraser tool
You’ve a brush tool; it’s almost common sense that there’d be an eraser. The eraser tool has an eraser as its icon. If you wish to use the eraser, click on the eraser tool or simply click the E button on your keyboard. Once you’ve selected the tool, you need to simply hover over the parts you wish to erase.
3. Bucket tool
The bucket tool is another useful tool that you can find in the left tool pane of pencil 2d animation. The tool icon looks like a bucket and it is used to fill an entire area with a particular color. You can choose the color you’d like to fill from the color pallet available on the left side. Alternatively, you can also access the bucket tool by pressing the “K” key on your keyboard.
4. Custom colors
A cool feature that you can find on pencil 2d animation software is the custom color one. You can merge and mix colors according to your choice and create your own color. To do so, you need to click on the small color box that you’ll find at the top right of your screen. By doing so, a huge color wheel will appear on your screen. Now you can either enter values of the R, G, and B if you wish to merge different colors and make a new one or select a particular color from the huge color wheel that appears in front of you. These colors vary in gradient, shade, and a lot of different factors.
5. The Undo button
The Undo button is a highly useful functionality for the lazy ones who do not wish to erase the mistake they made. By undoing, the previous step gets reverted and you can start over again. The traditional undo shortcut, Ctrl+Z does work in the pencil 2d animation. Alternatively, you can also use the undo feature via the user interface. You can do so by heading over to the edit option in the topmost bar. The first option in the drop-down menu would be undo.
Part 3 How to Create Animations with Pencil2D?
Creating animations in pencil 2d is slightly sophisticated and certainly needs minimal practice. Follow the steps listed below in order to learn how to animate through pencil 2d to make your first animation.
1. Ensure that you’ve turned on your bitmap on the first frame
Animation works through quick switching of frame which makes it appear as though the object is in motion. By turning on the bitmap, pencil 2d animation ensures that you’ve no blank frames at the start of your animation.
2. Draw your animated character
Since you’re trying to animate, you need to have an animated character or object. Hence, the first step to making your first animation is by drawing the object or character that you wish to animate. Try to make the character as realistic as possible. To start with, maybe you can try animating just a stick figure; this is because animating a complex character is rather difficult for beginners.
3.The three circular buttons
Once you’re satisfied with the character you draw, you need to spot the 3 circular buttons which are arranged in the “+”,”-“,”+” order. By pressing the first “+” button, you can add an empty slide. If you click on the “-“ button, it will delete the most recent slide and if you click on the next “+” button, it will duplicate the current slide.
4.Repeat until you get an animation
Now that you know how to deal with multiple frames, you can continue creating frames and making the animated characters move by tweaking with the drawing in every frame. For instance, if you wish to show that the animated character is running, in one of the frames the left leg should be forward and in the next one, the right leg should be forward. Keep repeating this process of tweaking with frames until you’ve your desired animated video.
Now that we’ve seen the process of animation via Pencil2D, you must have realized that it’s pretty orthodox and complicated. Moreover, you cannot carry out rigging and other newer animation techniques. Hence, we introduce you to Wondershare Filmora Video Editor , your all in one animation making platform. Here you can animate without any hassle. Wondershare Filmora makes your job easier with multiple animation features, you needn’t even draw your animated character. You can simply import a custom-made character and rig the character. Further, you need not deal with multiple frames and personally pay attention to each frame. All in all, Filmora makes your job simple and your animations much more seamless.
For Win 7 or later (64-bit)
For macOS 10.12 or later
Key Takeaways from This Episode
● Animation is actively being used for multiple purposes.
● Today we took a look at one of the orthodox yet popular animation tools, Pencil2D.
● The Pencil2D animation tool offers you multiple functionalities and allows you to make animations.
● Next, we also took a look at Wondershare Filmora Pro, your one-stop shop for all animation needs. You can find multiple animation features here and it’s all so simple.
● What are you waiting for? Your next animation is just one click away.
How to Create Your Avatar Free
How to Create Your Own Avatar Free
An easy yet powerful editor
Numerous effects to choose from
Detailed tutorials provided by the official channel
As a profile image, you can use your Facebook avatar. You can choose from a range of faces, hairstyles, and costumes for your avatar.
This article will help in creating your own avatar app and let you understand how to make your own my little pony avatar.
In this article
01 [Avatar Maker Tutorial | Create your Avatar for Free](#Part 1)
02 [5 Apps to Build Your Avatar](#Part 2)
Part 1 Avatar Maker Tutorial | Create your Avatar for Free
Adobe Creative Cloud Express is an online tool to make your own avatars for free. With Adobe, you can create a handcrafted avatar to match your personality for your social media profiles, YouTube videos, and so much more. Adobe lets you think out of the box, easy as choosing a template and sharing. Let us discuss the steps to create your own avatar for free using Adobe.
![]()
01Step 1: Start with Inspiration
You can never start from an empty canvas; there are several templates available you can choose any one of them by browsing with color, aesthetic, mood, and many other categories to have an idea of creating an avatar. Once you find a suitable graphic, you can click or tap on it starts editing as a document in the editor.
![]()
02Step 2: Remix
You can customize your avatar templates in a variety of ways. Change the font and copy. Substitute your photos for the imagery. Alternatively, you can use Creative Cloud Express to search through thousands of free pictures. Design your own by spending as little time as you wish.
![]()
03Step 3: Amplify Up the Flair
You can be as creative as you can by adding flair and personality to your projects with design assets. Add animated text and GIF to your project in one tap. They have cleared all the other technical issues to focus on your style and message.
![]()
04Step 4: Resize
The days where you have to remember the dimension of the image are gone. Once you have selected the design, you can modify and resize using the Auto magical resize available feature. Duplicate the project, select “Hit Resize,” and choose the platform to adapt it, and our AI will take care of the rest. Enjoy sharing it on other media.
[Well, this feature is a premium feature, so if you wish to access it, you need to do a subscription.]
![]()
05Step 5: Save and Share
Once you have applied all your creativity to your project, click on the “Publish” button and share your creations. Creative Cloud saves your project in your profile so that you can revisit and edit your projects whenever required.
Explore these professional templates to make your own avatar-free. Browse for themes like logos, icons, personalized fonts, and other elements to create an authentic look.
![]()
Part 2 5 Apps to Build Your Avatars
Having your avatar as your profile picture is freaking excellent and fun. There are many apps to create your avatars; let’s discuss some of them.
01Boo App–3D Avatar Emoji
Boo creates 3D characters that look similar to you within minutes. There are plenty of outfit options that can be customized separately for your styles to match your daily fashion. With this app, make your own avatars for free.
Highlights
●It offers a ton of features like skin tones, hair colors, eye colors, and hairstyles
●It assists in making your own my little pony avatar to give a unique style.
●New items are updated regularly.
Limits
●Limited color options
●Background glitch
●Sometimes after clicking the color option, it gets changed.
Review/Ratings
It has a rating of about 4.4 and many good reviews from users.
02Faceq
This application provides multiple facial features and an extensive trendy wardrobe. Even the tiniest characteristics on the face, such as beauty marks, facial hair, and brows, are essential. Hair accessories to make you own my little pony avatar. It looks as beautiful as when you apply your creativity to the maximum level.
Highlights
●Inclusive of many tabs for obvious face form, hairdo, and attire.
●Add more life to your avatars like text bubbles, hand gestures, etc.
●Multiple facial features
Limits
●Limited makeup options
●More dressing options expected
●Some slogans may be inappropriate
Ratings/Review
It has a rating of 3.1
03 SuperMe
This application is mainly for girls, and it offers 1000+ facial expressions and more materials. You can create and share animated videos of your avatars with the world and chat with people to make new friends. You can use this application to create my animated avatar.
Highlights
●There are 100 animations facilities where you can randomly apply by a simple handshake.
●A straightforward procedure to use.
●Multiple Facial expressions.
Limits
●You need to buy coins. It would be good if available for free.
●Primarily for girls
●The limitation of this application is that the language is still in its original language (Chinese).
Ratings/Review
This app has a rating of about 4
04Zmoji
Zmoji, a personal emoji creator, enables chatting with multiple versions of yours, and thus this way, you can make your own my little pony avatar. There are many unique features introduced to create a more appropriate.
Highlights
●It has a simple interface.
●It allows you to build a vivid cartoon avatar that matches your style quickly.
●It has Emoji Keyboard, which will enable you to send emojis directly from your keyboard in iMessage and third-party apps.
Limits
●The app also requires a subscription for some activities, which is disappointing.
●The subscription cost is high.
Ratings/Reviews
This app has a review of about 4.6
05Wondershare Wondershare Filmora Video Editor
To create my animated avatar, you can choose Wondershare Wondershare Filmora Video Editor . It is something magical that allows you to do anything with your photo. Of course, including changing to an avatar or a cartoon character. In this journal, you will see many different ways to make your own avatar for free, but Wondershare Filmora Video Editor offers to be all. It contains many templates, font styles, animation effects, wardrobes, and what less. Wondershare Filmora Video Editor is easier to use; with a few steps, you can create an avatar representing you more accurately than any other software could do.
It just goes with creating layers, liquefying, smoothening and additional features. And simply, you can share it to any social media directly from the software. Wondershare Wondershare Filmora Video Editor is mainly used to create my animated avatar.
Highlights
●Simple and easy interface.
●User friendly
●Multitude of features
Limits
●Advanced version need a subscription
Reviews
4.4 as per user reviews
For Win 7 or later (64-bit)
For macOS 10.12 or later
● Key Takeaways from This Episode →
● Understanding Adobe Creative Cloud Express
● Five different Apps used in creating my animated avatar
● Compared to all other online tools and programs, Wondershare Wondershare Filmora Video Editor is superior.
Top 3 Ways to Create Gif Images with Great 3D Gif Maker
Top 3 Ways to Create Gif Images with Great 3D Gif Maker
An easy yet powerful editor
Numerous effects to choose from
Detailed tutorials provided by the official channel
If what you’re searching for is a 3D GIF Maker, then we’ve got your back. Below, we’ve not only listed the three best ways to create 3D animated GIFs, but we’ve also included a brief tutorial that you can reference when creating your very own GIF images.
In this article
01 [Best 3 Ways to Create 3D Animated GIFs](#Part 1)
02 [Create 3D animated GIFs online with Filmora](#Part 2)
Part 1 Best 3 Ways to Create 3D Animated GIFs
First off, as promised, we have a brief list of some 3D GIF Maker tools that you can try. We’ve made sure to pick a unique set of 3D GIF Maker tools and 3D GIF Generator tools in order to give you a variety to choose from. It won’t be the most comprehensive list, but it should help you on your way to understanding how these 3D GIF makers usually work and how you can use them in order to create GIF images that you can share with your friends, family, and colleagues.
01 Wondershare Filmora Video Editor
The first 3D GIF Maker on our list is Filmora. It’s probably not the first one that you’d naturally think of as a 3D GIF Maker, seeing as it was developed to be more than that. But, it doesn’t discount the fact that it can be used in order to create and edit your own GIFs.
Wondershare Filmora is available for both Windows and Mac users. It allows you to create a GIF with images or video easily and even gives you the tools needed to edit and perfect it before you export it for use (a process that we’ll be showing off in more detail in the tutorial section below if you’re interested in learning more.)
For Win 7 or later (64-bit)
For macOS 10.12 or later
022. Adobe Photoshop
Adobe Photoshop, much like Filmora, is probably not, first and foremost, considered a mere 3D GIF Maker. However, it doesn’t erase its 3D GIF Creator functions. This tool, if used correctly, can make just about anything you want.
The process of using it, of course, is a little fussier than other alternatives (you’ll probably want to look up a more detailed explanation on the subject), but the fussiness does also mean that you can control every detail of your project and get it to look exactly how you want it to look.
03EaseUS Video Editor
Similar to Filmora, EaseUS Video Editor is an advanced video editing tool that you can use as a 3D GIF Creator quite easily. It comes built-in with templates, filters, design elements, transition effects, music, and so much more — allowing you to freely design your GIF images so that they can be ready for publishing right off the bat.
The beauty of it, of course, is that, much like with all the other options that we introduced today, you can use the program for more than just 3D GIF creation after the fact — opening yourself up for different and more complex projects in the future (be they image, audio, or video-related.)
Part 2 Create 3D Animated Gifs Online With Wondershare Filmora Video Editor
Now, as promised, we’ve also included a tutorial that you can follow along with to create your own 3D Animated GIFs with the tool, Wondershare Filmora Video Editor . With this tool, we’ll be showing you the basic way to do it (by using a premade video that you can edit and then convert into GIF format). But, feel free to explore the tool and use it as you wish (i.e., as a 3D spinning GIF creator, 3D rotating text GIF maker, 3D cube GIF maker, and so on.)
01Step 1: Launch Filmora Video Editor
First things first, launch the 3D GIF maker that you intend to use. In our case, that is Filmora (a screenshot has been provided below for your edification and reference. We’ll be using Filmora as our example.)
02Step 2: Upload File(s)
Next, upload the file or files that you want to turn into a GIF.
As mentioned in the introduction, we’ll be using a pre-made video, but you can use whatever you wish (i.e., images). In order to upload, we clicked the File tab (pointed out in the image below) and selected Import Media > Import Media File. However, you can also drag and drop your file(s) on the designated area of the UI..
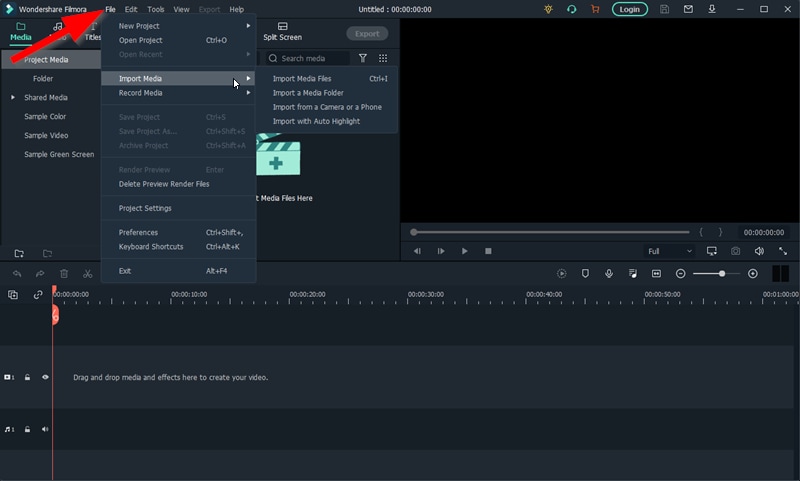
03Step 3: Drag Uploaded Media to Timeline
To create a GIF withFilmora , you’ll need to first create a video. Don’t worry, this is simple. Just drag and drop the media that you want to use onto the timeline.
Note: Any uploaded media will be in the media folder (marked [1] in the image below). Drag media from there onto the timeline (marked [2] in the image below) in order to create a video.
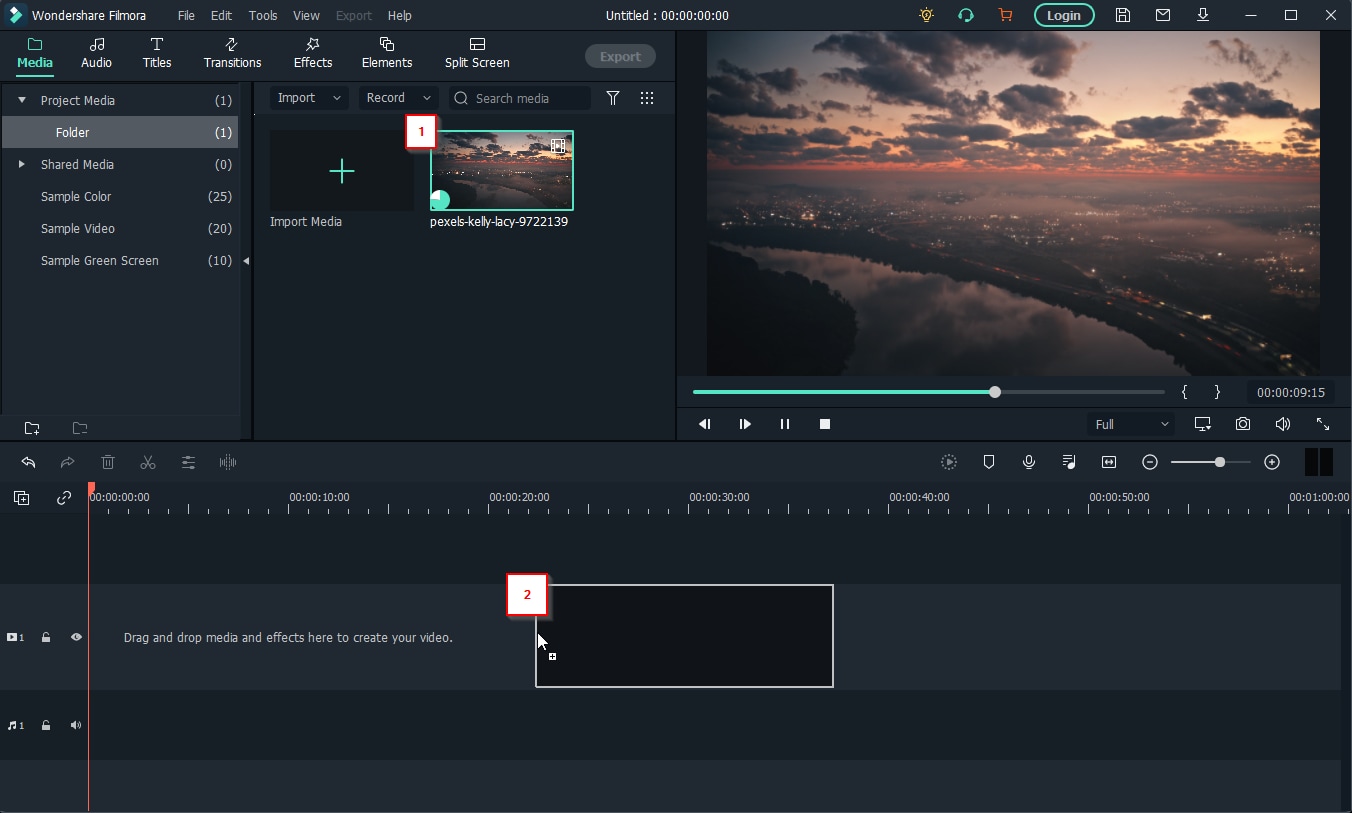
04Step 4: (Optional) Edit Video
If you want, take this opportunity to work on your video some more before converting it into a GIF. Filmora is set up to help you with this. Providing all the following features:
●Trim or Cut features to trim down the video.
●Add Text or audio to video.
●Use templates, filters, or other elements to design videos.
●Add transitions for better video flow.
And then some. In our case, we used the ‘Trim’ feature to cut down our video for a cleaner look.
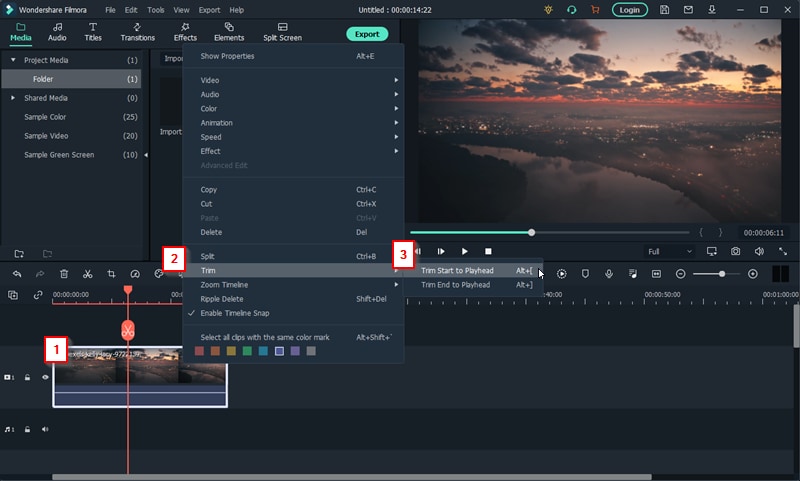
05Step 5: Create Video > GIF
Once you’re done editing your video, you can now convert it to a GIF.
This is easy enough to do. Just click the ‘Export’ tab and select the ‘Create Video’ option. That will allow you to choose to convert your finished video into a GIF file that you can share with your friends.
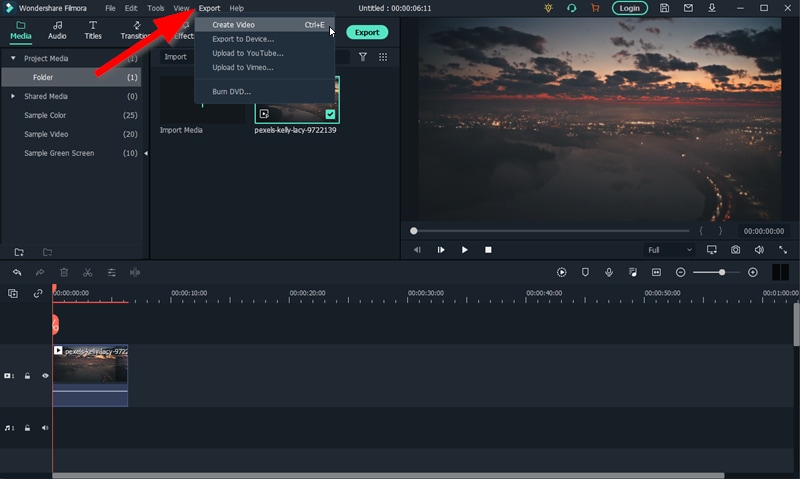
● Key Takeaways from This Episode →
● GIFs are a great way of sharing fun moments with friends and family. And, these days, it’s easier than ever to create them.
● There are 3D GIF Makers available everywhere online. Each one is a little different, of course. But capable of allowing you to create GIFs with images and videos that you can eventually share.
● One such example is the 3D GIF Maker, Filmora. It was the first one that we introduced on our list of the best 3D GIf Makers.
● We also included a tutorial on how you can use Filmora as a 3D GIF Generator for your reference. You can try out the program today if you like. Wondershare offers a FREE trial that you can use in order to explore the many functions of the software before you commit to buying out the perpetual license or signing up for one of their subscription packages.
If what you’re searching for is a 3D GIF Maker, then we’ve got your back. Below, we’ve not only listed the three best ways to create 3D animated GIFs, but we’ve also included a brief tutorial that you can reference when creating your very own GIF images.
In this article
01 [Best 3 Ways to Create 3D Animated GIFs](#Part 1)
02 [Create 3D animated GIFs online with Filmora](#Part 2)
Part 1 Best 3 Ways to Create 3D Animated GIFs
First off, as promised, we have a brief list of some 3D GIF Maker tools that you can try. We’ve made sure to pick a unique set of 3D GIF Maker tools and 3D GIF Generator tools in order to give you a variety to choose from. It won’t be the most comprehensive list, but it should help you on your way to understanding how these 3D GIF makers usually work and how you can use them in order to create GIF images that you can share with your friends, family, and colleagues.
01 Wondershare Filmora Video Editor
The first 3D GIF Maker on our list is Filmora. It’s probably not the first one that you’d naturally think of as a 3D GIF Maker, seeing as it was developed to be more than that. But, it doesn’t discount the fact that it can be used in order to create and edit your own GIFs.
Wondershare Filmora is available for both Windows and Mac users. It allows you to create a GIF with images or video easily and even gives you the tools needed to edit and perfect it before you export it for use (a process that we’ll be showing off in more detail in the tutorial section below if you’re interested in learning more.)
For Win 7 or later (64-bit)
For macOS 10.12 or later
022. Adobe Photoshop
Adobe Photoshop, much like Filmora, is probably not, first and foremost, considered a mere 3D GIF Maker. However, it doesn’t erase its 3D GIF Creator functions. This tool, if used correctly, can make just about anything you want.
The process of using it, of course, is a little fussier than other alternatives (you’ll probably want to look up a more detailed explanation on the subject), but the fussiness does also mean that you can control every detail of your project and get it to look exactly how you want it to look.
03EaseUS Video Editor
Similar to Filmora, EaseUS Video Editor is an advanced video editing tool that you can use as a 3D GIF Creator quite easily. It comes built-in with templates, filters, design elements, transition effects, music, and so much more — allowing you to freely design your GIF images so that they can be ready for publishing right off the bat.
The beauty of it, of course, is that, much like with all the other options that we introduced today, you can use the program for more than just 3D GIF creation after the fact — opening yourself up for different and more complex projects in the future (be they image, audio, or video-related.)
Part 2 Create 3D Animated Gifs Online With Wondershare Filmora Video Editor
Now, as promised, we’ve also included a tutorial that you can follow along with to create your own 3D Animated GIFs with the tool, Wondershare Filmora Video Editor . With this tool, we’ll be showing you the basic way to do it (by using a premade video that you can edit and then convert into GIF format). But, feel free to explore the tool and use it as you wish (i.e., as a 3D spinning GIF creator, 3D rotating text GIF maker, 3D cube GIF maker, and so on.)
01Step 1: Launch Filmora Video Editor
First things first, launch the 3D GIF maker that you intend to use. In our case, that is Filmora (a screenshot has been provided below for your edification and reference. We’ll be using Filmora as our example.)
02Step 2: Upload File(s)
Next, upload the file or files that you want to turn into a GIF.
As mentioned in the introduction, we’ll be using a pre-made video, but you can use whatever you wish (i.e., images). In order to upload, we clicked the File tab (pointed out in the image below) and selected Import Media > Import Media File. However, you can also drag and drop your file(s) on the designated area of the UI..
03Step 3: Drag Uploaded Media to Timeline
To create a GIF withFilmora , you’ll need to first create a video. Don’t worry, this is simple. Just drag and drop the media that you want to use onto the timeline.
Note: Any uploaded media will be in the media folder (marked [1] in the image below). Drag media from there onto the timeline (marked [2] in the image below) in order to create a video.
04Step 4: (Optional) Edit Video
If you want, take this opportunity to work on your video some more before converting it into a GIF. Filmora is set up to help you with this. Providing all the following features:
●Trim or Cut features to trim down the video.
●Add Text or audio to video.
●Use templates, filters, or other elements to design videos.
●Add transitions for better video flow.
And then some. In our case, we used the ‘Trim’ feature to cut down our video for a cleaner look.
05Step 5: Create Video > GIF
Once you’re done editing your video, you can now convert it to a GIF.
This is easy enough to do. Just click the ‘Export’ tab and select the ‘Create Video’ option. That will allow you to choose to convert your finished video into a GIF file that you can share with your friends.
● Key Takeaways from This Episode →
● GIFs are a great way of sharing fun moments with friends and family. And, these days, it’s easier than ever to create them.
● There are 3D GIF Makers available everywhere online. Each one is a little different, of course. But capable of allowing you to create GIFs with images and videos that you can eventually share.
● One such example is the 3D GIF Maker, Filmora. It was the first one that we introduced on our list of the best 3D GIf Makers.
● We also included a tutorial on how you can use Filmora as a 3D GIF Generator for your reference. You can try out the program today if you like. Wondershare offers a FREE trial that you can use in order to explore the many functions of the software before you commit to buying out the perpetual license or signing up for one of their subscription packages.
5 Different Animation Styles: A Simple but Comprehensive Guide
5 Different Animation Styles: A Simple but Comprehensive Guide

Shanoon Cox
Mar 27, 2024• Proven solutions
To whatever generation or kind one could belong to, animation style videos attract people of all ages, and you will be one of them for sure. Rather than ordinary videos, animated ones provoke diverse impacts on the audience utilizing kinesthetic, illustration, and aural. But the reality or fact is, due to overexposure to social media sites and technological advancements, we have forgotten its importance. They are on the verge of existence at present. Are you an art lover who wishes to know more about animation styles? Want to know some of the software tools that can bring out the artist in you? Here is a complete guide that is all you need.
- Part 1: 5 Different Animation Styles
- Part 2: Create Your Animation Videos with Professional Video Editor
5 Different Animation Styles
Ready to enter into the world of animation along with us? We are all set to take you through a ride of different animation styles, their importance, and some of the videos that one should give a try!
1. 2D Animation
Let’s start with 2D as our fist animation style, which is the traditional or oldest form in practice for more than 100 years since 1908. 2D has widely been in usage to create animated short films, cartoon characters, games, marketing videos, and educational materials. In 2D animation, the characters or items, creatures, and backgrounds get crafted in a two-dimensional space. It produces a graphic of movement with the drawings played serially one after another.
Recommended Software: At present, various free animator tools like Creatoon, Blender, and Pencil 2D, whereas, for professionals, Encore, Flash, Toon Boom Harmony, and Adobe Photoshop can be handy!
The above 2D animation style video is a short film “Dark Dark Woods” directed by the students at “The Animation Workshop.” It is all about the young princess, Maria, drenched, and tired of living a royal life being filled with rules, duties, lessons, responsibilities, and customs. One night, she enters into an adventurous event where she finds herself in a mysterious monster-filled dark wood. Watch the film and find did she find out there!
2. 3D Animation
As the next version of 2D, in the animation industry, 3D revolutionized the market since its first appearance in 1972. Like 2D, 3D finds applications in varied platforms like a business, education, and entertainment. Still, the difference is they are unique and created in three-dimensional space using computer graphics and cinematography techniques as well. The pictures or characters look perfected with cutting-edge technology where toy story movie is an outstanding example.
Recommended Software: One can try some of the 3D modeling software packs like Maya, Houdini, Modo, ZBrush, and Lightwave 3D.
Do you know how it feels if you are trapped alone on a deserted island? “It’s a Cinch!” is a fantastic, funny 3D short film that is an adventurous movie made by the ESMA team at CGI. For sure, you will like this funny movie all about atrocities happening with a man and a pelican and enjoy it as much as I did!
3. Motion Graphics
Our next animation style is motion graphics of the animated graphic design, where text appears to be the main enhancing factor. It is a piece of animation or digital footage that illuminates a motion or notation incorporated with audio. It is a new way of communicating to the audience and in driving them deep into the story. You can categorize it under the visual effect technique, which involves the movement of graphic images or elements like logos or text, sound, music, and motion. Motion graphics are best to be found in action and finds a place in multimedia projects, advertising agencies, branding, television title making, and storytelling.
Recommended Software: Tools that are best for motion graphics is Mocha AE, After Effects, Illustrator, and Cinema 4D.
The world is a great place, but we always forget another beautiful hidden green world behind the fantastic buildings we reside in. Yes, “Beautiful World” is a motion graphic video by Blasterjaxx & DBSTF feat. Ryder presents how we humans have developed a great empire by destroying the other beautiful part of the world.
4. Stop Motion
Stop motion is one of the traditional animation styles that is the most popular filmmaking technique that uses hand-crafted or manipulated objects, mostly clay models. Puppets, silhouettes, and cut-outs can also be implemented as stop motion aids to produce animation. It is labor-intensive, a form of art, and has its flavor in animation, although 3D and visual effects have replaced it quite a long time before. But still, filmmakers like Tim Burton use stop motion in their films, making it to withstand the animation industry.
Recommended Software: You can make your stop motion video with software like Dragon frame, Stop Motion Pro Eclipse, and IKITMovie.
Although stop motion has gone before ages, there is still a fantastic introduction. Here is an award-winning short film, “Tokri (the basket),” which is a clumsy accident that leads a juvenile girl onto Mumbai’s streets with the trust of making things correct. Studio Eeksaurus, an Indian bastion animation company, has depicted a father and daughter’s tender emotive tale.
5. Paint-On-Glass Animation
Here is a Paint-on-Glass animation style that is a technique used for making animated films that gives a lot of fun. Artists paint short stories on glasses using oil paints and film them by recording it frame-by-frame. Russian animator Aleksandr Petrov is a famous artist well known for making award-winning paint-on-glass animation. Animators use different objects like brick dust, sand, pastels, and charcoal, to create outstanding drama in their films.
Recommended Software: You can also become a paint-on-glass animator now with tools like Pencil 2D, Blender, Krita, and GIMP.
Suppose you are wondering whether you could find any paint-on-glass animated movie on social media sites. In that case, there are numerous animated films, like “The Old Man and the Sea,” and “My Love,” produced by the experts of pictures of Aleksandr Petrov animation. Surprisingly, this bind-blowing introduction is a result of oil paints on a sheet of glass.
Conclusion
Do you aspire to become an animator and come up painting bright colors to videos? Choose animation styles that you most enjoy, find attractive today, and start working on it. Lastly, do not forget to give Filmora a chance to uplift your creation and give your animation style a life!
Shanoon Cox
Shanoon Cox is a writer and a lover of all things video.
Follow @Shanoon Cox
Shanoon Cox
Mar 27, 2024• Proven solutions
To whatever generation or kind one could belong to, animation style videos attract people of all ages, and you will be one of them for sure. Rather than ordinary videos, animated ones provoke diverse impacts on the audience utilizing kinesthetic, illustration, and aural. But the reality or fact is, due to overexposure to social media sites and technological advancements, we have forgotten its importance. They are on the verge of existence at present. Are you an art lover who wishes to know more about animation styles? Want to know some of the software tools that can bring out the artist in you? Here is a complete guide that is all you need.
- Part 1: 5 Different Animation Styles
- Part 2: Create Your Animation Videos with Professional Video Editor
5 Different Animation Styles
Ready to enter into the world of animation along with us? We are all set to take you through a ride of different animation styles, their importance, and some of the videos that one should give a try!
1. 2D Animation
Let’s start with 2D as our fist animation style, which is the traditional or oldest form in practice for more than 100 years since 1908. 2D has widely been in usage to create animated short films, cartoon characters, games, marketing videos, and educational materials. In 2D animation, the characters or items, creatures, and backgrounds get crafted in a two-dimensional space. It produces a graphic of movement with the drawings played serially one after another.
Recommended Software: At present, various free animator tools like Creatoon, Blender, and Pencil 2D, whereas, for professionals, Encore, Flash, Toon Boom Harmony, and Adobe Photoshop can be handy!
The above 2D animation style video is a short film “Dark Dark Woods” directed by the students at “The Animation Workshop.” It is all about the young princess, Maria, drenched, and tired of living a royal life being filled with rules, duties, lessons, responsibilities, and customs. One night, she enters into an adventurous event where she finds herself in a mysterious monster-filled dark wood. Watch the film and find did she find out there!
2. 3D Animation
As the next version of 2D, in the animation industry, 3D revolutionized the market since its first appearance in 1972. Like 2D, 3D finds applications in varied platforms like a business, education, and entertainment. Still, the difference is they are unique and created in three-dimensional space using computer graphics and cinematography techniques as well. The pictures or characters look perfected with cutting-edge technology where toy story movie is an outstanding example.
Recommended Software: One can try some of the 3D modeling software packs like Maya, Houdini, Modo, ZBrush, and Lightwave 3D.
Do you know how it feels if you are trapped alone on a deserted island? “It’s a Cinch!” is a fantastic, funny 3D short film that is an adventurous movie made by the ESMA team at CGI. For sure, you will like this funny movie all about atrocities happening with a man and a pelican and enjoy it as much as I did!
3. Motion Graphics
Our next animation style is motion graphics of the animated graphic design, where text appears to be the main enhancing factor. It is a piece of animation or digital footage that illuminates a motion or notation incorporated with audio. It is a new way of communicating to the audience and in driving them deep into the story. You can categorize it under the visual effect technique, which involves the movement of graphic images or elements like logos or text, sound, music, and motion. Motion graphics are best to be found in action and finds a place in multimedia projects, advertising agencies, branding, television title making, and storytelling.
Recommended Software: Tools that are best for motion graphics is Mocha AE, After Effects, Illustrator, and Cinema 4D.
The world is a great place, but we always forget another beautiful hidden green world behind the fantastic buildings we reside in. Yes, “Beautiful World” is a motion graphic video by Blasterjaxx & DBSTF feat. Ryder presents how we humans have developed a great empire by destroying the other beautiful part of the world.
4. Stop Motion
Stop motion is one of the traditional animation styles that is the most popular filmmaking technique that uses hand-crafted or manipulated objects, mostly clay models. Puppets, silhouettes, and cut-outs can also be implemented as stop motion aids to produce animation. It is labor-intensive, a form of art, and has its flavor in animation, although 3D and visual effects have replaced it quite a long time before. But still, filmmakers like Tim Burton use stop motion in their films, making it to withstand the animation industry.
Recommended Software: You can make your stop motion video with software like Dragon frame, Stop Motion Pro Eclipse, and IKITMovie.
Although stop motion has gone before ages, there is still a fantastic introduction. Here is an award-winning short film, “Tokri (the basket),” which is a clumsy accident that leads a juvenile girl onto Mumbai’s streets with the trust of making things correct. Studio Eeksaurus, an Indian bastion animation company, has depicted a father and daughter’s tender emotive tale.
5. Paint-On-Glass Animation
Here is a Paint-on-Glass animation style that is a technique used for making animated films that gives a lot of fun. Artists paint short stories on glasses using oil paints and film them by recording it frame-by-frame. Russian animator Aleksandr Petrov is a famous artist well known for making award-winning paint-on-glass animation. Animators use different objects like brick dust, sand, pastels, and charcoal, to create outstanding drama in their films.
Recommended Software: You can also become a paint-on-glass animator now with tools like Pencil 2D, Blender, Krita, and GIMP.
Suppose you are wondering whether you could find any paint-on-glass animated movie on social media sites. In that case, there are numerous animated films, like “The Old Man and the Sea,” and “My Love,” produced by the experts of pictures of Aleksandr Petrov animation. Surprisingly, this bind-blowing introduction is a result of oil paints on a sheet of glass.
Conclusion
Do you aspire to become an animator and come up painting bright colors to videos? Choose animation styles that you most enjoy, find attractive today, and start working on it. Lastly, do not forget to give Filmora a chance to uplift your creation and give your animation style a life!
Shanoon Cox
Shanoon Cox is a writer and a lover of all things video.
Follow @Shanoon Cox
How to Convert Animated GIF From Video
Versatile Video Editor - Wondershare Filmora
An easy yet powerful editor
Numerous effects to choose from
Detailed tutorials provided by the official channel
The animated GIFs excite the viewers and convey a message. The instant chats include these animated GIFs to add fun to your conversation. Few web designers place animated GIFs on their web pages to attract their target customers wisely. You can convert animated GIFs from video using a reliable application available in the digital space. The animated GIFs impress the viewers and add flavor to the content. Mostly used replacing the emojis because the emojis are static images, whereas the animated GIFs showcase an action that triggers more meaning to the viewers. There are options to extract a specific clipping from videos and use them as animated GIFs. Here, you will be learning about GIFs and the best ways to edit them with sophisticated tools.

In this article
01 [What is GIF?](#Part 1)
02 [Why do People like to use GIFs?](#Part 2)
03 [Convert Animated GIF from Video](#Part 3)
04 [Tip: Easily edit your GIF for free](#Part 4)
Part 1 What is GIF?
The GIF is a Graphical Interchange Format and represents the file format in the bitmap. When compared to other image formats, GIF has unique specifications that are appreciable. The GIF has a lossless compression feature and you can transfer them to any space effortlessly. It includes 256 colors and is widely used for creating buttons and banners on the webpages. It came into practice in the year1987 and occupied the computer space commercially. GIFs are preferred to create small animations and are adopted by social media users. After the advent of PNG, the usage of GIF gradually decreased by website users. Later, the animated GIFs conquered the digital space as they replace most websites’ videos. It serves as one of the best message conveyers and is quite interesting for social media users. Gradually the younger generations were highly attracted to these animated GIFs to express their thoughts in an image format.
Part 2 Why do People like to use GIFs?
People prefer GIFs when compared to videos because animated GIFs convey a strong message quickly than videos. Social media users feel comfortable using GIFs and consider it the best way to express their emotions. Apart from the chat interface, you can find the animated GIFs occupying the website’s landing page, blog posts, and emails. The designers opt for animated GIFs instead of short videos because of their effective results. Many webpage visitors skim the content, and the animated GIFs quickly reveal what you convey. The audience understands the essential data you are emphasizing on the websites swiftly with the help of the animated GIFs.
When you include videos on your websites, the users skip the videos without making any clicks due to lack of time. The animated GIFs overcame this issue, the GIFs started to play as soon as the page loads, and the audience took a quick look at it, receiving the data you are trying to narrate through these animated GIFs. Many web page users prefer animated GIFs because they take less time to load and consume data. Both the viewers and webpage designers use GIFs instead of videos to convey their message in a visual format.
Part 3 Convert Animated GIF from Video
Giphy is the best online program that creates animated GIFs from video. It is an exclusively online program that focuses on an efficient way to create animated GIFs from videos. There are many online tools available to make your GIFs. The Giphy is an impressive application with loads of in-built features to entertain audiences. While creating a GIF, ensure it has a good loading capability to obtain efficient results. You can follow the below steps to convert GIFs from videos using the Giphy app.
Step 1
Visit the official website of Giphy and upload the videos to convert a GIF by tapping the Convert button. You can also upload the video file by pasting the URL from YouTube or Vimeo.

Step 2
Now, use the Giphy tool to trim the video and spot out the section that requires converting it as GIFs.
Trim the videos and locate the section that requires the creation of animated GIFs.

Step 3
Customize the trimmed video section using stickers, filters, and texts. After personalizing the trimmed video, tap Upload to Giphy to store the edited animated GIFs in its library.
You can access the animated GIFs from the storage library in your account.

Follow the above guidelines to create animated GIFs from videos using the Giphy online tool. Surf the steps carefully to ensure successful completion of the animated GIFs creation from video.
Part 4 Tip: Easily edit your GIF for free
Further, you can refine the GIFs using a professional editor like Filmora. The Filmora from Wondershare is an awesome tool that gives you a wow feel while editing the media files. It is an exclusive program that edits the media files effectively to obtain the desired outcomes. You can work as a pro editor without any technical skills. The simple interface of this application triggers you to use the built-in elements professionally. Tap the relevant controls to include the desired effects on the uploaded GIF images. The timeline has a user-friendly interface and there are no complexities even while handling larger image or video files.
The key features of the Filmora application
● Customize the videos based on your needs. You can crop, add text, resize the dimensions precisely.
● You can add special effects to the videos using the in-built filters
● It has a simple interface and assists you in working like a pro.
● The trimmer tool aids in creating animated GIFs from your videos
● Easy to import and export the edited files to desired storage space by a single click action.
Apart from the above functionalities, you can discover enlightening uses of Filmora by installing it on your device. The controls are explicit and you can access them without any hesitation. The simple interface aids the newbie users to master this app in no time due to its comfortable working timeline.
The stepwise procedure to create animated GIFs from the imported videos using the Filmora application.
Step 1 Install the application
Visit the official website of Filmora, download the tool concerning your system OS, and install it by following the instruction wizard. Import the desired video into the timeline by tapping the Import Media Files option.

Step 2 Add texts to the video
Based on your requirements, you can trim the video using the edit tool and insert desired texts by tapping the Title menu.

Step 3 Export the edited file
Finally, click the Export button to save the edited file on any desired storage space. During the export operation, you can perform various changes to your media files. There are options to modify the file format, resolution, and storage path. Tap the respective menus to choose the desired platform that requires the storage operation. Directly post the animated GIFs on your YouTube or Vimeo based on your needs.

The above steps will aid you in creating animated GIFs from videos and using this application efficiently to bring the desired impact on it.
Wondershare Filmora
Get started easily with Filmora’s powerful performance, intuitive interface, and countless effects!
Try It Free Try It Free Try It Free Learn More >

AI Portrait – The best feature of Wondershare Filmora for gameplay editing
The AI Portrait is a new add-on in Wondershare Filmora. It can easily remove video backgrounds without using a green screen or chroma key, allowing you to add borders, glitch effects, pixelated, noise, or segmentation video effects.

Conclusion
Thus, this article had given enough insights into creating an animated GIF from videos. You can either use an online tool or opt for Filmora to edit the videos and convert them to impressive animated GIFs. The Filmora helps you to edit the media files professionally, and its simple interface assists in handling even the complex files efficiently. Connect with this article to explore the video edit process using a reliable program like Filmora. Stay tuned to create animated GIFs that conveys explicit messages to the audience.
The animated GIFs excite the viewers and convey a message. The instant chats include these animated GIFs to add fun to your conversation. Few web designers place animated GIFs on their web pages to attract their target customers wisely. You can convert animated GIFs from video using a reliable application available in the digital space. The animated GIFs impress the viewers and add flavor to the content. Mostly used replacing the emojis because the emojis are static images, whereas the animated GIFs showcase an action that triggers more meaning to the viewers. There are options to extract a specific clipping from videos and use them as animated GIFs. Here, you will be learning about GIFs and the best ways to edit them with sophisticated tools.
In this article
01 [What is GIF?](#Part 1)
02 [Why do People like to use GIFs?](#Part 2)
03 [Convert Animated GIF from Video](#Part 3)
04 [Tip: Easily edit your GIF for free](#Part 4)
Part 1 What is GIF?
The GIF is a Graphical Interchange Format and represents the file format in the bitmap. When compared to other image formats, GIF has unique specifications that are appreciable. The GIF has a lossless compression feature and you can transfer them to any space effortlessly. It includes 256 colors and is widely used for creating buttons and banners on the webpages. It came into practice in the year1987 and occupied the computer space commercially. GIFs are preferred to create small animations and are adopted by social media users. After the advent of PNG, the usage of GIF gradually decreased by website users. Later, the animated GIFs conquered the digital space as they replace most websites’ videos. It serves as one of the best message conveyers and is quite interesting for social media users. Gradually the younger generations were highly attracted to these animated GIFs to express their thoughts in an image format.
Part 2 Why do People like to use GIFs?
People prefer GIFs when compared to videos because animated GIFs convey a strong message quickly than videos. Social media users feel comfortable using GIFs and consider it the best way to express their emotions. Apart from the chat interface, you can find the animated GIFs occupying the website’s landing page, blog posts, and emails. The designers opt for animated GIFs instead of short videos because of their effective results. Many webpage visitors skim the content, and the animated GIFs quickly reveal what you convey. The audience understands the essential data you are emphasizing on the websites swiftly with the help of the animated GIFs.
When you include videos on your websites, the users skip the videos without making any clicks due to lack of time. The animated GIFs overcame this issue, the GIFs started to play as soon as the page loads, and the audience took a quick look at it, receiving the data you are trying to narrate through these animated GIFs. Many web page users prefer animated GIFs because they take less time to load and consume data. Both the viewers and webpage designers use GIFs instead of videos to convey their message in a visual format.
Part 3 Convert Animated GIF from Video
Giphy is the best online program that creates animated GIFs from video. It is an exclusively online program that focuses on an efficient way to create animated GIFs from videos. There are many online tools available to make your GIFs. The Giphy is an impressive application with loads of in-built features to entertain audiences. While creating a GIF, ensure it has a good loading capability to obtain efficient results. You can follow the below steps to convert GIFs from videos using the Giphy app.
Step 1
Visit the official website of Giphy and upload the videos to convert a GIF by tapping the Convert button. You can also upload the video file by pasting the URL from YouTube or Vimeo.
Step 2
Now, use the Giphy tool to trim the video and spot out the section that requires converting it as GIFs.
Trim the videos and locate the section that requires the creation of animated GIFs.
Step 3
Customize the trimmed video section using stickers, filters, and texts. After personalizing the trimmed video, tap Upload to Giphy to store the edited animated GIFs in its library.
You can access the animated GIFs from the storage library in your account.
Follow the above guidelines to create animated GIFs from videos using the Giphy online tool. Surf the steps carefully to ensure successful completion of the animated GIFs creation from video.
Part 4 Tip: Easily edit your GIF for free
Further, you can refine the GIFs using a professional editor like Filmora. The Filmora from Wondershare is an awesome tool that gives you a wow feel while editing the media files. It is an exclusive program that edits the media files effectively to obtain the desired outcomes. You can work as a pro editor without any technical skills. The simple interface of this application triggers you to use the built-in elements professionally. Tap the relevant controls to include the desired effects on the uploaded GIF images. The timeline has a user-friendly interface and there are no complexities even while handling larger image or video files.
The key features of the Filmora application
● Customize the videos based on your needs. You can crop, add text, resize the dimensions precisely.
● You can add special effects to the videos using the in-built filters
● It has a simple interface and assists you in working like a pro.
● The trimmer tool aids in creating animated GIFs from your videos
● Easy to import and export the edited files to desired storage space by a single click action.
Apart from the above functionalities, you can discover enlightening uses of Filmora by installing it on your device. The controls are explicit and you can access them without any hesitation. The simple interface aids the newbie users to master this app in no time due to its comfortable working timeline.
The stepwise procedure to create animated GIFs from the imported videos using the Filmora application.
Step 1 Install the application
Visit the official website of Filmora, download the tool concerning your system OS, and install it by following the instruction wizard. Import the desired video into the timeline by tapping the Import Media Files option.
Step 2 Add texts to the video
Based on your requirements, you can trim the video using the edit tool and insert desired texts by tapping the Title menu.
Step 3 Export the edited file
Finally, click the Export button to save the edited file on any desired storage space. During the export operation, you can perform various changes to your media files. There are options to modify the file format, resolution, and storage path. Tap the respective menus to choose the desired platform that requires the storage operation. Directly post the animated GIFs on your YouTube or Vimeo based on your needs.
The above steps will aid you in creating animated GIFs from videos and using this application efficiently to bring the desired impact on it.
Wondershare Filmora
Get started easily with Filmora’s powerful performance, intuitive interface, and countless effects!
Try It Free Try It Free Try It Free Learn More >
AI Portrait – The best feature of Wondershare Filmora for gameplay editing
The AI Portrait is a new add-on in Wondershare Filmora. It can easily remove video backgrounds without using a green screen or chroma key, allowing you to add borders, glitch effects, pixelated, noise, or segmentation video effects.
Conclusion
Thus, this article had given enough insights into creating an animated GIF from videos. You can either use an online tool or opt for Filmora to edit the videos and convert them to impressive animated GIFs. The Filmora helps you to edit the media files professionally, and its simple interface assists in handling even the complex files efficiently. Connect with this article to explore the video edit process using a reliable program like Filmora. Stay tuned to create animated GIFs that conveys explicit messages to the audience.
10 Great MP4 to GIF Converters to Get Perfect-Made GIF
10 Must-Use MP4 to GIF Converters to Get Perfect-Made GIF
An easy yet powerful editor
Numerous effects to choose from
Detailed tutorials provided by the official channel
GIFs are becoming more common day by day. They are used for a wide range of purposes, from chatting and expressing emotions on social media to promoting products and services. GIFs are image formats that are relatively easy to download and upload and easy to convey messages and thoughts to a wide range of people. On the other hand, MP4 are video files that contain audio. These files are large and require special requirements to run and work properly.
There are a lot of advantages of using GIF files, like they are easy to make and store, help create animations quickly, and convey messages and emotions more conveniently. With the increasing usage of GIF files, it has become important to know and understand the tools used to convert the MP4 files into GIF formats.
In this article
01 [5 Offline MP4 to GIF Converters](#Part 1)
02 [5 Online MP4 to GIF Converters](#Part 2)
Part 1 5 Offline MP4 to GIF Converters
Offline MP4 to GIF converter is the best option as it helps to create GIF files quickly and easily, without any quality loss. The following offline converters can be used effectively to turn MP4 into GIF formats very easily and quickly:
01Any GIF Animator
Any GIF Animator is one of the great offline tools used for converting videos to GIF files very quickly. It can easily convert the videos into attractive GIFs in seconds.
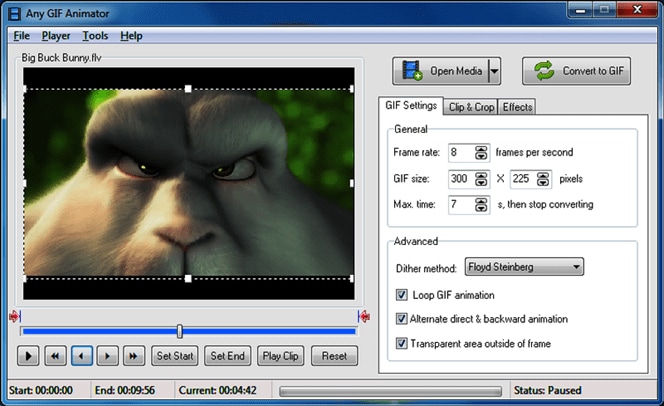
Key Features:
● It has a very easy-to-use interface for user convenience.
● It sustains a considerable number of video formats.
● It allows the users to edit converted GIFs like adding frames, forward and backward looping, etc.
● It will enable you to edit the files imported from DVDs and WebCam recorded files.
● It has an in-built animation wizard.
Pros:
● It works for both Mac as well as Windows
● Any GIF Animator can be downloaded freely.
● It can convert both videos as well as images.
Cons:
● It crashes at times while processing the videos.
● Uploading the files takes a longer time than usual.
02DVDFab
DVDFab is another offline tool that converts the files from MP4 to GIF in very little time without compromising the quality of the outcome.

Key Features:
● It supports a large number of video formats.
● It has a user-friendly interface.
● It can be used for both Mac & Windows.
● It is a great multimedia solution software.
● It comes with affordable pricing.
Pros:
● It is quick & easy to use.
● It delivers high-quality outputs.
● It allows the users to completely control the looping, frequency, and size of the files.
Cons:
● Being a multimedia software, it requires learning.
● Complete beginners can get confused.
03Wondershare TunesGo
TunesGo was developed by one of the most trusted software companies – Wondershare. It is a great tool used to make GIFs from MP4 files.
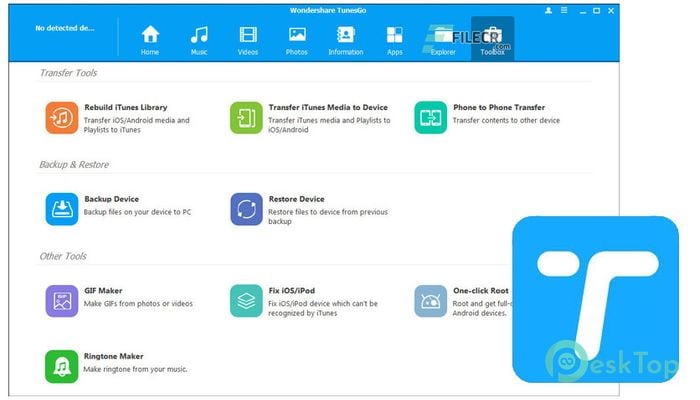
Key Features:
● Developed by one of the most trusted software development companies.
● Compatible for all iOS devices.
● A user-friendly interface is suitable for complete beginners.
● A trial version is available.
● Works faster and delivers high-resolution output.
Pros:
● Supports; almost all types of video formats.
● It permits you to edit the videos before converting.
● It can also convert images and live videos to GIFs.
Cons:
● It is costly.
● It doesn’t allow you to edit Smart playlists.
04KickMyGraphics
It is another powerful offline tool to convert MP4 to high-quality GIF files. It allows users to convert different formats of videos and images into GIFs.
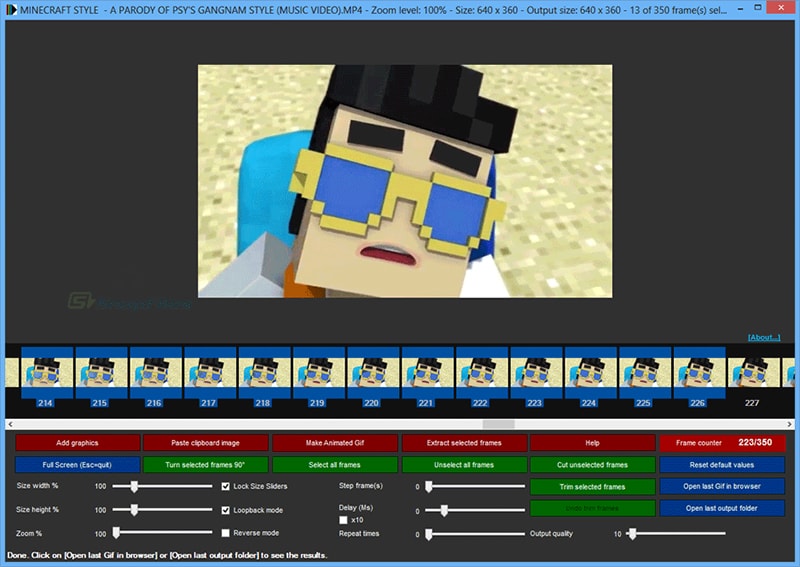
Key Features:
● Compatibility lies with Mac and Windows both.
● Users can instantly upload various video formats like MPG, MP4, AVI, etc.
● Users can directly upload considerable image formats like JPG, PNG, BMP, etc.
● It has a user-friendly interface.
● It is a freeware offline GIF converter.
Pros:
● It has an in-built editing tool for easy customization.
● It supports direct recording of the animated GIFs.
● It also allows you to use different editing features like the loop, pan, reverse, etc.
Cons:
● Its usage is somehow complicated for beginners.
● It doesn’t support all types of video formats.
05Movavi
It is tremendous offline software that can be downloaded for Mac & PC. It helps in converting the MP4 to GIFs very quickly and easily.
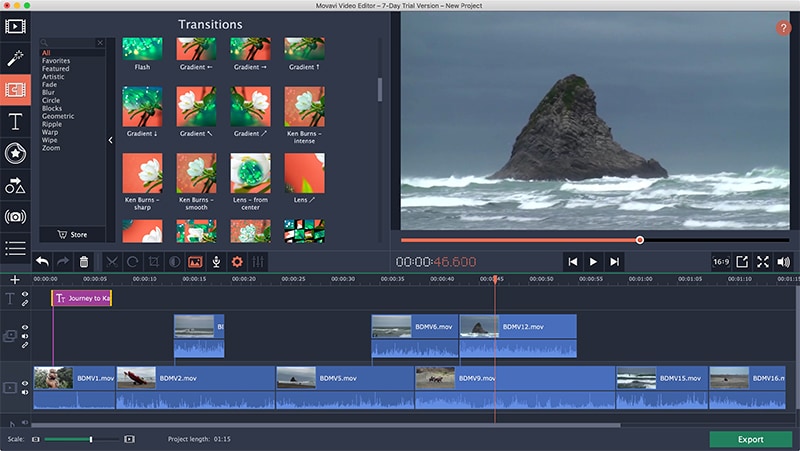
Key Features:
● Mac and Windows are completely supported.
● It allows the users to edit their creations.
● It is also available for all android devices.
● It converts the files very quickly without compromising the quality of the content.
● It is an excellent tool for converting and editing GIFs.
Pros:
● Easy and beneficial for beginners
● Compatible with video formats like MOV, MP4, MPG, AVI, etc.
● It has an in-built AI feature to upscale the output quality.
Cons:
● It has fundamental video editing features.
● It doesn’t allow to copy-paste the video effect while editing.
Part 2 5 Online MP4 to GIF Converters
Online tools for converting files from MP4 to GIF are effortless and convenient because they can be used on any operating system. The following given are some of the great online tools to convert MP4 to GIF with ease and convenience:
01GIF Maker by Giphy
Giphy is known as the king of the online GIF maker tools. It is a GIF converter great tool with around 300 million users daily using it. It allows the users to convert the GIFs by pasting the video links from third-party websites like YouTube.
Key Features:
● Being an online tool, it is compatible with all types of devices.
● It is elementary to use for all types of users.
● It allows the users to add stickers and captions to their GIFs.
● No fee for this so you can use it free of cost.
● It is a website, so it doesn’t require to be downloaded.
Pros:
● Straightforward and quick to use.
● It delivers a high-resolution output with many customization features.
● It can also convert the GIFs using the links of videos from third-party hosting like YouTube.
Cons:
● Speed of the internet connection matters.
● It comes with a limited edition of colors.
02**Wondershare Filmora Video Editor **
Filmora is one of the best online video editing tools created by Wondershare. Filmora can be used to convert files from MP4 to GIF very effectively and efficiently.
For Win 7 or later (64-bit)
For macOS 10.12 or later
Wondershare Filmora
Get started easily with Filmora’s powerful performance, intuitive interface, and countless effects!
Try It Free Try It Free Try It Free Learn More >
Key Features:
● Fully compatible with any operating system.
● It is a great video editing software with many features like adding music, subtitles, etc.
● It can be also be downloaded on Mac and Windows OS.
● It comes with an annual premium subscription for $51.99.
● It can also be purchased with a one-time fee of $79.99.
Pros:
● It has great video editing features.
● It can convert a large number of video formats to high-resolution GIF files.
● You can customize your GIFs as per your requirements using this tool.
Cons:
● Being an all-in-one video editing tool, this can be much more if you just need GIF creations.
● You cannot remove the watermark and use many editing features if you use a trial version.
03CloudConvert
CloudConvert is another easy-to-use MP4 to GIF converter online. It converts all types of video files into GIFs in a concise time.
Key Features:
● It is easy to use.
● It converts MP4 to GIF very quickly.
● It is free of cost.
● It doesn’t require third-party installation.
● It uses compression algorithms.
Pros:
● It is an open-source converter.
● It allows you to add texts.
● It helps in creating GIFs for web publishing.
Cons:
● Complicated for large files.
● Requires; steady internet connection.
04Convertio
Convertio is another online GIF converter that anyone can use. You just need to upload the MP4 file using Dropbox and hit the ‘Convert’ button.
Key Features:
● Effortless and anyone can easily use it.
● One can easily upload files from Dropbox and Google Drive.
● It also has a drag and drops component for uploading the files.
● It is entirely free to use.
● It is online and doesn’t require any installation.
Pros:
● It converts MP4 to GIF very quickly.
● It delivers high-quality output.
● User-friendly interface.
Cons:
● It doesn’t allow the users to edit their GIFs.
● It doesn’t have the customizing feature and is not user-specific.
05Ezgif
Ezgif is free of cost and an easy-to-use online tool that helps you create GIFs in two easy steps, i.e., upload and convert.
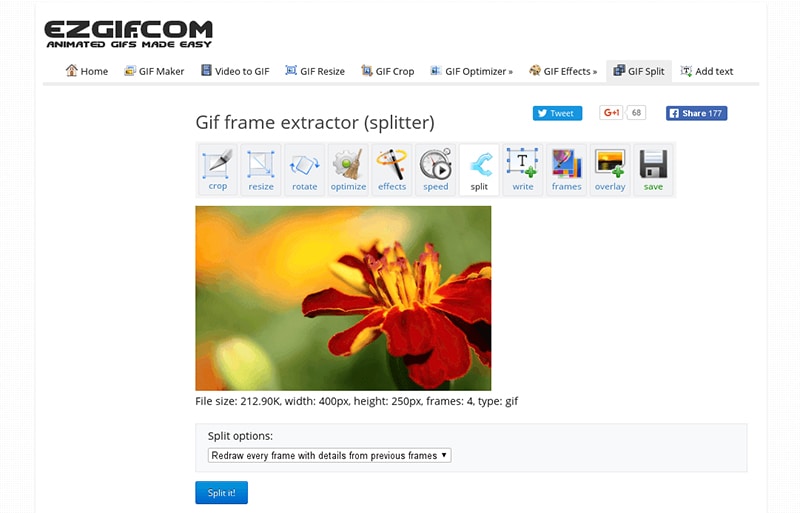
Key Features:
● It is an online tool compatible with both Mac and Windows.
● No download and installation required.
● It is a freeware program.
● It maintains the quality of the outcome.
● It converts GIFs very quickly.
Pros:
● User-friendly and can be used by all.
● It has amazing features that assist you while you convert MP4 to GIF.
● It is not complicated for beginners.
Cons:
● It has limited editing features.
● Only 3 minutes video can be done at maximum.
● Key Takeaways from This Episode →
●The demand for GIF files increases with each passing day due to its many advantages. As a result, many people are looking for easy MP4 to GIF converters that are easy and convenient to use.
●Above mentioned online and offline converters can quickly help you turn MP4 into GIF files without compromising the quality of the graphics.
●These converters are readily available and can easily be used on both Mac and Windows with many conveniences.
●They can help you convert the MP4 files into GIF format very quickly, no matter how large the video size is. GIFs being smaller in size and easily transferrable provide many advantages to the users.
GIFs are becoming more common day by day. They are used for a wide range of purposes, from chatting and expressing emotions on social media to promoting products and services. GIFs are image formats that are relatively easy to download and upload and easy to convey messages and thoughts to a wide range of people. On the other hand, MP4 are video files that contain audio. These files are large and require special requirements to run and work properly.
There are a lot of advantages of using GIF files, like they are easy to make and store, help create animations quickly, and convey messages and emotions more conveniently. With the increasing usage of GIF files, it has become important to know and understand the tools used to convert the MP4 files into GIF formats.
In this article
01 [5 Offline MP4 to GIF Converters](#Part 1)
02 [5 Online MP4 to GIF Converters](#Part 2)
Part 1 5 Offline MP4 to GIF Converters
Offline MP4 to GIF converter is the best option as it helps to create GIF files quickly and easily, without any quality loss. The following offline converters can be used effectively to turn MP4 into GIF formats very easily and quickly:
01Any GIF Animator
Any GIF Animator is one of the great offline tools used for converting videos to GIF files very quickly. It can easily convert the videos into attractive GIFs in seconds.
Key Features:
● It has a very easy-to-use interface for user convenience.
● It sustains a considerable number of video formats.
● It allows the users to edit converted GIFs like adding frames, forward and backward looping, etc.
● It will enable you to edit the files imported from DVDs and WebCam recorded files.
● It has an in-built animation wizard.
Pros:
● It works for both Mac as well as Windows
● Any GIF Animator can be downloaded freely.
● It can convert both videos as well as images.
Cons:
● It crashes at times while processing the videos.
● Uploading the files takes a longer time than usual.
02DVDFab
DVDFab is another offline tool that converts the files from MP4 to GIF in very little time without compromising the quality of the outcome.
Key Features:
● It supports a large number of video formats.
● It has a user-friendly interface.
● It can be used for both Mac & Windows.
● It is a great multimedia solution software.
● It comes with affordable pricing.
Pros:
● It is quick & easy to use.
● It delivers high-quality outputs.
● It allows the users to completely control the looping, frequency, and size of the files.
Cons:
● Being a multimedia software, it requires learning.
● Complete beginners can get confused.
03Wondershare TunesGo
TunesGo was developed by one of the most trusted software companies – Wondershare. It is a great tool used to make GIFs from MP4 files.
Key Features:
● Developed by one of the most trusted software development companies.
● Compatible for all iOS devices.
● A user-friendly interface is suitable for complete beginners.
● A trial version is available.
● Works faster and delivers high-resolution output.
Pros:
● Supports; almost all types of video formats.
● It permits you to edit the videos before converting.
● It can also convert images and live videos to GIFs.
Cons:
● It is costly.
● It doesn’t allow you to edit Smart playlists.
04KickMyGraphics
It is another powerful offline tool to convert MP4 to high-quality GIF files. It allows users to convert different formats of videos and images into GIFs.
Key Features:
● Compatibility lies with Mac and Windows both.
● Users can instantly upload various video formats like MPG, MP4, AVI, etc.
● Users can directly upload considerable image formats like JPG, PNG, BMP, etc.
● It has a user-friendly interface.
● It is a freeware offline GIF converter.
Pros:
● It has an in-built editing tool for easy customization.
● It supports direct recording of the animated GIFs.
● It also allows you to use different editing features like the loop, pan, reverse, etc.
Cons:
● Its usage is somehow complicated for beginners.
● It doesn’t support all types of video formats.
05Movavi
It is tremendous offline software that can be downloaded for Mac & PC. It helps in converting the MP4 to GIFs very quickly and easily.
Key Features:
● Mac and Windows are completely supported.
● It allows the users to edit their creations.
● It is also available for all android devices.
● It converts the files very quickly without compromising the quality of the content.
● It is an excellent tool for converting and editing GIFs.
Pros:
● Easy and beneficial for beginners
● Compatible with video formats like MOV, MP4, MPG, AVI, etc.
● It has an in-built AI feature to upscale the output quality.
Cons:
● It has fundamental video editing features.
● It doesn’t allow to copy-paste the video effect while editing.
Part 2 5 Online MP4 to GIF Converters
Online tools for converting files from MP4 to GIF are effortless and convenient because they can be used on any operating system. The following given are some of the great online tools to convert MP4 to GIF with ease and convenience:
01GIF Maker by Giphy
Giphy is known as the king of the online GIF maker tools. It is a GIF converter great tool with around 300 million users daily using it. It allows the users to convert the GIFs by pasting the video links from third-party websites like YouTube.
Key Features:
● Being an online tool, it is compatible with all types of devices.
● It is elementary to use for all types of users.
● It allows the users to add stickers and captions to their GIFs.
● No fee for this so you can use it free of cost.
● It is a website, so it doesn’t require to be downloaded.
Pros:
● Straightforward and quick to use.
● It delivers a high-resolution output with many customization features.
● It can also convert the GIFs using the links of videos from third-party hosting like YouTube.
Cons:
● Speed of the internet connection matters.
● It comes with a limited edition of colors.
02**Wondershare Filmora Video Editor **
Filmora is one of the best online video editing tools created by Wondershare. Filmora can be used to convert files from MP4 to GIF very effectively and efficiently.
For Win 7 or later (64-bit)
For macOS 10.12 or later
Wondershare Filmora
Get started easily with Filmora’s powerful performance, intuitive interface, and countless effects!
Try It Free Try It Free Try It Free Learn More >
Key Features:
● Fully compatible with any operating system.
● It is a great video editing software with many features like adding music, subtitles, etc.
● It can be also be downloaded on Mac and Windows OS.
● It comes with an annual premium subscription for $51.99.
● It can also be purchased with a one-time fee of $79.99.
Pros:
● It has great video editing features.
● It can convert a large number of video formats to high-resolution GIF files.
● You can customize your GIFs as per your requirements using this tool.
Cons:
● Being an all-in-one video editing tool, this can be much more if you just need GIF creations.
● You cannot remove the watermark and use many editing features if you use a trial version.
03CloudConvert
CloudConvert is another easy-to-use MP4 to GIF converter online. It converts all types of video files into GIFs in a concise time.
Key Features:
● It is easy to use.
● It converts MP4 to GIF very quickly.
● It is free of cost.
● It doesn’t require third-party installation.
● It uses compression algorithms.
Pros:
● It is an open-source converter.
● It allows you to add texts.
● It helps in creating GIFs for web publishing.
Cons:
● Complicated for large files.
● Requires; steady internet connection.
04Convertio
Convertio is another online GIF converter that anyone can use. You just need to upload the MP4 file using Dropbox and hit the ‘Convert’ button.
Key Features:
● Effortless and anyone can easily use it.
● One can easily upload files from Dropbox and Google Drive.
● It also has a drag and drops component for uploading the files.
● It is entirely free to use.
● It is online and doesn’t require any installation.
Pros:
● It converts MP4 to GIF very quickly.
● It delivers high-quality output.
● User-friendly interface.
Cons:
● It doesn’t allow the users to edit their GIFs.
● It doesn’t have the customizing feature and is not user-specific.
05Ezgif
Ezgif is free of cost and an easy-to-use online tool that helps you create GIFs in two easy steps, i.e., upload and convert.
Key Features:
● It is an online tool compatible with both Mac and Windows.
● No download and installation required.
● It is a freeware program.
● It maintains the quality of the outcome.
● It converts GIFs very quickly.
Pros:
● User-friendly and can be used by all.
● It has amazing features that assist you while you convert MP4 to GIF.
● It is not complicated for beginners.
Cons:
● It has limited editing features.
● Only 3 minutes video can be done at maximum.
● Key Takeaways from This Episode →
●The demand for GIF files increases with each passing day due to its many advantages. As a result, many people are looking for easy MP4 to GIF converters that are easy and convenient to use.
●Above mentioned online and offline converters can quickly help you turn MP4 into GIF files without compromising the quality of the graphics.
●These converters are readily available and can easily be used on both Mac and Windows with many conveniences.
●They can help you convert the MP4 files into GIF format very quickly, no matter how large the video size is. GIFs being smaller in size and easily transferrable provide many advantages to the users.
Also read:
- Why These 10+ Top Text Motion Templates Are Worth Your Attention
- Top 15 2D Animation Software Free That Worth to Try for 2024
- Updated 10 of the Best Disney Animated Shows
- 6 Unexpected Ways Gif Animation Maker Can Affect Your Marketing for 2024
- Updated 2024 Approved How to Find Some Different Ways to Animated Cartoon of Yourself
- New 2024 Approved 10 Best Animation Makers for Kids to Have Fun
- Updated 2024 Approved Simple Guide to Create New and Exciting Blackboard Animation
- 2024 Approved 6 Unexpected Ways Gif Animation Maker Can Affect Your Marketing
- Best 15 Anime Fonts-Find Your Favorite One for 2024
- Make Well Done Animated GIF for 2024
- Updated In 2024, 10 Must-Use MP4 to GIF Converters to Get Perfect-Made GIF
- New 2024 Approved Top 12 2D Animation Studios All Should Check Out
- 2024 Approved Top 10 Old Cartoons From Cartoon Network That You Miss
- Updated 10 Stunning Stop Motion Movies You Should Not Miss for 2024
- Updated 2024 Approved Is Blender 2D Animation As Awesome As 3D?
- Top 10 Animated DP for WhatsApp
- New 2024 Approved How to Create an Adobe Collage?
- 5 Photoshop Alternatives to Animate Logo for 2024
- Updated 2024 Approved The Only Guide to Make 2D Rigging Clear to You
- Updated 2024 Approved How to Animate Picture Online Without Learning From Scratch
- New In 2024, 5 Websites with Animated Logos That Can Catch Your Eyes
- Tips to Create Animated Social Media Posts in Canva
- Updated The Best Free 12 GIF Meme Maker at a Glance
- Updated In 2024, Top 10 Free Video Translators to Mitigate Translation Risks
- Set Your Preferred Job Location on LinkedIn App of your Realme V30T | Dr.fone
- Recover lost data from Honor Magic 6 Lite
- Fix the Error of Unfortunately the Process.com.android.phone Has Stopped on Meizu 21 Pro | Dr.fone
- How to Track Realme GT 5 Location by Number | Dr.fone
- How to Recover Deleted Photos from Android Gallery App on Realme
- 9 Solutions to Fix Process System Isnt Responding Error on Vivo Y27 5G | Dr.fone
- 4 Ways to Mirror Apple iPhone 12 Pro to Laptop via USB or Wi-Fi | Dr.fone
- In 2024, 3 Smart and Simple Ways to Change Home Address on Apple iPhone SE | Dr.fone
- In 2024, Best 3 Honor Play 8T Emulator for Mac to Run Your Wanted Android Apps | Dr.fone
- Title: In 2024, All About 3D Medical Animation
- Author: Elon
- Created at : 2024-05-19 03:04:32
- Updated at : 2024-05-20 03:04:32
- Link: https://animation-videos.techidaily.com/in-2024-all-about-3d-medical-animation/
- License: This work is licensed under CC BY-NC-SA 4.0.
