

In 2024, Apps to Animate Still Pictures
Apps to Animate Still Pictures
Apps to Animate Still Pictures Which Could Make Your Pictures Become Internet Sensation
An easy yet powerful editor
Numerous effects to choose from
Detailed tutorials provided by the official channel
Now, it is a question of what to do with all those still photos lying in your phone. You can be pretty certain that you won’t be retiring from clicking images anytime soon. A tip to help make posting images more interesting would be using apps to animate your photos.
You can also find an app that animates your face specifically, which is great for instagram content and has a greater chance of getting reactions or comments. So without further to do let’s get animating.
In this article
01 [Review of General Methods: Can You Animate Still Pictures?](#Part 1)
02 [10 Best apps to animate still photos on Android & iOS](#Part 2)
03 [Additional Extension: 5 Apps to Animate Old Photos](#Part 3)
Part 1 Review of General Methods: Can You Animate Still Pictures?
It’s pretty obvious that you can! These days you can do whatever you want online so animating still pictures should be a piece of cake if you know-how.
A video is basically an entire collage of moving pictures. So if you can cut out pictures from a video why not turn still pictures into animations.
There are a number of ways you can use to animate still images →
● Videos are multiple pictures that move at a frame rate. Make short copies of a video by cutting out the essential moments and playing them in a loop.
● Add and play video animation elements over a picture. With the right software, this task is as easy as copy-pasting over another image.
● Apply an animated 3D image with a transparent background over another image. Remember, the bigger the element the closer it is. So size is directly translated as distance.
● You can use multiple filters and effects on an image with an animated portrait app. Find out what app you can use further on in this article.
● Turn an image into a GIF. No matter its small size and cartoonish style, GIF animation has a very wide appeal as online content.
Part 2 10 Best apps to animate still photos on Android & iOS
01GIPHY
Giphy is the largest internet catalog for GIF files, clips & stickers. No matter if it is a scene from a movie or an animation you have watched somewhere, using this application you can easily find, save & share or simply create something new.
Price: Free
Pros
● Quickly turns still photos into an animation.
● Easily share your work through all social media channels.
Cons
● Search tags are varied; you may need to search using unlikely words to get desired results.
Applicable System: Android
02GIPHY
One of the best ways to turn your photos & videos into GIFs is using ImgPlay. It has a clearer interface making it easy to use. Imgplay comes with paid- premium and non-paid version making it suitable for personal & professional application.
Price: Pro $4.99.
Pros
● It is not packed with unnecessary features.
Cons
● ImgPlay slaps a watermark on all its non-premium versions.
Applicable System: Android & iOS.
03Loopsie
The best Part is that Loopsie provides spectacular cinematographic effects to your animated stills. Stabilization algorithm efficiently removes shaking effects & blurs.
Price: Free.
Pros
● User friendly UI
● Easy to share on social media platforms.
Cons
● Paid version is a bit pricey.
Applicable System: Only on iOS.
04StoryZ
Looking for ways to create animated visuals form still images? This is where your quest ends. An advanced editing platform that offers overlays, movement & color filters. Banner Ads & watermarks can be removed by paying a small subscription fee.
Price: Free version available. Premium costs INR 789 a year.
Pros
● Double exposure effect combines video overlay & static imagery.
Cons
● Contains Ad & watermark.
Applicable System: Android.
05Animate Me
Animate Me offers you a package of postcards & greeting snapshots that you can animate according to your need. The paid subscription will get you updated sounds & effects every now & then.
Price: Free.
Pros
● Easy to use & beginners friendly.
Cons
● Editing features & tools are limited.
Applicable System: Windows**.**
06Movepic
Create animated stills, GIFs, live-wallpapers all with Movepic. It allows you to animate simply anything by drawing a path. You can also adjust the speed of animation manually.
Price: Free.
Pros
● Animate in a light motion.
● Easy to use.
Cons
● Free version leaves a watermark on images.
Applicable System: Android & iOS.
07Pixaloop
Pixaloop is a fun app packed with significant animation & editing features. 100% free to use software delivers live animated images in a few clicks. User friendly interface edits images using powerful & precise animation tools.
Price- Free.
Pros
● Offers all the necessary features & core tools.
● Provides accuracy & flexibility to the users.
Cons
● The animation process is a bit time consuming.
Applicable System: Android & iOS.
08Zoetropic
Zoetropic has a combination of 3D tools and Camera FX to animate your images. User friendly interface allows you to mask the still areas if you wish to keep it still.
Price: $199 (Pro)
Pros
● Easily customize motion areas.
● Apply overlays & audios.
Cons
● App price is higher than similar available apps.
Applicable System: Android & iOS.
9Motionleap
It is one of the most top reviewed apps on Playstore related to animating still photos. It has several features like programming directional cues, freeze portions of your photo or even apply filters.
Price: Free version. Pro version; $3.50/month, $18/year and $55 lifetime.
Pros
● Its free version does not apply watermark.
● Intuitive Interface.
Cons
● Best features are locked in Pro version.
Applicable System: Android & iOS.
Part 3 Additional Extension: 5 Apps to Animate Old Photos
It can be unanimously agreed upon that people have been storing photos for decades as a means of preserving memories. We don’t get much opportunity to meet familiar faces too often so why not just try and animate still images of relatives. Now we already know how we can start animating images on apps but restoring original images maybe a tad more complicated than that. This time a bit of the animation is dependent on the physical state of the picture so be sure it’s in mint condition.
These photos can be restored or manipulated digitally with the help of smart AI. We have listed down some of the apps to animate old photos and reconstruct faces;
01Photos Revive
You can add colour to old worn out photos and make them look more realistic in terms of tonal colorization using artificial intelligence. The app also asks you recollect any details of the photo that you might remember in terms of the image.
Applicable OS: iOS only.

02Remini
After going through several improvements and upgrades, you can use the app Remini to confidently restore low resolution images that are either pixelated, blurred or damaged into High Definition images. This app has already been used by users to process a hundred million photos.
Applicable OS: Android 1.7.2 or higher, & iOS 9.3 or higher.

03Colorize
Another app that uses AI to add colorization to your old images. It is a popular animate your family photo app which has amazing other tools and filters to try out.
Applicable OS: Android and iOS.

04Deep Nostalgia
Using this app which has been innovated by the geology platform MyHeritage uses ai to add gestures to still images to evoke nostalgia in the users.
Applicable OS: Online.

04Google Photoscan
Google scanner is a futuristic app for restoring photos of the past. The app uses a smart scanning technology that provides several scans of the same photo automatically.
Applicable OS: Android or iOS.

Key Takeaways from This Episode
● Animating photos are a new way of reimagining still images into moving live content. There are many methods and approaches you can choose to animate your images.
● Some of them being video animations, transparent background elements, Filters and effects and of course GIFs.
● There are dozens of apps with built in smart artificial intelligence to help restore old photos or make short animations out of them. Some of them are applicable for desktops while others available both on Android and iOS.
Now, it is a question of what to do with all those still photos lying in your phone. You can be pretty certain that you won’t be retiring from clicking images anytime soon. A tip to help make posting images more interesting would be using apps to animate your photos.
You can also find an app that animates your face specifically, which is great for instagram content and has a greater chance of getting reactions or comments. So without further to do let’s get animating.
In this article
01 [Review of General Methods: Can You Animate Still Pictures?](#Part 1)
02 [10 Best apps to animate still photos on Android & iOS](#Part 2)
03 [Additional Extension: 5 Apps to Animate Old Photos](#Part 3)
Part 1 Review of General Methods: Can You Animate Still Pictures?
It’s pretty obvious that you can! These days you can do whatever you want online so animating still pictures should be a piece of cake if you know-how.
A video is basically an entire collage of moving pictures. So if you can cut out pictures from a video why not turn still pictures into animations.
There are a number of ways you can use to animate still images →
● Videos are multiple pictures that move at a frame rate. Make short copies of a video by cutting out the essential moments and playing them in a loop.
● Add and play video animation elements over a picture. With the right software, this task is as easy as copy-pasting over another image.
● Apply an animated 3D image with a transparent background over another image. Remember, the bigger the element the closer it is. So size is directly translated as distance.
● You can use multiple filters and effects on an image with an animated portrait app. Find out what app you can use further on in this article.
● Turn an image into a GIF. No matter its small size and cartoonish style, GIF animation has a very wide appeal as online content.
Part 2 10 Best apps to animate still photos on Android & iOS
01GIPHY
Giphy is the largest internet catalog for GIF files, clips & stickers. No matter if it is a scene from a movie or an animation you have watched somewhere, using this application you can easily find, save & share or simply create something new.
Price: Free
Pros
● Quickly turns still photos into an animation.
● Easily share your work through all social media channels.
Cons
● Search tags are varied; you may need to search using unlikely words to get desired results.
Applicable System: Android
02GIPHY
One of the best ways to turn your photos & videos into GIFs is using ImgPlay. It has a clearer interface making it easy to use. Imgplay comes with paid- premium and non-paid version making it suitable for personal & professional application.
Price: Pro $4.99.
Pros
● It is not packed with unnecessary features.
Cons
● ImgPlay slaps a watermark on all its non-premium versions.
Applicable System: Android & iOS.
03Loopsie
The best Part is that Loopsie provides spectacular cinematographic effects to your animated stills. Stabilization algorithm efficiently removes shaking effects & blurs.
Price: Free.
Pros
● User friendly UI
● Easy to share on social media platforms.
Cons
● Paid version is a bit pricey.
Applicable System: Only on iOS.
04StoryZ
Looking for ways to create animated visuals form still images? This is where your quest ends. An advanced editing platform that offers overlays, movement & color filters. Banner Ads & watermarks can be removed by paying a small subscription fee.
Price: Free version available. Premium costs INR 789 a year.
Pros
● Double exposure effect combines video overlay & static imagery.
Cons
● Contains Ad & watermark.
Applicable System: Android.
05Animate Me
Animate Me offers you a package of postcards & greeting snapshots that you can animate according to your need. The paid subscription will get you updated sounds & effects every now & then.
Price: Free.
Pros
● Easy to use & beginners friendly.
Cons
● Editing features & tools are limited.
Applicable System: Windows**.**
06Movepic
Create animated stills, GIFs, live-wallpapers all with Movepic. It allows you to animate simply anything by drawing a path. You can also adjust the speed of animation manually.
Price: Free.
Pros
● Animate in a light motion.
● Easy to use.
Cons
● Free version leaves a watermark on images.
Applicable System: Android & iOS.
07Pixaloop
Pixaloop is a fun app packed with significant animation & editing features. 100% free to use software delivers live animated images in a few clicks. User friendly interface edits images using powerful & precise animation tools.
Price- Free.
Pros
● Offers all the necessary features & core tools.
● Provides accuracy & flexibility to the users.
Cons
● The animation process is a bit time consuming.
Applicable System: Android & iOS.
08Zoetropic
Zoetropic has a combination of 3D tools and Camera FX to animate your images. User friendly interface allows you to mask the still areas if you wish to keep it still.
Price: $199 (Pro)
Pros
● Easily customize motion areas.
● Apply overlays & audios.
Cons
● App price is higher than similar available apps.
Applicable System: Android & iOS.
9Motionleap
It is one of the most top reviewed apps on Playstore related to animating still photos. It has several features like programming directional cues, freeze portions of your photo or even apply filters.
Price: Free version. Pro version; $3.50/month, $18/year and $55 lifetime.
Pros
● Its free version does not apply watermark.
● Intuitive Interface.
Cons
● Best features are locked in Pro version.
Applicable System: Android & iOS.
Part 3 Additional Extension: 5 Apps to Animate Old Photos
It can be unanimously agreed upon that people have been storing photos for decades as a means of preserving memories. We don’t get much opportunity to meet familiar faces too often so why not just try and animate still images of relatives. Now we already know how we can start animating images on apps but restoring original images maybe a tad more complicated than that. This time a bit of the animation is dependent on the physical state of the picture so be sure it’s in mint condition.
These photos can be restored or manipulated digitally with the help of smart AI. We have listed down some of the apps to animate old photos and reconstruct faces;
01Photos Revive
You can add colour to old worn out photos and make them look more realistic in terms of tonal colorization using artificial intelligence. The app also asks you recollect any details of the photo that you might remember in terms of the image.
Applicable OS: iOS only.
02Remini
After going through several improvements and upgrades, you can use the app Remini to confidently restore low resolution images that are either pixelated, blurred or damaged into High Definition images. This app has already been used by users to process a hundred million photos.
Applicable OS: Android 1.7.2 or higher, & iOS 9.3 or higher.
03Colorize
Another app that uses AI to add colorization to your old images. It is a popular animate your family photo app which has amazing other tools and filters to try out.
Applicable OS: Android and iOS.
04Deep Nostalgia
Using this app which has been innovated by the geology platform MyHeritage uses ai to add gestures to still images to evoke nostalgia in the users.
Applicable OS: Online.
04Google Photoscan
Google scanner is a futuristic app for restoring photos of the past. The app uses a smart scanning technology that provides several scans of the same photo automatically.
Applicable OS: Android or iOS.
Key Takeaways from This Episode
● Animating photos are a new way of reimagining still images into moving live content. There are many methods and approaches you can choose to animate your images.
● Some of them being video animations, transparent background elements, Filters and effects and of course GIFs.
● There are dozens of apps with built in smart artificial intelligence to help restore old photos or make short animations out of them. Some of them are applicable for desktops while others available both on Android and iOS.
What This Post Can Teach You About Clay Animation
What This Post Can Teach You About Clay Animation
An easy yet powerful editor
Numerous effects to choose from
Detailed tutorials provided by the official channel
The kids of the last decade probably grew up with at least one of their favorite mooring binge cartoon being a clay animation.
Filmmakers have been stunned and amazed witnessing how spectacular the results are in clay-mation. Clay can be molded and shaped into almost any object an infinite number of times to create figures.
You will notice how there are but a few Claymation blockbuster movies. That because the process of making one requires precision and a lot of patience.
In this article
01 [How Does Clay Animation Work?](#Part 1)
02 [What Are Some Famous Clay Animation Characters?](#Part 2)
03 [How Many Changes Does a Clay Animation Movie Require?](#Part 3)
04 [8 Famous Claymation Movies in 2022](#Part 4)
Part 1 How Does Clay Animation Work?
Claymation sculptures originate from blobs of clay. Claymators mold them into their desired characters using painstaking efforts, patience and team work. First, a miniature skeleton is made to fit the clay around. On top of that goes a latex layer. Then the Claymation artist moves the models into required position following the storyline or script. Clay animation not only uses clay, sometimes it involves wires and armatures for smoother movement of the characters. Moreover, artists have to be concerned about fingerprints and dirt marks all the time. At times, plastic made or fabric made accessories is brought into play to give the figurines a realistic look. Detailing is the most difficult and important part for enhancing your clay character and film.
Clay animation also uses stop- motion animation. It includes capturing minute movements and of models to make it look like the characters is acting on their own. In stop motion animation, animators typically shoot at fps or fps. Though some claymators prefer to capture it at half the rate, fps or fps whereas fps is frame per second these captured still images are edited then converted into a video or film using stop motion software.
In recent times use of editing software and developed cameras has made the shooting process easier. Also, armatures clay models have eased the process of creating sculptures. Though, time is still a great deal while making clay animation.
Part 2 What Are Some Famous Clay Animation Characters?
● Wallace: The character was born during the 80’s, back when stop motion was relatively unheard of. Wallace is the star of the franchise featuring Wallace and Gromit. The idea of this dynamic duo took about seven years to turn into a full scale television show. It went to becoming an Oscar winning work of art.
● Victor Van Dort (Corpse Bride): The persona of a handsome man in his prime. Short and messy brown vest over a slim structure with big brown eyes. The protagonist of the corpse bride, Victor is a character in conflict stuck within an epic love triangle involving the dead. This amazing dark satire brings out the best in clay animation with precise movements and amazing music.
● Rocky (Chicken Run): Mel Gibson went out on a foot with Rocky, though he is known for the same. Rocky is the second character with prominence in the film. The plot is about chickens attempting to escape their inevitable demise. Rocky crash lands in the coop pretending to have figured out how to fly.
● Coraline: Not your everyday story about an eleven year old. Coraline Jones continues to haunt/impact us all even today and has a strong cult backing. It was initially meant to be live action but was later shifted to Claymation which took over four years to make.
● Shaun the Sheep: Shaun is a sheep (obviously) who goes on world adventures. The movies was featured as the TV spin off. The character was meant to appeal to both children and family. The entire movie was dependant on movement and expressions rather than dialogue making Claymation the perfect medium to bring out the character.
Part 3 How Many Changes Does a Clay Animation Movie Require?
It is difficult to say what is the exact time taken by a Claymation production as all stop motion movies are unique and require a considerable amount of time to make.
An estimate made by Fords depicted that that it took a single two minute footage of ‘Boxtrolls’ a week to make. The total running time ended at 1 hour minutes.
Part 4 8 Famous Claymation Movies in 2022
Claymation movies showing up on the silver screen is a rare event but they have often regular staple for cartoon television series. Despite the fact that the process is time consuming and labor intensive some of the best filmmakers and animators still prefer Claymation as a medium. Though recently, CGI based animations are taking up the vast market share of animated films, clay animations have been around for quite a while even before Plasticine. Here is a list of some of the most memorable Claymation flicks.
01Wallace and Gromit – The Curse of the Were-Rabbit
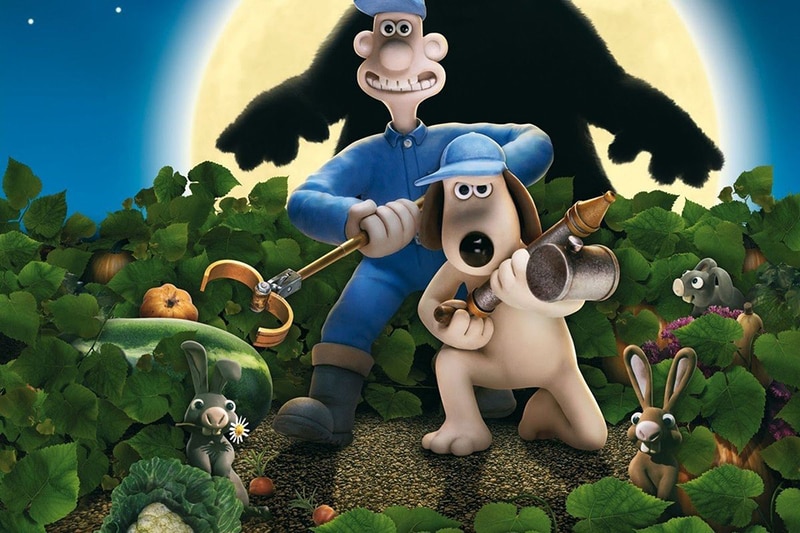
The British stop-motion comedy franchise which had 5 installation had been a first of its kind. The characters Wallace and Gromit later inspired their own movie “Wallace and Gromit – The Curse of the Were-Rabbit” which was released back in 20by Dreamworks Animation. The mystery solving duo ran a pest control company while Wallace experiments on a brain washing gadget for dissuading wild rabbits which leads to its own disaster. This movie has a classic appeal amongst children an adults alike.
02The Nighmare before Christmas (1993)
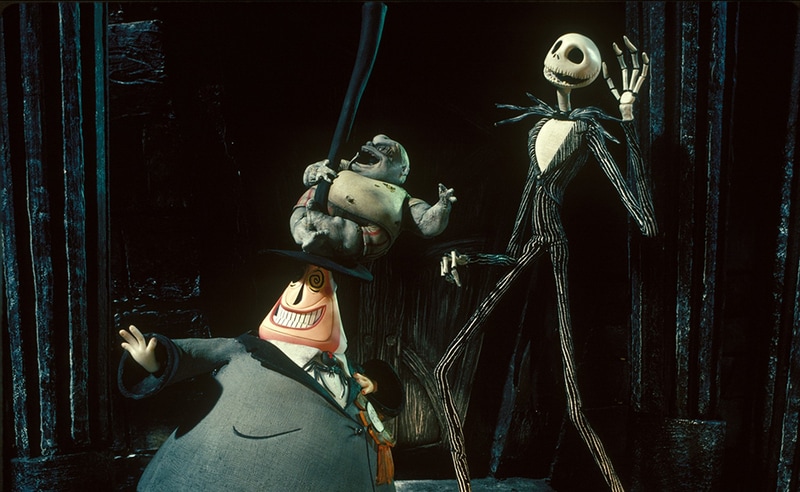
Directed by Time Burton, this film is one that impresses us all every time. The success of this Claymation is embedded in the fact that it made creepy gothic characters look appealing. It has a mixture of both the Halloween and Christmas theme. The character Jack Skellington goes through a magic door to arrive at ‘Christmas Town’. Using Claymation was an excellent choice for the script as it enabled the animators to bring about that distorted movements that evolved into a gorgeous visual storytelling.
03Chicken Run (1994)
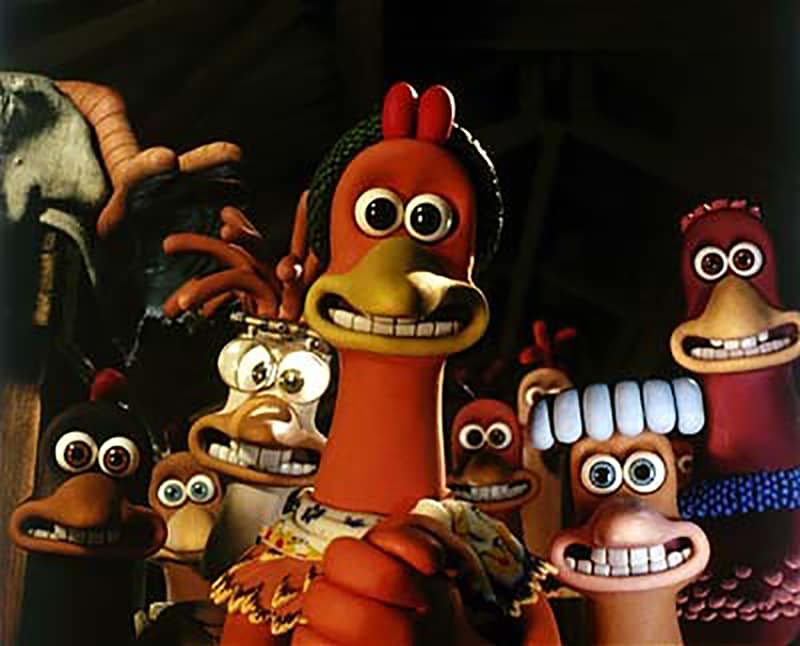
Popular claymation give credit to Chicken Run for its amazing dramatization of fiction. For the first time ever a stop motion film had a cast as amazing as Chicken Run; starring Mel Gibson and Timothy Spall. The film was a collaboration amongst elite production studios like Aardman Animations and DreamWorks Animation. The story is a spoof of the 19film ‘The Great Escape’.
04The Corpse Bride (2005)
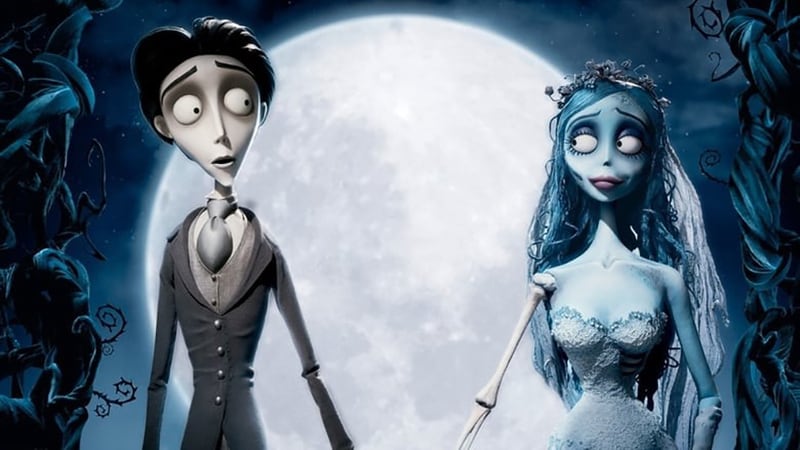
The Corpse Bride is probably the second Tim Burton film on our list. The director seems to have a special preference for the stop motion genre. When you combine that with an amazing musical script and charming but relatable ghoulish characters, the flick becomes an absolute delight.
05Coraline (2009)
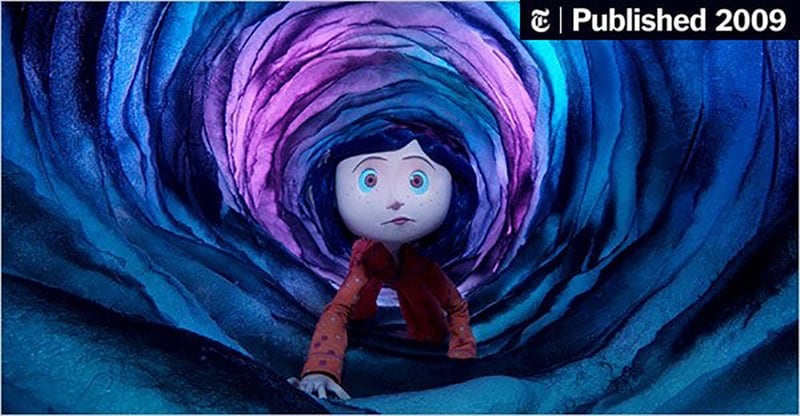
Here’s where Tim Burton establishes his cult following. The film Caroline was based the novel by Neil Gaiman. The story is about the weird adventures of a girl named ‘Caroline’ and a button eyed rag doll who she meets after travelling through a portal. Laika Studios made the appeal of the film as beautiful yet unsettling. It harbors plenty of dark and creepy aspects like by many followers of this type of fiction.
06Frankenweenie (1984)
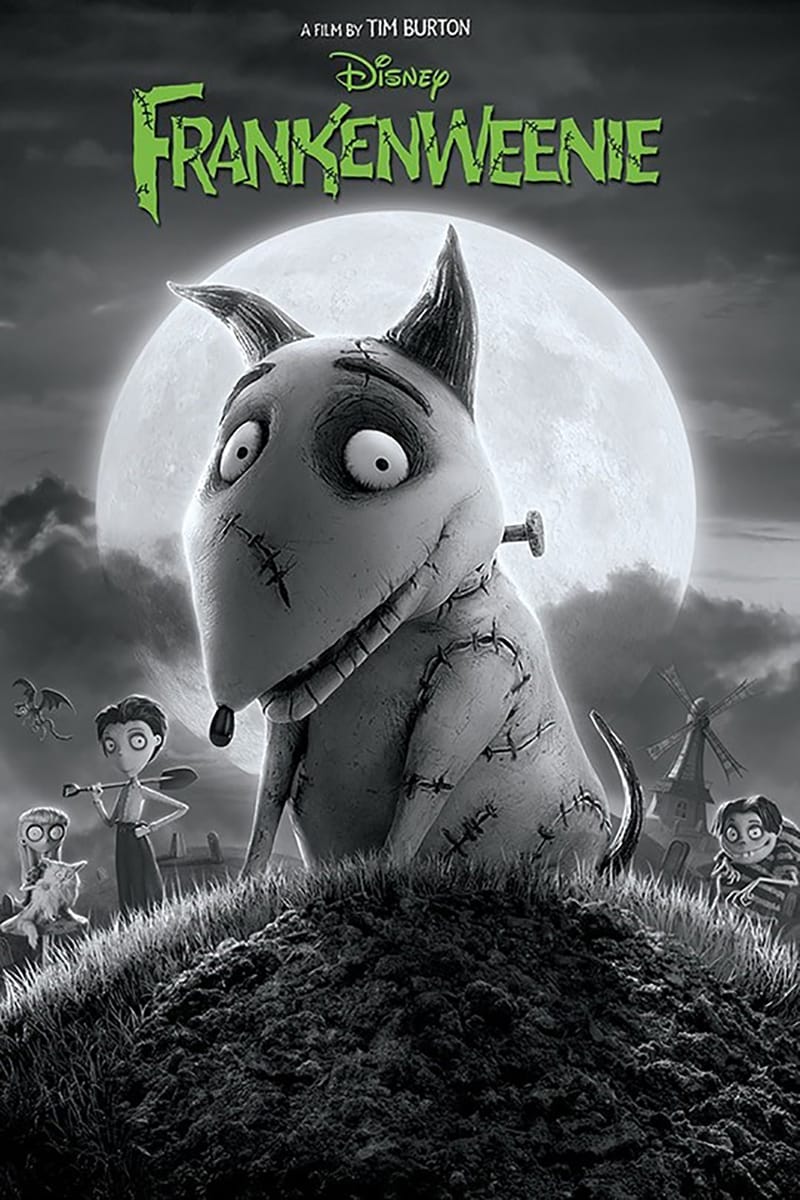
There are dozen animated films that were way ahead of their time and were discontinued as the medium was seen more to be specifically directed for children only. Tim Burton’s creation ‘Frankenweenie’ was considered a ‘love letter’ to the Golden Age of Horror films. It was considered too dark for the average viewer so the director was later let go by Disney.
07Paranorman (2012)
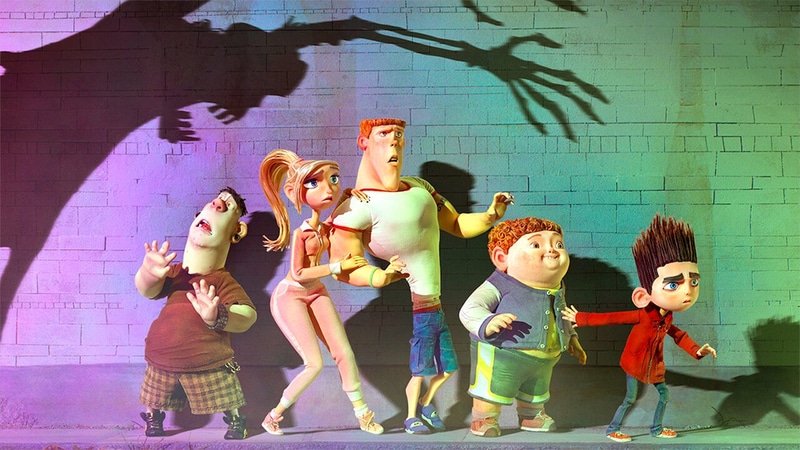
A more somber attempt at stop motion films was Paranorman. It featured printed faces in the characters which needed a new and innovative creative approach. People experienced ground breaking characterization of an openly gay character in the film which was a milestone in terms of mainstream animated films. Films like ‘Paranorman’ perfectly depicts the entry of modern film making software like ****Wondershare Filmora Video Editor ** and Maya in stop motion animations.
08The Boxtrolls (2014)
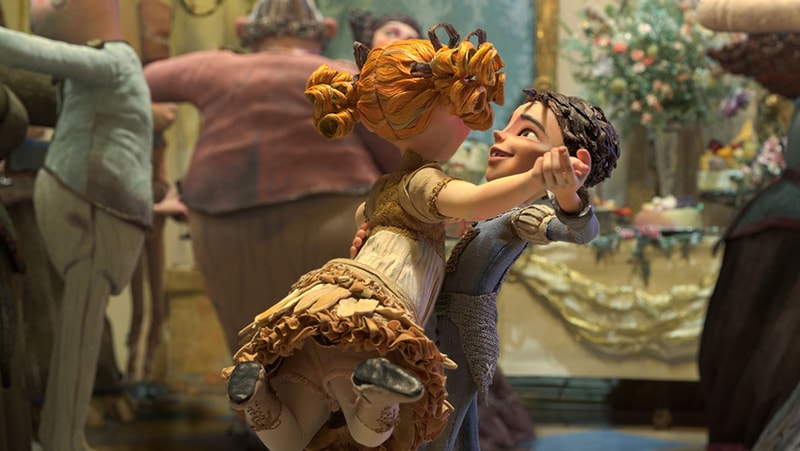
From the makers of Paranorman, Boxtrolls all introduces an innovative approach to using clay models in films. Featuring Ben Kingsley, Simon Peggs and Richard Ayoade, Boxtrolls is probably the very few box office hits on this list. The film first premiered at the Venice Film Festival the same year of its release.
Wondershare Filmora
Get started easily with Filmora’s powerful performance, intuitive interface, and countless effects Try It Free Try It Free Learn More >

● Key Takeaways from This Episode →
● Stop motion animation has evolved into various different genres and styles but the Claymation has been accepted as a classic medium.
● Not every filmmaker chooses to go down the clay path to animation but those who have has clearly achieved wonders.
● If you wish to give it a try, there is no reason to think that it is impossible but rather demand all your dedication.
The kids of the last decade probably grew up with at least one of their favorite mooring binge cartoon being a clay animation.
Filmmakers have been stunned and amazed witnessing how spectacular the results are in clay-mation. Clay can be molded and shaped into almost any object an infinite number of times to create figures.
You will notice how there are but a few Claymation blockbuster movies. That because the process of making one requires precision and a lot of patience.
In this article
01 [How Does Clay Animation Work?](#Part 1)
02 [What Are Some Famous Clay Animation Characters?](#Part 2)
03 [How Many Changes Does a Clay Animation Movie Require?](#Part 3)
04 [8 Famous Claymation Movies in 2022](#Part 4)
Part 1 How Does Clay Animation Work?
Claymation sculptures originate from blobs of clay. Claymators mold them into their desired characters using painstaking efforts, patience and team work. First, a miniature skeleton is made to fit the clay around. On top of that goes a latex layer. Then the Claymation artist moves the models into required position following the storyline or script. Clay animation not only uses clay, sometimes it involves wires and armatures for smoother movement of the characters. Moreover, artists have to be concerned about fingerprints and dirt marks all the time. At times, plastic made or fabric made accessories is brought into play to give the figurines a realistic look. Detailing is the most difficult and important part for enhancing your clay character and film.
Clay animation also uses stop- motion animation. It includes capturing minute movements and of models to make it look like the characters is acting on their own. In stop motion animation, animators typically shoot at fps or fps. Though some claymators prefer to capture it at half the rate, fps or fps whereas fps is frame per second these captured still images are edited then converted into a video or film using stop motion software.
In recent times use of editing software and developed cameras has made the shooting process easier. Also, armatures clay models have eased the process of creating sculptures. Though, time is still a great deal while making clay animation.
Part 2 What Are Some Famous Clay Animation Characters?
● Wallace: The character was born during the 80’s, back when stop motion was relatively unheard of. Wallace is the star of the franchise featuring Wallace and Gromit. The idea of this dynamic duo took about seven years to turn into a full scale television show. It went to becoming an Oscar winning work of art.
● Victor Van Dort (Corpse Bride): The persona of a handsome man in his prime. Short and messy brown vest over a slim structure with big brown eyes. The protagonist of the corpse bride, Victor is a character in conflict stuck within an epic love triangle involving the dead. This amazing dark satire brings out the best in clay animation with precise movements and amazing music.
● Rocky (Chicken Run): Mel Gibson went out on a foot with Rocky, though he is known for the same. Rocky is the second character with prominence in the film. The plot is about chickens attempting to escape their inevitable demise. Rocky crash lands in the coop pretending to have figured out how to fly.
● Coraline: Not your everyday story about an eleven year old. Coraline Jones continues to haunt/impact us all even today and has a strong cult backing. It was initially meant to be live action but was later shifted to Claymation which took over four years to make.
● Shaun the Sheep: Shaun is a sheep (obviously) who goes on world adventures. The movies was featured as the TV spin off. The character was meant to appeal to both children and family. The entire movie was dependant on movement and expressions rather than dialogue making Claymation the perfect medium to bring out the character.
Part 3 How Many Changes Does a Clay Animation Movie Require?
It is difficult to say what is the exact time taken by a Claymation production as all stop motion movies are unique and require a considerable amount of time to make.
An estimate made by Fords depicted that that it took a single two minute footage of ‘Boxtrolls’ a week to make. The total running time ended at 1 hour minutes.
Part 4 8 Famous Claymation Movies in 2022
Claymation movies showing up on the silver screen is a rare event but they have often regular staple for cartoon television series. Despite the fact that the process is time consuming and labor intensive some of the best filmmakers and animators still prefer Claymation as a medium. Though recently, CGI based animations are taking up the vast market share of animated films, clay animations have been around for quite a while even before Plasticine. Here is a list of some of the most memorable Claymation flicks.
01Wallace and Gromit – The Curse of the Were-Rabbit
The British stop-motion comedy franchise which had 5 installation had been a first of its kind. The characters Wallace and Gromit later inspired their own movie “Wallace and Gromit – The Curse of the Were-Rabbit” which was released back in 20by Dreamworks Animation. The mystery solving duo ran a pest control company while Wallace experiments on a brain washing gadget for dissuading wild rabbits which leads to its own disaster. This movie has a classic appeal amongst children an adults alike.
02The Nighmare before Christmas (1993)
Directed by Time Burton, this film is one that impresses us all every time. The success of this Claymation is embedded in the fact that it made creepy gothic characters look appealing. It has a mixture of both the Halloween and Christmas theme. The character Jack Skellington goes through a magic door to arrive at ‘Christmas Town’. Using Claymation was an excellent choice for the script as it enabled the animators to bring about that distorted movements that evolved into a gorgeous visual storytelling.
03Chicken Run (1994)
Popular claymation give credit to Chicken Run for its amazing dramatization of fiction. For the first time ever a stop motion film had a cast as amazing as Chicken Run; starring Mel Gibson and Timothy Spall. The film was a collaboration amongst elite production studios like Aardman Animations and DreamWorks Animation. The story is a spoof of the 19film ‘The Great Escape’.
04The Corpse Bride (2005)
The Corpse Bride is probably the second Tim Burton film on our list. The director seems to have a special preference for the stop motion genre. When you combine that with an amazing musical script and charming but relatable ghoulish characters, the flick becomes an absolute delight.
05Coraline (2009)
Here’s where Tim Burton establishes his cult following. The film Caroline was based the novel by Neil Gaiman. The story is about the weird adventures of a girl named ‘Caroline’ and a button eyed rag doll who she meets after travelling through a portal. Laika Studios made the appeal of the film as beautiful yet unsettling. It harbors plenty of dark and creepy aspects like by many followers of this type of fiction.
06Frankenweenie (1984)
There are dozen animated films that were way ahead of their time and were discontinued as the medium was seen more to be specifically directed for children only. Tim Burton’s creation ‘Frankenweenie’ was considered a ‘love letter’ to the Golden Age of Horror films. It was considered too dark for the average viewer so the director was later let go by Disney.
07Paranorman (2012)
A more somber attempt at stop motion films was Paranorman. It featured printed faces in the characters which needed a new and innovative creative approach. People experienced ground breaking characterization of an openly gay character in the film which was a milestone in terms of mainstream animated films. Films like ‘Paranorman’ perfectly depicts the entry of modern film making software like ****Wondershare Filmora Video Editor ** and Maya in stop motion animations.
08The Boxtrolls (2014)
From the makers of Paranorman, Boxtrolls all introduces an innovative approach to using clay models in films. Featuring Ben Kingsley, Simon Peggs and Richard Ayoade, Boxtrolls is probably the very few box office hits on this list. The film first premiered at the Venice Film Festival the same year of its release.
Wondershare Filmora
Get started easily with Filmora’s powerful performance, intuitive interface, and countless effects Try It Free Try It Free Learn More >
● Key Takeaways from This Episode →
● Stop motion animation has evolved into various different genres and styles but the Claymation has been accepted as a classic medium.
● Not every filmmaker chooses to go down the clay path to animation but those who have has clearly achieved wonders.
● If you wish to give it a try, there is no reason to think that it is impossible but rather demand all your dedication.
How to Make a GIF in Photoshop
How to Make a GIF in Photoshop

Shanoon Cox
Mar 27, 2024• Proven solutions
We all love GIFs and their impressive style of delivering stories. They not only contain set of frames rather they wrap inside lots of emotions and thoughts of creators. You can easily find numbers of eye catching GIF collections over social media sites.
If you love these animated images then probably you might have initiated a search over internet about how to create GIFs. And search engine must have shown you a path to unlimited GIF creator tools . That’s common. But here we are going to talk about one professional recommendation for GIF creation. Yeah, it is Photoshop and it can instantly generate appealing animated Gifs for you.
Below you will be able to learn strategies to create GIF images with latest version of Photoshop:
How to make a GIF in Photoshop
Method 1: Make a GIF from Video in Photoshop
Step 1: Launch your software
Once you have downloaded your Photoshop software tool on your device then simply run it. Note that CS6 versions of Photoshop provide full support to animated files.
Step 2: Get your video clip imported
As your software timeline is available on screen, now you have to import your desired video file to this platform. Simple go to File option from top left corner of toolbar and then from drop down menu select import. Further select, video frames to layers. Choose your video file and soon all its frames will appear on screen. Photoshop also allows users to work on clipped versions of video files; in that case you can use slider to limit the frames at the time of uploading process.
Step 3: Adjust file Import Settings
You will be glad to know that Photoshop offers creative editing features where you can also make color balance adjustments. When you are done with the frame adjustments then go to File and now choose Save for Web from drop down menu.
It will immediately open one new window containing all advanced settings that can assist in better customization of your GIF image. As users need small file size for web uploading needs so you can adjust all these parameters below to get best results:
Colors: Colors are most important descriptive elements for any video so their selection must be done wisely. As more colors can ensure better view but for reducing file size at the same time you can prefer to drop this selection up to 128.
Dither: The dithering process is used to scatter so many colour rich pixels into image so that even a limited colour package can develop intermediate colours over it. If you pick higher number of colours then definitely the image will look finer but at the cost of higher file size.
Lossy: If you want to add some internal drop in the quality of image then this setting is useful. But try to keep it lower because higher range may destroy actual information from image whereas smaller value is good if you want to just reduce the file size.
Size: Users can prefer to change overall dimensions of their GIF that ultimately leads to huge impact on file size.
Step 4: Time to Save your GIF file
When you are done with the editing process and want to save the newly created GIF image then simply move to the File menu available on top left corner of software window and from drop down menu choose “Save for Web” option. It will further ask you to adjust the output file parameters ahead, make changes as per need of your project and finally get it saved to your device.
Check this video to know more:
Method 2: Make a GIF from Still Photos in Photoshop
It is also possible to develop animated GIF images from collection of still images in Photoshop. In this method, users simply need to maintain layers of each frame and then they are sequenced using timeline tool or Photoshop’s animation based editing. Here are few simple to follow steps to get best results:
1. Step 1
First of all, user is advised to bring all desired still images into a single folder in his computer. Then go to the software window, move to Files option and further choose Scripts. It will provide you an option for Load Files into Stack. Now hit browse button and choose your images from desktop folder that you further want to use for development of GIF image. Hit OK. It will immediately open a new composition on screen and all these stills will appear like individual layers of a new single image.
Users can reorder or rearrange these frames as per their desired GIF animation but note that the frame that you want to place at first position in your final GIF must appear at bottom layer and others must follow the same sequence upwards.
All these GIF layers can also be created individually by user using Photoshop tools. To do this, simply run your Photoshop and then use File > New option to start working with a new project. Hit Ok. It is time to unlock the background layer; you can do this by simply double clicking on the lock icon available on screen. Now in order to create a new layer over it, move to Layer option and press New button. You can design all your new layers with this process. As soon as all your images get created then arrange them in bottom to top order same as the previous method.
Note that, this process becomes effective only if you are working on the older version of software and it does not have “Load Files into Stack” feature. You can simply load all your desired stills on Photoshop platform and then drag them to new project window. The free transform tool of Photoshop can help you to resize all the added layers as per need. Use shortcut keys: Ctrl+T to make changes faster.
2. Step 2
Now as your entire GIF image layers have been arranged so next task is to start sequencing. If you are working on CS5 or lower version of Photoshop then you van move to animation window by using Window plus Animation option. On the other side, CS6 or CC users need to click over Window + Timeline option.
As soon as sequencing tool appears on your screen, you will find a small right facing arrow on upper right corner of your screen. Hit this arrow and then choose “Make Frames from Layer” option. The eye icon can be used to hide all unwanted layers. From bottom menu, you can choose looping sequence for your image.
3. Step 3
Finally your animated GIF image is ready and now you can export it to your computer. Hit File option and then Chose Save for Web from drop down menu. But note that for web uploading a file size less then 1MB is acceptable. You can alter it by changing, loss, dither, color and size settings. At last hit Save button and now you can upload your GIF.
Read More to Get : the ultimate guide on How to Convert GIF to Video on your laptop or phone.
Conclusion
If you feel like Photoshop is difficult to learn, Filmora meme maker is your ultimate solution. It helps you make image, GIF and video memes directly without watermark. It is totally FREE to use and no sign up. You can change text size, color and position to create caption when you are editing. You can also put text inside or outside in GIF. Just with a few clicks, your GIF is done . Try it now!
Shanoon Cox
Shanoon Cox is a writer and a lover of all things video.
Follow @Shanoon Cox
Shanoon Cox
Mar 27, 2024• Proven solutions
We all love GIFs and their impressive style of delivering stories. They not only contain set of frames rather they wrap inside lots of emotions and thoughts of creators. You can easily find numbers of eye catching GIF collections over social media sites.
If you love these animated images then probably you might have initiated a search over internet about how to create GIFs. And search engine must have shown you a path to unlimited GIF creator tools . That’s common. But here we are going to talk about one professional recommendation for GIF creation. Yeah, it is Photoshop and it can instantly generate appealing animated Gifs for you.
Below you will be able to learn strategies to create GIF images with latest version of Photoshop:
How to make a GIF in Photoshop
Method 1: Make a GIF from Video in Photoshop
Step 1: Launch your software
Once you have downloaded your Photoshop software tool on your device then simply run it. Note that CS6 versions of Photoshop provide full support to animated files.
Step 2: Get your video clip imported
As your software timeline is available on screen, now you have to import your desired video file to this platform. Simple go to File option from top left corner of toolbar and then from drop down menu select import. Further select, video frames to layers. Choose your video file and soon all its frames will appear on screen. Photoshop also allows users to work on clipped versions of video files; in that case you can use slider to limit the frames at the time of uploading process.
Step 3: Adjust file Import Settings
You will be glad to know that Photoshop offers creative editing features where you can also make color balance adjustments. When you are done with the frame adjustments then go to File and now choose Save for Web from drop down menu.
It will immediately open one new window containing all advanced settings that can assist in better customization of your GIF image. As users need small file size for web uploading needs so you can adjust all these parameters below to get best results:
Colors: Colors are most important descriptive elements for any video so their selection must be done wisely. As more colors can ensure better view but for reducing file size at the same time you can prefer to drop this selection up to 128.
Dither: The dithering process is used to scatter so many colour rich pixels into image so that even a limited colour package can develop intermediate colours over it. If you pick higher number of colours then definitely the image will look finer but at the cost of higher file size.
Lossy: If you want to add some internal drop in the quality of image then this setting is useful. But try to keep it lower because higher range may destroy actual information from image whereas smaller value is good if you want to just reduce the file size.
Size: Users can prefer to change overall dimensions of their GIF that ultimately leads to huge impact on file size.
Step 4: Time to Save your GIF file
When you are done with the editing process and want to save the newly created GIF image then simply move to the File menu available on top left corner of software window and from drop down menu choose “Save for Web” option. It will further ask you to adjust the output file parameters ahead, make changes as per need of your project and finally get it saved to your device.
Check this video to know more:
Method 2: Make a GIF from Still Photos in Photoshop
It is also possible to develop animated GIF images from collection of still images in Photoshop. In this method, users simply need to maintain layers of each frame and then they are sequenced using timeline tool or Photoshop’s animation based editing. Here are few simple to follow steps to get best results:
1. Step 1
First of all, user is advised to bring all desired still images into a single folder in his computer. Then go to the software window, move to Files option and further choose Scripts. It will provide you an option for Load Files into Stack. Now hit browse button and choose your images from desktop folder that you further want to use for development of GIF image. Hit OK. It will immediately open a new composition on screen and all these stills will appear like individual layers of a new single image.
Users can reorder or rearrange these frames as per their desired GIF animation but note that the frame that you want to place at first position in your final GIF must appear at bottom layer and others must follow the same sequence upwards.
All these GIF layers can also be created individually by user using Photoshop tools. To do this, simply run your Photoshop and then use File > New option to start working with a new project. Hit Ok. It is time to unlock the background layer; you can do this by simply double clicking on the lock icon available on screen. Now in order to create a new layer over it, move to Layer option and press New button. You can design all your new layers with this process. As soon as all your images get created then arrange them in bottom to top order same as the previous method.
Note that, this process becomes effective only if you are working on the older version of software and it does not have “Load Files into Stack” feature. You can simply load all your desired stills on Photoshop platform and then drag them to new project window. The free transform tool of Photoshop can help you to resize all the added layers as per need. Use shortcut keys: Ctrl+T to make changes faster.
2. Step 2
Now as your entire GIF image layers have been arranged so next task is to start sequencing. If you are working on CS5 or lower version of Photoshop then you van move to animation window by using Window plus Animation option. On the other side, CS6 or CC users need to click over Window + Timeline option.
As soon as sequencing tool appears on your screen, you will find a small right facing arrow on upper right corner of your screen. Hit this arrow and then choose “Make Frames from Layer” option. The eye icon can be used to hide all unwanted layers. From bottom menu, you can choose looping sequence for your image.
3. Step 3
Finally your animated GIF image is ready and now you can export it to your computer. Hit File option and then Chose Save for Web from drop down menu. But note that for web uploading a file size less then 1MB is acceptable. You can alter it by changing, loss, dither, color and size settings. At last hit Save button and now you can upload your GIF.
Read More to Get : the ultimate guide on How to Convert GIF to Video on your laptop or phone.
Conclusion
If you feel like Photoshop is difficult to learn, Filmora meme maker is your ultimate solution. It helps you make image, GIF and video memes directly without watermark. It is totally FREE to use and no sign up. You can change text size, color and position to create caption when you are editing. You can also put text inside or outside in GIF. Just with a few clicks, your GIF is done . Try it now!
Shanoon Cox
Shanoon Cox is a writer and a lover of all things video.
Follow @Shanoon Cox
20 Best Anime Movies You Cannot Miss [2024 List]
20 Best Anime Movies You Cannot Miss [2024 Update]
Shanoon Cox
Mar 27, 2024• Proven solutions
Most anime movies are originally produced in Japan, but their popularity spans worldwide. Anime movie has made it to the most-liked genre list and is widely viewed by people of all ages, gender, and nationalities. An anime movie is mostly based on science fiction, fantasy, or supernatural creatures. These movies feature extraordinary graphics and highly engaging plots that attract viewers.
Choosing the best anime movie can be hard as there are countless such movies. But, if you are looking for a must-watch anime movie, read ahead for our ultimate list of top anime movies.
- 20 Best Anime Movies You Can Watch Online
- Bonus Tip-Record Anime Movie with Wondershare Filmora for an Anime Explanation
20 Best Anime Movies You Can Watch Online
Below we have listed the anime movie we consider to be the best amongst the hundreds and thousands of others.
| Top Anime Movies | Genre | Director | Release Time |
|---|---|---|---|
| Spirited Away | Drama, Fantasy | Hayao Miyazaki | 2001 |
| Princess Mononoke | Fantasy | Hayao Miyazaki | 1997 |
| Howl’s Moving Castle | Fantasy | Hayao Miyazaki | 2004 |
| Ghost in the Shell | Science Fiction, Crime | Mamoru Oshii | 1995 |
| Psycho-Pass | Action, Sci-fi | Naoyoshi Shiotani | 2012 |
| Your Name | Sci-fi, Drama | Makoto Shinkai | 2016 |
| A Silent Voice | Drama | Naoko Yamada | 2016 |
| Akira | Cyberpunk, Sci-fi, Action | Katsuhiro Ôtomo | 1988 |
| Weathering with You | Fantasy, Drama | Makoto Shinkao | 2019 |
| Grave of the Fireflies | War, Drama | Isao Takahat | 1988 |
| Perfect Blue | Thriller, Drama | Satoshi Kon | 1977 |
| The Girl Who Leapt Through Time | Fantasy, Romance | Mamuro Hosoda | 2006 |
| My Hero Academia: Heroes Rising | Sci-fi | Kenji Nagasaki | 2019 |
| Wolf Children | Fantasy, Drama | Mamoru Hosoda | 2012 |
| Your Lie in April | Musical, Romance | Takehiko Shinjo | 2015 |
| I Want to Eat Your Pancreas | Romance, Drama | Shin’ichirō Ushijima | 2018 |
| Whisper of the Heart | Romance | Yoshifumi Kondo | 1995 |
| One Piece: Stampede | Action, Adventure | Takashi Otsuka | 2019 |
| Death Note | Crime, Action, Thriller | Tetsuro Araki | 2006 |
| Dragon Ball Super: Broly | Adventure, Fantasy | Tatsuya Nagamine | 2018 |
1. Spirited Away
Release Time: 2001
Genre: Drama, Fantasy
Director: Hayao Miyazaki
The masterpiece created in the anime movie industry is certainly ‘Spirited Away.’ It is a very gripping story of a 10-year old girl who accidentally wanders into a mysterious land with her parents who are transformed into pigs as a witch curse. The girl, Chihiro, starts working for the witch Yubaba, who takes away her original name, changing it to Sen. The main character Haku saves Chihiro from trouble, and they become acquainted. You can watch a free anime movie like this one and be taken to the world of Sen as she tries to keep her real name alive and portrays an extraordinary character of a happy spirit.
2. Princess Mononoke
Release Time: 1997
Genre: Fantasy
Director: Hayao Miyazaki
Princess Mononoke is classified as the best anime movie of all time. This anime movie was aired years ago and is based on a much ancient Muromachi period. The fantasy movie revolves around the life of the main characters. One is a clan’s prince, Ashitaka, And the other is a young girl, San, who lives in the woods and was raised by the wolves. As the fantasy unfolds, Ashitaka can be seen struggling to strike an understanding between humans and nature so that he and San may live together. It is widely viewed and loved globally owing to the hyper-realistically attractive plot of the anime movie.
3. Howl’s Moving Castle
Release Time: 2004
Genre: Fantasy
Director: Hayao Miyazaki
Another impressive anime movie by the master filmmaker Hayao Miyazaki is Howl’s Moving Castle. You can watch this free anime movie that is originally based on the British novel. As a young and beautiful girl is reviled by a witch and turned into a 90-year old woman, she discovers a magic castle and a handsome wizard. The powerful wizard might be the chance to her freedom and youth again. The highly gripping plot of this anime movie that takes viewers on a journey through fantasyland is the basis for its worldwide popularity.
4. Ghost in the Shell
Release Time: 1995
Genre: Science Fiction, Crime
Director: Mamoru Oshii
Ghost in the Shell is a pioneer anime movie based on the Manga by Masamune Shiro. It was released decades ago, but it shows life in 2030. As the anime movie features a world where technology is highly advanced, a cyborg policewoman is seen fighting crime using her extraordinary powers. The main characters, such as Major Motoko Kusanagi and the members of Public Security Section 9, are also seen preventing crime in this evolved era. This action-packed anime movie is well-loved by fans as it displays striking graphics and thrilling action scenes.
5. Psycho-Pass
Release Time: 2012
Genre: Action, Sci-fi
Director: Naoyoshi Shiotani
Psycho-Pass is a free anime movie streaming worldwide and building fans owing to its storyline. As the name suggests, this anime movie introduces an innovative judgment system known as Sibyl System. People are analyzed and given a psycho pass after assessing their criminal intent. But, the climax is introduced as a new police recruit Akane Tsunemori starts questioning the authorities. As she discovers what is actually right and wrong, the anime builds suspense in this dystopian-themed anime movie.
6. Your Name
Release Time: 2016
Genre: Sci-fi, drama
Director: Makoto Shinkai
The best anime movie released recently is ‘Your Name.’ It features a strange phenomenon that leads to the swapping of the lives of two individuals. The boy residing in Metropolitan Tokyo, Taki Tachibana, and a rural Japanese girl Mitusha Miyamizu are on a path to find whose body they are inhabiting. This anime movie simultaneously features two different lives as they try to discover each other. It unfolds quite spectacularly while being emotional and humorous at the same time.
7. A Silent Voice
Release Time: 2016
Genre: Drama
Director: Naoko Yamada
An emotionally exceptional anime movie, A Silent Voice, is also based on the Manga series. It brings to light the social issues mostly faced by teenagers and school-going teens. The story unfurls as a deaf girl, Shoka, is continuously harassed and bullied by Shoya, her classmate. But, the anime movie is highly appraised as it takes a positive turn when the harasser realizes his mistake and sets out to make amends. You can watch this free anime movie which is incredibly moving and raises sensitive issues like suicide, bullying, parental divorce, etc.
8. Akira
Release Time: 1988
Genre: Cyberpunk, Sci-fi, Action
Director: Katsuhiro Ôtomo
Yet another amazing anime movie based on a best-selling manga series is Manga. It is based in Neo-Tokyo, which is collapsing due to World War 3. The twist comes when the Biker gang Bosozoku member Tetsuo Shima is involved in an accident, and the military experiments on him, resulting in a murderous being with supernatural powers. This story also features the gang leader Shotaro Kaneda, who, alongside Tetsuo, gets involved in a conspiracy involving a guy named Akira. This free anime movie is renowned due to the high-end animations and remarkable visuals. This adds to the reasons why you should definitely watch anime movie like this one.
9. Weathering with You
Release Time: 2019
Genre: Fantasy, drama
Director: Makoto Shinkao
Makoto Shinkao again takes the lead by directing an outstanding anime movie that has become one of the most viewed anime movies recently. An islander boy Hodaka leaves his home for the bustling life of the Metropolitan city of Tokyo. There, he runs into a young girl, Hina, who lives all by herself. Soon, he discovers that Hina holds power to bend the weather to her will. And she uses that power to bring sunshine into people’s lives on their significant days such as weddings, etc. Both Hina and Hodaka become close and explore her powers in secret together until evil pops up and the movie plunges into a moving climax. The suspense of this anime movie has been keeping the viewers glued to the screens.
10. Grave of the Fireflies
Release Time: 1988
Genre: War, drama
Director: Isao Takahat
A phenomenal anime movie by Isao Takahat features the struggling life of two siblings trying to make do in the country torn apart by war. It is an extremely emotional anime movie that displays the after-effects and repercussions of war. The 14-year old boy, Seita, tries to rebuild his life with a 4-year old sister. As the movie progresses, the young kids can be seen surviving on scraps and looking for happiness in the ruins of what is left. The stunning and shocking reality of the wars is accurately depicted in this moving movie, making it one of the best anime movie ever.
11. Perfect Blue
Release Time: 1977
Genre: Thriller, drama
Director: Satoshi Kon
Perfect Blue is the best anime movie that features the fusion of various genres, ultimately presenting a masterpiece. This anime movie follows the life of a pop-star turned actress whose life is stalked and threatened by her past, an obsessed stalker, and the ghosts following her all the time. She suffers humiliation, privacy breaches, and psychological issues. This gripping thriller shows the life of a star behind the limelight. Its emotionally gripping plot has built a huge fanbase.
12. The Girl Who Leapt Through Time
Release Time: 2006
Genre: Fantasy, romance
Director: Mamuro Hosoda
This particular anime movie revolves around three high schoolers, namely, Makoto, Kosuke, and Chiaki. Among these, Makoto discovers that she can time travel. By using this power, she travels into the past. But, soon, she realizes that her actions are going to cost her in one way or the other, and she learns that time waits for no one. It also explores other common interests possessed by teenagers, such as love, studies, and career. This anime movie certainly features an excellent fantasy plot that attracts fans.
13. My Hero Academia: Heroes Rising
Release Time: 2019
Genre: Sci-fi
Director: Kenji Nagasaki
Another anime movie based on the Manga series, My Hero Academia is superhero fiction. It features a world where the majority of the population consists of people with superpowers, commonly known as Quirks. However, a young boy Izuku, born without any powers, longs to become a superhero like the rest of them. The movie follows the journey of Izuku as he saves a bully from evil and is granted the chance to attend the training school otherwise reserved for superheroes. The plot is suspenseful and keeps viewers guessing as to what will happen in the next scene.
14. Wolf Children
Release Time: 2012
Genre: Fantasy, drama
Director: Mamoru Hosoda
Under the direction of Mamoru Hosoda, this masterpiece was produced by Studio Chizu and can easily be classified as the best anime movie so far. This unique plot features the life of a young woman, Hana, who falls in love with a guy she meets at her college in Tokyo. Little does she know that he is not an ordinary boy but, in fact, a werewolf. Nevertheless, they get married, and 2 kids, Yuki and Ama, are born. The story becomes very interesting when the father dies, and Hana is left alone to care for her children. As Yuki and Ama are not ordinary like their mother, Hana faces numerous issues along her journey.
15. Your Lie in April
Release Time: 2015
Genre: Musical, romance
Director: Takehiko Shinjo
Your Lie in April is a free anime movie also streamed on Netlfix owing to its extraordinary storyline loved by people all over the world. This story features a piano prodigy, Kosei Arima, who breaks down during a performance after his mother passes away. Despite a fine hearing, he is unable to hear his own piano. But, all that magically changes when Kaori Miyazono, an enthusiastic violinist, enters his life and takes him back to his music. This anime movie beautifully unfolds as she herself deteriorates but gives Kosei a new life before she falls fatally sick.
16. I Want to Eat Your Pancreas
Release Time: 2018
Genre: Romance, drama
Director: Shin’ichirō Ushijima
This anime movie is extremely emotional yet humorous. As Haruki stumbles upon a secret diary in a hospital waiting room, he discovers that his classmate, Sakura, is dying from a fatal disease. And soon, they go from classmates to lovers, living life to the fullest by following Sakura’s bucket list. A heart-wrenching twist is introduced when fate takes Sakura away from Haruki a little too soon and very suddenly. This exceptional and heart-breaking love story is a must-watch anime movie.
17. Whisper of the Heart
Release Time: 1995
Genre: Romance
Director: Yoshifumi Kondo
Whisper of the Heart follows the life of a young girl and boy as they meet and befriend each other in rather accidental circumstances. Shizuku, a 14-year old bibliophile, discovers that all her favorite books are already being checked out by someone named Seiji. Curious, she is determined to find the boy who shares the same interests as her. But, when she follows a cat riding the train into a shop, she finds him, and they instantly become friends. This anime movie is a story about dreams and passion and the journey they take to fulfill them. It is a very light-hearted comedy and romance anime movie attracting huge fans.
18. One Piece: Stampede
Release Time: 2019
Genre: Action, adventure
Director: Takashi Otsuka
One Piece: Stampede takes viewers to a bustling Pirate Festival. This festival is for pirates and by pirates. From around the world, pirates gather to partake in the treasure hunt organized in this festival. The treasure is from the collection of Golder Roger, the former Pirate king, and all those involved give their all to win it. This anime movie is one of the best action movies and features numerous famed anime movie characters in all their glory, along with the best, most powerful character, Bullet.
19. Death Note
Release Time: 2006
Genre: Crime, action, thriller
Director: Tetsuro Araki
As a thriller anime movie, Death Note features a young high school boy, Light Yagami, who tries to purge the world by using a supernatural diary. Light stumbles upon a diary containing supernatural powers that have the ability to kill anyone whose name is written in it, given that the user knows the person and has seen his face. As Light goes around killing people he deems too immoral to live, he calls for trouble as the police force is after him. This suspenseful anime movie grips the viewers as they try to gauge who is right or wrong.
20. Dragon Ball Super: Broly
Release Time: 2018
Genre: Adventure, fantasy
Director: Tatsuya Nagamine
Dragon Ball Super: Broly is the tale of three Saiyans fighting each other for power and revenge. As Broly returns, Goku and Vegeta encounter powers are unseen before. As the anime movie unfolds, it shows how jealousy and the politics of acquiring the throne lead people to behave. The three warriors are seen fighting, and the whole plot revolves around the legendary Super Saiyan.
Bonus Tip-Record Anime Movie with Wondershare Filmora for an Anime Explanation
Wondershare Filmora is an all-in-one video editor loaded with professional-grade tools to create spectacular videos. The intuitive interface further makes it easy to use the one-click tools for crafting cinematics videos. It has numerous editing features such as the motion-tracking tool, color match, and audio ducking. With it, you can easily record and explain an anime movie by editing it as you like.
Here are the steps to record an anime movie with Filmora.
1. Download, install and launch Wondershare Filmora. In the Media tab, open the Record drop-down menu and tap on the Record PC Screen.
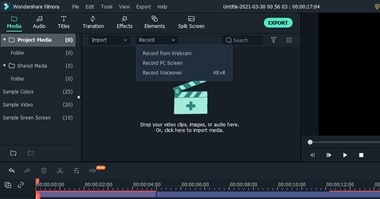


2. A settings dialogue box will pop open. Customize the parameters such as the custom screen or tab, quality, record time, etc. Press the red icon to start recording the anime movie.
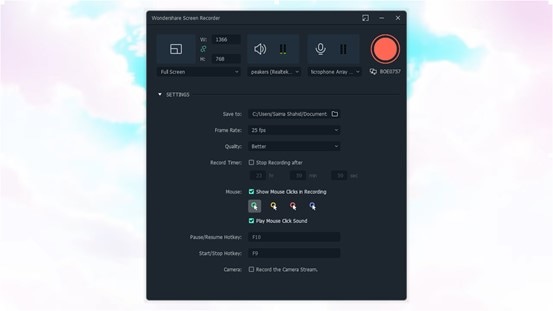
3.After 3 seconds, it will start recording. To stop the recording, you can press the F9 button.
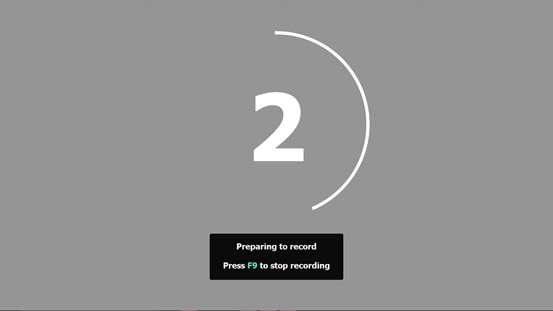
4.The recorded video will be saved to your device and will also be added to your preview in Filmora.
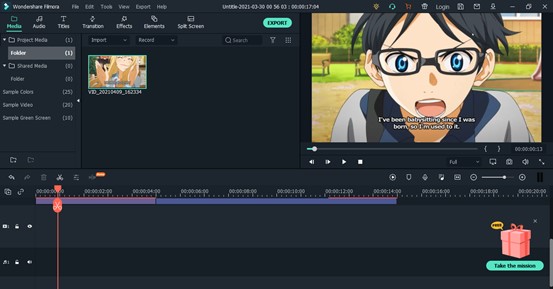
5.Now, you can drag it to the timeline to make more edits to the anime movie. From the Titles tab, you can add the title for the anime movie by choosing an attractive template and customizing it.
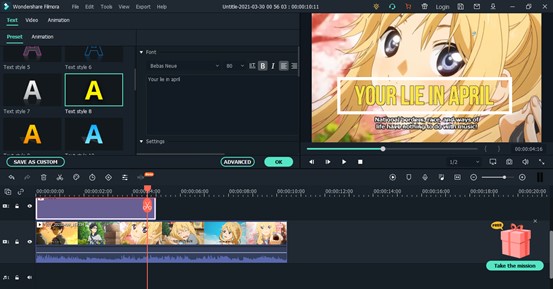
6.You can also add exciting Elements and emoticons.
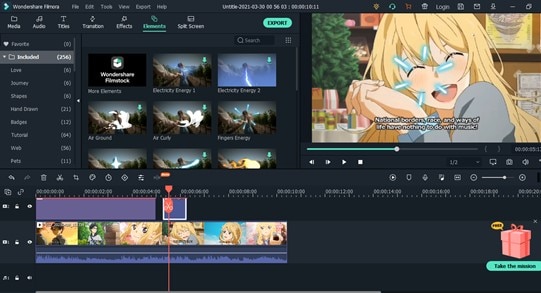
7.Once you have finished editing the anime movie, click on Export and save the video to your device or share it directly on social media.

Summing up
If you are a true anime movie fan, it is possible that you might have watched all the top movies we have mentioned above. But, if you still haven’t come across these truly impressive anime movies, you are in for a treat. Even if you are not a fan of anime, you must watch anime movie listed above to be truly amazed. All these are ever-green and the best anime movie of their time.
Add these stunning anime movies and serials to your bucket list and prepare for endless entertainment provided by exciting anime characters. So, go on and watch free anime movie of your choice and enjoy.
Shanoon Cox
Shanoon Cox is a writer and a lover of all things video.
Follow @Shanoon Cox
Shanoon Cox
Mar 27, 2024• Proven solutions
Most anime movies are originally produced in Japan, but their popularity spans worldwide. Anime movie has made it to the most-liked genre list and is widely viewed by people of all ages, gender, and nationalities. An anime movie is mostly based on science fiction, fantasy, or supernatural creatures. These movies feature extraordinary graphics and highly engaging plots that attract viewers.
Choosing the best anime movie can be hard as there are countless such movies. But, if you are looking for a must-watch anime movie, read ahead for our ultimate list of top anime movies.
- 20 Best Anime Movies You Can Watch Online
- Bonus Tip-Record Anime Movie with Wondershare Filmora for an Anime Explanation
20 Best Anime Movies You Can Watch Online
Below we have listed the anime movie we consider to be the best amongst the hundreds and thousands of others.
| Top Anime Movies | Genre | Director | Release Time |
|---|---|---|---|
| Spirited Away | Drama, Fantasy | Hayao Miyazaki | 2001 |
| Princess Mononoke | Fantasy | Hayao Miyazaki | 1997 |
| Howl’s Moving Castle | Fantasy | Hayao Miyazaki | 2004 |
| Ghost in the Shell | Science Fiction, Crime | Mamoru Oshii | 1995 |
| Psycho-Pass | Action, Sci-fi | Naoyoshi Shiotani | 2012 |
| Your Name | Sci-fi, Drama | Makoto Shinkai | 2016 |
| A Silent Voice | Drama | Naoko Yamada | 2016 |
| Akira | Cyberpunk, Sci-fi, Action | Katsuhiro Ôtomo | 1988 |
| Weathering with You | Fantasy, Drama | Makoto Shinkao | 2019 |
| Grave of the Fireflies | War, Drama | Isao Takahat | 1988 |
| Perfect Blue | Thriller, Drama | Satoshi Kon | 1977 |
| The Girl Who Leapt Through Time | Fantasy, Romance | Mamuro Hosoda | 2006 |
| My Hero Academia: Heroes Rising | Sci-fi | Kenji Nagasaki | 2019 |
| Wolf Children | Fantasy, Drama | Mamoru Hosoda | 2012 |
| Your Lie in April | Musical, Romance | Takehiko Shinjo | 2015 |
| I Want to Eat Your Pancreas | Romance, Drama | Shin’ichirō Ushijima | 2018 |
| Whisper of the Heart | Romance | Yoshifumi Kondo | 1995 |
| One Piece: Stampede | Action, Adventure | Takashi Otsuka | 2019 |
| Death Note | Crime, Action, Thriller | Tetsuro Araki | 2006 |
| Dragon Ball Super: Broly | Adventure, Fantasy | Tatsuya Nagamine | 2018 |
1. Spirited Away
Release Time: 2001
Genre: Drama, Fantasy
Director: Hayao Miyazaki
The masterpiece created in the anime movie industry is certainly ‘Spirited Away.’ It is a very gripping story of a 10-year old girl who accidentally wanders into a mysterious land with her parents who are transformed into pigs as a witch curse. The girl, Chihiro, starts working for the witch Yubaba, who takes away her original name, changing it to Sen. The main character Haku saves Chihiro from trouble, and they become acquainted. You can watch a free anime movie like this one and be taken to the world of Sen as she tries to keep her real name alive and portrays an extraordinary character of a happy spirit.
2. Princess Mononoke
Release Time: 1997
Genre: Fantasy
Director: Hayao Miyazaki
Princess Mononoke is classified as the best anime movie of all time. This anime movie was aired years ago and is based on a much ancient Muromachi period. The fantasy movie revolves around the life of the main characters. One is a clan’s prince, Ashitaka, And the other is a young girl, San, who lives in the woods and was raised by the wolves. As the fantasy unfolds, Ashitaka can be seen struggling to strike an understanding between humans and nature so that he and San may live together. It is widely viewed and loved globally owing to the hyper-realistically attractive plot of the anime movie.
3. Howl’s Moving Castle
Release Time: 2004
Genre: Fantasy
Director: Hayao Miyazaki
Another impressive anime movie by the master filmmaker Hayao Miyazaki is Howl’s Moving Castle. You can watch this free anime movie that is originally based on the British novel. As a young and beautiful girl is reviled by a witch and turned into a 90-year old woman, she discovers a magic castle and a handsome wizard. The powerful wizard might be the chance to her freedom and youth again. The highly gripping plot of this anime movie that takes viewers on a journey through fantasyland is the basis for its worldwide popularity.
4. Ghost in the Shell
Release Time: 1995
Genre: Science Fiction, Crime
Director: Mamoru Oshii
Ghost in the Shell is a pioneer anime movie based on the Manga by Masamune Shiro. It was released decades ago, but it shows life in 2030. As the anime movie features a world where technology is highly advanced, a cyborg policewoman is seen fighting crime using her extraordinary powers. The main characters, such as Major Motoko Kusanagi and the members of Public Security Section 9, are also seen preventing crime in this evolved era. This action-packed anime movie is well-loved by fans as it displays striking graphics and thrilling action scenes.
5. Psycho-Pass
Release Time: 2012
Genre: Action, Sci-fi
Director: Naoyoshi Shiotani
Psycho-Pass is a free anime movie streaming worldwide and building fans owing to its storyline. As the name suggests, this anime movie introduces an innovative judgment system known as Sibyl System. People are analyzed and given a psycho pass after assessing their criminal intent. But, the climax is introduced as a new police recruit Akane Tsunemori starts questioning the authorities. As she discovers what is actually right and wrong, the anime builds suspense in this dystopian-themed anime movie.
6. Your Name
Release Time: 2016
Genre: Sci-fi, drama
Director: Makoto Shinkai
The best anime movie released recently is ‘Your Name.’ It features a strange phenomenon that leads to the swapping of the lives of two individuals. The boy residing in Metropolitan Tokyo, Taki Tachibana, and a rural Japanese girl Mitusha Miyamizu are on a path to find whose body they are inhabiting. This anime movie simultaneously features two different lives as they try to discover each other. It unfolds quite spectacularly while being emotional and humorous at the same time.
7. A Silent Voice
Release Time: 2016
Genre: Drama
Director: Naoko Yamada
An emotionally exceptional anime movie, A Silent Voice, is also based on the Manga series. It brings to light the social issues mostly faced by teenagers and school-going teens. The story unfurls as a deaf girl, Shoka, is continuously harassed and bullied by Shoya, her classmate. But, the anime movie is highly appraised as it takes a positive turn when the harasser realizes his mistake and sets out to make amends. You can watch this free anime movie which is incredibly moving and raises sensitive issues like suicide, bullying, parental divorce, etc.
8. Akira
Release Time: 1988
Genre: Cyberpunk, Sci-fi, Action
Director: Katsuhiro Ôtomo
Yet another amazing anime movie based on a best-selling manga series is Manga. It is based in Neo-Tokyo, which is collapsing due to World War 3. The twist comes when the Biker gang Bosozoku member Tetsuo Shima is involved in an accident, and the military experiments on him, resulting in a murderous being with supernatural powers. This story also features the gang leader Shotaro Kaneda, who, alongside Tetsuo, gets involved in a conspiracy involving a guy named Akira. This free anime movie is renowned due to the high-end animations and remarkable visuals. This adds to the reasons why you should definitely watch anime movie like this one.
9. Weathering with You
Release Time: 2019
Genre: Fantasy, drama
Director: Makoto Shinkao
Makoto Shinkao again takes the lead by directing an outstanding anime movie that has become one of the most viewed anime movies recently. An islander boy Hodaka leaves his home for the bustling life of the Metropolitan city of Tokyo. There, he runs into a young girl, Hina, who lives all by herself. Soon, he discovers that Hina holds power to bend the weather to her will. And she uses that power to bring sunshine into people’s lives on their significant days such as weddings, etc. Both Hina and Hodaka become close and explore her powers in secret together until evil pops up and the movie plunges into a moving climax. The suspense of this anime movie has been keeping the viewers glued to the screens.
10. Grave of the Fireflies
Release Time: 1988
Genre: War, drama
Director: Isao Takahat
A phenomenal anime movie by Isao Takahat features the struggling life of two siblings trying to make do in the country torn apart by war. It is an extremely emotional anime movie that displays the after-effects and repercussions of war. The 14-year old boy, Seita, tries to rebuild his life with a 4-year old sister. As the movie progresses, the young kids can be seen surviving on scraps and looking for happiness in the ruins of what is left. The stunning and shocking reality of the wars is accurately depicted in this moving movie, making it one of the best anime movie ever.
11. Perfect Blue
Release Time: 1977
Genre: Thriller, drama
Director: Satoshi Kon
Perfect Blue is the best anime movie that features the fusion of various genres, ultimately presenting a masterpiece. This anime movie follows the life of a pop-star turned actress whose life is stalked and threatened by her past, an obsessed stalker, and the ghosts following her all the time. She suffers humiliation, privacy breaches, and psychological issues. This gripping thriller shows the life of a star behind the limelight. Its emotionally gripping plot has built a huge fanbase.
12. The Girl Who Leapt Through Time
Release Time: 2006
Genre: Fantasy, romance
Director: Mamuro Hosoda
This particular anime movie revolves around three high schoolers, namely, Makoto, Kosuke, and Chiaki. Among these, Makoto discovers that she can time travel. By using this power, she travels into the past. But, soon, she realizes that her actions are going to cost her in one way or the other, and she learns that time waits for no one. It also explores other common interests possessed by teenagers, such as love, studies, and career. This anime movie certainly features an excellent fantasy plot that attracts fans.
13. My Hero Academia: Heroes Rising
Release Time: 2019
Genre: Sci-fi
Director: Kenji Nagasaki
Another anime movie based on the Manga series, My Hero Academia is superhero fiction. It features a world where the majority of the population consists of people with superpowers, commonly known as Quirks. However, a young boy Izuku, born without any powers, longs to become a superhero like the rest of them. The movie follows the journey of Izuku as he saves a bully from evil and is granted the chance to attend the training school otherwise reserved for superheroes. The plot is suspenseful and keeps viewers guessing as to what will happen in the next scene.
14. Wolf Children
Release Time: 2012
Genre: Fantasy, drama
Director: Mamoru Hosoda
Under the direction of Mamoru Hosoda, this masterpiece was produced by Studio Chizu and can easily be classified as the best anime movie so far. This unique plot features the life of a young woman, Hana, who falls in love with a guy she meets at her college in Tokyo. Little does she know that he is not an ordinary boy but, in fact, a werewolf. Nevertheless, they get married, and 2 kids, Yuki and Ama, are born. The story becomes very interesting when the father dies, and Hana is left alone to care for her children. As Yuki and Ama are not ordinary like their mother, Hana faces numerous issues along her journey.
15. Your Lie in April
Release Time: 2015
Genre: Musical, romance
Director: Takehiko Shinjo
Your Lie in April is a free anime movie also streamed on Netlfix owing to its extraordinary storyline loved by people all over the world. This story features a piano prodigy, Kosei Arima, who breaks down during a performance after his mother passes away. Despite a fine hearing, he is unable to hear his own piano. But, all that magically changes when Kaori Miyazono, an enthusiastic violinist, enters his life and takes him back to his music. This anime movie beautifully unfolds as she herself deteriorates but gives Kosei a new life before she falls fatally sick.
16. I Want to Eat Your Pancreas
Release Time: 2018
Genre: Romance, drama
Director: Shin’ichirō Ushijima
This anime movie is extremely emotional yet humorous. As Haruki stumbles upon a secret diary in a hospital waiting room, he discovers that his classmate, Sakura, is dying from a fatal disease. And soon, they go from classmates to lovers, living life to the fullest by following Sakura’s bucket list. A heart-wrenching twist is introduced when fate takes Sakura away from Haruki a little too soon and very suddenly. This exceptional and heart-breaking love story is a must-watch anime movie.
17. Whisper of the Heart
Release Time: 1995
Genre: Romance
Director: Yoshifumi Kondo
Whisper of the Heart follows the life of a young girl and boy as they meet and befriend each other in rather accidental circumstances. Shizuku, a 14-year old bibliophile, discovers that all her favorite books are already being checked out by someone named Seiji. Curious, she is determined to find the boy who shares the same interests as her. But, when she follows a cat riding the train into a shop, she finds him, and they instantly become friends. This anime movie is a story about dreams and passion and the journey they take to fulfill them. It is a very light-hearted comedy and romance anime movie attracting huge fans.
18. One Piece: Stampede
Release Time: 2019
Genre: Action, adventure
Director: Takashi Otsuka
One Piece: Stampede takes viewers to a bustling Pirate Festival. This festival is for pirates and by pirates. From around the world, pirates gather to partake in the treasure hunt organized in this festival. The treasure is from the collection of Golder Roger, the former Pirate king, and all those involved give their all to win it. This anime movie is one of the best action movies and features numerous famed anime movie characters in all their glory, along with the best, most powerful character, Bullet.
19. Death Note
Release Time: 2006
Genre: Crime, action, thriller
Director: Tetsuro Araki
As a thriller anime movie, Death Note features a young high school boy, Light Yagami, who tries to purge the world by using a supernatural diary. Light stumbles upon a diary containing supernatural powers that have the ability to kill anyone whose name is written in it, given that the user knows the person and has seen his face. As Light goes around killing people he deems too immoral to live, he calls for trouble as the police force is after him. This suspenseful anime movie grips the viewers as they try to gauge who is right or wrong.
20. Dragon Ball Super: Broly
Release Time: 2018
Genre: Adventure, fantasy
Director: Tatsuya Nagamine
Dragon Ball Super: Broly is the tale of three Saiyans fighting each other for power and revenge. As Broly returns, Goku and Vegeta encounter powers are unseen before. As the anime movie unfolds, it shows how jealousy and the politics of acquiring the throne lead people to behave. The three warriors are seen fighting, and the whole plot revolves around the legendary Super Saiyan.
Bonus Tip-Record Anime Movie with Wondershare Filmora for an Anime Explanation
Wondershare Filmora is an all-in-one video editor loaded with professional-grade tools to create spectacular videos. The intuitive interface further makes it easy to use the one-click tools for crafting cinematics videos. It has numerous editing features such as the motion-tracking tool, color match, and audio ducking. With it, you can easily record and explain an anime movie by editing it as you like.
Here are the steps to record an anime movie with Filmora.
1. Download, install and launch Wondershare Filmora. In the Media tab, open the Record drop-down menu and tap on the Record PC Screen.
2. A settings dialogue box will pop open. Customize the parameters such as the custom screen or tab, quality, record time, etc. Press the red icon to start recording the anime movie.
3.After 3 seconds, it will start recording. To stop the recording, you can press the F9 button.
4.The recorded video will be saved to your device and will also be added to your preview in Filmora.
5.Now, you can drag it to the timeline to make more edits to the anime movie. From the Titles tab, you can add the title for the anime movie by choosing an attractive template and customizing it.
6.You can also add exciting Elements and emoticons.
7.Once you have finished editing the anime movie, click on Export and save the video to your device or share it directly on social media.
Summing up
If you are a true anime movie fan, it is possible that you might have watched all the top movies we have mentioned above. But, if you still haven’t come across these truly impressive anime movies, you are in for a treat. Even if you are not a fan of anime, you must watch anime movie listed above to be truly amazed. All these are ever-green and the best anime movie of their time.
Add these stunning anime movies and serials to your bucket list and prepare for endless entertainment provided by exciting anime characters. So, go on and watch free anime movie of your choice and enjoy.
Shanoon Cox
Shanoon Cox is a writer and a lover of all things video.
Follow @Shanoon Cox
The Best 20 Motion Graphics Companies & Studios
The Best 20 Motion Graphics Companies & Studios
An easy yet powerful editor
Numerous effects to choose from
Detailed tutorials provided by the official channel
Generally, while watching the movies or the commercial ads you will see the great work of the motion graphic motion graphic companies but sometimes you don’t know who they are or how to connect with them. Here, we will share the best 20 motion graphics studio providing motion graphics services.
In this article
01 [Best 20 Motion Graphics Companies & Studios](#Part 1)
02 [Make Motion Graphics Videos without Hiring Motion Graphics Company](#Part 2)
Part 1 Best 20 Motion Graphics Companies & Studios
01Galera
Location: L’viv, Ukraine
Min. Project Size: $5,000+
Avg. Hourly Rate: $- $/ hr
Service Focus: Video Production
Animation Focus: 50%
02Cub Studio
Location: London
Min. Project Size: Not Disclosed
Avg. Hourly Rate: Not Disclosed
Service Focus: Video Production
Animation Focus: 45%
03BuzzFlick
Location: New York,
Min. Project Size: $1,000+
Avg. Hourly Rate: $- $/ hr
Service Focus: Video Production & Graphic Design
Animation Focus: 20%
04Thinkmojo
Location: Campbell
Min. Project Size: Not Disclosed
Avg. Hourly Rate: Not Disclosed
Service Focus: Video Production
Animation Focus: 50%
05Covalent
Location: Pittsburgh, United States
Min. Project Size: $5,000+
Avg. Hourly Rate: $1- $1/ hr
Service Focus: Video Production, Digital Strategy & Broadcast Video
Animation Focus: 40%
06FEVR
Location: Miami
Min. Project Size: $10,000+
Avg. Hourly Rate: $1- $1/ hr
Service Focus: Video Production
Animation Focus: 100%
07Sparkhouse
Location: Irvine & Carlsbad
Min. Project Size: $10,000+
Avg. Hourly Rate: $1- $1/ hr
Service Focus: Video Production
Animation Focus: 50%
08Shoot You
Location: New York
Min. Project Size: $5,000+
Avg. Hourly Rate: $1- $1/ hr
Service Focus: Video Production, Advertising & Content Marketing
Animation Focus: 50%
09Early Light Media
Location: Severna Park, United States
Min. Project Size: Undisclosed
Avg. Hourly Rate: $1- $1/ hr
Service Focus: Video Production
Animation Focus: 40%
10Commotion Engine
Location: Chamblee, United States
Min. Project Size: $5,000+
Avg. Hourly Rate: $1- $1/ hr
Service Focus: Video Production & Graphic Design
Animation Focus: 35%
11Demo Duck
Location: Chicago. United States
Min. Project Size: $5,000+
Avg. Hourly Rate: $1- $1/ hr
Service Focus: Video Production
Animation Focus: 40%
12The Mill
Location: London, United Kingdom
Min. Project Size: $10,000+
Avg. Hourly Rate: $1- $1/ hr
Service Focus: Graphic Design, Video Production
Animation Focus: 40%
13Troika
Location: Los Angeles, United States
Min. Project Size: $5,000+
Avg. Hourly Rate: $1- $1/ hr
Service Focus: Advertising, Branding & Digital Strategy
Animation Focus: 60%
14Explainify
Location: Fayetteville, United States
Min. Project Size: $10,000+
Avg. Hourly Rate: $1- $1/ hr
Service Focus: Video Production & Broadcast Video
Animation Focus: 40%
15Rip Media Group
Location: Los Angeles, United States
Min. Project Size: $1,000+
Avg. Hourly Rate: $1- $1/ hr
Service Focus: Video Production, Content Marketing & Conversion Optimization
Animation Focus: 40%

16CRFT
Location: New York
Min. Project Size: $1,000+
Avg. Hourly Rate: $- $/ hr
Service Focus: Video Production
Animation Focus: 51%
17Production M
Location: Studio City, United States
Min. Project Size: $10,000+
Avg. Hourly Rate: $30/ hr
Service Focus: Video Production
Animation Focus: 50%

18Signature Video Group
Location: Toronto, Canada
Min. Project Size: $10,000+
Avg. Hourly Rate: Undisclosed
Service Focus: Video Production
Animation Focus: 50%

19BX Films
Location: Walnut Creek, CA
Min. Project Size: $25,000+
Avg. Hourly Rate: $1- $1/ hr
Service Focus: Video Production & Broadcast Video
Animation Focus: 50%
20Bottle Rocket Media
Location: Chicago, IL
Min. Project Size: $10,000+
Avg. Hourly Rate: $1- $1/ hr
Service Focus: Video Production & Broadcast Video
Animation Focus: 50%
Part 2 Make Motion Graphics Videos without Hiring Motion Graphics Company
● Wondershare Filmora Video Editor
Wondershare Filmora is powerful motion graphic video maker software which really helps you a lot if you don’t want to hire a motion graphics agency and want to make your videos by yourself. This video creator program comes with several features such as adding effects, audio, video, text, stickers and many other types of elements to the motion graphic videos.
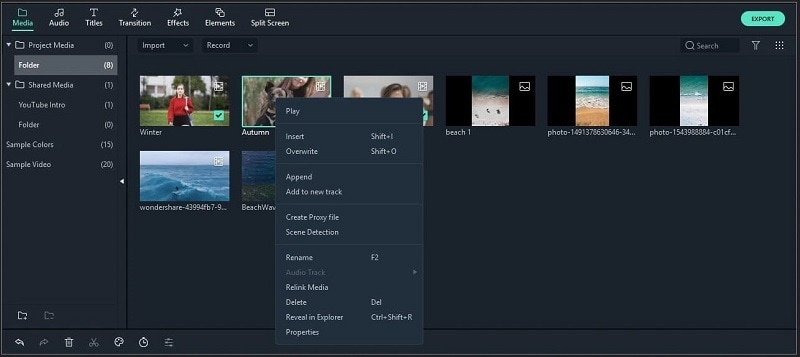
This program can save your lots of cost of hiring motion graphics studio for making your product or brand videos. The best part of the software is that it comes with a very easy to use interface which can be used by everyone to create videos even if you are a newbie or the non tech savvy person. It comes with the options to add motion tracking, key framing, color match, audio ducking, green screen, video split and video effects.

Wondershare Filmora - Best Video Editor for Mac/Windows
5,481,435 people have downloaded it.
Build unique custom animations without breaking a sweat.
Focus on creating epic stories and leave the details to Filmora’s auto features.
Start a creative adventure with drag & drop effects and endless possibilities.
Filmora simplifies advanced features to save you time and effort.
Filmora cuts out repetition so you can move on to your next creative breakthrough.
● Key Takeaways from This Episode →
● The list we have compiled in this article about the motion graphics services companies, are the companies who are providing very good services for the motion graphics videos.
● These best motion graphics studios can help you to create the best product videos according to your choice. But, the fact is that these companies charges lots of price for making videos.
Generally, while watching the movies or the commercial ads you will see the great work of the motion graphic motion graphic companies but sometimes you don’t know who they are or how to connect with them. Here, we will share the best 20 motion graphics studio providing motion graphics services.
In this article
01 [Best 20 Motion Graphics Companies & Studios](#Part 1)
02 [Make Motion Graphics Videos without Hiring Motion Graphics Company](#Part 2)
Part 1 Best 20 Motion Graphics Companies & Studios
01Galera
Location: L’viv, Ukraine
Min. Project Size: $5,000+
Avg. Hourly Rate: $- $/ hr
Service Focus: Video Production
Animation Focus: 50%
02Cub Studio
Location: London
Min. Project Size: Not Disclosed
Avg. Hourly Rate: Not Disclosed
Service Focus: Video Production
Animation Focus: 45%
03BuzzFlick
Location: New York,
Min. Project Size: $1,000+
Avg. Hourly Rate: $- $/ hr
Service Focus: Video Production & Graphic Design
Animation Focus: 20%
04Thinkmojo
Location: Campbell
Min. Project Size: Not Disclosed
Avg. Hourly Rate: Not Disclosed
Service Focus: Video Production
Animation Focus: 50%
05Covalent
Location: Pittsburgh, United States
Min. Project Size: $5,000+
Avg. Hourly Rate: $1- $1/ hr
Service Focus: Video Production, Digital Strategy & Broadcast Video
Animation Focus: 40%
06FEVR
Location: Miami
Min. Project Size: $10,000+
Avg. Hourly Rate: $1- $1/ hr
Service Focus: Video Production
Animation Focus: 100%
07Sparkhouse
Location: Irvine & Carlsbad
Min. Project Size: $10,000+
Avg. Hourly Rate: $1- $1/ hr
Service Focus: Video Production
Animation Focus: 50%
08Shoot You
Location: New York
Min. Project Size: $5,000+
Avg. Hourly Rate: $1- $1/ hr
Service Focus: Video Production, Advertising & Content Marketing
Animation Focus: 50%
09Early Light Media
Location: Severna Park, United States
Min. Project Size: Undisclosed
Avg. Hourly Rate: $1- $1/ hr
Service Focus: Video Production
Animation Focus: 40%
10Commotion Engine
Location: Chamblee, United States
Min. Project Size: $5,000+
Avg. Hourly Rate: $1- $1/ hr
Service Focus: Video Production & Graphic Design
Animation Focus: 35%
11Demo Duck
Location: Chicago. United States
Min. Project Size: $5,000+
Avg. Hourly Rate: $1- $1/ hr
Service Focus: Video Production
Animation Focus: 40%
12The Mill
Location: London, United Kingdom
Min. Project Size: $10,000+
Avg. Hourly Rate: $1- $1/ hr
Service Focus: Graphic Design, Video Production
Animation Focus: 40%
13Troika
Location: Los Angeles, United States
Min. Project Size: $5,000+
Avg. Hourly Rate: $1- $1/ hr
Service Focus: Advertising, Branding & Digital Strategy
Animation Focus: 60%
14Explainify
Location: Fayetteville, United States
Min. Project Size: $10,000+
Avg. Hourly Rate: $1- $1/ hr
Service Focus: Video Production & Broadcast Video
Animation Focus: 40%
15Rip Media Group
Location: Los Angeles, United States
Min. Project Size: $1,000+
Avg. Hourly Rate: $1- $1/ hr
Service Focus: Video Production, Content Marketing & Conversion Optimization
Animation Focus: 40%
16CRFT
Location: New York
Min. Project Size: $1,000+
Avg. Hourly Rate: $- $/ hr
Service Focus: Video Production
Animation Focus: 51%
17Production M
Location: Studio City, United States
Min. Project Size: $10,000+
Avg. Hourly Rate: $30/ hr
Service Focus: Video Production
Animation Focus: 50%
18Signature Video Group
Location: Toronto, Canada
Min. Project Size: $10,000+
Avg. Hourly Rate: Undisclosed
Service Focus: Video Production
Animation Focus: 50%
19BX Films
Location: Walnut Creek, CA
Min. Project Size: $25,000+
Avg. Hourly Rate: $1- $1/ hr
Service Focus: Video Production & Broadcast Video
Animation Focus: 50%
20Bottle Rocket Media
Location: Chicago, IL
Min. Project Size: $10,000+
Avg. Hourly Rate: $1- $1/ hr
Service Focus: Video Production & Broadcast Video
Animation Focus: 50%
Part 2 Make Motion Graphics Videos without Hiring Motion Graphics Company
● Wondershare Filmora Video Editor
Wondershare Filmora is powerful motion graphic video maker software which really helps you a lot if you don’t want to hire a motion graphics agency and want to make your videos by yourself. This video creator program comes with several features such as adding effects, audio, video, text, stickers and many other types of elements to the motion graphic videos.
This program can save your lots of cost of hiring motion graphics studio for making your product or brand videos. The best part of the software is that it comes with a very easy to use interface which can be used by everyone to create videos even if you are a newbie or the non tech savvy person. It comes with the options to add motion tracking, key framing, color match, audio ducking, green screen, video split and video effects.
Wondershare Filmora - Best Video Editor for Mac/Windows
5,481,435 people have downloaded it.
Build unique custom animations without breaking a sweat.
Focus on creating epic stories and leave the details to Filmora’s auto features.
Start a creative adventure with drag & drop effects and endless possibilities.
Filmora simplifies advanced features to save you time and effort.
Filmora cuts out repetition so you can move on to your next creative breakthrough.
● Key Takeaways from This Episode →
● The list we have compiled in this article about the motion graphics services companies, are the companies who are providing very good services for the motion graphics videos.
● These best motion graphics studios can help you to create the best product videos according to your choice. But, the fact is that these companies charges lots of price for making videos.
How to Make an Animated Travel Map Video?
How to Make an Animated Travel Map Video?

Benjamin Arango
Mar 27, 2024• Proven solutions
Animated travel map videos make it easy for the viewers to follow the routes from the source to destination locations right on the single screen. While the static maps would only allow the audience to see the markers from where the journey would start and is expected to end, the animated ones show the real-time movements and therefore look more interactive when viewed.
That said, here you will learn how to create an attractive and engaging animated travel map video using one of the easiest post-production applications, Wondershare Filmora, which is widely appreciated by amateurs and professionals throughout the globe. In another section, you will also learn about an alternative program that might be of some help in case you are more into online designing.
- Method 1: Make Animated Travel Map Videos with Location Video Maker - [Video Tutorial]
- Method 2: Make Interactive Animated Travel Map with Pictramap
- Method 3: Create Animated Travel Map Using Multidev
Method 1 Make Animated Travel Map Videos with Location Video Maker
The entire process of creating an animated travel map video in Wondershare’s Filmora is categorized into two parts, wherein the first part you will collect all the ingredients that are needed to get started, and in the second part you will actually make an animated map using the tools and features present in Filmora.
Watch a video tutorial to see how to make an animated map for a video:
For Win 7 or later (64-bit)
 Secure Download
For macOS 10.14 or later
Secure Download


Part 1: Prepare the Travel Map Materials
Following are the ingredients and the methods to collect them for animated travel map preparation:
Step 1: Get the Map
The first thing that you would need to prepare an animated map is an image of a realistic map. Thanks to Google and Microsoft, these things are now pretty easy to arrange. The process is given below:
- Launch your preferred web browser
- Type google.com in the address bar or the search box and hit Enter
- Scroll to zoom out so you can see the entire world map on one screen

- Type Snipping Tool in the Cortana search box present on the left side of the Taskbar
- Launch Snipping Tool, and use it to capture the screenshot of the map
Note: Snipping Tool is a built-in app in Windows 10 and is available for free. If you are using any other operating system, or have a different program to capture the screenshots, feel free to use it according to your convenience.
- Save the screenshot you captured as a JPG file on your PC
Step 2: Mark Out the Map Path
The next step in the process of preparing an animated travel map is to mark your route on it. To do so, you can use any of your preferred photo editing tools. However, to keep this illustration simple, Microsoft Paint is used here, and the method is given below:
- Right-click the screenshot you just captured
- Go to Open with on the context menu, and then click Paint from the submenu that appears
- Pick your preferred color from the pallet of the Paint interface. It is advisable to use an eye-catchy shade such as Red
- Use the Sphere shape tool to draw a circle over the source and destination locations on the map
- Use the Line tool to draw a line from the source point to the destination. Try giving the line a few turns to make it look realistic
- Go to File > Save As, and save the marked image with a different name
Note: Once this is done, you should have two image files of the map, i.e., one without the marks and one with it
Step 3: Download Some Travel Icons
Another important ingredient in an effective travel map animation is touring icons such as location marker image, a traveling medium symbol like a helicopter, airplane, car/bike (for short distances), etc. A couple of websites that offer royalty-free stock photos at absolutely no cost are listed below:
Note: Although the websites given above allow you to download and use their stock images and icons for free, you may need to give credits to the designers/creators of the symbols while using their objects. Therefore, you are suggested to check the Terms & Conditions and norms of usage of the elements before downloading and adding them to your projects.
Part 2: Make Animated Travel Map Videos with Filmora
After you have gathered all the necessary ingredients that are required to create a travel map animation, it is now time to get to work. The following instructions would guide you through the step-by-step process of preparing a decent and realistic animated travel map in Wondershare Filmora :
For Win 7 or later (64-bit)
Secure Download
For macOS 10.14 or later
Secure Download
Step 1: Import Ingredients to Filmora and Add Them to the Timeline
Launch the video editor on your computer, click anywhere inside the Media window at the upper-left area, and import all the images and icons that you collected earlier to program. Next, drag both the images of the map, i.e., with and without the marks to the Timeline, and ensure that they are of the same duration and are placed on the same track.

Note: Be sure to put the map without the marks first, and then the one with the marks. Also note that the images have the playback duration of 5 seconds in the Timeline by default, and this tenure can be reduced or increased by dragging the side handle of the media to the left or right respectively.
Step 2: Add Transition for Illusion of Route Appearance
Go to Transition from the standard toolbar at the top, locate the Erase Slide transition effect from the available presets, and place it in between the two image files that you earlier added to the Timeline. Next, click and drag either of the side handles of the transition to the end of the media clip. Notice how the other side of the effect is expanded in equal proportion.

Step 3: Preview and Export
Press the Spacebar on the keyboard to preview the video and see if the route appears as if it is being drawn on the map. Once the animation looks acceptable, click EXPORT from the top-center, go to the Local tab on the Export window, select MP4 from the formats list in the left, and click EXPORT from the bottom-right corner to export the current animation to MP4.
Step 4: Customize the Travel Map Media
Either start a new project and import the video of the map you exported in the previous step to the app and then to the Timeline, or remove the existing media from the Timeline in the same project, and add the exported video to it for convenience.

For Win 7 or later (64-bit)
Secure Download
For macOS 10.14 or later
Secure Download
Next, position the Skimmer (Playhead) a couple of frames before the one the route line appears and starts stretching from, and click the Split icon from the editing toolbar above the Timeline itself. Repeat this process for the other side of the media, i.e., position the Skimmer a couple of frames after the route line reaches the destination location, and click the Split icon again. Then remove the separated segments from both the sides by selecting them and pressing Delete on the keyboard, leaving only the portion where the animation is visible.

Optionally, right-click the media that is left behind in the Timeline, and go to Speed and Duration from the context menu. On the Custom Speed box, drag the Speed slider to the left to decrease the playback speed resulting in the increased duration of the media. Alternatively, you can manually enter a value in the Speed box to get precise tenure. Click OK when you are done.

Step 5: Add Animations to Travel Map
Right-click the media in the Timeline, and go to Add Animation from the context menu. Make sure that the Skimmer is on the first frame, and add several keyframes as explained below:
- Click Add to add the first keyframe

- Move a couple of frames further, and click Add one more time. Now, while you are on this second keyframe, use the Scale slider to zoom in to the map so the source location remains within focus.

- Next, move the Playhead further and add another keyframe a couple of frames before the route line hits the edge of the window.
- After this, move the Playhead again and position it where the route line reaches its destination location. Add another keyframe here as well, and move the map in the Preview window so the focus is now on the destination.
- Move the Playhead a few frames further, add another keyframe, and use the Scale slider to zoom a bit more into the map to make the entire animation look realistic. Click OK to save the changes.
Step 6: Add Icons and Titles, and Export the Project
Drag the image of the traveling medium to the Timeline, and place it on the frame the route line starts from. Make sure to place the image on the track above the map, and stretch it to the end so it remains visible throughout the animation. Next, use the method explained above to add keyframes to move the medium along with the route line from the source to the destination. Optionally, add the image of the location marker at the destination point, go to Transition, and add your preferred transition effect, preferably Dissolve, to the marker track in the Timeline so it looks as if it has appeared as the medium arrived the destination.
For Win 7 or later (64-bit)
Secure Download
For macOS 10.14 or later
Secure Download
Get back to the first frame in the Timeline, go to Titles on the standard toolbar, and add a title preset somewhere near the source location. Resize the text, change the format as needed, and add your preferred caption to it such as the start time, name, etc. Reduce the duration of the track so the title appears for a few frames, preferably before the map animation starts. Click OK when done. Repeat this process for the destination point as well.
Once everything is complete, click the Play button in the Preview window to review your work. If the video looks acceptable, click EXPORT from the top-center of the interface, and use the method explained earlier to export the animated travel map in your preferred format.
![]()
Method 2 How to Make Interactive Animated Travel Map with Pictramap
If you don’t want to install a dedicated animation software on your computer due to limited hardware resources or some other reason, there is an online solution called Pictramap to create a travel map animation using a web browser. The web app offers a lucrative interface that could be easily understood and worked with to produce an animated map for free.
The process to create an animated travel map with Pictramap is given below:
Step 1: Create a Project
Launch your favorite web browser, go to https://www.pictramap.com/ , click Create yours now, it’s free, and sign up to Pictramap using your preferred method. When you are on the Dashboard, enter a name in the field available under the My Projects section, and click Create to create a new project (the animated map).

Step 2: Define the Locations and Method of Commute
On the map, right-click the location you want to start your journey from, enter the name of the location or any other significant title, and click Add. Click the location marker, click the Travel Mode icon, and select your preferred mode of traveling. Repeat this process to mark the destination location as well.

Step 3: Preview the Animation
Click the View Animation button from the upper-right corner of the page to see the animated travel map.

Downsides of Using Pictramap to Create Animated Travel Map Video
Although Pictramap allows you to create a travel map animation with ease and extremely quickly, at the time of this writing, it offers no way of downloading the animation to your PC, and therefore it couldn’t be used in your projects.
If you are using Wondershare Filmora, you can use its built-in screen recording feature to record the animation that Pictramap plays, and then save the captured footage as MP4 or any other format on your computer. This video can then be imported to your projects for further uses.
![]()
A cross-platform for making videos anywhere for all creators

Why your video editing isn’t good enough? How about some creative inspo?
- 100 Million+ Users
- 150+ Countries and Regions
- 4 Million+ Social Media Followers
- 5 Million+ Stock Media for Use
* Secure Download

Method 3 How To Make Animated Travel Map Using Multidev
Multi.dev is still a new web-based application to build awesome animated maps, but it’s good! The application helps you create presentations about all your recent and previous trips. And the interface is also hassle-free.
So, follow this step-by-step guide to making animated maps with Multi.dev.
Step 1: Open Multi.dev
Visit Multi.dev from your internet browser.

Once the tool gets open, you will see a demo video. This example clip will have animated maps of different locations. So it is up to you whether to use the same example and edit the places you have been to or are planning to visit. Or, simply create a new animated map from scratch.
Step 2: Choose Your First Location
Take your mouse cursor on the left side of the application and type the first location in the search bar. As soon as you do it, you will see that the “travel arrow” will automatically begin from there. Likewise, type and select the next location through the search bar.
Once you type the location, you will see 8 travel modes, including airplane, bus, and train. You can select the same mode for all sites or a different mode for another place. Totally up to you!

Step 3: Select Map Themes
All your chosen places will be highlighted in the software’s minimalistic map.

Step 4: Download Map on Your Computer
If you’re happy with the animated map, click the “Create Video” button to save the animated map on your computer in a few minutes.


Contrarily, you can also share the animation by choosing the “Share Animation” option.
Conclusion
An animated travel map plays an important role to add a realistic touring effect to your motion picture projects. While you can use a web app like Pictramap to create such an animation online easily and for free, the limitations it comes along with might keep you from choosing this method.
Instead, you may want to get more inclined toward a dedicated post-production software like Wondershare Filmora that gives you full control over the process, and the freedom to choose your preferred format to export the animation to for independent usage.
For Win 7 or later (64-bit)
Secure Download
For macOS 10.14 or later
Secure Download
Benjamin Arango
Benjamin Arango is a writer and a lover of all things video.
Follow @Benjamin Arango
Benjamin Arango
Mar 27, 2024• Proven solutions
Animated travel map videos make it easy for the viewers to follow the routes from the source to destination locations right on the single screen. While the static maps would only allow the audience to see the markers from where the journey would start and is expected to end, the animated ones show the real-time movements and therefore look more interactive when viewed.
That said, here you will learn how to create an attractive and engaging animated travel map video using one of the easiest post-production applications, Wondershare Filmora, which is widely appreciated by amateurs and professionals throughout the globe. In another section, you will also learn about an alternative program that might be of some help in case you are more into online designing.
- Method 1: Make Animated Travel Map Videos with Location Video Maker - [Video Tutorial]
- Method 2: Make Interactive Animated Travel Map with Pictramap
- Method 3: Create Animated Travel Map Using Multidev
Method 1 Make Animated Travel Map Videos with Location Video Maker
The entire process of creating an animated travel map video in Wondershare’s Filmora is categorized into two parts, wherein the first part you will collect all the ingredients that are needed to get started, and in the second part you will actually make an animated map using the tools and features present in Filmora.
Watch a video tutorial to see how to make an animated map for a video:
For Win 7 or later (64-bit)
Secure Download
For macOS 10.14 or later
Secure Download
Part 1: Prepare the Travel Map Materials
Following are the ingredients and the methods to collect them for animated travel map preparation:
Step 1: Get the Map
The first thing that you would need to prepare an animated map is an image of a realistic map. Thanks to Google and Microsoft, these things are now pretty easy to arrange. The process is given below:
- Launch your preferred web browser
- Type google.com in the address bar or the search box and hit Enter
- Scroll to zoom out so you can see the entire world map on one screen
- Type Snipping Tool in the Cortana search box present on the left side of the Taskbar
- Launch Snipping Tool, and use it to capture the screenshot of the map
Note: Snipping Tool is a built-in app in Windows 10 and is available for free. If you are using any other operating system, or have a different program to capture the screenshots, feel free to use it according to your convenience.
- Save the screenshot you captured as a JPG file on your PC
Step 2: Mark Out the Map Path
The next step in the process of preparing an animated travel map is to mark your route on it. To do so, you can use any of your preferred photo editing tools. However, to keep this illustration simple, Microsoft Paint is used here, and the method is given below:
- Right-click the screenshot you just captured
- Go to Open with on the context menu, and then click Paint from the submenu that appears
- Pick your preferred color from the pallet of the Paint interface. It is advisable to use an eye-catchy shade such as Red
- Use the Sphere shape tool to draw a circle over the source and destination locations on the map
- Use the Line tool to draw a line from the source point to the destination. Try giving the line a few turns to make it look realistic
- Go to File > Save As, and save the marked image with a different name
Note: Once this is done, you should have two image files of the map, i.e., one without the marks and one with it
Step 3: Download Some Travel Icons
Another important ingredient in an effective travel map animation is touring icons such as location marker image, a traveling medium symbol like a helicopter, airplane, car/bike (for short distances), etc. A couple of websites that offer royalty-free stock photos at absolutely no cost are listed below:
Note: Although the websites given above allow you to download and use their stock images and icons for free, you may need to give credits to the designers/creators of the symbols while using their objects. Therefore, you are suggested to check the Terms & Conditions and norms of usage of the elements before downloading and adding them to your projects.
Part 2: Make Animated Travel Map Videos with Filmora
After you have gathered all the necessary ingredients that are required to create a travel map animation, it is now time to get to work. The following instructions would guide you through the step-by-step process of preparing a decent and realistic animated travel map in Wondershare Filmora :
For Win 7 or later (64-bit)
Secure Download
For macOS 10.14 or later
Secure Download
Step 1: Import Ingredients to Filmora and Add Them to the Timeline
Launch the video editor on your computer, click anywhere inside the Media window at the upper-left area, and import all the images and icons that you collected earlier to program. Next, drag both the images of the map, i.e., with and without the marks to the Timeline, and ensure that they are of the same duration and are placed on the same track.
Note: Be sure to put the map without the marks first, and then the one with the marks. Also note that the images have the playback duration of 5 seconds in the Timeline by default, and this tenure can be reduced or increased by dragging the side handle of the media to the left or right respectively.
Step 2: Add Transition for Illusion of Route Appearance
Go to Transition from the standard toolbar at the top, locate the Erase Slide transition effect from the available presets, and place it in between the two image files that you earlier added to the Timeline. Next, click and drag either of the side handles of the transition to the end of the media clip. Notice how the other side of the effect is expanded in equal proportion.
Step 3: Preview and Export
Press the Spacebar on the keyboard to preview the video and see if the route appears as if it is being drawn on the map. Once the animation looks acceptable, click EXPORT from the top-center, go to the Local tab on the Export window, select MP4 from the formats list in the left, and click EXPORT from the bottom-right corner to export the current animation to MP4.
Step 4: Customize the Travel Map Media
Either start a new project and import the video of the map you exported in the previous step to the app and then to the Timeline, or remove the existing media from the Timeline in the same project, and add the exported video to it for convenience.
For Win 7 or later (64-bit)
Secure Download
For macOS 10.14 or later
Secure Download
Next, position the Skimmer (Playhead) a couple of frames before the one the route line appears and starts stretching from, and click the Split icon from the editing toolbar above the Timeline itself. Repeat this process for the other side of the media, i.e., position the Skimmer a couple of frames after the route line reaches the destination location, and click the Split icon again. Then remove the separated segments from both the sides by selecting them and pressing Delete on the keyboard, leaving only the portion where the animation is visible.
Optionally, right-click the media that is left behind in the Timeline, and go to Speed and Duration from the context menu. On the Custom Speed box, drag the Speed slider to the left to decrease the playback speed resulting in the increased duration of the media. Alternatively, you can manually enter a value in the Speed box to get precise tenure. Click OK when you are done.
Step 5: Add Animations to Travel Map
Right-click the media in the Timeline, and go to Add Animation from the context menu. Make sure that the Skimmer is on the first frame, and add several keyframes as explained below:
- Click Add to add the first keyframe
- Move a couple of frames further, and click Add one more time. Now, while you are on this second keyframe, use the Scale slider to zoom in to the map so the source location remains within focus.
- Next, move the Playhead further and add another keyframe a couple of frames before the route line hits the edge of the window.
- After this, move the Playhead again and position it where the route line reaches its destination location. Add another keyframe here as well, and move the map in the Preview window so the focus is now on the destination.
- Move the Playhead a few frames further, add another keyframe, and use the Scale slider to zoom a bit more into the map to make the entire animation look realistic. Click OK to save the changes.
Step 6: Add Icons and Titles, and Export the Project
Drag the image of the traveling medium to the Timeline, and place it on the frame the route line starts from. Make sure to place the image on the track above the map, and stretch it to the end so it remains visible throughout the animation. Next, use the method explained above to add keyframes to move the medium along with the route line from the source to the destination. Optionally, add the image of the location marker at the destination point, go to Transition, and add your preferred transition effect, preferably Dissolve, to the marker track in the Timeline so it looks as if it has appeared as the medium arrived the destination.
For Win 7 or later (64-bit)
Secure Download
For macOS 10.14 or later
Secure Download
Get back to the first frame in the Timeline, go to Titles on the standard toolbar, and add a title preset somewhere near the source location. Resize the text, change the format as needed, and add your preferred caption to it such as the start time, name, etc. Reduce the duration of the track so the title appears for a few frames, preferably before the map animation starts. Click OK when done. Repeat this process for the destination point as well.
Once everything is complete, click the Play button in the Preview window to review your work. If the video looks acceptable, click EXPORT from the top-center of the interface, and use the method explained earlier to export the animated travel map in your preferred format.
![]()
Method 2 How to Make Interactive Animated Travel Map with Pictramap
If you don’t want to install a dedicated animation software on your computer due to limited hardware resources or some other reason, there is an online solution called Pictramap to create a travel map animation using a web browser. The web app offers a lucrative interface that could be easily understood and worked with to produce an animated map for free.
The process to create an animated travel map with Pictramap is given below:
Step 1: Create a Project
Launch your favorite web browser, go to https://www.pictramap.com/ , click Create yours now, it’s free, and sign up to Pictramap using your preferred method. When you are on the Dashboard, enter a name in the field available under the My Projects section, and click Create to create a new project (the animated map).
Step 2: Define the Locations and Method of Commute
On the map, right-click the location you want to start your journey from, enter the name of the location or any other significant title, and click Add. Click the location marker, click the Travel Mode icon, and select your preferred mode of traveling. Repeat this process to mark the destination location as well.
Step 3: Preview the Animation
Click the View Animation button from the upper-right corner of the page to see the animated travel map.
Downsides of Using Pictramap to Create Animated Travel Map Video
Although Pictramap allows you to create a travel map animation with ease and extremely quickly, at the time of this writing, it offers no way of downloading the animation to your PC, and therefore it couldn’t be used in your projects.
If you are using Wondershare Filmora, you can use its built-in screen recording feature to record the animation that Pictramap plays, and then save the captured footage as MP4 or any other format on your computer. This video can then be imported to your projects for further uses.
![]()
A cross-platform for making videos anywhere for all creators
Why your video editing isn’t good enough? How about some creative inspo?
- 100 Million+ Users
- 150+ Countries and Regions
- 4 Million+ Social Media Followers
- 5 Million+ Stock Media for Use
* Secure Download
Method 3 How To Make Animated Travel Map Using Multidev
Multi.dev is still a new web-based application to build awesome animated maps, but it’s good! The application helps you create presentations about all your recent and previous trips. And the interface is also hassle-free.
So, follow this step-by-step guide to making animated maps with Multi.dev.
Step 1: Open Multi.dev
Visit Multi.dev from your internet browser.
Once the tool gets open, you will see a demo video. This example clip will have animated maps of different locations. So it is up to you whether to use the same example and edit the places you have been to or are planning to visit. Or, simply create a new animated map from scratch.
Step 2: Choose Your First Location
Take your mouse cursor on the left side of the application and type the first location in the search bar. As soon as you do it, you will see that the “travel arrow” will automatically begin from there. Likewise, type and select the next location through the search bar.
Once you type the location, you will see 8 travel modes, including airplane, bus, and train. You can select the same mode for all sites or a different mode for another place. Totally up to you!
Step 3: Select Map Themes
All your chosen places will be highlighted in the software’s minimalistic map.
Step 4: Download Map on Your Computer
If you’re happy with the animated map, click the “Create Video” button to save the animated map on your computer in a few minutes.
Contrarily, you can also share the animation by choosing the “Share Animation” option.
Conclusion
An animated travel map plays an important role to add a realistic touring effect to your motion picture projects. While you can use a web app like Pictramap to create such an animation online easily and for free, the limitations it comes along with might keep you from choosing this method.
Instead, you may want to get more inclined toward a dedicated post-production software like Wondershare Filmora that gives you full control over the process, and the freedom to choose your preferred format to export the animation to for independent usage.
For Win 7 or later (64-bit)
Secure Download
For macOS 10.14 or later
Secure Download
Benjamin Arango
Benjamin Arango is a writer and a lover of all things video.
Follow @Benjamin Arango
How to Draw Cartoons Step by Step with This Guide
Learn How to Draw Cartoons Step by Step with This Guide
An easy yet powerful editor
Numerous effects to choose from
Detailed tutorials provided by the official channel
Cartoon character drawing is usually a vital aspect of any child’s life who loves to watch cartoon series and can sometimes be someone’s favorite thing in the world.

A cartoon character is a series of single drawings that tell a joke or story. Although cartoons are mostly drawn, they can sometimes be animated. Kids like comics which makes them an essential part of every child’s life. Cartoons are not only used for entertainment purposes but also help kids and young children learn more about the world around them. For example, children learn about love, loss, friendship, and other essential life issues about life by watching cartoons.
However, cartoons are not only limited to children but are also for adults. In addition, cartoons created for an adult audience go deeper into real-life problems and explore darker themes. They aim to create content that matches the maturity and age of the audience. Watching cartoons is fun. But what if you could make them? This article will provide you with a guide on producing cool cartoon drawings that will match different audiences, both older and younger.
In this article
01 [How to Draw Cartoon Characters Step by Step](#Part 1)
02 [Cartoon Easy Drawing with Colour Step by Step](#Part 2)
03 [Cartoon Easy Sketch Drawing Step by Step](#Part 3)
Part 1 How to Draw Cartoon Characters Step by Step
Note that in the world we live in, Professionals were once students, and experts were once beginners. This means that everyone has a starting point, and they all have one thing in common: “learning.” Whether you are aspiring to become an English teacher, an astrophysicist, an artist, or a physician’s assistant, you must first learn the ins and outs of the field.
Those aspiring to become animators and cartoonists must first learn the basics of cartoon character drawing and practice some easy, simple cartoon drawing before cranking out the Mickey-Mouses of the entertainment world. However, we will cover the basic principles of easy cartoon drawing for beginners step by step to get your learning process started. Here is how to draw a Micky-Mouse perfectly:

Step 1:
● Use a pencil to begin your drawing.
● First, create a circle for the head and a curved line on the left side.
● Draw a horizontal line at the center.
Step 2: Next, draw an oval shape for the mouth and a “U” shape added to the bottom, and then you can add another parallel “U” shape and connect it with the oval.
Step 3: Draw the eye using two upside-down “U” shapes, and then you add his large ear on the right and a small one at the top of the head.
Step 4: You can draw a bean shape and another smaller one inside for the body.
Step 5: Add oval shapes for his feet to draw his legs and draw his tail on the right side just above the leg.
Step 6: Draw two elongated shapes for his arms, a small oval for the hand and a basic shape of his fingers.
Step 7: Draw the cheese and add a few small circles inside.
Step 8: Also include the facial features by drawing the inside of the nose, eyebrows, eyes, and whiskers.
Step 9:
● Draw his fingers and hair between his ears.
● Trace your pencil lines with a sharpie.
● Erase the pencil afterward.
Step 10: Finally, you can color your drawing and upload it to your website.
Part 1 Cartoon Easy Drawing with Colour Step by Step
Applying color to a drawing is very important to beautify your drawing and make it look stunning and attractive. Here is how to cartoon easy drawing a flower using a colored pencil:
Step 1: Using a color photocopy of a reference photo, crop and rearrange elements of the poppy composition. With light pressure and HB pencil, draw a composition onto a four-ply, 100% cotton museum board frequently found among framing supplies.
Step 2: With very light pressure, apply the first colored pencil layer and add more emphasis where the values will be deeper. While doing this, note that the pencil application will still appear granular, and the texture of the museum board is still visible.

Step 3: Create the veins in the leaves and the fuzzy texture of the stem and pod, and also, as the individual strands of stamens, put down a sheet of translucent drafting paper. Use heavy tracing paper with a very sharp 7H graphite pencil and apply heavy pressure in drawing the lines for stamens, fuzz, and veins on the drafting paper and impress them into the surface of the museum board. Then, with a contrasting layer of darker color, these features dramatically show up on the stem, leaves, center of the flower, pod, and center of the flower. Then add deeper values of rose in the shadowed areas of the flower petals.

Step 4: To make them appear less granular and intensify the colors, start by blending with a clear, alcohol-based blending marker. The solvent, wax, or vegetable oil then dissolves the binder in the colored pencil layer and fluidly releases the pigment. This will also help to “fill in” the dots of the tooth of the paper and make the color appear denser.

Step 5: Continue to intensify the color by using a non-pigmented blending pencil over a previous layer and repeat a layer or two of color, much like a “color sandwich.” Repeat this “ burnishing “ process for subsequent layerings of color, like a double-decker or triple-decker sandwich.
Also, make sure the rich, dark negative space is carried out the same way, layering colors and burnishing, then repeating the colors for deep, rich saturation.
Render the deep, smeary flecks of pollen by heavily applying “freckles” of burgundy, then slightly smudge them with the tip of a blending marker. Lastly, scratch a few of the tiny wisps of fuzz on the pod and stem carefully into the board via a sharp X-acto knife for a striking contrast of light against the deep background.

Part 2 Cartoon Easy Sketch Drawing Step by Step
This is the initial stage of the drawing process. It requires you to create an outline of the concept you want to draw before adding color. However, it is also referred to as a technique in shading. For example, if you’re going to sketch a cherry fruit, there are a few things to note here.
Try not to look at the cherry as a whole but look at its shapes and name them. This way, you are looking at the parts to the whole and not the entire piece.

Step 1: Draw two overlapping circles and draw two curved lines from each of the circles.
Step 2: Make a small rectangle at the top to join the two stems and draw a second set of curved lines.
Step 3: Draw thick lines inside the rectangle for the bumps and darken the lines and use your finger to smudge them a bit for the shaded effect.
Step 4: Draw a curved line from the stem on the right to the circle’s edge to create the bump.
Step 5: Holding your pencil at an angle, make light strokes going across the front of both cherries. Take note of the places where there is no light. This is where the light source is hitting the cherry the most.
Step 6: To darken, a shade over those places again, keep layering the shading technique until you get the effect you see on the cherries.
Step 7: Use the same technique to shade under the cherries, but use your finger to smudge it to smoother the shadow.
●Bonus:
You can add color, effect, or animate to your cartoon character drawing by using Wondershare Filmora Video Editor , the best editor on the internet. Filmora is a free software program with the same creating abilities and imaging editing similar to Adobe Illustrator. It is open software that runs on various programs, such as Windows, Mac, and Linux. Please get to know more about this exclusive tool from Wondershare on their official website.
For Win 7 or later (64-bit)
For macOS 10.12 or later
● Ending Thoughts →
● A step-by-step guide on drawing easy cartoons for painting and how to sketch your drawing correctly.
● Cartoon character drawings in easy and quick steps.
● Easy cartoon drawing for beginners.
● Lastly, to add color to your drawing, use Filmora software.
● So, use the tips and tricks to make your presentation’s best cartoon characters come alive and be a pro with Filmora.
Cartoon character drawing is usually a vital aspect of any child’s life who loves to watch cartoon series and can sometimes be someone’s favorite thing in the world.
A cartoon character is a series of single drawings that tell a joke or story. Although cartoons are mostly drawn, they can sometimes be animated. Kids like comics which makes them an essential part of every child’s life. Cartoons are not only used for entertainment purposes but also help kids and young children learn more about the world around them. For example, children learn about love, loss, friendship, and other essential life issues about life by watching cartoons.
However, cartoons are not only limited to children but are also for adults. In addition, cartoons created for an adult audience go deeper into real-life problems and explore darker themes. They aim to create content that matches the maturity and age of the audience. Watching cartoons is fun. But what if you could make them? This article will provide you with a guide on producing cool cartoon drawings that will match different audiences, both older and younger.
In this article
01 [How to Draw Cartoon Characters Step by Step](#Part 1)
02 [Cartoon Easy Drawing with Colour Step by Step](#Part 2)
03 [Cartoon Easy Sketch Drawing Step by Step](#Part 3)
Part 1 How to Draw Cartoon Characters Step by Step
Note that in the world we live in, Professionals were once students, and experts were once beginners. This means that everyone has a starting point, and they all have one thing in common: “learning.” Whether you are aspiring to become an English teacher, an astrophysicist, an artist, or a physician’s assistant, you must first learn the ins and outs of the field.
Those aspiring to become animators and cartoonists must first learn the basics of cartoon character drawing and practice some easy, simple cartoon drawing before cranking out the Mickey-Mouses of the entertainment world. However, we will cover the basic principles of easy cartoon drawing for beginners step by step to get your learning process started. Here is how to draw a Micky-Mouse perfectly:
Step 1:
● Use a pencil to begin your drawing.
● First, create a circle for the head and a curved line on the left side.
● Draw a horizontal line at the center.
Step 2: Next, draw an oval shape for the mouth and a “U” shape added to the bottom, and then you can add another parallel “U” shape and connect it with the oval.
Step 3: Draw the eye using two upside-down “U” shapes, and then you add his large ear on the right and a small one at the top of the head.
Step 4: You can draw a bean shape and another smaller one inside for the body.
Step 5: Add oval shapes for his feet to draw his legs and draw his tail on the right side just above the leg.
Step 6: Draw two elongated shapes for his arms, a small oval for the hand and a basic shape of his fingers.
Step 7: Draw the cheese and add a few small circles inside.
Step 8: Also include the facial features by drawing the inside of the nose, eyebrows, eyes, and whiskers.
Step 9:
● Draw his fingers and hair between his ears.
● Trace your pencil lines with a sharpie.
● Erase the pencil afterward.
Step 10: Finally, you can color your drawing and upload it to your website.
Part 1 Cartoon Easy Drawing with Colour Step by Step
Applying color to a drawing is very important to beautify your drawing and make it look stunning and attractive. Here is how to cartoon easy drawing a flower using a colored pencil:
Step 1: Using a color photocopy of a reference photo, crop and rearrange elements of the poppy composition. With light pressure and HB pencil, draw a composition onto a four-ply, 100% cotton museum board frequently found among framing supplies.
Step 2: With very light pressure, apply the first colored pencil layer and add more emphasis where the values will be deeper. While doing this, note that the pencil application will still appear granular, and the texture of the museum board is still visible.
Step 3: Create the veins in the leaves and the fuzzy texture of the stem and pod, and also, as the individual strands of stamens, put down a sheet of translucent drafting paper. Use heavy tracing paper with a very sharp 7H graphite pencil and apply heavy pressure in drawing the lines for stamens, fuzz, and veins on the drafting paper and impress them into the surface of the museum board. Then, with a contrasting layer of darker color, these features dramatically show up on the stem, leaves, center of the flower, pod, and center of the flower. Then add deeper values of rose in the shadowed areas of the flower petals.
Step 4: To make them appear less granular and intensify the colors, start by blending with a clear, alcohol-based blending marker. The solvent, wax, or vegetable oil then dissolves the binder in the colored pencil layer and fluidly releases the pigment. This will also help to “fill in” the dots of the tooth of the paper and make the color appear denser.
Step 5: Continue to intensify the color by using a non-pigmented blending pencil over a previous layer and repeat a layer or two of color, much like a “color sandwich.” Repeat this “ burnishing “ process for subsequent layerings of color, like a double-decker or triple-decker sandwich.
Also, make sure the rich, dark negative space is carried out the same way, layering colors and burnishing, then repeating the colors for deep, rich saturation.
Render the deep, smeary flecks of pollen by heavily applying “freckles” of burgundy, then slightly smudge them with the tip of a blending marker. Lastly, scratch a few of the tiny wisps of fuzz on the pod and stem carefully into the board via a sharp X-acto knife for a striking contrast of light against the deep background.
Part 2 Cartoon Easy Sketch Drawing Step by Step
This is the initial stage of the drawing process. It requires you to create an outline of the concept you want to draw before adding color. However, it is also referred to as a technique in shading. For example, if you’re going to sketch a cherry fruit, there are a few things to note here.
Try not to look at the cherry as a whole but look at its shapes and name them. This way, you are looking at the parts to the whole and not the entire piece.
Step 1: Draw two overlapping circles and draw two curved lines from each of the circles.
Step 2: Make a small rectangle at the top to join the two stems and draw a second set of curved lines.
Step 3: Draw thick lines inside the rectangle for the bumps and darken the lines and use your finger to smudge them a bit for the shaded effect.
Step 4: Draw a curved line from the stem on the right to the circle’s edge to create the bump.
Step 5: Holding your pencil at an angle, make light strokes going across the front of both cherries. Take note of the places where there is no light. This is where the light source is hitting the cherry the most.
Step 6: To darken, a shade over those places again, keep layering the shading technique until you get the effect you see on the cherries.
Step 7: Use the same technique to shade under the cherries, but use your finger to smudge it to smoother the shadow.
●Bonus:
You can add color, effect, or animate to your cartoon character drawing by using Wondershare Filmora Video Editor , the best editor on the internet. Filmora is a free software program with the same creating abilities and imaging editing similar to Adobe Illustrator. It is open software that runs on various programs, such as Windows, Mac, and Linux. Please get to know more about this exclusive tool from Wondershare on their official website.
For Win 7 or later (64-bit)
For macOS 10.12 or later
● Ending Thoughts →
● A step-by-step guide on drawing easy cartoons for painting and how to sketch your drawing correctly.
● Cartoon character drawings in easy and quick steps.
● Easy cartoon drawing for beginners.
● Lastly, to add color to your drawing, use Filmora software.
● So, use the tips and tricks to make your presentation’s best cartoon characters come alive and be a pro with Filmora.
Also read:
- New 2024 Approved 10 Amazing Cartoon Music Examples You Need to Bookmark
- In 2024, OBS Animated Alternatives
- New In 2024, Useful Tips for Canva Animated Elements
- In 2024, Amazing Techniques of Motion Graphics in Premiere Pro
- New Best 10 Popular Cartoons You Forgot Existed
- In 2024, 12 Websites with Triggered Animate on Scroll Examples
- Updated 2024 Approved The Only Guide Youll Ever Need to Learn That Make 2D Rigging Clear to You
- New 2D Character Animation Everything You Should Know About It
- In 2024, 15 Best Stop Motion Animation Kits to Fuel Creativity
- Updated Top 12 Illusion Gifs Top Picks for 2024
- Updated 2024 Approved Adobe Animate Riggings PROPER Tutorial for You
- New In 2024, Top 10 Free Online Animated Logo Makers Everyone Should Know
- 10 Cartoon Characters That Should Top Your List for 2024
- New 10 Best Photoshop Cartoon Effects For Creatives for 2024
- Updated In 2024, The 15 Most Efficient Photo to Cartoon Apps for Android
- In 2024, 10 Great MP4 to GIF Converters to Get Perfect-Made GIF
- New 2024 Approved Tips That Show Anybody How to Get Awesome Background for Slideshow in PowerPoint
- Updated 10 Amazing Whiteboard Animation Video Examples You Need to Bookmark
- Top 10 Animated DP for WhatsApp for 2024
- Tecno Pop 8 Stuck on Screen – Finding Solutions For Stuck on Boot | Dr.fone
- How to Cast Vivo X Fold 2 to Computer for iPhone and Android? | Dr.fone
- How to Reset a Locked Xiaomi Redmi A2 Phone
- Which is the Best Fake GPS Joystick App On Itel P55? | Dr.fone
- In 2024, Fake the Location to Get Around the MLB Blackouts on Motorola Moto G24 | Dr.fone
- Best Honor X50 GT Pattern Lock Removal Tools Remove Android Pattern Lock Without Losing Data
- Best Android Data Recovery - Undelete Lost Music from Oppo
- In 2024, 4 Most-Known Ways to Find Someone on Tinder For Realme Note 50 by Name | Dr.fone
- Undelete lost call logs from Vivo T2 Pro 5G
- How to Factory Reset Nokia G42 5G If I Forgot Security Code or Password? | Dr.fone
- Hassle-Free Ways to Remove FRP Lock from Itel P55+ Phones with/without a PC
- How to Factory Reset iPad or iPhone 13 mini without iCloud Password or Apple ID?
- In 2024, Two Ways to Track My Boyfriends Apple iPhone XR without Him Knowing | Dr.fone
- In 2024, How to Unlock Nokia C12 Pro Phone Pattern Lock without Factory Reset
- Title: In 2024, Apps to Animate Still Pictures
- Author: Elon
- Created at : 2024-06-23 02:10:04
- Updated at : 2024-06-24 02:10:04
- Link: https://animation-videos.techidaily.com/in-2024-apps-to-animate-still-pictures/
- License: This work is licensed under CC BY-NC-SA 4.0.
