
:max_bytes(150000):strip_icc():format(webp)/ScreenShot2018-12-08at3.04.00PM-5c0c23f6c9e77c00018eae4e.png)
In 2024, Before You Learn Facebook Slideshow 5 Things You Should Know
Before You Learn Facebook Slideshow: 5 Things You Should Know
Before You Learn Facebook Slideshow Things You Should Know [How-TOS]
An easy yet powerful editor
Numerous effects to choose from
Detailed tutorials provided by the official channel
If you are looking for interesting solutions to create the most amazing slideshow on Facebook, rest assured, you are at the right place to get every help!
In this article
01 [Where Did the Facebook Slideshow Tool Go?](#Part 1)
02 [How to Create a Slideshow on Facebook?](#Part 2)
03 [Top 5 Facebook Slideshow Alternatives](#Part 3)
Part 1 Where Did the Facebook Slideshow Tool Go?
While almost everyone around you must be fascinated about the stunning and appealing slideshows that the Facebook community used to offer its users with, it is evidently sad to realize that the utility has become a story of the past. The creators of the tool have by now, took multiple rounds on removing, retrieving and again removing the utility from the official Facebook website as well as the smartphone application.
It is however relaxing to know that the Facebook developer team has worked efficiently to produce alternatives to the application’s slideshow tool after the latter’s permanent disappearance from the user account pages and app profiles. You can now work with the Facebook Ads Manager or Facebook Creator Studio to sort out the concern of creating slideshow on Facebook.
Part 2 How to Create a Slideshow on Facebook?
Facebook slideshows are incredibly awesome trends of making a concise, expressive and to the point delivery of diverse content varieties. Piping up your information through and extensive assortment of sound, text and motion, these short snippets are no less than a seamless video streaming of the same information.
If you are about to launch a new product for your business enterprise, consider working with the utility to create an elusive Facebook slideshow ad for a quick demonstration of your brand among different social media communities, turning the fun of slideshow creation into a smart and responsive product promotion strategy, without having to bother your wallet for the same.
If you are concerned about the quality of the final output, it is not a cause of worry, since the Facebook slideshow creator tool promises you of an appreciable slideshow result, that takes a quick loading time, is comparable to a high resolution video and works well with all your favourite devices.
Having talked enough on the usage credibility, let us now proceed to adhere to the concern of creating a slideshow on Facebook with a diversity of media files in the following section:
01Facebook Slideshows from Videos
Step 1: Launch the Tool
Start with opening the Facebook app in your device to launch the ‘Facebook Ads Manager’ utility and tap ‘Create’ in the latter’s welcome interface.

Step 2: Select Your Video
Browse through your device’s gallery to choose a desired video for slideshow creation. When you have made your choice, set a 16:9 aspect ratio for the same to avoid square cropping.

Step 3: Upload Your Video
Proceed with uploading your video to the Facebook tool by clicking on the ‘Add Video’ button and watch it getting split into still images frames, from where you can view a seamless slideshow display of the same.

Step 4: Select Multiple Frames
you can now select a series of image frames and arrange them in the correct sequence of appearance by clicking on each one of them to be included within the creator timeline.
Step 5: Add Captions Your Stills
Tap on the small ‘Pencil’ icon within the images to customize them with suitable captions. You can further add style to these image names by making appropriate selections of font, position color of every frame caption. Once you have finished naming all the frames, click on ‘Save’ to apply your changes.
Step 6: Preview Your Creation
When you are satisfied with your work, consider watching a preview of the same to be assured of the perfect placement of everything. To do this, navigate to the ‘Preview Pane’ at the top right corner of the program interface, and tapping the ‘Preview’ button.
02Facebook Slideshows from Images
Step 1: Launch the Tool
To begin with, open the Facebook app in any of your preferred devices and proceed to launch the ‘Facebook Ads Manager’ tool, followed by clicking on the ‘Create Slideshow’ button at the bottom of the tool’s welcome screen.

Step 2: Upload Your Images
As you complete Step 1, a ‘Video Creation Kit’ will appear, where you will need to click within the ‘Create Slideshow’ checkbox, followed by tapping on the ‘Continue’ button at the bottom right corner of the window.

Step 3: Upload Your Images
Clicking on the ‘Continue’ button will take you to the ‘Settings Box’ where you need to tap on the ‘Add Photos’ option. An image selection box will now pop up, allowing you to select and upload a maximum of 10 images from your Facebook account, stock and page galleries or your device collections. Prefer keeping all the photos within the same aspect ratio to escape the extra task of cropping the images.
When you have finished making your selections, navigate to the bottom right corner of the window and hit the ‘Confirm’ button. This will make your selections shows up all together in the ‘Settings Box’, in the sequential order of their appearance in the slideshow. If you want to introduce some changes, delete and re-upload the images.

Step 4: Customize Your Images with Captions
To add suitable captions to the slideshow images, tap the ‘Pencil’ icon within them. You are also allowed to customize the stills with transitions, effects, etc., and make adjustments to the screen time of each image frame.

Part 3 Top 5 Facebook Slideshow Alternatives
Having heard about the disappointment from the exit of the Facebook slideshow creator tool, it becomes naturally important to seek through the affordable alternatives of the same to set straight the issue of how to do a slideshow on Facebook. Working towards the solutions, let us learn about the top 5 most preferred Facebook slideshow alternatives in the following section:
03PowerDirector
One of the most suitable candidates of Facebook slideshow alternatives, PowerDirector easily lands among the highly preferred tools for creating stunning slideshows. Compatible with the MacOs and Windows operating systems, the software lets you create high end, top quality slideshow presentations with a classic and professional outlook.
Talking of the creator program’s most appealing features, this one is an upgraded slideshow creator suite that is capable enough to address your most diverse design requirements, like those of high resolution video effects, Hollywood inspired movies and personal content sharing. The software package is loaded with tons of elusive video effects, themed templates and transition effects to facilitate a compelling creation.
Working with PowerDirector’s exclusive slideshow program, you get the liberty to escape the notch of storyboard and timeline editing and start the creation process in the launch window of the program itself. The extremely user cohesive interface of the software guides you through each creation step via streamlined plug-ins, making the design process quick and super easy even for newbies.

04SmartSHOW 3D
When thinking of how to make a slideshow on facebook, this one is another top rated Facebook slideshow alternatives, that comes with an extensive toolkit to create amazing presentations from video clips and images, while complementing them with a plethora of effects and transitions. Some of the key features of the program include multiple slide layering, animating selected layers and fine tune the transitions with keyframe adjustments.
You can additionally uplift the slides with image masks, shapes, 3D animated texts and other forms of graphic arts. An additively appealing feature of the slideshow creator program is the ability to mix descriptive images with your favorite music to develop stunning masterpieces of entertaining slideshows, which you can conveniently share and enjoy with family and friends on a diversity of social media platforms.
Using the tool, you can work with applying motion graphic effects to still photos without having to be an over the top tech savvy user. The editor library of the tool is loaded with some of the most awesome transition effects, like, wipes, 3D motions, gradients and fade-ins, along with the facility of adding titles, voice comments and captions to the slides of your presentation. The tool is however, exclusively a Windows compatible utility.

05PhotoStage Slideshow Software
Next in the list of alternatives to the Facebook slideshow maker tool is the aforesaid software program, that allows you to create professional quality slideshows with as many videos and images as you can possibly think of and supplement them with a variety of texts, music, voiceovers and effects. You can further work on customizing the slideshow images with making suitable adjustments in color, brightness and saturation parameters.
The software comes with a Quick Create utility, which you can use to instantly create high resolution slideshows and spark them up with zooms, pans and fades, while getting a preview of the same in real-time. You can even proceed to burn your creation into a disk, make an online upload, or simply save it to your device.
Talking of the cost constraints of this amazing slideshow creator tool, you get to work with the software for a commercial use, free of cost for a definite time period and with a restricted number of features. However, you can always consider on buying the paid version of the program to avail an access to the latter’s entire range of features and utilities. The tool works well with all Windows and Mac supported devices.

06Kizoa
Moving ahead in the list you have the Kizoa slideshow maker for Facebook, which is a dependable alternative to the conventional Facebook slideshow creator. Choosing this tool to design your slideshow presentation, you are entitled to the amazing feature of displaying your presentation on almost any screen, including smartphones, television, computers and tablets with getting to choose from 7 types of aspect ratios. The tool is designed to have a Windows and MacOs compatibility.
The application further lets you add the most specific parts of your images within the presentation slides with its smart cropping tool, while keeping an account of the file formats and screen space requirements of the images with utmost convenience. You are also allowed to choose from a storehouse of preset templates to add your desired photos and video clips in the slideshow and entice them with GIFs, effects and texts.
When you are done with the creation process, just attempt to download and save the slideshow in any preferred file format, such as, AVI, GIF, MP4, MOV, MPEG2, etc., or even burn it to a DVD. You are now free to share your slideshow on various online media sharing platforms. Using the free version of Kizoa, you are permitted to create slideshows with a duration of 60 seconds, which can be upgraded to a limitless length with a paid subscription.

07SlideLab
If you are a newbie to the field of creating slideshows, and wondering about how to create a slideshow on Facebook 2021, this one is affordably the most perfect tool you can rely on. Packed with an extensive range of effects, music, transitions and filters, SlideLab is the smartest software choice to create slideshow presentations for family entertainment and personal use.
The tool consists of an in built sharing utility that allows you to design and share slideshows on social media platforms, like YouTube, Facebook and Instagram with a single click. Working on your slideshow within the program, you can escape the cringe of cropping the images, as they are automatically adjusted to the square fit alignment of the app’s working window. You can quickly rearrange the placement of the images in the slideshow as per your preferences.
As far as the sharing credibility of the presentation is concerned, the software grants you the liberty to export your creation in PPTX and PDF file formats, and view them later in Keynote and PowerPoint.
The app shows a convenient workflow with Windows and MacOs devices and limits the image play duration to 3 seconds, along with a permitting a restricted number of transitions and effects in its free version, which you can access by availing a paid subscription of the program.

08Creating Facebook Slideshows With Wondershare Filmora
When browsing through feasible alternatives on how to make a facebook slideshow, the IT market is indeed flooded with a hoard of creation utilities. If you have just begun trying hands at slideshow creation, consider using the Wondershare Filmora Video Editor slideshow maker application for addressing your slideshow design concerns. The extensive, feature rich library of the app lets you create attractive presentation masterpieces with a wide range of special effects, transitions, texts, titles and music tracks.
For Win 7 or later (64-bit)
For macOS 10.12 or later
Working with the Filmora slideshow creator, you can trim, crop or cut the video clips and images of your presentation to give them the best look. The tool comes with a unique Filmora Template Mode to create business oriented Facebook slideshows, is compatible to any windows and Mac supported device and lets you easily make a slideshow on Facebook.
● Ending Thoughts →
● Creating Facebook slideshows can be useful in addressing a variety of personal and professional data sharing needs.
● Browsing through design alternatives, you will land across a pool of software choices to create stunning slideshows for Facebook.
● When deciding on the best Facebook slideshow creator tool, Wondershare Filmora can be your smartest pick.
If you are looking for interesting solutions to create the most amazing slideshow on Facebook, rest assured, you are at the right place to get every help!
In this article
01 [Where Did the Facebook Slideshow Tool Go?](#Part 1)
02 [How to Create a Slideshow on Facebook?](#Part 2)
03 [Top 5 Facebook Slideshow Alternatives](#Part 3)
Part 1 Where Did the Facebook Slideshow Tool Go?
While almost everyone around you must be fascinated about the stunning and appealing slideshows that the Facebook community used to offer its users with, it is evidently sad to realize that the utility has become a story of the past. The creators of the tool have by now, took multiple rounds on removing, retrieving and again removing the utility from the official Facebook website as well as the smartphone application.
It is however relaxing to know that the Facebook developer team has worked efficiently to produce alternatives to the application’s slideshow tool after the latter’s permanent disappearance from the user account pages and app profiles. You can now work with the Facebook Ads Manager or Facebook Creator Studio to sort out the concern of creating slideshow on Facebook.
Part 2 How to Create a Slideshow on Facebook?
Facebook slideshows are incredibly awesome trends of making a concise, expressive and to the point delivery of diverse content varieties. Piping up your information through and extensive assortment of sound, text and motion, these short snippets are no less than a seamless video streaming of the same information.
If you are about to launch a new product for your business enterprise, consider working with the utility to create an elusive Facebook slideshow ad for a quick demonstration of your brand among different social media communities, turning the fun of slideshow creation into a smart and responsive product promotion strategy, without having to bother your wallet for the same.
If you are concerned about the quality of the final output, it is not a cause of worry, since the Facebook slideshow creator tool promises you of an appreciable slideshow result, that takes a quick loading time, is comparable to a high resolution video and works well with all your favourite devices.
Having talked enough on the usage credibility, let us now proceed to adhere to the concern of creating a slideshow on Facebook with a diversity of media files in the following section:
01Facebook Slideshows from Videos
Step 1: Launch the Tool
Start with opening the Facebook app in your device to launch the ‘Facebook Ads Manager’ utility and tap ‘Create’ in the latter’s welcome interface.
Step 2: Select Your Video
Browse through your device’s gallery to choose a desired video for slideshow creation. When you have made your choice, set a 16:9 aspect ratio for the same to avoid square cropping.
Step 3: Upload Your Video
Proceed with uploading your video to the Facebook tool by clicking on the ‘Add Video’ button and watch it getting split into still images frames, from where you can view a seamless slideshow display of the same.
Step 4: Select Multiple Frames
you can now select a series of image frames and arrange them in the correct sequence of appearance by clicking on each one of them to be included within the creator timeline.
Step 5: Add Captions Your Stills
Tap on the small ‘Pencil’ icon within the images to customize them with suitable captions. You can further add style to these image names by making appropriate selections of font, position color of every frame caption. Once you have finished naming all the frames, click on ‘Save’ to apply your changes.
Step 6: Preview Your Creation
When you are satisfied with your work, consider watching a preview of the same to be assured of the perfect placement of everything. To do this, navigate to the ‘Preview Pane’ at the top right corner of the program interface, and tapping the ‘Preview’ button.
02Facebook Slideshows from Images
Step 1: Launch the Tool
To begin with, open the Facebook app in any of your preferred devices and proceed to launch the ‘Facebook Ads Manager’ tool, followed by clicking on the ‘Create Slideshow’ button at the bottom of the tool’s welcome screen.
Step 2: Upload Your Images
As you complete Step 1, a ‘Video Creation Kit’ will appear, where you will need to click within the ‘Create Slideshow’ checkbox, followed by tapping on the ‘Continue’ button at the bottom right corner of the window.
Step 3: Upload Your Images
Clicking on the ‘Continue’ button will take you to the ‘Settings Box’ where you need to tap on the ‘Add Photos’ option. An image selection box will now pop up, allowing you to select and upload a maximum of 10 images from your Facebook account, stock and page galleries or your device collections. Prefer keeping all the photos within the same aspect ratio to escape the extra task of cropping the images.
When you have finished making your selections, navigate to the bottom right corner of the window and hit the ‘Confirm’ button. This will make your selections shows up all together in the ‘Settings Box’, in the sequential order of their appearance in the slideshow. If you want to introduce some changes, delete and re-upload the images.
Step 4: Customize Your Images with Captions
To add suitable captions to the slideshow images, tap the ‘Pencil’ icon within them. You are also allowed to customize the stills with transitions, effects, etc., and make adjustments to the screen time of each image frame.
Part 3 Top 5 Facebook Slideshow Alternatives
Having heard about the disappointment from the exit of the Facebook slideshow creator tool, it becomes naturally important to seek through the affordable alternatives of the same to set straight the issue of how to do a slideshow on Facebook. Working towards the solutions, let us learn about the top 5 most preferred Facebook slideshow alternatives in the following section:
03PowerDirector
One of the most suitable candidates of Facebook slideshow alternatives, PowerDirector easily lands among the highly preferred tools for creating stunning slideshows. Compatible with the MacOs and Windows operating systems, the software lets you create high end, top quality slideshow presentations with a classic and professional outlook.
Talking of the creator program’s most appealing features, this one is an upgraded slideshow creator suite that is capable enough to address your most diverse design requirements, like those of high resolution video effects, Hollywood inspired movies and personal content sharing. The software package is loaded with tons of elusive video effects, themed templates and transition effects to facilitate a compelling creation.
Working with PowerDirector’s exclusive slideshow program, you get the liberty to escape the notch of storyboard and timeline editing and start the creation process in the launch window of the program itself. The extremely user cohesive interface of the software guides you through each creation step via streamlined plug-ins, making the design process quick and super easy even for newbies.
04SmartSHOW 3D
When thinking of how to make a slideshow on facebook, this one is another top rated Facebook slideshow alternatives, that comes with an extensive toolkit to create amazing presentations from video clips and images, while complementing them with a plethora of effects and transitions. Some of the key features of the program include multiple slide layering, animating selected layers and fine tune the transitions with keyframe adjustments.
You can additionally uplift the slides with image masks, shapes, 3D animated texts and other forms of graphic arts. An additively appealing feature of the slideshow creator program is the ability to mix descriptive images with your favorite music to develop stunning masterpieces of entertaining slideshows, which you can conveniently share and enjoy with family and friends on a diversity of social media platforms.
Using the tool, you can work with applying motion graphic effects to still photos without having to be an over the top tech savvy user. The editor library of the tool is loaded with some of the most awesome transition effects, like, wipes, 3D motions, gradients and fade-ins, along with the facility of adding titles, voice comments and captions to the slides of your presentation. The tool is however, exclusively a Windows compatible utility.
05PhotoStage Slideshow Software
Next in the list of alternatives to the Facebook slideshow maker tool is the aforesaid software program, that allows you to create professional quality slideshows with as many videos and images as you can possibly think of and supplement them with a variety of texts, music, voiceovers and effects. You can further work on customizing the slideshow images with making suitable adjustments in color, brightness and saturation parameters.
The software comes with a Quick Create utility, which you can use to instantly create high resolution slideshows and spark them up with zooms, pans and fades, while getting a preview of the same in real-time. You can even proceed to burn your creation into a disk, make an online upload, or simply save it to your device.
Talking of the cost constraints of this amazing slideshow creator tool, you get to work with the software for a commercial use, free of cost for a definite time period and with a restricted number of features. However, you can always consider on buying the paid version of the program to avail an access to the latter’s entire range of features and utilities. The tool works well with all Windows and Mac supported devices.
06Kizoa
Moving ahead in the list you have the Kizoa slideshow maker for Facebook, which is a dependable alternative to the conventional Facebook slideshow creator. Choosing this tool to design your slideshow presentation, you are entitled to the amazing feature of displaying your presentation on almost any screen, including smartphones, television, computers and tablets with getting to choose from 7 types of aspect ratios. The tool is designed to have a Windows and MacOs compatibility.
The application further lets you add the most specific parts of your images within the presentation slides with its smart cropping tool, while keeping an account of the file formats and screen space requirements of the images with utmost convenience. You are also allowed to choose from a storehouse of preset templates to add your desired photos and video clips in the slideshow and entice them with GIFs, effects and texts.
When you are done with the creation process, just attempt to download and save the slideshow in any preferred file format, such as, AVI, GIF, MP4, MOV, MPEG2, etc., or even burn it to a DVD. You are now free to share your slideshow on various online media sharing platforms. Using the free version of Kizoa, you are permitted to create slideshows with a duration of 60 seconds, which can be upgraded to a limitless length with a paid subscription.
07SlideLab
If you are a newbie to the field of creating slideshows, and wondering about how to create a slideshow on Facebook 2021, this one is affordably the most perfect tool you can rely on. Packed with an extensive range of effects, music, transitions and filters, SlideLab is the smartest software choice to create slideshow presentations for family entertainment and personal use.
The tool consists of an in built sharing utility that allows you to design and share slideshows on social media platforms, like YouTube, Facebook and Instagram with a single click. Working on your slideshow within the program, you can escape the cringe of cropping the images, as they are automatically adjusted to the square fit alignment of the app’s working window. You can quickly rearrange the placement of the images in the slideshow as per your preferences.
As far as the sharing credibility of the presentation is concerned, the software grants you the liberty to export your creation in PPTX and PDF file formats, and view them later in Keynote and PowerPoint.
The app shows a convenient workflow with Windows and MacOs devices and limits the image play duration to 3 seconds, along with a permitting a restricted number of transitions and effects in its free version, which you can access by availing a paid subscription of the program.
08Creating Facebook Slideshows With Wondershare Filmora
When browsing through feasible alternatives on how to make a facebook slideshow, the IT market is indeed flooded with a hoard of creation utilities. If you have just begun trying hands at slideshow creation, consider using the Wondershare Filmora Video Editor slideshow maker application for addressing your slideshow design concerns. The extensive, feature rich library of the app lets you create attractive presentation masterpieces with a wide range of special effects, transitions, texts, titles and music tracks.
For Win 7 or later (64-bit)
For macOS 10.12 or later
Working with the Filmora slideshow creator, you can trim, crop or cut the video clips and images of your presentation to give them the best look. The tool comes with a unique Filmora Template Mode to create business oriented Facebook slideshows, is compatible to any windows and Mac supported device and lets you easily make a slideshow on Facebook.
● Ending Thoughts →
● Creating Facebook slideshows can be useful in addressing a variety of personal and professional data sharing needs.
● Browsing through design alternatives, you will land across a pool of software choices to create stunning slideshows for Facebook.
● When deciding on the best Facebook slideshow creator tool, Wondershare Filmora can be your smartest pick.
8 Blender 3D Animation Tutorials
8 Blender 3D Animation Tutorials for Beginners
An easy yet powerful editor
Numerous effects to choose from
Detailed tutorials provided by the official channel
Blender animation software is one of the open-source software chosen to create animations. It is easy to create animations, videos or graphics, etc. If you want to be an animation 3D artist, make creative universes, and meet each of the different characters moving around in your heart.
You will learn the step-by-step procedure to create animations and add other edits to the animation. And also a few tips to develop better Blender 3D animation effects.
In this article
01 [Is Blender best for animation?](#Part 1)
02 [How to Create 3D Animated Characters with Blender in 15 Minutes.](#Part 2)
03 [Become a Pro from Beginners in 8 Tutorials](#Part 3)
Part 1 Is Blender best for animation?
The answer to if the Blender is suitable for animation is yes. Blender animation is the best for making animations and bringing any living to animator. This software is mostly for professional works whose limitations will be learning the process, not any technical defects. Let’s talk about why Blender 3D animation software is the best and more helpful.
Character animation is an essential tool for animation, and Blender has developed this tool with no way less to other software.
There are many animation effects other than animating characters. Blender 3D for free has all the necessary tools to do all types of rigs and animations without any difficulty.
Blender is one software that has 2D animation inbuilt in it, like drawing and creating 2D animation.
Blender’s animation tools are making motion graphics possible by advancing the features than it was four years ago.
Nowadays, many people are using Blender to do professional works, including freelancers, small studios, and even game developers.
Part 2 How to Create 3D Animated Characters with Blender in 15 Minutes.
This is a series for people who want to learn how to create 3D blender animation characters from keeping a reference image. Blender’s ringing tools will be more helpful for this process.
01Step 1: Importing
Initially, import a Blender 3D animation character into the Blender to animate. Many free and paid characters are available in Vincent, and Rain v2.0 is present in Blender Cloud; above all, these characters are for free.
Steps to import the character either from Vincent or Rain v2.0
Download the character file from the cloud to any destination folder on the computer. Open the Blender and place the cursor on the origin point on the screen. Later select import present in the File menu and choose the file format. And now, allow the Python script to run for the selected character folder.

02Step 2: Add Keyframes
There will be a diamond-shaped icon below to choose the keyframe you want to add to the timeline, which you may also delete.
Adding a keyframe is simple. Open the timeline window in the animation editor. Press the alphabet ‘G’ on the keyboard, move the bone and place it. Then hit Shift+I and choose the channel LocRot and insert the keyframe. Likewise, you can adjust the keyframe by dragging, making it fast or slow to the requirements.
Moving the keyframe to 20 makes it faster, and moving to 40, slower.
03Step 3: Get Reference Materials
It will be challenging to add movements to the characters, so plenty of videos can get the moves right. There are various reference images and videos available on the Internet. You can either add the selected reference materials to the second screen or add them to the 3D space. Let’s discuss how to add it.
Hit Shift + A to add the reference material. Later select “Image” and then choose the “Background.” Scale the reference image onto the 3D space after it loads.
Afterward, you can leave it to the animation of the reference article, or you can further edit or amplify the movements.
04Step 4: Fine–Tuning and Sound
This step will add smooth movements by combining two keyframes for a more professional look. We have to use the Dope sheet to do complete this process. Let’s see how to add it.
Initially, split the window horizontally. Later switch over the dope sheet below the animation tab, where you can see keyframes of all axis. Now you can drag and edit to slow or amplify the speed.
There is a Graphic editor, which is more advanced to make the movements more accurately and directly to edit the curves.
Sound effects make any video or animation better. You can add and import the sound files. You can also create your sound and insert it into the Blender. Let’s discuss adding sound and making it sync to the character.
Download the audio file, hit shift + A to open Add menu, and choose the “Sound.” Now select the sound that you wish to add.
Drag the sound to keep it to the specific sections alone. Also, you can switch between “No Sync” to “AV Sync” in the playback to give the best synchronization to the characters. The volume and pitch can be adjusted using the sidebar.
05Step 5: Rendering
Before rendering, make sure you keep the FPS is same as that chosen during the keyframes to avoid unnecessary renders. After setting the frame correctly, causing the animation is easy.
Initially, click on “scene” and choose the file extension, file formats, and file colors (BW, RGB, or RGBA). Select the encoding container as “WebM” and video Codec as “WEBM/VP9. After adding the sound, set the audio codec to “Vorbis.” Choose output quality and speed.
After all the rendering, select Render from the top bar and select “Render Animation” in Blender Animation.
Awesome! We have successfully blended a character using Blender 3D animation software. With more practice and knowledge about more tools, one can easily use the Blender 3D mouse.
Part 3 Become a Pro from Beginners in 8 Tutorials.
01Fix 1: Complete Beginners Guide to Blender 2.8
This YouTube tutorial focuses on Blender version 2.8. The tutorial features the redesigned user interface and tools like 3D viewpoint and UV editor, which has new interactive tools. And about different 3D shapes and simple edits like adding colors and “G drag,” etc.
02Fix 2: Blender 2.9 for Absolute Beginners
This YouTube tutorial on Blender 3D animation software version 2.9 has the new advancement about denoiser interactivity in the 3D viewpoint. The YouTuber explains EEVEE, cycles, workbench, movements, rotate, and scale objects.
03Fix 3: Blender Day -1 Absolute Basics - Introduction Series for Beginners
This YouTube tutorial says about the introduction to the Blender 3D for free for beginners. He explains simple movements like rotating and scaling, shapes, and colors to the objects. He also says about the pivot plot and how to create a basic primitive using blender.
04Fix 4: Zoync TV’s Blender Beginners Series
The Blender Beginners video by ZoyncTV is on Blender 2.6. Indeed, even as hotkeys and terms change, the hidden ideas will forever be pertinent. Every video in this 11-section is somewhere between 10 and 20 minutes, split into five separate subjects: displaying, modifiers, materials, surfaces, and animations. It’s a beginner-level course.
05Fix 5: The Blender Survival Guide
The Blender Survival Guide series by Creative COW is outdated but the best video for somebody who has never utilized Blender. Each video in this 13-section series is somewhere in the range of 15 and 45 minutes in length, which means you’ll get 350 intense minutes of preparing. It is a survival reference that shows just the outright necessities.
06Fix 6: KatBit’s Blender Tutorial
The KatsBits site is home to lots of tutorials, video games. Its Blender animation tutorials are fantastic when you want a beginning stage for various 3D models. There are 45 Blender tutorials. Tutorials take you through the most common way of making a 3D level for Quake and tell you the best way to make a basic model.
07Fix 7: Daniel Krafft’s 100 Blender 2.8 Tips
While this is another Blender 2.8 tutorial, Daniel’s tips are overall for any Blender work process. He teaches simple stuff like vertex and edges and some technical parts in the Blender 3D animation software.
08Fix 8: Blender 3D: Noob to Pro
This last tutorial is a “wiki book” called Blender 3D: Noob to Pro that consists of important Blender animation tips and experiences. Start with an outline of 3D ideas and a top-to-bottom introduction to Blender.
Regarding Blender 3D mouse software, we would like to recommend one more tool to you the most. Yes, it is none other than Wondershare Filmora, a perfect alternative to Blender 3D animation software wherein you can get excellent 3D animation effects, 3D texts and animate it. There are some simple steps and various options to work in Filmora for creating 3D animated effects.
● Composition
● Creating our 3D text
● Creating the 3D look
● Basics of 3D animation
● Animating the text in 3D
There are countless YouTube tutorial videos for working with Wondershare Filmora Video Editor ‘s latest version.
Key Takeaways from This Episode
● We learned about Blender 3D animation software.
● How can you create characters using Blender animation?
● 8 Tutorials to move you from a beginner to a Pro.
Blender animation software is one of the open-source software chosen to create animations. It is easy to create animations, videos or graphics, etc. If you want to be an animation 3D artist, make creative universes, and meet each of the different characters moving around in your heart.
You will learn the step-by-step procedure to create animations and add other edits to the animation. And also a few tips to develop better Blender 3D animation effects.
In this article
01 [Is Blender best for animation?](#Part 1)
02 [How to Create 3D Animated Characters with Blender in 15 Minutes.](#Part 2)
03 [Become a Pro from Beginners in 8 Tutorials](#Part 3)
Part 1 Is Blender best for animation?
The answer to if the Blender is suitable for animation is yes. Blender animation is the best for making animations and bringing any living to animator. This software is mostly for professional works whose limitations will be learning the process, not any technical defects. Let’s talk about why Blender 3D animation software is the best and more helpful.
Character animation is an essential tool for animation, and Blender has developed this tool with no way less to other software.
There are many animation effects other than animating characters. Blender 3D for free has all the necessary tools to do all types of rigs and animations without any difficulty.
Blender is one software that has 2D animation inbuilt in it, like drawing and creating 2D animation.
Blender’s animation tools are making motion graphics possible by advancing the features than it was four years ago.
Nowadays, many people are using Blender to do professional works, including freelancers, small studios, and even game developers.
Part 2 How to Create 3D Animated Characters with Blender in 15 Minutes.
This is a series for people who want to learn how to create 3D blender animation characters from keeping a reference image. Blender’s ringing tools will be more helpful for this process.
01Step 1: Importing
Initially, import a Blender 3D animation character into the Blender to animate. Many free and paid characters are available in Vincent, and Rain v2.0 is present in Blender Cloud; above all, these characters are for free.
Steps to import the character either from Vincent or Rain v2.0
Download the character file from the cloud to any destination folder on the computer. Open the Blender and place the cursor on the origin point on the screen. Later select import present in the File menu and choose the file format. And now, allow the Python script to run for the selected character folder.
02Step 2: Add Keyframes
There will be a diamond-shaped icon below to choose the keyframe you want to add to the timeline, which you may also delete.
Adding a keyframe is simple. Open the timeline window in the animation editor. Press the alphabet ‘G’ on the keyboard, move the bone and place it. Then hit Shift+I and choose the channel LocRot and insert the keyframe. Likewise, you can adjust the keyframe by dragging, making it fast or slow to the requirements.
Moving the keyframe to 20 makes it faster, and moving to 40, slower.
03Step 3: Get Reference Materials
It will be challenging to add movements to the characters, so plenty of videos can get the moves right. There are various reference images and videos available on the Internet. You can either add the selected reference materials to the second screen or add them to the 3D space. Let’s discuss how to add it.
Hit Shift + A to add the reference material. Later select “Image” and then choose the “Background.” Scale the reference image onto the 3D space after it loads.
Afterward, you can leave it to the animation of the reference article, or you can further edit or amplify the movements.
04Step 4: Fine–Tuning and Sound
This step will add smooth movements by combining two keyframes for a more professional look. We have to use the Dope sheet to do complete this process. Let’s see how to add it.
Initially, split the window horizontally. Later switch over the dope sheet below the animation tab, where you can see keyframes of all axis. Now you can drag and edit to slow or amplify the speed.
There is a Graphic editor, which is more advanced to make the movements more accurately and directly to edit the curves.
Sound effects make any video or animation better. You can add and import the sound files. You can also create your sound and insert it into the Blender. Let’s discuss adding sound and making it sync to the character.
Download the audio file, hit shift + A to open Add menu, and choose the “Sound.” Now select the sound that you wish to add.
Drag the sound to keep it to the specific sections alone. Also, you can switch between “No Sync” to “AV Sync” in the playback to give the best synchronization to the characters. The volume and pitch can be adjusted using the sidebar.
05Step 5: Rendering
Before rendering, make sure you keep the FPS is same as that chosen during the keyframes to avoid unnecessary renders. After setting the frame correctly, causing the animation is easy.
Initially, click on “scene” and choose the file extension, file formats, and file colors (BW, RGB, or RGBA). Select the encoding container as “WebM” and video Codec as “WEBM/VP9. After adding the sound, set the audio codec to “Vorbis.” Choose output quality and speed.
After all the rendering, select Render from the top bar and select “Render Animation” in Blender Animation.
Awesome! We have successfully blended a character using Blender 3D animation software. With more practice and knowledge about more tools, one can easily use the Blender 3D mouse.
Part 3 Become a Pro from Beginners in 8 Tutorials.
01Fix 1: Complete Beginners Guide to Blender 2.8
This YouTube tutorial focuses on Blender version 2.8. The tutorial features the redesigned user interface and tools like 3D viewpoint and UV editor, which has new interactive tools. And about different 3D shapes and simple edits like adding colors and “G drag,” etc.
02Fix 2: Blender 2.9 for Absolute Beginners
This YouTube tutorial on Blender 3D animation software version 2.9 has the new advancement about denoiser interactivity in the 3D viewpoint. The YouTuber explains EEVEE, cycles, workbench, movements, rotate, and scale objects.
03Fix 3: Blender Day -1 Absolute Basics - Introduction Series for Beginners
This YouTube tutorial says about the introduction to the Blender 3D for free for beginners. He explains simple movements like rotating and scaling, shapes, and colors to the objects. He also says about the pivot plot and how to create a basic primitive using blender.
04Fix 4: Zoync TV’s Blender Beginners Series
The Blender Beginners video by ZoyncTV is on Blender 2.6. Indeed, even as hotkeys and terms change, the hidden ideas will forever be pertinent. Every video in this 11-section is somewhere between 10 and 20 minutes, split into five separate subjects: displaying, modifiers, materials, surfaces, and animations. It’s a beginner-level course.
05Fix 5: The Blender Survival Guide
The Blender Survival Guide series by Creative COW is outdated but the best video for somebody who has never utilized Blender. Each video in this 13-section series is somewhere in the range of 15 and 45 minutes in length, which means you’ll get 350 intense minutes of preparing. It is a survival reference that shows just the outright necessities.
06Fix 6: KatBit’s Blender Tutorial
The KatsBits site is home to lots of tutorials, video games. Its Blender animation tutorials are fantastic when you want a beginning stage for various 3D models. There are 45 Blender tutorials. Tutorials take you through the most common way of making a 3D level for Quake and tell you the best way to make a basic model.
07Fix 7: Daniel Krafft’s 100 Blender 2.8 Tips
While this is another Blender 2.8 tutorial, Daniel’s tips are overall for any Blender work process. He teaches simple stuff like vertex and edges and some technical parts in the Blender 3D animation software.
08Fix 8: Blender 3D: Noob to Pro
This last tutorial is a “wiki book” called Blender 3D: Noob to Pro that consists of important Blender animation tips and experiences. Start with an outline of 3D ideas and a top-to-bottom introduction to Blender.
Regarding Blender 3D mouse software, we would like to recommend one more tool to you the most. Yes, it is none other than Wondershare Filmora, a perfect alternative to Blender 3D animation software wherein you can get excellent 3D animation effects, 3D texts and animate it. There are some simple steps and various options to work in Filmora for creating 3D animated effects.
● Composition
● Creating our 3D text
● Creating the 3D look
● Basics of 3D animation
● Animating the text in 3D
There are countless YouTube tutorial videos for working with Wondershare Filmora Video Editor ‘s latest version.
Key Takeaways from This Episode
● We learned about Blender 3D animation software.
● How can you create characters using Blender animation?
● 8 Tutorials to move you from a beginner to a Pro.
Best 10 Animated Templates in Canva
Versatile Video Editor - Wondershare Filmora
An easy yet powerful editor
Numerous effects to choose from
Detailed tutorials provided by the official channel
Canva is one of the premier graphic design platforms available to users. They can create Instagram posts, make YouTube thumbnails, infographics, invitations, business cards, and more.
The platform is beginner-friendly and extremely customizable, ideal for everyday use. More brands and companies use data visualized through graphic design, creating greater understanding and impact on users.
With Canva animated templates, you can show more with less work. This has wide-ranging effects from diversifying education to elaborating business reports and lucrative marketing opportunities.
In the article below, take a look at ten of the best Canva animated templates.
In this article
01 [Can You Animate in Canva?](#Part 1)
02 [Where Can I Find Animated Elements In Canva?](#Part 2)
03 [How Do I Get More Animations in Canva? ](#Part 3)
Part 1 Can You Animate in Canva?
Animation is an evergreen storytelling style as it’s versatile enough to be used in various types of content. Animations can last from a few seconds to a few minutes. According to HubSpot, A video-based email increases click rates by 300%.
1. Customization
Canva can be used to create customized animation. This can be done by creating an image and animating each element. Users can choose to create a textured background and edit images uploaded to Canva.
Users can also overlay audio to enhance the quality of the animation. The text can be refined to suit the style of the animation.
2. Automation
Canva has also launched a comprehensive suite of features under the “Animation” button. This automates the process and allows static images to be converted to animations. The animations range from simple motion to complex creations.
3. Movement
With the animation button, users can choose the type of animation they would like to use. The choices range from subtle animations like ‘Fade’, ‘Drift’ to bursts of motion like ‘Tumble’ and ‘Block’ and everything in-between.
4. Overview
Canva helps create high-quality animations at affordable prices. Creating an animation has never been easier with ready-made design templates by experienced designers.
Let’s look at how to animate the various elements of an image and the various animated templates in Canva.
Part 2 Where Can I Find Animated Elements In Canva?
With Canva’s many layouts and features to choose from, it might be difficult to figure out where to start. So, let’s start with the basics.
You have four basic facets to consider when choosing to animate. They are text, audio, image, and video. Every animation is crafted from varied combinations of these four basic steps.
One other consideration is the style of presentation you’d like to choose. Is it in portrait mode or landscape mode?
Do you want a previously crafted presentation ready to go? If so, Canva offers two options.
Step1 Select the “Create a Design” option on Canva
This allows users to create content in any format ranging from Instagram videos and reels, YouTube thumbnails and Facebook covers, logos, and more.
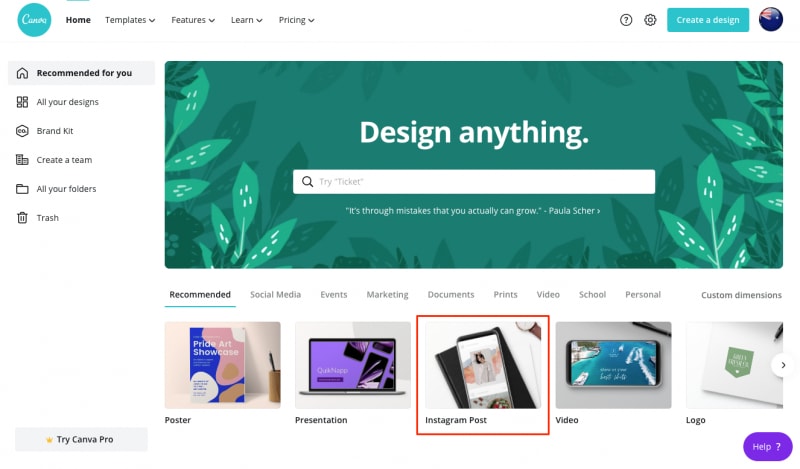
Step2 You can edit images and add the necessary text to your content. Bolster your content with video clips and audio to create the primary image you want
Edit the content to your preferences.
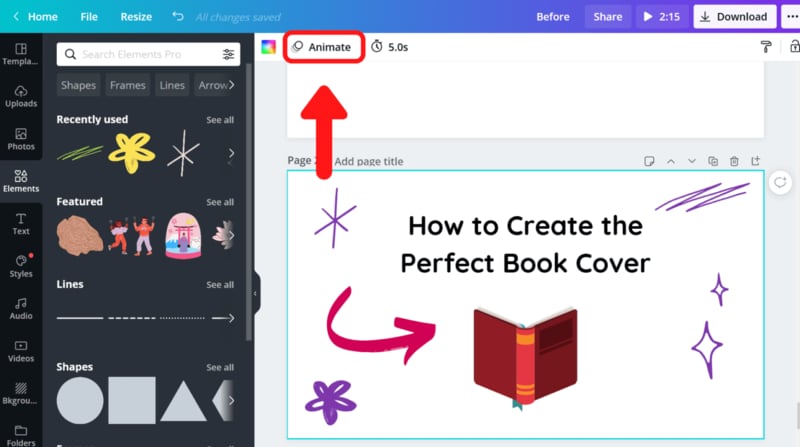
Step3 You are now ready to animate the construct
Select the animate button and look for “Page Animations” to animate the entire presentation. You can choose to animate any element on the page. You can also add borders or other design elements and animate them.
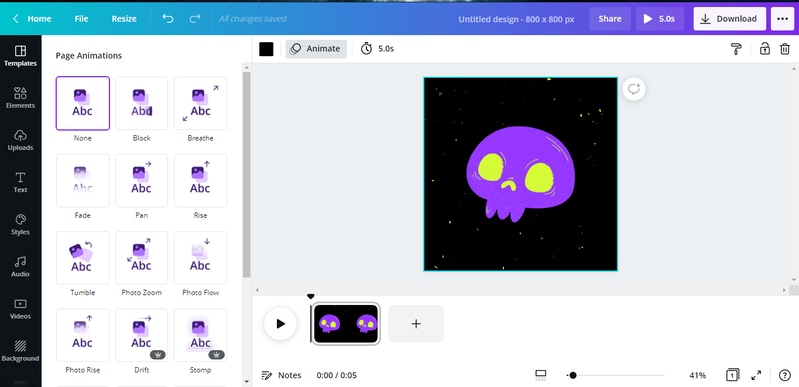
Step4 Here, you can choose from any myriad options for animation styles
You can also adjust the length of each animation with the stopwatch icon next to the animate button.
You can change the length of your video if you have one. You can also modify the audio clip to suit each animation.

Step5 Once you’ve animated the features according to your preference, you can now save the file in pdf, jpg, png or gif, or mp4 formats
Please note that all these options are for Canva Pro. Canva with the free subscription may allow limited format downloads. This is why you should consider tools like Wondershare Filmore for video animation.
Wondershare Filmora Pro for Video Animation
With Wondershare Filmora Pro, animation has never been easier. With its innovative keyframe technology, it makes animations easy to use. Animations can be easily created and, with the help of Filmora’s automation tool, fine-tuned for a professional finish.
Filmora provides a pioneering opportunity to create a visual masterpiece with a beginner’s experience with a simple functional drag and drop. With motion tracking, the ability to create split-screen, green screen, and blending capabilities, the Filmora Pro experience is unparalleled.
Part 3 How Do I Get More Animations in Canva?
Canva has filters allowing users to sort presentations by style, like “Animated,” “Minimalist,” “Corporate” and more. Canva has a series of ready-made animated templates available for use. Let’s explore a few of them.
It also allows sorting by themes like “Pink” or “Business” or “Background” depending on your needs. Users can also choose to sort out presentations according to the presentation’s color scheme.
Pink and Violet Simple Hot Neon Gradients Creative Presentation
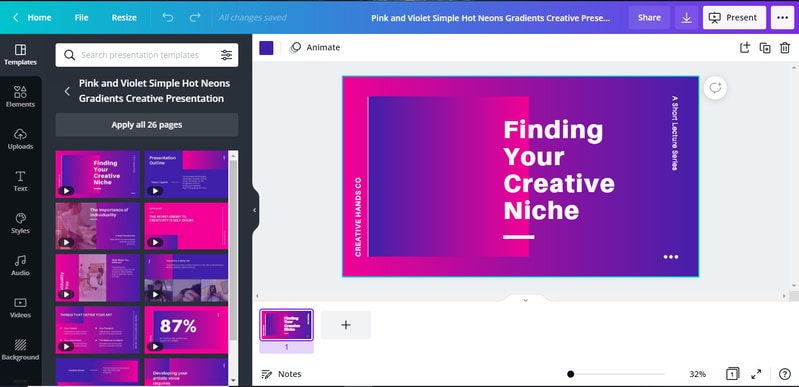
With a gradient background that’s a popular website trend, this presentation boasts twenty-six slides with a signature animation you can tweak to suit your needs.
Blue Timeline Cycle Presentation
This presentation is useful for compact information with a clean and modern outlook. With ten power-packed slides, this animated template allows researchers and businesses to use data visualization to convey ideas.
Blue and White Illustrated Medical Healthcare in the 21st Century Education Presentation
With fourteen slides, this animation perfectly creates a visual treat for viewers. You can also convey vital information in bite-sized morsels. You can illustrate your point with lively animation designs while captivating your audience.
Neon Cyber Monday Sale Animated Video Facebook Ad Post
A fresh offering from Canva is this neon Facebook Ad Post with a captivating starry background and neon text elements.
You can customize this video to edit the text, the color palette, the duration of the video, and more.
Yellow Happy Wildlife Conservation Day Animated Video
For a child-friendly video with animation, head on over to this presentation. This animation allows children to marvel at the motion and pay rapt attention when listening to essential issues with soothing attention-grabbing colors.
Green and Orange Business Hip Tech Weekly Team Updates Presentation
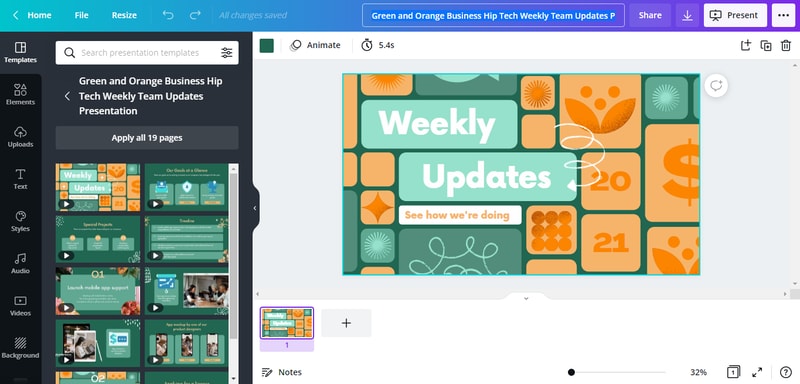
As the perfect complement of colors, this presentation is suited for everything from a YouTube thumbnail to a business meeting. With nineteen slides, the variations of animations found are endless.
Brown Cute Start Healthy Lifestyle Explainer Video Animation
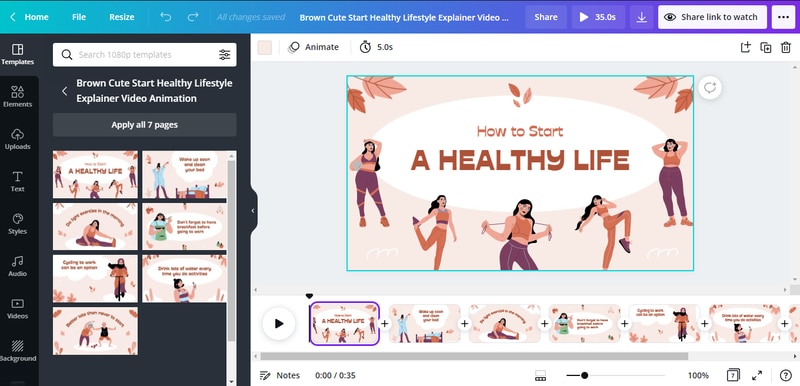
These cute animations make it straightforward to craft an explainer video around fitness. You can also use this for an Instagram post or story reel.
With seven slides, you can craft a compelling explainer video that keeps your viewers glued to the screen.
Sweet Fruit Candy Animated Group Project Presentation
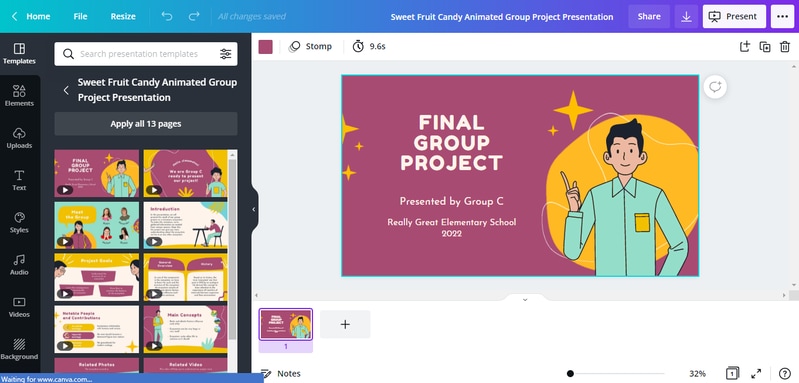
This presentation is perfect for group presentations. It’s an ideal template to break down large amounts of information in a versatile and easily created presentation.
With over thirteen slides, it’s a perfect slide set to breathe new life into your homework.
Pink and Cream Minimalist Food Animated Presentation

For a simple personalized food-related presentation, this slide set has you covered. With gorgeous visuals and space to write recipes, the history.
This presentation, with fourteen slides, remains a favorite among culinary enthusiasts.
Marketing Agency Animated Facebook Cover
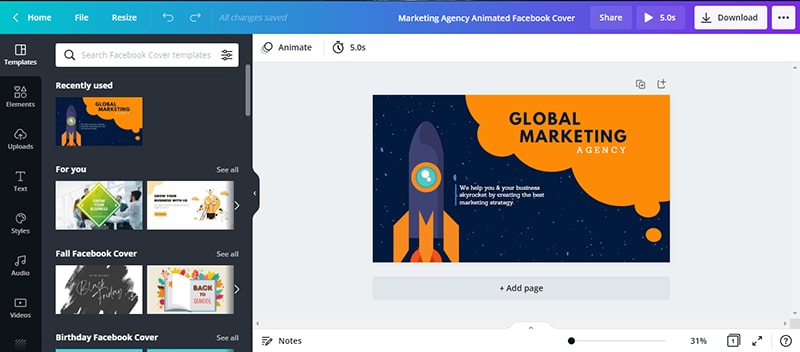
Motion is identified as a compelling website design trend for 2022. Colorful, animated art in vibrant color themes can win more visitors to your page and attention in a saturated market.
Use this theme to illustrate a gorgeous campaign ad for your social media feed.
Wondershare Filmora
Get started easily with Filmora’s powerful performance, intuitive interface, and countless effects!
Try It Free Try It Free Try It Free Learn More >

AI Portrait – The best feature of Wondershare Filmora for gameplay editing
The AI Portrait is a new add-on in Wondershare Filmora. It can easily remove video backgrounds without using a green screen or chroma key, allowing you to add borders, glitch effects, pixelated, noise, or segmentation video effects.

Final Words
Canva is a great tool for animated videos and you can use animated Canva templates to create a unique animation in images. It is a great tool and can be used easily to create any length of animated video. But if you are looking for an advanced and easy-to-use video animation tool, then give a try to Wondershare Filmora.
Canva is one of the premier graphic design platforms available to users. They can create Instagram posts, make YouTube thumbnails, infographics, invitations, business cards, and more.
The platform is beginner-friendly and extremely customizable, ideal for everyday use. More brands and companies use data visualized through graphic design, creating greater understanding and impact on users.
With Canva animated templates, you can show more with less work. This has wide-ranging effects from diversifying education to elaborating business reports and lucrative marketing opportunities.
In the article below, take a look at ten of the best Canva animated templates.
In this article
01 [Can You Animate in Canva?](#Part 1)
02 [Where Can I Find Animated Elements In Canva?](#Part 2)
03 [How Do I Get More Animations in Canva? ](#Part 3)
Part 1 Can You Animate in Canva?
Animation is an evergreen storytelling style as it’s versatile enough to be used in various types of content. Animations can last from a few seconds to a few minutes. According to HubSpot, A video-based email increases click rates by 300%.
1. Customization
Canva can be used to create customized animation. This can be done by creating an image and animating each element. Users can choose to create a textured background and edit images uploaded to Canva.
Users can also overlay audio to enhance the quality of the animation. The text can be refined to suit the style of the animation.
2. Automation
Canva has also launched a comprehensive suite of features under the “Animation” button. This automates the process and allows static images to be converted to animations. The animations range from simple motion to complex creations.
3. Movement
With the animation button, users can choose the type of animation they would like to use. The choices range from subtle animations like ‘Fade’, ‘Drift’ to bursts of motion like ‘Tumble’ and ‘Block’ and everything in-between.
4. Overview
Canva helps create high-quality animations at affordable prices. Creating an animation has never been easier with ready-made design templates by experienced designers.
Let’s look at how to animate the various elements of an image and the various animated templates in Canva.
Part 2 Where Can I Find Animated Elements In Canva?
With Canva’s many layouts and features to choose from, it might be difficult to figure out where to start. So, let’s start with the basics.
You have four basic facets to consider when choosing to animate. They are text, audio, image, and video. Every animation is crafted from varied combinations of these four basic steps.
One other consideration is the style of presentation you’d like to choose. Is it in portrait mode or landscape mode?
Do you want a previously crafted presentation ready to go? If so, Canva offers two options.
Step1 Select the “Create a Design” option on Canva
This allows users to create content in any format ranging from Instagram videos and reels, YouTube thumbnails and Facebook covers, logos, and more.
Step2 You can edit images and add the necessary text to your content. Bolster your content with video clips and audio to create the primary image you want
Edit the content to your preferences.
Step3 You are now ready to animate the construct
Select the animate button and look for “Page Animations” to animate the entire presentation. You can choose to animate any element on the page. You can also add borders or other design elements and animate them.
Step4 Here, you can choose from any myriad options for animation styles
You can also adjust the length of each animation with the stopwatch icon next to the animate button.
You can change the length of your video if you have one. You can also modify the audio clip to suit each animation.
Step5 Once you’ve animated the features according to your preference, you can now save the file in pdf, jpg, png or gif, or mp4 formats
Please note that all these options are for Canva Pro. Canva with the free subscription may allow limited format downloads. This is why you should consider tools like Wondershare Filmore for video animation.
Wondershare Filmora Pro for Video Animation
With Wondershare Filmora Pro, animation has never been easier. With its innovative keyframe technology, it makes animations easy to use. Animations can be easily created and, with the help of Filmora’s automation tool, fine-tuned for a professional finish.
Filmora provides a pioneering opportunity to create a visual masterpiece with a beginner’s experience with a simple functional drag and drop. With motion tracking, the ability to create split-screen, green screen, and blending capabilities, the Filmora Pro experience is unparalleled.
Part 3 How Do I Get More Animations in Canva?
Canva has filters allowing users to sort presentations by style, like “Animated,” “Minimalist,” “Corporate” and more. Canva has a series of ready-made animated templates available for use. Let’s explore a few of them.
It also allows sorting by themes like “Pink” or “Business” or “Background” depending on your needs. Users can also choose to sort out presentations according to the presentation’s color scheme.
Pink and Violet Simple Hot Neon Gradients Creative Presentation
With a gradient background that’s a popular website trend, this presentation boasts twenty-six slides with a signature animation you can tweak to suit your needs.
Blue Timeline Cycle Presentation
This presentation is useful for compact information with a clean and modern outlook. With ten power-packed slides, this animated template allows researchers and businesses to use data visualization to convey ideas.
Blue and White Illustrated Medical Healthcare in the 21st Century Education Presentation
With fourteen slides, this animation perfectly creates a visual treat for viewers. You can also convey vital information in bite-sized morsels. You can illustrate your point with lively animation designs while captivating your audience.
Neon Cyber Monday Sale Animated Video Facebook Ad Post
A fresh offering from Canva is this neon Facebook Ad Post with a captivating starry background and neon text elements.
You can customize this video to edit the text, the color palette, the duration of the video, and more.
Yellow Happy Wildlife Conservation Day Animated Video
For a child-friendly video with animation, head on over to this presentation. This animation allows children to marvel at the motion and pay rapt attention when listening to essential issues with soothing attention-grabbing colors.
Green and Orange Business Hip Tech Weekly Team Updates Presentation
As the perfect complement of colors, this presentation is suited for everything from a YouTube thumbnail to a business meeting. With nineteen slides, the variations of animations found are endless.
Brown Cute Start Healthy Lifestyle Explainer Video Animation
These cute animations make it straightforward to craft an explainer video around fitness. You can also use this for an Instagram post or story reel.
With seven slides, you can craft a compelling explainer video that keeps your viewers glued to the screen.
Sweet Fruit Candy Animated Group Project Presentation
This presentation is perfect for group presentations. It’s an ideal template to break down large amounts of information in a versatile and easily created presentation.
With over thirteen slides, it’s a perfect slide set to breathe new life into your homework.
Pink and Cream Minimalist Food Animated Presentation
For a simple personalized food-related presentation, this slide set has you covered. With gorgeous visuals and space to write recipes, the history.
This presentation, with fourteen slides, remains a favorite among culinary enthusiasts.
Marketing Agency Animated Facebook Cover
Motion is identified as a compelling website design trend for 2022. Colorful, animated art in vibrant color themes can win more visitors to your page and attention in a saturated market.
Use this theme to illustrate a gorgeous campaign ad for your social media feed.
Wondershare Filmora
Get started easily with Filmora’s powerful performance, intuitive interface, and countless effects!
Try It Free Try It Free Try It Free Learn More >
AI Portrait – The best feature of Wondershare Filmora for gameplay editing
The AI Portrait is a new add-on in Wondershare Filmora. It can easily remove video backgrounds without using a green screen or chroma key, allowing you to add borders, glitch effects, pixelated, noise, or segmentation video effects.
Final Words
Canva is a great tool for animated videos and you can use animated Canva templates to create a unique animation in images. It is a great tool and can be used easily to create any length of animated video. But if you are looking for an advanced and easy-to-use video animation tool, then give a try to Wondershare Filmora.
Can I Still Do Animated Logo Design Without Design Skills?
Can I Still Do Animated Logo Design Without Design Skills?
An easy yet powerful editor
Numerous effects to choose from
Detailed tutorials provided by the official channel
In the fast-moving world, you cannot afford to keep your brand design still as it doesn’t influence the audience toward your business. It is pretty essential to create an impressive and animated logo for the brand.
This article will discuss how you can create an animated logo design even if you do not have design skills.
In this article
01 [This is What a Conventional Professional Animation Designer Should Be](#Part 1)
02 [Your Number 1 Tip to Do Animated Logo Design Without Design Skills](#Part 2)
03 [This is the Smartest Tip Ever About Filmora](#Part 3)
Part 1 This is What a Conventional Professional Animation Designer Should Be
01How to Make an Animated Logo for an Animation Designer?
There are various online logo maker tools available to create an animated logo design for your brand easily. There are several online logo makers available from which you can easily create an effective animated logo for your business. We will discuss Canva online logo maker for a better understanding of making the online animated logo design for the brand. All you have to do is to follow the simple steps listed below.
Method to make the Animated Logo Design for your Business
Step 1: Initiate with Canva
Initially, you need to launch Canva and choose “Animated Logos” for the library of effectively and professionally designed templates through which you can create inspiration and further customize it accordingly.
Step 2: Choose the appropriate design as per nature of business
Now, you have to select any one of the designed templates that seem closest to the look you are looking to give to your brand. All the templates available are professionally designed and fully customizable. You can even initiate the process with the blank design template from scratch. It would help if you made sure that you were looking to create a simple or complex design for the logo.
![]()
Step 3: Customization of the animated logo
Now is the time to customize your logo. You can use a lot of creativity and skills. Think about your business and how the logo should and take help of the font styles, design colors, font size, video background, and text to bring out the best in your animated logo design. Look for what effect you want for the logo design. Apart from this, it is better to animate the text and elements separately or set the complete design into motion. After successfully editing the design of the logo, you need to proceed to the next step listed below.
![]()
Step 4: Download the file in required format
When you are satisfied with the logo animation design, you need to save it. Also, you can download it into high-resolution either in MP4 videos or GIF files as per your choice. With MP4 file, you will need to include the audio files; however, if you choose GIF files, it will provide you with brief and compressed clips with no audio.
![]()
Step 5: Include the file to your various visual branding media
Lastly, you need to recall and recognize the brand by employing an innovative animated logo in different visual media like social media accounts, websites, and various advertising and promo videos. After making a creative animated logo design, you can use it on your website or different social accounts to attract your business audience.
02How Much Does a Professional Animated Logo Cost?
The cost for the professional animated logo is not fixed, as it depends on the work you have done while making a logo for your brand. In general words, it can be said that the price for animated logo design is anywhere from $0 to $1000. However, if you have a small firm or startup looking to get a quality design, it will cost you between $300-$1300. Suppose you have a large-scale business and are looking to replace the traditional logo design with a customized animated logo. In that case, you will be required to hire a professional logo designer who will look after the design and make it creative.
Part 2 Your Number 1 Tip to Do Animated Logo Design Without Design Skills
011. 5 Tools You Need to Make an Animated Logo
When looking to create an animated logo design free for your social media account or website, you need to understand that you will require some tools to create it impressive and professional. The 5 tools or the websites used for making the animated logo design are listed below:
● Canva
● Filmora
● Designhill
● Squarespace
● Hatchful
025 Tips to Animate a Logo
● Make sure to use images that include transparent background
You need to make sure that when you upload any images or illustrations, it must include a transparent background so that you will be able to make a seamless animation logo without having pesky color and look attractive to the audience.
![]()
● Select the suitable template for the business
You will discover several template options available while using the animated logo designer; however, you need to make sure that chosen template must align with the business nature. For example, if you sell organic products, you need to choose the environment design template.
![]()
● Make use of masks appropriately
A mask is defined as the container for the photos. The logo design maker service provides interesting masks in different shapes to make a stunning and appealing animated logo after effects. You are required to use masks with photos, solid color, and shaded background.
● Keep it simple and short
Always try to make logo design short and straightforward! If you are using too many effects and colors in the logo design, it turns complex for the audience.
![]()
● Create an impact on the audience
To impact the audience, you need to make sure that the animation doesn’t last longer than 3-4 seconds. The templates collections of the different logo design makers are perfectly timed; therefore, there is no need to worry about making long animation.
Part 3 This is the Smartest Tip Ever About Filmora
01What’s Filmora?
![]()
Wondershare Filmora is video editing software available on Wondershare that facilitates you to explore creativity and make the cinematic magic regarding the professionally designed videos. This tool comprises a wide range of visual effects, video editing features, and motion graphics, making it the most preferred and ideal tool for video editing purposes. If you are looking to use the tool, all you have to do is download the Filmora software on your Windows or Mac system. After downloading the software, please install the program, run it and start using it.
Wondershare Filmora
Power Up Your Story with Filmora. Professional video editing is made easy.
Requirement
Windows- Win 8 or later (64 bit OS) and MAC- macOS X 10.13 or later.
The state-of-art feature of the tool makes it one of the most preferred tools for video editing, especially for the filmmaker and video editors.
02Is It Possible to Add a Video to the Animated Logo?
Yes, you will include video to the animated logo by selecting the “Video” tab. Along with such, add it to a text or make use of them as the background. You also need to understand that such videos are accessible to Filmora Pro members.
03Is the Music Available on the Asset Library Royalty-free?
No, if you are using royalty- free assets you are required to pay for getting the access…
04How to Make an Animated Video in a Snap?
If you are looking to create an animated video in a snap, you need to follow the below steps:
Step 1: Choose the incredible tool for making animated videos: You need to download the tool and register your account.
Step 2: Select a well-made animation template: Select the template from the library of the tool and launch your trip of creation.
Step 3: Drag and drop: Drag and drop the content to the canvas and customize every aspect of the video with complete flexibility.
Step 4: Download and share: Download your creation to the device and also remember to share it on your social media account for better reach.
Key Takeaways from This Episode
● Filmora makes the video editing experience more engaging and hassle-free. It can be easily downloaded on your Window or Mac System by visiting the Wondershare official website. It includes several editing options which help you to create an engaging animated video.
● You can make animated logo designs even if you don’t have design skills by choosing the online logo design maker over the Internet. The template will be initially provided to you; all you have to do is select the correct template following the nature of your business.
● You can easily add multimedia files like audio and video to your animated logo design by selecting the “Video” tab. Along with, such add it to a text or make use of them as the background. Therefore, it can be concluded that you can easily create an animated logo design without design skills and give your brand professional and valued recognition.
● If you have any recommendations or doubts regarding the discussion, please let us know by commenting on the box below.
Best 10 Apps to Enhance Your Instagram Story Slideshow
Best 10 Apps to Enhance Your Instagram Story Slideshow
An easy yet powerful editor
Numerous effects to choose from
Detailed tutorials provided by the official channel
Instagram reels and stories have turned into convenient ways of exploring your video creation skills with fun. Read further to know about the top 10 apps to create amazing Insta story slideshows!
In this article
01 [What’s Instagram Story Slideshow](#Part 1)
02 [How to Use Instagram Slideshow?](#Part 2)
03 [Top 10 Apps for Making Instagram Story Slideshow (iOS & Android)](#Part 3)
04 [Tips for Enhancing Your Insta Story Slideshow](#Part 4)
Part 1 What’s Instagram Story Slideshow
With the growing influence of social media on the global life and work culture in today’s times, each and every event on such platforms becomes the new trend of the current IT impacted society. Speaking in the light of the newest developments, Instagram story slideshows have become the latest talk of the diverse range of social media communities across the web.
Since its entry into the communication galore, the Instagram application has emerged as an absolute favourite of social media freaks, thanks to its already captivating features. Moving ahead with its customary user appealing efforts, the latter has recently introduced the slideshow feature to upgrade and improvise its content stories and reels.
Working with the same, you can now integrate your otherwise simple and elementary Instagram stories into awesome slideshows. This visibly means that your conventional stories and reels on the app are now going to get that missing spark with a plethora of customizable motion graphic features. An Instagram story slideshow can work to earn you a huge number of followers, thus uplifting your social creativity quotient and entertainment appeal.
These creative 15 second snippets are appreciably the most amazing trends to increase your audience backup as a market organization, business enterprise, an influencer or as a rising star, all because of an excellent content presentation strategy and catchy outlook. Try hands at using this high end graphic presentation utility to attract the most awaited jaw dropping appreciation of your social media posts.
Part 2 How to Use Instagram Slideshow
Now that you are aware about the excitement and social buzz that your Instagram story slideshows can create with an immediate effect, the aforesaid reason is sufficient enough to motivate you towards diving deeper into the interesting ways of working with the feature to your maximum advantage. Adhering to the concern, let us proceed with learning about the most appealing trends to use an Instagram slideshow in the following section:
● Stepwise Tutorials and Visual Guides
The utility of Instagram slideshows to merge multiple images and videos together has blocked the interruption of additional feeds amid the content presentation, thus giving you the liberty to post a set of related videos and stills in one go, which can be of great help when you encounter a need to share tutorial videos, recipe follow ups and alike content that essentially requires a sequential presentation.
The Instagram stories slideshow can be useful to DIY creators who wish to demonstrate or guide their followers to create stunning examples of self-designed masterpieces. Posting step wise guides with clear cut instructions to work upon or use something, like that of a new product, can also be catered with an Instagram slideshow story.
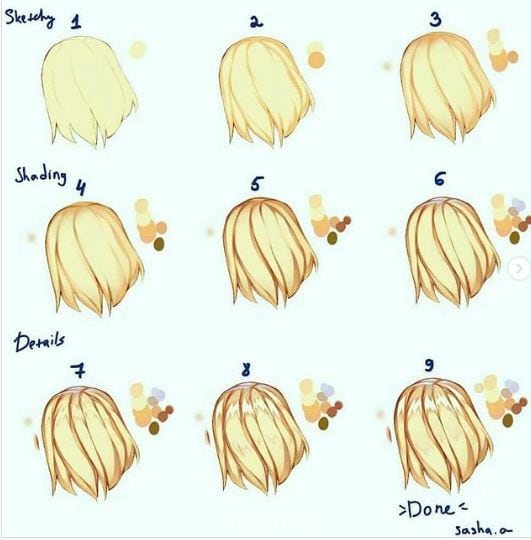
● Product Advertising and Sale
If you are looking for impressive and cost effective solutions to launch your products among potential customers, consider taking the help of Instagram slideshows. The feature is known to deliver excellent results in the brand promotion of some particular products, such as jewelry and apparel design.
Jewelers, furniture retailers and textile designers can work with the slideshow to upload a series of images and videos for a clear and vivid demonstration of the product. Considering the fact that such commodities may greatly differ in their visual and actual appearance, the products can be shown through a variety of angles to facilitate viewers with the most comprehensive and an almost exact presentation of the different aspects that a product claims to have.
Part 3 Top 10 Apps for Making Instagram Story Slideshow (iOS & Android)
By now, you must have had a comprehensive understanding of the significance of Instagram story slideshows in uplifting different aspects of your content delivery, along with effectively addressing your diverse and large scale information sharing needs. Moving ahead with our discussion, let us browse through some of the best software solutions to create the most appealing Instagram story slideshows in the following section:
01SlideLab
Starting with the list the first application to look forward on creating over the top Instagram story slideshows with utmost ease. The software package is loaded with an extensive range of editing effects and filters, audio-visual transitions and supplementary design elements, that promise you of a high resolution, professional quality slideshow output.
Working with the software, you get the flexibility to conveniently customize the sequence in which the images would appear in the slideshow, with allowing a maximum screen display time of 3 seconds to each image. The created slideshows can be easily shared on various media handles and platforms, including Instagram, Facebook and YouTube.
While you can undertake a free trial of the tool, a paid subscription of the same costing $ 4.99 is required for accessing the complete range of features associated with the program. The software is however, exclusively compatible with iOS supported devices.
02VivaVideo
This one is an excellent video editor and graphic designer tool, which you can use to create and share amazing slideshows to complement your Instagram stories and feeds. Working with the aforesaid software program, you don’t need to worry about the concerns of device compatibility, as the program works well with your favorite MacOs and Windows supported systems and devices.
Talking of the specific features that the software promises to offer, you can use its built in camera to capture high resolution videos and supplement them with over 60 high end customization utilities, like sound effects and transitions, along with dubbing the video. The basic version of the tool is available for free usage and allows you to choose between the Pro and Quick modes, respectively for a high flexibility and an escalated automated response.
The free version is however, known to leave watermarks on the created videos, is stuffed with frequently appearing ads and permits a 5-minute presentation time. You can escape these hustles anytime by subscribing to the paid version of VivaVideo for $ 2.99.

03InShot
The InShot image and video editor program is another potential candidate to be employed as an Instagram story slideshow creator. The software’s effect library is packed with a heap of conveniently usable design elements and features to create the most beautiful Instagram slideshows. The app can be put to use for efficiently designing Instagram stories to address personal and professional concerns.
Some over the top features of the tool include, the flexibility to crop, trim, cut and merge video files, and uplift them with a range of effects, filters, transitions and backgrounds. The exclusive audio flexibility of the software allows you to add upbeat sound and music, while enabling a choice of fading music in and out.
The software additionally permits to adjust the speed control of your videos, making them run in a slow or fast motion as per the content requirement. There are also a variety of graphic elements, like, texts, emojis, stickers, etc., which you can add to your images and videos to make them more pronounced.

04StoryArt
Enjoying the highest user ratings on a number of leading software review platforms, the StoryArt software package lands among the most popular and preferred applications to work with creating slideshows for Instagram stories. The most appealing features of the software program include, an extensive range of more than 200 premade slideshow templates which can be directly edited to create amazing Instagram feeds and stories.
Other attractive features of the slideshow creator tool include, a plethora of design effects with varying diversities of fonts, colors, filters and around 20 elusive background themes, that are updated weekly with new additions. The program comes with a clean and responsive interface, is free to use and conforms with Windows and MacOs devices.
05Unfold
Unfold is quite a reliable software tool for creating elegant Instagram story slideshows from a storehouse of preset design templates, while adding a series of inline video and image editing effects to the same. The tool’s slideshow creator package comes with a mix of free and premium features, and does not require the account creation formality to begin working.
Major attractions of the program consist of 25 free and more than 60 premium slideshow design templates, 5 different font styles and upgraded text customizations, high resolution slideshow output and a direct share facility. You can prefer to download the software application from the various iOS and Android app stores, and work with the same on your preferred laptops, desktops and smartphones, without worrying about device compatibility.

06Canva
Canva is conveniently counted among the best Instagram slideshow maker tools and has the possibly the vastest inventory of over 60, 000 beautiful premade slideshow templates to create the mot captivating Instagram stories. Working with the tool, you are granted the liberty to select from a hoard of around 1 million stock images to set the most perfect background for the slideshow being created.
Additional features of the software comprise of high end image customization effects, fonts, transitions, texts and filters, with a never ending variety of frames, textures, icons, badges and stickers. If this is not enough, you get to access a diverse library of high end design elements, like, photo vignette, design grids, image enhancer and photo blur, to compliment your Instagram slideshow stories with the most cherished visual effects.
Talking of the platform cohesiveness, you can work with the tool through its desktop download as well as a free installation from any of the Android or Apple app stores.

07Adobe Spark
This one is a family of graphic design software and tools that conveniently boasts of its extensive credibility towards facilitating the creation of high resolution and engaging image and video slideshows to uplift the conventional feeds and stories of Instagram. Post the creation process, you can add a diversity of audio-visual effects, like, animations, sounds, fonts, text layouts, cutouts and design elements to further enhance your graphic artwork.
The application greets you with the most pleasing and easy to use workspace, which would never require you to be a graphic design expert to start working on the slideshows. If you are into creating video centered Instagram story slideshows, you can choose to work with animated videos and prefer to select the media from your device gallery as well as the software’s huge in-house video collection. The tool’s template library is a further amusement, with a countless number of story and message centered themes.
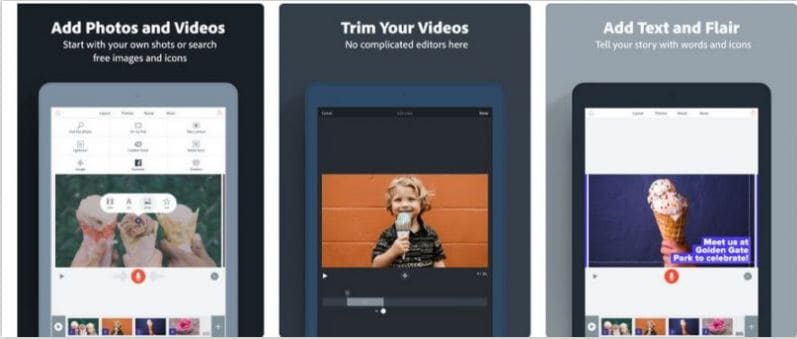
08PhotoGrid
If you are explicitly keen on creating video and photo collages for a jaw dropping Instagram story, consider working with the aforesaid application without a second thought. What’s more exciting is that the software comes with a huge set of over 300 pre made design templates to exclusively craft beautiful slideshows for Instagram stories on any iOS and Android device.
Talking of the app’s set of editing features, apart from being packed with multiple text fonts, over 60 image filters and 90 slideshow backgrounds, the most striking characteristic of the tool is, it permits you to clip an object from an image and remove the latter’s background. Other utilities of the software comprise of a real-time selfie camera, that clicks and automatically beautifies the captured image, beauty enhancing features that can apply and remove makeup from profile shots and selfies.
09Typorama
The next entry in the list is the Typorama software tool, which you can use to create text based slideshows for your Instagram stories. The software’s fonts library is full of elusive typographic designs to choose the best one that suits your content style and arrangement within the slideshow. When opting to work with this feature of the software, you will only need to select a suitable background and begin typing. That’s it!
Extending the text styling credibility of the tool a bit more, you can select from over 50 different typographic layouts and more than 100 typeface and font choices, a huge collection of story based quotes and a diversity of shadows, distortion effects and gradients to improvise your text. The program additionally consists of over 1000 stock templates, image filters, overlays and correction tools to enhance your slideshow background.
10Microsoft Hyperlapse
This one is an advanced slideshow creator program that allows you to design Instagram stories slideshow in time lapse. You can work with the tool to modify the slideshow speed up to 32 times ahead of the normal and create time lapse stories for a maximum of 20 minutes directly on your smartphone.
The app specializes in creating high end video slideshows for Instagram stories and feeds, while showing a great compatibility with high resolution videos. The working interface is super easy to understand and use, without requiring any over the top technical expertise. Feel free to use the app on any iOS or Android supported smartphone.
Part 4 Tips for Enhancing Your Insta Story Slideshow
By far, you have come a long way reading through the credibility, usage and tools to create Instagram story slideshow free of cost as well as though paid subscriptions. In the following section of this article, let us keep our focus on learning about some of the most amazing tips and tricks to upgrade your Insta story slideshow to the next level:
● A Compact Photo Album
Do you land among those social media freaks how want to share just every moment of your day with your peers, or are you confused on selecting the best photos and videos of a cherished event, vacation or bringing home a new utility and end up posting a heap of media on your social media handles?
If your answer is a guilty ‘Yes’, you can try on giving up the habit now by creating an Instagram story photo slideshow to share mini album of your most loved images from the event or vacation. You can use the feature to create a collection of amazing videos as well and share it too with your friends on social media without the guilt of becoming a feed-hog.
Want a practical experience of using Instagram slideshows? See through the following tutorial to understand the exact creation process:
Step 1: Choose the First Image
Begin with selecting the first image for your slideshow, just as you would ideally do for a normal, single image Instagram feed and long press the same.
Step 2: Confirming the Selection
Navigate to the bottom right corner of your selected image to locate a button similar to a photo slideshow. Tap the button to see a ‘1’ inscribed in a blue circle appear on your chosen image.
Step 3: Make Further Selections
You can now proceed to select other images or videos for the slideshow, in a similar fashion as the first one. You are allowed to include a maximum of 10 media files within the slideshow.
Step 4: Customize Your Creation
Tap the ‘Next’ button when you have finished making the required selections. The editor interface will now open to let you customize the selected images with a series of effects and filters, both one at a time, as well as the entire set altogether. You can also work with modifying the order of appearance of the photos and videos if required.
Step 5: The Final Touches
Once you are done with the editing process, continue to follow the remaining steps, as you would do to create a normal Instagram post. You can include captions, locations and tag your peers on the platform.
Step 6: Time to Share!
Your Instagram slideshow is ready to be posted. Upload it either to your feed or story to receive a hoard of likes and comments!
● Animated Text Overlays
If your Instagram story slideshows are missing out on the visual spunk, try complimenting their images and videos with animated transitions and text overlays. Short and quick animations are the best ways to enhance a slideshow story with an eye catching effect. Applying a variety of text overlays would help to keep the audience curious about the next visual delight.
● Prefer a Vertical Aspect Ratio
While the landscape mode tends to ward off certain portions of the visual media from a slideshow being played across multiple sized screens, using the portrait mode with a vertical aspect ratio suits best to almost every screen size. Taking care of this fact will ensure that your audience does not get distracted with the semi visible contents of the slideshow story.
● Choose Your Editing Effects Wisely
Regardless of the slideshow creation tool you prefer, there are a diversity of effects, templates, design elements and filters to uplift your craft with the perfect look. However, you should be cautious enough while making your choice so that the balance of colors, fonts and themes is affordably maintained, lest you would end up with a messy and loud Instagram story slideshow, that would not gather much appeal.
● Creating Instagram Story Slideshows with Wondershare Filmora
Wondershare Filmora Video Editor is the undisputed leader in creating awesome slideshows for Instagram stories, packed with a diverse number of graphic design tools. Beginning to discuss about the reserve of features that the software promises to offer, the app’s template library is a trunk of the most expressive and elegant slideshow backgrounds, themes and images.
For Win 7 or later (64-bit)
For macOS 10.12 or later
Moving further, the app has recently added the 1:1 aspect ratio to its image and video resolution alternatives to exclusively adhere to the slideshow design concern, allowing the perfect display of your craft across a variety of screen dimensions. Filmora, an advanced version of the basic Filmora editor program is known to most effectively cater to the concern of creating Instagram story slideshows.
Working with this slideshow creator program, you can explore your editing skills to your heart’s content and supplement the images and videos of your slideshow with the most expanded range of audio-visual effects, seamless animated transitions, text overlays, thematic backgrounds and creative image filters. The app comes to you absolutely free of cost and welcomes you with a pleasing and clean interface, and is compatible with all of your Mac, iOS and Windows supported devices and Android smartphones.
● Ending Thoughts →
● Instagram story slideshows are the newest trends of professional and commercial information sharing and personalized fun and entertainment.
● When looking through alternatives to create Instagram slideshow online or through an application software, there is a heap of creator tools.
● Pick the Wondershare Filmora slideshow creator program to design the most sparked up slideshows for your Instagram stories.
Instagram reels and stories have turned into convenient ways of exploring your video creation skills with fun. Read further to know about the top 10 apps to create amazing Insta story slideshows!
In this article
01 [What’s Instagram Story Slideshow](#Part 1)
02 [How to Use Instagram Slideshow?](#Part 2)
03 [Top 10 Apps for Making Instagram Story Slideshow (iOS & Android)](#Part 3)
04 [Tips for Enhancing Your Insta Story Slideshow](#Part 4)
Part 1 What’s Instagram Story Slideshow
With the growing influence of social media on the global life and work culture in today’s times, each and every event on such platforms becomes the new trend of the current IT impacted society. Speaking in the light of the newest developments, Instagram story slideshows have become the latest talk of the diverse range of social media communities across the web.
Since its entry into the communication galore, the Instagram application has emerged as an absolute favourite of social media freaks, thanks to its already captivating features. Moving ahead with its customary user appealing efforts, the latter has recently introduced the slideshow feature to upgrade and improvise its content stories and reels.
Working with the same, you can now integrate your otherwise simple and elementary Instagram stories into awesome slideshows. This visibly means that your conventional stories and reels on the app are now going to get that missing spark with a plethora of customizable motion graphic features. An Instagram story slideshow can work to earn you a huge number of followers, thus uplifting your social creativity quotient and entertainment appeal.
These creative 15 second snippets are appreciably the most amazing trends to increase your audience backup as a market organization, business enterprise, an influencer or as a rising star, all because of an excellent content presentation strategy and catchy outlook. Try hands at using this high end graphic presentation utility to attract the most awaited jaw dropping appreciation of your social media posts.
Part 2 How to Use Instagram Slideshow
Now that you are aware about the excitement and social buzz that your Instagram story slideshows can create with an immediate effect, the aforesaid reason is sufficient enough to motivate you towards diving deeper into the interesting ways of working with the feature to your maximum advantage. Adhering to the concern, let us proceed with learning about the most appealing trends to use an Instagram slideshow in the following section:
● Stepwise Tutorials and Visual Guides
The utility of Instagram slideshows to merge multiple images and videos together has blocked the interruption of additional feeds amid the content presentation, thus giving you the liberty to post a set of related videos and stills in one go, which can be of great help when you encounter a need to share tutorial videos, recipe follow ups and alike content that essentially requires a sequential presentation.
The Instagram stories slideshow can be useful to DIY creators who wish to demonstrate or guide their followers to create stunning examples of self-designed masterpieces. Posting step wise guides with clear cut instructions to work upon or use something, like that of a new product, can also be catered with an Instagram slideshow story.
● Product Advertising and Sale
If you are looking for impressive and cost effective solutions to launch your products among potential customers, consider taking the help of Instagram slideshows. The feature is known to deliver excellent results in the brand promotion of some particular products, such as jewelry and apparel design.
Jewelers, furniture retailers and textile designers can work with the slideshow to upload a series of images and videos for a clear and vivid demonstration of the product. Considering the fact that such commodities may greatly differ in their visual and actual appearance, the products can be shown through a variety of angles to facilitate viewers with the most comprehensive and an almost exact presentation of the different aspects that a product claims to have.
Part 3 Top 10 Apps for Making Instagram Story Slideshow (iOS & Android)
By now, you must have had a comprehensive understanding of the significance of Instagram story slideshows in uplifting different aspects of your content delivery, along with effectively addressing your diverse and large scale information sharing needs. Moving ahead with our discussion, let us browse through some of the best software solutions to create the most appealing Instagram story slideshows in the following section:
01SlideLab
Starting with the list the first application to look forward on creating over the top Instagram story slideshows with utmost ease. The software package is loaded with an extensive range of editing effects and filters, audio-visual transitions and supplementary design elements, that promise you of a high resolution, professional quality slideshow output.
Working with the software, you get the flexibility to conveniently customize the sequence in which the images would appear in the slideshow, with allowing a maximum screen display time of 3 seconds to each image. The created slideshows can be easily shared on various media handles and platforms, including Instagram, Facebook and YouTube.
While you can undertake a free trial of the tool, a paid subscription of the same costing $ 4.99 is required for accessing the complete range of features associated with the program. The software is however, exclusively compatible with iOS supported devices.
02VivaVideo
This one is an excellent video editor and graphic designer tool, which you can use to create and share amazing slideshows to complement your Instagram stories and feeds. Working with the aforesaid software program, you don’t need to worry about the concerns of device compatibility, as the program works well with your favorite MacOs and Windows supported systems and devices.
Talking of the specific features that the software promises to offer, you can use its built in camera to capture high resolution videos and supplement them with over 60 high end customization utilities, like sound effects and transitions, along with dubbing the video. The basic version of the tool is available for free usage and allows you to choose between the Pro and Quick modes, respectively for a high flexibility and an escalated automated response.
The free version is however, known to leave watermarks on the created videos, is stuffed with frequently appearing ads and permits a 5-minute presentation time. You can escape these hustles anytime by subscribing to the paid version of VivaVideo for $ 2.99.
03InShot
The InShot image and video editor program is another potential candidate to be employed as an Instagram story slideshow creator. The software’s effect library is packed with a heap of conveniently usable design elements and features to create the most beautiful Instagram slideshows. The app can be put to use for efficiently designing Instagram stories to address personal and professional concerns.
Some over the top features of the tool include, the flexibility to crop, trim, cut and merge video files, and uplift them with a range of effects, filters, transitions and backgrounds. The exclusive audio flexibility of the software allows you to add upbeat sound and music, while enabling a choice of fading music in and out.
The software additionally permits to adjust the speed control of your videos, making them run in a slow or fast motion as per the content requirement. There are also a variety of graphic elements, like, texts, emojis, stickers, etc., which you can add to your images and videos to make them more pronounced.
04StoryArt
Enjoying the highest user ratings on a number of leading software review platforms, the StoryArt software package lands among the most popular and preferred applications to work with creating slideshows for Instagram stories. The most appealing features of the software program include, an extensive range of more than 200 premade slideshow templates which can be directly edited to create amazing Instagram feeds and stories.
Other attractive features of the slideshow creator tool include, a plethora of design effects with varying diversities of fonts, colors, filters and around 20 elusive background themes, that are updated weekly with new additions. The program comes with a clean and responsive interface, is free to use and conforms with Windows and MacOs devices.
05Unfold
Unfold is quite a reliable software tool for creating elegant Instagram story slideshows from a storehouse of preset design templates, while adding a series of inline video and image editing effects to the same. The tool’s slideshow creator package comes with a mix of free and premium features, and does not require the account creation formality to begin working.
Major attractions of the program consist of 25 free and more than 60 premium slideshow design templates, 5 different font styles and upgraded text customizations, high resolution slideshow output and a direct share facility. You can prefer to download the software application from the various iOS and Android app stores, and work with the same on your preferred laptops, desktops and smartphones, without worrying about device compatibility.
06Canva
Canva is conveniently counted among the best Instagram slideshow maker tools and has the possibly the vastest inventory of over 60, 000 beautiful premade slideshow templates to create the mot captivating Instagram stories. Working with the tool, you are granted the liberty to select from a hoard of around 1 million stock images to set the most perfect background for the slideshow being created.
Additional features of the software comprise of high end image customization effects, fonts, transitions, texts and filters, with a never ending variety of frames, textures, icons, badges and stickers. If this is not enough, you get to access a diverse library of high end design elements, like, photo vignette, design grids, image enhancer and photo blur, to compliment your Instagram slideshow stories with the most cherished visual effects.
Talking of the platform cohesiveness, you can work with the tool through its desktop download as well as a free installation from any of the Android or Apple app stores.
07Adobe Spark
This one is a family of graphic design software and tools that conveniently boasts of its extensive credibility towards facilitating the creation of high resolution and engaging image and video slideshows to uplift the conventional feeds and stories of Instagram. Post the creation process, you can add a diversity of audio-visual effects, like, animations, sounds, fonts, text layouts, cutouts and design elements to further enhance your graphic artwork.
The application greets you with the most pleasing and easy to use workspace, which would never require you to be a graphic design expert to start working on the slideshows. If you are into creating video centered Instagram story slideshows, you can choose to work with animated videos and prefer to select the media from your device gallery as well as the software’s huge in-house video collection. The tool’s template library is a further amusement, with a countless number of story and message centered themes.
08PhotoGrid
If you are explicitly keen on creating video and photo collages for a jaw dropping Instagram story, consider working with the aforesaid application without a second thought. What’s more exciting is that the software comes with a huge set of over 300 pre made design templates to exclusively craft beautiful slideshows for Instagram stories on any iOS and Android device.
Talking of the app’s set of editing features, apart from being packed with multiple text fonts, over 60 image filters and 90 slideshow backgrounds, the most striking characteristic of the tool is, it permits you to clip an object from an image and remove the latter’s background. Other utilities of the software comprise of a real-time selfie camera, that clicks and automatically beautifies the captured image, beauty enhancing features that can apply and remove makeup from profile shots and selfies.
09Typorama
The next entry in the list is the Typorama software tool, which you can use to create text based slideshows for your Instagram stories. The software’s fonts library is full of elusive typographic designs to choose the best one that suits your content style and arrangement within the slideshow. When opting to work with this feature of the software, you will only need to select a suitable background and begin typing. That’s it!
Extending the text styling credibility of the tool a bit more, you can select from over 50 different typographic layouts and more than 100 typeface and font choices, a huge collection of story based quotes and a diversity of shadows, distortion effects and gradients to improvise your text. The program additionally consists of over 1000 stock templates, image filters, overlays and correction tools to enhance your slideshow background.
10Microsoft Hyperlapse
This one is an advanced slideshow creator program that allows you to design Instagram stories slideshow in time lapse. You can work with the tool to modify the slideshow speed up to 32 times ahead of the normal and create time lapse stories for a maximum of 20 minutes directly on your smartphone.
The app specializes in creating high end video slideshows for Instagram stories and feeds, while showing a great compatibility with high resolution videos. The working interface is super easy to understand and use, without requiring any over the top technical expertise. Feel free to use the app on any iOS or Android supported smartphone.
Part 4 Tips for Enhancing Your Insta Story Slideshow
By far, you have come a long way reading through the credibility, usage and tools to create Instagram story slideshow free of cost as well as though paid subscriptions. In the following section of this article, let us keep our focus on learning about some of the most amazing tips and tricks to upgrade your Insta story slideshow to the next level:
● A Compact Photo Album
Do you land among those social media freaks how want to share just every moment of your day with your peers, or are you confused on selecting the best photos and videos of a cherished event, vacation or bringing home a new utility and end up posting a heap of media on your social media handles?
If your answer is a guilty ‘Yes’, you can try on giving up the habit now by creating an Instagram story photo slideshow to share mini album of your most loved images from the event or vacation. You can use the feature to create a collection of amazing videos as well and share it too with your friends on social media without the guilt of becoming a feed-hog.
Want a practical experience of using Instagram slideshows? See through the following tutorial to understand the exact creation process:
Step 1: Choose the First Image
Begin with selecting the first image for your slideshow, just as you would ideally do for a normal, single image Instagram feed and long press the same.
Step 2: Confirming the Selection
Navigate to the bottom right corner of your selected image to locate a button similar to a photo slideshow. Tap the button to see a ‘1’ inscribed in a blue circle appear on your chosen image.
Step 3: Make Further Selections
You can now proceed to select other images or videos for the slideshow, in a similar fashion as the first one. You are allowed to include a maximum of 10 media files within the slideshow.
Step 4: Customize Your Creation
Tap the ‘Next’ button when you have finished making the required selections. The editor interface will now open to let you customize the selected images with a series of effects and filters, both one at a time, as well as the entire set altogether. You can also work with modifying the order of appearance of the photos and videos if required.
Step 5: The Final Touches
Once you are done with the editing process, continue to follow the remaining steps, as you would do to create a normal Instagram post. You can include captions, locations and tag your peers on the platform.
Step 6: Time to Share!
Your Instagram slideshow is ready to be posted. Upload it either to your feed or story to receive a hoard of likes and comments!
● Animated Text Overlays
If your Instagram story slideshows are missing out on the visual spunk, try complimenting their images and videos with animated transitions and text overlays. Short and quick animations are the best ways to enhance a slideshow story with an eye catching effect. Applying a variety of text overlays would help to keep the audience curious about the next visual delight.
● Prefer a Vertical Aspect Ratio
While the landscape mode tends to ward off certain portions of the visual media from a slideshow being played across multiple sized screens, using the portrait mode with a vertical aspect ratio suits best to almost every screen size. Taking care of this fact will ensure that your audience does not get distracted with the semi visible contents of the slideshow story.
● Choose Your Editing Effects Wisely
Regardless of the slideshow creation tool you prefer, there are a diversity of effects, templates, design elements and filters to uplift your craft with the perfect look. However, you should be cautious enough while making your choice so that the balance of colors, fonts and themes is affordably maintained, lest you would end up with a messy and loud Instagram story slideshow, that would not gather much appeal.
● Creating Instagram Story Slideshows with Wondershare Filmora
Wondershare Filmora Video Editor is the undisputed leader in creating awesome slideshows for Instagram stories, packed with a diverse number of graphic design tools. Beginning to discuss about the reserve of features that the software promises to offer, the app’s template library is a trunk of the most expressive and elegant slideshow backgrounds, themes and images.
For Win 7 or later (64-bit)
For macOS 10.12 or later
Moving further, the app has recently added the 1:1 aspect ratio to its image and video resolution alternatives to exclusively adhere to the slideshow design concern, allowing the perfect display of your craft across a variety of screen dimensions. Filmora, an advanced version of the basic Filmora editor program is known to most effectively cater to the concern of creating Instagram story slideshows.
Working with this slideshow creator program, you can explore your editing skills to your heart’s content and supplement the images and videos of your slideshow with the most expanded range of audio-visual effects, seamless animated transitions, text overlays, thematic backgrounds and creative image filters. The app comes to you absolutely free of cost and welcomes you with a pleasing and clean interface, and is compatible with all of your Mac, iOS and Windows supported devices and Android smartphones.
● Ending Thoughts →
● Instagram story slideshows are the newest trends of professional and commercial information sharing and personalized fun and entertainment.
● When looking through alternatives to create Instagram slideshow online or through an application software, there is a heap of creator tools.
● Pick the Wondershare Filmora slideshow creator program to design the most sparked up slideshows for your Instagram stories.
Cartoon Fundamentals: How to Learn Cartoon Characters Sketch Quickly
Cartoon Fundamentals: How to Learn Cartoon Characters Sketch Quickly
An easy yet powerful editor
Numerous effects to choose from
Detailed tutorials provided by the official channel
Whether your favourite Cartoon character Bugs-bunny comes from space or beyond your imagination, whether nostalgic Tom and Jerry are young, eternal or old, knowing the process to draw cute, funny, adorable cartoon-characters is a kind of special feeling always & looks essential incase you desire to become quality professional artist. Cartoon Characters are more challenging to draw while taking care of their weird postures, body-parts like legs, hands.Cartoons characters are the easiest ones to draw as it involved simplistic shapes and doesn’t needed a hard core practice.
In this article, you will be able to get access to drawing amazing characters with a wide range of characters featuring ordinary people, fictional-characters, creatures, monsters, or your favourite cute little ones in easy way.
In this article
01 [Basics of Cartoon Characters Sketch](#Part 1)
02 [Cartoon Characters Sketch Anyone Can Draw (With Free Video Tutorials)](#Part 2)
Part 1 Basics of Cartoon Characters Sketch
Before going ahead with the process of learning step by step how to draw cartoon characters, you need to understand the methodology behind sketching. It is easy to draw multiple cartoon characters but at the same time, you need to figure out sketching techniques involved in making that happen. If you want to extract few details of your central character, you need to represent cartoon characters sketch with the help of shapes. The main goal here is to recognize drawing & let it be attractive as children are the main audience and cartoon characters like Disney, Chuck Jones, Walter-Lantz and others have truly enchanted this world with eternal character & their magical appearance.
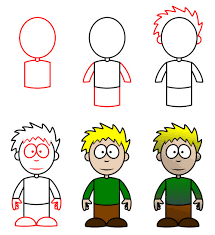
01Concentrating on circle
One of the most basic and interesting shape for any cartoon sketch is circle. All you need is to clearly define basic proportion of your character and that can be happened with desired character’s head. Later on you can trace its charm with face axis.
02Draw Cartoon Eyes
In order to make eyes, one needs to take care of oval shape sketch with slight tilt to side at top position. You have to note that, it is always important to leave good gap between each one of them of approximately similar size as the eye.
03Drawing Cartoon Hair
There is nothing to fear when it comes to draw cartoon hair. You don’t need stylist or a fashion designer in order to make them look perfect. With ideal haircut and matching personality of the desired character, you can do this thing pretty awesome. Hair can represent age, conservatism, rebellion etc. and comes in incredible features.
One of the most accurate & a faster way to do that is by taking references from a fashion magazine, Google Search or cartoon magazine. Once you are done with your findings of ideal styling, you can later on simplify your hair version.
04Sketching for Older Character
Sometimes older characters can be pretty easy to draw as it all begins with their eyes, facial expressions, addition of wrinkles, eyebrows, eye pupils etc. You just need to expand eyebrow a little bit. The older characters have thicker-eyebrows, large forehead space etc.
05Drawing a female character
It’s simple, just focus around delicacy in facial structures, like:-
● Thin eyebrows
● Larger & expressive eyelashes
● Thinner-chin
● Small-nose under fewer-details
● Long hair or depends on your choice
That’s it. Also, you need to give comfort feeling to your character, the more you draw the more realistic it will look.
● Filmora for learning new drawing skills
For Win 7 or later (64-bit)
For macOS 10.12 or later
If you want to showcase your talent to this world without any extravagant apps or software then FIlmora is the best choice that you can consider for drawing some amazing cartoon at your own. This app has its own fun loving designing features and you can add varieties of stickers, images and text to your drawings.
What exactly Filmora can do your drawings:
● For your Pencil sketch of cartoon characters, this app has a lot of text, images and fun loving stickers to showcase more highlighting features of your cartoon character.
● You can share your cartoon with your friends and other community over the web through Twitter, Facebook, and WhatsApp etc.
● This will let you access video editing and image editing features also, to give your cartoon a life.
Part 2 Cartoon Characters Sketch Anyone Can Draw (With Free Video Tutorials)
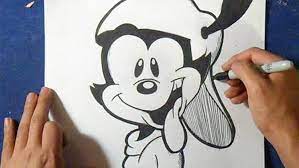
Now, it’s time to move on with thinking about which cartoon characters to put in your papers with emotions, facial expressions and other features. We are now moving towards the process to include more and more emotions to the same.
Let’s begin drawing 8 amazing characters that are not only famous but also living in heart of children.
01Bugs Bunny
Who doesn’t live Bugs Bunny? Well, it is among the list of most iconic characters that you can imagine and it is certainly the most funnies and interesting character to draw. Right from drawing its big feet to attractive teeth just made for cutting carrots, a lot of things are included in Bugs bunny.
Let’s Draw it:-
● Draw a circle & a “noodle” shaped object as per the imagination. The circle will be its head & pear shape will be its body. You need to make bottom pear fatter as compared to upper portion and also upper-part has to overlap head circle only a little.
● Include perspective guidelines at around the head as this thing can correctly position eyes as well as nose of your bunny.
● You need to draw the eyes at Horizontal guideline and nose where guidelines crosses.
● Draw cheeks and include ears, arms. At the time of drawing arms, you have to give natural curve to arms.
● The arm curves together with the legs-curves might look little difficult, therefore you have to make use of your pencil tenderly without pushing it harder.
● Draw inner lines in ear & iris ellipse at inner portion of eyes.
● Add nose & draw mouth, teeth.
● Your Bunny starts taking its shape and here you can add colors as per your choice
Your cartoon Bugs-Bunny is now ready.
02Popeye
One of the most famous cartoon character of Disney Popeye also appeared on the cinema screens and this belongs to the list of famous classic cartoon-characters.
Let’s draw this amazing character:-
● First Sketch few basic shapes like head, chest, belly.
● It’s a comic character so give it a grotesque-look
● Slightly include other body-parts with shapes like ellipses, noodles in the form of contours.
● Draw one centre-line across the head with well-balanced facial features.
● Draw nose, mouth, ears for the face to form.
● Sketch contours of Popeye’s fists, and arms.
● You can begin giving colors to this shape with flat layers of colorings
03Barney Rubble
As a next door friend and neighbor of Flintstone-house, Barney is kind of a quirky character. This contains features like ears & big feet in the form of angles.
Here is an amazing video tutorial for your Barnet Rubble Cartoon Character:-
04Scrooge McDuck
This cartoon character has wealthy features with fun-loving designs to draw in the form of top-hat, a-cane, as well as few small reading glasses. When it comes to drawing this cartoon characters sketch you need to come up with funny and slightly challenging features.
05Drawing a Ninja For Amazing Action
● Step 1
Work on the head first with nice & precise circle in order to illustrate head portion. Inside this, you can add two more tiny circles for eyes. Once you are done with the eyes, you need to add large & thin rectangle that represents headband. At one portion of headband draw tiny circle with small triangles in numbers 2.
● Step 2
Left arm of our ninja can be sketched through a long & thin rectangle. In order to showcase right arm, draw two rectangles and later on both hands has to be represented in terms of circles.
● Step 3
Two Legs are also need to draw in terms of unusual position. So total of 5 rectangles has to be drawn for both legs & feet.
● Step 4
Add accessories like sabre with basic shapes like circle or rectangle for the same.
● Step 5
Now refine it with an outline and work upon head to make sure both eyes will be clear & visible and also keep the head round & tight.
● Step 6
For upper portion, use nice curved lines and illustrate chest & arms. For showing a discipline make use of good contour likes that highlights posture & gesture.
● Step 7
Repeat the process for the lower portion of your Action ninja.
● Step 8
Now throw some colors’ either black, brown & red to finish the masterpiece!
06Morty Smith
Morty is a lot easy and occupies t-shirt & jeans in its overall appearance and it is much smaller & way more natural than you usually think.
07Helga G. Pataki
If you want to add some crazy cartoon characters in your list then Helga is a good choice. While drawing its cartoon, you need to pay close attention to head as this thing can be little strange with her rectangle hairdo.
08Kim Possible
The design of Kim Possible looks easy at first appearance but when you actually begin with the process of draw its shape, you may get confused. You need to add varieties of features in her face with crazy parachute pants right from the 1980s.
09Shaggy Rogers
The companion of Scooby Shaggy also love its treats & also like to run-away from the monsters at first sight. He can solve mysteries and fun to watch.
● Ending Thoughts →
● Well, drawing cartoons is always a fun loving thing to do. You can pick any one cartoon for drawing some favorite designs.
● You can make use of professional apps to give proper background to your poster or sketch making.
● For Fictional creatures, you can illustrate their styling features, fun facts and lot more to make it much more interesting.
Whether your favourite Cartoon character Bugs-bunny comes from space or beyond your imagination, whether nostalgic Tom and Jerry are young, eternal or old, knowing the process to draw cute, funny, adorable cartoon-characters is a kind of special feeling always & looks essential incase you desire to become quality professional artist. Cartoon Characters are more challenging to draw while taking care of their weird postures, body-parts like legs, hands.Cartoons characters are the easiest ones to draw as it involved simplistic shapes and doesn’t needed a hard core practice.
In this article, you will be able to get access to drawing amazing characters with a wide range of characters featuring ordinary people, fictional-characters, creatures, monsters, or your favourite cute little ones in easy way.
In this article
01 [Basics of Cartoon Characters Sketch](#Part 1)
02 [Cartoon Characters Sketch Anyone Can Draw (With Free Video Tutorials)](#Part 2)
Part 1 Basics of Cartoon Characters Sketch
Before going ahead with the process of learning step by step how to draw cartoon characters, you need to understand the methodology behind sketching. It is easy to draw multiple cartoon characters but at the same time, you need to figure out sketching techniques involved in making that happen. If you want to extract few details of your central character, you need to represent cartoon characters sketch with the help of shapes. The main goal here is to recognize drawing & let it be attractive as children are the main audience and cartoon characters like Disney, Chuck Jones, Walter-Lantz and others have truly enchanted this world with eternal character & their magical appearance.
01Concentrating on circle
One of the most basic and interesting shape for any cartoon sketch is circle. All you need is to clearly define basic proportion of your character and that can be happened with desired character’s head. Later on you can trace its charm with face axis.
02Draw Cartoon Eyes
In order to make eyes, one needs to take care of oval shape sketch with slight tilt to side at top position. You have to note that, it is always important to leave good gap between each one of them of approximately similar size as the eye.
03Drawing Cartoon Hair
There is nothing to fear when it comes to draw cartoon hair. You don’t need stylist or a fashion designer in order to make them look perfect. With ideal haircut and matching personality of the desired character, you can do this thing pretty awesome. Hair can represent age, conservatism, rebellion etc. and comes in incredible features.
One of the most accurate & a faster way to do that is by taking references from a fashion magazine, Google Search or cartoon magazine. Once you are done with your findings of ideal styling, you can later on simplify your hair version.
04Sketching for Older Character
Sometimes older characters can be pretty easy to draw as it all begins with their eyes, facial expressions, addition of wrinkles, eyebrows, eye pupils etc. You just need to expand eyebrow a little bit. The older characters have thicker-eyebrows, large forehead space etc.
05Drawing a female character
It’s simple, just focus around delicacy in facial structures, like:-
● Thin eyebrows
● Larger & expressive eyelashes
● Thinner-chin
● Small-nose under fewer-details
● Long hair or depends on your choice
That’s it. Also, you need to give comfort feeling to your character, the more you draw the more realistic it will look.
● Filmora for learning new drawing skills
For Win 7 or later (64-bit)
For macOS 10.12 or later
If you want to showcase your talent to this world without any extravagant apps or software then FIlmora is the best choice that you can consider for drawing some amazing cartoon at your own. This app has its own fun loving designing features and you can add varieties of stickers, images and text to your drawings.
What exactly Filmora can do your drawings:
● For your Pencil sketch of cartoon characters, this app has a lot of text, images and fun loving stickers to showcase more highlighting features of your cartoon character.
● You can share your cartoon with your friends and other community over the web through Twitter, Facebook, and WhatsApp etc.
● This will let you access video editing and image editing features also, to give your cartoon a life.
Part 2 Cartoon Characters Sketch Anyone Can Draw (With Free Video Tutorials)
Now, it’s time to move on with thinking about which cartoon characters to put in your papers with emotions, facial expressions and other features. We are now moving towards the process to include more and more emotions to the same.
Let’s begin drawing 8 amazing characters that are not only famous but also living in heart of children.
01Bugs Bunny
Who doesn’t live Bugs Bunny? Well, it is among the list of most iconic characters that you can imagine and it is certainly the most funnies and interesting character to draw. Right from drawing its big feet to attractive teeth just made for cutting carrots, a lot of things are included in Bugs bunny.
Let’s Draw it:-
● Draw a circle & a “noodle” shaped object as per the imagination. The circle will be its head & pear shape will be its body. You need to make bottom pear fatter as compared to upper portion and also upper-part has to overlap head circle only a little.
● Include perspective guidelines at around the head as this thing can correctly position eyes as well as nose of your bunny.
● You need to draw the eyes at Horizontal guideline and nose where guidelines crosses.
● Draw cheeks and include ears, arms. At the time of drawing arms, you have to give natural curve to arms.
● The arm curves together with the legs-curves might look little difficult, therefore you have to make use of your pencil tenderly without pushing it harder.
● Draw inner lines in ear & iris ellipse at inner portion of eyes.
● Add nose & draw mouth, teeth.
● Your Bunny starts taking its shape and here you can add colors as per your choice
Your cartoon Bugs-Bunny is now ready.
02Popeye
One of the most famous cartoon character of Disney Popeye also appeared on the cinema screens and this belongs to the list of famous classic cartoon-characters.
Let’s draw this amazing character:-
● First Sketch few basic shapes like head, chest, belly.
● It’s a comic character so give it a grotesque-look
● Slightly include other body-parts with shapes like ellipses, noodles in the form of contours.
● Draw one centre-line across the head with well-balanced facial features.
● Draw nose, mouth, ears for the face to form.
● Sketch contours of Popeye’s fists, and arms.
● You can begin giving colors to this shape with flat layers of colorings
03Barney Rubble
As a next door friend and neighbor of Flintstone-house, Barney is kind of a quirky character. This contains features like ears & big feet in the form of angles.
Here is an amazing video tutorial for your Barnet Rubble Cartoon Character:-
04Scrooge McDuck
This cartoon character has wealthy features with fun-loving designs to draw in the form of top-hat, a-cane, as well as few small reading glasses. When it comes to drawing this cartoon characters sketch you need to come up with funny and slightly challenging features.
05Drawing a Ninja For Amazing Action
● Step 1
Work on the head first with nice & precise circle in order to illustrate head portion. Inside this, you can add two more tiny circles for eyes. Once you are done with the eyes, you need to add large & thin rectangle that represents headband. At one portion of headband draw tiny circle with small triangles in numbers 2.
● Step 2
Left arm of our ninja can be sketched through a long & thin rectangle. In order to showcase right arm, draw two rectangles and later on both hands has to be represented in terms of circles.
● Step 3
Two Legs are also need to draw in terms of unusual position. So total of 5 rectangles has to be drawn for both legs & feet.
● Step 4
Add accessories like sabre with basic shapes like circle or rectangle for the same.
● Step 5
Now refine it with an outline and work upon head to make sure both eyes will be clear & visible and also keep the head round & tight.
● Step 6
For upper portion, use nice curved lines and illustrate chest & arms. For showing a discipline make use of good contour likes that highlights posture & gesture.
● Step 7
Repeat the process for the lower portion of your Action ninja.
● Step 8
Now throw some colors’ either black, brown & red to finish the masterpiece!
06Morty Smith
Morty is a lot easy and occupies t-shirt & jeans in its overall appearance and it is much smaller & way more natural than you usually think.
07Helga G. Pataki
If you want to add some crazy cartoon characters in your list then Helga is a good choice. While drawing its cartoon, you need to pay close attention to head as this thing can be little strange with her rectangle hairdo.
08Kim Possible
The design of Kim Possible looks easy at first appearance but when you actually begin with the process of draw its shape, you may get confused. You need to add varieties of features in her face with crazy parachute pants right from the 1980s.
09Shaggy Rogers
The companion of Scooby Shaggy also love its treats & also like to run-away from the monsters at first sight. He can solve mysteries and fun to watch.
● Ending Thoughts →
● Well, drawing cartoons is always a fun loving thing to do. You can pick any one cartoon for drawing some favorite designs.
● You can make use of professional apps to give proper background to your poster or sketch making.
● For Fictional creatures, you can illustrate their styling features, fun facts and lot more to make it much more interesting.
Apps to Animate Still Pictures Which Could Make Your Pictures Become Internet Sensation
Apps to Animate Still Pictures Which Could Make Your Pictures Become Internet Sensation
An easy yet powerful editor
Numerous effects to choose from
Detailed tutorials provided by the official channel
Now, it is a question of what to do with all those still photos lying in your phone. You can be pretty certain that you won’t be retiring from clicking images anytime soon. A tip to help make posting images more interesting would be using apps to animate your photos.
You can also find an app that animates your face specifically, which is great for instagram content and has a greater chance of getting reactions or comments. So without further to do let’s get animating.
In this article
01 [Review of General Methods: Can You Animate Still Pictures?](#Part 1)
02 [10 Best apps to animate still photos on Android & iOS](#Part 2)
03 [Additional Extension: 5 Apps to Animate Old Photos](#Part 3)
Part 1 Review of General Methods: Can You Animate Still Pictures?
It’s pretty obvious that you can! These days you can do whatever you want online so animating still pictures should be a piece of cake if you know-how.
A video is basically an entire collage of moving pictures. So if you can cut out pictures from a video why not turn still pictures into animations.
There are a number of ways you can use to animate still images →
● Videos are multiple pictures that move at a frame rate. Make short copies of a video by cutting out the essential moments and playing them in a loop.
● Add and play video animation elements over a picture. With the right software, this task is as easy as copy-pasting over another image.
● Apply an animated 3D image with a transparent background over another image. Remember, the bigger the element the closer it is. So size is directly translated as distance.
● You can use multiple filters and effects on an image with an animated portrait app. Find out what app you can use further on in this article.
● Turn an image into a GIF. No matter its small size and cartoonish style, GIF animation has a very wide appeal as online content.
Part 2 10 Best apps to animate still photos on Android & iOS
01GIPHY
Giphy is the largest internet catalog for GIF files, clips & stickers. No matter if it is a scene from a movie or an animation you have watched somewhere, using this application you can easily find, save & share or simply create something new.
Price: Free
Pros
● Quickly turns still photos into an animation.
● Easily share your work through all social media channels.
Cons
● Search tags are varied; you may need to search using unlikely words to get desired results.
Applicable System: Android
02GIPHY
One of the best ways to turn your photos & videos into GIFs is using ImgPlay. It has a clearer interface making it easy to use. Imgplay comes with paid- premium and non-paid version making it suitable for personal & professional application.
Price: Pro $4.99.
Pros
● It is not packed with unnecessary features.
Cons
● ImgPlay slaps a watermark on all its non-premium versions.
Applicable System: Android & iOS.
03Loopsie
The best Part is that Loopsie provides spectacular cinematographic effects to your animated stills. Stabilization algorithm efficiently removes shaking effects & blurs.
Price: Free.
Pros
● User friendly UI
● Easy to share on social media platforms.
Cons
● Paid version is a bit pricey.
Applicable System: Only on iOS.
04StoryZ
Looking for ways to create animated visuals form still images? This is where your quest ends. An advanced editing platform that offers overlays, movement & color filters. Banner Ads & watermarks can be removed by paying a small subscription fee.
Price: Free version available. Premium costs INR 789 a year.
Pros
● Double exposure effect combines video overlay & static imagery.
Cons
● Contains Ad & watermark.
Applicable System: Android.
05Animate Me
Animate Me offers you a package of postcards & greeting snapshots that you can animate according to your need. The paid subscription will get you updated sounds & effects every now & then.
Price: Free.
Pros
● Easy to use & beginners friendly.
Cons
● Editing features & tools are limited.
Applicable System: Windows**.**
06Movepic
Create animated stills, GIFs, live-wallpapers all with Movepic. It allows you to animate simply anything by drawing a path. You can also adjust the speed of animation manually.
Price: Free.
Pros
● Animate in a light motion.
● Easy to use.
Cons
● Free version leaves a watermark on images.
Applicable System: Android & iOS.
07Pixaloop
Pixaloop is a fun app packed with significant animation & editing features. 100% free to use software delivers live animated images in a few clicks. User friendly interface edits images using powerful & precise animation tools.
Price- Free.
Pros
● Offers all the necessary features & core tools.
● Provides accuracy & flexibility to the users.
Cons
● The animation process is a bit time consuming.
Applicable System: Android & iOS.
08Zoetropic
Zoetropic has a combination of 3D tools and Camera FX to animate your images. User friendly interface allows you to mask the still areas if you wish to keep it still.
Price: $199 (Pro)
Pros
● Easily customize motion areas.
● Apply overlays & audios.
Cons
● App price is higher than similar available apps.
Applicable System: Android & iOS.
9Motionleap
It is one of the most top reviewed apps on Playstore related to animating still photos. It has several features like programming directional cues, freeze portions of your photo or even apply filters.
Price: Free version. Pro version; $3.50/month, $18/year and $55 lifetime.
Pros
● Its free version does not apply watermark.
● Intuitive Interface.
Cons
● Best features are locked in Pro version.
Applicable System: Android & iOS.
Part 3 Additional Extension: 5 Apps to Animate Old Photos
It can be unanimously agreed upon that people have been storing photos for decades as a means of preserving memories. We don’t get much opportunity to meet familiar faces too often so why not just try and animate still images of relatives. Now we already know how we can start animating images on apps but restoring original images maybe a tad more complicated than that. This time a bit of the animation is dependent on the physical state of the picture so be sure it’s in mint condition.
These photos can be restored or manipulated digitally with the help of smart AI. We have listed down some of the apps to animate old photos and reconstruct faces;
01Photos Revive
You can add colour to old worn out photos and make them look more realistic in terms of tonal colorization using artificial intelligence. The app also asks you recollect any details of the photo that you might remember in terms of the image.
Applicable OS: iOS only.

02Remini
After going through several improvements and upgrades, you can use the app Remini to confidently restore low resolution images that are either pixelated, blurred or damaged into High Definition images. This app has already been used by users to process a hundred million photos.
Applicable OS: Android 1.7.2 or higher, & iOS 9.3 or higher.

03Colorize
Another app that uses AI to add colorization to your old images. It is a popular animate your family photo app which has amazing other tools and filters to try out.
Applicable OS: Android and iOS.

04Deep Nostalgia
Using this app which has been innovated by the geology platform MyHeritage uses ai to add gestures to still images to evoke nostalgia in the users.
Applicable OS: Online.

04Google Photoscan
Google scanner is a futuristic app for restoring photos of the past. The app uses a smart scanning technology that provides several scans of the same photo automatically.
Applicable OS: Android or iOS.

Key Takeaways from This Episode
● Animating photos are a new way of reimagining still images into moving live content. There are many methods and approaches you can choose to animate your images.
● Some of them being video animations, transparent background elements, Filters and effects and of course GIFs.
● There are dozens of apps with built in smart artificial intelligence to help restore old photos or make short animations out of them. Some of them are applicable for desktops while others available both on Android and iOS.
Now, it is a question of what to do with all those still photos lying in your phone. You can be pretty certain that you won’t be retiring from clicking images anytime soon. A tip to help make posting images more interesting would be using apps to animate your photos.
You can also find an app that animates your face specifically, which is great for instagram content and has a greater chance of getting reactions or comments. So without further to do let’s get animating.
In this article
01 [Review of General Methods: Can You Animate Still Pictures?](#Part 1)
02 [10 Best apps to animate still photos on Android & iOS](#Part 2)
03 [Additional Extension: 5 Apps to Animate Old Photos](#Part 3)
Part 1 Review of General Methods: Can You Animate Still Pictures?
It’s pretty obvious that you can! These days you can do whatever you want online so animating still pictures should be a piece of cake if you know-how.
A video is basically an entire collage of moving pictures. So if you can cut out pictures from a video why not turn still pictures into animations.
There are a number of ways you can use to animate still images →
● Videos are multiple pictures that move at a frame rate. Make short copies of a video by cutting out the essential moments and playing them in a loop.
● Add and play video animation elements over a picture. With the right software, this task is as easy as copy-pasting over another image.
● Apply an animated 3D image with a transparent background over another image. Remember, the bigger the element the closer it is. So size is directly translated as distance.
● You can use multiple filters and effects on an image with an animated portrait app. Find out what app you can use further on in this article.
● Turn an image into a GIF. No matter its small size and cartoonish style, GIF animation has a very wide appeal as online content.
Part 2 10 Best apps to animate still photos on Android & iOS
01GIPHY
Giphy is the largest internet catalog for GIF files, clips & stickers. No matter if it is a scene from a movie or an animation you have watched somewhere, using this application you can easily find, save & share or simply create something new.
Price: Free
Pros
● Quickly turns still photos into an animation.
● Easily share your work through all social media channels.
Cons
● Search tags are varied; you may need to search using unlikely words to get desired results.
Applicable System: Android
02GIPHY
One of the best ways to turn your photos & videos into GIFs is using ImgPlay. It has a clearer interface making it easy to use. Imgplay comes with paid- premium and non-paid version making it suitable for personal & professional application.
Price: Pro $4.99.
Pros
● It is not packed with unnecessary features.
Cons
● ImgPlay slaps a watermark on all its non-premium versions.
Applicable System: Android & iOS.
03Loopsie
The best Part is that Loopsie provides spectacular cinematographic effects to your animated stills. Stabilization algorithm efficiently removes shaking effects & blurs.
Price: Free.
Pros
● User friendly UI
● Easy to share on social media platforms.
Cons
● Paid version is a bit pricey.
Applicable System: Only on iOS.
04StoryZ
Looking for ways to create animated visuals form still images? This is where your quest ends. An advanced editing platform that offers overlays, movement & color filters. Banner Ads & watermarks can be removed by paying a small subscription fee.
Price: Free version available. Premium costs INR 789 a year.
Pros
● Double exposure effect combines video overlay & static imagery.
Cons
● Contains Ad & watermark.
Applicable System: Android.
05Animate Me
Animate Me offers you a package of postcards & greeting snapshots that you can animate according to your need. The paid subscription will get you updated sounds & effects every now & then.
Price: Free.
Pros
● Easy to use & beginners friendly.
Cons
● Editing features & tools are limited.
Applicable System: Windows**.**
06Movepic
Create animated stills, GIFs, live-wallpapers all with Movepic. It allows you to animate simply anything by drawing a path. You can also adjust the speed of animation manually.
Price: Free.
Pros
● Animate in a light motion.
● Easy to use.
Cons
● Free version leaves a watermark on images.
Applicable System: Android & iOS.
07Pixaloop
Pixaloop is a fun app packed with significant animation & editing features. 100% free to use software delivers live animated images in a few clicks. User friendly interface edits images using powerful & precise animation tools.
Price- Free.
Pros
● Offers all the necessary features & core tools.
● Provides accuracy & flexibility to the users.
Cons
● The animation process is a bit time consuming.
Applicable System: Android & iOS.
08Zoetropic
Zoetropic has a combination of 3D tools and Camera FX to animate your images. User friendly interface allows you to mask the still areas if you wish to keep it still.
Price: $199 (Pro)
Pros
● Easily customize motion areas.
● Apply overlays & audios.
Cons
● App price is higher than similar available apps.
Applicable System: Android & iOS.
9Motionleap
It is one of the most top reviewed apps on Playstore related to animating still photos. It has several features like programming directional cues, freeze portions of your photo or even apply filters.
Price: Free version. Pro version; $3.50/month, $18/year and $55 lifetime.
Pros
● Its free version does not apply watermark.
● Intuitive Interface.
Cons
● Best features are locked in Pro version.
Applicable System: Android & iOS.
Part 3 Additional Extension: 5 Apps to Animate Old Photos
It can be unanimously agreed upon that people have been storing photos for decades as a means of preserving memories. We don’t get much opportunity to meet familiar faces too often so why not just try and animate still images of relatives. Now we already know how we can start animating images on apps but restoring original images maybe a tad more complicated than that. This time a bit of the animation is dependent on the physical state of the picture so be sure it’s in mint condition.
These photos can be restored or manipulated digitally with the help of smart AI. We have listed down some of the apps to animate old photos and reconstruct faces;
01Photos Revive
You can add colour to old worn out photos and make them look more realistic in terms of tonal colorization using artificial intelligence. The app also asks you recollect any details of the photo that you might remember in terms of the image.
Applicable OS: iOS only.
02Remini
After going through several improvements and upgrades, you can use the app Remini to confidently restore low resolution images that are either pixelated, blurred or damaged into High Definition images. This app has already been used by users to process a hundred million photos.
Applicable OS: Android 1.7.2 or higher, & iOS 9.3 or higher.
03Colorize
Another app that uses AI to add colorization to your old images. It is a popular animate your family photo app which has amazing other tools and filters to try out.
Applicable OS: Android and iOS.
04Deep Nostalgia
Using this app which has been innovated by the geology platform MyHeritage uses ai to add gestures to still images to evoke nostalgia in the users.
Applicable OS: Online.
04Google Photoscan
Google scanner is a futuristic app for restoring photos of the past. The app uses a smart scanning technology that provides several scans of the same photo automatically.
Applicable OS: Android or iOS.
Key Takeaways from This Episode
● Animating photos are a new way of reimagining still images into moving live content. There are many methods and approaches you can choose to animate your images.
● Some of them being video animations, transparent background elements, Filters and effects and of course GIFs.
● There are dozens of apps with built in smart artificial intelligence to help restore old photos or make short animations out of them. Some of them are applicable for desktops while others available both on Android and iOS.
Also read:
- Updated In 2024, How to Send and Add Snapchat GIFs 100 in Easy Way
- Learn Disney Cartoon Drawing to See Disney Magic Moments
- Updated 2024 Approved Finding Some Different Ways to Animated Cartoon of Yourself
- The Best 10 Sketch Animation Video Makers for 2024
- 10 Realistic Cartoon Characters You Would Run Away From if You Met in Real Life for 2024
- New In 2024, Ways to Create an Animated Sticky Navbar
- Updated In 2024, Some Must-Know Useful Lego Animation Ideas for You
- New In 2024, Best GIF Maker Software for Windows and Mac
- Top 10 Free Online Animated Logo Makers Everyone Should Know for 2024
- Updated Top 10 Video to GIF Converters Top Picks
- Updated Tips on How to Get Awesome Background for Slideshow in PowerPoint for 2024
- 10 Top Memorable Japanese Cat Cartoons for 2024
- Updated Convert Animated GIF From Video for 2024
- New In 2024, How to Make a Video a Live Photo 2023
- Updated 2024 Approved Some Must-Know Useful Lego Animation Ideas for You
- New Simple Shortcut to Convert Videos to Gifs on iPhone
- Updated The Only Guide Youll Need to Learn About GIF Video Downloader for 2024
- Updated 10 Great MP4 to GIF Converters to Get Perfect-Made GIF for 2024
- Updated Methods to Make Photo Motion Effect Online, In 2024
- Updated The Secret Sauce for Making GIF Instagram Story More Stunning for 2024
- New 5 Must Try Ways to Add GIF in Text Message on Android
- New 2024 Approved Top 20+ Best Free GIF Makers Online to Quickly Edit GIF
- How to Create Free Photo Collage Frame in Minutes?
- How to Fake Snapchat Location on Nokia 150 (2023) | Dr.fone
- Can I Bypass a Forgotten Phone Password Of Poco C65?
- In 2024, How To Bypass Honor Play 7T FRP In 3 Different Ways
- In 2024, How to Use Life360 on Windows PC For Sony Xperia 1 V? | Dr.fone
- Easy Guide to Samsung Galaxy S23 Tactical Edition FRP Bypass With Best Methods
- 3 Ways to Unlock iPhone 12 mini without Passcode or Face ID | Dr.fone
- How to Cast Infinix Smart 8 Plus Screen to PC Using WiFi | Dr.fone
- New In 2024, AI Script Feature
- Complete Guide to Hard Reset Your Oppo Find X6 | Dr.fone
- Top 9 Xiaomi 14 Ultra Monitoring Apps for Parental Controls | Dr.fone
- 3uTools Virtual Location Not Working On Realme V30T? Fix Now | Dr.fone
- In 2024, Complete Fixes To Solve Apple iPhone 15 Randomly Asking for Apple ID Password
- In 2024, Android to Apple How To Transfer Photos From Huawei Nova Y91 to iPad Easily | Dr.fone
- Full Tutorial to Bypass Your Xiaomi Face Lock?
- In 2024, Downloading SamFw FRP Tool 3.0 for Itel S23
- In 2024, How to Fix when Apple Account Locked On iPhone 15 Pro?
- In 2024, Apple ID Locked for Security Reasons From Apple iPhone 14 Plus? Find the Best Solution Here
- In 2024, Mastering Android Device Manager The Ultimate Guide to Unlocking Your Vivo S18 Device
- Can Life360 Track You When Your Honor X8b is off? | Dr.fone
- Title: In 2024, Before You Learn Facebook Slideshow 5 Things You Should Know
- Author: Elon
- Created at : 2024-05-19 03:05:01
- Updated at : 2024-05-20 03:05:01
- Link: https://animation-videos.techidaily.com/in-2024-before-you-learn-facebook-slideshow-5-things-you-should-know/
- License: This work is licensed under CC BY-NC-SA 4.0.
