
:max_bytes(150000):strip_icc():format(webp)/001_2654847-5b99b903c9e77c005077d0d8.jpg)
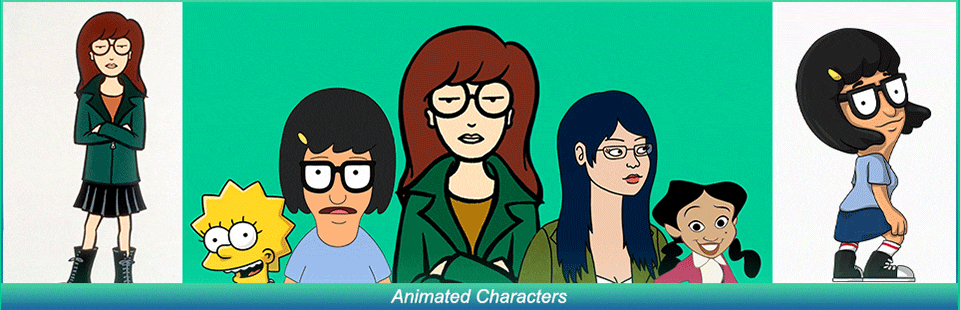
In 2024, Best 15 Classics Animated Cartoon Movies
Best 15 Classics Animated Cartoon Movies
Best 15 Instant Classics Animated Cartoon Movies
An easy yet powerful editor
Numerous effects to choose from
Detailed tutorials provided by the official channel
The animated characters let an individual experience a world that has certain things that hardly exist in reality.
Here we will share all the relatable details about the particular movie that will be helpful in deciding whether you wish to watch it or not.
In this article
01 [Which is the Best Animated Movie Ever?](#Part 1)
02 [We know how to animate. Do you?](#Part 2)
Part 1 Which is the Best Animated Movie Ever?
Let’s have a look at the best 15 classical animated cartoon movies that you should watch if you are an animation movie lover.
01 Toy Story 4
Toy Story 4 was released on June 21, 2019 in the United States and will be available for streaming on October 1, 2019.The IMDb rating for Toy Story 4 was 7.7 out of 10, and the Rotten Tomatoes rating was 97%. This movie ranks first among all the animated movies available till date. This is a movie from Walt Disney, and its gross revenue was $434 million.

02 Spider-Man: into the spider verse
Spider-Man: Into the Spider Verse was released in theatres on December 14, 2018 and started streaming on March 19, 2019. The IMDB rating for this movie is 8.4 out of 10 and the Rotten Tomatoes rating is 97%. This movie is from Sony Pictures Entertainment and Columbia Pictures. The gross revenue was $190.2 million.

03 Inside Out
Inside Out was released worldwide in theatres on June 19, 2015 and started streaming on November 3, 2015. This movie received an 8.1 IMDB rating out of 10, and the Rotten Tomatoes rating was 98%. It is from Walt Disney and has a gross revenue of $2 million.

04 COCO
Coco was released in theatres on November 22, 2017 and started streaming on February 13, 2018. The IMDB rating for this movie is 8.4 out of 10 and the Rotten Tomatoes rating is 97%. This movie is from Walt Disney. The gross revenue was $210.5 million.

05 Snow White and the Seven Dwarfs
Snow White and the Seven Dwarfs (1937) was released in theatres in 1937 and started streaming on Nov. 16, 2004. The IMDB rating for this movie is 7.6 out of 10 and the Rotten Tomatoes rating is 98%. This movie is from Walt Disney.

06 Incredibles 2
Incredibles 2 (2018) was released in theatres on June 15, 2018 and became available for streaming on November 6, 2018.The IMDB rating for this movie is 7.6 out of 10 and the Rotten Tomatoes rating is 97%. This movie is from Walt Disney. The gross revenue was $608.6 million.

07 Zootopia (2016)
Zootopia (2016) was released in theatres on March 4, 2016 and started streaming on June 7, 2016. The IMDB rating for this movie is 8.0 out of 10 and the Rotten Tomatoes rating is 98%. This movie is from Walt Disney. The gross revenue was $200 million.

08 Paddington 2 (2018)
Paddington 2 (2018) was released in theatres on Jan. 1, 2018 and started streaming on Apr. 24, 2018. The IMDB rating for this movie is 7.8 out of 10 and the Rotten Tomatoes rating is 99%. This movie is from Warner Bros. Pictures. The gross revenue was $38.4 million.

09 Up
Up was released in theatres on May 29, 2009 and started streaming on Nov. 10, 2009. The IMDB rating for this movie is 8.2 out of 10 and the Rotten Tomatoes rating is 98%. This movie is from Walt Disney and Pixar Animation Studios. The gross revenue was $78.2 million.

10 Toy Story 2 (1999)
Toy Story 2 (1999) was released in theatres on December 24, 1999 and started streaming on March 23, 2010. The IMDB rating for this movie is 7.9 out of 10 and the Rotten Tomatoes rating is 100%. This movie is from Walt Disney Pictures. The gross revenue was $245.9 million.

11 Toy Story 3 (2010)
Toy Story 3 (2010) was released in theatres on June 18, 2010 and started streaming on Nov. 2, 2010. The IMDB rating for this movie is 8.2 out of 10 and the Rotten Tomatoes rating is 98%. This movie is from Walt Disney. The gross revenue was $415.0 million.

12 Finding Dory (2016)
Finding Dory (2016) was released in theatres on June 17, 2016 and started streaming on Nov. 15, 2016. The IMDB rating for this movie is 7.3 out of 10 and the Rotten Tomatoes rating is 94%. This movie is from Sony Pictures Entertainment and Columbia Pictures. The gross revenue was $486.2 million.

13 Finding Nemo (2003)
Finding Nemo (2003) was released in theatres on May 30, 2003 and started streaming on Nov. 4, 2003. The IMDB rating for this movie is 8.1 out of 10 and the Rotten Tomatoes rating is 99%. This movie is from Walt Disney Pictures. The gross revenue was $110.2 million.

13 Pinocchio (1940)
Pinocchio (1940) was released in theatres on February 9, 1940 and started streaming on December 3, 2002. The IMDB rating for this movie is 8.4 out of 10 and the Rotten Tomatoes rating is 100%. This movie is from Walt Disney Pictures. The gross revenue was $18.7 million.

13 The LEGO Movie (2014)
The LEGO Movie (2014) was released in theatres on February 7, 2014 and started streaming on June 17, 2014. The IMDB rating for this movie is 7.7 out of 10 and the Rotten Tomatoes rating is 96%. This movie is from Warner Bros. Pictures. The gross revenue was $257.8 million.
The animated characters let an individual experience a world that has certain things that hardly exist in reality.
Here we will share all the relatable details about the particular movie that will be helpful in deciding whether you wish to watch it or not.
In this article
01 [Which is the Best Animated Movie Ever?](#Part 1)
02 [We know how to animate. Do you?](#Part 2)
Part 1 Which is the Best Animated Movie Ever?
Let’s have a look at the best 15 classical animated cartoon movies that you should watch if you are an animation movie lover.
01 Toy Story 4
Toy Story 4 was released on June 21, 2019 in the United States and will be available for streaming on October 1, 2019.The IMDb rating for Toy Story 4 was 7.7 out of 10, and the Rotten Tomatoes rating was 97%. This movie ranks first among all the animated movies available till date. This is a movie from Walt Disney, and its gross revenue was $434 million.
02 Spider-Man: into the spider verse
Spider-Man: Into the Spider Verse was released in theatres on December 14, 2018 and started streaming on March 19, 2019. The IMDB rating for this movie is 8.4 out of 10 and the Rotten Tomatoes rating is 97%. This movie is from Sony Pictures Entertainment and Columbia Pictures. The gross revenue was $190.2 million.
03 Inside Out
Inside Out was released worldwide in theatres on June 19, 2015 and started streaming on November 3, 2015. This movie received an 8.1 IMDB rating out of 10, and the Rotten Tomatoes rating was 98%. It is from Walt Disney and has a gross revenue of $2 million.
04 COCO
Coco was released in theatres on November 22, 2017 and started streaming on February 13, 2018. The IMDB rating for this movie is 8.4 out of 10 and the Rotten Tomatoes rating is 97%. This movie is from Walt Disney. The gross revenue was $210.5 million.
05 Snow White and the Seven Dwarfs
Snow White and the Seven Dwarfs (1937) was released in theatres in 1937 and started streaming on Nov. 16, 2004. The IMDB rating for this movie is 7.6 out of 10 and the Rotten Tomatoes rating is 98%. This movie is from Walt Disney.
06 Incredibles 2
Incredibles 2 (2018) was released in theatres on June 15, 2018 and became available for streaming on November 6, 2018.The IMDB rating for this movie is 7.6 out of 10 and the Rotten Tomatoes rating is 97%. This movie is from Walt Disney. The gross revenue was $608.6 million.
07 Zootopia (2016)
Zootopia (2016) was released in theatres on March 4, 2016 and started streaming on June 7, 2016. The IMDB rating for this movie is 8.0 out of 10 and the Rotten Tomatoes rating is 98%. This movie is from Walt Disney. The gross revenue was $200 million.
08 Paddington 2 (2018)
Paddington 2 (2018) was released in theatres on Jan. 1, 2018 and started streaming on Apr. 24, 2018. The IMDB rating for this movie is 7.8 out of 10 and the Rotten Tomatoes rating is 99%. This movie is from Warner Bros. Pictures. The gross revenue was $38.4 million.
09 Up
Up was released in theatres on May 29, 2009 and started streaming on Nov. 10, 2009. The IMDB rating for this movie is 8.2 out of 10 and the Rotten Tomatoes rating is 98%. This movie is from Walt Disney and Pixar Animation Studios. The gross revenue was $78.2 million.
10 Toy Story 2 (1999)
Toy Story 2 (1999) was released in theatres on December 24, 1999 and started streaming on March 23, 2010. The IMDB rating for this movie is 7.9 out of 10 and the Rotten Tomatoes rating is 100%. This movie is from Walt Disney Pictures. The gross revenue was $245.9 million.
11 Toy Story 3 (2010)
Toy Story 3 (2010) was released in theatres on June 18, 2010 and started streaming on Nov. 2, 2010. The IMDB rating for this movie is 8.2 out of 10 and the Rotten Tomatoes rating is 98%. This movie is from Walt Disney. The gross revenue was $415.0 million.
12 Finding Dory (2016)
Finding Dory (2016) was released in theatres on June 17, 2016 and started streaming on Nov. 15, 2016. The IMDB rating for this movie is 7.3 out of 10 and the Rotten Tomatoes rating is 94%. This movie is from Sony Pictures Entertainment and Columbia Pictures. The gross revenue was $486.2 million.
13 Finding Nemo (2003)
Finding Nemo (2003) was released in theatres on May 30, 2003 and started streaming on Nov. 4, 2003. The IMDB rating for this movie is 8.1 out of 10 and the Rotten Tomatoes rating is 99%. This movie is from Walt Disney Pictures. The gross revenue was $110.2 million.
13 Pinocchio (1940)
Pinocchio (1940) was released in theatres on February 9, 1940 and started streaming on December 3, 2002. The IMDB rating for this movie is 8.4 out of 10 and the Rotten Tomatoes rating is 100%. This movie is from Walt Disney Pictures. The gross revenue was $18.7 million.
13 The LEGO Movie (2014)
The LEGO Movie (2014) was released in theatres on February 7, 2014 and started streaming on June 17, 2014. The IMDB rating for this movie is 7.7 out of 10 and the Rotten Tomatoes rating is 96%. This movie is from Warner Bros. Pictures. The gross revenue was $257.8 million.
How to Make Animated Videos for Business [Simple Guide]
How to Make Animated Videos for Business – an Ultimate Guide

Liza Brown
Mar 27, 2024• Proven solutions
“Animation for business is about creating the illusion of life, and you can attract your buyers for life.”
Animation means when you create the illusion of movement in still figures. It is the method of drawing, designing, and making for photographic sequences. There could be many kinds of animation, such as traditional animation, stop motion animation, computer animation, Motion Graphics, 2D Animation, and 3D Animation.
The animation for business is the key to attract target audiences with ease. It is a way of communication, which is more than just cartoons and movies. The involvement of business animation has increased the ROI for various brands. All-in-all, you can determine the difference between business ROI with animation versus the business’s ROI without animation. If you feel that animation for business is not a thing for you, kindly stay tuned with the post. We will reveal useful facts regarding the importance of animation in business and how to make animated videos for your brand in an effortless manner.
- Part 1: Why use animation for business?
- Part 2: How to choose animation styles for your business?
- Part 3: What to Consider before Making Animated Business Videos?
- Part 4: Powerful Video Editor Helps You Create Stunning Animated Videos
- Part 5: How to make an animated business video?
Why use animation for business?
As we have earlier mentioned, animation is the key to attractive branding. According to Smart Insights’ recent article on Video Marketing in 2020, around 92% of marketers feel this an essential part of business strategy. In contrast, 88% of marketers think that video marketing in animation offers them positive ROI.
We can describe to you a list of 5 reasons to use animation for business as follows.
It is fun and entertaining
Your animation doesn’t need to be realistic or accurate. The purpose of using it in business or even cartoons is to instill fun and entertainment. The animation is a way to grab customers’ attention rather than being used as a strict marketing tool. Customers will look over to the story more interesting than the traditional ad system.
Lasting impression
The animated videos for business leave a memorable impression on the current as well as new customers. However, you must be clear about using animation in a way that creatively tells about your business. A story that is too different from the business purpose may not be a good idea to create a lasting impression.
So, you must tell about the values you inject in a particular product so that the potential customers get attracted by the visuals and the information they get from it.
Boosts conversion rate
Due to the highly attractive nature of business animation videos, the customer is likely to complete the action as expected by the brand. More than half the visited customers will likely stay on the website with animated content rather than getting you the high bounce off rates. So, you should beautifully explain the merits of your service or product to the user in animated videos for business. It’s great if you add CTA at the end of the video.
Easy updates
Being a potent marketing tool animation for business is a new and updated aspect. It is one of the advanced digital technologies to update messaging and marketing collateral and reflect your business values. The presentation of content with animation appeals to different and new potential audiences cost-effectively and efficiently.
Turns complex ideas into easy ones
Dealing with complex ideas or products in the text form can be pretty hard to convey effectively unless you insert animation in the text and make it attractive. After all, complex ideas can’t quickly turn into easy ones.
How to choose animation styles for your business?
After knowing the apparent benefits of animation, we will discuss how you can choose different animation styles for your business. There could be lots of types, among which we are just going to mention four basic animation styles for business.
Kinetic Typography
Kinetic typography means ‘moving text.’ You can see this kind of animation everywhere, from website landing pages to TV commercials. The tool can be useful to shrink, expand, fly, grow, move in slow motion, or change the letter in numerous ways to grab readers’ attention.
Character animation
Character animation refers to making animated animals or persons. It depends solely on the animator’s animator or demand to create a character and decide how it will move, look, or interact with the external environment.
Whiteboard animation
The whiteboard animation is another famous kind of animation for business where a storyboard is the basics. The process tells you a story mostly by the presentation of someone’s hands. Notably, the whiteboard is to represent the time-lapse or stop motion effect.
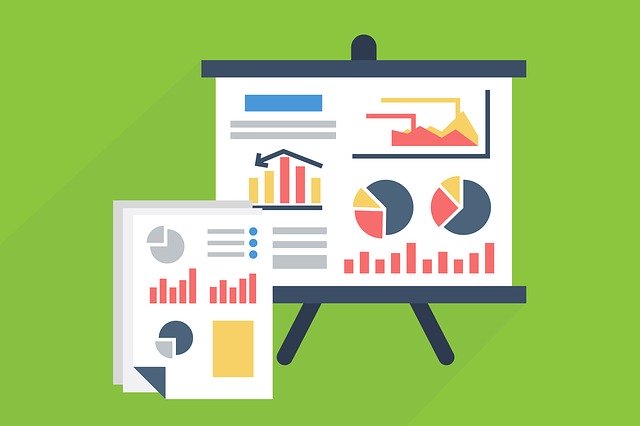
Infographics
Information Graphics or Infographics refers to the visual representation of data or information. Generally, it collects charts, imagery, and minimal text to give a simple overview of the topic. The animated videos for business with Infographics are one of the valuable tools for business communication.
What to Consider before Making Animated Business Videos?
The decision to make animated videos for business could be a tricky task even if you are aware of the importance, as mentioned above, of animation. Merely knowing the importance won’t get you on the right path without any implementation efforts.
You need to implement the right strategies and know what factors are essential to look for before making animated videos for business. So, let’s discuss those critical points!
Budget
The budget comes as the top-most factor because you can’t do anything without enough money. So, be ready to invest a fair amount or at least invest in reliable video editing software. However, animation for business doesn’t demand a budget like creating a Pixar movie in millions. For instance, using Wondershare Filmora will cost you around $49.99 per year, less than spending millions in outsourcing video animation work. However, it also depends upon the kind of job and style of business values you want to present in the animation. You have to outsource if it’s expert-level work!
Brand Positioning
Consider your brand positioning! While using the animation for business, viewers tend to remember more about the brand values than mere visuals. They want to know your identity as a brand and your industry. It will help if you incorporate some brand positioning first before deciding to make animation videos for business. What you can do is check the overview of the brand from the customer’s point of view. After that, you can instill the presentation according to your business type, whether B2B or B2C.
Target Audience
Making animation videos about the target audience is essential, but it doesn’t necessarily mean making videos only for them. The very first question is to ask why you are making such a video. There could be many reasons behind the same, such as gaining new customers, educating the current customers, or raising the awareness of a new product or brand.
Market
Video promotion is the last but not least, step! You must know the ideas to market your videos before even starting the creation. The market can be Instagram or any other social media platform where you get a high presence of potential customers. Furthermore, the video should not be too pushy.
How to make an animated business video?
You need to stay by the steps given below to create stunning animated videos for business.
Step 1: Video Script
Start by writing what you want to present in the form of a video script. To be clear, write it according to the direction and purpose of your video.
Step 2: Create a storyboard
You can implement the animation video-making process after creating a storyboard for your video. It is more of a way to visualize your video about different shots and scenarios.
You can use Animaker as an online storyboard tool.
Step 3: Choose the style of animation video
Select your particular kind of animation for business from the different types of animation videos given above.
Step 4: Start animation
With Wondershare Filmora Pro Video Editor’s help, you can do wonders for the animation for business. All the tutorials are clear on its official YouTube channel on using specific animation tools of Filmora Pro.
Step 5: Add background music
It is vital to have a soul in your story. You can add suitable background music and voice-over with the help of Wondershare Filmora Video Editor with ease of tools.
Conclusion
Thus, that is all you need to understand about animation for business. No matter the brand or brand values you have, animated videos for business always stand apart from traditional marketing.
So, be smart and use the updated marketing tools!
Here is a 101 Guide on animation for business with simple steps, even for a beginner. We’ll tell you the importance and right software to create stunning animated videos for business.
Liza Brown
Liza Brown is a writer and a lover of all things video.
Follow @Liza Brown
Liza Brown
Mar 27, 2024• Proven solutions
“Animation for business is about creating the illusion of life, and you can attract your buyers for life.”
Animation means when you create the illusion of movement in still figures. It is the method of drawing, designing, and making for photographic sequences. There could be many kinds of animation, such as traditional animation, stop motion animation, computer animation, Motion Graphics, 2D Animation, and 3D Animation.
The animation for business is the key to attract target audiences with ease. It is a way of communication, which is more than just cartoons and movies. The involvement of business animation has increased the ROI for various brands. All-in-all, you can determine the difference between business ROI with animation versus the business’s ROI without animation. If you feel that animation for business is not a thing for you, kindly stay tuned with the post. We will reveal useful facts regarding the importance of animation in business and how to make animated videos for your brand in an effortless manner.
- Part 1: Why use animation for business?
- Part 2: How to choose animation styles for your business?
- Part 3: What to Consider before Making Animated Business Videos?
- Part 4: Powerful Video Editor Helps You Create Stunning Animated Videos
- Part 5: How to make an animated business video?
Why use animation for business?
As we have earlier mentioned, animation is the key to attractive branding. According to Smart Insights’ recent article on Video Marketing in 2020, around 92% of marketers feel this an essential part of business strategy. In contrast, 88% of marketers think that video marketing in animation offers them positive ROI.
We can describe to you a list of 5 reasons to use animation for business as follows.
It is fun and entertaining
Your animation doesn’t need to be realistic or accurate. The purpose of using it in business or even cartoons is to instill fun and entertainment. The animation is a way to grab customers’ attention rather than being used as a strict marketing tool. Customers will look over to the story more interesting than the traditional ad system.
Lasting impression
The animated videos for business leave a memorable impression on the current as well as new customers. However, you must be clear about using animation in a way that creatively tells about your business. A story that is too different from the business purpose may not be a good idea to create a lasting impression.
So, you must tell about the values you inject in a particular product so that the potential customers get attracted by the visuals and the information they get from it.
Boosts conversion rate
Due to the highly attractive nature of business animation videos, the customer is likely to complete the action as expected by the brand. More than half the visited customers will likely stay on the website with animated content rather than getting you the high bounce off rates. So, you should beautifully explain the merits of your service or product to the user in animated videos for business. It’s great if you add CTA at the end of the video.
Easy updates
Being a potent marketing tool animation for business is a new and updated aspect. It is one of the advanced digital technologies to update messaging and marketing collateral and reflect your business values. The presentation of content with animation appeals to different and new potential audiences cost-effectively and efficiently.
Turns complex ideas into easy ones
Dealing with complex ideas or products in the text form can be pretty hard to convey effectively unless you insert animation in the text and make it attractive. After all, complex ideas can’t quickly turn into easy ones.
How to choose animation styles for your business?
After knowing the apparent benefits of animation, we will discuss how you can choose different animation styles for your business. There could be lots of types, among which we are just going to mention four basic animation styles for business.
Kinetic Typography
Kinetic typography means ‘moving text.’ You can see this kind of animation everywhere, from website landing pages to TV commercials. The tool can be useful to shrink, expand, fly, grow, move in slow motion, or change the letter in numerous ways to grab readers’ attention.
Character animation
Character animation refers to making animated animals or persons. It depends solely on the animator’s animator or demand to create a character and decide how it will move, look, or interact with the external environment.
Whiteboard animation
The whiteboard animation is another famous kind of animation for business where a storyboard is the basics. The process tells you a story mostly by the presentation of someone’s hands. Notably, the whiteboard is to represent the time-lapse or stop motion effect.
Infographics
Information Graphics or Infographics refers to the visual representation of data or information. Generally, it collects charts, imagery, and minimal text to give a simple overview of the topic. The animated videos for business with Infographics are one of the valuable tools for business communication.
What to Consider before Making Animated Business Videos?
The decision to make animated videos for business could be a tricky task even if you are aware of the importance, as mentioned above, of animation. Merely knowing the importance won’t get you on the right path without any implementation efforts.
You need to implement the right strategies and know what factors are essential to look for before making animated videos for business. So, let’s discuss those critical points!
Budget
The budget comes as the top-most factor because you can’t do anything without enough money. So, be ready to invest a fair amount or at least invest in reliable video editing software. However, animation for business doesn’t demand a budget like creating a Pixar movie in millions. For instance, using Wondershare Filmora will cost you around $49.99 per year, less than spending millions in outsourcing video animation work. However, it also depends upon the kind of job and style of business values you want to present in the animation. You have to outsource if it’s expert-level work!
Brand Positioning
Consider your brand positioning! While using the animation for business, viewers tend to remember more about the brand values than mere visuals. They want to know your identity as a brand and your industry. It will help if you incorporate some brand positioning first before deciding to make animation videos for business. What you can do is check the overview of the brand from the customer’s point of view. After that, you can instill the presentation according to your business type, whether B2B or B2C.
Target Audience
Making animation videos about the target audience is essential, but it doesn’t necessarily mean making videos only for them. The very first question is to ask why you are making such a video. There could be many reasons behind the same, such as gaining new customers, educating the current customers, or raising the awareness of a new product or brand.
Market
Video promotion is the last but not least, step! You must know the ideas to market your videos before even starting the creation. The market can be Instagram or any other social media platform where you get a high presence of potential customers. Furthermore, the video should not be too pushy.
How to make an animated business video?
You need to stay by the steps given below to create stunning animated videos for business.
Step 1: Video Script
Start by writing what you want to present in the form of a video script. To be clear, write it according to the direction and purpose of your video.
Step 2: Create a storyboard
You can implement the animation video-making process after creating a storyboard for your video. It is more of a way to visualize your video about different shots and scenarios.
You can use Animaker as an online storyboard tool.
Step 3: Choose the style of animation video
Select your particular kind of animation for business from the different types of animation videos given above.
Step 4: Start animation
With Wondershare Filmora Pro Video Editor’s help, you can do wonders for the animation for business. All the tutorials are clear on its official YouTube channel on using specific animation tools of Filmora Pro.
Step 5: Add background music
It is vital to have a soul in your story. You can add suitable background music and voice-over with the help of Wondershare Filmora Video Editor with ease of tools.
Conclusion
Thus, that is all you need to understand about animation for business. No matter the brand or brand values you have, animated videos for business always stand apart from traditional marketing.
So, be smart and use the updated marketing tools!
Here is a 101 Guide on animation for business with simple steps, even for a beginner. We’ll tell you the importance and right software to create stunning animated videos for business.
Liza Brown
Liza Brown is a writer and a lover of all things video.
Follow @Liza Brown
18 Best Tools and Services to Create Animated Videos for Your Business
18 Best Tools and Services to Create Animated Videos for Your Business

Shanoon Cox
Mar 27, 2024• Proven solutions
Video content is dominating the market with a huge arena to explore. Be it a short clip that explains your company/product or a user guide kind of thing, when you are up for business explainer videos, there is nothing better than illustrative animated videos.
These animated videos can be made without much hassle and can bring exceptional results for your business. All that you need to do is, figure out the right animation tool or service for business animation and convey your message aptly to the audience, and then rest will be history.
Make Your Marketing Videos Shine
Recently, video marketing has become an unstoppable trend. Celebrities and businesses earn great fortune through high-quality marketing videos. To join the profitable video marketing era , you can create your own marketing videos now!
- Part 1: Best Tools and Services to Make Animated Videos for Business
- Part 2: The Benefits of Animated Videos for Your Business
- Part 3: FAQ to Create Animated Videos
Part 1: Best Tools and Services to Make Animated Videos for Business
1. Wideo
Among 2D animtion makers , this can let you edit, create, and share animated videos for business intuitively. You get more than 80 ready-to-edit video templates for business or build them from scratch to suit your business demands. These templates are completely customizable for your needs and make Wideo a much liked tool.
Features:
- You can build amazing animated videos effortlessly.
- You just spend 5 minutes to pick the template and customize by drag and drop, and you are sorted to create a professional looking animated business.
- Either download as a MP4 or share on social media sites like Facebook and YouTube, Wideo does it all.
2. Moovly
Being in your budget and still creating fabulous videos which are intuitive and simple for your business is possible with Moovly. Using this tool you can create animated video, banners, Ads, Whiteboard animation, YouTube intro, and engaging explainer video.
Features:
- You don’t need to install it, as it can directly be done on your desktop.
- You need not more than 15 minutes to do a video.
- More than 600000 free samples, videos, animations and sounds are readily available and you are allowed to use your own media too.

3. Powtoon
PowToon can create engaging explainer animated videos for business, which can captivate the audience. Be it marketing, HR, IT, report making or training your videos always standout. These videos are useful for creating personal videos to surprise your loved ones, make attention grabbing learning material, and captivating office presentations.
Features:
- Anyday a PowToon weighs over video as it can engage, explain and market your idea in the work place.
- With inbuilt drag and drop template a high quality PowToon is just made within 20 minutes.
- With a growing community of fellow designers, you can easily get help for a new video from them.

4. Piehole.tv
They have a simple and stress free process to create an animation.
Features:
- They arrange a call for you to get a creative brief and start the process.
- Be it script, voiceover, design, or animation, they can integrate it better.
5. Blender
This open source video animator has is free to use and has 3D creation suite. Rigging, modeling, animation, rendering, simulation, motion tracking and compositing, game creation, as well as video editing is possible with Blender.
Features:
- You can get attractive ultra-realistic rendering with cycle render engine from Blender.
- This is a public project by numbers of scientists, VFX experts, artists animators and the likes.
- The high end modeling tools help in sculpting, modeling, and UV features are remarkable.
- 3D painting using textured brushes and masking allows crisper out comes.

6. Animate CC
Creating vector business animations and publish them instantly is made easy. These animations include – apps, web, and games to name a few. You can reach the target audience through mobile, desktop, and TV.
Features:
- With animation and illustration tools creating web-based interactive content is easy now, be it game environments, player sprites, or interfaces your games and Ads will stand out.
- You can export the animations to multiple platforms like WebGL, HTML5 Canvas, Flash/Adobe AIR and the likes.
- Create interactive web banners and lively expressive characters using tilt and pressure sensitive brushes.

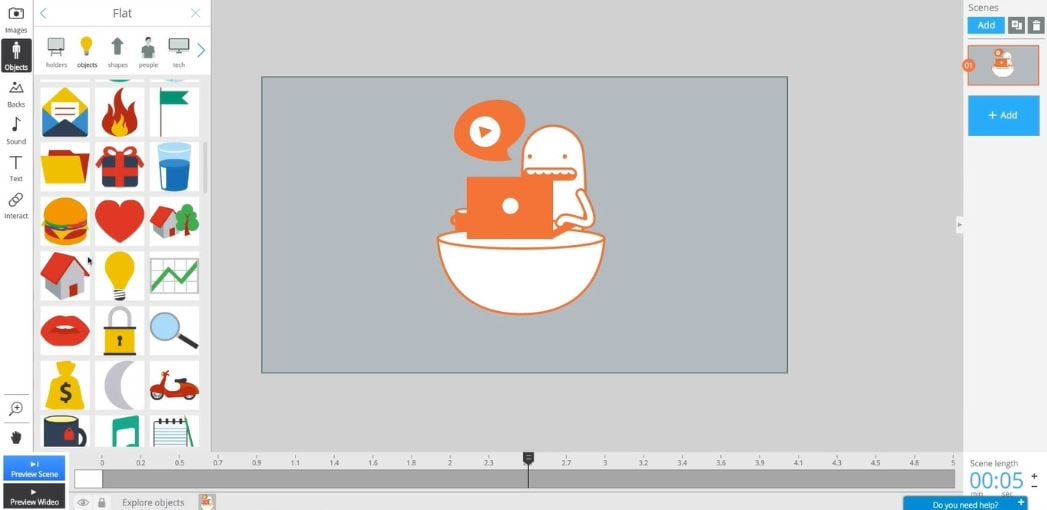
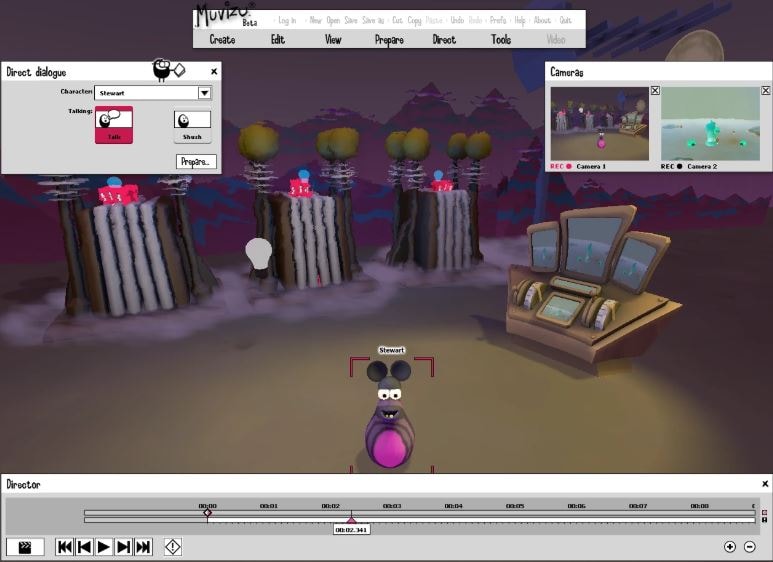
7. Muvizu
Your business explainer videos can be flawlessly designed with interactive 3D animation package like Muvizu. You can drag and drop the customizable animated characters with sets and use the automatic lip-synching feature for a great video.
Features:
- Worldwide it’s a great tool for demonstrators to use as a lesson building element that reaches students with the right message.
- With their easy commercial terms, you can earn money from your animations without any hassle.
- Engaging content that can reach the audience quickly with super-fast controls.
8. CrazyTalk Animator 3
Revered as the easiest 2D animation program it allows animators to create compelling business animations. You can add life to logos, images, and props using the elastic motion effects as well as the inbuilt templates. 2D talking characters are built using bone ridge editors, facial puppet, motion libraries for web, videos, apps, games, and presentations.
Features:
- It comes with a preview camera for reviewing scenes and live camera for using key frames to animate the position of the camera.
- A rich environment to edit animation, actors, special effects and scenes.
- You can navigate scenes using perspective mode in order to experience the movements of the camera in realistic 3D feel.

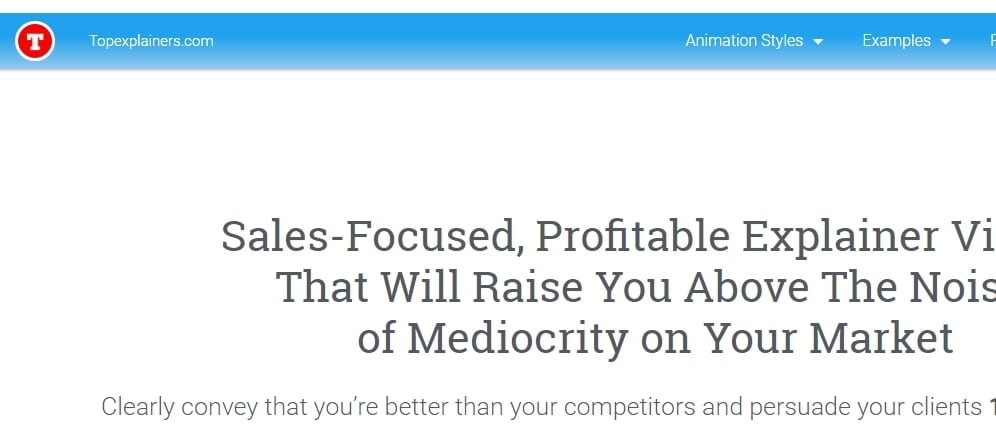
9. Topexplainers
Topexplainers help the business to make high-quality professional videos for your business including 50% of animation technology and 50% of marketing techniques. With Topexplainers, you can reach your clients and convey your message in just a few seconds. The team makes clear, short, and convincing videos to explain your business in a very simple way. The powers of content and visuals have no match. The Topexplainers video animation services help to make customized videos to garner 5 times more positive engagements and 65% more attention from the users.
Pricing – There are 3 packages in Topexplainers. Firstly, the 30-second package priced at $397. Secondly, the 60-second package at $597, and finally, the 90-second package priced at $797.
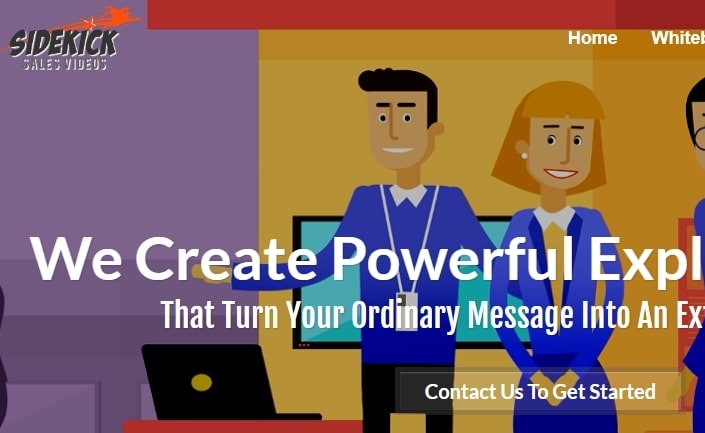
10. Side Kick Sales Videos
The value of business animation videos is increasing with each passing day. Side Kick Sales Videos team aims at creating highly-effective, ingenious, result-driven online videos that can help in fighting the rat-race and get the attention of the viewers. From graphics animation to royalty free music and highly converting the script to visual design, Side Kick Sales Videos personalizes video animation services to create an enhancing package and create your brand awareness.
Pricing – Side Kick Sales Videos offer 3 packages for 30 seconds, 60 seconds, and 90 seconds explainer videos respectively. The price for 30 seconds video is $247, 60 seconds is $349, and 90 seconds is $449.
11. Explainify
The team at Explainify understands your brand and your ideas to create the right tone of the message that you wish to convey to your customers. From scripting the 60-90 seconds pitch to showing you the storyboard and helping you understand what the final video will be like with animations, sound, and vocals, Explainify offers great video animation services.

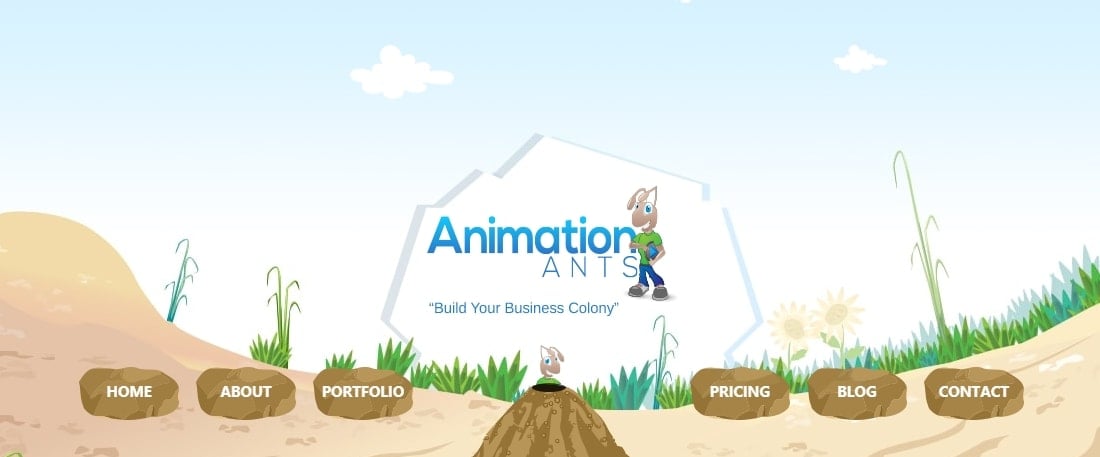
12. Animation ANTS
The business animation explainer videos have the power to strengthen your marketing efforts. Animation ANTS helps to create stunning, short, and crisp videos within an affordable budget to deliver your message to the masses. Your customers receive a concise message with the videos created by the Animation ANTS.
Pricing – The custom videos have different package names like Leaf, Seed, and Rock. Each of the packages is priced at $3900, $4700, and $5400 respectively. Other than the packages, Animation Ants also offer more template style videos at a discounted price.
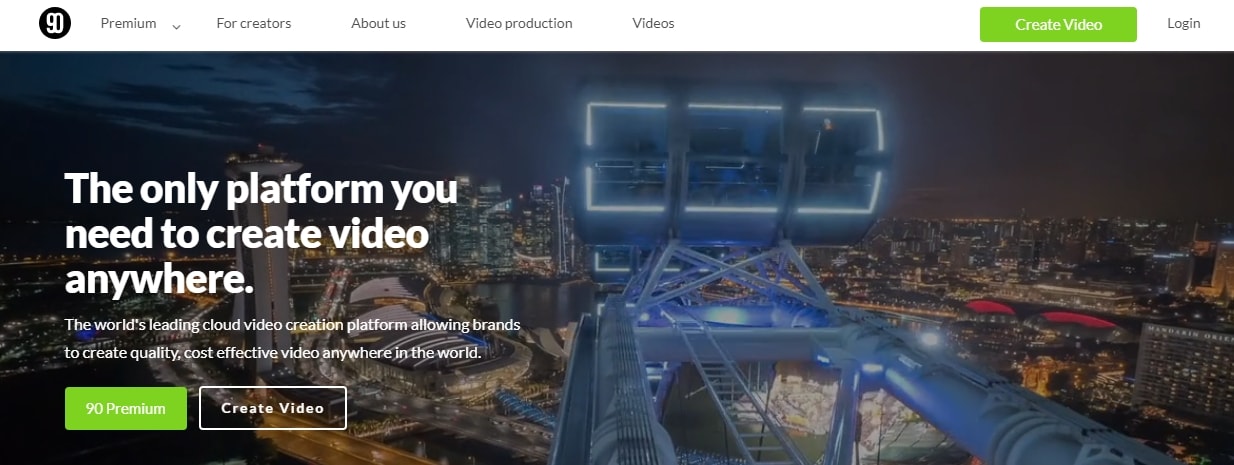
13. 90 Seconds
Yes, the name says it all. Within 90 seconds you can create a business animation video, just plan, shoot, edit and review your video from your mobile device. The entire process of creating a video is simple, quick, and easy with the 90 seconds video animation services. You get access to the 90 seconds marketplace of over 12,000 video creative professionals in over 160 countries. You can choose from 70 categories that include photographers, videographers, animators and more.
Pricing – The pricing is flexible for 90 Seconds. Firstly, there’s standard fixed pricing, especially effective for one-time projects. Second, comes the pre-pay starting from US$20000 which is good for the on-going massive content requirement with a flexible timeline. Finally, the subscription model starts from US$3500/month for the brands that regularly need video content and loves what 90-Seconds offer.
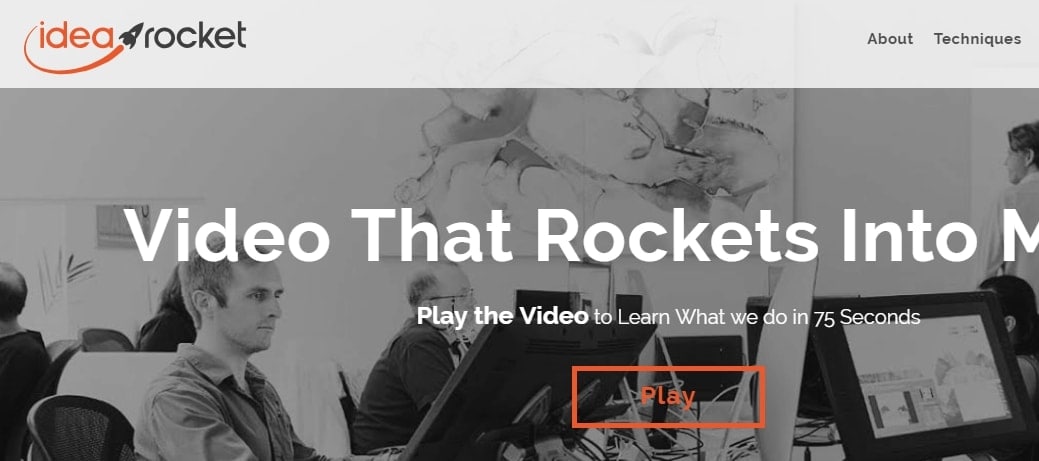
14. Idea Rocket Animation
If you are looking for a perfect solution for the most complex problem, turn to Idea Rocket Animation. It takes a brief from you to understand your brand and requirements and then designs the business animation video online. The Idea Rocket Animation takes your message and pitches it to a story, creating a visually appealing design, animations, and sounds.
Pricing – The pricing of business animation videos with Idea Rocket Animation is between $5,000 and $35,000 per minute depending on your choice of animation styles, studios, etc. Budget pricing is also available for creating animation videos between $2000 to $5000 where you need to satisfy with budget studios, DIY software, and freelance professionals.
15. Battle Media Lab
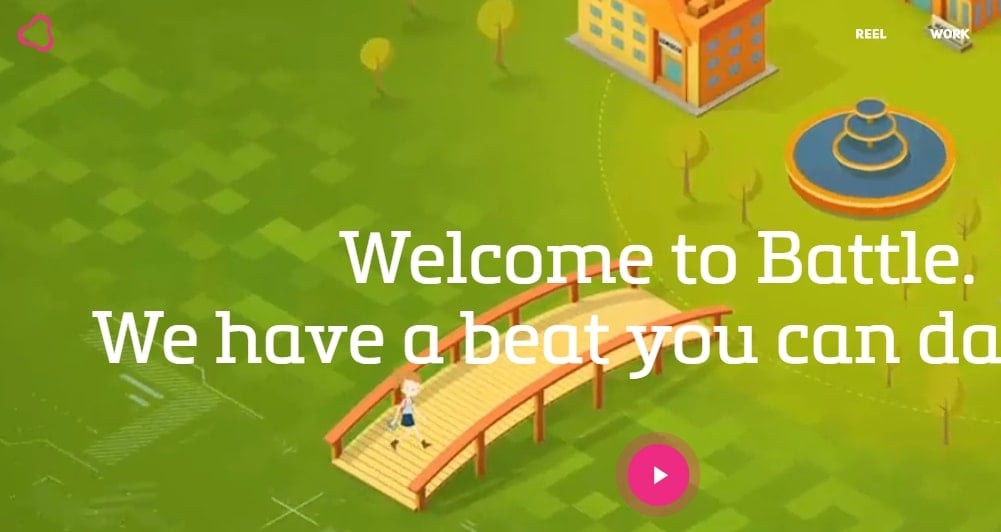
The Battle Media Lab bridges the gaps between brands, design, animations, sound, bringing all together beautifully into one video that is appealing to the viewers. This is one of the most trusted video animation services that influence your brand positively by defining the essence of your products and services and how it benefits the community through an eye-catching and impressive video.
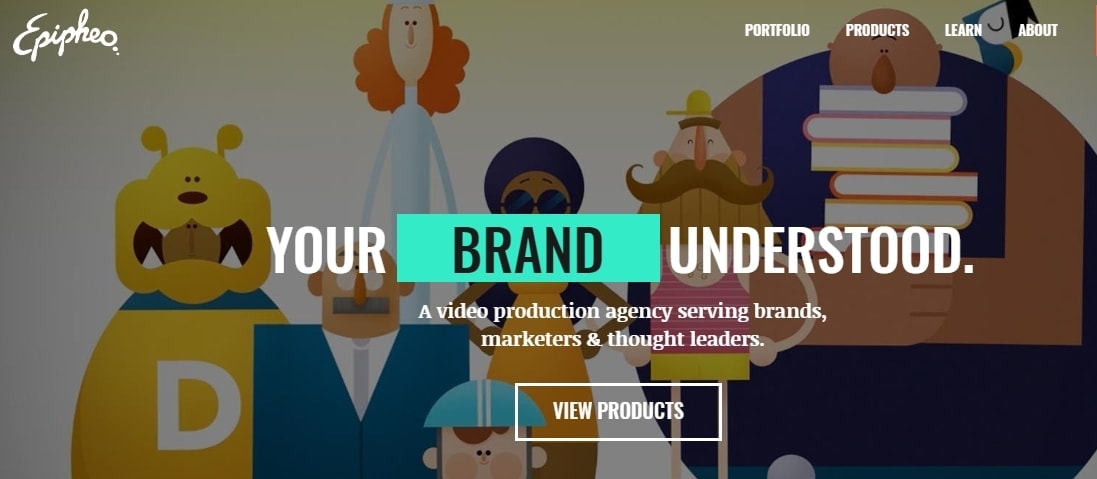
16. Epipheo
Creating a business animation video with Epipheo, lets you explain what you do and offer, why do your products, services, and presence matters or how you’re unique and different from the rest of the companies in the similar niche through an appealing video that can draw the attention of the viewers.
Pricing – The different categories of videos that Epipheo offers are – a video case study, internal video, storytelling video, trade show videos, 3D explainer videos and more. You need to ask for a quote as per your requirement.
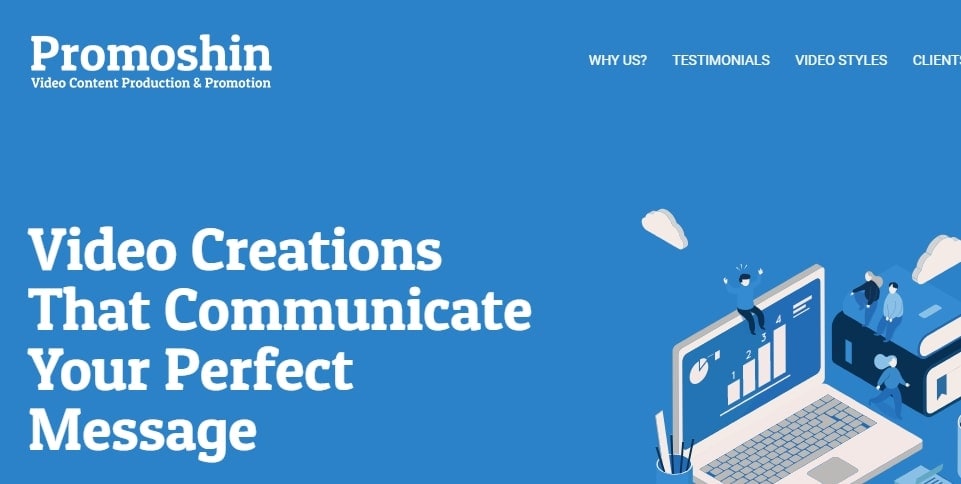
17. Promoshin
Do you wish to avoid in-house video cost or hefty fees for several one-time projects? Turn to Promoshin that allows you to create unlimited customized video content at a flat fee per month. With Promoshin you get to access a team of 8 creative experts who can create any kind of video for your company with unlimited revisions.
Pricing – You need to fill a form to get the pricing detail.
18. Tell us Talk
You get a special admin interface which can access by one or more users as per your control. Tell us talk helps the small businesses to create a manageable comprehensive web interface that can be used by users to manage the administrative tasks of the company. It makes your task easy and simple to deal with the customers through customer admin interface used by the web administrators with the help of toolbox function. From internal billing to API access and sending SMS and MMS, Tell us Talk creates a personal interactive platform to keep in touch with your customers and win their trust.
Pricing – Tell us Talk basic fees is 46.8 EUR/month per user. For additional users, the charge is 1.8 EUR/month. The extended option costs 57.8 EUR/month with additional users charged at 1.8 EUR/month.
Part 2: The Benefits of Animated Videos for Your Business
1. Exposure for your brand extensively
Animated videos for business is a great medium for brand development as they wonderfully collaborate color schemes, logos, brand images with the right kind of audio visuals for creating a complete packaged deal.
These animated audio visuals make your branding more appealing by creating recurrent themes, which keeps the background or foundation intact, while the characters in the clip move.
Animation also helps you to develop more sophisticated creatives and brand icons that can strengthen your marketing pitch. It doesn’t matter whether you are a seasoned player in online marketing or an amateur, the right animated video can speak volumes to promote your business.
2. High quality yet low budget
With animated videos you save plenty of money and time that gets wasted with traditionally shot videos. The surging costs to track a location, hire a crew, pay the artists, pay for top-notch equipment, arrange the set, etc. can make a hole in your pocket.
But, business animation can drastically reverse the expenses by creating a beautiful amalgamation of voiceover, visual, and audio content to deliver a beautiful story. The right animation artist and the correct tool can help you woo your audience like never before.
If you don’t like something in an animated video, then only that part is chopped and edited to add something more substantial.
3. More engagement
A video content is always appealing to the audience, as apart from plain text it is loaded with interesting audio visuals. Human brain being thirsty for knowledge through sight and experience is keen to consume more of audio visual things.
This in turn helps you create better engagement with your target group. Animated videos being a popular medium of imparting knowledge and message, deliver a clear and crisp message in a short span of tome and encourage audio visual learning.
Part 3: FAQ to Create Animated Videos
1. Which software is used to make animated videos?
In the world of animation, different software programs represent various tools to create animated videos with. You will often need to deal separately with 3D animation than 2D, you might need another for modeling and yet a third for rendering. Maya is a good all-round program that can help. Other tools to create animated videos include Adobe Animate and Moho. Each is a decent all-round program with great features.
2. How do I make an animated video for free?
There are tools to create animated videos that are available online, for free, if you know where to look. One of the tops of the list is Filmora, from Wondershare. Although any exported files will contain their watermark unless you unlock the paid version – you can still animate on it. Their Animation 101 pack has both features and learning tools, which will help you to succeed. Best of all, Filmora has an online learning library packed full of resources, as well as a multitude of plugins to help you broaden your animation horizons. It’s an excellent program for a beginner and a unique program for the more experienced editor, so everyone wins.
3. How to start a career in animation?
There are several steps to becoming a full-time animation artist – but it is possible. You should start by getting the relevant College qualifications in animation, or by entering a digital animation degree program. As you learn, save up your successes for both a CV and a portfolio. If you can put together a good demo reel, then all the better. Accept any work experience you can get, and, with a little luck, you will finish your studies with all the tools to create animated videos that you could ever need.
Final Verdict
Apart from using the above mentioned tools for creating business explainer videos, you could use Wondershare Filmora and edit your video while rendering powerful effects. We are sure that with this tool, there is no room for being disappointed. It can seamlessly create the most engaging videos with the least professional video editing.
Shanoon Cox
Shanoon Cox is a writer and a lover of all things video.
Follow @Shanoon Cox
Shanoon Cox
Mar 27, 2024• Proven solutions
Video content is dominating the market with a huge arena to explore. Be it a short clip that explains your company/product or a user guide kind of thing, when you are up for business explainer videos, there is nothing better than illustrative animated videos.
These animated videos can be made without much hassle and can bring exceptional results for your business. All that you need to do is, figure out the right animation tool or service for business animation and convey your message aptly to the audience, and then rest will be history.
Make Your Marketing Videos Shine
Recently, video marketing has become an unstoppable trend. Celebrities and businesses earn great fortune through high-quality marketing videos. To join the profitable video marketing era , you can create your own marketing videos now!
- Part 1: Best Tools and Services to Make Animated Videos for Business
- Part 2: The Benefits of Animated Videos for Your Business
- Part 3: FAQ to Create Animated Videos
Part 1: Best Tools and Services to Make Animated Videos for Business
1. Wideo
Among 2D animtion makers , this can let you edit, create, and share animated videos for business intuitively. You get more than 80 ready-to-edit video templates for business or build them from scratch to suit your business demands. These templates are completely customizable for your needs and make Wideo a much liked tool.
Features:
- You can build amazing animated videos effortlessly.
- You just spend 5 minutes to pick the template and customize by drag and drop, and you are sorted to create a professional looking animated business.
- Either download as a MP4 or share on social media sites like Facebook and YouTube, Wideo does it all.
2. Moovly
Being in your budget and still creating fabulous videos which are intuitive and simple for your business is possible with Moovly. Using this tool you can create animated video, banners, Ads, Whiteboard animation, YouTube intro, and engaging explainer video.
Features:
- You don’t need to install it, as it can directly be done on your desktop.
- You need not more than 15 minutes to do a video.
- More than 600000 free samples, videos, animations and sounds are readily available and you are allowed to use your own media too.
3. Powtoon
PowToon can create engaging explainer animated videos for business, which can captivate the audience. Be it marketing, HR, IT, report making or training your videos always standout. These videos are useful for creating personal videos to surprise your loved ones, make attention grabbing learning material, and captivating office presentations.
Features:
- Anyday a PowToon weighs over video as it can engage, explain and market your idea in the work place.
- With inbuilt drag and drop template a high quality PowToon is just made within 20 minutes.
- With a growing community of fellow designers, you can easily get help for a new video from them.
4. Piehole.tv
They have a simple and stress free process to create an animation.
Features:
- They arrange a call for you to get a creative brief and start the process.
- Be it script, voiceover, design, or animation, they can integrate it better.
5. Blender
This open source video animator has is free to use and has 3D creation suite. Rigging, modeling, animation, rendering, simulation, motion tracking and compositing, game creation, as well as video editing is possible with Blender.
Features:
- You can get attractive ultra-realistic rendering with cycle render engine from Blender.
- This is a public project by numbers of scientists, VFX experts, artists animators and the likes.
- The high end modeling tools help in sculpting, modeling, and UV features are remarkable.
- 3D painting using textured brushes and masking allows crisper out comes.
6. Animate CC
Creating vector business animations and publish them instantly is made easy. These animations include – apps, web, and games to name a few. You can reach the target audience through mobile, desktop, and TV.
Features:
- With animation and illustration tools creating web-based interactive content is easy now, be it game environments, player sprites, or interfaces your games and Ads will stand out.
- You can export the animations to multiple platforms like WebGL, HTML5 Canvas, Flash/Adobe AIR and the likes.
- Create interactive web banners and lively expressive characters using tilt and pressure sensitive brushes.
7. Muvizu
Your business explainer videos can be flawlessly designed with interactive 3D animation package like Muvizu. You can drag and drop the customizable animated characters with sets and use the automatic lip-synching feature for a great video.
Features:
- Worldwide it’s a great tool for demonstrators to use as a lesson building element that reaches students with the right message.
- With their easy commercial terms, you can earn money from your animations without any hassle.
- Engaging content that can reach the audience quickly with super-fast controls.
8. CrazyTalk Animator 3
Revered as the easiest 2D animation program it allows animators to create compelling business animations. You can add life to logos, images, and props using the elastic motion effects as well as the inbuilt templates. 2D talking characters are built using bone ridge editors, facial puppet, motion libraries for web, videos, apps, games, and presentations.
Features:
- It comes with a preview camera for reviewing scenes and live camera for using key frames to animate the position of the camera.
- A rich environment to edit animation, actors, special effects and scenes.
- You can navigate scenes using perspective mode in order to experience the movements of the camera in realistic 3D feel.
9. Topexplainers
Topexplainers help the business to make high-quality professional videos for your business including 50% of animation technology and 50% of marketing techniques. With Topexplainers, you can reach your clients and convey your message in just a few seconds. The team makes clear, short, and convincing videos to explain your business in a very simple way. The powers of content and visuals have no match. The Topexplainers video animation services help to make customized videos to garner 5 times more positive engagements and 65% more attention from the users.
Pricing – There are 3 packages in Topexplainers. Firstly, the 30-second package priced at $397. Secondly, the 60-second package at $597, and finally, the 90-second package priced at $797.
10. Side Kick Sales Videos
The value of business animation videos is increasing with each passing day. Side Kick Sales Videos team aims at creating highly-effective, ingenious, result-driven online videos that can help in fighting the rat-race and get the attention of the viewers. From graphics animation to royalty free music and highly converting the script to visual design, Side Kick Sales Videos personalizes video animation services to create an enhancing package and create your brand awareness.
Pricing – Side Kick Sales Videos offer 3 packages for 30 seconds, 60 seconds, and 90 seconds explainer videos respectively. The price for 30 seconds video is $247, 60 seconds is $349, and 90 seconds is $449.
11. Explainify
The team at Explainify understands your brand and your ideas to create the right tone of the message that you wish to convey to your customers. From scripting the 60-90 seconds pitch to showing you the storyboard and helping you understand what the final video will be like with animations, sound, and vocals, Explainify offers great video animation services.
12. Animation ANTS
The business animation explainer videos have the power to strengthen your marketing efforts. Animation ANTS helps to create stunning, short, and crisp videos within an affordable budget to deliver your message to the masses. Your customers receive a concise message with the videos created by the Animation ANTS.
Pricing – The custom videos have different package names like Leaf, Seed, and Rock. Each of the packages is priced at $3900, $4700, and $5400 respectively. Other than the packages, Animation Ants also offer more template style videos at a discounted price.
13. 90 Seconds
Yes, the name says it all. Within 90 seconds you can create a business animation video, just plan, shoot, edit and review your video from your mobile device. The entire process of creating a video is simple, quick, and easy with the 90 seconds video animation services. You get access to the 90 seconds marketplace of over 12,000 video creative professionals in over 160 countries. You can choose from 70 categories that include photographers, videographers, animators and more.
Pricing – The pricing is flexible for 90 Seconds. Firstly, there’s standard fixed pricing, especially effective for one-time projects. Second, comes the pre-pay starting from US$20000 which is good for the on-going massive content requirement with a flexible timeline. Finally, the subscription model starts from US$3500/month for the brands that regularly need video content and loves what 90-Seconds offer.
14. Idea Rocket Animation
If you are looking for a perfect solution for the most complex problem, turn to Idea Rocket Animation. It takes a brief from you to understand your brand and requirements and then designs the business animation video online. The Idea Rocket Animation takes your message and pitches it to a story, creating a visually appealing design, animations, and sounds.
Pricing – The pricing of business animation videos with Idea Rocket Animation is between $5,000 and $35,000 per minute depending on your choice of animation styles, studios, etc. Budget pricing is also available for creating animation videos between $2000 to $5000 where you need to satisfy with budget studios, DIY software, and freelance professionals.
15. Battle Media Lab
The Battle Media Lab bridges the gaps between brands, design, animations, sound, bringing all together beautifully into one video that is appealing to the viewers. This is one of the most trusted video animation services that influence your brand positively by defining the essence of your products and services and how it benefits the community through an eye-catching and impressive video.
16. Epipheo
Creating a business animation video with Epipheo, lets you explain what you do and offer, why do your products, services, and presence matters or how you’re unique and different from the rest of the companies in the similar niche through an appealing video that can draw the attention of the viewers.
Pricing – The different categories of videos that Epipheo offers are – a video case study, internal video, storytelling video, trade show videos, 3D explainer videos and more. You need to ask for a quote as per your requirement.
17. Promoshin
Do you wish to avoid in-house video cost or hefty fees for several one-time projects? Turn to Promoshin that allows you to create unlimited customized video content at a flat fee per month. With Promoshin you get to access a team of 8 creative experts who can create any kind of video for your company with unlimited revisions.
Pricing – You need to fill a form to get the pricing detail.
18. Tell us Talk
You get a special admin interface which can access by one or more users as per your control. Tell us talk helps the small businesses to create a manageable comprehensive web interface that can be used by users to manage the administrative tasks of the company. It makes your task easy and simple to deal with the customers through customer admin interface used by the web administrators with the help of toolbox function. From internal billing to API access and sending SMS and MMS, Tell us Talk creates a personal interactive platform to keep in touch with your customers and win their trust.
Pricing – Tell us Talk basic fees is 46.8 EUR/month per user. For additional users, the charge is 1.8 EUR/month. The extended option costs 57.8 EUR/month with additional users charged at 1.8 EUR/month.
Part 2: The Benefits of Animated Videos for Your Business
1. Exposure for your brand extensively
Animated videos for business is a great medium for brand development as they wonderfully collaborate color schemes, logos, brand images with the right kind of audio visuals for creating a complete packaged deal.
These animated audio visuals make your branding more appealing by creating recurrent themes, which keeps the background or foundation intact, while the characters in the clip move.
Animation also helps you to develop more sophisticated creatives and brand icons that can strengthen your marketing pitch. It doesn’t matter whether you are a seasoned player in online marketing or an amateur, the right animated video can speak volumes to promote your business.
2. High quality yet low budget
With animated videos you save plenty of money and time that gets wasted with traditionally shot videos. The surging costs to track a location, hire a crew, pay the artists, pay for top-notch equipment, arrange the set, etc. can make a hole in your pocket.
But, business animation can drastically reverse the expenses by creating a beautiful amalgamation of voiceover, visual, and audio content to deliver a beautiful story. The right animation artist and the correct tool can help you woo your audience like never before.
If you don’t like something in an animated video, then only that part is chopped and edited to add something more substantial.
3. More engagement
A video content is always appealing to the audience, as apart from plain text it is loaded with interesting audio visuals. Human brain being thirsty for knowledge through sight and experience is keen to consume more of audio visual things.
This in turn helps you create better engagement with your target group. Animated videos being a popular medium of imparting knowledge and message, deliver a clear and crisp message in a short span of tome and encourage audio visual learning.
Part 3: FAQ to Create Animated Videos
1. Which software is used to make animated videos?
In the world of animation, different software programs represent various tools to create animated videos with. You will often need to deal separately with 3D animation than 2D, you might need another for modeling and yet a third for rendering. Maya is a good all-round program that can help. Other tools to create animated videos include Adobe Animate and Moho. Each is a decent all-round program with great features.
2. How do I make an animated video for free?
There are tools to create animated videos that are available online, for free, if you know where to look. One of the tops of the list is Filmora, from Wondershare. Although any exported files will contain their watermark unless you unlock the paid version – you can still animate on it. Their Animation 101 pack has both features and learning tools, which will help you to succeed. Best of all, Filmora has an online learning library packed full of resources, as well as a multitude of plugins to help you broaden your animation horizons. It’s an excellent program for a beginner and a unique program for the more experienced editor, so everyone wins.
3. How to start a career in animation?
There are several steps to becoming a full-time animation artist – but it is possible. You should start by getting the relevant College qualifications in animation, or by entering a digital animation degree program. As you learn, save up your successes for both a CV and a portfolio. If you can put together a good demo reel, then all the better. Accept any work experience you can get, and, with a little luck, you will finish your studies with all the tools to create animated videos that you could ever need.
Final Verdict
Apart from using the above mentioned tools for creating business explainer videos, you could use Wondershare Filmora and edit your video while rendering powerful effects. We are sure that with this tool, there is no room for being disappointed. It can seamlessly create the most engaging videos with the least professional video editing.
Shanoon Cox
Shanoon Cox is a writer and a lover of all things video.
Follow @Shanoon Cox
Learn Simple Blender Rigging in Only 2 Minutes
Learn Simple Blender Rigging in Only 2 Minutes
An easy yet powerful editor
Numerous effects to choose from
Detailed tutorials provided by the official channel
Blender is a FREE, open-source 3D Animation program that is very popular for beginner animators. It’s a good way of starting if you’re not yet sure about how far you want to go into animation as it won’t demand any immediate monetary commitment.
Now, as for its features, today, we’ll be focusing on Blender Rigging features.
In this article
01 [Why Use Blender Rigging?](#Part 1)
02 [The Art of Effective Rigging in Blender [TUTORIAL]](#Part 2)
03 [Introduction to Rigging in Blender Course](#Part 3)
Part 1 Why Use Blender Rigging?
Blender Character Rigging is a great way of creating truly beautiful and realistic animations. Despite being an open-source program, it’s capable of doing just as much, if not more, than some of the more premium Animation software out there.
So, if you want to create video projects for your audience’s entertainment or edification with animation, then Blender Rigging is definitely something that you should consider. With this tool, you can create the complex animations that you need and then polish it up in a video editor like Wondershare Filmora Video Editor (which is a premium, video-editing tool that you can use to perfect your finished Blender Rigging animations.)

Part 2 The Art of Effective Rigging in Blender [TUTORIAL]
For this next section, we’re going to be introducing a couple of tutorials that you can look into to teach you more about Blender Character Rigging, Blender Facial Rigging, Blender Muscle Rig, and so on.
These topics are each very long-winded on their own though, so we’ve linked appropriate video tutorials that you can learn more and reserved ourselves to a brief description of each technique so that you can determine whether it’s something that interests you (although, of course, our recommendation is that you check each one out so that you can get the full ‘Blender’ experience.)
01Blender Character Rigging
The main thing people usually look at Blender for is, Blender Character Rigging. And, because it was created to emulate professional animation software, Blender has this function down to pat. To give you an idea of what features you can expect: Blender comes with custom bone shapes for easy Blender character rigging, it also comes with envelope skinny, skeleton skinning, and automatic skinning. With these alone, you can be assured that you will be able to create complex animations without much trouble.
02Blender Facial Rigging
Facial Rigging is usually a more complex subject that is avoided by animators without much experience. But, with Blender, facial rigging is possible. The YouTube video should show you the process of going about Blender Facial Rigging from start to finish (from sculpting the character face itself and then making use of Blender Rigging tools for setting up a skeletal structure for your face’s character to become animated.)
03Blender Muscle Rigging
Creating a Blender Muscle Rig is exactly what it sounds like. It is, of course, much more complicated than normal rigging, but it is a good subject to familiarize yourself with anyway, as it will allow you to go to the ‘next stage’ as you say, with your Animations. The video that we’ve attached is from Pierrick Picaut, who has released a series of videos on the subject of Blender Rigging in general and has extensively explained how to create a Blender Human Rig from the general body, the face, the muscles, and so on.
04Blender Rigging
Although a lot of Animation relies on more ‘traditional’ methods of expressing movement, one can still make use of more modern animation practices, like rigs, to set up their animations for movement. It’s an especially good skill to learn if you’re more interested in content-friendly animations (rather than creating a film of your own.)
05Blender Rigging
This next tutorial is an introduction to basic Blender Rigging. It’s a good one to both start and end on, as it was created for beginners specifically, and uses an example that is perhaps easier to understand most. Make sure to give it a shot just in case.
Part 3 Introduction to Rigging in Blender Course
For this next part, we introduce two other resources that you can take advantage of to learn more about Blender Rigging. Whether it be about Blender character rigging, Blender facial rigging, free blender rigs, creating muscle rigs, and so and so forth. These resources have got your back.
01Where to Learn the Course?
The first major course that we think you might be interested in is Mark Masters’ blender rigging course. You can find this course at PluralSight (which is a website that is focused on helping users of software develop their skills). Mark Masters, the instructor for this course, is a professional animator and works as a Animator for the animation studio, Steelhouse Productions. So, you can be sure that there is much that you can learn from him.

02Other Tools to Learn Rigging
As for other places to learn? We suggest the “Blender Fundamentals” course that Blender themselves have posted on YouTube. They have several of these courses (for all of the more recent versions of Blender). So, you can pick out a course that works for you. One of their more recent series is “Blender Fundamentals 2.which currently has videos all on the subject of Blender rigging (including Blender rigging and Blender rigging videos.)

● Key Takeaways from This Episode →
● If you’re interested in trying out blender rigging yourself, you’ll probably want to study the subject a little before beginning.
● Blender Rigging is quite a complex subject for beginners but having something to start with should help you on your way.
● For that, we recommend checking out the videos that we mentioned in section two of this article, where we recommend some popular tutorials regarding some of the more common Blender Rigging subjects.
● If you’re looking for something more comprehensive or put together though. A course might be more up to your taste. For that, we recommend either Mark Master’s introduction to rigging and animation over at PluralSight or Blender’s own “Blender Fundamental” series on YouTube (which should introduce all the functions you’ll need to know.)
Blender is a FREE, open-source 3D Animation program that is very popular for beginner animators. It’s a good way of starting if you’re not yet sure about how far you want to go into animation as it won’t demand any immediate monetary commitment.
Now, as for its features, today, we’ll be focusing on Blender Rigging features.
In this article
01 [Why Use Blender Rigging?](#Part 1)
02 [The Art of Effective Rigging in Blender [TUTORIAL]](#Part 2)
03 [Introduction to Rigging in Blender Course](#Part 3)
Part 1 Why Use Blender Rigging?
Blender Character Rigging is a great way of creating truly beautiful and realistic animations. Despite being an open-source program, it’s capable of doing just as much, if not more, than some of the more premium Animation software out there.
So, if you want to create video projects for your audience’s entertainment or edification with animation, then Blender Rigging is definitely something that you should consider. With this tool, you can create the complex animations that you need and then polish it up in a video editor like Wondershare Filmora Video Editor (which is a premium, video-editing tool that you can use to perfect your finished Blender Rigging animations.)
Part 2 The Art of Effective Rigging in Blender [TUTORIAL]
For this next section, we’re going to be introducing a couple of tutorials that you can look into to teach you more about Blender Character Rigging, Blender Facial Rigging, Blender Muscle Rig, and so on.
These topics are each very long-winded on their own though, so we’ve linked appropriate video tutorials that you can learn more and reserved ourselves to a brief description of each technique so that you can determine whether it’s something that interests you (although, of course, our recommendation is that you check each one out so that you can get the full ‘Blender’ experience.)
01Blender Character Rigging
The main thing people usually look at Blender for is, Blender Character Rigging. And, because it was created to emulate professional animation software, Blender has this function down to pat. To give you an idea of what features you can expect: Blender comes with custom bone shapes for easy Blender character rigging, it also comes with envelope skinny, skeleton skinning, and automatic skinning. With these alone, you can be assured that you will be able to create complex animations without much trouble.
02Blender Facial Rigging
Facial Rigging is usually a more complex subject that is avoided by animators without much experience. But, with Blender, facial rigging is possible. The YouTube video should show you the process of going about Blender Facial Rigging from start to finish (from sculpting the character face itself and then making use of Blender Rigging tools for setting up a skeletal structure for your face’s character to become animated.)
03Blender Muscle Rigging
Creating a Blender Muscle Rig is exactly what it sounds like. It is, of course, much more complicated than normal rigging, but it is a good subject to familiarize yourself with anyway, as it will allow you to go to the ‘next stage’ as you say, with your Animations. The video that we’ve attached is from Pierrick Picaut, who has released a series of videos on the subject of Blender Rigging in general and has extensively explained how to create a Blender Human Rig from the general body, the face, the muscles, and so on.
04Blender Rigging
Although a lot of Animation relies on more ‘traditional’ methods of expressing movement, one can still make use of more modern animation practices, like rigs, to set up their animations for movement. It’s an especially good skill to learn if you’re more interested in content-friendly animations (rather than creating a film of your own.)
05Blender Rigging
This next tutorial is an introduction to basic Blender Rigging. It’s a good one to both start and end on, as it was created for beginners specifically, and uses an example that is perhaps easier to understand most. Make sure to give it a shot just in case.
Part 3 Introduction to Rigging in Blender Course
For this next part, we introduce two other resources that you can take advantage of to learn more about Blender Rigging. Whether it be about Blender character rigging, Blender facial rigging, free blender rigs, creating muscle rigs, and so and so forth. These resources have got your back.
01Where to Learn the Course?
The first major course that we think you might be interested in is Mark Masters’ blender rigging course. You can find this course at PluralSight (which is a website that is focused on helping users of software develop their skills). Mark Masters, the instructor for this course, is a professional animator and works as a Animator for the animation studio, Steelhouse Productions. So, you can be sure that there is much that you can learn from him.
02Other Tools to Learn Rigging
As for other places to learn? We suggest the “Blender Fundamentals” course that Blender themselves have posted on YouTube. They have several of these courses (for all of the more recent versions of Blender). So, you can pick out a course that works for you. One of their more recent series is “Blender Fundamentals 2.which currently has videos all on the subject of Blender rigging (including Blender rigging and Blender rigging videos.)
● Key Takeaways from This Episode →
● If you’re interested in trying out blender rigging yourself, you’ll probably want to study the subject a little before beginning.
● Blender Rigging is quite a complex subject for beginners but having something to start with should help you on your way.
● For that, we recommend checking out the videos that we mentioned in section two of this article, where we recommend some popular tutorials regarding some of the more common Blender Rigging subjects.
● If you’re looking for something more comprehensive or put together though. A course might be more up to your taste. For that, we recommend either Mark Master’s introduction to rigging and animation over at PluralSight or Blender’s own “Blender Fundamental” series on YouTube (which should introduce all the functions you’ll need to know.)
How to Cartoonize Photo Photoshop in Easy Steps
How to Cartoonize Photo Photoshop in Easy Steps
An easy yet powerful editor
Numerous effects to choose from
Detailed tutorials provided by the official channel
Cartoons, an already catchy entertainment source, can upgrade other media utilities on integration. Look through the easiest ways of creating cartoonize photo Photoshop stills!
In this article
01 [Types of Cartoon Effects in Photoshop](#Part 1)
02 [Easiest Ways to Cartoonize Photo in Photoshop](#Part 2)
03 [How to Use a Variety of Photoshop Special Effects to Create the Final Caricature Look](#Part 3)
Part 1 Types of Cartoon Effects in Photoshop
It is an absolute fun activity to explore your editing creativity in the realm of cartoonizing the otherwise ordinary still captures. Talking of the most convenient cartoon creator and editor applications, you can safely rely on the Photoshop Image Editor application to choose from a pool of cartoon editing effects for adding that spunky and funny element to your image files.
Presented in the following section, is a discussion of some of the most stunning and visibly amazing cartoon effects in the application’s Editor Library to cartoonize Photoshop images:
01Pop Art Photoshop Action
The effect is a predominantly preferred as a cartoon action Photoshop utility to caricaturize a normal image, along with customizing the same to change the colors and background of the original still capture for creating a brand new appearance with utmost ease. Apart from this, the aforesaid effect allows you to exclusively customize the globally acclaimed graphic masterpieces of Roy Lichtenstein. Working with the effect, you can edit a self-portrait or the favorite image of your pet to give the latter, a funny retro feel.

02Vintage Comic Creator
If the idea of sticking to just the creation of cartoon images is not enough to satisfy you, the Vintage Comic Creator effect allows you to expand your creativity level to work on cartoon based shape and text edits. You can use the effect to enhance an image logo or plain text with a comic book oriented text. A download of this cartoon effect template facilitates you with diversities of customizable layer styles, overlays and patterns.

03GTA Photoshop Action
This is a complete pleasure for the creative fan of Grand Theft Auto, the wicked chasing game series. Additional to creating a stark variety of edited cartoon stills, you are free to reinvent the aforesaid game’s most popular caricature edits, while using the GTA Photoshop Action editing filter. Launched by Indworks, the effect package consisting of 15 vibrant themes and 5 collage templates; promises a quick mimicry of your most cherished video and console games.

04Vector Paint Photoshop Action
The one is an amazing Photoshop effect for creating cartoon edits, which works through a merger of two different ingenious art themes or styles for transforming basic images into cartoonized stills.
The effect grants you the liberty to use varieties of art styles, such as, comic, photo retouching and energetic oil to obtain editing results comparable to that of any original photograph. The template is conveniently simple to use and assures you of quick results. All this, just at a nominal price of $6! Interesting, right?

05Ultra Realistic 3D Space Effect
Considering the fact of you being a space admirer, this one is the perfect image editor for you to add the vibrancy of stunning space elements and backgrounds within your cartoonized edits. The effect lets you play with the diverse range of customizable text and exciting caricature backgrounds. When downloading the template, you get a main setup file, a few editing examples and a web link to the free fonts present in the effect.

06Animated Zombie Grime Art Photoshop Action
Are you in love with the latest zombie grimes? If yes, then this action set is exclusive editor package for you. Working with the aforesaid image template, you can effortlessly add the perfect zombie theme to your cartoon edits, along with simultaneously creating a stunning animation, which you can use to enhance your video or GIF uploads on social media. Not forgetting the best part, you get a free access to this amazing utility.

Part 2 Easiest Ways to Cartoonize Photo in Photoshop
Having known about the amazing varieties of cartoonized editor templates in Photoshop, it is a natural instinct to feel motivated to create your own caricature images from normal capture stills. Addressing the concern of image transformation methods to turn a photo into a cartoon Photoshop, let us dive into some of the most affordable methods of creating cartoonized photos in the aforesaid editing application.
Talking of the most basic Photoshop tools for creating caricature images, you can start your editing spree with using the Graphic Tablet, Brush Tool, Layer Masks and a graphic pen to create amateur cartoonized edits from your still photographs, getting a full control on image tracing.
01Brush Tool
A few usage examples include working with a combination of the graphic tablet pen and the editor brushes to trace your image, using the brush in a masked or a fresh layer to avoid altering the actual image, and much more.
02Graphic Tablet
It is best to use the Photoshop Graphic Tablet for adhering to the concern of tracing cartoonized images. You can alternatively cater to the job with a trackpad, mouse, or even your hand. It is however, difficult to assure steady hand postures for image tracing, lest you are using a stylus pen.
03Pen Tool
Using the Pen Tool for cartoonizing your portrait, allows you to draw outlines along the desired figure within the image, along with its important elements, so that you can easily use these outlined paths to introduce different color blocks.
Similar to the Brush Tool, the Photoshop Pen utility grants you the freedom to vary the degree of detailing in your cartoon edit, from being highly expressive to only remaining around the shore. Working with the Pen Tool can, however be a bit tiring and time taking, with respect to the extent of detailing you wish to add to the caricature edits.
Additional to the aforementioned tools, you can also consider using the default image filters of the Photoshop application to get comparable results. This is an exclusively better option to choose, compared to the Pen Tool, when you are working without a Graphic Tablet. To get over the top realistic caricature renderings, you will need to supplement the use of Photoshop filters with the application’s editing channels and other adjustments.
Part 3 How to Use a Variety of Photoshop Special Effects to Create the Final Caricature Look
Considering the extensive discussion on the credibility of the Photoshop Image Editor application in the realm of creating stunning caricature images in high end resolution, let us proceed to learn about using the diversity of Photoshop’s special effects to get the last stage cartoonized appearance of ordinary still images.
User’s Guide to Create High End Cartoonized Look
The following tutorial is a stepwise explanation of the process to convert photo into cartoon Photoshop in the easiest possible way. Stick to the method for getting affordable results in a quick span.
Step 1: Download and Launch the Program
Visit the official website of Photoshop Image Editor for a free download of the software program in your system, followed by installing and launching the same in your device.
Step 2: Upload Your Image
On a successful launch of the editor program, you will be directed to the ‘Photoshop Editor’ window, where you are required to upload any desired still image from your device for creating a cartoonized edit. To do this, either simply add your image to the editor workspace using the ‘Drag and Drop’ method, or navigate to the ‘File’ tab in the top toolbar and click on ‘Open’ in the dropdown menu.
Step 3: Edge Enhancement
Once your image appears in the editor timeline, proceed to sharpen the edges of the face and body of the portrait. Start with navigating to and clicking on the ‘Filter’ option, followed by tapping on ‘Filter Gallery’ and selecting the ‘Artistic’ folder, where you need to choose the ‘Poster Edges’ option. Observe the effect of these setting on the portrait and make necessary changes.

Step 4: Background Setting
Ensure that the background and foreground of your image are set to white and black colors respectively. If not, proceed to adjust the same as required.

Step 5: Distorting the Edges
You now need to introduce some distortion in the edges of your portrait. Navigate to the ‘Filter’ option again, open the ‘Filter Gallery’ and choose ‘Torn Edges’ from the menu that drops down. Select the desired parameter values in accordance with your creative suitability.


Step 6: Using the Channels Panel
The next step is to select and copy your portrait using the ‘Ctrl + A’ and Ctrl + C commands respectively. Navigate to the ‘Channels’ panel at the right of the Photoshop workspace. At the panel’s bottom right, proceed with creating a new channel. It will be assigned the name ‘Alpha 1’ by Photoshop, which you are most welcome to change.


Step 7: Color Inversion
When you finish creating the channel, use the ‘Ctrl + V’ command to paste your portrait in the same. Proceed with inverting the image colors by navigating to the ‘Image’ option, followed by choosing the ‘Adjustment’ and ‘Invert’ options from the consecutive drop downs. Now, make a selection of the ‘White’ regions of your portrait by pressing the ‘Ctrl’ key and clicking on the ‘Alpha 1 Channel thumbnail.

Step 8: Layer Creation
Navigate to the ‘Layers’ panel at the right of the Photoshop workspace, and click on the ‘New Layer’ icon for creating a fresh layer. Fill the just created layer with black color, either by pressing ‘g’ from your system’s keyboard, or using the ‘Paint Bucket’ tool. Don’t forget to assign a suitable name to the layer.

Repeat the above process to create a separate layer and e fill the same with white color. The layer creation process is essential to separate the white and black colors of the actual image.

Step 10: Layer Dragging
In the ‘Layers’ panel, drag the ‘Black’ layer above the ‘White’ one.

Step 11: Creating Additional Layers
You are now required to create three more layers, with the same process as for the above two, for adding effects to the Skin, Clothes and Teeth/Eyes of the portrait. When you finish creation, assign suitable names to the layers, followed by dragging them below the ‘Black’ one within the ‘Layers’ panel.

Step 12: Color Selection and Application
Choose the respective colors for the clothes, skin and teeth/eyes of the cartoonized edit. To proceed with color application, navigate to the toolbar at the left of the Photoshop workspace and choose the ‘Brush Tool’. Finally, choose a particular layer and apply careful brush strokes to add color to the specific area of the portrait that you wish to edit. Follow the same process to add colors to the remaining layers to get the desired result in all areas of your cartoonized edit.

Step 13: Using the Gradient Tool
Navigate to the ‘Layers’ panel again and create a new ‘Gradient’ layer to further enhance your creation. You now need to select the ‘Gradient Tool’ from the toolbar at the left of the Photoshop workspace. The ‘Gradient Editor’ pops up with the continuously running ‘Gradient Bar’, as soon as you make the selection. Double click on the gradient boxes at both ends to select them, followed by making your color choices. Tap on ‘OK’ when you are satisfied with your work.

Step 14: Filling the Gradients
To proceed with gradient filling, press and hold the mouse button on the image at the bottom left and continue to drag the cursor to its top right corner. Leave the mouse and navigate to the ‘Layers’ panel for dragging and dropping the ‘Gradient’ layer above the ‘White’ layer.

You are now done with the process of creating a caricature edit from a normal still portrait. Your final image output will appear something like the following:

Cartoons, an already catchy entertainment source, can upgrade other media utilities on integration. Look through the easiest ways of creating cartoonize photo Photoshop stills!
In this article
01 [Types of Cartoon Effects in Photoshop](#Part 1)
02 [Easiest Ways to Cartoonize Photo in Photoshop](#Part 2)
03 [How to Use a Variety of Photoshop Special Effects to Create the Final Caricature Look](#Part 3)
Part 1 Types of Cartoon Effects in Photoshop
It is an absolute fun activity to explore your editing creativity in the realm of cartoonizing the otherwise ordinary still captures. Talking of the most convenient cartoon creator and editor applications, you can safely rely on the Photoshop Image Editor application to choose from a pool of cartoon editing effects for adding that spunky and funny element to your image files.
Presented in the following section, is a discussion of some of the most stunning and visibly amazing cartoon effects in the application’s Editor Library to cartoonize Photoshop images:
01Pop Art Photoshop Action
The effect is a predominantly preferred as a cartoon action Photoshop utility to caricaturize a normal image, along with customizing the same to change the colors and background of the original still capture for creating a brand new appearance with utmost ease. Apart from this, the aforesaid effect allows you to exclusively customize the globally acclaimed graphic masterpieces of Roy Lichtenstein. Working with the effect, you can edit a self-portrait or the favorite image of your pet to give the latter, a funny retro feel.
02Vintage Comic Creator
If the idea of sticking to just the creation of cartoon images is not enough to satisfy you, the Vintage Comic Creator effect allows you to expand your creativity level to work on cartoon based shape and text edits. You can use the effect to enhance an image logo or plain text with a comic book oriented text. A download of this cartoon effect template facilitates you with diversities of customizable layer styles, overlays and patterns.
03GTA Photoshop Action
This is a complete pleasure for the creative fan of Grand Theft Auto, the wicked chasing game series. Additional to creating a stark variety of edited cartoon stills, you are free to reinvent the aforesaid game’s most popular caricature edits, while using the GTA Photoshop Action editing filter. Launched by Indworks, the effect package consisting of 15 vibrant themes and 5 collage templates; promises a quick mimicry of your most cherished video and console games.
04Vector Paint Photoshop Action
The one is an amazing Photoshop effect for creating cartoon edits, which works through a merger of two different ingenious art themes or styles for transforming basic images into cartoonized stills.
The effect grants you the liberty to use varieties of art styles, such as, comic, photo retouching and energetic oil to obtain editing results comparable to that of any original photograph. The template is conveniently simple to use and assures you of quick results. All this, just at a nominal price of $6! Interesting, right?
05Ultra Realistic 3D Space Effect
Considering the fact of you being a space admirer, this one is the perfect image editor for you to add the vibrancy of stunning space elements and backgrounds within your cartoonized edits. The effect lets you play with the diverse range of customizable text and exciting caricature backgrounds. When downloading the template, you get a main setup file, a few editing examples and a web link to the free fonts present in the effect.
06Animated Zombie Grime Art Photoshop Action
Are you in love with the latest zombie grimes? If yes, then this action set is exclusive editor package for you. Working with the aforesaid image template, you can effortlessly add the perfect zombie theme to your cartoon edits, along with simultaneously creating a stunning animation, which you can use to enhance your video or GIF uploads on social media. Not forgetting the best part, you get a free access to this amazing utility.
Part 2 Easiest Ways to Cartoonize Photo in Photoshop
Having known about the amazing varieties of cartoonized editor templates in Photoshop, it is a natural instinct to feel motivated to create your own caricature images from normal capture stills. Addressing the concern of image transformation methods to turn a photo into a cartoon Photoshop, let us dive into some of the most affordable methods of creating cartoonized photos in the aforesaid editing application.
Talking of the most basic Photoshop tools for creating caricature images, you can start your editing spree with using the Graphic Tablet, Brush Tool, Layer Masks and a graphic pen to create amateur cartoonized edits from your still photographs, getting a full control on image tracing.
01Brush Tool
A few usage examples include working with a combination of the graphic tablet pen and the editor brushes to trace your image, using the brush in a masked or a fresh layer to avoid altering the actual image, and much more.
02Graphic Tablet
It is best to use the Photoshop Graphic Tablet for adhering to the concern of tracing cartoonized images. You can alternatively cater to the job with a trackpad, mouse, or even your hand. It is however, difficult to assure steady hand postures for image tracing, lest you are using a stylus pen.
03Pen Tool
Using the Pen Tool for cartoonizing your portrait, allows you to draw outlines along the desired figure within the image, along with its important elements, so that you can easily use these outlined paths to introduce different color blocks.
Similar to the Brush Tool, the Photoshop Pen utility grants you the freedom to vary the degree of detailing in your cartoon edit, from being highly expressive to only remaining around the shore. Working with the Pen Tool can, however be a bit tiring and time taking, with respect to the extent of detailing you wish to add to the caricature edits.
Additional to the aforementioned tools, you can also consider using the default image filters of the Photoshop application to get comparable results. This is an exclusively better option to choose, compared to the Pen Tool, when you are working without a Graphic Tablet. To get over the top realistic caricature renderings, you will need to supplement the use of Photoshop filters with the application’s editing channels and other adjustments.
Part 3 How to Use a Variety of Photoshop Special Effects to Create the Final Caricature Look
Considering the extensive discussion on the credibility of the Photoshop Image Editor application in the realm of creating stunning caricature images in high end resolution, let us proceed to learn about using the diversity of Photoshop’s special effects to get the last stage cartoonized appearance of ordinary still images.
User’s Guide to Create High End Cartoonized Look
The following tutorial is a stepwise explanation of the process to convert photo into cartoon Photoshop in the easiest possible way. Stick to the method for getting affordable results in a quick span.
Step 1: Download and Launch the Program
Visit the official website of Photoshop Image Editor for a free download of the software program in your system, followed by installing and launching the same in your device.
Step 2: Upload Your Image
On a successful launch of the editor program, you will be directed to the ‘Photoshop Editor’ window, where you are required to upload any desired still image from your device for creating a cartoonized edit. To do this, either simply add your image to the editor workspace using the ‘Drag and Drop’ method, or navigate to the ‘File’ tab in the top toolbar and click on ‘Open’ in the dropdown menu.
Step 3: Edge Enhancement
Once your image appears in the editor timeline, proceed to sharpen the edges of the face and body of the portrait. Start with navigating to and clicking on the ‘Filter’ option, followed by tapping on ‘Filter Gallery’ and selecting the ‘Artistic’ folder, where you need to choose the ‘Poster Edges’ option. Observe the effect of these setting on the portrait and make necessary changes.
Step 4: Background Setting
Ensure that the background and foreground of your image are set to white and black colors respectively. If not, proceed to adjust the same as required.
Step 5: Distorting the Edges
You now need to introduce some distortion in the edges of your portrait. Navigate to the ‘Filter’ option again, open the ‘Filter Gallery’ and choose ‘Torn Edges’ from the menu that drops down. Select the desired parameter values in accordance with your creative suitability.
Step 6: Using the Channels Panel
The next step is to select and copy your portrait using the ‘Ctrl + A’ and Ctrl + C commands respectively. Navigate to the ‘Channels’ panel at the right of the Photoshop workspace. At the panel’s bottom right, proceed with creating a new channel. It will be assigned the name ‘Alpha 1’ by Photoshop, which you are most welcome to change.
Step 7: Color Inversion
When you finish creating the channel, use the ‘Ctrl + V’ command to paste your portrait in the same. Proceed with inverting the image colors by navigating to the ‘Image’ option, followed by choosing the ‘Adjustment’ and ‘Invert’ options from the consecutive drop downs. Now, make a selection of the ‘White’ regions of your portrait by pressing the ‘Ctrl’ key and clicking on the ‘Alpha 1 Channel thumbnail.
Step 8: Layer Creation
Navigate to the ‘Layers’ panel at the right of the Photoshop workspace, and click on the ‘New Layer’ icon for creating a fresh layer. Fill the just created layer with black color, either by pressing ‘g’ from your system’s keyboard, or using the ‘Paint Bucket’ tool. Don’t forget to assign a suitable name to the layer.
Repeat the above process to create a separate layer and e fill the same with white color. The layer creation process is essential to separate the white and black colors of the actual image.
Step 10: Layer Dragging
In the ‘Layers’ panel, drag the ‘Black’ layer above the ‘White’ one.
Step 11: Creating Additional Layers
You are now required to create three more layers, with the same process as for the above two, for adding effects to the Skin, Clothes and Teeth/Eyes of the portrait. When you finish creation, assign suitable names to the layers, followed by dragging them below the ‘Black’ one within the ‘Layers’ panel.
Step 12: Color Selection and Application
Choose the respective colors for the clothes, skin and teeth/eyes of the cartoonized edit. To proceed with color application, navigate to the toolbar at the left of the Photoshop workspace and choose the ‘Brush Tool’. Finally, choose a particular layer and apply careful brush strokes to add color to the specific area of the portrait that you wish to edit. Follow the same process to add colors to the remaining layers to get the desired result in all areas of your cartoonized edit.
Step 13: Using the Gradient Tool
Navigate to the ‘Layers’ panel again and create a new ‘Gradient’ layer to further enhance your creation. You now need to select the ‘Gradient Tool’ from the toolbar at the left of the Photoshop workspace. The ‘Gradient Editor’ pops up with the continuously running ‘Gradient Bar’, as soon as you make the selection. Double click on the gradient boxes at both ends to select them, followed by making your color choices. Tap on ‘OK’ when you are satisfied with your work.
Step 14: Filling the Gradients
To proceed with gradient filling, press and hold the mouse button on the image at the bottom left and continue to drag the cursor to its top right corner. Leave the mouse and navigate to the ‘Layers’ panel for dragging and dropping the ‘Gradient’ layer above the ‘White’ layer.
You are now done with the process of creating a caricature edit from a normal still portrait. Your final image output will appear something like the following:
Tips on How to Get Awesome Background for Slideshow in PowerPoint
Tips That Show Anybody How to Get Awesome Background for Slideshow in Powerpoint
An easy yet powerful editor
Numerous effects to choose from
Detailed tutorials provided by the official channel
Amazing slideshow background are an absolute attention grabber in the realm of creative PowerPoint presentations. If you wish to upgrade yours with the same, be here to learn how!
In this article
01 [How to Add Video Background in PowerPoint?](#Part 1)
02 [How to Create Moving Backgrounds in Microsoft PowerPoint?](#Part 2)
03 [Some Tips for You to Get Awesome PowerPoint Backgrounds & Templates](#Part 3)
Part 1 How to Add Video Background in PowerPoint?
When the talk is about engaging means to deliver a precise information, PowerPoint slideshows are an absolute stunner. While these are already a captivating utility to present your thing, the output and audience engagement is at par with the inclusion of attractive design elements in the presentation. As is evident, there are enormous diversities of supplementary elements to complement your presentation, let us centre our discussion to the application of video background for slideshow in PowerPoint.
User’s Guide to Add Video Background in a PowerPoint Slideshow
The following section presents a detailed explanation of the steps to supplement your PowerPoint presentations with classic video backgrounds in just a few quick steps:
Step 1: Launch Your Presentation
Start with opening the desired PowerPoint presentation to which you want to add the video background, in any of your preferred devices.
Step 2: Add a Video to Your Slide
Browse through your presentation slides to locate the one you want to add the video background to. When you have made your choice, navigate to the PowerPoint toolbar at the top and hit the ‘Insert’ tab and choose the ‘Video’ option.
You will now be presented with 2 choices, either uploading a video from your device or insert one from the web by pasting its YouTube URL into the slide. If you are uploading a video from your device, proceed with selecting the desired video and tap ‘Insert’.

Step 3: Move and Resize Your Video
After uploading your video to the slide, you need to make suitable adjustments in its size and alignment to synchronize the same with the contents of the slide. To do this, drag the top left corner of the video to that of the slide to set the top alignment ratio. In the same way, move the bottom right corner of the video to be in sync with that of the slide. You will see the video occupying the entire slide at the end of the adjustment process.

Step 4: Set the Video Background
You will now need to set the video as the background of your slide, so that the latter’s contents are displayed over the video. You can do this by right clicking on the video and choosing the ‘Send to Back’ option from the dropdown that follows. This will cause the contents of your slide to get displayed over the video.

Step 5: Playback Edit and Customization Choices
Before proceeding towards making changes in the video playback and formatting, prefer taking a quick preview of your work till here. Once you are satisfied, navigate to the PowerPoint Toolbar at the top, hit the ‘Video Tools’ tab, followed by clicking on the ‘Playback’ tab.
It is recommended to introduce the following changes in your video for the most affordable slideshow output:
● Loop Your Video
Creating a video loop will facilitate you with an automatic replay of your video without the need to restart it every time with a click. You can loop your video by navigating to the ‘Video Options’ section and choose ‘Loop Until Stopped’ by clicking within the checkbox next to it. The background video will now continue to play until you switch to a different slide.
● Automatically Start Your Video
To avoid clicking on the slide amid your presentation for the video loop to begin, adjust the latter’s settings for an automatic start. Navigate to the ‘Start’ dropdown menu and select ‘Automatically’.
● Trim Your Video
You can work with some basic video editing tools in PowerPoint, like trimming and cropping your background video to a desired length. If you wish to ward off certain portions of your video, reach to and click o the ‘Trim Video’ button. Following this, drag the slider of the video to select the desired portions of the clip and exclude the rest.
You can further work with some more editing effects to create the perfect video backgrounds for your presentation slides in line with your specific preferences.

Step 6: Annotate Your Video Background
When you are done with the video editing process, take a preview of the same to ensure that everything is set in the proper order and at the proper place. Lastly, if you wish to add suitable text annotations to your video, you can do this with the ‘ClassPoint’ tool to write over the video background. All you need to do is select a preferred pen colour and start writing on your slide screen. You can further, save the annotations for a work record.

Part 2 How to Create Moving Backgrounds in Microsoft PowerPoint?
Moving PowerPoint slideshow background is another aspect of graphic creativity at its best, which can be used in a number of ways to grab considerable viewer attention. When choosing to add moving backgrounds to your presentation, the latter can aid in improving the style of content presentation, making your audience curious about how and what happens next.
Having learnt about the utility and creation process of video backgrounds in the PowerPoint presentation tool, let us extend our discussion to the method of creating a moving slide show background in the same in the following section:
User’s Guide to Create Moving Backgrounds for PowerPoint Presentations
Discussed below is an explanatory procedure for designing moving backgrounds with an awesome appearance for slideshow presentations in Microsoft PowerPoint:
Step 1: Open Your Presentation
To begin with, launch the PowerPoint tool in your preferred device and open the presentation on which you will be working to add the moving background. After the presentation gets loaded, navigate through the same and select the desired slide to proceed with the aforesaid task.
Step 2: Choose a Video Location
To add your desired video to the slide, navigate to the PowerPoint ribbon at the top and click on the ‘Insert’ tab. Select ‘Video’ from the list of options that appears, followed by choosing one of the ‘Online Video’ or ‘Video on My PC’ options from the video selection prompt. It is further recommended to select a video in the MP4 format, as the latter gives best results of moving and video backgrounds.
Step 3: Insert Your Video
Choose the second option in the selection prompt to upload a video from your device. You will now be asked to browse through your device and locate the desired video in the ‘Insert Video’ dialog box that appears. Select your video and tap the ‘Insert’ button to add your video.
To upload videos from an online source, choose the ‘Online Video’ option in the selection prompt and proceed to search the video from PowerPoint or paste its embed code to recover the video. The chosen video will begin to download and can be added to the PowerPoint presentation after the download process comes to an end.

Step 4: Playback Editing and Video Customization
Before proceeding further, consider paying your video once by clicking on the ‘Start’ button. You can also add different effects, trim and crop or add a bookmark to your video by navigating to and clicking on the ‘Video Tools’ tab, followed by selecting the ‘Format’ option. To work with the start and playback options for the video, click on ‘Playback’ in the dropdown menu of the ‘Video Tools’ tab.

Part 3 Some Tips for You to Get Awesome PowerPoint Backgrounds & Templates
Now that you have developed a comprehensive understanding of the utility of adding video and moving background for slideshow presentation, let us look through some easy tips and tricks to conveniently access the top rated and the most popular PowerPoint slideshow templates and backgrounds in the following section:
01Cool Slide Backgrounds
Slideshow presentations in PowerPoint are supplemented with a visual spark through amazing and vibrant backgrounds that are a sign of excellent graphic creativity. When working with a PowerPoint presentation of your own, do take the liberty to use some cool slide backgrounds to your creative advantage.
When the talk is about complementing your presentation with a cohesive and upbeat background, you can either select the most suitable one from a heap of pre made slideshow templates available both in the PowerPoint slideshow creator tool as well as across the web. However, if you wish to take the excitement to another level, try hands at creating an awesome and cool backgrounds for PowerPoint slides of your own!
Talking about some really cool tips and tricks to design a slideshow presentation background in PowerPoint, start with including some specific shapes and color overlays to the background capture, experiment with a polygon background, work on enhancing the background image with classic and artistic effects and apply a mix of colors, textures and patterns to give a classy look to your slideshow backgrounds.

02Professional Slideshow Backgrounds
If you are aiming at creating a PowerPoint slideshow presentation with a business centered design approach, you will need to cut down on some extra elements that you would ideally choose to include in a personal purpose based slideshow. Paying attention to the fact that business and corporate centered presentations should be simple, subtle and to the point, it would be an intelligent step to avoid adding too many expressive elements in the background.
Whether you are creating a professional slideshow background of your own or working with a pre designed template, take care to include a complementary play of a light background theme with a maximum of 2 balancing shades.
Avoid too much vibrancy and abstain from applying over the top effects and quick transitions, lest your presentation may look a bit too crowed. If your slides have lot of written content, prefer using a white color background text in a professional font style.
If you have decided on picking a pre made template, you can browse through a diversity of suggestions across the web, while keeping the aforesaid constraints in mind. Consider taking a look at the figure given below to have a more comprehensive understating of the prerequisites of selecting a professional sideshow background template:

03Happy Birthday Slide Backgrounds
Birthday parties are the most appealing synonyms of fun and entertainment. If you are into the profession of organizing events that renders smiling and happy faces, slideshow presentations could be of great help to you in discussing about services, types of social gentries and event targets with your clients.
When looking through different options to select the perfect birthday template, either for a professional event, or just to go down the memory lane of your most cherished moments, take caution to search for a vibrant alternative with colorful images, different background designs and party oriented cool themes, wide aspect ratio with high screen resolution for a mass display and conveniently editable graphics.
If you are creating a happy birthday slide background of your own, there are variety of realms to explore your graphic design creativity, owing to the fact that the subject of creation is highly expressive and multi-dimensional. While you are free to extend your creativity to the next level, do pay attention to the above constraints for a more elusive and outstanding creation output, while maintaining the fun and entertainment quotient intact.

04Wedding Slide Backgrounds
Considering the fact that wedding events are pronounced means of fun, leisure, enjoyment and beautiful memories, anything that aims to be a part of the celebrations, should be equally ecstatic and engaging. Infusing festive occasions with technology, slideshow based wedding invitations and moment captures are the top rated modern trends of celebrating this significant life event.
If you are keen on designing the perfect slideshow presentation for wedding invitations, photo albums and thank you cards, prefer to choose a wedding slide background template with aesthetic layout and flowing element inclusions, like that of floral borders and scented candles. Look though the elements of a subtle thematic setup with soothing color combinations, preferably in complementary pastel shades, like pink and white.
Talking of template customizability, the latter should have placeholders to include names of the bride and groom, the wedding date and venue, and of course the wedding photographs. The beautiful slide background template should have enough design space to include the most elusive play of text colors and fonts to suit specific preferences of creating special memories of a cherished event.

05Slideshow Backgrounds and Templates in Filmora
When looking for the most convenient lead to an extensive variety of beautiful slideshow templates and background, the template library of Wondershare Filmora Video Editor slideshow creator program can be your most affordable destination. The aforesaid software library is known to possess the best and most perfect template choices to suit the creation constraints of almost every slideshow presentation style and objective you can possibly think of.
For Win 7 or later (64-bit)
For macOS 10.12 or later
The elusive templates are further supplemented with a plethora of design flexibilities and customization features that are all set to deliver you the most appreciable creation output. Stressing a bit on the template customization choices of the software, you can work with the tool to uplift your slideshow backgrounds with artistic image effects and overlays, annotate them with beautiful text formations in a variety of colors, fonts and sizes and lots more.
Moving a bit deeper into the creative aspect, you can upgrade the visual style of your presentations with the most perfect and seamless image and video transitions and text animations. The bottom line is, working with the aforesaid slideshow creator program, you are entitled to get jaw dropping applaud from your audience, while making a confident and a content delivery through your slideshow presentation.

● Ending Thoughts →
● Using an expressive and complementing background in your slideshow presentation uplifts its visual credibility in captivating your audience.
● Browsing through the web, you get to access a vast range of amazing slideshow backgrounds and templates to make your presentation, a visual masterpiece.
● When looking for the most distributed storehouse of slideshow backgrounds and templates, the Wondershare Filmora library is your ultimate solution.
Amazing slideshow background are an absolute attention grabber in the realm of creative PowerPoint presentations. If you wish to upgrade yours with the same, be here to learn how!
In this article
01 [How to Add Video Background in PowerPoint?](#Part 1)
02 [How to Create Moving Backgrounds in Microsoft PowerPoint?](#Part 2)
03 [Some Tips for You to Get Awesome PowerPoint Backgrounds & Templates](#Part 3)
Part 1 How to Add Video Background in PowerPoint?
When the talk is about engaging means to deliver a precise information, PowerPoint slideshows are an absolute stunner. While these are already a captivating utility to present your thing, the output and audience engagement is at par with the inclusion of attractive design elements in the presentation. As is evident, there are enormous diversities of supplementary elements to complement your presentation, let us centre our discussion to the application of video background for slideshow in PowerPoint.
User’s Guide to Add Video Background in a PowerPoint Slideshow
The following section presents a detailed explanation of the steps to supplement your PowerPoint presentations with classic video backgrounds in just a few quick steps:
Step 1: Launch Your Presentation
Start with opening the desired PowerPoint presentation to which you want to add the video background, in any of your preferred devices.
Step 2: Add a Video to Your Slide
Browse through your presentation slides to locate the one you want to add the video background to. When you have made your choice, navigate to the PowerPoint toolbar at the top and hit the ‘Insert’ tab and choose the ‘Video’ option.
You will now be presented with 2 choices, either uploading a video from your device or insert one from the web by pasting its YouTube URL into the slide. If you are uploading a video from your device, proceed with selecting the desired video and tap ‘Insert’.
Step 3: Move and Resize Your Video
After uploading your video to the slide, you need to make suitable adjustments in its size and alignment to synchronize the same with the contents of the slide. To do this, drag the top left corner of the video to that of the slide to set the top alignment ratio. In the same way, move the bottom right corner of the video to be in sync with that of the slide. You will see the video occupying the entire slide at the end of the adjustment process.
Step 4: Set the Video Background
You will now need to set the video as the background of your slide, so that the latter’s contents are displayed over the video. You can do this by right clicking on the video and choosing the ‘Send to Back’ option from the dropdown that follows. This will cause the contents of your slide to get displayed over the video.
Step 5: Playback Edit and Customization Choices
Before proceeding towards making changes in the video playback and formatting, prefer taking a quick preview of your work till here. Once you are satisfied, navigate to the PowerPoint Toolbar at the top, hit the ‘Video Tools’ tab, followed by clicking on the ‘Playback’ tab.
It is recommended to introduce the following changes in your video for the most affordable slideshow output:
● Loop Your Video
Creating a video loop will facilitate you with an automatic replay of your video without the need to restart it every time with a click. You can loop your video by navigating to the ‘Video Options’ section and choose ‘Loop Until Stopped’ by clicking within the checkbox next to it. The background video will now continue to play until you switch to a different slide.
● Automatically Start Your Video
To avoid clicking on the slide amid your presentation for the video loop to begin, adjust the latter’s settings for an automatic start. Navigate to the ‘Start’ dropdown menu and select ‘Automatically’.
● Trim Your Video
You can work with some basic video editing tools in PowerPoint, like trimming and cropping your background video to a desired length. If you wish to ward off certain portions of your video, reach to and click o the ‘Trim Video’ button. Following this, drag the slider of the video to select the desired portions of the clip and exclude the rest.
You can further work with some more editing effects to create the perfect video backgrounds for your presentation slides in line with your specific preferences.
Step 6: Annotate Your Video Background
When you are done with the video editing process, take a preview of the same to ensure that everything is set in the proper order and at the proper place. Lastly, if you wish to add suitable text annotations to your video, you can do this with the ‘ClassPoint’ tool to write over the video background. All you need to do is select a preferred pen colour and start writing on your slide screen. You can further, save the annotations for a work record.
Part 2 How to Create Moving Backgrounds in Microsoft PowerPoint?
Moving PowerPoint slideshow background is another aspect of graphic creativity at its best, which can be used in a number of ways to grab considerable viewer attention. When choosing to add moving backgrounds to your presentation, the latter can aid in improving the style of content presentation, making your audience curious about how and what happens next.
Having learnt about the utility and creation process of video backgrounds in the PowerPoint presentation tool, let us extend our discussion to the method of creating a moving slide show background in the same in the following section:
User’s Guide to Create Moving Backgrounds for PowerPoint Presentations
Discussed below is an explanatory procedure for designing moving backgrounds with an awesome appearance for slideshow presentations in Microsoft PowerPoint:
Step 1: Open Your Presentation
To begin with, launch the PowerPoint tool in your preferred device and open the presentation on which you will be working to add the moving background. After the presentation gets loaded, navigate through the same and select the desired slide to proceed with the aforesaid task.
Step 2: Choose a Video Location
To add your desired video to the slide, navigate to the PowerPoint ribbon at the top and click on the ‘Insert’ tab. Select ‘Video’ from the list of options that appears, followed by choosing one of the ‘Online Video’ or ‘Video on My PC’ options from the video selection prompt. It is further recommended to select a video in the MP4 format, as the latter gives best results of moving and video backgrounds.
Step 3: Insert Your Video
Choose the second option in the selection prompt to upload a video from your device. You will now be asked to browse through your device and locate the desired video in the ‘Insert Video’ dialog box that appears. Select your video and tap the ‘Insert’ button to add your video.
To upload videos from an online source, choose the ‘Online Video’ option in the selection prompt and proceed to search the video from PowerPoint or paste its embed code to recover the video. The chosen video will begin to download and can be added to the PowerPoint presentation after the download process comes to an end.
Step 4: Playback Editing and Video Customization
Before proceeding further, consider paying your video once by clicking on the ‘Start’ button. You can also add different effects, trim and crop or add a bookmark to your video by navigating to and clicking on the ‘Video Tools’ tab, followed by selecting the ‘Format’ option. To work with the start and playback options for the video, click on ‘Playback’ in the dropdown menu of the ‘Video Tools’ tab.
Part 3 Some Tips for You to Get Awesome PowerPoint Backgrounds & Templates
Now that you have developed a comprehensive understanding of the utility of adding video and moving background for slideshow presentation, let us look through some easy tips and tricks to conveniently access the top rated and the most popular PowerPoint slideshow templates and backgrounds in the following section:
01Cool Slide Backgrounds
Slideshow presentations in PowerPoint are supplemented with a visual spark through amazing and vibrant backgrounds that are a sign of excellent graphic creativity. When working with a PowerPoint presentation of your own, do take the liberty to use some cool slide backgrounds to your creative advantage.
When the talk is about complementing your presentation with a cohesive and upbeat background, you can either select the most suitable one from a heap of pre made slideshow templates available both in the PowerPoint slideshow creator tool as well as across the web. However, if you wish to take the excitement to another level, try hands at creating an awesome and cool backgrounds for PowerPoint slides of your own!
Talking about some really cool tips and tricks to design a slideshow presentation background in PowerPoint, start with including some specific shapes and color overlays to the background capture, experiment with a polygon background, work on enhancing the background image with classic and artistic effects and apply a mix of colors, textures and patterns to give a classy look to your slideshow backgrounds.
02Professional Slideshow Backgrounds
If you are aiming at creating a PowerPoint slideshow presentation with a business centered design approach, you will need to cut down on some extra elements that you would ideally choose to include in a personal purpose based slideshow. Paying attention to the fact that business and corporate centered presentations should be simple, subtle and to the point, it would be an intelligent step to avoid adding too many expressive elements in the background.
Whether you are creating a professional slideshow background of your own or working with a pre designed template, take care to include a complementary play of a light background theme with a maximum of 2 balancing shades.
Avoid too much vibrancy and abstain from applying over the top effects and quick transitions, lest your presentation may look a bit too crowed. If your slides have lot of written content, prefer using a white color background text in a professional font style.
If you have decided on picking a pre made template, you can browse through a diversity of suggestions across the web, while keeping the aforesaid constraints in mind. Consider taking a look at the figure given below to have a more comprehensive understating of the prerequisites of selecting a professional sideshow background template:
03Happy Birthday Slide Backgrounds
Birthday parties are the most appealing synonyms of fun and entertainment. If you are into the profession of organizing events that renders smiling and happy faces, slideshow presentations could be of great help to you in discussing about services, types of social gentries and event targets with your clients.
When looking through different options to select the perfect birthday template, either for a professional event, or just to go down the memory lane of your most cherished moments, take caution to search for a vibrant alternative with colorful images, different background designs and party oriented cool themes, wide aspect ratio with high screen resolution for a mass display and conveniently editable graphics.
If you are creating a happy birthday slide background of your own, there are variety of realms to explore your graphic design creativity, owing to the fact that the subject of creation is highly expressive and multi-dimensional. While you are free to extend your creativity to the next level, do pay attention to the above constraints for a more elusive and outstanding creation output, while maintaining the fun and entertainment quotient intact.
04Wedding Slide Backgrounds
Considering the fact that wedding events are pronounced means of fun, leisure, enjoyment and beautiful memories, anything that aims to be a part of the celebrations, should be equally ecstatic and engaging. Infusing festive occasions with technology, slideshow based wedding invitations and moment captures are the top rated modern trends of celebrating this significant life event.
If you are keen on designing the perfect slideshow presentation for wedding invitations, photo albums and thank you cards, prefer to choose a wedding slide background template with aesthetic layout and flowing element inclusions, like that of floral borders and scented candles. Look though the elements of a subtle thematic setup with soothing color combinations, preferably in complementary pastel shades, like pink and white.
Talking of template customizability, the latter should have placeholders to include names of the bride and groom, the wedding date and venue, and of course the wedding photographs. The beautiful slide background template should have enough design space to include the most elusive play of text colors and fonts to suit specific preferences of creating special memories of a cherished event.
05Slideshow Backgrounds and Templates in Filmora
When looking for the most convenient lead to an extensive variety of beautiful slideshow templates and background, the template library of Wondershare Filmora Video Editor slideshow creator program can be your most affordable destination. The aforesaid software library is known to possess the best and most perfect template choices to suit the creation constraints of almost every slideshow presentation style and objective you can possibly think of.
For Win 7 or later (64-bit)
For macOS 10.12 or later
The elusive templates are further supplemented with a plethora of design flexibilities and customization features that are all set to deliver you the most appreciable creation output. Stressing a bit on the template customization choices of the software, you can work with the tool to uplift your slideshow backgrounds with artistic image effects and overlays, annotate them with beautiful text formations in a variety of colors, fonts and sizes and lots more.
Moving a bit deeper into the creative aspect, you can upgrade the visual style of your presentations with the most perfect and seamless image and video transitions and text animations. The bottom line is, working with the aforesaid slideshow creator program, you are entitled to get jaw dropping applaud from your audience, while making a confident and a content delivery through your slideshow presentation.
● Ending Thoughts →
● Using an expressive and complementing background in your slideshow presentation uplifts its visual credibility in captivating your audience.
● Browsing through the web, you get to access a vast range of amazing slideshow backgrounds and templates to make your presentation, a visual masterpiece.
● When looking for the most distributed storehouse of slideshow backgrounds and templates, the Wondershare Filmora library is your ultimate solution.
The Secret Sauce for Making GIF Instagram Story More Aesthetic
The Secret Sauce for Making GIF Instagram Story More Aesthetic
An easy yet powerful editor
Numerous effects to choose from
Detailed tutorials provided by the official channel
Adding own gift stickers to an Instagram story is in trend. An Instagram story can be made more creative with an Instagram gif story. Make a powerful impact with a gif on an Instagram story.
In this article
01 [How to Post Gifs to Instagram Story](#Part 1)
02 [8 Cute Instagram Stickers to Make Your Stories Aesthetic](#Part 2)
03 [How to Create Custom Gifs for Instagram Stories](#Part 3)
Part 1 How to Post Gifs to Instagram Story
Instagram stories are one of the best mediums to get connected to people at large. To be in trends and grab maximum people’s attention, it is very necessary to be updated with the new elements of Instagram stories. Gif Instagram story is a new way to increase the followers and be in trends. Adding these gifs in Instagram stories will improve your business by creating more engaging content for business promotion. Let’s see how this can be done?
● Go to the Instagram app installed on your phone. While adding a sticker to a picture of videos in Instagram stories, a GIF option will appear.
● When you tap it, you can find several attractive gifs in the library powered by GIPHY.
● Tap add sticker button that appears on the top of the Instagram stories. Tap the ‘GIF’ icon; the library of trending gifs will appear.
● Look for the gif you need to add to your story. You also have a search option to find your favorite or trending gif.
● After selecting the desired gif, you can add it to your photo or video after resizing it as you desired.
● After finishing, tap on the ‘Your story’ icon.
So, this way, it is easy to create gif story instagram with just a few simple steps.
Part 2 Cute Instagram Stickers to Make Your Stories Aesthetic
Cute Instagram stickers are the best way to lift the creativity of your Instagram stories. Adding stickers are an amazing idea to add design to Instagram stories. Stickers make stories more creative and interesting. Some of the amazing stickers to beautify Instagram stories are:
01BOHO
Boho stickers are good when you search for new stickers. They add fun to the story and give an amazing look for any lifestyle picture over an Instagram story. Boho white is also one type of sticker where are of them are white. Applying white boho to the picture background highlights the space and looks good. One has so many options from cute stars, hearts, lines, and flowers.
02FOOPKLO

For those who want words and saying gif on instagram story, there are some cute pink stickers available. These can be searched as FOOPKLO. Pink flowers, clusters, sayings, hearts, and some more cute stickers are there which can make Instagram stories lovelier.
03HALEYIVERS
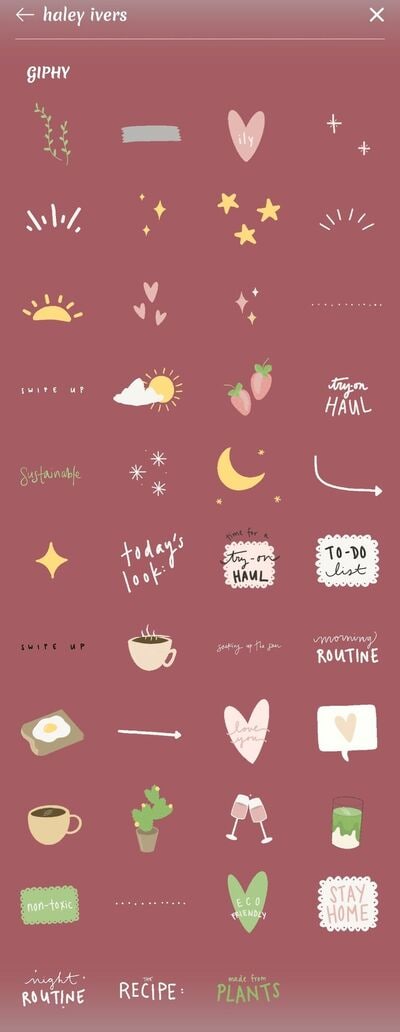
For those who are active Instagram users and update their stories every day, the old stickers may not entertain them. So, for those, there are HALEYIVERS stickers. Good morning, days, sunshine, coffee, stars, and hearts add a great style to the Instagram stories. So, next time you need some punch over Instagram stories add some HALEYIVERS stickers.
04OHLALALITA
Instagram story gif is one of the great ways to even express your thoughts and moods in a summarized way. So, for those who wish to add a short story on Instagram, OHLALALITA has the best stickers. Loaded with so many cute words such as Tank you, Made with love, chill, glow, bye-bye, Wow, and many more, it makes any story in just simple words.
05SCARLETPIN
Instagram story gifs are a gift to those who are food lovers. Now with some new additions of gifs from GIPHY, they can post their food stories over their Instagram stories. The range of stickers that can help them is SCARLETPIN. These consist of some bright and colorful stickers of food. Red strawberries, tea, leaves, and oranges are great stuff to include in the morning Instagram stories.
06CURSIVE

Gif for Instagram story is also available in attractive writings. CURSIVE is the most attractive form of writing stories. Popular and cute sayings can be checked on CURSIVE and can be included in the stories. They can be searched and remembered easily. Cursive phrases can be added to the Instagram stories that look visually appealing to the viewers.
07EMOJIS
Emojis are the most lovable stickers available and can be part of any Instagram story. Typing on emojis can be done easily and they can be searched on the search bar. Perfect emojis gifs can be applied to an Instagram story that suits the situation. It can be moved or resized as per the requirement. These emojis gifs add a fun element to the Instagram stories.
08PAINT & BRUSH
Instagram gif story can be made creative with paint and brush. Earlier the users can add text with plain background only. But, paint and brush have enhanced it. Now users can add paint behind the text to make it more engaging. They are simple yet very attractive when added to the stories.
Part 3 How to Create Custom Gifs for Instagram Stories
Funny and expressive Instagram stories of your own always win the hearts of followers. Custom-made gif for Instagram is a great tool for business owners as it brings volume to their business by increasing leads. Custom-made gifs over Instagram stories are eye-catching and thus people get interested in the business. This helps in creating a good brand image for the business.
So, some of the ways to create fascinating custom Gifs Instagram stories for self and business are:
01Pin Instagram stories
Visiting a place and letting people know where you are through Instagram stories is always loved by all. Now, this can be done attractively by using the Pin feature. One can pin on the pictures and videos over the Instagram stories to a particular place. This is the most interesting element to make an Instagram story catchy. It can be done easily by tapping and holding it till it shows a pin at the little bar. This was one can pin gif at the desired location. This gif can pop up at a certain location only. It can be applied to videos one has made of a certain location by moving the gif to a place where one desires.
02Using Gif to give life to any image
To make gif Instagram story aesthetic, adding some moves with sparkles will be the right option. An Instagram user can give life to a picture by including animated elements. Gif adds a fun and surprising element to any Instagram story. When movement in any picture is added through gif, it catches the attention of the viewers and they follow it. A business can make its content engaging with gifs and can achieve its goal.
03Gifs Instagram story to catch viewer’s attention
Gif can be used effectively to create attractive Instagram stories. These gifs are good for the business to highlight their important elements. Gifs like the link in bio, sound on, and swipe up are created for a call to action from the viewers. Adding arrows and signals through gif in the Instagram stories direct the people to spend some minutes on the stories and find something new.
04Highlighting text with gif effects
A customized Instagram story can be made by highlighting text through adding gifs. Sparkle, stars, and highlights gifs can be searched easily and can be applied to any Instagram story. By adding a gif, the text looks stunning and grabs the attention of the viewers. GIPHY has several text-based gifs which can take an ordinary text over the story at a great level. It can be searched by mentioning related keywords.
05Adding gifs to customize selfies
Selfies to Instagram stories are very common. But they can be made even better with some amazing gifs from GIPHY. One can add sunglasses, hats, jewelry, and other fun props to the selfies. Filters can be added by creating their own story through a gif.
06Filmora V11 – A GIF resource
Wondershare Filmora Video Editor (The Filmora Meme maker) : Some many apps and websites offer beautiful gifs to beautify Instagram stories. One of the places where Instagram users can find a wide collection of attractive gifs is Filmora V11. It is a user-friendly tool that has media editing features. It can be used to add sound, light effects, and beautiful gifs to Instagram stories.

Wondershare Filmora - Best Video Editor for Mac/Windows
5,481,435 people have downloaded it.
Build unique custom animations without breaking a sweat.
Focus on creating epic stories and leave the details to Filmora’s auto features.
Start a creative adventure with drag & drop effects and endless possibilities.
Filmora simplifies advanced features to save you time and effort.
Filmora cuts out repetition so you can move on to your next creative breakthrough.
For creating gifs, Filmora V11 can be used and it can be made in a few simple steps. Filmora V11 app is required to be installed on the system and media files can be imported there. Files can be dragged for creating gifs. Filters, stickers, and other effects can be added. They can be further customized as per the requirement of the users. After adding background effects, music, and sound, the gif can be previewed also. The media can be saved as GIFs and can be easily exported also. To customize gifs, the Filmora Meme maker can be used. Captions can be added to GIFs and can be customized by using templates available at Filmora.
So, next time you need to know how to add your own gif to Instagram story, go to Filmora V11. This is one of the great platforms to create some amazing custom gifs to add to Instagram stories. If you want to surprise your viewers with some interesting gifs, try Filmora V11.
● Key Takeaways from This Episode →
● Instagram stories are the most effective way to mark a great impression on the viewers. It is also one of the effective tools to lift any business. Best results can be obtained when attractive and interesting gifs are added to Instagram stories.
● Instagram stories gifs are becoming trendy and there are so many cute and amazing gif stickers available to create Instagram stories. Some of the widely used gifs and stickers are Boho, FOOPKLO, HALEYIVERS, OHLALALITA, and EMOJIS. Instagram users can explore these cute and funny stickers and add them to beautify their Instagram stories.
● Customized gif has spiced up the Instagram stories and amazed the people. This feature helps a business to influence people towards their work and attract more people. The content becomes more engaging and interesting through a customized gif.
Adding own gift stickers to an Instagram story is in trend. An Instagram story can be made more creative with an Instagram gif story. Make a powerful impact with a gif on an Instagram story.
In this article
01 [How to Post Gifs to Instagram Story](#Part 1)
02 [8 Cute Instagram Stickers to Make Your Stories Aesthetic](#Part 2)
03 [How to Create Custom Gifs for Instagram Stories](#Part 3)
Part 1 How to Post Gifs to Instagram Story
Instagram stories are one of the best mediums to get connected to people at large. To be in trends and grab maximum people’s attention, it is very necessary to be updated with the new elements of Instagram stories. Gif Instagram story is a new way to increase the followers and be in trends. Adding these gifs in Instagram stories will improve your business by creating more engaging content for business promotion. Let’s see how this can be done?
● Go to the Instagram app installed on your phone. While adding a sticker to a picture of videos in Instagram stories, a GIF option will appear.
● When you tap it, you can find several attractive gifs in the library powered by GIPHY.
● Tap add sticker button that appears on the top of the Instagram stories. Tap the ‘GIF’ icon; the library of trending gifs will appear.
● Look for the gif you need to add to your story. You also have a search option to find your favorite or trending gif.
● After selecting the desired gif, you can add it to your photo or video after resizing it as you desired.
● After finishing, tap on the ‘Your story’ icon.
So, this way, it is easy to create gif story instagram with just a few simple steps.
Part 2 Cute Instagram Stickers to Make Your Stories Aesthetic
Cute Instagram stickers are the best way to lift the creativity of your Instagram stories. Adding stickers are an amazing idea to add design to Instagram stories. Stickers make stories more creative and interesting. Some of the amazing stickers to beautify Instagram stories are:
01BOHO
Boho stickers are good when you search for new stickers. They add fun to the story and give an amazing look for any lifestyle picture over an Instagram story. Boho white is also one type of sticker where are of them are white. Applying white boho to the picture background highlights the space and looks good. One has so many options from cute stars, hearts, lines, and flowers.
02FOOPKLO
For those who want words and saying gif on instagram story, there are some cute pink stickers available. These can be searched as FOOPKLO. Pink flowers, clusters, sayings, hearts, and some more cute stickers are there which can make Instagram stories lovelier.
03HALEYIVERS
For those who are active Instagram users and update their stories every day, the old stickers may not entertain them. So, for those, there are HALEYIVERS stickers. Good morning, days, sunshine, coffee, stars, and hearts add a great style to the Instagram stories. So, next time you need some punch over Instagram stories add some HALEYIVERS stickers.
04OHLALALITA
Instagram story gif is one of the great ways to even express your thoughts and moods in a summarized way. So, for those who wish to add a short story on Instagram, OHLALALITA has the best stickers. Loaded with so many cute words such as Tank you, Made with love, chill, glow, bye-bye, Wow, and many more, it makes any story in just simple words.
05SCARLETPIN
Instagram story gifs are a gift to those who are food lovers. Now with some new additions of gifs from GIPHY, they can post their food stories over their Instagram stories. The range of stickers that can help them is SCARLETPIN. These consist of some bright and colorful stickers of food. Red strawberries, tea, leaves, and oranges are great stuff to include in the morning Instagram stories.
06CURSIVE
Gif for Instagram story is also available in attractive writings. CURSIVE is the most attractive form of writing stories. Popular and cute sayings can be checked on CURSIVE and can be included in the stories. They can be searched and remembered easily. Cursive phrases can be added to the Instagram stories that look visually appealing to the viewers.
07EMOJIS
Emojis are the most lovable stickers available and can be part of any Instagram story. Typing on emojis can be done easily and they can be searched on the search bar. Perfect emojis gifs can be applied to an Instagram story that suits the situation. It can be moved or resized as per the requirement. These emojis gifs add a fun element to the Instagram stories.
08PAINT & BRUSH
Instagram gif story can be made creative with paint and brush. Earlier the users can add text with plain background only. But, paint and brush have enhanced it. Now users can add paint behind the text to make it more engaging. They are simple yet very attractive when added to the stories.
Part 3 How to Create Custom Gifs for Instagram Stories
Funny and expressive Instagram stories of your own always win the hearts of followers. Custom-made gif for Instagram is a great tool for business owners as it brings volume to their business by increasing leads. Custom-made gifs over Instagram stories are eye-catching and thus people get interested in the business. This helps in creating a good brand image for the business.
So, some of the ways to create fascinating custom Gifs Instagram stories for self and business are:
01Pin Instagram stories
Visiting a place and letting people know where you are through Instagram stories is always loved by all. Now, this can be done attractively by using the Pin feature. One can pin on the pictures and videos over the Instagram stories to a particular place. This is the most interesting element to make an Instagram story catchy. It can be done easily by tapping and holding it till it shows a pin at the little bar. This was one can pin gif at the desired location. This gif can pop up at a certain location only. It can be applied to videos one has made of a certain location by moving the gif to a place where one desires.
02Using Gif to give life to any image
To make gif Instagram story aesthetic, adding some moves with sparkles will be the right option. An Instagram user can give life to a picture by including animated elements. Gif adds a fun and surprising element to any Instagram story. When movement in any picture is added through gif, it catches the attention of the viewers and they follow it. A business can make its content engaging with gifs and can achieve its goal.
03Gifs Instagram story to catch viewer’s attention
Gif can be used effectively to create attractive Instagram stories. These gifs are good for the business to highlight their important elements. Gifs like the link in bio, sound on, and swipe up are created for a call to action from the viewers. Adding arrows and signals through gif in the Instagram stories direct the people to spend some minutes on the stories and find something new.
04Highlighting text with gif effects
A customized Instagram story can be made by highlighting text through adding gifs. Sparkle, stars, and highlights gifs can be searched easily and can be applied to any Instagram story. By adding a gif, the text looks stunning and grabs the attention of the viewers. GIPHY has several text-based gifs which can take an ordinary text over the story at a great level. It can be searched by mentioning related keywords.
05Adding gifs to customize selfies
Selfies to Instagram stories are very common. But they can be made even better with some amazing gifs from GIPHY. One can add sunglasses, hats, jewelry, and other fun props to the selfies. Filters can be added by creating their own story through a gif.
06Filmora V11 – A GIF resource
Wondershare Filmora Video Editor (The Filmora Meme maker) : Some many apps and websites offer beautiful gifs to beautify Instagram stories. One of the places where Instagram users can find a wide collection of attractive gifs is Filmora V11. It is a user-friendly tool that has media editing features. It can be used to add sound, light effects, and beautiful gifs to Instagram stories.
Wondershare Filmora - Best Video Editor for Mac/Windows
5,481,435 people have downloaded it.
Build unique custom animations without breaking a sweat.
Focus on creating epic stories and leave the details to Filmora’s auto features.
Start a creative adventure with drag & drop effects and endless possibilities.
Filmora simplifies advanced features to save you time and effort.
Filmora cuts out repetition so you can move on to your next creative breakthrough.
For creating gifs, Filmora V11 can be used and it can be made in a few simple steps. Filmora V11 app is required to be installed on the system and media files can be imported there. Files can be dragged for creating gifs. Filters, stickers, and other effects can be added. They can be further customized as per the requirement of the users. After adding background effects, music, and sound, the gif can be previewed also. The media can be saved as GIFs and can be easily exported also. To customize gifs, the Filmora Meme maker can be used. Captions can be added to GIFs and can be customized by using templates available at Filmora.
So, next time you need to know how to add your own gif to Instagram story, go to Filmora V11. This is one of the great platforms to create some amazing custom gifs to add to Instagram stories. If you want to surprise your viewers with some interesting gifs, try Filmora V11.
● Key Takeaways from This Episode →
● Instagram stories are the most effective way to mark a great impression on the viewers. It is also one of the effective tools to lift any business. Best results can be obtained when attractive and interesting gifs are added to Instagram stories.
● Instagram stories gifs are becoming trendy and there are so many cute and amazing gif stickers available to create Instagram stories. Some of the widely used gifs and stickers are Boho, FOOPKLO, HALEYIVERS, OHLALALITA, and EMOJIS. Instagram users can explore these cute and funny stickers and add them to beautify their Instagram stories.
● Customized gif has spiced up the Instagram stories and amazed the people. This feature helps a business to influence people towards their work and attract more people. The content becomes more engaging and interesting through a customized gif.
Also read:
- New In 2024, Best GIF Resizers to Reduce GIF Size
- Updated 4 Things You Need to Know About Pinterest GIF
- 15 Best Video to GIF App on iPhone and Android
- Types of Cartoon Styles You May Use for The Next Marketing Project
- In 2024, Best 10 Animated DP for WhatsApp
- In 2024, Step-by-Step Guide to Send Gif WhatsApp on Android
- New How to Create Photo Collage Frame for Free in Minutes, In 2024
- Updated In 2024, Pencil2D Animation Tutorial Overview
- A Beginners Guide to Explain What 3D Animation Is for 2024
- Updated 2024 Approved 15 Top Collage Makers to Create Aesthetic Collages
- Updated In 2024, Nurturing the Spirit Through the Top 10 Intellectual Anime Websites
- Updated 2024 Approved 15 Best Apps to Turn Photos Into Cartoons and Sketches
- Updated Something About Types of Motion Graphics for 2024
- New In 2024, Secrets to Make 2D Game Animation
- New In 2024, Best 10 Animated Photo Collage Apps
- New The Ultimate Cheatsheet to 15 Adobe Animate Alternatives
- 2024 Approved Amazing Techniques of Motion Graphics in Premiere Pro
- In 2024, How To Animate Graphics in Canva
- Updated Best 12 Evil Cartoon Characters of All Time for 2024
- New 2024 Approved Ways to Stop Animation From Looping in Unity
- 2024 Approved How to Create Your Avatar Free
- Updated In 2024, Ways on How to Get Started in Stop Motion Claymation
- In 2024, How to View GPX Files Online and Offline Solutions Of Apple iPhone 15 Pro Max | Dr.fone
- In 2024, Latest way to get Shiny Meltan Box in Pokémon Go Mystery Box On Tecno Spark Go (2024) | Dr.fone
- Read This Guide to Find a Reliable Alternative to Fake GPS On Nokia 130 Music | Dr.fone
- In 2024, 5 Ways to Move Contacts From Tecno Pop 8 to iPhone (13/14/15) | Dr.fone
- How To Change Your SIM PIN Code on Your Tecno Pova 5 Pro Phone
- How can I get more stardust in pokemon go On Samsung Galaxy S24 Ultra? | Dr.fone
- Ultimate Guide, How to Transfer Music From Apple iPhone 15 Pro Max to iPhone | Dr.fone
- How To Fake GPS On ZTE Nubia Flip 5G For Mobile Legends? | Dr.fone
- In 2024, Easily Unlock Your Vivo X100 Pro Device SIM
- In 2024, Top 10 Telegram Spy Tools On Nokia C02 for Parents | Dr.fone
- Title: In 2024, Best 15 Classics Animated Cartoon Movies
- Author: Elon
- Created at : 2024-05-19 03:04:37
- Updated at : 2024-05-20 03:04:37
- Link: https://animation-videos.techidaily.com/in-2024-best-15-classics-animated-cartoon-movies/
- License: This work is licensed under CC BY-NC-SA 4.0.
