
:max_bytes(150000):strip_icc():format(webp)/GettyImages-642250032-010d3026f565420eac9ac098bced6278.jpg)
In 2024, Guide on Creating GIF in WhatsApp iPhone
Guide on Creating GIF in WhatsApp iPhone
2024 Guide on How to Create GIF in WhatsApp iPhone
An easy yet powerful editor
Numerous effects to choose from
Detailed tutorials provided by the official channel
Standing for Graphics Interchange Format, GIF is short animated images that you can see all over social media sites and other online platforms. These interesting animations can also be shared during your conversations on WhatsApp.

So, if you too are looking for ways to create as well as send GIFs on WhatsApp iPhone, you are on the right page. Keep reading to know all the possible ways to send WhatsApp GIFs on iPhone.
In this article
01 [How to send WhatsApp GIF from the integrated library on iPhone](#Part 1)
02 [How to send Live Photos as WhatsApp GIF on iPhone](#Part 2)
03 [How to create WhatsApp GIF using videos on iPhone](#Part 3)
04 [How to create excellent GIF effortlessly using Wondershare Filmora- All in One video editing software](#Part 4)
Part 1 How to send WhatsApp GIF from the integrated library on iPhone
If you have the latest version of WhatsApp installed on your phone, you can easily and quickly send the GIF from the integrated library having a collection of GIFs in several categories. The steps to send GIF in WhatsApp iPhone are as below.
Step 1. On your iPhone, launch WhatsApp and open the contact or a group to which you wish to send the GIF.
Step 2. Click on the Stickers icon at the typing section and then choose the GIF option at the bottom.
Step 3. Multiple GIFs in different categories will appear. You can further search for the desired GIF using a keyword at the search icon at the bottom-left corner. The list of the Recents and the Favorites can also be searched using their respective icons.
Note: To save any particular GIF in the favorites list, tap and hold the GIF and then click on Add To Favorites option.
StepTap on the selected GIF and then click on the Send icon at the bottom-right corner. Your WhatsApp GIF iPhone will be sent.

Part 2 How to send Live Photos as WhatsApp GIF on iPhone
Live Photos on your iPhone can also be sent as GIFs in WhatsApp conversations and the steps for the same are as below.
Note: The feature is available for users having iPhone 6 or later versions.
Step 1.Open the WhatsApp contact on your iPhone to whom you wish to send the GIF. Click on the + icon and then choose the option of Photo & Video Library.
Step 2. Search for the Live photo in your gallery and then press it. When the image pops out, slide upwards and then click on the Select as GIF option.
Step 3. Tap on the Send icon to share the selected Live photo as GIF.

Part 3 How to create WhatsApp GIF using videos on iPhone
In addition to the integrated library, you can also convert the videos on your iPhone to GIF and share them on WhatsApp. To be used as GIF, the length of the videos cannot be more than 6 seconds. Thus, for a larger video, you need to trim it to be under 6 seconds. Steps to get the task done are as follows.
Step 1.Launch WhatsApp on your iPhone and select the contact to which you want to share the GIF. Next, click on + sign and then choose Photo & Video Library option.
Step 2.Select the desired video from your phone gallery.
Step 3.After the video is added, an editing screen will open. Here you can trim the video to make it under 6 seconds using the slider at the top. Further changes can be made like adding a sticker, text, or making a freehand drawing.
Step 4.After all customizations are done, click on the GIF button.
Step 5.Finally, tap on the Send icon at the bottom-right corner to send the edited video as GIF.

Part 4 How to create excellent GIF effortlessly using Wondershare Filmora- All in One video editing software
WhatsApp in your iPhone has a built-in option to create GIFs using the videos on the device. Though the process is simple, the option for editing and customizations are limited. So, if you want to create GIFs using videos online and with advanced editing tools, we suggest using Wondershare Filmora Video Editor .
This all-in-one video editing software will let you edit and customize your files in several ways and in a few simple steps, your desired GIF will be ready.
Wondershare Filmora
Get started easily with Filmora’s powerful performance, intuitive interface, and countless effects!
Try It Free Try It Free Try It Free Learn More >

Key features of the software
● Add media files in all ley formats like MP4, MOV, MKV, PNG, and others to create GIFs.
● Simple and quick steps for creating the desired animation.
● Allows to customize the GIF using functions like slow-down, crop, rotate, and many more.
● Allows adding text, voice, and other elements.
● Option to share the created GIF to Vimeo, and YouTube directly.
● Software support to all latest Windows and Mac systems.
Steps to create WhatsApp GIF using Wondershare Filmora.
Step 1.Open the installed software on your system and import the desired images and videos from your system.
Step 2.Drag and drop the added videos and images to the timeline.

Step 3.Edit the file using features like crop, rotate, split, and others.
Step 4.Add text and other elements as needed.

Step 5.At the Local tab, save the customized media as GIF. Select the file name and the destination and then finally, click on the EXPORT button to start processing.
● Key Takeaways from This Episode →
●Gifs for WhatsApp iPhone can be added from the integrated library.
●Live Photos, as well as videos, can also be used to create and share them as GIF.
●For creating interesting and funny GIF in a hassle-free manner, Wondershare Filmora works as the best software.
Standing for Graphics Interchange Format, GIF is short animated images that you can see all over social media sites and other online platforms. These interesting animations can also be shared during your conversations on WhatsApp.
So, if you too are looking for ways to create as well as send GIFs on WhatsApp iPhone, you are on the right page. Keep reading to know all the possible ways to send WhatsApp GIFs on iPhone.
In this article
01 [How to send WhatsApp GIF from the integrated library on iPhone](#Part 1)
02 [How to send Live Photos as WhatsApp GIF on iPhone](#Part 2)
03 [How to create WhatsApp GIF using videos on iPhone](#Part 3)
04 [How to create excellent GIF effortlessly using Wondershare Filmora- All in One video editing software](#Part 4)
Part 1 How to send WhatsApp GIF from the integrated library on iPhone
If you have the latest version of WhatsApp installed on your phone, you can easily and quickly send the GIF from the integrated library having a collection of GIFs in several categories. The steps to send GIF in WhatsApp iPhone are as below.
Step 1. On your iPhone, launch WhatsApp and open the contact or a group to which you wish to send the GIF.
Step 2. Click on the Stickers icon at the typing section and then choose the GIF option at the bottom.
Step 3. Multiple GIFs in different categories will appear. You can further search for the desired GIF using a keyword at the search icon at the bottom-left corner. The list of the Recents and the Favorites can also be searched using their respective icons.
Note: To save any particular GIF in the favorites list, tap and hold the GIF and then click on Add To Favorites option.
StepTap on the selected GIF and then click on the Send icon at the bottom-right corner. Your WhatsApp GIF iPhone will be sent.
Part 2 How to send Live Photos as WhatsApp GIF on iPhone
Live Photos on your iPhone can also be sent as GIFs in WhatsApp conversations and the steps for the same are as below.
Note: The feature is available for users having iPhone 6 or later versions.
Step 1.Open the WhatsApp contact on your iPhone to whom you wish to send the GIF. Click on the + icon and then choose the option of Photo & Video Library.
Step 2. Search for the Live photo in your gallery and then press it. When the image pops out, slide upwards and then click on the Select as GIF option.
Step 3. Tap on the Send icon to share the selected Live photo as GIF.
Part 3 How to create WhatsApp GIF using videos on iPhone
In addition to the integrated library, you can also convert the videos on your iPhone to GIF and share them on WhatsApp. To be used as GIF, the length of the videos cannot be more than 6 seconds. Thus, for a larger video, you need to trim it to be under 6 seconds. Steps to get the task done are as follows.
Step 1.Launch WhatsApp on your iPhone and select the contact to which you want to share the GIF. Next, click on + sign and then choose Photo & Video Library option.
Step 2.Select the desired video from your phone gallery.
Step 3.After the video is added, an editing screen will open. Here you can trim the video to make it under 6 seconds using the slider at the top. Further changes can be made like adding a sticker, text, or making a freehand drawing.
Step 4.After all customizations are done, click on the GIF button.
Step 5.Finally, tap on the Send icon at the bottom-right corner to send the edited video as GIF.
Part 4 How to create excellent GIF effortlessly using Wondershare Filmora- All in One video editing software
WhatsApp in your iPhone has a built-in option to create GIFs using the videos on the device. Though the process is simple, the option for editing and customizations are limited. So, if you want to create GIFs using videos online and with advanced editing tools, we suggest using Wondershare Filmora Video Editor .
This all-in-one video editing software will let you edit and customize your files in several ways and in a few simple steps, your desired GIF will be ready.
Wondershare Filmora
Get started easily with Filmora’s powerful performance, intuitive interface, and countless effects!
Try It Free Try It Free Try It Free Learn More >
Key features of the software
● Add media files in all ley formats like MP4, MOV, MKV, PNG, and others to create GIFs.
● Simple and quick steps for creating the desired animation.
● Allows to customize the GIF using functions like slow-down, crop, rotate, and many more.
● Allows adding text, voice, and other elements.
● Option to share the created GIF to Vimeo, and YouTube directly.
● Software support to all latest Windows and Mac systems.
Steps to create WhatsApp GIF using Wondershare Filmora.
Step 1.Open the installed software on your system and import the desired images and videos from your system.
Step 2.Drag and drop the added videos and images to the timeline.
Step 3.Edit the file using features like crop, rotate, split, and others.
Step 4.Add text and other elements as needed.
Step 5.At the Local tab, save the customized media as GIF. Select the file name and the destination and then finally, click on the EXPORT button to start processing.
● Key Takeaways from This Episode →
●Gifs for WhatsApp iPhone can be added from the integrated library.
●Live Photos, as well as videos, can also be used to create and share them as GIF.
●For creating interesting and funny GIF in a hassle-free manner, Wondershare Filmora works as the best software.
Convert Animated GIF From Video
Versatile Video Editor - Wondershare Filmora
An easy yet powerful editor
Numerous effects to choose from
Detailed tutorials provided by the official channel
The animated GIFs excite the viewers and convey a message. The instant chats include these animated GIFs to add fun to your conversation. Few web designers place animated GIFs on their web pages to attract their target customers wisely. You can convert animated GIFs from video using a reliable application available in the digital space. The animated GIFs impress the viewers and add flavor to the content. Mostly used replacing the emojis because the emojis are static images, whereas the animated GIFs showcase an action that triggers more meaning to the viewers. There are options to extract a specific clipping from videos and use them as animated GIFs. Here, you will be learning about GIFs and the best ways to edit them with sophisticated tools.

In this article
01 [What is GIF?](#Part 1)
02 [Why do People like to use GIFs?](#Part 2)
03 [Convert Animated GIF from Video](#Part 3)
04 [Tip: Easily edit your GIF for free](#Part 4)
Part 1 What is GIF?
The GIF is a Graphical Interchange Format and represents the file format in the bitmap. When compared to other image formats, GIF has unique specifications that are appreciable. The GIF has a lossless compression feature and you can transfer them to any space effortlessly. It includes 256 colors and is widely used for creating buttons and banners on the webpages. It came into practice in the year1987 and occupied the computer space commercially. GIFs are preferred to create small animations and are adopted by social media users. After the advent of PNG, the usage of GIF gradually decreased by website users. Later, the animated GIFs conquered the digital space as they replace most websites’ videos. It serves as one of the best message conveyers and is quite interesting for social media users. Gradually the younger generations were highly attracted to these animated GIFs to express their thoughts in an image format.
Part 2 Why do People like to use GIFs?
People prefer GIFs when compared to videos because animated GIFs convey a strong message quickly than videos. Social media users feel comfortable using GIFs and consider it the best way to express their emotions. Apart from the chat interface, you can find the animated GIFs occupying the website’s landing page, blog posts, and emails. The designers opt for animated GIFs instead of short videos because of their effective results. Many webpage visitors skim the content, and the animated GIFs quickly reveal what you convey. The audience understands the essential data you are emphasizing on the websites swiftly with the help of the animated GIFs.
When you include videos on your websites, the users skip the videos without making any clicks due to lack of time. The animated GIFs overcame this issue, the GIFs started to play as soon as the page loads, and the audience took a quick look at it, receiving the data you are trying to narrate through these animated GIFs. Many web page users prefer animated GIFs because they take less time to load and consume data. Both the viewers and webpage designers use GIFs instead of videos to convey their message in a visual format.
Part 3 Convert Animated GIF from Video
Giphy is the best online program that creates animated GIFs from video. It is an exclusively online program that focuses on an efficient way to create animated GIFs from videos. There are many online tools available to make your GIFs. The Giphy is an impressive application with loads of in-built features to entertain audiences. While creating a GIF, ensure it has a good loading capability to obtain efficient results. You can follow the below steps to convert GIFs from videos using the Giphy app.
Step 1
Visit the official website of Giphy and upload the videos to convert a GIF by tapping the Convert button. You can also upload the video file by pasting the URL from YouTube or Vimeo.

Step 2
Now, use the Giphy tool to trim the video and spot out the section that requires converting it as GIFs.
Trim the videos and locate the section that requires the creation of animated GIFs.

Step 3
Customize the trimmed video section using stickers, filters, and texts. After personalizing the trimmed video, tap Upload to Giphy to store the edited animated GIFs in its library.
You can access the animated GIFs from the storage library in your account.

Follow the above guidelines to create animated GIFs from videos using the Giphy online tool. Surf the steps carefully to ensure successful completion of the animated GIFs creation from video.
Part 4 Tip: Easily edit your GIF for free
Further, you can refine the GIFs using a professional editor like Filmora. The Filmora from Wondershare is an awesome tool that gives you a wow feel while editing the media files. It is an exclusive program that edits the media files effectively to obtain the desired outcomes. You can work as a pro editor without any technical skills. The simple interface of this application triggers you to use the built-in elements professionally. Tap the relevant controls to include the desired effects on the uploaded GIF images. The timeline has a user-friendly interface and there are no complexities even while handling larger image or video files.
The key features of the Filmora application
● Customize the videos based on your needs. You can crop, add text, resize the dimensions precisely.
● You can add special effects to the videos using the in-built filters
● It has a simple interface and assists you in working like a pro.
● The trimmer tool aids in creating animated GIFs from your videos
● Easy to import and export the edited files to desired storage space by a single click action.
Apart from the above functionalities, you can discover enlightening uses of Filmora by installing it on your device. The controls are explicit and you can access them without any hesitation. The simple interface aids the newbie users to master this app in no time due to its comfortable working timeline.
The stepwise procedure to create animated GIFs from the imported videos using the Filmora application.
Step 1 Install the application
Visit the official website of Filmora, download the tool concerning your system OS, and install it by following the instruction wizard. Import the desired video into the timeline by tapping the Import Media Files option.

Step 2 Add texts to the video
Based on your requirements, you can trim the video using the edit tool and insert desired texts by tapping the Title menu.

Step 3 Export the edited file
Finally, click the Export button to save the edited file on any desired storage space. During the export operation, you can perform various changes to your media files. There are options to modify the file format, resolution, and storage path. Tap the respective menus to choose the desired platform that requires the storage operation. Directly post the animated GIFs on your YouTube or Vimeo based on your needs.

The above steps will aid you in creating animated GIFs from videos and using this application efficiently to bring the desired impact on it.
Wondershare Filmora
Get started easily with Filmora’s powerful performance, intuitive interface, and countless effects!
Try It Free Try It Free Try It Free Learn More >
AI Portrait – The best feature of Wondershare Filmora for gameplay editing
The AI Portrait is a new add-on in Wondershare Filmora. It can easily remove video backgrounds without using a green screen or chroma key, allowing you to add borders, glitch effects, pixelated, noise, or segmentation video effects.

Conclusion
Thus, this article had given enough insights into creating an animated GIF from videos. You can either use an online tool or opt for Filmora to edit the videos and convert them to impressive animated GIFs. The Filmora helps you to edit the media files professionally, and its simple interface assists in handling even the complex files efficiently. Connect with this article to explore the video edit process using a reliable program like Filmora. Stay tuned to create animated GIFs that conveys explicit messages to the audience.
The animated GIFs excite the viewers and convey a message. The instant chats include these animated GIFs to add fun to your conversation. Few web designers place animated GIFs on their web pages to attract their target customers wisely. You can convert animated GIFs from video using a reliable application available in the digital space. The animated GIFs impress the viewers and add flavor to the content. Mostly used replacing the emojis because the emojis are static images, whereas the animated GIFs showcase an action that triggers more meaning to the viewers. There are options to extract a specific clipping from videos and use them as animated GIFs. Here, you will be learning about GIFs and the best ways to edit them with sophisticated tools.
In this article
01 [What is GIF?](#Part 1)
02 [Why do People like to use GIFs?](#Part 2)
03 [Convert Animated GIF from Video](#Part 3)
04 [Tip: Easily edit your GIF for free](#Part 4)
Part 1 What is GIF?
The GIF is a Graphical Interchange Format and represents the file format in the bitmap. When compared to other image formats, GIF has unique specifications that are appreciable. The GIF has a lossless compression feature and you can transfer them to any space effortlessly. It includes 256 colors and is widely used for creating buttons and banners on the webpages. It came into practice in the year1987 and occupied the computer space commercially. GIFs are preferred to create small animations and are adopted by social media users. After the advent of PNG, the usage of GIF gradually decreased by website users. Later, the animated GIFs conquered the digital space as they replace most websites’ videos. It serves as one of the best message conveyers and is quite interesting for social media users. Gradually the younger generations were highly attracted to these animated GIFs to express their thoughts in an image format.
Part 2 Why do People like to use GIFs?
People prefer GIFs when compared to videos because animated GIFs convey a strong message quickly than videos. Social media users feel comfortable using GIFs and consider it the best way to express their emotions. Apart from the chat interface, you can find the animated GIFs occupying the website’s landing page, blog posts, and emails. The designers opt for animated GIFs instead of short videos because of their effective results. Many webpage visitors skim the content, and the animated GIFs quickly reveal what you convey. The audience understands the essential data you are emphasizing on the websites swiftly with the help of the animated GIFs.
When you include videos on your websites, the users skip the videos without making any clicks due to lack of time. The animated GIFs overcame this issue, the GIFs started to play as soon as the page loads, and the audience took a quick look at it, receiving the data you are trying to narrate through these animated GIFs. Many web page users prefer animated GIFs because they take less time to load and consume data. Both the viewers and webpage designers use GIFs instead of videos to convey their message in a visual format.
Part 3 Convert Animated GIF from Video
Giphy is the best online program that creates animated GIFs from video. It is an exclusively online program that focuses on an efficient way to create animated GIFs from videos. There are many online tools available to make your GIFs. The Giphy is an impressive application with loads of in-built features to entertain audiences. While creating a GIF, ensure it has a good loading capability to obtain efficient results. You can follow the below steps to convert GIFs from videos using the Giphy app.
Step 1
Visit the official website of Giphy and upload the videos to convert a GIF by tapping the Convert button. You can also upload the video file by pasting the URL from YouTube or Vimeo.
Step 2
Now, use the Giphy tool to trim the video and spot out the section that requires converting it as GIFs.
Trim the videos and locate the section that requires the creation of animated GIFs.
Step 3
Customize the trimmed video section using stickers, filters, and texts. After personalizing the trimmed video, tap Upload to Giphy to store the edited animated GIFs in its library.
You can access the animated GIFs from the storage library in your account.
Follow the above guidelines to create animated GIFs from videos using the Giphy online tool. Surf the steps carefully to ensure successful completion of the animated GIFs creation from video.
Part 4 Tip: Easily edit your GIF for free
Further, you can refine the GIFs using a professional editor like Filmora. The Filmora from Wondershare is an awesome tool that gives you a wow feel while editing the media files. It is an exclusive program that edits the media files effectively to obtain the desired outcomes. You can work as a pro editor without any technical skills. The simple interface of this application triggers you to use the built-in elements professionally. Tap the relevant controls to include the desired effects on the uploaded GIF images. The timeline has a user-friendly interface and there are no complexities even while handling larger image or video files.
The key features of the Filmora application
● Customize the videos based on your needs. You can crop, add text, resize the dimensions precisely.
● You can add special effects to the videos using the in-built filters
● It has a simple interface and assists you in working like a pro.
● The trimmer tool aids in creating animated GIFs from your videos
● Easy to import and export the edited files to desired storage space by a single click action.
Apart from the above functionalities, you can discover enlightening uses of Filmora by installing it on your device. The controls are explicit and you can access them without any hesitation. The simple interface aids the newbie users to master this app in no time due to its comfortable working timeline.
The stepwise procedure to create animated GIFs from the imported videos using the Filmora application.
Step 1 Install the application
Visit the official website of Filmora, download the tool concerning your system OS, and install it by following the instruction wizard. Import the desired video into the timeline by tapping the Import Media Files option.
Step 2 Add texts to the video
Based on your requirements, you can trim the video using the edit tool and insert desired texts by tapping the Title menu.
Step 3 Export the edited file
Finally, click the Export button to save the edited file on any desired storage space. During the export operation, you can perform various changes to your media files. There are options to modify the file format, resolution, and storage path. Tap the respective menus to choose the desired platform that requires the storage operation. Directly post the animated GIFs on your YouTube or Vimeo based on your needs.
The above steps will aid you in creating animated GIFs from videos and using this application efficiently to bring the desired impact on it.
Wondershare Filmora
Get started easily with Filmora’s powerful performance, intuitive interface, and countless effects!
Try It Free Try It Free Try It Free Learn More >
AI Portrait – The best feature of Wondershare Filmora for gameplay editing
The AI Portrait is a new add-on in Wondershare Filmora. It can easily remove video backgrounds without using a green screen or chroma key, allowing you to add borders, glitch effects, pixelated, noise, or segmentation video effects.
Conclusion
Thus, this article had given enough insights into creating an animated GIF from videos. You can either use an online tool or opt for Filmora to edit the videos and convert them to impressive animated GIFs. The Filmora helps you to edit the media files professionally, and its simple interface assists in handling even the complex files efficiently. Connect with this article to explore the video edit process using a reliable program like Filmora. Stay tuned to create animated GIFs that conveys explicit messages to the audience.
Best 10 Video to GIF Converters: Top Picks
Best 10 Video to GIF Converters: Top Picks
An easy yet powerful editor
Numerous effects to choose from
Detailed tutorials provided by the official channel
Having trouble converting your videos to GIF? Browse the top 10 converters to sort this out!
In this article
01 [Why GIFs are Widely Used and Popular?](#Part 1)
02 [Top 10 Ways to Turn Video into GIF](#Part 2)
Part 1 Why GIFs are Widely Used and Popular?
If you take a poll on the watch preference of GIF versus videos, most of votes you get would be in favor of watching GIFs. There are obvious reasons to the fact that anyone would prefer watching a GIF over a video, irrespective of its length. Some major ones that make it quite annoying to watch videos include the following:
● To begin with, you need to turn the video on and off, depending on your choice of watching a video or surfing through stories and feeds, failing which you get to hear additional sounds through your feed from the already running video. You further need to stop the music or go for a volume control in case you are not interested to watch the video.
● Most of the videos you run turn up to be irrelevant or uninteresting through the middle, but you don’t have a choice to make bit adjustments. If however possible, the method is not quite convenient. You may need to visit a different site in case you run a video that is not integrated with webpage of your searched content, wait for the portal’s interface to load or watch an advertisement.
● GIFs, on the other hand, do not require pausing or turning off, and run automatically. You also don’t need to mute any sounds. These ensure to-the-point message delivery and don’t divert your attention from the primary content you visit the webpage for.
Owing to the above, most of us are now much interested to convert videos to GIFs for an exact, impactful and to the point content creation and sharing. See through the next sections of this article to learn about the best video to GIF conversion tools and software.
Part 1 Top 10 Ways to Turn Video into GIF
Considering the credibility of GIFs, you may often require to convert your long videos into short and content specific GIFs. Given below are the 10 best methods to cater to the need of video to GIF conversion:
01Filmora
Wondershare Filmora Video Editor is one among the most popular and easy methods to convert videos to GIFs. It is compatible with almost all common video formats and is loaded with a plethora of exciting effects and editing tools. Take the following steps to create GIFs from videos using this application:
Wondershare Filmora
Get started easily with Filmora’s powerful performance, intuitive interface, and countless effects!
Try It Free Try It Free Try It Free Learn More >

Step 1: Import Your Video
Launch Filmora and import your desired video in the app’s welcome window. To do this, click on ‘New Project’ followed by ‘Import’ option from the drop down menu to add your video to the Filmora.

Step 2: Timeline Dragging
Add your video to the app’s timeline using the ‘Drag and Drop’ method. You can also extract video frames by taking screenshots and merge these images into your GIF from the media library.

Step 3: Explore Your Editing Skills
You can now edit the imported video in the timeline using a range of interesting effects. Crop, trim, split or make speed adjustments to give your video a catchy look.

Step 4: Include Messages
Try adding texts and supplementary elements to deliver impactful messages through your creation.

Step 5: It’s Time to Share!
Click ‘Export’ to save your GIF to your device. You are now ready to post your work in your social communities to get the most deserved attention of your peers!

02YouTube to GIF
This one is a simple and user-friendly video to GIF converter. You can convert videos to GIFs from your PC or other online platforms with this converter. The converter allows you to play with a variety of editing effects to make your creation more interesting. All you need to do is the following:
● In the video URL bar, type ‘gif’ after ‘www.’ and you will be redirected to converter’s working window. Set the GIF time interval or apply specific effects using the tools from the panel in the left of the working window.


● To set the video time frame, highlight it in the video timeline. Set the desired interval using the ‘Start Time’ and ‘End Time’ options.

● To add a new visual effect, select it from the menu. Below the video timeline, a row of parameters will get displayed. Set the effect parameters to make desired changes.
● Click ‘Create GIF’. In the ‘Settings’ menu, you can rename and add tags to your creation and even make it private.

● That’s it! You can download your GIF now. You may get a converter purchase offer for enabling advanced features. While most users prefer sticking to the free version, it is up to you whether to decline or accept the purchase offer.
● The ‘Download’ feature is exclusive to registered users. However, if you don’t prefer creating an account, just open the GIF download link in a separate tab’s ‘Direct Link’ row. Alternatively, you can replace ‘gif’ with ‘conv’ in the video URL bar and choose ‘Convert to GIF’. However, this process may take some extra minutes.

03Giphy GIF Maker
This is an editing tool that you can use to convert video to GIF online. This one is a reliable converter tool with a user-cohesive interface. It is a simple video editor that is available to you for free. All you need to do is mentioned below:
Step 1: Load your Video
Go to the official app website and paste your desired video link in the search bar. Your video gets uploaded to the app’s editor screen. Specify the time frame and check out your GIF’s preview.

Step 2: Let’s Go Editing!
Select ‘Continue to Decorate’ to edit your GIF with texts, effects, frames and filters. You can even go for a straight upload if your video doesn’t require customization.

Step 3: Time to Share!
Select ‘Continue to Upload’ and add required tags. Tap ‘Upload to Giphy’ to make a social media post or add it to the app’s website through a specific share code.
04Wondershare TunesGo
This is an effective video to GIF creator tool, loaded with extensive features. You can use this application to convert videos, live photos and multiple snaps into interesting GIFs. TunesGo gives you the freedom to edit your work in your own style with a variety of effects. Here’s what you need to do:

Step 1: Launch TunesGo
Download, install and launch the app into your PC. You may be asked for a device connection setup, but you can skip that in case GIF creation is your only requirement.

Step 2: Upload your Video
In the app’s welcome screen, navigate to ‘Toolbox’ at the top. From the drop down interface, choose ‘GIF Maker’. In the new window that pops-up next, click on ‘Add’ to upload the desired video to the app from your PC.

Step 3: Let’s Create!
Set the required time frame for your GIF in the app’s timeline and tap the ‘Create GIF’ button to start the conversion process. On completion, your work gets automatically saved in the ‘Pictures’ folder in your PC. You can also customize your target location.

05Vimeo
Vimeo is also a quick, 3-stepvideo to GIF converter. However, you need to have a Vimeo account to take up the conversion process. This is an easy and hassle free GIF creator, that adheres to your creation needs within minutes. Here’s what you need to do:
Step 1: Upload Your Video
Log in to your Vimeo account. In the opening window, select ’Upload’ from the toolbar at the top. ‘Drag and Drop’ or click ‘Choose Files’ to upload the desired video from your device.

Step 2: Create Your GIF
After you are done uploading the video, select ‘Create a GIF’ from the sidebar at the left. You will be directed to the GIF Editor window. Select a loop section from the video and set a time frame of maximum 6 seconds in the video timeline. Now click ‘Create GIF’.


Step 3: Export Your Creation
Your GIF is ready to download and share. You can also embed your GIF by generating embed codes for specific platforms.
06 Adobe Photoshop
This one is one f the most popular editing applications you can use to make GIF out of video. It’s simple and user-friendly interface does not require you to possess a Photoshop mastery for the conversion purpose. Here’s what you need to follow:
Step 1: Search Your Video
Find a video of your choice from a desired platform. In case you want a YouTube video, add ‘ss’ prior to the video’s service name in YouTube’s URL bar.
STEP 2: Edit Your Video
Use any preferable video splitters and editors to crop, trim and add interesting effects to your video and set a maximum time frame of 3 seconds.
Step 3: Create GIF
Open your edited video in Adobe Photoshop and tap ‘File Import-Video frames into layers’.

Step 4: Adjust Settings
Make required setting adjustments and click on ‘File-Save for Web’. Try adjusting image resolution and color range if your file size exceeds 10 MB.

Step 5: Save Your Work
In the ’Files’ tab at the top, select ‘Save’ and choose the ‘.gif’ extension in the ‘File Type’ dialog box to save your creation to your PC.
07Convertio
This converter provides a simple, 3-step process to create GIF from video. Either use it as a browser extension or download it from Google Chrome Webstore. Take the following steps to convert videos to GIF online.
● Upload your desired video to the service timeline. You can either choose files directly or ‘Drag and Drop’ them from your device.
● Select ‘Convert’ to make GIF from your uploaded video.
● Tap ‘Download’ to save your creation.

You can use this service to make different format conversions. However, this converter does not allow you to edit or add effects your GIF.
08MakeAGif
You can use this tool as a GIF video maker online to create, exchange and share GIFs on different platforms. Additionally, you also get the flexibility to use already saved images in your device to add them to your GIF. The app’s basic version allows you to create GIFs without watermarks. To add watermarks, you will need an account on the app. To convert videos to GIFs using this tool, you should take the following steps:
Step 1: Upload Your Video
In the app’s welcome screen, click on ‘Video to GIF’ and upload a desired video in the editor timeline. Add effects and make speed and time frame adjustments. When satisfied, tap ‘Continue to Publishing’.

Step 2: Add Names and Tags
In the publishing window, give a suitable name and add required tags to your edited video to make it easily identifiable. When you are done, click on ‘Create a GIF’ from the bottom right.

Step 3: Ready to Share!
You can now share your created GIF across social media platforms.

09Adobe Premiere
Similar to Adobe Photoshop, Adobe Premiere too is quite a preferred application for creating GIFs from videos. This is a simple, quick and free application that converts your videos to GIFs in a span of few minutes. Here’s what you need to do to go about the process:

Step 1: Edit your Video
Add a video of your choice in the Adobe Premiere timeline and play with your editing creativity to add desired effects and filters to it. Make sure to set requisite time frames to your edit.

Step 2: Prepare an Export
Click into the app’s video timeline, and prepare a file export using the following path:
File> Export> Media

Step 3: Settings Adjustments
In the Media Export window, navigate to the ‘Format’ tab. From the drop down menu, choose ‘Animated GIF’. Here, you can add your gif file, select its target destination and adjust the required settings.

Step 4: Export Your Work
Click ‘Export’ to share your creation on social media or click on ‘Queue’ to send your GIF to a specific media encoder.

1010. Movavi Video Converter
This is one of the latest video converter software you can rely on to make GIF from video files. This software allows you to create top quality animated GIFs and is compatible with a variety of video formats. Using this converter, you can create amazing GIFs in 5 quick steps: here’s what you need to follow:
Step 1: Download and Install the Software
To begin, download the converter software from its official site and adhere to the user instructions to install the same in your system.
Step 2: Upload Your Video
In the software’s opening window, click on ‘Add Media’ followed by ‘Add Video’ and select a desired video from your system to upload on the Movavi video timeline.

Step 3: Trim Your Video
Select ‘Edit’ from the right of your video file. In the editing window, specify the initial cut of the video by displacing the marker to the desired point. Click on ‘Scissors’ to add multiple cut points to your video. You can even drag the cut points around the editor timeline. Choose the unvented sections and click ‘Trash Can’. When the result satisfies you, click ‘Done’.

Step 4: Choose a Conversion Format
Navigate to the ‘Images’ tab and select ‘GIF’ and set an adequate size for the GIF. Here, you can adjust quality, frame size and rate and resize method using the ‘Cogwheel’ tool.

Step 5: Let’s Get Converting!
Tap ‘Convert’ and wait for the conversion to finish. You will be automatically directed to the folder where your converted files get saved.

● Key Takeaways from This Episode →
● GIFs are short, to the point and convenient to access, providing exact and impactful message delivery.
● The software market is flooded with a variety of editing tools to convert your dull videos to catchy GIFs.
● Filmora is a quick and smart editing tool that envisages your GIF creating experience with a range of exciting features.
Having trouble converting your videos to GIF? Browse the top 10 converters to sort this out!
In this article
01 [Why GIFs are Widely Used and Popular?](#Part 1)
02 [Top 10 Ways to Turn Video into GIF](#Part 2)
Part 1 Why GIFs are Widely Used and Popular?
If you take a poll on the watch preference of GIF versus videos, most of votes you get would be in favor of watching GIFs. There are obvious reasons to the fact that anyone would prefer watching a GIF over a video, irrespective of its length. Some major ones that make it quite annoying to watch videos include the following:
● To begin with, you need to turn the video on and off, depending on your choice of watching a video or surfing through stories and feeds, failing which you get to hear additional sounds through your feed from the already running video. You further need to stop the music or go for a volume control in case you are not interested to watch the video.
● Most of the videos you run turn up to be irrelevant or uninteresting through the middle, but you don’t have a choice to make bit adjustments. If however possible, the method is not quite convenient. You may need to visit a different site in case you run a video that is not integrated with webpage of your searched content, wait for the portal’s interface to load or watch an advertisement.
● GIFs, on the other hand, do not require pausing or turning off, and run automatically. You also don’t need to mute any sounds. These ensure to-the-point message delivery and don’t divert your attention from the primary content you visit the webpage for.
Owing to the above, most of us are now much interested to convert videos to GIFs for an exact, impactful and to the point content creation and sharing. See through the next sections of this article to learn about the best video to GIF conversion tools and software.
Part 1 Top 10 Ways to Turn Video into GIF
Considering the credibility of GIFs, you may often require to convert your long videos into short and content specific GIFs. Given below are the 10 best methods to cater to the need of video to GIF conversion:
01Filmora
Wondershare Filmora Video Editor is one among the most popular and easy methods to convert videos to GIFs. It is compatible with almost all common video formats and is loaded with a plethora of exciting effects and editing tools. Take the following steps to create GIFs from videos using this application:
Wondershare Filmora
Get started easily with Filmora’s powerful performance, intuitive interface, and countless effects!
Try It Free Try It Free Try It Free Learn More >
Step 1: Import Your Video
Launch Filmora and import your desired video in the app’s welcome window. To do this, click on ‘New Project’ followed by ‘Import’ option from the drop down menu to add your video to the Filmora.
Step 2: Timeline Dragging
Add your video to the app’s timeline using the ‘Drag and Drop’ method. You can also extract video frames by taking screenshots and merge these images into your GIF from the media library.
Step 3: Explore Your Editing Skills
You can now edit the imported video in the timeline using a range of interesting effects. Crop, trim, split or make speed adjustments to give your video a catchy look.
Step 4: Include Messages
Try adding texts and supplementary elements to deliver impactful messages through your creation.
Step 5: It’s Time to Share!
Click ‘Export’ to save your GIF to your device. You are now ready to post your work in your social communities to get the most deserved attention of your peers!
02YouTube to GIF
This one is a simple and user-friendly video to GIF converter. You can convert videos to GIFs from your PC or other online platforms with this converter. The converter allows you to play with a variety of editing effects to make your creation more interesting. All you need to do is the following:
● In the video URL bar, type ‘gif’ after ‘www.’ and you will be redirected to converter’s working window. Set the GIF time interval or apply specific effects using the tools from the panel in the left of the working window.
● To set the video time frame, highlight it in the video timeline. Set the desired interval using the ‘Start Time’ and ‘End Time’ options.
● To add a new visual effect, select it from the menu. Below the video timeline, a row of parameters will get displayed. Set the effect parameters to make desired changes.
● Click ‘Create GIF’. In the ‘Settings’ menu, you can rename and add tags to your creation and even make it private.
● That’s it! You can download your GIF now. You may get a converter purchase offer for enabling advanced features. While most users prefer sticking to the free version, it is up to you whether to decline or accept the purchase offer.
● The ‘Download’ feature is exclusive to registered users. However, if you don’t prefer creating an account, just open the GIF download link in a separate tab’s ‘Direct Link’ row. Alternatively, you can replace ‘gif’ with ‘conv’ in the video URL bar and choose ‘Convert to GIF’. However, this process may take some extra minutes.
03Giphy GIF Maker
This is an editing tool that you can use to convert video to GIF online. This one is a reliable converter tool with a user-cohesive interface. It is a simple video editor that is available to you for free. All you need to do is mentioned below:
Step 1: Load your Video
Go to the official app website and paste your desired video link in the search bar. Your video gets uploaded to the app’s editor screen. Specify the time frame and check out your GIF’s preview.
Step 2: Let’s Go Editing!
Select ‘Continue to Decorate’ to edit your GIF with texts, effects, frames and filters. You can even go for a straight upload if your video doesn’t require customization.
Step 3: Time to Share!
Select ‘Continue to Upload’ and add required tags. Tap ‘Upload to Giphy’ to make a social media post or add it to the app’s website through a specific share code.
04Wondershare TunesGo
This is an effective video to GIF creator tool, loaded with extensive features. You can use this application to convert videos, live photos and multiple snaps into interesting GIFs. TunesGo gives you the freedom to edit your work in your own style with a variety of effects. Here’s what you need to do:
Step 1: Launch TunesGo
Download, install and launch the app into your PC. You may be asked for a device connection setup, but you can skip that in case GIF creation is your only requirement.
Step 2: Upload your Video
In the app’s welcome screen, navigate to ‘Toolbox’ at the top. From the drop down interface, choose ‘GIF Maker’. In the new window that pops-up next, click on ‘Add’ to upload the desired video to the app from your PC.
Step 3: Let’s Create!
Set the required time frame for your GIF in the app’s timeline and tap the ‘Create GIF’ button to start the conversion process. On completion, your work gets automatically saved in the ‘Pictures’ folder in your PC. You can also customize your target location.
05Vimeo
Vimeo is also a quick, 3-stepvideo to GIF converter. However, you need to have a Vimeo account to take up the conversion process. This is an easy and hassle free GIF creator, that adheres to your creation needs within minutes. Here’s what you need to do:
Step 1: Upload Your Video
Log in to your Vimeo account. In the opening window, select ’Upload’ from the toolbar at the top. ‘Drag and Drop’ or click ‘Choose Files’ to upload the desired video from your device.
Step 2: Create Your GIF
After you are done uploading the video, select ‘Create a GIF’ from the sidebar at the left. You will be directed to the GIF Editor window. Select a loop section from the video and set a time frame of maximum 6 seconds in the video timeline. Now click ‘Create GIF’.
Step 3: Export Your Creation
Your GIF is ready to download and share. You can also embed your GIF by generating embed codes for specific platforms.
06 Adobe Photoshop
This one is one f the most popular editing applications you can use to make GIF out of video. It’s simple and user-friendly interface does not require you to possess a Photoshop mastery for the conversion purpose. Here’s what you need to follow:
Step 1: Search Your Video
Find a video of your choice from a desired platform. In case you want a YouTube video, add ‘ss’ prior to the video’s service name in YouTube’s URL bar.
STEP 2: Edit Your Video
Use any preferable video splitters and editors to crop, trim and add interesting effects to your video and set a maximum time frame of 3 seconds.
Step 3: Create GIF
Open your edited video in Adobe Photoshop and tap ‘File Import-Video frames into layers’.
Step 4: Adjust Settings
Make required setting adjustments and click on ‘File-Save for Web’. Try adjusting image resolution and color range if your file size exceeds 10 MB.
Step 5: Save Your Work
In the ’Files’ tab at the top, select ‘Save’ and choose the ‘.gif’ extension in the ‘File Type’ dialog box to save your creation to your PC.
07Convertio
This converter provides a simple, 3-step process to create GIF from video. Either use it as a browser extension or download it from Google Chrome Webstore. Take the following steps to convert videos to GIF online.
● Upload your desired video to the service timeline. You can either choose files directly or ‘Drag and Drop’ them from your device.
● Select ‘Convert’ to make GIF from your uploaded video.
● Tap ‘Download’ to save your creation.
You can use this service to make different format conversions. However, this converter does not allow you to edit or add effects your GIF.
08MakeAGif
You can use this tool as a GIF video maker online to create, exchange and share GIFs on different platforms. Additionally, you also get the flexibility to use already saved images in your device to add them to your GIF. The app’s basic version allows you to create GIFs without watermarks. To add watermarks, you will need an account on the app. To convert videos to GIFs using this tool, you should take the following steps:
Step 1: Upload Your Video
In the app’s welcome screen, click on ‘Video to GIF’ and upload a desired video in the editor timeline. Add effects and make speed and time frame adjustments. When satisfied, tap ‘Continue to Publishing’.
Step 2: Add Names and Tags
In the publishing window, give a suitable name and add required tags to your edited video to make it easily identifiable. When you are done, click on ‘Create a GIF’ from the bottom right.
Step 3: Ready to Share!
You can now share your created GIF across social media platforms.
09Adobe Premiere
Similar to Adobe Photoshop, Adobe Premiere too is quite a preferred application for creating GIFs from videos. This is a simple, quick and free application that converts your videos to GIFs in a span of few minutes. Here’s what you need to do to go about the process:
Step 1: Edit your Video
Add a video of your choice in the Adobe Premiere timeline and play with your editing creativity to add desired effects and filters to it. Make sure to set requisite time frames to your edit.
Step 2: Prepare an Export
Click into the app’s video timeline, and prepare a file export using the following path:
File> Export> Media
Step 3: Settings Adjustments
In the Media Export window, navigate to the ‘Format’ tab. From the drop down menu, choose ‘Animated GIF’. Here, you can add your gif file, select its target destination and adjust the required settings.
Step 4: Export Your Work
Click ‘Export’ to share your creation on social media or click on ‘Queue’ to send your GIF to a specific media encoder.
1010. Movavi Video Converter
This is one of the latest video converter software you can rely on to make GIF from video files. This software allows you to create top quality animated GIFs and is compatible with a variety of video formats. Using this converter, you can create amazing GIFs in 5 quick steps: here’s what you need to follow:
Step 1: Download and Install the Software
To begin, download the converter software from its official site and adhere to the user instructions to install the same in your system.
Step 2: Upload Your Video
In the software’s opening window, click on ‘Add Media’ followed by ‘Add Video’ and select a desired video from your system to upload on the Movavi video timeline.
Step 3: Trim Your Video
Select ‘Edit’ from the right of your video file. In the editing window, specify the initial cut of the video by displacing the marker to the desired point. Click on ‘Scissors’ to add multiple cut points to your video. You can even drag the cut points around the editor timeline. Choose the unvented sections and click ‘Trash Can’. When the result satisfies you, click ‘Done’.
Step 4: Choose a Conversion Format
Navigate to the ‘Images’ tab and select ‘GIF’ and set an adequate size for the GIF. Here, you can adjust quality, frame size and rate and resize method using the ‘Cogwheel’ tool.
Step 5: Let’s Get Converting!
Tap ‘Convert’ and wait for the conversion to finish. You will be automatically directed to the folder where your converted files get saved.
● Key Takeaways from This Episode →
● GIFs are short, to the point and convenient to access, providing exact and impactful message delivery.
● The software market is flooded with a variety of editing tools to convert your dull videos to catchy GIFs.
● Filmora is a quick and smart editing tool that envisages your GIF creating experience with a range of exciting features.
Fuel Creativity with 10 Awesome Collection of 2D Animation Examples
Fuel your Creativity with 10 Awesome Collection of 2D Animation Examples
An easy yet powerful editor
Numerous effects to choose from
Detailed tutorials provided by the official channel
It is pretty evident that organizations are prompt integrating videos into their campaigns on marketing and numerous other touch points.
If you’re not much sure about whether to go with 3D or 2D, always commence with viewing example videos to acquire some inspiration and knowledge or have a talk with 2D cartoon animation video production agencies which could suggest an apt fit.
As it’s always engaging, cost-effective, and fun, animated explainer best 2D animation video will educate and entertain the entire audience at the same time. It is just not only the insight about the services, products, or brand which associate your organization with your customers.
It is the attitude and personality of the brand as well that individual will forward to others after eyeing your video. If you wish to know about what an effectual video peeps like, here’re 10 majestic examples.
01Travel Portland
Why it’s Awesome: This gritty animation beautifully blends real-world objects and hand-drawn style.
Travel Portland - You Can, In Portland from HouseSpecial on Vimeo .
This video made for Travel Portland is quite a decent example of a video which combines distinctive animation disciplines through to singular vision. The video that was clearly created with After Effects, classic animation principles, hand-drawn animation, and showcases stop motion.
02Down the Rabbit Hole
Why It’s Awesome : An alluring case study in experimental design and shape organization.
Down The Rabbit Hole 2016 from Agent Pekka on Vimeo .
Without careful organization and pre-planning, the timeline of the animator could get considerably messy. This video showcases an extravagant example of a multidisciplinary approach and shape layer keyframing to best 2D animation design. In this video, you’ll get keyframing all of the elements.
03Veterans Day
Why it’s Awesome : It is a fascinating model to liquid gritty-style animated video.
SyFy / NBCUniversal - Veterans Day from STATE on Vimeo .
This video made for Syfy and NBC is a superb example of the liquid animation amalgamated with gritty design. Likely this video utilized a 2D rendering simulator technique such as ‘toon shading’ in the Cinema 4D.
04Min Stora Dag
Why it’s Awesome **:**This video wonderfully exhibits stretch and squash assorted with motivated actions.
Min Stora Dag from Brikk on Vimeo .
There’re twelve fundamental principles of animation which you must always follow to make your animations work more interesting. The following video is truly an appreciable instance of a piece that incorporates several of those twelve basic principles to make something remarkably fun.
05Paper
Why it’s Awesome : This video proficiently blends digital and physical elements to craft a splendid 2D design.
Probably you utilized to create most of your work on the computer. Even so, you may find it amusing to experiment with integrating real-world pieces into the next animation project of yours. It may perhaps take a little more pre-production than you are used to, however, the results could be astonishing. This incredible clip from PES is an exquisite blend of expert compositing and paper cutouts.
06CMYK
Why it’s Awesome **:**CMYK presents us that even nominal movement could add up lots of personality to 2D characters.
The objective of any character animator is just to unveil what your character is considering. Animators acquire this in distinct ways, but one vital thing to keep in mind is that you do not have to invest hundreds of hours on a single project so as to produce characters with emotions. This striking animation proves that you could give life to stiff characters with nothing but the most minuscule of movement.
07Tako Faito
Why it’s Awesome **:**This video is literally a fun blend of vectorized 3D elements and Japanese style animation.
Tako Faito! from Giant Ant on Vimeo .
The aim of most animators is to give a hand-drawn look to a project. Regardless, obtaining a good hand-drawn look without the physical drawing of your characters on the computer is quite challenging. This modish video from Giant Ant exhibits how you could simulate hand-drawn video with the ‘easy-to-make’ 3D elements.
08ZOHO
Why It’s Awesome : It reduces troubles significantly, and you face with multi-channel selling.
ZOHO Inventory is online-based inventory management software that aids you to manage offline and online orders and maintain track of the stock levels across multitudinous channels. Zoho Inventory incorporates eBay, Amazon, Etsy, and Shopify, so your sales, contacts, and items orders in these channels are automatically imported. This 2D animation video showcases how you could optimize inventory and purchases levels and obtain critical insights with ZOHO inventory about your businesses at any moment.
09TraQtion
Why it’s Awesome : Working in the cloud, your suppliers and you could ingress the system anywhere, anytime, so you’re in the loop always.
TraQtion is a cloud-based software that helps manufacturers and retailers with the site, product, and supplier compliance management. It aids in tracking the compliance and quality from macro to minutiae, predicting problems, and then taking rectifying measures, wherever you’re. TraQtion produced this animated 2D video to disclose how seamless compliance and quality can be. It’s a sprucely done video overall.
10George Clinical
Why it’s Awesome : George Clinical exhibits its all complete offerings with this 2D video.
In Asia, George Clinical is one of the prime Clinical Research Organizations, imparting top-quality clinical trial research facilities from beginning to finish, reinforced by innovation and science. George Clinical caters an extensive range of clinical trial services to biotech, medical device, and pharmaceutical consumers for all the trial phases, post-marketing trials, registration. This 2D animation video delivers a comprehensive overview of George Clinical and its services.
Verdict
The best upshot of a 2D animated video isn’t to increase the traffic but an endorsement of any brand. Free 2D animation video must cater to the personality and attitude of the brand to a wide range of target audiences. Hence, whenever that onlooker requires something accordant, they will consider your brand and its services.
Irrespective of the matter if you are going to use B2C or B2B marketing, live2D animation video is the platform that connects your audience with you. After the connection is completely built, you will be one step up ahead for sure, holding back on another side to generate sales and escalate ROI. Undeniably, animated videos do the conversion.
The affluent video is one with a catchy hook, a stimulating message and marks your brand to the target audience. Therefore, do not be afraid at all to be distinct from others.
In this respect the name of Wondershare Filmora Video Editor needs mentioning as it is one such video editing software that provides you with countless features and benefits. It becomes easy to create animated videos like a professional when you install Filmora.
Wondershare Filmora
Get started easily with Filmora’s powerful performance, intuitive interface, and countless effects!
Try It Free Try It Free Try It Free Learn More >
Key Takeaways from This Episode
● Work with an organization that can fully understand your requirement on video production easily
● Find a combine multiple videos or reference video elements from the different sources
● Build an invincible creative brief
● With the aforementioned live2D animation instances, it is pretty evident that organizations are prompt integrating videos into their campaigns on marketing and numerous other touch-points.
● If you’re planning to develop these videos, a steady commencement is to develop a briefing of what could be the style and tone for your videos. We recommend you to be unique and different whilst you produce your messaging via the videos.
● Agencies make custom videos typically based on your given brief. At a fixed price with an accomplished video production services plan, their design team skillfully works right from development concept to animation and art design. Having produced 1200+ explainers for the businesses, their creative professional team could help you come up with the upright fit.
How to Create Picsart Cartoon
How to Create Picsart Cartoon
An easy yet powerful editor
Numerous effects to choose from
Detailed tutorials provided by the official channel
Cartoonized images are a convenient source of fun and media entertainment in present times. Try hands at creating your own caricature masterpieces with Picsart!
In this article
01 [How To Edit Cartoon Picture in Picsart](#Part 1)
02 [How To Make A Cartoon On Your Phone](#Part 2)
03 [How to Cartoon Yourself on Picsart](#Part 3)
Part 1 How to Edit Cartoon Picture in Picsart
Cartoonized pictures as you must be aware of, are comic transformations of real-time images and are widely used on social media to add a funny angle to the diversity of conversation going on, or even just as a source of plentiful amusement.
If you often feel motivated to experiment with the art and are looking for a perfect solution, see through the following section for a detailed and stepwise guide to create and edit a Picsart cartoon with utmost ease and within a quick time span:
User’s Guide to Edit Cartoon Pictures in Picsart
Step 1: Download the Picsart Application
Visit the official Picsart website to download the desktop version of the app in your Windows or MacOs supported PC.
Step 2: Make a Selection
Launch the app in your system to reach the Picsart welcome screen. Navigate to the bottom and tap the ‘+’ symbol. You are now required to choose a desired image to create the cartoon edit. You can either browse through your system gallery or search a specific one from the Picsart photo library in the ‘Search Bar’ at the top of the app screen.

Step 3: Let’s Get Editing!
When you have made your choice, navigate to the toolbar at the bottom of the app screen and click on the ‘Effects’ tab. Make a side scroll to choose a specific effect category, like that of ‘Artistic’ or ‘Magic’ to open a library of effects in the selected category.
As an example, selecting the ‘Cartoonizer’ option in the ‘Artistic’ effects category can add an immediate caricature feel to your selected real-time image. You can further include manual adjustments to get the perfect cartoon look by pressing and holding the ‘Cartoonizer’ option. There are a whole variety of magical effects, such as, Neo Pop, Soul, Badlands, Animation and Paw in the ‘Magic’ effects category, that are just perfect in giving your edit a fantasizing look with a Picsart cartoon background.
If you are looking for a quicker editing process, prefer adding cartoonized elements, like ‘Picsart Stickers’ to your image instead of going for a complete caricature edit. To do this, open the ‘Picsart Photo Editor’, navigates to the ‘Sticker’ symbol and click on it, followed by searching ‘Cartoon Sticker’. You can alternatively search a specific keyword with the ‘Cartoon’ descriptor, if you are clear on what you want to add.
You can further, resize your selected sticker with a ‘Two Finger Pinch’ or use the ‘Eraser’ tool to ward off any unwanted portions from the same. You are free to take as many repetitions of the process as you wish, till you get the perfect result for saving to your device and sharing on your social media handles.

Step 4: Time to Save and Share!
When you are satisfied with your work, navigate to the right hand corner and tap ‘Apply’ to finalize your changes, followed by clicking on the ‘Next’ button at the top right corner of the app screen to save and export your creation.
Part 2 How to Make a Cartoon on Your Phone
After a detailed analysis of the cartoon editing procedure in your desktops, let us see thro ugh the method of creating cartoonized images on your MacOs and Android smartphones on the following section:
Stepwise Procedure for Creating Cartoonized Images on Phone
Step 1: Download the Application
When going to use the Picsart editor application on your smartphone, you will first require a download of the same in your concerned device. You can do this by visiting the ‘Google PlayStore’ for an Android device or the ‘Apple App Store’ for MacOs smartphones.
Step 2: Choose a Real-time Image
After a successful launch of the ‘Picsart Editor’ application in your smartphone, reach to and click on the ‘+’ icon at the bottom of the app’s working interface. This needs to be followed by selecting any specific real-time image, either from your smartphone gallery or the Picsart photo library using the top ‘Search Bar’ of the interface, for creating a cartoonized edit.

Step 3: Editing Begins!
Once you are done with selecting the image, proceed to add effects to your selection by clicking the ‘Effects’ tab in the bottom toolbar, succeeded by picking a desired effect type through a right scroll. Tap on any category, such as, Magic, Artistic, etc, to open the effect library of the same.
For instance, you can click on the ‘Cartoonizer’ option within Artistic’ effects to supplement your uploaded real-time image with an instant cartoonized effect. You are also granted the liberty to make manual changes to set the caricature image effects as per your preferences, which you can do with a ‘Press and Hold’ of the ‘Cartoonizer’ tab. If you have a diversion towards complementing your cartoonized images with magical effects, choose from Animation, Neo Pop, Paw, Badlands, Paw, and other amazing options in the ‘Magic’ category.

Step 4: Save and Export
When you have completed the editing process and the changes satisfy you, go to the ‘Apply’ tab at the right side of the editor screen to see the changes appear in your edit. You can now navigate to the upper right corner of the app screen and click on ‘Next’ to save your work locally to your device, along with exporting the same across different media platforms.
Part 3 How to Cartoon Yourself on Picsart
Having learnt about the interesting ways to edit cartoon pictures and create cartoons on your smartphone, you might like to try hands on creating a cartoon portrait of yourself in the Picsart editor for a variety of reasons, like that of creating cartoon profile pics of yourself. Let us have a look of the procedure for the same using the Picsart Online Image Editor tool in the following section:
User’s Guide to Create a Cartoon Portrait With Picsart Online Photo Editor
Step 1: Launch the Application
In any of your favorite internet browsers, search for and open ‘Picsart Desktop Editor’. In the app’s working interface, tap ‘Upload’ or ‘New Project’ to choose an image from your device or the free to use Picsart image library respectively, for proceeding with the cartoonized transformations.

Step 2: Edit Your Selection
Tap on the ‘Effects’ tab from the editing toolbar at the top of your image and select a desired effect category to access the diversity of cartoonifying filters. It is recommended to select the ‘Magic’ category for the most splendid cartoon effects, such as, Paw, Badland, Animation, Soul and Neo Pop among many others.

You can even make manual adjustments in the brightness, color, saturation, burn and fade, etc., of the image by clicking on the ‘Adjust’ and ‘Blend’ options at the top of the image workspace.

Step 3: Download and Share Your Work
When you are done editing, navigate to and click on the ‘Share’ option at the upper right corner of the editor screen to download your cartoonized image.

****Wondershare Filmora Video Editor Cartoon Image Creator**
For Win 7 or later (64-bit)
For macOS 10.12 or later
Picsart is certainly a dependable solution to create caricature images, but if you are keen on looking for an alternative application to cater to the need, Introduced to the software market by Wondershare, the Filmora Cartoon Image Creator can be a convenient rescue. The app promises you of a high quality cartoonized edit with a plethora of editing effects to suit your most specific editing preferences.
● Ending Thoughts →
● Creating cartoonized edits from real time images is a fun and entertaining activity along with being the latest media trend.
● The Picsart editor application allows making caricature images from actual stills through desktop, smartphone and online compatible image editing program.
● Talking of suitable Picsart alternatives, you can rely on the Filmora Cartoon Image Creator application for high quality cartoonized image creation.
Cartoonized images are a convenient source of fun and media entertainment in present times. Try hands at creating your own caricature masterpieces with Picsart!
In this article
01 [How To Edit Cartoon Picture in Picsart](#Part 1)
02 [How To Make A Cartoon On Your Phone](#Part 2)
03 [How to Cartoon Yourself on Picsart](#Part 3)
Part 1 How to Edit Cartoon Picture in Picsart
Cartoonized pictures as you must be aware of, are comic transformations of real-time images and are widely used on social media to add a funny angle to the diversity of conversation going on, or even just as a source of plentiful amusement.
If you often feel motivated to experiment with the art and are looking for a perfect solution, see through the following section for a detailed and stepwise guide to create and edit a Picsart cartoon with utmost ease and within a quick time span:
User’s Guide to Edit Cartoon Pictures in Picsart
Step 1: Download the Picsart Application
Visit the official Picsart website to download the desktop version of the app in your Windows or MacOs supported PC.
Step 2: Make a Selection
Launch the app in your system to reach the Picsart welcome screen. Navigate to the bottom and tap the ‘+’ symbol. You are now required to choose a desired image to create the cartoon edit. You can either browse through your system gallery or search a specific one from the Picsart photo library in the ‘Search Bar’ at the top of the app screen.
Step 3: Let’s Get Editing!
When you have made your choice, navigate to the toolbar at the bottom of the app screen and click on the ‘Effects’ tab. Make a side scroll to choose a specific effect category, like that of ‘Artistic’ or ‘Magic’ to open a library of effects in the selected category.
As an example, selecting the ‘Cartoonizer’ option in the ‘Artistic’ effects category can add an immediate caricature feel to your selected real-time image. You can further include manual adjustments to get the perfect cartoon look by pressing and holding the ‘Cartoonizer’ option. There are a whole variety of magical effects, such as, Neo Pop, Soul, Badlands, Animation and Paw in the ‘Magic’ effects category, that are just perfect in giving your edit a fantasizing look with a Picsart cartoon background.
If you are looking for a quicker editing process, prefer adding cartoonized elements, like ‘Picsart Stickers’ to your image instead of going for a complete caricature edit. To do this, open the ‘Picsart Photo Editor’, navigates to the ‘Sticker’ symbol and click on it, followed by searching ‘Cartoon Sticker’. You can alternatively search a specific keyword with the ‘Cartoon’ descriptor, if you are clear on what you want to add.
You can further, resize your selected sticker with a ‘Two Finger Pinch’ or use the ‘Eraser’ tool to ward off any unwanted portions from the same. You are free to take as many repetitions of the process as you wish, till you get the perfect result for saving to your device and sharing on your social media handles.
Step 4: Time to Save and Share!
When you are satisfied with your work, navigate to the right hand corner and tap ‘Apply’ to finalize your changes, followed by clicking on the ‘Next’ button at the top right corner of the app screen to save and export your creation.
Part 2 How to Make a Cartoon on Your Phone
After a detailed analysis of the cartoon editing procedure in your desktops, let us see thro ugh the method of creating cartoonized images on your MacOs and Android smartphones on the following section:
Stepwise Procedure for Creating Cartoonized Images on Phone
Step 1: Download the Application
When going to use the Picsart editor application on your smartphone, you will first require a download of the same in your concerned device. You can do this by visiting the ‘Google PlayStore’ for an Android device or the ‘Apple App Store’ for MacOs smartphones.
Step 2: Choose a Real-time Image
After a successful launch of the ‘Picsart Editor’ application in your smartphone, reach to and click on the ‘+’ icon at the bottom of the app’s working interface. This needs to be followed by selecting any specific real-time image, either from your smartphone gallery or the Picsart photo library using the top ‘Search Bar’ of the interface, for creating a cartoonized edit.
Step 3: Editing Begins!
Once you are done with selecting the image, proceed to add effects to your selection by clicking the ‘Effects’ tab in the bottom toolbar, succeeded by picking a desired effect type through a right scroll. Tap on any category, such as, Magic, Artistic, etc, to open the effect library of the same.
For instance, you can click on the ‘Cartoonizer’ option within Artistic’ effects to supplement your uploaded real-time image with an instant cartoonized effect. You are also granted the liberty to make manual changes to set the caricature image effects as per your preferences, which you can do with a ‘Press and Hold’ of the ‘Cartoonizer’ tab. If you have a diversion towards complementing your cartoonized images with magical effects, choose from Animation, Neo Pop, Paw, Badlands, Paw, and other amazing options in the ‘Magic’ category.
Step 4: Save and Export
When you have completed the editing process and the changes satisfy you, go to the ‘Apply’ tab at the right side of the editor screen to see the changes appear in your edit. You can now navigate to the upper right corner of the app screen and click on ‘Next’ to save your work locally to your device, along with exporting the same across different media platforms.
Part 3 How to Cartoon Yourself on Picsart
Having learnt about the interesting ways to edit cartoon pictures and create cartoons on your smartphone, you might like to try hands on creating a cartoon portrait of yourself in the Picsart editor for a variety of reasons, like that of creating cartoon profile pics of yourself. Let us have a look of the procedure for the same using the Picsart Online Image Editor tool in the following section:
User’s Guide to Create a Cartoon Portrait With Picsart Online Photo Editor
Step 1: Launch the Application
In any of your favorite internet browsers, search for and open ‘Picsart Desktop Editor’. In the app’s working interface, tap ‘Upload’ or ‘New Project’ to choose an image from your device or the free to use Picsart image library respectively, for proceeding with the cartoonized transformations.
Step 2: Edit Your Selection
Tap on the ‘Effects’ tab from the editing toolbar at the top of your image and select a desired effect category to access the diversity of cartoonifying filters. It is recommended to select the ‘Magic’ category for the most splendid cartoon effects, such as, Paw, Badland, Animation, Soul and Neo Pop among many others.
You can even make manual adjustments in the brightness, color, saturation, burn and fade, etc., of the image by clicking on the ‘Adjust’ and ‘Blend’ options at the top of the image workspace.
Step 3: Download and Share Your Work
When you are done editing, navigate to and click on the ‘Share’ option at the upper right corner of the editor screen to download your cartoonized image.
****Wondershare Filmora Video Editor Cartoon Image Creator**
For Win 7 or later (64-bit)
For macOS 10.12 or later
Picsart is certainly a dependable solution to create caricature images, but if you are keen on looking for an alternative application to cater to the need, Introduced to the software market by Wondershare, the Filmora Cartoon Image Creator can be a convenient rescue. The app promises you of a high quality cartoonized edit with a plethora of editing effects to suit your most specific editing preferences.
● Ending Thoughts →
● Creating cartoonized edits from real time images is a fun and entertaining activity along with being the latest media trend.
● The Picsart editor application allows making caricature images from actual stills through desktop, smartphone and online compatible image editing program.
● Talking of suitable Picsart alternatives, you can rely on the Filmora Cartoon Image Creator application for high quality cartoonized image creation.
How to Create Benime Whiteboard Animation on Android
How to Create Benime Whiteboard Animation in Android
An easy yet powerful editor
Numerous effects to choose from
Detailed tutorials provided by the official channel
Millions of people on social media would want to post the working system, information, and business policies on a topic. For this reason, such people need an easy way to make a good quality influential video in a short time. Although many applications can help you create animated videos.
In this article, we will be talking about whiteboard animation and, more specifically, about Benime whiteboard animation mod APK.
In this article
01 [What’s Benime Used for?](#Part 1)
02 [How to Create Benime Whiteboard Animation in Android](#Part 2)
Part 1 What’s Benime Used for?
Benime is the first doodle video creation application on Android devices that allows users to create professional and realistic doodle videos within minutes. It can add music and voice-over to audio, create presentations and marketing videos, and create a whiteboard animation using built-in assets.
One of the practical uses of Benime whiteboard animation is that it makes it very easy for anybody to create a professional whiteboard animation without any experience or knowledge in animation. With this application, you can use the built-in templates or decide to start from scratch using your drawings or images, then record yourself talking over the top of your work. It is one of the most active Android applications to explain ideas through a captivating animated video that can eventually increase your followers quickly.
It is used not just to explain information in an impersonal codon way but also to connect with your audience. By allowing your audience to show concern about what you are trying to showcase and evoking empathy.
It helps you get the audience to pay attention to the content you are creating by providing you with personalized graphics, colors, and images.
Benime is a great application that can help create an animated video using built-in assets. The application is flexible, user-friendly, and accessible via Benime whiteboard animation APK download. To download the Android application and make your desired video, you can also visit the Google play store to proceed with downloading the application as it contains advertisements and offers in-app purchases.
So, in short, we can say that Benime is valuable for,
● Whiteboard animation creation
● Inbuilt assets for video making
● Editing video with either voice, music, text, color
● Motion Slide animation
● Board background
● Supports online rendering of videos
● Instant preview functioning
● Sharing video in MP4 format
Part 2 How to Create Benime Whiteboard Animation in Android
We will also be giving you tips on all you need to know about creating a whiteboard animation:
● Write a script, whether it is a short script or a regular video. The whiteboard animation video might not succeed with exciting information and images and no coherent story. Since it is not a set of bullet points, storyboards, or blog stories, having a proper script is everything you need.
● Next is to start your storyboard to help you organize your thoughts much better. By creating a storyboard, you have a good idea of how the final product will look like and the transition of the story.
● Create memorable photos that will excite your audience. Perhaps if you are a creative person, this part will be much easier as all you need is to create a unique and fun image that will help pass the information that she wants to get across.
● Animates the created images and finds clearance between your script and the photos.
● Record the audio, which is the final step to ensure a perfectly synchronized audio and content.
Benime Whiteboard Animation application offers tons of features that can be used to enhance whiteboard animation creation. More so, here is a step-by-guide on how to use the Benime application more effectively and efficiently in creating a whiteboard animation:
01Software Download
First, download and install the Benime application on your phone and then open it.
02Create New Video
Click on the + sign to make a new video. Enter the video title, choose the desired video quality, and click Create a Movie.
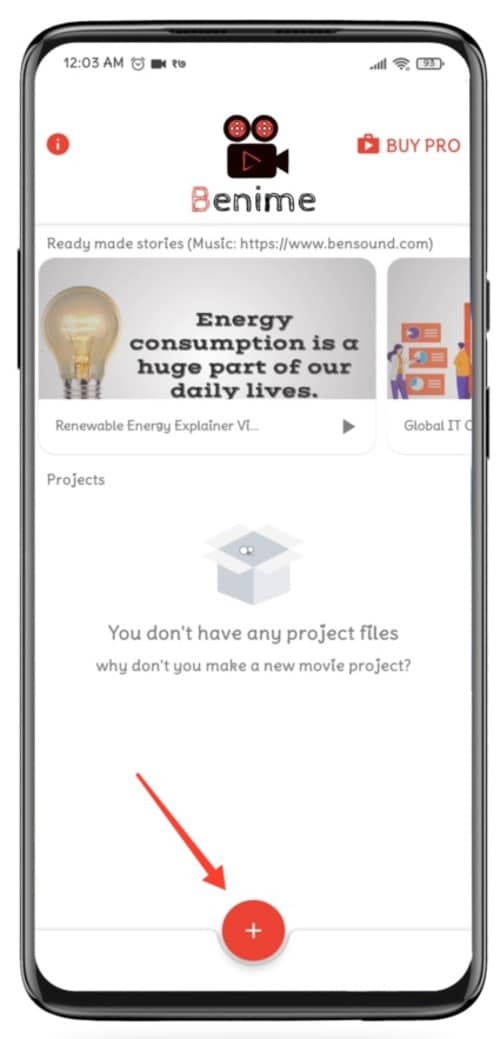
03Enter Text
A blank slide will be visible, where you will make changes, tap the Text option to enter the text.
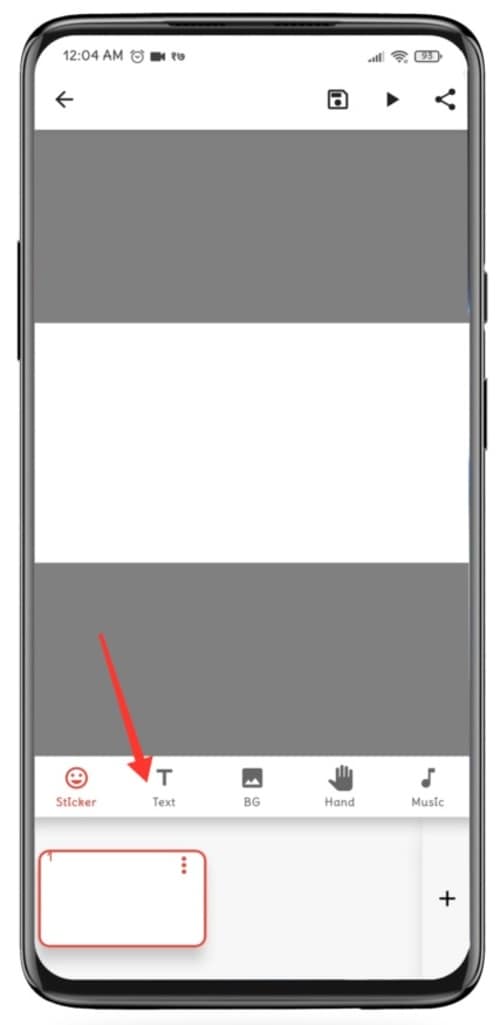
04Edit Text
After entering your desired text, click on the Insert option. The text size can be changeable by swiping to the left or right on the size line. More so, you can edit the color of the text by clicking on the color option. You can also change and use the application by clicking on the hand option. Background color change can go with the BG option.
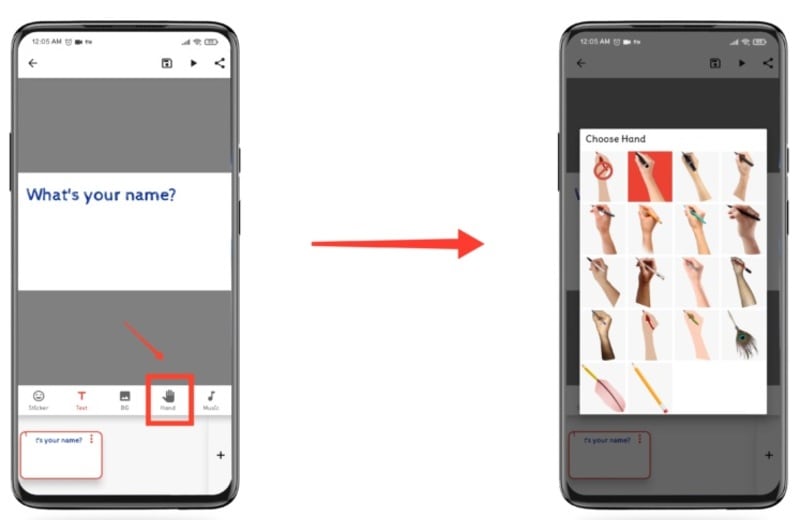
If you want to insert some characters, drawings, pictures, etc. Click on the sticker option at the bottom left and then slide to the right at the top to choose the icon or image that you want to insert.
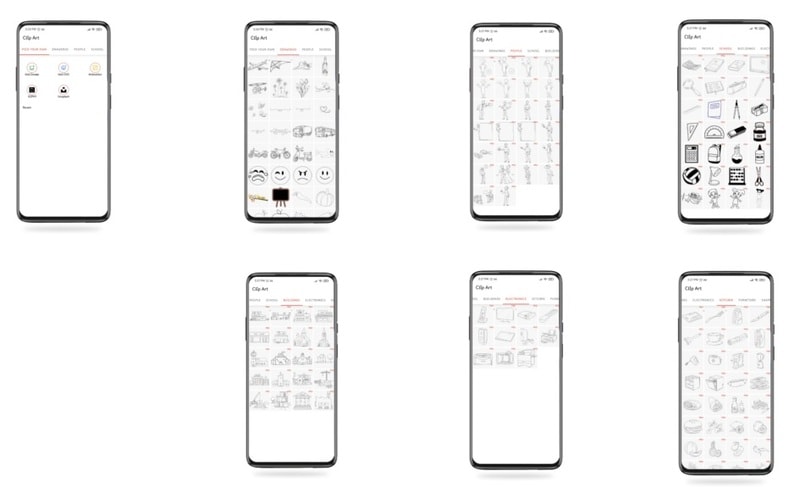
05Add Audio
After you are ok with the text and image, you can now add your voice over or music by clicking on any of the two options: voice over and music track.
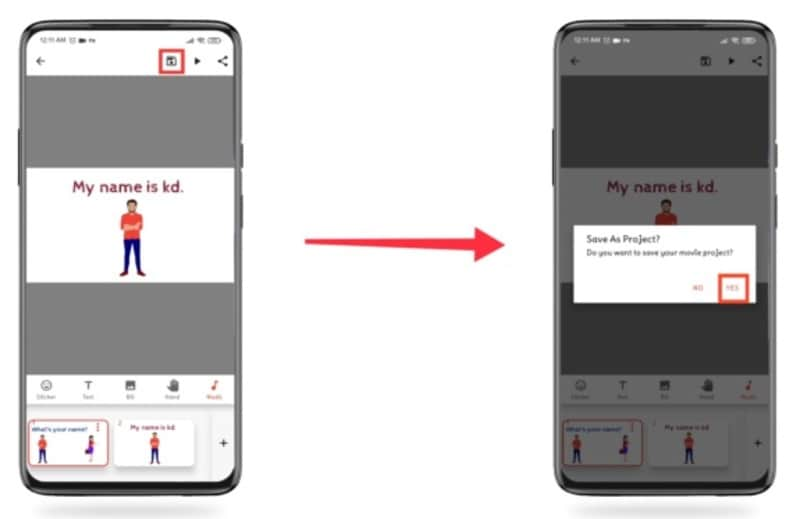
05Create and Share your Video
Lastly, click on the Save icon and then click on Yes. Then insert the name of the video and click on Make movie. Instantly the video will enter the rendering mode, and after this process, you will get the option of playing and sharing the film. Select the one you wish.
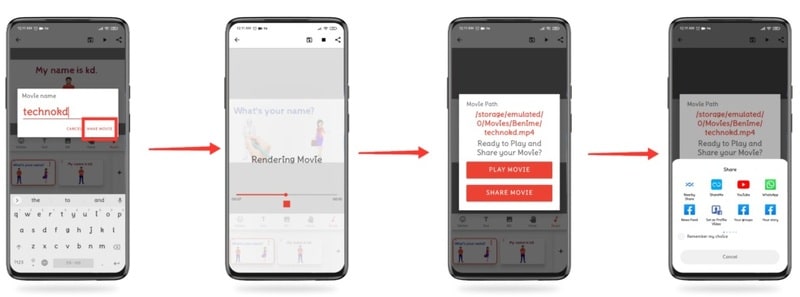
Benime Whiteboard animation can also be on PC via varieties of software. However, the Filmora software has proven to be one of the best because of its features. While working or creating a storyboard, the most aptly used software is Filmora. That will make it easy to create whiteboard animation with lots and lots of editing options in terms of transparency, 2D/animation, smooth keyframing, and a lot more.
Part 3 PC Tools Useful For Whiteboard Animation
01Renderforest Whiteboard Animation
Renderforest whiteboard animation: This is a free whiteboard animation tool that creates exciting and unique animation stories, a cloud-based program that does not need a powerful machine. It weeds hundreds of ready-made scenes to enhance your whiteboard animation stories
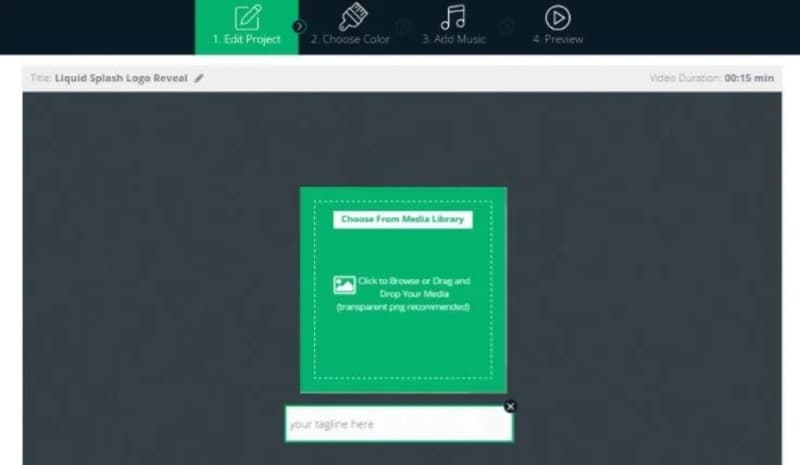
02Powtoon Whiteboard Animation
This can make a whiteboard animation very quickly for free, with an object to touch up video and free royalty music to make your whiteboard animation perfect.
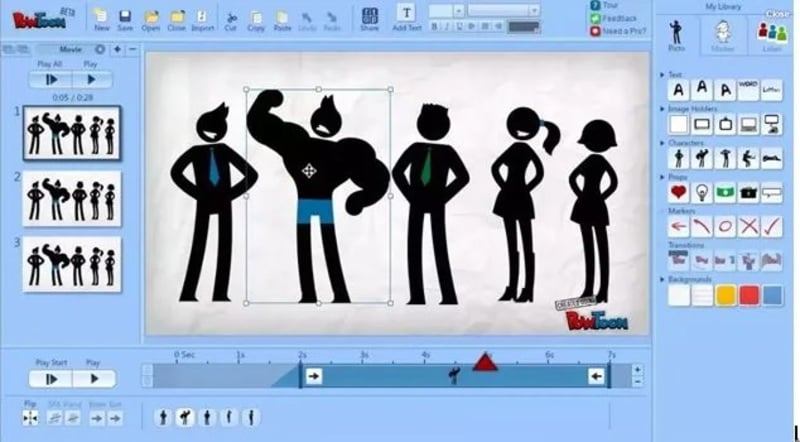
03Fiverr Whiteboard Animation
If looking for different whiteboard and animation explainers, Fiverr whiteboard animation will be the right choice. That will assist you in how to keep or engage your audience with proper explanation.
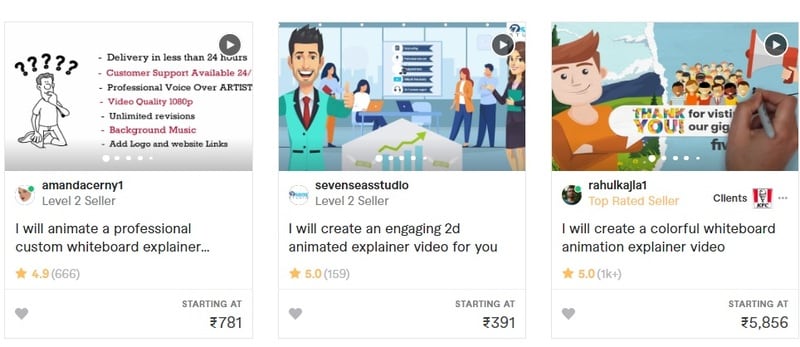
04Whiteboard Animation Videoscribe
Being in the education domain is a noble cause, and you can enhance the delivery of quality education through Whiteboard Animation Videoscribe. That will give you the freedom to modify your content with animation drawing. However, it is a subscription-based service.
05Vyond Whiteboard Animation
Vyond whiteboard animation provides you with in-house whiteboard animated video production solutions for educational, professional, or training purposes.
06Animaker Whiteboard Animation
This is another free whiteboard animation software used to make videos quickly with various functions. It includes a free-to-use option and a full video length that is enough. It supports a few props, characters, infographic icons, animated maps, charts, etc.
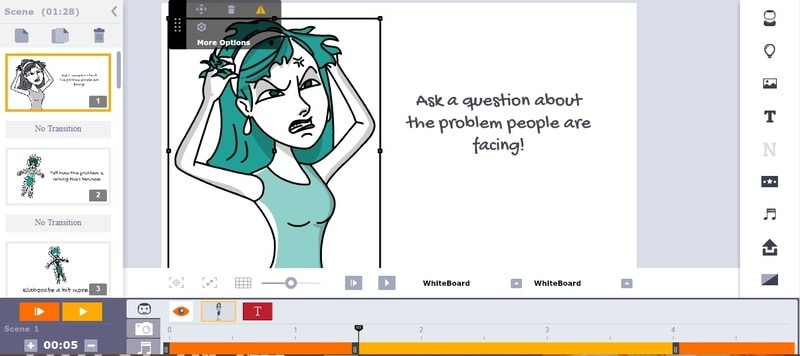
07Rawshorts Whiteboard Animation
This simple, easy-to-use whiteboard animation comes with an explainer video with a drag-and-drop interface. You can either start from nothing or choose between the animated whiteboard templates. Rendering and sharing the animated video in this software is super easy and comes with a Facebook, YouTube, and other social media platform integration. Anyone can use whether you are a beginner or professional, creating videos to show your client, training videos, and marketing videos that help demonstrate a strategy.
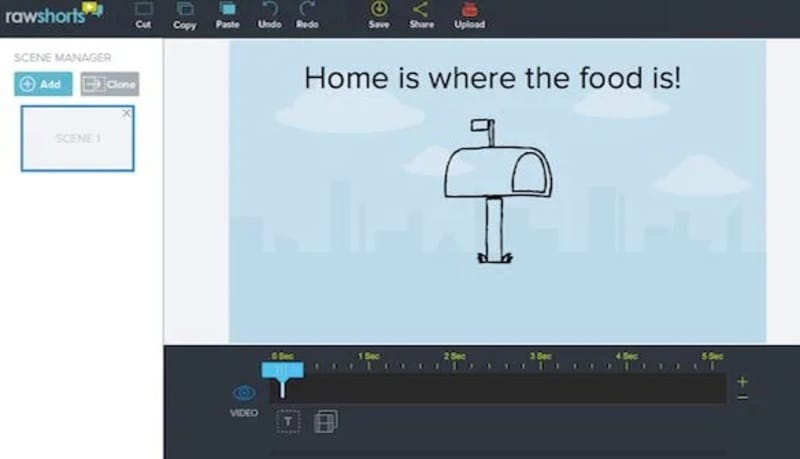
08Videojeeves Whiteboard Animation
This software has many whiteboard animation options, whether you are open to sharing something with your friends or creating a whiteboard animation for work. It helps to make your job easier and faster.
09Truscribe Whiteboard Animation
This premier software offers customers a dedicated plan when they are whiteboard animation videos can be created. With this software, the process can start when customers request a quote on their website, giving them more reliable information about the pricing and strategy.
● Key Takeaways from This Episode →
● Basic functionality of Benime Whiteboard Animation software.
● How to create whiteboard animation with Benime.
● Whiteboard animation on PC with Filmora and some other relevant software.
Millions of people on social media would want to post the working system, information, and business policies on a topic. For this reason, such people need an easy way to make a good quality influential video in a short time. Although many applications can help you create animated videos.
In this article, we will be talking about whiteboard animation and, more specifically, about Benime whiteboard animation mod APK.
In this article
01 [What’s Benime Used for?](#Part 1)
02 [How to Create Benime Whiteboard Animation in Android](#Part 2)
Part 1 What’s Benime Used for?
Benime is the first doodle video creation application on Android devices that allows users to create professional and realistic doodle videos within minutes. It can add music and voice-over to audio, create presentations and marketing videos, and create a whiteboard animation using built-in assets.
One of the practical uses of Benime whiteboard animation is that it makes it very easy for anybody to create a professional whiteboard animation without any experience or knowledge in animation. With this application, you can use the built-in templates or decide to start from scratch using your drawings or images, then record yourself talking over the top of your work. It is one of the most active Android applications to explain ideas through a captivating animated video that can eventually increase your followers quickly.
It is used not just to explain information in an impersonal codon way but also to connect with your audience. By allowing your audience to show concern about what you are trying to showcase and evoking empathy.
It helps you get the audience to pay attention to the content you are creating by providing you with personalized graphics, colors, and images.
Benime is a great application that can help create an animated video using built-in assets. The application is flexible, user-friendly, and accessible via Benime whiteboard animation APK download. To download the Android application and make your desired video, you can also visit the Google play store to proceed with downloading the application as it contains advertisements and offers in-app purchases.
So, in short, we can say that Benime is valuable for,
● Whiteboard animation creation
● Inbuilt assets for video making
● Editing video with either voice, music, text, color
● Motion Slide animation
● Board background
● Supports online rendering of videos
● Instant preview functioning
● Sharing video in MP4 format
Part 2 How to Create Benime Whiteboard Animation in Android
We will also be giving you tips on all you need to know about creating a whiteboard animation:
● Write a script, whether it is a short script or a regular video. The whiteboard animation video might not succeed with exciting information and images and no coherent story. Since it is not a set of bullet points, storyboards, or blog stories, having a proper script is everything you need.
● Next is to start your storyboard to help you organize your thoughts much better. By creating a storyboard, you have a good idea of how the final product will look like and the transition of the story.
● Create memorable photos that will excite your audience. Perhaps if you are a creative person, this part will be much easier as all you need is to create a unique and fun image that will help pass the information that she wants to get across.
● Animates the created images and finds clearance between your script and the photos.
● Record the audio, which is the final step to ensure a perfectly synchronized audio and content.
Benime Whiteboard Animation application offers tons of features that can be used to enhance whiteboard animation creation. More so, here is a step-by-guide on how to use the Benime application more effectively and efficiently in creating a whiteboard animation:
01Software Download
First, download and install the Benime application on your phone and then open it.
02Create New Video
Click on the + sign to make a new video. Enter the video title, choose the desired video quality, and click Create a Movie.
03Enter Text
A blank slide will be visible, where you will make changes, tap the Text option to enter the text.
04Edit Text
After entering your desired text, click on the Insert option. The text size can be changeable by swiping to the left or right on the size line. More so, you can edit the color of the text by clicking on the color option. You can also change and use the application by clicking on the hand option. Background color change can go with the BG option.
If you want to insert some characters, drawings, pictures, etc. Click on the sticker option at the bottom left and then slide to the right at the top to choose the icon or image that you want to insert.
05Add Audio
After you are ok with the text and image, you can now add your voice over or music by clicking on any of the two options: voice over and music track.
05Create and Share your Video
Lastly, click on the Save icon and then click on Yes. Then insert the name of the video and click on Make movie. Instantly the video will enter the rendering mode, and after this process, you will get the option of playing and sharing the film. Select the one you wish.
Benime Whiteboard animation can also be on PC via varieties of software. However, the Filmora software has proven to be one of the best because of its features. While working or creating a storyboard, the most aptly used software is Filmora. That will make it easy to create whiteboard animation with lots and lots of editing options in terms of transparency, 2D/animation, smooth keyframing, and a lot more.
Part 3 PC Tools Useful For Whiteboard Animation
01Renderforest Whiteboard Animation
Renderforest whiteboard animation: This is a free whiteboard animation tool that creates exciting and unique animation stories, a cloud-based program that does not need a powerful machine. It weeds hundreds of ready-made scenes to enhance your whiteboard animation stories
02Powtoon Whiteboard Animation
This can make a whiteboard animation very quickly for free, with an object to touch up video and free royalty music to make your whiteboard animation perfect.
03Fiverr Whiteboard Animation
If looking for different whiteboard and animation explainers, Fiverr whiteboard animation will be the right choice. That will assist you in how to keep or engage your audience with proper explanation.
04Whiteboard Animation Videoscribe
Being in the education domain is a noble cause, and you can enhance the delivery of quality education through Whiteboard Animation Videoscribe. That will give you the freedom to modify your content with animation drawing. However, it is a subscription-based service.
05Vyond Whiteboard Animation
Vyond whiteboard animation provides you with in-house whiteboard animated video production solutions for educational, professional, or training purposes.
06Animaker Whiteboard Animation
This is another free whiteboard animation software used to make videos quickly with various functions. It includes a free-to-use option and a full video length that is enough. It supports a few props, characters, infographic icons, animated maps, charts, etc.
07Rawshorts Whiteboard Animation
This simple, easy-to-use whiteboard animation comes with an explainer video with a drag-and-drop interface. You can either start from nothing or choose between the animated whiteboard templates. Rendering and sharing the animated video in this software is super easy and comes with a Facebook, YouTube, and other social media platform integration. Anyone can use whether you are a beginner or professional, creating videos to show your client, training videos, and marketing videos that help demonstrate a strategy.
08Videojeeves Whiteboard Animation
This software has many whiteboard animation options, whether you are open to sharing something with your friends or creating a whiteboard animation for work. It helps to make your job easier and faster.
09Truscribe Whiteboard Animation
This premier software offers customers a dedicated plan when they are whiteboard animation videos can be created. With this software, the process can start when customers request a quote on their website, giving them more reliable information about the pricing and strategy.
● Key Takeaways from This Episode →
● Basic functionality of Benime Whiteboard Animation software.
● How to create whiteboard animation with Benime.
● Whiteboard animation on PC with Filmora and some other relevant software.
Also read:
- Updated 10 Popular Cartoon Characters That You Wont Want to Miss for 2024
- In 2024, How to Cartoonize Photo Photoshop in Simple Steps
- New Ways to Stop Animation From Looping in Unity
- 2024 Approved A Beginners Guide to Tell You What 3D Animation Is
- Updated In 2024, The Secret Sauce for Making GIF Instagram Story More Aesthetic
- Updated 15 Best Stop Motion Animation Kits to Fuel Creativity
- New 5 Must Try Ways to Add GIF in Text Message on Android for 2024
- Updated Can I Still Do Animated Logo Design Without Design Skills, In 2024
- Updated Adobe Animate Riggings Tutorial for You for 2024
- 2024 Approved 10 Photoshop Cartoon Effects For Creatives
- New Christmas Is Coming! How to Find & Make Animated Christmas GIFs for 2024
- In 2024, How to Create Picsart Cartoon in Simple Ways
- In 2024, Is It That Easy to Make My Animated Character
- Top 8 Tools Tell You How to Make Slideshows for Instagram for 2024
- Updated How to Make a Video a Live Photo for 2024
- New In 2024, Best 12 Illusion Gifs Top Picks
- Updated 5 Foolproof Amazing Anime Text to Speech Tips for Makers
- Little Known Techniques of Motion Graphics in Premiere Pro
- 2024 Approved Samples of Cartoon Character Face
- New In 2024, Tips for Animated Collage Maker
- 2024 Approved Ready to Animate Game Character From Scratch?
- New Top 10 Best and Fast Ways to Turn Image Into Gif
- Updated In 2024, How to Combine Multiple GIFs Into One with GIF Combiner
- Updated In 2024, Make Well Done Animated GIF
- How to Create Benime Whiteboard Animation on Android for 2024
- Updated The 15 Most Efficient Photo to Cartoon Apps for Android for 2024
- New In 2024, 5 Websites with Animated Logos That Can Catch Your Eyes
- In 2024, 10 Cartoon Character Makers to Create Animated Characters
- New In 2024, Tips on How to Get Awesome Background for Slideshow in PowerPoint
- 2024 Approved The Best 10 Sketch Animation Video Makers
- New How to Create Picsart Cartoon in Simple Ways
- How To Bypass FRP on Motorola Edge 40 Pro
- In 2024, Hassle-Free Ways to Remove FRP Lock from Motorola Moto G73 5G Phones with/without a PC
- Android Screen Stuck General Xiaomi Civi 3 Disney 100th Anniversary Edition Partly Screen Unresponsive | Dr.fone
- In 2024, FRP Hijacker by Hagard Download and Bypass your Vivo T2 5G FRP Locks
- Full Guide to Hard Reset Your Xiaomi Redmi K70E | Dr.fone
- How to Reset a Infinix Hot 40 Phone that is Locked?
- How to Hard Reset Xiaomi 14 Pro Without Password | Dr.fone
- In 2024, How to Reset your Samsung Galaxy M14 5G Lock Screen Password
- In 2024, How to Transfer Contacts from Vivo Y36i to Other Android Devices Devices? | Dr.fone
- Easy Fixes How To Recover Forgotten iCloud Password On your iPhone 15 Pro
- Easy steps to recover deleted videos from Itel P40
- Change Location on Yik Yak For your Motorola G54 5G to Enjoy More Fun | Dr.fone
- Does Airplane Mode Turn off GPS Location On Nokia G310? | Dr.fone
- What Legendaries Are In Pokemon Platinum On Apple iPhone X? | Dr.fone
- Best Pokemons for PVP Matches in Pokemon Go For Sony Xperia 10 V | Dr.fone
- In 2024, Is pgsharp legal when you are playing pokemon On Apple iPhone 12 Pro Max? | Dr.fone
- How to Spy on Text Messages from Computer & Oppo K11 5G | Dr.fone
- Hassle-Free Ways to Remove FRP Lock from Nokia G22 Phones with/without a PC
- Disable screen lock on Y27 4G
- How to Unlock Motorola Edge 2023 Phone without Google Account?
- How to use Snapchat Location Spoofer to Protect Your Privacy On Apple iPhone 14 Pro Max? | Dr.fone
- In 2024, Dose Life360 Notify Me When Someone Checks My Location On Oppo A2? | Dr.fone
- In 2024, Tips and Tricks for Apple ID Locked Issue On Apple iPhone 6 Plus
- In 2024, Is GSM Flasher ADB Legit? Full Review To Bypass Your Itel P55TFRP Lock
- In 2024, Troubleshooting Error Connecting to the Apple ID Server On Apple iPhone 14
- How to Repair corrupt MP4 and AVI files of Infinix Hot 30i with Video Repair Utility on Mac?
- 2024 Approved A Guide on Starting Private Live Streams on YouTube
- Title: In 2024, Guide on Creating GIF in WhatsApp iPhone
- Author: Elon
- Created at : 2024-05-19 03:04:50
- Updated at : 2024-05-20 03:04:50
- Link: https://animation-videos.techidaily.com/in-2024-guide-on-creating-gif-in-whatsapp-iphone/
- License: This work is licensed under CC BY-NC-SA 4.0.
