

In 2024, Have You Seen the Facebook Cartoon App Everyones Using Recently
Have You Seen the Facebook Cartoon App Everyone’s Using Recently
Have You Seen the Facebook Cartoon App Everyone’s Using Lately
An easy yet powerful editor
Numerous effects to choose from
Detailed tutorials provided by the official channel
Facebook cartooning has lately gained momentum in the realm of social media entertainment. Level up your graphic skills with the most recent cartoon app for Facebook!
In this article
01 [How to Make a Facebook Avatar](#Part 1)
02 [Facebook: How to Do the Cartoon Filter Challenge](#Part 2)
Part 1 How to Make a Facebook Avatar
Cartooning and caricature drawing has earned an ultimate preference of graphic designers since times as old as the retro cartoon strips to the modern day digitally created caricaturized avatars, which have by now imbibed usage credibility within almost any and every sector, regardless of the central theme of pr productivity.
Owing to their highly expressive avatars and the inherent ability to transmit information via a characteristic fun element, these have become potential sources of information sharing and entertainment. When it comes to social media, these graphic masterpieces become more vibrant and exportable. Talking of the current trends, caricature avatars on the Facebook cartoon app have created a buzz among the users of the app.
This one is a recently launched feature of Facebook that allows you to cartoonize your real time image with a diversity of customization options. Diving into the creation pool, see through the following section to learn the knowhow of creating amazing caricature avatars using the Facebook app:
User’s Guide to Create a Facebook Avatar
Step 1: You Need the Facebook Application
As the first step, you will need to download and launch the Facebook app in your preferred Android, Windows or MacOs device.
Step 2: Setting Up the Utility
After a successful launch of the app in your device, navigate to the bottom right corner of Facebook’s welcome interface and tap the ‘Three Lines’ icon.

Step 3: Choosing Your Avatar
As you tap on the icon mentioned in Step 2, a drop down menu appears. Click on the ‘See More’ option in the menu and tap ‘Avatars’ in the list of options that follows.

Step 4: Do as Directed
Once you have selected the ‘Avatar’ feature, a number of prompts will appear sin series, asking you to make selections of your hair style, skin tone and related features for customization. In case you are not able to locate all the options, tap the bar at the top of each option and also below your progressing avatar.


Step 5: Adding Further Details
You can additionally explore your editing creativity by customizing the eye, nose and body shape, eyebrows and outfit of your avatar.


Step 6: Almost There!
When you are satisfied with the look of your avatar, navigate to upper right corner of the app screen and click on the ‘Checkmark’ to finalize your changes. Go for a comparison of the created avatar with your real time photo by clicking on the ‘Selfie’ button beneath your avatar.

Step 7: Share Your Work
The created avatars get automatically saved locally in your device; from you can share and export them to any media sharing platforms, like amplifying your chat comments or sending stickers in different apps with utmost convenience using the ‘Share’ button.


Part 2 Facebook: How to Do the Cartoon Filter Challenge
Now that you are accustomed to the fun and excitement of creating cartoonized avatars on the cartoon app on Facebook, it would be an absolute merry to try hands on taking up the trending Facebook Cartoon Filter Challenge, which is the current buzz on social media. Let us enter into the challenge with the quick and easy process discussed in the following section:
Steps to Take Up the Cartoon Filter Challenge
Step 1: Download the Required Application
Begin with downloading the Voila AI Artist Cartoon Photo application to your system by visiting the latter’s official website.
Step 2: Launch the Application
Post a successful installation, launch the app in your system and tap ‘3D Cartoon’ in the latter’s opening interface.
Step 3: Grant App Permissions
You will now be asked to grant certain access permissions by the app to use your device media. Grant the same by tapping the ‘Allow Access’ option, followed by clicking on ‘Select Photos’.
Step 4: Make Your Selection
Browse your device gallery to choose a desired photo for cartoonizing.
Step 5: View the Transformation
When you are done with selecting and uploading the photo, tap on the same to let the app transform your selection to a caricature image grid.
Step 6: Save Your Avatar
Once the conversion process is over, navigate to the ’Arrow’ in the right corner of the screen to save your caricature image in your device gallery.
Step 7: Ready to Export
Saving your work permits you to export and share your creation on Facebook.
Filmora Cartoon Creator
Creating cartoonized images is already an absolute fun, which gets further leveled up when you pick the Wondershare Filmora Video Editor Cartoon Creator to work on caricature avatars. This one is an excellent choice to adhere to the purpose of making and customizing cartoonized versions of real time photos. Launched by Wondershare, the Filmora app is known to not only create, but also texturise and beautify your cartoon avatars with its extensive effects library in almost no time.
For Win 7 or later (64-bit)
For macOS 10.12 or later
● Ending Thoughts →
● Facebook has recently introduced a new cartoon avatar feature that creates cartoonized versions of your real-time photos.
● You can take part in the Cartoon Filter Challenge on Facebook to create and share amazing cartoon images.
● You can alternatively depend on the Filmora Cartoon Creator app to create and customize cartoon avatars within a blink.
Facebook cartooning has lately gained momentum in the realm of social media entertainment. Level up your graphic skills with the most recent cartoon app for Facebook!
In this article
01 [How to Make a Facebook Avatar](#Part 1)
02 [Facebook: How to Do the Cartoon Filter Challenge](#Part 2)
Part 1 How to Make a Facebook Avatar
Cartooning and caricature drawing has earned an ultimate preference of graphic designers since times as old as the retro cartoon strips to the modern day digitally created caricaturized avatars, which have by now imbibed usage credibility within almost any and every sector, regardless of the central theme of pr productivity.
Owing to their highly expressive avatars and the inherent ability to transmit information via a characteristic fun element, these have become potential sources of information sharing and entertainment. When it comes to social media, these graphic masterpieces become more vibrant and exportable. Talking of the current trends, caricature avatars on the Facebook cartoon app have created a buzz among the users of the app.
This one is a recently launched feature of Facebook that allows you to cartoonize your real time image with a diversity of customization options. Diving into the creation pool, see through the following section to learn the knowhow of creating amazing caricature avatars using the Facebook app:
User’s Guide to Create a Facebook Avatar
Step 1: You Need the Facebook Application
As the first step, you will need to download and launch the Facebook app in your preferred Android, Windows or MacOs device.
Step 2: Setting Up the Utility
After a successful launch of the app in your device, navigate to the bottom right corner of Facebook’s welcome interface and tap the ‘Three Lines’ icon.
Step 3: Choosing Your Avatar
As you tap on the icon mentioned in Step 2, a drop down menu appears. Click on the ‘See More’ option in the menu and tap ‘Avatars’ in the list of options that follows.
Step 4: Do as Directed
Once you have selected the ‘Avatar’ feature, a number of prompts will appear sin series, asking you to make selections of your hair style, skin tone and related features for customization. In case you are not able to locate all the options, tap the bar at the top of each option and also below your progressing avatar.
Step 5: Adding Further Details
You can additionally explore your editing creativity by customizing the eye, nose and body shape, eyebrows and outfit of your avatar.
Step 6: Almost There!
When you are satisfied with the look of your avatar, navigate to upper right corner of the app screen and click on the ‘Checkmark’ to finalize your changes. Go for a comparison of the created avatar with your real time photo by clicking on the ‘Selfie’ button beneath your avatar.
Step 7: Share Your Work
The created avatars get automatically saved locally in your device; from you can share and export them to any media sharing platforms, like amplifying your chat comments or sending stickers in different apps with utmost convenience using the ‘Share’ button.
Part 2 Facebook: How to Do the Cartoon Filter Challenge
Now that you are accustomed to the fun and excitement of creating cartoonized avatars on the cartoon app on Facebook, it would be an absolute merry to try hands on taking up the trending Facebook Cartoon Filter Challenge, which is the current buzz on social media. Let us enter into the challenge with the quick and easy process discussed in the following section:
Steps to Take Up the Cartoon Filter Challenge
Step 1: Download the Required Application
Begin with downloading the Voila AI Artist Cartoon Photo application to your system by visiting the latter’s official website.
Step 2: Launch the Application
Post a successful installation, launch the app in your system and tap ‘3D Cartoon’ in the latter’s opening interface.
Step 3: Grant App Permissions
You will now be asked to grant certain access permissions by the app to use your device media. Grant the same by tapping the ‘Allow Access’ option, followed by clicking on ‘Select Photos’.
Step 4: Make Your Selection
Browse your device gallery to choose a desired photo for cartoonizing.
Step 5: View the Transformation
When you are done with selecting and uploading the photo, tap on the same to let the app transform your selection to a caricature image grid.
Step 6: Save Your Avatar
Once the conversion process is over, navigate to the ’Arrow’ in the right corner of the screen to save your caricature image in your device gallery.
Step 7: Ready to Export
Saving your work permits you to export and share your creation on Facebook.
Filmora Cartoon Creator
Creating cartoonized images is already an absolute fun, which gets further leveled up when you pick the Wondershare Filmora Video Editor Cartoon Creator to work on caricature avatars. This one is an excellent choice to adhere to the purpose of making and customizing cartoonized versions of real time photos. Launched by Wondershare, the Filmora app is known to not only create, but also texturise and beautify your cartoon avatars with its extensive effects library in almost no time.
For Win 7 or later (64-bit)
For macOS 10.12 or later
● Ending Thoughts →
● Facebook has recently introduced a new cartoon avatar feature that creates cartoonized versions of your real-time photos.
● You can take part in the Cartoon Filter Challenge on Facebook to create and share amazing cartoon images.
● You can alternatively depend on the Filmora Cartoon Creator app to create and customize cartoon avatars within a blink.
Animate Pictures in Canva
Versatile Video Editor - Wondershare Filmora
An easy yet powerful editor
Numerous effects to choose from
Detailed tutorials provided by the official channel
With the rapid rise of social media worldwide, animated posts (like GIFs) are becoming famous. They have become a replacement to other modes like JPEG and .Png
Famous designing tools like Canva introduced an animation feature in the light of its popularity. The feature allows you to step up your social media game and creates animated visuals in a blink! It is also efficient for both professional and amateur users.
Besides social media content, Canva is also useful to design birthday cards, event invites, inspirational quotes, and more! Let’s learn about how to animate pictures in Canva in detail.
In this article
01 What Canva Pictures Can Be Used For?
02 How to Animate Pictures in Canva?
03 Tips: Animate Pictures In Video
Part 1: What Canva Pictures Can Be Used For?
Be it for marketing campaigns or projects, Canva is the best tool for all designing work. It is a foolproof platform where you do not need prior designing experience. Canva is useful for

Social media/Instagram Posts: You can build your Instagram presence by creating posts through Canva. It has multiple templates and features to make alluring Instagram posts. It also has drag-and-drop free images to add customized designs to the template.
Facebook Covers: You can make Facebook covers on Canva by choosing a layout and adding other elements. You can include colors, fonts, and pictures on the cover. Canva has templates for all themes, moods, and styles!
Event Invites: Canva has hundreds of free layouts and libraries to create event invites. You can choose the appropriate template and incorporate party-oriented photos, icons, stickers, illustrations, and graphics. It also has a personalizing option to add personal pictures and artwork in the editor.
Inspirational Quotes: Canva allows you to curate inspirational quotes and dispense motivation in people. It has templates to modify the elements like font size, text size, borders, images, and more!
Collages: It helps create a collage where you can combine multiple pictures in one frame. Canva offers various grids with a capacity of 12 pictures and different sizes.
Part 2: How to Animate Pictures in Canva?
Canva helps you add instant animation in presentations, social media posts, and more. To know how to animate images in Canva, follow the below steps:

Step 1: Add Static Elements
Start by creating an image through static elements. To make the design attractive, you can add sample texts, illustrations, doodles, and other entities.
Try to stimulate your creativity and come up with a layout beforehand. If possible, sketch on paper and replicate the same.
Step 2: Animate Your Design
Take a final glance at the layout. Make sure it’s perfect. Once all the elements are placed as per your design, it’s time to animate them. For that:
- Click on the white background page
- Go to the “Toolbar” section
- Select the “Animate” button
Step 3: Select Page Animation Style
Canva offers six animation styles, where five are for free users, and one is for pro users. To access the five animation styles, follow these steps.
- Press the “Animate” Button
- Select “Page Animations”
- There you will find options like Block, Pan, Fade, Rise, and Tumble
- Select the style as per your design
Step 4: Preview and Download
After selecting a page animation style, it will preview the effect. If you find it good, move on to downloading the GIF. Here’s how to do so
- Go to the “Toolbar” option (present on your upper right hand)
- Choose GIF as the file type
- Check the page number and verify if it’s correct
- Press the “Done” button
Step 5: Final GIF
After clicking on the “Done” button, your GIF will be downloaded. You will be able to see a display for five seconds. If you want to edit the image after this, click on the time button (near the “Animate” button).
So, that was all about how to animate a photo in Canva.
Drawbacks of Canva
Despite efficient features and easy interface, there are certain areas where Canva lacks. This includes
- It does not have any local file storage.
- As too many people use Canva, your template may look the same as others.
- Some of its best features are not free to access.
- The mobile app version lacks certain elements and features.
Out of all these drawbacks, repetitions of templates are a big issue. That’s because everyone wants their posts to look unique and irreplaceable. However, common Canva templates may prevent that from happening.
Fortunately, there are ways to combat such issues. Let’s learn about them in the next section.
Tips: Animate Pictures In Video
You can also animate pictures in the video to make them more lively. For that, you can use Wondershare Filmora Pro Video Editor. It’s also efficient if you don’t know how to animate a picture in Canva:
Wondershare Filmora Video Editor
Filmora by Wondershare is a video editing software that helps you build custom animations easily. It has auto features to make epic stories and posts.
Wondershare Filmora
Get started easily with Filmora’s powerful performance, intuitive interface, and countless effects!
Try It Free Try It Free Try It Free Learn More about Filmora>

Its drag and drop effect makes designing simple and quick. Due to its outstanding attributes, options, and styles, Filmora has 77+ million happy users!
It’s a power-packed integration of functionality, performance, and more! In fact, it resolves the repeated template issue of Canva. The software has top-notch functions and innovative filters that add authenticity to the designs.
Till now, you learned about how to animate a picture on Canva. Now, let’s comprehend the right way to use Filmora for animating and adding images in the video.
Before using, make sure to update the software to its latest version. Follow separate methods for both Windows and Mac.
For Win
Step 1: Adding Image to Video Track
With Filmora, adding images to video is a matter of seconds! Start by:
- Identify the position where you want to add the image and place the Playhead there.
- Right-click on the picture from the media library. Click on the “Insert” option. Your image will be added. Select the “Append” option, if you want to add an image at the video end.

Note: How to Remove Black Bars around the Image?
- Go to “Settings” from the File section.
- Click on the “Editing” tab and select “Photo Placement.”
- Choose from the “Crop to Fit” or “Pan To Zoom” option. The black bars will be removed.
To add the image in between the video clip, split them. Now, add the image between the split parts.
Step 2: Add Images as Overlays
To add images as overlays, drag the image to a video track above the main track. The main track consists of your video.
Track 1 (or the track with a video clip) is the base of your video. If you add anything else, it will be displayed above this track as video track 2, 3, and so on. Overall, you can add 100 video tracks.
Step 3: Edit Your Image
If you know how to animate an image in Canva, editing images on Filmora is even easier. You can try the following methods:
Animate Your Images
- To add animation presets to the image, click on the image twice.
- Go to the “Animation Tab” and look for an animation preset.
- Drag the presets to the image for its effect

Make Image Color Adjustments
- Double-click on the image
- Go to the “Color” tab and then the “Color” section
- Customize the temperature, saturation, brightness, etc., as per your need.
- Press Ok.
Change Image Duration
You can increase the image duration to more than the default timing of 5 seconds. For that:
- Click on the image and select the “Duration” option.
- Go to the “Duration Setting” panel.
- Add the new duration timing.

Adjust Position, Rotate/Flip, and Opacity
- You can resize the image position through the circles and squares at the image edges.
- To flip or rotate the image, double-click on the picture. From the “Image Panel,” go to “Transform” and then click on “Rotate.” You can choose either “Horizontal Flip” or “Vertical Flip” to flip the images.
- Double-click on the image and click on the “Composting” option to add opacity. You can choose the blending mode or adjust the “Opacity” accordingly.

For Mac
Filmora for Mac comes with a drag and drop feature to add transitions, animated titles, and effects. You can start a new project from scratch by clicking on “New Project”. The entire process is the same as that for Windows users.
To apply animation in the images, use the motion effects option. For that,
- Click on the Image
- Go to Motion Tab
- Select a motion effect
- Double-click to apply the effect

Conclusion
So that’s how to animate photos in Canva. Hopefully, our steps will help you revamp your posts like a pro! If not Canva, you can use its alternative Filmora. It’s equally prominent, user-friendly, and feature-rich.
Versatile Video Editor - Wondershare Filmora
An easy yet powerful editor
Numerous effects to choose from
Detailed tutorials provided by the official channel
With the rapid rise of social media worldwide, animated posts (like GIFs) are becoming famous. They have become a replacement to other modes like JPEG and .Png
Famous designing tools like Canva introduced an animation feature in the light of its popularity. The feature allows you to step up your social media game and creates animated visuals in a blink! It is also efficient for both professional and amateur users.
Besides social media content, Canva is also useful to design birthday cards, event invites, inspirational quotes, and more! Let’s learn about how to animate pictures in Canva in detail.
In this article
01 What Canva Pictures Can Be Used For?
02 How to Animate Pictures in Canva?
03 Tips: Animate Pictures In Video
Part 1: What Canva Pictures Can Be Used For?
Be it for marketing campaigns or projects, Canva is the best tool for all designing work. It is a foolproof platform where you do not need prior designing experience. Canva is useful for
Social media/Instagram Posts: You can build your Instagram presence by creating posts through Canva. It has multiple templates and features to make alluring Instagram posts. It also has drag-and-drop free images to add customized designs to the template.
Facebook Covers: You can make Facebook covers on Canva by choosing a layout and adding other elements. You can include colors, fonts, and pictures on the cover. Canva has templates for all themes, moods, and styles!
Event Invites: Canva has hundreds of free layouts and libraries to create event invites. You can choose the appropriate template and incorporate party-oriented photos, icons, stickers, illustrations, and graphics. It also has a personalizing option to add personal pictures and artwork in the editor.
Inspirational Quotes: Canva allows you to curate inspirational quotes and dispense motivation in people. It has templates to modify the elements like font size, text size, borders, images, and more!
Collages: It helps create a collage where you can combine multiple pictures in one frame. Canva offers various grids with a capacity of 12 pictures and different sizes.
Part 2: How to Animate Pictures in Canva?
Canva helps you add instant animation in presentations, social media posts, and more. To know how to animate images in Canva, follow the below steps:
Step 1: Add Static Elements
Start by creating an image through static elements. To make the design attractive, you can add sample texts, illustrations, doodles, and other entities.
Try to stimulate your creativity and come up with a layout beforehand. If possible, sketch on paper and replicate the same.
Step 2: Animate Your Design
Take a final glance at the layout. Make sure it’s perfect. Once all the elements are placed as per your design, it’s time to animate them. For that:
- Click on the white background page
- Go to the “Toolbar” section
- Select the “Animate” button
Step 3: Select Page Animation Style
Canva offers six animation styles, where five are for free users, and one is for pro users. To access the five animation styles, follow these steps.
- Press the “Animate” Button
- Select “Page Animations”
- There you will find options like Block, Pan, Fade, Rise, and Tumble
- Select the style as per your design
Step 4: Preview and Download
After selecting a page animation style, it will preview the effect. If you find it good, move on to downloading the GIF. Here’s how to do so
- Go to the “Toolbar” option (present on your upper right hand)
- Choose GIF as the file type
- Check the page number and verify if it’s correct
- Press the “Done” button
Step 5: Final GIF
After clicking on the “Done” button, your GIF will be downloaded. You will be able to see a display for five seconds. If you want to edit the image after this, click on the time button (near the “Animate” button).
So, that was all about how to animate a photo in Canva.
Drawbacks of Canva
Despite efficient features and easy interface, there are certain areas where Canva lacks. This includes
- It does not have any local file storage.
- As too many people use Canva, your template may look the same as others.
- Some of its best features are not free to access.
- The mobile app version lacks certain elements and features.
Out of all these drawbacks, repetitions of templates are a big issue. That’s because everyone wants their posts to look unique and irreplaceable. However, common Canva templates may prevent that from happening.
Fortunately, there are ways to combat such issues. Let’s learn about them in the next section.
Tips: Animate Pictures In Video
You can also animate pictures in the video to make them more lively. For that, you can use Wondershare Filmora Pro Video Editor. It’s also efficient if you don’t know how to animate a picture in Canva:
Wondershare Filmora Video Editor
Filmora by Wondershare is a video editing software that helps you build custom animations easily. It has auto features to make epic stories and posts.
Wondershare Filmora
Get started easily with Filmora’s powerful performance, intuitive interface, and countless effects!
Try It Free Try It Free Try It Free Learn More about Filmora>
Its drag and drop effect makes designing simple and quick. Due to its outstanding attributes, options, and styles, Filmora has 77+ million happy users!
It’s a power-packed integration of functionality, performance, and more! In fact, it resolves the repeated template issue of Canva. The software has top-notch functions and innovative filters that add authenticity to the designs.
Till now, you learned about how to animate a picture on Canva. Now, let’s comprehend the right way to use Filmora for animating and adding images in the video.
Before using, make sure to update the software to its latest version. Follow separate methods for both Windows and Mac.
For Win
Step 1: Adding Image to Video Track
With Filmora, adding images to video is a matter of seconds! Start by:
- Identify the position where you want to add the image and place the Playhead there.
- Right-click on the picture from the media library. Click on the “Insert” option. Your image will be added. Select the “Append” option, if you want to add an image at the video end.
Note: How to Remove Black Bars around the Image?
- Go to “Settings” from the File section.
- Click on the “Editing” tab and select “Photo Placement.”
- Choose from the “Crop to Fit” or “Pan To Zoom” option. The black bars will be removed.
To add the image in between the video clip, split them. Now, add the image between the split parts.
Step 2: Add Images as Overlays
To add images as overlays, drag the image to a video track above the main track. The main track consists of your video.
Track 1 (or the track with a video clip) is the base of your video. If you add anything else, it will be displayed above this track as video track 2, 3, and so on. Overall, you can add 100 video tracks.
Step 3: Edit Your Image
If you know how to animate an image in Canva, editing images on Filmora is even easier. You can try the following methods:
Animate Your Images
- To add animation presets to the image, click on the image twice.
- Go to the “Animation Tab” and look for an animation preset.
- Drag the presets to the image for its effect
Make Image Color Adjustments
- Double-click on the image
- Go to the “Color” tab and then the “Color” section
- Customize the temperature, saturation, brightness, etc., as per your need.
- Press Ok.
Change Image Duration
You can increase the image duration to more than the default timing of 5 seconds. For that:
- Click on the image and select the “Duration” option.
- Go to the “Duration Setting” panel.
- Add the new duration timing.
Adjust Position, Rotate/Flip, and Opacity
- You can resize the image position through the circles and squares at the image edges.
- To flip or rotate the image, double-click on the picture. From the “Image Panel,” go to “Transform” and then click on “Rotate.” You can choose either “Horizontal Flip” or “Vertical Flip” to flip the images.
- Double-click on the image and click on the “Composting” option to add opacity. You can choose the blending mode or adjust the “Opacity” accordingly.
For Mac
Filmora for Mac comes with a drag and drop feature to add transitions, animated titles, and effects. You can start a new project from scratch by clicking on “New Project”. The entire process is the same as that for Windows users.
To apply animation in the images, use the motion effects option. For that,
- Click on the Image
- Go to Motion Tab
- Select a motion effect
- Double-click to apply the effect
Conclusion
So that’s how to animate photos in Canva. Hopefully, our steps will help you revamp your posts like a pro! If not Canva, you can use its alternative Filmora. It’s equally prominent, user-friendly, and feature-rich.
Versatile Video Editor - Wondershare Filmora
An easy yet powerful editor
Numerous effects to choose from
Detailed tutorials provided by the official channel
Top 12 Illusion Gifs: Top Picks
Best 12 Illusion Gifs: Top Picks
An easy yet powerful editor
Numerous effects to choose from
Detailed tutorials provided by the official channel
Do you know that these are reaching heights and people are very happy in sharing them? If you are unaware of it, don’t worry and keep reading. Thorugh today’s post, we will discuss illusion GIF in detail yo make it easy for you to make up your mind and try your hands on it.
In this article
01 [What Is GIF Illustration?](#Part 1)
02 [Best 12 Illusion Gifs](#Part 2)
Part 1 What Is GIF Illustration?
GIFs are a form of digital media that is used to show animations and other types of visuals. It is a type of file format that can be created with different editing software. These are usually used for short videos or images on the internet and social media.
Furthermore, GIFs are an excellent way to create visual content for social media posts or as an animated overlay on a video.
These are now used as everything from advertisements to commentary from all walks of life. The users of GIFs seem to be endless! They can be used in many different ways, such as to add visual interest, provide context or even humor, and so on. It is totally on the user how they are considering it to make the things more relevant to the context for which they have created or shared the GIF.
Part 2 Best 12 Illusion Gifs
This curated list will help you to know the best Illusion GIF that is still ruling out the market. This includes:-
01Van Gogh Stare GIF
The Van Gogh Stare, also known as the “dazzle camouflage,” is an optical illusion created by artist Vincent van Gogh. It was likely intended to represent the eye’s instability and movement. The image has been used in a variety of ways, including on social media sites like Tumblr. In general, this GIF illusion is a demonstration of the Van Gogh Stare.
02This brain-busting rotation
We are all used to seeing the world around us in two dimensions. But what if we could see it in three dimensions? Well, now you can! This GIF shows a rotating 3D object that appears to be made of cubes. The illusion is created by the fact that the camera rotates around the object, but you can’t see it from every angle.
03This loop tea GIF
This GIF illusion is a perfect example of how our brain works. When we see something that doesn’t make sense, we try to make sense of it by filling in the gaps with what we believe it should look like. The GIF illusion consists of two frames. The first frame shows a woman drinking tea from a cup, and the second frame shows her drinking from an empty cup. When our brain tries to fill in the gaps, it assumes that the woman drank all of the tea and sees her as drinking from an empty cup even though she is actually drinking from a full one.
04No smkoing! Well, you should never
The GIF illusion consists of two images: one of a cloud and another of cauliflower. The animation starts with the cloud and then switches to the cauliflower. But if you take a closer look, you’ll notice that there’s actually no smoke in the first image, just the cauliflower. And it’s not really a head either - it’s just an ordinary cauliflower from behind.
The reason why this illusion works is that our brains are wired to see patterns and shapes in things that aren’t always there - for example, when we see faces in random objects or shapes in clouds. This GIF takes advantage of that by showing two images where these are
05The never-ending corridor
The GIF illusion is a rather simple illusion that takes advantage of the way our brains perceive motion. Our brains are programmed to see a moving object as a single object in order to make sense of the world around us. This means that when we see an object moving, we perceive it as one solid thing instead of many separate objects.
This GIF illusion is a perfect example of how the human brain works. The brain can’t process that the two images are different, and instead, it sees them as a single image.
06Now, this, the eye-pleaser
The illusion works on the principle of depth perception and how our eyes are not able to accurately process all of the information that they receive from our surroundings. The black lines on the white background make it seem like there are two rows of lines, but there’s only one row that appears to be moving back and forth.
07Commercial At design GIF
The GIF illusion is a simple design that tricks the brain into thinking that it is 3D. The design consists of two circles, one inside the other, with three arrows pointing inwards. The outside circle has a white background and the inside circle has a black background. When you look at this design from different angles, you will see that the arrows point outwards and not inwards as they should be doing.
08Wait what? Is this truly a reflection?
This illusion works because our brain recognizes that the mirror image is not what’s really happening and flips the image in our head to make it right-side up.
It’s also possible that we are tricked by the fact that we know mirrors flip images, so when we see an upside-down image in front of us, we automatically assume it’s just inverted.
09This haunting tableau (Not exactly a GIF but worth sharing)
The GIF illusion is a type of optical illusion that can be explained by the Gestalt Principles. The Gestalt Principles are guidelines for how we perceive and organize visual information. This optical illusion is created by overlapping two similar images on top of each other in the same place but with different colors. Our brain perceives this as a single image, and our eyes try to make sense of it by looking for visual cues in the image. When we focus on one image, it looks like a triangle with a red line going through it. But when we focus on the other image, it looks like an arrow pointing up that has been cut in half with a red line through it.
10This safety hazard
This GIF illusion is a safety hazard because it tricks the brain into thinking that the person in front of them is standing still. When you stare at this GIF for too long, the person will appear to be moving backward. This illusion can cause accidents if you believe that a person is still when they are actually approaching you.
11Welcome to the 3d World
It’s an illusion created by the use of perspective. The camera is positioned in such a way that it appears that the three-dimensional cube is only two-dimensional.
The camera is positioned in such a way that it appears that the three-dimensional cube is only two-dimensional.
12I will keep this table forever
The GIF illusion is an optical illusion that makes the table in the background appear to be bigger than it actually is. The table in front of the window appears to be smaller and closer to the viewer. There are two factors that make this illusion happen. One of them is perspective, which makes objects appear larger as they get closer and smaller as they get farther away. The other factor is size constancy, which makes objects look about the same size regardless of how far away they are from you.
Part 3 How Do You Make a GIF Illustration?
If you are someone who is curious to make a GIF illustration but have no clue how to make it, then the online portals are catering to all your needs. Right now, there are multiple tools available that will help you to create the illustration seamlessly. Among all of them, we suggest you try your hands on Filmora.
Wondershare Filmora Video Editor is one of the best tools available to make the gift illustration as you want. You just need to upload the content, and then you are all set to edit it at your convenience. The best part is the interface of the tool is very simple to understand, which simply means there will be no need for you to belong to any technical background to use this tool.

Wondershare Filmora - Best Video Editor for Mac/Windows
5,481,435 people have downloaded it.
Build unique custom animations without breaking a sweat.
Focus on creating epic stories and leave the details to Filmora’s auto features.
Start a creative adventure with drag & drop effects and endless possibilities.
Filmora simplifies advanced features to save you time and effort.
Filmora cuts out repetition so you can move on to your next creative breakthrough.
Along with creating the GIF files, it also help you to do the editing as you wanted. For example, if you are looking forward to reading on any text to the GIF file, you can also do it seamlessly. The interface will help you to understand how you can do it so that there will be no problem in creating the content as you want.
● Key Takeaways from This Episode →
● Filmora is the best tool to create illusion GIF.
●Illusion GIF are in use for advertisement.
●Creating illusion GIF is just a matter of few steps.
Do you know that these are reaching heights and people are very happy in sharing them? If you are unaware of it, don’t worry and keep reading. Thorugh today’s post, we will discuss illusion GIF in detail yo make it easy for you to make up your mind and try your hands on it.
In this article
01 [What Is GIF Illustration?](#Part 1)
02 [Best 12 Illusion Gifs](#Part 2)
Part 1 What Is GIF Illustration?
GIFs are a form of digital media that is used to show animations and other types of visuals. It is a type of file format that can be created with different editing software. These are usually used for short videos or images on the internet and social media.
Furthermore, GIFs are an excellent way to create visual content for social media posts or as an animated overlay on a video.
These are now used as everything from advertisements to commentary from all walks of life. The users of GIFs seem to be endless! They can be used in many different ways, such as to add visual interest, provide context or even humor, and so on. It is totally on the user how they are considering it to make the things more relevant to the context for which they have created or shared the GIF.
Part 2 Best 12 Illusion Gifs
This curated list will help you to know the best Illusion GIF that is still ruling out the market. This includes:-
01Van Gogh Stare GIF
The Van Gogh Stare, also known as the “dazzle camouflage,” is an optical illusion created by artist Vincent van Gogh. It was likely intended to represent the eye’s instability and movement. The image has been used in a variety of ways, including on social media sites like Tumblr. In general, this GIF illusion is a demonstration of the Van Gogh Stare.
02This brain-busting rotation
We are all used to seeing the world around us in two dimensions. But what if we could see it in three dimensions? Well, now you can! This GIF shows a rotating 3D object that appears to be made of cubes. The illusion is created by the fact that the camera rotates around the object, but you can’t see it from every angle.
03This loop tea GIF
This GIF illusion is a perfect example of how our brain works. When we see something that doesn’t make sense, we try to make sense of it by filling in the gaps with what we believe it should look like. The GIF illusion consists of two frames. The first frame shows a woman drinking tea from a cup, and the second frame shows her drinking from an empty cup. When our brain tries to fill in the gaps, it assumes that the woman drank all of the tea and sees her as drinking from an empty cup even though she is actually drinking from a full one.
04No smkoing! Well, you should never
The GIF illusion consists of two images: one of a cloud and another of cauliflower. The animation starts with the cloud and then switches to the cauliflower. But if you take a closer look, you’ll notice that there’s actually no smoke in the first image, just the cauliflower. And it’s not really a head either - it’s just an ordinary cauliflower from behind.
The reason why this illusion works is that our brains are wired to see patterns and shapes in things that aren’t always there - for example, when we see faces in random objects or shapes in clouds. This GIF takes advantage of that by showing two images where these are
05The never-ending corridor
The GIF illusion is a rather simple illusion that takes advantage of the way our brains perceive motion. Our brains are programmed to see a moving object as a single object in order to make sense of the world around us. This means that when we see an object moving, we perceive it as one solid thing instead of many separate objects.
This GIF illusion is a perfect example of how the human brain works. The brain can’t process that the two images are different, and instead, it sees them as a single image.
06Now, this, the eye-pleaser
The illusion works on the principle of depth perception and how our eyes are not able to accurately process all of the information that they receive from our surroundings. The black lines on the white background make it seem like there are two rows of lines, but there’s only one row that appears to be moving back and forth.
07Commercial At design GIF
The GIF illusion is a simple design that tricks the brain into thinking that it is 3D. The design consists of two circles, one inside the other, with three arrows pointing inwards. The outside circle has a white background and the inside circle has a black background. When you look at this design from different angles, you will see that the arrows point outwards and not inwards as they should be doing.
08Wait what? Is this truly a reflection?
This illusion works because our brain recognizes that the mirror image is not what’s really happening and flips the image in our head to make it right-side up.
It’s also possible that we are tricked by the fact that we know mirrors flip images, so when we see an upside-down image in front of us, we automatically assume it’s just inverted.
09This haunting tableau (Not exactly a GIF but worth sharing)
The GIF illusion is a type of optical illusion that can be explained by the Gestalt Principles. The Gestalt Principles are guidelines for how we perceive and organize visual information. This optical illusion is created by overlapping two similar images on top of each other in the same place but with different colors. Our brain perceives this as a single image, and our eyes try to make sense of it by looking for visual cues in the image. When we focus on one image, it looks like a triangle with a red line going through it. But when we focus on the other image, it looks like an arrow pointing up that has been cut in half with a red line through it.
10This safety hazard
This GIF illusion is a safety hazard because it tricks the brain into thinking that the person in front of them is standing still. When you stare at this GIF for too long, the person will appear to be moving backward. This illusion can cause accidents if you believe that a person is still when they are actually approaching you.
11Welcome to the 3d World
It’s an illusion created by the use of perspective. The camera is positioned in such a way that it appears that the three-dimensional cube is only two-dimensional.
The camera is positioned in such a way that it appears that the three-dimensional cube is only two-dimensional.
12I will keep this table forever
The GIF illusion is an optical illusion that makes the table in the background appear to be bigger than it actually is. The table in front of the window appears to be smaller and closer to the viewer. There are two factors that make this illusion happen. One of them is perspective, which makes objects appear larger as they get closer and smaller as they get farther away. The other factor is size constancy, which makes objects look about the same size regardless of how far away they are from you.
Part 3 How Do You Make a GIF Illustration?
If you are someone who is curious to make a GIF illustration but have no clue how to make it, then the online portals are catering to all your needs. Right now, there are multiple tools available that will help you to create the illustration seamlessly. Among all of them, we suggest you try your hands on Filmora.
Wondershare Filmora Video Editor is one of the best tools available to make the gift illustration as you want. You just need to upload the content, and then you are all set to edit it at your convenience. The best part is the interface of the tool is very simple to understand, which simply means there will be no need for you to belong to any technical background to use this tool.
Wondershare Filmora - Best Video Editor for Mac/Windows
5,481,435 people have downloaded it.
Build unique custom animations without breaking a sweat.
Focus on creating epic stories and leave the details to Filmora’s auto features.
Start a creative adventure with drag & drop effects and endless possibilities.
Filmora simplifies advanced features to save you time and effort.
Filmora cuts out repetition so you can move on to your next creative breakthrough.
Along with creating the GIF files, it also help you to do the editing as you wanted. For example, if you are looking forward to reading on any text to the GIF file, you can also do it seamlessly. The interface will help you to understand how you can do it so that there will be no problem in creating the content as you want.
● Key Takeaways from This Episode →
● Filmora is the best tool to create illusion GIF.
●Illusion GIF are in use for advertisement.
●Creating illusion GIF is just a matter of few steps.
Before You Learn Facebook Slideshow: 5 Things You Should Know [How-TOS]
Before You Learn Facebook Slideshow Things You Should Know [How-TOS]
An easy yet powerful editor
Numerous effects to choose from
Detailed tutorials provided by the official channel
If you are looking for interesting solutions to create the most amazing slideshow on Facebook, rest assured, you are at the right place to get every help!
In this article
01 [Where Did the Facebook Slideshow Tool Go?](#Part 1)
02 [How to Create a Slideshow on Facebook?](#Part 2)
03 [Top 5 Facebook Slideshow Alternatives](#Part 3)
Part 1 Where Did the Facebook Slideshow Tool Go?
While almost everyone around you must be fascinated about the stunning and appealing slideshows that the Facebook community used to offer its users with, it is evidently sad to realize that the utility has become a story of the past. The creators of the tool have by now, took multiple rounds on removing, retrieving and again removing the utility from the official Facebook website as well as the smartphone application.
It is however relaxing to know that the Facebook developer team has worked efficiently to produce alternatives to the application’s slideshow tool after the latter’s permanent disappearance from the user account pages and app profiles. You can now work with the Facebook Ads Manager or Facebook Creator Studio to sort out the concern of creating slideshow on Facebook.
Part 2 How to Create a Slideshow on Facebook?
Facebook slideshows are incredibly awesome trends of making a concise, expressive and to the point delivery of diverse content varieties. Piping up your information through and extensive assortment of sound, text and motion, these short snippets are no less than a seamless video streaming of the same information.
If you are about to launch a new product for your business enterprise, consider working with the utility to create an elusive Facebook slideshow ad for a quick demonstration of your brand among different social media communities, turning the fun of slideshow creation into a smart and responsive product promotion strategy, without having to bother your wallet for the same.
If you are concerned about the quality of the final output, it is not a cause of worry, since the Facebook slideshow creator tool promises you of an appreciable slideshow result, that takes a quick loading time, is comparable to a high resolution video and works well with all your favourite devices.
Having talked enough on the usage credibility, let us now proceed to adhere to the concern of creating a slideshow on Facebook with a diversity of media files in the following section:
01Facebook Slideshows from Videos
Step 1: Launch the Tool
Start with opening the Facebook app in your device to launch the ‘Facebook Ads Manager’ utility and tap ‘Create’ in the latter’s welcome interface.

Step 2: Select Your Video
Browse through your device’s gallery to choose a desired video for slideshow creation. When you have made your choice, set a 16:9 aspect ratio for the same to avoid square cropping.

Step 3: Upload Your Video
Proceed with uploading your video to the Facebook tool by clicking on the ‘Add Video’ button and watch it getting split into still images frames, from where you can view a seamless slideshow display of the same.

Step 4: Select Multiple Frames
you can now select a series of image frames and arrange them in the correct sequence of appearance by clicking on each one of them to be included within the creator timeline.
Step 5: Add Captions Your Stills
Tap on the small ‘Pencil’ icon within the images to customize them with suitable captions. You can further add style to these image names by making appropriate selections of font, position color of every frame caption. Once you have finished naming all the frames, click on ‘Save’ to apply your changes.
Step 6: Preview Your Creation
When you are satisfied with your work, consider watching a preview of the same to be assured of the perfect placement of everything. To do this, navigate to the ‘Preview Pane’ at the top right corner of the program interface, and tapping the ‘Preview’ button.
02Facebook Slideshows from Images
Step 1: Launch the Tool
To begin with, open the Facebook app in any of your preferred devices and proceed to launch the ‘Facebook Ads Manager’ tool, followed by clicking on the ‘Create Slideshow’ button at the bottom of the tool’s welcome screen.

Step 2: Upload Your Images
As you complete Step 1, a ‘Video Creation Kit’ will appear, where you will need to click within the ‘Create Slideshow’ checkbox, followed by tapping on the ‘Continue’ button at the bottom right corner of the window.

Step 3: Upload Your Images
Clicking on the ‘Continue’ button will take you to the ‘Settings Box’ where you need to tap on the ‘Add Photos’ option. An image selection box will now pop up, allowing you to select and upload a maximum of 10 images from your Facebook account, stock and page galleries or your device collections. Prefer keeping all the photos within the same aspect ratio to escape the extra task of cropping the images.
When you have finished making your selections, navigate to the bottom right corner of the window and hit the ‘Confirm’ button. This will make your selections shows up all together in the ‘Settings Box’, in the sequential order of their appearance in the slideshow. If you want to introduce some changes, delete and re-upload the images.

Step 4: Customize Your Images with Captions
To add suitable captions to the slideshow images, tap the ‘Pencil’ icon within them. You are also allowed to customize the stills with transitions, effects, etc., and make adjustments to the screen time of each image frame.

Part 3 Top 5 Facebook Slideshow Alternatives
Having heard about the disappointment from the exit of the Facebook slideshow creator tool, it becomes naturally important to seek through the affordable alternatives of the same to set straight the issue of how to do a slideshow on Facebook. Working towards the solutions, let us learn about the top 5 most preferred Facebook slideshow alternatives in the following section:
03PowerDirector
One of the most suitable candidates of Facebook slideshow alternatives, PowerDirector easily lands among the highly preferred tools for creating stunning slideshows. Compatible with the MacOs and Windows operating systems, the software lets you create high end, top quality slideshow presentations with a classic and professional outlook.
Talking of the creator program’s most appealing features, this one is an upgraded slideshow creator suite that is capable enough to address your most diverse design requirements, like those of high resolution video effects, Hollywood inspired movies and personal content sharing. The software package is loaded with tons of elusive video effects, themed templates and transition effects to facilitate a compelling creation.
Working with PowerDirector’s exclusive slideshow program, you get the liberty to escape the notch of storyboard and timeline editing and start the creation process in the launch window of the program itself. The extremely user cohesive interface of the software guides you through each creation step via streamlined plug-ins, making the design process quick and super easy even for newbies.

04SmartSHOW 3D
When thinking of how to make a slideshow on facebook, this one is another top rated Facebook slideshow alternatives, that comes with an extensive toolkit to create amazing presentations from video clips and images, while complementing them with a plethora of effects and transitions. Some of the key features of the program include multiple slide layering, animating selected layers and fine tune the transitions with keyframe adjustments.
You can additionally uplift the slides with image masks, shapes, 3D animated texts and other forms of graphic arts. An additively appealing feature of the slideshow creator program is the ability to mix descriptive images with your favorite music to develop stunning masterpieces of entertaining slideshows, which you can conveniently share and enjoy with family and friends on a diversity of social media platforms.
Using the tool, you can work with applying motion graphic effects to still photos without having to be an over the top tech savvy user. The editor library of the tool is loaded with some of the most awesome transition effects, like, wipes, 3D motions, gradients and fade-ins, along with the facility of adding titles, voice comments and captions to the slides of your presentation. The tool is however, exclusively a Windows compatible utility.

05PhotoStage Slideshow Software
Next in the list of alternatives to the Facebook slideshow maker tool is the aforesaid software program, that allows you to create professional quality slideshows with as many videos and images as you can possibly think of and supplement them with a variety of texts, music, voiceovers and effects. You can further work on customizing the slideshow images with making suitable adjustments in color, brightness and saturation parameters.
The software comes with a Quick Create utility, which you can use to instantly create high resolution slideshows and spark them up with zooms, pans and fades, while getting a preview of the same in real-time. You can even proceed to burn your creation into a disk, make an online upload, or simply save it to your device.
Talking of the cost constraints of this amazing slideshow creator tool, you get to work with the software for a commercial use, free of cost for a definite time period and with a restricted number of features. However, you can always consider on buying the paid version of the program to avail an access to the latter’s entire range of features and utilities. The tool works well with all Windows and Mac supported devices.

06Kizoa
Moving ahead in the list you have the Kizoa slideshow maker for Facebook, which is a dependable alternative to the conventional Facebook slideshow creator. Choosing this tool to design your slideshow presentation, you are entitled to the amazing feature of displaying your presentation on almost any screen, including smartphones, television, computers and tablets with getting to choose from 7 types of aspect ratios. The tool is designed to have a Windows and MacOs compatibility.
The application further lets you add the most specific parts of your images within the presentation slides with its smart cropping tool, while keeping an account of the file formats and screen space requirements of the images with utmost convenience. You are also allowed to choose from a storehouse of preset templates to add your desired photos and video clips in the slideshow and entice them with GIFs, effects and texts.
When you are done with the creation process, just attempt to download and save the slideshow in any preferred file format, such as, AVI, GIF, MP4, MOV, MPEG2, etc., or even burn it to a DVD. You are now free to share your slideshow on various online media sharing platforms. Using the free version of Kizoa, you are permitted to create slideshows with a duration of 60 seconds, which can be upgraded to a limitless length with a paid subscription.

07SlideLab
If you are a newbie to the field of creating slideshows, and wondering about how to create a slideshow on Facebook 2021, this one is affordably the most perfect tool you can rely on. Packed with an extensive range of effects, music, transitions and filters, SlideLab is the smartest software choice to create slideshow presentations for family entertainment and personal use.
The tool consists of an in built sharing utility that allows you to design and share slideshows on social media platforms, like YouTube, Facebook and Instagram with a single click. Working on your slideshow within the program, you can escape the cringe of cropping the images, as they are automatically adjusted to the square fit alignment of the app’s working window. You can quickly rearrange the placement of the images in the slideshow as per your preferences.
As far as the sharing credibility of the presentation is concerned, the software grants you the liberty to export your creation in PPTX and PDF file formats, and view them later in Keynote and PowerPoint.
The app shows a convenient workflow with Windows and MacOs devices and limits the image play duration to 3 seconds, along with a permitting a restricted number of transitions and effects in its free version, which you can access by availing a paid subscription of the program.

08Creating Facebook Slideshows With Wondershare Filmora
When browsing through feasible alternatives on how to make a facebook slideshow, the IT market is indeed flooded with a hoard of creation utilities. If you have just begun trying hands at slideshow creation, consider using the Wondershare Filmora Video Editor slideshow maker application for addressing your slideshow design concerns. The extensive, feature rich library of the app lets you create attractive presentation masterpieces with a wide range of special effects, transitions, texts, titles and music tracks.
For Win 7 or later (64-bit)
For macOS 10.12 or later
Working with the Filmora slideshow creator, you can trim, crop or cut the video clips and images of your presentation to give them the best look. The tool comes with a unique Filmora Template Mode to create business oriented Facebook slideshows, is compatible to any windows and Mac supported device and lets you easily make a slideshow on Facebook.
● Ending Thoughts →
● Creating Facebook slideshows can be useful in addressing a variety of personal and professional data sharing needs.
● Browsing through design alternatives, you will land across a pool of software choices to create stunning slideshows for Facebook.
● When deciding on the best Facebook slideshow creator tool, Wondershare Filmora can be your smartest pick.
If you are looking for interesting solutions to create the most amazing slideshow on Facebook, rest assured, you are at the right place to get every help!
In this article
01 [Where Did the Facebook Slideshow Tool Go?](#Part 1)
02 [How to Create a Slideshow on Facebook?](#Part 2)
03 [Top 5 Facebook Slideshow Alternatives](#Part 3)
Part 1 Where Did the Facebook Slideshow Tool Go?
While almost everyone around you must be fascinated about the stunning and appealing slideshows that the Facebook community used to offer its users with, it is evidently sad to realize that the utility has become a story of the past. The creators of the tool have by now, took multiple rounds on removing, retrieving and again removing the utility from the official Facebook website as well as the smartphone application.
It is however relaxing to know that the Facebook developer team has worked efficiently to produce alternatives to the application’s slideshow tool after the latter’s permanent disappearance from the user account pages and app profiles. You can now work with the Facebook Ads Manager or Facebook Creator Studio to sort out the concern of creating slideshow on Facebook.
Part 2 How to Create a Slideshow on Facebook?
Facebook slideshows are incredibly awesome trends of making a concise, expressive and to the point delivery of diverse content varieties. Piping up your information through and extensive assortment of sound, text and motion, these short snippets are no less than a seamless video streaming of the same information.
If you are about to launch a new product for your business enterprise, consider working with the utility to create an elusive Facebook slideshow ad for a quick demonstration of your brand among different social media communities, turning the fun of slideshow creation into a smart and responsive product promotion strategy, without having to bother your wallet for the same.
If you are concerned about the quality of the final output, it is not a cause of worry, since the Facebook slideshow creator tool promises you of an appreciable slideshow result, that takes a quick loading time, is comparable to a high resolution video and works well with all your favourite devices.
Having talked enough on the usage credibility, let us now proceed to adhere to the concern of creating a slideshow on Facebook with a diversity of media files in the following section:
01Facebook Slideshows from Videos
Step 1: Launch the Tool
Start with opening the Facebook app in your device to launch the ‘Facebook Ads Manager’ utility and tap ‘Create’ in the latter’s welcome interface.
Step 2: Select Your Video
Browse through your device’s gallery to choose a desired video for slideshow creation. When you have made your choice, set a 16:9 aspect ratio for the same to avoid square cropping.
Step 3: Upload Your Video
Proceed with uploading your video to the Facebook tool by clicking on the ‘Add Video’ button and watch it getting split into still images frames, from where you can view a seamless slideshow display of the same.
Step 4: Select Multiple Frames
you can now select a series of image frames and arrange them in the correct sequence of appearance by clicking on each one of them to be included within the creator timeline.
Step 5: Add Captions Your Stills
Tap on the small ‘Pencil’ icon within the images to customize them with suitable captions. You can further add style to these image names by making appropriate selections of font, position color of every frame caption. Once you have finished naming all the frames, click on ‘Save’ to apply your changes.
Step 6: Preview Your Creation
When you are satisfied with your work, consider watching a preview of the same to be assured of the perfect placement of everything. To do this, navigate to the ‘Preview Pane’ at the top right corner of the program interface, and tapping the ‘Preview’ button.
02Facebook Slideshows from Images
Step 1: Launch the Tool
To begin with, open the Facebook app in any of your preferred devices and proceed to launch the ‘Facebook Ads Manager’ tool, followed by clicking on the ‘Create Slideshow’ button at the bottom of the tool’s welcome screen.
Step 2: Upload Your Images
As you complete Step 1, a ‘Video Creation Kit’ will appear, where you will need to click within the ‘Create Slideshow’ checkbox, followed by tapping on the ‘Continue’ button at the bottom right corner of the window.
Step 3: Upload Your Images
Clicking on the ‘Continue’ button will take you to the ‘Settings Box’ where you need to tap on the ‘Add Photos’ option. An image selection box will now pop up, allowing you to select and upload a maximum of 10 images from your Facebook account, stock and page galleries or your device collections. Prefer keeping all the photos within the same aspect ratio to escape the extra task of cropping the images.
When you have finished making your selections, navigate to the bottom right corner of the window and hit the ‘Confirm’ button. This will make your selections shows up all together in the ‘Settings Box’, in the sequential order of their appearance in the slideshow. If you want to introduce some changes, delete and re-upload the images.
Step 4: Customize Your Images with Captions
To add suitable captions to the slideshow images, tap the ‘Pencil’ icon within them. You are also allowed to customize the stills with transitions, effects, etc., and make adjustments to the screen time of each image frame.
Part 3 Top 5 Facebook Slideshow Alternatives
Having heard about the disappointment from the exit of the Facebook slideshow creator tool, it becomes naturally important to seek through the affordable alternatives of the same to set straight the issue of how to do a slideshow on Facebook. Working towards the solutions, let us learn about the top 5 most preferred Facebook slideshow alternatives in the following section:
03PowerDirector
One of the most suitable candidates of Facebook slideshow alternatives, PowerDirector easily lands among the highly preferred tools for creating stunning slideshows. Compatible with the MacOs and Windows operating systems, the software lets you create high end, top quality slideshow presentations with a classic and professional outlook.
Talking of the creator program’s most appealing features, this one is an upgraded slideshow creator suite that is capable enough to address your most diverse design requirements, like those of high resolution video effects, Hollywood inspired movies and personal content sharing. The software package is loaded with tons of elusive video effects, themed templates and transition effects to facilitate a compelling creation.
Working with PowerDirector’s exclusive slideshow program, you get the liberty to escape the notch of storyboard and timeline editing and start the creation process in the launch window of the program itself. The extremely user cohesive interface of the software guides you through each creation step via streamlined plug-ins, making the design process quick and super easy even for newbies.
04SmartSHOW 3D
When thinking of how to make a slideshow on facebook, this one is another top rated Facebook slideshow alternatives, that comes with an extensive toolkit to create amazing presentations from video clips and images, while complementing them with a plethora of effects and transitions. Some of the key features of the program include multiple slide layering, animating selected layers and fine tune the transitions with keyframe adjustments.
You can additionally uplift the slides with image masks, shapes, 3D animated texts and other forms of graphic arts. An additively appealing feature of the slideshow creator program is the ability to mix descriptive images with your favorite music to develop stunning masterpieces of entertaining slideshows, which you can conveniently share and enjoy with family and friends on a diversity of social media platforms.
Using the tool, you can work with applying motion graphic effects to still photos without having to be an over the top tech savvy user. The editor library of the tool is loaded with some of the most awesome transition effects, like, wipes, 3D motions, gradients and fade-ins, along with the facility of adding titles, voice comments and captions to the slides of your presentation. The tool is however, exclusively a Windows compatible utility.
05PhotoStage Slideshow Software
Next in the list of alternatives to the Facebook slideshow maker tool is the aforesaid software program, that allows you to create professional quality slideshows with as many videos and images as you can possibly think of and supplement them with a variety of texts, music, voiceovers and effects. You can further work on customizing the slideshow images with making suitable adjustments in color, brightness and saturation parameters.
The software comes with a Quick Create utility, which you can use to instantly create high resolution slideshows and spark them up with zooms, pans and fades, while getting a preview of the same in real-time. You can even proceed to burn your creation into a disk, make an online upload, or simply save it to your device.
Talking of the cost constraints of this amazing slideshow creator tool, you get to work with the software for a commercial use, free of cost for a definite time period and with a restricted number of features. However, you can always consider on buying the paid version of the program to avail an access to the latter’s entire range of features and utilities. The tool works well with all Windows and Mac supported devices.
06Kizoa
Moving ahead in the list you have the Kizoa slideshow maker for Facebook, which is a dependable alternative to the conventional Facebook slideshow creator. Choosing this tool to design your slideshow presentation, you are entitled to the amazing feature of displaying your presentation on almost any screen, including smartphones, television, computers and tablets with getting to choose from 7 types of aspect ratios. The tool is designed to have a Windows and MacOs compatibility.
The application further lets you add the most specific parts of your images within the presentation slides with its smart cropping tool, while keeping an account of the file formats and screen space requirements of the images with utmost convenience. You are also allowed to choose from a storehouse of preset templates to add your desired photos and video clips in the slideshow and entice them with GIFs, effects and texts.
When you are done with the creation process, just attempt to download and save the slideshow in any preferred file format, such as, AVI, GIF, MP4, MOV, MPEG2, etc., or even burn it to a DVD. You are now free to share your slideshow on various online media sharing platforms. Using the free version of Kizoa, you are permitted to create slideshows with a duration of 60 seconds, which can be upgraded to a limitless length with a paid subscription.
07SlideLab
If you are a newbie to the field of creating slideshows, and wondering about how to create a slideshow on Facebook 2021, this one is affordably the most perfect tool you can rely on. Packed with an extensive range of effects, music, transitions and filters, SlideLab is the smartest software choice to create slideshow presentations for family entertainment and personal use.
The tool consists of an in built sharing utility that allows you to design and share slideshows on social media platforms, like YouTube, Facebook and Instagram with a single click. Working on your slideshow within the program, you can escape the cringe of cropping the images, as they are automatically adjusted to the square fit alignment of the app’s working window. You can quickly rearrange the placement of the images in the slideshow as per your preferences.
As far as the sharing credibility of the presentation is concerned, the software grants you the liberty to export your creation in PPTX and PDF file formats, and view them later in Keynote and PowerPoint.
The app shows a convenient workflow with Windows and MacOs devices and limits the image play duration to 3 seconds, along with a permitting a restricted number of transitions and effects in its free version, which you can access by availing a paid subscription of the program.
08Creating Facebook Slideshows With Wondershare Filmora
When browsing through feasible alternatives on how to make a facebook slideshow, the IT market is indeed flooded with a hoard of creation utilities. If you have just begun trying hands at slideshow creation, consider using the Wondershare Filmora Video Editor slideshow maker application for addressing your slideshow design concerns. The extensive, feature rich library of the app lets you create attractive presentation masterpieces with a wide range of special effects, transitions, texts, titles and music tracks.
For Win 7 or later (64-bit)
For macOS 10.12 or later
Working with the Filmora slideshow creator, you can trim, crop or cut the video clips and images of your presentation to give them the best look. The tool comes with a unique Filmora Template Mode to create business oriented Facebook slideshows, is compatible to any windows and Mac supported device and lets you easily make a slideshow on Facebook.
● Ending Thoughts →
● Creating Facebook slideshows can be useful in addressing a variety of personal and professional data sharing needs.
● Browsing through design alternatives, you will land across a pool of software choices to create stunning slideshows for Facebook.
● When deciding on the best Facebook slideshow creator tool, Wondershare Filmora can be your smartest pick.
10 Great Apps to Turn Funny Animated Images Into Comics
10 Great Apps for Turning Funny Animated Images into Comics
An easy yet powerful editor
Numerous effects to choose from
Detailed tutorials provided by the official channel
There are several apps available that can let you create interesting funny animated images, cartoons, and comics by adding speech bubbles, animations, and other effects.

In this article
01 [Top apps to turn pictures into cartoons](#Part 1)
02 [Best Alternative to Cartoon Apps- Wondershare Filmorapro](#Part 2)
03 [Key Takeaways](#Part 3)
Part 1 Top apps to turn pictures into cartoons
To add some fun elements to your regular images and make them even more interesting you can convert them into cartoons and comics. The task of conversion can seem to be difficult and tricky but with the availability of several apps and programs, you can achieve the desired results in just a few clicks.
With multiple options available, you are bound to get confused while selecting an app. Helping you with the same, we have shortlisted the top 10 apps in the category as below.
01 Prisma Photo Editor
Available for download on Android and iOS devices this is an excellent photo editing app that comes with over 300 art filters and animations. You can quickly convert your images into funny and interesting cartoons using the app in no time. Additionally, several image parameters like sharpness, exposure, brightness, and others can also be adjusted as needed.
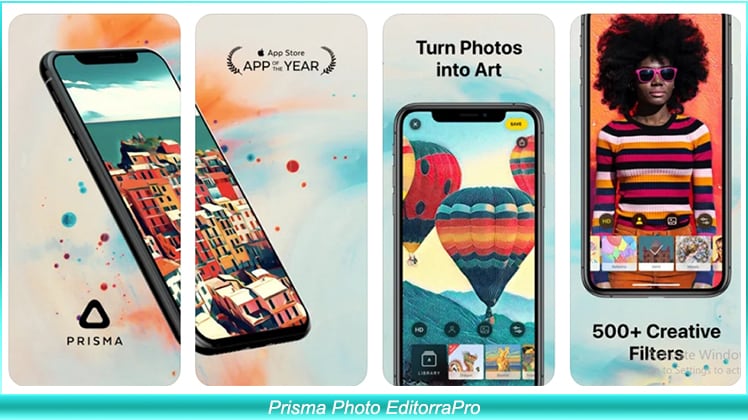
02 Photo Lab Picture Editor
This is free to use app on the Google Play Store with the IAP option. With a 4.6 high rating, the app is simple to use and offers more than 900 funny and stylish effects that can be added to your images. You can choose from photo montages, animations, filters, and other effects that match your requirements. You can even add photo frames to make your image look impressive. Create professional-looking cartoons in no time using this wonderful app.
03 MomentCam Cartoons & Stickers
This free app on Google Play Store with a 4 rating is just perfect for creating interesting cartoons and emoticons using images. The process is simple and quick where you just need to add the image and create its personalized avatar. Interesting background can also be added to further enhance the cartoon. The app also gives you the option to share the created cartoon on social media sites.

04 ToonMe
Create cartoons using your selfies and other images on your phone in just a few clicks using this high-rated app on Google Play Store. The AI of the app allows the creation of interesting full-body cartoons as well as vector portrait templates. Multiple layouts and designs are also available to choose from. The interface is simple and the app is also available for download Apple Play Store.

05 Pixlr- Free Photo Editor
This is a widely used image editing app that is simple and free to use. A wide range of image editing features and filters are available with the app including cartoon filters that will let you unleash your creativity and design impressive cartoons and other images. Also available for iOS devices the app also facilitates sharing the created images over social media and emails. Additional features include auto-fix, double exposure, adjusting image tone, and others.
06 Painnt- Pro Art Filters
This feature-packed app on Google Store lets you create professional-looking art pieces from the images using filters and animations. With more than 1000 filters in several categories including cartoons, classical, abstract, and others you can have a creation of your choice. App uses AI and also has an option for preview and fine-tuning. You can even share your creations with the app community and over social networking sites.
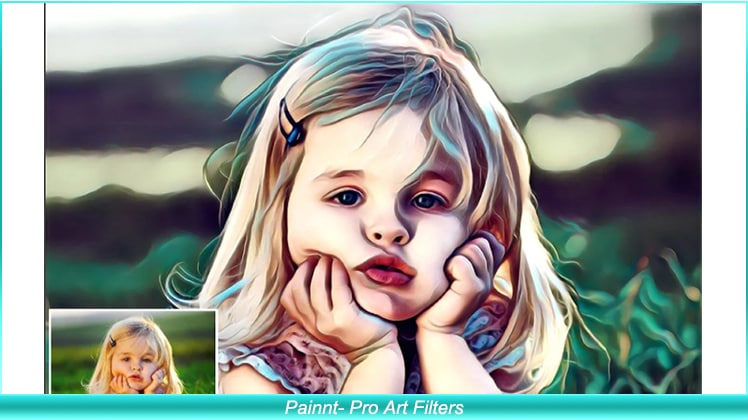
07 Clip2Comic & Caricature Maker
This is among the best app for iPhone users that allows creating funny and interesting cartoons, caricatures, and other artwork using images. Several other editing tools and filters are also available that support customizing high-quality and high-resolution images. Additionally, the app also supports editing the videos and converting them into animated clippings. The deformation filter further makes your creation look funny and interesting.
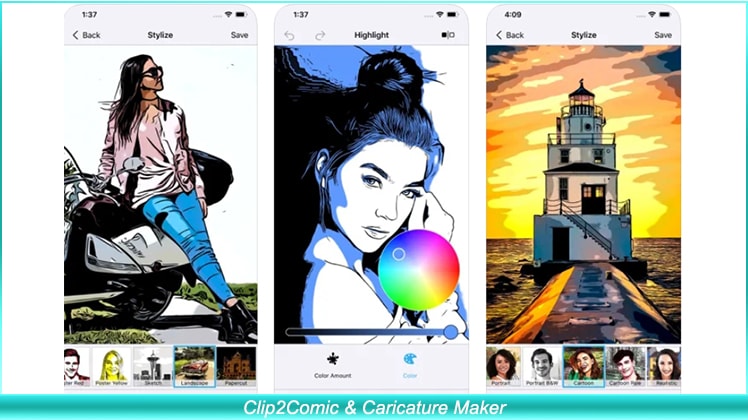
08 Deep Art Effects
This free app for Android and iOS devices comes with more than 100 effects and filters of different types including cartoon-based. Using the AI of the app, you can create impressive artwork in HD resolution. The app supports fast image processing and also supports sharing the artwork with the community. A paid premium version of the app is also available that has no ads, watermark, allows creating own filters, and has additional features.
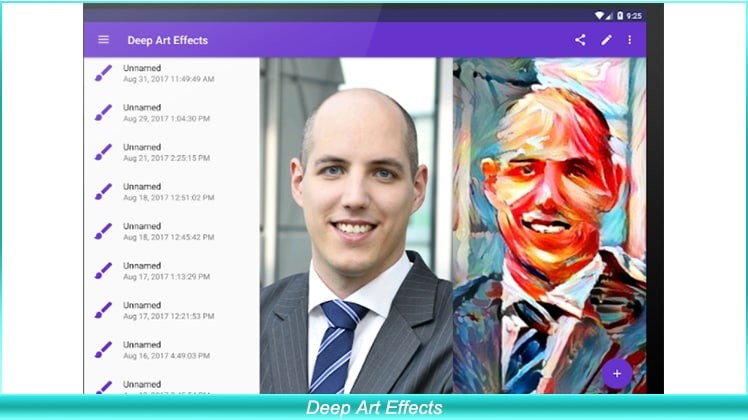
09 Cartoon Photo Editor
This free app for iOS devices will let you turn your images into cartoons like a pro. The app comes with more than 15 cartoon filters to choose from and you can even choose the art style as a retro cartoon, Minecraft, and others. The images from the device can be added to the app or you can even capture one using the camera. The created cartoons can also be shared over social media sites using the app. The pro-paid version offers additional features and functions.
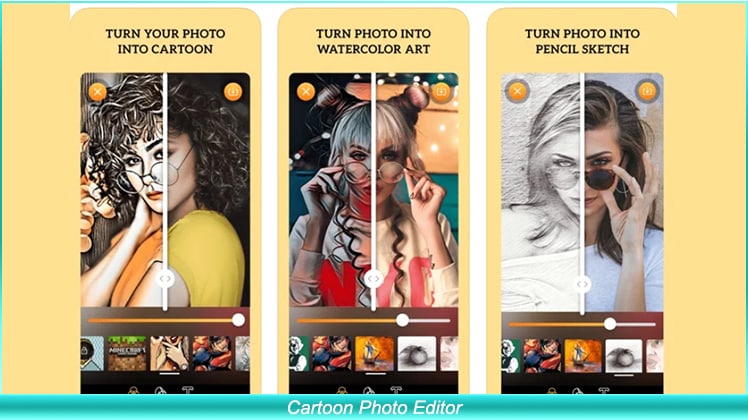
10 Comica- Comics and cartoon maker
As the name suggests, this is a comics and cartoon creating an app on Google Play Store. This lightweight app is free to use and comes with legit-looking effects and allows adding speech balloons. You can even create your memes using the app and take your creativity to a new level.

Key Takeaways from This Episode
● Check out the images on your smartphone or system that can be used for creating interesting cartoons.
● Analyze multiple apps and programs that can let you add cartoon and comic effects to your selected images.
● Finalize the tool that offers the best features, is simple to use, and can quickly convert your images to funny animated images and cartoons with added functionalities.
There are several apps available that can let you create interesting funny animated images, cartoons, and comics by adding speech bubbles, animations, and other effects.
In this article
01 [Top apps to turn pictures into cartoons](#Part 1)
02 [Best Alternative to Cartoon Apps- Wondershare Filmorapro](#Part 2)
03 [Key Takeaways](#Part 3)
Part 1 Top apps to turn pictures into cartoons
To add some fun elements to your regular images and make them even more interesting you can convert them into cartoons and comics. The task of conversion can seem to be difficult and tricky but with the availability of several apps and programs, you can achieve the desired results in just a few clicks.
With multiple options available, you are bound to get confused while selecting an app. Helping you with the same, we have shortlisted the top 10 apps in the category as below.
01 Prisma Photo Editor
Available for download on Android and iOS devices this is an excellent photo editing app that comes with over 300 art filters and animations. You can quickly convert your images into funny and interesting cartoons using the app in no time. Additionally, several image parameters like sharpness, exposure, brightness, and others can also be adjusted as needed.
02 Photo Lab Picture Editor
This is free to use app on the Google Play Store with the IAP option. With a 4.6 high rating, the app is simple to use and offers more than 900 funny and stylish effects that can be added to your images. You can choose from photo montages, animations, filters, and other effects that match your requirements. You can even add photo frames to make your image look impressive. Create professional-looking cartoons in no time using this wonderful app.
03 MomentCam Cartoons & Stickers
This free app on Google Play Store with a 4 rating is just perfect for creating interesting cartoons and emoticons using images. The process is simple and quick where you just need to add the image and create its personalized avatar. Interesting background can also be added to further enhance the cartoon. The app also gives you the option to share the created cartoon on social media sites.
04 ToonMe
Create cartoons using your selfies and other images on your phone in just a few clicks using this high-rated app on Google Play Store. The AI of the app allows the creation of interesting full-body cartoons as well as vector portrait templates. Multiple layouts and designs are also available to choose from. The interface is simple and the app is also available for download Apple Play Store.
05 Pixlr- Free Photo Editor
This is a widely used image editing app that is simple and free to use. A wide range of image editing features and filters are available with the app including cartoon filters that will let you unleash your creativity and design impressive cartoons and other images. Also available for iOS devices the app also facilitates sharing the created images over social media and emails. Additional features include auto-fix, double exposure, adjusting image tone, and others.
06 Painnt- Pro Art Filters
This feature-packed app on Google Store lets you create professional-looking art pieces from the images using filters and animations. With more than 1000 filters in several categories including cartoons, classical, abstract, and others you can have a creation of your choice. App uses AI and also has an option for preview and fine-tuning. You can even share your creations with the app community and over social networking sites.
07 Clip2Comic & Caricature Maker
This is among the best app for iPhone users that allows creating funny and interesting cartoons, caricatures, and other artwork using images. Several other editing tools and filters are also available that support customizing high-quality and high-resolution images. Additionally, the app also supports editing the videos and converting them into animated clippings. The deformation filter further makes your creation look funny and interesting.
08 Deep Art Effects
This free app for Android and iOS devices comes with more than 100 effects and filters of different types including cartoon-based. Using the AI of the app, you can create impressive artwork in HD resolution. The app supports fast image processing and also supports sharing the artwork with the community. A paid premium version of the app is also available that has no ads, watermark, allows creating own filters, and has additional features.
09 Cartoon Photo Editor
This free app for iOS devices will let you turn your images into cartoons like a pro. The app comes with more than 15 cartoon filters to choose from and you can even choose the art style as a retro cartoon, Minecraft, and others. The images from the device can be added to the app or you can even capture one using the camera. The created cartoons can also be shared over social media sites using the app. The pro-paid version offers additional features and functions.
10 Comica- Comics and cartoon maker
As the name suggests, this is a comics and cartoon creating an app on Google Play Store. This lightweight app is free to use and comes with legit-looking effects and allows adding speech balloons. You can even create your memes using the app and take your creativity to a new level.
Key Takeaways from This Episode
● Check out the images on your smartphone or system that can be used for creating interesting cartoons.
● Analyze multiple apps and programs that can let you add cartoon and comic effects to your selected images.
● Finalize the tool that offers the best features, is simple to use, and can quickly convert your images to funny animated images and cartoons with added functionalities.
You Can Turn a TikTok Into a GIF Now. Here’s How
You Can Turn a TikTok Into a GIF Now. Here’s How
An easy yet powerful editor
Numerous effects to choose from
Detailed tutorials provided by the official channel
Want to add sharing flexibility to TikTok videos? Convert them into GIFs!
In this article
01 [What is GIF TikTok?](#Part 1)
02 [How to Make a GIF From a TikTok Video](#Part 2)
Part 1 What Is TikTok GIF?
In today’s IT enhanced lifestyle, having a profound reach on social media is the new name of popularity. Everyone out there is profusely keen on creating and sharing a plethora of content varieties; memes, videos, animations and what not, across social communities. However, TikTok videos lag behind in this race; often lack the ‘Share’ flexibility.
To match up, there are solutions to convert TikTok video into GIFs. A TikTok GIF is a short, impactful and to the point clip that’s here to share fun and exciting content in the most interesting ways. If you have a bunch of TikTok videos to share with your peers, but missing out on an effective sharing solution, you can conveniently look forward to convert those videos into catchy and interesting GIFs that will definitely hold the attention of your viewers.
Feel motivated? See through the rest of this article to know some quick and easy TikTok to GIF conversion tools and software!
Part 2 How to Make a GIF From a TikTok Video
When looking through solutions to create GIF TikTok videos, you will find a pool of methods and tools available on the internet. All you need to do is select the best one for yourself and get started with converting TikTok Videos into GIFs. Given below are some of the best solutions adhering to the aforesaid concern:
01Filmora
Wondershare Filmora Video Editor is one of the best application software to create a TikTok GIF. This is a simple and smart converter application that caters to your concern in just a few minutes. What’s best is that this app is absolutely free to use and is compatible with your PC, smartphone and a variety of other devices. Here’s how you can use Filmora to convert your TikTok videos into GIFs:

Step 1: Import Your Video
Start with importing a desired TikTok video file to the Filmora timeline. You can also ‘Drag and Drop’ the video file to the editor timeline. Using this application, you have the flexibility to import your clip in almost any video format.

Step 2: Edit Your Clip
Suited to your content preferences, you can edit and enhance your clips with a variety of effects, like, cut, trim, rotate, split, etc., and make appropriate speed adjustments. You can even include text messages to make your GIF more impactful.

Wondershare Filmora
Get started easily with Filmora’s powerful performance, intuitive interface, and countless effects!
Try It Free Try It Free Try It Free Learn More >
Step 3: Let’s Save and Share!
When you are happy, save your work using the .gif file extension. That’s it! You are ready to share your creation with your social media peers.

02TikTok’s Inbuilt GIF Converter
TikTok allows you to directly convert its videos into GIFs. You can use the TikTok application in your smartphone to take up the conversion process. All you need to do is follow the steps given below:
Step 1: Select Your TikTok Video
To get started, open the TikTok application in your smartphone and select the video you want to convert into GIF.
Step 2: Share the Video
Click the ‘Share’ icon at the right of the video screen.

Step 3: Format Selection
Scroll down to the bottom of the screen and choose the ‘Share as GIF’ option. This will automatically convert your TikTok video into GIF in a few seconds.

Step 4: Save and Export
Click on the ‘Save Image’ option to save the GIF in your phone’s gallery. You can also export your creation to different social media platforms.
03Wondershare UniConverter
This one is a handy toolbox loaded with a variety of features that allow you to play with your video creativity. Using this tool, you can quickly create GIF for TikTok and also fix the size and duration of the same. This software supports almost all video formats and comes with an inbuilt editor that you can use to add effects and make your GIFs all the more interesting. This is compatible with your Windows or MacOS PC.
Take the following steps to create GIFs from TikTok videos using this software:

Step 1: Download and Launch the Application
Download the Wondershare UniConverter application to your PC from the software’s official website.
Step 2: Open GIF Maker
In the app’s welcome screen, navigate to the ‘Toolbox’ tab and select ‘GIF Maker’ from the panel that gets displayed.
Step 3: Upload Your TikTok Video
In the next pop-up window, select ‘Video to GIF’ and click on the (+) icon in the centre. You can also click on ‘Add Files’ in the top left and choose a saved TikTok video from your PC to upload.

Step 4: Trim Your Video
Trim the uploaded video to the desired portion from where you wish to create the GIF and set adequate time frames for the same. You can even drag the video thumbnail slider to trim the video.

Step 5: Let’s Get Creating!
Set the final size and frame rate from the ‘Output Size’ and ‘Frame Rate’ tabs respectively. To save your creation, browse and choose the desired system folder by clicking on the ‘Save to:’ tab. Lastly, select ‘Create GIF’ to start the conversion process.

04Kapwing GIF Maker
There may be instances where you cannot save or share TikTok videos. To cut the rush in such cases, you can use Kapwing’s GIF Maker to convert videos from TikTok to GIF online. This one is a free video editing tool that works with almost all internet enabled smartphones and supports almost all common video formats. Here’s what you need to do for making GIFs from TikTok videos using this tool:
Step 1: Copy a Video Link
Search your desired TikTok video and click on the ‘Share’ icon. In the drop down menu, select ‘Copy Link’ to save the video link in your device memory. Once this happens, you will get a confirmation message that says, ‘Copied’.

Step 2: Open GIF Maker
Open the GIF Maker tool in your browser and paste the saved TikTok video link in the editor’s URL bar. This will automatically redirect you to the Kapwing Studio, where you have the liberty to trim, crop or split your video clip to the desired time frame. It is better to set a play span of 3-5 seconds.
You can trim the clip by dragging its ends or introduce cuts at specific points using the split button above the editor timeline. To make volume adjustments, select the video layer and click on ‘Edit Video’ and move the adjuster circle to the left or right to decrease, increase and mute the video volume.


Step 3: Download and Share Your Creation
To save your work, tap ‘Export Video’ at the top and select ‘Export as GIF’ from the drop down menu. Wait for the conversion process to finish and click ‘Download’. This will save the GIF to your device.
You will find a watermark at the corner of your clip. Click ‘Sign In to Remove the Watermark’ to remove it. A workspace for the present and later projects will be created, where you can save you work for a couple of days with Kapwing’s free version. To export your work to social media, click ‘Share’. You can even host your creation on websites. Just copy the video link and select ‘Embed’.

05TT Downloader
This one is another online tool you can use to create GIFs from TikTok videos. This is a quick converter tool that transforms TikTok videos to GIFs in 5 easy steps within minutes. It is a browser tool and does not require a software download. All you need to do is explained in the following steps:

Step 1:
Visit the official site of the tool.
Step 2:
Select ‘TikTok to GIF’ to get redirected to the TikTok to GIF Converter home page.
Step 3:
Copy and paste the desired TikTok video link in the converter’s URL bar. To proceed further, click on ‘Get Video’.

Step 4:
Trim your clip within a time frame of 1-10 seconds.
Step 5:
Click ‘Done’ to initiate the conversion process. Once it finishes, you can download the converted GIF to your device.
06MiniTool MovieMaker
You can prefer this tool to convert TikTok videos in your PC into GIFs. This tool gives you the liberty to trim, cut, reverse and rotate GIFs and even add text and filters to them. Here’s how you can use this tool to transform TikTok videos into interesting GIFs:
Step 1:
Download and install this GIF maker tool in your PC. Launch the same when you are done with the installation process.
Step 2:
In the converter window, import and add your desired TikTok clip into the converter timeline.

Step 3:
You are now free to edit and add text to your video.
Step 4:
Once you finish, tap ‘Export’ and choose your output format as GIF.
Step 5:
Hit ‘Export’ to let the conversion process begin.
● Key Takeaways from This Episode →
● TikTok videos often lack the save and share features, which is an obvious necessity of today’s social outlook.
● Varieties of online tools and software are available for converting TikTok videos to GIFs to increase the sharing flexibility.
● Filmora is a quick and intelligent choice to take up the conversion process within a catch of few clicks.
Want to add sharing flexibility to TikTok videos? Convert them into GIFs!
In this article
01 [What is GIF TikTok?](#Part 1)
02 [How to Make a GIF From a TikTok Video](#Part 2)
Part 1 What Is TikTok GIF?
In today’s IT enhanced lifestyle, having a profound reach on social media is the new name of popularity. Everyone out there is profusely keen on creating and sharing a plethora of content varieties; memes, videos, animations and what not, across social communities. However, TikTok videos lag behind in this race; often lack the ‘Share’ flexibility.
To match up, there are solutions to convert TikTok video into GIFs. A TikTok GIF is a short, impactful and to the point clip that’s here to share fun and exciting content in the most interesting ways. If you have a bunch of TikTok videos to share with your peers, but missing out on an effective sharing solution, you can conveniently look forward to convert those videos into catchy and interesting GIFs that will definitely hold the attention of your viewers.
Feel motivated? See through the rest of this article to know some quick and easy TikTok to GIF conversion tools and software!
Part 2 How to Make a GIF From a TikTok Video
When looking through solutions to create GIF TikTok videos, you will find a pool of methods and tools available on the internet. All you need to do is select the best one for yourself and get started with converting TikTok Videos into GIFs. Given below are some of the best solutions adhering to the aforesaid concern:
01Filmora
Wondershare Filmora Video Editor is one of the best application software to create a TikTok GIF. This is a simple and smart converter application that caters to your concern in just a few minutes. What’s best is that this app is absolutely free to use and is compatible with your PC, smartphone and a variety of other devices. Here’s how you can use Filmora to convert your TikTok videos into GIFs:
Step 1: Import Your Video
Start with importing a desired TikTok video file to the Filmora timeline. You can also ‘Drag and Drop’ the video file to the editor timeline. Using this application, you have the flexibility to import your clip in almost any video format.
Step 2: Edit Your Clip
Suited to your content preferences, you can edit and enhance your clips with a variety of effects, like, cut, trim, rotate, split, etc., and make appropriate speed adjustments. You can even include text messages to make your GIF more impactful.
Wondershare Filmora
Get started easily with Filmora’s powerful performance, intuitive interface, and countless effects!
Try It Free Try It Free Try It Free Learn More >
Step 3: Let’s Save and Share!
When you are happy, save your work using the .gif file extension. That’s it! You are ready to share your creation with your social media peers.
02TikTok’s Inbuilt GIF Converter
TikTok allows you to directly convert its videos into GIFs. You can use the TikTok application in your smartphone to take up the conversion process. All you need to do is follow the steps given below:
Step 1: Select Your TikTok Video
To get started, open the TikTok application in your smartphone and select the video you want to convert into GIF.
Step 2: Share the Video
Click the ‘Share’ icon at the right of the video screen.
Step 3: Format Selection
Scroll down to the bottom of the screen and choose the ‘Share as GIF’ option. This will automatically convert your TikTok video into GIF in a few seconds.
Step 4: Save and Export
Click on the ‘Save Image’ option to save the GIF in your phone’s gallery. You can also export your creation to different social media platforms.
03Wondershare UniConverter
This one is a handy toolbox loaded with a variety of features that allow you to play with your video creativity. Using this tool, you can quickly create GIF for TikTok and also fix the size and duration of the same. This software supports almost all video formats and comes with an inbuilt editor that you can use to add effects and make your GIFs all the more interesting. This is compatible with your Windows or MacOS PC.
Take the following steps to create GIFs from TikTok videos using this software:
Step 1: Download and Launch the Application
Download the Wondershare UniConverter application to your PC from the software’s official website.
Step 2: Open GIF Maker
In the app’s welcome screen, navigate to the ‘Toolbox’ tab and select ‘GIF Maker’ from the panel that gets displayed.
Step 3: Upload Your TikTok Video
In the next pop-up window, select ‘Video to GIF’ and click on the (+) icon in the centre. You can also click on ‘Add Files’ in the top left and choose a saved TikTok video from your PC to upload.
Step 4: Trim Your Video
Trim the uploaded video to the desired portion from where you wish to create the GIF and set adequate time frames for the same. You can even drag the video thumbnail slider to trim the video.
Step 5: Let’s Get Creating!
Set the final size and frame rate from the ‘Output Size’ and ‘Frame Rate’ tabs respectively. To save your creation, browse and choose the desired system folder by clicking on the ‘Save to:’ tab. Lastly, select ‘Create GIF’ to start the conversion process.
04Kapwing GIF Maker
There may be instances where you cannot save or share TikTok videos. To cut the rush in such cases, you can use Kapwing’s GIF Maker to convert videos from TikTok to GIF online. This one is a free video editing tool that works with almost all internet enabled smartphones and supports almost all common video formats. Here’s what you need to do for making GIFs from TikTok videos using this tool:
Step 1: Copy a Video Link
Search your desired TikTok video and click on the ‘Share’ icon. In the drop down menu, select ‘Copy Link’ to save the video link in your device memory. Once this happens, you will get a confirmation message that says, ‘Copied’.
Step 2: Open GIF Maker
Open the GIF Maker tool in your browser and paste the saved TikTok video link in the editor’s URL bar. This will automatically redirect you to the Kapwing Studio, where you have the liberty to trim, crop or split your video clip to the desired time frame. It is better to set a play span of 3-5 seconds.
You can trim the clip by dragging its ends or introduce cuts at specific points using the split button above the editor timeline. To make volume adjustments, select the video layer and click on ‘Edit Video’ and move the adjuster circle to the left or right to decrease, increase and mute the video volume.
Step 3: Download and Share Your Creation
To save your work, tap ‘Export Video’ at the top and select ‘Export as GIF’ from the drop down menu. Wait for the conversion process to finish and click ‘Download’. This will save the GIF to your device.
You will find a watermark at the corner of your clip. Click ‘Sign In to Remove the Watermark’ to remove it. A workspace for the present and later projects will be created, where you can save you work for a couple of days with Kapwing’s free version. To export your work to social media, click ‘Share’. You can even host your creation on websites. Just copy the video link and select ‘Embed’.
05TT Downloader
This one is another online tool you can use to create GIFs from TikTok videos. This is a quick converter tool that transforms TikTok videos to GIFs in 5 easy steps within minutes. It is a browser tool and does not require a software download. All you need to do is explained in the following steps:
Step 1:
Visit the official site of the tool.
Step 2:
Select ‘TikTok to GIF’ to get redirected to the TikTok to GIF Converter home page.
Step 3:
Copy and paste the desired TikTok video link in the converter’s URL bar. To proceed further, click on ‘Get Video’.
Step 4:
Trim your clip within a time frame of 1-10 seconds.
Step 5:
Click ‘Done’ to initiate the conversion process. Once it finishes, you can download the converted GIF to your device.
06MiniTool MovieMaker
You can prefer this tool to convert TikTok videos in your PC into GIFs. This tool gives you the liberty to trim, cut, reverse and rotate GIFs and even add text and filters to them. Here’s how you can use this tool to transform TikTok videos into interesting GIFs:
Step 1:
Download and install this GIF maker tool in your PC. Launch the same when you are done with the installation process.
Step 2:
In the converter window, import and add your desired TikTok clip into the converter timeline.
Step 3:
You are now free to edit and add text to your video.
Step 4:
Once you finish, tap ‘Export’ and choose your output format as GIF.
Step 5:
Hit ‘Export’ to let the conversion process begin.
● Key Takeaways from This Episode →
● TikTok videos often lack the save and share features, which is an obvious necessity of today’s social outlook.
● Varieties of online tools and software are available for converting TikTok videos to GIFs to increase the sharing flexibility.
● Filmora is a quick and intelligent choice to take up the conversion process within a catch of few clicks.
DP Animation Maker Tutorial for Finding The Best Animated Profile Picture Maker
DP Animation Maker Tutorial for Finding The Best Animated Profile Picture Maker
An easy yet powerful editor
Numerous effects to choose from
Detailed tutorials provided by the official channel
Social media is getting more and more competitive, and it’s crucial to make a good first impression. Animated profile pictures grab the user’s attention and give the added boost that helps you become different in a good way.
This article will show you the ten top animated profile picture makers using which you can create awesome profile pictures with ease.
In this article
01 [What does “PFP” mean?](#Part 1)
02 [The 10 Best Animated Profile Picture Makers for Making awesome profile pictures](#Part 2)
03 [What Happens if You Make Animated Video Instead of Pictures?](#Part 3)
Part 1 What does “PFP” mean?
PFP stands for “Picture For Profile” or, more commonly, “Profile Picture.” It is the first thing people see when they visit your profile on a social networking website. The profile owners typically upload their own images on Facebook, Twitter, Instagram, WhatsApp, and others at different times during the year or when anything significant happens.
Adding a photo gives your followers a chance to put a face to the name and an idea of what you look like. This allows them to better relate to you and creates a strong foundation for conversations and any other type of interactions.
Part 2 The 10 Best Animated Profile Picture Makers for Making awesome profile pictures
Animated profile pictures add fun and steal the show when you add them to your social accounts. What’s more, it can be much easier to create a WhatsApp animated profile picture when you’re using the right tool. Here in this post, we present you with the ten best animated profile picture makers for your reference and use.
01Canva
Canva lets you make an animated profile picture as simple as “drag and drop” without any creativity. Canva’s unique WYSIWYG animation technique makes it very straightforward to create your own avatar - making awesome animated gifs has never been simpler.
The UI is simple enough that even the smallest of details are well thought out. The captions are editable, so you easily customize the words appearing in each awesome gif.
Canva, one of the best animated profile picture makers, is a great alternative for those who prefer to work and create using the browser and without downloading and installing any software. You can also access Canva directly from any mobile device or tablet, making it convenient for you to share creative greetings and social media posts with your friends and loved ones.

●Pros:
● A near-unlimited number of stunning pre-built templates for a wide range of usage
● Beautiful and easy-to-use application interface
● The tool gets frequent bug fixes and updates with the latest features and even more templates
Cons:
● The free plan comes with a pretty meager cloud storage capacity
● No vector design is possible
● Lack of the ability to connect more than one Facebook login for those who handle personal and business pages separately
02Placeit
Are you looking for an easy way to make a simple but effective WhatsApp animated profile picture? Go to Placeit.net, and be creative with its wide range of customizable attractive pre-built templates.
Templates are hand-drawn and professionally designed. With thousands of animated templates, you can create a profile picture in a jiffy. Placeit lets you post fun and exciting photos that attract attention and grow your fanbase in no time.
Make your profile picture come to life with this one-of-a-kind animated profile picture maker! Using its proprietary image editor, you will be able to spread smiles, laughter, surprise, and much more right in seconds.

Pros:
● The overall UI is fairly streamlined – making an animated profile picture should take more than just a few clicks
● From color schemes to changing text fonts – everything is customizable
● Templates are ultra-high-quality
Cons:
● A bit expensive monthly plan
● Pay-per-item cost is definitely not affordable
● No option to add your own custom font
03PicMonkey
PicMonkey is a powerful yet simple online photo editor that lets you showcase your creativity and brand through animated profile pictures, cover photos, advertisements of all kinds, and more. In addition to its easy-to-learn features, PicMonkey offers endless possibilities for amateurs and professionals alike!
To be a meaningful part of the social media world, creating your own profile picture is not only fun but also a smart way to show your individuality. And with PicMonkey’s image editor, crafting the perfect profile picture doesn’t have to be complicated. With over 15 million users, PicMonkey is a leading photo editing software that has been helping individuals create drool-worthy designs in minutes.

Pros:
● The interface is user-friendly, and the tool offers an easy-to-learn feature set
● With a plethora of customizable in-built templates, you can generate some fresh animated profile pictures every time you try the app
● The developer keeps the tool updated with new resources and features always
Cons:
● You cannot work on more than one template simultaneously
● Lacks a proper and detailed user guide with useful tips
● Without paying for the Pro version, you can’t access some super-handy basic features
04Powerpuff Yourself
Are you looking for an easy way to make your own avatar? Powerpuff Yourself is a user-friendly tool that produces realistic anime avatars based on your photos. The features that you can expect are –
● Anime avatars, each with six different skin tones.
● Female or male avatars,
● Unique background based on your answers to the questions, and
● About 70 different hairstyles.
Make your very own anime avatar with this cute animated profile picture generator by simply selecting mouth, eyes, glasses, hair, and dress for your preferred character. After choosing the scene for the background, answer some questions about yourself and press the button to create your avatar!

Pros:
● Choose from a variety of combinations of face, eyes, hairstyles, clothes, and accessories
● Share your fresh customized avatar with just a single click
● Available in all major languages
Cons:
● No option to upload your own custom design
● The generated avatar can’t be white-labeled as the end result gets saved with the CN logo
● While the background can be animated, you are not allowed to animate the main character
05Pixlr
Change the way you see yourself on social networks With Pixlr. It is a free online profile picture maker, tablet, and mobile photo editor with all the amazing editing features one can expect only from professional tools like Photoshop. Ever wonder how your photos would look in black-and-white or what that flower in your hand looks like as a cartoon? Go to pixlr.com, log in with Facebook to create your free account, and you will be surprised by what you can do with its host of powerful self-edit features.
Complete your online persona with the help of Pixlr, now available on browser, Android, and iOS! Use the Pixlr app to take a picture and then, with a few taps or mouse clicks, enhance and decorate it. Add funny text, use special effects filters, crop and rotate, remove red-eye - it’s all there in one app! Make an impact with your profile picture and be recognized as an expert in your field.

Pros:
● Offers a simple yet powerful browser-based graphics editing experience
● A great collection of multipurpose templates designed to keep the modern social platforms in mind
● Plenty of super useful features are available in the free version
Cons:
● Some annoying glitches in the middle of editing while shifting from one tab to another
● A fair number of options work slowly due to bugs that need to be ironed out
● The doodle tool offers no “brush” feature
06Animate Me
Animate Me is a new application for iPhone that assists you with creating animated images. It has an easy-to-use interface to make animations with photos so that you can design your own animated image in a jiffy without any hassle.
The tool has two modes to create images. One of the modes is Edit mode, where you can edit your work immediately after you finish drawing. And another is Camera mode, which allows you to make a hand-drawn animation out of videos already shot. This dp animation maker tutorial can be easy for you to understand.
Touch, draw and share your animation - with Animate Me, there is no longer any need for professional graphics tools. Create animation from your photos, GIF files, or live camera action with just a touch, and share it with family and friends by email, message or post it to your Facebook wall.

Pros:
● Straightforward user interface
● Add images from your device or Facebook album or choose one from the app’s pre-built collection
● Add exciting cool features and cute sounds to your images
Cons:
● The free version of the tool has a limited number of options
● Frequent updates come with new bugs
● Some users complained of “bad words” even in the kid’s voice
07Picstun
Do you want to make awesome animated videos with your photos easily? Picstun is the best photo animator app in the Android market which can add powerful video effects to a picture free and instantaneously. It produces beautiful cartoon effects for your photos and video, allowing you to tell animated video stories in gorgeous styles instead of sharing static pictures.
You can learn this simple yet professional photo animator easily. Users of PicStun are able to create an animated video with a variety of over 3,000 pictures in various topics and animation effects.
The best thing about this application is that you can use your gallery images, too, on which the animation will be superimposed. There are many other nifty features in this next-generation picture animation maker tool. For instance, adding text, effects, music, and more right onto your pictures is possible directly from the application interface.

Pros:
● A wide range of animation effects are available
● Allows you to preview the result before you finally save it and share the same with the world
● One-click social network sharing
Cons:
● The application often crashes when trying to import multiple images into it
● A limited number of effects beg for an update with fresh animation possibilities
● Lacks proper instructions for the new users
08Loopsie
Loopsie allows you to create picture animation using your own photos. Add emojis, text, drawings, and speech bubbles to your photos in a matter of seconds to create amazing GIF images that can be used for messages or for sharing.
Are you tired of boring photos? This animated profile picture maker lets you animate your images! Just add one of the characters to your photo and give them an animated life. Loopsie supports video creation too! Add video clips and photos, pick a theme for your video, and Loopsie will do the work for you. Now, you can also hashtag on Facebook or Twitter to show off your design like the pros!

Pros:
● An easy-to-use interface offers a short learning curve
● The resolutions of end-results are readily social media compatible
● Can share on all major social networking sites directly within the app
Cons:
● While it allows the user to import their own videos, they get ranked randomly inside the app
● A new user can find it a little difficult to use the software without enough instruction set
● Recent updates added too many gimmicky filters without actually improving the experience much
09PFPmaker
PFPmaker is the original animated profile picture maker that allows adding eye-catching animations to your profile images on major social platforms like Instagram, Facebook, Twitter, and more. With PFPMaker, creating personalized animated gifs of yourself is a piece of cake. Simply decide what you want in your animation, upload some images (or take from the in-built collection inside the app), and PFPMaker will make it happen.
Increase your brand awareness, get more likes and shares, and drive more traffic to your website - all by making custom animated profile pictures using PFPmaker. Now you can create a professional identity in a matter of seconds and acquire new followers, fans, or customers!

Pros:
● Generates strikingly gorgeous animated profile images in seconds
● Its AI-powered background removal tool works awesomely well
● Loads of customization option makes this a cool nifty tool
Cons:
● No native Android or iOS app is available; everything is browser-based
● Competitors offer more animation possibilities
● While users can request a specific feature, it gets implemented rarely
10Animated GIF Maker
Animated GIF Maker is an online tool to create animated gif pictures from the user’s photos and images. The tool can convert image files up to 6MB in size, with a maximum of 5 frames. However, files greater than 3MB in size will not be displayed on the result page
Make a photo animation! Upload your own images, and Animated Gif Maker will merge them into a cool animated GIF. You can use this tool to create an animated profile picture for your social page or just have fun making short videos with your friends’ photos. Adjust the file format, resize the image and add text to your new animated picture – whatever way you want to customize the result is possible by this little tool!

Pros:
● Allows a user to upload more than one file at the same time
● Images can be converted into multiple formats easily
● Cropping and resizing the uploaded pictures is a breeze
Cons:
● File upload size restricted to 6 MB
● No native smartphone app
● The browser-based interface offers limited functionalities
Key Takeaways from This Episode
● Keeping your Facebook, Twitter, and other social profile photos fresh is vital if you want to make a good impression.
● Or perhaps you just want to have an image that is up to date and relevant. But have you ever tried to use an animated profile picture maker?
● If not, this is the right time you choose from one of our preferred tools from this article and surprise your friends with your new whatsapp animated profile picture today.
Social media is getting more and more competitive, and it’s crucial to make a good first impression. Animated profile pictures grab the user’s attention and give the added boost that helps you become different in a good way.
This article will show you the ten top animated profile picture makers using which you can create awesome profile pictures with ease.
In this article
01 [What does “PFP” mean?](#Part 1)
02 [The 10 Best Animated Profile Picture Makers for Making awesome profile pictures](#Part 2)
03 [What Happens if You Make Animated Video Instead of Pictures?](#Part 3)
Part 1 What does “PFP” mean?
PFP stands for “Picture For Profile” or, more commonly, “Profile Picture.” It is the first thing people see when they visit your profile on a social networking website. The profile owners typically upload their own images on Facebook, Twitter, Instagram, WhatsApp, and others at different times during the year or when anything significant happens.
Adding a photo gives your followers a chance to put a face to the name and an idea of what you look like. This allows them to better relate to you and creates a strong foundation for conversations and any other type of interactions.
Part 2 The 10 Best Animated Profile Picture Makers for Making awesome profile pictures
Animated profile pictures add fun and steal the show when you add them to your social accounts. What’s more, it can be much easier to create a WhatsApp animated profile picture when you’re using the right tool. Here in this post, we present you with the ten best animated profile picture makers for your reference and use.
01Canva
Canva lets you make an animated profile picture as simple as “drag and drop” without any creativity. Canva’s unique WYSIWYG animation technique makes it very straightforward to create your own avatar - making awesome animated gifs has never been simpler.
The UI is simple enough that even the smallest of details are well thought out. The captions are editable, so you easily customize the words appearing in each awesome gif.
Canva, one of the best animated profile picture makers, is a great alternative for those who prefer to work and create using the browser and without downloading and installing any software. You can also access Canva directly from any mobile device or tablet, making it convenient for you to share creative greetings and social media posts with your friends and loved ones.
●Pros:
● A near-unlimited number of stunning pre-built templates for a wide range of usage
● Beautiful and easy-to-use application interface
● The tool gets frequent bug fixes and updates with the latest features and even more templates
Cons:
● The free plan comes with a pretty meager cloud storage capacity
● No vector design is possible
● Lack of the ability to connect more than one Facebook login for those who handle personal and business pages separately
02Placeit
Are you looking for an easy way to make a simple but effective WhatsApp animated profile picture? Go to Placeit.net, and be creative with its wide range of customizable attractive pre-built templates.
Templates are hand-drawn and professionally designed. With thousands of animated templates, you can create a profile picture in a jiffy. Placeit lets you post fun and exciting photos that attract attention and grow your fanbase in no time.
Make your profile picture come to life with this one-of-a-kind animated profile picture maker! Using its proprietary image editor, you will be able to spread smiles, laughter, surprise, and much more right in seconds.
Pros:
● The overall UI is fairly streamlined – making an animated profile picture should take more than just a few clicks
● From color schemes to changing text fonts – everything is customizable
● Templates are ultra-high-quality
Cons:
● A bit expensive monthly plan
● Pay-per-item cost is definitely not affordable
● No option to add your own custom font
03PicMonkey
PicMonkey is a powerful yet simple online photo editor that lets you showcase your creativity and brand through animated profile pictures, cover photos, advertisements of all kinds, and more. In addition to its easy-to-learn features, PicMonkey offers endless possibilities for amateurs and professionals alike!
To be a meaningful part of the social media world, creating your own profile picture is not only fun but also a smart way to show your individuality. And with PicMonkey’s image editor, crafting the perfect profile picture doesn’t have to be complicated. With over 15 million users, PicMonkey is a leading photo editing software that has been helping individuals create drool-worthy designs in minutes.
Pros:
● The interface is user-friendly, and the tool offers an easy-to-learn feature set
● With a plethora of customizable in-built templates, you can generate some fresh animated profile pictures every time you try the app
● The developer keeps the tool updated with new resources and features always
Cons:
● You cannot work on more than one template simultaneously
● Lacks a proper and detailed user guide with useful tips
● Without paying for the Pro version, you can’t access some super-handy basic features
04Powerpuff Yourself
Are you looking for an easy way to make your own avatar? Powerpuff Yourself is a user-friendly tool that produces realistic anime avatars based on your photos. The features that you can expect are –
● Anime avatars, each with six different skin tones.
● Female or male avatars,
● Unique background based on your answers to the questions, and
● About 70 different hairstyles.
Make your very own anime avatar with this cute animated profile picture generator by simply selecting mouth, eyes, glasses, hair, and dress for your preferred character. After choosing the scene for the background, answer some questions about yourself and press the button to create your avatar!
Pros:
● Choose from a variety of combinations of face, eyes, hairstyles, clothes, and accessories
● Share your fresh customized avatar with just a single click
● Available in all major languages
Cons:
● No option to upload your own custom design
● The generated avatar can’t be white-labeled as the end result gets saved with the CN logo
● While the background can be animated, you are not allowed to animate the main character
05Pixlr
Change the way you see yourself on social networks With Pixlr. It is a free online profile picture maker, tablet, and mobile photo editor with all the amazing editing features one can expect only from professional tools like Photoshop. Ever wonder how your photos would look in black-and-white or what that flower in your hand looks like as a cartoon? Go to pixlr.com, log in with Facebook to create your free account, and you will be surprised by what you can do with its host of powerful self-edit features.
Complete your online persona with the help of Pixlr, now available on browser, Android, and iOS! Use the Pixlr app to take a picture and then, with a few taps or mouse clicks, enhance and decorate it. Add funny text, use special effects filters, crop and rotate, remove red-eye - it’s all there in one app! Make an impact with your profile picture and be recognized as an expert in your field.
Pros:
● Offers a simple yet powerful browser-based graphics editing experience
● A great collection of multipurpose templates designed to keep the modern social platforms in mind
● Plenty of super useful features are available in the free version
Cons:
● Some annoying glitches in the middle of editing while shifting from one tab to another
● A fair number of options work slowly due to bugs that need to be ironed out
● The doodle tool offers no “brush” feature
06Animate Me
Animate Me is a new application for iPhone that assists you with creating animated images. It has an easy-to-use interface to make animations with photos so that you can design your own animated image in a jiffy without any hassle.
The tool has two modes to create images. One of the modes is Edit mode, where you can edit your work immediately after you finish drawing. And another is Camera mode, which allows you to make a hand-drawn animation out of videos already shot. This dp animation maker tutorial can be easy for you to understand.
Touch, draw and share your animation - with Animate Me, there is no longer any need for professional graphics tools. Create animation from your photos, GIF files, or live camera action with just a touch, and share it with family and friends by email, message or post it to your Facebook wall.
Pros:
● Straightforward user interface
● Add images from your device or Facebook album or choose one from the app’s pre-built collection
● Add exciting cool features and cute sounds to your images
Cons:
● The free version of the tool has a limited number of options
● Frequent updates come with new bugs
● Some users complained of “bad words” even in the kid’s voice
07Picstun
Do you want to make awesome animated videos with your photos easily? Picstun is the best photo animator app in the Android market which can add powerful video effects to a picture free and instantaneously. It produces beautiful cartoon effects for your photos and video, allowing you to tell animated video stories in gorgeous styles instead of sharing static pictures.
You can learn this simple yet professional photo animator easily. Users of PicStun are able to create an animated video with a variety of over 3,000 pictures in various topics and animation effects.
The best thing about this application is that you can use your gallery images, too, on which the animation will be superimposed. There are many other nifty features in this next-generation picture animation maker tool. For instance, adding text, effects, music, and more right onto your pictures is possible directly from the application interface.
Pros:
● A wide range of animation effects are available
● Allows you to preview the result before you finally save it and share the same with the world
● One-click social network sharing
Cons:
● The application often crashes when trying to import multiple images into it
● A limited number of effects beg for an update with fresh animation possibilities
● Lacks proper instructions for the new users
08Loopsie
Loopsie allows you to create picture animation using your own photos. Add emojis, text, drawings, and speech bubbles to your photos in a matter of seconds to create amazing GIF images that can be used for messages or for sharing.
Are you tired of boring photos? This animated profile picture maker lets you animate your images! Just add one of the characters to your photo and give them an animated life. Loopsie supports video creation too! Add video clips and photos, pick a theme for your video, and Loopsie will do the work for you. Now, you can also hashtag on Facebook or Twitter to show off your design like the pros!
Pros:
● An easy-to-use interface offers a short learning curve
● The resolutions of end-results are readily social media compatible
● Can share on all major social networking sites directly within the app
Cons:
● While it allows the user to import their own videos, they get ranked randomly inside the app
● A new user can find it a little difficult to use the software without enough instruction set
● Recent updates added too many gimmicky filters without actually improving the experience much
09PFPmaker
PFPmaker is the original animated profile picture maker that allows adding eye-catching animations to your profile images on major social platforms like Instagram, Facebook, Twitter, and more. With PFPMaker, creating personalized animated gifs of yourself is a piece of cake. Simply decide what you want in your animation, upload some images (or take from the in-built collection inside the app), and PFPMaker will make it happen.
Increase your brand awareness, get more likes and shares, and drive more traffic to your website - all by making custom animated profile pictures using PFPmaker. Now you can create a professional identity in a matter of seconds and acquire new followers, fans, or customers!
Pros:
● Generates strikingly gorgeous animated profile images in seconds
● Its AI-powered background removal tool works awesomely well
● Loads of customization option makes this a cool nifty tool
Cons:
● No native Android or iOS app is available; everything is browser-based
● Competitors offer more animation possibilities
● While users can request a specific feature, it gets implemented rarely
10Animated GIF Maker
Animated GIF Maker is an online tool to create animated gif pictures from the user’s photos and images. The tool can convert image files up to 6MB in size, with a maximum of 5 frames. However, files greater than 3MB in size will not be displayed on the result page
Make a photo animation! Upload your own images, and Animated Gif Maker will merge them into a cool animated GIF. You can use this tool to create an animated profile picture for your social page or just have fun making short videos with your friends’ photos. Adjust the file format, resize the image and add text to your new animated picture – whatever way you want to customize the result is possible by this little tool!
Pros:
● Allows a user to upload more than one file at the same time
● Images can be converted into multiple formats easily
● Cropping and resizing the uploaded pictures is a breeze
Cons:
● File upload size restricted to 6 MB
● No native smartphone app
● The browser-based interface offers limited functionalities
Key Takeaways from This Episode
● Keeping your Facebook, Twitter, and other social profile photos fresh is vital if you want to make a good impression.
● Or perhaps you just want to have an image that is up to date and relevant. But have you ever tried to use an animated profile picture maker?
● If not, this is the right time you choose from one of our preferred tools from this article and surprise your friends with your new whatsapp animated profile picture today.
Also read:
- How to Animate - Adobe Animate Tutorial for All for 2024
- New Whats Rigging Animation and Why It Matters
- New Learn How to Draw Cartoons Step by Step with This Guide for 2024
- In 2024, Learn Simple Blender Rigging in Only 2 Minutes
- 2024 Approved Can I Do Animated Logo Design Without Design Skills?
- New 2024 Approved How to Draw A Skeleton Cartoon – A Step by Step Guide
- New 2024 Approved Learn All About Lip-Syncing in Animation
- Updated 2024 Approved 10 Photoshop Cartoon Effects For Creatives
- Updated In 2024, Secrets to Make 2D Game Animation
- New Best Guide for Beginners on 2D Animation Making
- New In 2024, How to Analyze an Editorial Cartoon Easily
- Updated In 2024, 18 Best Tools and Services to Create Animated Videos for Your Business
- Updated In 2024, Learn How to Make Architecture Animation
- Updated In 2024, Techniques for Creating Animated Logo That Few People Know About
- New In 2024, What Wikipedia Cant Tell You About the 10 Best Batman Cartoons
- New 10 Cartoon Photo Converters
- How To Get Out of Recovery or DFU Mode on iPhone XR? | Dr.fone
- Fix Unfortunately Settings Has Stopped on Samsung Galaxy XCover 7 Quickly | Dr.fone
- In 2024, Easiest Guide How to Clone Samsung Galaxy Z Flip 5 Phone? | Dr.fone
- How To Restore Missing Messages Files from Motorola Edge 2023
- The Best 8 VPN Hardware Devices Reviewed On Itel P40 | Dr.fone
- Full Solutions to Fix Error Code 920 In Google Play on Vivo Y200e 5G | Dr.fone
- In 2024, How to Unlock T-Mobile iPhone 12 online without SIM Card?
- Reasons for Xiaomi Redmi Note 12 5G Stuck on Startup Screen and Ways To Fix Them | Dr.fone
- How to Fix OnePlus 12 Find My Friends No Location Found? | Dr.fone
- Can I Bypass a Forgotten Phone Password Of Realme?
- The Updated Method to Bypass Samsung Galaxy M34 FRP
- Complete Tutorial to Use VPNa to Fake GPS Location On Realme V30 | Dr.fone
- How to Reset Apple ID and Apple Password On iPhone SE
- A Detailed Guide on Faking Your Location in Mozilla Firefox On Vivo X100 | Dr.fone
- Title: In 2024, Have You Seen the Facebook Cartoon App Everyones Using Recently
- Author: Elon
- Created at : 2024-06-15 11:23:03
- Updated at : 2024-06-16 11:23:03
- Link: https://animation-videos.techidaily.com/in-2024-have-you-seen-the-facebook-cartoon-app-everyones-using-recently/
- License: This work is licensed under CC BY-NC-SA 4.0.
