
:max_bytes(150000):strip_icc():format(webp)/man-measuring-tv-size-102761115-getty-5bf8513246e0fb008321de5f.jpg)
In 2024, How to Analyze an Editorial Cartoon Easily
How to Analyze an Editorial Cartoon Easily
How to Analyze an Editorial Cartoon
An easy yet powerful editor
Numerous effects to choose from
Detailed tutorials provided by the official channel
We all remember opening our daily newspaper and seeing a graphical representation of some new scoop or story that gives you a gist of what is happening, usually involving humor or sarcasm. That is what one would call and editorial cartoon and they are quite popular amongst newspapers, internet blogs and most recently, Social Media.
Some would even say that ‘Memes’ are an evolved form of editorial cartoons. They are funny, entertaining and can even portray some type of story. Editorial cartoons, in layman terms are a graphical approach to reflect the creator’s ideas. These are usually drawn on a tight deadline; hence feature simple caricatures and whimsical characters.
Cartoonists and hobbyists around the world can save on time using online tools to bring their ideas to life. Today, with some help from the right technology, anybody can try their hands in drawing amazing characters, combining both visual and verbal languages.
If you are someone who feels they have an amazing idea for a cartoon but lacks the skills to draw one can choose from a plethora of tools like Powtown, Photoshop or AI Artist to create amazing sketches and drawing, in half the time.
In this article
01 [Always Be Timely — Editorial Cartoons in a Snap](#Part 1)
02 [The 8 Best Apps to Turn Photos Into Cartoons and Sketches](#Part 2)
03 [How to Make 3D Cartoon From a Photo](#Part 3)
Part 1 Always Be Timely — Editorial Cartoons in a Snap
When a new idea pops into your head, we are usually overwhelmed or excited by its prospects of it that we forget to analyze its features before proceeding to turn it into a cartoon. Here are some tips to help you look into the details of your cartoon.
● Make a note of all the characters in your cartoon strip, what actions are they involved in and the dialogues that are being uttered.
● From which angle or whose angle the story is being told.
● Divide the cartoon design into four quadrants; Top Right & Left, Bottom Right & Left.
● Pay attention to key elements such as use of furniture, tools, technology or signs.
● Define traits like time of day, time of the year or time in history where the context is set.
● Keep in mind the audience you are reaching out to. You can ensure reliability the subtle use of intellect and humour.
Now that you have a clearer picture of what you are trying to depict it is best not to delay the idea and start cracking your creative eggs.
Beginners can use an easy tool like Powtoon, and its simple drag and drop interface to start making cartoons in just three simple steps. You can save up on a lot of time and get your cartoon ready for uploading to your new blog post.
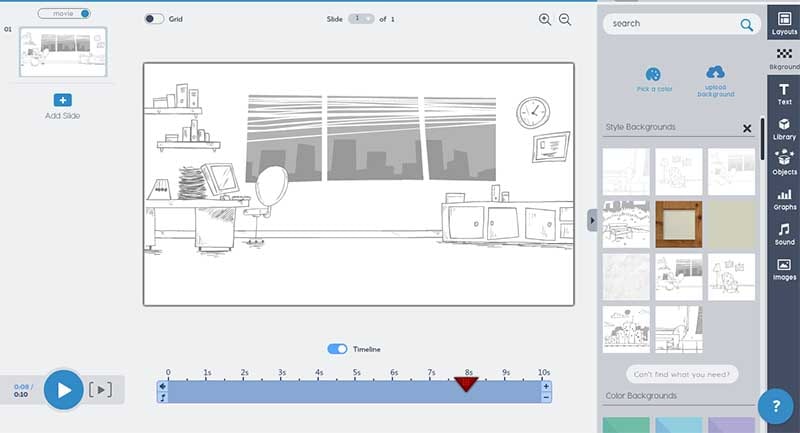
Step 1: Set a Background for your Cartoon
Open the Powtoon Studio on your system and click on ‘Backgrounds’ located on the panel to your right. It will open up a vast library filled with ready to use backgrounds.
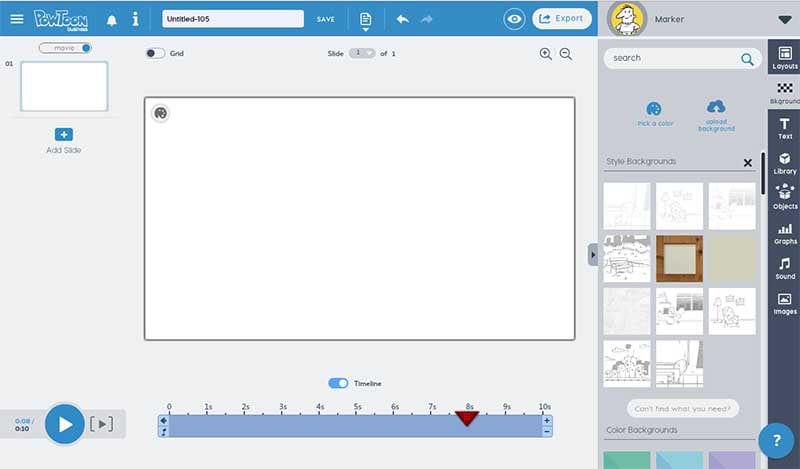
Select any you like to get started. It will intently appear on the board.
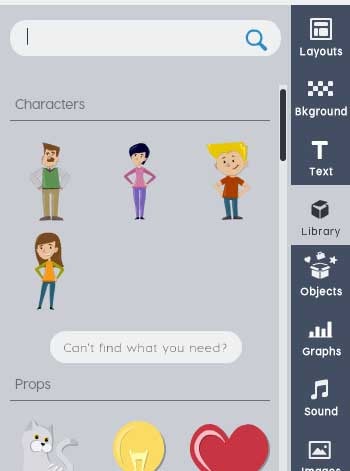
Step 2: Select the Characters for your Cartoon
Well, you have a setting and now it is time to place your characters in it. Click on the ‘Animated Character’ from the panel. Choose any template for your characters.
Step 3: Add the Text
There are various ways you can add dialogues, messages or texts to your cartoon. You can click on ‘Text’ and add a Quote Box or Dialogue Box. You can edit your text by simply clicking on the box.
Part 2 The 8 Best Apps to Turn Photos Into Cartoons and Sketches
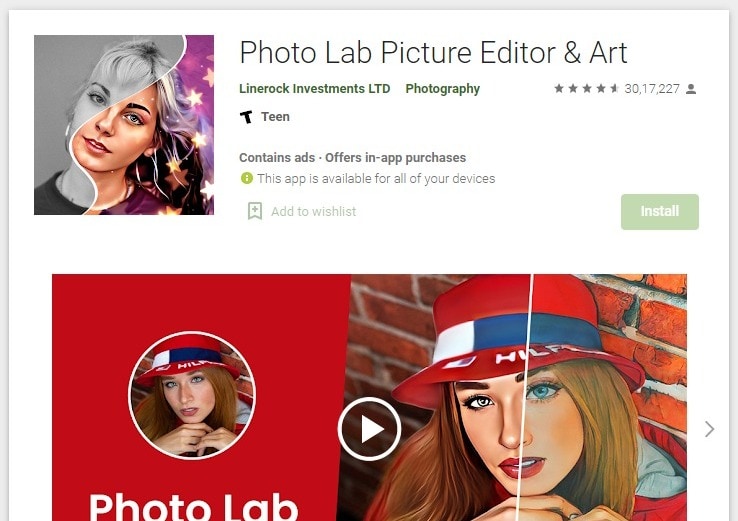
01Photo Lab Picture Editor
Photolab is a great choice for turning your photos into a painting, sketch or a watercolor image. Along with filters you will get montages, borders and frames to make your art work more realistic. You will find all presets in the effects category. It also features filters like digital rain and jigsaw puzzle. Photolab can also be used as a photo editor as it is capable to perform color adjustment, rotate and crop.
Key Features:
● 800+ effects.
● E-card templates for special occasions.
● You can choose a photo from gallery or click one using the camera app.
02Prisma Photo Editor
Prisma has the magical ability to turn your photo or sketch into a Van Gogh or Picasso style painting. Wondering how? It has filters that are inspired by the eminent artist around the world. Choose a photo from your gallery and choose from exciting filters. Prisma also have cool editing tools that help you adjust the intensity of the filters applied if you want to.
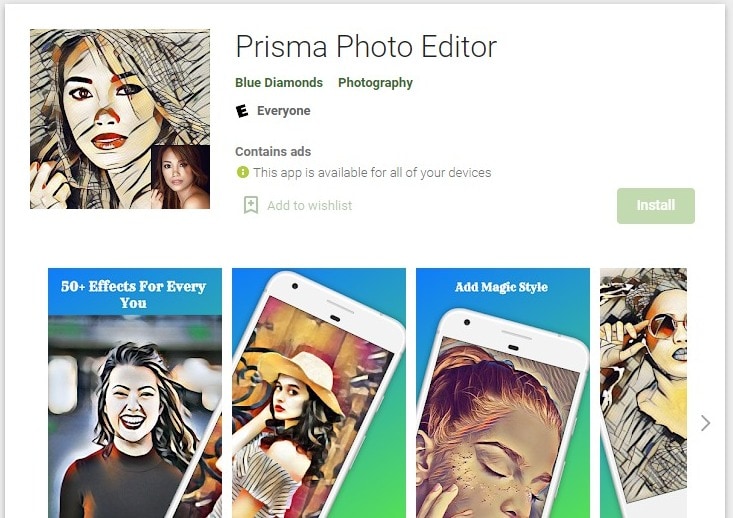
Key Features
● Online App community.
● Similar to Instagram
● artistic filters.
03Paint Lab – Photo Cartoon
Paintlab features an easy to use interface and wide range of filters. With it you can turn any photos into a cartoon or a drawing just in few seconds. Once you are done editing you can share your final work on any social media platform directly from paintlab. It is compatible only with androids.
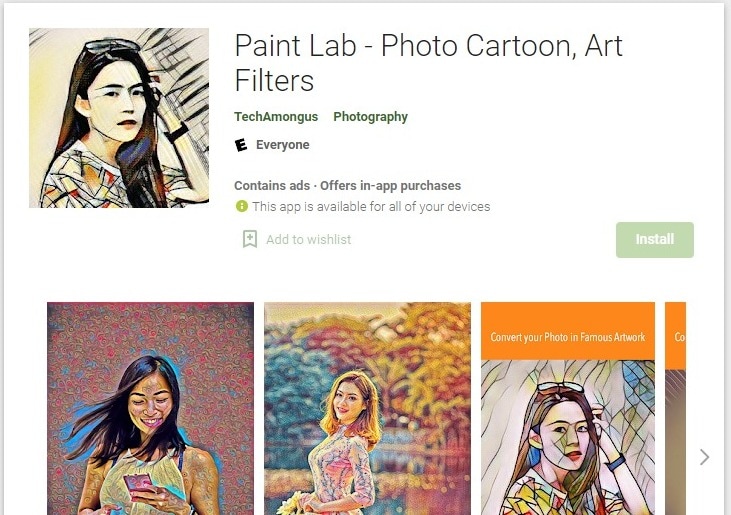
Key Fetaures
● Fast editing
● Perfect or beginners.
● Includes beautification and imperfection correction tools and effects.
04Cartoon Photo PRO
Using Cartoon Photo Pro alongside your photos you can also turn your videos into cartoon. Effects are artistic and customizable. Only downside it doesn’t come for free. It also has great ratings in Playstore.

Key Features
● User friendly interface
● Animates videos.
05Brushstroke
Brushstroke is ideal for editing and printing high resolution photos. The app comes with a paint directly option. It is not android compatible. The best feature is apart from filters and painting styles you can also pick the color palette and canvas surface.
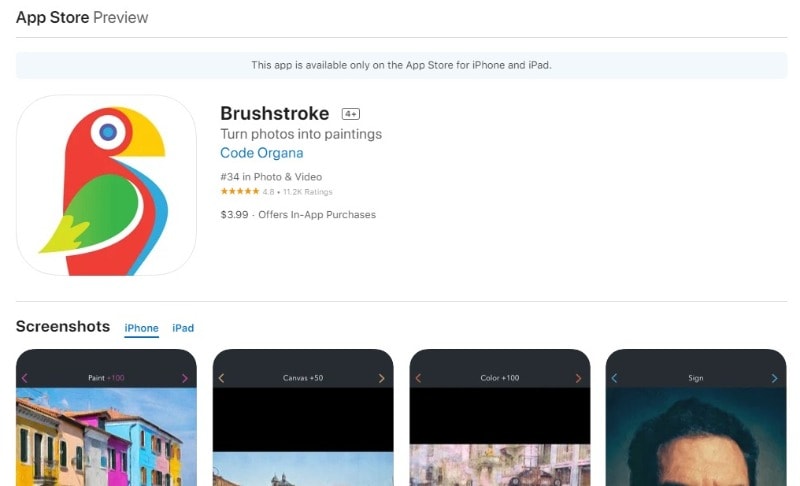
Key Features
● You can sign your photos before printing
● Wide range of styles and sub-styles.
06Clip2Comic
If you like having fun and playing around we bet you would love an photo editing app that turn your close ones’ photo into caricatures. One tap can give you comic-book style drawing and sketches. This is one of best sketch and animation apps suggested for iPhone users. User friendly interface is an added bonus.
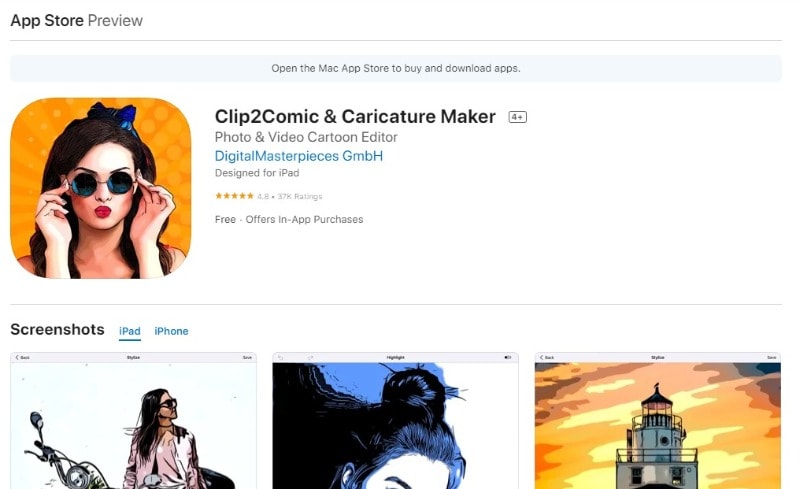
Key Features
● Live preview animation camera option.
● Carton-style photo effects.
07PhotoMania
PhotoMania is fun to use, if you want to try out different effects then you are at the right app. It has 400 presets in total including vintage looks and effects for sketches. PhotoMania has a collection of cool and exciting frames that you can add to your photos to make them more interesting. If you are someone who likes to send e-cards here you will get dozens of options. You can also utilize PhotoMania as a photo editor as it features the best exposure settings. And we know how important masking tool is, it helps you create neat photos, the app also has this amazing feature.
Key Features:
● Advanced photo editing tools and presets, for instance HDR and LOMO.
● It can also make your photo a painting.
● Adds textures and offers holiday templates.
08Toonme
Toonme has similar photo editing features like Clip2Comic. Only it is better. It has AI assistance that helps you create realistic effects. You can choose from the variety of styles and even tweak them to get a personalized style. Toonme is free to download but if you want use pro features you can subscribe to their monthly affordable package. Also, it is compatible with both iOS and Android devices.
Key Features:
● Offers hand-drawn effects.
● Offers numerous layouts that goes well with profile pictures even instagram stories.
● You can share your work with other Toonme Users.
Part 3 How to Make 3D Cartoon From a Photo
Do you know that animators used to hand sketch every frame and every detail that too with continuation? Thanks to our modern day technology we can take a snap of any object or person and turn that into a cartoon within few seconds. With the right amount of help and creativity you can create characters that are entertaining and engaging at the same time. Wondershare Filmora Video Editor can be used to create animated videos. Amazing features and filters save editing time while making the entire process flexible. Though we have already mentioned eight apps for sketching, animating and caricaturing your photos, Filmora is a complete package. Motion tracking, easy zoom in and out, masking, panning and color correction are some of the best features offered by this editing software. It can run on both PC and Mac. User friendly interface suits both professionals as well as beginner.
For Win 7 or later (64-bit)
For macOS 10.12 or later
● Ending Thoughts →
● Creating an animated video that stands as an exception is now simple and hassle-free.
● Never be afraid to experiment and explore amazing ways of story-telling.
● Things discussed so far will help you analyze and understand cartoons and animation.
We all remember opening our daily newspaper and seeing a graphical representation of some new scoop or story that gives you a gist of what is happening, usually involving humor or sarcasm. That is what one would call and editorial cartoon and they are quite popular amongst newspapers, internet blogs and most recently, Social Media.
Some would even say that ‘Memes’ are an evolved form of editorial cartoons. They are funny, entertaining and can even portray some type of story. Editorial cartoons, in layman terms are a graphical approach to reflect the creator’s ideas. These are usually drawn on a tight deadline; hence feature simple caricatures and whimsical characters.
Cartoonists and hobbyists around the world can save on time using online tools to bring their ideas to life. Today, with some help from the right technology, anybody can try their hands in drawing amazing characters, combining both visual and verbal languages.
If you are someone who feels they have an amazing idea for a cartoon but lacks the skills to draw one can choose from a plethora of tools like Powtown, Photoshop or AI Artist to create amazing sketches and drawing, in half the time.
In this article
01 [Always Be Timely — Editorial Cartoons in a Snap](#Part 1)
02 [The 8 Best Apps to Turn Photos Into Cartoons and Sketches](#Part 2)
03 [How to Make 3D Cartoon From a Photo](#Part 3)
Part 1 Always Be Timely — Editorial Cartoons in a Snap
When a new idea pops into your head, we are usually overwhelmed or excited by its prospects of it that we forget to analyze its features before proceeding to turn it into a cartoon. Here are some tips to help you look into the details of your cartoon.
● Make a note of all the characters in your cartoon strip, what actions are they involved in and the dialogues that are being uttered.
● From which angle or whose angle the story is being told.
● Divide the cartoon design into four quadrants; Top Right & Left, Bottom Right & Left.
● Pay attention to key elements such as use of furniture, tools, technology or signs.
● Define traits like time of day, time of the year or time in history where the context is set.
● Keep in mind the audience you are reaching out to. You can ensure reliability the subtle use of intellect and humour.
Now that you have a clearer picture of what you are trying to depict it is best not to delay the idea and start cracking your creative eggs.
Beginners can use an easy tool like Powtoon, and its simple drag and drop interface to start making cartoons in just three simple steps. You can save up on a lot of time and get your cartoon ready for uploading to your new blog post.
Step 1: Set a Background for your Cartoon
Open the Powtoon Studio on your system and click on ‘Backgrounds’ located on the panel to your right. It will open up a vast library filled with ready to use backgrounds.
Select any you like to get started. It will intently appear on the board.
Step 2: Select the Characters for your Cartoon
Well, you have a setting and now it is time to place your characters in it. Click on the ‘Animated Character’ from the panel. Choose any template for your characters.
Step 3: Add the Text
There are various ways you can add dialogues, messages or texts to your cartoon. You can click on ‘Text’ and add a Quote Box or Dialogue Box. You can edit your text by simply clicking on the box.
Part 2 The 8 Best Apps to Turn Photos Into Cartoons and Sketches
01Photo Lab Picture Editor
Photolab is a great choice for turning your photos into a painting, sketch or a watercolor image. Along with filters you will get montages, borders and frames to make your art work more realistic. You will find all presets in the effects category. It also features filters like digital rain and jigsaw puzzle. Photolab can also be used as a photo editor as it is capable to perform color adjustment, rotate and crop.
Key Features:
● 800+ effects.
● E-card templates for special occasions.
● You can choose a photo from gallery or click one using the camera app.
02Prisma Photo Editor
Prisma has the magical ability to turn your photo or sketch into a Van Gogh or Picasso style painting. Wondering how? It has filters that are inspired by the eminent artist around the world. Choose a photo from your gallery and choose from exciting filters. Prisma also have cool editing tools that help you adjust the intensity of the filters applied if you want to.
Key Features
● Online App community.
● Similar to Instagram
● artistic filters.
03Paint Lab – Photo Cartoon
Paintlab features an easy to use interface and wide range of filters. With it you can turn any photos into a cartoon or a drawing just in few seconds. Once you are done editing you can share your final work on any social media platform directly from paintlab. It is compatible only with androids.
Key Fetaures
● Fast editing
● Perfect or beginners.
● Includes beautification and imperfection correction tools and effects.
04Cartoon Photo PRO
Using Cartoon Photo Pro alongside your photos you can also turn your videos into cartoon. Effects are artistic and customizable. Only downside it doesn’t come for free. It also has great ratings in Playstore.
Key Features
● User friendly interface
● Animates videos.
05Brushstroke
Brushstroke is ideal for editing and printing high resolution photos. The app comes with a paint directly option. It is not android compatible. The best feature is apart from filters and painting styles you can also pick the color palette and canvas surface.
Key Features
● You can sign your photos before printing
● Wide range of styles and sub-styles.
06Clip2Comic
If you like having fun and playing around we bet you would love an photo editing app that turn your close ones’ photo into caricatures. One tap can give you comic-book style drawing and sketches. This is one of best sketch and animation apps suggested for iPhone users. User friendly interface is an added bonus.
Key Features
● Live preview animation camera option.
● Carton-style photo effects.
07PhotoMania
PhotoMania is fun to use, if you want to try out different effects then you are at the right app. It has 400 presets in total including vintage looks and effects for sketches. PhotoMania has a collection of cool and exciting frames that you can add to your photos to make them more interesting. If you are someone who likes to send e-cards here you will get dozens of options. You can also utilize PhotoMania as a photo editor as it features the best exposure settings. And we know how important masking tool is, it helps you create neat photos, the app also has this amazing feature.
Key Features:
● Advanced photo editing tools and presets, for instance HDR and LOMO.
● It can also make your photo a painting.
● Adds textures and offers holiday templates.
08Toonme
Toonme has similar photo editing features like Clip2Comic. Only it is better. It has AI assistance that helps you create realistic effects. You can choose from the variety of styles and even tweak them to get a personalized style. Toonme is free to download but if you want use pro features you can subscribe to their monthly affordable package. Also, it is compatible with both iOS and Android devices.
Key Features:
● Offers hand-drawn effects.
● Offers numerous layouts that goes well with profile pictures even instagram stories.
● You can share your work with other Toonme Users.
Part 3 How to Make 3D Cartoon From a Photo
Do you know that animators used to hand sketch every frame and every detail that too with continuation? Thanks to our modern day technology we can take a snap of any object or person and turn that into a cartoon within few seconds. With the right amount of help and creativity you can create characters that are entertaining and engaging at the same time. Wondershare Filmora Video Editor can be used to create animated videos. Amazing features and filters save editing time while making the entire process flexible. Though we have already mentioned eight apps for sketching, animating and caricaturing your photos, Filmora is a complete package. Motion tracking, easy zoom in and out, masking, panning and color correction are some of the best features offered by this editing software. It can run on both PC and Mac. User friendly interface suits both professionals as well as beginner.
For Win 7 or later (64-bit)
For macOS 10.12 or later
● Ending Thoughts →
● Creating an animated video that stands as an exception is now simple and hassle-free.
● Never be afraid to experiment and explore amazing ways of story-telling.
● Things discussed so far will help you analyze and understand cartoons and animation.
10 2D/3D Animation Tips & Tricks for You
10 2D/3D Animation Tips & Tricks to Bring New Ideas to You

Shanoon Cox
Mar 27, 2024• Proven solutions
Animation is a skill that you need years to practice. However, the learning process can be boosted if you master some animation tips. If you’re looking for great 2D/3D animation tips and tricks, this is what we will offer here.
There are some overlaps between 2D and 3D animation tips like practicing and object pose, but in essence, animation tips can be learned commonly.
These animation tips will help you make your 2D and 3D animations as bold and creative as possible, while reduce your workload and enable you to get your work out into the world quicker with excellent animation software . Let’s take a look at the top 10 2D/3D animation tips and tricks right now.
- Part 1: 2D Animation Tips for Beginners
- Part 2: 3D Animation Tips for Beginners
- Part 3: Frequently Asked Questions about Animation Tips
You may also like: Top 10 Anime Websites to Watch Anime Free
Part 1: 2D Animation Tips for Beginners
1. Find a reference in the real world
This first 2D animation tip is to find a reference. Using a real-world reference can help you animate faces effectively. When studios work with voice-over artists , they often record their facial movements so 2D animators can work with them and ensure their expressions are captured convincingly.
If this isn’t possible, consider using your face, so you have something to refer back to. You could use a mirror and speak the words your character will be saying into it. This can help you get the animated expressions just right.

2. Observe real life
The second animation tip is about observation. One of the key aspects of 2D animation is bringing life to animate objections. You need to think hard about how emotion can be portrayed and choose each movement carefully.
Spend time watching how people in real-life environments talk and interact with each one another, how they move, and how they express emotion. People-watching can be worth its weight in gold when it comes to preparing animations for 2D. Don’t be afraid to spend a great deal of time doing this, as it can be counted as valuable research.

3. Simplicity is the key
2D animation is never complicated compared with 3D. Think carefully before making a scene too complex. If there is too much information to digest, the overall effect can be one of confusion, and you may even find yourself compromising the realism of the scene. Try not to litter the scene with too many pose changes or other elements, and keep it authentic.

4. Draw animation again and again
Drawing animation takes a lot of time. It can’t be finished within one day, so you better know deep down that one piece of work only can be done after you have revised it many times. For 2D animation, it means you need to draw objects on paper many times.
In other words, the animation is a skill that needs practice and time. You can’t master it quickly. Luckily, all pains will be rewarded someday.

5. Feedback is crucial
Feedback is an essential part of artistic development . It’s wise to actively seek out commentary from knowledgeable figures who can help you improve. Naturally, we may see work we have invested a great deal of time and effort indifferently to someone not so involved in the creative process. Feedback can equate to a valuable learning opportunity that will help you make the result hit the spot much more convincingly.

Part 2: 3D Animation Tips for Beginners
Speaking of 3D animation, we think it is not easy to start at first. In this case, you need more tips and tricks.
6. Carefully use keyframing
3D Animation is all about poses. Remember, this animation tip is crucial. Individual frames come together to create movement and tell a story. The keyframes in 3D animation videos are the first and last movements in any sequence. You need to create strong first and last poses for your movements before deciding what happens between them. You must make these poses as memorable and powerful as you can.

7. Evaluate constructive criticism
It’s vital to pay attention to constructive criticism rather than simply choosing to ignore it. Most examples of constructive criticism aren’t about offending you, and friendly advice can play a pivotal role in helping you get the results that you are looking for.
This 3D animation tip can take years to reach the level you want to when it comes to the animation industry. Even if you don’t receive a great deal of or even any positive feedback, the people offering their comments may simply be trying to help you so you can improve. You may find that the criticism is being made purely because of personal preference on the part of the commentator.

8. Take the rhythm in animation
For 3D stop motion animation video, rhythm is an element to do storytelling. The best 3D animations have a strong sense of rhythm and a natural movement flow. Many inexperienced animators have found themselves animating too fast or slow. Don’t worry if you have this problem in the early days, as chances are you’ll start to get it right with time. Timing and spacing between your frames create movement in your animation. With time, you will get a better idea of how many frames you need to move the object from point A to B.

9. Basic model
You may see your system working too hard when you use a high-res model , and this can dramatically slow down the animation process. When you playback the animation in real-time, you may not see every frame. If you are working on the motion of a character, use a simple proxy 3D model to prevent this problem. You can then work more effectively with movement and return the more complex model to the process later.

10. Use ‘shark fin’
This is a advanced 3D animation tip for you. A curve known as the ‘shark fin’ is often used for facial animation processes. This can help you represent rapid facial movements, including those involving the lips and eyebrows. Faces can move very quickly, so it’s wise to make expressions occur within just one or two frames, or three if the spacing demands it.

Part 3: Frequently Asked Questions about Animation Tips
Below are four FAQs about 2D and 3D animation tips that people have asked many times. Hope they are helpful.
1. Are there any animation tricks to use?
We must say muting dialogue is one trick you should know. If your audio is on, you need to listen to it again and again. Thus, audio can disturb your creating process. After you finished the animation, you can turn audio on to revise the animation.
Besides, when you do animation, another trick is you can pause the post before the character goes into the next pose. It is a commonly used trick used by professionals, so you might think it is useful.
2. Is animation hard to learn?
Many beginners are wondering is it difficult to learn animation. The answer is NO if you are about to learn 2D animation. Many tutorials and lessons are easy to find in the market. However, if you start on 3D animation, it will be much harder than you thought. In this case, we recommend you learning 2D animation first.
3. Can I learn animation on my own?
You can learn animation on your own, but that’s not the best way. We recommend you learning animation by attending a training class , especially if you are a starter. You can build a solid animation knowledge base fast compared with learning on your own.
4. How can I get better at animation?
The best answer to get better is to imitate and practice. This tip is the most useful, practical, but difficult to complete one. If you can practice like half a year, you will get much better at animation.
Conclusion
By taking the above animation tips, you can create engaging, inspiring, and unforgettable animations that will captivate your audience. Why not get started following these animation tips right now?
Shanoon Cox
Shanoon Cox is a writer and a lover of all things video.
Follow @Shanoon Cox
Shanoon Cox
Mar 27, 2024• Proven solutions
Animation is a skill that you need years to practice. However, the learning process can be boosted if you master some animation tips. If you’re looking for great 2D/3D animation tips and tricks, this is what we will offer here.
There are some overlaps between 2D and 3D animation tips like practicing and object pose, but in essence, animation tips can be learned commonly.
These animation tips will help you make your 2D and 3D animations as bold and creative as possible, while reduce your workload and enable you to get your work out into the world quicker with excellent animation software . Let’s take a look at the top 10 2D/3D animation tips and tricks right now.
- Part 1: 2D Animation Tips for Beginners
- Part 2: 3D Animation Tips for Beginners
- Part 3: Frequently Asked Questions about Animation Tips
You may also like: Top 10 Anime Websites to Watch Anime Free
Part 1: 2D Animation Tips for Beginners
1. Find a reference in the real world
This first 2D animation tip is to find a reference. Using a real-world reference can help you animate faces effectively. When studios work with voice-over artists , they often record their facial movements so 2D animators can work with them and ensure their expressions are captured convincingly.
If this isn’t possible, consider using your face, so you have something to refer back to. You could use a mirror and speak the words your character will be saying into it. This can help you get the animated expressions just right.
2. Observe real life
The second animation tip is about observation. One of the key aspects of 2D animation is bringing life to animate objections. You need to think hard about how emotion can be portrayed and choose each movement carefully.
Spend time watching how people in real-life environments talk and interact with each one another, how they move, and how they express emotion. People-watching can be worth its weight in gold when it comes to preparing animations for 2D. Don’t be afraid to spend a great deal of time doing this, as it can be counted as valuable research.
3. Simplicity is the key
2D animation is never complicated compared with 3D. Think carefully before making a scene too complex. If there is too much information to digest, the overall effect can be one of confusion, and you may even find yourself compromising the realism of the scene. Try not to litter the scene with too many pose changes or other elements, and keep it authentic.
4. Draw animation again and again
Drawing animation takes a lot of time. It can’t be finished within one day, so you better know deep down that one piece of work only can be done after you have revised it many times. For 2D animation, it means you need to draw objects on paper many times.
In other words, the animation is a skill that needs practice and time. You can’t master it quickly. Luckily, all pains will be rewarded someday.
5. Feedback is crucial
Feedback is an essential part of artistic development . It’s wise to actively seek out commentary from knowledgeable figures who can help you improve. Naturally, we may see work we have invested a great deal of time and effort indifferently to someone not so involved in the creative process. Feedback can equate to a valuable learning opportunity that will help you make the result hit the spot much more convincingly.
Part 2: 3D Animation Tips for Beginners
Speaking of 3D animation, we think it is not easy to start at first. In this case, you need more tips and tricks.
6. Carefully use keyframing
3D Animation is all about poses. Remember, this animation tip is crucial. Individual frames come together to create movement and tell a story. The keyframes in 3D animation videos are the first and last movements in any sequence. You need to create strong first and last poses for your movements before deciding what happens between them. You must make these poses as memorable and powerful as you can.
7. Evaluate constructive criticism
It’s vital to pay attention to constructive criticism rather than simply choosing to ignore it. Most examples of constructive criticism aren’t about offending you, and friendly advice can play a pivotal role in helping you get the results that you are looking for.
This 3D animation tip can take years to reach the level you want to when it comes to the animation industry. Even if you don’t receive a great deal of or even any positive feedback, the people offering their comments may simply be trying to help you so you can improve. You may find that the criticism is being made purely because of personal preference on the part of the commentator.
8. Take the rhythm in animation
For 3D stop motion animation video, rhythm is an element to do storytelling. The best 3D animations have a strong sense of rhythm and a natural movement flow. Many inexperienced animators have found themselves animating too fast or slow. Don’t worry if you have this problem in the early days, as chances are you’ll start to get it right with time. Timing and spacing between your frames create movement in your animation. With time, you will get a better idea of how many frames you need to move the object from point A to B.
9. Basic model
You may see your system working too hard when you use a high-res model , and this can dramatically slow down the animation process. When you playback the animation in real-time, you may not see every frame. If you are working on the motion of a character, use a simple proxy 3D model to prevent this problem. You can then work more effectively with movement and return the more complex model to the process later.
10. Use ‘shark fin’
This is a advanced 3D animation tip for you. A curve known as the ‘shark fin’ is often used for facial animation processes. This can help you represent rapid facial movements, including those involving the lips and eyebrows. Faces can move very quickly, so it’s wise to make expressions occur within just one or two frames, or three if the spacing demands it.
Part 3: Frequently Asked Questions about Animation Tips
Below are four FAQs about 2D and 3D animation tips that people have asked many times. Hope they are helpful.
1. Are there any animation tricks to use?
We must say muting dialogue is one trick you should know. If your audio is on, you need to listen to it again and again. Thus, audio can disturb your creating process. After you finished the animation, you can turn audio on to revise the animation.
Besides, when you do animation, another trick is you can pause the post before the character goes into the next pose. It is a commonly used trick used by professionals, so you might think it is useful.
2. Is animation hard to learn?
Many beginners are wondering is it difficult to learn animation. The answer is NO if you are about to learn 2D animation. Many tutorials and lessons are easy to find in the market. However, if you start on 3D animation, it will be much harder than you thought. In this case, we recommend you learning 2D animation first.
3. Can I learn animation on my own?
You can learn animation on your own, but that’s not the best way. We recommend you learning animation by attending a training class , especially if you are a starter. You can build a solid animation knowledge base fast compared with learning on your own.
4. How can I get better at animation?
The best answer to get better is to imitate and practice. This tip is the most useful, practical, but difficult to complete one. If you can practice like half a year, you will get much better at animation.
Conclusion
By taking the above animation tips, you can create engaging, inspiring, and unforgettable animations that will captivate your audience. Why not get started following these animation tips right now?
Shanoon Cox
Shanoon Cox is a writer and a lover of all things video.
Follow @Shanoon Cox
Adobe Animate Rigging’s Tutorial for You
Adobe Animate Rigging’s PROPER Tutorial for You
An easy yet powerful editor
Numerous effects to choose from
Detailed tutorials provided by the official channel
Character rigging involves some easy steps. And the best way for it is Adobe animate rigging. We have laid down the following discussion to help you learn the easiest method of character rigging. And along with it, we will also help you understand both 2D and 3D character designing most effortlessly.
Lastly, and most importantly, it is vital to opt for the simplest yet feature-loaded tool for any animation work. Thus, we will also mention the best tool for animation and video editing. So, without any further wait, let us start our discussion.
In this article
01 [How to Rig a Simple Character | Adobe Animate Tutorial](#Part 1)
02 [Step by Step to Help You Understand 2D/3D Character Design](#Part 2)
Part 1 How to Rig a Simple Character | Adobe Animate Tutorial
Character rigging in Adobe is effortless and straightforward. There are a few steps for rigging in adobe animate, and we will be discussing and explaining the different steps that will help you learn rigging characters for your animation works.
The following are the steps to help you create a rig in Adobe animate.
Step 1: The first step involves selecting the shape for rigging. Otherwise, you can also use bitmap on stage for it.
**Step 2:**Look for the “Asset warp tool” present in the tool panel. This tool will help you in the process of rigging.

Step 3: Create the first joint using the “Asset warp tool” by clicking on the image or the bitmap with the tool. You will see that a triangular mesh-like structure has been formed on your image or bitmap. And the part where you clicked on the image or the bitmap with the “Asset warp tool” forms the first joint.

Step 4: The next step involves making more joints on the image and instilling bones between the joints. For that, go to the “Warp Options” and choose the “Tools” tab. There you will see the option of “Create bones”. Ensure to enable the “Create bones” option; otherwise, you will not create bones between the different joints.

Step 5: Complete the rig formation by joining all the joints correctly with each other with the help of the bones.

The above steps would help you create the rig for the image or bitmap you want to animate. And now, the following steps will help you learn the steps for modifying the rig as well as tweening.
The first process for it is deformation. So, the following are the steps that help you perform the process of deformation in animation.
Step 6: You need to deform the mesh, and you can do so by holding and dragging the joint with the help of the “Asset warp tool”.

**Step 7:**You can also rotate a bone by clicking and dragging the bone you want to rotate when you drag a joint, the size of the joint changes, which is not the case when you drag a bone. Its size remains constant.

Now, we will help you learn to work with the different keyframes. The keyframes enable the image or the bitmap to acquire different poses, vital for animation. The “Edit Multiple Frames” mode helps you work with different keyframes.
You can readily create new keyframes and deform the image through joints or bones. Each keyframe retains its own set, and you can integrate different transforms after setting one pose for the image in the keyframe.

Part 2 Step by Step to Help You Understand 2D/Character Design
Animation is immensely enjoyable and takes the best of our creativity. And as we know, there are two major and most renowned types of it. One is the 2-dimensional animation, which we know as the animation. And the other one is 3-dimensional, better known as animation.
Now, there are different aspects that are essential for anyone aspiring to animate, whether in or 3D, to know. One of the aspects is designing characters for animation. And we have ideally put forth a discussion about the different factors you need to know about character designing in and animation.
01Animate Character Design
There are some steps involved in the designing a character for animation. And those steps are pretty diverse. So, we have enlisted all the required steps and factors to help you learn and understand character designing for animation. The list is as follows.
02Understanding your audience
To create the best character design, it is essential that you understand your target audience. If your target audience includes the kids and the children, your character design will primarily be based on cartoons.
Ensure which genre of animation does your audience prefer? If it is funny or mythological or any other genre, you design your characters accordingly.

03Understand the type of characters or animation you are going to create
There are different types of animation or characters in animation. Different types serve different purposes and genres. So, let us know about the different types of animations, and this will help you understand which one would suit your requirements.
● Pop-style Characters
The characters you see in the comics and superhero animation movies are pop-style characters. They are highly expressive, become the centre of attraction and always are dominant on the screen. They tend to deliver an energy that reaches the audience impeccably.

● Iconic design
These characters are less fancy but highly expressive. They usually have a block face yet connect to an audience of all types. They are generally best for the corporate videos and those with some messages to be delivered.

● Editorial Style Characters
These characters are highly elegant and bold. These are characters that we see in different publications. They consist of great style, realisticity and cleanliness. They are mainly used to express the quality of presence.

● Sketch and experiment
Now that you know about the different character types, it will help you understand which one would match the genre of animation you prefer to work on. So, start sketching your imagination in a draft.
Decide on the different poses your character might have. Track them down in a draft. It helps you become organised and put down your plan and creativity collectively.
Trial and error are one of the best ways to achieve perfection. So, it is crucial to sketch and then take feedback. If they do not appear praiseworthy, continue sketching and then get feedback again.
● Animate and execute
Lastly, it would be best to execute all your drafts and imaginations. Try using the animation tools that suit your skill capacity and genre of animation the best.
04Animate Character Design
There are five simple steps that will help you animate a character design in 3D. The steps are as follows.
● Contrivance the ideas
Try to include such characters that include several layers. It helps in better animation and also makes your creativity sphere widen.

● Designing the character
Your main character has a large to play. So, use all the necessary tools, starting from photoshop to all the other significant factors, to make your character attain all the features necessary for standing out. It also ensures that you can readily apply all the animation techniques and give your creativity shape.

● Modelling the environment
Adding props to the background is an option. You may choose not to include any props as well. You can add the required props and accessories to your main characters. It includes clothes, scars and the like.

● Animation
It is the main step. Use the best tool for animation and instill all the necessary animation processes. Use the different layers in your main character. Set up the primary constraints and animate the background and the props. Ensure proper light settings and set the handheld camera movements as well.

● Playblast settings
Here you choose the appropriate size of your animation video. It is also an important step, which completes your animation of the character in animation.

Now that we know about the different essential aspects of and animation and character design knowing which tool can help us in the most effortless yet best quality video editing. So, as promised before, we will now discuss the best video editing tool, Wondershare Filmora Video Editor !
Here are the best features of Filmora that can ideally help you in video editing.
● Professional quality video editing tools include video stabilization, noise removal, colour tuning, audio mixer, advanced text editor, editing support, scene detection, and an audio equalizer.
● Although it is ideal for professional use, the tool is simple and effortless ot use. You face no difficulties in understating the features of the tool.
● There are over 8effects available that you can use in your videos.
● You can download it for free!
● You can readily opt for its free trial that enables you to be sure of what you are using before buying it!

For Win 7 or later (64-bit)
For macOS 10.12 or later
● Key Takeaways from This Episode →
● A piece of general information about character rigging in animation and how it is beneficial.
● A simple tutorial for character designing in and animation
● The features of the best video editing tool- Filmora.
Character rigging involves some easy steps. And the best way for it is Adobe animate rigging. We have laid down the following discussion to help you learn the easiest method of character rigging. And along with it, we will also help you understand both 2D and 3D character designing most effortlessly.
Lastly, and most importantly, it is vital to opt for the simplest yet feature-loaded tool for any animation work. Thus, we will also mention the best tool for animation and video editing. So, without any further wait, let us start our discussion.
In this article
01 [How to Rig a Simple Character | Adobe Animate Tutorial](#Part 1)
02 [Step by Step to Help You Understand 2D/3D Character Design](#Part 2)
Part 1 How to Rig a Simple Character | Adobe Animate Tutorial
Character rigging in Adobe is effortless and straightforward. There are a few steps for rigging in adobe animate, and we will be discussing and explaining the different steps that will help you learn rigging characters for your animation works.
The following are the steps to help you create a rig in Adobe animate.
Step 1: The first step involves selecting the shape for rigging. Otherwise, you can also use bitmap on stage for it.
**Step 2:**Look for the “Asset warp tool” present in the tool panel. This tool will help you in the process of rigging.
Step 3: Create the first joint using the “Asset warp tool” by clicking on the image or the bitmap with the tool. You will see that a triangular mesh-like structure has been formed on your image or bitmap. And the part where you clicked on the image or the bitmap with the “Asset warp tool” forms the first joint.
Step 4: The next step involves making more joints on the image and instilling bones between the joints. For that, go to the “Warp Options” and choose the “Tools” tab. There you will see the option of “Create bones”. Ensure to enable the “Create bones” option; otherwise, you will not create bones between the different joints.
Step 5: Complete the rig formation by joining all the joints correctly with each other with the help of the bones.
The above steps would help you create the rig for the image or bitmap you want to animate. And now, the following steps will help you learn the steps for modifying the rig as well as tweening.
The first process for it is deformation. So, the following are the steps that help you perform the process of deformation in animation.
Step 6: You need to deform the mesh, and you can do so by holding and dragging the joint with the help of the “Asset warp tool”.
**Step 7:**You can also rotate a bone by clicking and dragging the bone you want to rotate when you drag a joint, the size of the joint changes, which is not the case when you drag a bone. Its size remains constant.
Now, we will help you learn to work with the different keyframes. The keyframes enable the image or the bitmap to acquire different poses, vital for animation. The “Edit Multiple Frames” mode helps you work with different keyframes.
You can readily create new keyframes and deform the image through joints or bones. Each keyframe retains its own set, and you can integrate different transforms after setting one pose for the image in the keyframe.
Part 2 Step by Step to Help You Understand 2D/Character Design
Animation is immensely enjoyable and takes the best of our creativity. And as we know, there are two major and most renowned types of it. One is the 2-dimensional animation, which we know as the animation. And the other one is 3-dimensional, better known as animation.
Now, there are different aspects that are essential for anyone aspiring to animate, whether in or 3D, to know. One of the aspects is designing characters for animation. And we have ideally put forth a discussion about the different factors you need to know about character designing in and animation.
01Animate Character Design
There are some steps involved in the designing a character for animation. And those steps are pretty diverse. So, we have enlisted all the required steps and factors to help you learn and understand character designing for animation. The list is as follows.
02Understanding your audience
To create the best character design, it is essential that you understand your target audience. If your target audience includes the kids and the children, your character design will primarily be based on cartoons.
Ensure which genre of animation does your audience prefer? If it is funny or mythological or any other genre, you design your characters accordingly.
03Understand the type of characters or animation you are going to create
There are different types of animation or characters in animation. Different types serve different purposes and genres. So, let us know about the different types of animations, and this will help you understand which one would suit your requirements.
● Pop-style Characters
The characters you see in the comics and superhero animation movies are pop-style characters. They are highly expressive, become the centre of attraction and always are dominant on the screen. They tend to deliver an energy that reaches the audience impeccably.
● Iconic design
These characters are less fancy but highly expressive. They usually have a block face yet connect to an audience of all types. They are generally best for the corporate videos and those with some messages to be delivered.
● Editorial Style Characters
These characters are highly elegant and bold. These are characters that we see in different publications. They consist of great style, realisticity and cleanliness. They are mainly used to express the quality of presence.
● Sketch and experiment
Now that you know about the different character types, it will help you understand which one would match the genre of animation you prefer to work on. So, start sketching your imagination in a draft.
Decide on the different poses your character might have. Track them down in a draft. It helps you become organised and put down your plan and creativity collectively.
Trial and error are one of the best ways to achieve perfection. So, it is crucial to sketch and then take feedback. If they do not appear praiseworthy, continue sketching and then get feedback again.
● Animate and execute
Lastly, it would be best to execute all your drafts and imaginations. Try using the animation tools that suit your skill capacity and genre of animation the best.
04Animate Character Design
There are five simple steps that will help you animate a character design in 3D. The steps are as follows.
● Contrivance the ideas
Try to include such characters that include several layers. It helps in better animation and also makes your creativity sphere widen.
● Designing the character
Your main character has a large to play. So, use all the necessary tools, starting from photoshop to all the other significant factors, to make your character attain all the features necessary for standing out. It also ensures that you can readily apply all the animation techniques and give your creativity shape.
● Modelling the environment
Adding props to the background is an option. You may choose not to include any props as well. You can add the required props and accessories to your main characters. It includes clothes, scars and the like.
● Animation
It is the main step. Use the best tool for animation and instill all the necessary animation processes. Use the different layers in your main character. Set up the primary constraints and animate the background and the props. Ensure proper light settings and set the handheld camera movements as well.
● Playblast settings
Here you choose the appropriate size of your animation video. It is also an important step, which completes your animation of the character in animation.
Now that we know about the different essential aspects of and animation and character design knowing which tool can help us in the most effortless yet best quality video editing. So, as promised before, we will now discuss the best video editing tool, Wondershare Filmora Video Editor !
Here are the best features of Filmora that can ideally help you in video editing.
● Professional quality video editing tools include video stabilization, noise removal, colour tuning, audio mixer, advanced text editor, editing support, scene detection, and an audio equalizer.
● Although it is ideal for professional use, the tool is simple and effortless ot use. You face no difficulties in understating the features of the tool.
● There are over 8effects available that you can use in your videos.
● You can download it for free!
● You can readily opt for its free trial that enables you to be sure of what you are using before buying it!
For Win 7 or later (64-bit)
For macOS 10.12 or later
● Key Takeaways from This Episode →
● A piece of general information about character rigging in animation and how it is beneficial.
● A simple tutorial for character designing in and animation
● The features of the best video editing tool- Filmora.
How to Create an Animated Sticky Navbar
How to Create an Animated Sticky Navbar
An easy yet powerful editor
Numerous effects to choose from
Detailed tutorials provided by the official channel
While there are different ways to enhance the overall user experience of a website, using an animated sticky navbar is the most ideal solution to get the job done.
In this article, we’ll walk you through some of the top benefits of animated sticky navbars and why you should incorporate them in your website’s design. So, without any further ado, let’s get started.
In this article
01 [What is an Animated Sticky Navbar?](#Part 1)
02 [What Are the Benefits of An Animated Sticky Navbar?](#Part 2)
03 [8 Fixed Sticky Navbars That’ll Grab Your Attention](#Part 3)
04 [Want To Create More Professional and Amazing Animations?](#Part 4)
Part 1 What is an Animated Sticky Navbar?
To put it in simple words, an animated sticky navbar is a dedicated header that stays fixed on the website, irrespective of the web page you’re accessing. Ideally, designers use a sticky navbar to allow website visitors to visit any web page within 2-3 clicks.
The animated navbar also incorporates a few animations that uplift the overall visual appearance of the website. It doesn’t matter if you are planning to design an e-commerce store or a simple service-based website, the animated navbar will allow you to make your website more user-friendly for the end-users.
Part 2 What Are the Benefits of An Animated Sticky Navbar?
Now, there are endless benefits of using an animated sticky navbar on your website. However, these are a few factors that make animated sticky navbars the most useful on-page element of a website.
01Quick Navigation
As we mentioned earlier, easy navigation is one of the key features of a sticky navbar. You can place links to all the other web pages within the navbar in the form of drop-down menus and ensure that users can visit any webpage within a single click. This will enhance the overall user experience and you’ll be able to encourage one-time visitors to spend more time on your website. Using the navbar will also improve your search engine rankings because the search engine crawler will be able to crawl all the web pages easily.
02Aesthetically Pleasing
The way your website looks has a huge impact on whether you’re going to retain the website visitors or not. An animated sticky navbar will make your website look aesthetically pleasing and captivate the visitors more effectively. You can add different animations and visual elements to the navbar and make them match your website’s overall color scheme.
03Better User Experience
Another reason why you would want to place an animated sticky navbar on your website is that it’ll uplift the overall user experience for the website visitors. From finding easy navigation to all the web pages to ensuring that all the web pages offer the same browsing experience, a navbar will make your website engaging and it’ll become easier to captivate the users.
Part 3 8 Fixed Sticky Navbars That’ll Grab Your Attention
So, now that you are familiar with the benefits of animated sticky navbars, here are the top examples that explain the best ways to use navigation bars on a website.
01Search Engine Journal
Search Engine Journal is an online knowledge hub where users can find every bit of information about digital marketing. The website publishes regular guides on SEO, PPC, Social Media Marketing, etc to help people get detailed insight into the benefits of digital marketing.
Since there are thousands of articles on the website, it could easily get chaotic for users to find the guide they are looking for. But, with an easy-to-navigate animated sticky navbar, Search Engine Journal has divided all the articles into their respective categories using simple drop-down menus
02AirBnB

Airbnb is one of the most popular platforms to find vacation homes in a different city/country to enjoy your holiday in complete comfort. One of the major reasons behind AirBnB’s immense success is its high-quality and easy-to-use website.
As you continue to scroll down the website, the sticky navbar stays fixed at the top with a dedicated search bar and a “Become a Host” Call-to-Action button. This way it doesn’t matter if a user is looking for a place to rent or simply wants to become a host, they’ll be able to get the job done within a few clicks.
03Graz Secrets
Graz Secrets is the perfect example of how you can use a sticky bar in the simplest manner and still grab users’ attention easily. The website uses a black-colored simple navigation bar with a “Download Now” button at the center. The button continues to illuminate due to the background animation even if you scroll to the end of the web page. The overall black design of the navbar adds more visual factors to the website and engages the visitors more effectively.
04Adobe
Adobe’s navigation bar is also a great example of how to use sticky navbars to uplift the overall user experience for website visitors. Even though the website doesn’t stay at its place when you scroll down, it immediately comes back as soon as you scroll up once.
Moreover, the navbar has links to all the Adobe products, which means users can visit any product page they want right away. It’s also worth understanding that Adobe has added a dedicated “Sign-in” button in the navigation bar to allow visitors to sign in to the Adobe cloud account straightaway.
05Daniel Filler
Daniel Filler’s website uses the navigation bar in the simplest way possible - yet manages to draw the viewers’ attention without any hassle. The designers have placed a pretty small navigation bar with links to all the important web pages.
The smaller size of the navigation bar doesn’t make the website look cluttered and still manages to do its job easily. In addition to this, the designers have also placed a dedicated logo and the “Up” button to allow users to directly go to the top of the web page with one click.
06Mind Inventory
Mind Inventory is an Indian software development company working towards designing high-quality websites and mobile applications. Their website is a perfect example of how one should use navigation bars in a website to improve the overall design scheme. In addition to placing links to all the important web pages, Mind Inventory has also introduced dedicated animations to make the drop-down menu appearance more pleasing.
07FHOKE
FHOKE’s navigation bar is one of the most aesthetically pleasing animated navbars that you can replicate on your website to maximize its performance. A white-colored navbar automatically turns gray as soon as you scroll down to maintain the contrast of the entire web page.
There are dedicated links to other web pages as well. However, you won’t find any drop-down menus. In case your website also has limited web pages, you can also replicate this animated sticky navbar to make it more appealing.
08H&M
Last but certainly not least, H&M is a clothing brand that’s popular across the globe. At first, H&M’s official website may look pretty basic, but its navigation bar is backed by a great marketing strategy. The bar contains all the product page categories that’ll direct you to any product page within a single click.
Key Takeaways from This Episode
● Animated sticky navbars are one of the most useful on-page elements that could help you grab user’s attention easily
● There are different ways to use animated navbars and it mainly depends on your website requirements.
● Like your website, you can also uplift the quality of your videos by adding animations and high-quality transitions
While there are different ways to enhance the overall user experience of a website, using an animated sticky navbar is the most ideal solution to get the job done.
In this article, we’ll walk you through some of the top benefits of animated sticky navbars and why you should incorporate them in your website’s design. So, without any further ado, let’s get started.
In this article
01 [What is an Animated Sticky Navbar?](#Part 1)
02 [What Are the Benefits of An Animated Sticky Navbar?](#Part 2)
03 [8 Fixed Sticky Navbars That’ll Grab Your Attention](#Part 3)
04 [Want To Create More Professional and Amazing Animations?](#Part 4)
Part 1 What is an Animated Sticky Navbar?
To put it in simple words, an animated sticky navbar is a dedicated header that stays fixed on the website, irrespective of the web page you’re accessing. Ideally, designers use a sticky navbar to allow website visitors to visit any web page within 2-3 clicks.
The animated navbar also incorporates a few animations that uplift the overall visual appearance of the website. It doesn’t matter if you are planning to design an e-commerce store or a simple service-based website, the animated navbar will allow you to make your website more user-friendly for the end-users.
Part 2 What Are the Benefits of An Animated Sticky Navbar?
Now, there are endless benefits of using an animated sticky navbar on your website. However, these are a few factors that make animated sticky navbars the most useful on-page element of a website.
01Quick Navigation
As we mentioned earlier, easy navigation is one of the key features of a sticky navbar. You can place links to all the other web pages within the navbar in the form of drop-down menus and ensure that users can visit any webpage within a single click. This will enhance the overall user experience and you’ll be able to encourage one-time visitors to spend more time on your website. Using the navbar will also improve your search engine rankings because the search engine crawler will be able to crawl all the web pages easily.
02Aesthetically Pleasing
The way your website looks has a huge impact on whether you’re going to retain the website visitors or not. An animated sticky navbar will make your website look aesthetically pleasing and captivate the visitors more effectively. You can add different animations and visual elements to the navbar and make them match your website’s overall color scheme.
03Better User Experience
Another reason why you would want to place an animated sticky navbar on your website is that it’ll uplift the overall user experience for the website visitors. From finding easy navigation to all the web pages to ensuring that all the web pages offer the same browsing experience, a navbar will make your website engaging and it’ll become easier to captivate the users.
Part 3 8 Fixed Sticky Navbars That’ll Grab Your Attention
So, now that you are familiar with the benefits of animated sticky navbars, here are the top examples that explain the best ways to use navigation bars on a website.
01Search Engine Journal
Search Engine Journal is an online knowledge hub where users can find every bit of information about digital marketing. The website publishes regular guides on SEO, PPC, Social Media Marketing, etc to help people get detailed insight into the benefits of digital marketing.
Since there are thousands of articles on the website, it could easily get chaotic for users to find the guide they are looking for. But, with an easy-to-navigate animated sticky navbar, Search Engine Journal has divided all the articles into their respective categories using simple drop-down menus
02AirBnB
Airbnb is one of the most popular platforms to find vacation homes in a different city/country to enjoy your holiday in complete comfort. One of the major reasons behind AirBnB’s immense success is its high-quality and easy-to-use website.
As you continue to scroll down the website, the sticky navbar stays fixed at the top with a dedicated search bar and a “Become a Host” Call-to-Action button. This way it doesn’t matter if a user is looking for a place to rent or simply wants to become a host, they’ll be able to get the job done within a few clicks.
03Graz Secrets
Graz Secrets is the perfect example of how you can use a sticky bar in the simplest manner and still grab users’ attention easily. The website uses a black-colored simple navigation bar with a “Download Now” button at the center. The button continues to illuminate due to the background animation even if you scroll to the end of the web page. The overall black design of the navbar adds more visual factors to the website and engages the visitors more effectively.
04Adobe
Adobe’s navigation bar is also a great example of how to use sticky navbars to uplift the overall user experience for website visitors. Even though the website doesn’t stay at its place when you scroll down, it immediately comes back as soon as you scroll up once.
Moreover, the navbar has links to all the Adobe products, which means users can visit any product page they want right away. It’s also worth understanding that Adobe has added a dedicated “Sign-in” button in the navigation bar to allow visitors to sign in to the Adobe cloud account straightaway.
05Daniel Filler
Daniel Filler’s website uses the navigation bar in the simplest way possible - yet manages to draw the viewers’ attention without any hassle. The designers have placed a pretty small navigation bar with links to all the important web pages.
The smaller size of the navigation bar doesn’t make the website look cluttered and still manages to do its job easily. In addition to this, the designers have also placed a dedicated logo and the “Up” button to allow users to directly go to the top of the web page with one click.
06Mind Inventory
Mind Inventory is an Indian software development company working towards designing high-quality websites and mobile applications. Their website is a perfect example of how one should use navigation bars in a website to improve the overall design scheme. In addition to placing links to all the important web pages, Mind Inventory has also introduced dedicated animations to make the drop-down menu appearance more pleasing.
07FHOKE
FHOKE’s navigation bar is one of the most aesthetically pleasing animated navbars that you can replicate on your website to maximize its performance. A white-colored navbar automatically turns gray as soon as you scroll down to maintain the contrast of the entire web page.
There are dedicated links to other web pages as well. However, you won’t find any drop-down menus. In case your website also has limited web pages, you can also replicate this animated sticky navbar to make it more appealing.
08H&M
Last but certainly not least, H&M is a clothing brand that’s popular across the globe. At first, H&M’s official website may look pretty basic, but its navigation bar is backed by a great marketing strategy. The bar contains all the product page categories that’ll direct you to any product page within a single click.
Key Takeaways from This Episode
● Animated sticky navbars are one of the most useful on-page elements that could help you grab user’s attention easily
● There are different ways to use animated navbars and it mainly depends on your website requirements.
● Like your website, you can also uplift the quality of your videos by adding animations and high-quality transitions
15 Top Pics Collage Apps
15 Best Pics Collage Apps in 2024: Top Picks
An easy yet powerful editor
Numerous effects to choose from
Detailed tutorials provided by the official channel
With a high-end camera in a mobile phone these days there is a huge collection of pictures from various events, trips, and of your near and dear ones. So why not be creative and make some interesting pics collage from these images? Surprise your friends, relatives, and other people on their special occasion by creating pics collage and for this, you would need the help of a good collage app.

With the myriad of options available, selecting a few can be a difficult task and to help you with this, we have shortlisted some of the popular ones in the write-up below.
Part 1 Top 11 Pics Collage apps for Android and iOS
Below we have shortlisted the best apps for the pics collage that will help you create a customized collage using multiple functions and tools.
01Pic Collage
This is one of the most widely used apps available for iOS and Android devices that helps you create interesting collages.
Key features
● Free app with basic features and allows to remove ads and get access to advanced features using the paid version
● Intuitive layout with multiple templates to create photo collage pics.
● Comes with an array of photo editing tools.
● Add images from your phone or also from social media accounts.

02Photo and Shape Collage Maker
This is a free Android-based app with a 3.6 rating.
Key features
● Create frame collage, shape collage, name collage, and others.
● Comes with predefined shapes for creating a collage.
● Allows editing the collage size, background, and other factors.
● Customized shape collage can be created your name, number, or face.
● Add stickers, text, and other elements.

03Diptic
This is a paid app for iOS devices that allows creating photos as well as video collages.
Key features:
● Comes with over 190 layouts to choose from
● Add multiple photos and videos in each layout.
● Option for customizing the layout.
● Use different filters for enhancing the images.
● Add captions, effects, and other interesting elements.
● Allows creating Diptics using photos and videos from the device, Facebook, Dropbox, and other sources.

04PhotoGrid
This is an Android and iOS based app for creating collages.
Key features
● Create collage using photos, and videos.
● Comes with a variety of templates for creating personalized collages.
● The built-in editor lets you customize the images.
● Background stickers, doodles, text, and other effects can be added.
● A free version supports basic features while the paid pro version removes ads and watermarks and offers advanced features.

05Ribbet
This app on Android and iOS is mainly a photo editing tool that also supports creating collages.
Key features
● Create a collage using different customizable templates.
● Edit images and change file parameters to suit requirements.
● Add special effects, frames, and text.
● Editing tools like clones, curves, and burning.

06Moldiv
Use this app on your Android and iOS devices to create collages and professionally edit images.
Key features
● Comes with a variety of free collage templates.
● A wide range of layouts is available that can be customized.
● Works as a pro image editing tool.
● Add stickers, filters, backgrounds, and other elements.
● Allows adding up to 9 photos in a frame.

07PicPlayPost
Just like its name, this is an interesting tool for creating collages on iOS and Android devices and supports other functions as well.
Key features
● Free app with IAP option.
● Allows creating an animated slideshow using images and videos.
● Option to choose aspect ratio depending on the platform you wish to use the collage.
● Add text watermark or a business logo using the app.
● A wide range of media file formats is supported.

08PiZap
This is a multitasking app for Android and iOS devices that support functions like creating a collage, meme, photo editing, and more.
Key features:
● Create photo collages, posters, and greeting cards, in a few simple steps.
● A wide range of templates is available including the ones for Twitter, YouTube, and other sites.
● Add text, memes, shapes, filters, and other elements.
● Free to use app with Pro version offering additional features and removing ads.

0910. Live Collage
Download this app on your Android and iOS devices for creating interesting collages.
Key features:
● A simple and clean interface makes collage-making easy and fast.
● Comes with a variety of templates including special ones for Facebook, and Instagram.
● Allows creating customized canvas size and 3D templates available as well.
● Add filters to enhance your images.

1011. Pic Stitch
The app on Android and iOS devices allows creating customized pic collages for all occasions.
Key features
● User-friendly interface to create a customized collage using images and videos.
● Comes with more than 200 templates.
● Multiple images editing options are supported.
● Share created collages to social media sites.
● Choose a customized aspect ratio and also add music.

1112. PicsArt
PicsArt collage is another widely used Android and iOS-based tool that can be used for multiple tasks including collage-making.
Key features
● Comes with multiple templates including the ones for social media as well as business requirements.
● Add up to 10 images on a grid.
● Comes with a free photo library to select images.
● Being a complete image editing tool it allows personalized images in different ways.

Additional Reading: Edit your videos professionally and create a video collage using Wondershare UniConverter
If you are looking for a video editing tool that can let your edit your videos like a professional Wondershare Filmora Video Editor is just the right choice. This Windows and Mac-based software support variety of basic, as well as advanced features, and this, makes the software for all users. With over 800 stunning effects, you can create a video masterpiece using your creativity. Media files in all key formats are supported and there are options to add texts, overlays, transitions, filters, as well as music files.
The split-screen feature of the software can be further used to play multiple videos in different frames making it look like a video collage.

Wondershare Filmora - Best Video Editor for Mac/Windows
5,481,435 people have downloaded it.
Build unique custom animations without breaking a sweat.
Focus on creating epic stories and leave the details to Filmora’s auto features.
Start a creative adventure with drag & drop effects and endless possibilities.
Filmora simplifies advanced features to save you time and effort.
Filmora cuts out repetition so you can move on to your next creative breakthrough.
● Key Takeaways from This Episode →
● Create stunning pic collages on your phone using apps.
● A wide range of apps for Android and iOS are available.
● Edit your videos professionally and create a video collage using Wondershare Filmora.
With a high-end camera in a mobile phone these days there is a huge collection of pictures from various events, trips, and of your near and dear ones. So why not be creative and make some interesting pics collage from these images? Surprise your friends, relatives, and other people on their special occasion by creating pics collage and for this, you would need the help of a good collage app.
With the myriad of options available, selecting a few can be a difficult task and to help you with this, we have shortlisted some of the popular ones in the write-up below.
Part 1 Top 11 Pics Collage apps for Android and iOS
Below we have shortlisted the best apps for the pics collage that will help you create a customized collage using multiple functions and tools.
01Pic Collage
This is one of the most widely used apps available for iOS and Android devices that helps you create interesting collages.
Key features
● Free app with basic features and allows to remove ads and get access to advanced features using the paid version
● Intuitive layout with multiple templates to create photo collage pics.
● Comes with an array of photo editing tools.
● Add images from your phone or also from social media accounts.
02Photo and Shape Collage Maker
This is a free Android-based app with a 3.6 rating.
Key features
● Create frame collage, shape collage, name collage, and others.
● Comes with predefined shapes for creating a collage.
● Allows editing the collage size, background, and other factors.
● Customized shape collage can be created your name, number, or face.
● Add stickers, text, and other elements.
03Diptic
This is a paid app for iOS devices that allows creating photos as well as video collages.
Key features:
● Comes with over 190 layouts to choose from
● Add multiple photos and videos in each layout.
● Option for customizing the layout.
● Use different filters for enhancing the images.
● Add captions, effects, and other interesting elements.
● Allows creating Diptics using photos and videos from the device, Facebook, Dropbox, and other sources.
04PhotoGrid
This is an Android and iOS based app for creating collages.
Key features
● Create collage using photos, and videos.
● Comes with a variety of templates for creating personalized collages.
● The built-in editor lets you customize the images.
● Background stickers, doodles, text, and other effects can be added.
● A free version supports basic features while the paid pro version removes ads and watermarks and offers advanced features.
05Ribbet
This app on Android and iOS is mainly a photo editing tool that also supports creating collages.
Key features
● Create a collage using different customizable templates.
● Edit images and change file parameters to suit requirements.
● Add special effects, frames, and text.
● Editing tools like clones, curves, and burning.
06Moldiv
Use this app on your Android and iOS devices to create collages and professionally edit images.
Key features
● Comes with a variety of free collage templates.
● A wide range of layouts is available that can be customized.
● Works as a pro image editing tool.
● Add stickers, filters, backgrounds, and other elements.
● Allows adding up to 9 photos in a frame.
07PicPlayPost
Just like its name, this is an interesting tool for creating collages on iOS and Android devices and supports other functions as well.
Key features
● Free app with IAP option.
● Allows creating an animated slideshow using images and videos.
● Option to choose aspect ratio depending on the platform you wish to use the collage.
● Add text watermark or a business logo using the app.
● A wide range of media file formats is supported.
08PiZap
This is a multitasking app for Android and iOS devices that support functions like creating a collage, meme, photo editing, and more.
Key features:
● Create photo collages, posters, and greeting cards, in a few simple steps.
● A wide range of templates is available including the ones for Twitter, YouTube, and other sites.
● Add text, memes, shapes, filters, and other elements.
● Free to use app with Pro version offering additional features and removing ads.
0910. Live Collage
Download this app on your Android and iOS devices for creating interesting collages.
Key features:
● A simple and clean interface makes collage-making easy and fast.
● Comes with a variety of templates including special ones for Facebook, and Instagram.
● Allows creating customized canvas size and 3D templates available as well.
● Add filters to enhance your images.
1011. Pic Stitch
The app on Android and iOS devices allows creating customized pic collages for all occasions.
Key features
● User-friendly interface to create a customized collage using images and videos.
● Comes with more than 200 templates.
● Multiple images editing options are supported.
● Share created collages to social media sites.
● Choose a customized aspect ratio and also add music.
1112. PicsArt
PicsArt collage is another widely used Android and iOS-based tool that can be used for multiple tasks including collage-making.
Key features
● Comes with multiple templates including the ones for social media as well as business requirements.
● Add up to 10 images on a grid.
● Comes with a free photo library to select images.
● Being a complete image editing tool it allows personalized images in different ways.
Additional Reading: Edit your videos professionally and create a video collage using Wondershare UniConverter
If you are looking for a video editing tool that can let your edit your videos like a professional Wondershare Filmora Video Editor is just the right choice. This Windows and Mac-based software support variety of basic, as well as advanced features, and this, makes the software for all users. With over 800 stunning effects, you can create a video masterpiece using your creativity. Media files in all key formats are supported and there are options to add texts, overlays, transitions, filters, as well as music files.
The split-screen feature of the software can be further used to play multiple videos in different frames making it look like a video collage.
Wondershare Filmora - Best Video Editor for Mac/Windows
5,481,435 people have downloaded it.
Build unique custom animations without breaking a sweat.
Focus on creating epic stories and leave the details to Filmora’s auto features.
Start a creative adventure with drag & drop effects and endless possibilities.
Filmora simplifies advanced features to save you time and effort.
Filmora cuts out repetition so you can move on to your next creative breakthrough.
● Key Takeaways from This Episode →
● Create stunning pic collages on your phone using apps.
● A wide range of apps for Android and iOS are available.
● Edit your videos professionally and create a video collage using Wondershare Filmora.
Learn All About 3D Logo Animation and Templates
Learn All About 3D Logo Animation and Templates
An easy yet powerful editor
Numerous effects to choose from
Detailed tutorials provided by the official channel
If you too are keen to have an animated logo for your brand, product, or business several readymade templates can be used.
![]()
There are types of 3D logo animation tools available that can be used for customizing these templates or creating a logo from scratch as per your requirements.
In this article
01 [Benefits of Using 3d Logo Animation?](#Part 1)
02 [Where to Use Animated Logos?](#Part 2)
03 [Tips to make animated logos effective](#Part 3)
04 [Top 3D-logo Animation Template Sites](#Part 4)
05 [Top Software for Creating 3D Animated Logos](#Part 5)
Part 1 Benefits of using 3D logo animation?
Animated logos offers multiple benefits to a business or a brand. Some of the major ones are gathered for you as below.
01Increase brand awareness
Animations add life to your logos and thus can help in raising brand awareness and creating an instant connection with the clients and audience. The chances of remembering an animated logo are high and this in turn will get the attention and engagement of the audience.
02Better storytelling
The combination of images, sound, and motion in a 3D logo helps in creating an emotional connection with the audience. An animated logo supports the brand story more efficiently than a static logo and can further help to create a detailed explanation of the story.
03Adds a modern and professional look
An animated logo will add a professional and modern look to your business, product, brand, company, site, and others. An animated logo will make the audience feel that you are innovative and go with the latest trends that in turn add to the professionalism.
04Look unique and stand out from the crowd
With similar-looking designs and logos, animation can make your brand and business look apart from the others and thus get the attention of prospective clients and customers.
05Creates a pleasant first impression
It is the first impression that can make or break the image of a brand or a product. So, to ensure that the first impression of your brand or business is excellent, animated logos works to a great extent.
![]()
Part 2 Where to use Animated Logos?
Though animated logos can be used for an array of business types and platforms, there are a few certain ones where they are most effective. Check these as below.
● Social Media
● Paid Ads
● Branded Videos
● Email signatures
● Websites
● Brands and business
● Products and e-commerce
Part 3 Tips to make animated logos effective
Animated logos are created to get the attention of the audience and thus create brand awareness and for this, several factors can be considered.
● Firstly, analyze the goals of the company before creating an animated logo. It is important to know what will be the brand personality that you wish to portray through the logo.
● The logos should be created based on the preferences of the users and thus making research of the same before finalizing the animation is important.
● Animated logos should be short and interesting. Long ones are boring and will also result in the loss of interest.
● It is interesting to include a surprise element in your logo by creating them in a manner so that they are unpredictable.
● Use professional software to create impressive software that will not only make the task easier but will also save time.
![]()
Part 4 Top 3D-logo animation template sites
There are several sites where you can check readymade animated logo templates that will make your animation creating task quick and easy. These templates have a readymade design for the animated logo and these designs can be further customized to create a logo of your choice. Most of the sites with templates also have a built-in editor that can be used for editing the templates. If not, you can download the template and can then edit them using professional editing software like Wondershare Filmora Video Editor .
Some of the sites where you can check 3D logo animation free download and paid download of the templates in different categories.
● Storyblocks
● FlexClip
● MotionArray
● AfterEffects and more.
You can check out the various templates available at one of these sites and choose the one that best matches your company or product’s personality and fit your requirements.
Part 5 Top software for creating 3D Animated Logos
If you want a customized logo to be created as per your needs or want to edit the templates, there are several animations creating software available. Below we have shortlisted some of the major ones.
01**Wondershare Filmora Video Editor **
This Windows and Mac-based software is an excellent tool for all types of video editing and creating requirements. Using the tool, you can create a 3D animated logo or can even edit the templates to meet your requirements. A simple interface makes the software apt for all users and the process is also fast.
Key features:
● Create the desired animation using keyframing.
● Use motion-blur to enhance the animation.
● Edit the animation and other videos using multiple editing effects.
● Allows adding interesting effects like transitions, filters, and more.
● Enhanced audio using features like background noise removal, audio equalizer, keyframe audio editing, and more.
● Support fast rendering and fast import and export of the files.
● Windows and Mac support.
For Win 7 or later (64-bit)
For macOS 10.12 or later
02Viddyoze
This is another popular and user-friendly software that can be used for creating 3D animated logos and other animations. The tool comes packed with multiple features and templates that allow creating the desired animation in no time.
Key features
● A user-friendly tool with an intuitive interface.
● Comes with multiple templates to choose from.
● The template can be customized by changing several parameters like text, colors, and more.
● Comes with multiple editing tools and has multi-font support.
● The custom-created audio track for live templates.
● Support multi-ratio templates to make them compatible with different platforms and sites.
![]()
03Renderforest
This is an online 3D animated logo maker that comes with multiple templates and tools. Simple to use, the tool needs no software download or installation.
Key features
● This 3D logo animation online free tool is simple to use and does not require any software download.
● Comes with multiple templates and animation designs like fire logo, shattering logo, splash logo, and more.
● 3D effects of the tool can be used for creating 3D animated logos.
![]()
04Adobe After Effects
Adobe is a reputed software for all types of video editing requirements and its long list of functions also includes 3D animated logo making. Though the learning curve of the software is steep, once you get the hang of it, you can easily create professional animations and edit files.
Key features
● Create high-quality animations including 3D logos.
● Allows adding keyframes for animations and add exciting effects.
● Support features like the 3D ground plane, 3D draught preview, extended viewport, 3D transform gizmos, and more.
● Comes with a wide range of readymade templates for creating logos.
● 3D logo animation after effects tool allows media replacement in motion graphic templates.
![]()
05Animaker
This is another widely used online tool that allows creating of decent 3D animated logos. The interface is simple and there is no requirement for any software download.
Key features
● Simple and user-friendly interface with support to drop and drag.
● Comes with over 20 readymade templates for creating animated logos.
● Audio files and music to the animations can also be added.
● Support to more than 50 languages which makes it accessible across the world.
● Created animations can also be uploaded to YouTube and Facebook.
![]()
● Key Takeaways from This Episode →
● 3D animated logos work magic for your business and brand by creating awareness, catching the attention of the audience, and also keeping them engaged.
● Animated logos are used by different types of businesses and industries and for different platforms.
● There are several sites where readymade templates for creating 3D animated logos are available. These templates can be customized as needed.
● An array of 3D animated logo-making software is available and one of the best on the list is Wondershare Filmora Video Editor that is effective and also user-friendly.
Looking for Love Animated GIFs? Here Are 5 Free Sources For You
Versatile Video Editor - Wondershare Filmora
An easy yet powerful editor
Numerous effects to choose from
Detailed tutorials provided by the official channel
You might already know how often people share all kinds of images and GIFs on social media and IM apps. For instance, you might want to send some love animated GIFs to others to express your feelings. After all, if a photo is worth a thousand words, then a GIF would value a million instead. That’s why to help you find some of the best anime love GIFs, I have listed the top 5 websites here. Besides that, I will also let you know how to come up with some heart-animated GIFs on your own.

In this article
01 [Tip 5 Places to Explore Love Animated GIFs](#Part 1)
02 [Make your Own Animated Love GIFs with Music](#Part 2)
03 [Make More Funny Love Animated GIFs with Filmora Meme Maker](#Part 3)
Part 1 Tip 5 Places to Explore Love Animated GIFs
If you search on the web, you can find a wide range of heart-animated GIFs on different websites and apps. Out of them, I would recommend exploring the following places to share or download I Love You funny GIFs.
1. Tenor
Tenor features one of the best sources to find heart-animated GIFs of all kinds. You can access its website on any browser of your choice and enter keywords like love, romantic, I love you, and so much more.
Apart from love cartoon GIFs, you can also find stickers and other animated content on Tenor. While there are options to download any I Love You anime GIF from Tenor, you can also generate its unique link and instantly share it with others on IM apps like WhatsApp or Telegram.
2. GyfCat
Explore some of the best I Love You funny GIFs, and that too for free at GyfCat. This online resource can be accessed on almost any platform and has a sleek interface. You can enter any keyword of your choice on GyfCat to find all sorts of anime love GIFs.
Most of the GIFs available on GyfCat are based on popular shows, series, and anime. You can readily download any animated heart GIF from here and later upload it on a preferred platform.
3. Giphy
Giphy is one of the biggest platforms to host GIFs and images of all freely available sorts. Since GIFs have limited inbuilt filters, you can enter keywords or look for anything via hashtags.
One of the best things about Giphy is that you can find tons of love animated GIFs in high quality. You can directly download them to your device or share them with others via their unique links.
4. Imgur
Imgur is known to host millions of images and GIFs in different categories. While most of these anime love GIFs are freely available on Imgur, some have restricted guidelines for commercial use.
You can also upload any GIF to Imgur and get its unique link to share it with others quickly. They can tap on the link to view your heart animated GIF without downloading anything.
5. Tumblr
Tumblr is a popular microblogging website that hosts millions of blogs in one place. Therefore, you can easily search for interesting blogs that upload the I Love You animated GIF.
Apart from following these blogs, you can also do a global search on Tumblr to find love cartoon GIFs in different categories. You can download them on your device or directly share them with others via Tumblr.
Part 2 Make your Own Animated Love GIFs with Music
Since the above-listed websites for I Love You anime GIFs can be a bit generic, you can consider coming up with some unique media of your own. To do that, I would recommend using Wondershare Filmora, which is a user-friendly and feature-equipped media editing tool.
If you want, you can readily import images, GIFs, videos, music, and other media files on Filmora. Besides that, the application also features a wide range of assets related to sound effects, images, and more that you can readily use. To come up with some interesting, I Love You animated GIFs using Filmora, follow this drill:
Step 1: Load your Media Files from your System
Once Wondershare Filmora is installed, you can launch it on your system and go to its Menu > File > Import to load your photos, videos, and so on. You can also drag and drop them to the interface of Filmora.
For Win 7 or later (64-bit)
For macOS 10.12 or later

Step 2: Use Filmora to Create Amazing Romantic GIFs
After loading these media files, you can drag and drop them to the timeline at the bottom to start editing. To get rid of anything, you can hover the mouse pointer on the sides to get its trimming tool and use it to clip any unwanted part of the clip.

Once you select any media, you can get tons of editing options for it on the side. For instance, you can go to its properties to rotate, flip, reposition, scale, and perform several other edits on your media files.

If you want to add any text or caption effect to your I Love You anime GIF, then you can go to the “Titles” section on Filmora. Here, you can find tons of caption effects that you can add to your projects and customize them further as per your needs.

Besides that, to make your heart-animated GIFs look more interesting, you can add numerous filters, overlays, stickers, and other effects from the available features on Filmora.

One of the best things about Filmora is exploring the inbuilt sound effects and adding background music to your love cartoon GIFs. For instance, you can add soundtracks, effects and even edit the inserted audio in Filmora. There is also an advanced option to record voiceovers using the native feature in Filmora.

Step 3: Save your Love Animated GIFs from Filmora
In the end, you can check a preview of your heart animated GIF on Filmora and can click on the “Export” button at the top. You can now export your media as a GIF file on your system. However, if it has background music, you can consider saving it as an MP4 file instead.

Tip Make More Funny Love Animated GIFs with Filmora Meme Maker
If you want to customize your GIFs, you can also take the assistance of Filmora Meme Maker . Let’s say you have created a love animated GIF or have found it online. Now, you can head to the official website of the Filmora Meme Maker and upload it here. Later, you can add captions to the GIF and customize it using readily available templates. That’s it! You can now download the I Love You funny GIF in a preferred format on your device.
Conclusion
There you go! I’m sure that after reading this post, you can find tons of love animated GIFs. From Tenor to Tumblr and Giphy to GyfCat, there are so many websites from where you can download unlimited anime love GIFs. Though, if you want to come up with some interesting heart-animated GIFs with music, then you can simply try Wondershare Filmora. It is one of the best media editing tools that offer a wide range of assets and other advanced features that would let you create and edit all kinds of GIFs on the go.
Versatile Video Editor - Wondershare Filmora
An easy yet powerful editor
Numerous effects to choose from
Detailed tutorials provided by the official channel
You might already know how often people share all kinds of images and GIFs on social media and IM apps. For instance, you might want to send some love animated GIFs to others to express your feelings. After all, if a photo is worth a thousand words, then a GIF would value a million instead. That’s why to help you find some of the best anime love GIFs, I have listed the top 5 websites here. Besides that, I will also let you know how to come up with some heart-animated GIFs on your own.
In this article
01 [Tip 5 Places to Explore Love Animated GIFs](#Part 1)
02 [Make your Own Animated Love GIFs with Music](#Part 2)
03 [Make More Funny Love Animated GIFs with Filmora Meme Maker](#Part 3)
Part 1 Tip 5 Places to Explore Love Animated GIFs
If you search on the web, you can find a wide range of heart-animated GIFs on different websites and apps. Out of them, I would recommend exploring the following places to share or download I Love You funny GIFs.
1. Tenor
Tenor features one of the best sources to find heart-animated GIFs of all kinds. You can access its website on any browser of your choice and enter keywords like love, romantic, I love you, and so much more.
Apart from love cartoon GIFs, you can also find stickers and other animated content on Tenor. While there are options to download any I Love You anime GIF from Tenor, you can also generate its unique link and instantly share it with others on IM apps like WhatsApp or Telegram.
2. GyfCat
Explore some of the best I Love You funny GIFs, and that too for free at GyfCat. This online resource can be accessed on almost any platform and has a sleek interface. You can enter any keyword of your choice on GyfCat to find all sorts of anime love GIFs.
Most of the GIFs available on GyfCat are based on popular shows, series, and anime. You can readily download any animated heart GIF from here and later upload it on a preferred platform.
3. Giphy
Giphy is one of the biggest platforms to host GIFs and images of all freely available sorts. Since GIFs have limited inbuilt filters, you can enter keywords or look for anything via hashtags.
One of the best things about Giphy is that you can find tons of love animated GIFs in high quality. You can directly download them to your device or share them with others via their unique links.
4. Imgur
Imgur is known to host millions of images and GIFs in different categories. While most of these anime love GIFs are freely available on Imgur, some have restricted guidelines for commercial use.
You can also upload any GIF to Imgur and get its unique link to share it with others quickly. They can tap on the link to view your heart animated GIF without downloading anything.
5. Tumblr
Tumblr is a popular microblogging website that hosts millions of blogs in one place. Therefore, you can easily search for interesting blogs that upload the I Love You animated GIF.
Apart from following these blogs, you can also do a global search on Tumblr to find love cartoon GIFs in different categories. You can download them on your device or directly share them with others via Tumblr.
Part 2 Make your Own Animated Love GIFs with Music
Since the above-listed websites for I Love You anime GIFs can be a bit generic, you can consider coming up with some unique media of your own. To do that, I would recommend using Wondershare Filmora, which is a user-friendly and feature-equipped media editing tool.
If you want, you can readily import images, GIFs, videos, music, and other media files on Filmora. Besides that, the application also features a wide range of assets related to sound effects, images, and more that you can readily use. To come up with some interesting, I Love You animated GIFs using Filmora, follow this drill:
Step 1: Load your Media Files from your System
Once Wondershare Filmora is installed, you can launch it on your system and go to its Menu > File > Import to load your photos, videos, and so on. You can also drag and drop them to the interface of Filmora.
For Win 7 or later (64-bit)
For macOS 10.12 or later
Step 2: Use Filmora to Create Amazing Romantic GIFs
After loading these media files, you can drag and drop them to the timeline at the bottom to start editing. To get rid of anything, you can hover the mouse pointer on the sides to get its trimming tool and use it to clip any unwanted part of the clip.
Once you select any media, you can get tons of editing options for it on the side. For instance, you can go to its properties to rotate, flip, reposition, scale, and perform several other edits on your media files.
If you want to add any text or caption effect to your I Love You anime GIF, then you can go to the “Titles” section on Filmora. Here, you can find tons of caption effects that you can add to your projects and customize them further as per your needs.
Besides that, to make your heart-animated GIFs look more interesting, you can add numerous filters, overlays, stickers, and other effects from the available features on Filmora.
One of the best things about Filmora is exploring the inbuilt sound effects and adding background music to your love cartoon GIFs. For instance, you can add soundtracks, effects and even edit the inserted audio in Filmora. There is also an advanced option to record voiceovers using the native feature in Filmora.
Step 3: Save your Love Animated GIFs from Filmora
In the end, you can check a preview of your heart animated GIF on Filmora and can click on the “Export” button at the top. You can now export your media as a GIF file on your system. However, if it has background music, you can consider saving it as an MP4 file instead.
Tip Make More Funny Love Animated GIFs with Filmora Meme Maker
If you want to customize your GIFs, you can also take the assistance of Filmora Meme Maker . Let’s say you have created a love animated GIF or have found it online. Now, you can head to the official website of the Filmora Meme Maker and upload it here. Later, you can add captions to the GIF and customize it using readily available templates. That’s it! You can now download the I Love You funny GIF in a preferred format on your device.
Conclusion
There you go! I’m sure that after reading this post, you can find tons of love animated GIFs. From Tenor to Tumblr and Giphy to GyfCat, there are so many websites from where you can download unlimited anime love GIFs. Though, if you want to come up with some interesting heart-animated GIFs with music, then you can simply try Wondershare Filmora. It is one of the best media editing tools that offer a wide range of assets and other advanced features that would let you create and edit all kinds of GIFs on the go.
Versatile Video Editor - Wondershare Filmora
An easy yet powerful editor
Numerous effects to choose from
Detailed tutorials provided by the official channel
Also read:
- 2024 Approved Most Effective Tactics to Set WhatsApp Status
- New 2024 Approved 8 Blender 3D Animation Tutorials
- In 2024, Before You Learn Facebook Slideshow 5 Things You Should Know How-TOS
- Updated Amazing Techniques of Motion Graphics in Premiere Pro
- New 2024 Approved What Is A GIF
- New The Best Free 12 GIF Meme Maker at a Glance for 2024
- New Best 12 Evil Cartoon Characters of All Time
- New Best Claymation Shows That Make Your Memories Unforgettable for 2024
- New 2024 Approved Adobe Animate CC Everything You Need to Know
- Updated In 2024, Great Ways to Make Claymation Videos
- Updated 2024 Approved How to Find Some Different Ways to Animated Cartoon of Yourself
- New Adobe Rigger Is AWESOME for 2024
- New In 2024, The Best 10 Sketch Animation Video Makers
- Complete Guide to Send Gif WhatsApp on Android for 2024
- Formula to Animate Photos From 10 Animate Pictures App for 2024
- In 2024, 18 Best Tools and Services to Create Animated Videos for Your Business
- 2024 Approved How to Make a Photoshop Collage in Simple Steps
- Updated 2024 Approved Tutorials to Make Animated Images – Even if Youre Just Starting Out
- In 2024, 10 of the Best Disney Animated Shows (Sorted by Popularity Ascending)
- The 10 Most Adorable Aesthetic Cartoon Characters for 2024
- New In 2024, Whats Music Video GIF & How to Add Music to GIF Files
- How to Screen Mirroring Oppo F23 5G to PC? | Dr.fone
- 4 Feasible Ways to Fake Location on Facebook For your Lava Blaze Pro 5G | Dr.fone
- In 2024, How to Unlock Poco F5 5G Phone with Broken Screen
- Prevent Cross-Site Tracking on Oppo A1x 5G and Browser | Dr.fone
- In 2024, 3 Methods to Mirror Infinix Note 30 VIP to Roku | Dr.fone
- In 2024, Hassle-Free Ways to Remove FRP Lock from Samsung Galaxy S23 FE Phones with/without a PC
- Best 10 Mock Location Apps Worth Trying On Poco M6 Pro 5G | Dr.fone
- Perfect Guide To Excel in TikTok Live Shopping for 2024
- In 2024, Pattern Locks Are Unsafe Secure Your Vivo Y78+ Phone Now with These Tips
- 3 Easy Solutions to Hard Reset Samsung Galaxy A54 5G | Dr.fone
- New What Is an AI Tool, In 2024
- In 2024, Step-by-Step Tutorial How To Bypass OnePlus 11R FRP
- In 2024, 3 Ways to Track Sony Xperia 5 V without Them Knowing | Dr.fone
- Title: In 2024, How to Analyze an Editorial Cartoon Easily
- Author: Elon
- Created at : 2024-05-19 03:04:47
- Updated at : 2024-05-20 03:04:47
- Link: https://animation-videos.techidaily.com/in-2024-how-to-analyze-an-editorial-cartoon-easily/
- License: This work is licensed under CC BY-NC-SA 4.0.
