
:max_bytes(150000):strip_icc():format(webp)/GettyImages-151812569-ff7311e1de18461da9f8698205953384.jpg)
In 2024, How to Create YouTube Intro Animation Like a Pro
How to Create YouTube Intro Animation Like a Pro
How to Create a YouTube Intro Animation like a Pro
An easy yet powerful editor
Numerous effects to choose from
Detailed tutorials provided by the official channel
YouTube video intro animation is the short introductory clips and plays at the beginning of a YouTube video. YouTube intro videos as in almost everywhere, most times probably without giving them a second chance or understanding what their purpose is. There is no difference in YouTube videos, as without a proper setup, even if the content is excellent, your audience is not likely to hang around.
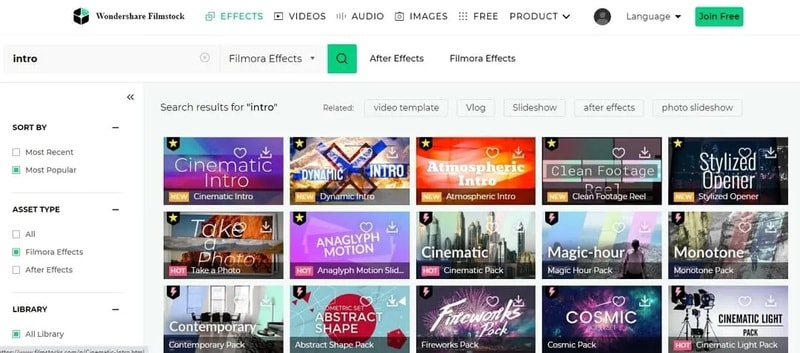
There is some free animation intro for YouTube that you can choose from to create your own YouTube intro. In this article, we will show a comprehensive guide on how to get an intro animation template free download and create your own free YouTube animation intro like a professional. So, let’s move on to explore how is the YouTube intro animation download process works using YouTube Intro Animation Makers through this article.
In this article
01 [What is YouTube Intro Animation?](#Part 1)
02 [How does YouTube Intro Animation Maker works?](#Part 2)
03 [5 of YouTube Intro Animation examples (2022)](#Part 3)
04 [How to Create a YouTube Intro Animation FAST](#Part 4)
Part 1 What is YouTube Intro Animation?
An animation video for YouTube intro is a short animated clip usually 5 to seconds in length and plays before the main YouTube video content. The intro YouTube animation is the primary step to creating your online persona and branding your content on YouTube. You can get YouTube intro animation for free online and include them in your YouTube content. A YouTube intro easily and quickly provides viewers insight into what they should expect from the channel. It is used to familiarize the viewer with the channel’s theme, feel, and look, which gives them context before reaching the main content.
Intro animation YouTube is sometimes called video bumpers, as they catch viewers’ attention and help reinforce your brand. In the general video, intros boost the video quality. You can also get a good video intro from intro animation free download websites for your YouTube content.
Part 2 How do YouTube Intro Animation Maker works?
You can create compelling, engaging, and best intro animation on YouTube by using free animation intro for YouTube or creating a YouTube intro animation by yourself. You don’t need be a pro in video editing or a creator to make animated video intros for your YouTube channel if you have the best intro animation software to create intro videos like a professional. Here are some benefits of YouTube intro animation maker and how it works:
● A YouTube intro animation maker has a built-in editor in your browser
● A YouTube intro animation maker is affordable, fast, and easy to use
● A YouTube intro animation maker can broadcast-quality logo animation and intros
● A YouTube intro animation maker has a wide variety of templates to make your YouTube animation intro
Using a YouTube intro animation maker, you are ready to create unskippable YouTube intros using the most versatile tool to turn your viewers into lifelong channel subscribers.
Part 3 5 of YouTube Intro Animation examples (2022)
To be successful on YouTube, capture and retain your viewers’ attention and increase your conversions. The best method to achieve this is by using an excellent YouTube animated intro to create a lasting impression to make your video worth watching. You can also get Professional YouTube animated intro from intro animation download websites. This action will look at 5 make YouTube intro animation examples and ideas from where you can draw your inspiration in 2022.
01Ted Talk
Ted Talk, free fire intro animation, is a perfect example of a beautiful and captured sequence that helps to tell the audience what the brand is all about and their ideas and worth spreading. The good news about this intro is that you don’t need to be a professional, hire an animator, or invest in any flashy or expensive animation to show your brand on YouTube.
To achieve this intro, all you require is some intro animation in After Effects template free that can work for your brand so that you’ll be able to retain your audience and make them wanting to come back for more.
02Jazza
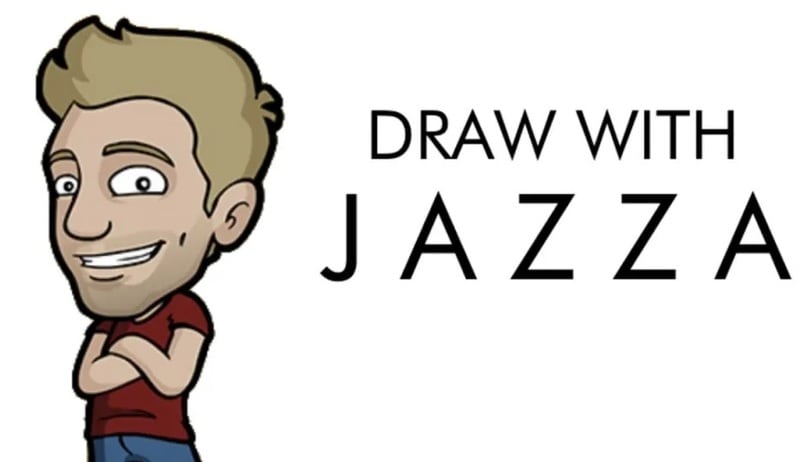
Jazza is a perfect example of free intro animation templates that you can use all over again to showcase your brand. The main idea for making a gaming intro animation video free download is to bring about an attractive, eye-capturing video intro through it.
This intro communicates a passion for teaching people to paint, animate, and draw. This same template can also create a vlog animation intro for the Jazza language lesson website, as it is a tremendous sequential presentation that represents Jazza mission.
03Salma Jafra
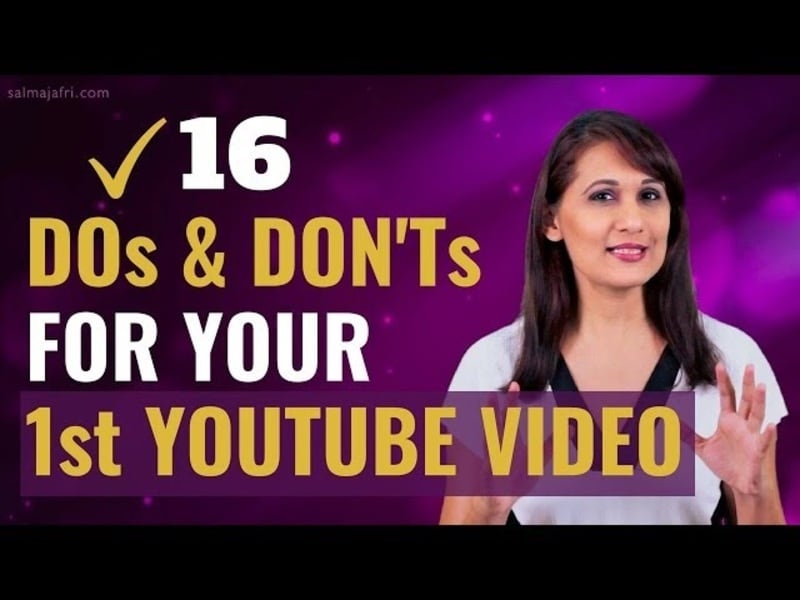
Salma Jafra Video intro tells a short story about the video’s main takeaways and includes an 8 seconds vlog intro animation sequence. Everything, including a brand color, is purple, which helps the audience recognize our videos on YouTube.
In addition to the free animation for YouTube intro, she plugged in her content to the end of the video or outro to generate enough traffic and adhere to SEO guidelines to ensure that the targeted audience finds the videos.
04SciShow
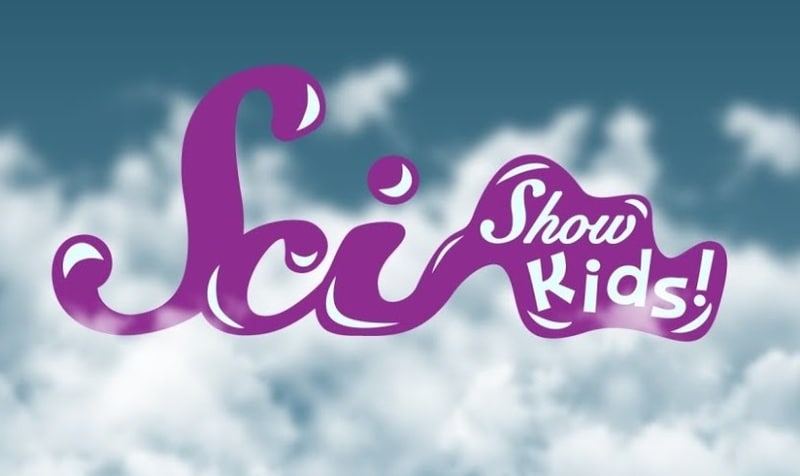
SciShow enables viewers to understand the brand and the kind of free YouTube intro animation video. The main trick of the video is to instantly grab viewers’ attention and convince them that the video is for them.
This intro animation video free download is a perfect example of how you can introduce your theme, tone, and brand name into your YouTube animation intro video download. This type of intro allows viewers to know what to expect quickly, and superb animation and design show off the value of production. Examples of a brand that can benefit from this type of YouTube animation intro download template is sleep studies.
05”Pump Red” Cinema Template

“Pump Red” Cinema Template is perfect for capturing reviewers’ imagination with an eye-catching, captivating, and intelligent video intro. By following the examples in this Minecraft animation intro template, you are more likely to retain your visitors or viewers from the moment they hit the play button on your YouTube video by using a catching soundtrack, on-brand messaging, and exciting visuals.
Part 4 How to Create a YouTube Intro Animation FAST
Whether you are using any streaming channel, YouTube, or selling videos on any e-commerce website, making animation for YouTube intro plays a vital role in promoting your brand. With it, creating an introduction may not seem as complicated as it sounds.
The section explains in detail how to make a YouTube intro animation free with the Wondershare Filmora Video Editor video editor from animated intro download templates or create a custom intro from scratch even if there is no existing footage or image to begin with. The following method will guide you through the process, and then you can keep your video saved for reuse in all creations to maintain consistency and give your brand a unique identity:
Wondershare Filmora
Get started easily with Filmora’s powerful performance, intuitive interface, and countless effects!
Try It Free Try It Free Try It Free Learn More >

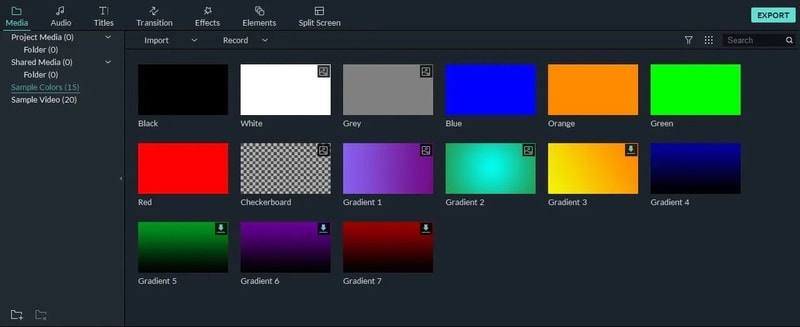
01Step Launch Intro Animation Software
Launch Wondershare Filmora Video Editor editor, add intro background to Filmora by going to the media tab at the top and selecting any sample colors category from the left pane. All the solid and gradient colors in the media library are available at the right, then over the mouse to the color title you want to use as a background and click on the + icon in the middle to add it to the timeline.
02Step Add Different effects
Add sound effects or audio to YouTube animated intro to make it more recognizable. In Wondershare Filmora Video Editor , visit the built-in audio library by double-clicking the audio thumbnail from the library and listening to the soundtrack. Repeat the process to find the perfect sound effects or background music for your video intro. D-and-drop the audio to the video.

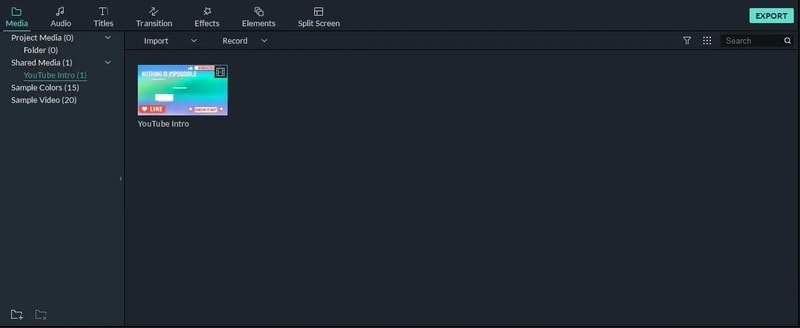
03Step Adding Branding Element
In the animated video intro, add the company name, branding element, and channel name to create brand awareness by clicking on the title tab and hovering the mouse to the text you want to use. Then drag and drop it to track above the video.
Go to the Effects tab and select category from the top left pane. Click and drag your preferred effects from the library effects to the timeline.
04Step Export
Once you finish creating your animated video intro with all the required ingredients, go to Export at the top center area of the interface to export the animated video intro, and once done, share it on social media.
To make YouTube intro animation templates free download with Filmora templates, follow the steps listed below:
Step Select Effects
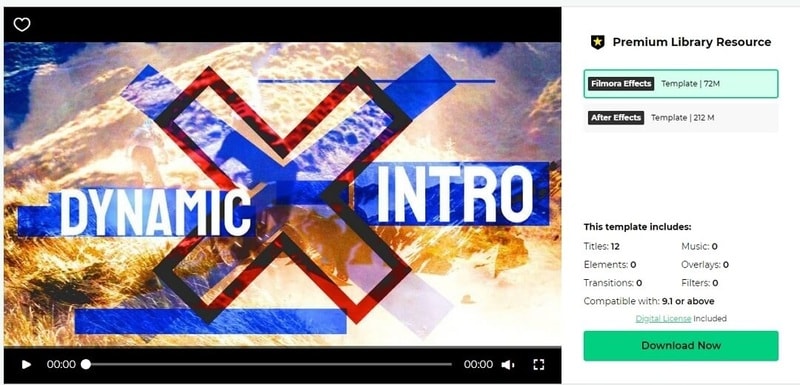
Log onto the Filmora effects page on filmstock with the same wsid used on Filmora and select the effect you want
Step Select template
Select the preferred intro templates by clicking on the download now and following the instructions on the screen to attend a download template. After downloading, see in red cycle under the transition, titles, and filter based on the element included in the effect part. Add this downloaded title or transition to the animated intro video.
Step Finalization
Delete your animated video intro from the templates that you selected.
● Key Takeaways from This Episode →
● Introduction about what is YouTube Intro?
● How Intro Animation Maker works with examples.
● The process to develop your own YouTube intro animation for free with Wondershare Filmora Video Editor .
YouTube video intro animation is the short introductory clips and plays at the beginning of a YouTube video. YouTube intro videos as in almost everywhere, most times probably without giving them a second chance or understanding what their purpose is. There is no difference in YouTube videos, as without a proper setup, even if the content is excellent, your audience is not likely to hang around.
There is some free animation intro for YouTube that you can choose from to create your own YouTube intro. In this article, we will show a comprehensive guide on how to get an intro animation template free download and create your own free YouTube animation intro like a professional. So, let’s move on to explore how is the YouTube intro animation download process works using YouTube Intro Animation Makers through this article.
In this article
01 [What is YouTube Intro Animation?](#Part 1)
02 [How does YouTube Intro Animation Maker works?](#Part 2)
03 [5 of YouTube Intro Animation examples (2022)](#Part 3)
04 [How to Create a YouTube Intro Animation FAST](#Part 4)
Part 1 What is YouTube Intro Animation?
An animation video for YouTube intro is a short animated clip usually 5 to seconds in length and plays before the main YouTube video content. The intro YouTube animation is the primary step to creating your online persona and branding your content on YouTube. You can get YouTube intro animation for free online and include them in your YouTube content. A YouTube intro easily and quickly provides viewers insight into what they should expect from the channel. It is used to familiarize the viewer with the channel’s theme, feel, and look, which gives them context before reaching the main content.
Intro animation YouTube is sometimes called video bumpers, as they catch viewers’ attention and help reinforce your brand. In the general video, intros boost the video quality. You can also get a good video intro from intro animation free download websites for your YouTube content.
Part 2 How do YouTube Intro Animation Maker works?
You can create compelling, engaging, and best intro animation on YouTube by using free animation intro for YouTube or creating a YouTube intro animation by yourself. You don’t need be a pro in video editing or a creator to make animated video intros for your YouTube channel if you have the best intro animation software to create intro videos like a professional. Here are some benefits of YouTube intro animation maker and how it works:
● A YouTube intro animation maker has a built-in editor in your browser
● A YouTube intro animation maker is affordable, fast, and easy to use
● A YouTube intro animation maker can broadcast-quality logo animation and intros
● A YouTube intro animation maker has a wide variety of templates to make your YouTube animation intro
Using a YouTube intro animation maker, you are ready to create unskippable YouTube intros using the most versatile tool to turn your viewers into lifelong channel subscribers.
Part 3 5 of YouTube Intro Animation examples (2022)
To be successful on YouTube, capture and retain your viewers’ attention and increase your conversions. The best method to achieve this is by using an excellent YouTube animated intro to create a lasting impression to make your video worth watching. You can also get Professional YouTube animated intro from intro animation download websites. This action will look at 5 make YouTube intro animation examples and ideas from where you can draw your inspiration in 2022.
01Ted Talk
Ted Talk, free fire intro animation, is a perfect example of a beautiful and captured sequence that helps to tell the audience what the brand is all about and their ideas and worth spreading. The good news about this intro is that you don’t need to be a professional, hire an animator, or invest in any flashy or expensive animation to show your brand on YouTube.
To achieve this intro, all you require is some intro animation in After Effects template free that can work for your brand so that you’ll be able to retain your audience and make them wanting to come back for more.
02Jazza
Jazza is a perfect example of free intro animation templates that you can use all over again to showcase your brand. The main idea for making a gaming intro animation video free download is to bring about an attractive, eye-capturing video intro through it.
This intro communicates a passion for teaching people to paint, animate, and draw. This same template can also create a vlog animation intro for the Jazza language lesson website, as it is a tremendous sequential presentation that represents Jazza mission.
03Salma Jafra
Salma Jafra Video intro tells a short story about the video’s main takeaways and includes an 8 seconds vlog intro animation sequence. Everything, including a brand color, is purple, which helps the audience recognize our videos on YouTube.
In addition to the free animation for YouTube intro, she plugged in her content to the end of the video or outro to generate enough traffic and adhere to SEO guidelines to ensure that the targeted audience finds the videos.
04SciShow
SciShow enables viewers to understand the brand and the kind of free YouTube intro animation video. The main trick of the video is to instantly grab viewers’ attention and convince them that the video is for them.
This intro animation video free download is a perfect example of how you can introduce your theme, tone, and brand name into your YouTube animation intro video download. This type of intro allows viewers to know what to expect quickly, and superb animation and design show off the value of production. Examples of a brand that can benefit from this type of YouTube animation intro download template is sleep studies.
05”Pump Red” Cinema Template
“Pump Red” Cinema Template is perfect for capturing reviewers’ imagination with an eye-catching, captivating, and intelligent video intro. By following the examples in this Minecraft animation intro template, you are more likely to retain your visitors or viewers from the moment they hit the play button on your YouTube video by using a catching soundtrack, on-brand messaging, and exciting visuals.
Part 4 How to Create a YouTube Intro Animation FAST
Whether you are using any streaming channel, YouTube, or selling videos on any e-commerce website, making animation for YouTube intro plays a vital role in promoting your brand. With it, creating an introduction may not seem as complicated as it sounds.
The section explains in detail how to make a YouTube intro animation free with the Wondershare Filmora Video Editor video editor from animated intro download templates or create a custom intro from scratch even if there is no existing footage or image to begin with. The following method will guide you through the process, and then you can keep your video saved for reuse in all creations to maintain consistency and give your brand a unique identity:
Wondershare Filmora
Get started easily with Filmora’s powerful performance, intuitive interface, and countless effects!
Try It Free Try It Free Try It Free Learn More >
01Step Launch Intro Animation Software
Launch Wondershare Filmora Video Editor editor, add intro background to Filmora by going to the media tab at the top and selecting any sample colors category from the left pane. All the solid and gradient colors in the media library are available at the right, then over the mouse to the color title you want to use as a background and click on the + icon in the middle to add it to the timeline.
02Step Add Different effects
Add sound effects or audio to YouTube animated intro to make it more recognizable. In Wondershare Filmora Video Editor , visit the built-in audio library by double-clicking the audio thumbnail from the library and listening to the soundtrack. Repeat the process to find the perfect sound effects or background music for your video intro. D-and-drop the audio to the video.
03Step Adding Branding Element
In the animated video intro, add the company name, branding element, and channel name to create brand awareness by clicking on the title tab and hovering the mouse to the text you want to use. Then drag and drop it to track above the video.
Go to the Effects tab and select category from the top left pane. Click and drag your preferred effects from the library effects to the timeline.
04Step Export
Once you finish creating your animated video intro with all the required ingredients, go to Export at the top center area of the interface to export the animated video intro, and once done, share it on social media.
To make YouTube intro animation templates free download with Filmora templates, follow the steps listed below:
Step Select Effects
Log onto the Filmora effects page on filmstock with the same wsid used on Filmora and select the effect you want
Step Select template
Select the preferred intro templates by clicking on the download now and following the instructions on the screen to attend a download template. After downloading, see in red cycle under the transition, titles, and filter based on the element included in the effect part. Add this downloaded title or transition to the animated intro video.
Step Finalization
Delete your animated video intro from the templates that you selected.
● Key Takeaways from This Episode →
● Introduction about what is YouTube Intro?
● How Intro Animation Maker works with examples.
● The process to develop your own YouTube intro animation for free with Wondershare Filmora Video Editor .
10 Trendy Free Logo Animation Templates
10 Trendy & Stylish Free Logo Animation Templates in 2024
An easy yet powerful editor
Numerous effects to choose from
Detailed tutorials provided by the official channel
The logo animation of your video or presentation sets the tone for how your audience will perceive your brand. There are many stylish and trendy free logo animation templates that you can use to create an inspiring impression of your brand. The basic is to make sure your logo animation grabs your viewer’s attention and is catchy to make them remember your company’s name. This article will guide you through complete logo animation
![]()
This article will guide you through complete logo animation templates. We have also included various logo animations that you can choose from for your brand. Along with that, you will also see how logo motion graphics and 3D logo effects come out to be a wonder to promote your business to the next level following After Effects logo templates and free logo intro templates. The article also guides you through proper steps to apply logo motion effectively with respective screenshots.
In this article
01 [What an Animated Logo Can Do for Your Business](#Part 1)
02 [10 Top Quality Free Logo Animation Templates](#Part 2)
03 [5 Techniques for Custom Logo Animation in After Effects](#Part 3)
04 [How to Make a Logo Animation for Free in Just 3 Minutes](#Part 4)
Part 1 What an Animated Logo Can Do for Your Business
It is widespread info that logo animation is often an effective promotional tool. Here are some of the fantastic purposes or benefits of an animated logo to your Business is that:
● It helps to increase the memorability of the brand.
● Stop motion logo helps in advertising and creating brand awareness.
● Logo animation on YouTube can improve storytelling, i.e., your animated video can tell a story about your brand.
● logo intro starts an original image for your brand’s growth.
To make animated logo work for your Business perfectly and efficiently, consider the following factors:
● Critically analyze the business goal and think of the brand’s personality.
● The logo animation should orient to the user’s preference. Therefore make sure you carry out user research.
● Create an unpredictable animation logo. Try to make your audience surprised so that the final results are unexpected in the first few seconds.
● After Effects logo animation templates should not be too long; therefore, try not to make your animated logo complex and keep it short. The recommendation is for it to stay under seconds.
![]()
Part 1 Top Quality Free Logo Animation Templates
This article section will provide a top-quality template for free logo animation on YouTube and other platforms for your business growth. From the list, you can select the logo animation templates free download that matches your need:
![]()
01Web Series
Web Series logo animation can be helpful on a web series Project. The pictures include some cool effects with minimal and captivating design to wow your audience.
02VHS 8Logo Intro
VHS 8Logo templates will take you back to the time of kung-fu movies and arcade 8-bit games. It is easy to edit and comes with a video tutorial featuring distortion effects, broken videotape, and lousy TV.
03Comic Logo
Comic Logo can be used in cartoons, comics, and kids theme video projects and comes in very handy. It has a cartoon style animation, is very colorful, and will be appreciated and loved by your audience
04Zero Glitch
Zero GlitchCan be used to give a glitch introduction to your video. It has an industrial and unique draft design that can perfectly fit any project that needs a techno logo opening.
05Quick bling
Quick bling is an elegant and simple logo animation template for upcoming projects. This logo template is easily customized and has a tutorial if you encounter any problems.
06Rise From The Dark
Rise from Dark comes up with some eye-grabbing yet simple After Effect logo animation template free download that can fit any video content. This logo template is perfect whether you need a logo intro for an event opener, TV show, or promo.
07Sports Logo Template
Sports Logo Template includes pre-rendering footage with an easy customization option. It doesn’t require any plugins.
08Holi Festival Logo Templates
Holi Festival Logo Templates are perfect when you want to grab your audience’s attention. A juicy bright explosion of color and features seven sounds of vibrant animation. It is super easy to use in animating your logo.
09Light City Logo Templates
Light City Logo Templates is a stunning logo animation template that features a luminescent cityscape and golden lions against a dark background specially designed for a dramatic and mysterious luxurious feel.
10Drifting Car Logo Templates
Drifting Car Logo Templates is the perfect answer for a movie project. It has seconds of footage with a funky sports car.
Part 3 5 Techniques for Custom Logo Animation in After Effects
A perfect way to capture your viewers’ attention and remind them who made the video is by creating a striking and simple logo animation After Effects template free download for your video project and using the After Effects logo animation template in an absolute sense. In this article, we will throw away tools that you will need to animate your logo from scratch in After Effects:
![]()
01Technique 1: Separate the Layers
Separate the layers in Photoshop or illustrator and check if they are all separated and correctly named
![]()
Steps: Next, import your logo into after-effects as footage correctly. Otherwise, cannot access the individual layers in your logo:
● For illustrator make sure the logo elements are on a separate layer.
● If the element is grouped, that is the same way they will be in After Effect.
● To simplify this process, select the group in AI. Using the layer menu, click on the release to layers>sequence.
● Click on import and select your logo design file.
● Select composition>retain layer sizes
● Click on import, and your logo will appear in your media browser as a comp containing its layer and include the folder of those layers.
02Technique 2: Editing Properly
If you made a mistake and important your file as a footer is better than a composition, here is how to fix it:
● Drag your single a high elements to the timeline from the browser media
● Right click>create>convert to layered comp
● Now your Design file will be accessible in layers
03Technique 3: Transitions
You can opt for different available transitions out of the logo intro template After Effects to modify your logo. Then, you can go with the dual Effect of logo animation with a transition effect.
![]()
04Technique 4: Logo Animation
Animate each layer using the straight-forward property scale, rotation, position, and opacity properties
● Select the layer in the timeline to add a keyframe to your layers
● Create and finish a keyframe by placing your Playhead on the frame you want
● Create where you want the animation to start by moving several frames backward from your first keyframe
● Change the value of the keyframe property until you are satisfied with the look
● Continue with each of the layers in turn until you feel happy with the effects
![]()
05Technique 5: Title Animation
Animate the title using the varieties of animation styles in After Effects if you can edit a text layer.
● Remove any AI text objects that you want to replace with after effects text layer.
● Create a fresh After Effects text layer.
● Copy-paste the text from AI to after-effects. In doing this, it will use the same font, color, and sizes is when you paste it in
● Go to the effects browser, choose your title animation, and drag and drop it to your new title.
● View all keyframes by pressing U and select the layer in the timeline, then adjust as you like.
Part 4 How to Make a Logo Animation for Free in Just 3 Minutes
Filmora is one of the best software editing tools for beginners to design logo animation and logo intro template free download easily and quickly with keyframing. It produces high-quality and smoothly animated logos with motion blur that gives your logo animation more touch-up. The logo intro-free animation in Filmora is simple to replicate if you get some logo inspiration and then conclude how you will execute your animation. All the editing tools like shape, elements, etc., are available in Filmora software.
![]()
01Step 1: Create Logo
First, you need to create the logo or have a png logo image using any photo editing software like Photoshop or Canva.

Wondershare Filmora - Best Video Editor for Mac/Windows
5,481,435 people have downloaded it.
Build unique custom animations without breaking a sweat.
Focus on creating epic stories and leave the details to Filmora’s auto features.
Start a creative adventure with drag & drop effects and endless possibilities.
Filmora simplifies advanced features to save you time and effort.
Filmora cuts out repetition so you can move on to your next creative breakthrough.
02Step 2: Import background
After you have edited your logo on Photoshop, import background video and logo in Filmora and Use the key-framing feature to animate your logo
03Step 3: Add effects
Add other effects to your logo animation to make it perfect by adding colors, text, etc., to wow your logo animations. Add shapes to the image to give it some effect then add the motions to these shapes.
04Step 4: Export
Once you are satisfied with the trendy and stylish free logo, you can export and share them on your social media platform.
● Key Takeaways from This Episode →
● Impact of animated logo for business
● Top-quality free logo animation
● Steps to make logo through Premiere Pro logo animation template for free.
The logo animation of your video or presentation sets the tone for how your audience will perceive your brand. There are many stylish and trendy free logo animation templates that you can use to create an inspiring impression of your brand. The basic is to make sure your logo animation grabs your viewer’s attention and is catchy to make them remember your company’s name. This article will guide you through complete logo animation
![]()
This article will guide you through complete logo animation templates. We have also included various logo animations that you can choose from for your brand. Along with that, you will also see how logo motion graphics and 3D logo effects come out to be a wonder to promote your business to the next level following After Effects logo templates and free logo intro templates. The article also guides you through proper steps to apply logo motion effectively with respective screenshots.
In this article
01 [What an Animated Logo Can Do for Your Business](#Part 1)
02 [10 Top Quality Free Logo Animation Templates](#Part 2)
03 [5 Techniques for Custom Logo Animation in After Effects](#Part 3)
04 [How to Make a Logo Animation for Free in Just 3 Minutes](#Part 4)
Part 1 What an Animated Logo Can Do for Your Business
It is widespread info that logo animation is often an effective promotional tool. Here are some of the fantastic purposes or benefits of an animated logo to your Business is that:
● It helps to increase the memorability of the brand.
● Stop motion logo helps in advertising and creating brand awareness.
● Logo animation on YouTube can improve storytelling, i.e., your animated video can tell a story about your brand.
● logo intro starts an original image for your brand’s growth.
To make animated logo work for your Business perfectly and efficiently, consider the following factors:
● Critically analyze the business goal and think of the brand’s personality.
● The logo animation should orient to the user’s preference. Therefore make sure you carry out user research.
● Create an unpredictable animation logo. Try to make your audience surprised so that the final results are unexpected in the first few seconds.
● After Effects logo animation templates should not be too long; therefore, try not to make your animated logo complex and keep it short. The recommendation is for it to stay under seconds.
![]()
Part 1 Top Quality Free Logo Animation Templates
This article section will provide a top-quality template for free logo animation on YouTube and other platforms for your business growth. From the list, you can select the logo animation templates free download that matches your need:
![]()
01Web Series
Web Series logo animation can be helpful on a web series Project. The pictures include some cool effects with minimal and captivating design to wow your audience.
02VHS 8Logo Intro
VHS 8Logo templates will take you back to the time of kung-fu movies and arcade 8-bit games. It is easy to edit and comes with a video tutorial featuring distortion effects, broken videotape, and lousy TV.
03Comic Logo
Comic Logo can be used in cartoons, comics, and kids theme video projects and comes in very handy. It has a cartoon style animation, is very colorful, and will be appreciated and loved by your audience
04Zero Glitch
Zero GlitchCan be used to give a glitch introduction to your video. It has an industrial and unique draft design that can perfectly fit any project that needs a techno logo opening.
05Quick bling
Quick bling is an elegant and simple logo animation template for upcoming projects. This logo template is easily customized and has a tutorial if you encounter any problems.
06Rise From The Dark
Rise from Dark comes up with some eye-grabbing yet simple After Effect logo animation template free download that can fit any video content. This logo template is perfect whether you need a logo intro for an event opener, TV show, or promo.
07Sports Logo Template
Sports Logo Template includes pre-rendering footage with an easy customization option. It doesn’t require any plugins.
08Holi Festival Logo Templates
Holi Festival Logo Templates are perfect when you want to grab your audience’s attention. A juicy bright explosion of color and features seven sounds of vibrant animation. It is super easy to use in animating your logo.
09Light City Logo Templates
Light City Logo Templates is a stunning logo animation template that features a luminescent cityscape and golden lions against a dark background specially designed for a dramatic and mysterious luxurious feel.
10Drifting Car Logo Templates
Drifting Car Logo Templates is the perfect answer for a movie project. It has seconds of footage with a funky sports car.
Part 3 5 Techniques for Custom Logo Animation in After Effects
A perfect way to capture your viewers’ attention and remind them who made the video is by creating a striking and simple logo animation After Effects template free download for your video project and using the After Effects logo animation template in an absolute sense. In this article, we will throw away tools that you will need to animate your logo from scratch in After Effects:
![]()
01Technique 1: Separate the Layers
Separate the layers in Photoshop or illustrator and check if they are all separated and correctly named
![]()
Steps: Next, import your logo into after-effects as footage correctly. Otherwise, cannot access the individual layers in your logo:
● For illustrator make sure the logo elements are on a separate layer.
● If the element is grouped, that is the same way they will be in After Effect.
● To simplify this process, select the group in AI. Using the layer menu, click on the release to layers>sequence.
● Click on import and select your logo design file.
● Select composition>retain layer sizes
● Click on import, and your logo will appear in your media browser as a comp containing its layer and include the folder of those layers.
02Technique 2: Editing Properly
If you made a mistake and important your file as a footer is better than a composition, here is how to fix it:
● Drag your single a high elements to the timeline from the browser media
● Right click>create>convert to layered comp
● Now your Design file will be accessible in layers
03Technique 3: Transitions
You can opt for different available transitions out of the logo intro template After Effects to modify your logo. Then, you can go with the dual Effect of logo animation with a transition effect.
![]()
04Technique 4: Logo Animation
Animate each layer using the straight-forward property scale, rotation, position, and opacity properties
● Select the layer in the timeline to add a keyframe to your layers
● Create and finish a keyframe by placing your Playhead on the frame you want
● Create where you want the animation to start by moving several frames backward from your first keyframe
● Change the value of the keyframe property until you are satisfied with the look
● Continue with each of the layers in turn until you feel happy with the effects
![]()
05Technique 5: Title Animation
Animate the title using the varieties of animation styles in After Effects if you can edit a text layer.
● Remove any AI text objects that you want to replace with after effects text layer.
● Create a fresh After Effects text layer.
● Copy-paste the text from AI to after-effects. In doing this, it will use the same font, color, and sizes is when you paste it in
● Go to the effects browser, choose your title animation, and drag and drop it to your new title.
● View all keyframes by pressing U and select the layer in the timeline, then adjust as you like.
Part 4 How to Make a Logo Animation for Free in Just 3 Minutes
Filmora is one of the best software editing tools for beginners to design logo animation and logo intro template free download easily and quickly with keyframing. It produces high-quality and smoothly animated logos with motion blur that gives your logo animation more touch-up. The logo intro-free animation in Filmora is simple to replicate if you get some logo inspiration and then conclude how you will execute your animation. All the editing tools like shape, elements, etc., are available in Filmora software.
![]()
01Step 1: Create Logo
First, you need to create the logo or have a png logo image using any photo editing software like Photoshop or Canva.
Wondershare Filmora - Best Video Editor for Mac/Windows
5,481,435 people have downloaded it.
Build unique custom animations without breaking a sweat.
Focus on creating epic stories and leave the details to Filmora’s auto features.
Start a creative adventure with drag & drop effects and endless possibilities.
Filmora simplifies advanced features to save you time and effort.
Filmora cuts out repetition so you can move on to your next creative breakthrough.
02Step 2: Import background
After you have edited your logo on Photoshop, import background video and logo in Filmora and Use the key-framing feature to animate your logo
03Step 3: Add effects
Add other effects to your logo animation to make it perfect by adding colors, text, etc., to wow your logo animations. Add shapes to the image to give it some effect then add the motions to these shapes.
04Step 4: Export
Once you are satisfied with the trendy and stylish free logo, you can export and share them on your social media platform.
● Key Takeaways from This Episode →
● Impact of animated logo for business
● Top-quality free logo animation
● Steps to make logo through Premiere Pro logo animation template for free.
All About 3D Medical Animation And Its Uses
All About 3D Medical Animation And Its Uses
An easy yet powerful editor
Numerous effects to choose from
Detailed tutorials provided by the official channel
You can see the use of 3D animation in all spheres of life including the medical field. More and more professionals in the field of the healthcare industry are now using 3D animations for several different tasks like education, communication, marketing, and more.

So, if you too are keen to learn about 3D medical animation videos, their uses, popular companies, and other details, you are reading on the right page.
In this article
01 [What is 3D Medical Animation?](#Part 1)
02 [Uses of 3D Medical Animations](#Part 2)
03 [Benefits of Using 3D Medical Animations](#Part 3)
04 [Top 3D Animation Companies](#Part 4)
05 [The Best Tool to Edit Your 3D Medical Animated Video – Wondershare Filmora](#Part 4)
Part 1 What is 3D Medical Animation?
A 3D medical animation can be termed as an animation that is used for different tasks in the healthcare and medical industry. These animations are used for several different tasks like explaining and detailing the concepts to the patients, compelling the investors, training professionals, marketing devices and drugs, and more. Depending on the target audience, the animations can be created by taking the help of specialized industries or using animated software.
Part 2 Uses Of 3D Medical Animations
3D animations have proved to be useful in the healthcare and medical industry in several ways. Below we have gathered some of the key benefits of the same.
01Using As A Mode Of Communication With Patients
Communication with the patients is one of the major uses of 3D animation in the healthcare field. Using animations, the communication with the patients can be enhanced in several ways. Explaining complex medical conditions and procedures to patients is difficult and here the animations help to a great extent. Going through animation will make a patient well prepared to see the doctor and learn about his/her medical condition or procedure to be performed. Patients do not have medical knowledge and these animations help them to know their condition, scenario, and procedure in a simple way that they can understand.
02Training Of Medical Professionals
Medical professionals need to keep themselves updated with the latest trends and practices and for this, they need to undergo training from time to time. 3D animations for the topics to be studied help them in better understanding the concepts and the procedures. Moreover, animations also help in e-learning.
03Educating New Professionals
For the new students using 3D animations is a great way to teach complex medical topics which otherwise explaining them orally or visually are not that effective. Animations can be used to educate about different topics like the anatomy of a human body, medical procedures, drug mechanisms, use of devices, and more.
04Used As A Marketing Tool
Since the presentation of medical information is difficult, marketing in the healthcare industry is quite a challenge. Moreover, the investors do not possess any medical know-how and the task of marketing becomes even more difficult. Thus, using 3D medical animations can be helpful here to explain the products, devices, and other things. Marketing of medicines to patients can also be done using animated mascots and characters.
05Marketing To Medical Professional
While marketing products and devices to medical professionals is not difficult in terms of knowledge or know-how as they are from the medical background. But with multiple marketing teams approaching them, time is a limitation and thus presentation needs to be short yet informative which can be achieved through the use of animations. Moreover, these animations can be sent to professionals through emails or by sharing a website link.

Part 3 Benefits Of Using 3D Medical Animations
Above we have discussed several fields and uses of 3D medical animations. Several factors make these animations useful.
●Helps in offering an in-depth and detailed explanation of complex subjects.
●Offers broad scope of explanation and especially subjects that cannot be explained easily through images or orally.
●Visual presentations offer better recall of the topic and details.
●Engagement through animations is enhanced and better.
●3D medical animations look professional and thus appear to be more reliable.
●Animations can be created to cater to a wider audience and people for different subjects.
Part 4 Top 3D Animation Companies
Creating 3D medical animation is not like creating any other 3D animation as it not only requires technical know-how but also in-depth knowledge of the medical field. Thus, for creating 3D medical animations, take help from the companies that specialize in this field to create 3D medical animation videos. Below we have shortlisted some of the popular 3D medical animation company.
●DG Medical Animations
●The SGNY Group
●Fusion Medical Animation
●TMBA Inc
●Pixeldust Studios
●Indigo Productions
●Nanobot Medical Animation Studio
●MultiVision Digital
●ICom Creative
●INVIVO
●JLab Animation
These companies offer different 3D medical animation services and depending on your requirements, you can choose the best suitable one.

Part 5 The Best Tool To Edit Your 3d Medical Animated Video – Wondershare Wondershare Filmora Video Editor
Even if you have got a 3D medical animation video created by a professional company, several times, the need may arise to edit and customize it. In such situations, you would need a professional tool that can help in editing the video without affecting the quality and other details. Wondershare Wondershare Filmora Video Editor is one such excellent software that can be used for the task. This Windows and Mac-based tool comes with a feature-packed built-in editor that can let you edit the files quickly and in a hassle-free manner. Additionally, you can also create decent animations using multiple features of the software.
The interface is simple and user-friendly that making the task of video creation and editing simple.
Key features of the software
● Allows creating dynamic and lively videos using over 100 layers of media.
● Allows complete editing and customization of the video using the editor.
● Animations using keyframing and other features can be created.
● Enhance audio using features like background noise reduction, keyframe audio editing, audio equalizer, and more.
● Support to features likes stabilization, fisheye correction, speed controlling, advanced color correction, 3D LUTs, and more.
● Support to Windows and Mac.
For Win 7 or later (64-bit)
For macOS 10.12 or later
● Key Takeaways from This Episode →
● The use of 3D medical animation in the healthcare and medical industry has increased manifold.
● The 3D medical animations are used for communication with patients, training, marketing, educations, and other uses.
● Several professional and specialized industries can help you create 3D medical animations.
● To edit the created videos and create other decent ones, Wondershare Wondershare Filmora Video Editor works as a great option.
You can see the use of 3D animation in all spheres of life including the medical field. More and more professionals in the field of the healthcare industry are now using 3D animations for several different tasks like education, communication, marketing, and more.
So, if you too are keen to learn about 3D medical animation videos, their uses, popular companies, and other details, you are reading on the right page.
In this article
01 [What is 3D Medical Animation?](#Part 1)
02 [Uses of 3D Medical Animations](#Part 2)
03 [Benefits of Using 3D Medical Animations](#Part 3)
04 [Top 3D Animation Companies](#Part 4)
05 [The Best Tool to Edit Your 3D Medical Animated Video – Wondershare Filmora](#Part 4)
Part 1 What is 3D Medical Animation?
A 3D medical animation can be termed as an animation that is used for different tasks in the healthcare and medical industry. These animations are used for several different tasks like explaining and detailing the concepts to the patients, compelling the investors, training professionals, marketing devices and drugs, and more. Depending on the target audience, the animations can be created by taking the help of specialized industries or using animated software.
Part 2 Uses Of 3D Medical Animations
3D animations have proved to be useful in the healthcare and medical industry in several ways. Below we have gathered some of the key benefits of the same.
01Using As A Mode Of Communication With Patients
Communication with the patients is one of the major uses of 3D animation in the healthcare field. Using animations, the communication with the patients can be enhanced in several ways. Explaining complex medical conditions and procedures to patients is difficult and here the animations help to a great extent. Going through animation will make a patient well prepared to see the doctor and learn about his/her medical condition or procedure to be performed. Patients do not have medical knowledge and these animations help them to know their condition, scenario, and procedure in a simple way that they can understand.
02Training Of Medical Professionals
Medical professionals need to keep themselves updated with the latest trends and practices and for this, they need to undergo training from time to time. 3D animations for the topics to be studied help them in better understanding the concepts and the procedures. Moreover, animations also help in e-learning.
03Educating New Professionals
For the new students using 3D animations is a great way to teach complex medical topics which otherwise explaining them orally or visually are not that effective. Animations can be used to educate about different topics like the anatomy of a human body, medical procedures, drug mechanisms, use of devices, and more.
04Used As A Marketing Tool
Since the presentation of medical information is difficult, marketing in the healthcare industry is quite a challenge. Moreover, the investors do not possess any medical know-how and the task of marketing becomes even more difficult. Thus, using 3D medical animations can be helpful here to explain the products, devices, and other things. Marketing of medicines to patients can also be done using animated mascots and characters.
05Marketing To Medical Professional
While marketing products and devices to medical professionals is not difficult in terms of knowledge or know-how as they are from the medical background. But with multiple marketing teams approaching them, time is a limitation and thus presentation needs to be short yet informative which can be achieved through the use of animations. Moreover, these animations can be sent to professionals through emails or by sharing a website link.
Part 3 Benefits Of Using 3D Medical Animations
Above we have discussed several fields and uses of 3D medical animations. Several factors make these animations useful.
●Helps in offering an in-depth and detailed explanation of complex subjects.
●Offers broad scope of explanation and especially subjects that cannot be explained easily through images or orally.
●Visual presentations offer better recall of the topic and details.
●Engagement through animations is enhanced and better.
●3D medical animations look professional and thus appear to be more reliable.
●Animations can be created to cater to a wider audience and people for different subjects.
Part 4 Top 3D Animation Companies
Creating 3D medical animation is not like creating any other 3D animation as it not only requires technical know-how but also in-depth knowledge of the medical field. Thus, for creating 3D medical animations, take help from the companies that specialize in this field to create 3D medical animation videos. Below we have shortlisted some of the popular 3D medical animation company.
●DG Medical Animations
●The SGNY Group
●Fusion Medical Animation
●TMBA Inc
●Pixeldust Studios
●Indigo Productions
●Nanobot Medical Animation Studio
●MultiVision Digital
●ICom Creative
●INVIVO
●JLab Animation
These companies offer different 3D medical animation services and depending on your requirements, you can choose the best suitable one.
Part 5 The Best Tool To Edit Your 3d Medical Animated Video – Wondershare Wondershare Filmora Video Editor
Even if you have got a 3D medical animation video created by a professional company, several times, the need may arise to edit and customize it. In such situations, you would need a professional tool that can help in editing the video without affecting the quality and other details. Wondershare Wondershare Filmora Video Editor is one such excellent software that can be used for the task. This Windows and Mac-based tool comes with a feature-packed built-in editor that can let you edit the files quickly and in a hassle-free manner. Additionally, you can also create decent animations using multiple features of the software.
The interface is simple and user-friendly that making the task of video creation and editing simple.
Key features of the software
● Allows creating dynamic and lively videos using over 100 layers of media.
● Allows complete editing and customization of the video using the editor.
● Animations using keyframing and other features can be created.
● Enhance audio using features like background noise reduction, keyframe audio editing, audio equalizer, and more.
● Support to features likes stabilization, fisheye correction, speed controlling, advanced color correction, 3D LUTs, and more.
● Support to Windows and Mac.
For Win 7 or later (64-bit)
For macOS 10.12 or later
● Key Takeaways from This Episode →
● The use of 3D medical animation in the healthcare and medical industry has increased manifold.
● The 3D medical animations are used for communication with patients, training, marketing, educations, and other uses.
● Several professional and specialized industries can help you create 3D medical animations.
● To edit the created videos and create other decent ones, Wondershare Wondershare Filmora Video Editor works as a great option.
Best 8 Tools Tell You How to Make Slideshows for Instagram
Top 8 Tools Tell You How to Make Slideshows for Instagram
An easy yet powerful editor
Numerous effects to choose from
Detailed tutorials provided by the official channel
Instagram slideshows land among the latest social media trends of fun and entertainment. Learn how to attract jaw dropping peer attention with creating the same!
In this article
01 [When Should You Use an Instagram Slideshow?](#Part 1)
02 [How to Make an Instagram Slideshow with Music?](#Part 2)
03 [8 Best Instagram Slideshow Apps for Creating Outstanding Slideshow](#Part 3)
Part 1 When Should You Use an Instagram Slideshow?
Revolutions in technology has opened doors to a plenty of new and exciting means of information sharing, entertainment and communication. Playing its part in the game, Instagram slideshow has emerged as an exciting means of quick and impactful content sharing. Diving deeper into the discussion, let us talk about the different areas of working with an Instagram slide show in the following section:
01Explanatory Product Demonstrations and Stepwise Tutorials
Considering the diverse media collaboration entertained by this social media platform, you get the liberty to include 10 media files of videos and images while creating a slideshow on Instagram. This is an affordably sufficient media space to demonstrate your newly launched product in front of the target audience.
The aforesaid characteristic of a slideshow for Instagram can be put to another use of creating detailed, step by step guides and product usage tutorials to create an increased and confident customer reach and brand applicability. A few examples include the presentations of recipes by food blogs and chefs, or a detailed look of the day’s outfit by fashion bloggers.
02Interactive Storytelling or Recreate an Event
Gone are the times when stories and events were restricted to a single image or video with a limited scope of understanding and explanation. You can now work with a combination of multiple images and videos to create more vivid and graphical descriptions of stories, narratives and events.
You can work on creating an engaging slideshow for Instagram to tell an amazing story, voice a narration from the beginning to the end, or share your best moments with your cherished audience, which will surely give them the feel of enjoying the adventure along with you.
03Create a Collection
You can now use a slide show for Instagram to design and present a collection of manifold ideas and products within a single post. You can improvise the collection with displaying a series of related products, showcasing a summary of your different blog posts through the week, or simply present a list of your most reliable inspirations, resources and influencers.
04Exciting Video Teasers
If you have a scheduled video release to entertain your audience, try working with interactive slideshows for Instagram to create some sensational teaser content of the upcoming release to imbibe a natural sense of curiosity within your audience.
You can experiment with releasing a mini photoshoot tour of your filming set, share close up progression details, or include a cliffhanger in the end of your Instagram slideshow to ensure the retrieval of your audience towards watching the release of the actual big content. You can use these short teasers as effective means of creating a campaign buzz, while building a closer connect with your audience.
Part 2 How to Make an Instagram Slideshow with Music?
By now, you must have gathered enough knowledge regarding the credibility of Instagram slideshows in catering to a diversity of commercial, professional and personal content sharing needs. Considering the same, you may conveniently feel motivated to try hands at creating stunning slideshow presentations for Instagram on your own.
Adhering to the concern, let us move ahead with our discussion, while talking about how to make a slideshow for Instagram and supplement the same with adaptable background music to develop amazing content masterpieces and share them with social media peers, while grabbing their obvious attention.
While there are a number of choices in the software market to choose your Instagram slideshow creator tool, the FlexClip tool can be a reliable option. Read though the following section to learn the slideshow creation process in the program with a comprehensive and stepwise tutorial guide:
Step 1: Download the Slideshow Creator Tool
Visit the official website of FlexClip to download and install the slideshow maker software in your preferred device.

Step 2: Start from Scratch
After a successful installation, proceed to launch the tool in your system and wait till the software greets you with its welcome interface. Here, you will have to reach to and tap the ‘Start to Create’ button to begin with the slideshow creation process. You can also select a preset template to work on your slideshow if nothing new clicks in your mind.
Step 3: Select an Aspect Ratio
In the tool’s creator window, navigate to the ‘Options Panel’ at the left and click on ‘More’ to select a suitable aspect ratio. Picking the 9:16 ratio would be a good choice.

Step 4: Upload Your Media
In the same ‘Options Panel’, click on ‘Media’ for dragging and dropping the desired video and image files from your device to the program’s media timeline, followed by applying them to the tool’s storyboard. You can alternatively, choose to directly work with media pages of any preset slideshow template.

Step 5: Customize Your Media
You can now proceed to improvise your media files with amazing texts, filters, stickers, emojis, widgets, etc., by clicking on specific object categories from the ‘Options Panel’.

Step 6: Include Seamless Transitions
Proceed to uplift your creation to the next level with the application of stunning image and video transitions. Navigate to the ‘Options Panel’ and tap ‘Elements’. A variety of transition effects will be displayed to choose from. Select the one you like to add it to your slideshow.

Step 7: Add a Background Music
An in line background audio is the best way to set the mood of your slideshow. Choose to add the same to your creation for making a more engaging impact on the audience. Visit the ‘Options Panel’ again and click on ‘Music’ to open the program’s audio library and select a perfect background music from the huge variety of choices, to include in your slideshow.

Step 8: Preview Your Creation
When you have finished customizing your slideshow, navigate to the top right corner of the editor’s storyboard and hit the ‘Preview’ button to visualize and ensure that your slideshow has everything at the right place. You can continue editing if there is a need to make some changes.
Step 9: Time to Save and Share!
When you are happy with your work, consider saving it either to your device or Google Dropbox, from where you can easily upload the same to your Instagram handle.
Part 3 Best Instagram Slideshow Apps for Creating Outstanding Slideshow
Social media is the talk of the trend in today’s times, which has extended its boundaries to visibly everything around us. Speaking in the light of the fact, slideshow presentations are no exception. Social media platforms today have come up with amazing tools and applications to create and share a stunning slideshow Instagram story with utmost ease and within an affordable time span.
Now that you have developed a comprehensive understanding of the credibility of working with Instagram slideshows and their creation process with the inclusion of complementary background music, let us dive into learning about some of the best and most popular Instagram apps for creating awesome slideshow presentations in the following section:
01Filme Lite
This tool lands among the leading user preferences to work on creating slideshow presentations. The application software is packed with a heap of latest features that form the Instagram trends in current times.
Apart from complementing your slideshow creations with tons of features, this slideshow maker for Instagram grants you the liberty to include your most loved videos and images within your presentation and customize them with a diverse range of effects, along with adjusting their play duration within the slideshow. Additional to image and video customization, you are also allowed to choose the image transition style that perfectly suits your content arrangement within the slides.
Working with the tool, you can be sure of getting an unparalleled slideshow creation experience with a very interactive and user oriented design interface, that is simple enough to be easily understood and worked upon by a newbie to the creative world.
02VivaVideo
If you are working on a detailed presentation and wish to spark up your creation with stunning varieties of jaw dropping special effects, consider creating your PowerPoint slideshows in this application. The tool’s effect library is a storehouse of the most amazing special effects that promise of transforming your slideshow into a visual masterpiece.
You can separately apply these effects to each of the slideshow images or choose to work on a combination of selected effects to include within a single video. Apart from this, you are free to choose an apt background music for your presentation slides from the extensive audio library of the software. The bottom line is; you are assured to a complete fun experience while creating slideshows with this tool.
03Movavi
If you are familiar enough with the fundamental concepts and the trivial anecdotes of working with slideshow presentations and want to take your graphic creativity to the next level, you can try hands at using the Movavi slideshow creator software to design high end PowerPoint presentations of professional quality. The best thing about the tool is, it works online and does not require a software download for usage concerns.
Along with creating online slideshow presentations with ease, the tool permits you to create online videos within minutes and instantly download the same for specific usage. You can further, pop up your presentation slides with wonderful transition and animation effects and also make adjustments in the play duration of each slide. The tool lets you choose and add a perfect background music to your presentation from its conveniently vast audio library.
04Slideshow Lab
If you have just landed into the world of creating slideshow presentations and are looking for easy solutions on how to make a slideshow on Instagram, consider working with this software to polish your design creativity. The simple and user cohesive interface of the tool is best for beginners to understand and get customary with the creation process, that takes the minimum possible time to render an appreciable PowerPoint presentation.
Talking about the slideshow design process, you will need to start with selecting a set of desired images, followed by uploading the same into the tool’s slideshow creator timeline. The next step is to arrange the images in the sequential order of appearance, select an appealing background music and apply smooth image transitions. When you are done with everything, proceed to save the presentation to your device.
05MoShow
While you can choose to create stunning slideshow presentations with almost any class of images, the aforesaid app works best to render Instagram images into a top rated Instagram photo slideshow without compromising with the high resolution image quality of Instagram photos. The application integrates motion pictures and lighting effects to transform the otherwise regular images into lively still captures.
Considering the credibility of the tool in overall user experience, its indeed a thumbs up from graphic creators across the globe, thanks to its smart and interactive interface, in time performance and outstanding creation outputs.
06InVideo Editor
Put an end to your search of effective solutions on how to do a slideshow on Instagram with the InVideo Editor, a smart video and graphic editor that can also be employed to adhere to the requirement of creating amazing slideshow presentations from Instagram media. While the creation process hardly takes a few minutes, you can work with the application to explore your editing creativity to the finest levels. The tool works well with any of your MacOs and Windows compatible devices.
The editor’s effects library is loaded with tons of graphic transitions and filters that are dedicated to enhance the contents of your presentation with utmost ease. You can add creative modifications to the slideshow media, such as, cut, crop and trim videos and images and add the most convincing music, overlays, fonts, etc., and enjoy an additional free access to hundreds of stock videos and slideshow templates.
07LightMV
This one is an online slideshow creator utility that works well with almost any operating system including Windows, iOS, Android and Mac. Essentially a cloud centered editor program, this tool caters to your high quality slideshow creation needs in the most effective way. The design process is quite simple, where you only need to add the images and videos, design your presentation and wait till everything comes to place.
What’s more appealing factor about the tool is that you will never need to download the program in your device or purchase a subscription plan to use the application. All you need to do is land into the tool’s website in your favorite browser and tap on the ‘Slideshow’ option to begin with the creation process. You can select from a heap of preset stunning slideshow templates to create the most enhanced PowerPoint presentation.
08Fliptastic
The Fliptastic slideshow creator app is exclusively developed to adhere to the graphic design concerns of iOS users. This one is a no cost graphic utility with a plethora of versatile features and considerable user backup. The app’s effect library is packed with a unique set of slideshow design templates, transitions, background music choices and filters that work to compliment your presentation with the subtlest look ever.
Paying a bit extra attention to the audio inclusion within the slides, the app offers you a range of free music files to work with, while additionally allowing you to upload and use one from your device or the internet.
09Creating Instagram Slideshows With Filmora
Talking exclusively within the domain of video creation and editing, the credibility of the Wondershare Filmora Video Editor software needs no introduction. Moving ahead with our discussion, let us learn about the process of creating awesome Instagram slideshows with Filmora in the following section:
Step 1: Download and Install the Program
To begin with addressing the concern of how to make a slideshow on Instagram story, navigate to the official Wondershare website and download the Wondershare Filmora Video Editor to your preferred system and proceed to install the same.
Wondershare Filmora - Best Video Editor for Mac/Windows
5,481,435 people have downloaded it.
Build unique custom animations without breaking a sweat.
Focus on creating epic stories and leave the details to Filmora’s auto features.
Start a creative adventure with drag & drop effects and endless possibilities.
Filmora simplifies advanced features to save you time and effort.
Filmora cuts out repetition so you can move on to your next creative breakthrough.
Step 2: Import Your Media
Launch the editor program and wait for the latter’s welcome screen to appear. Here, you need to import the images, videos and other media files to the editor timeline for including them in your slideshow. It is recommended to collect all the image and video files into one single folder before opening a new slideshow design project.
In the editor’s welcome screen, navigate to the ‘Media’ tab at the top left corner and click on the same to open the ‘Import’ menu. From here, you need to choose the ‘Import a Media Folder’ option, followed by navigating to the folder that contains the to be imported media files. When you have reached to the required folder, select it and tap ‘OK’ to import the same into the project timeline. When all the files have been imported, you can see them in the ‘Project Media’ panel.

Step 3: Timeline Positioning of Media Files
Reach to the ‘File’ menu and choose ‘Preferences’ from the latter’s dropdown menu. In the ‘Preferences’ window, hit the ‘Editing’ tab and tap on ‘Photo Preferences’. From the drop down menu that follows, choose the ‘Crop to Fit’ option to adjust the aspect ratio of your imported images in line with the slideshow project. In case your images have the 9:16 vertical aspect ratio, select the ‘Fit’ option to make a proper screen fit.

You can proceed to include the image zoom and camera pan features within your project by clicking on the ‘Pan & Zoom’ option. You can further, modify the preset durations of transitions, effects and photos in the ‘Editing’ tab itself before adding them to the editor timeline. Another way of doing the same is to drag the ends of the media files inward or outward, post the timeline adding process.

When you have finished making the required adjustments, navigate back the ‘Media Panel’ to include the imported media files within the project timeline. You can either click on the files to add them, or choose to ‘Drag and Drop’ the same at a preferred place within the timeline.
When all the images and videos have been added, proceed to arrange them in the desired order of appearance in the slideshow, followed by adjusting their screen time and play durations through any of the methods explained above.
Step 4: Add Transitions to Eliminate Hard Cuts
The smooth play of a slideshow is often distorted by hard cuts, which can be escaped by applying smooth transition effects to the slides. Consider exploring the ‘Transitions’ tab of Filmora to choose from a diversity of easily customizable transition effects and place them at the intersection point of the respective slides in the project timeline.
Instead of applying the same transition to every slide, prefer choosing the one that exclusively suits the content arrangement and flow within particular slides. This would save your slideshow from getting a repetitive look.

Post the timeline adding of a transition, you can double click on the same to reach the ‘Transition Setting Window’, where you are allowed to customize the play duration and select its ‘Transition Mode’. Play durations can alternatively be customised in the project timeline by dragging the slider in a left or right direction.
Step 5: Add Overlays and Filters for an Improvised Colour Scheme
To enhance the thematic appeal of your slideshow, consider desaturating the colours of the included images with the extensive range of visual effects and overlays available in the ‘Effects’ tab of the software’s editing timeline. Opening the tab, you are exposed to a series of ‘Filter and Overlay’ categories, that have further subdivisions of Light Leaks, Sepia Tone and Lomography.
To add a particular effect, place it in the timeline track above the desired clip or image. Observe the changes in the ‘Preview Panel’ and proceed to adjust the effect settings if required, by double clicking on the particular effect.

Step 6: Include Motion Graphic Elements
To supplement your slideshow with elegant motion graphics, navigate to the ‘Elements’ tab in the editor timeline. From here, you can access and choose any suitable motion graphic template from a diversity of available choices, to include within the project timeline. The step is completely optional and you should pay attention to the style of content presentation and the cause of creation of your slideshow when choosing to add these elements to the same.

Step 7: Record Voiceovers and Create Soundtracks
To record a voiceover for your slideshow, navigate to the ‘Media’ tab and tap the ‘Record’ dropdown menu. Click on ‘Record Voiceover’ in the list of options that appears. The ‘Record Audio’ icon pops up and you now need to select a microphone to be used in the recording process. When you are ready, tap the ‘Record’ button to let the recording begin.

You can now see your voice recording appear in the ‘Media’ tab with the previously imported media files, ready to be placed within the audio track of the project timeline. Filmora’s audio library is a storehouse of free access music and audio effects. To add one to your slideshow, navigate and click on the ‘Audio’ tab to select from the extensive Rock, Young & Bright, Electronic, etc., music subcategories till you get the perfect match for your presentation.

Once you have selected all the music tracks, place them one by one on the project timeline and move ahead with adjusting their play durations.
Step 8: Export Your Creation
When you are satisfied with your work, you can export the slideshow directly from Filmora to a number of media sharing platforms. All you need to do is, navigate to and tap the ‘Export’ button in the top right corner of the editor screen and proceed to set the resolution and frame rate, and select the output file format of your created slideshow in the ‘Export Window’ that appears.

When you are ready with everything, click on the ‘Export’ button at the bottom right corner of the screen to share your slideshow across different platforms, including YouTube, Instagram, Vimeo, etc.
The time required by Filmora to render your slideshow on the chosen platform will depend on the output file size. Considering the fact that larger files require a much longer time to be rendered, it would be a smart decision to limit the file size of your slideshow within 500 MB.
● Ending Thoughts →
● Instagram slideshows are exciting means of diving into fun-filled entertainment with your social media peers.
● When looking for solutions on how to create a slideshow on Instagram, there are loads of choices in the software market.
● Talking of best creator alternatives, you can pick the Wondershare Filmora slideshow developer program to make an amazing Insta story slideshow.
Instagram slideshows land among the latest social media trends of fun and entertainment. Learn how to attract jaw dropping peer attention with creating the same!
In this article
01 [When Should You Use an Instagram Slideshow?](#Part 1)
02 [How to Make an Instagram Slideshow with Music?](#Part 2)
03 [8 Best Instagram Slideshow Apps for Creating Outstanding Slideshow](#Part 3)
Part 1 When Should You Use an Instagram Slideshow?
Revolutions in technology has opened doors to a plenty of new and exciting means of information sharing, entertainment and communication. Playing its part in the game, Instagram slideshow has emerged as an exciting means of quick and impactful content sharing. Diving deeper into the discussion, let us talk about the different areas of working with an Instagram slide show in the following section:
01Explanatory Product Demonstrations and Stepwise Tutorials
Considering the diverse media collaboration entertained by this social media platform, you get the liberty to include 10 media files of videos and images while creating a slideshow on Instagram. This is an affordably sufficient media space to demonstrate your newly launched product in front of the target audience.
The aforesaid characteristic of a slideshow for Instagram can be put to another use of creating detailed, step by step guides and product usage tutorials to create an increased and confident customer reach and brand applicability. A few examples include the presentations of recipes by food blogs and chefs, or a detailed look of the day’s outfit by fashion bloggers.
02Interactive Storytelling or Recreate an Event
Gone are the times when stories and events were restricted to a single image or video with a limited scope of understanding and explanation. You can now work with a combination of multiple images and videos to create more vivid and graphical descriptions of stories, narratives and events.
You can work on creating an engaging slideshow for Instagram to tell an amazing story, voice a narration from the beginning to the end, or share your best moments with your cherished audience, which will surely give them the feel of enjoying the adventure along with you.
03Create a Collection
You can now use a slide show for Instagram to design and present a collection of manifold ideas and products within a single post. You can improvise the collection with displaying a series of related products, showcasing a summary of your different blog posts through the week, or simply present a list of your most reliable inspirations, resources and influencers.
04Exciting Video Teasers
If you have a scheduled video release to entertain your audience, try working with interactive slideshows for Instagram to create some sensational teaser content of the upcoming release to imbibe a natural sense of curiosity within your audience.
You can experiment with releasing a mini photoshoot tour of your filming set, share close up progression details, or include a cliffhanger in the end of your Instagram slideshow to ensure the retrieval of your audience towards watching the release of the actual big content. You can use these short teasers as effective means of creating a campaign buzz, while building a closer connect with your audience.
Part 2 How to Make an Instagram Slideshow with Music?
By now, you must have gathered enough knowledge regarding the credibility of Instagram slideshows in catering to a diversity of commercial, professional and personal content sharing needs. Considering the same, you may conveniently feel motivated to try hands at creating stunning slideshow presentations for Instagram on your own.
Adhering to the concern, let us move ahead with our discussion, while talking about how to make a slideshow for Instagram and supplement the same with adaptable background music to develop amazing content masterpieces and share them with social media peers, while grabbing their obvious attention.
While there are a number of choices in the software market to choose your Instagram slideshow creator tool, the FlexClip tool can be a reliable option. Read though the following section to learn the slideshow creation process in the program with a comprehensive and stepwise tutorial guide:
Step 1: Download the Slideshow Creator Tool
Visit the official website of FlexClip to download and install the slideshow maker software in your preferred device.
Step 2: Start from Scratch
After a successful installation, proceed to launch the tool in your system and wait till the software greets you with its welcome interface. Here, you will have to reach to and tap the ‘Start to Create’ button to begin with the slideshow creation process. You can also select a preset template to work on your slideshow if nothing new clicks in your mind.
Step 3: Select an Aspect Ratio
In the tool’s creator window, navigate to the ‘Options Panel’ at the left and click on ‘More’ to select a suitable aspect ratio. Picking the 9:16 ratio would be a good choice.
Step 4: Upload Your Media
In the same ‘Options Panel’, click on ‘Media’ for dragging and dropping the desired video and image files from your device to the program’s media timeline, followed by applying them to the tool’s storyboard. You can alternatively, choose to directly work with media pages of any preset slideshow template.
Step 5: Customize Your Media
You can now proceed to improvise your media files with amazing texts, filters, stickers, emojis, widgets, etc., by clicking on specific object categories from the ‘Options Panel’.
Step 6: Include Seamless Transitions
Proceed to uplift your creation to the next level with the application of stunning image and video transitions. Navigate to the ‘Options Panel’ and tap ‘Elements’. A variety of transition effects will be displayed to choose from. Select the one you like to add it to your slideshow.
Step 7: Add a Background Music
An in line background audio is the best way to set the mood of your slideshow. Choose to add the same to your creation for making a more engaging impact on the audience. Visit the ‘Options Panel’ again and click on ‘Music’ to open the program’s audio library and select a perfect background music from the huge variety of choices, to include in your slideshow.
Step 8: Preview Your Creation
When you have finished customizing your slideshow, navigate to the top right corner of the editor’s storyboard and hit the ‘Preview’ button to visualize and ensure that your slideshow has everything at the right place. You can continue editing if there is a need to make some changes.
Step 9: Time to Save and Share!
When you are happy with your work, consider saving it either to your device or Google Dropbox, from where you can easily upload the same to your Instagram handle.
Part 3 Best Instagram Slideshow Apps for Creating Outstanding Slideshow
Social media is the talk of the trend in today’s times, which has extended its boundaries to visibly everything around us. Speaking in the light of the fact, slideshow presentations are no exception. Social media platforms today have come up with amazing tools and applications to create and share a stunning slideshow Instagram story with utmost ease and within an affordable time span.
Now that you have developed a comprehensive understanding of the credibility of working with Instagram slideshows and their creation process with the inclusion of complementary background music, let us dive into learning about some of the best and most popular Instagram apps for creating awesome slideshow presentations in the following section:
01Filme Lite
This tool lands among the leading user preferences to work on creating slideshow presentations. The application software is packed with a heap of latest features that form the Instagram trends in current times.
Apart from complementing your slideshow creations with tons of features, this slideshow maker for Instagram grants you the liberty to include your most loved videos and images within your presentation and customize them with a diverse range of effects, along with adjusting their play duration within the slideshow. Additional to image and video customization, you are also allowed to choose the image transition style that perfectly suits your content arrangement within the slides.
Working with the tool, you can be sure of getting an unparalleled slideshow creation experience with a very interactive and user oriented design interface, that is simple enough to be easily understood and worked upon by a newbie to the creative world.
02VivaVideo
If you are working on a detailed presentation and wish to spark up your creation with stunning varieties of jaw dropping special effects, consider creating your PowerPoint slideshows in this application. The tool’s effect library is a storehouse of the most amazing special effects that promise of transforming your slideshow into a visual masterpiece.
You can separately apply these effects to each of the slideshow images or choose to work on a combination of selected effects to include within a single video. Apart from this, you are free to choose an apt background music for your presentation slides from the extensive audio library of the software. The bottom line is; you are assured to a complete fun experience while creating slideshows with this tool.
03Movavi
If you are familiar enough with the fundamental concepts and the trivial anecdotes of working with slideshow presentations and want to take your graphic creativity to the next level, you can try hands at using the Movavi slideshow creator software to design high end PowerPoint presentations of professional quality. The best thing about the tool is, it works online and does not require a software download for usage concerns.
Along with creating online slideshow presentations with ease, the tool permits you to create online videos within minutes and instantly download the same for specific usage. You can further, pop up your presentation slides with wonderful transition and animation effects and also make adjustments in the play duration of each slide. The tool lets you choose and add a perfect background music to your presentation from its conveniently vast audio library.
04Slideshow Lab
If you have just landed into the world of creating slideshow presentations and are looking for easy solutions on how to make a slideshow on Instagram, consider working with this software to polish your design creativity. The simple and user cohesive interface of the tool is best for beginners to understand and get customary with the creation process, that takes the minimum possible time to render an appreciable PowerPoint presentation.
Talking about the slideshow design process, you will need to start with selecting a set of desired images, followed by uploading the same into the tool’s slideshow creator timeline. The next step is to arrange the images in the sequential order of appearance, select an appealing background music and apply smooth image transitions. When you are done with everything, proceed to save the presentation to your device.
05MoShow
While you can choose to create stunning slideshow presentations with almost any class of images, the aforesaid app works best to render Instagram images into a top rated Instagram photo slideshow without compromising with the high resolution image quality of Instagram photos. The application integrates motion pictures and lighting effects to transform the otherwise regular images into lively still captures.
Considering the credibility of the tool in overall user experience, its indeed a thumbs up from graphic creators across the globe, thanks to its smart and interactive interface, in time performance and outstanding creation outputs.
06InVideo Editor
Put an end to your search of effective solutions on how to do a slideshow on Instagram with the InVideo Editor, a smart video and graphic editor that can also be employed to adhere to the requirement of creating amazing slideshow presentations from Instagram media. While the creation process hardly takes a few minutes, you can work with the application to explore your editing creativity to the finest levels. The tool works well with any of your MacOs and Windows compatible devices.
The editor’s effects library is loaded with tons of graphic transitions and filters that are dedicated to enhance the contents of your presentation with utmost ease. You can add creative modifications to the slideshow media, such as, cut, crop and trim videos and images and add the most convincing music, overlays, fonts, etc., and enjoy an additional free access to hundreds of stock videos and slideshow templates.
07LightMV
This one is an online slideshow creator utility that works well with almost any operating system including Windows, iOS, Android and Mac. Essentially a cloud centered editor program, this tool caters to your high quality slideshow creation needs in the most effective way. The design process is quite simple, where you only need to add the images and videos, design your presentation and wait till everything comes to place.
What’s more appealing factor about the tool is that you will never need to download the program in your device or purchase a subscription plan to use the application. All you need to do is land into the tool’s website in your favorite browser and tap on the ‘Slideshow’ option to begin with the creation process. You can select from a heap of preset stunning slideshow templates to create the most enhanced PowerPoint presentation.
08Fliptastic
The Fliptastic slideshow creator app is exclusively developed to adhere to the graphic design concerns of iOS users. This one is a no cost graphic utility with a plethora of versatile features and considerable user backup. The app’s effect library is packed with a unique set of slideshow design templates, transitions, background music choices and filters that work to compliment your presentation with the subtlest look ever.
Paying a bit extra attention to the audio inclusion within the slides, the app offers you a range of free music files to work with, while additionally allowing you to upload and use one from your device or the internet.
09Creating Instagram Slideshows With Filmora
Talking exclusively within the domain of video creation and editing, the credibility of the Wondershare Filmora Video Editor software needs no introduction. Moving ahead with our discussion, let us learn about the process of creating awesome Instagram slideshows with Filmora in the following section:
Step 1: Download and Install the Program
To begin with addressing the concern of how to make a slideshow on Instagram story, navigate to the official Wondershare website and download the Wondershare Filmora Video Editor to your preferred system and proceed to install the same.
Wondershare Filmora - Best Video Editor for Mac/Windows
5,481,435 people have downloaded it.
Build unique custom animations without breaking a sweat.
Focus on creating epic stories and leave the details to Filmora’s auto features.
Start a creative adventure with drag & drop effects and endless possibilities.
Filmora simplifies advanced features to save you time and effort.
Filmora cuts out repetition so you can move on to your next creative breakthrough.
Step 2: Import Your Media
Launch the editor program and wait for the latter’s welcome screen to appear. Here, you need to import the images, videos and other media files to the editor timeline for including them in your slideshow. It is recommended to collect all the image and video files into one single folder before opening a new slideshow design project.
In the editor’s welcome screen, navigate to the ‘Media’ tab at the top left corner and click on the same to open the ‘Import’ menu. From here, you need to choose the ‘Import a Media Folder’ option, followed by navigating to the folder that contains the to be imported media files. When you have reached to the required folder, select it and tap ‘OK’ to import the same into the project timeline. When all the files have been imported, you can see them in the ‘Project Media’ panel.
Step 3: Timeline Positioning of Media Files
Reach to the ‘File’ menu and choose ‘Preferences’ from the latter’s dropdown menu. In the ‘Preferences’ window, hit the ‘Editing’ tab and tap on ‘Photo Preferences’. From the drop down menu that follows, choose the ‘Crop to Fit’ option to adjust the aspect ratio of your imported images in line with the slideshow project. In case your images have the 9:16 vertical aspect ratio, select the ‘Fit’ option to make a proper screen fit.
You can proceed to include the image zoom and camera pan features within your project by clicking on the ‘Pan & Zoom’ option. You can further, modify the preset durations of transitions, effects and photos in the ‘Editing’ tab itself before adding them to the editor timeline. Another way of doing the same is to drag the ends of the media files inward or outward, post the timeline adding process.
When you have finished making the required adjustments, navigate back the ‘Media Panel’ to include the imported media files within the project timeline. You can either click on the files to add them, or choose to ‘Drag and Drop’ the same at a preferred place within the timeline.
When all the images and videos have been added, proceed to arrange them in the desired order of appearance in the slideshow, followed by adjusting their screen time and play durations through any of the methods explained above.
Step 4: Add Transitions to Eliminate Hard Cuts
The smooth play of a slideshow is often distorted by hard cuts, which can be escaped by applying smooth transition effects to the slides. Consider exploring the ‘Transitions’ tab of Filmora to choose from a diversity of easily customizable transition effects and place them at the intersection point of the respective slides in the project timeline.
Instead of applying the same transition to every slide, prefer choosing the one that exclusively suits the content arrangement and flow within particular slides. This would save your slideshow from getting a repetitive look.
Post the timeline adding of a transition, you can double click on the same to reach the ‘Transition Setting Window’, where you are allowed to customize the play duration and select its ‘Transition Mode’. Play durations can alternatively be customised in the project timeline by dragging the slider in a left or right direction.
Step 5: Add Overlays and Filters for an Improvised Colour Scheme
To enhance the thematic appeal of your slideshow, consider desaturating the colours of the included images with the extensive range of visual effects and overlays available in the ‘Effects’ tab of the software’s editing timeline. Opening the tab, you are exposed to a series of ‘Filter and Overlay’ categories, that have further subdivisions of Light Leaks, Sepia Tone and Lomography.
To add a particular effect, place it in the timeline track above the desired clip or image. Observe the changes in the ‘Preview Panel’ and proceed to adjust the effect settings if required, by double clicking on the particular effect.
Step 6: Include Motion Graphic Elements
To supplement your slideshow with elegant motion graphics, navigate to the ‘Elements’ tab in the editor timeline. From here, you can access and choose any suitable motion graphic template from a diversity of available choices, to include within the project timeline. The step is completely optional and you should pay attention to the style of content presentation and the cause of creation of your slideshow when choosing to add these elements to the same.
Step 7: Record Voiceovers and Create Soundtracks
To record a voiceover for your slideshow, navigate to the ‘Media’ tab and tap the ‘Record’ dropdown menu. Click on ‘Record Voiceover’ in the list of options that appears. The ‘Record Audio’ icon pops up and you now need to select a microphone to be used in the recording process. When you are ready, tap the ‘Record’ button to let the recording begin.
You can now see your voice recording appear in the ‘Media’ tab with the previously imported media files, ready to be placed within the audio track of the project timeline. Filmora’s audio library is a storehouse of free access music and audio effects. To add one to your slideshow, navigate and click on the ‘Audio’ tab to select from the extensive Rock, Young & Bright, Electronic, etc., music subcategories till you get the perfect match for your presentation.
Once you have selected all the music tracks, place them one by one on the project timeline and move ahead with adjusting their play durations.
Step 8: Export Your Creation
When you are satisfied with your work, you can export the slideshow directly from Filmora to a number of media sharing platforms. All you need to do is, navigate to and tap the ‘Export’ button in the top right corner of the editor screen and proceed to set the resolution and frame rate, and select the output file format of your created slideshow in the ‘Export Window’ that appears.
When you are ready with everything, click on the ‘Export’ button at the bottom right corner of the screen to share your slideshow across different platforms, including YouTube, Instagram, Vimeo, etc.
The time required by Filmora to render your slideshow on the chosen platform will depend on the output file size. Considering the fact that larger files require a much longer time to be rendered, it would be a smart decision to limit the file size of your slideshow within 500 MB.
● Ending Thoughts →
● Instagram slideshows are exciting means of diving into fun-filled entertainment with your social media peers.
● When looking for solutions on how to create a slideshow on Instagram, there are loads of choices in the software market.
● Talking of best creator alternatives, you can pick the Wondershare Filmora slideshow developer program to make an amazing Insta story slideshow.
Learn Pencil2D Animation Tutorial Overview
Animation is one of the trendiest technologies. The basics of animation were formulated in the 2000s from the moving page trick. The first few animators learned that animation is nothing but continuous switching of frames from one to another. One animated still is switched to another and then another in a quick sequence such that it makes a sequential moving frame. Today, animation has come a long way from where it started and today it is used for several commercials, tutorials, and even educational lecture videos. Pencil2D animation is an amazing animation tool that can be used by even neophytes. Want to learn more about 2d pencil animation and its super cool features? Well, you’re at the perfect place. Today we’ll be telling you more about pencil 2d animation and giving you a small overview of its usage.
In this article
01 [What is Pencil2D and How to Install?](#Part 1)
02 [Overview of the Application Interface](#Part 2)
03 [How to Create Animations with Pencil2D?](#Part 3)
Part 1 What is Pencil2D and How to Install?
2d pencil animation is popular open-source animation software. The software is pretty cool for those who are newly starting off with animation. The open-source software is available on all major operating systems including Windows, Mac OS, and Unix. Using this amazing software, we can make amazing cartoon characters using traditional cartoon-making techniques such as tracing drawing, skinning. Using this software, you can save animations in the native animation formats or extract the animation to PNG, JPG, or other formats. Wish to explore more about pencil 2d animation software? Follow the steps listed below in order to download the pencil2d animation software.
● Firstly, you need to ensure that your device has ample space on it.
● Next, you need to head to the official website of pencil2d.
● Further, you need to select your operating system. You can find different versions of the software, namely windows 7/8/10, windows XP/ Vista, Mac OS, and Linux
● Once downloaded, you need to start the installation setup. Note that this may take a while to download.
● Once downloaded, you can start familiarizing yourself with the software.
Part 2 Overview of the Application Interface
1. The brush tool
The brush tool must have reminded you of paint software in windows. The brush tool is a popular and highly utilitarian basic tool in Pencil2D animation software. You can either access it via the user interface or quickly access it by using the B key on your keyboard. As the name suggests, the brush tool is literally just a brush that allows you to draw and paint any sort of drawings of different shades, colors, and thickness. If you wish to change the color, you can find a color palette on the left side of the interface.

2. The eraser tool
You’ve a brush tool; it’s almost common sense that there’d be an eraser. The eraser tool has an eraser as its icon. If you wish to use the eraser, click on the eraser tool or simply click the E button on your keyboard. Once you’ve selected the tool, you need to simply hover over the parts you wish to erase.

3. Bucket tool
The bucket tool is another useful tool that you can find in the left tool pane of pencil 2d animation. The tool icon looks like a bucket and it is used to fill an entire area with a particular color. You can choose the color you’d like to fill from the color pallet available on the left side. Alternatively, you can also access the bucket tool by pressing the “K” key on your keyboard.

4. Custom colors
A cool feature that you can find on pencil 2d animation software is the custom color one. You can merge and mix colors according to your choice and create your own color. To do so, you need to click on the small color box that you’ll find at the top right of your screen. By doing so, a huge color wheel will appear on your screen. Now you can either enter values of the R, G, and B if you wish to merge different colors and make a new one or select a particular color from the huge color wheel that appears in front of you. These colors vary in gradient, shade, and a lot of different factors.

5. The Undo button
The Undo button is a highly useful functionality for the lazy ones who do not wish to erase the mistake they made. By undoing, the previous step gets reverted and you can start over again. The traditional undo shortcut, Ctrl+Z does work in the pencil 2d animation. Alternatively, you can also use the undo feature via the user interface. You can do so by heading over to the edit option in the topmost bar. The first option in the drop-down menu would be undo.

Part 3 How to Create Animations with Pencil2D?
Creating animations in pencil 2d is slightly sophisticated and certainly needs minimal practice. Follow the steps listed below in order to learn how to animate through pencil 2d to make your first animation.
1. Ensure that you’ve turned on your bitmap on the first frame
Animation works through quick switching of frame which makes it appear as though the object is in motion. By turning on the bitmap, pencil 2d animation ensures that you’ve no blank frames at the start of your animation.

2. Draw your animated character
Since you’re trying to animate, you need to have an animated character or object. Hence, the first step to making your first animation is by drawing the object or character that you wish to animate. Try to make the character as realistic as possible. To start with, maybe you can try animating just a stick figure; this is because animating a complex character is rather difficult for beginners.

3.The three circular buttons
Once you’re satisfied with the character you draw, you need to spot the 3 circular buttons which are arranged in the “+”,”-“,”+” order. By pressing the first “+” button, you can add an empty slide. If you click on the “-“ button, it will delete the most recent slide and if you click on the next “+” button, it will duplicate the current slide.

4.Repeat until you get an animation
Now that you know how to deal with multiple frames, you can continue creating frames and making the animated characters move by tweaking with the drawing in every frame. For instance, if you wish to show that the animated character is running, in one of the frames the left leg should be forward and in the next one, the right leg should be forward. Keep repeating this process of tweaking with frames until you’ve your desired animated video.

Now that we’ve seen the process of animation via Pencil2D, you must have realized that it’s pretty orthodox and complicated. Moreover, you cannot carry out rigging and other newer animation techniques. Hence, we introduce you to Wondershare Filmora Video Editor , your all in one animation making platform. Here you can animate without any hassle. Wondershare Filmora makes your job easier with multiple animation features, you needn’t even draw your animated character. You can simply import a custom-made character and rig the character. Further, you need not deal with multiple frames and personally pay attention to each frame. All in all, Filmora makes your job simple and your animations much more seamless.
For Win 7 or later (64-bit)
For macOS 10.12 or later
Key Takeaways from This Episode
● Animation is actively being used for multiple purposes.
● Today we took a look at one of the orthodox yet popular animation tools, Pencil2D.
● The Pencil2D animation tool offers you multiple functionalities and allows you to make animations.
● Next, we also took a look at Wondershare Filmora Pro, your one-stop shop for all animation needs. You can find multiple animation features here and it’s all so simple.
● What are you waiting for? Your next animation is just one click away.
02 [Overview of the Application Interface](#Part 2)
03 [How to Create Animations with Pencil2D?](#Part 3)
Part 1 What is Pencil2D and How to Install?
2d pencil animation is popular open-source animation software. The software is pretty cool for those who are newly starting off with animation. The open-source software is available on all major operating systems including Windows, Mac OS, and Unix. Using this amazing software, we can make amazing cartoon characters using traditional cartoon-making techniques such as tracing drawing, skinning. Using this software, you can save animations in the native animation formats or extract the animation to PNG, JPG, or other formats. Wish to explore more about pencil 2d animation software? Follow the steps listed below in order to download the pencil2d animation software.
● Firstly, you need to ensure that your device has ample space on it.
● Next, you need to head to the official website of pencil2d.
● Further, you need to select your operating system. You can find different versions of the software, namely windows 7/8/10, windows XP/ Vista, Mac OS, and Linux
● Once downloaded, you need to start the installation setup. Note that this may take a while to download.
● Once downloaded, you can start familiarizing yourself with the software.
Part 2 Overview of the Application Interface
1. The brush tool
The brush tool must have reminded you of paint software in windows. The brush tool is a popular and highly utilitarian basic tool in Pencil2D animation software. You can either access it via the user interface or quickly access it by using the B key on your keyboard. As the name suggests, the brush tool is literally just a brush that allows you to draw and paint any sort of drawings of different shades, colors, and thickness. If you wish to change the color, you can find a color palette on the left side of the interface.
2. The eraser tool
You’ve a brush tool; it’s almost common sense that there’d be an eraser. The eraser tool has an eraser as its icon. If you wish to use the eraser, click on the eraser tool or simply click the E button on your keyboard. Once you’ve selected the tool, you need to simply hover over the parts you wish to erase.
3. Bucket tool
The bucket tool is another useful tool that you can find in the left tool pane of pencil 2d animation. The tool icon looks like a bucket and it is used to fill an entire area with a particular color. You can choose the color you’d like to fill from the color pallet available on the left side. Alternatively, you can also access the bucket tool by pressing the “K” key on your keyboard.
4. Custom colors
A cool feature that you can find on pencil 2d animation software is the custom color one. You can merge and mix colors according to your choice and create your own color. To do so, you need to click on the small color box that you’ll find at the top right of your screen. By doing so, a huge color wheel will appear on your screen. Now you can either enter values of the R, G, and B if you wish to merge different colors and make a new one or select a particular color from the huge color wheel that appears in front of you. These colors vary in gradient, shade, and a lot of different factors.
5. The Undo button
The Undo button is a highly useful functionality for the lazy ones who do not wish to erase the mistake they made. By undoing, the previous step gets reverted and you can start over again. The traditional undo shortcut, Ctrl+Z does work in the pencil 2d animation. Alternatively, you can also use the undo feature via the user interface. You can do so by heading over to the edit option in the topmost bar. The first option in the drop-down menu would be undo.
Part 3 How to Create Animations with Pencil2D?
Creating animations in pencil 2d is slightly sophisticated and certainly needs minimal practice. Follow the steps listed below in order to learn how to animate through pencil 2d to make your first animation.
1. Ensure that you’ve turned on your bitmap on the first frame
Animation works through quick switching of frame which makes it appear as though the object is in motion. By turning on the bitmap, pencil 2d animation ensures that you’ve no blank frames at the start of your animation.
2. Draw your animated character
Since you’re trying to animate, you need to have an animated character or object. Hence, the first step to making your first animation is by drawing the object or character that you wish to animate. Try to make the character as realistic as possible. To start with, maybe you can try animating just a stick figure; this is because animating a complex character is rather difficult for beginners.
3.The three circular buttons
Once you’re satisfied with the character you draw, you need to spot the 3 circular buttons which are arranged in the “+”,”-“,”+” order. By pressing the first “+” button, you can add an empty slide. If you click on the “-“ button, it will delete the most recent slide and if you click on the next “+” button, it will duplicate the current slide.
4.Repeat until you get an animation
Now that you know how to deal with multiple frames, you can continue creating frames and making the animated characters move by tweaking with the drawing in every frame. For instance, if you wish to show that the animated character is running, in one of the frames the left leg should be forward and in the next one, the right leg should be forward. Keep repeating this process of tweaking with frames until you’ve your desired animated video.
Now that we’ve seen the process of animation via Pencil2D, you must have realized that it’s pretty orthodox and complicated. Moreover, you cannot carry out rigging and other newer animation techniques. Hence, we introduce you to Wondershare Filmora Video Editor , your all in one animation making platform. Here you can animate without any hassle. Wondershare Filmora makes your job easier with multiple animation features, you needn’t even draw your animated character. You can simply import a custom-made character and rig the character. Further, you need not deal with multiple frames and personally pay attention to each frame. All in all, Filmora makes your job simple and your animations much more seamless.
For Win 7 or later (64-bit)
For macOS 10.12 or later
Key Takeaways from This Episode
● Animation is actively being used for multiple purposes.
● Today we took a look at one of the orthodox yet popular animation tools, Pencil2D.
● The Pencil2D animation tool offers you multiple functionalities and allows you to make animations.
● Next, we also took a look at Wondershare Filmora Pro, your one-stop shop for all animation needs. You can find multiple animation features here and it’s all so simple.
● What are you waiting for? Your next animation is just one click away.
How to Find Some Different Ways to Animated Cartoon of Yourself
How to Find Some Different Ways to Animated Cartoon of Yourself
An easy yet powerful editor
Numerous effects to choose from
Detailed tutorials provided by the official channel
Illustrations and transforming pictures into cartoon characters have become famous these days. Are you keen to make one but unable to find the right apps that animate your pictures to do so?
This article will help you find the perfect match for you. You can make an animated cartoon of yourself.
In this article
01 [8 Ways to Get Creative With Your Photos into Cartoon Online Or With Apps](#Part 1)
02 [How to Make Animated Cartoon of Yourself in PowerPoint](#Part 2)
03 [Best 5 Apps to Cartoon Yourself on iPhone, iPad, and Android](#Part 3)
Part 1 8 Ways to Get Creative With Your Photos into Cartoon Online Or With Apps
01ToonCamera
Pros:
● ToonCamera is famous for its tremendous and in-time customer support.
● It has got a variety of high-quality filters for your pictures.
● The best part is that it allows you to apply filters in existing photos or videos and real-time.
Cons:
● ToonCamera comes only with the basic set of tools. You will get multiple filters but not various tools.
● It works only on iOS 8.1 or the later versions.
● The app will charge $1.99.

Hot comments from netizens:
ToonCamera allows you to crop and resize your photos. You can add any filter from its huge filter collection and give your picture an animated effect or Edit.
02Cartoon Camera Free
Pros:
● Cartoon Camera Free is an application that is very easy to use.
● The interface of this app is intuitive.
● You will have high-resolution export as output using a cartoon camera free for editing.
Cons:
● The shortcoming of this app is that it asks you to update frequently.
● The settings in the application are entirely automatic and already set.
● You cannot try your creativity or make changes in the editing according to your choice. It has only two effects.

Hot comments from netizens:
Cartoon Camera Free allows you to apply cartoon and pencil sketch effects to your photos. It is a tremendous animate your pictures app. Not only that, this app will enable you to view the impact in real-time.
03Clip2Comic & Caricature Maker
Pros:
● Clip2Comic & Caricature Maker has 1080p at export.
● This application can transform your pictures into posters, cartoons, and sketch art.
● The best of the app is that it allows you to reset image settings
Cons:
● It works only on iOS platforms.
● The app will leave back their watermark on your pictures. You need to get the paid version to remove the watermark.
● It is an expensive app compared to other editing apps.

Hot Comments from netizens:
People love this editing app. There are eight different comics, sketches, and cartoon characters. The app comes with a caricature and deformation tool and multiple image editing and enhancing tools.
04Cartoon Yourself Video Effects
Pros:
● The editing in this app allows you to keep realistic emotions in your videos and photos.
● The interface is very intuitive.
● The app imitates perfect emotions and has a wide variety for you.
Cons:
● Cartoon Yourself Video Effects may lag sometimes
● The effects may not work at times.
● You may require in-app purchases.

Hot Comments from netizens:
This app gives you access to a brand spectrum of emotions giving the perfect realistic touch to your video. You can share animated videos and gifs with your friends from this app.
05Cartoon Sketch Camera Pro
Pros:
● Cartoon Sketch Camera Pro has a sleek user interface.
● It has got eight cartoon effects and filters for your photos.
● It supports iOS13.
Cons:
● There are no image editors’ options.
● You may face image reporting issues.
● The app will cost you $1.99 to get rid of ads and distances.

Hot Comments from netizens:
Cartoon Sketch Camera Pro Cartoon has effects likePixellate, Sketch, Halftone, Dots, Crosshatch Swirl, and Emboss. You can pally these effects on your photos to get the desired output.
06Photo to Cartoon yourself Edit
Pros:
● You can directly click photos using the app that you want to edit.
● This app allows you to share the cartooned image via email.
● There are a lot of effects and textures available.
Cons:
● You may need in-app purchases to access all effects.
● You will not be able to stretch images to get more photo details.
● You cannot share files from here on social media.

Hot Comments from netizens:
Photo to Cartoon yourself Edit is an app that makes your picture look animated and transforms them into funny and beautiful cartoons in seconds. You can adjust the image in all formats and make the color look more vivid.
07Artist – Video and Photo Editor with Art Filters
Pros:
● Artist allows you to use cartoon filter with just a single click
● This app has multiple filters for every emotion.
● You can create square videos in low quality too.
Cons
● For video edits, the app supports only 30-sec duration.
● You may require in-app purchases to access some features.
● The app may lag at times.

Hot Comments from netizens:
Artist is a straightforward and helpful app. It has multiple features and effects for creating animated pictures. It offers video editing options that look fun. You can turn your selfie into cartoon characters using artisto in just one click.
08Moment Cartoon Caricature Cam
Pros:
● Moment Cartoon Caricature Cam holds an exciting selfie contest for users.
● The app has multiple collections of stickers.
● There are a variety of photo-enhancing tools.
Cons:
● The app is relatively slow at loading
● It includes a lot of ads.
● There are sometimes photo uploading issues.

Hot Comments from netizens:
Using Moment Cartoon Caricature Cam you can edit and enhance your photos. You can create a cartoon version of your selfies and participate in selfie contests.
Part 2 How to Make Animated Cartoon of Yourself in PowerPoint
To turn yourself into an animated character in PowerPoint, it is best to have an image with transparent or white background for best results. You can then use the picture effects, and other tools present in PowerPoint as mentioned to get your output.
● If the target picture has a background, your first step is to isolate it from its background. Remove the background or make it white.
● Now you need to sharpen the picture by 50%. This is available in the picture corrections effect.
● Next, copy the image and paste it back as a picture.
● Repeat these steps four times to make the lines in the image stand out sharply.
● In the end, add the color effect of Black and White at 20%.
● You will get quite a fairly detailed output.
Part 3 Best 5 Apps to Cartoon Yourself on iPhone, iPad, and Android
Five apps to cartoon yourself on iOS and Android platforms.
01Cartoon Yourself
Pros:
● It is a verybasic and simple to use photo to cartoon app for everyone.
● One does not require any editing skills to use this app.
● It contains nice and beautiful cartoons effects
Cons:
● The number of free filters and effects is minimal.
● You may require in-app purchases to access some features.
● It does not allow to click photos or record videos.
Hot Comments from netizens:
Cartoon Yourself is a great app to effortlessly turn your photos into animated versions. You have to add pictures from your gallery and then start editing. You will find a lot of editing tools in this app.
02Paint- art and cartoon filters
Pros:
● It has more than a thousand filters and effects
● Customized cartoon filters are set with various parameters
● It is also an artwork community
Cons:
● Even if you use the paid version, there might be bugs on thedesktop version.
● It needs almost regular updates.
● You may require in-app purchases to access some features.
Hot Comments from netizens:
Paint is an excellent app with thousands of filters and effects to choose from. It allows you to experiment with your creativity and create animated pictures.
03MomentCam cartoons and stickers
Pros:
● Here, you can create your cartoon effects
● It has a very active art community to share photos and win prizes.
● It has an easy user interface
Cons:
● There might be errors in loading if you connect with wifi.
● You may require in-app purchases to access some features
● Ads are very annoying.
Hot comments from netizens:
This app offers you a wide range of filters and emoticons. You can easily edit your photos and convert them into cartoon versions.
04Cart
Pros:
● It is a user-friendly app.
● It has got an intuitive interface
● The effects present here are very interesting
Cons:
● The app contains a lot of ads
● The app may freeze sometimes
● It includes an ad.
Hot comments from netizens:
Camaro offers you a wide range of effects like pencil, sketch, carton, watermarks, etc. You can customize the parameters of each filter.
05Sketch Me! Sketch and Cartoon
Pros:
● You can save the image directly from here
● It has opacity adjustments and distinct edges
● There are multiple video effects, including cartoons
Cons:
● There are issues with image importing
● It costs $1.99 in the app store
● May lag at times
Hot comments from netizens:
Sketch Me! Sketch and Cartoon is a great app that allows you to edit images, manage settings, adjust sharpness, opacity, and create the best-animated version of your photo.
Key Takeaways from This Episode
● Creating cartoon versions of your photos is very simple.
● You need not be a skilled editor for that.
● You can work out your creativity seamlessly by accessing these apps, tools, and software.
● Take help from the aforementioned apps and get the desired results. Happy animating!
Illustrations and transforming pictures into cartoon characters have become famous these days. Are you keen to make one but unable to find the right apps that animate your pictures to do so?
This article will help you find the perfect match for you. You can make an animated cartoon of yourself.
In this article
01 [8 Ways to Get Creative With Your Photos into Cartoon Online Or With Apps](#Part 1)
02 [How to Make Animated Cartoon of Yourself in PowerPoint](#Part 2)
03 [Best 5 Apps to Cartoon Yourself on iPhone, iPad, and Android](#Part 3)
Part 1 8 Ways to Get Creative With Your Photos into Cartoon Online Or With Apps
01ToonCamera
Pros:
● ToonCamera is famous for its tremendous and in-time customer support.
● It has got a variety of high-quality filters for your pictures.
● The best part is that it allows you to apply filters in existing photos or videos and real-time.
Cons:
● ToonCamera comes only with the basic set of tools. You will get multiple filters but not various tools.
● It works only on iOS 8.1 or the later versions.
● The app will charge $1.99.
Hot comments from netizens:
ToonCamera allows you to crop and resize your photos. You can add any filter from its huge filter collection and give your picture an animated effect or Edit.
02Cartoon Camera Free
Pros:
● Cartoon Camera Free is an application that is very easy to use.
● The interface of this app is intuitive.
● You will have high-resolution export as output using a cartoon camera free for editing.
Cons:
● The shortcoming of this app is that it asks you to update frequently.
● The settings in the application are entirely automatic and already set.
● You cannot try your creativity or make changes in the editing according to your choice. It has only two effects.
Hot comments from netizens:
Cartoon Camera Free allows you to apply cartoon and pencil sketch effects to your photos. It is a tremendous animate your pictures app. Not only that, this app will enable you to view the impact in real-time.
03Clip2Comic & Caricature Maker
Pros:
● Clip2Comic & Caricature Maker has 1080p at export.
● This application can transform your pictures into posters, cartoons, and sketch art.
● The best of the app is that it allows you to reset image settings
Cons:
● It works only on iOS platforms.
● The app will leave back their watermark on your pictures. You need to get the paid version to remove the watermark.
● It is an expensive app compared to other editing apps.
Hot Comments from netizens:
People love this editing app. There are eight different comics, sketches, and cartoon characters. The app comes with a caricature and deformation tool and multiple image editing and enhancing tools.
04Cartoon Yourself Video Effects
Pros:
● The editing in this app allows you to keep realistic emotions in your videos and photos.
● The interface is very intuitive.
● The app imitates perfect emotions and has a wide variety for you.
Cons:
● Cartoon Yourself Video Effects may lag sometimes
● The effects may not work at times.
● You may require in-app purchases.
Hot Comments from netizens:
This app gives you access to a brand spectrum of emotions giving the perfect realistic touch to your video. You can share animated videos and gifs with your friends from this app.
05Cartoon Sketch Camera Pro
Pros:
● Cartoon Sketch Camera Pro has a sleek user interface.
● It has got eight cartoon effects and filters for your photos.
● It supports iOS13.
Cons:
● There are no image editors’ options.
● You may face image reporting issues.
● The app will cost you $1.99 to get rid of ads and distances.
Hot Comments from netizens:
Cartoon Sketch Camera Pro Cartoon has effects likePixellate, Sketch, Halftone, Dots, Crosshatch Swirl, and Emboss. You can pally these effects on your photos to get the desired output.
06Photo to Cartoon yourself Edit
Pros:
● You can directly click photos using the app that you want to edit.
● This app allows you to share the cartooned image via email.
● There are a lot of effects and textures available.
Cons:
● You may need in-app purchases to access all effects.
● You will not be able to stretch images to get more photo details.
● You cannot share files from here on social media.
Hot Comments from netizens:
Photo to Cartoon yourself Edit is an app that makes your picture look animated and transforms them into funny and beautiful cartoons in seconds. You can adjust the image in all formats and make the color look more vivid.
07Artist – Video and Photo Editor with Art Filters
Pros:
● Artist allows you to use cartoon filter with just a single click
● This app has multiple filters for every emotion.
● You can create square videos in low quality too.
Cons
● For video edits, the app supports only 30-sec duration.
● You may require in-app purchases to access some features.
● The app may lag at times.
Hot Comments from netizens:
Artist is a straightforward and helpful app. It has multiple features and effects for creating animated pictures. It offers video editing options that look fun. You can turn your selfie into cartoon characters using artisto in just one click.
08Moment Cartoon Caricature Cam
Pros:
● Moment Cartoon Caricature Cam holds an exciting selfie contest for users.
● The app has multiple collections of stickers.
● There are a variety of photo-enhancing tools.
Cons:
● The app is relatively slow at loading
● It includes a lot of ads.
● There are sometimes photo uploading issues.
Hot Comments from netizens:
Using Moment Cartoon Caricature Cam you can edit and enhance your photos. You can create a cartoon version of your selfies and participate in selfie contests.
Part 2 How to Make Animated Cartoon of Yourself in PowerPoint
To turn yourself into an animated character in PowerPoint, it is best to have an image with transparent or white background for best results. You can then use the picture effects, and other tools present in PowerPoint as mentioned to get your output.
● If the target picture has a background, your first step is to isolate it from its background. Remove the background or make it white.
● Now you need to sharpen the picture by 50%. This is available in the picture corrections effect.
● Next, copy the image and paste it back as a picture.
● Repeat these steps four times to make the lines in the image stand out sharply.
● In the end, add the color effect of Black and White at 20%.
● You will get quite a fairly detailed output.
Part 3 Best 5 Apps to Cartoon Yourself on iPhone, iPad, and Android
Five apps to cartoon yourself on iOS and Android platforms.
01Cartoon Yourself
Pros:
● It is a verybasic and simple to use photo to cartoon app for everyone.
● One does not require any editing skills to use this app.
● It contains nice and beautiful cartoons effects
Cons:
● The number of free filters and effects is minimal.
● You may require in-app purchases to access some features.
● It does not allow to click photos or record videos.
Hot Comments from netizens:
Cartoon Yourself is a great app to effortlessly turn your photos into animated versions. You have to add pictures from your gallery and then start editing. You will find a lot of editing tools in this app.
02Paint- art and cartoon filters
Pros:
● It has more than a thousand filters and effects
● Customized cartoon filters are set with various parameters
● It is also an artwork community
Cons:
● Even if you use the paid version, there might be bugs on thedesktop version.
● It needs almost regular updates.
● You may require in-app purchases to access some features.
Hot Comments from netizens:
Paint is an excellent app with thousands of filters and effects to choose from. It allows you to experiment with your creativity and create animated pictures.
03MomentCam cartoons and stickers
Pros:
● Here, you can create your cartoon effects
● It has a very active art community to share photos and win prizes.
● It has an easy user interface
Cons:
● There might be errors in loading if you connect with wifi.
● You may require in-app purchases to access some features
● Ads are very annoying.
Hot comments from netizens:
This app offers you a wide range of filters and emoticons. You can easily edit your photos and convert them into cartoon versions.
04Cart
Pros:
● It is a user-friendly app.
● It has got an intuitive interface
● The effects present here are very interesting
Cons:
● The app contains a lot of ads
● The app may freeze sometimes
● It includes an ad.
Hot comments from netizens:
Camaro offers you a wide range of effects like pencil, sketch, carton, watermarks, etc. You can customize the parameters of each filter.
05Sketch Me! Sketch and Cartoon
Pros:
● You can save the image directly from here
● It has opacity adjustments and distinct edges
● There are multiple video effects, including cartoons
Cons:
● There are issues with image importing
● It costs $1.99 in the app store
● May lag at times
Hot comments from netizens:
Sketch Me! Sketch and Cartoon is a great app that allows you to edit images, manage settings, adjust sharpness, opacity, and create the best-animated version of your photo.
Key Takeaways from This Episode
● Creating cartoon versions of your photos is very simple.
● You need not be a skilled editor for that.
● You can work out your creativity seamlessly by accessing these apps, tools, and software.
● Take help from the aforementioned apps and get the desired results. Happy animating!
What Is Still Motion Animation?
What is Still Motion Animation and How Does It Work?
An easy yet powerful editor
Numerous effects to choose from
Detailed tutorials provided by the official channel
When we talk about motion, it makes us think about moves, but it refers to step motion when speaking about still-motion. So, in simple words, still motion animation refers to the animation that holds picture-to-picture motion animation.
This article covers all the relevant information related to still motion animation, paper motion animation, liquid motion animation. The name may vary, but such motions come under stop motion or still motion techniques to a great extent. That uses picture after picture or stopping camera process from reflecting animation to any inanimate objects or things. Under paper motion animation, images are adjusted in such a manner that results in continual animation reflection.
In this article
01 [Guide to Learn What is Still Motion Animation](#Part 1)
02 [6 Most Satisfying Still Motion Animation Examples](#Part 2)
03 [5 Inspiring Still Motion Animation Websites to Check Out](#Part 3)
04 [How Still Motion Are Animated at Filmora](#Part 4)
Part 1 Guide to Learn What is Still Motion Animation
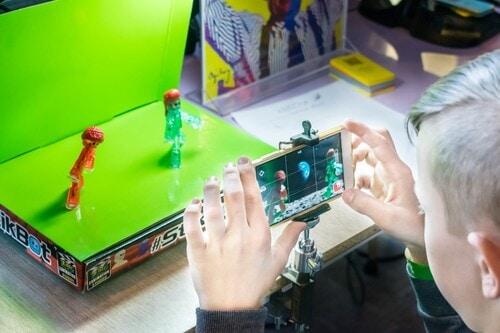
Still motion animation is also known as walking motion animation and stalk motion animation used to boost a scene in animation. It comes in a frame-to-frame outlook. It can be a booster in horror movies, comedy, and thrillers. It used to express flashbacks, dreams, and summaries of a long scene. Sometimes it could be slower, faster, fade, blur or split frames to discover/show unconscious scenes.
Part 2 6 Most Satisfying Still Motion Animation examples
Before moving ahead with detailing how to process still motion animation, let’s try to understand it with some out-of-the-box examples to make you know what liquid motion animation is with the following criteria?
01Rudolph the Red-Nosed Reindeer

The famous, Rudolph, the Red-Nosed Reindeer, is a 19Christmas movie that shows stop motion animation first. The class one-hour program special mentions many people’s first exposure to the stop motion that Rudolph especially showed, Yukon Cornelius, Sam the snowman, etc. In everlasting memory of Rudolph, people still mention the Island of Misfit Toys and wonder what that seemingly-normal ragdoll is doing there.
02A town called Panic (2009)
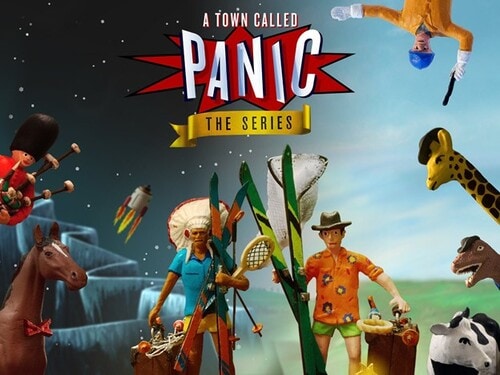
Based on the Belgian puppet on a series of identical names, this demented feature seems to star the playthings you would find packed away with an old model plaything. The plot illustrates how boyish Cowboy and Indian want to offer a birthday gift to their housemate and seemingly surrogate parent, Horse, resulting in mishaps at birthday parties, the frozen north, and also the bottom of the ocean. The persistently surreal feature includes equine music teachers, giant robotic penguins, and livestock used as cannon-fodder. Still, instead of becoming overwhelming annoying, a town called Panic sustains its gleefulness over the long run.
03Chicken Run (1994)
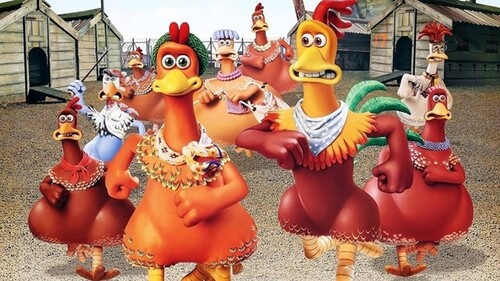
Chicken Run is a still/stop motion animation comedy film produced by Pathe Aardman and Dreamwork animations. It’s a 20stop-motion animated movie. The plot focuses on a group of chickens who see poultry named Rocky as their hope to vacate the farm when their owners prepare to show them chicken meat tarts. He manages to help them in an adventurous, funny way which makes the movie best. Its sequel started developing in 2020.
04Mary and Max (2009)
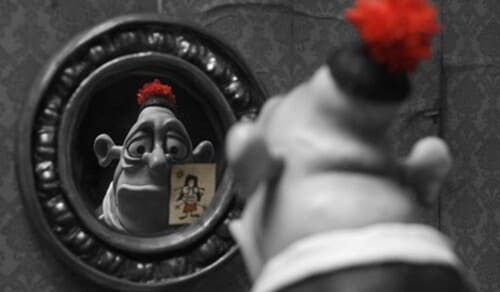
Mary and Max are again a still-motion animation adult comedy-drama film. It is an Australian film written and directed by Adam Elliot, which shows the lives and friendships of two unlikely people. Elliot’s relationship inspires the movie with his friend. He has been writing when his friend had started for over twenty years.
05The Nightmare Before Christmas (1993)

The Nightmare Before Christmas is also known as Tim Burton’s Nightmare before Christmas. It is an American stop-motion animation movie. It shows a musical dark fantasy Halloween film directed by Henry Selick.
It depicts the story of Jack Skellington, the king of “Halloween Town,” who stumbles upon “Christmas town.” He becomes obsessive about celebrating the vacation.
06Fantastic Mr. Fox (2009)
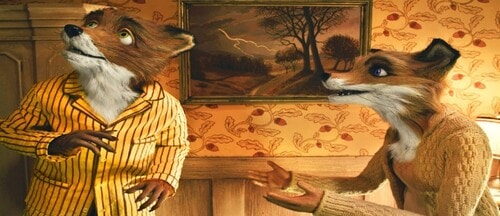
Fantastic Mr. Fox is a comedy film based on stop motion animation directed by Wes Anderson, who co-wrote the screenplay with Noah Baumbach. It is an American 20movie. The project is predicated on the 19children’s novel of the identical name by Roald Dahl. The plot is the titular character Mr. Fox (Clooney), as his spree of thefts leads to his family, and later his community, eventually hunted down by three farmers called Boggis (Robin Hurlstone), Bunce (Hugo Guinness), and Bean (Michael Gambon).
Part 3 5 Inspiring Still Motion Animation Websites to Check out
Here, with your journey of paper motion animation, let’s try to explore some inspiring websites that support still motion animation with the following information:
01Dragonframe Blog
Dragonframe makes a picture capture computer program for halt movement. So, they are kind of specialists on the matter. And they keep a charming web journal around the subject. It supports Still motion animation accurately.
Dragonframe highlights the most recent and most noteworthy halt movement recordings of all sorts in their web journal. They incorporate pictures, video, and a brief compose-up on each one. It’s a fantastic source of motivation and a great way to find out what’s trending within the world of halt movement liveliness.
02Stop MotionAnimation.com
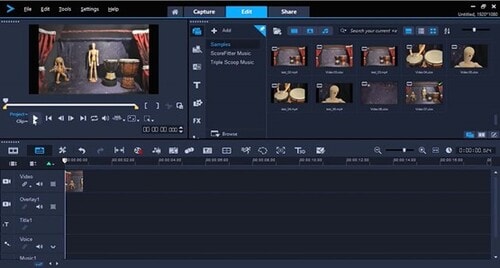
Here’s a thought, if you’re searching for stop movement activity assets, why not see to StopMotionAnimation.com?
StopMotionAnimation.com may be a community location for all things related to the procedure and craftsmanship shape. They have free instructional exercises just like the “The Unique Halt Movement Handbook” in web page shape, recordings that serve as motivation, and a message board that clients can sign up for and take portion in.
They indeed have their claim list of assets to purchase apparatuses and supplies to make your claim’s halt movement liveliness.
03Into film
Into Film isn’t a halt movement liveliness location. It’s a location around filmmaking in common, but one specific asset worth checking out for any wannabe halt movement animator.
That’s the “Introduction to Halt Movement Animation” PDF accessible for gratis download. Unquestionably choose this one up on the off chance that you’re unused to the art.
And at that point, hang around Into Film to memorize more recommendations on object motion animation and the craftsmanship of filmmaking.
04Animation Resources.org
Movement Assets could be a location committed to all sorts of movement procedures. They talk about hypotheses and methods and have a community program through the site.
But they, too, conversation a parcel approximately halt movement and the history of the craftsmanship frame. By searching for “stop motion“ on the location, you’ll get a list of the broad web journal posts on the subject and learn more approximately the roots of halt motion.
05AnimateClay.com

Whereas there are many ways to make halt movement animation, clay is one of the foremost well-known, much obliged in massive portion to Aardman Animation and their motion pictures like Wallace & Gromit.
AnimateClay.com could be an asset, particularly for claymation. They have a vast instructional exercise segment, news, holdings for acquiring supplies, and a podcast devoted to animating with clay.
Part 4How Still Motion Are Animated at Filmora?
Wondershare Filmora Video Editor is by far one of the best video altering computer program with cool highlights that compares to other competing video altering Softwares. Numerous video-altering programs claimed to offer proficiency come about; Filmora is one of some consumer-level devices that convey.
Wondershare Filmora - Best Video Editor for Mac/Windows
5,481,435 people have downloaded it.
Build unique custom animations without breaking a sweat.
Focus on creating epic stories and leave the details to Filmora’s auto features.
Start a creative adventure with drag & drop effects and endless possibilities.
Filmora simplifies advanced features to save you time and effort.
Filmora cuts out repetition so you can move on to your next creative breakthrough.
01Step 1: Start your video project
However, if you’re not an Animoto client, sign up for a free account to induce begun. Log in and press Make to start a modern video. Select Begin from Scratch, choose a topic and a perspective ratio.
02Step 2: Add a photo burst block
Another step is to tap on the little additional sign symbol at the foot of your workspace. This will open up the Include a Square window. Tap Burst on the left-hand side of the window. Animoto recordings are built by blending and coordinating pieces. The Burst square permits you to include a fast arrangement of up to pictures in your video.
You’ll be inquired to select a move. We prescribe the Difficult Cut move for a clean-looking halt movement effect.
03Step 3: Add your photos in the right order
Another, transfer the photographs that you shot for your halt movement and drag and drop them into the Photo Burst square. Make beyond any doubt you include them in consecutive arrange, from to begin with to last.
If you’ve got more than photos—the most significant number a single Photo Burst square accepts—that’s not an issue. Add a modern Photo Burst after the primary and proceed including your pictures.
04Step 4: Adjust your speed
Once your photographs get included, it’s time to set the speed. Tap the stopwatch symbol within the Burst square, and you’ll discover three-speed options—Slower, Quicker, and Auto. Press through to choose the speed that feels best to you.
05Step 5: Now, finalize your video
Once that’s done, you’re able to place the final finishing touches on your video. You can also add Blocks, text, and music from the library.
● Key Takeaways from This Episode →
● What is meant by Stop motion or still motion animation
● Different examples of paper motion animation to explain the techniques
● Steps to apply walking motion animation with Filmora
When we talk about motion, it makes us think about moves, but it refers to step motion when speaking about still-motion. So, in simple words, still motion animation refers to the animation that holds picture-to-picture motion animation.
This article covers all the relevant information related to still motion animation, paper motion animation, liquid motion animation. The name may vary, but such motions come under stop motion or still motion techniques to a great extent. That uses picture after picture or stopping camera process from reflecting animation to any inanimate objects or things. Under paper motion animation, images are adjusted in such a manner that results in continual animation reflection.
In this article
01 [Guide to Learn What is Still Motion Animation](#Part 1)
02 [6 Most Satisfying Still Motion Animation Examples](#Part 2)
03 [5 Inspiring Still Motion Animation Websites to Check Out](#Part 3)
04 [How Still Motion Are Animated at Filmora](#Part 4)
Part 1 Guide to Learn What is Still Motion Animation
Still motion animation is also known as walking motion animation and stalk motion animation used to boost a scene in animation. It comes in a frame-to-frame outlook. It can be a booster in horror movies, comedy, and thrillers. It used to express flashbacks, dreams, and summaries of a long scene. Sometimes it could be slower, faster, fade, blur or split frames to discover/show unconscious scenes.
Part 2 6 Most Satisfying Still Motion Animation examples
Before moving ahead with detailing how to process still motion animation, let’s try to understand it with some out-of-the-box examples to make you know what liquid motion animation is with the following criteria?
01Rudolph the Red-Nosed Reindeer
The famous, Rudolph, the Red-Nosed Reindeer, is a 19Christmas movie that shows stop motion animation first. The class one-hour program special mentions many people’s first exposure to the stop motion that Rudolph especially showed, Yukon Cornelius, Sam the snowman, etc. In everlasting memory of Rudolph, people still mention the Island of Misfit Toys and wonder what that seemingly-normal ragdoll is doing there.
02A town called Panic (2009)
Based on the Belgian puppet on a series of identical names, this demented feature seems to star the playthings you would find packed away with an old model plaything. The plot illustrates how boyish Cowboy and Indian want to offer a birthday gift to their housemate and seemingly surrogate parent, Horse, resulting in mishaps at birthday parties, the frozen north, and also the bottom of the ocean. The persistently surreal feature includes equine music teachers, giant robotic penguins, and livestock used as cannon-fodder. Still, instead of becoming overwhelming annoying, a town called Panic sustains its gleefulness over the long run.
03Chicken Run (1994)
Chicken Run is a still/stop motion animation comedy film produced by Pathe Aardman and Dreamwork animations. It’s a 20stop-motion animated movie. The plot focuses on a group of chickens who see poultry named Rocky as their hope to vacate the farm when their owners prepare to show them chicken meat tarts. He manages to help them in an adventurous, funny way which makes the movie best. Its sequel started developing in 2020.
04Mary and Max (2009)
Mary and Max are again a still-motion animation adult comedy-drama film. It is an Australian film written and directed by Adam Elliot, which shows the lives and friendships of two unlikely people. Elliot’s relationship inspires the movie with his friend. He has been writing when his friend had started for over twenty years.
05The Nightmare Before Christmas (1993)
The Nightmare Before Christmas is also known as Tim Burton’s Nightmare before Christmas. It is an American stop-motion animation movie. It shows a musical dark fantasy Halloween film directed by Henry Selick.
It depicts the story of Jack Skellington, the king of “Halloween Town,” who stumbles upon “Christmas town.” He becomes obsessive about celebrating the vacation.
06Fantastic Mr. Fox (2009)
Fantastic Mr. Fox is a comedy film based on stop motion animation directed by Wes Anderson, who co-wrote the screenplay with Noah Baumbach. It is an American 20movie. The project is predicated on the 19children’s novel of the identical name by Roald Dahl. The plot is the titular character Mr. Fox (Clooney), as his spree of thefts leads to his family, and later his community, eventually hunted down by three farmers called Boggis (Robin Hurlstone), Bunce (Hugo Guinness), and Bean (Michael Gambon).
Part 3 5 Inspiring Still Motion Animation Websites to Check out
Here, with your journey of paper motion animation, let’s try to explore some inspiring websites that support still motion animation with the following information:
01Dragonframe Blog
Dragonframe makes a picture capture computer program for halt movement. So, they are kind of specialists on the matter. And they keep a charming web journal around the subject. It supports Still motion animation accurately.
Dragonframe highlights the most recent and most noteworthy halt movement recordings of all sorts in their web journal. They incorporate pictures, video, and a brief compose-up on each one. It’s a fantastic source of motivation and a great way to find out what’s trending within the world of halt movement liveliness.
02Stop MotionAnimation.com
Here’s a thought, if you’re searching for stop movement activity assets, why not see to StopMotionAnimation.com?
StopMotionAnimation.com may be a community location for all things related to the procedure and craftsmanship shape. They have free instructional exercises just like the “The Unique Halt Movement Handbook” in web page shape, recordings that serve as motivation, and a message board that clients can sign up for and take portion in.
They indeed have their claim list of assets to purchase apparatuses and supplies to make your claim’s halt movement liveliness.
03Into film
Into Film isn’t a halt movement liveliness location. It’s a location around filmmaking in common, but one specific asset worth checking out for any wannabe halt movement animator.
That’s the “Introduction to Halt Movement Animation” PDF accessible for gratis download. Unquestionably choose this one up on the off chance that you’re unused to the art.
And at that point, hang around Into Film to memorize more recommendations on object motion animation and the craftsmanship of filmmaking.
04Animation Resources.org
Movement Assets could be a location committed to all sorts of movement procedures. They talk about hypotheses and methods and have a community program through the site.
But they, too, conversation a parcel approximately halt movement and the history of the craftsmanship frame. By searching for “stop motion“ on the location, you’ll get a list of the broad web journal posts on the subject and learn more approximately the roots of halt motion.
05AnimateClay.com
Whereas there are many ways to make halt movement animation, clay is one of the foremost well-known, much obliged in massive portion to Aardman Animation and their motion pictures like Wallace & Gromit.
AnimateClay.com could be an asset, particularly for claymation. They have a vast instructional exercise segment, news, holdings for acquiring supplies, and a podcast devoted to animating with clay.
Part 4How Still Motion Are Animated at Filmora?
Wondershare Filmora Video Editor is by far one of the best video altering computer program with cool highlights that compares to other competing video altering Softwares. Numerous video-altering programs claimed to offer proficiency come about; Filmora is one of some consumer-level devices that convey.
Wondershare Filmora - Best Video Editor for Mac/Windows
5,481,435 people have downloaded it.
Build unique custom animations without breaking a sweat.
Focus on creating epic stories and leave the details to Filmora’s auto features.
Start a creative adventure with drag & drop effects and endless possibilities.
Filmora simplifies advanced features to save you time and effort.
Filmora cuts out repetition so you can move on to your next creative breakthrough.
01Step 1: Start your video project
However, if you’re not an Animoto client, sign up for a free account to induce begun. Log in and press Make to start a modern video. Select Begin from Scratch, choose a topic and a perspective ratio.
02Step 2: Add a photo burst block
Another step is to tap on the little additional sign symbol at the foot of your workspace. This will open up the Include a Square window. Tap Burst on the left-hand side of the window. Animoto recordings are built by blending and coordinating pieces. The Burst square permits you to include a fast arrangement of up to pictures in your video.
You’ll be inquired to select a move. We prescribe the Difficult Cut move for a clean-looking halt movement effect.
03Step 3: Add your photos in the right order
Another, transfer the photographs that you shot for your halt movement and drag and drop them into the Photo Burst square. Make beyond any doubt you include them in consecutive arrange, from to begin with to last.
If you’ve got more than photos—the most significant number a single Photo Burst square accepts—that’s not an issue. Add a modern Photo Burst after the primary and proceed including your pictures.
04Step 4: Adjust your speed
Once your photographs get included, it’s time to set the speed. Tap the stopwatch symbol within the Burst square, and you’ll discover three-speed options—Slower, Quicker, and Auto. Press through to choose the speed that feels best to you.
05Step 5: Now, finalize your video
Once that’s done, you’re able to place the final finishing touches on your video. You can also add Blocks, text, and music from the library.
● Key Takeaways from This Episode →
● What is meant by Stop motion or still motion animation
● Different examples of paper motion animation to explain the techniques
● Steps to apply walking motion animation with Filmora
Also read:
- New Are You Ready to Animate Game Character From Scratch?
- New 2024 Approved How to Draw Cartoons Step by Step with This Guide
- Updated 2024 Approved Best 10 Video to GIF Converters Top Picks
- New In 2024, How to Stop Animation From Looping in Unity
- New How to Make a Video a Live Photo 2023
- In 2024, How to Obtain and Create Animated GIF Icons Like a Pro?
- New 20 Free After Effects Logo Reveal Templates You Will Want to Know for 2024
- New 10 Amazing Cartoon Music Examples You Need to Bookmark for 2024
- Updated 2024 Approved Is Blender 2D Animation As Awesome As 3D?
- New 5 Photoshop Alternatives to Animate Logo for 2024
- 2024 Approved 10 Caricature Makers to Turn Photo to Caricature Effects
- Updated 2024 Approved 12 Websites with Triggered Animate on Scroll Examples
- Top 10 Classical Animated Cartoon Types With Examples
- 2024 Approved 10 Great Apps to Turn Funny Animated Images Into Comics
- New How-To Guide Secret Shortcut to Adobe Animate Character Tutorial
- New 2024 Approved 4 Things You Should Know About Pinterest GIF
- 2024 Approved 15 Animated Characters We All Had A Crush On
- 2024 Approved OBS Animated Lower Thirds Alternatives
- New 2024 Approved What Make Aesthetic Cartoon Drawing More Understandable
- 2024 Approved Methods to Make Photo Motion Effect Online?
- New 2024 Approved How to Combine Multiple GIFs Into One with GIF Combiner
- Updated 2024 Approved Techniques for Creating Animated Logo That Few People Know About
- Updated In 2024, How to Cartoonize Photo Photoshop in Easy Steps
- 2024 Approved The Most Efficient Techniques to Make 3D Animation Character
- New 2024 Approved How To Remove The Endless Loop From Animated GIF
- Updated In 2024, How to Make Your GIF on WhatsApp in Simple Ways
- In 2024, Best 10 3D Text Animation Templates
- Updated 10 Best Photoshop Cartoon Effects For Creatives for 2024
- 2024 Approved 5 Foolproof Amazing Anime Text to Speech Tips for Makers
- What Is Anime? Anime VS Manga VS Cartoon
- New What Is Still Motion Animation, In 2024
- 10 Stunning Stop Motion Movies That You Should Not Miss for 2024
- New 15 Best Stop Motion Animation Kits to Fuel Creativity (2024 Guide)
- Best 10 Anime Websites to Watch Dubbed Anime Free for 2024
- In 2024, 10 Best Fake GPS Location Spoofers for Honor X50i+ | Dr.fone
- Remove the Lock Screen Fingerprint Of Your Samsung Galaxy F34 5G
- In 2024, Easily Unlock Your Oppo Find X7 Device SIM
- Remove Google FRP lock on Vivo T2 Pro 5G
- Play Store Stuck on Downloading Of Xiaomi Redmi Note 12 Pro+ 5G? 7 Ways to Resolve | Dr.fone
- In 2024, All About iPhone 13 Unlock Chip You Need to Know
- How to Fix Locked Apple ID on iPhone 6
- Life360 Circle Everything You Need to Know On OnePlus 12R | Dr.fone
- Home Button Not Working on Xiaomi Redmi K70 Pro? Here Are Real Fixes | Dr.fone
- 3 Facts You Need to Know about Screen Mirroring Itel S23 | Dr.fone
- In 2024, Apple ID Locked for Security Reasons On iPhone 12 Pro Max? Find the Best Solution Here
- How to Fix Error 495 While Download/Updating Android Apps On Xiaomi Redmi Note 13 Pro 5G | Dr.fone
- In 2024, Remove Device Supervision From your Apple iPhone 6 Plus
- How to Unlock Samsung Galaxy M34 5G Phone with Broken Screen
- In 2024, FRP Hijacker by Hagard Download and Bypass your Infinix Note 30 VIP FRP Locks
- Why Your WhatsApp Live Location is Not Updating and How to Fix on your Samsung Galaxy A05s | Dr.fone
- In 2024, How To Do Honor Magic5 Ultimate Screen Sharing | Dr.fone
- How To Simulate GPS Movement With Location Spoofer On Itel P55? | Dr.fone
- In 2024, Bypass iCloud Activation Lock with IMEI Code On your Apple iPhone 11 Pro
- In 2024, Here are Some of the Best Pokemon Discord Servers to Join On Oppo Reno 8T 5G | Dr.fone
- Fix App Not Available in Your Country Play Store Problem on Nokia C110 | Dr.fone
- Honor Play 40C Stuck on Screen – Finding Solutions For Stuck on Boot | Dr.fone
- In 2024, Lock Your Itel P40+ Phone in Style The Top 5 Gesture Lock Screen Apps
- Bypassing Google Account With vnROM Bypass For Tecno
- How To Repair iOS System Issues of Apple iPhone XS? | Dr.fone
- In 2024, Forgotten The Voicemail Password Of Vivo V29 Pro? Try These Fixes
- How To Activate and Use Life360 Ghost Mode On HTC U23 Pro | Dr.fone
- In 2024, How to Fake GPS on Android without Mock Location For your Realme V30 | Dr.fone
- Possible solutions to restore deleted music from Honor X7b
- 4 solution to get rid of pokemon fail to detect location On Apple iPhone XS | Dr.fone
- In 2024, How to Spy on Text Messages from Computer & OnePlus Nord N30 5G | Dr.fone
- Title: In 2024, How to Create YouTube Intro Animation Like a Pro
- Author: Elon
- Created at : 2024-05-19 03:05:10
- Updated at : 2024-05-20 03:05:10
- Link: https://animation-videos.techidaily.com/in-2024-how-to-create-youtube-intro-animation-like-a-pro/
- License: This work is licensed under CC BY-NC-SA 4.0.
