
:max_bytes(150000):strip_icc():format(webp)/movie-night-at-home-with-popcorn_t20_yv3PA9-5c815f7fc9e77c0001fd5b49.jpg)
In 2024, How to Draw Cartoons Step by Step with This Guide
Learn How to Draw Cartoons Step by Step with This Guide
Learn How to Draw Cartoons Step by Step with This Guide
An easy yet powerful editor
Numerous effects to choose from
Detailed tutorials provided by the official channel
Cartoon character drawing is usually a vital aspect of any child’s life who loves to watch cartoon series and can sometimes be someone’s favorite thing in the world.

A cartoon character is a series of single drawings that tell a joke or story. Although cartoons are mostly drawn, they can sometimes be animated. Kids like comics which makes them an essential part of every child’s life. Cartoons are not only used for entertainment purposes but also help kids and young children learn more about the world around them. For example, children learn about love, loss, friendship, and other essential life issues about life by watching cartoons.
However, cartoons are not only limited to children but are also for adults. In addition, cartoons created for an adult audience go deeper into real-life problems and explore darker themes. They aim to create content that matches the maturity and age of the audience. Watching cartoons is fun. But what if you could make them? This article will provide you with a guide on producing cool cartoon drawings that will match different audiences, both older and younger.
In this article
01 [How to Draw Cartoon Characters Step by Step](#Part 1)
02 [Cartoon Easy Drawing with Colour Step by Step](#Part 2)
03 [Cartoon Easy Sketch Drawing Step by Step](#Part 3)
Part 1 How to Draw Cartoon Characters Step by Step
Note that in the world we live in, Professionals were once students, and experts were once beginners. This means that everyone has a starting point, and they all have one thing in common: “learning.” Whether you are aspiring to become an English teacher, an astrophysicist, an artist, or a physician’s assistant, you must first learn the ins and outs of the field.
Those aspiring to become animators and cartoonists must first learn the basics of cartoon character drawing and practice some easy, simple cartoon drawing before cranking out the Mickey-Mouses of the entertainment world. However, we will cover the basic principles of easy cartoon drawing for beginners step by step to get your learning process started. Here is how to draw a Micky-Mouse perfectly:

Step 1:
● Use a pencil to begin your drawing.
● First, create a circle for the head and a curved line on the left side.
● Draw a horizontal line at the center.
Step 2: Next, draw an oval shape for the mouth and a “U” shape added to the bottom, and then you can add another parallel “U” shape and connect it with the oval.
Step 3: Draw the eye using two upside-down “U” shapes, and then you add his large ear on the right and a small one at the top of the head.
Step 4: You can draw a bean shape and another smaller one inside for the body.
Step 5: Add oval shapes for his feet to draw his legs and draw his tail on the right side just above the leg.
Step 6: Draw two elongated shapes for his arms, a small oval for the hand and a basic shape of his fingers.
Step 7: Draw the cheese and add a few small circles inside.
Step 8: Also include the facial features by drawing the inside of the nose, eyebrows, eyes, and whiskers.
Step 9:
● Draw his fingers and hair between his ears.
● Trace your pencil lines with a sharpie.
● Erase the pencil afterward.
Step 10: Finally, you can color your drawing and upload it to your website.
Part 1 Cartoon Easy Drawing with Colour Step by Step
Applying color to a drawing is very important to beautify your drawing and make it look stunning and attractive. Here is how to cartoon easy drawing a flower using a colored pencil:
Step 1: Using a color photocopy of a reference photo, crop and rearrange elements of the poppy composition. With light pressure and HB pencil, draw a composition onto a four-ply, 100% cotton museum board frequently found among framing supplies.
Step 2: With very light pressure, apply the first colored pencil layer and add more emphasis where the values will be deeper. While doing this, note that the pencil application will still appear granular, and the texture of the museum board is still visible.

Step 3: Create the veins in the leaves and the fuzzy texture of the stem and pod, and also, as the individual strands of stamens, put down a sheet of translucent drafting paper. Use heavy tracing paper with a very sharp 7H graphite pencil and apply heavy pressure in drawing the lines for stamens, fuzz, and veins on the drafting paper and impress them into the surface of the museum board. Then, with a contrasting layer of darker color, these features dramatically show up on the stem, leaves, center of the flower, pod, and center of the flower. Then add deeper values of rose in the shadowed areas of the flower petals.

Step 4: To make them appear less granular and intensify the colors, start by blending with a clear, alcohol-based blending marker. The solvent, wax, or vegetable oil then dissolves the binder in the colored pencil layer and fluidly releases the pigment. This will also help to “fill in” the dots of the tooth of the paper and make the color appear denser.

Step 5: Continue to intensify the color by using a non-pigmented blending pencil over a previous layer and repeat a layer or two of color, much like a “color sandwich.” Repeat this “ burnishing “ process for subsequent layerings of color, like a double-decker or triple-decker sandwich.
Also, make sure the rich, dark negative space is carried out the same way, layering colors and burnishing, then repeating the colors for deep, rich saturation.
Render the deep, smeary flecks of pollen by heavily applying “freckles” of burgundy, then slightly smudge them with the tip of a blending marker. Lastly, scratch a few of the tiny wisps of fuzz on the pod and stem carefully into the board via a sharp X-acto knife for a striking contrast of light against the deep background.

Part 2 Cartoon Easy Sketch Drawing Step by Step
This is the initial stage of the drawing process. It requires you to create an outline of the concept you want to draw before adding color. However, it is also referred to as a technique in shading. For example, if you’re going to sketch a cherry fruit, there are a few things to note here.
Try not to look at the cherry as a whole but look at its shapes and name them. This way, you are looking at the parts to the whole and not the entire piece.

Step 1: Draw two overlapping circles and draw two curved lines from each of the circles.
Step 2: Make a small rectangle at the top to join the two stems and draw a second set of curved lines.
Step 3: Draw thick lines inside the rectangle for the bumps and darken the lines and use your finger to smudge them a bit for the shaded effect.
Step 4: Draw a curved line from the stem on the right to the circle’s edge to create the bump.
Step 5: Holding your pencil at an angle, make light strokes going across the front of both cherries. Take note of the places where there is no light. This is where the light source is hitting the cherry the most.
Step 6: To darken, a shade over those places again, keep layering the shading technique until you get the effect you see on the cherries.
Step 7: Use the same technique to shade under the cherries, but use your finger to smudge it to smoother the shadow.
●Bonus:
You can add color, effect, or animate to your cartoon character drawing by using Wondershare Filmora Video Editor , the best editor on the internet. Filmora is a free software program with the same creating abilities and imaging editing similar to Adobe Illustrator. It is open software that runs on various programs, such as Windows, Mac, and Linux. Please get to know more about this exclusive tool from Wondershare on their official website.
For Win 7 or later (64-bit)
For macOS 10.12 or later
● Ending Thoughts →
● A step-by-step guide on drawing easy cartoons for painting and how to sketch your drawing correctly.
● Cartoon character drawings in easy and quick steps.
● Easy cartoon drawing for beginners.
● Lastly, to add color to your drawing, use Filmora software.
● So, use the tips and tricks to make your presentation’s best cartoon characters come alive and be a pro with Filmora.
Cartoon character drawing is usually a vital aspect of any child’s life who loves to watch cartoon series and can sometimes be someone’s favorite thing in the world.
A cartoon character is a series of single drawings that tell a joke or story. Although cartoons are mostly drawn, they can sometimes be animated. Kids like comics which makes them an essential part of every child’s life. Cartoons are not only used for entertainment purposes but also help kids and young children learn more about the world around them. For example, children learn about love, loss, friendship, and other essential life issues about life by watching cartoons.
However, cartoons are not only limited to children but are also for adults. In addition, cartoons created for an adult audience go deeper into real-life problems and explore darker themes. They aim to create content that matches the maturity and age of the audience. Watching cartoons is fun. But what if you could make them? This article will provide you with a guide on producing cool cartoon drawings that will match different audiences, both older and younger.
In this article
01 [How to Draw Cartoon Characters Step by Step](#Part 1)
02 [Cartoon Easy Drawing with Colour Step by Step](#Part 2)
03 [Cartoon Easy Sketch Drawing Step by Step](#Part 3)
Part 1 How to Draw Cartoon Characters Step by Step
Note that in the world we live in, Professionals were once students, and experts were once beginners. This means that everyone has a starting point, and they all have one thing in common: “learning.” Whether you are aspiring to become an English teacher, an astrophysicist, an artist, or a physician’s assistant, you must first learn the ins and outs of the field.
Those aspiring to become animators and cartoonists must first learn the basics of cartoon character drawing and practice some easy, simple cartoon drawing before cranking out the Mickey-Mouses of the entertainment world. However, we will cover the basic principles of easy cartoon drawing for beginners step by step to get your learning process started. Here is how to draw a Micky-Mouse perfectly:
Step 1:
● Use a pencil to begin your drawing.
● First, create a circle for the head and a curved line on the left side.
● Draw a horizontal line at the center.
Step 2: Next, draw an oval shape for the mouth and a “U” shape added to the bottom, and then you can add another parallel “U” shape and connect it with the oval.
Step 3: Draw the eye using two upside-down “U” shapes, and then you add his large ear on the right and a small one at the top of the head.
Step 4: You can draw a bean shape and another smaller one inside for the body.
Step 5: Add oval shapes for his feet to draw his legs and draw his tail on the right side just above the leg.
Step 6: Draw two elongated shapes for his arms, a small oval for the hand and a basic shape of his fingers.
Step 7: Draw the cheese and add a few small circles inside.
Step 8: Also include the facial features by drawing the inside of the nose, eyebrows, eyes, and whiskers.
Step 9:
● Draw his fingers and hair between his ears.
● Trace your pencil lines with a sharpie.
● Erase the pencil afterward.
Step 10: Finally, you can color your drawing and upload it to your website.
Part 1 Cartoon Easy Drawing with Colour Step by Step
Applying color to a drawing is very important to beautify your drawing and make it look stunning and attractive. Here is how to cartoon easy drawing a flower using a colored pencil:
Step 1: Using a color photocopy of a reference photo, crop and rearrange elements of the poppy composition. With light pressure and HB pencil, draw a composition onto a four-ply, 100% cotton museum board frequently found among framing supplies.
Step 2: With very light pressure, apply the first colored pencil layer and add more emphasis where the values will be deeper. While doing this, note that the pencil application will still appear granular, and the texture of the museum board is still visible.
Step 3: Create the veins in the leaves and the fuzzy texture of the stem and pod, and also, as the individual strands of stamens, put down a sheet of translucent drafting paper. Use heavy tracing paper with a very sharp 7H graphite pencil and apply heavy pressure in drawing the lines for stamens, fuzz, and veins on the drafting paper and impress them into the surface of the museum board. Then, with a contrasting layer of darker color, these features dramatically show up on the stem, leaves, center of the flower, pod, and center of the flower. Then add deeper values of rose in the shadowed areas of the flower petals.
Step 4: To make them appear less granular and intensify the colors, start by blending with a clear, alcohol-based blending marker. The solvent, wax, or vegetable oil then dissolves the binder in the colored pencil layer and fluidly releases the pigment. This will also help to “fill in” the dots of the tooth of the paper and make the color appear denser.
Step 5: Continue to intensify the color by using a non-pigmented blending pencil over a previous layer and repeat a layer or two of color, much like a “color sandwich.” Repeat this “ burnishing “ process for subsequent layerings of color, like a double-decker or triple-decker sandwich.
Also, make sure the rich, dark negative space is carried out the same way, layering colors and burnishing, then repeating the colors for deep, rich saturation.
Render the deep, smeary flecks of pollen by heavily applying “freckles” of burgundy, then slightly smudge them with the tip of a blending marker. Lastly, scratch a few of the tiny wisps of fuzz on the pod and stem carefully into the board via a sharp X-acto knife for a striking contrast of light against the deep background.
Part 2 Cartoon Easy Sketch Drawing Step by Step
This is the initial stage of the drawing process. It requires you to create an outline of the concept you want to draw before adding color. However, it is also referred to as a technique in shading. For example, if you’re going to sketch a cherry fruit, there are a few things to note here.
Try not to look at the cherry as a whole but look at its shapes and name them. This way, you are looking at the parts to the whole and not the entire piece.
Step 1: Draw two overlapping circles and draw two curved lines from each of the circles.
Step 2: Make a small rectangle at the top to join the two stems and draw a second set of curved lines.
Step 3: Draw thick lines inside the rectangle for the bumps and darken the lines and use your finger to smudge them a bit for the shaded effect.
Step 4: Draw a curved line from the stem on the right to the circle’s edge to create the bump.
Step 5: Holding your pencil at an angle, make light strokes going across the front of both cherries. Take note of the places where there is no light. This is where the light source is hitting the cherry the most.
Step 6: To darken, a shade over those places again, keep layering the shading technique until you get the effect you see on the cherries.
Step 7: Use the same technique to shade under the cherries, but use your finger to smudge it to smoother the shadow.
●Bonus:
You can add color, effect, or animate to your cartoon character drawing by using Wondershare Filmora Video Editor , the best editor on the internet. Filmora is a free software program with the same creating abilities and imaging editing similar to Adobe Illustrator. It is open software that runs on various programs, such as Windows, Mac, and Linux. Please get to know more about this exclusive tool from Wondershare on their official website.
For Win 7 or later (64-bit)
For macOS 10.12 or later
● Ending Thoughts →
● A step-by-step guide on drawing easy cartoons for painting and how to sketch your drawing correctly.
● Cartoon character drawings in easy and quick steps.
● Easy cartoon drawing for beginners.
● Lastly, to add color to your drawing, use Filmora software.
● So, use the tips and tricks to make your presentation’s best cartoon characters come alive and be a pro with Filmora.
15 Best Apps to Turn Photos Into Cartoons and Sketches
The 15 Best Apps to Turn Photos into Cartoons and Sketches
An easy yet powerful editor
Numerous effects to choose from
Detailed tutorials provided by the official channel
Our mobile phones give a plethora of capabilities for making them seem creative and one-of-a-kind. One method is to convert ordinary pictures into cartoons or sketches.
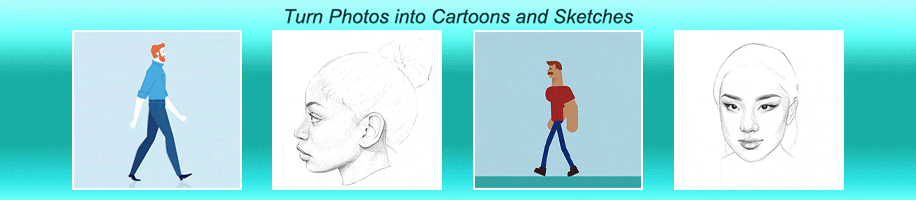
And if you want to test an app that can convert any picture into a cartoon, this post is for you.
In this article
01 [The 10 best apps to turn photos into cartoons ](#Part 1)
02 [The 5 best apps to turn photos into sketches](#Part 2)
Part 1 The 10 Best Apps to Turn Photos into Cartoons
We all love clicking pictures and exploring what more effects could be added to the click. Converting your images into cartoons is one such effect that most digital art lovers out there would love to unleash their creativity. If you would like to learn more about Filmora video animation , you can watch this tutorial:
For Win 7 or later (64-bit)
For macOS 10.12 or later
Below is the list of top 10 apps that one can use to convert photos to cartoons.
01Cartoon Pictures
Compatibility: Android
Rating: 4.1/5
Key Features: Free of cost with diverse options for cartoon filters.
Verdict:
For people looking to convert photos into cartoons, the Cartoon Pictures app is the one-stop for all. With its compatibility currently offered to both android and iOS, Cartoon Pictures offers a wide range of options. A person can modify their pictures using filters and effects on their image converted to cartoon.
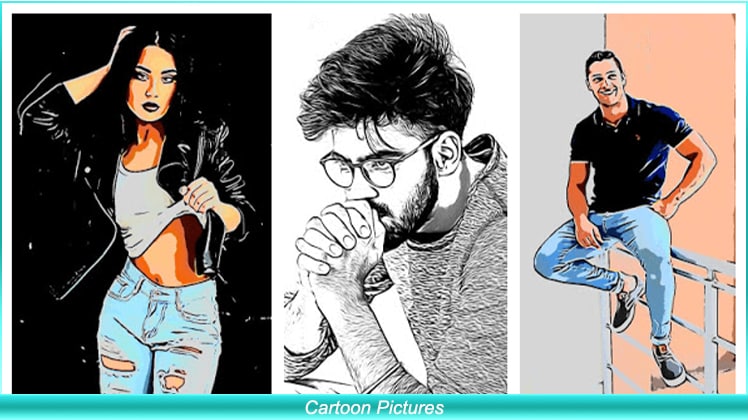
Cartoon pictures are on the top of our list due to the positive review. Overall, the app optimises memory consumption, i.e. 13MB with Cartoon Me’s gallery of filters, drawings, art pieces, editions, cartoons, oil paintings, artistic pictures, effects, and photos.
02Snapchat
Compatibility: Android/iOS
Rating: Android: 4.2/5, iOS: 3.6/5
Key Features: Popular app allowing you to not only use filters but connect with people from all over the world.
Verdict:
Although the app is famous worldwide as a photo-sharing app, Snapchat can be used for much more than that. Snapchat has launched a new effect that allows users to convert their photographs into Disney characters. It changes your look into “a modern-day prince(ess).”
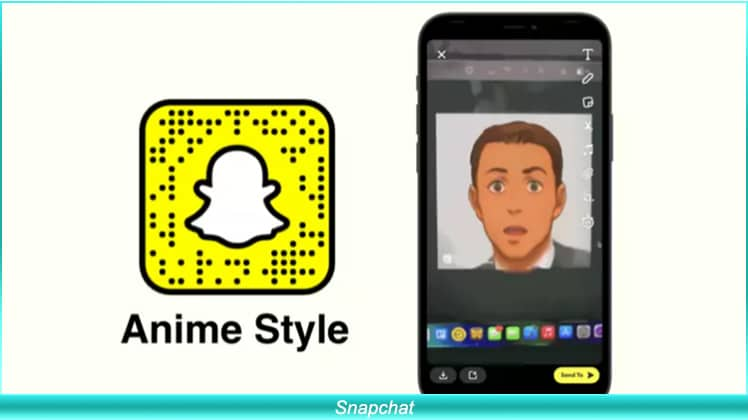
According to the firm, numerous Snapchatters across the world have been using this filter to click a cartoon portrait and has been watched over 1.7 billion times. Snapchat has several other filters that help you convert your real-life photo into a cartoon. Snapchat is free for all, with several positive reviews from across the globe.
03ToonMe
Compatibility: Android/iOS
Rating: Android 4.2/5, iOS: 4.6/5
Key Features: Easy to use UI with several options to cartoonify image
Verdict:
ToonMe is the most simple to use; this app is on our list with an easy UI to use. Compared to all the other photo to cartoon apps, toonme best suits the people who are looking to convert their images readily. You may use your phone or existing photographs to make a cartoon using free built-in editing features.
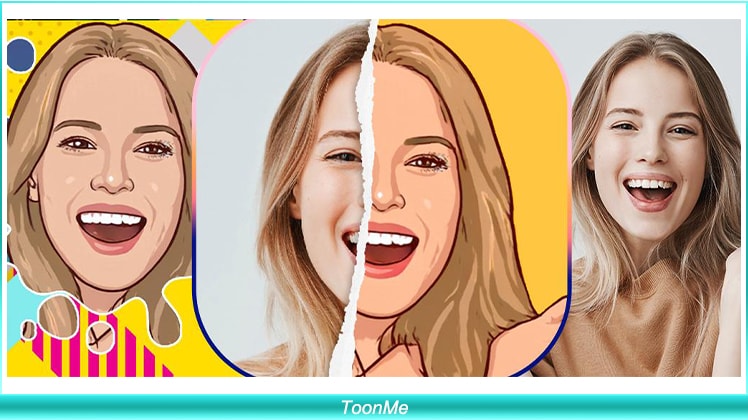
The software is only 16 MB in size and is free to download from both the Google play store and the Apple app store. You may download it right now and start transforming yourself into cartoons.
04Wondershare Filmora
Compatibility: Win/Mac
Rating: Win: 4.5/5, Mac: 4.6/5
Key Features: Several options for video and photo editing in HD+.
Verdict:
Wondershare Filmora Video Editor is a well renowned and well-recognised name for those in the video-editing industry. It is well known for its wide range of tools and implementations that can be made on one image using Filmora. It has a user-friendly interface and an easy-to-use photo to cartoon converter tool.
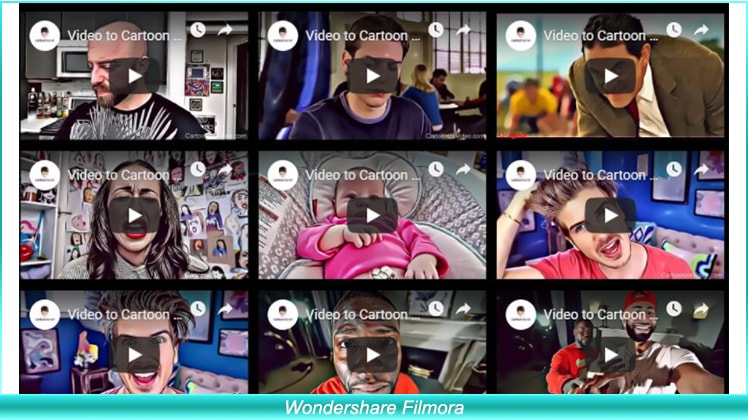
Although there is wide use of Filmora in this section, we would be talking about its ability to convert images into cartoons. The app is available for both Win and Mac, which is entirely justifiable for the feature it offers.

Wondershare Filmora - Best Video Editor for Mac/Windows
5,481,435 people have downloaded it.
Build unique custom animations without breaking a sweat.
Focus on creating epic stories and leave the details to Filmora’s auto features.
Start a creative adventure with drag & drop effects and endless possibilities.
Filmora simplifies advanced features to save you time and effort.
Filmora cuts out repetition so you can move on to your next creative breakthrough.
05Comics and Cartoon Maker
Compatibility: Android
Rating: 4.0/5
Key Features: Readily converts images to animate photos with a comic effect.
Verdict:
Are you a comic fan looking to convert your photos into animated images? Comic Cartoon Maker is the right app for you. With several options to convert your image into a cartoon. Comic Cartoon Maker is available for both Android and iOS and occupies 20MB of space in both.
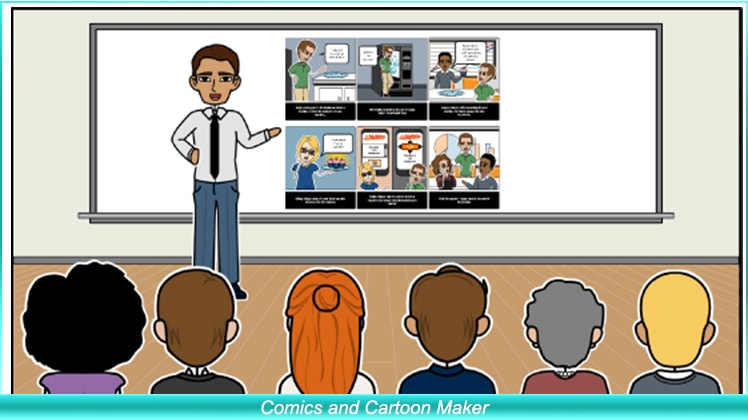
You may choose a photo from your collection or snap a fresh one with the app. After you’ve selected your filter, you may add speaking balloons to create a more believable “comic effect.” This is the simplest approach to “cartoon yourself” that you will discover on the internet.
06Avatoon
Compatibility: Android/iOS
Rating: Android: 4.5/5, iOS: 4.6/5
Key Features: Facial recognition, snapshots, stickers, avatars, and animated profile picture style options.
Verdict:
If you want to transform yourself into animated pictures, this is the programme you use. Anyone can transform themselves into animated characters with a simple click, which may then be made into stickers. These Stickers may be shared among your acquaintances via the WhatsApp app as well as other major social networking sites such as Instagram, Facebook, and many others.
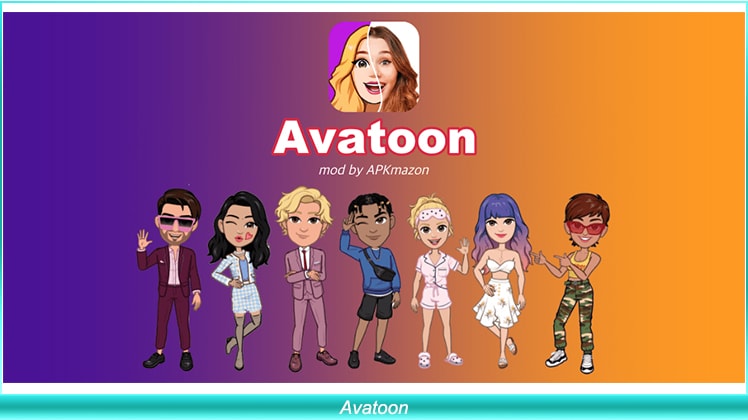
The software is 53 MB in size and is downloadable on both the Play Store and the App Store. The app has been reviewed positively due to the diverse usability of its features.
07Reface
Compatibility: Android/iOS
Rating: Android: 4.2/ 5, iOS: 4.7/5
Key Features: Swap your face with celebrities and animated cartoons.
Verdict:
It’s a famous cartoon picture maker, a face-swapping app available on both the Play Store and App stores. You may change your appearance to that of celebrities featuring animated Disney characters. The software is a lot of fun and very simple to use.
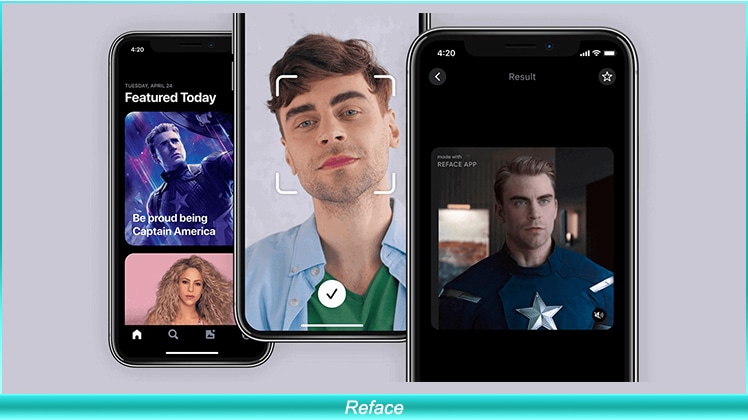
The app is available in both paid and free editions. Although you will be limited to setting and swapping space per day using the free versions, The app consumes a total of 14MB and comes with unique features such as GIF, stickers, meme maker, etc.
08Prisma Photo Editor
Compatibility: Android/iOS
Rating: Android: 4.4/5, iOS: 4.6/5
Key Features: Most optimised AI which converts pictures into cartoons and much more
Verdict:
Prisma picture designer is an older and well-known photo editing tool for both Android and iOS users. It is a picture editing software with the ability to create cartoon pictures in a short amount of time. This programme is a multifunctional photo editor that allows you to edit images and make yourself into a cartoon effortlessly**.**
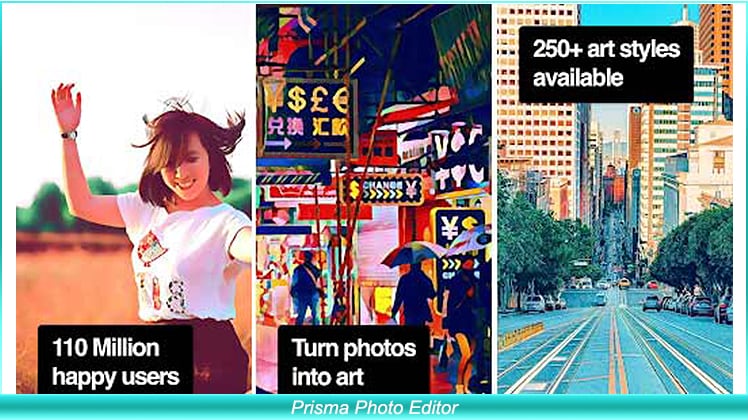
It features a variety of picture filter choices as well as a unique feed. You can simply change a photograph into a magnificent piece of artwork in the style of Munk, Picasso, or any other design you like, which has led to such good reviews by users. Although the app consumes 68MB it is yet most compatible and easy to convert pictures to cartoons.
09Sketch Drawing Photo Editor
Compatibility: Android
Rating: 4.3/5
Key Features: Create animated pics, drawings and sketches with this free animated photo maker
Verdict:
Pencil Photo Sketch is a professional photo programme that can transform your images into stunning hand-drawn pencil drawings or comic cartoon-like illustrations. Choose an image from your album or take a photo with your smartphone to create a pencil sketch or drawing effect.

The app UI is straightforward to use; all you have to do is import a picture or choose a snapshot from your collection and transform it into a magnificent pencil drawing. The software is around 19 MB in size and therefore is downloadable on both the play store and the app store.
10Moments Cartoon Caricature
Compatibility: Android
Rating: 3.2/5
Key Features: Helps you turn your photo into an animated caricature cartoon.
Verdict:
You’ll be able to enter selfie challenges or merely appreciate the great caricature tools that will allow you to convert a regular event into a funny photo. The app’s photo editor has a plethora of tools for transforming photos into cartoons in whatever way you desire.
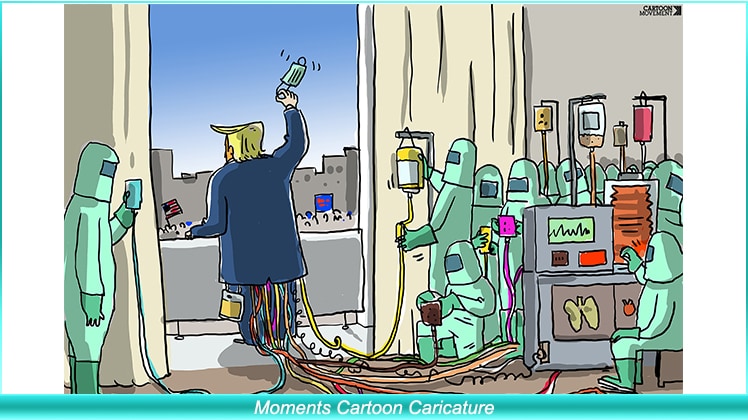
You’ll also have the option of exploring with monochrome caricatures. All of the options available in the Moments Cartoon Caricature software are intended to assist you in creating great social media photographs.
Part 2 The 5 Best Apps to Turn Photos into Sketches
Now that we are done editing the cartoons, next on our list is sketches. Several digital artists look forward to creating a sketch-like effect to their photos. Below is the list of five apps that would help users turn their photos into sketches.
01PicsArt
Compatibility: Android, iOS
Rating: Android: 4.2/5, iOS:4.6/5
Key Features: Several filters, effects and modifications that one can do to their clicks
Verdict: Looking to transform your pictures into an artwork or sketch? Don’t worry PicsArt has got you covered. The app is compatible with Android and iOS and takes around 75MB on your device.
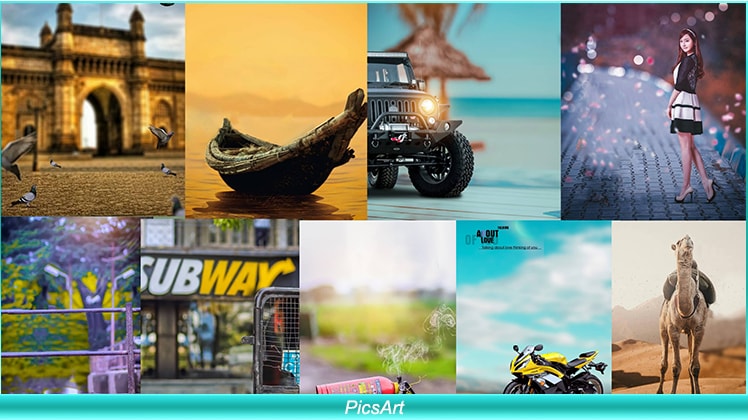
The app can be used to convert images to sketches and much more, making the app multipurpose. The user friendly UI and magnificent quality of filters have given them a reputed stand in their field.
02GoArt
Compatibility: Android,iOS
Rating: Android: 4.3/5, iOS:3.7/5
Key Features: Turns photos into HD paintings that can be printed and framed.
Verdict: GoArt was created to print the images you make as a key focus. This provides some incredible benefits as well as a few possible drawbacks for your photography requirements. The programme transforms the snapshot into an artistic composition by utilising AI technology.
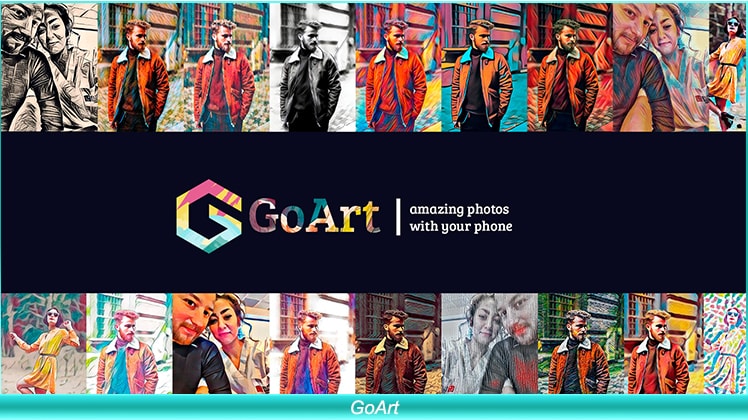
Even though it produces a clear and high-quality image, it might take a couple of minutes to process, as opposed to other fast solutions.
03PhotoLab
Compatibility: Android,iOS
Rating: Android: 4.0/5, iOS:4.3/5
Key Features: Photo filters, sketchbook effect, collages and montage for quick touch-ups.
Verdict: PhotoLab is the software for you if you enjoy playing with hilarious, innovative, and attractive effects. The AI-powered technology is incredibly simple to use and will instantly do modifications such as trimming for you.
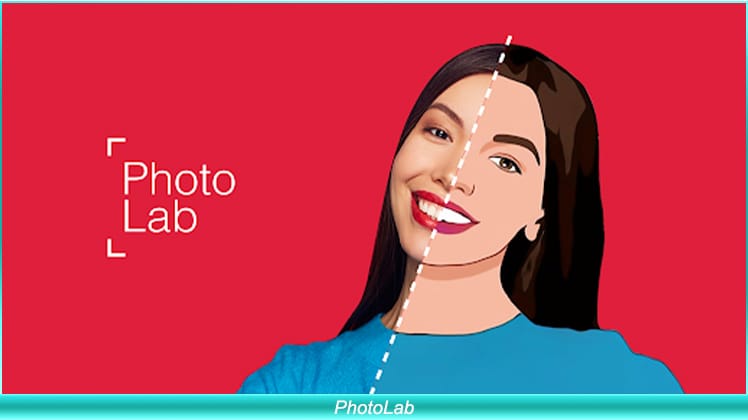
You may quickly publish your picture to social media or share it on a platform developed particularly for publishing digital art from the app.
04Instatoon
Compatibility: iOS
Rating: 4.4/5
Key Features: Helps iOS users convert their images into real-life portraits.
Verdict:
Instatoon has a large fan base since it provides a high-quality product that genuinely does what you ask for! This programme has fewer picture editing options because it focuses solely on producing art from your photographs.
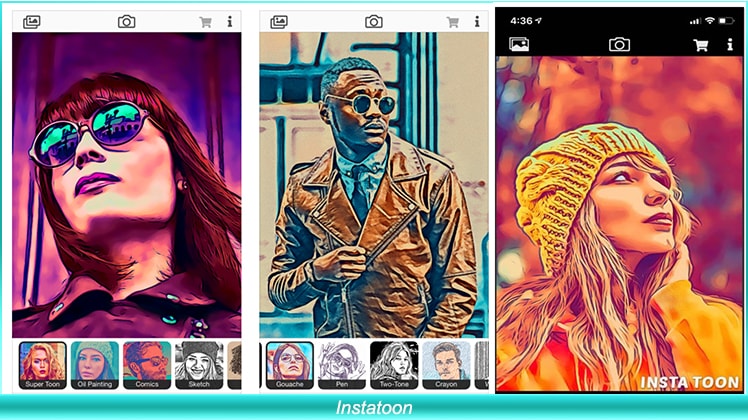
Scroll through the list of possible filters until you discover the ideal match. Numerous filter choices are available, such as black and white sketch designs, oil paintings, and cartoons.
05BeCasso
Compatibility: iOS
Rating: 4.6/5
Key Features: Artificial intelligence, neural networks, and aesthetic picture filters form a potent mix.
Verdict:
BeCasso is packed with excellent creative filters inspired by your favourite painters, such as Vincent Van Gogh and Pablo Picasso.
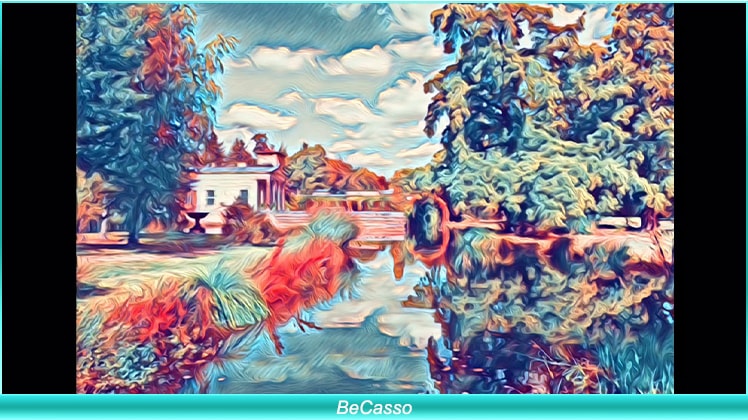
After importing your chosen photo, scroll through a big variety of different artistic styles and choose the filters you want. You would like to edit your images prior sharing them because most of the photo editing capabilities in this programme are only available when you pay for a membership.
Key Takeaways from This Episode
● Using various software, making sketches and cartoons can be tedious and time-consuming for digital enthusiasts. This brings us to a more leisurely resort to propose an effortless and hassle-free way to convert their images into cartoons and sketches.
● So far, we have learned about the various ways we can use animated pic maker and software to animate pictures and form sketch-like effects using apps made for android and iOS.
● With every app having its diversified use and application, users can download the one that suits them the best, reading through the given content to help them save time and plan better.
Our mobile phones give a plethora of capabilities for making them seem creative and one-of-a-kind. One method is to convert ordinary pictures into cartoons or sketches.
And if you want to test an app that can convert any picture into a cartoon, this post is for you.
In this article
01 [The 10 best apps to turn photos into cartoons ](#Part 1)
02 [The 5 best apps to turn photos into sketches](#Part 2)
Part 1 The 10 Best Apps to Turn Photos into Cartoons
We all love clicking pictures and exploring what more effects could be added to the click. Converting your images into cartoons is one such effect that most digital art lovers out there would love to unleash their creativity. If you would like to learn more about Filmora video animation , you can watch this tutorial:
For Win 7 or later (64-bit)
For macOS 10.12 or later
Below is the list of top 10 apps that one can use to convert photos to cartoons.
01Cartoon Pictures
Compatibility: Android
Rating: 4.1/5
Key Features: Free of cost with diverse options for cartoon filters.
Verdict:
For people looking to convert photos into cartoons, the Cartoon Pictures app is the one-stop for all. With its compatibility currently offered to both android and iOS, Cartoon Pictures offers a wide range of options. A person can modify their pictures using filters and effects on their image converted to cartoon.
Cartoon pictures are on the top of our list due to the positive review. Overall, the app optimises memory consumption, i.e. 13MB with Cartoon Me’s gallery of filters, drawings, art pieces, editions, cartoons, oil paintings, artistic pictures, effects, and photos.
02Snapchat
Compatibility: Android/iOS
Rating: Android: 4.2/5, iOS: 3.6/5
Key Features: Popular app allowing you to not only use filters but connect with people from all over the world.
Verdict:
Although the app is famous worldwide as a photo-sharing app, Snapchat can be used for much more than that. Snapchat has launched a new effect that allows users to convert their photographs into Disney characters. It changes your look into “a modern-day prince(ess).”
According to the firm, numerous Snapchatters across the world have been using this filter to click a cartoon portrait and has been watched over 1.7 billion times. Snapchat has several other filters that help you convert your real-life photo into a cartoon. Snapchat is free for all, with several positive reviews from across the globe.
03ToonMe
Compatibility: Android/iOS
Rating: Android 4.2/5, iOS: 4.6/5
Key Features: Easy to use UI with several options to cartoonify image
Verdict:
ToonMe is the most simple to use; this app is on our list with an easy UI to use. Compared to all the other photo to cartoon apps, toonme best suits the people who are looking to convert their images readily. You may use your phone or existing photographs to make a cartoon using free built-in editing features.
The software is only 16 MB in size and is free to download from both the Google play store and the Apple app store. You may download it right now and start transforming yourself into cartoons.
04Wondershare Filmora
Compatibility: Win/Mac
Rating: Win: 4.5/5, Mac: 4.6/5
Key Features: Several options for video and photo editing in HD+.
Verdict:
Wondershare Filmora Video Editor is a well renowned and well-recognised name for those in the video-editing industry. It is well known for its wide range of tools and implementations that can be made on one image using Filmora. It has a user-friendly interface and an easy-to-use photo to cartoon converter tool.
Although there is wide use of Filmora in this section, we would be talking about its ability to convert images into cartoons. The app is available for both Win and Mac, which is entirely justifiable for the feature it offers.
Wondershare Filmora - Best Video Editor for Mac/Windows
5,481,435 people have downloaded it.
Build unique custom animations without breaking a sweat.
Focus on creating epic stories and leave the details to Filmora’s auto features.
Start a creative adventure with drag & drop effects and endless possibilities.
Filmora simplifies advanced features to save you time and effort.
Filmora cuts out repetition so you can move on to your next creative breakthrough.
05Comics and Cartoon Maker
Compatibility: Android
Rating: 4.0/5
Key Features: Readily converts images to animate photos with a comic effect.
Verdict:
Are you a comic fan looking to convert your photos into animated images? Comic Cartoon Maker is the right app for you. With several options to convert your image into a cartoon. Comic Cartoon Maker is available for both Android and iOS and occupies 20MB of space in both.
You may choose a photo from your collection or snap a fresh one with the app. After you’ve selected your filter, you may add speaking balloons to create a more believable “comic effect.” This is the simplest approach to “cartoon yourself” that you will discover on the internet.
06Avatoon
Compatibility: Android/iOS
Rating: Android: 4.5/5, iOS: 4.6/5
Key Features: Facial recognition, snapshots, stickers, avatars, and animated profile picture style options.
Verdict:
If you want to transform yourself into animated pictures, this is the programme you use. Anyone can transform themselves into animated characters with a simple click, which may then be made into stickers. These Stickers may be shared among your acquaintances via the WhatsApp app as well as other major social networking sites such as Instagram, Facebook, and many others.
The software is 53 MB in size and is downloadable on both the Play Store and the App Store. The app has been reviewed positively due to the diverse usability of its features.
07Reface
Compatibility: Android/iOS
Rating: Android: 4.2/ 5, iOS: 4.7/5
Key Features: Swap your face with celebrities and animated cartoons.
Verdict:
It’s a famous cartoon picture maker, a face-swapping app available on both the Play Store and App stores. You may change your appearance to that of celebrities featuring animated Disney characters. The software is a lot of fun and very simple to use.
The app is available in both paid and free editions. Although you will be limited to setting and swapping space per day using the free versions, The app consumes a total of 14MB and comes with unique features such as GIF, stickers, meme maker, etc.
08Prisma Photo Editor
Compatibility: Android/iOS
Rating: Android: 4.4/5, iOS: 4.6/5
Key Features: Most optimised AI which converts pictures into cartoons and much more
Verdict:
Prisma picture designer is an older and well-known photo editing tool for both Android and iOS users. It is a picture editing software with the ability to create cartoon pictures in a short amount of time. This programme is a multifunctional photo editor that allows you to edit images and make yourself into a cartoon effortlessly**.**
It features a variety of picture filter choices as well as a unique feed. You can simply change a photograph into a magnificent piece of artwork in the style of Munk, Picasso, or any other design you like, which has led to such good reviews by users. Although the app consumes 68MB it is yet most compatible and easy to convert pictures to cartoons.
09Sketch Drawing Photo Editor
Compatibility: Android
Rating: 4.3/5
Key Features: Create animated pics, drawings and sketches with this free animated photo maker
Verdict:
Pencil Photo Sketch is a professional photo programme that can transform your images into stunning hand-drawn pencil drawings or comic cartoon-like illustrations. Choose an image from your album or take a photo with your smartphone to create a pencil sketch or drawing effect.
The app UI is straightforward to use; all you have to do is import a picture or choose a snapshot from your collection and transform it into a magnificent pencil drawing. The software is around 19 MB in size and therefore is downloadable on both the play store and the app store.
10Moments Cartoon Caricature
Compatibility: Android
Rating: 3.2/5
Key Features: Helps you turn your photo into an animated caricature cartoon.
Verdict:
You’ll be able to enter selfie challenges or merely appreciate the great caricature tools that will allow you to convert a regular event into a funny photo. The app’s photo editor has a plethora of tools for transforming photos into cartoons in whatever way you desire.
You’ll also have the option of exploring with monochrome caricatures. All of the options available in the Moments Cartoon Caricature software are intended to assist you in creating great social media photographs.
Part 2 The 5 Best Apps to Turn Photos into Sketches
Now that we are done editing the cartoons, next on our list is sketches. Several digital artists look forward to creating a sketch-like effect to their photos. Below is the list of five apps that would help users turn their photos into sketches.
01PicsArt
Compatibility: Android, iOS
Rating: Android: 4.2/5, iOS:4.6/5
Key Features: Several filters, effects and modifications that one can do to their clicks
Verdict: Looking to transform your pictures into an artwork or sketch? Don’t worry PicsArt has got you covered. The app is compatible with Android and iOS and takes around 75MB on your device.
The app can be used to convert images to sketches and much more, making the app multipurpose. The user friendly UI and magnificent quality of filters have given them a reputed stand in their field.
02GoArt
Compatibility: Android,iOS
Rating: Android: 4.3/5, iOS:3.7/5
Key Features: Turns photos into HD paintings that can be printed and framed.
Verdict: GoArt was created to print the images you make as a key focus. This provides some incredible benefits as well as a few possible drawbacks for your photography requirements. The programme transforms the snapshot into an artistic composition by utilising AI technology.
Even though it produces a clear and high-quality image, it might take a couple of minutes to process, as opposed to other fast solutions.
03PhotoLab
Compatibility: Android,iOS
Rating: Android: 4.0/5, iOS:4.3/5
Key Features: Photo filters, sketchbook effect, collages and montage for quick touch-ups.
Verdict: PhotoLab is the software for you if you enjoy playing with hilarious, innovative, and attractive effects. The AI-powered technology is incredibly simple to use and will instantly do modifications such as trimming for you.
You may quickly publish your picture to social media or share it on a platform developed particularly for publishing digital art from the app.
04Instatoon
Compatibility: iOS
Rating: 4.4/5
Key Features: Helps iOS users convert their images into real-life portraits.
Verdict:
Instatoon has a large fan base since it provides a high-quality product that genuinely does what you ask for! This programme has fewer picture editing options because it focuses solely on producing art from your photographs.
Scroll through the list of possible filters until you discover the ideal match. Numerous filter choices are available, such as black and white sketch designs, oil paintings, and cartoons.
05BeCasso
Compatibility: iOS
Rating: 4.6/5
Key Features: Artificial intelligence, neural networks, and aesthetic picture filters form a potent mix.
Verdict:
BeCasso is packed with excellent creative filters inspired by your favourite painters, such as Vincent Van Gogh and Pablo Picasso.
After importing your chosen photo, scroll through a big variety of different artistic styles and choose the filters you want. You would like to edit your images prior sharing them because most of the photo editing capabilities in this programme are only available when you pay for a membership.
Key Takeaways from This Episode
● Using various software, making sketches and cartoons can be tedious and time-consuming for digital enthusiasts. This brings us to a more leisurely resort to propose an effortless and hassle-free way to convert their images into cartoons and sketches.
● So far, we have learned about the various ways we can use animated pic maker and software to animate pictures and form sketch-like effects using apps made for android and iOS.
● With every app having its diversified use and application, users can download the one that suits them the best, reading through the given content to help them save time and plan better.
How to Create Picsart Cartoon
How to Create Picsart Cartoon
An easy yet powerful editor
Numerous effects to choose from
Detailed tutorials provided by the official channel
Cartoonized images are a convenient source of fun and media entertainment in present times. Try hands at creating your own caricature masterpieces with Picsart!
In this article
01 [How To Edit Cartoon Picture in Picsart](#Part 1)
02 [How To Make A Cartoon On Your Phone](#Part 2)
03 [How to Cartoon Yourself on Picsart](#Part 3)
Part 1 How to Edit Cartoon Picture in Picsart
Cartoonized pictures as you must be aware of, are comic transformations of real-time images and are widely used on social media to add a funny angle to the diversity of conversation going on, or even just as a source of plentiful amusement.
If you often feel motivated to experiment with the art and are looking for a perfect solution, see through the following section for a detailed and stepwise guide to create and edit a Picsart cartoon with utmost ease and within a quick time span:
User’s Guide to Edit Cartoon Pictures in Picsart
Step 1: Download the Picsart Application
Visit the official Picsart website to download the desktop version of the app in your Windows or MacOs supported PC.
Step 2: Make a Selection
Launch the app in your system to reach the Picsart welcome screen. Navigate to the bottom and tap the ‘+’ symbol. You are now required to choose a desired image to create the cartoon edit. You can either browse through your system gallery or search a specific one from the Picsart photo library in the ‘Search Bar’ at the top of the app screen.

Step 3: Let’s Get Editing!
When you have made your choice, navigate to the toolbar at the bottom of the app screen and click on the ‘Effects’ tab. Make a side scroll to choose a specific effect category, like that of ‘Artistic’ or ‘Magic’ to open a library of effects in the selected category.
As an example, selecting the ‘Cartoonizer’ option in the ‘Artistic’ effects category can add an immediate caricature feel to your selected real-time image. You can further include manual adjustments to get the perfect cartoon look by pressing and holding the ‘Cartoonizer’ option. There are a whole variety of magical effects, such as, Neo Pop, Soul, Badlands, Animation and Paw in the ‘Magic’ effects category, that are just perfect in giving your edit a fantasizing look with a Picsart cartoon background.
If you are looking for a quicker editing process, prefer adding cartoonized elements, like ‘Picsart Stickers’ to your image instead of going for a complete caricature edit. To do this, open the ‘Picsart Photo Editor’, navigates to the ‘Sticker’ symbol and click on it, followed by searching ‘Cartoon Sticker’. You can alternatively search a specific keyword with the ‘Cartoon’ descriptor, if you are clear on what you want to add.
You can further, resize your selected sticker with a ‘Two Finger Pinch’ or use the ‘Eraser’ tool to ward off any unwanted portions from the same. You are free to take as many repetitions of the process as you wish, till you get the perfect result for saving to your device and sharing on your social media handles.

Step 4: Time to Save and Share!
When you are satisfied with your work, navigate to the right hand corner and tap ‘Apply’ to finalize your changes, followed by clicking on the ‘Next’ button at the top right corner of the app screen to save and export your creation.
Part 2 How to Make a Cartoon on Your Phone
After a detailed analysis of the cartoon editing procedure in your desktops, let us see thro ugh the method of creating cartoonized images on your MacOs and Android smartphones on the following section:
Stepwise Procedure for Creating Cartoonized Images on Phone
Step 1: Download the Application
When going to use the Picsart editor application on your smartphone, you will first require a download of the same in your concerned device. You can do this by visiting the ‘Google PlayStore’ for an Android device or the ‘Apple App Store’ for MacOs smartphones.
Step 2: Choose a Real-time Image
After a successful launch of the ‘Picsart Editor’ application in your smartphone, reach to and click on the ‘+’ icon at the bottom of the app’s working interface. This needs to be followed by selecting any specific real-time image, either from your smartphone gallery or the Picsart photo library using the top ‘Search Bar’ of the interface, for creating a cartoonized edit.

Step 3: Editing Begins!
Once you are done with selecting the image, proceed to add effects to your selection by clicking the ‘Effects’ tab in the bottom toolbar, succeeded by picking a desired effect type through a right scroll. Tap on any category, such as, Magic, Artistic, etc, to open the effect library of the same.
For instance, you can click on the ‘Cartoonizer’ option within Artistic’ effects to supplement your uploaded real-time image with an instant cartoonized effect. You are also granted the liberty to make manual changes to set the caricature image effects as per your preferences, which you can do with a ‘Press and Hold’ of the ‘Cartoonizer’ tab. If you have a diversion towards complementing your cartoonized images with magical effects, choose from Animation, Neo Pop, Paw, Badlands, Paw, and other amazing options in the ‘Magic’ category.

Step 4: Save and Export
When you have completed the editing process and the changes satisfy you, go to the ‘Apply’ tab at the right side of the editor screen to see the changes appear in your edit. You can now navigate to the upper right corner of the app screen and click on ‘Next’ to save your work locally to your device, along with exporting the same across different media platforms.
Part 3 How to Cartoon Yourself on Picsart
Having learnt about the interesting ways to edit cartoon pictures and create cartoons on your smartphone, you might like to try hands on creating a cartoon portrait of yourself in the Picsart editor for a variety of reasons, like that of creating cartoon profile pics of yourself. Let us have a look of the procedure for the same using the Picsart Online Image Editor tool in the following section:
User’s Guide to Create a Cartoon Portrait With Picsart Online Photo Editor
Step 1: Launch the Application
In any of your favorite internet browsers, search for and open ‘Picsart Desktop Editor’. In the app’s working interface, tap ‘Upload’ or ‘New Project’ to choose an image from your device or the free to use Picsart image library respectively, for proceeding with the cartoonized transformations.

Step 2: Edit Your Selection
Tap on the ‘Effects’ tab from the editing toolbar at the top of your image and select a desired effect category to access the diversity of cartoonifying filters. It is recommended to select the ‘Magic’ category for the most splendid cartoon effects, such as, Paw, Badland, Animation, Soul and Neo Pop among many others.

You can even make manual adjustments in the brightness, color, saturation, burn and fade, etc., of the image by clicking on the ‘Adjust’ and ‘Blend’ options at the top of the image workspace.

Step 3: Download and Share Your Work
When you are done editing, navigate to and click on the ‘Share’ option at the upper right corner of the editor screen to download your cartoonized image.

****Wondershare Filmora Video Editor Cartoon Image Creator**
For Win 7 or later (64-bit)
For macOS 10.12 or later
Picsart is certainly a dependable solution to create caricature images, but if you are keen on looking for an alternative application to cater to the need, Introduced to the software market by Wondershare, the Filmora Cartoon Image Creator can be a convenient rescue. The app promises you of a high quality cartoonized edit with a plethora of editing effects to suit your most specific editing preferences.
● Ending Thoughts →
● Creating cartoonized edits from real time images is a fun and entertaining activity along with being the latest media trend.
● The Picsart editor application allows making caricature images from actual stills through desktop, smartphone and online compatible image editing program.
● Talking of suitable Picsart alternatives, you can rely on the Filmora Cartoon Image Creator application for high quality cartoonized image creation.
Cartoonized images are a convenient source of fun and media entertainment in present times. Try hands at creating your own caricature masterpieces with Picsart!
In this article
01 [How To Edit Cartoon Picture in Picsart](#Part 1)
02 [How To Make A Cartoon On Your Phone](#Part 2)
03 [How to Cartoon Yourself on Picsart](#Part 3)
Part 1 How to Edit Cartoon Picture in Picsart
Cartoonized pictures as you must be aware of, are comic transformations of real-time images and are widely used on social media to add a funny angle to the diversity of conversation going on, or even just as a source of plentiful amusement.
If you often feel motivated to experiment with the art and are looking for a perfect solution, see through the following section for a detailed and stepwise guide to create and edit a Picsart cartoon with utmost ease and within a quick time span:
User’s Guide to Edit Cartoon Pictures in Picsart
Step 1: Download the Picsart Application
Visit the official Picsart website to download the desktop version of the app in your Windows or MacOs supported PC.
Step 2: Make a Selection
Launch the app in your system to reach the Picsart welcome screen. Navigate to the bottom and tap the ‘+’ symbol. You are now required to choose a desired image to create the cartoon edit. You can either browse through your system gallery or search a specific one from the Picsart photo library in the ‘Search Bar’ at the top of the app screen.
Step 3: Let’s Get Editing!
When you have made your choice, navigate to the toolbar at the bottom of the app screen and click on the ‘Effects’ tab. Make a side scroll to choose a specific effect category, like that of ‘Artistic’ or ‘Magic’ to open a library of effects in the selected category.
As an example, selecting the ‘Cartoonizer’ option in the ‘Artistic’ effects category can add an immediate caricature feel to your selected real-time image. You can further include manual adjustments to get the perfect cartoon look by pressing and holding the ‘Cartoonizer’ option. There are a whole variety of magical effects, such as, Neo Pop, Soul, Badlands, Animation and Paw in the ‘Magic’ effects category, that are just perfect in giving your edit a fantasizing look with a Picsart cartoon background.
If you are looking for a quicker editing process, prefer adding cartoonized elements, like ‘Picsart Stickers’ to your image instead of going for a complete caricature edit. To do this, open the ‘Picsart Photo Editor’, navigates to the ‘Sticker’ symbol and click on it, followed by searching ‘Cartoon Sticker’. You can alternatively search a specific keyword with the ‘Cartoon’ descriptor, if you are clear on what you want to add.
You can further, resize your selected sticker with a ‘Two Finger Pinch’ or use the ‘Eraser’ tool to ward off any unwanted portions from the same. You are free to take as many repetitions of the process as you wish, till you get the perfect result for saving to your device and sharing on your social media handles.
Step 4: Time to Save and Share!
When you are satisfied with your work, navigate to the right hand corner and tap ‘Apply’ to finalize your changes, followed by clicking on the ‘Next’ button at the top right corner of the app screen to save and export your creation.
Part 2 How to Make a Cartoon on Your Phone
After a detailed analysis of the cartoon editing procedure in your desktops, let us see thro ugh the method of creating cartoonized images on your MacOs and Android smartphones on the following section:
Stepwise Procedure for Creating Cartoonized Images on Phone
Step 1: Download the Application
When going to use the Picsart editor application on your smartphone, you will first require a download of the same in your concerned device. You can do this by visiting the ‘Google PlayStore’ for an Android device or the ‘Apple App Store’ for MacOs smartphones.
Step 2: Choose a Real-time Image
After a successful launch of the ‘Picsart Editor’ application in your smartphone, reach to and click on the ‘+’ icon at the bottom of the app’s working interface. This needs to be followed by selecting any specific real-time image, either from your smartphone gallery or the Picsart photo library using the top ‘Search Bar’ of the interface, for creating a cartoonized edit.
Step 3: Editing Begins!
Once you are done with selecting the image, proceed to add effects to your selection by clicking the ‘Effects’ tab in the bottom toolbar, succeeded by picking a desired effect type through a right scroll. Tap on any category, such as, Magic, Artistic, etc, to open the effect library of the same.
For instance, you can click on the ‘Cartoonizer’ option within Artistic’ effects to supplement your uploaded real-time image with an instant cartoonized effect. You are also granted the liberty to make manual changes to set the caricature image effects as per your preferences, which you can do with a ‘Press and Hold’ of the ‘Cartoonizer’ tab. If you have a diversion towards complementing your cartoonized images with magical effects, choose from Animation, Neo Pop, Paw, Badlands, Paw, and other amazing options in the ‘Magic’ category.
Step 4: Save and Export
When you have completed the editing process and the changes satisfy you, go to the ‘Apply’ tab at the right side of the editor screen to see the changes appear in your edit. You can now navigate to the upper right corner of the app screen and click on ‘Next’ to save your work locally to your device, along with exporting the same across different media platforms.
Part 3 How to Cartoon Yourself on Picsart
Having learnt about the interesting ways to edit cartoon pictures and create cartoons on your smartphone, you might like to try hands on creating a cartoon portrait of yourself in the Picsart editor for a variety of reasons, like that of creating cartoon profile pics of yourself. Let us have a look of the procedure for the same using the Picsart Online Image Editor tool in the following section:
User’s Guide to Create a Cartoon Portrait With Picsart Online Photo Editor
Step 1: Launch the Application
In any of your favorite internet browsers, search for and open ‘Picsart Desktop Editor’. In the app’s working interface, tap ‘Upload’ or ‘New Project’ to choose an image from your device or the free to use Picsart image library respectively, for proceeding with the cartoonized transformations.
Step 2: Edit Your Selection
Tap on the ‘Effects’ tab from the editing toolbar at the top of your image and select a desired effect category to access the diversity of cartoonifying filters. It is recommended to select the ‘Magic’ category for the most splendid cartoon effects, such as, Paw, Badland, Animation, Soul and Neo Pop among many others.
You can even make manual adjustments in the brightness, color, saturation, burn and fade, etc., of the image by clicking on the ‘Adjust’ and ‘Blend’ options at the top of the image workspace.
Step 3: Download and Share Your Work
When you are done editing, navigate to and click on the ‘Share’ option at the upper right corner of the editor screen to download your cartoonized image.
****Wondershare Filmora Video Editor Cartoon Image Creator**
For Win 7 or later (64-bit)
For macOS 10.12 or later
Picsart is certainly a dependable solution to create caricature images, but if you are keen on looking for an alternative application to cater to the need, Introduced to the software market by Wondershare, the Filmora Cartoon Image Creator can be a convenient rescue. The app promises you of a high quality cartoonized edit with a plethora of editing effects to suit your most specific editing preferences.
● Ending Thoughts →
● Creating cartoonized edits from real time images is a fun and entertaining activity along with being the latest media trend.
● The Picsart editor application allows making caricature images from actual stills through desktop, smartphone and online compatible image editing program.
● Talking of suitable Picsart alternatives, you can rely on the Filmora Cartoon Image Creator application for high quality cartoonized image creation.
10 Best Romance Anime Movies You Need to Watch
10 Best Romance Anime Movies You Need to Watch

Shanoon Cox
Mar 27, 2024• Proven solutions
The demand for romance anime movies has soared in recent years and this has been down to the amazing concepts they come with. A lot of persons have, in recent times began to appreciate the genuine awesomeness of these movies. A lot of these anime love story movies come with incredible storylines that leave their audience emotionally connected to them. The plots are relatable and more often than not they address certain circumstances we find ourselves when we love someone. Since the demand for these kinds of movies is on the rise, it’s only fair I share with you the 10 best romance anime movies you should watch.
10 Best Romance Anime Movies to Watch
Without wasting any time, let’s get down to it. This is not listed in any particular order.
- 1. Howls Moving Castle
- 2. Weathering with You
- 3. Whispers of the Heart
- 4. From Up on Poppy Hill
- 5. Your Name
- 6. The Wind Rises
- 7. The Girl Who Leapt Through Time
- 8. The Garden of Words
- 9. Doukyusei
- 10. 5 Centimeters Per Second
1. Howls Moving Castle
How’s Moving Castle told the story of a girl Sophie, who was having quite an uneventful life at her daddy’s hat store until she met wizard Howl, who actually lived in a literal flying castle. They both become really close and as their relationship soared, an evil witch casts a spell on the young Sophie.
The spell was designed to make her age really fast. Devasted, Howl is forced to use all his magical powers to fight the evil witch and try his possible best to return his love Sophie to her youthful self.
This 2004 romance anime movie is loved by many because it laid emphasis on fighting for your loved one. The movie racked up so many awards for its incredible scripting.
2. Weathering with You
This tells the story of a young high school boy who got tired of the unending issues at home and decides to run away to Tokyo. He meets unfortunate events while on the ferry to Tokyo and is saved by a friend. Now I’m in Tokyo, he gets a job and in the course of doing his job he comes across a girl who can manipulate the weather. He also finds out she is an orphan. Taking pity on her, he gets a great business idea and soon. They start making lots of money with his idea and her gift. Unfortunately, things go south as her body starts evaporating. Our young hero promises to help her stay safe.
The movie won so many hearts with its clear theme of kindness and love.
3. Whispers of the Heart
Third on the list of romance anime movies to watch is whispers of the heart. The movie which is based on a manga with the same name, tells of a young girl who loves reading and her dreams of being a writer when she grew up. One day she discovers that all her library books have been checked by Seiji Amasawa. Her journey to school one day leads her to meet a large cat which in turn leads her to an eccentric antique dealer. Soon she starts writing her own novel and begins her quest to find her soul mate. This amazing anime love story tells us the story of a girl and a cat she loves with a guy that would do anything to get her attention.
The movie won so many hearts with its clear theme of kindness and love.
4. From Up on Poppy Hill
This is not your everyday romance anime movie. Set in 1963, Japan, the movie shows the adventures of a 16-year-old girl named, Umi who lives in a boarding house. She meets a boy Shun, who was a member of the school’s newspaper team and they and one other person decide to clean up the clubhouse. They soon discovered that the school chairman and another businessman had plans to actually demolish the building. Having developed strong feelings for each other, the couple and Shiro must find a way to convince the chairman to change his mind.
This told us a unique story of love, not just for our fellow humans, but for a place.
5. Your Name
Your name is an extraordinary tale of two teenagers who somehow share a magical connection when they discover they are swapping bodies. This happened as a result of the girl’s wish to be a boy in her next life. Somehow, she discovered she was able to become a boy in her dreams, only it wasn’t a dream, she was actually swapping body with a real boy. Having not met each other in person, they decide to do so. On meeting themselves things get even more complicated and weird for both of them.
Racking up a number of awards, Your name was the highest-grossing anime movie in 2016. It’s an absolute depiction of the deep connection we share as humans won a lot of hearts.
6. The Wind Rises
This movie tells us the amazing story of a young boy and his love for airplanes. Growing up wanting to be a pilot, he was told he couldn’t do it because of his nearsightedness. Devastated, he still continues to dream about flying planes and goes on reading a lot about past pilots and plane designers. In his dream he gets visited by one of the great people he read about, who tells him designing a plane is better than flying. His passion further deepens when he meets the love of his love who goes on to encourage him throughout their mishaps to design a plane. Persistence, passion, and courage were aesthetically showcased in the movie and that’s one reason viewers love it.
7. The Girl Who Leapt Through Time
This fantasy romance anime love story tells of a young girl who inadvertently trips upon a walnut in front of a blackboard. She is hit by a train while riding a bicycle on her way home. Strangely, she didn’t die, instead, she gets transported back in time to minutes before the train hit her. She later learns she can do time leaps. With her newfound ability, she starts leaping through time to get out of awkward situations and events. She soon discovers her time leaps have adverse effects on others and dedicates her time leaps to helping others.
This 2006 anime movie showed us how kind the human heart can be as she decides to use her gift to help others.
8. The Garden of Words
The film focuses on the encounters of a 15-year-old boy and a 27-year-old woman. The young boy always met this woman at a particular garden on rainy mornings and soon they become chatty. While she never told him anything about herself including her name, the young boy tells the woman everything about himself. When he finally learns who she is, they both discover they have been helping each other learn how to walk life’s journey. The movie depicts just how maturity is a thing of the mind. It shows just how adults also feel the same way teenagers feel and how teenagers receive the same pressure adults suffer.
9. Doukyusei
Doukyusei tells us about a carefree boy who is part of a band. Being always focused on what’s happening now, he and his entire class are forced to partake in an upcoming chorus festival. Coincidentally he meets one of his classmates who is well known for his brilliance. He sees him practicing alone and failing woefully to get their class song right. Happy to see the brilliant student in need of help, he decides to help his new friend achieve his aim and prepare for the upcoming event. This is not your conventional anime romance movie because it tells a story of two boys and their ‘love’ for each other.
10. 5 Centimeters Per Second
This film tells us the story of a young boy who gets the chance to befriend a new girl who was just transferred to his school. We are taken through their genuine friendship which came as a result of their taste and interests being the same. They soon develop strong feelings for each other and their bond is shown when they both speak to each other using their names only. They later go separate ways in a bid to further their studies but while apart they could still communicate deeply. They go on to meet different partners and even have children but their connection remained intact.
This short series shows us just how amazing the human heart can be when deeply attached to another.
Bonus Tip-Record and Share a Romance Anime Movie with Wondershare Filmora
There are many ways you can record these romance anime movies to watch and share with your loved ones, the best way is using Wondershare Filmora’s recording feature. Wondershare Filmora offers you the ability to actually record your movies and let your audience know what’s happening in the scene. Filmora also packs advanced editing features (4k editing support) as well as scene detection features, all to ensure that you have the best experience.
- 4K editing support.
- Supports GIF
- Advanced noise remover
- Ability to color tune properly
- Advanced text editor
- Audio mixer
- Scene detection.


Recording and sharing movies have never been easier, you can try it with one of these movies
Conclusion
So, there you have it, the 10 best romance anime movies you need to watch right now. Whichever one you pick first is sure to pique your interest in this amazing genre of anime movies. In as much as a lot of us like watching anime action movies and the likes and this makes us dislike the romance genre. Seeing a proper anime love story movie can totally change your perspective on life, love and a lot of emotions in ways you wouldn’t believe. And what would be better than recording and sharing anyone you’ve watched for a loved one to watch using Wondershare Filmora?
Shanoon Cox
Shanoon Cox is a writer and a lover of all things video.
Follow @Shanoon Cox
Shanoon Cox
Mar 27, 2024• Proven solutions
The demand for romance anime movies has soared in recent years and this has been down to the amazing concepts they come with. A lot of persons have, in recent times began to appreciate the genuine awesomeness of these movies. A lot of these anime love story movies come with incredible storylines that leave their audience emotionally connected to them. The plots are relatable and more often than not they address certain circumstances we find ourselves when we love someone. Since the demand for these kinds of movies is on the rise, it’s only fair I share with you the 10 best romance anime movies you should watch.
10 Best Romance Anime Movies to Watch
Without wasting any time, let’s get down to it. This is not listed in any particular order.
- 1. Howls Moving Castle
- 2. Weathering with You
- 3. Whispers of the Heart
- 4. From Up on Poppy Hill
- 5. Your Name
- 6. The Wind Rises
- 7. The Girl Who Leapt Through Time
- 8. The Garden of Words
- 9. Doukyusei
- 10. 5 Centimeters Per Second
1. Howls Moving Castle
How’s Moving Castle told the story of a girl Sophie, who was having quite an uneventful life at her daddy’s hat store until she met wizard Howl, who actually lived in a literal flying castle. They both become really close and as their relationship soared, an evil witch casts a spell on the young Sophie.
The spell was designed to make her age really fast. Devasted, Howl is forced to use all his magical powers to fight the evil witch and try his possible best to return his love Sophie to her youthful self.
This 2004 romance anime movie is loved by many because it laid emphasis on fighting for your loved one. The movie racked up so many awards for its incredible scripting.
2. Weathering with You
This tells the story of a young high school boy who got tired of the unending issues at home and decides to run away to Tokyo. He meets unfortunate events while on the ferry to Tokyo and is saved by a friend. Now I’m in Tokyo, he gets a job and in the course of doing his job he comes across a girl who can manipulate the weather. He also finds out she is an orphan. Taking pity on her, he gets a great business idea and soon. They start making lots of money with his idea and her gift. Unfortunately, things go south as her body starts evaporating. Our young hero promises to help her stay safe.
The movie won so many hearts with its clear theme of kindness and love.
3. Whispers of the Heart
Third on the list of romance anime movies to watch is whispers of the heart. The movie which is based on a manga with the same name, tells of a young girl who loves reading and her dreams of being a writer when she grew up. One day she discovers that all her library books have been checked by Seiji Amasawa. Her journey to school one day leads her to meet a large cat which in turn leads her to an eccentric antique dealer. Soon she starts writing her own novel and begins her quest to find her soul mate. This amazing anime love story tells us the story of a girl and a cat she loves with a guy that would do anything to get her attention.
The movie won so many hearts with its clear theme of kindness and love.
4. From Up on Poppy Hill
This is not your everyday romance anime movie. Set in 1963, Japan, the movie shows the adventures of a 16-year-old girl named, Umi who lives in a boarding house. She meets a boy Shun, who was a member of the school’s newspaper team and they and one other person decide to clean up the clubhouse. They soon discovered that the school chairman and another businessman had plans to actually demolish the building. Having developed strong feelings for each other, the couple and Shiro must find a way to convince the chairman to change his mind.
This told us a unique story of love, not just for our fellow humans, but for a place.
5. Your Name
Your name is an extraordinary tale of two teenagers who somehow share a magical connection when they discover they are swapping bodies. This happened as a result of the girl’s wish to be a boy in her next life. Somehow, she discovered she was able to become a boy in her dreams, only it wasn’t a dream, she was actually swapping body with a real boy. Having not met each other in person, they decide to do so. On meeting themselves things get even more complicated and weird for both of them.
Racking up a number of awards, Your name was the highest-grossing anime movie in 2016. It’s an absolute depiction of the deep connection we share as humans won a lot of hearts.
6. The Wind Rises
This movie tells us the amazing story of a young boy and his love for airplanes. Growing up wanting to be a pilot, he was told he couldn’t do it because of his nearsightedness. Devastated, he still continues to dream about flying planes and goes on reading a lot about past pilots and plane designers. In his dream he gets visited by one of the great people he read about, who tells him designing a plane is better than flying. His passion further deepens when he meets the love of his love who goes on to encourage him throughout their mishaps to design a plane. Persistence, passion, and courage were aesthetically showcased in the movie and that’s one reason viewers love it.
7. The Girl Who Leapt Through Time
This fantasy romance anime love story tells of a young girl who inadvertently trips upon a walnut in front of a blackboard. She is hit by a train while riding a bicycle on her way home. Strangely, she didn’t die, instead, she gets transported back in time to minutes before the train hit her. She later learns she can do time leaps. With her newfound ability, she starts leaping through time to get out of awkward situations and events. She soon discovers her time leaps have adverse effects on others and dedicates her time leaps to helping others.
This 2006 anime movie showed us how kind the human heart can be as she decides to use her gift to help others.
8. The Garden of Words
The film focuses on the encounters of a 15-year-old boy and a 27-year-old woman. The young boy always met this woman at a particular garden on rainy mornings and soon they become chatty. While she never told him anything about herself including her name, the young boy tells the woman everything about himself. When he finally learns who she is, they both discover they have been helping each other learn how to walk life’s journey. The movie depicts just how maturity is a thing of the mind. It shows just how adults also feel the same way teenagers feel and how teenagers receive the same pressure adults suffer.
9. Doukyusei
Doukyusei tells us about a carefree boy who is part of a band. Being always focused on what’s happening now, he and his entire class are forced to partake in an upcoming chorus festival. Coincidentally he meets one of his classmates who is well known for his brilliance. He sees him practicing alone and failing woefully to get their class song right. Happy to see the brilliant student in need of help, he decides to help his new friend achieve his aim and prepare for the upcoming event. This is not your conventional anime romance movie because it tells a story of two boys and their ‘love’ for each other.
10. 5 Centimeters Per Second
This film tells us the story of a young boy who gets the chance to befriend a new girl who was just transferred to his school. We are taken through their genuine friendship which came as a result of their taste and interests being the same. They soon develop strong feelings for each other and their bond is shown when they both speak to each other using their names only. They later go separate ways in a bid to further their studies but while apart they could still communicate deeply. They go on to meet different partners and even have children but their connection remained intact.
This short series shows us just how amazing the human heart can be when deeply attached to another.
Bonus Tip-Record and Share a Romance Anime Movie with Wondershare Filmora
There are many ways you can record these romance anime movies to watch and share with your loved ones, the best way is using Wondershare Filmora’s recording feature. Wondershare Filmora offers you the ability to actually record your movies and let your audience know what’s happening in the scene. Filmora also packs advanced editing features (4k editing support) as well as scene detection features, all to ensure that you have the best experience.
- 4K editing support.
- Supports GIF
- Advanced noise remover
- Ability to color tune properly
- Advanced text editor
- Audio mixer
- Scene detection.
Recording and sharing movies have never been easier, you can try it with one of these movies
Conclusion
So, there you have it, the 10 best romance anime movies you need to watch right now. Whichever one you pick first is sure to pique your interest in this amazing genre of anime movies. In as much as a lot of us like watching anime action movies and the likes and this makes us dislike the romance genre. Seeing a proper anime love story movie can totally change your perspective on life, love and a lot of emotions in ways you wouldn’t believe. And what would be better than recording and sharing anyone you’ve watched for a loved one to watch using Wondershare Filmora?
Shanoon Cox
Shanoon Cox is a writer and a lover of all things video.
Follow @Shanoon Cox
Why These 10 Top Text Motion Templates Are Worth Your Attention
Why These 10+ Top Text Motion Templates Are Worth Your Attention
An easy yet powerful editor
Numerous effects to choose from
Detailed tutorials provided by the official channel
If you’re looking to add some ‘text in motion‘ to your video projects, then you’ve come to the right place! We’ve listed some of our favorite Text Motion After Effects and Text Motion Graphics Premiere Pro templates that you can use to get a head start in the realm of adding motion into text! (As a bonus, we’ve also included an overview on text motion and some of the best text motion graphics tutorials that you can refer to when trying out the templates we’ve recommended.)
In this article
01 [What’s Text Motion?](#Part 1)
02 [10 Best Text Motion After Effects](#Part 2)
03 [Tutorials for Making Great Text Motion](#Part 3)
Part 1 What’s Text Motion?
Alright, first of all, let’s answer the big question! Text Motion, what is it and why should you be adding it to your projects ASAP? Well, in regards to the former, the answer is simple: text motion graphics is literally text animation that you can add to your projects to give it an extra bit of life and make it more show-stealing!
In regards to the latter, the answer is in its description! After all, why wouldn’t you want your projects to be able to capture more attention?

Have a look at the screenshot above that we included of an example project on the video editor, Wondershare Filmora . As you can see, we inserted text in motion at the very start. And despite being a still screenshot of said text motion graphics, the preview is eye-catching even when paused!
This is the kind of project that you can do yourself with the right templates and the right video editor. We’ve got your back on the first in the list coming up. And, as for the second, we recommend that you try out Filmora! It is, as you can see, quite an expansive software. One that will allow you to truly make the most of the text motion graphics you’ll be able to create at the end of this article.
Part 2 10 Best Text Motion After Effects
Alright, now let’s move on to our promised Text Motion Graphics After Effects and Text Motion Graphics Premiere Pro templates. We’ve tried our best to pick a variety out for you so that you can have a good selection to choose from! You should also take the time to explore the different platforms where these templates are offered in case you end up needing a different look!
01Clean and Elegant Corporate Identity – Text Reveal (Mogrt)
The first on this list is the ‘Clean and Elegant Corporate Identity — Text Reveal’ by Mogrt. The title is quite explanatory in and of itself, but just in case you’re confused, it’s a template that was designed for professionals and brands to establish their corporate identity. The font is very modern in design, and it comes with several flare variations so that the reveal works out in the way that you want it to.
Other aspects, like the shadow blur, opacity, particle size (for the reveal), and text glossiness are also adjustable and can be changed at will based on your standards.
02Multipurpose Clean 3D Text to Title
The next text motion template is the ‘Multipurpose Clean 3D Text to Title’ also created by Mogrt. This one is text motion graphics that you can use for Premiere Pro and, with proper customization, and be used for just about anything that you want! It’s a very multi-purpose kind of graphic, one that you can maybe sneak in as an advert or for announcing celebrations or anniversaries!
As a final note, if you want to use this graphic as text motion for after effects , it is available for that as well!
03Simple Motion Text | Premiere Pro
This next template, the ‘Simple Motion Text’ graphic, is one that is available for both Premiere Pro and After Effects (though the link we’ve provided is for the Premiere Pro version!) As the name implies, the animation is quite simple, which may be exactly what you want, in any case. It certainly makes it very versatile (especially as you can change font style and color as you will). Making it the perfect template for a beginner that’s just starting out and doesn’t want anything too complicated.
0430 Glitch Text Presets For Premiere Pro | Mogrt
This next template, the ‘30 Glitch Text Presets’ by Mogrt is a Premiere Pro exclusive! It’s also quite fun in its particulars. As a template, it’s not as versatile as the one that we introduced previously, since the ‘glitch’ effect gives off quite the unique vibes, but that doesn’t make it any less potent at catching the eyes of your audience!
The best part, in this case, is that it comes with 30 pre-sets, all with fitting glitch sound effects (included in the pack) that you can use. Of course, there are other customization functions as well, including font style, color, transparency, and so on.
05Comic Bubbles MOGRT
Again, this next templated, called ‘Comic Bubbles’, kind of has its own unique vibe, making it inflexible in some ways but also more fun if that’s the kind of look that you’re looking for. Which, in this case, are literal ‘Comic’ text bubbles, like you would see in your old 90s comic (loud, pop-y, and with lots of bright colors!) The only difference from that to this is that these comic text bubbles move, allowing you to create ‘punchy’ text in between animated projects.
For your reference, there are 80 different comic bubbles included in the pack. All of which are easy to customize and will allow you to adjust colors, text, and transition effects (have a look at the video that we’ve linked if you want to see it in action!)
06Smoke To Text Reveal (Mogrt)
This next template, ‘Smoke to Text Reveal’ is another one that serves a very particular need. To help with visualization, the text motion graphics are at first obscured by smoke before it bubbles up into a crisp, modern text reveal! It’s perfect for those looking for underwater-themed text motion graphics. Or those who want to serve a hint of mystery with the smoke effect.
This is Text Motion Graphics - Premiere Pro. And the best part about it is that you can customize the text and the background at will — allowing you to truly make the template your own and make the most out of the smoke-to-reveal effect.
07Text Messages Toolkit
Want to appeal to the Gen Z audience? Then, the ‘text messages toolkit’ might be a fun text motion graphics for you to try. As you can perhaps surmise from the name, it’s a template that you can use in order to create ‘text message’ interactions. It’s customizable too! You can change the text box color, size, transparency, and just have a ball pimping it out of that’s what you want.
08Large Text Title Block
With the ‘large text title block’ template, you have the flexibility of the naturally more modern and minimalistic design, allowing you to use it for a wide variety of different projects. It works especially well for advertisements, if you’re wondering about potential uses, or as transition graphics between text to video!
09Blueprint Titles
Want something that’s a little quirkier? Or, perhaps, instructional? Then the ‘Blueprint Titles’ template is one that you can consider. As you can perhaps guess from the name, it allows you to create text motion graphics in a style that is similar to the kind of blueprints you usually see when working with design or architecture.
10Dynamic Minimalism
Sometimes, simple really is best! And, this next template, the ‘Dynamic Minimalism’ text motion after effects and text motion graphics premiere pro template is one that you might want in your arsenal just for the sake of your simpler projects! The kit comes with 30 different animations, as well as other customization functions that you can play around with to add a little personality to what are otherwise very minimalistic designs.
Part 3 Tutorials for Making Great Text Motion
For the last part of this article, we’ll be introducing some tutorials that you can refer to while trying out the templates that we recommended! We’ve pulled all of this from YouTube so that you can start learning immediately! And, of course, a variety has been chosen so that you can get your info from more than one source.
01Smooth Professional Text Animation in Premiere Pro - TUTORIAL
The first tutorial we have for you was created by Ignace Aleya on YouTube. This tutorial is a ‘Premiere Pro’ tutorial that focuses on helping beginners and intermediate users alike in understanding the ways of text motion graphics. He offers some pretty good pointers and tricks on keeping the quality of your work high. And the way that he shares his knowledge is pretty solid too! Allowing you to both watch and enjoy the video.
02Easy Title Motion Graphics
This next tutorial is about text motion graphics while working in Adobe After Effects. Like the previous tutorial, it will teach you the basics of using templates! It was posted by SonduckFilm, and the video covers five different “Easy Title Motion Graphics” as examples! Altogether, it’s a great choice if what you’re looking for is tips on making the most out of the templates we introduced on our list.
03Basic Logo Animations
Next, we have a tutorial from the YouTube content creator, Broken! This one is on the subject of both simple and complex logo animations that you can create when working on establishing a brand. It’s a great video for beginners and is quite informative on the subject of customization.
● Key Takeaways from This Episode →
● What is text motion and why do you need to start using it for your own projects ASAP? Well, text motion graphics are, basically, text animation! They’re eye-catching and informative at the same time, making them a great vessel for getting a message across to your audience.
● If you want to start creating text motion graphics yourself, we suggest starting with templates first! At least then, you’ll be able to make yourself comfortable while learning about the opportunities available to you.
● There are many different templates out there that you can try. Some are multi-purpose, some not. We’ve chosen a variety to introduce to you in of this article! Complete with a list of some tutorials in that you can refer to no matter what kind of project you’re working on.
If you’re looking to add some ‘text in motion‘ to your video projects, then you’ve come to the right place! We’ve listed some of our favorite Text Motion After Effects and Text Motion Graphics Premiere Pro templates that you can use to get a head start in the realm of adding motion into text! (As a bonus, we’ve also included an overview on text motion and some of the best text motion graphics tutorials that you can refer to when trying out the templates we’ve recommended.)
In this article
01 [What’s Text Motion?](#Part 1)
02 [10 Best Text Motion After Effects](#Part 2)
03 [Tutorials for Making Great Text Motion](#Part 3)
Part 1 What’s Text Motion?
Alright, first of all, let’s answer the big question! Text Motion, what is it and why should you be adding it to your projects ASAP? Well, in regards to the former, the answer is simple: text motion graphics is literally text animation that you can add to your projects to give it an extra bit of life and make it more show-stealing!
In regards to the latter, the answer is in its description! After all, why wouldn’t you want your projects to be able to capture more attention?
Have a look at the screenshot above that we included of an example project on the video editor, Wondershare Filmora . As you can see, we inserted text in motion at the very start. And despite being a still screenshot of said text motion graphics, the preview is eye-catching even when paused!
This is the kind of project that you can do yourself with the right templates and the right video editor. We’ve got your back on the first in the list coming up. And, as for the second, we recommend that you try out Filmora! It is, as you can see, quite an expansive software. One that will allow you to truly make the most of the text motion graphics you’ll be able to create at the end of this article.
Part 2 10 Best Text Motion After Effects
Alright, now let’s move on to our promised Text Motion Graphics After Effects and Text Motion Graphics Premiere Pro templates. We’ve tried our best to pick a variety out for you so that you can have a good selection to choose from! You should also take the time to explore the different platforms where these templates are offered in case you end up needing a different look!
01Clean and Elegant Corporate Identity – Text Reveal (Mogrt)
The first on this list is the ‘Clean and Elegant Corporate Identity — Text Reveal’ by Mogrt. The title is quite explanatory in and of itself, but just in case you’re confused, it’s a template that was designed for professionals and brands to establish their corporate identity. The font is very modern in design, and it comes with several flare variations so that the reveal works out in the way that you want it to.
Other aspects, like the shadow blur, opacity, particle size (for the reveal), and text glossiness are also adjustable and can be changed at will based on your standards.
02Multipurpose Clean 3D Text to Title
The next text motion template is the ‘Multipurpose Clean 3D Text to Title’ also created by Mogrt. This one is text motion graphics that you can use for Premiere Pro and, with proper customization, and be used for just about anything that you want! It’s a very multi-purpose kind of graphic, one that you can maybe sneak in as an advert or for announcing celebrations or anniversaries!
As a final note, if you want to use this graphic as text motion for after effects , it is available for that as well!
03Simple Motion Text | Premiere Pro
This next template, the ‘Simple Motion Text’ graphic, is one that is available for both Premiere Pro and After Effects (though the link we’ve provided is for the Premiere Pro version!) As the name implies, the animation is quite simple, which may be exactly what you want, in any case. It certainly makes it very versatile (especially as you can change font style and color as you will). Making it the perfect template for a beginner that’s just starting out and doesn’t want anything too complicated.
0430 Glitch Text Presets For Premiere Pro | Mogrt
This next template, the ‘30 Glitch Text Presets’ by Mogrt is a Premiere Pro exclusive! It’s also quite fun in its particulars. As a template, it’s not as versatile as the one that we introduced previously, since the ‘glitch’ effect gives off quite the unique vibes, but that doesn’t make it any less potent at catching the eyes of your audience!
The best part, in this case, is that it comes with 30 pre-sets, all with fitting glitch sound effects (included in the pack) that you can use. Of course, there are other customization functions as well, including font style, color, transparency, and so on.
05Comic Bubbles MOGRT
Again, this next templated, called ‘Comic Bubbles’, kind of has its own unique vibe, making it inflexible in some ways but also more fun if that’s the kind of look that you’re looking for. Which, in this case, are literal ‘Comic’ text bubbles, like you would see in your old 90s comic (loud, pop-y, and with lots of bright colors!) The only difference from that to this is that these comic text bubbles move, allowing you to create ‘punchy’ text in between animated projects.
For your reference, there are 80 different comic bubbles included in the pack. All of which are easy to customize and will allow you to adjust colors, text, and transition effects (have a look at the video that we’ve linked if you want to see it in action!)
06Smoke To Text Reveal (Mogrt)
This next template, ‘Smoke to Text Reveal’ is another one that serves a very particular need. To help with visualization, the text motion graphics are at first obscured by smoke before it bubbles up into a crisp, modern text reveal! It’s perfect for those looking for underwater-themed text motion graphics. Or those who want to serve a hint of mystery with the smoke effect.
This is Text Motion Graphics - Premiere Pro. And the best part about it is that you can customize the text and the background at will — allowing you to truly make the template your own and make the most out of the smoke-to-reveal effect.
07Text Messages Toolkit
Want to appeal to the Gen Z audience? Then, the ‘text messages toolkit’ might be a fun text motion graphics for you to try. As you can perhaps surmise from the name, it’s a template that you can use in order to create ‘text message’ interactions. It’s customizable too! You can change the text box color, size, transparency, and just have a ball pimping it out of that’s what you want.
08Large Text Title Block
With the ‘large text title block’ template, you have the flexibility of the naturally more modern and minimalistic design, allowing you to use it for a wide variety of different projects. It works especially well for advertisements, if you’re wondering about potential uses, or as transition graphics between text to video!
09Blueprint Titles
Want something that’s a little quirkier? Or, perhaps, instructional? Then the ‘Blueprint Titles’ template is one that you can consider. As you can perhaps guess from the name, it allows you to create text motion graphics in a style that is similar to the kind of blueprints you usually see when working with design or architecture.
10Dynamic Minimalism
Sometimes, simple really is best! And, this next template, the ‘Dynamic Minimalism’ text motion after effects and text motion graphics premiere pro template is one that you might want in your arsenal just for the sake of your simpler projects! The kit comes with 30 different animations, as well as other customization functions that you can play around with to add a little personality to what are otherwise very minimalistic designs.
Part 3 Tutorials for Making Great Text Motion
For the last part of this article, we’ll be introducing some tutorials that you can refer to while trying out the templates that we recommended! We’ve pulled all of this from YouTube so that you can start learning immediately! And, of course, a variety has been chosen so that you can get your info from more than one source.
01Smooth Professional Text Animation in Premiere Pro - TUTORIAL
The first tutorial we have for you was created by Ignace Aleya on YouTube. This tutorial is a ‘Premiere Pro’ tutorial that focuses on helping beginners and intermediate users alike in understanding the ways of text motion graphics. He offers some pretty good pointers and tricks on keeping the quality of your work high. And the way that he shares his knowledge is pretty solid too! Allowing you to both watch and enjoy the video.
02Easy Title Motion Graphics
This next tutorial is about text motion graphics while working in Adobe After Effects. Like the previous tutorial, it will teach you the basics of using templates! It was posted by SonduckFilm, and the video covers five different “Easy Title Motion Graphics” as examples! Altogether, it’s a great choice if what you’re looking for is tips on making the most out of the templates we introduced on our list.
03Basic Logo Animations
Next, we have a tutorial from the YouTube content creator, Broken! This one is on the subject of both simple and complex logo animations that you can create when working on establishing a brand. It’s a great video for beginners and is quite informative on the subject of customization.
● Key Takeaways from This Episode →
● What is text motion and why do you need to start using it for your own projects ASAP? Well, text motion graphics are, basically, text animation! They’re eye-catching and informative at the same time, making them a great vessel for getting a message across to your audience.
● If you want to start creating text motion graphics yourself, we suggest starting with templates first! At least then, you’ll be able to make yourself comfortable while learning about the opportunities available to you.
● There are many different templates out there that you can try. Some are multi-purpose, some not. We’ve chosen a variety to introduce to you in of this article! Complete with a list of some tutorials in that you can refer to no matter what kind of project you’re working on.
How to Create a Whiteboard Animation Video
Whiteboard animation simply refers to the process of story telling using pictures and drawn resources on a whiteboard or a plane white surface. Its simply the creation of conventional story telling procedure where text, images, diagrams, figures, etc are drawn onto a white surface.
Whiteboard animation video usually work with audio, visual and most times a combination of both audio and visual to sell a particular information to the audience. Another name it has gotten over time which you may come across while surfing the internet is doodle videos.

In creating this type of videos, script writes are usually employed because of the dynamics involved in creating them. The major users of whiteboard animation video are business owners and people in the education fields. Other people make use of it but these two groups are the major users.
Whiteboard animation is important because it helps viewers remember the contents of what they watched better than looking at an image that contains a lot of information that may not always be organized.
Over time, whiteboard videos have become a more compelling and innovative method of dissemination information. They work so well because it’s a more relatable and fun way of making videos. It goes outside the conventional video making techniques and employs the animation standards which is fun to watch, engaging and still maintains the ability to effective pass the required information to the viewers.
Also, it uses a unique style to mix text, animations, and colors to drive the point home. Viewers are usually glued to their screen while watching it. The usual white background equally makes the information being displayed to effective contrast with each other. However, there is a recent movement from the usual white background to any color of choice while still maintaining the contrasting quality of the videos.
Finally, people tend to remember events or information if they are told as stories. This is one of the major objectives of whiteboard animation videos. They use graphics and animations to tell stories, sell products and services while maintaining the fun in it.
Whiteboard animation video usually takes time to create. Its not always as easy as it may seem. It takes dedication and patience before you perfect the video. if you’re new to this, its ok to not have that perfect video immediately. What matters is your will to grow and get better.
Below is an example of a whiteboard animation video created using Animaker. We’ll still look at the various software applications used for creating whiteboard animation videos.
How to Create Your Video
Step1 The first step to creating your whiteboard animation video is to know your topic of choice. Determining your choice topic is based on the purpose of the video. You have to know the reason why the video is being created in the first place to enable you decide the contents, the outlook, the font style and size and the colors to use.
Step2 The next step after you’ve getting your topic is execution of the idea. This involves having a script which usually involves the step-by-step procedure you are to follow to achieve your goal. Writing the script is arguable the most difficult process. However, once you get it right, all the other processes become relatively easy to execute. You might need to employ a professional script writer depending on your budget for the project.
Step3 After that, the next thing is to deicide whether or not to use your own voice or computer voice. This is also called a voice over. Most software provides a text to speech voice over option which usually comes with various alternatives. There is also another option of using your own voice to finish the project.
Step4 Add text, graphics and animation. This step is usually easier when you are working with the script already provided. You include the text, animations, figures, etc. sometimes you might need to import additional resources to complete this task. However, not all software provides for this.
Step5 Organize your work. In organizing your work, you must ensure that you voice over matches properly with what is on display. Check your spellings, grammar, composition and other ‘little’ details that may give your work a bad look.
Step6 Save your work and export. Once your done with your work, you have to save it on your local disk. This also means downloading the work from the website or software onto a local disk. You can now share the video on any social media of your choice. The most popular place to share it is on YouTube which is the most widely used video watching application.
Top 3 Whiteboard Animation Software
When considering which software is best for whiteboard animation creation needs, the most important factor to have at the back of your mind is flexibility and cost. Some software are really flexible to use but cost more than many people can afford. Others are cheap to purchase but do not have all the necessary resources needed to make a great video.
We’ll be looking at various software that combines cost effectiveness and flexibility. Note however that this list is not exhaustive of the software that combines these two features but are worthy of mention for the purpose of this article.
Filmora
At the top of our list is Filmora . This does not make them the best. However, they are relatively easy to use and have a combination of the two features mentioned above. Finally on our list is Filmora. This software offers much more than just whiteboard animation. It’s your go-to software for your video creation and video editing needs. One of the best parts of this software is that it supports 2D and 3D animation.

Free Download For Win 7 or later(64-bit)
Free Download For macOS 10.14 or later
Animaker
It has a lot of free resources which are made available to users after creating and account with them and verifying your email. However, like most other software, the juicy parts of it are locked and can be unlocked with a monthly or yearly subscription. They are 3 packages; Basic which cost $10 per month and $120 per year, starter package which cost $19 per month and $228 per year and the pro package which costs $49 per month and $588 per year.

This software is at the top of our list because the free resources it provides is adequate to make a decent whiteboard animation. Note that it comes with their watermark which cannot be removed without a paid subscription.
Doodly
Doodly is one of the most popular software applications for creating whiteboard videos. Its popularity comes from the fact that no prior skills is needed to use the software other than basic computer and internet usage. A lot of processes are already automated for users. If you’re a user that is concerned about quick responses from their customer care/support, doodly covers you. They have a record time response to issues from their users. Visit https://www.doodly.com/pricing/ to view their pricing.

Conclusion
If you’re wondering why you should chose whiteboard animation over the conventional video creating technique, then you should probably try it out. Animation easily captures the interest of viewers and the slide-by-slide transitioning equally makes it better. You can always try out other software applications to know the one that fits you best.
How to Create Your Video
Step1 The first step to creating your whiteboard animation video is to know your topic of choice. Determining your choice topic is based on the purpose of the video. You have to know the reason why the video is being created in the first place to enable you decide the contents, the outlook, the font style and size and the colors to use.
Step2 The next step after you’ve getting your topic is execution of the idea. This involves having a script which usually involves the step-by-step procedure you are to follow to achieve your goal. Writing the script is arguable the most difficult process. However, once you get it right, all the other processes become relatively easy to execute. You might need to employ a professional script writer depending on your budget for the project.
Step3 After that, the next thing is to deicide whether or not to use your own voice or computer voice. This is also called a voice over. Most software provides a text to speech voice over option which usually comes with various alternatives. There is also another option of using your own voice to finish the project.
Step4 Add text, graphics and animation. This step is usually easier when you are working with the script already provided. You include the text, animations, figures, etc. sometimes you might need to import additional resources to complete this task. However, not all software provides for this.
Step5 Organize your work. In organizing your work, you must ensure that you voice over matches properly with what is on display. Check your spellings, grammar, composition and other ‘little’ details that may give your work a bad look.
Step6 Save your work and export. Once your done with your work, you have to save it on your local disk. This also means downloading the work from the website or software onto a local disk. You can now share the video on any social media of your choice. The most popular place to share it is on YouTube which is the most widely used video watching application.
Top 3 Whiteboard Animation Software
When considering which software is best for whiteboard animation creation needs, the most important factor to have at the back of your mind is flexibility and cost. Some software are really flexible to use but cost more than many people can afford. Others are cheap to purchase but do not have all the necessary resources needed to make a great video.
We’ll be looking at various software that combines cost effectiveness and flexibility. Note however that this list is not exhaustive of the software that combines these two features but are worthy of mention for the purpose of this article.
Filmora
At the top of our list is Filmora . This does not make them the best. However, they are relatively easy to use and have a combination of the two features mentioned above. Finally on our list is Filmora. This software offers much more than just whiteboard animation. It’s your go-to software for your video creation and video editing needs. One of the best parts of this software is that it supports 2D and 3D animation.
Free Download For Win 7 or later(64-bit)
Free Download For macOS 10.14 or later
Animaker
It has a lot of free resources which are made available to users after creating and account with them and verifying your email. However, like most other software, the juicy parts of it are locked and can be unlocked with a monthly or yearly subscription. They are 3 packages; Basic which cost $10 per month and $120 per year, starter package which cost $19 per month and $228 per year and the pro package which costs $49 per month and $588 per year.
This software is at the top of our list because the free resources it provides is adequate to make a decent whiteboard animation. Note that it comes with their watermark which cannot be removed without a paid subscription.
Doodly
Doodly is one of the most popular software applications for creating whiteboard videos. Its popularity comes from the fact that no prior skills is needed to use the software other than basic computer and internet usage. A lot of processes are already automated for users. If you’re a user that is concerned about quick responses from their customer care/support, doodly covers you. They have a record time response to issues from their users. Visit https://www.doodly.com/pricing/ to view their pricing.
Conclusion
If you’re wondering why you should chose whiteboard animation over the conventional video creating technique, then you should probably try it out. Animation easily captures the interest of viewers and the slide-by-slide transitioning equally makes it better. You can always try out other software applications to know the one that fits you best.
Also read:
- New How to Send and Add Snapchat GIFs 100 in Easy Way for 2024
- In 2024, 10 Realistic Cartoon Characters You Will Run Away From if You Met in R
- In 2024, Best 10 Anime Series of All Time | Watch Anime Online
- New In 2024, Something About Types of Motion Graphics
- New A Beginners Guide to Explain What 3D Animation Is
- Updated 2024 Approved Tips for Animated Collage Maker
- Updated 2024 Approved How to Get Started in Stop Motion Claymation
- 2024 Approved 8 Best Motion Graphics Online Tools for Your Inspiration
- New Easy Cartoon Characters Drawing Tutorials for You Beginners
- Updated In 2024, What Is Still Motion Animation?
- Updated In 2024, Secret Shortcut to Adobe Animate Character Tutorial
- Updated 5 Free Animated Gif Sources You Must Check for 2024
- 15 Best Video to GIF App on iPhone and Android
- New How to Make Photo 3D Cartoon Online for 2024
- New Top 10 Classical Animated Cartoon Types With Examples
- New How to Draw Cartoons Step by Step with This Guide for 2024
- 8 Free GIF Animators to Make Your Own GIF for 2024
- In 2024, How to Animate - Adobe Animate Tutorias
- New Guide on How to Create GIF in WhatsApp iPhone for 2024
- Updated 5 Best Adobe Animate Courses & Classes
- 2024 Approved 10 Classical Animated Cartoon Types With Examples
- In 2024, Best 15 Greatest Claymation Movies of All Time
- New Stunning Ideas About Creating Personalised WhatsApp GIF Sticker
- New 2024 Approved Top 10 Banned Anime Around the World and Why
- New In 2024, Tutorial on Making Unity 2D Animation
- What Is A GIF for 2024
- New In 2024, Animated Business Logos and Tools to Create
- New 2024 Approved 8 Top Motion Graphics Online Tools for Your Inspiration
- Updated In 2024, 5 Must Try Ways to Add and Send GIF in Text Message on Android
- New How to Obtain and Create Animated GIF Icons Like a Pro, In 2024
- Updated In 2024, Most Effective Tactics to Set WhatsApp Status
- 2024 Approved What Wikipedia Cant Tell You About the 10 Best Batman Cartoons
- Learn What Are Differences Between 2D And 3D Animation for 2024
- Updated Top 7 Best Animated Lyric Video Software for FREE
- Best Claymation Shows That Make Your Memories Unforgettable
- New How to Create Animated Video on Canva, In 2024
- FREE Best Anime Streaming Sites to Download Anime
- Updated In 2024, Best 10 Video to GIF Converters Top Picks
- In 2024, The Top Free 12 GIF Meme Maker at a Glance
- 2024 Approved Ways to Master to Find 10 Best Free Animated Text Generator
- Updated In 2024, Secrets for TikTok Live Studio Success
- How to Transfer Data from Samsung Galaxy A23 5G to BlackBerry | Dr.fone
- In 2024, Delete Gmail Account With/Without Password On Motorola Moto G24
- Best Xiaomi Redmi Note 12 4G Pattern Lock Removal Tools Remove Android Pattern Lock Without Losing Data
- How to Sign Out of Apple ID From Apple iPhone 6s Plus without Password?
- Does Life360 Notify When You Log Out On Itel A60? | Dr.fone
- In 2024, Top Apps and Online Tools To Track Realme C33 2023 Phone With/Without IMEI Number
- How to Update Apple iPhone 8 Plus without Losing Any Data? | Dr.fone
- Easy steps to recover deleted photos from Civi 3.
- 5 Ways to Reset Oppo A59 5G Without Volume Buttons | Dr.fone
- 8 Solutions to Fix Find My Friends Location Not Available On Motorola G54 5G | Dr.fone
- Fix Infinix Note 30i Android System Webview Crash 2024 Issue | Dr.fone
- Title: In 2024, How to Draw Cartoons Step by Step with This Guide
- Author: Elon
- Created at : 2024-05-19 03:04:44
- Updated at : 2024-05-20 03:04:44
- Link: https://animation-videos.techidaily.com/in-2024-how-to-draw-cartoons-step-by-step-with-this-guide/
- License: This work is licensed under CC BY-NC-SA 4.0.
