
:max_bytes(150000):strip_icc():format(webp)/iPad-Pro_creative-sketch_10302018-5be0773ac9e77c0051d5d51c.jpg)
In 2024, Secrets to Make 2D Game Animation
Secrets to Make 2D Game Animation
Secrets to Make 2D Game Animation
An easy yet powerful editor
Numerous effects to choose from
Detailed tutorials provided by the official channel
In this dominated era by 2D game animation, when even the latest versions of Super Mario Bros and Street Fighter. are created of polygonized characters, quality sprite-based 2D games are rare.
In this article
01 [2D Game Animation Courses and Tutorials](#Part 1)
02 [5 Best Game Animation Services to Buy Online](#Part 2)
03 [Best 5 Game Animation Tools for Development As of 2022](#Part 3)
04 [3 Tips for Making Great Animations for 2D Games](#Part 4)
05 [How to Make 2D Animation for Games](#Part 5)
Part 1 2D Game Animation Courses and Tutorials
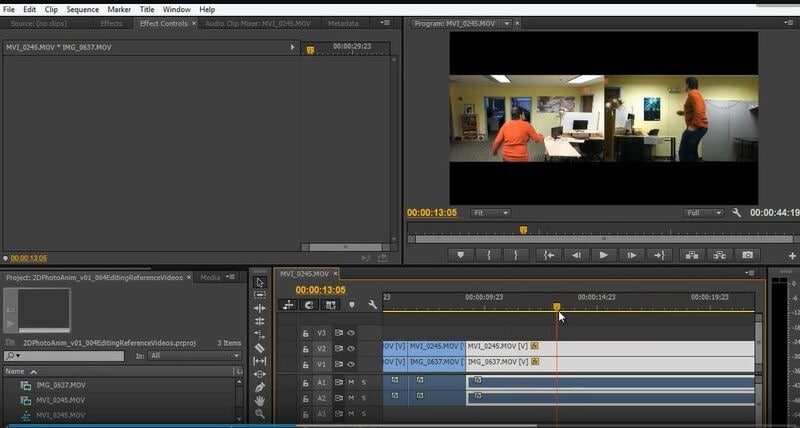
01Animating a 2D Character within Live-Action Video in Photoshop and Premiere
This tutorial greatly defines the process of creating traditional 2D animation in Photoshop implacable over live-action video. We’ll discuss the live-action planning shots with animation in mind, continuity of video editing, and making references for video animation. You will also know how to create the critical poses via rough animation to finish the entire movement and make final line images.
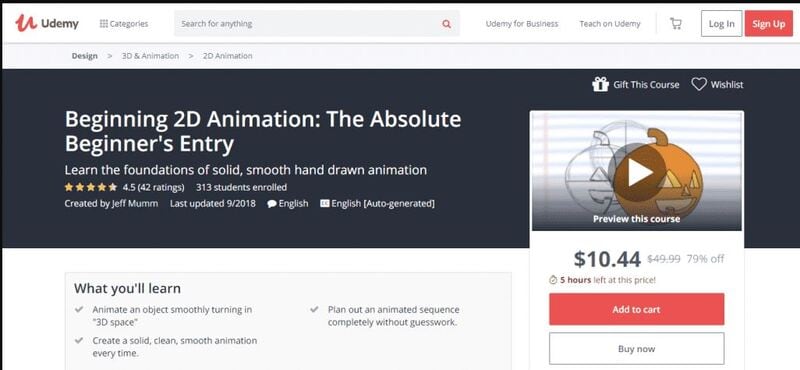
02Beginning 2D Animation: The Absolute Beginner’s Entry with Jeff Mumm
This course lays a solid foundation for absolute beginners entering the exciting world of 2D game animation. Here, we describe the detailed steps to create unique and great-looking animations.
You will also learn ‘easing,’ one of the twelve animation principles, and ultimately plan an animated sequence.
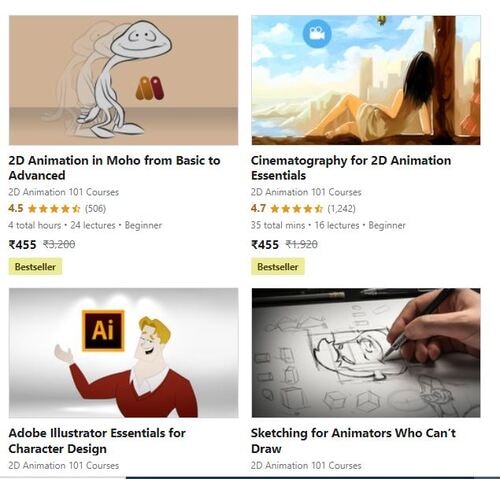
032D Animation in Moho from Basic to Advanced
This course focuses on applying the principles of animation to create an organic walk cycle for the character. This tutorial or course will also teach you how to rig and prepare your animated characters and do 2D game animation.
You will also learn how to trace characters in Moho and use different drawing tools.
Also, you will learn how to create an organic walk cycle by applying advanced animation principles.

042D Animation 101 Courses
This is one of the free online and the ultimate 2D game character design and animation courses that offer free online certificates. Autumn Leave Films has ten years of experience in the film industry and a great collection of short films – nearly 30 2D Animation 101 Courses.
2D Animation 101 provides eight courses, plus free and proprietary 2D game character animation software. In addition, their “Free Step-by-Step Plan” is specifically compelling to beginners in the 2D Animation arena.
It includes daily 10-minute lessons, online 2D game character animation tutorials, suggestions, and tips on using the required software.
05Skillshare -2D Animation for Beginners with Adobe Animate
This is one of the free online 2D animation courses that offer free online animation courses with certificates. You can learn 2D animation online by following Walt’s course. This course is designed for beginners and demonstrates how to create animated characters by providing students with an understanding of the fundamental principles and vivid examples. This tutorial covers various topics, including vector art basics in Animate, nested animations, adding audio to animations, and more.
This short course or tutorial is ideal for animation for personal rather than professional reasons.

Part 2 5 Best Game Animation Services to Buy Online
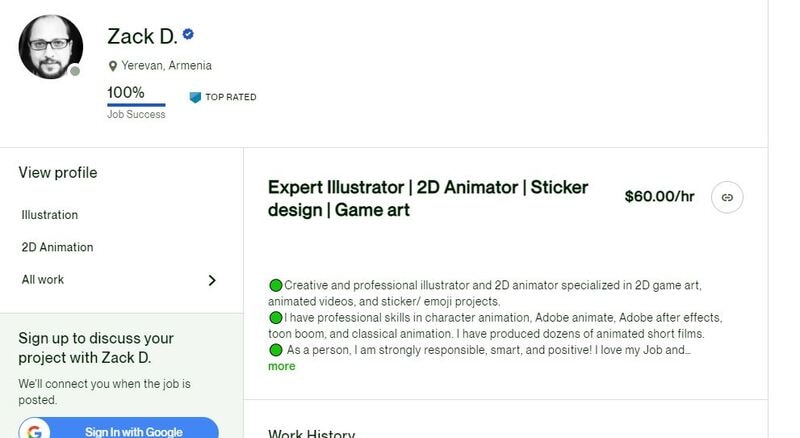
Rather than using and learning the best 2D animation software for game development, we’d like to describe a list of the top 5 freelancing platforms to rely upon for the best game animation services.
01Upwork
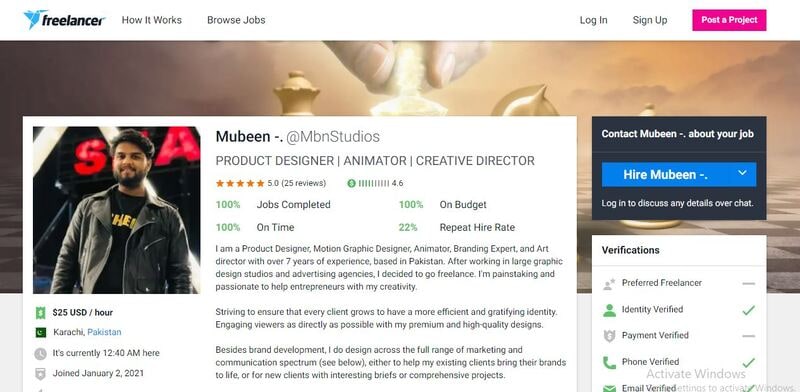
02Freelancer
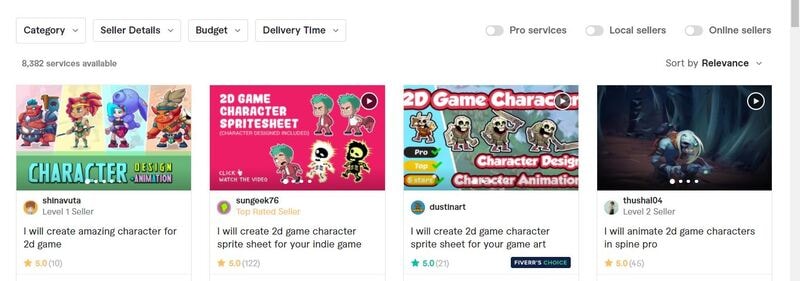
03Fiverr
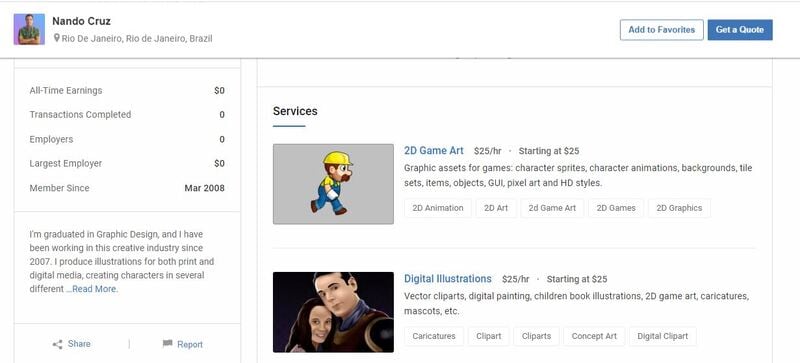
04Guru
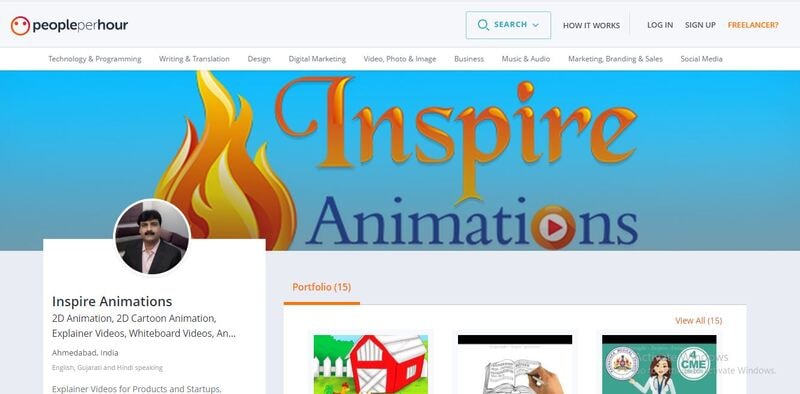
05PeoplePerHour
Part 3 Best 5 Game Animation Tools for Development As of 2022
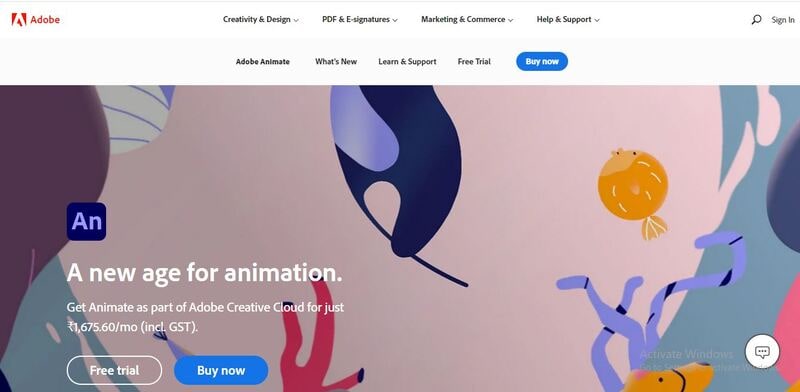
01Adobe Animate
It is a program from Adobe’s Creative Cloud. It offers the ability to make many varieties of animated features, games, or other Flash multimedia. The program was called Adobe Flash Professional for more than ten years; that name was retired in 2015.
The main features of Animate are as follows:
● Integration with your Adobe cloud library of assets
● Easy cross-platform use with other Adobe products
● Creates animated movies, cartoons, or clips
● Creates Flash games or interactive Flash utilities
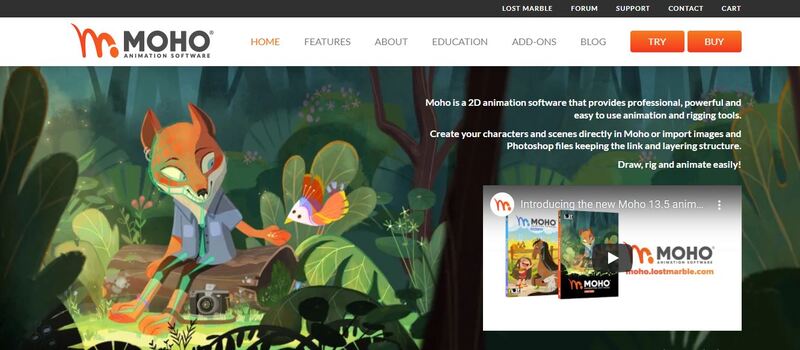
02Moho
It’s a comprehensive and best 2D game animation software where your animations are basically on the level of some of your favorite creations. It’s projected toward animators looking to hone their craft.
You could create some fantastic stuff if you’re up to the task (and the price). Moreover, they’re constantly adding updates.
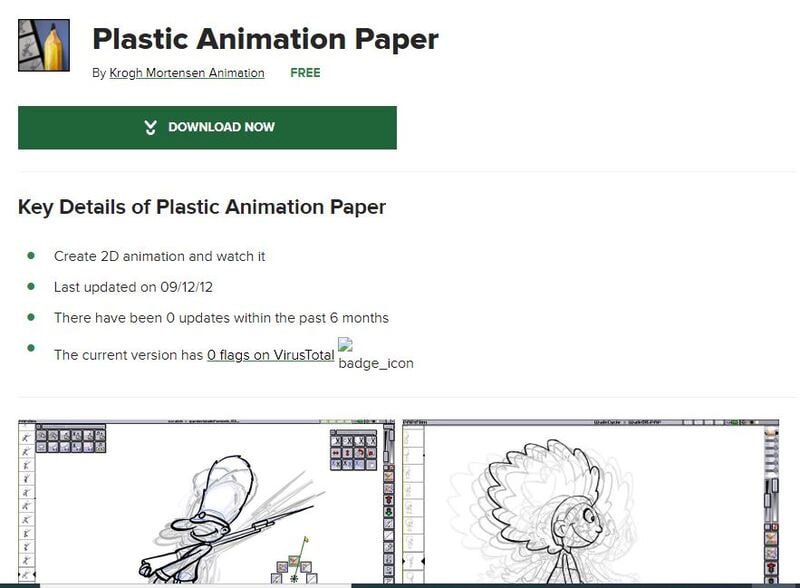
03Plastic Animation Paper
Plastic Animation Paper is another best 2D game character animation software that deals heavily with the concept of pencil drawing.
The program is designed for the most straightforward use and involves clear resolution. You can do whatever you wish with your drawings and elevate yourself to the next level.
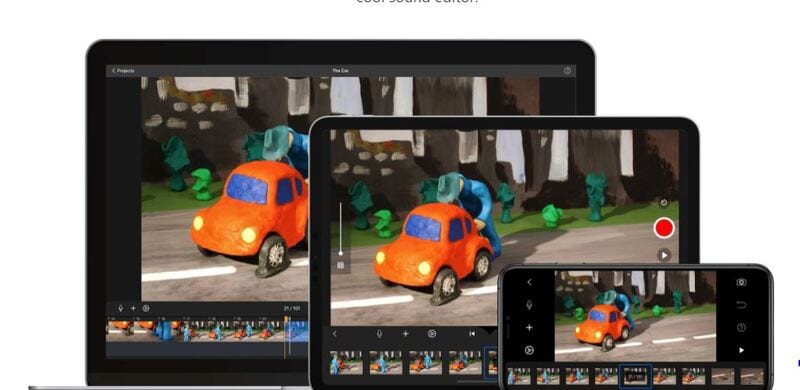
04Stop Motion Studio
‘Want to create movies like Wallace and those groovy Lego shorts on YouTube? Stop Motion Studio allows you to create terrific stop action movies with a bucket of specialized features.’
05Animaker
Learning how to make 2D animation for games with Animaker is also good to set up a storyboard and animate the characters or props in that scene. It’s used by companies like Verizon, Google, Pepsi, etc.
It’s appropriate for ad placement on websites and simplistic for beginners. They make it easy and super-fast to get lost for hours animating.
Part 4 3 Tips for Making Great Animations for 2D Games
Now that you have some initial idea of 2D game animation let’s jump to the top 3 tips that will help you create the best and unique 2D game character animation designs with ease.
It will be beneficial while knowing how to make 2D animation for games.
01Focus on the story and start with simple movements
You need to focus on the storyline so that outcome will come accordingly. Focus on every detail while sketching, and don’t miss out on simple movements. Take paper and pencil and start drawing simple exercises like the movement of a bouncing ball etc.
02Use keyframes properly
You need to carefully use keyframes’ start and endpoints to have robust storytelling and movements. To adequately describe the first and last, you need to consider effectively using the keyframes.
03Enliven your characters
You need to give life to your characters so that audience can best relate to the story. Also, pay good attention to facial expressions, sound, tickling movements, etc.
Although these may look like the most straightforward tips ever, these are the most practical 2D game animation strategies that can do wonders if used effectively.
Part 5 How to Make 2D Animation for Games
Making 2D game character animation isn’t a straightforward process and thus needs detailed knowledge that we will describe below.
Let’s use Unity as the best 2D animation software for games without further ado!
Essential awareness of the Unity Editor (how to navigate and open tabs) is required to work with the Unity Animation window.
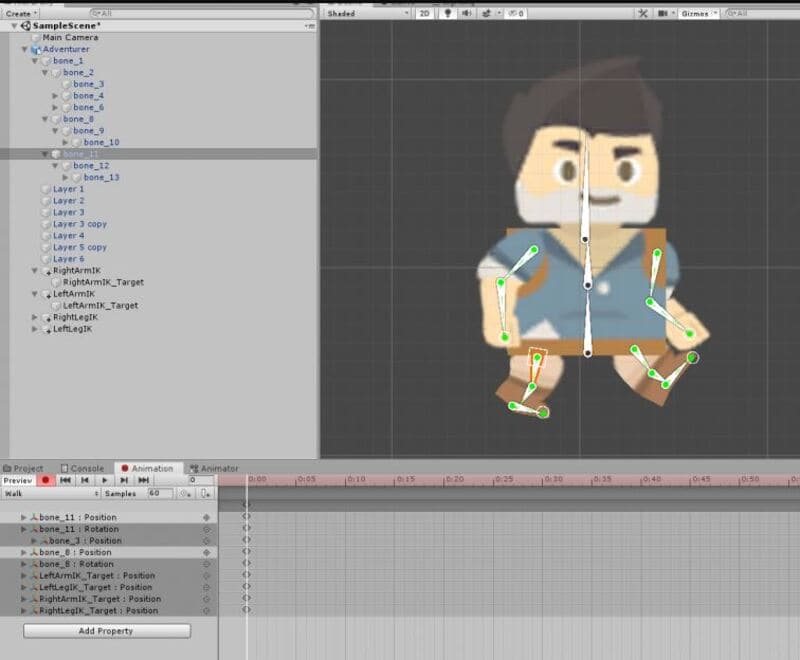
01Step 1: Start the Animation tab
Choose the Adventurer character and launch the Animation tab.
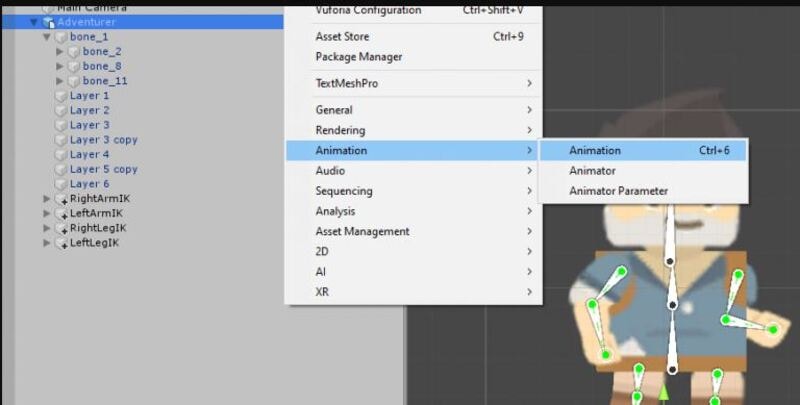
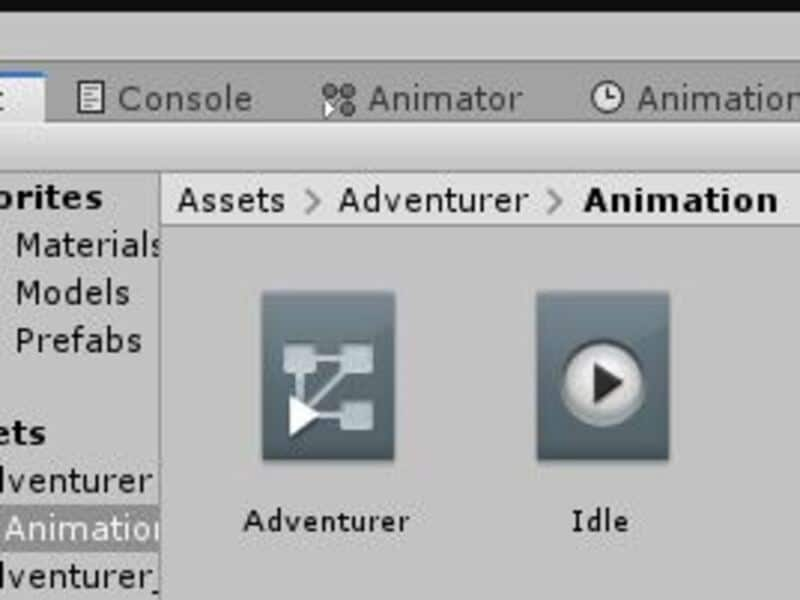
Dock this next to your project tab and console tab. Head towards the project tab and name with the Adventurer folder. Make a new folder known as “Animation.”
With the Animation tab, create a new animation known as “Idle” placed in our Animation folder.
It also creates an Animator Controller in that same folder.
Now, let’s start animating this character!
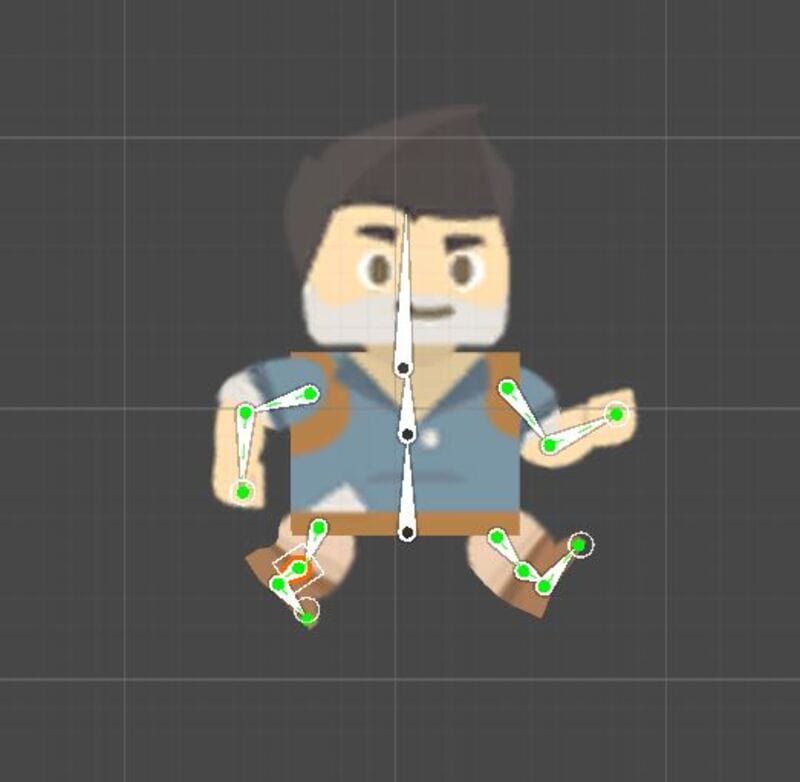
02Step 2: Proceed with the Idle Animation
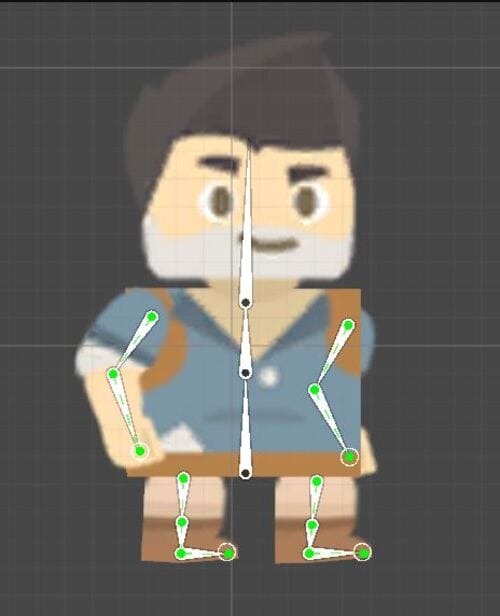
IKs contribute a lot to the efficiency and speed of animating when it comes to idle animation. We must animate a subtle movement very similar to a breathing motion. Tap the red record button and move the character to this position:
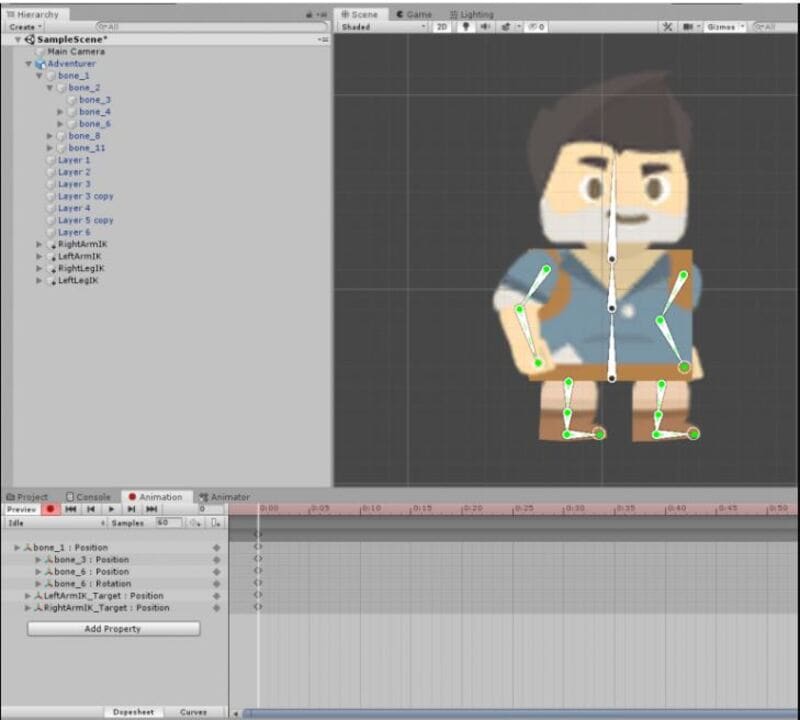
Now go about fifty frames ahead and barely move the top torso bone straight down.
Drag the arm IKs to the side to contain less bend in them and display a sort of “swinging” motion. Here is the pose that I chose:
A subtle tweak is there. It makes the idle animation look strange if we create large movements. Then, choose the first group of keyframes and tap the Ctrl-C (Command-C on a Mac).
Then, paste these frame-centric keyframes on number 1:50.
So, the nice looping animation is over now! It looks genuine, but we need to add some head motion to improve the illusion.
Just rotate the head back ever so slightly. But, as you can see, it makes a huge difference. Alright! Congratulations! We now have an idle animation!
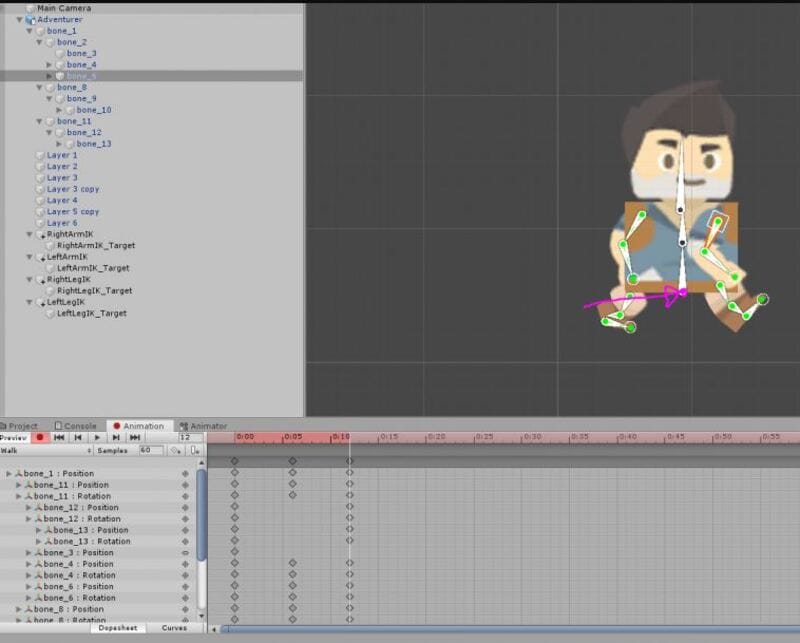
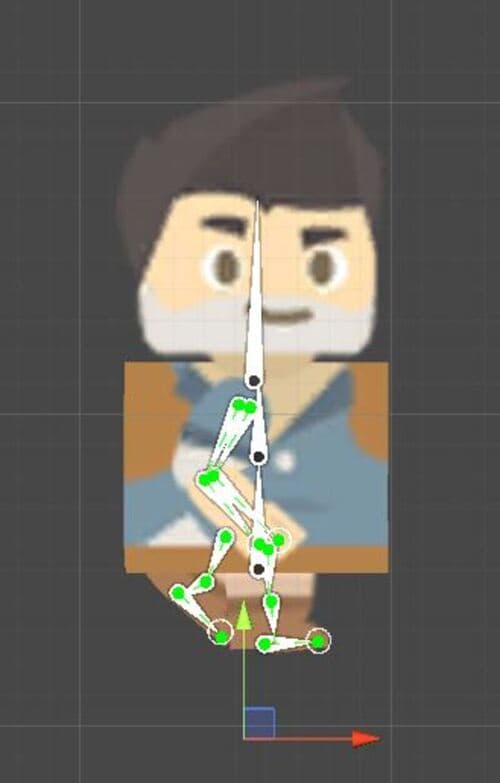
03Step 3: Start walk animation
Create a new animation clip called ‘Walk.”
This animation is a bit more technical. Here, we need to know a few essential things about walk locomotion. The walk animation’s primary function is that the character is always touching the ground. Therefore, we should never have a pose where our character is airborne. Also, I use the word “pose” intentionally. When we animate in 2D, an action comprises certain key poses. In the scenario of the walk animation, we have one posture like this:
Here we have the right foot (relative to the character) touching the ground as you wander.
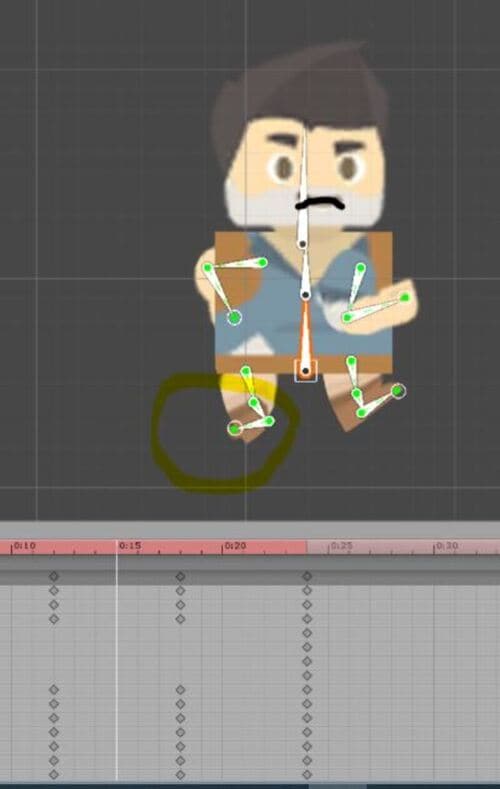
Then, about six frames ahead, we have a “passing pose.”
It contains a slight movement downwards. It further adds a realistic bobbing motion.
We must animate the character moving forward by moving the entire character game object. Don’t move the surface by any other means except by dragging the character as the whole object.
Then, the “dynamic pose” with the left foot touching the ground this time.
This happens at frame twelve, and we are still forwarding the character.
Now, we just require a final passing pose.
And then we recreate the same pose!
Now, copy the first keyframe and paste it. Reposition the character on the X-axis to match the forward motion. Now, go back to your animation and tweak any limbs bending in the wrong direction.
We are done!
04Step 4: Run animation
For the Run animation, create one pose with the airborne character. The distance covered is also more significant than the walk animation. Besides, the run animation has a similar general structure, but we add one extra pose to improve the illusion ultimately.
Create a new animation folder or clip called “Run.”
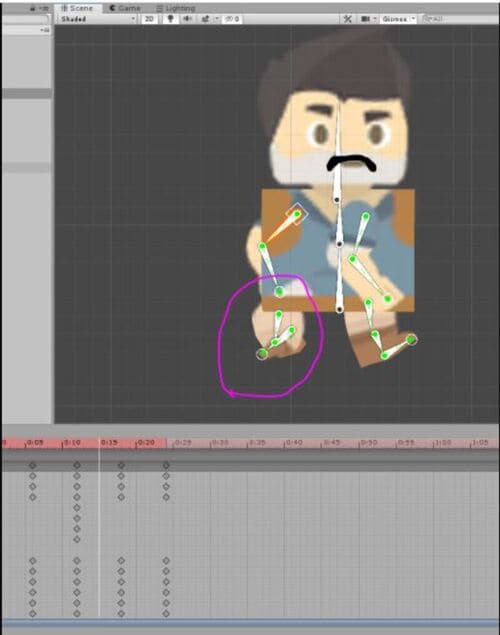
Tap the record tab and move the limbs to this pose:
The armature, we found, was very fiddly, so be patient while trying to create this pose. This first dynamic pose means that we need to have the whole character move slightly up on the y-axis. Then, after forwarding the six frames, we drag the character in different positions and down while limbs reposition to make the first passing pose.
Go through these two keyframes to check if you have an experimental animation. Reposition the feet to avoid foot sliding.
Then, the second dynamic pose happens six frames forward:
Now, we have another passing posture at frame number 18:
And conclusively, we have our final dynamic pose and make it look like the first pose. An excellent place to begin is to copy the first frame and paste it at the end. Drag the character forward on the X-axis into the ideal place. Now move the limbs into roughly the exact position as the beginning pose.
05Step 5: Go back to animation and check
Now, you can go back through the animation and consider checking two things. Firstly, correct any unnaturally bent limbs.
06Step 6: Create a contact pose
Secondly, we are required to add a unique pose to this run cycle called a “Contact Pose,” where we can visibly see the character make contact with the ground. This pose occurs a few frames after the dynamic pose and a few before the passing pose. It is simply the forward leg making early contact with the ground.

We need one of these before every passing pose. Also, while we’re here, let’s add a little more toe movement after passing each passing pose to make it look like the character got pushed off the ground.
So, this is the procedure to use the best 2D animation software for game development via Unity, and you can similarly continue to make jump animations, root motion, and more.
This tutorial mainly focused on animating a 2D character and dove deeper into the actual structure of an animation. Knowing these things will allow you to animate 2D characters and 3D characters as the principles are the same for each medium.
Easiest Solution for 2D Game Character Animation
Animating 2D games with Filmora Pro is a perfect choice. You get to try out its excellent 2D and 3D animation functions that are highly affordable and simple to use for both Android and iOS devices. You can consider using keyframe animations and letting them look realistic.
You can also get your fingers on a vast range of video editing tools with Wondershare Filmora Video Editor , such as color correction and grading, motion tracking, keying, simulations, and more. It allows you to make incredible animated videos and cinematic reels.
How to animate games with Wondershare Filmora
More advancement means more and kinds of games are fading out to obscurity. You can now animate 2D games underrated and add a bit of your touch to them via software like Filmora Pro and others like it.
For example, Filmora Pro features a dozen different transition effects like Centre Wipe, Evaporate, or Linear Wipe.
For Win 7 or later (64-bit)
For macOS 10.12 or later
You can also apply 3D rendering techniques to your games’ light and shadow effects.
● Key Takeaways from This Episode →
● A guide to the ultimate 2d game character design & animation course
● A guide to 5 best game animation services
● Learning five best 2D game character animation tools
● Tips for making excellent 2D game animations
● A step by ultimate step guide to making 2D game animation character in Unity
● Exploring the easiest solution for 2D game animation
In this dominated era by 2D game animation, when even the latest versions of Super Mario Bros and Street Fighter. are created of polygonized characters, quality sprite-based 2D games are rare.
In this article
01 [2D Game Animation Courses and Tutorials](#Part 1)
02 [5 Best Game Animation Services to Buy Online](#Part 2)
03 [Best 5 Game Animation Tools for Development As of 2022](#Part 3)
04 [3 Tips for Making Great Animations for 2D Games](#Part 4)
05 [How to Make 2D Animation for Games](#Part 5)
Part 1 2D Game Animation Courses and Tutorials
01Animating a 2D Character within Live-Action Video in Photoshop and Premiere
This tutorial greatly defines the process of creating traditional 2D animation in Photoshop implacable over live-action video. We’ll discuss the live-action planning shots with animation in mind, continuity of video editing, and making references for video animation. You will also know how to create the critical poses via rough animation to finish the entire movement and make final line images.
02Beginning 2D Animation: The Absolute Beginner’s Entry with Jeff Mumm
This course lays a solid foundation for absolute beginners entering the exciting world of 2D game animation. Here, we describe the detailed steps to create unique and great-looking animations.
You will also learn ‘easing,’ one of the twelve animation principles, and ultimately plan an animated sequence.
032D Animation in Moho from Basic to Advanced
This course focuses on applying the principles of animation to create an organic walk cycle for the character. This tutorial or course will also teach you how to rig and prepare your animated characters and do 2D game animation.
You will also learn how to trace characters in Moho and use different drawing tools.
Also, you will learn how to create an organic walk cycle by applying advanced animation principles.
042D Animation 101 Courses
This is one of the free online and the ultimate 2D game character design and animation courses that offer free online certificates. Autumn Leave Films has ten years of experience in the film industry and a great collection of short films – nearly 30 2D Animation 101 Courses.
2D Animation 101 provides eight courses, plus free and proprietary 2D game character animation software. In addition, their “Free Step-by-Step Plan” is specifically compelling to beginners in the 2D Animation arena.
It includes daily 10-minute lessons, online 2D game character animation tutorials, suggestions, and tips on using the required software.
05Skillshare -2D Animation for Beginners with Adobe Animate
This is one of the free online 2D animation courses that offer free online animation courses with certificates. You can learn 2D animation online by following Walt’s course. This course is designed for beginners and demonstrates how to create animated characters by providing students with an understanding of the fundamental principles and vivid examples. This tutorial covers various topics, including vector art basics in Animate, nested animations, adding audio to animations, and more.
This short course or tutorial is ideal for animation for personal rather than professional reasons.
Part 2 5 Best Game Animation Services to Buy Online
Rather than using and learning the best 2D animation software for game development, we’d like to describe a list of the top 5 freelancing platforms to rely upon for the best game animation services.
01Upwork
02Freelancer
03Fiverr
04Guru
05PeoplePerHour
Part 3 Best 5 Game Animation Tools for Development As of 2022
01Adobe Animate
It is a program from Adobe’s Creative Cloud. It offers the ability to make many varieties of animated features, games, or other Flash multimedia. The program was called Adobe Flash Professional for more than ten years; that name was retired in 2015.
The main features of Animate are as follows:
● Integration with your Adobe cloud library of assets
● Easy cross-platform use with other Adobe products
● Creates animated movies, cartoons, or clips
● Creates Flash games or interactive Flash utilities
02Moho
It’s a comprehensive and best 2D game animation software where your animations are basically on the level of some of your favorite creations. It’s projected toward animators looking to hone their craft.
You could create some fantastic stuff if you’re up to the task (and the price). Moreover, they’re constantly adding updates.
03Plastic Animation Paper
Plastic Animation Paper is another best 2D game character animation software that deals heavily with the concept of pencil drawing.
The program is designed for the most straightforward use and involves clear resolution. You can do whatever you wish with your drawings and elevate yourself to the next level.
04Stop Motion Studio
‘Want to create movies like Wallace and those groovy Lego shorts on YouTube? Stop Motion Studio allows you to create terrific stop action movies with a bucket of specialized features.’
05Animaker
Learning how to make 2D animation for games with Animaker is also good to set up a storyboard and animate the characters or props in that scene. It’s used by companies like Verizon, Google, Pepsi, etc.
It’s appropriate for ad placement on websites and simplistic for beginners. They make it easy and super-fast to get lost for hours animating.
Part 4 3 Tips for Making Great Animations for 2D Games
Now that you have some initial idea of 2D game animation let’s jump to the top 3 tips that will help you create the best and unique 2D game character animation designs with ease.
It will be beneficial while knowing how to make 2D animation for games.
01Focus on the story and start with simple movements
You need to focus on the storyline so that outcome will come accordingly. Focus on every detail while sketching, and don’t miss out on simple movements. Take paper and pencil and start drawing simple exercises like the movement of a bouncing ball etc.
02Use keyframes properly
You need to carefully use keyframes’ start and endpoints to have robust storytelling and movements. To adequately describe the first and last, you need to consider effectively using the keyframes.
03Enliven your characters
You need to give life to your characters so that audience can best relate to the story. Also, pay good attention to facial expressions, sound, tickling movements, etc.
Although these may look like the most straightforward tips ever, these are the most practical 2D game animation strategies that can do wonders if used effectively.
Part 5 How to Make 2D Animation for Games
Making 2D game character animation isn’t a straightforward process and thus needs detailed knowledge that we will describe below.
Let’s use Unity as the best 2D animation software for games without further ado!
Essential awareness of the Unity Editor (how to navigate and open tabs) is required to work with the Unity Animation window.
01Step 1: Start the Animation tab
Choose the Adventurer character and launch the Animation tab.
Dock this next to your project tab and console tab. Head towards the project tab and name with the Adventurer folder. Make a new folder known as “Animation.”
With the Animation tab, create a new animation known as “Idle” placed in our Animation folder.
It also creates an Animator Controller in that same folder.
Now, let’s start animating this character!
02Step 2: Proceed with the Idle Animation
IKs contribute a lot to the efficiency and speed of animating when it comes to idle animation. We must animate a subtle movement very similar to a breathing motion. Tap the red record button and move the character to this position:
Now go about fifty frames ahead and barely move the top torso bone straight down.
Drag the arm IKs to the side to contain less bend in them and display a sort of “swinging” motion. Here is the pose that I chose:
A subtle tweak is there. It makes the idle animation look strange if we create large movements. Then, choose the first group of keyframes and tap the Ctrl-C (Command-C on a Mac).
Then, paste these frame-centric keyframes on number 1:50.
So, the nice looping animation is over now! It looks genuine, but we need to add some head motion to improve the illusion.
Just rotate the head back ever so slightly. But, as you can see, it makes a huge difference. Alright! Congratulations! We now have an idle animation!
03Step 3: Start walk animation
Create a new animation clip called ‘Walk.”
This animation is a bit more technical. Here, we need to know a few essential things about walk locomotion. The walk animation’s primary function is that the character is always touching the ground. Therefore, we should never have a pose where our character is airborne. Also, I use the word “pose” intentionally. When we animate in 2D, an action comprises certain key poses. In the scenario of the walk animation, we have one posture like this:
Here we have the right foot (relative to the character) touching the ground as you wander.
Then, about six frames ahead, we have a “passing pose.”
It contains a slight movement downwards. It further adds a realistic bobbing motion.
We must animate the character moving forward by moving the entire character game object. Don’t move the surface by any other means except by dragging the character as the whole object.
Then, the “dynamic pose” with the left foot touching the ground this time.
This happens at frame twelve, and we are still forwarding the character.
Now, we just require a final passing pose.
And then we recreate the same pose!
Now, copy the first keyframe and paste it. Reposition the character on the X-axis to match the forward motion. Now, go back to your animation and tweak any limbs bending in the wrong direction.
We are done!
04Step 4: Run animation
For the Run animation, create one pose with the airborne character. The distance covered is also more significant than the walk animation. Besides, the run animation has a similar general structure, but we add one extra pose to improve the illusion ultimately.
Create a new animation folder or clip called “Run.”
Tap the record tab and move the limbs to this pose:
The armature, we found, was very fiddly, so be patient while trying to create this pose. This first dynamic pose means that we need to have the whole character move slightly up on the y-axis. Then, after forwarding the six frames, we drag the character in different positions and down while limbs reposition to make the first passing pose.
Go through these two keyframes to check if you have an experimental animation. Reposition the feet to avoid foot sliding.
Then, the second dynamic pose happens six frames forward:
Now, we have another passing posture at frame number 18:
And conclusively, we have our final dynamic pose and make it look like the first pose. An excellent place to begin is to copy the first frame and paste it at the end. Drag the character forward on the X-axis into the ideal place. Now move the limbs into roughly the exact position as the beginning pose.
05Step 5: Go back to animation and check
Now, you can go back through the animation and consider checking two things. Firstly, correct any unnaturally bent limbs.
06Step 6: Create a contact pose
Secondly, we are required to add a unique pose to this run cycle called a “Contact Pose,” where we can visibly see the character make contact with the ground. This pose occurs a few frames after the dynamic pose and a few before the passing pose. It is simply the forward leg making early contact with the ground.
We need one of these before every passing pose. Also, while we’re here, let’s add a little more toe movement after passing each passing pose to make it look like the character got pushed off the ground.
So, this is the procedure to use the best 2D animation software for game development via Unity, and you can similarly continue to make jump animations, root motion, and more.
This tutorial mainly focused on animating a 2D character and dove deeper into the actual structure of an animation. Knowing these things will allow you to animate 2D characters and 3D characters as the principles are the same for each medium.
Easiest Solution for 2D Game Character Animation
Animating 2D games with Filmora Pro is a perfect choice. You get to try out its excellent 2D and 3D animation functions that are highly affordable and simple to use for both Android and iOS devices. You can consider using keyframe animations and letting them look realistic.
You can also get your fingers on a vast range of video editing tools with Wondershare Filmora Video Editor , such as color correction and grading, motion tracking, keying, simulations, and more. It allows you to make incredible animated videos and cinematic reels.
How to animate games with Wondershare Filmora
More advancement means more and kinds of games are fading out to obscurity. You can now animate 2D games underrated and add a bit of your touch to them via software like Filmora Pro and others like it.
For example, Filmora Pro features a dozen different transition effects like Centre Wipe, Evaporate, or Linear Wipe.
For Win 7 or later (64-bit)
For macOS 10.12 or later
You can also apply 3D rendering techniques to your games’ light and shadow effects.
● Key Takeaways from This Episode →
● A guide to the ultimate 2d game character design & animation course
● A guide to 5 best game animation services
● Learning five best 2D game character animation tools
● Tips for making excellent 2D game animations
● A step by ultimate step guide to making 2D game animation character in Unity
● Exploring the easiest solution for 2D game animation
How to Animate - Adobe Animate Tutorias
How to Animate - Adobe Animate Tutorial for All
An easy yet powerful editor
Numerous effects to choose from
Detailed tutorials provided by the official channel
Now, since the tool has too many elements to understand, it’s always a good strategy to start your journey with a dedicated Adobe Animate CC tutorial.
In today’s guide, we are going to introduce a few of these tutorials so that you can easily start creating animations in Adobe Animate CC, even if you have zero prior experience with the software.
In this article
01 [Adobe Animate CC tutorial](#Part 1)
02 [How Do You Animate in Adobe Animation?](#Part 2)
03 [Other Rare Tutorials for Self-learning to Learn How to Animate](#Part 3)
Part 1 Is Adobe Animate Good for Beginners?
When people start their careers as graphic designers, they always struggle to pick the right tool to accompany them during their journey. Since there are too many options to choose from, beginners always end up comparing a tool with other available options. They even weigh the pros and cons of each animation software individually to make the best decision. The same is the case with Adobe Animate. Many beginners want to know if Adobe Animate is the right animation software to get started as a professional graphic designer.
Since the Adobe community continues to grow rapidly, you’ll also be able to find a variety of Adobe Animate tutorials quite easily.
So, as far as beginner-friendliness is concerned, Adobe Animate is a complete winner that anyone can use to create stunning animations, designs, and templates right on their PCs.
Part 2 How Do You Animate in Adobe Animation?
1. Introduction to Adobe Animate
For complete beginners, there’s nothing better than a one-stop tutorial that provides a detailed insight into the basics of Adobe Animate and helps them get familiar with different elements of the software.
Well, this 2 hours 30 minutes long YouTube Adobe Animate tutorial by TipTut is what you need to start your journey with the software. The tutorial involves everything, starting from the simple setup to creating your first animation. You can either download this tutorial on your system or watch it online to understand the basic workflow of Adobe Animate.
Key Features:
● Learn how to set up a project in Adobe Animate.
● Adjusting the elements (such as frame rate) of your first animation.
● Completing your first animation using colors, gestures, and simple movement.
2. Creating HTML Banner Ads
Apart from regular 2D animations, some designers also use Adobe Animate to create dedicated banner ads for their marketing campaigns using HTML 5. This will be a pretty useful Adobe Animate tutorial PDF for anyone who wants to join a marketing firm or plan exclusive marketing campaigns for his own products/services.
Key Features:
● Learn how to build HTML banner ads from scratch.
● Get familiar with the overall process of publishing a banner ad on platforms like Google AdWords.
● Understand how to keep the file size of a banner down to keep it optimized.
3. Animate CC Game Development
As we mentioned earlier, some people also use Adobe Animate to design games. If you want to follow the same career, this Adobe Animate CC tutorial is for you.
All the games developed in Adobe Animate are designed in HTML 5 and are usually web-based. By the end of this tutorial, you would have built a fully-functional game in Adobe Animate.
Key Features:
● Creating the game world.
● Understanding CreateJS Overview in Adobe Animate CC.
● Building in-game assets and configuring their unique features.
4. 2D Animation for Beginners
This is another useful Adobe Animate tutorial for all the beginners out there. Compiled by Walt Wonderwolk, the tutorial is separated into 12 parts in which he has explained different features of Adobe Animate in detail.
Key Features:
● Designing graphic vectors in Adobe Animate.
● Each feature is explained with a respective example.
● Learn how to add sounds to your animations to make them visually appealing.
5. Adobe Animate for Social Media
Being a feature-packed animation software, you can also use Adobe Animate to create content for your social media profiles. To do this, however, you must be familiar with all the necessary features of the tool. This 1.5 hours long tutorial will help you get familiar with features such as the tweening system that’ll help you turn regular social media posts into stunning animations.
Key Features:
● Designing simple assets and designs for social media.
● Exporting GIFs and Animated Videos.
● Customizing stills and motion graphics in Adobe Animate.
Key Takeaways from This Episode
● Adobe Animate boasts different applications, ranging from simple 2D animations to game designing
● Since Adobe Animation is an extensive software, it’ll always be a wise decision to get started with Adobe Animate tutorials.
● After you have compiled designs/animations in Adobe Animate, Wondershare Filmora Pro will help you enhance its overall quality.
How To Learn Cartoon Sketch Drawing— Pencil Sketch for Beginners
How To Learn Cartoon Sketch Drawing— Pencil Sketch for Beginners
An easy yet powerful editor
Numerous effects to choose from
Detailed tutorials provided by the official channel
If you are learning how to draw, particularly cartoon sketches drawing, you must start at a beginner’s level. No skill is difficult if you just put your mind to it. You can learn the basics of the beginning, what you must do, and a learning curve, but if you have passion for it or love what you are doing, you will give it time to practice.
It all boils down to practicing it. Knowing how to draw beautiful sketch cartoons drawing is not a complex thing to do if you start at the beginner’s level.
So, for all who are reading this article, we will show sketch drawings of cartoons, i.e., how to draw step by step in an understandable manner.
In this article
01 [Collection of 8 Hottest Cartoon Drawings](#Part 1)
02 [How to Draw Cartoon Step by Step Easy Pencil Drawing](#Part 2)
Part 1 Collection of 8 Hottest Cartoon Drawings
Here’s a collection of 8 hottest cartoon love drawing pencil sketches for you.
01Motlu Patlu
This is a sketch of the Motu Patlu cartoon drawing. The artist used some simple forms such as a pear shape while developing the body in making this sketch. The pear shape helps in developing the bodies of cartoon characters.

02Basketball Sketch Drawing
The cartoon basketball drawing is one of our top picks wherein the artist took his time to get every detail in the scene. The image alone tells the story.

03Tom and Jerry Sketch drawing
If you were a lover of the famous cartoon Tom and Jerry, you should know this. Here’s a sketch cartoon drawing of Tom and Jerry.

04Cat Sketch
Isn’t this beautiful sketch cartoon drawing of a cat just it? The way the artist details it and gets the perfect fit made it part of our collection.

05Cute Cartoon love sketch
We couldn’t have finished this list without adding this beautiful sketch cartoon drawing.

06Homer
This cartoon sketch drawing of Homer in the Simpsons is just it. Looking at the body build, you can easily trace the outline of the pear-shaped form.

07Cute Cartoon Drawing
This drawing cartoon sketch caught our attention, and we are sure you would love it. With the round head and pear-shaped belly, you will agree that you can start your learning journey with the steps listed in this article.

08Cartoon love drawing
This sketch cartoon drawing portrays the love between a girl and a boy. It is one attractive sketch that shows details of expressions on the faces.

Part 2 How to Draw Cartoon Step by Step Easy Pencil Drawing
An essential factor you must bear in mind is that you must not let go of your creativity when learning how to draw.
You have to be free with yourself and try to create cartoon sketch drawings of characters that you love.
The more it’s about something you love, the better you get at it.
Here’s a step-by-step process of an easy pencil drawing or sketch cartoon drawing.
● Step 1: Draw a circle
Draw a circle and a “noodle” shape, as shown in the illustration. The head is a circle, and the body is a pear form.
The lower half of the pear is fatter than the top. Take note of how the upper half slightly overlaps the head circle.

● Step 2: Draw a pair of eyes.
As shown in the image, add the perspective guidelines around the head. These recommendations will assist you in correctly positioning your rabbit’s eyes and nose.
Above the horizontal guideline, draw the eyes. Where the parameters cross is where the nose is put.

● Step 3: Draw the cheek and Wings
Make the cheekbones. As shown in the illustration, add the ears and arms. It’s OK if the ear shapes differ somewhat from those displayed.
Notice how the arm contour curve organically emerges from behind the shoulders when you sketch the arms. Make it this way if you can.

● Step 4: Draw the legs
Draw the legs and tail of the animal. The arm and leg curves may appear to be challenging. As a result, be gentle with your pencil. Don’t yank on the pencil too hard!
Your cartoon rabbit’s shape is now plainly evident.

● Step 5: Draw the mouth
Let’s focus on the face for a moment. Draw an iris ellipse and an inner line in the ear inside the eyes. Include the nose. Draw the mouth and the teeth.

● Step 6: Outline the contours
Because rabbits eat carrots, this one eats them in excess. Outline the carrot’s outlines. On the legs, draw the brows and the fingers.
As you may have observed, I messed up the teeth in the previous image. Therefore I deleted the thick black pencil lines that were superfluous.
Erase and Shade (Step 8)

● Step 7: Outline the Character
Now, outline the contours of the entire character with a softer pencil. You can pick up B4 or B6 (if you don’t have either, try HB). Please leave a little bright dot on the nose while darkening it.

● Step 8: Erase and Shade
Remove everything that isn’t required. See? That is how your bunny should seem.
I also advocate using a pencil-type eraser in addition to regular or kneaded erasers. Shade the entire rabbit’s body if you’re using a graphite pencil. The inside of the ear, the belly, the paws, and the tail can all be white or brighter.

●Bonus Software for Beautiful Sketch Cartoon Drawing:
Wondershare Filmora Video Editor is a superb video editing software developed by Wondershare. It is a simple entry-level version with preset video templates and effects. With the numerous powerful features in Filmora, we can add amazing effects to our cartoon sketches to make them look better.
For Win 7 or later (64-bit)
For macOS 10.12 or later
Here’s how to use Filmora for cartoon sketch drawing enhancements.
Chroma key (Green screen): This feature can change the background of your sketched cartoon drawing photo by adding special effects to make it look nice.
Color Match: Color match is a feature in Filmora used to apply color correction settings in a video. You can use this feature to enhance your sketches.
Mask and blend: Filmora mask and blend feature has resourceful modes and is easy to use. You can use them for your pencil sketched cartoon drawing.
● Ending Thoughts →
● Making beautiful sketch cartoon drawings is not rocket science. It is a result of consistent practice.
● In this article, we have given you key points and strategies you can use to start practicing cartoon sketch drawing. However, do begin from our idea, i.e., a circle for the head and a pear for developing the body.
● Thus, your journey to learning how to draw cartoons step by step quickly with a pencil is already a walkover.
If you are learning how to draw, particularly cartoon sketches drawing, you must start at a beginner’s level. No skill is difficult if you just put your mind to it. You can learn the basics of the beginning, what you must do, and a learning curve, but if you have passion for it or love what you are doing, you will give it time to practice.
It all boils down to practicing it. Knowing how to draw beautiful sketch cartoons drawing is not a complex thing to do if you start at the beginner’s level.
So, for all who are reading this article, we will show sketch drawings of cartoons, i.e., how to draw step by step in an understandable manner.
In this article
01 [Collection of 8 Hottest Cartoon Drawings](#Part 1)
02 [How to Draw Cartoon Step by Step Easy Pencil Drawing](#Part 2)
Part 1 Collection of 8 Hottest Cartoon Drawings
Here’s a collection of 8 hottest cartoon love drawing pencil sketches for you.
01Motlu Patlu
This is a sketch of the Motu Patlu cartoon drawing. The artist used some simple forms such as a pear shape while developing the body in making this sketch. The pear shape helps in developing the bodies of cartoon characters.
02Basketball Sketch Drawing
The cartoon basketball drawing is one of our top picks wherein the artist took his time to get every detail in the scene. The image alone tells the story.
03Tom and Jerry Sketch drawing
If you were a lover of the famous cartoon Tom and Jerry, you should know this. Here’s a sketch cartoon drawing of Tom and Jerry.
04Cat Sketch
Isn’t this beautiful sketch cartoon drawing of a cat just it? The way the artist details it and gets the perfect fit made it part of our collection.
05Cute Cartoon love sketch
We couldn’t have finished this list without adding this beautiful sketch cartoon drawing.
06Homer
This cartoon sketch drawing of Homer in the Simpsons is just it. Looking at the body build, you can easily trace the outline of the pear-shaped form.
07Cute Cartoon Drawing
This drawing cartoon sketch caught our attention, and we are sure you would love it. With the round head and pear-shaped belly, you will agree that you can start your learning journey with the steps listed in this article.
08Cartoon love drawing
This sketch cartoon drawing portrays the love between a girl and a boy. It is one attractive sketch that shows details of expressions on the faces.
Part 2 How to Draw Cartoon Step by Step Easy Pencil Drawing
An essential factor you must bear in mind is that you must not let go of your creativity when learning how to draw.
You have to be free with yourself and try to create cartoon sketch drawings of characters that you love.
The more it’s about something you love, the better you get at it.
Here’s a step-by-step process of an easy pencil drawing or sketch cartoon drawing.
● Step 1: Draw a circle
Draw a circle and a “noodle” shape, as shown in the illustration. The head is a circle, and the body is a pear form.
The lower half of the pear is fatter than the top. Take note of how the upper half slightly overlaps the head circle.
● Step 2: Draw a pair of eyes.
As shown in the image, add the perspective guidelines around the head. These recommendations will assist you in correctly positioning your rabbit’s eyes and nose.
Above the horizontal guideline, draw the eyes. Where the parameters cross is where the nose is put.
● Step 3: Draw the cheek and Wings
Make the cheekbones. As shown in the illustration, add the ears and arms. It’s OK if the ear shapes differ somewhat from those displayed.
Notice how the arm contour curve organically emerges from behind the shoulders when you sketch the arms. Make it this way if you can.
● Step 4: Draw the legs
Draw the legs and tail of the animal. The arm and leg curves may appear to be challenging. As a result, be gentle with your pencil. Don’t yank on the pencil too hard!
Your cartoon rabbit’s shape is now plainly evident.
● Step 5: Draw the mouth
Let’s focus on the face for a moment. Draw an iris ellipse and an inner line in the ear inside the eyes. Include the nose. Draw the mouth and the teeth.
● Step 6: Outline the contours
Because rabbits eat carrots, this one eats them in excess. Outline the carrot’s outlines. On the legs, draw the brows and the fingers.
As you may have observed, I messed up the teeth in the previous image. Therefore I deleted the thick black pencil lines that were superfluous.
Erase and Shade (Step 8)
● Step 7: Outline the Character
Now, outline the contours of the entire character with a softer pencil. You can pick up B4 or B6 (if you don’t have either, try HB). Please leave a little bright dot on the nose while darkening it.
● Step 8: Erase and Shade
Remove everything that isn’t required. See? That is how your bunny should seem.
I also advocate using a pencil-type eraser in addition to regular or kneaded erasers. Shade the entire rabbit’s body if you’re using a graphite pencil. The inside of the ear, the belly, the paws, and the tail can all be white or brighter.
●Bonus Software for Beautiful Sketch Cartoon Drawing:
Wondershare Filmora Video Editor is a superb video editing software developed by Wondershare. It is a simple entry-level version with preset video templates and effects. With the numerous powerful features in Filmora, we can add amazing effects to our cartoon sketches to make them look better.
For Win 7 or later (64-bit)
For macOS 10.12 or later
Here’s how to use Filmora for cartoon sketch drawing enhancements.
Chroma key (Green screen): This feature can change the background of your sketched cartoon drawing photo by adding special effects to make it look nice.
Color Match: Color match is a feature in Filmora used to apply color correction settings in a video. You can use this feature to enhance your sketches.
Mask and blend: Filmora mask and blend feature has resourceful modes and is easy to use. You can use them for your pencil sketched cartoon drawing.
● Ending Thoughts →
● Making beautiful sketch cartoon drawings is not rocket science. It is a result of consistent practice.
● In this article, we have given you key points and strategies you can use to start practicing cartoon sketch drawing. However, do begin from our idea, i.e., a circle for the head and a pear for developing the body.
● Thus, your journey to learning how to draw cartoons step by step quickly with a pencil is already a walkover.
Adobe Animate CC: Everything You Need to Know
Adobe Animate CC: Everything You Need to Know

Liza Brown
Mar 27, 2024• Proven solutions
In this article, we are going to clue you in on the new features of 2D animation maker Adobe Animate CC. So, if you are confused about flash animation tool and you are up to a project, just go for Animate CC.
You might also like: 10 Best 2D Animation Software in 2020 [Free/Paid]
What is Adobe Animate CC?
The animation lovers when seeking to serve the purpose, must have used and heard about Adobe Flash, but now we would here inform you that Adobe Animate CC has now replaced the old Adobe Flash.
Along with renaming the tool, the evolution from Flash to Adobe Animate CC has added a wide range of advanced functionalities like support to WebGL and HTML5 canvas.
You will not regret your decision after reading this article and will find that using Adobe Animate CC is a wise choice. Hence, let’s begin to get enlightened on the features.
New features of Adobe Animate CC
1. Adobe Animate Camera
Adobe Animate CC introduces virtual camera functionality unlike other animation software . With the help of this feature, you can easily stimulate your camera’s movement giving your animation a more realistic view.
Making it simpler, you can effortlessly execute panning, zooming and rotating to your animations if you wish. Using the virtual camera in Animate CC, you will be enabling to add more dramatic effects while creating an animation.
For instance, if there’s a fighting scene in our animated movie, you can rotate at the moment the scene shows destruction to give it a dramatic effect or you can zoom in or out and change the viewer’s attention from one point to the other.
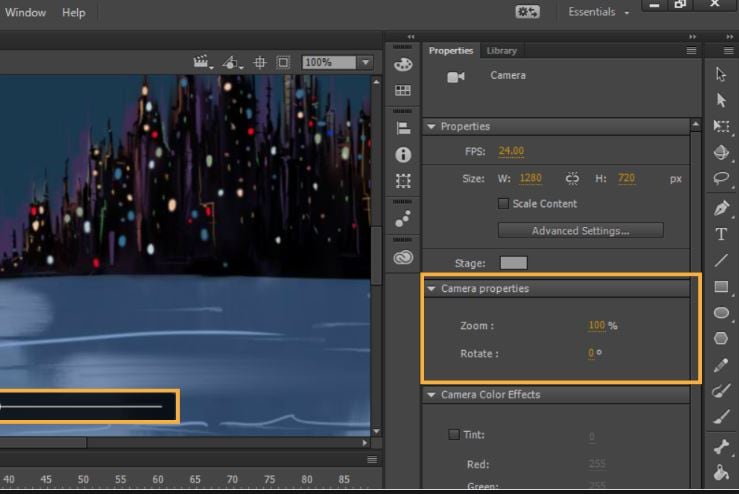
2. Export format
Adobe Animate CC has adapted the web standards for the exporting your animation which makes it easier for everyone to view it from desktop to mobile device.
This tweak has revolutionized the web based flash animation by simply eliminating the annoying “need to install a flash player plug-in” which was in case of Flash Professional Platform. With Adobe Animate, users can export content for WebGL, HTML5 Canvas, 4k video easily.
Moreover, you can generate the keyframes based sprite-sheet and animate them accordingly using the CSS. Adapting web standards doesn’t mean that Adobe Animate CC has entirely abandoned the SWF format.
Users do have a privilege to export their files to Flash Player format. Furthermore, a new OAM packaging is also introduced by new Adobe Animate CC which enables you to package assets in .zip format.

3. Vector brushes
Another important functionality that Adobe Animate has brought is giving the opportunity to create vector brushes. This is kind of same as that used in Adobe Illustrator. With this update in brushing tools, one can have pressure and tilt functionalities on drawing of lines and strokes with the help of pen or stylus.
This is helpful in creating strokes in touch-sensitive devices. The width can be changed according to how much pressure you apply when creating patterns. So, if you wish to create 2D vector graphics using shapes, patterns, curves etc. Animate CC would be a good choice.
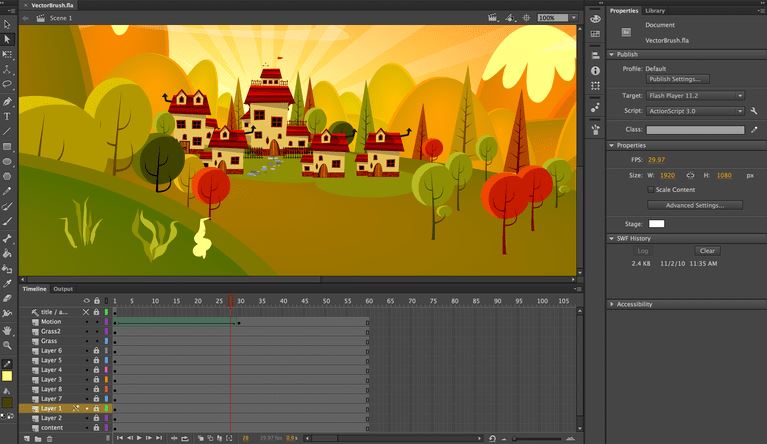
4. Audio Syncing
The timeline feature of the tool will now allow the users to sync audios in their animations and this is a yet another feature that Animate CC has added. This means you can do audio synchronization for your animation series.
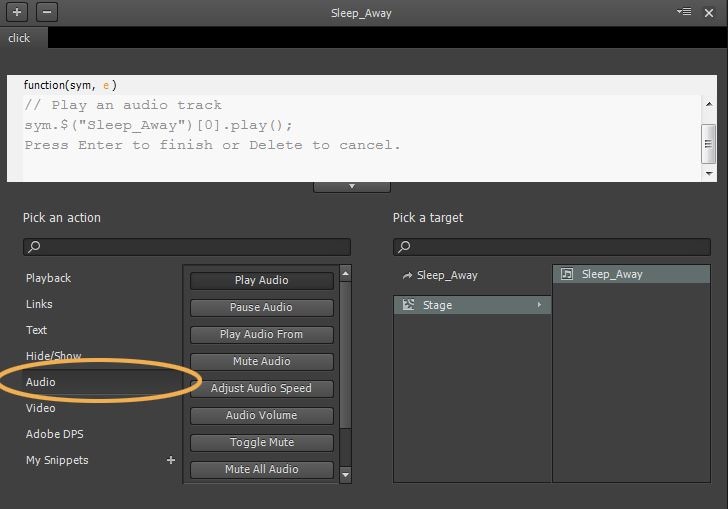
Nevertheless, doing this can be a little demanding as well as time-consuming with HTML5 alone. In addition, you also get enabled for audio loop control with the Adobe Animate CC’s timeline feature.
5. Font
Adobe Animate CC comes now with integration of Typekit where you get countless premium web fonts. These web fonts will be present for HTML5 canvas documents in the tool. Users can pick out from thousands of high-quality fonts via a subscription plan.
Putting in different words, first you can try some selected fonts available in the Typekit library via any level of Creative Cloud plan. Then when you subscribe by spending some money, you can then get access to complete Typekit library where there are thousands of premium fonts for HTML5 canvas.

Final Verdict
Animation industry is no doubt a very interesting one and having the best tool can make it more interesting and fun. After making you familiarize with the top functionalities that are coming with Adobe Animate CC, we feel it would be fair to end the discussion here. Hope you will not give a second thought on Animate CC when need to do flash animation.
Before ending, one more thing that we would like to give the other thought by introducing you Filmora.
No, this is a not another feature, but an interesting yet powerful video editing software created by Wondershare, one of the leading brand in multimedia field. You can use this tool and get your animated videos edited using its extraordinary effects.
Liza Brown
Liza Brown is a writer and a lover of all things video.
Follow @Liza Brown
Liza Brown
Mar 27, 2024• Proven solutions
In this article, we are going to clue you in on the new features of 2D animation maker Adobe Animate CC. So, if you are confused about flash animation tool and you are up to a project, just go for Animate CC.
You might also like: 10 Best 2D Animation Software in 2020 [Free/Paid]
What is Adobe Animate CC?
The animation lovers when seeking to serve the purpose, must have used and heard about Adobe Flash, but now we would here inform you that Adobe Animate CC has now replaced the old Adobe Flash.
Along with renaming the tool, the evolution from Flash to Adobe Animate CC has added a wide range of advanced functionalities like support to WebGL and HTML5 canvas.
You will not regret your decision after reading this article and will find that using Adobe Animate CC is a wise choice. Hence, let’s begin to get enlightened on the features.
New features of Adobe Animate CC
1. Adobe Animate Camera
Adobe Animate CC introduces virtual camera functionality unlike other animation software . With the help of this feature, you can easily stimulate your camera’s movement giving your animation a more realistic view.
Making it simpler, you can effortlessly execute panning, zooming and rotating to your animations if you wish. Using the virtual camera in Animate CC, you will be enabling to add more dramatic effects while creating an animation.
For instance, if there’s a fighting scene in our animated movie, you can rotate at the moment the scene shows destruction to give it a dramatic effect or you can zoom in or out and change the viewer’s attention from one point to the other.
2. Export format
Adobe Animate CC has adapted the web standards for the exporting your animation which makes it easier for everyone to view it from desktop to mobile device.
This tweak has revolutionized the web based flash animation by simply eliminating the annoying “need to install a flash player plug-in” which was in case of Flash Professional Platform. With Adobe Animate, users can export content for WebGL, HTML5 Canvas, 4k video easily.
Moreover, you can generate the keyframes based sprite-sheet and animate them accordingly using the CSS. Adapting web standards doesn’t mean that Adobe Animate CC has entirely abandoned the SWF format.
Users do have a privilege to export their files to Flash Player format. Furthermore, a new OAM packaging is also introduced by new Adobe Animate CC which enables you to package assets in .zip format.
3. Vector brushes
Another important functionality that Adobe Animate has brought is giving the opportunity to create vector brushes. This is kind of same as that used in Adobe Illustrator. With this update in brushing tools, one can have pressure and tilt functionalities on drawing of lines and strokes with the help of pen or stylus.
This is helpful in creating strokes in touch-sensitive devices. The width can be changed according to how much pressure you apply when creating patterns. So, if you wish to create 2D vector graphics using shapes, patterns, curves etc. Animate CC would be a good choice.
4. Audio Syncing
The timeline feature of the tool will now allow the users to sync audios in their animations and this is a yet another feature that Animate CC has added. This means you can do audio synchronization for your animation series.
Nevertheless, doing this can be a little demanding as well as time-consuming with HTML5 alone. In addition, you also get enabled for audio loop control with the Adobe Animate CC’s timeline feature.
5. Font
Adobe Animate CC comes now with integration of Typekit where you get countless premium web fonts. These web fonts will be present for HTML5 canvas documents in the tool. Users can pick out from thousands of high-quality fonts via a subscription plan.
Putting in different words, first you can try some selected fonts available in the Typekit library via any level of Creative Cloud plan. Then when you subscribe by spending some money, you can then get access to complete Typekit library where there are thousands of premium fonts for HTML5 canvas.
Final Verdict
Animation industry is no doubt a very interesting one and having the best tool can make it more interesting and fun. After making you familiarize with the top functionalities that are coming with Adobe Animate CC, we feel it would be fair to end the discussion here. Hope you will not give a second thought on Animate CC when need to do flash animation.
Before ending, one more thing that we would like to give the other thought by introducing you Filmora.
No, this is a not another feature, but an interesting yet powerful video editing software created by Wondershare, one of the leading brand in multimedia field. You can use this tool and get your animated videos edited using its extraordinary effects.
Liza Brown
Liza Brown is a writer and a lover of all things video.
Follow @Liza Brown
How To Create Animated Clipart in PowerPoint
How To Create Animated Clipart in PowerPoint
An easy yet powerful editor
Numerous effects to choose from
Detailed tutorials provided by the official channel
Clipart is a special type of graphic art. There are pre-made images that are used to illustrate all sorts of things.

The use of animated clipart is increasing day by day. Here, we will discuss the steps of creating animated clipart for PowerPoint.
In this article
01 [What is Moving Clipart Called?](#Part 1)
02 [Where Can I Find Free Animated Clipart?](#Part 2)
03 [How Do You Add an Animated Clipart to a Slide?](#Part 3)
Part 1 What is Moving Clipart Called?
The moving clipart is basically called animated clipart or Animated Gifs. These are easy and quick ways to present contents that are dynamic, especially on Web pages. The sizes of these files are small compared to the other alternatives for creating dynamic content like Flash and Java. If you would like to learn more about video animation , you can watch this tutorial:
For Win 7 or later (64-bit)
For macOS 10.12 or later
These are several images that are encoded in GIF or Graphic interchange format. This contains a number of frames or images within a single file and can be described by the graphic control extension of its own.

Part 2 Where Can I Find Free Animated Clipart?
We all love to use different types of images to express ourselves. However, the process of finding out better quality, copyright > free and also high > resolution free images a really tough task. To make sure that you can find the right one for you, you can go through some really amazing image resources.
These image resources have a huge collection of CCO or Creative Commons licensed and high > quality pictures to meet your different types of needs. Also, keep in mind to check on to the page that is licensed before using any clipart or animated clip art for copyright infringement.
01 Upsplash

Unsplash is a special site that was launched in the year 2013. This site posts ten photos that are handpicked every ten days. These photos are free of charge. As categorized under CCO, this site offers high > quality resolution images that can add beauty as well as credibility to your work.
02 Pixabay

Pixabay was launched in the year 2016 and has 550,000 free illustrations, photos, and vectors. It is equipped with a search engine that is versatile and can easily customize and broaden the search. Thus, this can offer you accurate results regarding your searches.
If you wish to use high > quality public domain pictures or animated clip art, this site can be your perfect option.
03 Public Domain

This website known as Public Domain has a collection of various high > quality pictures, images, and vectors that you can easily use for your animated videos. Especially, vectors are available here in a big number.
04 Openclipart

Though there are many websites where you can get clip arts, very few of them can provide clip arts of excellent quality. This website known as Openclipart is a reliable source of 11,000 designed clip arts that you can easily use in your animation videos.
05 Bing

Bing is no doubt an extensive search engine that can work similarly to Google. Bing has a special filter that has a large number of superior quality public domain images, vectors, clip arts, and illustrations to amaze you.
06 Photopin

As Photopin has millions of free images, many bloggers prefer to use this for their blog posts. However, Photopin does not come under the CCO license. So, you can use their images but you need to add a link to their website.
07 Pond5 creative

Pond5 is the largest online marketplace of the world for royalty–free stock music has now released the creative common category for media with the target to make it easily accessible to their users.
This site offers not only some superior quality free images, but you can also find some special characters, effects, vectors, sounds, animated clip art, 3D models, and many more. You just have to use the filter showing “Public domain only” to get those free licensed images.
08 Clker.com

Clker is mainly used for clip arts. You can easily get numerous clip arts of different sizes without any charges. This is an amazing source of free graphics, vectors, illustrations, etc. Moreover, this site is also licensed under CCO.
Part 3 How Do You Add an Animated Clipart to a Slide?

You can easily add animated clip art or GIF into the Google slides, to make your creation more visually attractive. To do this task you can choose multiple methods, but the easiest of them is using a GIF URL.
Here is the complete process of how to add a GIF to Google slides using a URL.
01 How to add a GIF to Google Slides using a URL

Step 1Open Your Presentation
Firstly, you need to go to slides.google.com and then open your presentation, or you can also create a new one.
Step 2Choose GIF That You Want to Insert
Click the slide that you want to insert the GIF onto in the sidebar located on the left side.
Step 3Image
In the top toolbar, just select “Insert”, then the “Image” option. After that, select “By URL”.
Step 4Paste URL
Just paste the URL into that box.
Step 5Insert
After that, the GIF will pop up, at that time just click on “Insert”.
02 Can you animate objects in PowerPoint?

How to add animations to the pictures, shapes, texts in a PowerPoint presentation?
Step 1Select the Text
First of all, you have to select the text or object that you wish to animate.
Step 2Select “Animations”
Next, Select “Animations” and choose an animation.
Step 3Choose “Effect Options”
Just choose “Effect Options” and select an effect.
How to manage effects and animations?
● With Previous
You can play an animation simultaneously as the previous animation in you the sequence.
● After previous
You can start an animation right after the previous ones starts.
● On click
You can start an animation or move the animated clip art while you click a slide.
● Delay
You may add time before an effect starts to run.
● Duration
You can also shorten or lengthen an effect.
How to change the order of animations?
● Move the option you desire Later
You can make an animation happen later in the sequence.
● Move the option you desire earlier
You can make an animation appear earlier in the sequence.
How to add animation to the grouped objects?
● Step 1
You need to press “Ctrl” and select the objects you want.
● Step 2
Select “Format> Group> Group” to group those objects or texts.
● Step 3
Select “Animations” and choose an animation.
03 How to Add Animated Clipart in Powerpoint?

Here is the detailed process for you.
Step 1Choose a Clip art image
You need to select the desired image. You can either select an image from the default option in PowerPoint showing Office clipart or you can search for images online or insert your own collection of photos.
Step 2Select an animation effect
You have to go to the “Animation “ tab and click on the option that shows “Add Animation”. From that drop-down menu, you will get several animation effects to animate your static image and create your animated clipart for PowerPoint.
Step 3Choose among different effects
PowerPoint offers animation effects of different types, like motion paths, entrance effects, entrance effects and emphasis effects.
Step 4Bringing transition effects
After creating animated clipart, you can also choose a transition effect to offer a special look to your presentation. In this case, when the slide is revealed this transition effect can easily complement your animation.
04 How Do I Make an Animated Video in Powerpoint?
When you wish to create an animated video for PowerPoint, you can do this easily. The steps are:
Step 1Insert the video into a slide
Insert the video into a slide and then click on “Insert “and select the option “Video”.
Click on the video and align it to the right position and size. Open “Animation Pane”.
Step 2Create a speech bubble
It is not necessary to interrupt your video while inserting an animation. So, it’s important to create a speech bubble.
Click “Shapes” and choose between different arrows, shapes, flow charts, that you can insert into the video.
Step 3Select “Animation Pane”
Click on the speech bubble. Go to “Animations” and select “Animation Pane”.
The animations can be inserted from the “Entrance” area.
Step 4Choose “Inbox”
Click on the speech bubble and choose “Inbox” and then “Fly-In”. The effects will appear in the area of the animation.
By moving the animation on this you can select the time when the animation will appear in the video.
Step 5Play the video
Right-click on “Start With Previous” to allow the animation to start and move.
The speech bubble will appear in the video after just 30 seconds, so move the animation until 30 sec. If you wish to stop the video in just 30 sec, click on the video and add “Play”.
Step 6Move the animation
Click right and choose the “Start With Previous” option. Move the animation to 0 seconds. Add “Pause”.
Click on “Add Animation” and then “Pause”. Then click right and choose “Start With Previous Again”. Move the animation to 30 sec as you need to stop the video from there. You can change the length by inserting the animation “Pause” again.
Step 7Run the video
Click right and select “Start With Previous”. While the continuation of the video, if you want the speech bubble to disappear, click on the bubble and on “Add Animation” and then “Exit” and choose “Fly Out”.
Click right and choose “Start With Previous “again. Move the animation to 60 seconds, as the video will start to run there.
Clipart is a special type of graphic art. There are pre-made images that are used to illustrate all sorts of things.
The use of animated clipart is increasing day by day. Here, we will discuss the steps of creating animated clipart for PowerPoint.
In this article
01 [What is Moving Clipart Called?](#Part 1)
02 [Where Can I Find Free Animated Clipart?](#Part 2)
03 [How Do You Add an Animated Clipart to a Slide?](#Part 3)
Part 1 What is Moving Clipart Called?
The moving clipart is basically called animated clipart or Animated Gifs. These are easy and quick ways to present contents that are dynamic, especially on Web pages. The sizes of these files are small compared to the other alternatives for creating dynamic content like Flash and Java. If you would like to learn more about video animation , you can watch this tutorial:
For Win 7 or later (64-bit)
For macOS 10.12 or later
These are several images that are encoded in GIF or Graphic interchange format. This contains a number of frames or images within a single file and can be described by the graphic control extension of its own.
Part 2 Where Can I Find Free Animated Clipart?
We all love to use different types of images to express ourselves. However, the process of finding out better quality, copyright > free and also high > resolution free images a really tough task. To make sure that you can find the right one for you, you can go through some really amazing image resources.
These image resources have a huge collection of CCO or Creative Commons licensed and high > quality pictures to meet your different types of needs. Also, keep in mind to check on to the page that is licensed before using any clipart or animated clip art for copyright infringement.
01 Upsplash
Unsplash is a special site that was launched in the year 2013. This site posts ten photos that are handpicked every ten days. These photos are free of charge. As categorized under CCO, this site offers high > quality resolution images that can add beauty as well as credibility to your work.
02 Pixabay
Pixabay was launched in the year 2016 and has 550,000 free illustrations, photos, and vectors. It is equipped with a search engine that is versatile and can easily customize and broaden the search. Thus, this can offer you accurate results regarding your searches.
If you wish to use high > quality public domain pictures or animated clip art, this site can be your perfect option.
03 Public Domain
This website known as Public Domain has a collection of various high > quality pictures, images, and vectors that you can easily use for your animated videos. Especially, vectors are available here in a big number.
04 Openclipart
Though there are many websites where you can get clip arts, very few of them can provide clip arts of excellent quality. This website known as Openclipart is a reliable source of 11,000 designed clip arts that you can easily use in your animation videos.
05 Bing
Bing is no doubt an extensive search engine that can work similarly to Google. Bing has a special filter that has a large number of superior quality public domain images, vectors, clip arts, and illustrations to amaze you.
06 Photopin
As Photopin has millions of free images, many bloggers prefer to use this for their blog posts. However, Photopin does not come under the CCO license. So, you can use their images but you need to add a link to their website.
07 Pond5 creative
Pond5 is the largest online marketplace of the world for royalty–free stock music has now released the creative common category for media with the target to make it easily accessible to their users.
This site offers not only some superior quality free images, but you can also find some special characters, effects, vectors, sounds, animated clip art, 3D models, and many more. You just have to use the filter showing “Public domain only” to get those free licensed images.
08 Clker.com
Clker is mainly used for clip arts. You can easily get numerous clip arts of different sizes without any charges. This is an amazing source of free graphics, vectors, illustrations, etc. Moreover, this site is also licensed under CCO.
Part 3 How Do You Add an Animated Clipart to a Slide?
You can easily add animated clip art or GIF into the Google slides, to make your creation more visually attractive. To do this task you can choose multiple methods, but the easiest of them is using a GIF URL.
Here is the complete process of how to add a GIF to Google slides using a URL.
01 How to add a GIF to Google Slides using a URL
Step 1Open Your Presentation
Firstly, you need to go to slides.google.com and then open your presentation, or you can also create a new one.
Step 2Choose GIF That You Want to Insert
Click the slide that you want to insert the GIF onto in the sidebar located on the left side.
Step 3Image
In the top toolbar, just select “Insert”, then the “Image” option. After that, select “By URL”.
Step 4Paste URL
Just paste the URL into that box.
Step 5Insert
After that, the GIF will pop up, at that time just click on “Insert”.
02 Can you animate objects in PowerPoint?
How to add animations to the pictures, shapes, texts in a PowerPoint presentation?
Step 1Select the Text
First of all, you have to select the text or object that you wish to animate.
Step 2Select “Animations”
Next, Select “Animations” and choose an animation.
Step 3Choose “Effect Options”
Just choose “Effect Options” and select an effect.
How to manage effects and animations?
● With Previous
You can play an animation simultaneously as the previous animation in you the sequence.
● After previous
You can start an animation right after the previous ones starts.
● On click
You can start an animation or move the animated clip art while you click a slide.
● Delay
You may add time before an effect starts to run.
● Duration
You can also shorten or lengthen an effect.
How to change the order of animations?
● Move the option you desire Later
You can make an animation happen later in the sequence.
● Move the option you desire earlier
You can make an animation appear earlier in the sequence.
How to add animation to the grouped objects?
● Step 1
You need to press “Ctrl” and select the objects you want.
● Step 2
Select “Format> Group> Group” to group those objects or texts.
● Step 3
Select “Animations” and choose an animation.
03 How to Add Animated Clipart in Powerpoint?
Here is the detailed process for you.
Step 1Choose a Clip art image
You need to select the desired image. You can either select an image from the default option in PowerPoint showing Office clipart or you can search for images online or insert your own collection of photos.
Step 2Select an animation effect
You have to go to the “Animation “ tab and click on the option that shows “Add Animation”. From that drop-down menu, you will get several animation effects to animate your static image and create your animated clipart for PowerPoint.
Step 3Choose among different effects
PowerPoint offers animation effects of different types, like motion paths, entrance effects, entrance effects and emphasis effects.
Step 4Bringing transition effects
After creating animated clipart, you can also choose a transition effect to offer a special look to your presentation. In this case, when the slide is revealed this transition effect can easily complement your animation.
04 How Do I Make an Animated Video in Powerpoint?
When you wish to create an animated video for PowerPoint, you can do this easily. The steps are:
Step 1Insert the video into a slide
Insert the video into a slide and then click on “Insert “and select the option “Video”.
Click on the video and align it to the right position and size. Open “Animation Pane”.
Step 2Create a speech bubble
It is not necessary to interrupt your video while inserting an animation. So, it’s important to create a speech bubble.
Click “Shapes” and choose between different arrows, shapes, flow charts, that you can insert into the video.
Step 3Select “Animation Pane”
Click on the speech bubble. Go to “Animations” and select “Animation Pane”.
The animations can be inserted from the “Entrance” area.
Step 4Choose “Inbox”
Click on the speech bubble and choose “Inbox” and then “Fly-In”. The effects will appear in the area of the animation.
By moving the animation on this you can select the time when the animation will appear in the video.
Step 5Play the video
Right-click on “Start With Previous” to allow the animation to start and move.
The speech bubble will appear in the video after just 30 seconds, so move the animation until 30 sec. If you wish to stop the video in just 30 sec, click on the video and add “Play”.
Step 6Move the animation
Click right and choose the “Start With Previous” option. Move the animation to 0 seconds. Add “Pause”.
Click on “Add Animation” and then “Pause”. Then click right and choose “Start With Previous Again”. Move the animation to 30 sec as you need to stop the video from there. You can change the length by inserting the animation “Pause” again.
Step 7Run the video
Click right and select “Start With Previous”. While the continuation of the video, if you want the speech bubble to disappear, click on the bubble and on “Add Animation” and then “Exit” and choose “Fly Out”.
Click right and choose “Start With Previous “again. Move the animation to 60 seconds, as the video will start to run there.
How to Make GIF Stickers for WhatsApp 100% The Simple Way
How to Make GIF Stickers for WhatsApp 100% The Easy Way
An easy yet powerful editor
Numerous effects to choose from
Detailed tutorials provided by the official channel
Wish your dear friends and loved ones on their special days using some interesting WhatsApp stickers. There is an integrated library of these stickers in different categories on your Android as well as iPhone.

Still, if you want a more personalized one, you can create a customized sticker using videos on your phone or using third-party apps and tools. Learn about how to use the integrated stickers and create customized in the following parts of the topic.
In this article
01 [Using stickers from integrated library](#Part 1)
02 [Best tools to create animated GIF sticker – Wondershare Filmora](#Part 2)
03 [Using iPhone and Android videos to make GIF stickers](#Part 3)
Part 1 Using stickers from integrated library
WhatsApp on your Android and iPhone has a decent collection of stickers that can send to your contacts. You simply need to look for the sticker in the desired category and send it and the steps for adding GIFs to WhatsApp are listed below.
Step 1. Open the WhatsApp contact to which you wish to send the sticker. To open the animation library on your Android device, tap on the emoji icon and choose the GIF option. On an iPhone, the library opens by clicking on the sticker icon.
Step 2. Search and select the desired sticker from the available options.
Step 3. To finally share the selected one, click on the sticker and then on the Send button.

Part 2 Best tools to create animated GIF sticker – Wondershare Filmora
If you are in search of a tool that lets you create a professional-looking animated GIF easily Wondershare Filmora Video Editor is the best WhatsApp GIF maker tool. This software once downloaded on your Windows or Mac system, is all set to look after multiple video editing tasks including GIF creation.
Wondershare Filmora
Get started easily with Filmora’s powerful performance, intuitive interface, and countless effects!
Try It Free Try It Free Try It Free Learn More >

Your videos in MP4, MKV, MOV, and several other key formats can be converted to a GIF file using the program and multiple options for editing are available as well like crop, trim, add effects, add texts, and more.
The intuitive interface of the software makes it easy to use even by non-techy people.
Steps on how to make WhatsApp GIF sticker using Wondershare Filmora
**Step 1.**On your Windows or Mac, download, install, and launch the Wondershare software and then import the video files from which GIF has to be created.
Step 2. The added files have to be now dragged and dropped to the timeline.

Step 3. Editing tools for customization can be used.
**Step 4.**For further personalization by adding text, effects, and more the related functions can be used.

Step 5. Next, choose the GIF option as the target file format from the Local tab. Select the file name and the location. Clicking on the EXPORT button will start the processing.

Part 3 Using iPhone and Android videos to make GIF stickers
If you do not wish to use any third-party tools, basic stickers can also be created using the videos on your Android and iPhone. A video cannot be more than 6 seconds in length to be used as a GIF and thus longer videos need to be trimmed.
Steps on how to make a GIF stickers for WhatsApp
Step 1. Launch the WhatsApp contact to which you wish to send the GIF. Add the video from the device gallery by clicking on the camera button. A video using the camera can also be recorded.
Note: Ensure that video length is not more than 6 seconds. If it is more, use the slider at the top to trim the video.
Step 2. Next, you can add the text using the Caption option.
Step 3. Now to convert this video into a GIF click on the GIF button under the video and then tap on the Send button to share this animation with the contact.

● Key Takeaways from This Episode →
●WhatsApp has an integrated library of GIF stickers in a wide range of categories.
●For creating customized stickers, Wondershare Filmora works as the best software as it is simple, quick, and has multiple editing options.
●Using the videos from the gallery, GIF stickers can also be created on your Android and iPhone.
Wish your dear friends and loved ones on their special days using some interesting WhatsApp stickers. There is an integrated library of these stickers in different categories on your Android as well as iPhone.
Still, if you want a more personalized one, you can create a customized sticker using videos on your phone or using third-party apps and tools. Learn about how to use the integrated stickers and create customized in the following parts of the topic.
In this article
01 [Using stickers from integrated library](#Part 1)
02 [Best tools to create animated GIF sticker – Wondershare Filmora](#Part 2)
03 [Using iPhone and Android videos to make GIF stickers](#Part 3)
Part 1 Using stickers from integrated library
WhatsApp on your Android and iPhone has a decent collection of stickers that can send to your contacts. You simply need to look for the sticker in the desired category and send it and the steps for adding GIFs to WhatsApp are listed below.
Step 1. Open the WhatsApp contact to which you wish to send the sticker. To open the animation library on your Android device, tap on the emoji icon and choose the GIF option. On an iPhone, the library opens by clicking on the sticker icon.
Step 2. Search and select the desired sticker from the available options.
Step 3. To finally share the selected one, click on the sticker and then on the Send button.
Part 2 Best tools to create animated GIF sticker – Wondershare Filmora
If you are in search of a tool that lets you create a professional-looking animated GIF easily Wondershare Filmora Video Editor is the best WhatsApp GIF maker tool. This software once downloaded on your Windows or Mac system, is all set to look after multiple video editing tasks including GIF creation.
Wondershare Filmora
Get started easily with Filmora’s powerful performance, intuitive interface, and countless effects!
Try It Free Try It Free Try It Free Learn More >
Your videos in MP4, MKV, MOV, and several other key formats can be converted to a GIF file using the program and multiple options for editing are available as well like crop, trim, add effects, add texts, and more.
The intuitive interface of the software makes it easy to use even by non-techy people.
Steps on how to make WhatsApp GIF sticker using Wondershare Filmora
**Step 1.**On your Windows or Mac, download, install, and launch the Wondershare software and then import the video files from which GIF has to be created.
Step 2. The added files have to be now dragged and dropped to the timeline.
Step 3. Editing tools for customization can be used.
**Step 4.**For further personalization by adding text, effects, and more the related functions can be used.
Step 5. Next, choose the GIF option as the target file format from the Local tab. Select the file name and the location. Clicking on the EXPORT button will start the processing.
Part 3 Using iPhone and Android videos to make GIF stickers
If you do not wish to use any third-party tools, basic stickers can also be created using the videos on your Android and iPhone. A video cannot be more than 6 seconds in length to be used as a GIF and thus longer videos need to be trimmed.
Steps on how to make a GIF stickers for WhatsApp
Step 1. Launch the WhatsApp contact to which you wish to send the GIF. Add the video from the device gallery by clicking on the camera button. A video using the camera can also be recorded.
Note: Ensure that video length is not more than 6 seconds. If it is more, use the slider at the top to trim the video.
Step 2. Next, you can add the text using the Caption option.
Step 3. Now to convert this video into a GIF click on the GIF button under the video and then tap on the Send button to share this animation with the contact.
● Key Takeaways from This Episode →
●WhatsApp has an integrated library of GIF stickers in a wide range of categories.
●For creating customized stickers, Wondershare Filmora works as the best software as it is simple, quick, and has multiple editing options.
●Using the videos from the gallery, GIF stickers can also be created on your Android and iPhone.
Top 10 Online Animated Logo Makers Everyone Should Know
Top 10 Free Online Animated Logo Makers Everyone Should Know
An easy yet powerful editor
Numerous effects to choose from
Detailed tutorials provided by the official channel
And as we all know objects in motion are much more attractive than static visuals, logo animation is the latest trend that is gaining popularity at a fast pace.
![]()
If you too want to create some interesting 3D logo motion and other types of animated logos but are confused about how to start, we are here to help you.
In this article
01 [What are Animated Logos and their benefits](#Part 1)
02 [Top 10 online tools for creating animated logos ](#Part 2)
03 [The Best Alternative to Online Animated Logo Makers](#Part 3)
Part 1 What Are Animated Logos and Their Benefits
A logo can be termed as the first face of your brand or a business which gives it a visual identity. A logo works as the foundation of the brand that helps in its growth as well as reputation. The trend has shifted from basic static logos to animated ones which include interesting motion graphics. These logos are catchy and capable of getting the instant attention of the people.
![]()
There are several benefits associated with using logo animation and some of the key ones are enlisted below.
● Create brand awareness A well-designed animated logo can create brand awareness by grabbing the interest of the potential clients and also creating a strong connection with them.
● Goes well with the brand story Animated logos gives you the freedom to use images, sounds, and motion graphics to have a connect with the audience. Thus, using animations logos that match your brand story can be created efficiently.
● Add professionalism and create a modern look Moving ahead with the times is the best thing with its business or promotion. So, a good animated logo will not only add a professional touch to your brand or a business but will also give a modern touch.
Part 2 Top 10 Online Tools for Creating Animated Logos
If you are low on budget or do not want to risk initially with the paid animated logos, free online tools work best. These programs work from your browser, need no software download, and are simple to use. Some of these tools can also be used to create logo to 3D animation. To cut down on your research work, we have shortlisted some of the widely used online animated logo makers as below.
01 Renderforest
When it comes to branding and animations online, this is the top-rated tool in its category. The tool allows creating impressive animated logos in just a few minutes. Pre-set styles are available that can be used according to the brand type.
Key Features:
● Allows creating animated logos using the AI of the tool.
● Intuitive and user-friendly interface.
● Comes with pre-set styles and readymade templates to choose from like minimal, abstract, organic, and more.
● Fonts and icons can be customized.
● High-definition export.
![]()
02 Viddyoze
This is another popular cloud-based tool that helps create interesting animated logos in a few simple clicks. The created animations can be further customized by making changes in the color scheme and other parameters.
Key Features:
● Simple to use online tool for creating 3D animations.
● Offers live-action animation.
● Characters and logos can be mixed and combined in a video.
● Comes with multiple templates and movie filters.
![]()
03 Adobe Spark
Adobe needs no introduction when it comes to editing and animations. Adobe Spark is a feature-packed online tool that helps you perform multiple functions including animated logo creation. Several templates in different categories are available to match your brand or business.
Key Features:
● Cloud-based tool for creating creative animated logos.
● Designs and templates are available in multiple categories.
● Customizable icons, colors, texts, fonts, and others.
● Support a wide range of additional features.
![]()
04 Design Free Logo
This is a free online 3D animated logo maker that comes with several pre-designed samples and templates for creating a perfect animated logo for your company. Simple to use, the tool is apt even for beginners in designing.
Key Features:
● This is 3D animation logo online free tool.
● Comes with a wide range of templates in an array of categories like the abstract, alphabet, floral, food, 3D, and more.
● Logos can be created based on the industry type.
● Simple and user-friendly interface.
![]()
05 PixTeller
Using this browser-based tool, motion to your logo elements can be added to create an impressive animated logo. A wide range of logo shapes, templates, and designs are available and option for customization is also there.
Key Features:
● Create animated logos frame by frame for better editing and customization.
● Comes with more than 100,000 shapes for the logos and over 130 fonts for creating a logo of your choice.
● Multiple customizable templates and designs in different categories are available.
● Support multiple filters like shadow, warp, blur, spacing, height, pixelate, and more.
● Created animated logos can be downloaded in MP4 or GIF format.
![]()
06 Offeo
This online animation tool is apt for creating hi-tech animated logos and the simple interface makes it perfect even for beginners. The tool is known for the perfect blend of creativity and handcraft.
Key Features:
● Create animated logos for websites as well as other platforms easily and quickly.
● Multiple library functions and customizable options are available.
● Allows adjusting the speed of the animation.
● Comes with multiple templates and graphics to choose from.
● Option to choose the ready-made elements or add the local ones.
![]()
07 Animaker
This free online tool just requires free sign-up after which it is all set to help you create rich animated logos. You can choose from the wide range of supported built-in templates as well as characters to match your requirements.
Key Features:
● This free SaaS video animation online tool helps create impressive animated logos, cartoons, and others.
● Comes with multiple templates, designs, characters, icons, charts, maps, and bags to choose from.
● Icons, colors, and other parameters can be customized using this 3D animation logo online free tool**.**
● Allows viewing the logo in different styles using the board style.
● Comes with sound effects and an option for voice recording and text to speech.
● Easy drag and drop interface make functioning quick.
● Software is supported in 50 languages worldwide.
● Created animations can be uploaded to social media sites.
![]()
08 Quince Media
For creating different types of animated media including animated logos this is a decent tool to use. Being an online program, it works from your browser and is free to use. Images in PNG and vector format can be added to the tool for creating the choice of animation.
Key Features:
● Create animated logos and other animated media using this simple and quick online tool.
● Comes with multiple designs and templates.
● 3D animated logos can be created for social media, films, broadcasts, and other platforms.
● Simple and fast to use.
![]()
09 MotionDen
This is a simple and easy online tool that can help you create animated logos in a hassle-free manner. You can even create other animated projects like slideshows, intros, and others using the program.
Key Features:
● A simple online tool with a user-friendly interface for creating logos.
● Comes with multiple templates in different categories like serenity, dark smoke, fire red, and more.
● Support to a wide range of devices including desktop, smartphone, and tablets.
● Allows creating 3D logos.
● Templates can be customized as per the requirements.
![]()
10 Tube Arsenal
This online tool is mainly used for creating YouTube video intros but it supports other functions as well including animated logo creation. The 3D editor of the program will let you add animations as needed. The extensive collection of templates lets you choose the design that best matches your requirements.
Key Features:
● Create animated logos using the 3D editor of the tool.
● Comes with an array of templates to choose from.
● Allows customizing color, text, images, and other parameters.
● This 3D animation logo online free support unlimited quick previews.
● Simple and user-friendly interface.
![]()
Key Takeaways from This Episode
● Logos are an integral part of brands and businesses that helps create brand awareness among potential clients.
● Animated logos are the present-day trend where motion graphics are added to the logos. These logo animation are interesting and can reach a broader audience and leave more impact.
● Several online tools for creating animated logos for free are available. Check out the features of these tools and choose the most suitable one.
● Wondershare Filmoa works as the best online alternative that helps in creating rich animated logos with an option for customization.
Also read:
- New 2024 Approved Techniques on Making After Effects 2D Animation
- A Roster of 15 Best Disney Channel Cartoons
- New 2024 Approved Adobe Rigger Is AWESOME
- New 12 Top Stop Motion Studios Worth Recommending
- New 2024 Approved Best 8 Tools Tell You How to Make Slideshows for Instagram
- Top 12 Illusion Gifs Top Picks
- 2024 Approved 8 Best Motion Graphics Online Tools for Your Inspiration
- In 2024, Is It That Easy to Make My Own Animated Character?
- In 2024, Best Tips for Effortless Unity 3D Animation
- New 10 Photoshop Cartoon Effects For Creatives for 2024
- Updated 2024 Approved The Top Free 12 GIF Meme Maker at a Glance
- Updated In 2024,
- Updated 2024 Approved 5 Different Animation Styles A Simple but Comprehensive Guide
- New 2024 Approved Learn All About 3D Logo Animation and Templates
- Updated How to Make an Animated Travel Map Video for 2024
- 2024 Approved How To Create Pinterest Slideshow in Simple Ways
- In 2024, Latest Guide How To Bypass Lava FRP Without Computer
- In 2024, iPogo will be the new iSpoofer On Samsung Galaxy M34? | Dr.fone
- In 2024, A Quick Guide to Oppo A59 5G FRP Bypass Instantly
- Why Does My Xiaomi Mix Fold 3 Keep Turning Off By Itself? 6 Fixes Are Here | Dr.fone
- How to Xiaomi Redmi 12 5G Get Deleted Phone Number Back with Ease and Safety
- How to Get and Use Pokemon Go Promo Codes On Apple iPhone 12 | Dr.fone
- How to Transfer Data After Switching From Samsung Galaxy XCover 6 Pro Tactical Edition to Latest Samsung | Dr.fone
- Troubleshooting Guide How to Fix an Unresponsive Samsung Galaxy A54 5G Screen | Dr.fone
- In 2024, Easy Tutorial for Activating iCloud from Apple iPhone SE Safe and Legal
- Dose Life360 Notify Me When Someone Checks My Location On Xiaomi Redmi Note 12 4G? | Dr.fone
- What Legendaries Are In Pokemon Platinum On OnePlus 12? | Dr.fone
- Why Does My Tecno Pova 5 Keep Turning Off By Itself? 6 Fixes Are Here | Dr.fone
- Title: In 2024, Secrets to Make 2D Game Animation
- Author: Elon
- Created at : 2024-04-21 09:30:25
- Updated at : 2024-04-22 09:30:25
- Link: https://animation-videos.techidaily.com/in-2024-secrets-to-make-2d-game-animation/
- License: This work is licensed under CC BY-NC-SA 4.0.
