

In 2024, The Top Free 12 GIF Meme Maker at a Glance
The Top Free 12 GIF Meme Maker at a Glance
The Best Free 12 GIF Meme Maker at a Glance
An easy yet powerful editor
Numerous effects to choose from
Detailed tutorials provided by the official channel
Do you want to make a meme out of a photo? You can do so with the aid of GIF meme maker, which provides an extensive range of templates, including popular ones and meme fonts and a dedicated interface. Let’s look at some of the excellent meme GIF generators for Android, iPhone, online tools, and desktop computers.
In this article
01 [What Is the Meme GIF Maker?](#Part 1)
02 [How Do You Make a GIF Meme on iPhone?](#Part 2)
03 [12 Meme Generators to Create Your Memes](#Part 3)
Part 1 What Is the Meme GIF Maker?
GIF meme maker allows users to make GIFs from the ground up by collecting or submitting videos or photographs. These GIF caption meme-makers enable users to add different creative effects like emojis, photos, text, filters, and backdrops for added customization. They can also export files, and some of them integrate directly with social networking networks to make uploading more convenient.
Each tool here has its own set of features, so read the entire article before determining which GIF meme generator is ideal for your personal or professional needs.
Part 2 How Do You Make a GIF Meme on iPhone?
Make a unique GIF meme on your iPhone following these few steps:
Step 1: Download and install a GIF maker
On your iPhone, install the GIF meme maker. Not only can you use this meme GIF generator to locate animated GIFs, but you can also use it to make your GIF memes from the start. Go to the Apple store, type GIF maker of your choice into the search field. Now select Get or Install from the drop-down menu.

Step 2: Create an account.
Create an account or log in. Fill in the text boxes with your email address, username, and password. Then press the Sign Up button.
Tap Log In, enter your email address with password if you already have an account.

Step 3: Select a photo or video to use for your GIF
Now it’s your turn to get inventive: Simply tap any of the effects tiles at the bottom of the screen to Construct a meme of a stupid selfie or photo with effects, then swipe left/right to navigate between effects. Press and hold the Shutter option to start a movie, or tap once to snap a shot.
p Create. This is locatedht corner.[1]

Step 4: Add text to meme
Put your meme text here. It’s critical to add your content to the meme because that’s what makes it a meme! To access the text tool, tap the Aa icon and type some text for the meme. Tap Done when you’re finished.
Resize and move your text. After you’ve tapped “Done” and are happy with your text, you can tap, hold, and drag it about your GIF. To alter the size, pinch two fingers together.


Step 5: Save and share
When you complete, tap the purple arrow. Tap this button in the bottom right corner once you’re happy with your meme GIF.
Select the Share GIF from the drop-down menu. If you wish to save the GIF to your camera roll, tap Save GIF.


Part 3 Meme Generators to Create Your Memes
Here are 12 meme generators that you can try out
01IMGFlip (Web)

Features:
• It has many meme templates
• You can easily build memes with your photographs.
• You can make changes to your memes
• It includes over 1000 meme templates.
• Allows you to find the meme template you want quickly.
Pros
• Many templates
• Fonts that you can customize.
• Memes on video
Cons
• Adds a watermark to the image
To make a meme with IMGFlip, follow these steps:
Step 1: Begin by making something.
Go to the website and click the “Create” button to get started. From the menu, select “Make a meme.”
Step 2: Pick a design template
To select the proper template for your meme, use the Search box. Alternatively, you can add your image to the app by clicking “Upload new template.”
Step 3: Insert text
Fill in the blanks with the meme text.
Next, click the options toggle to change the text next to each field. Save the image.
02DrMemes (Web)

Features
• You can easily produce memes for free.
• Create memes without a watermark.
• Change fonts easily
• Add emojis and stickers easily to memes.
• You can turn your photos into a GIF meme.
Pros
• User-friendly interface
• Personalization of fonts
• There is no watermark.
Cons
• A smaller number of templates
Follow these simple steps to make a meme using this website:
Step 1: Select a template
Open drmemes.com and select “Choose meme template” or “Upload picture,” depending on how you want to Construct a meme.
Step 2: Type in your text
Add Text from the side boxes. To change the font, use the settings toggle.
03ILoveIMG (Web)

Features
• Provides a variety of templates
• Allows you to alter the size and style of the font
• It generates memes that are free of watermarks.
• You may also choose whether you want the text to be forced into the image.
Pros
• An extensive library of free templates
• There is no watermark.
• Simple to use
• Can compress, resize, crop, and perform other image-editing activities.
Cons
• You can’t change the font.
Follow these steps to make memes using ILoveIMG:
Step 1: Go to the website.
In a browser, go to the website.
Step 2: Pick a design template
“Select meme template” or “Upload image” are the options.
Step 3: Type in your text
Fill in the blanks with your text.
04Meme Generator (Android/iOS)

Features:
● Over 500 high-quality memes and caption examples included.
● You can change size and color.
● There are a variety of fonts to pick from.
● Use the search or filter options to discover the memes you’re looking for quickly.
● There are no watermarks.
Pros
• Many templates
• Crop, rotate and flip images
• Personalize it with a custom image, font style, and sticker.
image
• There is no watermark.
Cons
• Lots of ads
Follow these simple steps to create a meme using the Meme Generator
Step 1: Add Image
Tap “Custom meme Gallery” to add an image from the gallery or select a meme template in the app.
Step 2: Crop Meme
Using the choices at the top of the app, you can crop the meme or rotate/flip the images.
Step 3: Customize font and Save
Change the font style, color, and alignment by tapping on it. You can also decorate it with a sticker.
When done, tap on “Save” to download the meme or hit “Share” to send it to social media apps.
05Meme Creator (Android)

Features
● A large collection of stock pictures and memes
● Add your quotes to the close captions.
● You can add your watermark.
● There are some fantastic stickers available.
● Simple to use
Pros
● No watermark
● Meme categories
● Custom fonts
Cons
● Occasional ads
Here is a simple step guide:
Step 1: Add Image
The program begins with a gallery of meme template categories, including animals, celebrities, cartoons, and more.
To add your original image, tap on one of these templates or hit the “Gallery” icon at the top.
Step 2: Change font size
Fill in the “Top” and “Bottom” text areas with the meme content. Using the options icon next to the text, change the font style.
Step 3: Save and Share
Use the “Save” or “Share” button at the bottom to download or send memes.
06Video & GIF Memes (Android)

Features
● It enables you to make memes from movies, GIFs and photos.
● No watermarks
● Easy to use
● Compatible on device
● Several stickers for users to leverage on
Pros
● There is no watermark.
● Tenor GIF database access
● You can video cut.
Cons
● Too many ads
There are no image memes.
Here are a few steps to follow:
Step 1: Select file
To begin, open the app and select the source file type.
Step 2: Customize text
When asked, trim the video, and add customizable meme text.
Save the video or GIF joke after changing video characteristics such as frame rate, speed, and quality.
07GIF Maker – Meme GIF Creator (iOS)

Features:
● Make as many GIFs as you like from your videos.
● Make an unlimited number of GIFs from your photos.
● Make an infinite number of memes.
● Filters, Stickers, and Fonts of the highest quality.
● Easy to use
Pros
● There is no watermark.
● User-friendly interphase.
● There are some fantastic stickers available.
Cons
● As others, ads.
Follow these simple steps to make use of this amazing tool:
Step 1: Choose the desired video
After running the app, select “Video to GIF” from the menu and select your video.
If necessary, trim it.
Step 2: Add text
To add amusing meme text to your video, tap “Add text.”
Step 3: Download and Share
To download the video or share it directly with social networking apps, click the Share icon.
08Memeto – Meme Maker & Creator (iOS)

Features:
● Create memes with your picture templates, blank memes, and popular templates.
● Customize options available
● Several different meme text styles to choose from.
● 1000+ stickers.
● Choose your photo from your Photo Gallery to be used as background
Pros
● There is no watermark.
● Various types of memes
Cons
● It lacks a search function.
Step 1: Choose a template
Select a meme template in the app, select the meme, and then hit the “Text” option to add and style meme text.
Step 2: Save and Share
Tap the Share button when you finish to save it to your device.
09Meme Generator Suite (Windows)

Features:
● Thousands of memes are available online
● Make memes out of your photos.
● Make posters with the phrase “KEEP CALM” and Jo Baka memes.
● You can move text, resized, and colored.
● There’s also an Offline Collection with over 300 memes that’s always ready to go!
Pros
• Many memes
• Effective search
• Collection in the offline mode
• There is no watermark.
Cons
• Advertisements
Follow these simple are guide:
Step 1: Select template or photo
Start using a pre-loaded meme template from the app or upload your image by selecting “From gallery.”
Step 2: Download and Save
Change the text settings and click the Save icon to download the image.
You can also immediately submit the image to IMGur or social networking apps.
10Meme Generator

Features:
● Get over 500 high-quality memes and caption examples.
● Size and color are changeable.
● There are a variety of fonts to pick from.
● Search or filter options to discover the memes you’re looking for.
● There are no watermarks.
Pros
• Examples of memes
• There is no watermark.
Cons
• Cannot share straight to social networking apps
Step 1: Click on Meme
To begin editing a meme, click on it.
Step 2: Change font
Change the font color and style of the meme text on the meme editing screen.
1111. Deal With It - GIF Maker

Features :
● This online GIF creator is simple to use.
● No third-party software is required to use this GIF maker.
● This website will complete the GIF conversion promptly.
● This GIF generator website is beneficial to new users.
Pros
● The website’s design is simplistic, making this GIF banner maker too simple to manage and utilize.
● It also intensifies the GIF maker, significantly improving the overall effect of the GIF in question.
Cons
● Because the pace of GIF makers is too slow, users sometimes opt to download installable GIF makers.
● GIF makers cannot create animated GIFs, so it is impossible to utilize this tool.
How to Use this Online GIF Maker
Visit the GIF maker’s official homepage.
Step 1: Choose an image
Because it can also be helpful to create GIFs from photos, you may use the Load Image option to upload an image from your computer.
Step 2: Editing
After that, you may add a phrase and glasses to the loaded image.
12LunaPic

Features:
● This online animated GIF creator has a very user-friendly design.
● No other third-party programs are required to use this online animated GIF creator.
● This website can also be valuable to creating GIF banners.
● You may create animated GIFs from several photographs with this website.
Pros
● With the aid of this program, the user can experience the GIF maker mobile feature; hence it is highly recommended.
● Because the tool is so simple, this banner GIF maker gets the job done in style and according to the user’s specifications.
Cons
● Like the GIF icon maker, this application lacks critical features like speed and accuracy necessary for GIF creation.
● Because this program can’t edit GIFs, it doesn’t have any of the GIF edit maker’s features.
How to use LunaPic
Step 1: Upload Image
To get started, go to LunaPic’s official website. To submit photographs from your computer to this online animated GIF maker, click the Upload button.
Step 2: Enhance the image
With this online GIF creator, you can now alter the images.
Step 3: Save the animated GIF
To save the produced GIF, select GIF as the output and click the Save button at the bottom.
Creating your animated GIF from any video or photo is a fascinating and entertaining undertaking. A video scene can be brutal to manage to owe to its vast size, but GIF forms are ideal for profile posts and sharing with friends in the form of simple jokes.
If you want to generate a GIF online, though, Wondershare Filmora Video Editor ‘s online meme maker is the best option. It allows you to create a watermark-free picture, GIF, and video memes. It is entirely free to use and requires no registration. When creating a caption, you can edit the text size, color, and position to make a caption while you are editing. You can also add text inside or outside in GIF. Just with some clicks, your GIF will be complete. Try it now!

Wondershare Filmora - Best Video Editor for Mac/Windows
5,481,435 people have downloaded it.
Build unique custom animations without breaking a sweat.
Focus on creating epic stories and leave the details to Filmora’s auto features.
Start a creative adventure with drag & drop effects and endless possibilities.
Filmora simplifies advanced features to save you time and effort.
Filmora cuts out repetition so you can move on to your next creative breakthrough.
● Key Takeaways from This Episode →
● Now that you know about the 12 best GIF meme generators and how to use them to make a unique and customized GIF with the simple step guide, you can now try your hands on new things.
● However, Wondershare Filmora is your sure best GIF caption meme maker to help you achieve excellent results as a GIF meme creator. So go for it Try It Free
Do you want to make a meme out of a photo? You can do so with the aid of GIF meme maker, which provides an extensive range of templates, including popular ones and meme fonts and a dedicated interface. Let’s look at some of the excellent meme GIF generators for Android, iPhone, online tools, and desktop computers.
In this article
01 [What Is the Meme GIF Maker?](#Part 1)
02 [How Do You Make a GIF Meme on iPhone?](#Part 2)
03 [12 Meme Generators to Create Your Memes](#Part 3)
Part 1 What Is the Meme GIF Maker?
GIF meme maker allows users to make GIFs from the ground up by collecting or submitting videos or photographs. These GIF caption meme-makers enable users to add different creative effects like emojis, photos, text, filters, and backdrops for added customization. They can also export files, and some of them integrate directly with social networking networks to make uploading more convenient.
Each tool here has its own set of features, so read the entire article before determining which GIF meme generator is ideal for your personal or professional needs.
Part 2 How Do You Make a GIF Meme on iPhone?
Make a unique GIF meme on your iPhone following these few steps:
Step 1: Download and install a GIF maker
On your iPhone, install the GIF meme maker. Not only can you use this meme GIF generator to locate animated GIFs, but you can also use it to make your GIF memes from the start. Go to the Apple store, type GIF maker of your choice into the search field. Now select Get or Install from the drop-down menu.
Step 2: Create an account.
Create an account or log in. Fill in the text boxes with your email address, username, and password. Then press the Sign Up button.
Tap Log In, enter your email address with password if you already have an account.
Step 3: Select a photo or video to use for your GIF
Now it’s your turn to get inventive: Simply tap any of the effects tiles at the bottom of the screen to Construct a meme of a stupid selfie or photo with effects, then swipe left/right to navigate between effects. Press and hold the Shutter option to start a movie, or tap once to snap a shot.
p Create. This is locatedht corner.[1]
Step 4: Add text to meme
Put your meme text here. It’s critical to add your content to the meme because that’s what makes it a meme! To access the text tool, tap the Aa icon and type some text for the meme. Tap Done when you’re finished.
Resize and move your text. After you’ve tapped “Done” and are happy with your text, you can tap, hold, and drag it about your GIF. To alter the size, pinch two fingers together.
Step 5: Save and share
When you complete, tap the purple arrow. Tap this button in the bottom right corner once you’re happy with your meme GIF.
Select the Share GIF from the drop-down menu. If you wish to save the GIF to your camera roll, tap Save GIF.
Part 3 Meme Generators to Create Your Memes
Here are 12 meme generators that you can try out
01IMGFlip (Web)
Features:
• It has many meme templates
• You can easily build memes with your photographs.
• You can make changes to your memes
• It includes over 1000 meme templates.
• Allows you to find the meme template you want quickly.
Pros
• Many templates
• Fonts that you can customize.
• Memes on video
Cons
• Adds a watermark to the image
To make a meme with IMGFlip, follow these steps:
Step 1: Begin by making something.
Go to the website and click the “Create” button to get started. From the menu, select “Make a meme.”
Step 2: Pick a design template
To select the proper template for your meme, use the Search box. Alternatively, you can add your image to the app by clicking “Upload new template.”
Step 3: Insert text
Fill in the blanks with the meme text.
Next, click the options toggle to change the text next to each field. Save the image.
02DrMemes (Web)
Features
• You can easily produce memes for free.
• Create memes without a watermark.
• Change fonts easily
• Add emojis and stickers easily to memes.
• You can turn your photos into a GIF meme.
Pros
• User-friendly interface
• Personalization of fonts
• There is no watermark.
Cons
• A smaller number of templates
Follow these simple steps to make a meme using this website:
Step 1: Select a template
Open drmemes.com and select “Choose meme template” or “Upload picture,” depending on how you want to Construct a meme.
Step 2: Type in your text
Add Text from the side boxes. To change the font, use the settings toggle.
03ILoveIMG (Web)
Features
• Provides a variety of templates
• Allows you to alter the size and style of the font
• It generates memes that are free of watermarks.
• You may also choose whether you want the text to be forced into the image.
Pros
• An extensive library of free templates
• There is no watermark.
• Simple to use
• Can compress, resize, crop, and perform other image-editing activities.
Cons
• You can’t change the font.
Follow these steps to make memes using ILoveIMG:
Step 1: Go to the website.
In a browser, go to the website.
Step 2: Pick a design template
“Select meme template” or “Upload image” are the options.
Step 3: Type in your text
Fill in the blanks with your text.
04Meme Generator (Android/iOS)
Features:
● Over 500 high-quality memes and caption examples included.
● You can change size and color.
● There are a variety of fonts to pick from.
● Use the search or filter options to discover the memes you’re looking for quickly.
● There are no watermarks.
Pros
• Many templates
• Crop, rotate and flip images
• Personalize it with a custom image, font style, and sticker.
image
• There is no watermark.
Cons
• Lots of ads
Follow these simple steps to create a meme using the Meme Generator
Step 1: Add Image
Tap “Custom meme Gallery” to add an image from the gallery or select a meme template in the app.
Step 2: Crop Meme
Using the choices at the top of the app, you can crop the meme or rotate/flip the images.
Step 3: Customize font and Save
Change the font style, color, and alignment by tapping on it. You can also decorate it with a sticker.
When done, tap on “Save” to download the meme or hit “Share” to send it to social media apps.
05Meme Creator (Android)
Features
● A large collection of stock pictures and memes
● Add your quotes to the close captions.
● You can add your watermark.
● There are some fantastic stickers available.
● Simple to use
Pros
● No watermark
● Meme categories
● Custom fonts
Cons
● Occasional ads
Here is a simple step guide:
Step 1: Add Image
The program begins with a gallery of meme template categories, including animals, celebrities, cartoons, and more.
To add your original image, tap on one of these templates or hit the “Gallery” icon at the top.
Step 2: Change font size
Fill in the “Top” and “Bottom” text areas with the meme content. Using the options icon next to the text, change the font style.
Step 3: Save and Share
Use the “Save” or “Share” button at the bottom to download or send memes.
06Video & GIF Memes (Android)
Features
● It enables you to make memes from movies, GIFs and photos.
● No watermarks
● Easy to use
● Compatible on device
● Several stickers for users to leverage on
Pros
● There is no watermark.
● Tenor GIF database access
● You can video cut.
Cons
● Too many ads
There are no image memes.
Here are a few steps to follow:
Step 1: Select file
To begin, open the app and select the source file type.
Step 2: Customize text
When asked, trim the video, and add customizable meme text.
Save the video or GIF joke after changing video characteristics such as frame rate, speed, and quality.
07GIF Maker – Meme GIF Creator (iOS)
Features:
● Make as many GIFs as you like from your videos.
● Make an unlimited number of GIFs from your photos.
● Make an infinite number of memes.
● Filters, Stickers, and Fonts of the highest quality.
● Easy to use
Pros
● There is no watermark.
● User-friendly interphase.
● There are some fantastic stickers available.
Cons
● As others, ads.
Follow these simple steps to make use of this amazing tool:
Step 1: Choose the desired video
After running the app, select “Video to GIF” from the menu and select your video.
If necessary, trim it.
Step 2: Add text
To add amusing meme text to your video, tap “Add text.”
Step 3: Download and Share
To download the video or share it directly with social networking apps, click the Share icon.
08Memeto – Meme Maker & Creator (iOS)
Features:
● Create memes with your picture templates, blank memes, and popular templates.
● Customize options available
● Several different meme text styles to choose from.
● 1000+ stickers.
● Choose your photo from your Photo Gallery to be used as background
Pros
● There is no watermark.
● Various types of memes
Cons
● It lacks a search function.
Step 1: Choose a template
Select a meme template in the app, select the meme, and then hit the “Text” option to add and style meme text.
Step 2: Save and Share
Tap the Share button when you finish to save it to your device.
09Meme Generator Suite (Windows)
Features:
● Thousands of memes are available online
● Make memes out of your photos.
● Make posters with the phrase “KEEP CALM” and Jo Baka memes.
● You can move text, resized, and colored.
● There’s also an Offline Collection with over 300 memes that’s always ready to go!
Pros
• Many memes
• Effective search
• Collection in the offline mode
• There is no watermark.
Cons
• Advertisements
Follow these simple are guide:
Step 1: Select template or photo
Start using a pre-loaded meme template from the app or upload your image by selecting “From gallery.”
Step 2: Download and Save
Change the text settings and click the Save icon to download the image.
You can also immediately submit the image to IMGur or social networking apps.
10Meme Generator
Features:
● Get over 500 high-quality memes and caption examples.
● Size and color are changeable.
● There are a variety of fonts to pick from.
● Search or filter options to discover the memes you’re looking for.
● There are no watermarks.
Pros
• Examples of memes
• There is no watermark.
Cons
• Cannot share straight to social networking apps
Step 1: Click on Meme
To begin editing a meme, click on it.
Step 2: Change font
Change the font color and style of the meme text on the meme editing screen.
1111. Deal With It - GIF Maker
Features :
● This online GIF creator is simple to use.
● No third-party software is required to use this GIF maker.
● This website will complete the GIF conversion promptly.
● This GIF generator website is beneficial to new users.
Pros
● The website’s design is simplistic, making this GIF banner maker too simple to manage and utilize.
● It also intensifies the GIF maker, significantly improving the overall effect of the GIF in question.
Cons
● Because the pace of GIF makers is too slow, users sometimes opt to download installable GIF makers.
● GIF makers cannot create animated GIFs, so it is impossible to utilize this tool.
How to Use this Online GIF Maker
Visit the GIF maker’s official homepage.
Step 1: Choose an image
Because it can also be helpful to create GIFs from photos, you may use the Load Image option to upload an image from your computer.
Step 2: Editing
After that, you may add a phrase and glasses to the loaded image.
12LunaPic
Features:
● This online animated GIF creator has a very user-friendly design.
● No other third-party programs are required to use this online animated GIF creator.
● This website can also be valuable to creating GIF banners.
● You may create animated GIFs from several photographs with this website.
Pros
● With the aid of this program, the user can experience the GIF maker mobile feature; hence it is highly recommended.
● Because the tool is so simple, this banner GIF maker gets the job done in style and according to the user’s specifications.
Cons
● Like the GIF icon maker, this application lacks critical features like speed and accuracy necessary for GIF creation.
● Because this program can’t edit GIFs, it doesn’t have any of the GIF edit maker’s features.
How to use LunaPic
Step 1: Upload Image
To get started, go to LunaPic’s official website. To submit photographs from your computer to this online animated GIF maker, click the Upload button.
Step 2: Enhance the image
With this online GIF creator, you can now alter the images.
Step 3: Save the animated GIF
To save the produced GIF, select GIF as the output and click the Save button at the bottom.
Creating your animated GIF from any video or photo is a fascinating and entertaining undertaking. A video scene can be brutal to manage to owe to its vast size, but GIF forms are ideal for profile posts and sharing with friends in the form of simple jokes.
If you want to generate a GIF online, though, Wondershare Filmora Video Editor ‘s online meme maker is the best option. It allows you to create a watermark-free picture, GIF, and video memes. It is entirely free to use and requires no registration. When creating a caption, you can edit the text size, color, and position to make a caption while you are editing. You can also add text inside or outside in GIF. Just with some clicks, your GIF will be complete. Try it now!
Wondershare Filmora - Best Video Editor for Mac/Windows
5,481,435 people have downloaded it.
Build unique custom animations without breaking a sweat.
Focus on creating epic stories and leave the details to Filmora’s auto features.
Start a creative adventure with drag & drop effects and endless possibilities.
Filmora simplifies advanced features to save you time and effort.
Filmora cuts out repetition so you can move on to your next creative breakthrough.
● Key Takeaways from This Episode →
● Now that you know about the 12 best GIF meme generators and how to use them to make a unique and customized GIF with the simple step guide, you can now try your hands on new things.
● However, Wondershare Filmora is your sure best GIF caption meme maker to help you achieve excellent results as a GIF meme creator. So go for it!
How to Animate Image on Scroll and Text on Scroll?
How to Animate Image on Scroll and Text on Scroll?
An easy yet powerful editor
Numerous effects to choose from
Detailed tutorials provided by the official channel
Over the years, web designers have tried different tactics to make their websites visually engaging. From marquee tags to animated navigation bars, designers tried everything they could to enhance the overall visual appearance of their websites.
One such tactic - that even brands like Sony and Apple - followed was image-on-scroll and text-on-scroll animations.
In this article
01 [How to Make Scroll Image Animation Like Apple?](#Part 1)
02 [How to Create a Scrolling Text Animation (Infinite Loop)](#Part 2)
Part 1 How to Make Scroll Image Animation Like Apple?
First, let’s take a look at different ways to make scroll-image animation like Apple. An image-on-scroll animation is an animation playback that appears on images as you continue to scroll down a website. You can use multiple methods to implement scroll image animations on your website.
01Use Filmora
Wondershare Filmora Video Editor is a feature-packed video editing tool that’s designed to help video editors create high-quality videos in a hassle-free manner. The tool offers a timeline-based interface that streamlines the entire video editing process and helps professionals execute complex video editing tasks in no time. In addition to its basic editing features, Filmora also offers advanced editing functions including color grading, motion tracking, and keyframing. It means you can easily turn your RAW footage into high-quality videos without any hassle.
Using Wondershare Filmora to animate images on scroll will be an ideal solution if you want to integrate a visually appealing element to your website. Let’s walk you through the step-by-step procedure of using Wondershare Filmora to create image-on-scroll animations.
Wondershare Filmora - Best Video Editor for Mac/Windows
5,481,435 people have downloaded it.
Build unique custom animations without breaking a sweat.
Focus on creating epic stories and leave the details to Filmora’s auto features.
Start a creative adventure with drag & drop effects and endless possibilities.
Filmora simplifies advanced features to save you time and effort.
Filmora cuts out repetition so you can move on to your next creative breakthrough.
Step 1 - Launch Filmora on your system and import the video/image that you want to edit. Then, load the selected file to Filmora’s timeline to proceed further.
Step 2 - Now, double-tap the video/image. This will launch the editing panel on your screen. Here, switch to the “Animation” panel.

Step 3 - Here you can either select “Presets” or click the “Customize” tab to create a custom animation through keyframing.

Step 4 - If you want to save time, however, it would be better to choose the “Presets” tab. Then, select the preset that you want to use.
Step 5 - Now, drag the selected preset to the timeline. Again, double-tap the preset layer. An editing panel will appear on your screen. Here you can adjust different elements of the preset to customize its playback.

So, that’s everything you need to know about animating image-on-scroll using Wondershare Filmora.
02Use ScrollSequence
Now, if you are not a professional editor or don’t want to overcomplicate things, you can use ScrollSequence to add image-on-scroll animation to your website. For readers who don’t know, ScrollSequence is a built-in WordPress plugin that you can directly install in your WordPress manager. The tool offers hundreds of ready-to-use animation templates that you can integrate and customize without any hassle.
All the templates offer complete customization, which means you can adjust the animation playback, import your own media files, and even customize the text. It’s worth understanding that this method will only work if you are using WordPress as the CMS platform for your website. ScrollSequence is only available as a WordPress plugin and you won’t be able to use it with any other website builder
03Write Your Own JavaScript Code
Finally, you can also write your own JavaScript code to animate image-on-scroll. However, this method will be a bit complicated as you would require technical expertise to write dedicated JavaScript scripts to animate image-on-scroll. If you choose this solution, you’ll have to start with writing HTML and CSS codes. This will help you style your web page in the beginning. And, once the web design is up and ready, you can move towards writing the JavaScript code to animate image-on-scroll in your web page.
Part 2 How to Create a Scrolling Text Animation (Infinite Loop)
Like image-on-scroll, text-on-scroll is another popular way to add visually appealing animations to your web designs. Text-on-scroll animations work the same way as image-on-scroll animations - the only difference is that these types of animations focus on the text playback instead of images. Again, you can use different methods to animate text on scroll and make your website’s content run in an infinite loop.
Some of these methods include:
01Use Filmora
Thanks to Filmora’s advanced editing panel, you can also use it to animate text within the videos. This will be an ideal solution for users who want to add videos with dedicated text banners and titles on their websites. With Filmora, you’ll be able to animate the text and make custom transitions in a hassle-free manner. Let’s walk you through the detailed procedure of using Wondershare Filmora to add text animation to your videos.
Step 1 - Open Filmora on your system and load the video into its timeline.
Step 2 - Double-tap the video file, and switch to the “Titles” tab. You’ll see a list of different title templates on your screen. Browse through these results and drag the desired template to the timelines. Make sure to adjust the title layer right above the video layer.

Step 3 - Again, double-click the title layer and you’ll see a dedicated text editor on your screen. Here enter the text that you want to display within the video. You can also select text size, orientation, and font to personalize its appearance.
Step 4 - Finally, switch to the “Animation” tab at the left sidebar. Choose any of these animation templates and the text within the video will be animated automatically.

So, that’s how you can use Filmora to animate text-on-scroll to improve the overall visual appearance of your website videos.
02Scroll-Text-Animations for Single Words
Another way to implement scroll-text animations is to modify the HTML & CSS code of your website. Again, this method will only be feasible if you have prior coding experience and know how to write well-optimized code.

The easiest way to animate text scrolls is through single-line animations. In this situation, only one line gets displayed at any particular time, which automatically gets switched to the next one as soon as you scroll down the cursor. If you are planning to create simple text-based animations, this method will help you get the job done easily.
Key Takeaways from This Episode
● You can animate image-on-scroll and text-on-scroll to enhance the overall visual appearance of your websites and make them more engaging for the end-users.
● If you are planning to upload dedicated videos on your website, you can use Wondershare Filmora, a fully-functional video editing tool, to animate both images and text through an easy-to-navigate editing panel.
● You should only opt for the coding method if you are an experienced coder and have worked on HTML/CSS/JavaScript projects in the past.
Over the years, web designers have tried different tactics to make their websites visually engaging. From marquee tags to animated navigation bars, designers tried everything they could to enhance the overall visual appearance of their websites.
One such tactic - that even brands like Sony and Apple - followed was image-on-scroll and text-on-scroll animations.
In this article
01 [How to Make Scroll Image Animation Like Apple?](#Part 1)
02 [How to Create a Scrolling Text Animation (Infinite Loop)](#Part 2)
Part 1 How to Make Scroll Image Animation Like Apple?
First, let’s take a look at different ways to make scroll-image animation like Apple. An image-on-scroll animation is an animation playback that appears on images as you continue to scroll down a website. You can use multiple methods to implement scroll image animations on your website.
01Use Filmora
Wondershare Filmora Video Editor is a feature-packed video editing tool that’s designed to help video editors create high-quality videos in a hassle-free manner. The tool offers a timeline-based interface that streamlines the entire video editing process and helps professionals execute complex video editing tasks in no time. In addition to its basic editing features, Filmora also offers advanced editing functions including color grading, motion tracking, and keyframing. It means you can easily turn your RAW footage into high-quality videos without any hassle.
Using Wondershare Filmora to animate images on scroll will be an ideal solution if you want to integrate a visually appealing element to your website. Let’s walk you through the step-by-step procedure of using Wondershare Filmora to create image-on-scroll animations.
Wondershare Filmora - Best Video Editor for Mac/Windows
5,481,435 people have downloaded it.
Build unique custom animations without breaking a sweat.
Focus on creating epic stories and leave the details to Filmora’s auto features.
Start a creative adventure with drag & drop effects and endless possibilities.
Filmora simplifies advanced features to save you time and effort.
Filmora cuts out repetition so you can move on to your next creative breakthrough.
Step 1 - Launch Filmora on your system and import the video/image that you want to edit. Then, load the selected file to Filmora’s timeline to proceed further.
Step 2 - Now, double-tap the video/image. This will launch the editing panel on your screen. Here, switch to the “Animation” panel.
Step 3 - Here you can either select “Presets” or click the “Customize” tab to create a custom animation through keyframing.
Step 4 - If you want to save time, however, it would be better to choose the “Presets” tab. Then, select the preset that you want to use.
Step 5 - Now, drag the selected preset to the timeline. Again, double-tap the preset layer. An editing panel will appear on your screen. Here you can adjust different elements of the preset to customize its playback.
So, that’s everything you need to know about animating image-on-scroll using Wondershare Filmora.
02Use ScrollSequence
Now, if you are not a professional editor or don’t want to overcomplicate things, you can use ScrollSequence to add image-on-scroll animation to your website. For readers who don’t know, ScrollSequence is a built-in WordPress plugin that you can directly install in your WordPress manager. The tool offers hundreds of ready-to-use animation templates that you can integrate and customize without any hassle.
All the templates offer complete customization, which means you can adjust the animation playback, import your own media files, and even customize the text. It’s worth understanding that this method will only work if you are using WordPress as the CMS platform for your website. ScrollSequence is only available as a WordPress plugin and you won’t be able to use it with any other website builder
03Write Your Own JavaScript Code
Finally, you can also write your own JavaScript code to animate image-on-scroll. However, this method will be a bit complicated as you would require technical expertise to write dedicated JavaScript scripts to animate image-on-scroll. If you choose this solution, you’ll have to start with writing HTML and CSS codes. This will help you style your web page in the beginning. And, once the web design is up and ready, you can move towards writing the JavaScript code to animate image-on-scroll in your web page.
Part 2 How to Create a Scrolling Text Animation (Infinite Loop)
Like image-on-scroll, text-on-scroll is another popular way to add visually appealing animations to your web designs. Text-on-scroll animations work the same way as image-on-scroll animations - the only difference is that these types of animations focus on the text playback instead of images. Again, you can use different methods to animate text on scroll and make your website’s content run in an infinite loop.
Some of these methods include:
01Use Filmora
Thanks to Filmora’s advanced editing panel, you can also use it to animate text within the videos. This will be an ideal solution for users who want to add videos with dedicated text banners and titles on their websites. With Filmora, you’ll be able to animate the text and make custom transitions in a hassle-free manner. Let’s walk you through the detailed procedure of using Wondershare Filmora to add text animation to your videos.
Step 1 - Open Filmora on your system and load the video into its timeline.
Step 2 - Double-tap the video file, and switch to the “Titles” tab. You’ll see a list of different title templates on your screen. Browse through these results and drag the desired template to the timelines. Make sure to adjust the title layer right above the video layer.
Step 3 - Again, double-click the title layer and you’ll see a dedicated text editor on your screen. Here enter the text that you want to display within the video. You can also select text size, orientation, and font to personalize its appearance.
Step 4 - Finally, switch to the “Animation” tab at the left sidebar. Choose any of these animation templates and the text within the video will be animated automatically.
So, that’s how you can use Filmora to animate text-on-scroll to improve the overall visual appearance of your website videos.
02Scroll-Text-Animations for Single Words
Another way to implement scroll-text animations is to modify the HTML & CSS code of your website. Again, this method will only be feasible if you have prior coding experience and know how to write well-optimized code.
The easiest way to animate text scrolls is through single-line animations. In this situation, only one line gets displayed at any particular time, which automatically gets switched to the next one as soon as you scroll down the cursor. If you are planning to create simple text-based animations, this method will help you get the job done easily.
Key Takeaways from This Episode
● You can animate image-on-scroll and text-on-scroll to enhance the overall visual appearance of your websites and make them more engaging for the end-users.
● If you are planning to upload dedicated videos on your website, you can use Wondershare Filmora, a fully-functional video editing tool, to animate both images and text through an easy-to-navigate editing panel.
● You should only opt for the coding method if you are an experienced coder and have worked on HTML/CSS/JavaScript projects in the past.
Useful Tips for Canva Animated Elements
Versatile Video Editor - Wondershare Filmora
An easy yet powerful editor
Numerous effects to choose from
Detailed tutorials provided by the official channel
Thanks to the progress of graphic design, users are no longer simply satisfied with everyday designs, no matter how complex the design itself. They want innovation, they want a fresh and mesmerizing new idea. This becomes increasingly harder to achieve and helps push the boundaries of what designers want.
This is where motion can come into play. Movement in graphic design has emerged as a recent design trend. This is where users benefit from valuable tips for Canva animated elements.
Without further ado, let’s dive into everything you need to know to design animated elements in Canva.
In this article
01 [What is Canva?](#Part 1)
02 [Animate An Element In Canva](#Part 2)
03 [Make Elements Move In Canva](#Part 3)
04 [How About Making Animated Elements On Video](#Part 4)
Part 1 What is Canva?
Canva has become a buzzword in the designing and animation world. It’s a graphic design platform that allows users to create graphic designs for social media, for presentations, documents, cards for any memorable occasion. It was founded by Melanie Perkins, an Australian technology entrepreneur.
Canva has become a buzzword in the designing and animation world. It’s a graphic design platform that allows users to create graphic designs for social media, for presentations, documents, cards for any memorable occasion. It was founded by Melanie Perkins, an Australian technology entrepreneur.
It allows users to work individually or across teams. With real-time live changes made available, Canva is pushing the boundary of what is possible and making it more accessible. With the introduction of animated elements in Canva, the possibilities for design horizons have expanded significantly.
Part 2 Animate An Element In Canva
There are one of two ways to go about creating an animation. You can work off an existing template or create a custom template. If you’re wondering how to animate individual elements in Canva then this guide is for you.
The first step to animation is building your custom static design. For that you need to go to Canva and select “Create a Design” option. Once you do, select the type of content you’re attempting to create- from Instagram posts to a presentation or an A4 document.
Think of the text font you’re going to use.

Then you should look into adding elements that suit your text on the design.

You can upload photographs into your creation with the upload button. This also extends to uploading audio that you want to use on video clips.

Once you’re done with these steps, you should have a customized static design that you can use. Let’s now look at how to animate individual elements in Canva. These elements are the text, the image, audio, and video.
2.1 Image
To add an image to Canva, you need to upload it in the ‘Upload’ tab on Canva. Once you do, the image can then be selected for display on your presentation.
For images, you can also choose to frame them within the “elements” tab. There are two kinds of elements. One which allows photographs to be embedded in them and ones which don’t. You can choose any element as a frame for your embedded image.
The next thing is to choose the “Animate” button. This will open up different options for animation features. The animate button allows a preview of what each animation does in real-time.

The ones with the crown are premium features exclusive to Canva Pro, the paid subscription.
2.2 Text
Add in the text you want to see to the image. The text can be in any style that you choose. Canva offers a variety of fonts that you can use to customize the color, size, and duration of the display.

2.3 Video
If you’re ready to take your content creation skills to the next level, this section is for you. You have the option of adding videos to Canva as well. Just load the video you have on hand to the Canva “Uploads” section. Introduce the video clip to the design.
Another way to embed the video is by using an element and embedding your video within it.
With video, you also have options like cropping, adjusting the playback. With playback, you can choose “Autoplay Video” and “Loop Video.” These are basic options for how the video can be played. The crop function allows you to trim the video to any point in time.
On top of this, you can use the animate button, which can create options for how the video is introduced to the backdrop.

If you want to remove the animation, you need to go to the “Animate” button and select the ‘None’ option to delete the animation from the design.
You can opt to animate either just the elements or you can animate the slide on the whole with “Page Animations.”
Part 3 Make Elements Move In Canva
How To Arrange The Order Of An Animation?
The brilliant thing about Canva is that you can decide the order you want to create your animation. The component elements of a Canva backdrop are the text, audio, images, video. These form the basis for the animated elements in Canva.
You can work on whichever component feels more accessible to you. Canva also allows users to make videos for title sequences and end-cards for video sharing platforms.
How to Change The Duration Of Animated Graphic In Canva
Once you’ve added a video element to your presentation, you’ll notice that the timer disappears from the production. This is because the presentation only lasts the duration of the video.
If you go to the next slide of the presentation, you can often notice a timer available. It has a default duration of five seconds. If you click on the clock symbol, a menu with “Timing” will appear with a slider. You can adjust the timing from 0.1 seconds up to a maximum of 30 seconds.
Part 4 How About Making Animated Elements On Video
If you’ve decided Canva is not the tool for you, you can choose any video editing software to make your animation.
Wondershare Filmora is the tool that can help you level up your content creation. It allows users to increase precision and provides professional video editing options.
AI Portrait – The best feature of Wondershare Filmora for gameplay editing
The AI Portrait is a new add-on in Wondershare Filmora. It can easily remove video backgrounds without using a green screen or chroma key, allowing you to add borders, glitch effects, pixelated, noise, or segmentation video effects.

Conclusion
Now that you understand how to build an animation and the software required, you should differentiate between average and extraordinary editing tools.
Filmora and Canva are the best editing tools in this case. Like you can animate individual elements Canva, you can do the same in the other tool also. It may be used to produce animation videos by introducing keyframes, resulting in a seamless and realistic animation. Aside from that, using color correction and an audio processor can help take your animations to the next tier.
Download it today to make your videos better.
Thanks to the progress of graphic design, users are no longer simply satisfied with everyday designs, no matter how complex the design itself. They want innovation, they want a fresh and mesmerizing new idea. This becomes increasingly harder to achieve and helps push the boundaries of what designers want.
This is where motion can come into play. Movement in graphic design has emerged as a recent design trend. This is where users benefit from valuable tips for Canva animated elements.
Without further ado, let’s dive into everything you need to know to design animated elements in Canva.
In this article
01 [What is Canva?](#Part 1)
02 [Animate An Element In Canva](#Part 2)
03 [Make Elements Move In Canva](#Part 3)
04 [How About Making Animated Elements On Video](#Part 4)
Part 1 What is Canva?
Canva has become a buzzword in the designing and animation world. It’s a graphic design platform that allows users to create graphic designs for social media, for presentations, documents, cards for any memorable occasion. It was founded by Melanie Perkins, an Australian technology entrepreneur.
Canva has become a buzzword in the designing and animation world. It’s a graphic design platform that allows users to create graphic designs for social media, for presentations, documents, cards for any memorable occasion. It was founded by Melanie Perkins, an Australian technology entrepreneur.
It allows users to work individually or across teams. With real-time live changes made available, Canva is pushing the boundary of what is possible and making it more accessible. With the introduction of animated elements in Canva, the possibilities for design horizons have expanded significantly.
Part 2 Animate An Element In Canva
There are one of two ways to go about creating an animation. You can work off an existing template or create a custom template. If you’re wondering how to animate individual elements in Canva then this guide is for you.
The first step to animation is building your custom static design. For that you need to go to Canva and select “Create a Design” option. Once you do, select the type of content you’re attempting to create- from Instagram posts to a presentation or an A4 document.
Think of the text font you’re going to use.
Then you should look into adding elements that suit your text on the design.
You can upload photographs into your creation with the upload button. This also extends to uploading audio that you want to use on video clips.
Once you’re done with these steps, you should have a customized static design that you can use. Let’s now look at how to animate individual elements in Canva. These elements are the text, the image, audio, and video.
2.1 Image
To add an image to Canva, you need to upload it in the ‘Upload’ tab on Canva. Once you do, the image can then be selected for display on your presentation.
For images, you can also choose to frame them within the “elements” tab. There are two kinds of elements. One which allows photographs to be embedded in them and ones which don’t. You can choose any element as a frame for your embedded image.
The next thing is to choose the “Animate” button. This will open up different options for animation features. The animate button allows a preview of what each animation does in real-time.
The ones with the crown are premium features exclusive to Canva Pro, the paid subscription.
2.2 Text
Add in the text you want to see to the image. The text can be in any style that you choose. Canva offers a variety of fonts that you can use to customize the color, size, and duration of the display.
2.3 Video
If you’re ready to take your content creation skills to the next level, this section is for you. You have the option of adding videos to Canva as well. Just load the video you have on hand to the Canva “Uploads” section. Introduce the video clip to the design.
Another way to embed the video is by using an element and embedding your video within it.
With video, you also have options like cropping, adjusting the playback. With playback, you can choose “Autoplay Video” and “Loop Video.” These are basic options for how the video can be played. The crop function allows you to trim the video to any point in time.
On top of this, you can use the animate button, which can create options for how the video is introduced to the backdrop.
If you want to remove the animation, you need to go to the “Animate” button and select the ‘None’ option to delete the animation from the design.
You can opt to animate either just the elements or you can animate the slide on the whole with “Page Animations.”
Part 3 Make Elements Move In Canva
How To Arrange The Order Of An Animation?
The brilliant thing about Canva is that you can decide the order you want to create your animation. The component elements of a Canva backdrop are the text, audio, images, video. These form the basis for the animated elements in Canva.
You can work on whichever component feels more accessible to you. Canva also allows users to make videos for title sequences and end-cards for video sharing platforms.
How to Change The Duration Of Animated Graphic In Canva
Once you’ve added a video element to your presentation, you’ll notice that the timer disappears from the production. This is because the presentation only lasts the duration of the video.
If you go to the next slide of the presentation, you can often notice a timer available. It has a default duration of five seconds. If you click on the clock symbol, a menu with “Timing” will appear with a slider. You can adjust the timing from 0.1 seconds up to a maximum of 30 seconds.
Part 4 How About Making Animated Elements On Video
If you’ve decided Canva is not the tool for you, you can choose any video editing software to make your animation.
Wondershare Filmora is the tool that can help you level up your content creation. It allows users to increase precision and provides professional video editing options.
AI Portrait – The best feature of Wondershare Filmora for gameplay editing
The AI Portrait is a new add-on in Wondershare Filmora. It can easily remove video backgrounds without using a green screen or chroma key, allowing you to add borders, glitch effects, pixelated, noise, or segmentation video effects.
Conclusion
Now that you understand how to build an animation and the software required, you should differentiate between average and extraordinary editing tools.
Filmora and Canva are the best editing tools in this case. Like you can animate individual elements Canva, you can do the same in the other tool also. It may be used to produce animation videos by introducing keyframes, resulting in a seamless and realistic animation. Aside from that, using color correction and an audio processor can help take your animations to the next tier.
Download it today to make your videos better.
Learn How to Do Funny Cartoon Drawings
The Art of Comics - Learn How to Do Funny Cartoon Drawings
An easy yet powerful editor
Numerous effects to choose from
Detailed tutorials provided by the official channel
Whether you want to use a simple short video or an accessible online lesson, you will find everything that you need to learn how to create comic cartoon drawing on this website. This website article contains all the tutorials you need, ranging from your favorite wild animals, places, objects, farm animals, characters, vehicles, and food.

Do not forget that practicing is the key to success, so don’t hesitate to try several drawing lessons to help you improve your abilities. Start today to learn how to draw funny cartoons online at your own pace and comfort with this step-by-step tutorial.
In this article
01 [How to Draw Funny Cartoon Faces](#Part 1)
02 [How to Draw Your Own Cartoon Character](#Part 2)
Part 1 How to Draw Funny Cartoon Faces
Drawing funny faces in cartoons is very easy compared to other drawing styles or drawing complete parts of the comic. All that is need is practice and experiment with different combinations of shapes. This article will guide on how to draw funny cartoon faces of various types using six other steps:
Step 1: To begin, you need to first draw the face outline by drawing the following;
● Any Perfect type of round shape like a circle.
● Any pear shapes
● An upside-down triangle
● A quadrilateral like a trapezium, a square, or any of your choice

Step 2: To draw the nose in the middle of the face, draw somewhere any of the following;
● A round shape that is bulgy
● A U-shape
● A V-shape
● A small dash.

Step 3: Next is that you draw two round shapes for the eyes, and each of them should have a smaller round or dot (for the pupil), which is above the nose. This eye can be in the shape of any of the following;
● Two large circles
● An ovals
● A curvy “M,” like the one you can see in the “McDonalds” logo.

Step 4: You can draw the mouth just below the nose and draw any of the shapes from the list given below. In addition, to make the mouth funnier, you should then add teeth by either drawing a small square sticking out inside the mouth from the upper side, at the roof of the mouth, or a straight horizontal line which is across the mouth and several vertical lines used to form a grid having two rows and many columns.
● A U-shaped curve that is large
● A triangle like a right-angled one which is most preferred
● A circle or an oval shape
● A rectangle shapes
● A straight line shapes

Step 5: You can add any other “extra fittings” such as the ears (in cartoons, ears generally considered to be ‘extra’), wrinkles, collar, hat, hair, etc.

Step 6: Finally, your cartoon face drawing is ready! You can also add different colors to the picture with different funky shades to make it attractive.

Part 2 How to Draw Your Own Cartoon Character
Are you bored? Why not take up a pencil and draw your cartoon comic drawing character? Note that drawing will be a relief from boredom, and it also helps your creativity fly very high.
However, you can easily add some colors and designs or even animate your cartoon character using this free software known as Filmora. Wondershare Filmora Video Editor is the best software to make you cartoon your picture or animate your cartoon characters with tons of filters and effects and its keyframing feature, which allows this with ease.
For Win 7 or later (64-bit)
For macOS 10.12 or later
Read this article on how to draw the perfect cartoon character yourself:
Step 1: The first is to have an idea of what you want to draw, i.e., the picture you want to draw. You can pick any character to draw from your favorite website or WeeWorld.com.
● First, you draw the face but make sure you don’t add a nose but do a black outline.
● Next, you can draw the other features but make sure you don’t use colored pencils. Only use your main writing utensil.
● Then, remember to use your imagination to add the clothes and hairstyle.
● Finally, you can delete any unwanted lines and color with artist utensils, such as crayons, paintbrushes, colored pencils, etc. Also, remember that you can add some detail to your character to make it pop out and be beautiful.

Step 2: Now you have officially made your cartoon, how does it feel?

Step 3: Next, you want to go back and draw again, but this time, not an imitation.

Step 4: Pick up a new piece of paper to be used to draw another character. But this time, you need to change the features. You can decide to make the eyes bigger, neon skin, and maybe crazy hair. You can try clothes that you would love to wear, or ones you wish you could get. Also, try to change the size around to make the features look different and add a nose, and then you can finally color your creation.

Step 5: Now, you can compare the two drawings to notice the difference. You will realize that one is an imitation while the other is all you! Now, you can grab a new piece of notebook paper.

Step 6: Next is that you begin to jot down different ideas. For example, you may want to draw a cute little puppy or a cute baby. Sometimes you can decide that your cartoon could be about a talking apple or something different.

Step 7: Grab another piece of paper and draw any other character you can imagine. You can try using a Sharpie marker for the outline by carefully tracing the pencil. Then you can erase any stray marks on the piece of paper. Next, you can also use any writing utensils like markers, crayons, colored pencils, pastels, or even paint, as it also works well.

Step 8: You can grab your notebook sheet again and then jot down any idea of a comic series. Also, make a plot or funny lines that you could use or any other characters.

Step 9: Next, you fold the blank sheet of paper and make it into about four lines. And then you can draw your main character by just using a pencil first.

Step 10: You can then draw the other characters and all the basic outlines in the drawing.

Step 11: Next is that you can draw the furniture and background, such as trees or anything else, to beautify your drawing.

Step 12: You can go back and add details and outline with Sharpie or black marker and delete any stray marks. You can also color if wanted.

Step 13: Next is for you to add dialogue and actively work with your character drawing.

Step 14: Finally, and there you have it. Congratulation! You now have your perfect, awesome, beautiful, and YOUR cartoon.

● Ending Thoughts →
● This article explained all you need to know about learning how to do funny cartoon drawings very quickly. You can also use these methods to create funny cat cartoon drawings or any other drawing you want for cat lovers.
● However, you can decide to animate your graphic using the best software to carry it out quickly, i.e., Filmora.
Whether you want to use a simple short video or an accessible online lesson, you will find everything that you need to learn how to create comic cartoon drawing on this website. This website article contains all the tutorials you need, ranging from your favorite wild animals, places, objects, farm animals, characters, vehicles, and food.
Do not forget that practicing is the key to success, so don’t hesitate to try several drawing lessons to help you improve your abilities. Start today to learn how to draw funny cartoons online at your own pace and comfort with this step-by-step tutorial.
In this article
01 [How to Draw Funny Cartoon Faces](#Part 1)
02 [How to Draw Your Own Cartoon Character](#Part 2)
Part 1 How to Draw Funny Cartoon Faces
Drawing funny faces in cartoons is very easy compared to other drawing styles or drawing complete parts of the comic. All that is need is practice and experiment with different combinations of shapes. This article will guide on how to draw funny cartoon faces of various types using six other steps:
Step 1: To begin, you need to first draw the face outline by drawing the following;
● Any Perfect type of round shape like a circle.
● Any pear shapes
● An upside-down triangle
● A quadrilateral like a trapezium, a square, or any of your choice
Step 2: To draw the nose in the middle of the face, draw somewhere any of the following;
● A round shape that is bulgy
● A U-shape
● A V-shape
● A small dash.
Step 3: Next is that you draw two round shapes for the eyes, and each of them should have a smaller round or dot (for the pupil), which is above the nose. This eye can be in the shape of any of the following;
● Two large circles
● An ovals
● A curvy “M,” like the one you can see in the “McDonalds” logo.
Step 4: You can draw the mouth just below the nose and draw any of the shapes from the list given below. In addition, to make the mouth funnier, you should then add teeth by either drawing a small square sticking out inside the mouth from the upper side, at the roof of the mouth, or a straight horizontal line which is across the mouth and several vertical lines used to form a grid having two rows and many columns.
● A U-shaped curve that is large
● A triangle like a right-angled one which is most preferred
● A circle or an oval shape
● A rectangle shapes
● A straight line shapes
Step 5: You can add any other “extra fittings” such as the ears (in cartoons, ears generally considered to be ‘extra’), wrinkles, collar, hat, hair, etc.
Step 6: Finally, your cartoon face drawing is ready! You can also add different colors to the picture with different funky shades to make it attractive.
Part 2 How to Draw Your Own Cartoon Character
Are you bored? Why not take up a pencil and draw your cartoon comic drawing character? Note that drawing will be a relief from boredom, and it also helps your creativity fly very high.
However, you can easily add some colors and designs or even animate your cartoon character using this free software known as Filmora. Wondershare Filmora Video Editor is the best software to make you cartoon your picture or animate your cartoon characters with tons of filters and effects and its keyframing feature, which allows this with ease.
For Win 7 or later (64-bit)
For macOS 10.12 or later
Read this article on how to draw the perfect cartoon character yourself:
Step 1: The first is to have an idea of what you want to draw, i.e., the picture you want to draw. You can pick any character to draw from your favorite website or WeeWorld.com.
● First, you draw the face but make sure you don’t add a nose but do a black outline.
● Next, you can draw the other features but make sure you don’t use colored pencils. Only use your main writing utensil.
● Then, remember to use your imagination to add the clothes and hairstyle.
● Finally, you can delete any unwanted lines and color with artist utensils, such as crayons, paintbrushes, colored pencils, etc. Also, remember that you can add some detail to your character to make it pop out and be beautiful.
Step 2: Now you have officially made your cartoon, how does it feel?
Step 3: Next, you want to go back and draw again, but this time, not an imitation.
Step 4: Pick up a new piece of paper to be used to draw another character. But this time, you need to change the features. You can decide to make the eyes bigger, neon skin, and maybe crazy hair. You can try clothes that you would love to wear, or ones you wish you could get. Also, try to change the size around to make the features look different and add a nose, and then you can finally color your creation.
Step 5: Now, you can compare the two drawings to notice the difference. You will realize that one is an imitation while the other is all you! Now, you can grab a new piece of notebook paper.
Step 6: Next is that you begin to jot down different ideas. For example, you may want to draw a cute little puppy or a cute baby. Sometimes you can decide that your cartoon could be about a talking apple or something different.
Step 7: Grab another piece of paper and draw any other character you can imagine. You can try using a Sharpie marker for the outline by carefully tracing the pencil. Then you can erase any stray marks on the piece of paper. Next, you can also use any writing utensils like markers, crayons, colored pencils, pastels, or even paint, as it also works well.
Step 8: You can grab your notebook sheet again and then jot down any idea of a comic series. Also, make a plot or funny lines that you could use or any other characters.
Step 9: Next, you fold the blank sheet of paper and make it into about four lines. And then you can draw your main character by just using a pencil first.
Step 10: You can then draw the other characters and all the basic outlines in the drawing.
Step 11: Next is that you can draw the furniture and background, such as trees or anything else, to beautify your drawing.
Step 12: You can go back and add details and outline with Sharpie or black marker and delete any stray marks. You can also color if wanted.
Step 13: Next is for you to add dialogue and actively work with your character drawing.
Step 14: Finally, and there you have it. Congratulation! You now have your perfect, awesome, beautiful, and YOUR cartoon.
● Ending Thoughts →
● This article explained all you need to know about learning how to do funny cartoon drawings very quickly. You can also use these methods to create funny cat cartoon drawings or any other drawing you want for cat lovers.
● However, you can decide to animate your graphic using the best software to carry it out quickly, i.e., Filmora.
Top 15 Male Anime Characters [By Voting]
Top 15 Male Anime Characters [By Voting]

Shanoon Cox
Mar 27, 2024• Proven solutions
You don’t generally see the kind of hype and excitement for a single category of content like one that revolves around anime. Anime offers a complete package filled with emotions, drama, entertainment, amazing plot twist, stunning visuals – and of course, admirable characters. No matter how good or bad the show is, an anime is always defined by its characters. A good-looking, charming, and badass hero is the backbone of an anime. Believe it or not but many popular cult-favorite anime characters have millions of fans. Today we will reveal the top 15 male anime characters.
Stay tuned to find out if your favorite anime boy made it to the list!
Best 15 Male Anime Characters/Anime Boys Voted by Anime Fans
Here is a list of the coolest of the cool top 15 most loved male anime characters in anime history according to the fan votes. Note that the characters here are listed in no particular order:
- 1. Levi Ackerman — Attack on Titan
- 2. Kakashi Hatake — Naruto
- 3. Itachi Uchiha — Naruto
- 4. L — Death Note
- 5. Ken Kaneki — Tokyo Ghoul
- 6. Karma Akabane – Assassination Classroom
- 7. Katsuki Bakugou – My Hero Academia
- 8. Killua Zaoldyeck – Hunter X Hunter
- 9. Hak – Yona of the Dawn
- 10. Ban – The Seven Deadly Sins
- 11. Satoru Gojo – Jujutsu Kaisen
- 12. Zero Kiryu – Vampire Knight
- 13. Edward Elric – Fullmetal Alchemist
- 14. Victor Nikiforov – Yuri!!! on Ice
- 15. Ayato Sakamaki – Diabolik Lovers
1. Levi Ackerman — Attack on Titan
Levi Ackerman is a cold, distant, antisocial anime boy. He looks like a young teenager but he’s decades old. Levi is the Captain of the Scouting Legion division and Special Operations Squad. He boasts the title of “Humanity’s Strongest Soldier” because he is the strongest human being in the world who can easily take down Titans. What makes this character so realistic is that he is not perfect; he’s facing his own emotional trauma and insecurities. Since his introduction, he has gained immense love and appreciation from the fans. Levi’s stern face, tactful nature and strength make him one of the best male anime characters.
2. Kakashi Hatake — Naruto
Naruto is perhaps one of the most famous anime shows out there with a number of cult-favorite characters. Kakashi Hatake is Naruto’s sensei and leader of team 7. Kakashi Hatake is a shinobi of Konohagakure’s Hatake clan. His teammate Obito Uchiha gives him a Sharingan. He gets the title “Copy Ninja Kakashi” because he can copy the moves of other ninjas due to his Sharingan. Kakashi is famous for his mysterious appearance, relaxed attitude, and dynamic personality.
3. Itachi Uchiha — Naruto

Itachi Uchiha is one of the most famous anime characters of all time. He is the most popular edge lord in the anime world. He is popular due to his older brother whose t-shirts and mixtapes he stole. Itachi Uchiha is not a protagonist but an anti-hero. He kills the entire Uchiha clan except for his brother Sasuke. Despite his negative characteristics, fans love him. His mysterious history, dreamy eyes, cool moves, and sexy personality make him an attractive male anime character. Itachi has millions of fans around the world with dedicated fandom websites.
4. L — Death Note
L Lawliet is the famous detective in Death Note. He is famous for his different aesthetic and strong personality. He is a man of high intelligence, awkward posture and intriguing mysteries. Ever since his introduction, L has left a long-lasting impression on viewers. This suspense series would have been incomplete without L. His social ineptitude and complex strategic reasoning are the perfect addition to the plot.
5. Ken Kaneki — Tokyo Ghoul
Ken Kaneki is the main character in Tokyo Ghoul married to Touka Kirishima. He has a gentle, introverted, and kind personality. At the beginning of the series, he is a normal man but then Rize Kamishiro’s kakuhou is transplanted in him. Ken then transforms into an artificial one-eyed ghoul, the first of his kind. Being half-ghoul, half-human he becomes a Quinx. Later on, he is known as the Eyepatch and becomes one of the strongest ghouls ever.
6. Karma Akabane – Assassination Classroom
Karma Akabane is a young, mischievous, and clever character in the anime series Assassination Classroom. Karma goes to the Kunugigaoka Junior High School and studies under Korosensei. Karma is a popular character because most teens can relate to his stubbornness. He is popular in school for violence and troublesome attitude. Even though he is shown to be cunning, sadistic, manipulating, and aggressive, there is still a tender side to him – and that’s what makes his character so exciting.
7. Katsuki Bakugou – My Hero Academia
Katsuki Bakugo is a famous male character in My Hero Academia manga and anime. His love and hate relationship with Katsuki is an important aspect of his overall personality. Being rude, arrogant, aggressive, and short-tempered, Katsuki is a man of average height. He has the typical; Japanese physique with a slim, muscular build. He is given the hero name “Great Explosion Murder God Dynamite” because he is very hot-headed and violent. Anime fans all over the world love his sexy lustrous ash-blond bangs, his fighting abilities, and his epic hero costume with Grenadier Bracers.
8. Killua Zaoldyeck – Hunter X Hunter
Killua Zaoldyeck is one of the strongest and most impactful characters of Hunter x Hunter. He is cool, sharp, and mischievous. Even though Killua is relegated as Gon Freecss’ sidekick, he has managed to grab the audience’s attention. His mysterious history, deadly talent, and never-ending contemplation of morality make him a great character.
9. Hak – Yona of the Dawn
Hak is the second most important character of this anime and manga series. Hak is the former General and Chief of the Wind Tribe who falls in love with Princess Yona. Hak is famous for his outstanding martial arts, swordsmanship, and archery skills. He earns the title of “Lightning Beast”, in the Kingdom of Kouka because he is the strongest fighter in the country. He is famous for his charming personality, sarcasm, wit, humor, and nonchalant behavior.
10. Ban – The Seven Deadly Sins
Ban is the king of Benwick and sin of Greed in Seven Deadly Sins. He is married to Elaine and has a daughter named Lancelot. and the king of Benwick. Ban is famous for his resilience and for giving up immortality to resurrect Elaine. Ban’s character is inspiring and passionate. He follows his heart and sometimes ends up suffering due to his selfishness and greedy nature. However, he is still caring and selfless for the people he loves and that’s what makes him so amazing.
11. Satoru Gojo – Jujutsu Kaisen
Satoru Gojo of Jujutsu Kaisen is a special grade jujutsu sorcerer. He teaches at the Tokyo Metropolitan Curse Technical College. Satoru is a tall handsome man with white hair and bright blue eyes. Gojo is a complex personality known to be nonchalant and fun around his friends, colleagues, and students. He is famous for his strength, speed, and reflexes. He is also the most powerful Jujutsu sorcerer
12. Zero Kiryu – Vampire Knight
Zero Kiryu is a vampire hunter and an ex-vampire. Zero is a tall attractive man with silver hair and snow-white skin and lavender eyes. He is one of the most popular manga and anime characters. He has a cool laid back rough and tough appearance; he has tattoos and multiple ear piercings. The tattoo is actually Hunter’s Seal which suppresses his vampire side and tames him. He has a strong loving personality. Even though he comes across as hostile and cold-hearted, he has a kind heart. He wishes to protect humans against his own people.
13. Edward Elric – Fullmetal Alchemist
Fullmetal Alchemist is the biggest Shounen anime with millions of fans. Edward Elric is the main protagonist of this anime series and manga. Fans love him for his spunky personality and morally conflicted human emotions. He loses his arm due to an alchemy experiment gone wrong. He is popular for his struggles through life, constant existential drama, heartwarming friendships, and epic alchemy battles. He is loud-mouthed, arrogant, headstrong, and resilient.
14. Victor Nikiforov – Yuri!!! on Ice
Victor Nikiforov is a famous figure skater in Yurri!!! On Ice. He is the coach and choreographer of Yuri Katsuki’s and his fiancé. Victor is presented as a very handsome man. He has a slim tall physique, light blue eyes, and short gray hair with bangs, the classic Japanese anime boy. Even though the star performer is Yuri, Victor has a strong celebrity persona and charisma. His flirtatious looks, sexy strength, and stunning performances, leaves the audience wanting for more. Victor is also very hardworking and always tries to perfect his skills and moves. His fun attitude, good looks, and easy-going personality make him one of the best male anime characters.
15. Ayato Sakamaki – Diabolik Lovers
Ayato Sakamaki belongs to the Sakamaki household and is the third son of the Vampire king Karlheinz and his wife Cordelia. Ayato is an angry young man with a slender body and rough reddish-colored spiky hair. He has a fair complexion and narrow green eyes. Ayato is a troublesome character yearning for attention. He is presented as a mischievous and clever young boy who looks down on others. By nature, he is a bully and teases people for his personal pleasure. Ayato refers to himself as “Ore-sama” (Yours Truly) after he falls in love with Chichinashi. Fans love him because he is a narcissist who is mercilessly passionate about torture – exactly what a real vampire should be!
Why Anime Boys Are Attractive?
What makes anime boys so attractive is their gentle demeanor. Anime has given a different touch to masculinity as compared to western shows - where an attractive man is usually portrayed as a tall macho dude with 6 packs. However, the concept of an anime boy is generally someone with a soft, cute, lithe yet athletic and badass personality. These hardcore tough guys have feminine qualities which set them apart from the mainstream heartthrobs like Chris Evans as Captain America or Zac Efron as Matt Brody.
Also, the ideal Japanese male is also much different than a Western guy. Japanese don’t desire strong, muscular, handsome Greek God-looking men. For them, the idea of an attractive man is a cool, laidback, charming, gentle guy with adorable looks and a goofy personality. Thus, a male anime character is a perfect combination of manly and sensitive - and women love that!
Create an Animation Video with Anireel
In simple words, Anireel is software that lets the creators create wonderfully animated videos by integrating fun elements and scenes into them. This animated video software is user-friendly and makes life easy for animation video creators. We understand that many individuals want to create great animation videos which they can use for many purposes, however, they feel that it is a very daunting task. Luckily, that’s not the case with the Anireel explainer video software.


Create an Animation Video with Smart Video Editor
Many people may think making an animation video is difficult. Actually, as long as you get the right video editor, it is not that difficult. Today, we would like to recommend you to use Filmora .
As a desktop solution for video editing , Filmora makes animation video creation easier than ever. You can check the below video about how to create an animation video. Except for video making, Filmora offers advanced features like Green Screen, Speed Ramping, Color Correction, and more to help you create a video for your loved anime character. Download Filmora and try it todayDownload Mac Version ](https://tools.techidaily.com/wondershare/filmora/download/ )
Shanoon Cox
Shanoon Cox is a writer and a lover of all things video.
Follow @Shanoon Cox
Shanoon Cox
Mar 27, 2024• Proven solutions
You don’t generally see the kind of hype and excitement for a single category of content like one that revolves around anime. Anime offers a complete package filled with emotions, drama, entertainment, amazing plot twist, stunning visuals – and of course, admirable characters. No matter how good or bad the show is, an anime is always defined by its characters. A good-looking, charming, and badass hero is the backbone of an anime. Believe it or not but many popular cult-favorite anime characters have millions of fans. Today we will reveal the top 15 male anime characters.
Stay tuned to find out if your favorite anime boy made it to the list!
Best 15 Male Anime Characters/Anime Boys Voted by Anime Fans
Here is a list of the coolest of the cool top 15 most loved male anime characters in anime history according to the fan votes. Note that the characters here are listed in no particular order:
- 1. Levi Ackerman — Attack on Titan
- 2. Kakashi Hatake — Naruto
- 3. Itachi Uchiha — Naruto
- 4. L — Death Note
- 5. Ken Kaneki — Tokyo Ghoul
- 6. Karma Akabane – Assassination Classroom
- 7. Katsuki Bakugou – My Hero Academia
- 8. Killua Zaoldyeck – Hunter X Hunter
- 9. Hak – Yona of the Dawn
- 10. Ban – The Seven Deadly Sins
- 11. Satoru Gojo – Jujutsu Kaisen
- 12. Zero Kiryu – Vampire Knight
- 13. Edward Elric – Fullmetal Alchemist
- 14. Victor Nikiforov – Yuri!!! on Ice
- 15. Ayato Sakamaki – Diabolik Lovers
1. Levi Ackerman — Attack on Titan
Levi Ackerman is a cold, distant, antisocial anime boy. He looks like a young teenager but he’s decades old. Levi is the Captain of the Scouting Legion division and Special Operations Squad. He boasts the title of “Humanity’s Strongest Soldier” because he is the strongest human being in the world who can easily take down Titans. What makes this character so realistic is that he is not perfect; he’s facing his own emotional trauma and insecurities. Since his introduction, he has gained immense love and appreciation from the fans. Levi’s stern face, tactful nature and strength make him one of the best male anime characters.
2. Kakashi Hatake — Naruto
Naruto is perhaps one of the most famous anime shows out there with a number of cult-favorite characters. Kakashi Hatake is Naruto’s sensei and leader of team 7. Kakashi Hatake is a shinobi of Konohagakure’s Hatake clan. His teammate Obito Uchiha gives him a Sharingan. He gets the title “Copy Ninja Kakashi” because he can copy the moves of other ninjas due to his Sharingan. Kakashi is famous for his mysterious appearance, relaxed attitude, and dynamic personality.
3. Itachi Uchiha — Naruto
Itachi Uchiha is one of the most famous anime characters of all time. He is the most popular edge lord in the anime world. He is popular due to his older brother whose t-shirts and mixtapes he stole. Itachi Uchiha is not a protagonist but an anti-hero. He kills the entire Uchiha clan except for his brother Sasuke. Despite his negative characteristics, fans love him. His mysterious history, dreamy eyes, cool moves, and sexy personality make him an attractive male anime character. Itachi has millions of fans around the world with dedicated fandom websites.
4. L — Death Note
L Lawliet is the famous detective in Death Note. He is famous for his different aesthetic and strong personality. He is a man of high intelligence, awkward posture and intriguing mysteries. Ever since his introduction, L has left a long-lasting impression on viewers. This suspense series would have been incomplete without L. His social ineptitude and complex strategic reasoning are the perfect addition to the plot.
5. Ken Kaneki — Tokyo Ghoul
Ken Kaneki is the main character in Tokyo Ghoul married to Touka Kirishima. He has a gentle, introverted, and kind personality. At the beginning of the series, he is a normal man but then Rize Kamishiro’s kakuhou is transplanted in him. Ken then transforms into an artificial one-eyed ghoul, the first of his kind. Being half-ghoul, half-human he becomes a Quinx. Later on, he is known as the Eyepatch and becomes one of the strongest ghouls ever.
6. Karma Akabane – Assassination Classroom
Karma Akabane is a young, mischievous, and clever character in the anime series Assassination Classroom. Karma goes to the Kunugigaoka Junior High School and studies under Korosensei. Karma is a popular character because most teens can relate to his stubbornness. He is popular in school for violence and troublesome attitude. Even though he is shown to be cunning, sadistic, manipulating, and aggressive, there is still a tender side to him – and that’s what makes his character so exciting.
7. Katsuki Bakugou – My Hero Academia
Katsuki Bakugo is a famous male character in My Hero Academia manga and anime. His love and hate relationship with Katsuki is an important aspect of his overall personality. Being rude, arrogant, aggressive, and short-tempered, Katsuki is a man of average height. He has the typical; Japanese physique with a slim, muscular build. He is given the hero name “Great Explosion Murder God Dynamite” because he is very hot-headed and violent. Anime fans all over the world love his sexy lustrous ash-blond bangs, his fighting abilities, and his epic hero costume with Grenadier Bracers.
8. Killua Zaoldyeck – Hunter X Hunter
Killua Zaoldyeck is one of the strongest and most impactful characters of Hunter x Hunter. He is cool, sharp, and mischievous. Even though Killua is relegated as Gon Freecss’ sidekick, he has managed to grab the audience’s attention. His mysterious history, deadly talent, and never-ending contemplation of morality make him a great character.
9. Hak – Yona of the Dawn
Hak is the second most important character of this anime and manga series. Hak is the former General and Chief of the Wind Tribe who falls in love with Princess Yona. Hak is famous for his outstanding martial arts, swordsmanship, and archery skills. He earns the title of “Lightning Beast”, in the Kingdom of Kouka because he is the strongest fighter in the country. He is famous for his charming personality, sarcasm, wit, humor, and nonchalant behavior.
10. Ban – The Seven Deadly Sins
Ban is the king of Benwick and sin of Greed in Seven Deadly Sins. He is married to Elaine and has a daughter named Lancelot. and the king of Benwick. Ban is famous for his resilience and for giving up immortality to resurrect Elaine. Ban’s character is inspiring and passionate. He follows his heart and sometimes ends up suffering due to his selfishness and greedy nature. However, he is still caring and selfless for the people he loves and that’s what makes him so amazing.
11. Satoru Gojo – Jujutsu Kaisen
Satoru Gojo of Jujutsu Kaisen is a special grade jujutsu sorcerer. He teaches at the Tokyo Metropolitan Curse Technical College. Satoru is a tall handsome man with white hair and bright blue eyes. Gojo is a complex personality known to be nonchalant and fun around his friends, colleagues, and students. He is famous for his strength, speed, and reflexes. He is also the most powerful Jujutsu sorcerer
12. Zero Kiryu – Vampire Knight
Zero Kiryu is a vampire hunter and an ex-vampire. Zero is a tall attractive man with silver hair and snow-white skin and lavender eyes. He is one of the most popular manga and anime characters. He has a cool laid back rough and tough appearance; he has tattoos and multiple ear piercings. The tattoo is actually Hunter’s Seal which suppresses his vampire side and tames him. He has a strong loving personality. Even though he comes across as hostile and cold-hearted, he has a kind heart. He wishes to protect humans against his own people.
13. Edward Elric – Fullmetal Alchemist
Fullmetal Alchemist is the biggest Shounen anime with millions of fans. Edward Elric is the main protagonist of this anime series and manga. Fans love him for his spunky personality and morally conflicted human emotions. He loses his arm due to an alchemy experiment gone wrong. He is popular for his struggles through life, constant existential drama, heartwarming friendships, and epic alchemy battles. He is loud-mouthed, arrogant, headstrong, and resilient.
14. Victor Nikiforov – Yuri!!! on Ice
Victor Nikiforov is a famous figure skater in Yurri!!! On Ice. He is the coach and choreographer of Yuri Katsuki’s and his fiancé. Victor is presented as a very handsome man. He has a slim tall physique, light blue eyes, and short gray hair with bangs, the classic Japanese anime boy. Even though the star performer is Yuri, Victor has a strong celebrity persona and charisma. His flirtatious looks, sexy strength, and stunning performances, leaves the audience wanting for more. Victor is also very hardworking and always tries to perfect his skills and moves. His fun attitude, good looks, and easy-going personality make him one of the best male anime characters.
15. Ayato Sakamaki – Diabolik Lovers
Ayato Sakamaki belongs to the Sakamaki household and is the third son of the Vampire king Karlheinz and his wife Cordelia. Ayato is an angry young man with a slender body and rough reddish-colored spiky hair. He has a fair complexion and narrow green eyes. Ayato is a troublesome character yearning for attention. He is presented as a mischievous and clever young boy who looks down on others. By nature, he is a bully and teases people for his personal pleasure. Ayato refers to himself as “Ore-sama” (Yours Truly) after he falls in love with Chichinashi. Fans love him because he is a narcissist who is mercilessly passionate about torture – exactly what a real vampire should be!
Why Anime Boys Are Attractive?
What makes anime boys so attractive is their gentle demeanor. Anime has given a different touch to masculinity as compared to western shows - where an attractive man is usually portrayed as a tall macho dude with 6 packs. However, the concept of an anime boy is generally someone with a soft, cute, lithe yet athletic and badass personality. These hardcore tough guys have feminine qualities which set them apart from the mainstream heartthrobs like Chris Evans as Captain America or Zac Efron as Matt Brody.
Also, the ideal Japanese male is also much different than a Western guy. Japanese don’t desire strong, muscular, handsome Greek God-looking men. For them, the idea of an attractive man is a cool, laidback, charming, gentle guy with adorable looks and a goofy personality. Thus, a male anime character is a perfect combination of manly and sensitive - and women love that!
Create an Animation Video with Anireel
In simple words, Anireel is software that lets the creators create wonderfully animated videos by integrating fun elements and scenes into them. This animated video software is user-friendly and makes life easy for animation video creators. We understand that many individuals want to create great animation videos which they can use for many purposes, however, they feel that it is a very daunting task. Luckily, that’s not the case with the Anireel explainer video software.
Create an Animation Video with Smart Video Editor
Many people may think making an animation video is difficult. Actually, as long as you get the right video editor, it is not that difficult. Today, we would like to recommend you to use Filmora .
As a desktop solution for video editing , Filmora makes animation video creation easier than ever. You can check the below video about how to create an animation video. Except for video making, Filmora offers advanced features like Green Screen, Speed Ramping, Color Correction, and more to help you create a video for your loved anime character. Download Filmora and try it todayDownload Mac Version ](https://tools.techidaily.com/wondershare/filmora/download/ )
Shanoon Cox
Shanoon Cox is a writer and a lover of all things video.
Follow @Shanoon Cox
Make Creative Animation Videos
Animation can explain whatever the mind of man can conceive – Walt Disney. Animation video is a craft in which images go through the process of conspiring, layout addition, and photographic chronology to create an illusion of action. In this article, let’s learn the importance of video animations and when and why to use this technique.
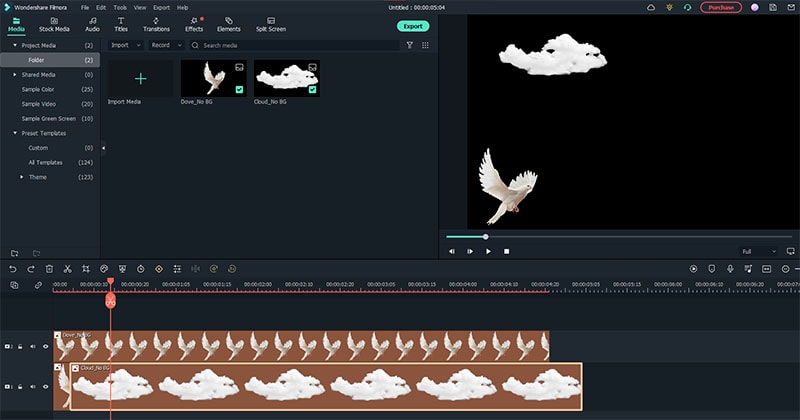
What are Video Animation and its importance?
Video as a marketing tool has become more popular but also more important. In this article, you can read more about why media marketing is getting more essential in comparison to text marketing. Therefore, an explainer video with Animation is an amazing way to show your target audience who you are, where you stand for, what you do and how you can solve the customer’s problem.
Video animation is an engaging technique that can help you comprehensively tell your story. Animated meaning can be better comprehended as a simulation of motion created by showing a series of pictures. Animated videos for a business catch the viewers and make for an enjoyable story-telling experience.
Often, animation videos are used to explain a concept or process. It’s straightforward to make these videos appealing and likable as you can primarily create them however you want. It can take longer to get the point across when people explain how to do something. Animations not only trigger emotions but spark conversations as well.
What are most common types of Animation?
The purpose of this article is to take you through the complexity of the different types of animation styles and methods. It also covers the track you should take (and what that path entails) to become an animator for each of the five types.
This guide is not about learning how to animate. But instead, it breaks down the five types of Animation available to you and what you’ll need to start animating: best software, schools, and courses.
Motion Graphics (Key framing): Motion graphics focus on making dynamic and exciting presentations of moving text logos and fundamental illustrations.
- Motion graphics can be 2D and 3D, and you’ll find them everywhere in news, sporting videos, the news, and other TV productions.
- Correct character animation is generally outside the scope of motion graphics, but many core animation principles also apply to motion graphics.
- Creating Motion Graphics depends on the plan used since video editing software often have different user interface or settings, but the idea is the same. Motion Graphics usually involves animating texts, pictures, or video clips using keyframing that is tweened to make a smooth motion between frames.
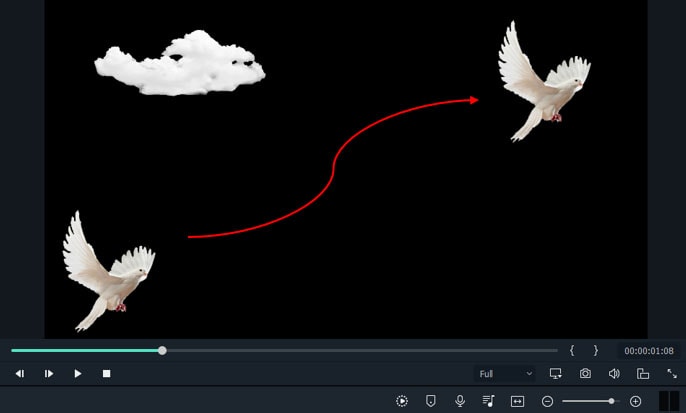
Traditional Animation: This is the classic type of Animation you’re probably most well known with. In the past, animators drew characters frame by frame, and then those pictures were moved onto transparent sheets for painting. That’s where the term animation comes from.
They started scanning drawings into the computer for digital coloring. The important thing is that hand-drawn animators still create their animation frame by frame using the same method and concept as in those old days of paper and cels.
How to Use Motion Graphics Animation in Filmora
Keyframes specify the start or end of a transition in a shot. A series of keyframes can give the semblance of the movement of an object. Keyframes include parameters such as Position, Scale, Opacity, and Rotation. These values can be changed and customized to make animations using keyframing.
Wondershare Filmora makes it really easy to use. Even learners or novices can use keyframe animation to create extraordinary videos. Plus, the keyframe templates are an added satisfaction. If you have limited time and need a quick fix, using Presets in the Animation tab is your best bet.
For this example, we’ll walk you through using Keyframes on the short video clip to make your Animation using Wondershare Filmora.
Free Download For Win 7 or later(64-bit)
Free Download For macOS 10.14 or later
Step1 Launch Wondershare Filmora from your system and select New Project.

Step2 Import your selected images. In this case I imported no background images to have a clear view on how key framing works.
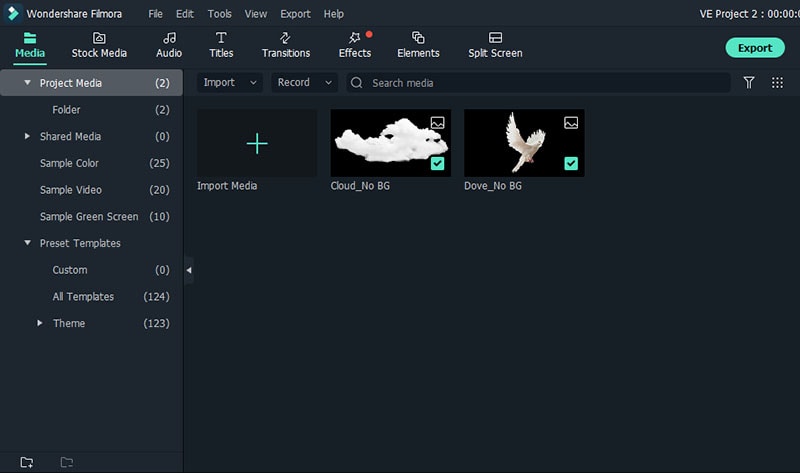
Step3 Drag or add the image on the Timeline Panel.
In this case I use a dove and a cloud to demo the Motion graphics animation
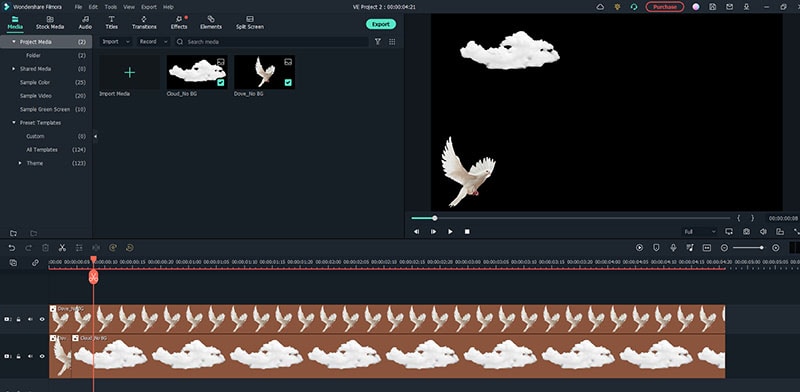
Step4 Double click the image then the Animation tab will display. Here, there are available presets, either the latest or the Legacy Animation, as indicated on the display that you can use.
There is also a tab if you want to customize your animations which requires premium account.
- Fade In
- Fade Out
- Pause
- Slide right
- Slide up
- Vortex In
- Vortex Out
- Zoom In
- Zoom Out
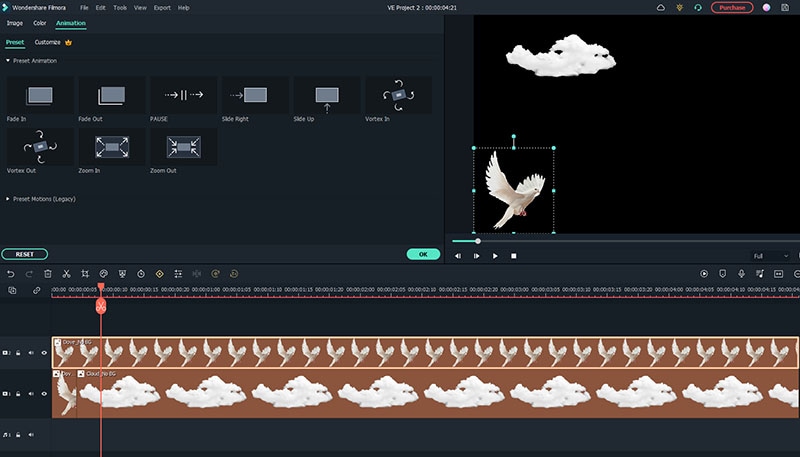
Step5 Select any animation you want by double-clicking the presets. In this case, I selected a slight right preset, and you will notice that the start arrow and end arrow indicator are displayed.
In the Timeline panel, you have an option to customize the start and end of the Preset. Just drag the arrow keys on either side to reach the keyframe you wish to change. Just simple.
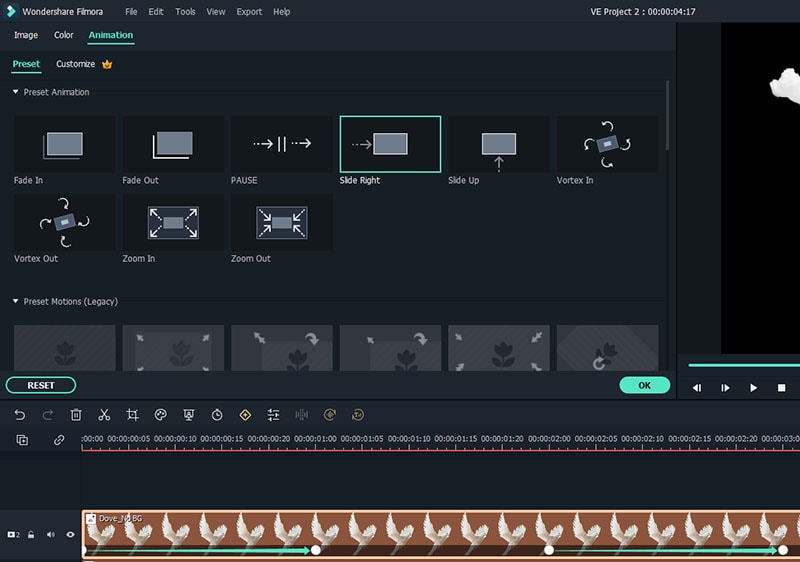
You can also do it on the cloud image that we’ve added.
Takeaway
Keyframing can bring steady images to life by introducing animations. With the super-easy keyframing tool in Filmora, you can now make invigorating videos. From easy to complex key framing. The customization property lets you unbind your creativity and take your editing to a professional level. Make your logo pop by adding keyframe animations. Better yet, you can also animate text.
No matter what industry you’re in, Animation can be relevant. Small start-ups to giant corporations use animation videos, too. Animation videos help to explain tricky processes or concepts, sell a product, or even to gain recognition for a product. Everyone resonates with Animation in some way or another. Almost everyone has watched cartoons or animations in their life, so these tend to grab attention more effectively.
We all love animation. From the animated cartoons we watched as kids to the latest and hottest animated music video, there’s something about seeing visuals come alive that captivates and inspires us. But video animation isn’t just for children, and it isn’t just for the entertainment value only.
Free Download For macOS 10.14 or later
Step1 Launch Wondershare Filmora from your system and select New Project.
Step2 Import your selected images. In this case I imported no background images to have a clear view on how key framing works.
Step3 Drag or add the image on the Timeline Panel.
In this case I use a dove and a cloud to demo the Motion graphics animation
Step4 Double click the image then the Animation tab will display. Here, there are available presets, either the latest or the Legacy Animation, as indicated on the display that you can use.
There is also a tab if you want to customize your animations which requires premium account.
- Fade In
- Fade Out
- Pause
- Slide right
- Slide up
- Vortex In
- Vortex Out
- Zoom In
- Zoom Out
Step5 Select any animation you want by double-clicking the presets. In this case, I selected a slight right preset, and you will notice that the start arrow and end arrow indicator are displayed.
In the Timeline panel, you have an option to customize the start and end of the Preset. Just drag the arrow keys on either side to reach the keyframe you wish to change. Just simple.
You can also do it on the cloud image that we’ve added.
Takeaway
Keyframing can bring steady images to life by introducing animations. With the super-easy keyframing tool in Filmora, you can now make invigorating videos. From easy to complex key framing. The customization property lets you unbind your creativity and take your editing to a professional level. Make your logo pop by adding keyframe animations. Better yet, you can also animate text.
No matter what industry you’re in, Animation can be relevant. Small start-ups to giant corporations use animation videos, too. Animation videos help to explain tricky processes or concepts, sell a product, or even to gain recognition for a product. Everyone resonates with Animation in some way or another. Almost everyone has watched cartoons or animations in their life, so these tend to grab attention more effectively.
We all love animation. From the animated cartoons we watched as kids to the latest and hottest animated music video, there’s something about seeing visuals come alive that captivates and inspires us. But video animation isn’t just for children, and it isn’t just for the entertainment value only.
How to Create Animated Video on Canva?
Canva is a simple way—without any graphic design experience—to make professional graphics for social media, newsletters, presentations, business cards, gift certificates, brochures, and more. Flexible design templates offer the ideal layout for your target destination, letting you aim over the design, not the file formatting or the size.
So, can you make an animated video on Canva?
Yes, because Canva lives on the cloud, you can access your graphics from anywhere you can get online while using Canva on the cloud. Learn how you can play, get up, and run with Canva in this short, fun tutorial guide. We’ll discuss adding and editing images, using inbuilt design templates, and working with typography to build your next project with Canva.
In the subsequent sections, we shall learn more about Canva animated videos and how to create one easily on your PC.
In this article
01 [Create an animated video with a Canva template](#Part 1)
02 [Create Canva animated video with your video](#Part 2)
Part 1 Create an animated video with a Canva template
In this section, we’ll explore how to make animated video on Canva, which applies to both the free and pro account of Canva. However, the steps given below got created from Canva’s free account. We suppose that you’ve already created an account on Canva and logged into the platform. So, further steps will proceed as follows:
Go to the Video tab given in the top front panel of Canva and choose any template of your desire. Let’s say we’ve selected the very first template, 1920 × 1080 pixels. There are lots of options provided by Canva from where you can choose your favorites. You can also create a template with a custom size.

After you enter the editing panel, you have the choice of different templates on the left-hand panel. You can search for a template of your choice among them and can create other pages, as shown below. To preview the templates, you can click the Play button with mentioned time duration on the top right corner of the editing screen.

Now, it’s time to add creativity and explore more editing elements within the Canva. You can modify the entire template given and add something of your own.

Now, you can explore various editing Elements given on the left-hand panel, as shown below. There are multiple options available here as well.

You can add some text within the Canva template, and you can search from the left-hand panel. Given above are various options by which you can bold, italicize, and underline the text.

Now, let’s add some music to the video. So, go to the Audio tab and select any one of the options among them. There are different choices for you to explore here as well.

After you’re done, you can hit the Preview Play button on the top and see your project, as shown below.
It’s all done, and you can proceed with the next section.
Part 2 Create Canva animated video with your video
We’ll discuss how to create an animated video by uploading our video in Canva without using any template in this section. After logging in to the Canva account credentials, select the Video tab and choose the different templates offered.
We’ve selected a blank template for the purpose as follows.

Now, you need to head directly towards the Uploads tab and upload your video created over here.

By now, you have most probably got over with uploading your media. Click the uploaded video, and it will automatically enter within the editing panel of Canva, as shown below.

You’re all done now, and it’s all finished! Even though template usage is quite simple, it’s pretty straightforward when you don’t use any ready-made template. However, you can still beautify this simple video with different elements like text, music, etc.
Animation style videos influence people of all ages to whatever generation, or the kind you belong to will be one of them for sure.
Animated ones provoke diverse impacts instead of ordinary videos on the audience utilizing illustration, kinesthetic, etc. But the fact is, due to technological advancements and overexposure to social media sites, we have forgotten its significance.
Want to know some other most accessible software tools that can bring out the artist in you? Here is an alternative that is all you need.
Are you surprised to find that you can go with various animation styles to boost your business or bring out your talents? But are you confused about how to revamp your story and effectively film it? Why should you worry when the best animation maker and Canva’s alternative Wondershare Filmora is here exclusively for you to create fantastic animation videos that could stand out of the box?
Conclusion
Do you aspire to paint with bright colors to videos or want to become an animator? Then, choose animation styles that you most enjoy, find attractive today, start working on them, or create Canva animated videos as the tutorial indicates above. Lastly, don’t forget to give Filmora a chance to upscale your creation and give your animation style a life!
02 [Create Canva animated video with your video](#Part 2)
Part 1 Create an animated video with a Canva template
In this section, we’ll explore how to make animated video on Canva, which applies to both the free and pro account of Canva. However, the steps given below got created from Canva’s free account. We suppose that you’ve already created an account on Canva and logged into the platform. So, further steps will proceed as follows:
Go to the Video tab given in the top front panel of Canva and choose any template of your desire. Let’s say we’ve selected the very first template, 1920 × 1080 pixels. There are lots of options provided by Canva from where you can choose your favorites. You can also create a template with a custom size.
After you enter the editing panel, you have the choice of different templates on the left-hand panel. You can search for a template of your choice among them and can create other pages, as shown below. To preview the templates, you can click the Play button with mentioned time duration on the top right corner of the editing screen.
Now, it’s time to add creativity and explore more editing elements within the Canva. You can modify the entire template given and add something of your own.
Now, you can explore various editing Elements given on the left-hand panel, as shown below. There are multiple options available here as well.
You can add some text within the Canva template, and you can search from the left-hand panel. Given above are various options by which you can bold, italicize, and underline the text.
Now, let’s add some music to the video. So, go to the Audio tab and select any one of the options among them. There are different choices for you to explore here as well.
After you’re done, you can hit the Preview Play button on the top and see your project, as shown below.
It’s all done, and you can proceed with the next section.
Part 2 Create Canva animated video with your video
We’ll discuss how to create an animated video by uploading our video in Canva without using any template in this section. After logging in to the Canva account credentials, select the Video tab and choose the different templates offered.
We’ve selected a blank template for the purpose as follows.
Now, you need to head directly towards the Uploads tab and upload your video created over here.
By now, you have most probably got over with uploading your media. Click the uploaded video, and it will automatically enter within the editing panel of Canva, as shown below.
You’re all done now, and it’s all finished! Even though template usage is quite simple, it’s pretty straightforward when you don’t use any ready-made template. However, you can still beautify this simple video with different elements like text, music, etc.
Animation style videos influence people of all ages to whatever generation, or the kind you belong to will be one of them for sure.
Animated ones provoke diverse impacts instead of ordinary videos on the audience utilizing illustration, kinesthetic, etc. But the fact is, due to technological advancements and overexposure to social media sites, we have forgotten its significance.
Want to know some other most accessible software tools that can bring out the artist in you? Here is an alternative that is all you need.
Are you surprised to find that you can go with various animation styles to boost your business or bring out your talents? But are you confused about how to revamp your story and effectively film it? Why should you worry when the best animation maker and Canva’s alternative Wondershare Filmora is here exclusively for you to create fantastic animation videos that could stand out of the box?
Conclusion
Do you aspire to paint with bright colors to videos or want to become an animator? Then, choose animation styles that you most enjoy, find attractive today, start working on them, or create Canva animated videos as the tutorial indicates above. Lastly, don’t forget to give Filmora a chance to upscale your creation and give your animation style a life!
Also read:
- Best 15 Female Anime Characters-Who Is Your Favorite for 2024
- New 15 Types of Cartoon Drawing Styles with Examples for 2024
- Updated In 2024, Top 20+ Best Free GIF Makers Online to Quickly Edit GIF
- New No. 1 Maker to Animate Your Logo Online Free for 2024
- New In 2024, Most Effective Tactics to Set WhatsApp Status
- 2024 Approved What Is the Meaning of Motion Graphics
- Updated 2024 Approved 10 Top Memorable Japanese Cat Cartoons
- Top 7 Best Animated Lyric Video Software for FREE for 2024
- Updated 12 Dubbed Anime Websites to Watch for Free for 2024
- New In 2024, How to Convert Video to GIF Fast & Easy
- Updated Whats Music Video GIF & How to Add Music to GIF Files for 2024
- New Something About Types of Motion Graphics for 2024
- Updated Top 10 Apps to Enhance Your Instagram Story Slideshow for 2024
- Whats Your No. 1 Maker to Animate Your Logo Online Free
- Updated 2024 Approved What This Post Can Teach You About Clay Animation
- 2024 Approved Easy Cartoon Characters Drawing Tutorials for You Beginners
- 2024 Approved 10 of the Best Disney Animated Shows
- 2024 Approved Top Claymation Shows That Make Your Memories Unforgettable
- 15 Forgotten Cartoon Characters of All Time for 2024
- Updated 2024 Approved Secret Source to Make a Stop Motion Puppet
- New In-Depth Study of Cartoon Painting Starts for 2024
- 2024 Approved How to Make Slideshow in LinkedIn
- New 5 Best Adobe Animate Courses & Classes
- Updated 5 Must Try Ways to Add and Send GIF in Text Message on Android for 2024
- 2024 Approved Obtain and Create Animated GIF Icons
- Updated In 2024, 5 Photoshop Alternatives to Animate Your Logo
- How to Make Architecture Animation
- How to Fix Error 495 While Download/Updating Android Apps On Motorola Moto G84 5G | Dr.fone
- The way to recover deleted pictures on Xiaomi Civi 3 without backup.
- Troubleshooting Guide How to Fix an Unresponsive Vivo V27 Screen | Dr.fone
- Complete guide for recovering music files on Itel P55T
- How to Unlock Apple ID From your Apple iPhone XS Max without Security Questions?
- Read This Guide to Find a Reliable Alternative to Fake GPS On Samsung Galaxy XCover 7 | Dr.fone
- How To Revive Your Bricked Motorola Moto G23 in Minutes | Dr.fone
- 4 Ways to Fix Android Blue Screen of Death On Poco X6 Pro | Dr.fone
- In 2024, How To Track IMEI Number Of Infinix Smart 7 Through Google Earth?
- How Can I Catch the Regional Pokémon without Traveling On OnePlus Nord 3 5G | Dr.fone
- In 2024, How to Unlock Nokia C22 Phone Password Without Factory Reset?
- In 2024, Why does the pokemon go battle league not available On Honor X50i | Dr.fone
- In 2024, 3 Ways to Track Apple iPhone 12 Pro without Them Knowing | Dr.fone
- In 2024, How to use Snapchat Location Spoofer to Protect Your Privacy On Oppo A59 5G? | Dr.fone
- Easy steps to recover deleted music from Honor 90
- How Can We Bypass Xiaomi Redmi A2 FRP?
- Best Oppo A1 5G Pattern Lock Removal Tools Remove Android Pattern Lock Without Losing Data
- Fixes for Apps Keep Crashing on Motorola Edge 40 Pro | Dr.fone
- How to Bypass Activation Lock from Apple iPhone 12 Pro or iPad?
- All Must-Knows to Use Fake GPS GO Location Spoofer On Itel S23+ | Dr.fone
- iPhone 6 Plus Backup Password Never Set But Still Asking? Heres the Fix | Dr.fone
- In 2024, 15 Best Strongest Pokémon To Use in Pokémon GO PvP Leagues For Oppo A2 | Dr.fone
- Title: In 2024, The Top Free 12 GIF Meme Maker at a Glance
- Author: Elon
- Created at : 2024-06-23 02:09:38
- Updated at : 2024-06-24 02:09:38
- Link: https://animation-videos.techidaily.com/in-2024-the-top-free-12-gif-meme-maker-at-a-glance/
- License: This work is licensed under CC BY-NC-SA 4.0.
