
In 2024, Tips for Canva Animated Elements
Useful Tips for Canva Animated Elements
Versatile Video Editor - Wondershare Filmora
An easy yet powerful editor
Numerous effects to choose from
Detailed tutorials provided by the official channel
Thanks to the progress of graphic design, users are no longer simply satisfied with everyday designs, no matter how complex the design itself. They want innovation, they want a fresh and mesmerizing new idea. This becomes increasingly harder to achieve and helps push the boundaries of what designers want.
This is where motion can come into play. Movement in graphic design has emerged as a recent design trend. This is where users benefit from valuable tips for Canva animated elements.
Without further ado, let’s dive into everything you need to know to design animated elements in Canva.
In this article
01 [What is Canva?](#Part 1)
02 [Animate An Element In Canva](#Part 2)
03 [Make Elements Move In Canva](#Part 3)
04 [How About Making Animated Elements On Video](#Part 4)
Part 1 What is Canva?
Canva has become a buzzword in the designing and animation world. It’s a graphic design platform that allows users to create graphic designs for social media, for presentations, documents, cards for any memorable occasion. It was founded by Melanie Perkins, an Australian technology entrepreneur.
Canva has become a buzzword in the designing and animation world. It’s a graphic design platform that allows users to create graphic designs for social media, for presentations, documents, cards for any memorable occasion. It was founded by Melanie Perkins, an Australian technology entrepreneur.
It allows users to work individually or across teams. With real-time live changes made available, Canva is pushing the boundary of what is possible and making it more accessible. With the introduction of animated elements in Canva, the possibilities for design horizons have expanded significantly.
Part 2 Animate An Element In Canva
There are one of two ways to go about creating an animation. You can work off an existing template or create a custom template. If you’re wondering how to animate individual elements in Canva then this guide is for you.
The first step to animation is building your custom static design. For that you need to go to Canva and select “Create a Design” option. Once you do, select the type of content you’re attempting to create- from Instagram posts to a presentation or an A4 document.
Think of the text font you’re going to use.

Then you should look into adding elements that suit your text on the design.

You can upload photographs into your creation with the upload button. This also extends to uploading audio that you want to use on video clips.

Once you’re done with these steps, you should have a customized static design that you can use. Let’s now look at how to animate individual elements in Canva. These elements are the text, the image, audio, and video.
2.1 Image
To add an image to Canva, you need to upload it in the ‘Upload’ tab on Canva. Once you do, the image can then be selected for display on your presentation.
For images, you can also choose to frame them within the “elements” tab. There are two kinds of elements. One which allows photographs to be embedded in them and ones which don’t. You can choose any element as a frame for your embedded image.
The next thing is to choose the “Animate” button. This will open up different options for animation features. The animate button allows a preview of what each animation does in real-time.

The ones with the crown are premium features exclusive to Canva Pro, the paid subscription.
2.2 Text
Add in the text you want to see to the image. The text can be in any style that you choose. Canva offers a variety of fonts that you can use to customize the color, size, and duration of the display.

2.3 Video
If you’re ready to take your content creation skills to the next level, this section is for you. You have the option of adding videos to Canva as well. Just load the video you have on hand to the Canva “Uploads” section. Introduce the video clip to the design.
Another way to embed the video is by using an element and embedding your video within it.
With video, you also have options like cropping, adjusting the playback. With playback, you can choose “Autoplay Video” and “Loop Video.” These are basic options for how the video can be played. The crop function allows you to trim the video to any point in time.
On top of this, you can use the animate button, which can create options for how the video is introduced to the backdrop.

If you want to remove the animation, you need to go to the “Animate” button and select the ‘None’ option to delete the animation from the design.
You can opt to animate either just the elements or you can animate the slide on the whole with “Page Animations.”
Part 3 Make Elements Move In Canva
How To Arrange The Order Of An Animation?
The brilliant thing about Canva is that you can decide the order you want to create your animation. The component elements of a Canva backdrop are the text, audio, images, video. These form the basis for the animated elements in Canva.
You can work on whichever component feels more accessible to you. Canva also allows users to make videos for title sequences and end-cards for video sharing platforms.
How to Change The Duration Of Animated Graphic In Canva
Once you’ve added a video element to your presentation, you’ll notice that the timer disappears from the production. This is because the presentation only lasts the duration of the video.
If you go to the next slide of the presentation, you can often notice a timer available. It has a default duration of five seconds. If you click on the clock symbol, a menu with “Timing” will appear with a slider. You can adjust the timing from 0.1 seconds up to a maximum of 30 seconds.
Part 4 How About Making Animated Elements On Video
If you’ve decided Canva is not the tool for you, you can choose any video editing software to make your animation.
Wondershare Filmora is the tool that can help you level up your content creation. It allows users to increase precision and provides professional video editing options.
AI Portrait – The best feature of Wondershare Filmora for gameplay editing
The AI Portrait is a new add-on in Wondershare Filmora. It can easily remove video backgrounds without using a green screen or chroma key, allowing you to add borders, glitch effects, pixelated, noise, or segmentation video effects.

Conclusion
Now that you understand how to build an animation and the software required, you should differentiate between average and extraordinary editing tools.
Filmora and Canva are the best editing tools in this case. Like you can animate individual elements Canva, you can do the same in the other tool also. It may be used to produce animation videos by introducing keyframes, resulting in a seamless and realistic animation. Aside from that, using color correction and an audio processor can help take your animations to the next tier.
Download it today to make your videos better.
Thanks to the progress of graphic design, users are no longer simply satisfied with everyday designs, no matter how complex the design itself. They want innovation, they want a fresh and mesmerizing new idea. This becomes increasingly harder to achieve and helps push the boundaries of what designers want.
This is where motion can come into play. Movement in graphic design has emerged as a recent design trend. This is where users benefit from valuable tips for Canva animated elements.
Without further ado, let’s dive into everything you need to know to design animated elements in Canva.
In this article
01 [What is Canva?](#Part 1)
02 [Animate An Element In Canva](#Part 2)
03 [Make Elements Move In Canva](#Part 3)
04 [How About Making Animated Elements On Video](#Part 4)
Part 1 What is Canva?
Canva has become a buzzword in the designing and animation world. It’s a graphic design platform that allows users to create graphic designs for social media, for presentations, documents, cards for any memorable occasion. It was founded by Melanie Perkins, an Australian technology entrepreneur.
Canva has become a buzzword in the designing and animation world. It’s a graphic design platform that allows users to create graphic designs for social media, for presentations, documents, cards for any memorable occasion. It was founded by Melanie Perkins, an Australian technology entrepreneur.
It allows users to work individually or across teams. With real-time live changes made available, Canva is pushing the boundary of what is possible and making it more accessible. With the introduction of animated elements in Canva, the possibilities for design horizons have expanded significantly.
Part 2 Animate An Element In Canva
There are one of two ways to go about creating an animation. You can work off an existing template or create a custom template. If you’re wondering how to animate individual elements in Canva then this guide is for you.
The first step to animation is building your custom static design. For that you need to go to Canva and select “Create a Design” option. Once you do, select the type of content you’re attempting to create- from Instagram posts to a presentation or an A4 document.
Think of the text font you’re going to use.
Then you should look into adding elements that suit your text on the design.
You can upload photographs into your creation with the upload button. This also extends to uploading audio that you want to use on video clips.
Once you’re done with these steps, you should have a customized static design that you can use. Let’s now look at how to animate individual elements in Canva. These elements are the text, the image, audio, and video.
2.1 Image
To add an image to Canva, you need to upload it in the ‘Upload’ tab on Canva. Once you do, the image can then be selected for display on your presentation.
For images, you can also choose to frame them within the “elements” tab. There are two kinds of elements. One which allows photographs to be embedded in them and ones which don’t. You can choose any element as a frame for your embedded image.
The next thing is to choose the “Animate” button. This will open up different options for animation features. The animate button allows a preview of what each animation does in real-time.
The ones with the crown are premium features exclusive to Canva Pro, the paid subscription.
2.2 Text
Add in the text you want to see to the image. The text can be in any style that you choose. Canva offers a variety of fonts that you can use to customize the color, size, and duration of the display.
2.3 Video
If you’re ready to take your content creation skills to the next level, this section is for you. You have the option of adding videos to Canva as well. Just load the video you have on hand to the Canva “Uploads” section. Introduce the video clip to the design.
Another way to embed the video is by using an element and embedding your video within it.
With video, you also have options like cropping, adjusting the playback. With playback, you can choose “Autoplay Video” and “Loop Video.” These are basic options for how the video can be played. The crop function allows you to trim the video to any point in time.
On top of this, you can use the animate button, which can create options for how the video is introduced to the backdrop.
If you want to remove the animation, you need to go to the “Animate” button and select the ‘None’ option to delete the animation from the design.
You can opt to animate either just the elements or you can animate the slide on the whole with “Page Animations.”
Part 3 Make Elements Move In Canva
How To Arrange The Order Of An Animation?
The brilliant thing about Canva is that you can decide the order you want to create your animation. The component elements of a Canva backdrop are the text, audio, images, video. These form the basis for the animated elements in Canva.
You can work on whichever component feels more accessible to you. Canva also allows users to make videos for title sequences and end-cards for video sharing platforms.
How to Change The Duration Of Animated Graphic In Canva
Once you’ve added a video element to your presentation, you’ll notice that the timer disappears from the production. This is because the presentation only lasts the duration of the video.
If you go to the next slide of the presentation, you can often notice a timer available. It has a default duration of five seconds. If you click on the clock symbol, a menu with “Timing” will appear with a slider. You can adjust the timing from 0.1 seconds up to a maximum of 30 seconds.
Part 4 How About Making Animated Elements On Video
If you’ve decided Canva is not the tool for you, you can choose any video editing software to make your animation.
Wondershare Filmora is the tool that can help you level up your content creation. It allows users to increase precision and provides professional video editing options.
AI Portrait – The best feature of Wondershare Filmora for gameplay editing
The AI Portrait is a new add-on in Wondershare Filmora. It can easily remove video backgrounds without using a green screen or chroma key, allowing you to add borders, glitch effects, pixelated, noise, or segmentation video effects.
Conclusion
Now that you understand how to build an animation and the software required, you should differentiate between average and extraordinary editing tools.
Filmora and Canva are the best editing tools in this case. Like you can animate individual elements Canva, you can do the same in the other tool also. It may be used to produce animation videos by introducing keyframes, resulting in a seamless and realistic animation. Aside from that, using color correction and an audio processor can help take your animations to the next tier.
Download it today to make your videos better.
10 Great MP4 to GIF Converters to Get Perfect-Made GIF
10 Must-Use MP4 to GIF Converters to Get Perfect-Made GIF
An easy yet powerful editor
Numerous effects to choose from
Detailed tutorials provided by the official channel
GIFs are becoming more common day by day. They are used for a wide range of purposes, from chatting and expressing emotions on social media to promoting products and services. GIFs are image formats that are relatively easy to download and upload and easy to convey messages and thoughts to a wide range of people. On the other hand, MP4 are video files that contain audio. These files are large and require special requirements to run and work properly.
There are a lot of advantages of using GIF files, like they are easy to make and store, help create animations quickly, and convey messages and emotions more conveniently. With the increasing usage of GIF files, it has become important to know and understand the tools used to convert the MP4 files into GIF formats.
In this article
01 [5 Offline MP4 to GIF Converters](#Part 1)
02 [5 Online MP4 to GIF Converters](#Part 2)
Part 1 5 Offline MP4 to GIF Converters
Offline MP4 to GIF converter is the best option as it helps to create GIF files quickly and easily, without any quality loss. The following offline converters can be used effectively to turn MP4 into GIF formats very easily and quickly:
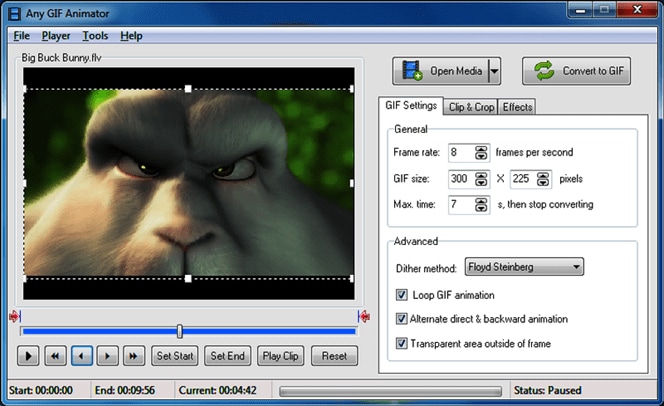
01Any GIF Animator
Any GIF Animator is one of the great offline tools used for converting videos to GIF files very quickly. It can easily convert the videos into attractive GIFs in seconds.
Key Features:
● It has a very easy-to-use interface for user convenience.
● It sustains a considerable number of video formats.
● It allows the users to edit converted GIFs like adding frames, forward and backward looping, etc.
● It will enable you to edit the files imported from DVDs and WebCam recorded files.
● It has an in-built animation wizard.
Pros:
● It works for both Mac as well as Windows
● Any GIF Animator can be downloaded freely.
● It can convert both videos as well as images.
Cons:
● It crashes at times while processing the videos.
● Uploading the files takes a longer time than usual.
02DVDFab
DVDFab is another offline tool that converts the files from MP4 to GIF in very little time without compromising the quality of the outcome.

Key Features:
● It supports a large number of video formats.
● It has a user-friendly interface.
● It can be used for both Mac & Windows.
● It is a great multimedia solution software.
● It comes with affordable pricing.
Pros:
● It is quick & easy to use.
● It delivers high-quality outputs.
● It allows the users to completely control the looping, frequency, and size of the files.
Cons:
● Being a multimedia software, it requires learning.
● Complete beginners can get confused.
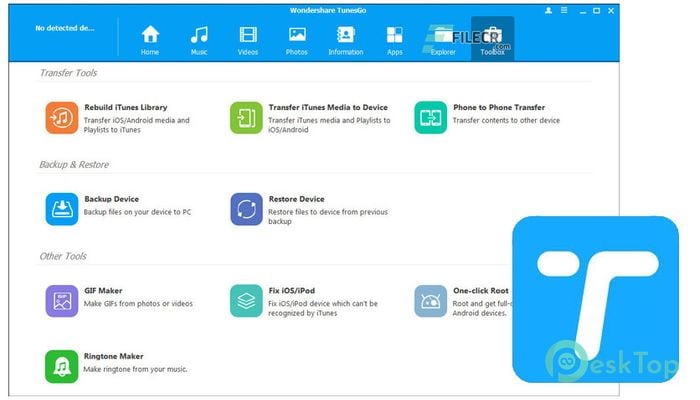
03Wondershare TunesGo
TunesGo was developed by one of the most trusted software companies – Wondershare. It is a great tool used to make GIFs from MP4 files.
Key Features:
● Developed by one of the most trusted software development companies.
● Compatible for all iOS devices.
● A user-friendly interface is suitable for complete beginners.
● A trial version is available.
● Works faster and delivers high-resolution output.
Pros:
● Supports; almost all types of video formats.
● It permits you to edit the videos before converting.
● It can also convert images and live videos to GIFs.
Cons:
● It is costly.
● It doesn’t allow you to edit Smart playlists.
04KickMyGraphics
It is another powerful offline tool to convert MP4 to high-quality GIF files. It allows users to convert different formats of videos and images into GIFs.
Key Features:
● Compatibility lies with Mac and Windows both.
● Users can instantly upload various video formats like MPG, MP4, AVI, etc.
● Users can directly upload considerable image formats like JPG, PNG, BMP, etc.
● It has a user-friendly interface.
● It is a freeware offline GIF converter.
Pros:
● It has an in-built editing tool for easy customization.
● It supports direct recording of the animated GIFs.
● It also allows you to use different editing features like the loop, pan, reverse, etc.
Cons:
● Its usage is somehow complicated for beginners.
● It doesn’t support all types of video formats.
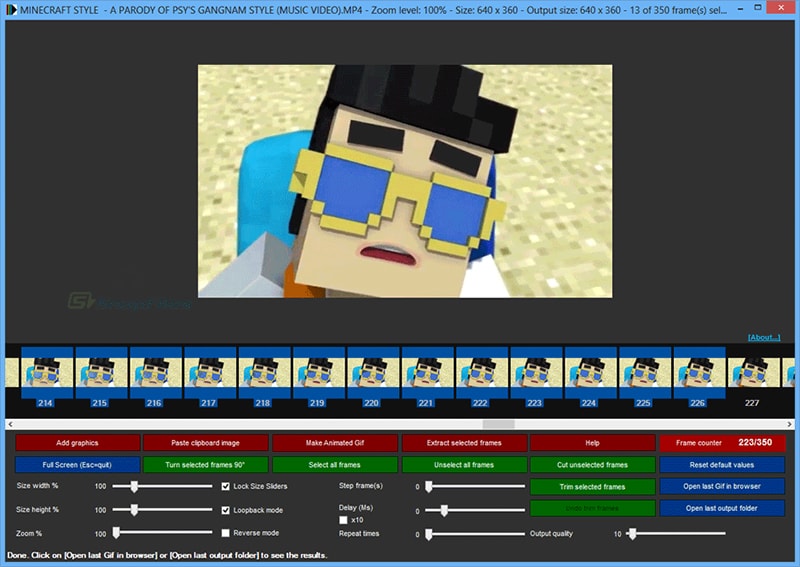
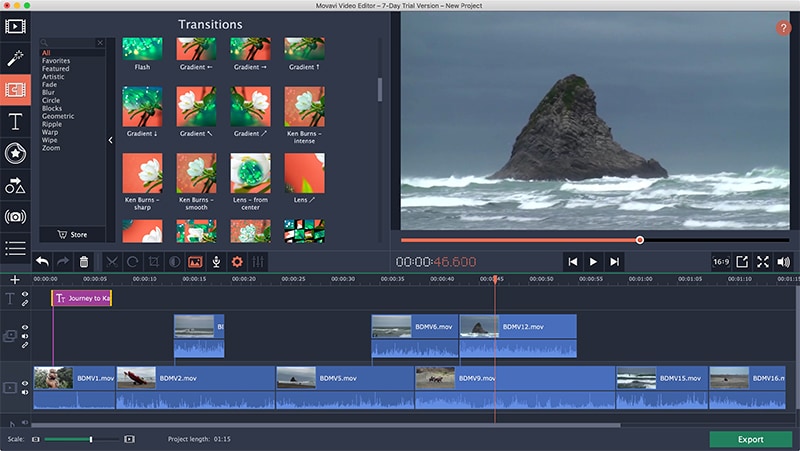
05Movavi
It is tremendous offline software that can be downloaded for Mac & PC. It helps in converting the MP4 to GIFs very quickly and easily.
Key Features:
● Mac and Windows are completely supported.
● It allows the users to edit their creations.
● It is also available for all android devices.
● It converts the files very quickly without compromising the quality of the content.
● It is an excellent tool for converting and editing GIFs.
Pros:
● Easy and beneficial for beginners
● Compatible with video formats like MOV, MP4, MPG, AVI, etc.
● It has an in-built AI feature to upscale the output quality.
Cons:
● It has fundamental video editing features.
● It doesn’t allow to copy-paste the video effect while editing.
Part 2 5 Online MP4 to GIF Converters
Online tools for converting files from MP4 to GIF are effortless and convenient because they can be used on any operating system. The following given are some of the great online tools to convert MP4 to GIF with ease and convenience:
01GIF Maker by Giphy
Giphy is known as the king of the online GIF maker tools. It is a GIF converter great tool with around 300 million users daily using it. It allows the users to convert the GIFs by pasting the video links from third-party websites like YouTube.
Key Features:
● Being an online tool, it is compatible with all types of devices.
● It is elementary to use for all types of users.
● It allows the users to add stickers and captions to their GIFs.
● No fee for this so you can use it free of cost.
● It is a website, so it doesn’t require to be downloaded.
Pros:
● Straightforward and quick to use.
● It delivers a high-resolution output with many customization features.
● It can also convert the GIFs using the links of videos from third-party hosting like YouTube.
Cons:
● Speed of the internet connection matters.
● It comes with a limited edition of colors.
02** Wondershare Filmora Video Editor
Filmora is one of the best online video editing tools created by Wondershare. Filmora can be used to convert files from MP4 to GIF very effectively and efficiently.
For Win 7 or later (64-bit)
For macOS 10.12 or later
Wondershare Filmora
Get started easily with Filmora’s powerful performance, intuitive interface, and countless effects Try It Free Try It Free Learn More >

Key Features:
● Fully compatible with any operating system.
● It is a great video editing software with many features like adding music, subtitles, etc.
● It can be also be downloaded on Mac and Windows OS.
● It comes with an annual premium subscription for $51.99.
● It can also be purchased with a one-time fee of $79.99.
Pros:
● It has great video editing features.
● It can convert a large number of video formats to high-resolution GIF files.
● You can customize your GIFs as per your requirements using this tool.
Cons:
● Being an all-in-one video editing tool, this can be much more if you just need GIF creations.
● You cannot remove the watermark and use many editing features if you use a trial version.
03CloudConvert
CloudConvert is another easy-to-use MP4 to GIF converter online. It converts all types of video files into GIFs in a concise time.
Key Features:
● It is easy to use.
● It converts MP4 to GIF very quickly.
● It is free of cost.
● It doesn’t require third-party installation.
● It uses compression algorithms.
Pros:
● It is an open-source converter.
● It allows you to add texts.
● It helps in creating GIFs for web publishing.
Cons:
● Complicated for large files.
● Requires; steady internet connection.
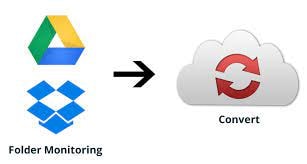
04Convertio
Convertio is another online GIF converter that anyone can use. You just need to upload the MP4 file using Dropbox and hit the ‘Convert’ button.
Key Features:
● Effortless and anyone can easily use it.
● One can easily upload files from Dropbox and Google Drive.
● It also has a drag and drops component for uploading the files.
● It is entirely free to use.
● It is online and doesn’t require any installation.
Pros:
● It converts MP4 to GIF very quickly.
● It delivers high-quality output.
● User-friendly interface.
Cons:
● It doesn’t allow the users to edit their GIFs.
● It doesn’t have the customizing feature and is not user-specific.
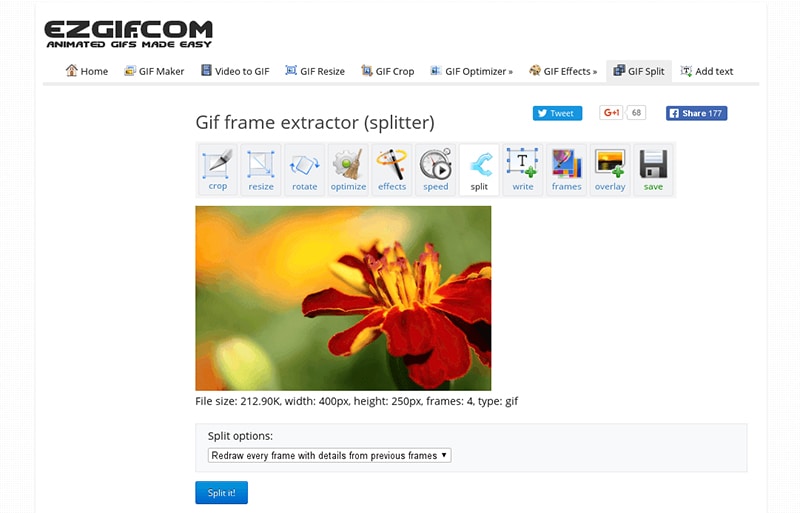
05Ezgif
Ezgif is free of cost and an easy-to-use online tool that helps you create GIFs in two easy steps, i.e., upload and convert.
Key Features:
● It is an online tool compatible with both Mac and Windows.
● No download and installation required.
● It is a freeware program.
● It maintains the quality of the outcome.
● It converts GIFs very quickly.
Pros:
● User-friendly and can be used by all.
● It has amazing features that assist you while you convert MP4 to GIF.
● It is not complicated for beginners.
Cons:
● It has limited editing features.
● Only 3 minutes video can be done at maximum.
● Key Takeaways from This Episode →
●The demand for GIF files increases with each passing day due to its many advantages. As a result, many people are looking for easy MP4 to GIF converters that are easy and convenient to use.
●Above mentioned online and offline converters can quickly help you turn MP4 into GIF files without compromising the quality of the graphics.
●These converters are readily available and can easily be used on both Mac and Windows with many conveniences.
●They can help you convert the MP4 files into GIF format very quickly, no matter how large the video size is. GIFs being smaller in size and easily transferrable provide many advantages to the users.
GIFs are becoming more common day by day. They are used for a wide range of purposes, from chatting and expressing emotions on social media to promoting products and services. GIFs are image formats that are relatively easy to download and upload and easy to convey messages and thoughts to a wide range of people. On the other hand, MP4 are video files that contain audio. These files are large and require special requirements to run and work properly.
There are a lot of advantages of using GIF files, like they are easy to make and store, help create animations quickly, and convey messages and emotions more conveniently. With the increasing usage of GIF files, it has become important to know and understand the tools used to convert the MP4 files into GIF formats.
In this article
01 [5 Offline MP4 to GIF Converters](#Part 1)
02 [5 Online MP4 to GIF Converters](#Part 2)
Part 1 5 Offline MP4 to GIF Converters
Offline MP4 to GIF converter is the best option as it helps to create GIF files quickly and easily, without any quality loss. The following offline converters can be used effectively to turn MP4 into GIF formats very easily and quickly:
01Any GIF Animator
Any GIF Animator is one of the great offline tools used for converting videos to GIF files very quickly. It can easily convert the videos into attractive GIFs in seconds.
Key Features:
● It has a very easy-to-use interface for user convenience.
● It sustains a considerable number of video formats.
● It allows the users to edit converted GIFs like adding frames, forward and backward looping, etc.
● It will enable you to edit the files imported from DVDs and WebCam recorded files.
● It has an in-built animation wizard.
Pros:
● It works for both Mac as well as Windows
● Any GIF Animator can be downloaded freely.
● It can convert both videos as well as images.
Cons:
● It crashes at times while processing the videos.
● Uploading the files takes a longer time than usual.
02DVDFab
DVDFab is another offline tool that converts the files from MP4 to GIF in very little time without compromising the quality of the outcome.
Key Features:
● It supports a large number of video formats.
● It has a user-friendly interface.
● It can be used for both Mac & Windows.
● It is a great multimedia solution software.
● It comes with affordable pricing.
Pros:
● It is quick & easy to use.
● It delivers high-quality outputs.
● It allows the users to completely control the looping, frequency, and size of the files.
Cons:
● Being a multimedia software, it requires learning.
● Complete beginners can get confused.
03Wondershare TunesGo
TunesGo was developed by one of the most trusted software companies – Wondershare. It is a great tool used to make GIFs from MP4 files.
Key Features:
● Developed by one of the most trusted software development companies.
● Compatible for all iOS devices.
● A user-friendly interface is suitable for complete beginners.
● A trial version is available.
● Works faster and delivers high-resolution output.
Pros:
● Supports; almost all types of video formats.
● It permits you to edit the videos before converting.
● It can also convert images and live videos to GIFs.
Cons:
● It is costly.
● It doesn’t allow you to edit Smart playlists.
04KickMyGraphics
It is another powerful offline tool to convert MP4 to high-quality GIF files. It allows users to convert different formats of videos and images into GIFs.
Key Features:
● Compatibility lies with Mac and Windows both.
● Users can instantly upload various video formats like MPG, MP4, AVI, etc.
● Users can directly upload considerable image formats like JPG, PNG, BMP, etc.
● It has a user-friendly interface.
● It is a freeware offline GIF converter.
Pros:
● It has an in-built editing tool for easy customization.
● It supports direct recording of the animated GIFs.
● It also allows you to use different editing features like the loop, pan, reverse, etc.
Cons:
● Its usage is somehow complicated for beginners.
● It doesn’t support all types of video formats.
05Movavi
It is tremendous offline software that can be downloaded for Mac & PC. It helps in converting the MP4 to GIFs very quickly and easily.
Key Features:
● Mac and Windows are completely supported.
● It allows the users to edit their creations.
● It is also available for all android devices.
● It converts the files very quickly without compromising the quality of the content.
● It is an excellent tool for converting and editing GIFs.
Pros:
● Easy and beneficial for beginners
● Compatible with video formats like MOV, MP4, MPG, AVI, etc.
● It has an in-built AI feature to upscale the output quality.
Cons:
● It has fundamental video editing features.
● It doesn’t allow to copy-paste the video effect while editing.
Part 2 5 Online MP4 to GIF Converters
Online tools for converting files from MP4 to GIF are effortless and convenient because they can be used on any operating system. The following given are some of the great online tools to convert MP4 to GIF with ease and convenience:
01GIF Maker by Giphy
Giphy is known as the king of the online GIF maker tools. It is a GIF converter great tool with around 300 million users daily using it. It allows the users to convert the GIFs by pasting the video links from third-party websites like YouTube.
Key Features:
● Being an online tool, it is compatible with all types of devices.
● It is elementary to use for all types of users.
● It allows the users to add stickers and captions to their GIFs.
● No fee for this so you can use it free of cost.
● It is a website, so it doesn’t require to be downloaded.
Pros:
● Straightforward and quick to use.
● It delivers a high-resolution output with many customization features.
● It can also convert the GIFs using the links of videos from third-party hosting like YouTube.
Cons:
● Speed of the internet connection matters.
● It comes with a limited edition of colors.
02** Wondershare Filmora Video Editor
Filmora is one of the best online video editing tools created by Wondershare. Filmora can be used to convert files from MP4 to GIF very effectively and efficiently.
For Win 7 or later (64-bit)
For macOS 10.12 or later
Wondershare Filmora
Get started easily with Filmora’s powerful performance, intuitive interface, and countless effects Try It Free Try It Free Learn More >
Key Features:
● Fully compatible with any operating system.
● It is a great video editing software with many features like adding music, subtitles, etc.
● It can be also be downloaded on Mac and Windows OS.
● It comes with an annual premium subscription for $51.99.
● It can also be purchased with a one-time fee of $79.99.
Pros:
● It has great video editing features.
● It can convert a large number of video formats to high-resolution GIF files.
● You can customize your GIFs as per your requirements using this tool.
Cons:
● Being an all-in-one video editing tool, this can be much more if you just need GIF creations.
● You cannot remove the watermark and use many editing features if you use a trial version.
03CloudConvert
CloudConvert is another easy-to-use MP4 to GIF converter online. It converts all types of video files into GIFs in a concise time.
Key Features:
● It is easy to use.
● It converts MP4 to GIF very quickly.
● It is free of cost.
● It doesn’t require third-party installation.
● It uses compression algorithms.
Pros:
● It is an open-source converter.
● It allows you to add texts.
● It helps in creating GIFs for web publishing.
Cons:
● Complicated for large files.
● Requires; steady internet connection.
04Convertio
Convertio is another online GIF converter that anyone can use. You just need to upload the MP4 file using Dropbox and hit the ‘Convert’ button.
Key Features:
● Effortless and anyone can easily use it.
● One can easily upload files from Dropbox and Google Drive.
● It also has a drag and drops component for uploading the files.
● It is entirely free to use.
● It is online and doesn’t require any installation.
Pros:
● It converts MP4 to GIF very quickly.
● It delivers high-quality output.
● User-friendly interface.
Cons:
● It doesn’t allow the users to edit their GIFs.
● It doesn’t have the customizing feature and is not user-specific.
05Ezgif
Ezgif is free of cost and an easy-to-use online tool that helps you create GIFs in two easy steps, i.e., upload and convert.
Key Features:
● It is an online tool compatible with both Mac and Windows.
● No download and installation required.
● It is a freeware program.
● It maintains the quality of the outcome.
● It converts GIFs very quickly.
Pros:
● User-friendly and can be used by all.
● It has amazing features that assist you while you convert MP4 to GIF.
● It is not complicated for beginners.
Cons:
● It has limited editing features.
● Only 3 minutes video can be done at maximum.
● Key Takeaways from This Episode →
●The demand for GIF files increases with each passing day due to its many advantages. As a result, many people are looking for easy MP4 to GIF converters that are easy and convenient to use.
●Above mentioned online and offline converters can quickly help you turn MP4 into GIF files without compromising the quality of the graphics.
●These converters are readily available and can easily be used on both Mac and Windows with many conveniences.
●They can help you convert the MP4 files into GIF format very quickly, no matter how large the video size is. GIFs being smaller in size and easily transferrable provide many advantages to the users.
Learn How to Draw Cartoons Step by Step with This Guide
Learn How to Draw Cartoons Step by Step with This Guide
An easy yet powerful editor
Numerous effects to choose from
Detailed tutorials provided by the official channel
Cartoon character drawing is usually a vital aspect of any child’s life who loves to watch cartoon series and can sometimes be someone’s favorite thing in the world.

A cartoon character is a series of single drawings that tell a joke or story. Although cartoons are mostly drawn, they can sometimes be animated. Kids like comics which makes them an essential part of every child’s life. Cartoons are not only used for entertainment purposes but also help kids and young children learn more about the world around them. For example, children learn about love, loss, friendship, and other essential life issues about life by watching cartoons.
However, cartoons are not only limited to children but are also for adults. In addition, cartoons created for an adult audience go deeper into real-life problems and explore darker themes. They aim to create content that matches the maturity and age of the audience. Watching cartoons is fun. But what if you could make them? This article will provide you with a guide on producing cool cartoon drawings that will match different audiences, both older and younger.
In this article
01 [How to Draw Cartoon Characters Step by Step](#Part 1)
02 [Cartoon Easy Drawing with Colour Step by Step](#Part 2)
03 [Cartoon Easy Sketch Drawing Step by Step](#Part 3)
Part 1 How to Draw Cartoon Characters Step by Step
Note that in the world we live in, Professionals were once students, and experts were once beginners. This means that everyone has a starting point, and they all have one thing in common: “learning.” Whether you are aspiring to become an English teacher, an astrophysicist, an artist, or a physician’s assistant, you must first learn the ins and outs of the field.
Those aspiring to become animators and cartoonists must first learn the basics of cartoon character drawing and practice some easy, simple cartoon drawing before cranking out the Mickey-Mouses of the entertainment world. However, we will cover the basic principles of easy cartoon drawing for beginners step by step to get your learning process started. Here is how to draw a Micky-Mouse perfectly:

Step 1:
● Use a pencil to begin your drawing.
● First, create a circle for the head and a curved line on the left side.
● Draw a horizontal line at the center.
Step 2: Next, draw an oval shape for the mouth and a “U” shape added to the bottom, and then you can add another parallel “U” shape and connect it with the oval.
Step 3: Draw the eye using two upside-down “U” shapes, and then you add his large ear on the right and a small one at the top of the head.
Step 4: You can draw a bean shape and another smaller one inside for the body.
Step 5: Add oval shapes for his feet to draw his legs and draw his tail on the right side just above the leg.
Step 6: Draw two elongated shapes for his arms, a small oval for the hand and a basic shape of his fingers.
Step 7: Draw the cheese and add a few small circles inside.
Step 8: Also include the facial features by drawing the inside of the nose, eyebrows, eyes, and whiskers.
Step 9:
● Draw his fingers and hair between his ears.
● Trace your pencil lines with a sharpie.
● Erase the pencil afterward.
Step 10: Finally, you can color your drawing and upload it to your website.
Part 1 Cartoon Easy Drawing with Colour Step by Step
Applying color to a drawing is very important to beautify your drawing and make it look stunning and attractive. Here is how to cartoon easy drawing a flower using a colored pencil:
Step 1: Using a color photocopy of a reference photo, crop and rearrange elements of the poppy composition. With light pressure and HB pencil, draw a composition onto a four-ply, 100% cotton museum board frequently found among framing supplies.
Step 2: With very light pressure, apply the first colored pencil layer and add more emphasis where the values will be deeper. While doing this, note that the pencil application will still appear granular, and the texture of the museum board is still visible.

Step 3: Create the veins in the leaves and the fuzzy texture of the stem and pod, and also, as the individual strands of stamens, put down a sheet of translucent drafting paper. Use heavy tracing paper with a very sharp 7H graphite pencil and apply heavy pressure in drawing the lines for stamens, fuzz, and veins on the drafting paper and impress them into the surface of the museum board. Then, with a contrasting layer of darker color, these features dramatically show up on the stem, leaves, center of the flower, pod, and center of the flower. Then add deeper values of rose in the shadowed areas of the flower petals.

Step 4: To make them appear less granular and intensify the colors, start by blending with a clear, alcohol-based blending marker. The solvent, wax, or vegetable oil then dissolves the binder in the colored pencil layer and fluidly releases the pigment. This will also help to “fill in” the dots of the tooth of the paper and make the color appear denser.

Step 5: Continue to intensify the color by using a non-pigmented blending pencil over a previous layer and repeat a layer or two of color, much like a “color sandwich.” Repeat this “ burnishing “ process for subsequent layerings of color, like a double-decker or triple-decker sandwich.
Also, make sure the rich, dark negative space is carried out the same way, layering colors and burnishing, then repeating the colors for deep, rich saturation.
Render the deep, smeary flecks of pollen by heavily applying “freckles” of burgundy, then slightly smudge them with the tip of a blending marker. Lastly, scratch a few of the tiny wisps of fuzz on the pod and stem carefully into the board via a sharp X-acto knife for a striking contrast of light against the deep background.

Part 2 Cartoon Easy Sketch Drawing Step by Step
This is the initial stage of the drawing process. It requires you to create an outline of the concept you want to draw before adding color. However, it is also referred to as a technique in shading. For example, if you’re going to sketch a cherry fruit, there are a few things to note here.
Try not to look at the cherry as a whole but look at its shapes and name them. This way, you are looking at the parts to the whole and not the entire piece.

Step 1: Draw two overlapping circles and draw two curved lines from each of the circles.
Step 2: Make a small rectangle at the top to join the two stems and draw a second set of curved lines.
Step 3: Draw thick lines inside the rectangle for the bumps and darken the lines and use your finger to smudge them a bit for the shaded effect.
Step 4: Draw a curved line from the stem on the right to the circle’s edge to create the bump.
Step 5: Holding your pencil at an angle, make light strokes going across the front of both cherries. Take note of the places where there is no light. This is where the light source is hitting the cherry the most.
Step 6: To darken, a shade over those places again, keep layering the shading technique until you get the effect you see on the cherries.
Step 7: Use the same technique to shade under the cherries, but use your finger to smudge it to smoother the shadow.
●Bonus:
You can add color, effect, or animate to your cartoon character drawing by using Wondershare Filmora Video Editor , the best editor on the internet. Filmora is a free software program with the same creating abilities and imaging editing similar to Adobe Illustrator. It is open software that runs on various programs, such as Windows, Mac, and Linux. Please get to know more about this exclusive tool from Wondershare on their official website.
For Win 7 or later (64-bit)
For macOS 10.12 or later
● Ending Thoughts →
● A step-by-step guide on drawing easy cartoons for painting and how to sketch your drawing correctly.
● Cartoon character drawings in easy and quick steps.
● Easy cartoon drawing for beginners.
● Lastly, to add color to your drawing, use Filmora software.
● So, use the tips and tricks to make your presentation’s best cartoon characters come alive and be a pro with Filmora.
Cartoon character drawing is usually a vital aspect of any child’s life who loves to watch cartoon series and can sometimes be someone’s favorite thing in the world.
A cartoon character is a series of single drawings that tell a joke or story. Although cartoons are mostly drawn, they can sometimes be animated. Kids like comics which makes them an essential part of every child’s life. Cartoons are not only used for entertainment purposes but also help kids and young children learn more about the world around them. For example, children learn about love, loss, friendship, and other essential life issues about life by watching cartoons.
However, cartoons are not only limited to children but are also for adults. In addition, cartoons created for an adult audience go deeper into real-life problems and explore darker themes. They aim to create content that matches the maturity and age of the audience. Watching cartoons is fun. But what if you could make them? This article will provide you with a guide on producing cool cartoon drawings that will match different audiences, both older and younger.
In this article
01 [How to Draw Cartoon Characters Step by Step](#Part 1)
02 [Cartoon Easy Drawing with Colour Step by Step](#Part 2)
03 [Cartoon Easy Sketch Drawing Step by Step](#Part 3)
Part 1 How to Draw Cartoon Characters Step by Step
Note that in the world we live in, Professionals were once students, and experts were once beginners. This means that everyone has a starting point, and they all have one thing in common: “learning.” Whether you are aspiring to become an English teacher, an astrophysicist, an artist, or a physician’s assistant, you must first learn the ins and outs of the field.
Those aspiring to become animators and cartoonists must first learn the basics of cartoon character drawing and practice some easy, simple cartoon drawing before cranking out the Mickey-Mouses of the entertainment world. However, we will cover the basic principles of easy cartoon drawing for beginners step by step to get your learning process started. Here is how to draw a Micky-Mouse perfectly:
Step 1:
● Use a pencil to begin your drawing.
● First, create a circle for the head and a curved line on the left side.
● Draw a horizontal line at the center.
Step 2: Next, draw an oval shape for the mouth and a “U” shape added to the bottom, and then you can add another parallel “U” shape and connect it with the oval.
Step 3: Draw the eye using two upside-down “U” shapes, and then you add his large ear on the right and a small one at the top of the head.
Step 4: You can draw a bean shape and another smaller one inside for the body.
Step 5: Add oval shapes for his feet to draw his legs and draw his tail on the right side just above the leg.
Step 6: Draw two elongated shapes for his arms, a small oval for the hand and a basic shape of his fingers.
Step 7: Draw the cheese and add a few small circles inside.
Step 8: Also include the facial features by drawing the inside of the nose, eyebrows, eyes, and whiskers.
Step 9:
● Draw his fingers and hair between his ears.
● Trace your pencil lines with a sharpie.
● Erase the pencil afterward.
Step 10: Finally, you can color your drawing and upload it to your website.
Part 1 Cartoon Easy Drawing with Colour Step by Step
Applying color to a drawing is very important to beautify your drawing and make it look stunning and attractive. Here is how to cartoon easy drawing a flower using a colored pencil:
Step 1: Using a color photocopy of a reference photo, crop and rearrange elements of the poppy composition. With light pressure and HB pencil, draw a composition onto a four-ply, 100% cotton museum board frequently found among framing supplies.
Step 2: With very light pressure, apply the first colored pencil layer and add more emphasis where the values will be deeper. While doing this, note that the pencil application will still appear granular, and the texture of the museum board is still visible.
Step 3: Create the veins in the leaves and the fuzzy texture of the stem and pod, and also, as the individual strands of stamens, put down a sheet of translucent drafting paper. Use heavy tracing paper with a very sharp 7H graphite pencil and apply heavy pressure in drawing the lines for stamens, fuzz, and veins on the drafting paper and impress them into the surface of the museum board. Then, with a contrasting layer of darker color, these features dramatically show up on the stem, leaves, center of the flower, pod, and center of the flower. Then add deeper values of rose in the shadowed areas of the flower petals.
Step 4: To make them appear less granular and intensify the colors, start by blending with a clear, alcohol-based blending marker. The solvent, wax, or vegetable oil then dissolves the binder in the colored pencil layer and fluidly releases the pigment. This will also help to “fill in” the dots of the tooth of the paper and make the color appear denser.
Step 5: Continue to intensify the color by using a non-pigmented blending pencil over a previous layer and repeat a layer or two of color, much like a “color sandwich.” Repeat this “ burnishing “ process for subsequent layerings of color, like a double-decker or triple-decker sandwich.
Also, make sure the rich, dark negative space is carried out the same way, layering colors and burnishing, then repeating the colors for deep, rich saturation.
Render the deep, smeary flecks of pollen by heavily applying “freckles” of burgundy, then slightly smudge them with the tip of a blending marker. Lastly, scratch a few of the tiny wisps of fuzz on the pod and stem carefully into the board via a sharp X-acto knife for a striking contrast of light against the deep background.
Part 2 Cartoon Easy Sketch Drawing Step by Step
This is the initial stage of the drawing process. It requires you to create an outline of the concept you want to draw before adding color. However, it is also referred to as a technique in shading. For example, if you’re going to sketch a cherry fruit, there are a few things to note here.
Try not to look at the cherry as a whole but look at its shapes and name them. This way, you are looking at the parts to the whole and not the entire piece.
Step 1: Draw two overlapping circles and draw two curved lines from each of the circles.
Step 2: Make a small rectangle at the top to join the two stems and draw a second set of curved lines.
Step 3: Draw thick lines inside the rectangle for the bumps and darken the lines and use your finger to smudge them a bit for the shaded effect.
Step 4: Draw a curved line from the stem on the right to the circle’s edge to create the bump.
Step 5: Holding your pencil at an angle, make light strokes going across the front of both cherries. Take note of the places where there is no light. This is where the light source is hitting the cherry the most.
Step 6: To darken, a shade over those places again, keep layering the shading technique until you get the effect you see on the cherries.
Step 7: Use the same technique to shade under the cherries, but use your finger to smudge it to smoother the shadow.
●Bonus:
You can add color, effect, or animate to your cartoon character drawing by using Wondershare Filmora Video Editor , the best editor on the internet. Filmora is a free software program with the same creating abilities and imaging editing similar to Adobe Illustrator. It is open software that runs on various programs, such as Windows, Mac, and Linux. Please get to know more about this exclusive tool from Wondershare on their official website.
For Win 7 or later (64-bit)
For macOS 10.12 or later
● Ending Thoughts →
● A step-by-step guide on drawing easy cartoons for painting and how to sketch your drawing correctly.
● Cartoon character drawings in easy and quick steps.
● Easy cartoon drawing for beginners.
● Lastly, to add color to your drawing, use Filmora software.
● So, use the tips and tricks to make your presentation’s best cartoon characters come alive and be a pro with Filmora.
Top 8 Anime Name & Title Generators Online-Get Cool Anime Names
Top 8 Anime Name Generators Online-Get Cool Anime Names

Shanoon Cox
Mar 27, 2024• Proven solutions
An anime name generator is a cool and fun tool that is used by anime lovers all over the world. This tool helps to create attractive anime names for you depending on your interests in anime or your character traits.
Anime names are used for a variety of purposes by anime lovers. Most of them want a cool anime-related name for their YouTube channel, game profile, twitch profile, etc. and with a large number of users on these platforms, it is difficult to get a unique name.
Also, a name becomes a symbol that represents quality, appearance, shortcomings, personality, etc.
The anime name generators will generate unique anime-related names for the users to choose from. A cool anime name always will attract more audiences to whatever content they are displaying.
Top 8 Anime Name Generators Online
A cool anime name will always attract the attention of people no matter what platform you are on. But not all people are creative enough to create such a name of their own. That is where an anime name generator comes for help.
Let’s have a look at the top 8 anime name generators available online that can be used to create unique anime names.
1. Fantasy Name Generator
The Fantasy Name Generator is a free application that can provide up to 10 anime and manga character names. The names on this site are divided into 3 categories, namely real names, fake names, and nicknames or unique names. All the names provided are Japanese.
A list of 10 names will be listed on the website when you open it. You can easily choose between male and female character anime names. If you are not satisfied with the displayed list, simply click on the Male names of Females names tab and 10 new random names will be displayed.
2. Cool Generator
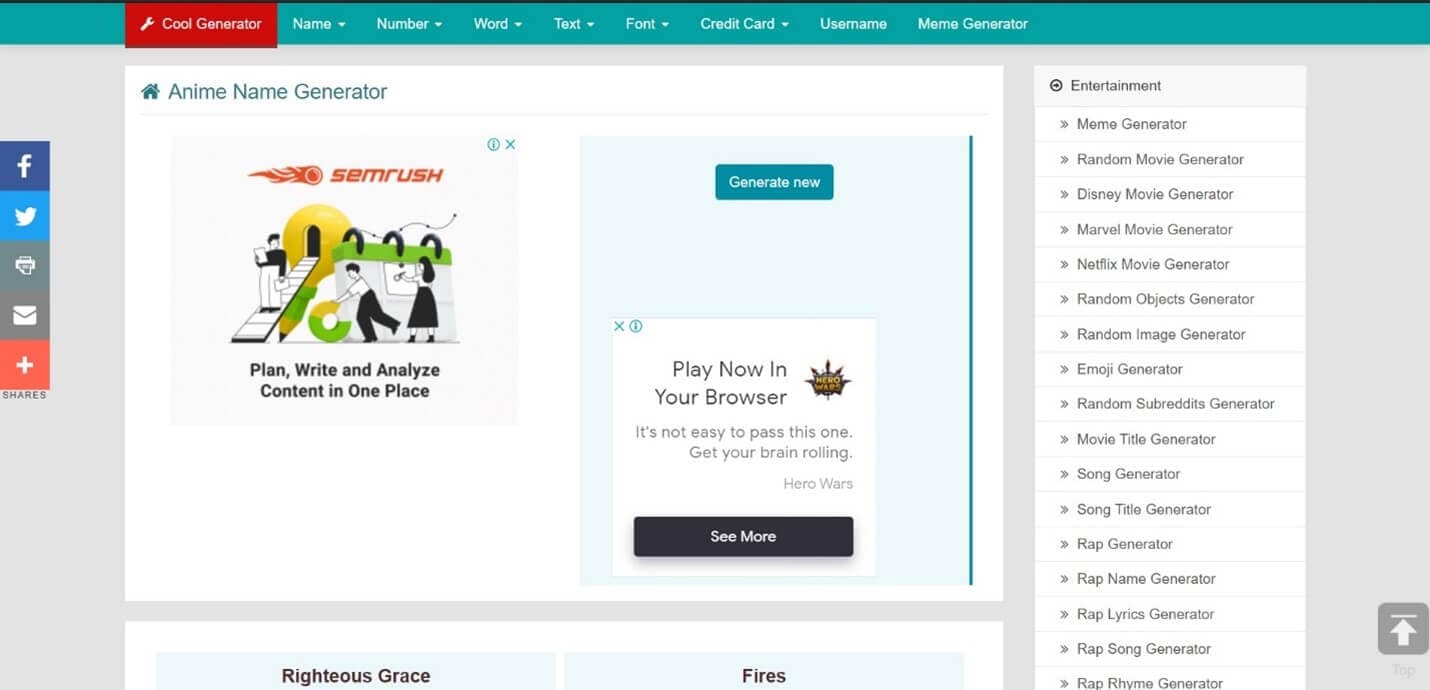
The Cool Generator is another simple anime name generator that can be used to create anime names, clan names, team names, etc. All the anime names generated by this tool are unique and represent different characteristics.
A list of 24 anime names will be displayed when you open the cool generator. You can choose any one of the names from it. If you are not satisfied with the names displayed, you can go for another set of 24 names by tapping on the Generate New tab displayed above.
3. Thestoryshack.com
Thestoryshack.com is an awesome anime name generator that can provide you with countless anime names for your story, gaming adventure, or any other project. 6 unique names will be displayed on the page and you can go for more by clicking on the refresh tab.
This anime name-generating tool helps to choose between female and male character names very easily. They have also sorted the names into different categories elf names like elf names, dragon names, demon names, dwarf names, medieval names, Viking names, etc. for the convenience of the users.
4. Masterpiece Generator
Masterpiece Generator is another free online tool that helps you to create epic anime names. This tool allows you to create names with a maximum of 5 components, and hence you can choose between short and sweet or long and swanky names.
This application takes into account a variety of factors like gender, character title, flavor, character type, birth year, nationality, etc. to create a list of names. Once you have givens your suggestion, a list of names will be displayed on the page after clicking on the Write me some character names tab towards the bottom.
5. Reedsy
Reedsy is another tool that can generate cool Japanese anime character names for you. All the names are computer-generated and have something to do with their traditions.
A list of five Japanese names will be displayed once you open the page. The meanings of these names will also be mentioned for those who wish to choose names with specific meanings. You can choose the names between random, male, and female options. Clicking on the Generate names tab will always display a new set of names with the meanings.
6. Rumandmonkey.com
Rumandmonkey.com is a fun anime title generator that you can use to create appealing anime names. A small drawback is the number of ads that keep covering your display when you open the tool.
This anime name generator has classified the character names based on a different generation. You can choose between the greatest generation, baby boomer, generation x, millennials, and generation alpha categories. A variety of other questions will be asked on your likes and dislikes and an anime name will be displayed depending on the answers you have given. This tool only displays 1 name at a time and might require a little patience.
7. Quizony
Quizony is a great anime name generator for anime fans out there. The anime names generated by this tool represent the personality and character of the individual.
A series of questions will be asked by this tool to have an idea of likes and dislikes. A small drawback is that about 29 questions must be answered before they provide you with anime names. Once all the questions are answered the tool will choose a unique name for you. This tool has a brilliant way of choosing names but is not a suitable option if you want more than one anime name.
8. Fun Generator
As the name indicates Fun Generator is a very good application for all the fun-seeking anime lovers out there. This tool allows you to choose between a variety of Japanese anime names for your character.
A list of 5 different anime character names will be displayed when you open the site. You can either choose any one of them or go for another set by clicking on the tabs below. They also have options to choose from random, male or female character names.
Conclusion
Anime names are used by many anime lovers all over the world as their user name, profile name, etc. most people tend to keep this name for a lifetime. But not everyone can create an anime name that defines them and which is already not taken.
This problem is solved by anime name generators that are freely available online nowadays. These anime name generators help to create unique anime names that are appealing and tailored to the character traits of the individual.
We have listed the best online anime title generators available above. Choose an attractive anime name for yourself and have fun.
Shanoon Cox
Shanoon Cox is a writer and a lover of all things video.
Follow @Shanoon Cox
Shanoon Cox
Mar 27, 2024• Proven solutions
An anime name generator is a cool and fun tool that is used by anime lovers all over the world. This tool helps to create attractive anime names for you depending on your interests in anime or your character traits.
Anime names are used for a variety of purposes by anime lovers. Most of them want a cool anime-related name for their YouTube channel, game profile, twitch profile, etc. and with a large number of users on these platforms, it is difficult to get a unique name.
Also, a name becomes a symbol that represents quality, appearance, shortcomings, personality, etc.
The anime name generators will generate unique anime-related names for the users to choose from. A cool anime name always will attract more audiences to whatever content they are displaying.
Top 8 Anime Name Generators Online
A cool anime name will always attract the attention of people no matter what platform you are on. But not all people are creative enough to create such a name of their own. That is where an anime name generator comes for help.
Let’s have a look at the top 8 anime name generators available online that can be used to create unique anime names.
1. Fantasy Name Generator
The Fantasy Name Generator is a free application that can provide up to 10 anime and manga character names. The names on this site are divided into 3 categories, namely real names, fake names, and nicknames or unique names. All the names provided are Japanese.
A list of 10 names will be listed on the website when you open it. You can easily choose between male and female character anime names. If you are not satisfied with the displayed list, simply click on the Male names of Females names tab and 10 new random names will be displayed.
2. Cool Generator
The Cool Generator is another simple anime name generator that can be used to create anime names, clan names, team names, etc. All the anime names generated by this tool are unique and represent different characteristics.
A list of 24 anime names will be displayed when you open the cool generator. You can choose any one of the names from it. If you are not satisfied with the names displayed, you can go for another set of 24 names by tapping on the Generate New tab displayed above.
3. Thestoryshack.com
Thestoryshack.com is an awesome anime name generator that can provide you with countless anime names for your story, gaming adventure, or any other project. 6 unique names will be displayed on the page and you can go for more by clicking on the refresh tab.
This anime name-generating tool helps to choose between female and male character names very easily. They have also sorted the names into different categories elf names like elf names, dragon names, demon names, dwarf names, medieval names, Viking names, etc. for the convenience of the users.
4. Masterpiece Generator
Masterpiece Generator is another free online tool that helps you to create epic anime names. This tool allows you to create names with a maximum of 5 components, and hence you can choose between short and sweet or long and swanky names.
This application takes into account a variety of factors like gender, character title, flavor, character type, birth year, nationality, etc. to create a list of names. Once you have givens your suggestion, a list of names will be displayed on the page after clicking on the Write me some character names tab towards the bottom.
5. Reedsy
Reedsy is another tool that can generate cool Japanese anime character names for you. All the names are computer-generated and have something to do with their traditions.
A list of five Japanese names will be displayed once you open the page. The meanings of these names will also be mentioned for those who wish to choose names with specific meanings. You can choose the names between random, male, and female options. Clicking on the Generate names tab will always display a new set of names with the meanings.
6. Rumandmonkey.com
Rumandmonkey.com is a fun anime title generator that you can use to create appealing anime names. A small drawback is the number of ads that keep covering your display when you open the tool.
This anime name generator has classified the character names based on a different generation. You can choose between the greatest generation, baby boomer, generation x, millennials, and generation alpha categories. A variety of other questions will be asked on your likes and dislikes and an anime name will be displayed depending on the answers you have given. This tool only displays 1 name at a time and might require a little patience.
7. Quizony
Quizony is a great anime name generator for anime fans out there. The anime names generated by this tool represent the personality and character of the individual.
A series of questions will be asked by this tool to have an idea of likes and dislikes. A small drawback is that about 29 questions must be answered before they provide you with anime names. Once all the questions are answered the tool will choose a unique name for you. This tool has a brilliant way of choosing names but is not a suitable option if you want more than one anime name.
8. Fun Generator
As the name indicates Fun Generator is a very good application for all the fun-seeking anime lovers out there. This tool allows you to choose between a variety of Japanese anime names for your character.
A list of 5 different anime character names will be displayed when you open the site. You can either choose any one of them or go for another set by clicking on the tabs below. They also have options to choose from random, male or female character names.
Conclusion
Anime names are used by many anime lovers all over the world as their user name, profile name, etc. most people tend to keep this name for a lifetime. But not everyone can create an anime name that defines them and which is already not taken.
This problem is solved by anime name generators that are freely available online nowadays. These anime name generators help to create unique anime names that are appealing and tailored to the character traits of the individual.
We have listed the best online anime title generators available above. Choose an attractive anime name for yourself and have fun.
Shanoon Cox
Shanoon Cox is a writer and a lover of all things video.
Follow @Shanoon Cox
Most Effective Tactics to Set WhatsApp Status
Most Effective Tactics to Set WhatsApp Status
An easy yet powerful editor
Numerous effects to choose from
Detailed tutorials provided by the official channel
People generally use images to be uploaded as their WhatsApp status and unknown to many, videos as well as GIFs can also be added as status.
This status remains on your profile for 24 hours and can be viewed only by people who are on your contact list. So, if you too looking for ways to add WhatsApp status GIF, keep reading.
In this article
01 [How to set an animated GIF as WhatsApp status from the phone gallery?](#Part 1)
02 [How to set an animated GIF as WhatsApp status using an app?](#Part 2)
03 [Setting WhatsApp GIF status using device internal camera](#Part 3)
04 [How to create an interesting GIF in a hassle-free manner using Wondershare Filmora](#Part 4)
Part 1 How to set an animated GIF as WhatsApp status from the phone gallery?
If the GIF that you wish to use as the WhatsApp status is present on your phone, you can add it directly from the phone gallery. The steps to get this task done are enlisted below.
Step 1. Launch WhatsApp on your phone and then click on the Status tab.
Step 2. Tap on the My status tab to add a new status. The camera app on the phone will open and you need to launch the phone gallery now.
Step 3. Choose the desired GIF from the gallery, click on it and then tap on the Send button to set it as your status.
The selected GIF will be set as your WhatsApp status.
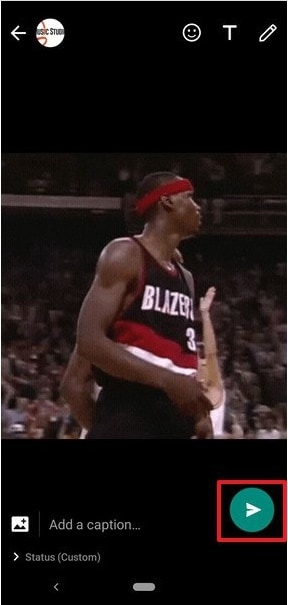
Part 2 How to set an animated GIF as WhatsApp status using an app?
Another way to add an animated GIF WhatsApp status is by using an app and for this, we recommend Giphy as the best tool. The steps to use the app for setting an animated status are as follows.
Step 1. Download, install and open the Giphy app on your phone.
Step 2. The main interface of the app will show multiple GIF options. You can also search your choice of animation based on categories or by using the search box.
Step 3. Next, click on the desired GIF to open it and see it in a larger frame.
Step 4. Under the selected GIF, click on the icon resembling a paper plane, and sharing options will appear.
Step 5. Choose the WhatsApp icon from the options available and then at the next menu, click on the My status option.
Step 6. Next, tap on the green arrow at the bottom-right corner to set GIF as WhatsApp status.
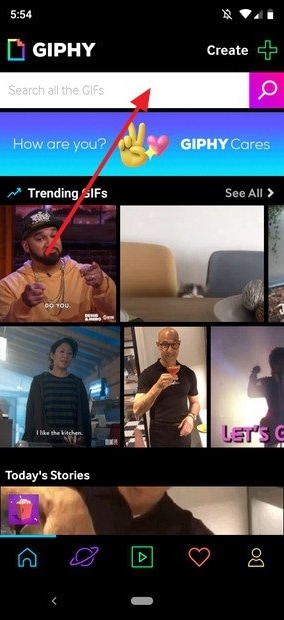
Part 3 Setting WhatsApp GIF status using device internal camera
Another way to add an animated GIF as WhatsApp status is using the internal camera of the device. The steps for the same are as follows.
Step 1. On your phone, launch WhatsApp and at the Status tab, click on the My Status option.
Step 2. The camera of the phone will get activated and now to start the video recording, you need to tap and hold the button that is used for taking the images.
Step 3. Record the video for which you wish to make an animation (video cannot be longer than 5 seconds).
Step 4. After the recording is done, you can adjust the duration using the slider and then choose to play the recorded video as GIF. Click on the Send button to share the video as WhatsApp Status.

Part 4 How to create an interesting GIF in a hassle-free manner using ** Wondershare Filmora Video Editor
If you wish to set your WhatsApp status as interesting GIF videos, you would need to download such animations online. Another way is to get customized GIF files and this professional tool will be required. If you too want to create your own customized animation in a hassle-free manner, we suggest using Wondershare Filmora. Not only WhatsApp status, but you can also use software for creating GIF animations for web pages, social media sites, ad banners, and other uses.
Wondershare Filmora
Get started easily with Filmora’s powerful performance, intuitive interface, and countless effects Try It Free Try It Free Learn More >
Using Wondershare Filmora, artistic animations can be quickly created using an image as well as videos. The process is simple and does not require any advanced technical know-how. To create the desired GIF video, there are multiple options for customizations available like adding text, overlays, elements, and more.
Key features of the software
● Create GIF animations using videos and still images.
● Support all key video and image formats like FLV, MKV, MP4, and more.
● Allows customizing the animations by adding text, overlays, elements, and others.
● Quick and hassle-free tool for creating an interesting GIF.
● Windows and Mac support.
Steps to create GIF for WhatsApp status using Wondershare Filmora
Step 1. Launch Wondershare Filmora and add video or images from which you wish to create an animated GIF.
Step 2. Drag and drop the added media file to the timeline of the software.
Step 3. Next, edit and customize the added files using features like combine, crop, split, speed-up, slow, and more.
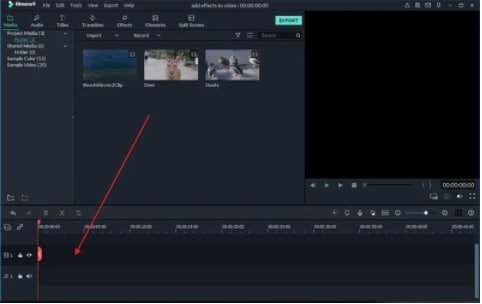
Step 4. You can also add text or elements like sound and others to the added files.
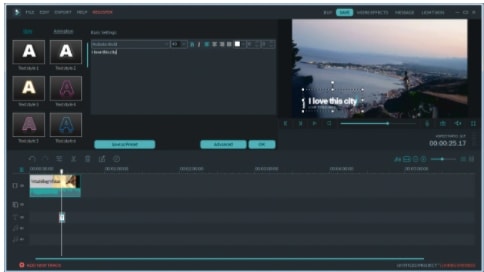
Step 5. Next, when all settings are done, choose GIF at the Local tab to save the media file as GIF. Choose the desired file name and the system location to save the file. Finally, click on the Export button.
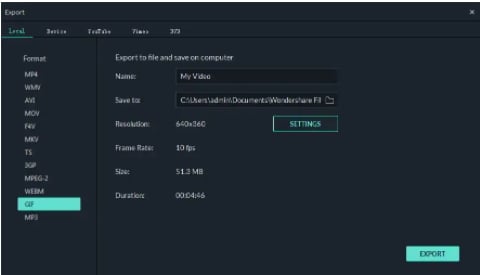
The created GIF animation will save to your selected folder and can be used as WhatsApp status, on social media sites, or for any other use as needed.
● Key Takeaways from This Episode →
●GIF animations can now be used as WhatsApp status.
●There are multiple ways to set GIF animations as WhatsApp status.
People generally use images to be uploaded as their WhatsApp status and unknown to many, videos as well as GIFs can also be added as status.
This status remains on your profile for 24 hours and can be viewed only by people who are on your contact list. So, if you too looking for ways to add WhatsApp status GIF, keep reading.
In this article
01 [How to set an animated GIF as WhatsApp status from the phone gallery?](#Part 1)
02 [How to set an animated GIF as WhatsApp status using an app?](#Part 2)
03 [Setting WhatsApp GIF status using device internal camera](#Part 3)
04 [How to create an interesting GIF in a hassle-free manner using Wondershare Filmora](#Part 4)
Part 1 How to set an animated GIF as WhatsApp status from the phone gallery?
If the GIF that you wish to use as the WhatsApp status is present on your phone, you can add it directly from the phone gallery. The steps to get this task done are enlisted below.
Step 1. Launch WhatsApp on your phone and then click on the Status tab.
Step 2. Tap on the My status tab to add a new status. The camera app on the phone will open and you need to launch the phone gallery now.
Step 3. Choose the desired GIF from the gallery, click on it and then tap on the Send button to set it as your status.
The selected GIF will be set as your WhatsApp status.
Part 2 How to set an animated GIF as WhatsApp status using an app?
Another way to add an animated GIF WhatsApp status is by using an app and for this, we recommend Giphy as the best tool. The steps to use the app for setting an animated status are as follows.
Step 1. Download, install and open the Giphy app on your phone.
Step 2. The main interface of the app will show multiple GIF options. You can also search your choice of animation based on categories or by using the search box.
Step 3. Next, click on the desired GIF to open it and see it in a larger frame.
Step 4. Under the selected GIF, click on the icon resembling a paper plane, and sharing options will appear.
Step 5. Choose the WhatsApp icon from the options available and then at the next menu, click on the My status option.
Step 6. Next, tap on the green arrow at the bottom-right corner to set GIF as WhatsApp status.
Part 3 Setting WhatsApp GIF status using device internal camera
Another way to add an animated GIF as WhatsApp status is using the internal camera of the device. The steps for the same are as follows.
Step 1. On your phone, launch WhatsApp and at the Status tab, click on the My Status option.
Step 2. The camera of the phone will get activated and now to start the video recording, you need to tap and hold the button that is used for taking the images.
Step 3. Record the video for which you wish to make an animation (video cannot be longer than 5 seconds).
Step 4. After the recording is done, you can adjust the duration using the slider and then choose to play the recorded video as GIF. Click on the Send button to share the video as WhatsApp Status.
Part 4 How to create an interesting GIF in a hassle-free manner using ** Wondershare Filmora Video Editor
If you wish to set your WhatsApp status as interesting GIF videos, you would need to download such animations online. Another way is to get customized GIF files and this professional tool will be required. If you too want to create your own customized animation in a hassle-free manner, we suggest using Wondershare Filmora. Not only WhatsApp status, but you can also use software for creating GIF animations for web pages, social media sites, ad banners, and other uses.
Wondershare Filmora
Get started easily with Filmora’s powerful performance, intuitive interface, and countless effects Try It Free Try It Free Learn More >
Using Wondershare Filmora, artistic animations can be quickly created using an image as well as videos. The process is simple and does not require any advanced technical know-how. To create the desired GIF video, there are multiple options for customizations available like adding text, overlays, elements, and more.
Key features of the software
● Create GIF animations using videos and still images.
● Support all key video and image formats like FLV, MKV, MP4, and more.
● Allows customizing the animations by adding text, overlays, elements, and others.
● Quick and hassle-free tool for creating an interesting GIF.
● Windows and Mac support.
Steps to create GIF for WhatsApp status using Wondershare Filmora
Step 1. Launch Wondershare Filmora and add video or images from which you wish to create an animated GIF.
Step 2. Drag and drop the added media file to the timeline of the software.
Step 3. Next, edit and customize the added files using features like combine, crop, split, speed-up, slow, and more.
Step 4. You can also add text or elements like sound and others to the added files.
Step 5. Next, when all settings are done, choose GIF at the Local tab to save the media file as GIF. Choose the desired file name and the system location to save the file. Finally, click on the Export button.
The created GIF animation will save to your selected folder and can be used as WhatsApp status, on social media sites, or for any other use as needed.
● Key Takeaways from This Episode →
●GIF animations can now be used as WhatsApp status.
●There are multiple ways to set GIF animations as WhatsApp status.
What Wikipedia Won’t Tell You Specifically About Character Rigging
What Wikipedia Won’t Tell You Specifically About Character Rigging
An easy yet powerful editor
Numerous effects to choose from
Detailed tutorials provided by the official channel
The function of character rigging can easily be compared to that of bones, muscles and joints. They act as skeletons to virtual animations. You can also imagine them as strings used on dolls. These digitalized bones function inter-connectedly in a 3D animation.
In this article
01 [Intro to Character Rigging](#Part 1)
02 [8 Tips for Character Rigging](#Part 2)
03 [10 Best Character Rigging Services to Buy Online](#Part 3)
04 [How to Make 3d Character Rig? Are There Any Plugins or Easy](#Part 4)
Part 1 Intro to Character Rigging
As you already know by now that the process of rigging a character can be quite a tedious task. It involves a lot of creative thinking, precision and a keen eye to notice all the small details.
Once you have a model character to work on, riggers set off to creating a skeleton to match the character. These skele-animations can be used to move the entire model as if tugging on strings (not literally).
The movement of the chain of skeletons or rigs is interdependent. Which means if you pull on any one bone, it moves all the other bones in the same sequence. Similar to how bones move within the human body.
Riggers use programs and tools to create a series of bone like structures that can deformed and animated freely according to the preference of the animators.
Movements like positioning, curving and rotation can be recorded and then played back in the animation.
This requires the rigger to constantly coordinate between modelers, animators till the end of the project. This entire process can take weeks or even months.
Amazingly enough, its 20and there are online tools and tutorials you can use to easily learn complex animations like they make in large scale movies and games.
Part 2 8 Tips for Character Rigging
01The Right Rig for the Job
Rigging is a skill all animators gets good at overtime. The more you practice the more familiar you are with the tools you are using. It will also help you understand that not all rigs are meant for the same set of movements.
You need to be able to discern what rig is it that you need and discard what you don’t. If the rig is being used in a game, then the focus will be more on the experience while for movies its attention.
02Deformers for Facial Rigging
Constructing a realistic facial rig can be quite a task but is indeed satisfying once finished. Human facial features require a great degree of flexibility which is why using a variety of deformers for different parts of the face. They are better suited for creating joints over the face and can be done more quickly.
03IK and FK
Though you can use one without the other, it is best to use both of them in an animation. You can’t work without both arms can you? Applying both Inverse and Forward Kinematics in your rig design can help it make more stylistic.
04Learn Python and Maya API: Learn Python and Maya API
If you wish to take your rigging skills to the next level then learning Maya API and Python are great millstones. This way, you can create high quality and sophisticated rigs with high intense flexibility on Maya. Also, Python allows you to write new scripts for PlugIns.
05Delegate to an Animator
After rigging for several hours it is easy to feel like you are only seeing from one perspective. Get in touch with an animator earlier on in the project can help you get feedback to stay consistent in the rigging process.
06Learn Web Technologies: Learn Web Technologies
To be a good animator or rigging specialist involves a lot of learning. Animation technology is constantly changing therefore it is highly recommended to stay up to date with the latest web technologies. Learning HTML, Java Script and CSS is becoming vital to being a part of the gaming world.
07Use Scalable Tools
Not all the characters or objects you rig are going to be of the same size. Selecting the right rigging software is crucial for you to be able to scale your animations. You won’t need to use everything, just the tools that serve your purpose.
08Use a Clean Interface
If you have ever heard of the phrase ‘clean workplace – cleaner work’ then you should know how an untidy interface can affect your workflow. This won’t necessarily change the results but can surely better your experience.
Part 3 Best Character Rigging Services to Buy Online
Don’t feel confused about where to begin. The first step to get into rigging is to master a software, any software, here are of the best ones you can choose from;
01Maya
Offers the best animation features on the market.

02Blender
Vast variety of tools for sculpting, rigging or VFX.

03Modo
Has a more simplified approach towards modelling and rigging.

043ds Max
Leverages high flexibility and ease of use to riggers.
05Sculptris
Excellentfor beginners who need a gateway software to start art.

06ZBrush
Lets you work on your sculpting skills with digital clay.

07Cheetah 3D
Developed by Macintosh to be an easy to learn modelling software.

08Rhinoceros 3D
Harbours a mathematical approach to modelling and modular design.

09Fusion 360
Offers a wide range of simulation tools.

10Cinema 4D
Recognized by professionals for well-equipped arsenal of digital rendering.

Part 4 How to Make Character Rig? Are There Any Plugins or Easy
How to Make Character Rig? Are There Any Plugins or Easy
When we imagine animation, most of the time we are baffled by the end product? But what really goes on behind the mesmerizing colors and whimsical characters.
The basic is of course building rigs to support the entire movement of the character and confine it to actual physical laws that makes it almost a mimic of reality. The entire process of rigging rather simplifies the path to achieve that goal.
In Cinema, character rigging has multiple layers that goes into creating the entire skeleton animation. Setting up a character rig can take anywhere between a few hours or a few days. It probably takes mainstream movies ten times that time.
Let us break down the process of making a rig so that it is simpler to understand.
The process;
Weight Painting: An integral part of the entire rigging process. Although, weight painting can be rendered automatically by the software that you are using, but that can end up making the animation look less realistic. You can instead fine tune the weight of each bone in the rig. You can also copy similar looking bones and apply them to different mesh and repurpose them to function differently.
Placing Bones: After designing a bone structure of character, you can copy the same and use it for similar characters. This is why in games and animation, you notice characters with similar features and traits.
Inverse Kinematics: Not all bones are meant to move in a forward direction. This is why inverses Kinematics are applied to certain bones like the legs, shoulders or even a dragon’s tail. Setting up the IK of your rig would keep specific bones pointed in the right direction so as to make the animation look more natural.
Applying Constraints: The physical realm is built with restrictions. There are things you can do or can’t do according to the natural order of things so as to make your character movement more naturalistic.
Simulation Skeletons: Now comes the part where the magic happens. After fully completing a skeletal animation you can now simulate the motion over the mesh and record the result of the simulation through a series of frames.
Create an animated movie: You can play back the simulation in an animation software such as Blender and then create your own animated movie with Filmora with its easy drag and drop interface. Movies are a collage of frames, so you need to animate according to the fps you want for your video.
Facial Rigs: Facial expressions are more complex than whole body movements. It requires the attention dedicated to a project of its own. Here is where you can play with deforming shapes together to replicate facial muscle movement.
● Key Takeaways from This Episode →
● Rigging has become science in its own right but that does not mean you can’t be artistic with it.
● What you should remember that creating skeletal animation is all about movement and applying physical restrictions to it.
● Start simple and practice until you master the most complex features of any of the top rigging software services raging in the market.
The function of character rigging can easily be compared to that of bones, muscles and joints. They act as skeletons to virtual animations. You can also imagine them as strings used on dolls. These digitalized bones function inter-connectedly in a 3D animation.
In this article
01 [Intro to Character Rigging](#Part 1)
02 [8 Tips for Character Rigging](#Part 2)
03 [10 Best Character Rigging Services to Buy Online](#Part 3)
04 [How to Make 3d Character Rig? Are There Any Plugins or Easy](#Part 4)
Part 1 Intro to Character Rigging
As you already know by now that the process of rigging a character can be quite a tedious task. It involves a lot of creative thinking, precision and a keen eye to notice all the small details.
Once you have a model character to work on, riggers set off to creating a skeleton to match the character. These skele-animations can be used to move the entire model as if tugging on strings (not literally).
The movement of the chain of skeletons or rigs is interdependent. Which means if you pull on any one bone, it moves all the other bones in the same sequence. Similar to how bones move within the human body.
Riggers use programs and tools to create a series of bone like structures that can deformed and animated freely according to the preference of the animators.
Movements like positioning, curving and rotation can be recorded and then played back in the animation.
This requires the rigger to constantly coordinate between modelers, animators till the end of the project. This entire process can take weeks or even months.
Amazingly enough, its 20and there are online tools and tutorials you can use to easily learn complex animations like they make in large scale movies and games.
Part 2 8 Tips for Character Rigging
01The Right Rig for the Job
Rigging is a skill all animators gets good at overtime. The more you practice the more familiar you are with the tools you are using. It will also help you understand that not all rigs are meant for the same set of movements.
You need to be able to discern what rig is it that you need and discard what you don’t. If the rig is being used in a game, then the focus will be more on the experience while for movies its attention.
02Deformers for Facial Rigging
Constructing a realistic facial rig can be quite a task but is indeed satisfying once finished. Human facial features require a great degree of flexibility which is why using a variety of deformers for different parts of the face. They are better suited for creating joints over the face and can be done more quickly.
03IK and FK
Though you can use one without the other, it is best to use both of them in an animation. You can’t work without both arms can you? Applying both Inverse and Forward Kinematics in your rig design can help it make more stylistic.
04Learn Python and Maya API: Learn Python and Maya API
If you wish to take your rigging skills to the next level then learning Maya API and Python are great millstones. This way, you can create high quality and sophisticated rigs with high intense flexibility on Maya. Also, Python allows you to write new scripts for PlugIns.
05Delegate to an Animator
After rigging for several hours it is easy to feel like you are only seeing from one perspective. Get in touch with an animator earlier on in the project can help you get feedback to stay consistent in the rigging process.
06Learn Web Technologies: Learn Web Technologies
To be a good animator or rigging specialist involves a lot of learning. Animation technology is constantly changing therefore it is highly recommended to stay up to date with the latest web technologies. Learning HTML, Java Script and CSS is becoming vital to being a part of the gaming world.
07Use Scalable Tools
Not all the characters or objects you rig are going to be of the same size. Selecting the right rigging software is crucial for you to be able to scale your animations. You won’t need to use everything, just the tools that serve your purpose.
08Use a Clean Interface
If you have ever heard of the phrase ‘clean workplace – cleaner work’ then you should know how an untidy interface can affect your workflow. This won’t necessarily change the results but can surely better your experience.
Part 3 Best Character Rigging Services to Buy Online
Don’t feel confused about where to begin. The first step to get into rigging is to master a software, any software, here are of the best ones you can choose from;
01Maya
Offers the best animation features on the market.
02Blender
Vast variety of tools for sculpting, rigging or VFX.
03Modo
Has a more simplified approach towards modelling and rigging.
043ds Max
Leverages high flexibility and ease of use to riggers.
05Sculptris
Excellentfor beginners who need a gateway software to start art.
06ZBrush
Lets you work on your sculpting skills with digital clay.
07Cheetah 3D
Developed by Macintosh to be an easy to learn modelling software.
08Rhinoceros 3D
Harbours a mathematical approach to modelling and modular design.
09Fusion 360
Offers a wide range of simulation tools.
10Cinema 4D
Recognized by professionals for well-equipped arsenal of digital rendering.
Part 4 How to Make Character Rig? Are There Any Plugins or Easy
How to Make Character Rig? Are There Any Plugins or Easy
When we imagine animation, most of the time we are baffled by the end product? But what really goes on behind the mesmerizing colors and whimsical characters.
The basic is of course building rigs to support the entire movement of the character and confine it to actual physical laws that makes it almost a mimic of reality. The entire process of rigging rather simplifies the path to achieve that goal.
In Cinema, character rigging has multiple layers that goes into creating the entire skeleton animation. Setting up a character rig can take anywhere between a few hours or a few days. It probably takes mainstream movies ten times that time.
Let us break down the process of making a rig so that it is simpler to understand.
The process;
Weight Painting: An integral part of the entire rigging process. Although, weight painting can be rendered automatically by the software that you are using, but that can end up making the animation look less realistic. You can instead fine tune the weight of each bone in the rig. You can also copy similar looking bones and apply them to different mesh and repurpose them to function differently.
Placing Bones: After designing a bone structure of character, you can copy the same and use it for similar characters. This is why in games and animation, you notice characters with similar features and traits.
Inverse Kinematics: Not all bones are meant to move in a forward direction. This is why inverses Kinematics are applied to certain bones like the legs, shoulders or even a dragon’s tail. Setting up the IK of your rig would keep specific bones pointed in the right direction so as to make the animation look more natural.
Applying Constraints: The physical realm is built with restrictions. There are things you can do or can’t do according to the natural order of things so as to make your character movement more naturalistic.
Simulation Skeletons: Now comes the part where the magic happens. After fully completing a skeletal animation you can now simulate the motion over the mesh and record the result of the simulation through a series of frames.
Create an animated movie: You can play back the simulation in an animation software such as Blender and then create your own animated movie with Filmora with its easy drag and drop interface. Movies are a collage of frames, so you need to animate according to the fps you want for your video.
Facial Rigs: Facial expressions are more complex than whole body movements. It requires the attention dedicated to a project of its own. Here is where you can play with deforming shapes together to replicate facial muscle movement.
● Key Takeaways from This Episode →
● Rigging has become science in its own right but that does not mean you can’t be artistic with it.
● What you should remember that creating skeletal animation is all about movement and applying physical restrictions to it.
● Start simple and practice until you master the most complex features of any of the top rigging software services raging in the market.
Also read:
- 15 Animated Characters We All Had A Crush On for 2024
- 2024 Approved Guide on Creating GIF in WhatsApp iPhone
- Updated Whiteboard Animation Services Top 15 Animation Companies to Pick for 2024
- 2024 Approved All About Types of Motion Graphics
- Secrets to Make 2D Game Animation
- New In 2024, All About Types of Motion Graphics
- Updated Best 10 Old Cartoons From Cartoon Network That You Miss for 2024
- How to Create Animated Video on Canva, In 2024
- In 2024, 10 Must-Use MP4 to GIF Converters to Get Perfect-Made GIF
- Updated 2024 Approved 18 Best Tools and Services to Create Animated Videos for Your Business
- Updated How to Learn Cartoon Characters Sketch Quickly
- Updated In 2024, How to Convert Video to GIF Fast & Easy
- In 2024, 5 Must Try Ways to Add and Send GIF in Text Message on Android
- 21 Top Free Anime Websites to Watch Anime Online-Anime
- New 20 Free After Effects Logo Reveal Templates
- New Are You Head Over Heels With 3D Animation Design?
- New In 2024, 5 Best Adobe Animate Courses & Classes | Beginners Complete Tutorial
- How to Send and Add Snapchat GIFs 100 The Easy Way for 2024
- Updated In 2024, 12 Animated Slideshow PowerPoint Templates and Tools to Make Them
- 2024 Approved All About 3D Medical Animation
- Updated How to Make an Animated Travel Map Video, In 2024
- New In 2024, The Only Guide to Make 2D Rigging Clear to You
- How to Make GIF Stickers for WhatsApp 100 The Easy Way
- Updated In 2024, What Is Still Motion Animation and How Does It Work?
- Easy Shortcut to Convert Videos to Gifs on iPhone for 2024
- 2024 Approved How to Convert Animated GIF From Video
- New How to Get Started in Stop Motion Claymation for 2024
- Updated In 2024, 10 Must Watch Netflix Cartoon Series For You
- New 5 Websites with Animated Logos That Catch Your Eyes
- Updated You Can Turn a TikTok Into a GIF Now
- Animated Business Logos and Tools to Create
- New 4 Things You Need to Know About Pinterest GIF
- Updated All About Types of Motion Graphics for 2024
- Updated Best 10 Animoji Apps You Can Use to Edit Animoji
- Apps to Animate Still Pictures
- Updated Christmas Is Coming! How to Find & Make Animated Christmas GIFs?
- Updated In 2024, Most Effective Tactics to Set WhatsApp Status
- Updated In 2024, Top 10 Apps to Enhance Your Instagram Story Slideshow
- Updated 2024 Approved You Can Turn a TikTok Into a GIF Now. Heres How
- Updated The Only Guide Youll Need to Learn About GIF Video Downloader for 2024
- New 2024 Approved Best Websites to Download Animated GIFs for Free-Free GIF Download
- Updated 2024 Approved How to Make Your Own GIF on WhatsApp in Simple Ways
- New 26 Cool Anime Girl Names and Their Meanings
- New In 2024, OBS Animated Lower Thirds Alternatives
- In 2024, Top 8 Anime Name & Title Generators Online-Get Cool Anime Names
- 12+ Stunning Instagram GIF Stickers and How to Make & Find
- In 2024, How to Remove Forgotten PIN Of Your Itel A70
- 9 Best Free Android Monitoring Apps to Monitor Phone Remotely For your Tecno Pova 6 Pro 5G | Dr.fone
- 15 Best Strongest Pokémon To Use in Pokémon GO PvP Leagues For Lava Blaze 2 Pro | Dr.fone
- For People Wanting to Mock GPS on Itel P40 Devices | Dr.fone
- Android Unlock Code Sim Unlock Your Honor 90 Pro Phone and Remove Locked Screen
- In 2024, Best 3 Vivo Y36 Emulator for Mac to Run Your Wanted Android Apps | Dr.fone
- How To Activate and Use Life360 Ghost Mode On Poco X5 | Dr.fone
- In 2024, Top IMEI Unlokers for Your Samsung Galaxy A25 5G Phone
- Unlocking Made Easy The Best 10 Apps for Unlocking Your Vivo Y100i Device
- Reasons for Nokia C22 Stuck on Startup Screen and Ways To Fix Them | Dr.fone
- 3 Things You Must Know about Fake Snapchat Location On Samsung Galaxy F34 5G | Dr.fone
- In 2024, New Multiple Ways How To Remove iCloud Activation Lock From your iPhone 14 Pro
- Title: In 2024, Tips for Canva Animated Elements
- Author: Elon
- Created at : 2024-06-23 02:10:04
- Updated at : 2024-06-24 02:10:04
- Link: https://animation-videos.techidaily.com/in-2024-tips-for-canva-animated-elements/
- License: This work is licensed under CC BY-NC-SA 4.0.
