
:max_bytes(150000):strip_icc():format(webp)/GettyImages-990620130-ec2a7076e3f043bfa4f540b72d2034c6.jpg)
In 2024, Tips for GIF to Animated PNG
Tips for GIF to Animated PNG
Versatile Video Editor - Wondershare Filmora
An easy yet powerful editor
Numerous effects to choose from
Detailed tutorials provided by the official channel
The advent of many instant chats had led to the demand for GIFs and animated PNGs. Users access these files to express their emotions amidst the chat environment. There are unique ways to convert GIFs to animated PNGs precisely. In the digital space, there are surplus applications are available to perform this conversion process without compromising with the quality factors.
In this article, a detailed discussion on the GIFs and the animated PNGs are available for better understanding. It is the process of working with images and implementing some actions with the pictures that makes it appear interesting. Most GIFs and animated PNGs are used for fun and it helps to excite your friends amidst serious chats. It serves as the source of conveying thoughts with fun-filled visuals. Before choosing between the GIFs and APNGs, analyze which file format offers you surplus advantages for optimal handling. Here, in the below discussion you will study the features of this file format and the precise methods to switch between these two files efficiently.
In this article
01 [What is GIF & What is animated PNG](#Part 1)
02 [GIF vs animated PNG, which is better?](#Part 2)
03 [Can PNG be animated like GIF?](#Part 3)
04 [How to Convert GIF to animated PNG?](#Part 4)
Part 1 What is GIF & What is animated PNG
The GIFs are animated images and the picture moves in a sequence in a cycle. The movement repeats without stopping. This type of picture is popular on the webpages and the built-in templates are available in the digital space for quick downloads. The single-frame GIFs take more time to download and displays exciting moves that trigger laughter with audiences. GIF takes the abbreviation of Graphics Interchange Format. It came into existence in the year 1980s and is widely used globally. GIFs are animated images in a basic format. It adopts the safe LZW algorithm that tracks the colors optimally.
The superior form of the motion picture is animated PNGs. It stands for Portable Network Graphics. This format supports indexed color, grayscale, and true color images. Additionally, the animated PNGs has advantages like alpha channels, cross-platform gamma corrections and two-dimensional interlacing. APNG came into existence in the year 1995 and is compatible with a few web browsers.
Part 2 GIF vs animated PNG, which is better?
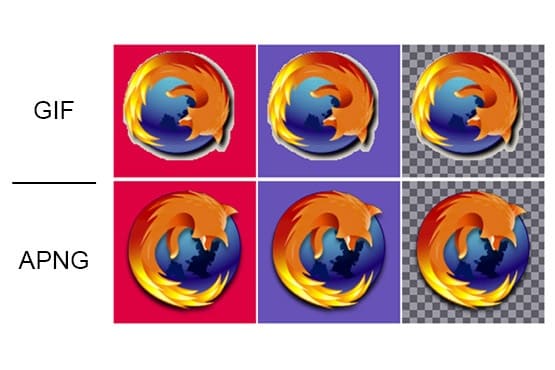
When compared to GIFs and APNG, APNG seems to be technically strong with a wide range of supporting features. The quality of the file of APNG is good as it displays 24-bit images and 8- bit transparency. The APNG images can be compressed to the smallest value thereby encouraging the ease of transfer between devices. APNG has access to many color combinations whereas GIFs can use up to 256 colors. The new web browser versions are compatible with APNGs and the older browsers play the GIFs precisely. To view the APNG files in the older browsers you require external plugins or extensions. The higher quality APNGs are mostly used by professionals when compared to GIFs. The portability in moving the animated images is simple with APNGs. The GIF files have a poor compression rate and it is difficult to transfer at the digital space.
Part 3 Can PNG be animated like GIF?
You can animate the PNG files like GIF using reliable tools in the online space. There are unique programs to establish this process. It works on every detail on the PNG files and adds transition effects to the images to implement the movements. If you take closer looks at the digital space, you will acquire sophisticated programs to add transitions to the static pictures. While animating the PNG files, you must include frames, durations, and transition effects to the PNG images to include the animations. Based on the settings, the animated PNG file functions. Every move of the images is assigned by the attributes set by the users with the help of powerful applications in the digital space. You can also find online tools to assist in this operation. The static PNG files get desired moves by animating like GIF files. The APNG has superior quality when compared to GIF files. As discussed above many professionals opt for APNG files than GIFs.

Part 4 How to Convert GIF to animated PNG?
In this section, you will learn how to convert GIF to animated PNG using online tools. Use the recommended online platform to carry out the quality conversions to acquire desired outcomes.
1. EZGIF
It is an exclusive online space that brings quality animations to GIF files acquiring the properties of APNG. By converting the GIFs to APNG, you can enhance various features like easy storage, best compression, quality elements in the file. When you step into this website, you can perform a wide range of conversion processes between animated and static image files. Choose the right tabs on the menu to trigger the desired changes to the uploaded files.
Choose GIF to APNG tab at the top menu to begin this conversion process. The GIF files will receive all the good functionalities of APNG after this conversion process. You can download the animated PNGs to any platform after a successful conversion.
Follow the below steps to proceed with GIF to animated PNGs using the EZGIF online tool.
Step 1
Go to the website and upload the GIF file by tapping the ‘Choose File’ button. The maximum file size is 50MB that ensures a flawless upload process. Here, you can either choose a file from a local drive or paste the URL from an online source into this webpage flawlessly. Then, click the Upload button to trigger this GIF to the APNG conversion process.
Step 2
Format the output and click the convert button to download the animated PNG files.
It is a simple and yet effective one that helps to convert the GIFs to animated PNGs in no time. You can also use the edit tools to make changes to the GIF files before the conversion process. The converted files are available for downloads at your local system drive. Access them when required and upload them to the desired platform to make fun with your friends and family members.
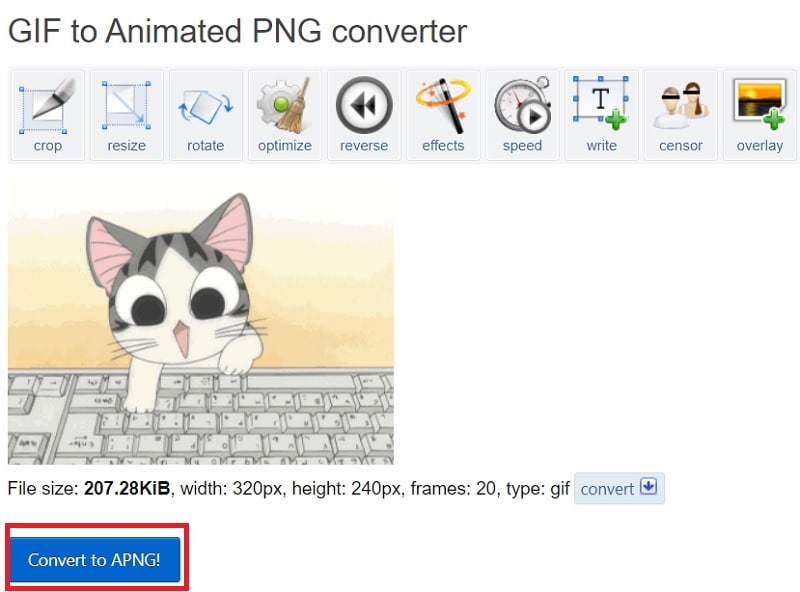
2. Free convert
In this section, you will be learning how to use the Free convert webpage to carry out the GIF to the animated PNG conversion process. It is a user-friendly interface where the controls are explicit to make the perfect click appropriately. This website provides a secure platform to carry out the conversion process optimally. The uploaded files are deleted automatically after 2 hours. You can expect a quality conversion process to take place on this website.
The stepwise process to convert GIF to animated PNG using the Freeconvert website.
Step 1
Upload the Gif files by tapping the ‘Choose GIF files’ button. This platform supports GIF file sizes up to 1GB.

Step 2
Hit the Convert to APNG button to trigger the conversion process and download the APNG file to desired storage space precisely.

Surf the above steps to carry out a precise conversion process between GIF and animated PNG. After this format conversion process, you can enjoy all the benefits of APNG overcoming the constraints with the GIF files.
These are the two efficient ways of converting the GIF files to APNG format using online web pages. You can choose any one of the websites to carry out the desired APNG conversion process optimally.
Wondershare Filmora
Get started easily with Filmora’s powerful performance, intuitive interface, and countless effects!
Try It Free Try It Free Try It Free Learn More >

AI Portrait – The best feature of Wondershare Filmora for gameplay editing
The AI Portrait is a new add-on in Wondershare Filmora. It can easily remove video backgrounds without using a green screen or chroma key, allowing you to add borders, glitch effects, pixelated, noise, or segmentation video effects.

Conclusion
Thus, this article had given valuable insights on the conversion of GIF to animated PNG files. The enlightening discussion about the GIFs and APNGs assists you to choose the best one from these two options. You must be clear about the differences between these formats and select the ones that meet your needs appropriately. Connect with the above-discussed web pages to carry out the conversion effortlessly with a few clicks. Stay connected with this article to discover the new horizons of animated clippings that excite you during online communications.
The advent of many instant chats had led to the demand for GIFs and animated PNGs. Users access these files to express their emotions amidst the chat environment. There are unique ways to convert GIFs to animated PNGs precisely. In the digital space, there are surplus applications are available to perform this conversion process without compromising with the quality factors.
In this article, a detailed discussion on the GIFs and the animated PNGs are available for better understanding. It is the process of working with images and implementing some actions with the pictures that makes it appear interesting. Most GIFs and animated PNGs are used for fun and it helps to excite your friends amidst serious chats. It serves as the source of conveying thoughts with fun-filled visuals. Before choosing between the GIFs and APNGs, analyze which file format offers you surplus advantages for optimal handling. Here, in the below discussion you will study the features of this file format and the precise methods to switch between these two files efficiently.
In this article
01 [What is GIF & What is animated PNG](#Part 1)
02 [GIF vs animated PNG, which is better?](#Part 2)
03 [Can PNG be animated like GIF?](#Part 3)
04 [How to Convert GIF to animated PNG?](#Part 4)
Part 1 What is GIF & What is animated PNG
The GIFs are animated images and the picture moves in a sequence in a cycle. The movement repeats without stopping. This type of picture is popular on the webpages and the built-in templates are available in the digital space for quick downloads. The single-frame GIFs take more time to download and displays exciting moves that trigger laughter with audiences. GIF takes the abbreviation of Graphics Interchange Format. It came into existence in the year 1980s and is widely used globally. GIFs are animated images in a basic format. It adopts the safe LZW algorithm that tracks the colors optimally.
The superior form of the motion picture is animated PNGs. It stands for Portable Network Graphics. This format supports indexed color, grayscale, and true color images. Additionally, the animated PNGs has advantages like alpha channels, cross-platform gamma corrections and two-dimensional interlacing. APNG came into existence in the year 1995 and is compatible with a few web browsers.
Part 2 GIF vs animated PNG, which is better?
When compared to GIFs and APNG, APNG seems to be technically strong with a wide range of supporting features. The quality of the file of APNG is good as it displays 24-bit images and 8- bit transparency. The APNG images can be compressed to the smallest value thereby encouraging the ease of transfer between devices. APNG has access to many color combinations whereas GIFs can use up to 256 colors. The new web browser versions are compatible with APNGs and the older browsers play the GIFs precisely. To view the APNG files in the older browsers you require external plugins or extensions. The higher quality APNGs are mostly used by professionals when compared to GIFs. The portability in moving the animated images is simple with APNGs. The GIF files have a poor compression rate and it is difficult to transfer at the digital space.
Part 3 Can PNG be animated like GIF?
You can animate the PNG files like GIF using reliable tools in the online space. There are unique programs to establish this process. It works on every detail on the PNG files and adds transition effects to the images to implement the movements. If you take closer looks at the digital space, you will acquire sophisticated programs to add transitions to the static pictures. While animating the PNG files, you must include frames, durations, and transition effects to the PNG images to include the animations. Based on the settings, the animated PNG file functions. Every move of the images is assigned by the attributes set by the users with the help of powerful applications in the digital space. You can also find online tools to assist in this operation. The static PNG files get desired moves by animating like GIF files. The APNG has superior quality when compared to GIF files. As discussed above many professionals opt for APNG files than GIFs.
Part 4 How to Convert GIF to animated PNG?
In this section, you will learn how to convert GIF to animated PNG using online tools. Use the recommended online platform to carry out the quality conversions to acquire desired outcomes.
1. EZGIF
It is an exclusive online space that brings quality animations to GIF files acquiring the properties of APNG. By converting the GIFs to APNG, you can enhance various features like easy storage, best compression, quality elements in the file. When you step into this website, you can perform a wide range of conversion processes between animated and static image files. Choose the right tabs on the menu to trigger the desired changes to the uploaded files.
Choose GIF to APNG tab at the top menu to begin this conversion process. The GIF files will receive all the good functionalities of APNG after this conversion process. You can download the animated PNGs to any platform after a successful conversion.
Follow the below steps to proceed with GIF to animated PNGs using the EZGIF online tool.
Step 1
Go to the website and upload the GIF file by tapping the ‘Choose File’ button. The maximum file size is 50MB that ensures a flawless upload process. Here, you can either choose a file from a local drive or paste the URL from an online source into this webpage flawlessly. Then, click the Upload button to trigger this GIF to the APNG conversion process.
Step 2
Format the output and click the convert button to download the animated PNG files.
It is a simple and yet effective one that helps to convert the GIFs to animated PNGs in no time. You can also use the edit tools to make changes to the GIF files before the conversion process. The converted files are available for downloads at your local system drive. Access them when required and upload them to the desired platform to make fun with your friends and family members.
2. Free convert
In this section, you will be learning how to use the Free convert webpage to carry out the GIF to the animated PNG conversion process. It is a user-friendly interface where the controls are explicit to make the perfect click appropriately. This website provides a secure platform to carry out the conversion process optimally. The uploaded files are deleted automatically after 2 hours. You can expect a quality conversion process to take place on this website.
The stepwise process to convert GIF to animated PNG using the Freeconvert website.
Step 1
Upload the Gif files by tapping the ‘Choose GIF files’ button. This platform supports GIF file sizes up to 1GB.
Step 2
Hit the Convert to APNG button to trigger the conversion process and download the APNG file to desired storage space precisely.
Surf the above steps to carry out a precise conversion process between GIF and animated PNG. After this format conversion process, you can enjoy all the benefits of APNG overcoming the constraints with the GIF files.
These are the two efficient ways of converting the GIF files to APNG format using online web pages. You can choose any one of the websites to carry out the desired APNG conversion process optimally.
Wondershare Filmora
Get started easily with Filmora’s powerful performance, intuitive interface, and countless effects!
Try It Free Try It Free Try It Free Learn More >
AI Portrait – The best feature of Wondershare Filmora for gameplay editing
The AI Portrait is a new add-on in Wondershare Filmora. It can easily remove video backgrounds without using a green screen or chroma key, allowing you to add borders, glitch effects, pixelated, noise, or segmentation video effects.
Conclusion
Thus, this article had given valuable insights on the conversion of GIF to animated PNG files. The enlightening discussion about the GIFs and APNGs assists you to choose the best one from these two options. You must be clear about the differences between these formats and select the ones that meet your needs appropriately. Connect with the above-discussed web pages to carry out the conversion effortlessly with a few clicks. Stay connected with this article to discover the new horizons of animated clippings that excite you during online communications.
Formula to Animate Photos From 10 Animate Pictures App
Epic Formula to Animate Photos from These 10 Animate Pictures App
An easy yet powerful editor
Numerous effects to choose from
Detailed tutorials provided by the official channel
With the availability of modern technology, still photos can be seamlessly transformed into live animated photos. Adding motion and movement along with filter effects to still photos is pretty easy with an animated pictures app.
For Win 7 or later (64-bit)
For macOS 10.12 or later
In this article, we have listed 10 of the best animated picture apps available in 2021. You will find all essential details and features of these 10 apps which will help you choose the best option when choosing an app for animating a picture. Let us take a look at these 10 apps!
In this article
01 [10 Animate Pictures Apps](#Part 1)
02 [The contrast of These 10 Animate Pictures Apps](#Part 2)
Part 1 10 Animate Pictures Apps
01 MotionLeap

MotionLeap
● Price
Free, with premium version available.
● OS
Android and iOS
● Key features
You can freeze parts of an image.
Variety of filters can be applied.
Although MotionLeap is free to use there’s a Pro and subscription version with a greater variety of features in it. The best part about this animated pictures app is that it does not put any watermark over the final image.
The app can animate still photos and convert them into short, loop videos. This is done by the programming of the directional cues into the image which is executed by dragging actions of the thumb across your mobile screen.
Although, on MotionLeap, without the pro version, the photo will be saved in video format.
02 GIPHY

GIPHY
● Price
Free
● OS
Android and iOS
● Key features
Simple, easy to use UI
A variety of built-in animation tools
Sticker maker on iOS (for iPhone X and later models)
We might already be acquainted with GIPHY as the most popular search engine for GIFs. Although, what’s unknown is that GIPHY has a mobile app both for Android and iOS which can be used to create GIFs and animate photos.
The app’s key advantage is its highly intuitive and very easy to use interface that makes it really easy to animate photos with the GIPHY app. Above all, it is completely free to use and along with animating pictures, you can also add captions to your animated photos or even capture short videos.
03 Movepic

Movepic
● Price
Free, with premium version available.
● OS
Android and iOS
● Key features
Easy to use.
A range of built in overlays and filters.
Movepic is another excellent app for animating pictures. As an animated pictures app, it is quite similar to MotionLeap owing to the fact that it animates still photos.
A downside of the Movepic free version is that it puts a watermark on the image and you cannot remove it without upgrading to the premium version or VIP account. The app saves the final images as a movie file and not as a GIF.
04 ImgPlay

ImgPlay
● Price
Free, with premium version available.
● OS
Android and iOS
● Key features
Easy to use.
Lay out still photographs side-by-side and use burst photos or videos.
ImgPlay is another very popular and effective animated pictures app. The app makes use of a range of ready-to-use animated photos for the web.
ImgPlay also comes with a range of advanced and easy-to-understand controls. This app, in spite of all its perks, puts a watermark on the image—which, once again, cannot be removed unless you buy the premium version of the app.
05 StoryZ

StoryZ
● Price
Free, with premium version available.
● OS
Android and iOS
● Key features
Programmed movement paths, overlays and color filters.
Saves images automatically as GIFs.
StoryZ is one of the best apps on this list and anyone who has used the app would agree with that. The app can seamlessly animate still photos.
A great thing about this app is that StoryZ enables users to remove the watermark from the image by simply watching a quick ad before saving the file.
06 VIMAGE 3D

VIMAGE 3D
● Price
Free, with premium version available.
● OS
Android and iOS
● Key features
AI enabled.
A range of filters and special effects.
Add sounds to your animated images and videos.
This one is an award winning app for animating pictures and the app won a Google Play award in 2018. The app is simply exceptional in terms of user experience as well as features.
Like most of these apps, you do need to pay to remove the watermark, get access to the full effects library, and the ability to export your images in up to 2560p resolution.
07 Photo Bender

Photo Bender
● Price
Free
● OS
Android
● Key features
A variety of editing tools and features including brushes.
Enables users to export images as MP4s, GIFs, JPEGs, and PNGs.
Photo Bender is an animated pictures app that is specific to the Android platform. The app is popular for its convenience of use and it enables users to digitally warp images and animate photos.
There are a variety of things that can be done to an image with the help of this app. From colouring an image, to bending it, stretching it, and a lot more, you can do it all. You also get a range of brushes to use on the image.
08 Zoetropic

Zoetropic
● Price
Free, with premium version available.
● OS
Android and iOS
● Key features
The app is really fast and efficient.
Simple UI.
Zoetropic helps you animate images in minutes,even if you are using the app for the first time. The app does not come with a lot of features but its simplicity, effectiveness and ease of use makes it a great option for animated pictures app.
09 Lumyer

Lumyer
● Price
Free, with premium version available.
● OS
Android and iOS
● Key features
Seasonal and occasional animation effects.
Easy to use.
This app is another great platform to edit pictures and animate them. It enables you to add a variety of effects to pictures and easily animate them.
From subtle weather effects to sparkle, seasonal animations and a lot more, the app offers a lot of options.
Part 2: The contrast of These 10 Animate Pictures Apps
| Name of The Animated Picture App | Advantages | Disadvantages |
|---|---|---|
| MotionLeap | No watermark+Variety of filters; | File saved in video format without pro version |
| GIPHY | Free to use+Simple UI | Not suitable for advanced editing |
| Movepic | Built-in overlays and filters | Saves final image as video file without pro version Watermark |
| ImgPlay | Easy to use and understand+Ready to go animated photos for the web | Watermark on image |
| StoryZ | Remove watermark by watching an ad+Variety of animation techniques | Boring interface |
| VIMAGE 3D | Neat UI+Endless features+AI enabled | Need to buy premium version to access majority of features |
| Photo Bender | A range of tasks can be executed | Not a very attractive UI |
| Zoetropic | Simple, effective and easy to use | Limited effects on free version |
| Lumyer | Fast and easy to use+Lot of features | Can be expensive due to several in-app purchases |
| Filmora | Easy to Use+fordable+ons of features+Seamless UI+rofessional video editing tools | Not available on mobile |
Key Takeaways from This Episode
● That brings us to the end of the article. Anyone looking for an animated pictures app to animate their images have found 10 of the best apps available in the market right now.
● With the list of these 10 apps, anyone can find the most suitable platform for their own purposes of animating an image.
● Last but not the least, if it comes to an all inclusive platform for video editing and animating pictures, Filmora Pro is definitely the winner on this list! So check out your options and make the best choice!
With the availability of modern technology, still photos can be seamlessly transformed into live animated photos. Adding motion and movement along with filter effects to still photos is pretty easy with an animated pictures app.
For Win 7 or later (64-bit)
For macOS 10.12 or later
In this article, we have listed 10 of the best animated picture apps available in 2021. You will find all essential details and features of these 10 apps which will help you choose the best option when choosing an app for animating a picture. Let us take a look at these 10 apps!
In this article
01 [10 Animate Pictures Apps](#Part 1)
02 [The contrast of These 10 Animate Pictures Apps](#Part 2)
Part 1 10 Animate Pictures Apps
01 MotionLeap
MotionLeap
● Price
Free, with premium version available.
● OS
Android and iOS
● Key features
You can freeze parts of an image.
Variety of filters can be applied.
Although MotionLeap is free to use there’s a Pro and subscription version with a greater variety of features in it. The best part about this animated pictures app is that it does not put any watermark over the final image.
The app can animate still photos and convert them into short, loop videos. This is done by the programming of the directional cues into the image which is executed by dragging actions of the thumb across your mobile screen.
Although, on MotionLeap, without the pro version, the photo will be saved in video format.
02 GIPHY
GIPHY
● Price
Free
● OS
Android and iOS
● Key features
Simple, easy to use UI
A variety of built-in animation tools
Sticker maker on iOS (for iPhone X and later models)
We might already be acquainted with GIPHY as the most popular search engine for GIFs. Although, what’s unknown is that GIPHY has a mobile app both for Android and iOS which can be used to create GIFs and animate photos.
The app’s key advantage is its highly intuitive and very easy to use interface that makes it really easy to animate photos with the GIPHY app. Above all, it is completely free to use and along with animating pictures, you can also add captions to your animated photos or even capture short videos.
03 Movepic
Movepic
● Price
Free, with premium version available.
● OS
Android and iOS
● Key features
Easy to use.
A range of built in overlays and filters.
Movepic is another excellent app for animating pictures. As an animated pictures app, it is quite similar to MotionLeap owing to the fact that it animates still photos.
A downside of the Movepic free version is that it puts a watermark on the image and you cannot remove it without upgrading to the premium version or VIP account. The app saves the final images as a movie file and not as a GIF.
04 ImgPlay
ImgPlay
● Price
Free, with premium version available.
● OS
Android and iOS
● Key features
Easy to use.
Lay out still photographs side-by-side and use burst photos or videos.
ImgPlay is another very popular and effective animated pictures app. The app makes use of a range of ready-to-use animated photos for the web.
ImgPlay also comes with a range of advanced and easy-to-understand controls. This app, in spite of all its perks, puts a watermark on the image—which, once again, cannot be removed unless you buy the premium version of the app.
05 StoryZ
StoryZ
● Price
Free, with premium version available.
● OS
Android and iOS
● Key features
Programmed movement paths, overlays and color filters.
Saves images automatically as GIFs.
StoryZ is one of the best apps on this list and anyone who has used the app would agree with that. The app can seamlessly animate still photos.
A great thing about this app is that StoryZ enables users to remove the watermark from the image by simply watching a quick ad before saving the file.
06 VIMAGE 3D
VIMAGE 3D
● Price
Free, with premium version available.
● OS
Android and iOS
● Key features
AI enabled.
A range of filters and special effects.
Add sounds to your animated images and videos.
This one is an award winning app for animating pictures and the app won a Google Play award in 2018. The app is simply exceptional in terms of user experience as well as features.
Like most of these apps, you do need to pay to remove the watermark, get access to the full effects library, and the ability to export your images in up to 2560p resolution.
07 Photo Bender
Photo Bender
● Price
Free
● OS
Android
● Key features
A variety of editing tools and features including brushes.
Enables users to export images as MP4s, GIFs, JPEGs, and PNGs.
Photo Bender is an animated pictures app that is specific to the Android platform. The app is popular for its convenience of use and it enables users to digitally warp images and animate photos.
There are a variety of things that can be done to an image with the help of this app. From colouring an image, to bending it, stretching it, and a lot more, you can do it all. You also get a range of brushes to use on the image.
08 Zoetropic
Zoetropic
● Price
Free, with premium version available.
● OS
Android and iOS
● Key features
The app is really fast and efficient.
Simple UI.
Zoetropic helps you animate images in minutes,even if you are using the app for the first time. The app does not come with a lot of features but its simplicity, effectiveness and ease of use makes it a great option for animated pictures app.
09 Lumyer
Lumyer
● Price
Free, with premium version available.
● OS
Android and iOS
● Key features
Seasonal and occasional animation effects.
Easy to use.
This app is another great platform to edit pictures and animate them. It enables you to add a variety of effects to pictures and easily animate them.
From subtle weather effects to sparkle, seasonal animations and a lot more, the app offers a lot of options.
Part 2: The contrast of These 10 Animate Pictures Apps
| Name of The Animated Picture App | Advantages | Disadvantages |
|---|---|---|
| MotionLeap | No watermark+Variety of filters; | File saved in video format without pro version |
| GIPHY | Free to use+Simple UI | Not suitable for advanced editing |
| Movepic | Built-in overlays and filters | Saves final image as video file without pro version Watermark |
| ImgPlay | Easy to use and understand+Ready to go animated photos for the web | Watermark on image |
| StoryZ | Remove watermark by watching an ad+Variety of animation techniques | Boring interface |
| VIMAGE 3D | Neat UI+Endless features+AI enabled | Need to buy premium version to access majority of features |
| Photo Bender | A range of tasks can be executed | Not a very attractive UI |
| Zoetropic | Simple, effective and easy to use | Limited effects on free version |
| Lumyer | Fast and easy to use+Lot of features | Can be expensive due to several in-app purchases |
| Filmora | Easy to Use+fordable+ons of features+Seamless UI+rofessional video editing tools | Not available on mobile |
Key Takeaways from This Episode
● That brings us to the end of the article. Anyone looking for an animated pictures app to animate their images have found 10 of the best apps available in the market right now.
● With the list of these 10 apps, anyone can find the most suitable platform for their own purposes of animating an image.
● Last but not the least, if it comes to an all inclusive platform for video editing and animating pictures, Filmora Pro is definitely the winner on this list! So check out your options and make the best choice!
What’s Music Video GIF & How to Add Music to Your GIF Files
What’s Music Video GIF & How to Add Music to Your GIF Files
An easy yet powerful editor
Numerous effects to choose from
Detailed tutorials provided by the official channel
Want to make your GIFs more catchy and interesting? Try adding music videos to multiply the fun!
In this article
01 [What’s Music Video GIF](#Part 1)
02 [How to Easily Add Music to Your GIF](#Part 2)
03 [How To Make a GIF With Music to Post on Instagram?](#Part 3)
Part 1 What’s Music Video GIF?
GIFs are essentially animated image files that already form an effective and interesting means of communication and media sharing. Your messages get additional spunk and appeal when you add relatable audios to your GIFs. A music video GIF is one that you create by adding sound to the originally mute GIF files. Additionally, creating music enabled GIFs is a fun activity on its own. You get to explore your editing creativity on different levels as you play with the exciting features that come with the latest editing tools available in the software market.
Whether create them casually or use them as a marketing tool, sound effects tend to considerably upgrade the utility of an animated or unmoving snap. If you are a social media freak and want to get your Instagram and Facebook stories be the talk among your friends on the internet, do consider trying these editing tricks to add that extra notch to your otherwise simple and soundless GIFs. After all, your creativity should never go unnoticed and get the attention it deserves!
If this gets you motivated and you have decided to level up your editing skills, do spare your valuable time to see through further sections of this article for quick and easy tools and methods to introduce audio and sound effects to those mute GIFs and never let your social media posts and stories miss a catch!

Part 2 How to Easily Add Music to Your GIF?
Musical GIF videos are quite interesting, no doubt on that, but what is noticeable here is that GIFs do not have inbuilt audio features. You need to add sound additionally to these files to create musical GIF videos. When trying to make your own music GIF video, you can take help of the following tools:
01Kapwing Editor
This one is a free online tool that helps you add audio to your GIFs. This application is free from issues of spam and watermark requirements. It assures you of a quality editing experience without supporting unnecessary and annoying advertisements.
Using this tool, you can create musical GIF videos in two different ways. Take the following steps to create musical GIF videos with this application:
● Using The Kapwing Studio:
Open the Studio and select the GIF and music files you want to merge. Upload the selected files in the tool.
Customize your audio in the Studio timeline to trim the sound file to the specific segment you wish to add to your GIF. You can also introduce volume adjustments and waveform effects to enhance your music video for GIF for an extra catch.
You can further add text and make size adjustments to your GIF using the sidebar controls.
Once you have finalized everything, click ‘Export’ to download the GIF music video in MP4 format. Note that if you download the GIF format, your video will lose the sound effect.
● Copy-Paste Method
You can also merge GIFs and music videos using the direct copy-paste method in the Kapwing Editor. To create one for yourself, here’s what you need to follow:
Step 1: GIF Upload
Select a GIF from your smartphone or PC gallery and upload it to the Kapwing Editor. You can even copy a GIF link from other apps like, YouTube, GIFHY, etc, and paste it in the editor timeline.
Step 2: Audio Upload
Next, you need to upload the audio file you want to get stitched with your GIF. Choose a file either from your system or copy-paste the YouTube URL of the selected video in the Kapwing timeline.
Step 3: Export Your Creation
That it! You are done with your creation. Click ‘Export’ to share your musical GIF video on different social platforms.

02VEED’S GIF Maker
Like the Kapwing Editor, this one is also a free online tool that you can use to add sound to your originally mute GIF files. What’s more interesting is, apart from adding music, you have the flexibility to draw over, add text and images to your GIFs before you proceed with adding sound to your selected GIF.
Follow the steps given below to start creating GIF music videos with this application:
Step 1: Upload GIF File
To begin, upload your selected GIF file to the application’s pop-up window using ‘Drag and Drop’ method. Alternatively, you can click on ‘Choose GIF File’ tab on the app’s welcome window. Select a file from your system’s gallery and click ‘Open’ to upload it.

Step 2: Add Music
To add audio files, select ‘Upload’ or tap the (+) sign at the bottom right to choose the desired music files. Drag them to VEED’s timeline to set them in the order of your preference.

Step 3: Download Your Creation
Your video gets created in MP4 format. Tap ‘Export’ to directly share it with your peers on Twitter, Facebook or other social platforms.
Part 3 How to Make a GIF With Music to Post on Instagram?
Exploring your creative skills is one thing, while attracting attention to your work is the other. You would definitely want your social media communities to notice and compliment your work. Instagram is one among the best media sharing apps you can use to share your creations.
To adhere to the concern of creating audio enabled GIFs compatible for sharing to your Instagram stories and feeds, you can any of the following editing tools:
01Filmora
Wondershare Filmora Video Editor is one of the best and most preferred editing software you can use to add sound to your GIFs and videos. You can play with your editing creativity to make exciting musical GIF videos with this software in just a few minutes.

Using this tool for your editing work promises you the following advantages:
Wondershare Filmora
Get started easily with Filmora’s powerful performance, intuitive interface, and countless effects!
Try It Free Try It Free Try It Free Learn More >
● Huge Audio Library
Filmora audio library exposes you with a diverse range of audio and music files and a variety of exciting and relatable sound effects to choose from. You can browse through this storehouse for that perfect music for your GIF absolutely free of cost. The library has an additional Filmstock Effect Store that further increases your audio choice bandwidth.
● Optimal Sync
Filmora allows you to establish the perfect sync between your GIF and audio. Its beat detection feature identifies audio hits to produce markers that you can use to obtain the ideal audio-GIF synchronization in your creations.
● Voiceover Applicable
Filmora gives you the flexibility to record and add you own voiceover using your microphone to make your creations more impactful.
Steps to Create Audio Enabled GIFs Using Filmora
Take the following steps to enhance your GIFs with music and sound effects:
● Select and import your GIF file to the Filmora timeline
● In the software’s audio library, select your desired music and sound effects to add them to the imported GIF file. You can even choose to add your own voiceover to the GIF.
● That’s it! You are now ready to share your work on your Instagram handle and other media sharing platforms. Just click ‘Export’ and your creation gets uploaded on social media in MP4 format. Make sure to adjust the resolution and bit settings for best results.

02Artwork
Like Filmora, Artwork is another application you can use to add sound to GIF files. This one is a browser tool that allows you to create sound enabled videos with static and animated images. Take up the following process to make your own musical GIF with Artwork:
● To begin, signup to Artwork’s free trial feature. Choose your desired sound file in MP3 format and trim it to a play duration of 1 minute. This is essential because Instagram doesn’t allow you to post longer GIFs.
● Add your selected GIF and trimmed MP3 files in Artwork’s pop-up window. Click ‘Save’ and wait till the process to finish.
● Your creation is ready. Download and share it on Instagram.
● Key Takeaways from This Episode →
● Adding music and sound to your GIF is both a fun and exciting activity and also has the potential to enhance the quality and reach of the message you desire to deliver through your GIF. Besides this, it enhances your editing creativity and skill, which is a complement in itself.
● A number of software and online tools available on the internet are ready to help you get through the task. You can rely on these tools to add audio to your GIFs within minutes absolutely free of cost and share them directly on social media.
● Filmora is one among the best GIF editing tools for sharing your creations on Instagram. You can access its huge audio library for selected sound effects, set a perfect sync between your GIF and its audio and even add your own voiceover to boost your creativity using this software.
Want to make your GIFs more catchy and interesting? Try adding music videos to multiply the fun!
In this article
01 [What’s Music Video GIF](#Part 1)
02 [How to Easily Add Music to Your GIF](#Part 2)
03 [How To Make a GIF With Music to Post on Instagram?](#Part 3)
Part 1 What’s Music Video GIF?
GIFs are essentially animated image files that already form an effective and interesting means of communication and media sharing. Your messages get additional spunk and appeal when you add relatable audios to your GIFs. A music video GIF is one that you create by adding sound to the originally mute GIF files. Additionally, creating music enabled GIFs is a fun activity on its own. You get to explore your editing creativity on different levels as you play with the exciting features that come with the latest editing tools available in the software market.
Whether create them casually or use them as a marketing tool, sound effects tend to considerably upgrade the utility of an animated or unmoving snap. If you are a social media freak and want to get your Instagram and Facebook stories be the talk among your friends on the internet, do consider trying these editing tricks to add that extra notch to your otherwise simple and soundless GIFs. After all, your creativity should never go unnoticed and get the attention it deserves!
If this gets you motivated and you have decided to level up your editing skills, do spare your valuable time to see through further sections of this article for quick and easy tools and methods to introduce audio and sound effects to those mute GIFs and never let your social media posts and stories miss a catch!
Part 2 How to Easily Add Music to Your GIF?
Musical GIF videos are quite interesting, no doubt on that, but what is noticeable here is that GIFs do not have inbuilt audio features. You need to add sound additionally to these files to create musical GIF videos. When trying to make your own music GIF video, you can take help of the following tools:
01Kapwing Editor
This one is a free online tool that helps you add audio to your GIFs. This application is free from issues of spam and watermark requirements. It assures you of a quality editing experience without supporting unnecessary and annoying advertisements.
Using this tool, you can create musical GIF videos in two different ways. Take the following steps to create musical GIF videos with this application:
● Using The Kapwing Studio:
Open the Studio and select the GIF and music files you want to merge. Upload the selected files in the tool.
Customize your audio in the Studio timeline to trim the sound file to the specific segment you wish to add to your GIF. You can also introduce volume adjustments and waveform effects to enhance your music video for GIF for an extra catch.
You can further add text and make size adjustments to your GIF using the sidebar controls.
Once you have finalized everything, click ‘Export’ to download the GIF music video in MP4 format. Note that if you download the GIF format, your video will lose the sound effect.
● Copy-Paste Method
You can also merge GIFs and music videos using the direct copy-paste method in the Kapwing Editor. To create one for yourself, here’s what you need to follow:
Step 1: GIF Upload
Select a GIF from your smartphone or PC gallery and upload it to the Kapwing Editor. You can even copy a GIF link from other apps like, YouTube, GIFHY, etc, and paste it in the editor timeline.
Step 2: Audio Upload
Next, you need to upload the audio file you want to get stitched with your GIF. Choose a file either from your system or copy-paste the YouTube URL of the selected video in the Kapwing timeline.
Step 3: Export Your Creation
That it! You are done with your creation. Click ‘Export’ to share your musical GIF video on different social platforms.
02VEED’S GIF Maker
Like the Kapwing Editor, this one is also a free online tool that you can use to add sound to your originally mute GIF files. What’s more interesting is, apart from adding music, you have the flexibility to draw over, add text and images to your GIFs before you proceed with adding sound to your selected GIF.
Follow the steps given below to start creating GIF music videos with this application:
Step 1: Upload GIF File
To begin, upload your selected GIF file to the application’s pop-up window using ‘Drag and Drop’ method. Alternatively, you can click on ‘Choose GIF File’ tab on the app’s welcome window. Select a file from your system’s gallery and click ‘Open’ to upload it.
Step 2: Add Music
To add audio files, select ‘Upload’ or tap the (+) sign at the bottom right to choose the desired music files. Drag them to VEED’s timeline to set them in the order of your preference.
Step 3: Download Your Creation
Your video gets created in MP4 format. Tap ‘Export’ to directly share it with your peers on Twitter, Facebook or other social platforms.
Part 3 How to Make a GIF With Music to Post on Instagram?
Exploring your creative skills is one thing, while attracting attention to your work is the other. You would definitely want your social media communities to notice and compliment your work. Instagram is one among the best media sharing apps you can use to share your creations.
To adhere to the concern of creating audio enabled GIFs compatible for sharing to your Instagram stories and feeds, you can any of the following editing tools:
01Filmora
Wondershare Filmora Video Editor is one of the best and most preferred editing software you can use to add sound to your GIFs and videos. You can play with your editing creativity to make exciting musical GIF videos with this software in just a few minutes.
Using this tool for your editing work promises you the following advantages:
Wondershare Filmora
Get started easily with Filmora’s powerful performance, intuitive interface, and countless effects!
Try It Free Try It Free Try It Free Learn More >
● Huge Audio Library
Filmora audio library exposes you with a diverse range of audio and music files and a variety of exciting and relatable sound effects to choose from. You can browse through this storehouse for that perfect music for your GIF absolutely free of cost. The library has an additional Filmstock Effect Store that further increases your audio choice bandwidth.
● Optimal Sync
Filmora allows you to establish the perfect sync between your GIF and audio. Its beat detection feature identifies audio hits to produce markers that you can use to obtain the ideal audio-GIF synchronization in your creations.
● Voiceover Applicable
Filmora gives you the flexibility to record and add you own voiceover using your microphone to make your creations more impactful.
Steps to Create Audio Enabled GIFs Using Filmora
Take the following steps to enhance your GIFs with music and sound effects:
● Select and import your GIF file to the Filmora timeline
● In the software’s audio library, select your desired music and sound effects to add them to the imported GIF file. You can even choose to add your own voiceover to the GIF.
● That’s it! You are now ready to share your work on your Instagram handle and other media sharing platforms. Just click ‘Export’ and your creation gets uploaded on social media in MP4 format. Make sure to adjust the resolution and bit settings for best results.
02Artwork
Like Filmora, Artwork is another application you can use to add sound to GIF files. This one is a browser tool that allows you to create sound enabled videos with static and animated images. Take up the following process to make your own musical GIF with Artwork:
● To begin, signup to Artwork’s free trial feature. Choose your desired sound file in MP3 format and trim it to a play duration of 1 minute. This is essential because Instagram doesn’t allow you to post longer GIFs.
● Add your selected GIF and trimmed MP3 files in Artwork’s pop-up window. Click ‘Save’ and wait till the process to finish.
● Your creation is ready. Download and share it on Instagram.
● Key Takeaways from This Episode →
● Adding music and sound to your GIF is both a fun and exciting activity and also has the potential to enhance the quality and reach of the message you desire to deliver through your GIF. Besides this, it enhances your editing creativity and skill, which is a complement in itself.
● A number of software and online tools available on the internet are ready to help you get through the task. You can rely on these tools to add audio to your GIFs within minutes absolutely free of cost and share them directly on social media.
● Filmora is one among the best GIF editing tools for sharing your creations on Instagram. You can access its huge audio library for selected sound effects, set a perfect sync between your GIF and its audio and even add your own voiceover to boost your creativity using this software.
How to Make GIF Instagram
How to Make GIF Instagram | Quick Tips
An easy yet powerful editor
Numerous effects to choose from
Detailed tutorials provided by the official channel
Creating gif for Instagram to make stories engaging in easy steps. Making Instagram stories by converting gif to video to attract more people.
In this article
01 [10 Best Instagram Gifs for Your Stories](#Part 1)
02 [How to Create a GIF for Instagram](#Part 2)
03 [How to Convert GIF to Video for Instagram](#Part 3)
Part 1 10 Best Instagram Gifs for Your Stories
All of you might know that GIF is also known as Graphics Interchange Format. It was created for the first time in the year 1987. With it you can decrease the size of photos and short animated images. With this kind of technology a gif instagram can also be made with the greatest ease. The GIF instagram story is a fun oriented task that all of you will appreciate in the long run. Here you can even add animated stickers and paste them to your story. With this way you can also make more stickers by changing their size in the long way. Instagram logo gif can also be made easily by following some keywords to get the desired gif over Instagram.
So, to make an Instagram story more happening some of the top gif galleries are:
01Bohemian
As the name suggests, the gif are Bohemian themed. Those who love to add some cute Bohemian things and pictures in gif style; they can type Bohemian on the search bar and choose the best one to make an Instagram story Bohemian themed. Colorful flowers, star, dream catcher, cute girl and days name are available in the said gif style.
02Chicayeye
Various gifs available at this keyword are warm colors themed. They make any Instagram story pleasing with simple yet beautiful color combinations. With matching color combinations of pictures and words, instagram stories can be made more interesting.
03Kindcomments
The name itself indicates, there will be a lot of quotes or sayings. Those who are fond of posting some beautiful and engaging quotes on social media accounts, they will definitely love to add gif from Kindcomments.
04Scarletpin

It is seen that food lovers always post their story when they have a lunch or dinner. Making people know what new they are having at a place through Instagram stories seems to be very interesting. So, for those SCARLETPIN has a wide collection of food gifs. It has bright and colorful pictures of food to make the stories more interesting.
05Gladdest
Adorable gif for insta can make any Instagram story look so sweet and engaging. So, when you need a soft tone gif with a lot of sayings, stars, flowers, a piece of cake and music, then type Gladdest at your search result and get some vintage styles gif that make your Instagram story adorable. This will make people to shower love and hearts at your story.
06Hanmade
A lot of gif in instagram that seems to be written with hands can be searched through “handmade”. It has some adorable pink and cute designs. Days and the months are written in some amazing style. An Instagram story can be made attractive by including some heart gif and sayings gif. Those who wish to add some cute stories on Christmas day, they can even get some cute wishes gif in it.
07Hygge
Season’s gif are most common gifs that are included in any Instagram story by the social media users. The most lovable season is the winters where the users have a lot of stuff to include in the story. Looking for winter’s gif for story? Then type Hygge at your search results. ???It will show various gif for a mood of coziness. One can find cozy mugs, stars, snowman, and seasonal stickers to make interesting story over Instagram.
08Vipapier
Some users look for a place where they can get most of the best instagram gifs for their Instagram stories. From sayings to cute pictures of hearts, flowers and stars all can be taken from Vipapier. The best thing is that it has muted color scheme and paint gif that can be applied anywhere in the background of the text. So, search Vipapier over the search results of Instagram and add one that fits in your space.
09LINE & LINES

This is a simple yet very good gif available to make text in the Instgaram look amazing and stylish. One can underline something or write something interesting in break up to give the text a new look. So, various lines can be seen at LINE & LINES to include the same in the Instagram stories.
10Square & Rectangle
Basic shapes are loved by every Instagram user who updates their stories every day. The reason is that they give a new and cool look to any picture. So, if you need basic shape, then ‘square’ or ‘rectangle’ are great way to make your new post look different and impress your followers. They are simple to create and can be added as background theme for the pictures of videos.
Part 2 How to Create a GIF for Instagram
Posting an Instagram GIF is easy using an application for both iPhone and Android. So, let’s see one by one how to make gifs for instagram and post the same on the Instagram stories. To begin with:
01How to Post an Instagram GIF Using App for iPhone
When you are in need to post Gifs to instagram story then you have to take some essential steps. These steps have been taken by GIPHY as well as from GIF stickers that you can add to your content at social media sites like Instagram.
● Install the Giphy app on your iPhone and open it.
● Look for the desired GIF which you want to include in your story on GIPHY.
● Click on the paper-airplane icon located under the GIF.
● Tap the Instagram button. A permission screen will open asking for giving permission for access to open Instagram.
● After giving permission, the selected GIF will open inside Instagram. Select Feed to post the selected GIF to your Instagram feed. This will be a new post over the Instagram.
● In case you need to edit of add filters, you can go with that by moving on to Next.
● Further tap next again to add caption and hash tags if required.
● After creation of GIF post is over, tap Share.
Here you will get more benefits like increasing and decreasing the size of images. Instagram story gif is an issue that is to be done for every kind of need and all the Instagram stories. By good fortune GIPHY has many tons of GIFs that can be selected for this kind of conditions. You just need a special kind of flair when you are making texts for your GIF interface. Even then you have to adopt gif instagram story aesthetic so that your task of doing any promotion on social media sites could become an easy one.
02How to Post an Instagram GIF Using App for Android
Gif can be posted easily using GIPHY Cam for Android. Here you can even open the app of instagram media with the help of an android. The simple steps are:
Save the GIF to the Download folder which you want to share to the Instagram.
Tap to the camera roll after opening GIPHY CAM.
Choose the GIF and move to the next button.
Let the GIF convert and then go to Instagram and share.
Part 3 How to Convert GIF to Video for Instagram
A gif can be converted into video by using various applications. Converting Gif by adding some filter, light effects and sound into video make it more attractive for Instagram stories. One can try Filmora to convert gif to video for instagram in just simple steps.
01**Wondershare Filmora Video Editor ** –A GIF resource

Wondershare Filmora - Best Video Editor for Mac/Windows
5,481,435 people have downloaded it.
Build unique custom animations without breaking a sweat.
Focus on creating epic stories and leave the details to Filmora’s auto features.
Start a creative adventure with drag & drop effects and endless possibilities.
Filmora simplifies advanced features to save you time and effort.
Filmora cuts out repetition so you can move on to your next creative breakthrough.
There are many applications and web tools that offer to convert beautiful gifs to videos and sharing the same over Instagram stories. Filmora V11 is one of the best video editor applications which assist the users to convert gif to video with minimal effort. It is a user-friendly tool that has media editing features. It allows the users to enhance their video with wide variety of sound, light effects, and beautiful gifs and share them to their Instagram stories.
For creating video or converting gifs to video, Filmora V11 can be used. It makes easy for the beginners to convert gift into videos in a few simple steps. Filmora V11 app is required to be installed on the system and media files can be imported there. The best thing is that it supports most of the video formats such as MP4, AVI, H261, FLV, MKV, 3GP, MOV, MPEG, VOB, RMVB, M4V, TS, M2TS, WMV, ASF and many more. To customize gifs and then converting it to video, the Filmora Meme maker can be used. Templates and captions are also found at the application.
02Steps to convert GIF to video for Instagram
● The first step is to download the application Filmora at your computer and open it. Choose the GIF file from the Filmora file.
● Do the necessary editing. This including adding some text, colors and effects to the gif.
● After adding all the effects and editing, tap to create a video from it. Export the same in MP4 format and save it over the mobile. The application will convert the gift into video and is ready for uploading.
● At last in the uploading process, open the Instagram application, select the video from the gallery.
● Captions or description can be added and then uploaded.
● Key Takeaways from This Episode →
● Instagram story gifs are concerned with mainstream creation for graphics interchange format. With these formats you can make the best and interesting story. So, to make gif, maximum use of GIPHY can be made to make your work look to be the best promotional one. Some of the best gifs can be searched by tapping keywords like Bohemian, Hanmade, LINE & LINES and Square & Rectangle
● Posting gif can be understood in just simple steps. If you desire to know how to create gifs for instagram, then you can explore various applications for both iPhone and Android. You may even search well on your GIF and then select the desired gif that can be added well to your instagram story.
● Instagram stories can be made more attractive by converting gif into videos. The same can be done with ease with some user friendly and high tech applications. Filmora can be the best software application for doing the magic over Instagram stories. It can be used to turn gif into videos or videos to gif. So, give your creativity a new height with some good application and impress your followers.
Creating gif for Instagram to make stories engaging in easy steps. Making Instagram stories by converting gif to video to attract more people.
In this article
01 [10 Best Instagram Gifs for Your Stories](#Part 1)
02 [How to Create a GIF for Instagram](#Part 2)
03 [How to Convert GIF to Video for Instagram](#Part 3)
Part 1 10 Best Instagram Gifs for Your Stories
All of you might know that GIF is also known as Graphics Interchange Format. It was created for the first time in the year 1987. With it you can decrease the size of photos and short animated images. With this kind of technology a gif instagram can also be made with the greatest ease. The GIF instagram story is a fun oriented task that all of you will appreciate in the long run. Here you can even add animated stickers and paste them to your story. With this way you can also make more stickers by changing their size in the long way. Instagram logo gif can also be made easily by following some keywords to get the desired gif over Instagram.
So, to make an Instagram story more happening some of the top gif galleries are:
01Bohemian
As the name suggests, the gif are Bohemian themed. Those who love to add some cute Bohemian things and pictures in gif style; they can type Bohemian on the search bar and choose the best one to make an Instagram story Bohemian themed. Colorful flowers, star, dream catcher, cute girl and days name are available in the said gif style.
02Chicayeye
Various gifs available at this keyword are warm colors themed. They make any Instagram story pleasing with simple yet beautiful color combinations. With matching color combinations of pictures and words, instagram stories can be made more interesting.
03Kindcomments
The name itself indicates, there will be a lot of quotes or sayings. Those who are fond of posting some beautiful and engaging quotes on social media accounts, they will definitely love to add gif from Kindcomments.
04Scarletpin
It is seen that food lovers always post their story when they have a lunch or dinner. Making people know what new they are having at a place through Instagram stories seems to be very interesting. So, for those SCARLETPIN has a wide collection of food gifs. It has bright and colorful pictures of food to make the stories more interesting.
05Gladdest
Adorable gif for insta can make any Instagram story look so sweet and engaging. So, when you need a soft tone gif with a lot of sayings, stars, flowers, a piece of cake and music, then type Gladdest at your search result and get some vintage styles gif that make your Instagram story adorable. This will make people to shower love and hearts at your story.
06Hanmade
A lot of gif in instagram that seems to be written with hands can be searched through “handmade”. It has some adorable pink and cute designs. Days and the months are written in some amazing style. An Instagram story can be made attractive by including some heart gif and sayings gif. Those who wish to add some cute stories on Christmas day, they can even get some cute wishes gif in it.
07Hygge
Season’s gif are most common gifs that are included in any Instagram story by the social media users. The most lovable season is the winters where the users have a lot of stuff to include in the story. Looking for winter’s gif for story? Then type Hygge at your search results. ???It will show various gif for a mood of coziness. One can find cozy mugs, stars, snowman, and seasonal stickers to make interesting story over Instagram.
08Vipapier
Some users look for a place where they can get most of the best instagram gifs for their Instagram stories. From sayings to cute pictures of hearts, flowers and stars all can be taken from Vipapier. The best thing is that it has muted color scheme and paint gif that can be applied anywhere in the background of the text. So, search Vipapier over the search results of Instagram and add one that fits in your space.
09LINE & LINES
This is a simple yet very good gif available to make text in the Instgaram look amazing and stylish. One can underline something or write something interesting in break up to give the text a new look. So, various lines can be seen at LINE & LINES to include the same in the Instagram stories.
10Square & Rectangle
Basic shapes are loved by every Instagram user who updates their stories every day. The reason is that they give a new and cool look to any picture. So, if you need basic shape, then ‘square’ or ‘rectangle’ are great way to make your new post look different and impress your followers. They are simple to create and can be added as background theme for the pictures of videos.
Part 2 How to Create a GIF for Instagram
Posting an Instagram GIF is easy using an application for both iPhone and Android. So, let’s see one by one how to make gifs for instagram and post the same on the Instagram stories. To begin with:
01How to Post an Instagram GIF Using App for iPhone
When you are in need to post Gifs to instagram story then you have to take some essential steps. These steps have been taken by GIPHY as well as from GIF stickers that you can add to your content at social media sites like Instagram.
● Install the Giphy app on your iPhone and open it.
● Look for the desired GIF which you want to include in your story on GIPHY.
● Click on the paper-airplane icon located under the GIF.
● Tap the Instagram button. A permission screen will open asking for giving permission for access to open Instagram.
● After giving permission, the selected GIF will open inside Instagram. Select Feed to post the selected GIF to your Instagram feed. This will be a new post over the Instagram.
● In case you need to edit of add filters, you can go with that by moving on to Next.
● Further tap next again to add caption and hash tags if required.
● After creation of GIF post is over, tap Share.
Here you will get more benefits like increasing and decreasing the size of images. Instagram story gif is an issue that is to be done for every kind of need and all the Instagram stories. By good fortune GIPHY has many tons of GIFs that can be selected for this kind of conditions. You just need a special kind of flair when you are making texts for your GIF interface. Even then you have to adopt gif instagram story aesthetic so that your task of doing any promotion on social media sites could become an easy one.
02How to Post an Instagram GIF Using App for Android
Gif can be posted easily using GIPHY Cam for Android. Here you can even open the app of instagram media with the help of an android. The simple steps are:
Save the GIF to the Download folder which you want to share to the Instagram.
Tap to the camera roll after opening GIPHY CAM.
Choose the GIF and move to the next button.
Let the GIF convert and then go to Instagram and share.
Part 3 How to Convert GIF to Video for Instagram
A gif can be converted into video by using various applications. Converting Gif by adding some filter, light effects and sound into video make it more attractive for Instagram stories. One can try Filmora to convert gif to video for instagram in just simple steps.
01**Wondershare Filmora Video Editor ** –A GIF resource
Wondershare Filmora - Best Video Editor for Mac/Windows
5,481,435 people have downloaded it.
Build unique custom animations without breaking a sweat.
Focus on creating epic stories and leave the details to Filmora’s auto features.
Start a creative adventure with drag & drop effects and endless possibilities.
Filmora simplifies advanced features to save you time and effort.
Filmora cuts out repetition so you can move on to your next creative breakthrough.
There are many applications and web tools that offer to convert beautiful gifs to videos and sharing the same over Instagram stories. Filmora V11 is one of the best video editor applications which assist the users to convert gif to video with minimal effort. It is a user-friendly tool that has media editing features. It allows the users to enhance their video with wide variety of sound, light effects, and beautiful gifs and share them to their Instagram stories.
For creating video or converting gifs to video, Filmora V11 can be used. It makes easy for the beginners to convert gift into videos in a few simple steps. Filmora V11 app is required to be installed on the system and media files can be imported there. The best thing is that it supports most of the video formats such as MP4, AVI, H261, FLV, MKV, 3GP, MOV, MPEG, VOB, RMVB, M4V, TS, M2TS, WMV, ASF and many more. To customize gifs and then converting it to video, the Filmora Meme maker can be used. Templates and captions are also found at the application.
02Steps to convert GIF to video for Instagram
● The first step is to download the application Filmora at your computer and open it. Choose the GIF file from the Filmora file.
● Do the necessary editing. This including adding some text, colors and effects to the gif.
● After adding all the effects and editing, tap to create a video from it. Export the same in MP4 format and save it over the mobile. The application will convert the gift into video and is ready for uploading.
● At last in the uploading process, open the Instagram application, select the video from the gallery.
● Captions or description can be added and then uploaded.
● Key Takeaways from This Episode →
● Instagram story gifs are concerned with mainstream creation for graphics interchange format. With these formats you can make the best and interesting story. So, to make gif, maximum use of GIPHY can be made to make your work look to be the best promotional one. Some of the best gifs can be searched by tapping keywords like Bohemian, Hanmade, LINE & LINES and Square & Rectangle
● Posting gif can be understood in just simple steps. If you desire to know how to create gifs for instagram, then you can explore various applications for both iPhone and Android. You may even search well on your GIF and then select the desired gif that can be added well to your instagram story.
● Instagram stories can be made more attractive by converting gif into videos. The same can be done with ease with some user friendly and high tech applications. Filmora can be the best software application for doing the magic over Instagram stories. It can be used to turn gif into videos or videos to gif. So, give your creativity a new height with some good application and impress your followers.
Learn Easy Blender Rigging in Only 2 Minutes
Learn Simple Blender Rigging in Only 2 Minutes
An easy yet powerful editor
Numerous effects to choose from
Detailed tutorials provided by the official channel
Blender is a FREE, open-source 3D Animation program that is very popular for beginner animators. It’s a good way of starting if you’re not yet sure about how far you want to go into animation as it won’t demand any immediate monetary commitment.
Now, as for its features, today, we’ll be focusing on Blender Rigging features.
In this article
01 [Why Use Blender Rigging?](#Part 1)
02 [The Art of Effective Rigging in Blender [TUTORIAL]](#Part 2)
03 [Introduction to Rigging in Blender Course](#Part 3)
Part 1 Why Use Blender Rigging?
Blender Character Rigging is a great way of creating truly beautiful and realistic animations. Despite being an open-source program, it’s capable of doing just as much, if not more, than some of the more premium Animation software out there.
So, if you want to create video projects for your audience’s entertainment or edification with animation, then Blender Rigging is definitely something that you should consider. With this tool, you can create the complex animations that you need and then polish it up in a video editor like Wondershare Filmora Video Editor (which is a premium, video-editing tool that you can use to perfect your finished Blender Rigging animations.)

Part 2 The Art of Effective Rigging in Blender [TUTORIAL]
For this next section, we’re going to be introducing a couple of tutorials that you can look into to teach you more about Blender Character Rigging, Blender Facial Rigging, Blender Muscle Rig, and so on.
These topics are each very long-winded on their own though, so we’ve linked appropriate video tutorials that you can learn more and reserved ourselves to a brief description of each technique so that you can determine whether it’s something that interests you (although, of course, our recommendation is that you check each one out so that you can get the full ‘Blender’ experience.)
01Blender Character Rigging
The main thing people usually look at Blender for is, Blender Character Rigging. And, because it was created to emulate professional animation software, Blender has this function down to pat. To give you an idea of what features you can expect: Blender comes with custom bone shapes for easy Blender character rigging, it also comes with envelope skinny, skeleton skinning, and automatic skinning. With these alone, you can be assured that you will be able to create complex animations without much trouble.
02Blender Facial Rigging
Facial Rigging is usually a more complex subject that is avoided by animators without much experience. But, with Blender, facial rigging is possible. The YouTube video should show you the process of going about Blender Facial Rigging from start to finish (from sculpting the character face itself and then making use of Blender Rigging tools for setting up a skeletal structure for your face’s character to become animated.)
03Blender Muscle Rigging
Creating a Blender Muscle Rig is exactly what it sounds like. It is, of course, much more complicated than normal rigging, but it is a good subject to familiarize yourself with anyway, as it will allow you to go to the ‘next stage’ as you say, with your Animations. The video that we’ve attached is from Pierrick Picaut, who has released a series of videos on the subject of Blender Rigging in general and has extensively explained how to create a Blender Human Rig from the general body, the face, the muscles, and so on.
04Blender Rigging
Although a lot of Animation relies on more ‘traditional’ methods of expressing movement, one can still make use of more modern animation practices, like rigs, to set up their animations for movement. It’s an especially good skill to learn if you’re more interested in content-friendly animations (rather than creating a film of your own.)
05Blender Rigging
This next tutorial is an introduction to basic Blender Rigging. It’s a good one to both start and end on, as it was created for beginners specifically, and uses an example that is perhaps easier to understand most. Make sure to give it a shot just in case.
Part 3 Introduction to Rigging in Blender Course
For this next part, we introduce two other resources that you can take advantage of to learn more about Blender Rigging. Whether it be about Blender character rigging, Blender facial rigging, free blender rigs, creating muscle rigs, and so and so forth. These resources have got your back.
01Where to Learn the Course?
The first major course that we think you might be interested in is Mark Masters’ blender rigging course. You can find this course at PluralSight (which is a website that is focused on helping users of software develop their skills). Mark Masters, the instructor for this course, is a professional animator and works as a Animator for the animation studio, Steelhouse Productions. So, you can be sure that there is much that you can learn from him.

02Other Tools to Learn Rigging
As for other places to learn? We suggest the “Blender Fundamentals” course that Blender themselves have posted on YouTube. They have several of these courses (for all of the more recent versions of Blender). So, you can pick out a course that works for you. One of their more recent series is “Blender Fundamentals 2.which currently has videos all on the subject of Blender rigging (including Blender rigging and Blender rigging videos.)

● Key Takeaways from This Episode →
● If you’re interested in trying out blender rigging yourself, you’ll probably want to study the subject a little before beginning.
● Blender Rigging is quite a complex subject for beginners but having something to start with should help you on your way.
● For that, we recommend checking out the videos that we mentioned in section two of this article, where we recommend some popular tutorials regarding some of the more common Blender Rigging subjects.
● If you’re looking for something more comprehensive or put together though. A course might be more up to your taste. For that, we recommend either Mark Master’s introduction to rigging and animation over at PluralSight or Blender’s own “Blender Fundamental” series on YouTube (which should introduce all the functions you’ll need to know.)
Blender is a FREE, open-source 3D Animation program that is very popular for beginner animators. It’s a good way of starting if you’re not yet sure about how far you want to go into animation as it won’t demand any immediate monetary commitment.
Now, as for its features, today, we’ll be focusing on Blender Rigging features.
In this article
01 [Why Use Blender Rigging?](#Part 1)
02 [The Art of Effective Rigging in Blender [TUTORIAL]](#Part 2)
03 [Introduction to Rigging in Blender Course](#Part 3)
Part 1 Why Use Blender Rigging?
Blender Character Rigging is a great way of creating truly beautiful and realistic animations. Despite being an open-source program, it’s capable of doing just as much, if not more, than some of the more premium Animation software out there.
So, if you want to create video projects for your audience’s entertainment or edification with animation, then Blender Rigging is definitely something that you should consider. With this tool, you can create the complex animations that you need and then polish it up in a video editor like Wondershare Filmora Video Editor (which is a premium, video-editing tool that you can use to perfect your finished Blender Rigging animations.)
Part 2 The Art of Effective Rigging in Blender [TUTORIAL]
For this next section, we’re going to be introducing a couple of tutorials that you can look into to teach you more about Blender Character Rigging, Blender Facial Rigging, Blender Muscle Rig, and so on.
These topics are each very long-winded on their own though, so we’ve linked appropriate video tutorials that you can learn more and reserved ourselves to a brief description of each technique so that you can determine whether it’s something that interests you (although, of course, our recommendation is that you check each one out so that you can get the full ‘Blender’ experience.)
01Blender Character Rigging
The main thing people usually look at Blender for is, Blender Character Rigging. And, because it was created to emulate professional animation software, Blender has this function down to pat. To give you an idea of what features you can expect: Blender comes with custom bone shapes for easy Blender character rigging, it also comes with envelope skinny, skeleton skinning, and automatic skinning. With these alone, you can be assured that you will be able to create complex animations without much trouble.
02Blender Facial Rigging
Facial Rigging is usually a more complex subject that is avoided by animators without much experience. But, with Blender, facial rigging is possible. The YouTube video should show you the process of going about Blender Facial Rigging from start to finish (from sculpting the character face itself and then making use of Blender Rigging tools for setting up a skeletal structure for your face’s character to become animated.)
03Blender Muscle Rigging
Creating a Blender Muscle Rig is exactly what it sounds like. It is, of course, much more complicated than normal rigging, but it is a good subject to familiarize yourself with anyway, as it will allow you to go to the ‘next stage’ as you say, with your Animations. The video that we’ve attached is from Pierrick Picaut, who has released a series of videos on the subject of Blender Rigging in general and has extensively explained how to create a Blender Human Rig from the general body, the face, the muscles, and so on.
04Blender Rigging
Although a lot of Animation relies on more ‘traditional’ methods of expressing movement, one can still make use of more modern animation practices, like rigs, to set up their animations for movement. It’s an especially good skill to learn if you’re more interested in content-friendly animations (rather than creating a film of your own.)
05Blender Rigging
This next tutorial is an introduction to basic Blender Rigging. It’s a good one to both start and end on, as it was created for beginners specifically, and uses an example that is perhaps easier to understand most. Make sure to give it a shot just in case.
Part 3 Introduction to Rigging in Blender Course
For this next part, we introduce two other resources that you can take advantage of to learn more about Blender Rigging. Whether it be about Blender character rigging, Blender facial rigging, free blender rigs, creating muscle rigs, and so and so forth. These resources have got your back.
01Where to Learn the Course?
The first major course that we think you might be interested in is Mark Masters’ blender rigging course. You can find this course at PluralSight (which is a website that is focused on helping users of software develop their skills). Mark Masters, the instructor for this course, is a professional animator and works as a Animator for the animation studio, Steelhouse Productions. So, you can be sure that there is much that you can learn from him.
02Other Tools to Learn Rigging
As for other places to learn? We suggest the “Blender Fundamentals” course that Blender themselves have posted on YouTube. They have several of these courses (for all of the more recent versions of Blender). So, you can pick out a course that works for you. One of their more recent series is “Blender Fundamentals 2.which currently has videos all on the subject of Blender rigging (including Blender rigging and Blender rigging videos.)
● Key Takeaways from This Episode →
● If you’re interested in trying out blender rigging yourself, you’ll probably want to study the subject a little before beginning.
● Blender Rigging is quite a complex subject for beginners but having something to start with should help you on your way.
● For that, we recommend checking out the videos that we mentioned in section two of this article, where we recommend some popular tutorials regarding some of the more common Blender Rigging subjects.
● If you’re looking for something more comprehensive or put together though. A course might be more up to your taste. For that, we recommend either Mark Master’s introduction to rigging and animation over at PluralSight or Blender’s own “Blender Fundamental” series on YouTube (which should introduce all the functions you’ll need to know.)
The Complete Guide to Whiteboard Animation
The Definitive Guide to Whiteboard Animation
An easy yet powerful editor
Numerous effects to choose from
Detailed tutorials provided by the official channel
We think about moving videos with actors and actresses when we talk about motion. But, when we speak about doodle videos or drawn videos, we feel about whiteboard animation.
This article covers all the necessary information about whiteboard animation, Filmora whiteboard animation, whiteboard animation cost, etc. Under whiteboard animation, sketches adjust in a manner that results in continual animation reflection.
In this article
01 [What is Whiteboard Animation?](#Part 1)
02 [How Can Whiteboard Animation Be Used?](#Part 2)
03 [What is Whiteboard Animation Cost?](#Part 3)
04 [Some Whiteboard Animation Tools That Worth Using](#Part 4)
Part 1 What is Whiteboard Animation?

Whiteboard animation is a style that shows static watcher images getting drawn on the white screen. The graphics are at the core of a narration that walks the audience through the story by the draws. These animations are modest to understand, but they make us involved all of an impulsive.
Whiteboard animation could be a video in the middle of narration that walks the viewer through a story by viewing the illustrator’s hand drawing it onto a white background. Established in 2007, whiteboard animation may be a new and exciting way of communicating to the viewer in a very personal way.
It applies effects like time-lapse and stop-motion to bring stories to life. Its uses include internal and external television and internet advertisements, software and product demonstrations, whiteboard animation lectures and educational videos for all ages, and various artistic possibilities like untrue storytelling.
Whiteboard animation videos are traditionally made by simply recording the artist live as they draw the content for the video while at the same time reciting the story. An efficient technique in these visually-oriented times, but a tricky balancing act for even the most effective illustrators and speakers.
Part 2 How Can Whiteboard Animation Be Used?
While working with whiteboard animation for pc or going with whiteboard animation hand drawing in digital mode, it is important to understand how can whiteboard animation be used for? Let’s try to figure out that in the following points:
01Represent complex ideas in a simple way
A whiteboard video can offer assistance if the item or framework you need to portray is complex or exceedingly specialized. Individuals frequently get bored amid clarifications, and the more point by point those clarifications are, the harder it is to focus.
Whether you’re pushing an item on a press page or sharing a new trade prepare with your team, employing a high-quality whiteboard movement video to induce your point-over will keep up tall intrigued for as long as the video is playing. This can be because whiteboard liveliness is fast-moving, outwardly point by point, and frequently colorful, making them simple and fun to watch—for as long as it takes to clarify the thought.
02You can cover a part of your thoughts all at once
For reasons comparative to those displayed over, a whiteboard video is perfect on the off chance that you would like to cover an expansive sum of data within the introduction. With ideas unfolding visually as the storyteller portrays what’s going on, you’ll be able to get absent with counting a part of diverse thoughts within the same video without losing the watcher intrigued.
03You need to get other business attention
Did you know that whiteboard activity recordings are fair as compelling for Bshowcasing? The industrial-yet-casual look-and-feel of whiteboard activity loans itself astoundingly generously to a corporate environment.
Whiteboard movement administrations can donate you a noteworthy edge over competing companies once you approach other businesses along with your offer.
04You should maintain a strategic distance from awful performing artists at all costs
With whiteboard liveliness, you don’t ought to enlist on-screen characters to play in your video. This cruel noteworthy took a toll on reserve funds. Still, it can moreover spare you genuine embarrassment—good, persuading performing artists can be troublesome to find, and awful ones will have your group of onlookers wincing through the complete introduction. Movement ousts this issue inside and out.
05You plan to use social media marketing
If you need to utilize YouTube or social media advertisements for your promotion, whiteboard liveliness recordings alone will do the job. Individuals like them, so you’ve got a great chance of getting sees and clicks—and sales.
(Fun truth: Did you know there are 3billion looks conducted on YouTube alone each month? If you need your share of that activity, utilizing whiteboard activity recordings may be your best wager.)
06You want to create a story
On the off-chance that you need your video to tell a portion of your brand’s story, no one will do that way better than whiteboard movement administrations. Disney demonstrated that liveliness was an incredibly viable way to tell stories nearly a hundred years ago. Why not take after that convention?
07You want to use humor
When you need to consolidate humor into your video introduction, whiteboard activity is one of the most excellent ways to induce giggles. Novice performing artists can be unbalanced and irritating when they attempt to be clever on camera, but in whiteboard animation’s laid-back visual fashion, it can communicate humor immaculately.
08You need to reuse ancient sound substance
If you want to repurpose other sorts of the substance you’ve got lying around—say, a podcast scene or a discourse you gave—you can combine preexisting audio with whiteboard liveliness. This will assist you to capitalize on the substance you’ve as of now made, and it’ll undoubtedly breathe new life into it.
Part 3 What is Whiteboard Animation Cost?
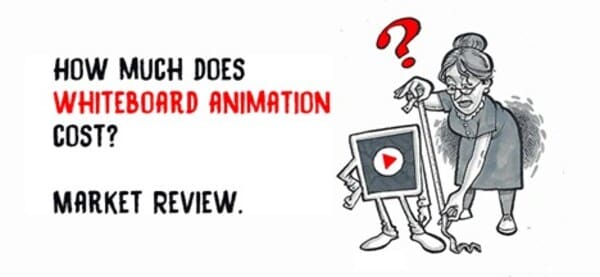
Should you contract an artisan or fair do-it-yourself for whiteboard activity? Let’s have a conversation around sweat equity.
You can set up a video camera yourself and utilize video altering computer program to make a Whiteboard Liveliness. However, it’ll likely require a couple of weeks of your time, and your comes about will be far from a professional studio’s quality. Expect ineffectively drawn pictures and composed words that are unreadable.
Whiteboard activity program can be fetched as small as $50plus saves a couple of weeks of your time. These cheap programs utilize an inactive picture of a hand and clip craftsmanship. But the ultimate item isn’t unique, and its esteem is an excellent Control Point introduction.
Another choice is Adobe Eventual outcomes, an industry-standard activity program. It’s what they utilize to create National Commercials. It costs $16in any case, and learning the computer program requires a bachelor’s degree.
Part 4 Some Whiteboard Animation Tools That Worth Using
Whiteboard animation software or whiteboard animation app permits you to form whiteboard animation videos. Animation software offers a visual, drag-and-drop interface to simplify the designing process for creators.
Wondering what whiteboard animations are? They’re explainer videos where a hand sketches on a whiteboard. Before, this was manual, where a lecturer writes on a whiteboard. But because of whiteboard animation software, you don’t have to have a whiteboard or compose aboard again.
Whiteboard animation tool has built-in hand styles and virtual whiteboards that automatically process animation formation.
Wondershare Filmora Video Editor and Camtasia are some of the best videos altering computer programs with cool features compared to other competing video varying Software.
Wondershare Filmora
Get started easily with Filmora’s powerful performance, intuitive interface, and countless effects!
Try It Free Try It Free Try It Free Learn More >
Here are a few steps to follow for making whiteboard animation videos in Filmora and Camtasia:
01Write a Script
Much like a standard video or a brief skit, there must be a script if a whiteboard animation video succeeds. It is excellent to have compelling images and information, but without a logical story, they’re nothing.
It is not a blog, storyboard, or a collection of bullet points. You hope for a proper script, which says everything about the video. Why? Because then you’ll know precisely what images should be added further in specific segments, what the narrator must show, and what transitions are necessary.
02Start with the Storyboard
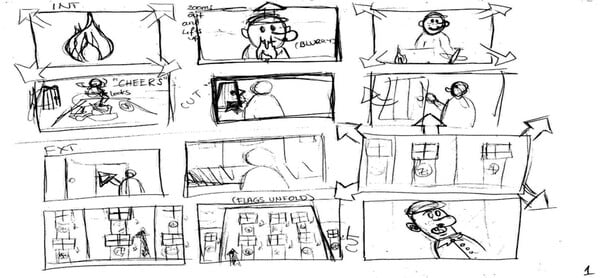
Now you have got a script, and you’ve got a clear idea of how you want your video to return across. It’s time to start out building the storyboard. With a storyboard, you may be able to sort out your thoughts far better. You’ll see how each frame comes onto the screen, and a unit of ammunition ties into the opposite.
When you create your storyboard, you may have a simple idea about how your final product will look. If there is some alteration you’re not proud of, this can be the instant where you’ll make changes.
03Create Images
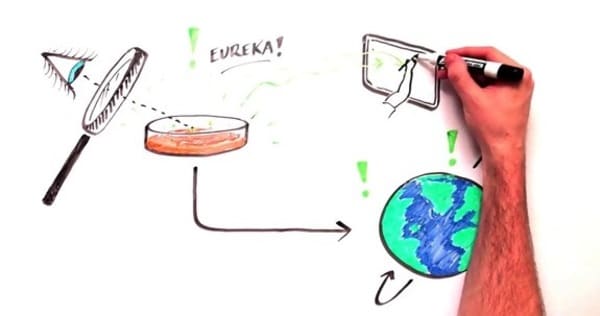
You may find this part very easy if you’re a precise person. It’s all about crafting fun and unique images that will help deliver the data you want to bring across. Attempt to create striking photos which will excite your audience. The simpler, more distinctive, and attractive you’ll be able to make those images, the higher your end product.
04Animate Those Images
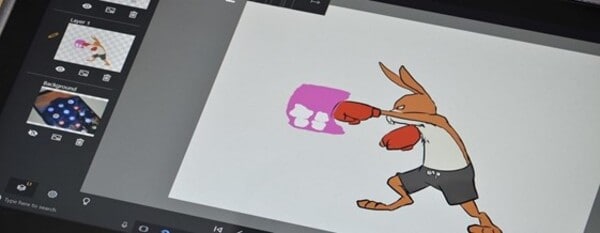
With your images drawn and in situ on the storyboard, it’s time to animate them. When animating your whiteboard animation video, confine in mind that every frame will likely show for no. quite seconds. This forces you to form every single movement count – with only some seconds per frame available, and quick movements are often preferable to extended scenes of stillness.
05Record and Sync the Audio
The audio is arguably one of the main essential parts of a whiteboard animation video. So, before recording the audio for any part of your project, practice reading through your script several times until you recognize it by memory and cannot struggle when speaking into the microphone during the particular recording process.
The final step involves getting your audio. Every animated video must have narration because it helps to elucidate what’s happening within the images that folks are seeing. Record your audio, and ensure it’s perfectly in sync with your content.
So, whether you are going with hand whiteboard animation and then modifying and animated with Filmora or the Camtasia whiteboard animation, both result in good whiteboard animation. Whereas, if looking for comprehensive video editing tools, the obvious choice will be Filmora.
● Key Takeaways from This Episode →
● In short, the article gives you the basic understanding of:
● What is meant by Whiteboard Animation?
● Different examples of whiteboard animation videos to explain the techniques
● Steps to apply whiteboard animation with Filmora
● Further, the article has explained Whiteboard Animation with different examples to clarify how it looks, and some websites may help you lead more about Whiteboard Animation videos. The most important question answered above is how to make videos ideally at Filmora. I hope your queries are explicit after reading this post.
We think about moving videos with actors and actresses when we talk about motion. But, when we speak about doodle videos or drawn videos, we feel about whiteboard animation.
This article covers all the necessary information about whiteboard animation, Filmora whiteboard animation, whiteboard animation cost, etc. Under whiteboard animation, sketches adjust in a manner that results in continual animation reflection.
In this article
01 [What is Whiteboard Animation?](#Part 1)
02 [How Can Whiteboard Animation Be Used?](#Part 2)
03 [What is Whiteboard Animation Cost?](#Part 3)
04 [Some Whiteboard Animation Tools That Worth Using](#Part 4)
Part 1 What is Whiteboard Animation?
Whiteboard animation is a style that shows static watcher images getting drawn on the white screen. The graphics are at the core of a narration that walks the audience through the story by the draws. These animations are modest to understand, but they make us involved all of an impulsive.
Whiteboard animation could be a video in the middle of narration that walks the viewer through a story by viewing the illustrator’s hand drawing it onto a white background. Established in 2007, whiteboard animation may be a new and exciting way of communicating to the viewer in a very personal way.
It applies effects like time-lapse and stop-motion to bring stories to life. Its uses include internal and external television and internet advertisements, software and product demonstrations, whiteboard animation lectures and educational videos for all ages, and various artistic possibilities like untrue storytelling.
Whiteboard animation videos are traditionally made by simply recording the artist live as they draw the content for the video while at the same time reciting the story. An efficient technique in these visually-oriented times, but a tricky balancing act for even the most effective illustrators and speakers.
Part 2 How Can Whiteboard Animation Be Used?
While working with whiteboard animation for pc or going with whiteboard animation hand drawing in digital mode, it is important to understand how can whiteboard animation be used for? Let’s try to figure out that in the following points:
01Represent complex ideas in a simple way
A whiteboard video can offer assistance if the item or framework you need to portray is complex or exceedingly specialized. Individuals frequently get bored amid clarifications, and the more point by point those clarifications are, the harder it is to focus.
Whether you’re pushing an item on a press page or sharing a new trade prepare with your team, employing a high-quality whiteboard movement video to induce your point-over will keep up tall intrigued for as long as the video is playing. This can be because whiteboard liveliness is fast-moving, outwardly point by point, and frequently colorful, making them simple and fun to watch—for as long as it takes to clarify the thought.
02You can cover a part of your thoughts all at once
For reasons comparative to those displayed over, a whiteboard video is perfect on the off chance that you would like to cover an expansive sum of data within the introduction. With ideas unfolding visually as the storyteller portrays what’s going on, you’ll be able to get absent with counting a part of diverse thoughts within the same video without losing the watcher intrigued.
03You need to get other business attention
Did you know that whiteboard activity recordings are fair as compelling for Bshowcasing? The industrial-yet-casual look-and-feel of whiteboard activity loans itself astoundingly generously to a corporate environment.
Whiteboard movement administrations can donate you a noteworthy edge over competing companies once you approach other businesses along with your offer.
04You should maintain a strategic distance from awful performing artists at all costs
With whiteboard liveliness, you don’t ought to enlist on-screen characters to play in your video. This cruel noteworthy took a toll on reserve funds. Still, it can moreover spare you genuine embarrassment—good, persuading performing artists can be troublesome to find, and awful ones will have your group of onlookers wincing through the complete introduction. Movement ousts this issue inside and out.
05You plan to use social media marketing
If you need to utilize YouTube or social media advertisements for your promotion, whiteboard liveliness recordings alone will do the job. Individuals like them, so you’ve got a great chance of getting sees and clicks—and sales.
(Fun truth: Did you know there are 3billion looks conducted on YouTube alone each month? If you need your share of that activity, utilizing whiteboard activity recordings may be your best wager.)
06You want to create a story
On the off-chance that you need your video to tell a portion of your brand’s story, no one will do that way better than whiteboard movement administrations. Disney demonstrated that liveliness was an incredibly viable way to tell stories nearly a hundred years ago. Why not take after that convention?
07You want to use humor
When you need to consolidate humor into your video introduction, whiteboard activity is one of the most excellent ways to induce giggles. Novice performing artists can be unbalanced and irritating when they attempt to be clever on camera, but in whiteboard animation’s laid-back visual fashion, it can communicate humor immaculately.
08You need to reuse ancient sound substance
If you want to repurpose other sorts of the substance you’ve got lying around—say, a podcast scene or a discourse you gave—you can combine preexisting audio with whiteboard liveliness. This will assist you to capitalize on the substance you’ve as of now made, and it’ll undoubtedly breathe new life into it.
Part 3 What is Whiteboard Animation Cost?
Should you contract an artisan or fair do-it-yourself for whiteboard activity? Let’s have a conversation around sweat equity.
You can set up a video camera yourself and utilize video altering computer program to make a Whiteboard Liveliness. However, it’ll likely require a couple of weeks of your time, and your comes about will be far from a professional studio’s quality. Expect ineffectively drawn pictures and composed words that are unreadable.
Whiteboard activity program can be fetched as small as $50plus saves a couple of weeks of your time. These cheap programs utilize an inactive picture of a hand and clip craftsmanship. But the ultimate item isn’t unique, and its esteem is an excellent Control Point introduction.
Another choice is Adobe Eventual outcomes, an industry-standard activity program. It’s what they utilize to create National Commercials. It costs $16in any case, and learning the computer program requires a bachelor’s degree.
Part 4 Some Whiteboard Animation Tools That Worth Using
Whiteboard animation software or whiteboard animation app permits you to form whiteboard animation videos. Animation software offers a visual, drag-and-drop interface to simplify the designing process for creators.
Wondering what whiteboard animations are? They’re explainer videos where a hand sketches on a whiteboard. Before, this was manual, where a lecturer writes on a whiteboard. But because of whiteboard animation software, you don’t have to have a whiteboard or compose aboard again.
Whiteboard animation tool has built-in hand styles and virtual whiteboards that automatically process animation formation.
Wondershare Filmora Video Editor and Camtasia are some of the best videos altering computer programs with cool features compared to other competing video varying Software.
Wondershare Filmora
Get started easily with Filmora’s powerful performance, intuitive interface, and countless effects!
Try It Free Try It Free Try It Free Learn More >
Here are a few steps to follow for making whiteboard animation videos in Filmora and Camtasia:
01Write a Script
Much like a standard video or a brief skit, there must be a script if a whiteboard animation video succeeds. It is excellent to have compelling images and information, but without a logical story, they’re nothing.
It is not a blog, storyboard, or a collection of bullet points. You hope for a proper script, which says everything about the video. Why? Because then you’ll know precisely what images should be added further in specific segments, what the narrator must show, and what transitions are necessary.
02Start with the Storyboard
Now you have got a script, and you’ve got a clear idea of how you want your video to return across. It’s time to start out building the storyboard. With a storyboard, you may be able to sort out your thoughts far better. You’ll see how each frame comes onto the screen, and a unit of ammunition ties into the opposite.
When you create your storyboard, you may have a simple idea about how your final product will look. If there is some alteration you’re not proud of, this can be the instant where you’ll make changes.
03Create Images
You may find this part very easy if you’re a precise person. It’s all about crafting fun and unique images that will help deliver the data you want to bring across. Attempt to create striking photos which will excite your audience. The simpler, more distinctive, and attractive you’ll be able to make those images, the higher your end product.
04Animate Those Images
With your images drawn and in situ on the storyboard, it’s time to animate them. When animating your whiteboard animation video, confine in mind that every frame will likely show for no. quite seconds. This forces you to form every single movement count – with only some seconds per frame available, and quick movements are often preferable to extended scenes of stillness.
05Record and Sync the Audio
The audio is arguably one of the main essential parts of a whiteboard animation video. So, before recording the audio for any part of your project, practice reading through your script several times until you recognize it by memory and cannot struggle when speaking into the microphone during the particular recording process.
The final step involves getting your audio. Every animated video must have narration because it helps to elucidate what’s happening within the images that folks are seeing. Record your audio, and ensure it’s perfectly in sync with your content.
So, whether you are going with hand whiteboard animation and then modifying and animated with Filmora or the Camtasia whiteboard animation, both result in good whiteboard animation. Whereas, if looking for comprehensive video editing tools, the obvious choice will be Filmora.
● Key Takeaways from This Episode →
● In short, the article gives you the basic understanding of:
● What is meant by Whiteboard Animation?
● Different examples of whiteboard animation videos to explain the techniques
● Steps to apply whiteboard animation with Filmora
● Further, the article has explained Whiteboard Animation with different examples to clarify how it looks, and some websites may help you lead more about Whiteboard Animation videos. The most important question answered above is how to make videos ideally at Filmora. I hope your queries are explicit after reading this post.
How-To Guide: Secret Shortcut to Adobe Animate Character Tutorial
How-to Guide: Secret Shortcut to Adobe Animate Character Tutorial
An easy yet powerful editor
Numerous effects to choose from
Detailed tutorials provided by the official channel
Whether you are a beginner or an experienced graphics designer, you can use Adobe Character Animator to animate 2D characters easily. But, if you are an absolute beginner, it might take a few weeks to get familiar with the software’s features/workflow.

Irrespective of your experience with the tool, this Adobe animate character tutorial will help you get started and edit visually appealing animated shorts.
In this article
01 [How Do I Animate a Character in Adobe Animation?](#Part 1)
02 [Is Adobe Character Animator Easy to Use?](#Part 2)
03 [How to Rig a Simple Character | Adobe Animate Tutorial](#Part 3)
04 [One-Stop Solution to Edit High-Quality Videos in Every Situation](#Part 4)
Part 1 How Do I Animate a Character in Adobe Animation?
1. Start With a Script
If you want to create an animation that engages the customers, you must always start your journey with a script. Like a short movie, even an animated sketch requires a script. It’ll set the tone for the entire animation and help you start sailing in the right direction.

If you have a full production team, the writers will take care of scriptwriting and you’ll just have to suggest a few changes in between. But, if you are working on your own, you’ll have to handle the script writing all-by-yourself. In any case, however, make sure to start by crafting a beautiful script with an amazing storyline.
2. Record the Voiceover
The next step in our Adobe Animate character tutorial is recording the voiceover for the video. Unless you are planning to create a GIF animation, you would need a dedicated voiceover for your animated video to make it more appealing.

Now, before you even begin with animating the character, recording the audio will help you clear out one task from the list. To record the voiceover, you can try different types of audio recording software and equipment.
3. Start Creating the Character
At this point in our Adobe animate character tutorial, we are ready to design the actual character itself. To do this, launch Adobe Character Animator on your system. On its home screen, you’ll see a tab containing different types of characters (along with their dedicated Photoshop and Illustrator versions). Click on any of these characters and it’ll automatically open in the editing panel of Adobe character animator.

Now, you can start with animating the character. In the top-left corner, you’ll see two different options, i.e., “
If you double-tap the “Scene” tab the character will open up in a real-time environment where it’ll react to your movement and speech. Make sure that the webcam stays turned on throughout the process. Then, simply press the “Record” button and start recording the entire scene for your animation.
Part 2 Is Adobe Character Animator Easy to Use?
That’s how you can animate a character in Adobe character animator and create visually stunning animations. However, many beginners want to know if it’s easy to use Adobe character animator. The answer is Yes! With Character Animator, Adobe has developed a relatively easy-to-use interface that anyone can use easily.
Part 3 How to Rig a Simple Character | Adobe Animate Tutorial
Now, if you aspire to become a skilled graphic designer, here are a few tutorials that’ll help you get started with Adobe Character Animator and explore all its features.
1. Getting Started With Adobe Character Animator
This 15 minutes Adobe animate character tutorial by Okay Samurai is the best thing you’ll find on the Internet, especially if you are a complete beginner and want to learn different elements of the software.
2. Creating Illustrator Puppet
Adobe Character Animator lets users create both Illustrator and Photoshop puppets. If you want to become an expert in the former, this hour-long YouTube video is the best tutorial for you.
3. Getting Started With Advanced Rigging
This is another useful Adobe Animate character tutorial that’s exclusively designed to help editors understand the basics of creating a character such as “Surr”. For people who don’t know, it’s a free character in the Illustrator puppet library that you can directly import into your project.
4. Animation Workflow in Adobe Character Animator
If you are looking for an all-in-one tutorial to understand the entire workflow of working with the software, this tutorial by Okay Samurai is the best place to get started.
5. Adding an Illustrator Puppet on Live Footage
In this tutorial, you’ll understand how you can create an Illustrator puppet and add it to real-life footage, even when there’s camera movement.
6. Using the Walk Behavior in Adobe Character Animator
This tutorial will be the perfect knowledge hub. In this tutorial, you’ll learn about the basics of using the walk behavior in Adobe Character Animator and how to apply it to different characters to make it walk across the scene.
7. Creating and Implementing Replays
Replays are one of the most powerful (and one of the latest) features of Adobe Character Animator. With Replays, you can record a gesture/movement and apply a trigger to use it anytime you want throughout the animation. This tutorial will help you understand how to implement the replays in the software and use them to craft the perfect storyline.
8. Cartoon Workflow in Character Animator
Thanks to this amazing 1 hour 40 minutes long Adobe animate character tutorial, you’ll be able to get familiar with the complete workflow of pairing the software with other tools and compiling a cartoon animation at the end using Adobe After Effects.
9. Running an Animated Livestream
If you are a YouTuber or have your own Instagram brand, this will be a pretty exciting way to engage with your audience. Simply use the livestream feature, create a stunning 2D character, and interact with your audience in a more interactive manner.
10. Working With Adobe Fresco and Character Animator
This is also a useful Adobe character animate tutorial by David Werner that’ll help you understand how to use both Adobe Fresco and Character Animator together. After this tutorial, you’ll be able to import your Fresco drawings into Character Animator and customize them to create visually engaging animations.
Key Takeaways from This Episode
● Adobe Character Animator is among the most powerful animation tools you can use in 2021 to create stunning animations
● You should always start designing an animation in Character Animator by writing dedicated scripts.
● You can also pair Adobe Character Animator with other Adobe editing tools such as Illustrator, Photoshop, and Adobe Fresco
Whether you are a beginner or an experienced graphics designer, you can use Adobe Character Animator to animate 2D characters easily. But, if you are an absolute beginner, it might take a few weeks to get familiar with the software’s features/workflow.
Irrespective of your experience with the tool, this Adobe animate character tutorial will help you get started and edit visually appealing animated shorts.
In this article
01 [How Do I Animate a Character in Adobe Animation?](#Part 1)
02 [Is Adobe Character Animator Easy to Use?](#Part 2)
03 [How to Rig a Simple Character | Adobe Animate Tutorial](#Part 3)
04 [One-Stop Solution to Edit High-Quality Videos in Every Situation](#Part 4)
Part 1 How Do I Animate a Character in Adobe Animation?
1. Start With a Script
If you want to create an animation that engages the customers, you must always start your journey with a script. Like a short movie, even an animated sketch requires a script. It’ll set the tone for the entire animation and help you start sailing in the right direction.
If you have a full production team, the writers will take care of scriptwriting and you’ll just have to suggest a few changes in between. But, if you are working on your own, you’ll have to handle the script writing all-by-yourself. In any case, however, make sure to start by crafting a beautiful script with an amazing storyline.
2. Record the Voiceover
The next step in our Adobe Animate character tutorial is recording the voiceover for the video. Unless you are planning to create a GIF animation, you would need a dedicated voiceover for your animated video to make it more appealing.
Now, before you even begin with animating the character, recording the audio will help you clear out one task from the list. To record the voiceover, you can try different types of audio recording software and equipment.
3. Start Creating the Character
At this point in our Adobe animate character tutorial, we are ready to design the actual character itself. To do this, launch Adobe Character Animator on your system. On its home screen, you’ll see a tab containing different types of characters (along with their dedicated Photoshop and Illustrator versions). Click on any of these characters and it’ll automatically open in the editing panel of Adobe character animator.
Now, you can start with animating the character. In the top-left corner, you’ll see two different options, i.e., “
If you double-tap the “Scene” tab the character will open up in a real-time environment where it’ll react to your movement and speech. Make sure that the webcam stays turned on throughout the process. Then, simply press the “Record” button and start recording the entire scene for your animation.
Part 2 Is Adobe Character Animator Easy to Use?
That’s how you can animate a character in Adobe character animator and create visually stunning animations. However, many beginners want to know if it’s easy to use Adobe character animator. The answer is Yes! With Character Animator, Adobe has developed a relatively easy-to-use interface that anyone can use easily.
Part 3 How to Rig a Simple Character | Adobe Animate Tutorial
Now, if you aspire to become a skilled graphic designer, here are a few tutorials that’ll help you get started with Adobe Character Animator and explore all its features.
1. Getting Started With Adobe Character Animator
This 15 minutes Adobe animate character tutorial by Okay Samurai is the best thing you’ll find on the Internet, especially if you are a complete beginner and want to learn different elements of the software.
2. Creating Illustrator Puppet
Adobe Character Animator lets users create both Illustrator and Photoshop puppets. If you want to become an expert in the former, this hour-long YouTube video is the best tutorial for you.
3. Getting Started With Advanced Rigging
This is another useful Adobe Animate character tutorial that’s exclusively designed to help editors understand the basics of creating a character such as “Surr”. For people who don’t know, it’s a free character in the Illustrator puppet library that you can directly import into your project.
4. Animation Workflow in Adobe Character Animator
If you are looking for an all-in-one tutorial to understand the entire workflow of working with the software, this tutorial by Okay Samurai is the best place to get started.
5. Adding an Illustrator Puppet on Live Footage
In this tutorial, you’ll understand how you can create an Illustrator puppet and add it to real-life footage, even when there’s camera movement.
6. Using the Walk Behavior in Adobe Character Animator
This tutorial will be the perfect knowledge hub. In this tutorial, you’ll learn about the basics of using the walk behavior in Adobe Character Animator and how to apply it to different characters to make it walk across the scene.
7. Creating and Implementing Replays
Replays are one of the most powerful (and one of the latest) features of Adobe Character Animator. With Replays, you can record a gesture/movement and apply a trigger to use it anytime you want throughout the animation. This tutorial will help you understand how to implement the replays in the software and use them to craft the perfect storyline.
8. Cartoon Workflow in Character Animator
Thanks to this amazing 1 hour 40 minutes long Adobe animate character tutorial, you’ll be able to get familiar with the complete workflow of pairing the software with other tools and compiling a cartoon animation at the end using Adobe After Effects.
9. Running an Animated Livestream
If you are a YouTuber or have your own Instagram brand, this will be a pretty exciting way to engage with your audience. Simply use the livestream feature, create a stunning 2D character, and interact with your audience in a more interactive manner.
10. Working With Adobe Fresco and Character Animator
This is also a useful Adobe character animate tutorial by David Werner that’ll help you understand how to use both Adobe Fresco and Character Animator together. After this tutorial, you’ll be able to import your Fresco drawings into Character Animator and customize them to create visually engaging animations.
Key Takeaways from This Episode
● Adobe Character Animator is among the most powerful animation tools you can use in 2021 to create stunning animations
● You should always start designing an animation in Character Animator by writing dedicated scripts.
● You can also pair Adobe Character Animator with other Adobe editing tools such as Illustrator, Photoshop, and Adobe Fresco
Also read:
- Updated In 2024, Amazing Ideas About Creating Personalised WhatsApp GIF Sticker
- New 10 Cartoon Photo Converters
- New In 2024, Ways You Can Master to Make Claymation Videos
- Top 20+ Best Free GIF Makers Online to Quickly Edit GIF
- Updated 2024 Approved Best 15 Anime Fonts-Find Your Favorite One
- Updated 2024 Approved Best 8 Tools Tell You How to Make Slideshows for Instagram
- Updated How To Learn Cartoon Sketch Drawing— Pencil Sketch for Beginners
- New In 2024, 8 Free GIF Animators to Make Your Own GIF
- Updated 12 Best Stop Motion Studios Worth Recommending for 2024
- In 2024, Obtain and Create Animated GIF Icons
- 2024 Approved 5 Different Animation Styles A Simple but Comprehensive Guide
- Updated 2024 Approved 15 Top Video to GIF App on iPhone and Android
- New 2024 Approved 15 Types of Cartoon Drawing Styles with Examples
- Updated How to Draw Skeleton Cartoon – A Step by Step Guide for 2024
- 2024 Approved Ways to Make Sure You Get the Most up to Date Cartoon Character Design Tips
- New Animate Your Photo Online with These Awesome Tools
- Updated 2024 Approved Want to Make a Meme GIF? Heres How to Do
- In 2024, Turning Off Two Factor Authentication From Apple iPhone SE (2020)? 5 Tips You Must Know
- 8 Solutions to Solve YouTube App Crashing on Vivo Y200e 5G | Dr.fone
- 11 Ways to Fix it When My Honor Play 7T Wont Charge | Dr.fone
- In 2024, How to Reset a Oppo F25 Pro 5G Phone that is Locked?
- In 2024, How to Transfer Contacts from Sony Xperia 10 V To Phone | Dr.fone
- 3 Methods to Mirror Nubia Red Magic 8S Pro to Roku | Dr.fone
- Ways to stop parent tracking your Oppo A18 | Dr.fone
- How To Transfer WhatsApp From Apple iPhone SE (2020) to other iPhone devices? | Dr.fone
- In 2024, Why Your WhatsApp Live Location is Not Updating and How to Fix on your Vivo S17 Pro | Dr.fone
- How Can Vivo Y17sMirror Share to PC? | Dr.fone
- Updated The Top 10 AI Avatar Generators
- Sim Unlock Vivo V27e Phones without Code 2 Ways to Remove Android Sim Lock
- In 2024, Top 15 Augmented Reality Games Like Pokémon GO To Play On Oppo Find X7 Ultra | Dr.fone
- In 2024, How to Track Xiaomi Redmi 12 5G by Phone Number | Dr.fone
- Cellular Network Not Available for Voice Calls On Oppo Reno 10 Pro 5G | Dr.fone
- In 2024, How to Reset Apple ID and Apple Password On iPhone SE
- Title: In 2024, Tips for GIF to Animated PNG
- Author: Elon
- Created at : 2024-05-19 03:04:49
- Updated at : 2024-05-20 03:04:49
- Link: https://animation-videos.techidaily.com/in-2024-tips-for-gif-to-animated-png/
- License: This work is licensed under CC BY-NC-SA 4.0.
