
:max_bytes(150000):strip_icc():format(webp)/5-things-to-consider-before-buying-a-graphics-card-5225912-e71513f30b90445e8c0702a87db6fcdc.jpg)
In 2024, Tutorial Guide to Animate Pictures in Canva
Tutorial Guide to Animate Pictures in Canva
Versatile Video Editor - Wondershare Filmora
An easy yet powerful editor
Numerous effects to choose from
Detailed tutorials provided by the official channel
With the rapid rise of social media worldwide, animated posts (like GIFs) are becoming famous. They have become a replacement to other modes like JPEG and .Png
Famous designing tools like Canva introduced an animation feature in the light of its popularity. The feature allows you to step up your social media game and creates animated visuals in a blink! It is also efficient for both professional and amateur users.
Besides social media content, Canva is also useful to design birthday cards, event invites, inspirational quotes, and more! Let’s learn about how to animate pictures in Canva in detail.
In this article
01 What Canva Pictures Can Be Used For?
02 How to Animate Pictures in Canva?
03 Tips: Animate Pictures In Video
Part 1: What Canva Pictures Can Be Used For?
Be it for marketing campaigns or projects, Canva is the best tool for all designing work. It is a foolproof platform where you do not need prior designing experience. Canva is useful for

Social media/Instagram Posts: You can build your Instagram presence by creating posts through Canva. It has multiple templates and features to make alluring Instagram posts. It also has drag-and-drop free images to add customized designs to the template.
Facebook Covers: You can make Facebook covers on Canva by choosing a layout and adding other elements. You can include colors, fonts, and pictures on the cover. Canva has templates for all themes, moods, and styles!
Event Invites: Canva has hundreds of free layouts and libraries to create event invites. You can choose the appropriate template and incorporate party-oriented photos, icons, stickers, illustrations, and graphics. It also has a personalizing option to add personal pictures and artwork in the editor.
Inspirational Quotes: Canva allows you to curate inspirational quotes and dispense motivation in people. It has templates to modify the elements like font size, text size, borders, images, and more!
Collages: It helps create a collage where you can combine multiple pictures in one frame. Canva offers various grids with a capacity of 12 pictures and different sizes.
Part 2: How to Animate Pictures in Canva?
Canva helps you add instant animation in presentations, social media posts, and more. To know how to animate images in Canva, follow the below steps:

Step 1: Add Static Elements
Start by creating an image through static elements. To make the design attractive, you can add sample texts, illustrations, doodles, and other entities.
Try to stimulate your creativity and come up with a layout beforehand. If possible, sketch on paper and replicate the same.
Step 2: Animate Your Design
Take a final glance at the layout. Make sure it’s perfect. Once all the elements are placed as per your design, it’s time to animate them. For that:
- Click on the white background page
- Go to the “Toolbar” section
- Select the “Animate” button
Step 3: Select Page Animation Style
Canva offers six animation styles, where five are for free users, and one is for pro users. To access the five animation styles, follow these steps.
- Press the “Animate” Button
- Select “Page Animations”
- There you will find options like Block, Pan, Fade, Rise, and Tumble
- Select the style as per your design
Step 4: Preview and Download
After selecting a page animation style, it will preview the effect. If you find it good, move on to downloading the GIF. Here’s how to do so
- Go to the “Toolbar” option (present on your upper right hand)
- Choose GIF as the file type
- Check the page number and verify if it’s correct
- Press the “Done” button
Step 5: Final GIF
After clicking on the “Done” button, your GIF will be downloaded. You will be able to see a display for five seconds. If you want to edit the image after this, click on the time button (near the “Animate” button).
So, that was all about how to animate a photo in Canva.
Drawbacks of Canva
Despite efficient features and easy interface, there are certain areas where Canva lacks. This includes
- It does not have any local file storage.
- As too many people use Canva, your template may look the same as others.
- Some of its best features are not free to access.
- The mobile app version lacks certain elements and features.
Out of all these drawbacks, repetitions of templates are a big issue. That’s because everyone wants their posts to look unique and irreplaceable. However, common Canva templates may prevent that from happening.
Fortunately, there are ways to combat such issues. Let’s learn about them in the next section.
Tips: Animate Pictures In Video
You can also animate pictures in the video to make them more lively. For that, you can use Wondershare Filmora Pro Video Editor. It’s also efficient if you don’t know how to animate a picture in Canva:
Wondershare Filmora Video Editor
Filmora by Wondershare is a video editing software that helps you build custom animations easily. It has auto features to make epic stories and posts.
Wondershare Filmora
Get started easily with Filmora’s powerful performance, intuitive interface, and countless effects!
Try It Free Try It Free Try It Free Learn More about Filmora>

Its drag and drop effect makes designing simple and quick. Due to its outstanding attributes, options, and styles, Filmora has 77+ million happy users!
It’s a power-packed integration of functionality, performance, and more! In fact, it resolves the repeated template issue of Canva. The software has top-notch functions and innovative filters that add authenticity to the designs.
Till now, you learned about how to animate a picture on Canva. Now, let’s comprehend the right way to use Filmora for animating and adding images in the video.
Before using, make sure to update the software to its latest version. Follow separate methods for both Windows and Mac.
For Win
Step 1: Adding Image to Video Track
With Filmora, adding images to video is a matter of seconds! Start by:
- Identify the position where you want to add the image and place the Playhead there.
- Right-click on the picture from the media library. Click on the “Insert” option. Your image will be added. Select the “Append” option, if you want to add an image at the video end.

Note: How to Remove Black Bars around the Image?
- Go to “Settings” from the File section.
- Click on the “Editing” tab and select “Photo Placement.”
- Choose from the “Crop to Fit” or “Pan To Zoom” option. The black bars will be removed.
To add the image in between the video clip, split them. Now, add the image between the split parts.
Step 2: Add Images as Overlays
To add images as overlays, drag the image to a video track above the main track. The main track consists of your video.
Track 1 (or the track with a video clip) is the base of your video. If you add anything else, it will be displayed above this track as video track 2, 3, and so on. Overall, you can add 100 video tracks.
Step 3: Edit Your Image
If you know how to animate an image in Canva, editing images on Filmora is even easier. You can try the following methods:
Animate Your Images
- To add animation presets to the image, click on the image twice.
- Go to the “Animation Tab” and look for an animation preset.
- Drag the presets to the image for its effect

Make Image Color Adjustments
- Double-click on the image
- Go to the “Color” tab and then the “Color” section
- Customize the temperature, saturation, brightness, etc., as per your need.
- Press Ok.
Change Image Duration
You can increase the image duration to more than the default timing of 5 seconds. For that:
- Click on the image and select the “Duration” option.
- Go to the “Duration Setting” panel.
- Add the new duration timing.

Adjust Position, Rotate/Flip, and Opacity
- You can resize the image position through the circles and squares at the image edges.
- To flip or rotate the image, double-click on the picture. From the “Image Panel,” go to “Transform” and then click on “Rotate.” You can choose either “Horizontal Flip” or “Vertical Flip” to flip the images.
- Double-click on the image and click on the “Composting” option to add opacity. You can choose the blending mode or adjust the “Opacity” accordingly.

For Mac
Filmora for Mac comes with a drag and drop feature to add transitions, animated titles, and effects. You can start a new project from scratch by clicking on “New Project”. The entire process is the same as that for Windows users.
To apply animation in the images, use the motion effects option. For that,
- Click on the Image
- Go to Motion Tab
- Select a motion effect
- Double-click to apply the effect

Conclusion
So that’s how to animate photos in Canva. Hopefully, our steps will help you revamp your posts like a pro! If not Canva, you can use its alternative Filmora. It’s equally prominent, user-friendly, and feature-rich.
Versatile Video Editor - Wondershare Filmora
An easy yet powerful editor
Numerous effects to choose from
Detailed tutorials provided by the official channel
With the rapid rise of social media worldwide, animated posts (like GIFs) are becoming famous. They have become a replacement to other modes like JPEG and .Png
Famous designing tools like Canva introduced an animation feature in the light of its popularity. The feature allows you to step up your social media game and creates animated visuals in a blink! It is also efficient for both professional and amateur users.
Besides social media content, Canva is also useful to design birthday cards, event invites, inspirational quotes, and more! Let’s learn about how to animate pictures in Canva in detail.
In this article
01 What Canva Pictures Can Be Used For?
02 How to Animate Pictures in Canva?
03 Tips: Animate Pictures In Video
Part 1: What Canva Pictures Can Be Used For?
Be it for marketing campaigns or projects, Canva is the best tool for all designing work. It is a foolproof platform where you do not need prior designing experience. Canva is useful for
Social media/Instagram Posts: You can build your Instagram presence by creating posts through Canva. It has multiple templates and features to make alluring Instagram posts. It also has drag-and-drop free images to add customized designs to the template.
Facebook Covers: You can make Facebook covers on Canva by choosing a layout and adding other elements. You can include colors, fonts, and pictures on the cover. Canva has templates for all themes, moods, and styles!
Event Invites: Canva has hundreds of free layouts and libraries to create event invites. You can choose the appropriate template and incorporate party-oriented photos, icons, stickers, illustrations, and graphics. It also has a personalizing option to add personal pictures and artwork in the editor.
Inspirational Quotes: Canva allows you to curate inspirational quotes and dispense motivation in people. It has templates to modify the elements like font size, text size, borders, images, and more!
Collages: It helps create a collage where you can combine multiple pictures in one frame. Canva offers various grids with a capacity of 12 pictures and different sizes.
Part 2: How to Animate Pictures in Canva?
Canva helps you add instant animation in presentations, social media posts, and more. To know how to animate images in Canva, follow the below steps:
Step 1: Add Static Elements
Start by creating an image through static elements. To make the design attractive, you can add sample texts, illustrations, doodles, and other entities.
Try to stimulate your creativity and come up with a layout beforehand. If possible, sketch on paper and replicate the same.
Step 2: Animate Your Design
Take a final glance at the layout. Make sure it’s perfect. Once all the elements are placed as per your design, it’s time to animate them. For that:
- Click on the white background page
- Go to the “Toolbar” section
- Select the “Animate” button
Step 3: Select Page Animation Style
Canva offers six animation styles, where five are for free users, and one is for pro users. To access the five animation styles, follow these steps.
- Press the “Animate” Button
- Select “Page Animations”
- There you will find options like Block, Pan, Fade, Rise, and Tumble
- Select the style as per your design
Step 4: Preview and Download
After selecting a page animation style, it will preview the effect. If you find it good, move on to downloading the GIF. Here’s how to do so
- Go to the “Toolbar” option (present on your upper right hand)
- Choose GIF as the file type
- Check the page number and verify if it’s correct
- Press the “Done” button
Step 5: Final GIF
After clicking on the “Done” button, your GIF will be downloaded. You will be able to see a display for five seconds. If you want to edit the image after this, click on the time button (near the “Animate” button).
So, that was all about how to animate a photo in Canva.
Drawbacks of Canva
Despite efficient features and easy interface, there are certain areas where Canva lacks. This includes
- It does not have any local file storage.
- As too many people use Canva, your template may look the same as others.
- Some of its best features are not free to access.
- The mobile app version lacks certain elements and features.
Out of all these drawbacks, repetitions of templates are a big issue. That’s because everyone wants their posts to look unique and irreplaceable. However, common Canva templates may prevent that from happening.
Fortunately, there are ways to combat such issues. Let’s learn about them in the next section.
Tips: Animate Pictures In Video
You can also animate pictures in the video to make them more lively. For that, you can use Wondershare Filmora Pro Video Editor. It’s also efficient if you don’t know how to animate a picture in Canva:
Wondershare Filmora Video Editor
Filmora by Wondershare is a video editing software that helps you build custom animations easily. It has auto features to make epic stories and posts.
Wondershare Filmora
Get started easily with Filmora’s powerful performance, intuitive interface, and countless effects!
Try It Free Try It Free Try It Free Learn More about Filmora>
Its drag and drop effect makes designing simple and quick. Due to its outstanding attributes, options, and styles, Filmora has 77+ million happy users!
It’s a power-packed integration of functionality, performance, and more! In fact, it resolves the repeated template issue of Canva. The software has top-notch functions and innovative filters that add authenticity to the designs.
Till now, you learned about how to animate a picture on Canva. Now, let’s comprehend the right way to use Filmora for animating and adding images in the video.
Before using, make sure to update the software to its latest version. Follow separate methods for both Windows and Mac.
For Win
Step 1: Adding Image to Video Track
With Filmora, adding images to video is a matter of seconds! Start by:
- Identify the position where you want to add the image and place the Playhead there.
- Right-click on the picture from the media library. Click on the “Insert” option. Your image will be added. Select the “Append” option, if you want to add an image at the video end.
Note: How to Remove Black Bars around the Image?
- Go to “Settings” from the File section.
- Click on the “Editing” tab and select “Photo Placement.”
- Choose from the “Crop to Fit” or “Pan To Zoom” option. The black bars will be removed.
To add the image in between the video clip, split them. Now, add the image between the split parts.
Step 2: Add Images as Overlays
To add images as overlays, drag the image to a video track above the main track. The main track consists of your video.
Track 1 (or the track with a video clip) is the base of your video. If you add anything else, it will be displayed above this track as video track 2, 3, and so on. Overall, you can add 100 video tracks.
Step 3: Edit Your Image
If you know how to animate an image in Canva, editing images on Filmora is even easier. You can try the following methods:
Animate Your Images
- To add animation presets to the image, click on the image twice.
- Go to the “Animation Tab” and look for an animation preset.
- Drag the presets to the image for its effect
Make Image Color Adjustments
- Double-click on the image
- Go to the “Color” tab and then the “Color” section
- Customize the temperature, saturation, brightness, etc., as per your need.
- Press Ok.
Change Image Duration
You can increase the image duration to more than the default timing of 5 seconds. For that:
- Click on the image and select the “Duration” option.
- Go to the “Duration Setting” panel.
- Add the new duration timing.
Adjust Position, Rotate/Flip, and Opacity
- You can resize the image position through the circles and squares at the image edges.
- To flip or rotate the image, double-click on the picture. From the “Image Panel,” go to “Transform” and then click on “Rotate.” You can choose either “Horizontal Flip” or “Vertical Flip” to flip the images.
- Double-click on the image and click on the “Composting” option to add opacity. You can choose the blending mode or adjust the “Opacity” accordingly.
For Mac
Filmora for Mac comes with a drag and drop feature to add transitions, animated titles, and effects. You can start a new project from scratch by clicking on “New Project”. The entire process is the same as that for Windows users.
To apply animation in the images, use the motion effects option. For that,
- Click on the Image
- Go to Motion Tab
- Select a motion effect
- Double-click to apply the effect
Conclusion
So that’s how to animate photos in Canva. Hopefully, our steps will help you revamp your posts like a pro! If not Canva, you can use its alternative Filmora. It’s equally prominent, user-friendly, and feature-rich.
Versatile Video Editor - Wondershare Filmora
An easy yet powerful editor
Numerous effects to choose from
Detailed tutorials provided by the official channel
Learn Disney Cartoon Drawing to See Disney Magic Moments
Learn Disney Cartoon Drawing to See More Disney Magic Moments
An easy yet powerful editor
Numerous effects to choose from
Detailed tutorials provided by the official channel
How to Draw a Disney Caricature

Disney-Inspired Ipad Drawing Class for Beginners
In this article
01 [How to Draw a Disney Caricature](#Part 1)
02 [Disney-Inspired Ipad Drawing Class for Beginners](#Part 2)
Part 1 How to Draw a Disney Caricature
Below is the step-by-step guide to making a Disney cartoon drawing with colors from the comfort of your home:
01How to Draw Mickey

Unarguably, Mickey Mouse is one of the most famous anime characters globally. This character was created in 1928 and is a famous Disney cartoon drawing by animators. Here are straightforward steps to help you draw a Mickey Mouse:
Step 1: Sketch the general but carefully observed features of Mickey Mouse, including the position of ears, body shape (reverse C shape), body proportions including eyes, limbs, and arms, length of arms, button on his pants, and angle on the hands.
Step 2: Take your pencil and paper, and using gentle and weak strokes, make a simple sketch of the head, neck, belly, and limbs.

Step 3: Draw contours of the mouth, ears, and nose.

Step 4: Specify the face features like a smiling opened mouth, tip of the nose, and eyes.

Step 5: Draw the hands carefully, observing the length of both arms and their proportion to the size of the character’s head.

Step 6: Sketch the outline contours of the shoes, the legs, and the pants.

Step 7: Sketch the final outline contour of the body, then erase excess lines where necessary. Add the two buttons on Mickey mouse pants.

Step 8: Draw his nose’s tail, tongue, and ellipse.

Step 9: First, use a 2B or 4B or any soft black color pencil to color the black parts.

Step 10: Depending on your preference, you can color with water, acrylic paints, or pastels.

02How to Draw Captain America
Follow these simple steps to make a Disney cartoon drawing of Captain America:
Step 1: Draw the head and chest
Draw the outlines of his masked face using smooth lines. Draw a curved line across his face to divide his face from his mask. Draw a large letter A and add tiny wings beside it on his forehead. Draw his mouth, eyes, and nose. Use curved lines to indicate his shoulder and chest, then draw a star on his chest.

Step 2: Draw his arm and waist
Draw a curved line on the shoulder to represent the bicep, then draw his gloved arm curled to form a fist. Draw curved lines beneath the chest to represent his muscular weight, then draw the pouches on his belt and use more curved lines to draw his waist.

Step 3: Draw his legs
Here, we shall portray Captain America in action. Use curved lines to show his extended right leg with boots. The left leg should appear more petite.

Step 4: Draw his shield
Against his right arm, carefully draw a flattened circular shape. You can achieve this by drawing concentric circles with a large star in the middle. Draw his arm poking out from behind his shield.

Step 5: Include the final details
Add some vertical lines across his waist and some details on his boots.

Step 6: Colour Captain America
Using colors of the American flag, color your drawing with red, white, and blue colors.

03How to Draw Stitch
Stitch is a bulletproof and fireproof alien from the Lilo and Stitch animations. Here’s how you can draw Stitch:
Step 1: Draw a circle that would form Stitch’s head

Step 2: Using a long curved line, draw an irregular peanut shape beneath the head to represent its body.

Step 3: To form its light underbelly, enclose a small shape parallel to the outline of Stitch’s body using a long curved line. On the chest region, draw a series of small “V” shapes to indicate the presence of fur.

Step 4: Draw Stitch’s arm using curved lines for the upper arm and another pair for the lower arm. Draw his bent hands and fingers using short lines. At the tip of its fingers, draw small pointed triangles to represent its claws.

Step 5: Erase the guidelines from Stitch’s arm

Step 6: Draw Stitch’s outstretched arm using a pair of curved lines and small “C” shaped lines to represent the fingers. Use short lines to connect the fingers. Draw small “V” shapes at the tip of the fingers for the triangular claws.

Step 7: Use a pair of curved lines to sketch each leg, then enclose the toes using C-shaped lines

Step 8: Sketch the ears using long curved lines to indicate the base and folds. Sketch the fur on top of Stitch’s head using a series of curved lines.

Step 9: Draw a big circle for the nose and use curved lines to indicate the nostrils. For the eyes, draw irregular rounded shapes, one within the other. Sketch too long curved lines to show the mouth and small blonde triangles for the teeth. Above the eyes and nose, draw curved lines.

Step 10: Use different shades of blue to colour Stitch.

Part 2 Disney-Inspired Ipad Drawing Class for Beginner
Here is a list of classes for beginners interested in drawing Disney characters.
01Dive into the world of Animation with a Disney-Inspired Ipad Drawing Course

This Disney-inspired lesson focuses on real-life scenarios that are beautiful and adorable. Create your everyday settings by sketching backgrounds and outfitting figures.
It will assist you in developing a straightforward approach to drawing cartoon characters through experimentation and time. Follow along and sketch characters, then make your new character.
02Drawing Faces: A Beginner‘s Guide

Ira Marcks, a graphic novelist, will teach you everything you need to know about drawing faces. Are you completely new when it comes to drawing? No worries; follow along with Ira’s bite-sized lectures, and you’ll be ready to delve into a class project by the end of the course.
Do you prefer to set your speed and work at it? If yes, then extend your learning beyond the classroom, download Ira’s Drawing Faces Book.
03Disney Inspired Drawings: Faces and Expressions

Learners will look at sketching a cartoon image of themselves or people they know while exploring the specific traits of Disney-style characters in this one-time live drawing lesson.
Learners will collaborate with the teacher while working on their art projects. This is a technique class, so the focus will be on the process and working towards a finished goal. Nevertheless, a piece may get completed outside of class.
This program is for students who have a basic understanding of drawing and proportion, are open to artistic growth, and are comfortable appearing on camera and sharing their work in a small group setting. All to help each other, and the classroom environment will support all students.
04Free Art Lessons By The Parks’ Imagineers
This lesson will teach how to create your theme park, design virtual landscapes, and even sketch unique costumes!
You’ll also learn how to draw characters from Frozen 2 like Anna and Elsa and classics like Mickey Mouse, Daisy Duck, Pluto, and others.
Your class experience can be enjoyable when using an easy-to-use tool like Wondershare Filmora.
Wondershare Filmora Video Editor is a robust and easy-to-use video editor for users of all skill levels, from beginner to advanced. Its advanced tools, adjustable keyframing, smoothing effects, and motion blur will considerably assist you in creating a high-quality animation video. Furthermore, the auto color correction and audio mixing will elevate your 2D animation film to new heights. Filmora is the best solution if you want more productivity, control, and customization options for your Disney cartoon drawings and animation.
For Win 7 or later (64-bit)
For macOS 10.12 or later
● Ending Thoughts →
● How to make a Disney cartoon drawing
● A step-by-step guide to drawing your favorite Disney cartoon drawing with colors
● How to use Filmora to create animations
● Different Disney-inspired beginner classes for iPad users.
How to Draw a Disney Caricature
Disney-Inspired Ipad Drawing Class for Beginners
In this article
01 [How to Draw a Disney Caricature](#Part 1)
02 [Disney-Inspired Ipad Drawing Class for Beginners](#Part 2)
Part 1 How to Draw a Disney Caricature
Below is the step-by-step guide to making a Disney cartoon drawing with colors from the comfort of your home:
01How to Draw Mickey
Unarguably, Mickey Mouse is one of the most famous anime characters globally. This character was created in 1928 and is a famous Disney cartoon drawing by animators. Here are straightforward steps to help you draw a Mickey Mouse:
Step 1: Sketch the general but carefully observed features of Mickey Mouse, including the position of ears, body shape (reverse C shape), body proportions including eyes, limbs, and arms, length of arms, button on his pants, and angle on the hands.
Step 2: Take your pencil and paper, and using gentle and weak strokes, make a simple sketch of the head, neck, belly, and limbs.
Step 3: Draw contours of the mouth, ears, and nose.
Step 4: Specify the face features like a smiling opened mouth, tip of the nose, and eyes.
Step 5: Draw the hands carefully, observing the length of both arms and their proportion to the size of the character’s head.
Step 6: Sketch the outline contours of the shoes, the legs, and the pants.
Step 7: Sketch the final outline contour of the body, then erase excess lines where necessary. Add the two buttons on Mickey mouse pants.
Step 8: Draw his nose’s tail, tongue, and ellipse.
Step 9: First, use a 2B or 4B or any soft black color pencil to color the black parts.
Step 10: Depending on your preference, you can color with water, acrylic paints, or pastels.
02How to Draw Captain America
Follow these simple steps to make a Disney cartoon drawing of Captain America:
Step 1: Draw the head and chest
Draw the outlines of his masked face using smooth lines. Draw a curved line across his face to divide his face from his mask. Draw a large letter A and add tiny wings beside it on his forehead. Draw his mouth, eyes, and nose. Use curved lines to indicate his shoulder and chest, then draw a star on his chest.
Step 2: Draw his arm and waist
Draw a curved line on the shoulder to represent the bicep, then draw his gloved arm curled to form a fist. Draw curved lines beneath the chest to represent his muscular weight, then draw the pouches on his belt and use more curved lines to draw his waist.
Step 3: Draw his legs
Here, we shall portray Captain America in action. Use curved lines to show his extended right leg with boots. The left leg should appear more petite.
Step 4: Draw his shield
Against his right arm, carefully draw a flattened circular shape. You can achieve this by drawing concentric circles with a large star in the middle. Draw his arm poking out from behind his shield.
Step 5: Include the final details
Add some vertical lines across his waist and some details on his boots.
Step 6: Colour Captain America
Using colors of the American flag, color your drawing with red, white, and blue colors.
03How to Draw Stitch
Stitch is a bulletproof and fireproof alien from the Lilo and Stitch animations. Here’s how you can draw Stitch:
Step 1: Draw a circle that would form Stitch’s head
Step 2: Using a long curved line, draw an irregular peanut shape beneath the head to represent its body.
Step 3: To form its light underbelly, enclose a small shape parallel to the outline of Stitch’s body using a long curved line. On the chest region, draw a series of small “V” shapes to indicate the presence of fur.
Step 4: Draw Stitch’s arm using curved lines for the upper arm and another pair for the lower arm. Draw his bent hands and fingers using short lines. At the tip of its fingers, draw small pointed triangles to represent its claws.
Step 5: Erase the guidelines from Stitch’s arm
Step 6: Draw Stitch’s outstretched arm using a pair of curved lines and small “C” shaped lines to represent the fingers. Use short lines to connect the fingers. Draw small “V” shapes at the tip of the fingers for the triangular claws.
Step 7: Use a pair of curved lines to sketch each leg, then enclose the toes using C-shaped lines
Step 8: Sketch the ears using long curved lines to indicate the base and folds. Sketch the fur on top of Stitch’s head using a series of curved lines.
Step 9: Draw a big circle for the nose and use curved lines to indicate the nostrils. For the eyes, draw irregular rounded shapes, one within the other. Sketch too long curved lines to show the mouth and small blonde triangles for the teeth. Above the eyes and nose, draw curved lines.
Step 10: Use different shades of blue to colour Stitch.
Part 2 Disney-Inspired Ipad Drawing Class for Beginner
Here is a list of classes for beginners interested in drawing Disney characters.
01Dive into the world of Animation with a Disney-Inspired Ipad Drawing Course
This Disney-inspired lesson focuses on real-life scenarios that are beautiful and adorable. Create your everyday settings by sketching backgrounds and outfitting figures.
It will assist you in developing a straightforward approach to drawing cartoon characters through experimentation and time. Follow along and sketch characters, then make your new character.
02Drawing Faces: A Beginner‘s Guide
Ira Marcks, a graphic novelist, will teach you everything you need to know about drawing faces. Are you completely new when it comes to drawing? No worries; follow along with Ira’s bite-sized lectures, and you’ll be ready to delve into a class project by the end of the course.
Do you prefer to set your speed and work at it? If yes, then extend your learning beyond the classroom, download Ira’s Drawing Faces Book.
03Disney Inspired Drawings: Faces and Expressions
Learners will look at sketching a cartoon image of themselves or people they know while exploring the specific traits of Disney-style characters in this one-time live drawing lesson.
Learners will collaborate with the teacher while working on their art projects. This is a technique class, so the focus will be on the process and working towards a finished goal. Nevertheless, a piece may get completed outside of class.
This program is for students who have a basic understanding of drawing and proportion, are open to artistic growth, and are comfortable appearing on camera and sharing their work in a small group setting. All to help each other, and the classroom environment will support all students.
04Free Art Lessons By The Parks’ Imagineers
This lesson will teach how to create your theme park, design virtual landscapes, and even sketch unique costumes!
You’ll also learn how to draw characters from Frozen 2 like Anna and Elsa and classics like Mickey Mouse, Daisy Duck, Pluto, and others.
Your class experience can be enjoyable when using an easy-to-use tool like Wondershare Filmora.
Wondershare Filmora Video Editor is a robust and easy-to-use video editor for users of all skill levels, from beginner to advanced. Its advanced tools, adjustable keyframing, smoothing effects, and motion blur will considerably assist you in creating a high-quality animation video. Furthermore, the auto color correction and audio mixing will elevate your 2D animation film to new heights. Filmora is the best solution if you want more productivity, control, and customization options for your Disney cartoon drawings and animation.
For Win 7 or later (64-bit)
For macOS 10.12 or later
● Ending Thoughts →
● How to make a Disney cartoon drawing
● A step-by-step guide to drawing your favorite Disney cartoon drawing with colors
● How to use Filmora to create animations
● Different Disney-inspired beginner classes for iPad users.
How to Create a YouTube Intro Animation Like a Pro
How to Create a YouTube Intro Animation like a Pro
An easy yet powerful editor
Numerous effects to choose from
Detailed tutorials provided by the official channel
YouTube video intro animation is the short introductory clips and plays at the beginning of a YouTube video. YouTube intro videos as in almost everywhere, most times probably without giving them a second chance or understanding what their purpose is. There is no difference in YouTube videos, as without a proper setup, even if the content is excellent, your audience is not likely to hang around.
There is some free animation intro for YouTube that you can choose from to create your own YouTube intro. In this article, we will show a comprehensive guide on how to get an intro animation template free download and create your own free YouTube animation intro like a professional. So, let’s move on to explore how is the YouTube intro animation download process works using YouTube Intro Animation Makers through this article.
In this article
01 [What is YouTube Intro Animation?](#Part 1)
02 [How does YouTube Intro Animation Maker works?](#Part 2)
03 [5 of YouTube Intro Animation examples (2022)](#Part 3)
04 [How to Create a YouTube Intro Animation FAST](#Part 4)
Part 1 What is YouTube Intro Animation?
An animation video for YouTube intro is a short animated clip usually 5 to seconds in length and plays before the main YouTube video content. The intro YouTube animation is the primary step to creating your online persona and branding your content on YouTube. You can get YouTube intro animation for free online and include them in your YouTube content. A YouTube intro easily and quickly provides viewers insight into what they should expect from the channel. It is used to familiarize the viewer with the channel’s theme, feel, and look, which gives them context before reaching the main content.
Intro animation YouTube is sometimes called video bumpers, as they catch viewers’ attention and help reinforce your brand. In the general video, intros boost the video quality. You can also get a good video intro from intro animation free download websites for your YouTube content.
Part 2 How do YouTube Intro Animation Maker works?
You can create compelling, engaging, and best intro animation on YouTube by using free animation intro for YouTube or creating a YouTube intro animation by yourself. You don’t need be a pro in video editing or a creator to make animated video intros for your YouTube channel if you have the best intro animation software to create intro videos like a professional. Here are some benefits of YouTube intro animation maker and how it works:
● A YouTube intro animation maker has a built-in editor in your browser
● A YouTube intro animation maker is affordable, fast, and easy to use
● A YouTube intro animation maker can broadcast-quality logo animation and intros
● A YouTube intro animation maker has a wide variety of templates to make your YouTube animation intro
Using a YouTube intro animation maker, you are ready to create unskippable YouTube intros using the most versatile tool to turn your viewers into lifelong channel subscribers.
Part 3 5 of YouTube Intro Animation examples (2022)
To be successful on YouTube, capture and retain your viewers’ attention and increase your conversions. The best method to achieve this is by using an excellent YouTube animated intro to create a lasting impression to make your video worth watching. You can also get Professional YouTube animated intro from intro animation download websites. This action will look at 5 make YouTube intro animation examples and ideas from where you can draw your inspiration in 2022.
01Ted Talk
Ted Talk, free fire intro animation, is a perfect example of a beautiful and captured sequence that helps to tell the audience what the brand is all about and their ideas and worth spreading. The good news about this intro is that you don’t need to be a professional, hire an animator, or invest in any flashy or expensive animation to show your brand on YouTube.
To achieve this intro, all you require is some intro animation in After Effects template free that can work for your brand so that you’ll be able to retain your audience and make them wanting to come back for more.
02Jazza
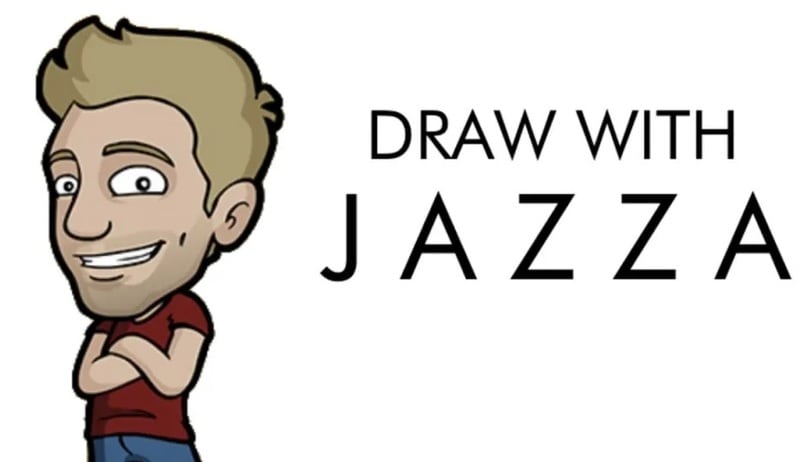
Jazza is a perfect example of free intro animation templates that you can use all over again to showcase your brand. The main idea for making a gaming intro animation video free download is to bring about an attractive, eye-capturing video intro through it.
This intro communicates a passion for teaching people to paint, animate, and draw. This same template can also create a vlog animation intro for the Jazza language lesson website, as it is a tremendous sequential presentation that represents Jazza mission.
03Salma Jafra
Salma Jafra Video intro tells a short story about the video’s main takeaways and includes an 8 seconds vlog intro animation sequence. Everything, including a brand color, is purple, which helps the audience recognize our videos on YouTube.
In addition to the free animation for YouTube intro, she plugged in her content to the end of the video or outro to generate enough traffic and adhere to SEO guidelines to ensure that the targeted audience finds the videos.
04SciShow
SciShow enables viewers to understand the brand and the kind of free YouTube intro animation video. The main trick of the video is to instantly grab viewers’ attention and convince them that the video is for them.
This intro animation video free download is a perfect example of how you can introduce your theme, tone, and brand name into your YouTube animation intro video download. This type of intro allows viewers to know what to expect quickly, and superb animation and design show off the value of production. Examples of a brand that can benefit from this type of YouTube animation intro download template is sleep studies.
05”Pump Red” Cinema Template

“Pump Red” Cinema Template is perfect for capturing reviewers’ imagination with an eye-catching, captivating, and intelligent video intro. By following the examples in this Minecraft animation intro template, you are more likely to retain your visitors or viewers from the moment they hit the play button on your YouTube video by using a catching soundtrack, on-brand messaging, and exciting visuals.
Part 4 How to Create a YouTube Intro Animation FAST
Whether you are using any streaming channel, YouTube, or selling videos on any e-commerce website, making animation for YouTube intro plays a vital role in promoting your brand. With it, creating an introduction may not seem as complicated as it sounds.
The section explains in detail how to make a YouTube intro animation free with the Wondershare Filmora Video Editor video editor from animated intro download templates or create a custom intro from scratch even if there is no existing footage or image to begin with. The following method will guide you through the process, and then you can keep your video saved for reuse in all creations to maintain consistency and give your brand a unique identity:
Wondershare Filmora
Get started easily with Filmora’s powerful performance, intuitive interface, and countless effects!
Try It Free Try It Free Try It Free Learn More >
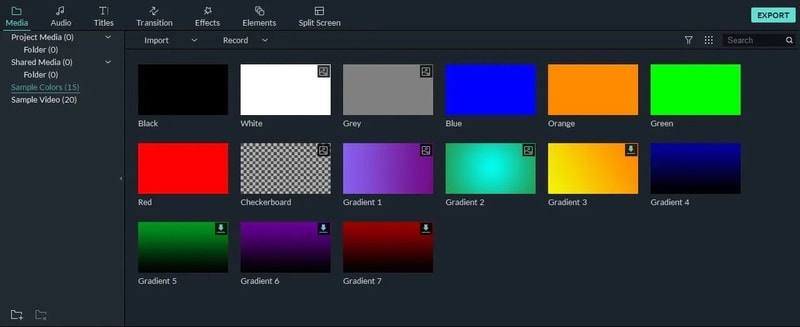
01Step Launch Intro Animation Software
Launch Wondershare Filmora Video Editor editor, add intro background to Filmora by going to the media tab at the top and selecting any sample colors category from the left pane. All the solid and gradient colors in the media library are available at the right, then over the mouse to the color title you want to use as a background and click on the + icon in the middle to add it to the timeline.
02Step Add Different effects
Add sound effects or audio to YouTube animated intro to make it more recognizable. In Wondershare Filmora Video Editor , visit the built-in audio library by double-clicking the audio thumbnail from the library and listening to the soundtrack. Repeat the process to find the perfect sound effects or background music for your video intro. D-and-drop the audio to the video.

03Step Adding Branding Element
In the animated video intro, add the company name, branding element, and channel name to create brand awareness by clicking on the title tab and hovering the mouse to the text you want to use. Then drag and drop it to track above the video.
Go to the Effects tab and select category from the top left pane. Click and drag your preferred effects from the library effects to the timeline.
04Step Export
Once you finish creating your animated video intro with all the required ingredients, go to Export at the top center area of the interface to export the animated video intro, and once done, share it on social media.
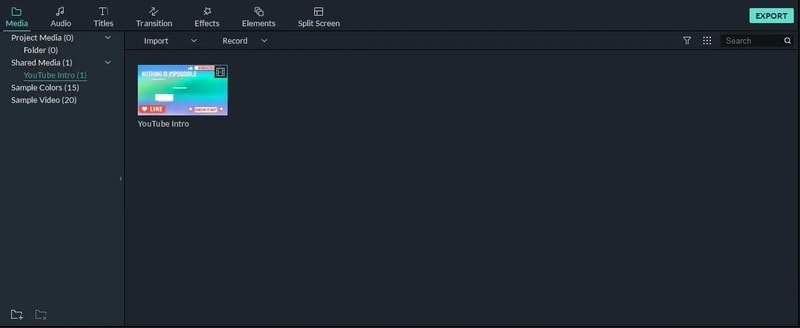
To make YouTube intro animation templates free download with Filmora templates, follow the steps listed below:
Step Select Effects
Log onto the Filmora effects page on filmstock with the same wsid used on Filmora and select the effect you want
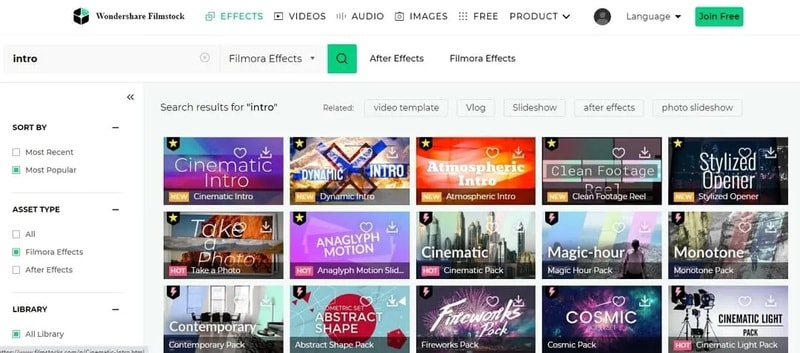
Step Select template
Select the preferred intro templates by clicking on the download now and following the instructions on the screen to attend a download template. After downloading, see in red cycle under the transition, titles, and filter based on the element included in the effect part. Add this downloaded title or transition to the animated intro video.
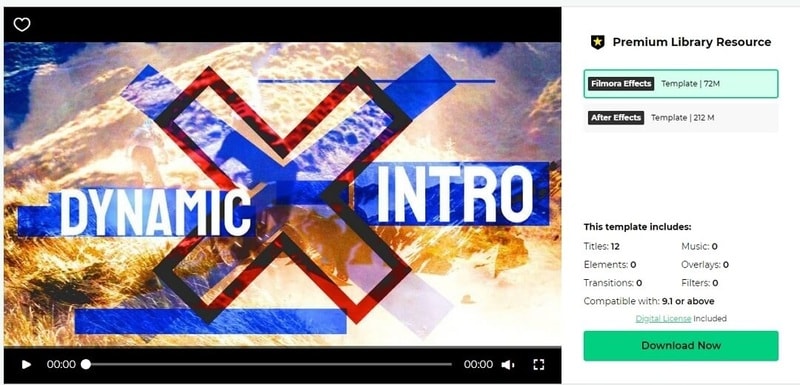
Step Finalization
Delete your animated video intro from the templates that you selected.
● Key Takeaways from This Episode →
● Introduction about what is YouTube Intro?
● How Intro Animation Maker works with examples.
● The process to develop your own YouTube intro animation for free with Wondershare Filmora Video Editor .
YouTube video intro animation is the short introductory clips and plays at the beginning of a YouTube video. YouTube intro videos as in almost everywhere, most times probably without giving them a second chance or understanding what their purpose is. There is no difference in YouTube videos, as without a proper setup, even if the content is excellent, your audience is not likely to hang around.
There is some free animation intro for YouTube that you can choose from to create your own YouTube intro. In this article, we will show a comprehensive guide on how to get an intro animation template free download and create your own free YouTube animation intro like a professional. So, let’s move on to explore how is the YouTube intro animation download process works using YouTube Intro Animation Makers through this article.
In this article
01 [What is YouTube Intro Animation?](#Part 1)
02 [How does YouTube Intro Animation Maker works?](#Part 2)
03 [5 of YouTube Intro Animation examples (2022)](#Part 3)
04 [How to Create a YouTube Intro Animation FAST](#Part 4)
Part 1 What is YouTube Intro Animation?
An animation video for YouTube intro is a short animated clip usually 5 to seconds in length and plays before the main YouTube video content. The intro YouTube animation is the primary step to creating your online persona and branding your content on YouTube. You can get YouTube intro animation for free online and include them in your YouTube content. A YouTube intro easily and quickly provides viewers insight into what they should expect from the channel. It is used to familiarize the viewer with the channel’s theme, feel, and look, which gives them context before reaching the main content.
Intro animation YouTube is sometimes called video bumpers, as they catch viewers’ attention and help reinforce your brand. In the general video, intros boost the video quality. You can also get a good video intro from intro animation free download websites for your YouTube content.
Part 2 How do YouTube Intro Animation Maker works?
You can create compelling, engaging, and best intro animation on YouTube by using free animation intro for YouTube or creating a YouTube intro animation by yourself. You don’t need be a pro in video editing or a creator to make animated video intros for your YouTube channel if you have the best intro animation software to create intro videos like a professional. Here are some benefits of YouTube intro animation maker and how it works:
● A YouTube intro animation maker has a built-in editor in your browser
● A YouTube intro animation maker is affordable, fast, and easy to use
● A YouTube intro animation maker can broadcast-quality logo animation and intros
● A YouTube intro animation maker has a wide variety of templates to make your YouTube animation intro
Using a YouTube intro animation maker, you are ready to create unskippable YouTube intros using the most versatile tool to turn your viewers into lifelong channel subscribers.
Part 3 5 of YouTube Intro Animation examples (2022)
To be successful on YouTube, capture and retain your viewers’ attention and increase your conversions. The best method to achieve this is by using an excellent YouTube animated intro to create a lasting impression to make your video worth watching. You can also get Professional YouTube animated intro from intro animation download websites. This action will look at 5 make YouTube intro animation examples and ideas from where you can draw your inspiration in 2022.
01Ted Talk
Ted Talk, free fire intro animation, is a perfect example of a beautiful and captured sequence that helps to tell the audience what the brand is all about and their ideas and worth spreading. The good news about this intro is that you don’t need to be a professional, hire an animator, or invest in any flashy or expensive animation to show your brand on YouTube.
To achieve this intro, all you require is some intro animation in After Effects template free that can work for your brand so that you’ll be able to retain your audience and make them wanting to come back for more.
02Jazza
Jazza is a perfect example of free intro animation templates that you can use all over again to showcase your brand. The main idea for making a gaming intro animation video free download is to bring about an attractive, eye-capturing video intro through it.
This intro communicates a passion for teaching people to paint, animate, and draw. This same template can also create a vlog animation intro for the Jazza language lesson website, as it is a tremendous sequential presentation that represents Jazza mission.
03Salma Jafra
Salma Jafra Video intro tells a short story about the video’s main takeaways and includes an 8 seconds vlog intro animation sequence. Everything, including a brand color, is purple, which helps the audience recognize our videos on YouTube.
In addition to the free animation for YouTube intro, she plugged in her content to the end of the video or outro to generate enough traffic and adhere to SEO guidelines to ensure that the targeted audience finds the videos.
04SciShow
SciShow enables viewers to understand the brand and the kind of free YouTube intro animation video. The main trick of the video is to instantly grab viewers’ attention and convince them that the video is for them.
This intro animation video free download is a perfect example of how you can introduce your theme, tone, and brand name into your YouTube animation intro video download. This type of intro allows viewers to know what to expect quickly, and superb animation and design show off the value of production. Examples of a brand that can benefit from this type of YouTube animation intro download template is sleep studies.
05”Pump Red” Cinema Template
“Pump Red” Cinema Template is perfect for capturing reviewers’ imagination with an eye-catching, captivating, and intelligent video intro. By following the examples in this Minecraft animation intro template, you are more likely to retain your visitors or viewers from the moment they hit the play button on your YouTube video by using a catching soundtrack, on-brand messaging, and exciting visuals.
Part 4 How to Create a YouTube Intro Animation FAST
Whether you are using any streaming channel, YouTube, or selling videos on any e-commerce website, making animation for YouTube intro plays a vital role in promoting your brand. With it, creating an introduction may not seem as complicated as it sounds.
The section explains in detail how to make a YouTube intro animation free with the Wondershare Filmora Video Editor video editor from animated intro download templates or create a custom intro from scratch even if there is no existing footage or image to begin with. The following method will guide you through the process, and then you can keep your video saved for reuse in all creations to maintain consistency and give your brand a unique identity:
Wondershare Filmora
Get started easily with Filmora’s powerful performance, intuitive interface, and countless effects!
Try It Free Try It Free Try It Free Learn More >
01Step Launch Intro Animation Software
Launch Wondershare Filmora Video Editor editor, add intro background to Filmora by going to the media tab at the top and selecting any sample colors category from the left pane. All the solid and gradient colors in the media library are available at the right, then over the mouse to the color title you want to use as a background and click on the + icon in the middle to add it to the timeline.
02Step Add Different effects
Add sound effects or audio to YouTube animated intro to make it more recognizable. In Wondershare Filmora Video Editor , visit the built-in audio library by double-clicking the audio thumbnail from the library and listening to the soundtrack. Repeat the process to find the perfect sound effects or background music for your video intro. D-and-drop the audio to the video.
03Step Adding Branding Element
In the animated video intro, add the company name, branding element, and channel name to create brand awareness by clicking on the title tab and hovering the mouse to the text you want to use. Then drag and drop it to track above the video.
Go to the Effects tab and select category from the top left pane. Click and drag your preferred effects from the library effects to the timeline.
04Step Export
Once you finish creating your animated video intro with all the required ingredients, go to Export at the top center area of the interface to export the animated video intro, and once done, share it on social media.
To make YouTube intro animation templates free download with Filmora templates, follow the steps listed below:
Step Select Effects
Log onto the Filmora effects page on filmstock with the same wsid used on Filmora and select the effect you want
Step Select template
Select the preferred intro templates by clicking on the download now and following the instructions on the screen to attend a download template. After downloading, see in red cycle under the transition, titles, and filter based on the element included in the effect part. Add this downloaded title or transition to the animated intro video.
Step Finalization
Delete your animated video intro from the templates that you selected.
● Key Takeaways from This Episode →
● Introduction about what is YouTube Intro?
● How Intro Animation Maker works with examples.
● The process to develop your own YouTube intro animation for free with Wondershare Filmora Video Editor .
How to Make Your Characters Interactive in Unity Animation Rigging
Learn How to Make Your Characters Interactive in Unity Animation Rigging
An easy yet powerful editor
Numerous effects to choose from
Detailed tutorials provided by the official channel
Animation is one such aspect that is formed from the integration of several varied factors and processes. One of the most vital ones is the process of rigging. Thus, we will be discussing Unity character rigging as Unity is one of the most efficient platforms for animation.
Additionally, we will introduce you to one of the best tools you can use to edit videos and nurture the creative skills you carry in yourself. So, without any further delay, let us start our discussion.
In this article
01 [What is Unity Rigging?](#Part 1)
02 [Is It Better to Rig in Unity or Blender?](#Part 2)
03 [How To Use Animation Rigging In Unity](#Part 3)
Part 1 What is Unity Rigging?
To understand what Unity rigging is, we must start our discussion first by discussing rigging in animation. In animation, rigging is the process in which your animation characters are separated into two parts. One is the mesh-like structure of the characters. And the other is the skeletal structure given to the characters.
You integrate bones and joints and join them accordingly in the characters present in your animation. It is similar to the presence of the human skeletal system. Moreover, just like the skeletal system in humans helps in the movements of the different parts of the body, the bone and joint structure through rigging also enables the characters in animation to move.
Therefore, we can say that rigging is the process by which you can enable your characters’ in animation to move and show different facial expressions, etc. So, it is obvious that without the process of rigging, the animation is impossible, which makes rigging one of the most crucial aspects of animation.
Now that we know what rigging in animation is, we will be discussing what is animation rigging in Unity. Unity technologies have developed a cross-platform gaming engine called ‘Unity’. And this platform also offers the ones interested in animation to learn animation rigging.
The Unity platform offers robust and effective tools for animation rigging. And these tools assist the animators to create real-time rigs in Unity. Most commonly, the set of tools in Unity for rigging is used on the characters. But, if one likes, they can also use the tools on ani Game Object that includes animations and skeletons.
Therefore, when you utilise the platform of Unity or the toolsets of Unity to perform rigging in animation, it can be referred to as unity rigging. It is one of the most powerful and renowned platforms for animation, creating the finest and most professional animation creations.

Part 2 Is It Better to Rig in Unity or Blender?
Another platform that can ideally assist you in animation is Blender. A common question arises as to whether one should choose blender rigging over Unity or vice versa. We have laid down the following table to compare the different features of Blender with that of Unity.
| | Unity | Blender | |
| ——————- | ————————————————————————————————————————- | ————————————————————————————————————————————— |
| About | It is a game engine that enables you in creating human-machine interfaces, AR simulations, customize splash screens, etc. | It is a computer graphics software that is open source and is mainly used for creating 3D models. |
| Types Supported | Supports 3D | |
| Best Purpose | Ideal for film, architecture, automotive, transportation, and other industries | Ideal for animation and design that assists in VFX, simulation, organizations of all sizes with rendering, modeling, and video editing. |
There are many features that Blender lacks, but Unity includes. The features included in Unity but are absent in Blender are as follows.
● Drawing
● Games
● In-Game Analytics
● Multi-player Gaming Network
● Player Management
● Virtual Reality
● IT Asset Management
● Prototype Creation
Therefore, it is preferred to opt for Unity rigging than Blender rigging, as Blender lacks a considerable number of features.
Part 3 How To Use Animation Rigging In Unity
Now, we will be introducing you to the different steps that will help you in unity rig animation. The following list includes the steps in the sequence that, when you deploy, will help you rig in the platform of Unity.
Step 1Installation
The first step is to install the “animation rigging package” of Unity. You will get the animation rigging package in the “Package Manager”. You will be able to avail of this animation package in Unity 2019.1 and above.
This package offers you a library that consists of rig constraints. And this library of rig constraints enables you to create procedural motion during the runtime. And the general term used for this is called “runtime rigging”.
The “Asset’s Animator Root” consist of the “Rig Builder Component”, which is the source where the rigs are accumulated. The rigs here are the constraints put together in groups. With these steps you will be able to create Unity humanoid rig that will make your animation creations look the finest, most realistic and most professional.

Step 2Rig Builder set-up
After installing the unity animation rigging package, the next step is to set up the rig builder. You will have to use the “Animator component” in this step. Using the “Animator component”, integrate the “Rig Builder component” with the “GameObject”. Generally, in the hierarchy of rig, it is the topmost “Transform”.
Then, you will have to make a new child GameObject. To which, you will have to integrate the “Rig component”. After this step, you need to access the “Animator root”, where you will find the “Rig Builder component”. In the “Rig Builder component”, you need to assign the “Rig to the Rig Layers” list.
It will complete the task of creating the most basic rig. The further steps will help you install the required behaviours in the character or characters.

Step 3Bone Rendering
Whether it is unity rigging or 3D, bone rendering is the most crucial step to enable your animation characters to gain movement. The “Unity Editor” will help you interact and work with the character’s skeleton in the “Scene view.”
You can add “Transform” lists and then display them in various visual styles with the help of the “Bone Renderer: component. It enables you to integrate numerous “Bone Renderer” components, each of them having its unique style of display. As a result, gameplay debugging, rig setup, keyframing, and other artist workflows are facilitated.

Step 4Adding Rig Effectors
This step enables one to add Gizmos to Transforms, facilitating selection and visualisation. The “Effector” are invisible during “Game View”, and this step enhances the quality of the character animation.

Step 5Managing the Rig Constraints
Your characters gain “runtime animation” through the rig constraints, and thus, these are the building blocks facilitating assembling the rigs. The rigs are combined in multiple and varied ways to obtain the desired motions and movements in the characters.

Step 6Working with the Two Bone IK Constraint
The first step here is to rest your character to the “Bind Pose.” you can do so by opting for the “Menu Bar” and selecting the “Animation Rigging” option. You will find the “Bind Pose” option there, and you will have to click on it.

Then add a child GameObject below “Character Rig”. Then add a new child GameObject below “Right Arm IK”. Integrate two new child GameObjects beneath the “Right Arm Ik” by naming the first and the second one “RH IK Target” and “RH IK Hint”, respectively.

Integrate the “Rig Builder Component” with the “Animator root GameObject”. Then proceed with selecting the “CharecterRig GameObject” and integrating a “Rig Component”. Select “Two Bone IK Contrainst” to the “Right Arm IK.”

Then, incorporate a “Box Effector” to the RH IK Target. Integrate a “Ball Effector” to the “RH IK Hint”.

Then select the “RH IK Hint” and “Right Elbow”. Select “Animation Rigging>align Transform”. Move away from the “Ball Effector”. Select the “Right Arm IK GameObject” and integrate the required bones. Integrate the Character Rig GameObkect with Rig Layer list by selecting the option of “Ninja”. Then press “Play” and see your creation come to life.

Now, you might as well want to showcase your creativity in editing and video making. For that, we have the best tool for you- FILMORA. This is the finest video editing tool with the most proficient features included in the following list.
● Over 8effects for editing videos
● Keyboard shortcut, audio ducking colour, colour match
● You can also change the speed of the videos
● Every professional-level video editing tool that you need is included in Wondershare Filmora Video Editor
The features are innumerable and so can not be possibly listed differently. So, you can readily try out this tool yourself, and if you do not want to purchase in the first instance, you can easily avail of its free trial. Although, we can guarantee that after using its free trial, you would definitely want to use every avail feature of the tool!

For Win 7 or later (64-bit)
For macOS 10.12 or later
● Key Takeaways from This Episode →
● A short introduction to the process of rigging, with which we proceeded on describing and understanding what unity rigging is. We also stated how important it is in the sphere of animation.
● Next, we compared rigging in Blender and Unity. After comparing the different factors, we decided that it is optimum to choose Unity for character rigging because of the lack of features in Blender.
● Lastly, we introduced you to the best video editing tool that will equally assist you in nurturing your creativity, video editing, and animation skills.
Animation is one such aspect that is formed from the integration of several varied factors and processes. One of the most vital ones is the process of rigging. Thus, we will be discussing Unity character rigging as Unity is one of the most efficient platforms for animation.
Additionally, we will introduce you to one of the best tools you can use to edit videos and nurture the creative skills you carry in yourself. So, without any further delay, let us start our discussion.
In this article
01 [What is Unity Rigging?](#Part 1)
02 [Is It Better to Rig in Unity or Blender?](#Part 2)
03 [How To Use Animation Rigging In Unity](#Part 3)
Part 1 What is Unity Rigging?
To understand what Unity rigging is, we must start our discussion first by discussing rigging in animation. In animation, rigging is the process in which your animation characters are separated into two parts. One is the mesh-like structure of the characters. And the other is the skeletal structure given to the characters.
You integrate bones and joints and join them accordingly in the characters present in your animation. It is similar to the presence of the human skeletal system. Moreover, just like the skeletal system in humans helps in the movements of the different parts of the body, the bone and joint structure through rigging also enables the characters in animation to move.
Therefore, we can say that rigging is the process by which you can enable your characters’ in animation to move and show different facial expressions, etc. So, it is obvious that without the process of rigging, the animation is impossible, which makes rigging one of the most crucial aspects of animation.
Now that we know what rigging in animation is, we will be discussing what is animation rigging in Unity. Unity technologies have developed a cross-platform gaming engine called ‘Unity’. And this platform also offers the ones interested in animation to learn animation rigging.
The Unity platform offers robust and effective tools for animation rigging. And these tools assist the animators to create real-time rigs in Unity. Most commonly, the set of tools in Unity for rigging is used on the characters. But, if one likes, they can also use the tools on ani Game Object that includes animations and skeletons.
Therefore, when you utilise the platform of Unity or the toolsets of Unity to perform rigging in animation, it can be referred to as unity rigging. It is one of the most powerful and renowned platforms for animation, creating the finest and most professional animation creations.
Part 2 Is It Better to Rig in Unity or Blender?
Another platform that can ideally assist you in animation is Blender. A common question arises as to whether one should choose blender rigging over Unity or vice versa. We have laid down the following table to compare the different features of Blender with that of Unity.
| | Unity | Blender | |
| ——————- | ————————————————————————————————————————- | ————————————————————————————————————————————— |
| About | It is a game engine that enables you in creating human-machine interfaces, AR simulations, customize splash screens, etc. | It is a computer graphics software that is open source and is mainly used for creating 3D models. |
| Types Supported | Supports 3D | |
| Best Purpose | Ideal for film, architecture, automotive, transportation, and other industries | Ideal for animation and design that assists in VFX, simulation, organizations of all sizes with rendering, modeling, and video editing. |
There are many features that Blender lacks, but Unity includes. The features included in Unity but are absent in Blender are as follows.
● Drawing
● Games
● In-Game Analytics
● Multi-player Gaming Network
● Player Management
● Virtual Reality
● IT Asset Management
● Prototype Creation
Therefore, it is preferred to opt for Unity rigging than Blender rigging, as Blender lacks a considerable number of features.
Part 3 How To Use Animation Rigging In Unity
Now, we will be introducing you to the different steps that will help you in unity rig animation. The following list includes the steps in the sequence that, when you deploy, will help you rig in the platform of Unity.
Step 1Installation
The first step is to install the “animation rigging package” of Unity. You will get the animation rigging package in the “Package Manager”. You will be able to avail of this animation package in Unity 2019.1 and above.
This package offers you a library that consists of rig constraints. And this library of rig constraints enables you to create procedural motion during the runtime. And the general term used for this is called “runtime rigging”.
The “Asset’s Animator Root” consist of the “Rig Builder Component”, which is the source where the rigs are accumulated. The rigs here are the constraints put together in groups. With these steps you will be able to create Unity humanoid rig that will make your animation creations look the finest, most realistic and most professional.
Step 2Rig Builder set-up
After installing the unity animation rigging package, the next step is to set up the rig builder. You will have to use the “Animator component” in this step. Using the “Animator component”, integrate the “Rig Builder component” with the “GameObject”. Generally, in the hierarchy of rig, it is the topmost “Transform”.
Then, you will have to make a new child GameObject. To which, you will have to integrate the “Rig component”. After this step, you need to access the “Animator root”, where you will find the “Rig Builder component”. In the “Rig Builder component”, you need to assign the “Rig to the Rig Layers” list.
It will complete the task of creating the most basic rig. The further steps will help you install the required behaviours in the character or characters.
Step 3Bone Rendering
Whether it is unity rigging or 3D, bone rendering is the most crucial step to enable your animation characters to gain movement. The “Unity Editor” will help you interact and work with the character’s skeleton in the “Scene view.”
You can add “Transform” lists and then display them in various visual styles with the help of the “Bone Renderer: component. It enables you to integrate numerous “Bone Renderer” components, each of them having its unique style of display. As a result, gameplay debugging, rig setup, keyframing, and other artist workflows are facilitated.
Step 4Adding Rig Effectors
This step enables one to add Gizmos to Transforms, facilitating selection and visualisation. The “Effector” are invisible during “Game View”, and this step enhances the quality of the character animation.
Step 5Managing the Rig Constraints
Your characters gain “runtime animation” through the rig constraints, and thus, these are the building blocks facilitating assembling the rigs. The rigs are combined in multiple and varied ways to obtain the desired motions and movements in the characters.
Step 6Working with the Two Bone IK Constraint
The first step here is to rest your character to the “Bind Pose.” you can do so by opting for the “Menu Bar” and selecting the “Animation Rigging” option. You will find the “Bind Pose” option there, and you will have to click on it.
Then add a child GameObject below “Character Rig”. Then add a new child GameObject below “Right Arm IK”. Integrate two new child GameObjects beneath the “Right Arm Ik” by naming the first and the second one “RH IK Target” and “RH IK Hint”, respectively.
Integrate the “Rig Builder Component” with the “Animator root GameObject”. Then proceed with selecting the “CharecterRig GameObject” and integrating a “Rig Component”. Select “Two Bone IK Contrainst” to the “Right Arm IK.”
Then, incorporate a “Box Effector” to the RH IK Target. Integrate a “Ball Effector” to the “RH IK Hint”.
Then select the “RH IK Hint” and “Right Elbow”. Select “Animation Rigging>align Transform”. Move away from the “Ball Effector”. Select the “Right Arm IK GameObject” and integrate the required bones. Integrate the Character Rig GameObkect with Rig Layer list by selecting the option of “Ninja”. Then press “Play” and see your creation come to life.
Now, you might as well want to showcase your creativity in editing and video making. For that, we have the best tool for you- FILMORA. This is the finest video editing tool with the most proficient features included in the following list.
● Over 8effects for editing videos
● Keyboard shortcut, audio ducking colour, colour match
● You can also change the speed of the videos
● Every professional-level video editing tool that you need is included in Wondershare Filmora Video Editor
The features are innumerable and so can not be possibly listed differently. So, you can readily try out this tool yourself, and if you do not want to purchase in the first instance, you can easily avail of its free trial. Although, we can guarantee that after using its free trial, you would definitely want to use every avail feature of the tool!
For Win 7 or later (64-bit)
For macOS 10.12 or later
● Key Takeaways from This Episode →
● A short introduction to the process of rigging, with which we proceeded on describing and understanding what unity rigging is. We also stated how important it is in the sphere of animation.
● Next, we compared rigging in Blender and Unity. After comparing the different factors, we decided that it is optimum to choose Unity for character rigging because of the lack of features in Blender.
● Lastly, we introduced you to the best video editing tool that will equally assist you in nurturing your creativity, video editing, and animation skills.
How to Create an Adobe Collage?
How to Create an Adobe Collage?
An easy yet powerful editor
Numerous effects to choose from
Detailed tutorials provided by the official channel
All of you might know that an adobe collage was created first of all by Ewelina Karpowiak in the working field of Adobe Photoshop. Here these professionals have the need to mix different shapes and types of textures.
They can also create illustrations that appear well like 3D looking pictures.
In this article
01 [What Are Collage Portrait?](#Part 1)
02 [How to Create a Photo Collage in Adobe Spark?](#Part 2)
03 [Where to Find More Photo Collage Resources](#Part 3)
Part 1 What Are Collage Portrait?
A collage portrait is the perfect technique with which you can easily make a picture by gathering other pieces of photos. Here you have to use the most perfect graphical pieces. In this way you can make a composite photo with the help of this technology. When you make use of an adobe spark collage then you will get more benefit with this kind of technique in the long way. In brief you can conclude that a collage portrait is a nice and good way to make a photo with as many portrait pictures. Here you can also make and create a good looking family pictures with such kind of pieces of photos. You can also give publicity to these kinds of photos in the long way.
Part 2 How to Create a Photo Collage in Adobe Spark?
When you take help of spark adobe collage then you can know how to create a photo collage in Adobe Spark. Just see the steps below with which you can genuine success in this task and motive:-
● You will need to choose and select your favorite collage photos.
● Just open the chosen photos in Photoshop.
● Just make a new file for your collage Photoshop.
● Add or upload images at the same time.
● Make proper arrangements of your chosen photos.
● Create proper spaces and merge all the graphic layers with one another.
Part 3 Where to Find More Photo Collage Resources
With the help of a collage adobe spark you can get help to get more photo collage resources. Just collect accessories like magazine photos, fancy papers and photographs. You can make all these kinds steps when you feel interested in creating collages. In this way you can gather these things to commence the process of adobe collage and its essential resources.
Wondershare Filmora
Get started easily with Filmora’s powerful performance, intuitive interface, and countless effects!
Try It Free Try It Free Try It Free Learn More >
Wondershare Filmora Video Editor ‘s stock media is now being very much high in the market of Adobe and photography. It is a very much non-stop stock media with media that is made with stock images. When you choose stock images then your photos will not get banned and spammed when you upload on the internet.
01The attraction of Filmora stock images and photos
When you chooseFilmora V11’s stock media then you can also easily add special video effects so that your Photoshop work will appear glittering in the long way. When you combine the technology of Adobe Collage with the above mentioned stock images related to Filmora then you will not have to pay any kind of royalty fee in the long way.
Here you can also customize the video effects with the greatest ease. Just choose the option of stock footage so that nobody will charge you of stealing photos from other websites on the internet. When you make videos related to the technique of collage adobe then you will see that you can give special video effects and music lyrics to enhance the attraction of such kind of these videos. You can even easily download all such useful resources from Filmora as well as software like Adobe. Just have completed access to such video making software like Adobe and merge it well with the stock images concerned with Filmora. Today most creators of collage adobe can make marvelous videos with applying these attractive video and pictorial effects.
Image Name- how-to-create-an-adobe-collage5
Alt tag- Filmora stock images and photos
01The final summary
● When you talk more about any adobe collage then you will see that it was created first of all by Ewelina Karpowiak. She was working as a Adobe Photoshop developer. You can see as well as realize that you can create a collage adobe by mixing as many pieces of portraits into a single picture in the long way. These pictures will appear well like good 3D looking pictures. You can give good publicity to these pictures in many ways.
● You can get the best support from a spark adobe collage when you need to make a good photo collage from the technique of Adobe Spark. When you do this then you will have to choose the best photos for your collage. You will need to open those photos that you will see in Photoshop. You might even upload and add the needed images at the same time duration. Even you have to make a new file for the sake of your collage Photoshop. You might even add and upload images at the same duration of time. You have to make proper arrangements for the photos that you have selected. You will also need to make proper spaces for sake of arranging your selected images.
● When you make active use of collage adobe spark then you will find more resources of photo collage. Here you can get accessories like fancy papers and magazine photos as well as good looking photographs. When you are in a mood to create more good appearing collages then you can have all these resources. You might even see that Filmora V11’s stock media has attained a very high popularity in the market of photos. When you use these techniques then you will get free stock photos that you can use and add anywhere. After you make your mind to make an adobe collage then you can also make very much attractive media. When you are in a mood to do Filmora stock photography then you can use stock images to make images as well as attractive videos. Here you can also make use of special video effects and good hearing music tunes. You can easily download these effective resources from Filmora stock photos. Their software is such with which you can make excellent videos and even here collage adobe will help you well in the long run. Just make these attractive videos with marvelous pictorial and image related effects.
01Some more things to know
● Today even adobe collage is being used in making and creating love portrait photography. Here you can take a fresh start when you want to create a nice picture or photo with the pieces of colorful portraits. Here you can also make dynamic photos with combined pieces of portraits. This task can be done quickly in a very simple way. Thus this kind of technology can be used to make good looking and colored posters, images of social media and covers of commercial and personal magazines. Here you might also see that adobe Photoshop is also being utilized to make such portraits that are made with collage technology. Here you can also make attractive designs. You have to also test and judge the effects of color effects. Just also take the help of incorporating textures to make a professional looking poster and collage adobe.
● You can also use an adobe spark collage to make anarchic newspapers. Here you have to use the cutting style to make the collage portraits with the best editorial design. Here you can get more beneficial results by mixing colorful images and media technology with one another. As far as fashion concerning portraits is concerned you can get the benefits of having an edgy twist with them. You can also make changes and blending of these images with some elements like patterns that look like bionomical images.
● The spark adobe collage is very much essential as here you can make or create as many colorful images with this unique technology. With it you can also make a brand new portrait by combining the pieces of a colorful picture. Just combine as many images to create a brand new print. This could be the best example to make a high quality designed picture. All the collage portraits require an image that works on the technique of anchoring. Never forget that such an image needs high resolution pixels that can be mapped at anytime.
● Key Takeaways from This Episode →
● Finally we want to say that the technology of adobe collage is the best way to make good looking colorful pictures with the pieces of portraits.
● Here you will see that when you are in need of making high quality colorful images then you can make use of stock images that are available free on the web or internet.
● When you make use of these photos then no one will charge you of stealing the photo images of others on the web.
Best 15 Female Anime Characters-Who Is Your Favorite?
Best 15 Female Anime Characters-Who Is Your Favorite?

Shanoon Cox
Mar 27, 2024• Proven solutions
With some powerful themes and ideas of loyalty, honor, and sacrifice, anime culture is not ending anytime soon. And being an anime fan, we are glad.
Since the early 1900’s, cool male and female anime characters have been inspiring fans worldwide; you will find plenty of anime girl characters who are ferocious, smartass, or simply princesses with blue, red, or blonde hair and personalities so engaging and influencing. This article includes tons of strong anime ladies you can look up to, from incredibly intellectual Motoko Kusanagi to an agile warrior Saber. We will talk about their intriguing stories, abilities, and powers that steal our hearts away.
Best 15 Female Anime Characters of All Time
Here we have the best 15 female anime characters found on TV and in films which are always one thing – popular. However, note that all these girl characters have earned their place in our list in no particular order. Let’s check them out!
- 1. Erza Scarlet- Fairy Tail
- 2. Kushina Uzumaki-Naruto
- 3. Asuna- Sword Art Online
- 4. Saber- Fate/Stay Night
- 5. Rias Gremory- High School DxD
- 6. Karma Akabane – Assassination Classroom
- 7. Mikasa Ackerman-Attack on Titan
- 8. Motoko Kusanagi-Ghost in the Shell
- 9. Touka Kirishima-Tokyo Ghoul
- 10. Tsukuyo-Gintama
- 11. Lucy Heartfilia- Fairy Tail
- 12. Yui Komori- Diabolik Lovers
- 13. Revy-Black Lagoon
- 14. Shoko Nishimiya- A Silent Voice
- 15.Esdeath- Akame ga Kill!
1. Erza Scarlet- Fairy Tail
Tall, beautiful, and a bit scary, Erza Scarlet is an S-class mage of the Fairy Tail Guild. As one of the leading female protagonists in Team Natsu, Erza feels great pride and shows dedication to the guild. She’s often seen in her custom-made armored suit, a blue skirt, and black boots with a blue Fairy Tail stamp on her upper left arm. But, changing her attire at any given time is never a problem for her, thanks to her Requip magic powers.
Anime fans love Erza for her strict yet clumsy personality. Her fighting and leadership skills in the war against Phantom Lord Guild have had fans in admiration.
2. Kushina Uzumaki-Naruto
We love the nickname “Red hot-blooded Habanero,” Kushina earned when she attacked a bunch of kids who teased and laughed at her. Born inUzushiogakure Uzumaki clan, Kushina was a beautiful woman in her early 20s with a slender figure. She is the wife of Minato Namikaze and the mother of Naruto Uzumaki in the top-rated Naruto series. Despite a short temper and violent outbursts, Kushina possesses a soft and caring side most people love her for.
3. Asuna- Sword Art Online
Asuna Yuuki is one of the popular anime girl characters of our favorite Sword Art Online novel, manga, anime franchise. She is the deuteragonist and former Vice-commander of the Knights of the Blood Oath in Sword Art Online. Early on, Asuna was shown to be a strong fighter who did not care about dying until she met Kirito. However, Asuna is a bit overly serious, and as the SAO series progresses, she is shown nothing but the wife of Kirito.
4. Saber- Fate/Stay Night
Fate/Stay Night’s Saber is the saber class servant of Kiritsugu Emiya in the Fourth Holy Grail War and Shirou Emiya in the Fifth Holy Grail War.. Serving her master with loyalty and devotion, Saber is a courageous and strong-willed female anime character. Fans around the world acknowledge her as a supremely skilled warrior with a kind heart, caring about the ones she loves. Her stats
5. Rias Gremory- High School DxD
School’s number one beauty, the red-haired Rias Gremory, deserves a spot on our list. She is the only daughter of Zeoticus Venelana Gremory and the next head of the Gremory clan. We love when she is called the Crimson-haired Ruin Princess. While she has charming features, she is very kind and compassionate even to her servants – something which makes her a fan favorite,
6. Nobara Kugisaki- Jujutsu Kaisen
Out of the many unique anime characters in Jujutsu Kaisen, Nobara Kugosaki is a tough girl most anime fans are drawn to. She is one of the Jujutsu manga’s three primary protagonists who moved to Tokyo. Nobara isn’t your typical strong lady; she is confident and outspoken about her appearance and herself as a person.
As a rebellious fighter, she has shown superhuman pain tolerance while fighting foes even larger than herself. Nobara fans love her proficiency with various curse-infused weaponry, such as the hammer and nail, straw dolls, and the rubber mallet.
7. Mikasa Ackerman-Attack on Titan

As the favorite of many anime fans, Mikasa Ackerman had to make it to our list of the best anime girl characters. The lead female of Attack on Titan, Mikasa, is portrayed as one of the strongest characters, both physically and mentally.
Once a cheerful, outgoing, and innocent child living with her parents, Mikasa grows up to be quite stoic and dangerous at times. Despite the trauma of witnessing the carnage during the Survey Corps and her biological parent’s brutal murder, Mikasa Ackerman retains humanity in her kind heart. But with a reserved, emotionally withdrawn personality who rarely speaks or losses her cool. Her character in the Attack on Titan series causes us to question our endurance.
8. Motoko Kusanagi-Ghost in the Shell
Who doesn’t know this quick-witted girl from the very popular Ghost in the shell manga-anime franchise, with a characteristic cyborg body? Motoko Kusanagi is employed as an officer for Public Security Section 9, a Japanese National Public Safety Commission division. After the airplane accident in her childhood, Motoko was comatose until her consciousness was put into a prosthetic body. Since then, she has been an excellent hacker with incredible intelligence and combat skills respected among her colleagues. Motoko connects with the audience on a greater level, for she is strong, cool, intellectual, and artificial at the same time.
9. Touka Kirishima-Tokyo Ghoul
Here comes a ferocious ghoul; one of the most talked-about female protagonists from the Tokyo Ghoul series is Touka Kirishima, aka Rabbit. While she tries not to resort to violence most of the time, sometimes she hunts with a Rabbit mask on, hence the alias.
In the past, she was a waitress at the famous coffee shop in Anteiku. With the progression of the series, Touka becomes the manager two years after the Owl Suppression Operation. And as humans and ghouls come to peace, she marries Ken Kaneki and gives birth to their first daughter Ichika Kaneki. Being a rugged, know-it-all kind of girl but with a touch of kindness, people adore Touka Kirishima.
10. Tsukuyo-Gintama
Tsukuyo from Gintama anime and manga is a fan-favorite, often known as “Courtesan of Death.” She is a blondie with a scar over her forehead that tells the tales of her loyalty to her master when he asked her to reject her identity as a woman. Orphaned as a child, Tsukuyo was raised and trained by a ruthless and deadly assassin, Jiraia. And so, she grows to be a competent, highly skilled ninja currently serving as a leader of an all-female law enforcement squad—no wonder all feminist anime fans look up to her interesting personality and powerful character.
11. Lucy Heartfilia- Fairy Tail
Lucy Heartfilia, an iconic anime girl from the Fairy Tail manga series, has the best character growth from the first episode to the last. When we first see her, she is a happy, innocent little girl who grows up to be a divine spirit mage and mother to seven children.
There are so many likable qualities about Lucy – she is fair and beautiful, responsible, with impressive magic skills, and a desire to become a world-famous author. Lucy Heartfilia leaves her home after her mother’s death with an ambition for independence, something admired by the fandom.
12. Yui Komori- Diabolik Lovers
Yui is living with Cordelia’s heart in her. When Cordelia was dying, she asked Richter to cut out and implant her heart into another human body, so he did it in the abandoned kid Yui. Later, she was adopted by a priest and vampire hunter, Seiji, and is forced to live with six vampire brothers.
When it comes to lovely vampire anime ladies, it’s not a surprise that Diabolik Lover’s Yui Komori is everyone’s favorite. Her wavy platinum blonde hair and glistering sherbet pink color eyes have caught the attention of the viewers. Not to mention the pretty pink flower hair clip on the left side of her hair adds to her beauty. But there’s more than just beauty about Yui Komori – she is still-willed and brave, with an optimistic personality. She is seen to keep a cool head about threats and not mind any mean comments from the other vampires.
13. Revy-Black Lagoon

No, we did not forget the heroine, Revy, or as you may call her Rebecca Lee from the Black Lagoon anime series. Everything about Revy is ferocious. In her mid to late twenties, Revy is a Chinese-American tan-skinned woman with a wild temperament. In the old days, she is shown as a thief and murderer who shot an unknown man as her first murder. You can’t really relate to this complex female anime character until you dive deeper into her intriguing story and understand the verbal and physical trauma she has faced over the years. Though she is a little rude, sarcastic, and troubled, her forgetful and humorous side touches our hearts once in a while.
14. Shoko Nishimiya- A Silent Voice
This entry has had a long-lasting impression on most anime fans because of her sweet and forgiving nature, who fakes smiles even when it’s hard to. Her character is one of a kind being clinically deaf but still the leading protagonist of the A Silent Voice series. Unfortunately, she has always been an easy target for bullies, especially her classmate Shoya, who later becomes her friend due to her forgiving nature. Despite the bullies, the pain, Shoko Nishimiya is a strong girl who cares about her family and friends but cries in silence when she is hurt.
15. Esdeath- Akame ga Kill
Without a doubt, Esdeath is the best dark character in the history of the darkest anime series or films. If you are an action lover like us, Esdeath’s spectacular fight skills will wow you. As a high-ranking general of the Empire, her attire consists of a General’s apparel with long sleeves, a blue scarf around the neck, and high-heeled boots. Soon, the Prime Minister appoints her as the leader of the Jaegers since she is stronger (emotionally and physically) than most characters. Now a manipulative and sadistic woman, Esdeath did not always lack empathy. Sadly, it was her father’s death in her own arms that hardened her heart to a point she humiliated and tortured anyone she finds weaker than her.
What Makes a Female Anime Character Stand out?
A bunch of unique and exciting anime characters is released every year. While some of these turn out lovable gems, others prove long-forgotten failures. But what is it about an anime character that makes it stand out?
Everything shapes the perfect leading anime character, from their personalities to their clothes and styling to the character development. Memorable anime girl characters are rare, well-written protagonists with profound nature, exciting stories, and emotions that relate to anime fans.
So, which female anime character is your favorite?
Shanoon Cox
Shanoon Cox is a writer and a lover of all things video.
Follow @Shanoon Cox
Shanoon Cox
Mar 27, 2024• Proven solutions
With some powerful themes and ideas of loyalty, honor, and sacrifice, anime culture is not ending anytime soon. And being an anime fan, we are glad.
Since the early 1900’s, cool male and female anime characters have been inspiring fans worldwide; you will find plenty of anime girl characters who are ferocious, smartass, or simply princesses with blue, red, or blonde hair and personalities so engaging and influencing. This article includes tons of strong anime ladies you can look up to, from incredibly intellectual Motoko Kusanagi to an agile warrior Saber. We will talk about their intriguing stories, abilities, and powers that steal our hearts away.
Best 15 Female Anime Characters of All Time
Here we have the best 15 female anime characters found on TV and in films which are always one thing – popular. However, note that all these girl characters have earned their place in our list in no particular order. Let’s check them out!
- 1. Erza Scarlet- Fairy Tail
- 2. Kushina Uzumaki-Naruto
- 3. Asuna- Sword Art Online
- 4. Saber- Fate/Stay Night
- 5. Rias Gremory- High School DxD
- 6. Karma Akabane – Assassination Classroom
- 7. Mikasa Ackerman-Attack on Titan
- 8. Motoko Kusanagi-Ghost in the Shell
- 9. Touka Kirishima-Tokyo Ghoul
- 10. Tsukuyo-Gintama
- 11. Lucy Heartfilia- Fairy Tail
- 12. Yui Komori- Diabolik Lovers
- 13. Revy-Black Lagoon
- 14. Shoko Nishimiya- A Silent Voice
- 15.Esdeath- Akame ga Kill!
1. Erza Scarlet- Fairy Tail
Tall, beautiful, and a bit scary, Erza Scarlet is an S-class mage of the Fairy Tail Guild. As one of the leading female protagonists in Team Natsu, Erza feels great pride and shows dedication to the guild. She’s often seen in her custom-made armored suit, a blue skirt, and black boots with a blue Fairy Tail stamp on her upper left arm. But, changing her attire at any given time is never a problem for her, thanks to her Requip magic powers.
Anime fans love Erza for her strict yet clumsy personality. Her fighting and leadership skills in the war against Phantom Lord Guild have had fans in admiration.
2. Kushina Uzumaki-Naruto
We love the nickname “Red hot-blooded Habanero,” Kushina earned when she attacked a bunch of kids who teased and laughed at her. Born inUzushiogakure Uzumaki clan, Kushina was a beautiful woman in her early 20s with a slender figure. She is the wife of Minato Namikaze and the mother of Naruto Uzumaki in the top-rated Naruto series. Despite a short temper and violent outbursts, Kushina possesses a soft and caring side most people love her for.
3. Asuna- Sword Art Online
Asuna Yuuki is one of the popular anime girl characters of our favorite Sword Art Online novel, manga, anime franchise. She is the deuteragonist and former Vice-commander of the Knights of the Blood Oath in Sword Art Online. Early on, Asuna was shown to be a strong fighter who did not care about dying until she met Kirito. However, Asuna is a bit overly serious, and as the SAO series progresses, she is shown nothing but the wife of Kirito.
4. Saber- Fate/Stay Night
Fate/Stay Night’s Saber is the saber class servant of Kiritsugu Emiya in the Fourth Holy Grail War and Shirou Emiya in the Fifth Holy Grail War.. Serving her master with loyalty and devotion, Saber is a courageous and strong-willed female anime character. Fans around the world acknowledge her as a supremely skilled warrior with a kind heart, caring about the ones she loves. Her stats
5. Rias Gremory- High School DxD
School’s number one beauty, the red-haired Rias Gremory, deserves a spot on our list. She is the only daughter of Zeoticus Venelana Gremory and the next head of the Gremory clan. We love when she is called the Crimson-haired Ruin Princess. While she has charming features, she is very kind and compassionate even to her servants – something which makes her a fan favorite,
6. Nobara Kugisaki- Jujutsu Kaisen
Out of the many unique anime characters in Jujutsu Kaisen, Nobara Kugosaki is a tough girl most anime fans are drawn to. She is one of the Jujutsu manga’s three primary protagonists who moved to Tokyo. Nobara isn’t your typical strong lady; she is confident and outspoken about her appearance and herself as a person.
As a rebellious fighter, she has shown superhuman pain tolerance while fighting foes even larger than herself. Nobara fans love her proficiency with various curse-infused weaponry, such as the hammer and nail, straw dolls, and the rubber mallet.
7. Mikasa Ackerman-Attack on Titan
As the favorite of many anime fans, Mikasa Ackerman had to make it to our list of the best anime girl characters. The lead female of Attack on Titan, Mikasa, is portrayed as one of the strongest characters, both physically and mentally.
Once a cheerful, outgoing, and innocent child living with her parents, Mikasa grows up to be quite stoic and dangerous at times. Despite the trauma of witnessing the carnage during the Survey Corps and her biological parent’s brutal murder, Mikasa Ackerman retains humanity in her kind heart. But with a reserved, emotionally withdrawn personality who rarely speaks or losses her cool. Her character in the Attack on Titan series causes us to question our endurance.
8. Motoko Kusanagi-Ghost in the Shell
Who doesn’t know this quick-witted girl from the very popular Ghost in the shell manga-anime franchise, with a characteristic cyborg body? Motoko Kusanagi is employed as an officer for Public Security Section 9, a Japanese National Public Safety Commission division. After the airplane accident in her childhood, Motoko was comatose until her consciousness was put into a prosthetic body. Since then, she has been an excellent hacker with incredible intelligence and combat skills respected among her colleagues. Motoko connects with the audience on a greater level, for she is strong, cool, intellectual, and artificial at the same time.
9. Touka Kirishima-Tokyo Ghoul
Here comes a ferocious ghoul; one of the most talked-about female protagonists from the Tokyo Ghoul series is Touka Kirishima, aka Rabbit. While she tries not to resort to violence most of the time, sometimes she hunts with a Rabbit mask on, hence the alias.
In the past, she was a waitress at the famous coffee shop in Anteiku. With the progression of the series, Touka becomes the manager two years after the Owl Suppression Operation. And as humans and ghouls come to peace, she marries Ken Kaneki and gives birth to their first daughter Ichika Kaneki. Being a rugged, know-it-all kind of girl but with a touch of kindness, people adore Touka Kirishima.
10. Tsukuyo-Gintama
Tsukuyo from Gintama anime and manga is a fan-favorite, often known as “Courtesan of Death.” She is a blondie with a scar over her forehead that tells the tales of her loyalty to her master when he asked her to reject her identity as a woman. Orphaned as a child, Tsukuyo was raised and trained by a ruthless and deadly assassin, Jiraia. And so, she grows to be a competent, highly skilled ninja currently serving as a leader of an all-female law enforcement squad—no wonder all feminist anime fans look up to her interesting personality and powerful character.
11. Lucy Heartfilia- Fairy Tail
Lucy Heartfilia, an iconic anime girl from the Fairy Tail manga series, has the best character growth from the first episode to the last. When we first see her, she is a happy, innocent little girl who grows up to be a divine spirit mage and mother to seven children.
There are so many likable qualities about Lucy – she is fair and beautiful, responsible, with impressive magic skills, and a desire to become a world-famous author. Lucy Heartfilia leaves her home after her mother’s death with an ambition for independence, something admired by the fandom.
12. Yui Komori- Diabolik Lovers
Yui is living with Cordelia’s heart in her. When Cordelia was dying, she asked Richter to cut out and implant her heart into another human body, so he did it in the abandoned kid Yui. Later, she was adopted by a priest and vampire hunter, Seiji, and is forced to live with six vampire brothers.
When it comes to lovely vampire anime ladies, it’s not a surprise that Diabolik Lover’s Yui Komori is everyone’s favorite. Her wavy platinum blonde hair and glistering sherbet pink color eyes have caught the attention of the viewers. Not to mention the pretty pink flower hair clip on the left side of her hair adds to her beauty. But there’s more than just beauty about Yui Komori – she is still-willed and brave, with an optimistic personality. She is seen to keep a cool head about threats and not mind any mean comments from the other vampires.
13. Revy-Black Lagoon
No, we did not forget the heroine, Revy, or as you may call her Rebecca Lee from the Black Lagoon anime series. Everything about Revy is ferocious. In her mid to late twenties, Revy is a Chinese-American tan-skinned woman with a wild temperament. In the old days, she is shown as a thief and murderer who shot an unknown man as her first murder. You can’t really relate to this complex female anime character until you dive deeper into her intriguing story and understand the verbal and physical trauma she has faced over the years. Though she is a little rude, sarcastic, and troubled, her forgetful and humorous side touches our hearts once in a while.
14. Shoko Nishimiya- A Silent Voice
This entry has had a long-lasting impression on most anime fans because of her sweet and forgiving nature, who fakes smiles even when it’s hard to. Her character is one of a kind being clinically deaf but still the leading protagonist of the A Silent Voice series. Unfortunately, she has always been an easy target for bullies, especially her classmate Shoya, who later becomes her friend due to her forgiving nature. Despite the bullies, the pain, Shoko Nishimiya is a strong girl who cares about her family and friends but cries in silence when she is hurt.
15. Esdeath- Akame ga Kill
Without a doubt, Esdeath is the best dark character in the history of the darkest anime series or films. If you are an action lover like us, Esdeath’s spectacular fight skills will wow you. As a high-ranking general of the Empire, her attire consists of a General’s apparel with long sleeves, a blue scarf around the neck, and high-heeled boots. Soon, the Prime Minister appoints her as the leader of the Jaegers since she is stronger (emotionally and physically) than most characters. Now a manipulative and sadistic woman, Esdeath did not always lack empathy. Sadly, it was her father’s death in her own arms that hardened her heart to a point she humiliated and tortured anyone she finds weaker than her.
What Makes a Female Anime Character Stand out?
A bunch of unique and exciting anime characters is released every year. While some of these turn out lovable gems, others prove long-forgotten failures. But what is it about an anime character that makes it stand out?
Everything shapes the perfect leading anime character, from their personalities to their clothes and styling to the character development. Memorable anime girl characters are rare, well-written protagonists with profound nature, exciting stories, and emotions that relate to anime fans.
So, which female anime character is your favorite?
Shanoon Cox
Shanoon Cox is a writer and a lover of all things video.
Follow @Shanoon Cox
That Will Make Aesthetic Cartoon Drawing More Understandable
That Will Make Aesthetic Cartoon Drawing More Understandable
An easy yet powerful editor
Numerous effects to choose from
Detailed tutorials provided by the official channel
When you are trying to make an aesthetic drawings cartoon, the primary thing to focus on is the composition. Composition is the combination, arrangement, and organization of objects within the borders of drawing space. To have a great aesthetic cartoon drawing, you must focus on bringing the eyes of the viewer toward your center of interest within an aesthetically-pleasing composition. When we create illustrations, we are often concerned with putting in a lot of details that will overload the image and lose the meaning that we originally wanted it to convey.

We engage our audience and viewer more by composing a perfect aesthetic drawing. In addition, many rules define a good composition drawing, but these rules are mainly guidelines. Also pay attention to your personal preferences and instincts. In this guide, we’ll teach you how to make an excellent aesthetic cartoon painting more understandable.
In this article
01 [Canvas Aesthetic Painting Ideas](#Part 1)
02 [Blender Aesthetic Painting Ideas](#Part 2)
03 [How to Create Super-Detailed Aesthetic Cartoon Painting](#Part 3)
Part 1 Canvas Aesthetic Painting Ideas
There are times you do not need to be a famous painter or an art professional to create beautiful wall art. Canvas painting is an all-in-one application for all skill levels, from beginners to experts. It also provides you with different painting ideas ranging from beach scenes to abstract designs to create pieces that look stunning and professional.
We have compiled a list of canvas aesthetic painting ideas to help you begin your journey as an aesthetic cartoon painter. Look through the images to determine which ones match the style of painting you wish to add to your drawing and get inspiration to create your designs.
01Disney Canvas Art
These are aesthetic cartoon painting ideas relating to 2020 Disney Canvas Art. You can get ideas from this to begin your journey into the world of painting.

02Hippie Painting Canva Art
If you are also looking for other aesthetic cartoon painting ideas to choose from, you can select from this 2020 Cute Canvas Paintings “Hippie Painting” Canvas Art.

03Spongebob Painting
These painting ideas are a part of the Canvas Aesthetic Cartoon Painting ideas of 2020 called Spongebob Painting Disney Canvas Art.

04Babs Bunny Pa Et Mini Lerret
These are a painting about “Babs Bunny Pa Et Mini Lerret.” A 2020 Mini Canvas Art Hippie Painting Canvas idea that you can choose from

Part 2 Blender Aesthetic Painting Ideas
Blender is an accessible and open-source 3D creation suite that supports the entirety of the 3D pipeline modeling, rigging, animation, simulation, compositing rendering, motion tracking, video editing, and 2D animation pipeline. It is a fact that this is one of the best open-source software you can choose from to make your aesthetic cartoon drawing.
It is entirely free software, and various artists can use it to start digging in and playing with it. Here are some of the blender aesthetic cartoon painting ideas you can choose from:
01Princess Ira and Amina
This is a fictional aesthetic drawing cartoon of an African princess having gold gifted powers with her face painting inspired by Nigerian traditional face decorations. However, her crown is adorned with crosses, crystals, and chains which incorporate several elements from different cultural designs available from all over the world to portray unity.

02Survival Knife Weekly Drills 045
This was a design painting inspired based on BUCK KNIVES in pain texturing and focuses on making a practical game-ready asset.

03Radiance
This is a blender aesthetic cartoon painting idea of a graduation project made for the Concept Art specialized cursus at New3dge School.

04 The character looks dev
This blender cartoon painting’s inspiration came from Edward, the short film’s main character. It is a work in progress but a lovely painting that can inspire you.
Part 3 How to Create Super-Detailed Aesthetic Cartoon Painting
To create a super detailed aesthetic cartoon drawing, you do not need to be a trained artist, nor do you need a fancy cartoon picture maker. All you need to create a cartoon painting photo is a simple and Free picture from a cartoon editor to help you carry out the task more effectively.
However, you can also convert your cartoon paint into creative animation using Wondershare Filmora Video Editor . Filmora is a powerful all-in-one tool for editing that you can use to that can be used for free to animate your cartoon with its tons of effects, filters, and keyframing features that can help you carry this out effectively.
For Win 7 or later (64-bit)
For macOS 10.12 or later
Here is how to create a super detailed aesthetic cartoon painting:

Step 1: Open the Picsart editor on your desktop browser and click on the new project
Step 2: Next is to click on Upload to select the photo that you want to cartoon paint from the computer library of your hard drive
Step 2: Click on the toolbar, select the effect feature from the dropdown above your photo, and click on Magic to view all available one-click cartoon filters. However, almost all of the Magic effects on this editor will help you achieve an aesthetic cartoon photo effect.
Step 4: Click on Adjust and Blend above your photo workspace on the editor. This will help you manually adjust the effects (color burn, fade, saturation, brightness, etc.).
Step 5: Preview your result and once you are happy with the new cartoon photo painting, click on the Share button and download it from the top right corner of the editor to save it on your device.
● Ending Thoughts →
● This article explained creating and gave inspiration and ideas for the aesthetic cartoon painting you can choose from to make yours. In addition, the report also recommends Filmora as an influential editor if you intend to create an animation from your cartoon painting due to its tons of features.
● So, now you can start building your aesthetic drawings and cartoons!
When you are trying to make an aesthetic drawings cartoon, the primary thing to focus on is the composition. Composition is the combination, arrangement, and organization of objects within the borders of drawing space. To have a great aesthetic cartoon drawing, you must focus on bringing the eyes of the viewer toward your center of interest within an aesthetically-pleasing composition. When we create illustrations, we are often concerned with putting in a lot of details that will overload the image and lose the meaning that we originally wanted it to convey.
We engage our audience and viewer more by composing a perfect aesthetic drawing. In addition, many rules define a good composition drawing, but these rules are mainly guidelines. Also pay attention to your personal preferences and instincts. In this guide, we’ll teach you how to make an excellent aesthetic cartoon painting more understandable.
In this article
01 [Canvas Aesthetic Painting Ideas](#Part 1)
02 [Blender Aesthetic Painting Ideas](#Part 2)
03 [How to Create Super-Detailed Aesthetic Cartoon Painting](#Part 3)
Part 1 Canvas Aesthetic Painting Ideas
There are times you do not need to be a famous painter or an art professional to create beautiful wall art. Canvas painting is an all-in-one application for all skill levels, from beginners to experts. It also provides you with different painting ideas ranging from beach scenes to abstract designs to create pieces that look stunning and professional.
We have compiled a list of canvas aesthetic painting ideas to help you begin your journey as an aesthetic cartoon painter. Look through the images to determine which ones match the style of painting you wish to add to your drawing and get inspiration to create your designs.
01Disney Canvas Art
These are aesthetic cartoon painting ideas relating to 2020 Disney Canvas Art. You can get ideas from this to begin your journey into the world of painting.
02Hippie Painting Canva Art
If you are also looking for other aesthetic cartoon painting ideas to choose from, you can select from this 2020 Cute Canvas Paintings “Hippie Painting” Canvas Art.
03Spongebob Painting
These painting ideas are a part of the Canvas Aesthetic Cartoon Painting ideas of 2020 called Spongebob Painting Disney Canvas Art.
04Babs Bunny Pa Et Mini Lerret
These are a painting about “Babs Bunny Pa Et Mini Lerret.” A 2020 Mini Canvas Art Hippie Painting Canvas idea that you can choose from
Part 2 Blender Aesthetic Painting Ideas
Blender is an accessible and open-source 3D creation suite that supports the entirety of the 3D pipeline modeling, rigging, animation, simulation, compositing rendering, motion tracking, video editing, and 2D animation pipeline. It is a fact that this is one of the best open-source software you can choose from to make your aesthetic cartoon drawing.
It is entirely free software, and various artists can use it to start digging in and playing with it. Here are some of the blender aesthetic cartoon painting ideas you can choose from:
01Princess Ira and Amina
This is a fictional aesthetic drawing cartoon of an African princess having gold gifted powers with her face painting inspired by Nigerian traditional face decorations. However, her crown is adorned with crosses, crystals, and chains which incorporate several elements from different cultural designs available from all over the world to portray unity.
02Survival Knife Weekly Drills 045
This was a design painting inspired based on BUCK KNIVES in pain texturing and focuses on making a practical game-ready asset.
03Radiance
This is a blender aesthetic cartoon painting idea of a graduation project made for the Concept Art specialized cursus at New3dge School.
04 The character looks dev
This blender cartoon painting’s inspiration came from Edward, the short film’s main character. It is a work in progress but a lovely painting that can inspire you.
Part 3 How to Create Super-Detailed Aesthetic Cartoon Painting
To create a super detailed aesthetic cartoon drawing, you do not need to be a trained artist, nor do you need a fancy cartoon picture maker. All you need to create a cartoon painting photo is a simple and Free picture from a cartoon editor to help you carry out the task more effectively.
However, you can also convert your cartoon paint into creative animation using Wondershare Filmora Video Editor . Filmora is a powerful all-in-one tool for editing that you can use to that can be used for free to animate your cartoon with its tons of effects, filters, and keyframing features that can help you carry this out effectively.
For Win 7 or later (64-bit)
For macOS 10.12 or later
Here is how to create a super detailed aesthetic cartoon painting:
Step 1: Open the Picsart editor on your desktop browser and click on the new project
Step 2: Next is to click on Upload to select the photo that you want to cartoon paint from the computer library of your hard drive
Step 2: Click on the toolbar, select the effect feature from the dropdown above your photo, and click on Magic to view all available one-click cartoon filters. However, almost all of the Magic effects on this editor will help you achieve an aesthetic cartoon photo effect.
Step 4: Click on Adjust and Blend above your photo workspace on the editor. This will help you manually adjust the effects (color burn, fade, saturation, brightness, etc.).
Step 5: Preview your result and once you are happy with the new cartoon photo painting, click on the Share button and download it from the top right corner of the editor to save it on your device.
● Ending Thoughts →
● This article explained creating and gave inspiration and ideas for the aesthetic cartoon painting you can choose from to make yours. In addition, the report also recommends Filmora as an influential editor if you intend to create an animation from your cartoon painting due to its tons of features.
● So, now you can start building your aesthetic drawings and cartoons!
Also read:
- New How to Make Photo Motion Effect Online for 2024
- New 2024 Approved 10 Photoshop Cartoon Effects For Creatives
- Updated 2024 Approved 5 Different Animation Styles A Simple but Comprehensive Guide
- New 2024 Approved The Ultimate Cheatsheet to 15 Adobe Animate Alternatives
- Updated In 2024, OBS Animated Alternatives
- New 2024 Approved Top 12 2D Animation Studios All Should Check Out
- New 10 Cartoon Characters That Should Top Your List for 2024
- New Best 8 Tools Tell You How to Make Slideshows for Instagram
- 4 Things You Should Know About Pinterest GIF
- What Is the Best Collage Photo Grid Maker - Experts Choice for 2024
- 2024 Approved The Top 20 Motion Graphics Companies & Studios
- 12 Captivating Websites with Triggered Animate on Scroll Examples for 2024
- Ideas That Will Help You Out in Learning How to Send WhatsApp Animated Gifs
- Updated In 2024, 12 Animated Slideshow PowerPoint Templates
- Updated In 2024, 2D Character Animation Everything You Should Know About It
- New 2024 Approved Convert Animated GIF From Video
- In 2024, What Is Anime? Anime VS Manga VS Cartoon
- 2024 Approved 5 Different Animation Styles A Simple but Comprehensive Guide
- Updated In 2024, 10 Cartoon Characters That Should Top Your List
- 2024 Approved Adobe Animate Text Effects Skills You Need to Know
- Updated In 2024, 12 Animation Video Maker That Can Triple Your Conversion Rates
- New 2024 Approved FREE Best Anime Streaming Sites to Download Anime
- 15 Iconic Cartoon Characters of All Time
- Best 15 Horror Animes That Will Trigger a Heart Attack for 2024
- Updated 2024 Approved Most Effective Tactics to Set WhatsApp Status
- Updated What Is Anime? Anime VS Manga VS Cartoon
- Updated In 2024, Most Effective Tactics to Set WhatsApp Status
- Updated 2024 Approved Best 15 Female Anime Characters-Who Is Your Favorite?
- Updated How to Create Animated Video on Canva for 2024
- What Wikipedia Cant Tell You About the 10 Best Batman Cartoons for 2024
- 10 Amazing Whiteboard Animation Video Examples You Need to Bookmark
- New In 2024, Best GIF to Video Converters
- New In 2024, 10 Best Photoshop Cartoon Effects For Creatives
- Updated Ideas of Learning How to Send WhatsApp Animated Gifs for 2024
- New In 2024, 15 Types of Cartoon Drawing Styles with Examples
- New 2024 Approved The Definitive Guide to Whiteboard Animation
- New No. 1 Maker to Animate Your Logo Online Free
- Updated 2024 Approved How to Create Benime Whiteboard Animation on Android
- In 2024, 10 2D/3D Animation Tips & Tricks for You
- In 2024, Top 7 Phone Number Locators To Track Samsung Galaxy A15 4G Location | Dr.fone
- Top 15 Apps To Hack WiFi Password On Realme 10T 5G
- The Best Android Unlock Software For Nokia Device Top 5 Picks to Remove Android Locks
- How To Fix Unresponsive Phone Touchscreen Of Honor X50i+ | Dr.fone
- In 2024, How to Transfer Contacts from Realme 11 Pro+ To Phone | Dr.fone
- In 2024, Why Your WhatsApp Live Location is Not Updating and How to Fix on your Poco C51 | Dr.fone
- In 2024, 3 Things You Must Know about Fake Snapchat Location On Vivo S17 | Dr.fone
- How To Bypass Activation Lock On Apple Watch Or Apple iPhone 11 Pro?
- 7 Solutions to Fix Chrome Crashes or Wont Open on Lava Yuva 3 | Dr.fone
- For People Wanting to Mock GPS on Nokia 150 (2023) Devices | Dr.fone
- About Lava FRP Bypass
- How to Fix My Vivo Y28 5G Location Is Wrong | Dr.fone
- In 2024, How to Watch Hulu Outside US On Vivo Y27s | Dr.fone
- Title: In 2024, Tutorial Guide to Animate Pictures in Canva
- Author: Elon
- Created at : 2024-05-19 03:05:06
- Updated at : 2024-05-20 03:05:06
- Link: https://animation-videos.techidaily.com/in-2024-tutorial-guide-to-animate-pictures-in-canva/
- License: This work is licensed under CC BY-NC-SA 4.0.
