
Learn About Lip-Syncing in Animation
Learn About Lip-Syncing in Animation
Learn all about Lip-Syncing in Animation
An easy yet powerful editor
Numerous effects to choose from
Detailed tutorials provided by the official channel
Lip syncing is one of the important parts of animations that need to be done perfectly. As children we have all enjoyed the special way in which Donald Duck or Mickey Mouse used to talk in cartoons, this is all because of the perfect lip-syncing.

Lip-sync animation tutorial are available that can assist you with the task.
In this article
01 [What is lip-syncing and its importance in animations?](#Part 1)
02 [Key factors to consider while lip-syncing in animations.](#Part 2)
03 [Best software for lip-syncing animations.](#Part 3)
04 [Best all-in-one video editing software for creating impressive animations.](#Part 4)
Part 1 What is Lip-syncing and Its Importance in Animations
In the simplest terms, lip-syncing can be termed as the process and way in which the sound is synchronized to the characters in animation. It is lip-syncing which brings life to the characters and makes them look talking. The process of lip-syncing in animations includes the dialogues and the mouth charts. The dialogues are broken into the phonetic syllables and the frames required for these syllables are then accessed.
Animations are moving and talking images and liveliness come from the dialogues that they speak. So, to make these talks appear real, flawless lip-syncing is very important.
Part 2 Key Factors to Consider While Lip-syncing in Animations
To make the lip-syncing in your animation look perfect several factors need to be taken care of. Some of these important ones are enlisted below.
01 Perfect Match of the Keyframes
The keyframes for the shapes of the words phrase by phrase needs to be perfect to make it look right. The right lip sync will have the correct timings from the mouth open to the mouth close.
02 Adding Body Language
To make the characters in your animations look real and lively, adding gestures and body language will play a huge role. Moreover, lip-syncing along with facial expressions will add to the overall richness of the animations.
03 Watch Yourself or Record Sample Videos
To get the correct lip-syncing for your animations, you can first try and practice by using a mirror or recording some trial videos. In these videos, you can speak and observe the jaw motion.
04 Use Blending
The technique of blending can also be used where the focus is on the most important shape of the mouth rather than each syllable. These shapes can then be blended and used in different ways and combinations.
05 Emphasize Eyes
Eyes need special focus as they can be used for expressing several emotions. Especially during the close-up shots in animations, a person looks at the eyes before the rest of the face.
06 Use the Apt Voice
No matter how perfectly the lip-syncing is done, it will not look good if the voice does not match the characters in your animations. So, make sure to select the voice that matches the looks and the personality of your characters.
Part 3 Best Software for Lip-syncing Animations
Lip sync in animations has become an easier and hassle-free task thanks to the advanced technology and several software and programs available. These 2D and 3D animation-supported tools allow syncing the mouth of the animated character with the dialogues and audio tracks. A few widely used tools for the task are enlisted below.
01 Anime Studio
This is a Windows and Mac-based professional software that supports multiple advanced functions like bone-rigging, automatic image tracing, integrated lip-synching, motion tracking, 3D shape design, character wizard, and many more. Using the vector-based tools of the software, you can add drawings and images for creating customized characters. There is a built-in character wizard that can be used for quick drawing and rigging the characters from the starting. Anime Studio allows recording the sound clip and then these can be synced to the animated characters. Several pre-set props, scenes, videos, stock audio, and characters are also available to choose from.

02 DAZ Studio
This is free-to-use software that can create impressive animations using multiple advanced features. The simple interface and functioning of the software make it apt even for users who have no prior experience in animations. The lip-sync feature of the software can be used to add audio to the created animations. Additional functions include morphing, adjusting different camera angles, plug-ins with advanced capabilities, and more.

03 Crazy Talk
To create impressive animations and add lip-syncing this is one of the popularly used tools. Quick to download, the software allows adding images and pictures to the tool, and then the head, mouth, and eye movement can be added along with lip-synced audio for creating impressive animations. The built-in timeline of the software offers you complete control over the animations, audio, and other parameters. Detailed customization options are supported including the teeth in the mouth of the character. The software is available for Windows and Mac systems.

04 Toon Boom Studio
To help you create rich animations for movies, games, learning, social media sites and any other purpose this is an apt tool to use. The software has a basic version for beginners while an advanced version for professionals. You can import media files in an array of formats like AI, JPEG, TGA, GIF, and others to create animations of your choice. Audio files in WAV, AIFF, and MP3 formats can be added to the created animations and the lip-sync analyzer tool can be used for that perfect syncing. Additional features include zoom-in, zoom-out, skeleton effect, support to the 3D background, multiple formats for exporting files, and more.

05 Crazy Talk Animator
This 2D animation tool can be used for creating rich animations by adding motion and different effects to your images. You can also create landscapes and scenes to further enhance the overall clip. Lip-sync to the animations is supported by the tool and you can even create marks for facial expression and use them to morph. Several tutorials and web resources are available for a better understanding of the tool and its functioning.

Adobe is also a good tool for all types of animation requirements and you can also check the adobe animate lip sync tutorial for your lip-syncing task.
Key Takeaways from This Episode
● Lip-syncing is an important and inevitable part of animations. Lip-syncing brings richness and liveliness to the clips.
● An array of tools and software are available that can help you effortlessly lip-sync animations.
● or all types of video editing needs and for creating animations, Wondershare Filmora works as an excellent all-in-one software.
Lip syncing is one of the important parts of animations that need to be done perfectly. As children we have all enjoyed the special way in which Donald Duck or Mickey Mouse used to talk in cartoons, this is all because of the perfect lip-syncing.
Lip-sync animation tutorial are available that can assist you with the task.
In this article
01 [What is lip-syncing and its importance in animations?](#Part 1)
02 [Key factors to consider while lip-syncing in animations.](#Part 2)
03 [Best software for lip-syncing animations.](#Part 3)
04 [Best all-in-one video editing software for creating impressive animations.](#Part 4)
Part 1 What is Lip-syncing and Its Importance in Animations
In the simplest terms, lip-syncing can be termed as the process and way in which the sound is synchronized to the characters in animation. It is lip-syncing which brings life to the characters and makes them look talking. The process of lip-syncing in animations includes the dialogues and the mouth charts. The dialogues are broken into the phonetic syllables and the frames required for these syllables are then accessed.
Animations are moving and talking images and liveliness come from the dialogues that they speak. So, to make these talks appear real, flawless lip-syncing is very important.
Part 2 Key Factors to Consider While Lip-syncing in Animations
To make the lip-syncing in your animation look perfect several factors need to be taken care of. Some of these important ones are enlisted below.
01 Perfect Match of the Keyframes
The keyframes for the shapes of the words phrase by phrase needs to be perfect to make it look right. The right lip sync will have the correct timings from the mouth open to the mouth close.
02 Adding Body Language
To make the characters in your animations look real and lively, adding gestures and body language will play a huge role. Moreover, lip-syncing along with facial expressions will add to the overall richness of the animations.
03 Watch Yourself or Record Sample Videos
To get the correct lip-syncing for your animations, you can first try and practice by using a mirror or recording some trial videos. In these videos, you can speak and observe the jaw motion.
04 Use Blending
The technique of blending can also be used where the focus is on the most important shape of the mouth rather than each syllable. These shapes can then be blended and used in different ways and combinations.
05 Emphasize Eyes
Eyes need special focus as they can be used for expressing several emotions. Especially during the close-up shots in animations, a person looks at the eyes before the rest of the face.
06 Use the Apt Voice
No matter how perfectly the lip-syncing is done, it will not look good if the voice does not match the characters in your animations. So, make sure to select the voice that matches the looks and the personality of your characters.
Part 3 Best Software for Lip-syncing Animations
Lip sync in animations has become an easier and hassle-free task thanks to the advanced technology and several software and programs available. These 2D and 3D animation-supported tools allow syncing the mouth of the animated character with the dialogues and audio tracks. A few widely used tools for the task are enlisted below.
01 Anime Studio
This is a Windows and Mac-based professional software that supports multiple advanced functions like bone-rigging, automatic image tracing, integrated lip-synching, motion tracking, 3D shape design, character wizard, and many more. Using the vector-based tools of the software, you can add drawings and images for creating customized characters. There is a built-in character wizard that can be used for quick drawing and rigging the characters from the starting. Anime Studio allows recording the sound clip and then these can be synced to the animated characters. Several pre-set props, scenes, videos, stock audio, and characters are also available to choose from.
02 DAZ Studio
This is free-to-use software that can create impressive animations using multiple advanced features. The simple interface and functioning of the software make it apt even for users who have no prior experience in animations. The lip-sync feature of the software can be used to add audio to the created animations. Additional functions include morphing, adjusting different camera angles, plug-ins with advanced capabilities, and more.
03 Crazy Talk
To create impressive animations and add lip-syncing this is one of the popularly used tools. Quick to download, the software allows adding images and pictures to the tool, and then the head, mouth, and eye movement can be added along with lip-synced audio for creating impressive animations. The built-in timeline of the software offers you complete control over the animations, audio, and other parameters. Detailed customization options are supported including the teeth in the mouth of the character. The software is available for Windows and Mac systems.
04 Toon Boom Studio
To help you create rich animations for movies, games, learning, social media sites and any other purpose this is an apt tool to use. The software has a basic version for beginners while an advanced version for professionals. You can import media files in an array of formats like AI, JPEG, TGA, GIF, and others to create animations of your choice. Audio files in WAV, AIFF, and MP3 formats can be added to the created animations and the lip-sync analyzer tool can be used for that perfect syncing. Additional features include zoom-in, zoom-out, skeleton effect, support to the 3D background, multiple formats for exporting files, and more.
05 Crazy Talk Animator
This 2D animation tool can be used for creating rich animations by adding motion and different effects to your images. You can also create landscapes and scenes to further enhance the overall clip. Lip-sync to the animations is supported by the tool and you can even create marks for facial expression and use them to morph. Several tutorials and web resources are available for a better understanding of the tool and its functioning.
Adobe is also a good tool for all types of animation requirements and you can also check the adobe animate lip sync tutorial for your lip-syncing task.
Key Takeaways from This Episode
● Lip-syncing is an important and inevitable part of animations. Lip-syncing brings richness and liveliness to the clips.
● An array of tools and software are available that can help you effortlessly lip-sync animations.
● or all types of video editing needs and for creating animations, Wondershare Filmora works as an excellent all-in-one software.
How to Make Animated Videos for Business [Simple Guide]
How to Make Animated Videos for Business – an Ultimate Guide

Liza Brown
Mar 27, 2024• Proven solutions
“Animation for business is about creating the illusion of life, and you can attract your buyers for life.”
Animation means when you create the illusion of movement in still figures. It is the method of drawing, designing, and making for photographic sequences. There could be many kinds of animation, such as traditional animation, stop motion animation, computer animation, Motion Graphics, 2D Animation, and 3D Animation.
The animation for business is the key to attract target audiences with ease. It is a way of communication, which is more than just cartoons and movies. The involvement of business animation has increased the ROI for various brands. All-in-all, you can determine the difference between business ROI with animation versus the business’s ROI without animation. If you feel that animation for business is not a thing for you, kindly stay tuned with the post. We will reveal useful facts regarding the importance of animation in business and how to make animated videos for your brand in an effortless manner.
- Part 1: Why use animation for business?
- Part 2: How to choose animation styles for your business?
- Part 3: What to Consider before Making Animated Business Videos?
- Part 4: Powerful Video Editor Helps You Create Stunning Animated Videos
- Part 5: How to make an animated business video?
Why use animation for business?
As we have earlier mentioned, animation is the key to attractive branding. According to Smart Insights’ recent article on Video Marketing in 2020, around 92% of marketers feel this an essential part of business strategy. In contrast, 88% of marketers think that video marketing in animation offers them positive ROI.
We can describe to you a list of 5 reasons to use animation for business as follows.
It is fun and entertaining
Your animation doesn’t need to be realistic or accurate. The purpose of using it in business or even cartoons is to instill fun and entertainment. The animation is a way to grab customers’ attention rather than being used as a strict marketing tool. Customers will look over to the story more interesting than the traditional ad system.
Lasting impression
The animated videos for business leave a memorable impression on the current as well as new customers. However, you must be clear about using animation in a way that creatively tells about your business. A story that is too different from the business purpose may not be a good idea to create a lasting impression.
So, you must tell about the values you inject in a particular product so that the potential customers get attracted by the visuals and the information they get from it.
Boosts conversion rate
Due to the highly attractive nature of business animation videos, the customer is likely to complete the action as expected by the brand. More than half the visited customers will likely stay on the website with animated content rather than getting you the high bounce off rates. So, you should beautifully explain the merits of your service or product to the user in animated videos for business. It’s great if you add CTA at the end of the video.
Easy updates
Being a potent marketing tool animation for business is a new and updated aspect. It is one of the advanced digital technologies to update messaging and marketing collateral and reflect your business values. The presentation of content with animation appeals to different and new potential audiences cost-effectively and efficiently.
Turns complex ideas into easy ones
Dealing with complex ideas or products in the text form can be pretty hard to convey effectively unless you insert animation in the text and make it attractive. After all, complex ideas can’t quickly turn into easy ones.
How to choose animation styles for your business?
After knowing the apparent benefits of animation, we will discuss how you can choose different animation styles for your business. There could be lots of types, among which we are just going to mention four basic animation styles for business.
Kinetic Typography
Kinetic typography means ‘moving text.’ You can see this kind of animation everywhere, from website landing pages to TV commercials. The tool can be useful to shrink, expand, fly, grow, move in slow motion, or change the letter in numerous ways to grab readers’ attention.
Character animation
Character animation refers to making animated animals or persons. It depends solely on the animator’s animator or demand to create a character and decide how it will move, look, or interact with the external environment.
Whiteboard animation
The whiteboard animation is another famous kind of animation for business where a storyboard is the basics. The process tells you a story mostly by the presentation of someone’s hands. Notably, the whiteboard is to represent the time-lapse or stop motion effect.
Infographics
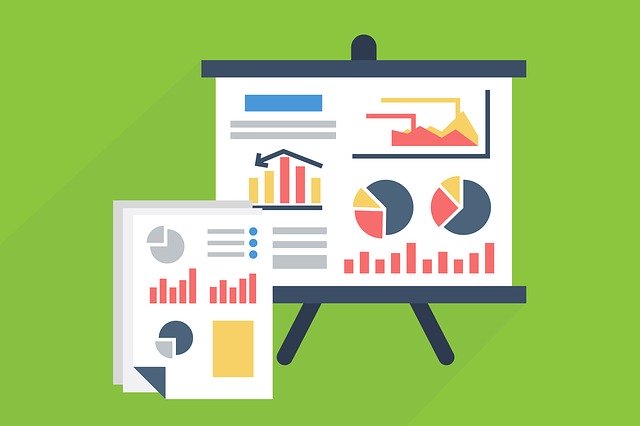
Information Graphics or Infographics refers to the visual representation of data or information. Generally, it collects charts, imagery, and minimal text to give a simple overview of the topic. The animated videos for business with Infographics are one of the valuable tools for business communication.
What to Consider before Making Animated Business Videos?
The decision to make animated videos for business could be a tricky task even if you are aware of the importance, as mentioned above, of animation. Merely knowing the importance won’t get you on the right path without any implementation efforts.
You need to implement the right strategies and know what factors are essential to look for before making animated videos for business. So, let’s discuss those critical points!
Budget
The budget comes as the top-most factor because you can’t do anything without enough money. So, be ready to invest a fair amount or at least invest in reliable video editing software. However, animation for business doesn’t demand a budget like creating a Pixar movie in millions. For instance, using Wondershare Filmora will cost you around $49.99 per year, less than spending millions in outsourcing video animation work. However, it also depends upon the kind of job and style of business values you want to present in the animation. You have to outsource if it’s expert-level work!
Brand Positioning
Consider your brand positioning! While using the animation for business, viewers tend to remember more about the brand values than mere visuals. They want to know your identity as a brand and your industry. It will help if you incorporate some brand positioning first before deciding to make animation videos for business. What you can do is check the overview of the brand from the customer’s point of view. After that, you can instill the presentation according to your business type, whether B2B or B2C.
Target Audience
Making animation videos about the target audience is essential, but it doesn’t necessarily mean making videos only for them. The very first question is to ask why you are making such a video. There could be many reasons behind the same, such as gaining new customers, educating the current customers, or raising the awareness of a new product or brand.
Market
Video promotion is the last but not least, step! You must know the ideas to market your videos before even starting the creation. The market can be Instagram or any other social media platform where you get a high presence of potential customers. Furthermore, the video should not be too pushy.
How to make an animated business video?
You need to stay by the steps given below to create stunning animated videos for business.
Step 1: Video Script
Start by writing what you want to present in the form of a video script. To be clear, write it according to the direction and purpose of your video.
Step 2: Create a storyboard
You can implement the animation video-making process after creating a storyboard for your video. It is more of a way to visualize your video about different shots and scenarios.
You can use Animaker as an online storyboard tool.
Step 3: Choose the style of animation video
Select your particular kind of animation for business from the different types of animation videos given above.
Step 4: Start animation
With Wondershare Filmora Pro Video Editor’s help, you can do wonders for the animation for business. All the tutorials are clear on its official YouTube channel on using specific animation tools of Filmora Pro.
Step 5: Add background music
It is vital to have a soul in your story. You can add suitable background music and voice-over with the help of Wondershare Filmora Video Editor with ease of tools.
Conclusion
Thus, that is all you need to understand about animation for business. No matter the brand or brand values you have, animated videos for business always stand apart from traditional marketing.
So, be smart and use the updated marketing tools!
Here is a 101 Guide on animation for business with simple steps, even for a beginner. We’ll tell you the importance and right software to create stunning animated videos for business.
Liza Brown
Liza Brown is a writer and a lover of all things video.
Follow @Liza Brown
Liza Brown
Mar 27, 2024• Proven solutions
“Animation for business is about creating the illusion of life, and you can attract your buyers for life.”
Animation means when you create the illusion of movement in still figures. It is the method of drawing, designing, and making for photographic sequences. There could be many kinds of animation, such as traditional animation, stop motion animation, computer animation, Motion Graphics, 2D Animation, and 3D Animation.
The animation for business is the key to attract target audiences with ease. It is a way of communication, which is more than just cartoons and movies. The involvement of business animation has increased the ROI for various brands. All-in-all, you can determine the difference between business ROI with animation versus the business’s ROI without animation. If you feel that animation for business is not a thing for you, kindly stay tuned with the post. We will reveal useful facts regarding the importance of animation in business and how to make animated videos for your brand in an effortless manner.
- Part 1: Why use animation for business?
- Part 2: How to choose animation styles for your business?
- Part 3: What to Consider before Making Animated Business Videos?
- Part 4: Powerful Video Editor Helps You Create Stunning Animated Videos
- Part 5: How to make an animated business video?
Why use animation for business?
As we have earlier mentioned, animation is the key to attractive branding. According to Smart Insights’ recent article on Video Marketing in 2020, around 92% of marketers feel this an essential part of business strategy. In contrast, 88% of marketers think that video marketing in animation offers them positive ROI.
We can describe to you a list of 5 reasons to use animation for business as follows.
It is fun and entertaining
Your animation doesn’t need to be realistic or accurate. The purpose of using it in business or even cartoons is to instill fun and entertainment. The animation is a way to grab customers’ attention rather than being used as a strict marketing tool. Customers will look over to the story more interesting than the traditional ad system.
Lasting impression
The animated videos for business leave a memorable impression on the current as well as new customers. However, you must be clear about using animation in a way that creatively tells about your business. A story that is too different from the business purpose may not be a good idea to create a lasting impression.
So, you must tell about the values you inject in a particular product so that the potential customers get attracted by the visuals and the information they get from it.
Boosts conversion rate
Due to the highly attractive nature of business animation videos, the customer is likely to complete the action as expected by the brand. More than half the visited customers will likely stay on the website with animated content rather than getting you the high bounce off rates. So, you should beautifully explain the merits of your service or product to the user in animated videos for business. It’s great if you add CTA at the end of the video.
Easy updates
Being a potent marketing tool animation for business is a new and updated aspect. It is one of the advanced digital technologies to update messaging and marketing collateral and reflect your business values. The presentation of content with animation appeals to different and new potential audiences cost-effectively and efficiently.
Turns complex ideas into easy ones
Dealing with complex ideas or products in the text form can be pretty hard to convey effectively unless you insert animation in the text and make it attractive. After all, complex ideas can’t quickly turn into easy ones.
How to choose animation styles for your business?
After knowing the apparent benefits of animation, we will discuss how you can choose different animation styles for your business. There could be lots of types, among which we are just going to mention four basic animation styles for business.
Kinetic Typography
Kinetic typography means ‘moving text.’ You can see this kind of animation everywhere, from website landing pages to TV commercials. The tool can be useful to shrink, expand, fly, grow, move in slow motion, or change the letter in numerous ways to grab readers’ attention.
Character animation
Character animation refers to making animated animals or persons. It depends solely on the animator’s animator or demand to create a character and decide how it will move, look, or interact with the external environment.
Whiteboard animation
The whiteboard animation is another famous kind of animation for business where a storyboard is the basics. The process tells you a story mostly by the presentation of someone’s hands. Notably, the whiteboard is to represent the time-lapse or stop motion effect.
Infographics
Information Graphics or Infographics refers to the visual representation of data or information. Generally, it collects charts, imagery, and minimal text to give a simple overview of the topic. The animated videos for business with Infographics are one of the valuable tools for business communication.
What to Consider before Making Animated Business Videos?
The decision to make animated videos for business could be a tricky task even if you are aware of the importance, as mentioned above, of animation. Merely knowing the importance won’t get you on the right path without any implementation efforts.
You need to implement the right strategies and know what factors are essential to look for before making animated videos for business. So, let’s discuss those critical points!
Budget
The budget comes as the top-most factor because you can’t do anything without enough money. So, be ready to invest a fair amount or at least invest in reliable video editing software. However, animation for business doesn’t demand a budget like creating a Pixar movie in millions. For instance, using Wondershare Filmora will cost you around $49.99 per year, less than spending millions in outsourcing video animation work. However, it also depends upon the kind of job and style of business values you want to present in the animation. You have to outsource if it’s expert-level work!
Brand Positioning
Consider your brand positioning! While using the animation for business, viewers tend to remember more about the brand values than mere visuals. They want to know your identity as a brand and your industry. It will help if you incorporate some brand positioning first before deciding to make animation videos for business. What you can do is check the overview of the brand from the customer’s point of view. After that, you can instill the presentation according to your business type, whether B2B or B2C.
Target Audience
Making animation videos about the target audience is essential, but it doesn’t necessarily mean making videos only for them. The very first question is to ask why you are making such a video. There could be many reasons behind the same, such as gaining new customers, educating the current customers, or raising the awareness of a new product or brand.
Market
Video promotion is the last but not least, step! You must know the ideas to market your videos before even starting the creation. The market can be Instagram or any other social media platform where you get a high presence of potential customers. Furthermore, the video should not be too pushy.
How to make an animated business video?
You need to stay by the steps given below to create stunning animated videos for business.
Step 1: Video Script
Start by writing what you want to present in the form of a video script. To be clear, write it according to the direction and purpose of your video.
Step 2: Create a storyboard
You can implement the animation video-making process after creating a storyboard for your video. It is more of a way to visualize your video about different shots and scenarios.
You can use Animaker as an online storyboard tool.
Step 3: Choose the style of animation video
Select your particular kind of animation for business from the different types of animation videos given above.
Step 4: Start animation
With Wondershare Filmora Pro Video Editor’s help, you can do wonders for the animation for business. All the tutorials are clear on its official YouTube channel on using specific animation tools of Filmora Pro.
Step 5: Add background music
It is vital to have a soul in your story. You can add suitable background music and voice-over with the help of Wondershare Filmora Video Editor with ease of tools.
Conclusion
Thus, that is all you need to understand about animation for business. No matter the brand or brand values you have, animated videos for business always stand apart from traditional marketing.
So, be smart and use the updated marketing tools!
Here is a 101 Guide on animation for business with simple steps, even for a beginner. We’ll tell you the importance and right software to create stunning animated videos for business.
Liza Brown
Liza Brown is a writer and a lover of all things video.
Follow @Liza Brown
10 Trendy & Stylish Free Logo Animation Templates
10 Trendy & Stylish Free Logo Animation Templates in 2024
An easy yet powerful editor
Numerous effects to choose from
Detailed tutorials provided by the official channel
The logo animation of your video or presentation sets the tone for how your audience will perceive your brand. There are many stylish and trendy free logo animation templates that you can use to create an inspiring impression of your brand. The basic is to make sure your logo animation grabs your viewer’s attention and is catchy to make them remember your company’s name. This article will guide you through complete logo animation
![]()
This article will guide you through complete logo animation templates. We have also included various logo animations that you can choose from for your brand. Along with that, you will also see how logo motion graphics and 3D logo effects come out to be a wonder to promote your business to the next level following After Effects logo templates and free logo intro templates. The article also guides you through proper steps to apply logo motion effectively with respective screenshots.
In this article
01 [What an Animated Logo Can Do for Your Business](#Part 1)
02 [10 Top Quality Free Logo Animation Templates](#Part 2)
03 [5 Techniques for Custom Logo Animation in After Effects](#Part 3)
04 [How to Make a Logo Animation for Free in Just 3 Minutes](#Part 4)
Part 1 What an Animated Logo Can Do for Your Business
It is widespread info that logo animation is often an effective promotional tool. Here are some of the fantastic purposes or benefits of an animated logo to your Business is that:
● It helps to increase the memorability of the brand.
● Stop motion logo helps in advertising and creating brand awareness.
● Logo animation on YouTube can improve storytelling, i.e., your animated video can tell a story about your brand.
● logo intro starts an original image for your brand’s growth.
To make animated logo work for your Business perfectly and efficiently, consider the following factors:
● Critically analyze the business goal and think of the brand’s personality.
● The logo animation should orient to the user’s preference. Therefore make sure you carry out user research.
● Create an unpredictable animation logo. Try to make your audience surprised so that the final results are unexpected in the first few seconds.
● After Effects logo animation templates should not be too long; therefore, try not to make your animated logo complex and keep it short. The recommendation is for it to stay under seconds.
![]()
Part 1 Top Quality Free Logo Animation Templates
This article section will provide a top-quality template for free logo animation on YouTube and other platforms for your business growth. From the list, you can select the logo animation templates free download that matches your need:
![]()
01Web Series
Web Series logo animation can be helpful on a web series Project. The pictures include some cool effects with minimal and captivating design to wow your audience.
02VHS 8Logo Intro
VHS 8Logo templates will take you back to the time of kung-fu movies and arcade 8-bit games. It is easy to edit and comes with a video tutorial featuring distortion effects, broken videotape, and lousy TV.
03Comic Logo
Comic Logo can be used in cartoons, comics, and kids theme video projects and comes in very handy. It has a cartoon style animation, is very colorful, and will be appreciated and loved by your audience
04Zero Glitch
Zero GlitchCan be used to give a glitch introduction to your video. It has an industrial and unique draft design that can perfectly fit any project that needs a techno logo opening.
05Quick bling
Quick bling is an elegant and simple logo animation template for upcoming projects. This logo template is easily customized and has a tutorial if you encounter any problems.
06Rise From The Dark
Rise from Dark comes up with some eye-grabbing yet simple After Effect logo animation template free download that can fit any video content. This logo template is perfect whether you need a logo intro for an event opener, TV show, or promo.
07Sports Logo Template
Sports Logo Template includes pre-rendering footage with an easy customization option. It doesn’t require any plugins.
08Holi Festival Logo Templates
Holi Festival Logo Templates are perfect when you want to grab your audience’s attention. A juicy bright explosion of color and features seven sounds of vibrant animation. It is super easy to use in animating your logo.
09Light City Logo Templates
Light City Logo Templates is a stunning logo animation template that features a luminescent cityscape and golden lions against a dark background specially designed for a dramatic and mysterious luxurious feel.
10Drifting Car Logo Templates
Drifting Car Logo Templates is the perfect answer for a movie project. It has seconds of footage with a funky sports car.
Part 3 5 Techniques for Custom Logo Animation in After Effects
A perfect way to capture your viewers’ attention and remind them who made the video is by creating a striking and simple logo animation After Effects template free download for your video project and using the After Effects logo animation template in an absolute sense. In this article, we will throw away tools that you will need to animate your logo from scratch in After Effects:
![]()
01Technique 1: Separate the Layers
Separate the layers in Photoshop or illustrator and check if they are all separated and correctly named
![]()
Steps: Next, import your logo into after-effects as footage correctly. Otherwise, cannot access the individual layers in your logo:
● For illustrator make sure the logo elements are on a separate layer.
● If the element is grouped, that is the same way they will be in After Effect.
● To simplify this process, select the group in AI. Using the layer menu, click on the release to layers>sequence.
● Click on import and select your logo design file.
● Select composition>retain layer sizes
● Click on import, and your logo will appear in your media browser as a comp containing its layer and include the folder of those layers.
02Technique 2: Editing Properly
If you made a mistake and important your file as a footer is better than a composition, here is how to fix it:
● Drag your single a high elements to the timeline from the browser media
● Right click>create>convert to layered comp
● Now your Design file will be accessible in layers
03Technique 3: Transitions
You can opt for different available transitions out of the logo intro template After Effects to modify your logo. Then, you can go with the dual Effect of logo animation with a transition effect.
![]()
04Technique 4: Logo Animation
Animate each layer using the straight-forward property scale, rotation, position, and opacity properties
● Select the layer in the timeline to add a keyframe to your layers
● Create and finish a keyframe by placing your Playhead on the frame you want
● Create where you want the animation to start by moving several frames backward from your first keyframe
● Change the value of the keyframe property until you are satisfied with the look
● Continue with each of the layers in turn until you feel happy with the effects
![]()
05Technique 5: Title Animation
Animate the title using the varieties of animation styles in After Effects if you can edit a text layer.
● Remove any AI text objects that you want to replace with after effects text layer.
● Create a fresh After Effects text layer.
● Copy-paste the text from AI to after-effects. In doing this, it will use the same font, color, and sizes is when you paste it in
● Go to the effects browser, choose your title animation, and drag and drop it to your new title.
● View all keyframes by pressing U and select the layer in the timeline, then adjust as you like.
Part 4 How to Make a Logo Animation for Free in Just 3 Minutes
Filmora is one of the best software editing tools for beginners to design logo animation and logo intro template free download easily and quickly with keyframing. It produces high-quality and smoothly animated logos with motion blur that gives your logo animation more touch-up. The logo intro-free animation in Filmora is simple to replicate if you get some logo inspiration and then conclude how you will execute your animation. All the editing tools like shape, elements, etc., are available in Filmora software.
![]()
01Step 1: Create Logo
First, you need to create the logo or have a png logo image using any photo editing software like Photoshop or Canva.

Wondershare Filmora - Best Video Editor for Mac/Windows
5,481,435 people have downloaded it.
Build unique custom animations without breaking a sweat.
Focus on creating epic stories and leave the details to Filmora’s auto features.
Start a creative adventure with drag & drop effects and endless possibilities.
Filmora simplifies advanced features to save you time and effort.
Filmora cuts out repetition so you can move on to your next creative breakthrough.
02Step 2: Import background
After you have edited your logo on Photoshop, import background video and logo in Filmora and Use the key-framing feature to animate your logo
03Step 3: Add effects
Add other effects to your logo animation to make it perfect by adding colors, text, etc., to wow your logo animations. Add shapes to the image to give it some effect then add the motions to these shapes.
04Step 4: Export
Once you are satisfied with the trendy and stylish free logo, you can export and share them on your social media platform.
● Key Takeaways from This Episode →
● Impact of animated logo for business
● Top-quality free logo animation
● Steps to make logo through Premiere Pro logo animation template for free.
The logo animation of your video or presentation sets the tone for how your audience will perceive your brand. There are many stylish and trendy free logo animation templates that you can use to create an inspiring impression of your brand. The basic is to make sure your logo animation grabs your viewer’s attention and is catchy to make them remember your company’s name. This article will guide you through complete logo animation
![]()
This article will guide you through complete logo animation templates. We have also included various logo animations that you can choose from for your brand. Along with that, you will also see how logo motion graphics and 3D logo effects come out to be a wonder to promote your business to the next level following After Effects logo templates and free logo intro templates. The article also guides you through proper steps to apply logo motion effectively with respective screenshots.
In this article
01 [What an Animated Logo Can Do for Your Business](#Part 1)
02 [10 Top Quality Free Logo Animation Templates](#Part 2)
03 [5 Techniques for Custom Logo Animation in After Effects](#Part 3)
04 [How to Make a Logo Animation for Free in Just 3 Minutes](#Part 4)
Part 1 What an Animated Logo Can Do for Your Business
It is widespread info that logo animation is often an effective promotional tool. Here are some of the fantastic purposes or benefits of an animated logo to your Business is that:
● It helps to increase the memorability of the brand.
● Stop motion logo helps in advertising and creating brand awareness.
● Logo animation on YouTube can improve storytelling, i.e., your animated video can tell a story about your brand.
● logo intro starts an original image for your brand’s growth.
To make animated logo work for your Business perfectly and efficiently, consider the following factors:
● Critically analyze the business goal and think of the brand’s personality.
● The logo animation should orient to the user’s preference. Therefore make sure you carry out user research.
● Create an unpredictable animation logo. Try to make your audience surprised so that the final results are unexpected in the first few seconds.
● After Effects logo animation templates should not be too long; therefore, try not to make your animated logo complex and keep it short. The recommendation is for it to stay under seconds.
![]()
Part 1 Top Quality Free Logo Animation Templates
This article section will provide a top-quality template for free logo animation on YouTube and other platforms for your business growth. From the list, you can select the logo animation templates free download that matches your need:
![]()
01Web Series
Web Series logo animation can be helpful on a web series Project. The pictures include some cool effects with minimal and captivating design to wow your audience.
02VHS 8Logo Intro
VHS 8Logo templates will take you back to the time of kung-fu movies and arcade 8-bit games. It is easy to edit and comes with a video tutorial featuring distortion effects, broken videotape, and lousy TV.
03Comic Logo
Comic Logo can be used in cartoons, comics, and kids theme video projects and comes in very handy. It has a cartoon style animation, is very colorful, and will be appreciated and loved by your audience
04Zero Glitch
Zero GlitchCan be used to give a glitch introduction to your video. It has an industrial and unique draft design that can perfectly fit any project that needs a techno logo opening.
05Quick bling
Quick bling is an elegant and simple logo animation template for upcoming projects. This logo template is easily customized and has a tutorial if you encounter any problems.
06Rise From The Dark
Rise from Dark comes up with some eye-grabbing yet simple After Effect logo animation template free download that can fit any video content. This logo template is perfect whether you need a logo intro for an event opener, TV show, or promo.
07Sports Logo Template
Sports Logo Template includes pre-rendering footage with an easy customization option. It doesn’t require any plugins.
08Holi Festival Logo Templates
Holi Festival Logo Templates are perfect when you want to grab your audience’s attention. A juicy bright explosion of color and features seven sounds of vibrant animation. It is super easy to use in animating your logo.
09Light City Logo Templates
Light City Logo Templates is a stunning logo animation template that features a luminescent cityscape and golden lions against a dark background specially designed for a dramatic and mysterious luxurious feel.
10Drifting Car Logo Templates
Drifting Car Logo Templates is the perfect answer for a movie project. It has seconds of footage with a funky sports car.
Part 3 5 Techniques for Custom Logo Animation in After Effects
A perfect way to capture your viewers’ attention and remind them who made the video is by creating a striking and simple logo animation After Effects template free download for your video project and using the After Effects logo animation template in an absolute sense. In this article, we will throw away tools that you will need to animate your logo from scratch in After Effects:
![]()
01Technique 1: Separate the Layers
Separate the layers in Photoshop or illustrator and check if they are all separated and correctly named
![]()
Steps: Next, import your logo into after-effects as footage correctly. Otherwise, cannot access the individual layers in your logo:
● For illustrator make sure the logo elements are on a separate layer.
● If the element is grouped, that is the same way they will be in After Effect.
● To simplify this process, select the group in AI. Using the layer menu, click on the release to layers>sequence.
● Click on import and select your logo design file.
● Select composition>retain layer sizes
● Click on import, and your logo will appear in your media browser as a comp containing its layer and include the folder of those layers.
02Technique 2: Editing Properly
If you made a mistake and important your file as a footer is better than a composition, here is how to fix it:
● Drag your single a high elements to the timeline from the browser media
● Right click>create>convert to layered comp
● Now your Design file will be accessible in layers
03Technique 3: Transitions
You can opt for different available transitions out of the logo intro template After Effects to modify your logo. Then, you can go with the dual Effect of logo animation with a transition effect.
![]()
04Technique 4: Logo Animation
Animate each layer using the straight-forward property scale, rotation, position, and opacity properties
● Select the layer in the timeline to add a keyframe to your layers
● Create and finish a keyframe by placing your Playhead on the frame you want
● Create where you want the animation to start by moving several frames backward from your first keyframe
● Change the value of the keyframe property until you are satisfied with the look
● Continue with each of the layers in turn until you feel happy with the effects
![]()
05Technique 5: Title Animation
Animate the title using the varieties of animation styles in After Effects if you can edit a text layer.
● Remove any AI text objects that you want to replace with after effects text layer.
● Create a fresh After Effects text layer.
● Copy-paste the text from AI to after-effects. In doing this, it will use the same font, color, and sizes is when you paste it in
● Go to the effects browser, choose your title animation, and drag and drop it to your new title.
● View all keyframes by pressing U and select the layer in the timeline, then adjust as you like.
Part 4 How to Make a Logo Animation for Free in Just 3 Minutes
Filmora is one of the best software editing tools for beginners to design logo animation and logo intro template free download easily and quickly with keyframing. It produces high-quality and smoothly animated logos with motion blur that gives your logo animation more touch-up. The logo intro-free animation in Filmora is simple to replicate if you get some logo inspiration and then conclude how you will execute your animation. All the editing tools like shape, elements, etc., are available in Filmora software.
![]()
01Step 1: Create Logo
First, you need to create the logo or have a png logo image using any photo editing software like Photoshop or Canva.
Wondershare Filmora - Best Video Editor for Mac/Windows
5,481,435 people have downloaded it.
Build unique custom animations without breaking a sweat.
Focus on creating epic stories and leave the details to Filmora’s auto features.
Start a creative adventure with drag & drop effects and endless possibilities.
Filmora simplifies advanced features to save you time and effort.
Filmora cuts out repetition so you can move on to your next creative breakthrough.
02Step 2: Import background
After you have edited your logo on Photoshop, import background video and logo in Filmora and Use the key-framing feature to animate your logo
03Step 3: Add effects
Add other effects to your logo animation to make it perfect by adding colors, text, etc., to wow your logo animations. Add shapes to the image to give it some effect then add the motions to these shapes.
04Step 4: Export
Once you are satisfied with the trendy and stylish free logo, you can export and share them on your social media platform.
● Key Takeaways from This Episode →
● Impact of animated logo for business
● Top-quality free logo animation
● Steps to make logo through Premiere Pro logo animation template for free.
Top 12 Illusion Gifs: Top Picks
Best 12 Illusion Gifs: Top Picks
An easy yet powerful editor
Numerous effects to choose from
Detailed tutorials provided by the official channel
Do you know that these are reaching heights and people are very happy in sharing them? If you are unaware of it, don’t worry and keep reading. Thorugh today’s post, we will discuss illusion GIF in detail yo make it easy for you to make up your mind and try your hands on it.
In this article
01 [What Is GIF Illustration?](#Part 1)
02 [Best 12 Illusion Gifs](#Part 2)
Part 1 What Is GIF Illustration?
GIFs are a form of digital media that is used to show animations and other types of visuals. It is a type of file format that can be created with different editing software. These are usually used for short videos or images on the internet and social media.
Furthermore, GIFs are an excellent way to create visual content for social media posts or as an animated overlay on a video.
These are now used as everything from advertisements to commentary from all walks of life. The users of GIFs seem to be endless! They can be used in many different ways, such as to add visual interest, provide context or even humor, and so on. It is totally on the user how they are considering it to make the things more relevant to the context for which they have created or shared the GIF.
Part 2 Best 12 Illusion Gifs
This curated list will help you to know the best Illusion GIF that is still ruling out the market. This includes:-
01Van Gogh Stare GIF
The Van Gogh Stare, also known as the “dazzle camouflage,” is an optical illusion created by artist Vincent van Gogh. It was likely intended to represent the eye’s instability and movement. The image has been used in a variety of ways, including on social media sites like Tumblr. In general, this GIF illusion is a demonstration of the Van Gogh Stare.
02This brain-busting rotation
We are all used to seeing the world around us in two dimensions. But what if we could see it in three dimensions? Well, now you can! This GIF shows a rotating 3D object that appears to be made of cubes. The illusion is created by the fact that the camera rotates around the object, but you can’t see it from every angle.
03This loop tea GIF
This GIF illusion is a perfect example of how our brain works. When we see something that doesn’t make sense, we try to make sense of it by filling in the gaps with what we believe it should look like. The GIF illusion consists of two frames. The first frame shows a woman drinking tea from a cup, and the second frame shows her drinking from an empty cup. When our brain tries to fill in the gaps, it assumes that the woman drank all of the tea and sees her as drinking from an empty cup even though she is actually drinking from a full one.
04No smkoing! Well, you should never
The GIF illusion consists of two images: one of a cloud and another of cauliflower. The animation starts with the cloud and then switches to the cauliflower. But if you take a closer look, you’ll notice that there’s actually no smoke in the first image, just the cauliflower. And it’s not really a head either - it’s just an ordinary cauliflower from behind.
The reason why this illusion works is that our brains are wired to see patterns and shapes in things that aren’t always there - for example, when we see faces in random objects or shapes in clouds. This GIF takes advantage of that by showing two images where these are
05The never-ending corridor
The GIF illusion is a rather simple illusion that takes advantage of the way our brains perceive motion. Our brains are programmed to see a moving object as a single object in order to make sense of the world around us. This means that when we see an object moving, we perceive it as one solid thing instead of many separate objects.
This GIF illusion is a perfect example of how the human brain works. The brain can’t process that the two images are different, and instead, it sees them as a single image.
06Now, this, the eye-pleaser
The illusion works on the principle of depth perception and how our eyes are not able to accurately process all of the information that they receive from our surroundings. The black lines on the white background make it seem like there are two rows of lines, but there’s only one row that appears to be moving back and forth.
07Commercial At design GIF
The GIF illusion is a simple design that tricks the brain into thinking that it is 3D. The design consists of two circles, one inside the other, with three arrows pointing inwards. The outside circle has a white background and the inside circle has a black background. When you look at this design from different angles, you will see that the arrows point outwards and not inwards as they should be doing.
08Wait what? Is this truly a reflection?
This illusion works because our brain recognizes that the mirror image is not what’s really happening and flips the image in our head to make it right-side up.
It’s also possible that we are tricked by the fact that we know mirrors flip images, so when we see an upside-down image in front of us, we automatically assume it’s just inverted.
09This haunting tableau (Not exactly a GIF but worth sharing)
The GIF illusion is a type of optical illusion that can be explained by the Gestalt Principles. The Gestalt Principles are guidelines for how we perceive and organize visual information. This optical illusion is created by overlapping two similar images on top of each other in the same place but with different colors. Our brain perceives this as a single image, and our eyes try to make sense of it by looking for visual cues in the image. When we focus on one image, it looks like a triangle with a red line going through it. But when we focus on the other image, it looks like an arrow pointing up that has been cut in half with a red line through it.
10This safety hazard
This GIF illusion is a safety hazard because it tricks the brain into thinking that the person in front of them is standing still. When you stare at this GIF for too long, the person will appear to be moving backward. This illusion can cause accidents if you believe that a person is still when they are actually approaching you.
11Welcome to the 3d World
It’s an illusion created by the use of perspective. The camera is positioned in such a way that it appears that the three-dimensional cube is only two-dimensional.
The camera is positioned in such a way that it appears that the three-dimensional cube is only two-dimensional.
12I will keep this table forever
The GIF illusion is an optical illusion that makes the table in the background appear to be bigger than it actually is. The table in front of the window appears to be smaller and closer to the viewer. There are two factors that make this illusion happen. One of them is perspective, which makes objects appear larger as they get closer and smaller as they get farther away. The other factor is size constancy, which makes objects look about the same size regardless of how far away they are from you.
Part 3 How Do You Make a GIF Illustration?
If you are someone who is curious to make a GIF illustration but have no clue how to make it, then the online portals are catering to all your needs. Right now, there are multiple tools available that will help you to create the illustration seamlessly. Among all of them, we suggest you try your hands on Filmora.
Wondershare Filmora Video Editor is one of the best tools available to make the gift illustration as you want. You just need to upload the content, and then you are all set to edit it at your convenience. The best part is the interface of the tool is very simple to understand, which simply means there will be no need for you to belong to any technical background to use this tool.
Wondershare Filmora - Best Video Editor for Mac/Windows
5,481,435 people have downloaded it.
Build unique custom animations without breaking a sweat.
Focus on creating epic stories and leave the details to Filmora’s auto features.
Start a creative adventure with drag & drop effects and endless possibilities.
Filmora simplifies advanced features to save you time and effort.
Filmora cuts out repetition so you can move on to your next creative breakthrough.
Along with creating the GIF files, it also help you to do the editing as you wanted. For example, if you are looking forward to reading on any text to the GIF file, you can also do it seamlessly. The interface will help you to understand how you can do it so that there will be no problem in creating the content as you want.
● Key Takeaways from This Episode →
● Filmora is the best tool to create illusion GIF.
●Illusion GIF are in use for advertisement.
●Creating illusion GIF is just a matter of few steps.
Tips That Show Anybody How to Get Awesome Background for Slideshow in PowerPoint
Tips That Show Anybody How to Get Awesome Background for Slideshow in Powerpoint
An easy yet powerful editor
Numerous effects to choose from
Detailed tutorials provided by the official channel
Amazing slideshow background are an absolute attention grabber in the realm of creative PowerPoint presentations. If you wish to upgrade yours with the same, be here to learn how!
In this article
01 [How to Add Video Background in PowerPoint?](#Part 1)
02 [How to Create Moving Backgrounds in Microsoft PowerPoint?](#Part 2)
03 [Some Tips for You to Get Awesome PowerPoint Backgrounds & Templates](#Part 3)
Part 1 How to Add Video Background in PowerPoint?
When the talk is about engaging means to deliver a precise information, PowerPoint slideshows are an absolute stunner. While these are already a captivating utility to present your thing, the output and audience engagement is at par with the inclusion of attractive design elements in the presentation. As is evident, there are enormous diversities of supplementary elements to complement your presentation, let us centre our discussion to the application of video background for slideshow in PowerPoint.
User’s Guide to Add Video Background in a PowerPoint Slideshow
The following section presents a detailed explanation of the steps to supplement your PowerPoint presentations with classic video backgrounds in just a few quick steps:
Step 1: Launch Your Presentation
Start with opening the desired PowerPoint presentation to which you want to add the video background, in any of your preferred devices.
Step 2: Add a Video to Your Slide
Browse through your presentation slides to locate the one you want to add the video background to. When you have made your choice, navigate to the PowerPoint toolbar at the top and hit the ‘Insert’ tab and choose the ‘Video’ option.
You will now be presented with 2 choices, either uploading a video from your device or insert one from the web by pasting its YouTube URL into the slide. If you are uploading a video from your device, proceed with selecting the desired video and tap ‘Insert’.

Step 3: Move and Resize Your Video
After uploading your video to the slide, you need to make suitable adjustments in its size and alignment to synchronize the same with the contents of the slide. To do this, drag the top left corner of the video to that of the slide to set the top alignment ratio. In the same way, move the bottom right corner of the video to be in sync with that of the slide. You will see the video occupying the entire slide at the end of the adjustment process.

Step 4: Set the Video Background
You will now need to set the video as the background of your slide, so that the latter’s contents are displayed over the video. You can do this by right clicking on the video and choosing the ‘Send to Back’ option from the dropdown that follows. This will cause the contents of your slide to get displayed over the video.

Step 5: Playback Edit and Customization Choices
Before proceeding towards making changes in the video playback and formatting, prefer taking a quick preview of your work till here. Once you are satisfied, navigate to the PowerPoint Toolbar at the top, hit the ‘Video Tools’ tab, followed by clicking on the ‘Playback’ tab.
It is recommended to introduce the following changes in your video for the most affordable slideshow output:
● Loop Your Video
Creating a video loop will facilitate you with an automatic replay of your video without the need to restart it every time with a click. You can loop your video by navigating to the ‘Video Options’ section and choose ‘Loop Until Stopped’ by clicking within the checkbox next to it. The background video will now continue to play until you switch to a different slide.
● Automatically Start Your Video
To avoid clicking on the slide amid your presentation for the video loop to begin, adjust the latter’s settings for an automatic start. Navigate to the ‘Start’ dropdown menu and select ‘Automatically’.
● Trim Your Video
You can work with some basic video editing tools in PowerPoint, like trimming and cropping your background video to a desired length. If you wish to ward off certain portions of your video, reach to and click o the ‘Trim Video’ button. Following this, drag the slider of the video to select the desired portions of the clip and exclude the rest.
You can further work with some more editing effects to create the perfect video backgrounds for your presentation slides in line with your specific preferences.

Step 6: Annotate Your Video Background
When you are done with the video editing process, take a preview of the same to ensure that everything is set in the proper order and at the proper place. Lastly, if you wish to add suitable text annotations to your video, you can do this with the ‘ClassPoint’ tool to write over the video background. All you need to do is select a preferred pen colour and start writing on your slide screen. You can further, save the annotations for a work record.

Part 2 How to Create Moving Backgrounds in Microsoft PowerPoint?
Moving PowerPoint slideshow background is another aspect of graphic creativity at its best, which can be used in a number of ways to grab considerable viewer attention. When choosing to add moving backgrounds to your presentation, the latter can aid in improving the style of content presentation, making your audience curious about how and what happens next.
Having learnt about the utility and creation process of video backgrounds in the PowerPoint presentation tool, let us extend our discussion to the method of creating a moving slide show background in the same in the following section:
User’s Guide to Create Moving Backgrounds for PowerPoint Presentations
Discussed below is an explanatory procedure for designing moving backgrounds with an awesome appearance for slideshow presentations in Microsoft PowerPoint:
Step 1: Open Your Presentation
To begin with, launch the PowerPoint tool in your preferred device and open the presentation on which you will be working to add the moving background. After the presentation gets loaded, navigate through the same and select the desired slide to proceed with the aforesaid task.
Step 2: Choose a Video Location
To add your desired video to the slide, navigate to the PowerPoint ribbon at the top and click on the ‘Insert’ tab. Select ‘Video’ from the list of options that appears, followed by choosing one of the ‘Online Video’ or ‘Video on My PC’ options from the video selection prompt. It is further recommended to select a video in the MP4 format, as the latter gives best results of moving and video backgrounds.
Step 3: Insert Your Video
Choose the second option in the selection prompt to upload a video from your device. You will now be asked to browse through your device and locate the desired video in the ‘Insert Video’ dialog box that appears. Select your video and tap the ‘Insert’ button to add your video.
To upload videos from an online source, choose the ‘Online Video’ option in the selection prompt and proceed to search the video from PowerPoint or paste its embed code to recover the video. The chosen video will begin to download and can be added to the PowerPoint presentation after the download process comes to an end.

Step 4: Playback Editing and Video Customization
Before proceeding further, consider paying your video once by clicking on the ‘Start’ button. You can also add different effects, trim and crop or add a bookmark to your video by navigating to and clicking on the ‘Video Tools’ tab, followed by selecting the ‘Format’ option. To work with the start and playback options for the video, click on ‘Playback’ in the dropdown menu of the ‘Video Tools’ tab.

Part 3 Some Tips for You to Get Awesome PowerPoint Backgrounds & Templates
Now that you have developed a comprehensive understanding of the utility of adding video and moving background for slideshow presentation, let us look through some easy tips and tricks to conveniently access the top rated and the most popular PowerPoint slideshow templates and backgrounds in the following section:
01Cool Slide Backgrounds
Slideshow presentations in PowerPoint are supplemented with a visual spark through amazing and vibrant backgrounds that are a sign of excellent graphic creativity. When working with a PowerPoint presentation of your own, do take the liberty to use some cool slide backgrounds to your creative advantage.
When the talk is about complementing your presentation with a cohesive and upbeat background, you can either select the most suitable one from a heap of pre made slideshow templates available both in the PowerPoint slideshow creator tool as well as across the web. However, if you wish to take the excitement to another level, try hands at creating an awesome and cool backgrounds for PowerPoint slides of your own!
Talking about some really cool tips and tricks to design a slideshow presentation background in PowerPoint, start with including some specific shapes and color overlays to the background capture, experiment with a polygon background, work on enhancing the background image with classic and artistic effects and apply a mix of colors, textures and patterns to give a classy look to your slideshow backgrounds.

02Professional Slideshow Backgrounds
If you are aiming at creating a PowerPoint slideshow presentation with a business centered design approach, you will need to cut down on some extra elements that you would ideally choose to include in a personal purpose based slideshow. Paying attention to the fact that business and corporate centered presentations should be simple, subtle and to the point, it would be an intelligent step to avoid adding too many expressive elements in the background.
Whether you are creating a professional slideshow background of your own or working with a pre designed template, take care to include a complementary play of a light background theme with a maximum of 2 balancing shades.
Avoid too much vibrancy and abstain from applying over the top effects and quick transitions, lest your presentation may look a bit too crowed. If your slides have lot of written content, prefer using a white color background text in a professional font style.
If you have decided on picking a pre made template, you can browse through a diversity of suggestions across the web, while keeping the aforesaid constraints in mind. Consider taking a look at the figure given below to have a more comprehensive understating of the prerequisites of selecting a professional sideshow background template:

03Happy Birthday Slide Backgrounds
Birthday parties are the most appealing synonyms of fun and entertainment. If you are into the profession of organizing events that renders smiling and happy faces, slideshow presentations could be of great help to you in discussing about services, types of social gentries and event targets with your clients.
When looking through different options to select the perfect birthday template, either for a professional event, or just to go down the memory lane of your most cherished moments, take caution to search for a vibrant alternative with colorful images, different background designs and party oriented cool themes, wide aspect ratio with high screen resolution for a mass display and conveniently editable graphics.
If you are creating a happy birthday slide background of your own, there are variety of realms to explore your graphic design creativity, owing to the fact that the subject of creation is highly expressive and multi-dimensional. While you are free to extend your creativity to the next level, do pay attention to the above constraints for a more elusive and outstanding creation output, while maintaining the fun and entertainment quotient intact.

04Wedding Slide Backgrounds
Considering the fact that wedding events are pronounced means of fun, leisure, enjoyment and beautiful memories, anything that aims to be a part of the celebrations, should be equally ecstatic and engaging. Infusing festive occasions with technology, slideshow based wedding invitations and moment captures are the top rated modern trends of celebrating this significant life event.
If you are keen on designing the perfect slideshow presentation for wedding invitations, photo albums and thank you cards, prefer to choose a wedding slide background template with aesthetic layout and flowing element inclusions, like that of floral borders and scented candles. Look though the elements of a subtle thematic setup with soothing color combinations, preferably in complementary pastel shades, like pink and white.
Talking of template customizability, the latter should have placeholders to include names of the bride and groom, the wedding date and venue, and of course the wedding photographs. The beautiful slide background template should have enough design space to include the most elusive play of text colors and fonts to suit specific preferences of creating special memories of a cherished event.

05Slideshow Backgrounds and Templates in Filmora
When looking for the most convenient lead to an extensive variety of beautiful slideshow templates and background, the template library of Wondershare Filmora Video Editor slideshow creator program can be your most affordable destination. The aforesaid software library is known to possess the best and most perfect template choices to suit the creation constraints of almost every slideshow presentation style and objective you can possibly think of.
For Win 7 or later (64-bit)
For macOS 10.12 or later
The elusive templates are further supplemented with a plethora of design flexibilities and customization features that are all set to deliver you the most appreciable creation output. Stressing a bit on the template customization choices of the software, you can work with the tool to uplift your slideshow backgrounds with artistic image effects and overlays, annotate them with beautiful text formations in a variety of colors, fonts and sizes and lots more.
Moving a bit deeper into the creative aspect, you can upgrade the visual style of your presentations with the most perfect and seamless image and video transitions and text animations. The bottom line is, working with the aforesaid slideshow creator program, you are entitled to get jaw dropping applaud from your audience, while making a confident and a content delivery through your slideshow presentation.

● Ending Thoughts →
● Using an expressive and complementing background in your slideshow presentation uplifts its visual credibility in captivating your audience.
● Browsing through the web, you get to access a vast range of amazing slideshow backgrounds and templates to make your presentation, a visual masterpiece.
● When looking for the most distributed storehouse of slideshow backgrounds and templates, the Wondershare Filmora library is your ultimate solution.
Amazing slideshow background are an absolute attention grabber in the realm of creative PowerPoint presentations. If you wish to upgrade yours with the same, be here to learn how!
In this article
01 [How to Add Video Background in PowerPoint?](#Part 1)
02 [How to Create Moving Backgrounds in Microsoft PowerPoint?](#Part 2)
03 [Some Tips for You to Get Awesome PowerPoint Backgrounds & Templates](#Part 3)
Part 1 How to Add Video Background in PowerPoint?
When the talk is about engaging means to deliver a precise information, PowerPoint slideshows are an absolute stunner. While these are already a captivating utility to present your thing, the output and audience engagement is at par with the inclusion of attractive design elements in the presentation. As is evident, there are enormous diversities of supplementary elements to complement your presentation, let us centre our discussion to the application of video background for slideshow in PowerPoint.
User’s Guide to Add Video Background in a PowerPoint Slideshow
The following section presents a detailed explanation of the steps to supplement your PowerPoint presentations with classic video backgrounds in just a few quick steps:
Step 1: Launch Your Presentation
Start with opening the desired PowerPoint presentation to which you want to add the video background, in any of your preferred devices.
Step 2: Add a Video to Your Slide
Browse through your presentation slides to locate the one you want to add the video background to. When you have made your choice, navigate to the PowerPoint toolbar at the top and hit the ‘Insert’ tab and choose the ‘Video’ option.
You will now be presented with 2 choices, either uploading a video from your device or insert one from the web by pasting its YouTube URL into the slide. If you are uploading a video from your device, proceed with selecting the desired video and tap ‘Insert’.
Step 3: Move and Resize Your Video
After uploading your video to the slide, you need to make suitable adjustments in its size and alignment to synchronize the same with the contents of the slide. To do this, drag the top left corner of the video to that of the slide to set the top alignment ratio. In the same way, move the bottom right corner of the video to be in sync with that of the slide. You will see the video occupying the entire slide at the end of the adjustment process.
Step 4: Set the Video Background
You will now need to set the video as the background of your slide, so that the latter’s contents are displayed over the video. You can do this by right clicking on the video and choosing the ‘Send to Back’ option from the dropdown that follows. This will cause the contents of your slide to get displayed over the video.
Step 5: Playback Edit and Customization Choices
Before proceeding towards making changes in the video playback and formatting, prefer taking a quick preview of your work till here. Once you are satisfied, navigate to the PowerPoint Toolbar at the top, hit the ‘Video Tools’ tab, followed by clicking on the ‘Playback’ tab.
It is recommended to introduce the following changes in your video for the most affordable slideshow output:
● Loop Your Video
Creating a video loop will facilitate you with an automatic replay of your video without the need to restart it every time with a click. You can loop your video by navigating to the ‘Video Options’ section and choose ‘Loop Until Stopped’ by clicking within the checkbox next to it. The background video will now continue to play until you switch to a different slide.
● Automatically Start Your Video
To avoid clicking on the slide amid your presentation for the video loop to begin, adjust the latter’s settings for an automatic start. Navigate to the ‘Start’ dropdown menu and select ‘Automatically’.
● Trim Your Video
You can work with some basic video editing tools in PowerPoint, like trimming and cropping your background video to a desired length. If you wish to ward off certain portions of your video, reach to and click o the ‘Trim Video’ button. Following this, drag the slider of the video to select the desired portions of the clip and exclude the rest.
You can further work with some more editing effects to create the perfect video backgrounds for your presentation slides in line with your specific preferences.
Step 6: Annotate Your Video Background
When you are done with the video editing process, take a preview of the same to ensure that everything is set in the proper order and at the proper place. Lastly, if you wish to add suitable text annotations to your video, you can do this with the ‘ClassPoint’ tool to write over the video background. All you need to do is select a preferred pen colour and start writing on your slide screen. You can further, save the annotations for a work record.
Part 2 How to Create Moving Backgrounds in Microsoft PowerPoint?
Moving PowerPoint slideshow background is another aspect of graphic creativity at its best, which can be used in a number of ways to grab considerable viewer attention. When choosing to add moving backgrounds to your presentation, the latter can aid in improving the style of content presentation, making your audience curious about how and what happens next.
Having learnt about the utility and creation process of video backgrounds in the PowerPoint presentation tool, let us extend our discussion to the method of creating a moving slide show background in the same in the following section:
User’s Guide to Create Moving Backgrounds for PowerPoint Presentations
Discussed below is an explanatory procedure for designing moving backgrounds with an awesome appearance for slideshow presentations in Microsoft PowerPoint:
Step 1: Open Your Presentation
To begin with, launch the PowerPoint tool in your preferred device and open the presentation on which you will be working to add the moving background. After the presentation gets loaded, navigate through the same and select the desired slide to proceed with the aforesaid task.
Step 2: Choose a Video Location
To add your desired video to the slide, navigate to the PowerPoint ribbon at the top and click on the ‘Insert’ tab. Select ‘Video’ from the list of options that appears, followed by choosing one of the ‘Online Video’ or ‘Video on My PC’ options from the video selection prompt. It is further recommended to select a video in the MP4 format, as the latter gives best results of moving and video backgrounds.
Step 3: Insert Your Video
Choose the second option in the selection prompt to upload a video from your device. You will now be asked to browse through your device and locate the desired video in the ‘Insert Video’ dialog box that appears. Select your video and tap the ‘Insert’ button to add your video.
To upload videos from an online source, choose the ‘Online Video’ option in the selection prompt and proceed to search the video from PowerPoint or paste its embed code to recover the video. The chosen video will begin to download and can be added to the PowerPoint presentation after the download process comes to an end.
Step 4: Playback Editing and Video Customization
Before proceeding further, consider paying your video once by clicking on the ‘Start’ button. You can also add different effects, trim and crop or add a bookmark to your video by navigating to and clicking on the ‘Video Tools’ tab, followed by selecting the ‘Format’ option. To work with the start and playback options for the video, click on ‘Playback’ in the dropdown menu of the ‘Video Tools’ tab.
Part 3 Some Tips for You to Get Awesome PowerPoint Backgrounds & Templates
Now that you have developed a comprehensive understanding of the utility of adding video and moving background for slideshow presentation, let us look through some easy tips and tricks to conveniently access the top rated and the most popular PowerPoint slideshow templates and backgrounds in the following section:
01Cool Slide Backgrounds
Slideshow presentations in PowerPoint are supplemented with a visual spark through amazing and vibrant backgrounds that are a sign of excellent graphic creativity. When working with a PowerPoint presentation of your own, do take the liberty to use some cool slide backgrounds to your creative advantage.
When the talk is about complementing your presentation with a cohesive and upbeat background, you can either select the most suitable one from a heap of pre made slideshow templates available both in the PowerPoint slideshow creator tool as well as across the web. However, if you wish to take the excitement to another level, try hands at creating an awesome and cool backgrounds for PowerPoint slides of your own!
Talking about some really cool tips and tricks to design a slideshow presentation background in PowerPoint, start with including some specific shapes and color overlays to the background capture, experiment with a polygon background, work on enhancing the background image with classic and artistic effects and apply a mix of colors, textures and patterns to give a classy look to your slideshow backgrounds.
02Professional Slideshow Backgrounds
If you are aiming at creating a PowerPoint slideshow presentation with a business centered design approach, you will need to cut down on some extra elements that you would ideally choose to include in a personal purpose based slideshow. Paying attention to the fact that business and corporate centered presentations should be simple, subtle and to the point, it would be an intelligent step to avoid adding too many expressive elements in the background.
Whether you are creating a professional slideshow background of your own or working with a pre designed template, take care to include a complementary play of a light background theme with a maximum of 2 balancing shades.
Avoid too much vibrancy and abstain from applying over the top effects and quick transitions, lest your presentation may look a bit too crowed. If your slides have lot of written content, prefer using a white color background text in a professional font style.
If you have decided on picking a pre made template, you can browse through a diversity of suggestions across the web, while keeping the aforesaid constraints in mind. Consider taking a look at the figure given below to have a more comprehensive understating of the prerequisites of selecting a professional sideshow background template:
03Happy Birthday Slide Backgrounds
Birthday parties are the most appealing synonyms of fun and entertainment. If you are into the profession of organizing events that renders smiling and happy faces, slideshow presentations could be of great help to you in discussing about services, types of social gentries and event targets with your clients.
When looking through different options to select the perfect birthday template, either for a professional event, or just to go down the memory lane of your most cherished moments, take caution to search for a vibrant alternative with colorful images, different background designs and party oriented cool themes, wide aspect ratio with high screen resolution for a mass display and conveniently editable graphics.
If you are creating a happy birthday slide background of your own, there are variety of realms to explore your graphic design creativity, owing to the fact that the subject of creation is highly expressive and multi-dimensional. While you are free to extend your creativity to the next level, do pay attention to the above constraints for a more elusive and outstanding creation output, while maintaining the fun and entertainment quotient intact.
04Wedding Slide Backgrounds
Considering the fact that wedding events are pronounced means of fun, leisure, enjoyment and beautiful memories, anything that aims to be a part of the celebrations, should be equally ecstatic and engaging. Infusing festive occasions with technology, slideshow based wedding invitations and moment captures are the top rated modern trends of celebrating this significant life event.
If you are keen on designing the perfect slideshow presentation for wedding invitations, photo albums and thank you cards, prefer to choose a wedding slide background template with aesthetic layout and flowing element inclusions, like that of floral borders and scented candles. Look though the elements of a subtle thematic setup with soothing color combinations, preferably in complementary pastel shades, like pink and white.
Talking of template customizability, the latter should have placeholders to include names of the bride and groom, the wedding date and venue, and of course the wedding photographs. The beautiful slide background template should have enough design space to include the most elusive play of text colors and fonts to suit specific preferences of creating special memories of a cherished event.
05Slideshow Backgrounds and Templates in Filmora
When looking for the most convenient lead to an extensive variety of beautiful slideshow templates and background, the template library of Wondershare Filmora Video Editor slideshow creator program can be your most affordable destination. The aforesaid software library is known to possess the best and most perfect template choices to suit the creation constraints of almost every slideshow presentation style and objective you can possibly think of.
For Win 7 or later (64-bit)
For macOS 10.12 or later
The elusive templates are further supplemented with a plethora of design flexibilities and customization features that are all set to deliver you the most appreciable creation output. Stressing a bit on the template customization choices of the software, you can work with the tool to uplift your slideshow backgrounds with artistic image effects and overlays, annotate them with beautiful text formations in a variety of colors, fonts and sizes and lots more.
Moving a bit deeper into the creative aspect, you can upgrade the visual style of your presentations with the most perfect and seamless image and video transitions and text animations. The bottom line is, working with the aforesaid slideshow creator program, you are entitled to get jaw dropping applaud from your audience, while making a confident and a content delivery through your slideshow presentation.
● Ending Thoughts →
● Using an expressive and complementing background in your slideshow presentation uplifts its visual credibility in captivating your audience.
● Browsing through the web, you get to access a vast range of amazing slideshow backgrounds and templates to make your presentation, a visual masterpiece.
● When looking for the most distributed storehouse of slideshow backgrounds and templates, the Wondershare Filmora library is your ultimate solution.
Learn Easy Blender Rigging in Only 2 Minutes
Learn Simple Blender Rigging in Only 2 Minutes
An easy yet powerful editor
Numerous effects to choose from
Detailed tutorials provided by the official channel
Blender is a FREE, open-source 3D Animation program that is very popular for beginner animators. It’s a good way of starting if you’re not yet sure about how far you want to go into animation as it won’t demand any immediate monetary commitment.
Now, as for its features, today, we’ll be focusing on Blender Rigging features.
In this article
01 [Why Use Blender Rigging?](#Part 1)
02 [The Art of Effective Rigging in Blender [TUTORIAL]](#Part 2)
03 [Introduction to Rigging in Blender Course](#Part 3)
Part 1 Why Use Blender Rigging?
Blender Character Rigging is a great way of creating truly beautiful and realistic animations. Despite being an open-source program, it’s capable of doing just as much, if not more, than some of the more premium Animation software out there.
So, if you want to create video projects for your audience’s entertainment or edification with animation, then Blender Rigging is definitely something that you should consider. With this tool, you can create the complex animations that you need and then polish it up in a video editor like Wondershare Filmora Video Editor (which is a premium, video-editing tool that you can use to perfect your finished Blender Rigging animations.)

Part 2 The Art of Effective Rigging in Blender [TUTORIAL]
For this next section, we’re going to be introducing a couple of tutorials that you can look into to teach you more about Blender Character Rigging, Blender Facial Rigging, Blender Muscle Rig, and so on.
These topics are each very long-winded on their own though, so we’ve linked appropriate video tutorials that you can learn more and reserved ourselves to a brief description of each technique so that you can determine whether it’s something that interests you (although, of course, our recommendation is that you check each one out so that you can get the full ‘Blender’ experience.)
01Blender Character Rigging
The main thing people usually look at Blender for is, Blender Character Rigging. And, because it was created to emulate professional animation software, Blender has this function down to pat. To give you an idea of what features you can expect: Blender comes with custom bone shapes for easy Blender character rigging, it also comes with envelope skinny, skeleton skinning, and automatic skinning. With these alone, you can be assured that you will be able to create complex animations without much trouble.
02Blender Facial Rigging
Facial Rigging is usually a more complex subject that is avoided by animators without much experience. But, with Blender, facial rigging is possible. The YouTube video should show you the process of going about Blender Facial Rigging from start to finish (from sculpting the character face itself and then making use of Blender Rigging tools for setting up a skeletal structure for your face’s character to become animated.)
03Blender Muscle Rigging
Creating a Blender Muscle Rig is exactly what it sounds like. It is, of course, much more complicated than normal rigging, but it is a good subject to familiarize yourself with anyway, as it will allow you to go to the ‘next stage’ as you say, with your Animations. The video that we’ve attached is from Pierrick Picaut, who has released a series of videos on the subject of Blender Rigging in general and has extensively explained how to create a Blender Human Rig from the general body, the face, the muscles, and so on.
04Blender Rigging
Although a lot of Animation relies on more ‘traditional’ methods of expressing movement, one can still make use of more modern animation practices, like rigs, to set up their animations for movement. It’s an especially good skill to learn if you’re more interested in content-friendly animations (rather than creating a film of your own.)
05Blender Rigging
This next tutorial is an introduction to basic Blender Rigging. It’s a good one to both start and end on, as it was created for beginners specifically, and uses an example that is perhaps easier to understand most. Make sure to give it a shot just in case.
Part 3 Introduction to Rigging in Blender Course
For this next part, we introduce two other resources that you can take advantage of to learn more about Blender Rigging. Whether it be about Blender character rigging, Blender facial rigging, free blender rigs, creating muscle rigs, and so and so forth. These resources have got your back.
01Where to Learn the Course?
The first major course that we think you might be interested in is Mark Masters’ blender rigging course. You can find this course at PluralSight (which is a website that is focused on helping users of software develop their skills). Mark Masters, the instructor for this course, is a professional animator and works as a Animator for the animation studio, Steelhouse Productions. So, you can be sure that there is much that you can learn from him.

02Other Tools to Learn Rigging
As for other places to learn? We suggest the “Blender Fundamentals” course that Blender themselves have posted on YouTube. They have several of these courses (for all of the more recent versions of Blender). So, you can pick out a course that works for you. One of their more recent series is “Blender Fundamentals 2.which currently has videos all on the subject of Blender rigging (including Blender rigging and Blender rigging videos.)

● Key Takeaways from This Episode →
● If you’re interested in trying out blender rigging yourself, you’ll probably want to study the subject a little before beginning.
● Blender Rigging is quite a complex subject for beginners but having something to start with should help you on your way.
● For that, we recommend checking out the videos that we mentioned in section two of this article, where we recommend some popular tutorials regarding some of the more common Blender Rigging subjects.
● If you’re looking for something more comprehensive or put together though. A course might be more up to your taste. For that, we recommend either Mark Master’s introduction to rigging and animation over at PluralSight or Blender’s own “Blender Fundamental” series on YouTube (which should introduce all the functions you’ll need to know.)
Blender is a FREE, open-source 3D Animation program that is very popular for beginner animators. It’s a good way of starting if you’re not yet sure about how far you want to go into animation as it won’t demand any immediate monetary commitment.
Now, as for its features, today, we’ll be focusing on Blender Rigging features.
In this article
01 [Why Use Blender Rigging?](#Part 1)
02 [The Art of Effective Rigging in Blender [TUTORIAL]](#Part 2)
03 [Introduction to Rigging in Blender Course](#Part 3)
Part 1 Why Use Blender Rigging?
Blender Character Rigging is a great way of creating truly beautiful and realistic animations. Despite being an open-source program, it’s capable of doing just as much, if not more, than some of the more premium Animation software out there.
So, if you want to create video projects for your audience’s entertainment or edification with animation, then Blender Rigging is definitely something that you should consider. With this tool, you can create the complex animations that you need and then polish it up in a video editor like Wondershare Filmora Video Editor (which is a premium, video-editing tool that you can use to perfect your finished Blender Rigging animations.)
Part 2 The Art of Effective Rigging in Blender [TUTORIAL]
For this next section, we’re going to be introducing a couple of tutorials that you can look into to teach you more about Blender Character Rigging, Blender Facial Rigging, Blender Muscle Rig, and so on.
These topics are each very long-winded on their own though, so we’ve linked appropriate video tutorials that you can learn more and reserved ourselves to a brief description of each technique so that you can determine whether it’s something that interests you (although, of course, our recommendation is that you check each one out so that you can get the full ‘Blender’ experience.)
01Blender Character Rigging
The main thing people usually look at Blender for is, Blender Character Rigging. And, because it was created to emulate professional animation software, Blender has this function down to pat. To give you an idea of what features you can expect: Blender comes with custom bone shapes for easy Blender character rigging, it also comes with envelope skinny, skeleton skinning, and automatic skinning. With these alone, you can be assured that you will be able to create complex animations without much trouble.
02Blender Facial Rigging
Facial Rigging is usually a more complex subject that is avoided by animators without much experience. But, with Blender, facial rigging is possible. The YouTube video should show you the process of going about Blender Facial Rigging from start to finish (from sculpting the character face itself and then making use of Blender Rigging tools for setting up a skeletal structure for your face’s character to become animated.)
03Blender Muscle Rigging
Creating a Blender Muscle Rig is exactly what it sounds like. It is, of course, much more complicated than normal rigging, but it is a good subject to familiarize yourself with anyway, as it will allow you to go to the ‘next stage’ as you say, with your Animations. The video that we’ve attached is from Pierrick Picaut, who has released a series of videos on the subject of Blender Rigging in general and has extensively explained how to create a Blender Human Rig from the general body, the face, the muscles, and so on.
04Blender Rigging
Although a lot of Animation relies on more ‘traditional’ methods of expressing movement, one can still make use of more modern animation practices, like rigs, to set up their animations for movement. It’s an especially good skill to learn if you’re more interested in content-friendly animations (rather than creating a film of your own.)
05Blender Rigging
This next tutorial is an introduction to basic Blender Rigging. It’s a good one to both start and end on, as it was created for beginners specifically, and uses an example that is perhaps easier to understand most. Make sure to give it a shot just in case.
Part 3 Introduction to Rigging in Blender Course
For this next part, we introduce two other resources that you can take advantage of to learn more about Blender Rigging. Whether it be about Blender character rigging, Blender facial rigging, free blender rigs, creating muscle rigs, and so and so forth. These resources have got your back.
01Where to Learn the Course?
The first major course that we think you might be interested in is Mark Masters’ blender rigging course. You can find this course at PluralSight (which is a website that is focused on helping users of software develop their skills). Mark Masters, the instructor for this course, is a professional animator and works as a Animator for the animation studio, Steelhouse Productions. So, you can be sure that there is much that you can learn from him.
02Other Tools to Learn Rigging
As for other places to learn? We suggest the “Blender Fundamentals” course that Blender themselves have posted on YouTube. They have several of these courses (for all of the more recent versions of Blender). So, you can pick out a course that works for you. One of their more recent series is “Blender Fundamentals 2.which currently has videos all on the subject of Blender rigging (including Blender rigging and Blender rigging videos.)
● Key Takeaways from This Episode →
● If you’re interested in trying out blender rigging yourself, you’ll probably want to study the subject a little before beginning.
● Blender Rigging is quite a complex subject for beginners but having something to start with should help you on your way.
● For that, we recommend checking out the videos that we mentioned in section two of this article, where we recommend some popular tutorials regarding some of the more common Blender Rigging subjects.
● If you’re looking for something more comprehensive or put together though. A course might be more up to your taste. For that, we recommend either Mark Master’s introduction to rigging and animation over at PluralSight or Blender’s own “Blender Fundamental” series on YouTube (which should introduce all the functions you’ll need to know.)
Before You Learn 3D Animation: Some Things You Should Know
Before You Learn 3D Animation: Some Things You Should Know
An easy yet powerful editor
Numerous effects to choose from
Detailed tutorials provided by the official channel
Before you delve into the profession of creating 3d cartoon filters, you need to understand or decide if creating animated characters is something you would like to do. It’s not going to be smooth as you will get frustrated at some point, you will get confused, and it will be challenging, but in the end, it is rewarding because it is an expression of your mind coming to life. You are the one to breathe life into your characters who represent your imaginations. You will also have to infuse a great deal of your creativity to create beautiful and exciting characters for others to enjoy. Meanwhile, let’s first understand what 3d animations mean.
Becoming a 3d animator is not a feat you can achieve in a short time. It is not days, weeks, months, or even years. Like any other profession, a professional 3d animator must have put in a great deal of work, mixed with a lot of passion and love for what he is doing. To become successful as a 3d animator, you must love what you are doing or be ready to put in the work.
This article will expose what you should learn to create beautiful 3d animation cartoons, including what to expect as a 3d animator.
In this article
01 [What are 3d animation and the process of 3d animation?](#Part 1)
02 [Differences between 2d animation and 3d animation](#Part 2)
03 [A roaster of 8 best 3d animation software.](#Part 3)
04 [Top 3 3d animation making mistakes to avoid](#Part 4)
Part 1 What Is 3D Animation And The Process of 3D Animation?
animation is a term that describes the art of creating 3-dimensional images and placing them in a digital environment. It is a process that uses motion to bring objects, characters, etc., to life.
It is also known as computer-generated imagery, and it is currently the most common animation type for feature films.
Various software and programs are designed specifically for 3d animations and allow the animators to bring the objects to life.
The process of 3d animation happens in three(3) stages;
● Modeling
● Layout and animation
● Rendering
Modeling in 3d animation involves generating the objects or characters either by using a modeling tool or using a real thing. The real object is scanned directly into the computer, where other processes follow. You have total control over your character and how you want them to appear by modeling. You decide the weight, specifications, feel, etc. However, scanning objects save a lot of time. You must add texture before modeling your character or reviewing it before moving to the following layout and animation.
Layout and animation stage: A layout is determined when the generated objects move to this stage. It involves creating a set/scene where the objects can position. Layout first happens before animation does. After adding the objects and characters, they get animated using animation variables. After this, you use motion capture or keyframing to give life to the models in the scenes.
Rendering: Rendering is using software or programs. It is not something to do using just your computer. These tools can generate the scenes into the finished image according to the client’s requirements or set goals.
Creating cartoon background images or any other form of animations is a process that requires a lot of planning and work, which sums up a lot of time. To learn 3d animation, you must be ready to give in ample time as it is a profession that requires some time to handle.
The process listed above also shows the creativity requirement required to succeed in the 3d animation industry. To think that you must create the scenes, which is the layout stage, means you have to be creative in your imagination. If you then decide to model your character from scratch using modeling tools. That also requires another job of thinking and extracting a lot of your creative juices.
Part 2 What is the difference between 2d animation and 3d animation?
Anyone can decide to learn animation with no plan in mind or understanding of what the profession involves. animation is different from 2d animation, and if you want to learn animation, you need to understand the distinction between these two.
animation can have a lot of creative possibilities, whereas 3d animation has a lot of natural abilities. The visual style of both types of animation is explicitly different.
3d animation is a more intensive technical process than the various stages mentioned earlier. It would most likely involve different specialists to handle them to get a more professional output. However, 2d animation consists of drawing the characters frame by frame.
animated cartoons are in The Simpsons, Pinocchio, the Lion king, etc.

animations are like the ones Dreamworks, Pixar, produce. They include the avengers, the bad guys, etc.


Part 3 A Roaster Of 8 Best 3D Animation Software

Several 3D animation software exists in the market, both free and paid. If you are a animation creator or love animation for fun, you can use the free software to make your videos, cartoon photos, 3d cartoon faces, etc.
With many animation software available in the market, you can only fully trust a few.
Here’s a roaster of 8 best 3D animation software you could use to create the cartoon monsters you’ve always been curious about;
● Filmora
● Blender
● Maya
● Wings 3d
● Adobe Animate
● Cinema 4d
● K-3D
● Milcamo
Filmora Video animation tool: This is a highly recommended 3D animation tool with many features and pros. It has a wide range of keyframes, about six of which make your cartoon background images smooth and natural.
| Software | Features | OS | Pro |
|---|---|---|---|
| Wondershare Filmora Video Editor | It has an auto-color correction It has smooth keyframes | Windows, Mac | You can apply light flare effects You can apply an audio mixer |
| Blender | It has textured brushes and masking for 3d painting. It has add-ons and customised tools with high python scripting. | Windows, Linux, Mac computers | It has Virtual reality rendering, Strong camera restoration. It had both manual and automatic tracking. |
| Maya | Free trial of 30 days. Can create complex technical effects | Windows, Max | Good Control and perfect accuracy. Can collect motion capture data. |
| Wings 3d | Auto UV mapping system It has support for light and material effects. | Windows, Linux, and Mac OS | Advanced 3d and 2d modeling tools. It is free to use |
| Adobe animate | Virtual camera functionality gives a realistic view. Adoptive animation effects, zooming, panning etc. | Windows, Mac | Effective audio syncing technology. Customizable font, styling etc. |
| Cinema 4d | Concepts develop without time modeling Large library of preset scenes. | Windows, Mac | Customised with a huge asset range It is a faster tool than Maya Dissect complete scene and is faster than Maya. |
| K-3D | It has property adjustment capabilities with handy strong features. I5 is made up of basic tools for animation, curves, patches. | Mac OS X, Linux, FreeBSD, windows platforms | It is very flexible for either complex or basic workflows. It has a wide selection of plugins. |
| Mixamo | Streamlined user experience It has a faster search function that is accurate | Windows, Mac | It has fast character and animation browsing. Download multiple animations at a go |
For Win 7 or later (64-bit)
For macOS 10.12 or later
Part 4 Top Three (3) 3d Animation Making Mistakes To Avoid

As we initially mentioned, 3d animation requires an intensive technical process. It is a skill that you need to hone over the years by paying attention to detail, being highly creative, and daring to succeed.
Here are 3 mistakes you must avoid during the animation process;
● Forgetting the ‘why’ factor
● Over-animating a scene
● Not giving your viewers time to take it in
Forgetting the why: In a animation cartoon, every move, walking step, and smile is essential. Every character represented in your cartoon background is there for a specific reason.
You would be making a mistake that will affect the result if you lose focus on this reason. Your viewers won’t find your cartoon believable if the moves and acting don’t add up.
Your characters don’t just move because they want to move. Something must have spurred the motion or reaction. It could be for what happened to them, what they heard, or saw another character did in the scene. Do not neglect the why of the act.
While animating, focus on why and keep revisiting until all your characters and objects are knitted closely together.
Over-animating a scene: This is another mistake animators should avoid. If you animate your characters, everything may be a mess if you animate the background and foreground. Simplicity is how to get this thing, keep it simple and focused.
Do not have much going on in each scene but only where you need the attention of your viewers. Animators that do this end up confusing their viewers with no direction.
You can use camera effects such as depth of field to make your audience focus on the point you are trying to make in the particular scene.
Not giving your viewers time to take it in: This is another 3d animation making a mistake you should be careful of. Not giving your viewers time to process the happenings on the scene before the next.
This can be avoided by timing and measuring cuts such that any animation at the start of a new scene is timed to enable the viewers to take it in. You can ask for third-party criticism on your work to find out how your animation is received and see pointers to mistakes such as this. The third party could be your colleague or friend.
Note: You can easily avoid any error or mistake or modify your 3D animation with the help of the Wondershare Filmora video editor. That will provide a solid base for featuring 3D animation.
● Ending Thoughts →
● 3D animation refers to using motion to breathe life into inanimate objects, and they can create animated videos and animation cartoons.
● 3D animation is highly technical, unlike 2d animation
● You can avoid the above 3d mistakes if you remain objective and open, and ready to accept constructive criticism.
● Becoming an animator is a fun thing to do, and it allows you to be free to express your creativity while entertaining other people entirely.
● Before you start learning 3d animation and create cartoon photos, ensure that you have read through all that we have explained here to have good information about what you are going into.
Before you delve into the profession of creating 3d cartoon filters, you need to understand or decide if creating animated characters is something you would like to do. It’s not going to be smooth as you will get frustrated at some point, you will get confused, and it will be challenging, but in the end, it is rewarding because it is an expression of your mind coming to life. You are the one to breathe life into your characters who represent your imaginations. You will also have to infuse a great deal of your creativity to create beautiful and exciting characters for others to enjoy. Meanwhile, let’s first understand what 3d animations mean.
Becoming a 3d animator is not a feat you can achieve in a short time. It is not days, weeks, months, or even years. Like any other profession, a professional 3d animator must have put in a great deal of work, mixed with a lot of passion and love for what he is doing. To become successful as a 3d animator, you must love what you are doing or be ready to put in the work.
This article will expose what you should learn to create beautiful 3d animation cartoons, including what to expect as a 3d animator.
In this article
01 [What are 3d animation and the process of 3d animation?](#Part 1)
02 [Differences between 2d animation and 3d animation](#Part 2)
03 [A roaster of 8 best 3d animation software.](#Part 3)
04 [Top 3 3d animation making mistakes to avoid](#Part 4)
Part 1 What Is 3D Animation And The Process of 3D Animation?
animation is a term that describes the art of creating 3-dimensional images and placing them in a digital environment. It is a process that uses motion to bring objects, characters, etc., to life.
It is also known as computer-generated imagery, and it is currently the most common animation type for feature films.
Various software and programs are designed specifically for 3d animations and allow the animators to bring the objects to life.
The process of 3d animation happens in three(3) stages;
● Modeling
● Layout and animation
● Rendering
Modeling in 3d animation involves generating the objects or characters either by using a modeling tool or using a real thing. The real object is scanned directly into the computer, where other processes follow. You have total control over your character and how you want them to appear by modeling. You decide the weight, specifications, feel, etc. However, scanning objects save a lot of time. You must add texture before modeling your character or reviewing it before moving to the following layout and animation.
Layout and animation stage: A layout is determined when the generated objects move to this stage. It involves creating a set/scene where the objects can position. Layout first happens before animation does. After adding the objects and characters, they get animated using animation variables. After this, you use motion capture or keyframing to give life to the models in the scenes.
Rendering: Rendering is using software or programs. It is not something to do using just your computer. These tools can generate the scenes into the finished image according to the client’s requirements or set goals.
Creating cartoon background images or any other form of animations is a process that requires a lot of planning and work, which sums up a lot of time. To learn 3d animation, you must be ready to give in ample time as it is a profession that requires some time to handle.
The process listed above also shows the creativity requirement required to succeed in the 3d animation industry. To think that you must create the scenes, which is the layout stage, means you have to be creative in your imagination. If you then decide to model your character from scratch using modeling tools. That also requires another job of thinking and extracting a lot of your creative juices.
Part 2 What is the difference between 2d animation and 3d animation?
Anyone can decide to learn animation with no plan in mind or understanding of what the profession involves. animation is different from 2d animation, and if you want to learn animation, you need to understand the distinction between these two.
animation can have a lot of creative possibilities, whereas 3d animation has a lot of natural abilities. The visual style of both types of animation is explicitly different.
3d animation is a more intensive technical process than the various stages mentioned earlier. It would most likely involve different specialists to handle them to get a more professional output. However, 2d animation consists of drawing the characters frame by frame.
animated cartoons are in The Simpsons, Pinocchio, the Lion king, etc.
animations are like the ones Dreamworks, Pixar, produce. They include the avengers, the bad guys, etc.
Part 3 A Roaster Of 8 Best 3D Animation Software
Several 3D animation software exists in the market, both free and paid. If you are a animation creator or love animation for fun, you can use the free software to make your videos, cartoon photos, 3d cartoon faces, etc.
With many animation software available in the market, you can only fully trust a few.
Here’s a roaster of 8 best 3D animation software you could use to create the cartoon monsters you’ve always been curious about;
● Filmora
● Blender
● Maya
● Wings 3d
● Adobe Animate
● Cinema 4d
● K-3D
● Milcamo
Filmora Video animation tool: This is a highly recommended 3D animation tool with many features and pros. It has a wide range of keyframes, about six of which make your cartoon background images smooth and natural.
| Software | Features | OS | Pro |
|---|---|---|---|
| Wondershare Filmora Video Editor | It has an auto-color correction It has smooth keyframes | Windows, Mac | You can apply light flare effects You can apply an audio mixer |
| Blender | It has textured brushes and masking for 3d painting. It has add-ons and customised tools with high python scripting. | Windows, Linux, Mac computers | It has Virtual reality rendering, Strong camera restoration. It had both manual and automatic tracking. |
| Maya | Free trial of 30 days. Can create complex technical effects | Windows, Max | Good Control and perfect accuracy. Can collect motion capture data. |
| Wings 3d | Auto UV mapping system It has support for light and material effects. | Windows, Linux, and Mac OS | Advanced 3d and 2d modeling tools. It is free to use |
| Adobe animate | Virtual camera functionality gives a realistic view. Adoptive animation effects, zooming, panning etc. | Windows, Mac | Effective audio syncing technology. Customizable font, styling etc. |
| Cinema 4d | Concepts develop without time modeling Large library of preset scenes. | Windows, Mac | Customised with a huge asset range It is a faster tool than Maya Dissect complete scene and is faster than Maya. |
| K-3D | It has property adjustment capabilities with handy strong features. I5 is made up of basic tools for animation, curves, patches. | Mac OS X, Linux, FreeBSD, windows platforms | It is very flexible for either complex or basic workflows. It has a wide selection of plugins. |
| Mixamo | Streamlined user experience It has a faster search function that is accurate | Windows, Mac | It has fast character and animation browsing. Download multiple animations at a go |
For Win 7 or later (64-bit)
For macOS 10.12 or later
Part 4 Top Three (3) 3d Animation Making Mistakes To Avoid
As we initially mentioned, 3d animation requires an intensive technical process. It is a skill that you need to hone over the years by paying attention to detail, being highly creative, and daring to succeed.
Here are 3 mistakes you must avoid during the animation process;
● Forgetting the ‘why’ factor
● Over-animating a scene
● Not giving your viewers time to take it in
Forgetting the why: In a animation cartoon, every move, walking step, and smile is essential. Every character represented in your cartoon background is there for a specific reason.
You would be making a mistake that will affect the result if you lose focus on this reason. Your viewers won’t find your cartoon believable if the moves and acting don’t add up.
Your characters don’t just move because they want to move. Something must have spurred the motion or reaction. It could be for what happened to them, what they heard, or saw another character did in the scene. Do not neglect the why of the act.
While animating, focus on why and keep revisiting until all your characters and objects are knitted closely together.
Over-animating a scene: This is another mistake animators should avoid. If you animate your characters, everything may be a mess if you animate the background and foreground. Simplicity is how to get this thing, keep it simple and focused.
Do not have much going on in each scene but only where you need the attention of your viewers. Animators that do this end up confusing their viewers with no direction.
You can use camera effects such as depth of field to make your audience focus on the point you are trying to make in the particular scene.
Not giving your viewers time to take it in: This is another 3d animation making a mistake you should be careful of. Not giving your viewers time to process the happenings on the scene before the next.
This can be avoided by timing and measuring cuts such that any animation at the start of a new scene is timed to enable the viewers to take it in. You can ask for third-party criticism on your work to find out how your animation is received and see pointers to mistakes such as this. The third party could be your colleague or friend.
Note: You can easily avoid any error or mistake or modify your 3D animation with the help of the Wondershare Filmora video editor. That will provide a solid base for featuring 3D animation.
● Ending Thoughts →
● 3D animation refers to using motion to breathe life into inanimate objects, and they can create animated videos and animation cartoons.
● 3D animation is highly technical, unlike 2d animation
● You can avoid the above 3d mistakes if you remain objective and open, and ready to accept constructive criticism.
● Becoming an animator is a fun thing to do, and it allows you to be free to express your creativity while entertaining other people entirely.
● Before you start learning 3d animation and create cartoon photos, ensure that you have read through all that we have explained here to have good information about what you are going into.
Also read:
- Updated How to Create a Whiteboard Video Step by Step for 2024
- Updated How to Make Architecture Animation
- In 2024, Tips That Show Anybody How to Get Awesome Background for Slideshow in PowerPoint
- The Only Guide Youll Need to Learn About GIF Video Downloader for 2024
- Updated Christmas Is Coming! How to Find & Make Animated Christmas GIFs, In 2024
- New In 2024, How to Make a Video a Live Photo
- Whiteboard Animation Services Top 15 Animation Companies to Pick for 2024
- Updated Top 10 Popular Cartoons You Forgot Existed
- New 2024 Approved 10 Cartoon Photo Converters
- New Beginners Guide for Learning 3D Animation
- New Animated Collage Maker Tips for 2024
- 15 Best Sites to Watch Cartoons Online Free And So Can You for 2024
- What Wikipedia Cant Tell You About the 10 Best Batman Cartoons for 2024
- 2024 Approved Animate Graphics in Canva
- New Ways You Can Master to Find 10 Best Free Animated Text Generator
- New The Most Efficient Techniques to Make 3D Animation Character
- Updated 2024 Approved How to Create an Adobe Collage?
- 10 Awesome Moving Animation PowerPoint Techniques
- Updated In 2024, How to Make GIF Stickers for WhatsApp 100 The Easy Way
- Updated In 2024, How to Analyze an Editorial Cartoon Easily
- Updated Adobe Animate CC Everything You Need to Know for 2024
- 2024 Approved 10 Must Watch Netflix Cartoon Series
- The 10 Best Batman Anime Movies- 2024 Updated
- Top 12 2D Animation Studios All Should Check Out for 2024
- New 4 Things You Should Know About Pinterest GIF for 2024
- Updated How to Send and Add Snapchat GIFs 100 in Easy Way for 2024
- New 4 Things You Need to Know About Pinterest GIF for 2024
- Most Effective Ways to Set WhatsApp Status
- How to Track a Lost Samsung Galaxy A14 4G for Free? | Dr.fone
- Repair Office 2016 Files (Word, Excel and PowerPoint)on Windows | Stellar
- New 2024 Approved How to Translate YouTube Videos to English Subtitles
- Transfer your Apple iPhone 15 Apps to New iPhone | Dr.fone
- How to Use Phone Clone to Migrate Your OnePlus Ace 3 Data? | Dr.fone
- How To Recover Lost Data from iPhone 6? | Dr.fone
- How to Factory Reset Google Pixel Fold If I Forgot Security Code or Password? | Dr.fone
- Play Store Stuck on Downloading Of Tecno Spark Go (2023)? 7 Ways to Resolve | Dr.fone
- Protecting Your Privacy How To Remove Apple ID From iPhone 15 Plus
- Recover your photos after Itel P55 5G has been deleted.
- This is how you can recover deleted pictures from Honor Magic 6 Lite.
- Hard Resetting an Oppo A1x 5G Device Made Easy | Dr.fone
- Title: Learn About Lip-Syncing in Animation
- Author: Elon
- Created at : 2024-05-19 03:04:25
- Updated at : 2024-05-20 03:04:25
- Link: https://animation-videos.techidaily.com/learn-about-lip-syncing-in-animation/
- License: This work is licensed under CC BY-NC-SA 4.0.
