
:max_bytes(150000):strip_icc():format(webp)/GettyImages-1437209125-b47ae60035f248e2b01b781f50f919c1.jpg)
Learn All About Lip-Syncing in Animation for 2024
Learn All About Lip-Syncing in Animation
Learn all about Lip-Syncing in Animation
An easy yet powerful editor
Numerous effects to choose from
Detailed tutorials provided by the official channel
Lip syncing is one of the important parts of animations that need to be done perfectly. As children we have all enjoyed the special way in which Donald Duck or Mickey Mouse used to talk in cartoons, this is all because of the perfect lip-syncing.

Lip-sync animation tutorial are available that can assist you with the task.
In this article
01 [What is lip-syncing and its importance in animations?](#Part 1)
02 [Key factors to consider while lip-syncing in animations.](#Part 2)
03 [Best software for lip-syncing animations.](#Part 3)
04 [Best all-in-one video editing software for creating impressive animations.](#Part 4)
Part 1 What is Lip-syncing and Its Importance in Animations
In the simplest terms, lip-syncing can be termed as the process and way in which the sound is synchronized to the characters in animation. It is lip-syncing which brings life to the characters and makes them look talking. The process of lip-syncing in animations includes the dialogues and the mouth charts. The dialogues are broken into the phonetic syllables and the frames required for these syllables are then accessed.
Animations are moving and talking images and liveliness come from the dialogues that they speak. So, to make these talks appear real, flawless lip-syncing is very important.
Part 2 Key Factors to Consider While Lip-syncing in Animations
To make the lip-syncing in your animation look perfect several factors need to be taken care of. Some of these important ones are enlisted below.
01 Perfect Match of the Keyframes
The keyframes for the shapes of the words phrase by phrase needs to be perfect to make it look right. The right lip sync will have the correct timings from the mouth open to the mouth close.
02 Adding Body Language
To make the characters in your animations look real and lively, adding gestures and body language will play a huge role. Moreover, lip-syncing along with facial expressions will add to the overall richness of the animations.
03 Watch Yourself or Record Sample Videos
To get the correct lip-syncing for your animations, you can first try and practice by using a mirror or recording some trial videos. In these videos, you can speak and observe the jaw motion.
04 Use Blending
The technique of blending can also be used where the focus is on the most important shape of the mouth rather than each syllable. These shapes can then be blended and used in different ways and combinations.
05 Emphasize Eyes
Eyes need special focus as they can be used for expressing several emotions. Especially during the close-up shots in animations, a person looks at the eyes before the rest of the face.
06 Use the Apt Voice
No matter how perfectly the lip-syncing is done, it will not look good if the voice does not match the characters in your animations. So, make sure to select the voice that matches the looks and the personality of your characters.
Part 3 Best Software for Lip-syncing Animations
Lip sync in animations has become an easier and hassle-free task thanks to the advanced technology and several software and programs available. These 2D and 3D animation-supported tools allow syncing the mouth of the animated character with the dialogues and audio tracks. A few widely used tools for the task are enlisted below.
01 Anime Studio
This is a Windows and Mac-based professional software that supports multiple advanced functions like bone-rigging, automatic image tracing, integrated lip-synching, motion tracking, 3D shape design, character wizard, and many more. Using the vector-based tools of the software, you can add drawings and images for creating customized characters. There is a built-in character wizard that can be used for quick drawing and rigging the characters from the starting. Anime Studio allows recording the sound clip and then these can be synced to the animated characters. Several pre-set props, scenes, videos, stock audio, and characters are also available to choose from.

02 DAZ Studio
This is free-to-use software that can create impressive animations using multiple advanced features. The simple interface and functioning of the software make it apt even for users who have no prior experience in animations. The lip-sync feature of the software can be used to add audio to the created animations. Additional functions include morphing, adjusting different camera angles, plug-ins with advanced capabilities, and more.

03 Crazy Talk
To create impressive animations and add lip-syncing this is one of the popularly used tools. Quick to download, the software allows adding images and pictures to the tool, and then the head, mouth, and eye movement can be added along with lip-synced audio for creating impressive animations. The built-in timeline of the software offers you complete control over the animations, audio, and other parameters. Detailed customization options are supported including the teeth in the mouth of the character. The software is available for Windows and Mac systems.

04 Toon Boom Studio
To help you create rich animations for movies, games, learning, social media sites and any other purpose this is an apt tool to use. The software has a basic version for beginners while an advanced version for professionals. You can import media files in an array of formats like AI, JPEG, TGA, GIF, and others to create animations of your choice. Audio files in WAV, AIFF, and MP3 formats can be added to the created animations and the lip-sync analyzer tool can be used for that perfect syncing. Additional features include zoom-in, zoom-out, skeleton effect, support to the 3D background, multiple formats for exporting files, and more.

05 Crazy Talk Animator
This 2D animation tool can be used for creating rich animations by adding motion and different effects to your images. You can also create landscapes and scenes to further enhance the overall clip. Lip-sync to the animations is supported by the tool and you can even create marks for facial expression and use them to morph. Several tutorials and web resources are available for a better understanding of the tool and its functioning.

Adobe is also a good tool for all types of animation requirements and you can also check the adobe animate lip sync tutorial for your lip-syncing task.
Key Takeaways from This Episode
● Lip-syncing is an important and inevitable part of animations. Lip-syncing brings richness and liveliness to the clips.
● An array of tools and software are available that can help you effortlessly lip-sync animations.
● or all types of video editing needs and for creating animations, Wondershare Filmora works as an excellent all-in-one software.
Lip syncing is one of the important parts of animations that need to be done perfectly. As children we have all enjoyed the special way in which Donald Duck or Mickey Mouse used to talk in cartoons, this is all because of the perfect lip-syncing.
Lip-sync animation tutorial are available that can assist you with the task.
In this article
01 [What is lip-syncing and its importance in animations?](#Part 1)
02 [Key factors to consider while lip-syncing in animations.](#Part 2)
03 [Best software for lip-syncing animations.](#Part 3)
04 [Best all-in-one video editing software for creating impressive animations.](#Part 4)
Part 1 What is Lip-syncing and Its Importance in Animations
In the simplest terms, lip-syncing can be termed as the process and way in which the sound is synchronized to the characters in animation. It is lip-syncing which brings life to the characters and makes them look talking. The process of lip-syncing in animations includes the dialogues and the mouth charts. The dialogues are broken into the phonetic syllables and the frames required for these syllables are then accessed.
Animations are moving and talking images and liveliness come from the dialogues that they speak. So, to make these talks appear real, flawless lip-syncing is very important.
Part 2 Key Factors to Consider While Lip-syncing in Animations
To make the lip-syncing in your animation look perfect several factors need to be taken care of. Some of these important ones are enlisted below.
01 Perfect Match of the Keyframes
The keyframes for the shapes of the words phrase by phrase needs to be perfect to make it look right. The right lip sync will have the correct timings from the mouth open to the mouth close.
02 Adding Body Language
To make the characters in your animations look real and lively, adding gestures and body language will play a huge role. Moreover, lip-syncing along with facial expressions will add to the overall richness of the animations.
03 Watch Yourself or Record Sample Videos
To get the correct lip-syncing for your animations, you can first try and practice by using a mirror or recording some trial videos. In these videos, you can speak and observe the jaw motion.
04 Use Blending
The technique of blending can also be used where the focus is on the most important shape of the mouth rather than each syllable. These shapes can then be blended and used in different ways and combinations.
05 Emphasize Eyes
Eyes need special focus as they can be used for expressing several emotions. Especially during the close-up shots in animations, a person looks at the eyes before the rest of the face.
06 Use the Apt Voice
No matter how perfectly the lip-syncing is done, it will not look good if the voice does not match the characters in your animations. So, make sure to select the voice that matches the looks and the personality of your characters.
Part 3 Best Software for Lip-syncing Animations
Lip sync in animations has become an easier and hassle-free task thanks to the advanced technology and several software and programs available. These 2D and 3D animation-supported tools allow syncing the mouth of the animated character with the dialogues and audio tracks. A few widely used tools for the task are enlisted below.
01 Anime Studio
This is a Windows and Mac-based professional software that supports multiple advanced functions like bone-rigging, automatic image tracing, integrated lip-synching, motion tracking, 3D shape design, character wizard, and many more. Using the vector-based tools of the software, you can add drawings and images for creating customized characters. There is a built-in character wizard that can be used for quick drawing and rigging the characters from the starting. Anime Studio allows recording the sound clip and then these can be synced to the animated characters. Several pre-set props, scenes, videos, stock audio, and characters are also available to choose from.
02 DAZ Studio
This is free-to-use software that can create impressive animations using multiple advanced features. The simple interface and functioning of the software make it apt even for users who have no prior experience in animations. The lip-sync feature of the software can be used to add audio to the created animations. Additional functions include morphing, adjusting different camera angles, plug-ins with advanced capabilities, and more.
03 Crazy Talk
To create impressive animations and add lip-syncing this is one of the popularly used tools. Quick to download, the software allows adding images and pictures to the tool, and then the head, mouth, and eye movement can be added along with lip-synced audio for creating impressive animations. The built-in timeline of the software offers you complete control over the animations, audio, and other parameters. Detailed customization options are supported including the teeth in the mouth of the character. The software is available for Windows and Mac systems.
04 Toon Boom Studio
To help you create rich animations for movies, games, learning, social media sites and any other purpose this is an apt tool to use. The software has a basic version for beginners while an advanced version for professionals. You can import media files in an array of formats like AI, JPEG, TGA, GIF, and others to create animations of your choice. Audio files in WAV, AIFF, and MP3 formats can be added to the created animations and the lip-sync analyzer tool can be used for that perfect syncing. Additional features include zoom-in, zoom-out, skeleton effect, support to the 3D background, multiple formats for exporting files, and more.
05 Crazy Talk Animator
This 2D animation tool can be used for creating rich animations by adding motion and different effects to your images. You can also create landscapes and scenes to further enhance the overall clip. Lip-sync to the animations is supported by the tool and you can even create marks for facial expression and use them to morph. Several tutorials and web resources are available for a better understanding of the tool and its functioning.
Adobe is also a good tool for all types of animation requirements and you can also check the adobe animate lip sync tutorial for your lip-syncing task.
Key Takeaways from This Episode
● Lip-syncing is an important and inevitable part of animations. Lip-syncing brings richness and liveliness to the clips.
● An array of tools and software are available that can help you effortlessly lip-sync animations.
● or all types of video editing needs and for creating animations, Wondershare Filmora works as an excellent all-in-one software.
Formula to Animate Photos From 10 Animate Pictures App
Epic Formula to Animate Photos from These 10 Animate Pictures App
An easy yet powerful editor
Numerous effects to choose from
Detailed tutorials provided by the official channel
With the availability of modern technology, still photos can be seamlessly transformed into live animated photos. Adding motion and movement along with filter effects to still photos is pretty easy with an animated pictures app.
For Win 7 or later (64-bit)
For macOS 10.12 or later
In this article, we have listed 10 of the best animated picture apps available in 2021. You will find all essential details and features of these 10 apps which will help you choose the best option when choosing an app for animating a picture. Let us take a look at these 10 apps!
In this article
01 [10 Animate Pictures Apps](#Part 1)
02 [The contrast of These 10 Animate Pictures Apps](#Part 2)
Part 1 10 Animate Pictures Apps
01 MotionLeap

MotionLeap
● Price
Free, with premium version available.
● OS
Android and iOS
● Key features
You can freeze parts of an image.
Variety of filters can be applied.
Although MotionLeap is free to use there’s a Pro and subscription version with a greater variety of features in it. The best part about this animated pictures app is that it does not put any watermark over the final image.
The app can animate still photos and convert them into short, loop videos. This is done by the programming of the directional cues into the image which is executed by dragging actions of the thumb across your mobile screen.
Although, on MotionLeap, without the pro version, the photo will be saved in video format.
02 GIPHY

GIPHY
● Price
Free
● OS
Android and iOS
● Key features
Simple, easy to use UI
A variety of built-in animation tools
Sticker maker on iOS (for iPhone X and later models)
We might already be acquainted with GIPHY as the most popular search engine for GIFs. Although, what’s unknown is that GIPHY has a mobile app both for Android and iOS which can be used to create GIFs and animate photos.
The app’s key advantage is its highly intuitive and very easy to use interface that makes it really easy to animate photos with the GIPHY app. Above all, it is completely free to use and along with animating pictures, you can also add captions to your animated photos or even capture short videos.
03 Movepic

Movepic
● Price
Free, with premium version available.
● OS
Android and iOS
● Key features
Easy to use.
A range of built in overlays and filters.
Movepic is another excellent app for animating pictures. As an animated pictures app, it is quite similar to MotionLeap owing to the fact that it animates still photos.
A downside of the Movepic free version is that it puts a watermark on the image and you cannot remove it without upgrading to the premium version or VIP account. The app saves the final images as a movie file and not as a GIF.
04 ImgPlay

ImgPlay
● Price
Free, with premium version available.
● OS
Android and iOS
● Key features
Easy to use.
Lay out still photographs side-by-side and use burst photos or videos.
ImgPlay is another very popular and effective animated pictures app. The app makes use of a range of ready-to-use animated photos for the web.
ImgPlay also comes with a range of advanced and easy-to-understand controls. This app, in spite of all its perks, puts a watermark on the image—which, once again, cannot be removed unless you buy the premium version of the app.
05 StoryZ

StoryZ
● Price
Free, with premium version available.
● OS
Android and iOS
● Key features
Programmed movement paths, overlays and color filters.
Saves images automatically as GIFs.
StoryZ is one of the best apps on this list and anyone who has used the app would agree with that. The app can seamlessly animate still photos.
A great thing about this app is that StoryZ enables users to remove the watermark from the image by simply watching a quick ad before saving the file.
06 VIMAGE 3D

VIMAGE 3D
● Price
Free, with premium version available.
● OS
Android and iOS
● Key features
AI enabled.
A range of filters and special effects.
Add sounds to your animated images and videos.
This one is an award winning app for animating pictures and the app won a Google Play award in 2018. The app is simply exceptional in terms of user experience as well as features.
Like most of these apps, you do need to pay to remove the watermark, get access to the full effects library, and the ability to export your images in up to 2560p resolution.
07 Photo Bender

Photo Bender
● Price
Free
● OS
Android
● Key features
A variety of editing tools and features including brushes.
Enables users to export images as MP4s, GIFs, JPEGs, and PNGs.
Photo Bender is an animated pictures app that is specific to the Android platform. The app is popular for its convenience of use and it enables users to digitally warp images and animate photos.
There are a variety of things that can be done to an image with the help of this app. From colouring an image, to bending it, stretching it, and a lot more, you can do it all. You also get a range of brushes to use on the image.
08 Zoetropic

Zoetropic
● Price
Free, with premium version available.
● OS
Android and iOS
● Key features
The app is really fast and efficient.
Simple UI.
Zoetropic helps you animate images in minutes,even if you are using the app for the first time. The app does not come with a lot of features but its simplicity, effectiveness and ease of use makes it a great option for animated pictures app.
09 Lumyer

Lumyer
● Price
Free, with premium version available.
● OS
Android and iOS
● Key features
Seasonal and occasional animation effects.
Easy to use.
This app is another great platform to edit pictures and animate them. It enables you to add a variety of effects to pictures and easily animate them.
From subtle weather effects to sparkle, seasonal animations and a lot more, the app offers a lot of options.
Part 2: The contrast of These 10 Animate Pictures Apps
| Name of The Animated Picture App | Advantages | Disadvantages |
|---|---|---|
| MotionLeap | No watermark+Variety of filters; | File saved in video format without pro version |
| GIPHY | Free to use+Simple UI | Not suitable for advanced editing |
| Movepic | Built-in overlays and filters | Saves final image as video file without pro version Watermark |
| ImgPlay | Easy to use and understand+Ready to go animated photos for the web | Watermark on image |
| StoryZ | Remove watermark by watching an ad+Variety of animation techniques | Boring interface |
| VIMAGE 3D | Neat UI+Endless features+AI enabled | Need to buy premium version to access majority of features |
| Photo Bender | A range of tasks can be executed | Not a very attractive UI |
| Zoetropic | Simple, effective and easy to use | Limited effects on free version |
| Lumyer | Fast and easy to use+Lot of features | Can be expensive due to several in-app purchases |
| Filmora | Easy to Use+fordable+ons of features+Seamless UI+rofessional video editing tools | Not available on mobile |
Key Takeaways from This Episode
● That brings us to the end of the article. Anyone looking for an animated pictures app to animate their images have found 10 of the best apps available in the market right now.
● With the list of these 10 apps, anyone can find the most suitable platform for their own purposes of animating an image.
● Last but not the least, if it comes to an all inclusive platform for video editing and animating pictures, Filmora Pro is definitely the winner on this list! So check out your options and make the best choice!
With the availability of modern technology, still photos can be seamlessly transformed into live animated photos. Adding motion and movement along with filter effects to still photos is pretty easy with an animated pictures app.
For Win 7 or later (64-bit)
For macOS 10.12 or later
In this article, we have listed 10 of the best animated picture apps available in 2021. You will find all essential details and features of these 10 apps which will help you choose the best option when choosing an app for animating a picture. Let us take a look at these 10 apps!
In this article
01 [10 Animate Pictures Apps](#Part 1)
02 [The contrast of These 10 Animate Pictures Apps](#Part 2)
Part 1 10 Animate Pictures Apps
01 MotionLeap
MotionLeap
● Price
Free, with premium version available.
● OS
Android and iOS
● Key features
You can freeze parts of an image.
Variety of filters can be applied.
Although MotionLeap is free to use there’s a Pro and subscription version with a greater variety of features in it. The best part about this animated pictures app is that it does not put any watermark over the final image.
The app can animate still photos and convert them into short, loop videos. This is done by the programming of the directional cues into the image which is executed by dragging actions of the thumb across your mobile screen.
Although, on MotionLeap, without the pro version, the photo will be saved in video format.
02 GIPHY
GIPHY
● Price
Free
● OS
Android and iOS
● Key features
Simple, easy to use UI
A variety of built-in animation tools
Sticker maker on iOS (for iPhone X and later models)
We might already be acquainted with GIPHY as the most popular search engine for GIFs. Although, what’s unknown is that GIPHY has a mobile app both for Android and iOS which can be used to create GIFs and animate photos.
The app’s key advantage is its highly intuitive and very easy to use interface that makes it really easy to animate photos with the GIPHY app. Above all, it is completely free to use and along with animating pictures, you can also add captions to your animated photos or even capture short videos.
03 Movepic
Movepic
● Price
Free, with premium version available.
● OS
Android and iOS
● Key features
Easy to use.
A range of built in overlays and filters.
Movepic is another excellent app for animating pictures. As an animated pictures app, it is quite similar to MotionLeap owing to the fact that it animates still photos.
A downside of the Movepic free version is that it puts a watermark on the image and you cannot remove it without upgrading to the premium version or VIP account. The app saves the final images as a movie file and not as a GIF.
04 ImgPlay
ImgPlay
● Price
Free, with premium version available.
● OS
Android and iOS
● Key features
Easy to use.
Lay out still photographs side-by-side and use burst photos or videos.
ImgPlay is another very popular and effective animated pictures app. The app makes use of a range of ready-to-use animated photos for the web.
ImgPlay also comes with a range of advanced and easy-to-understand controls. This app, in spite of all its perks, puts a watermark on the image—which, once again, cannot be removed unless you buy the premium version of the app.
05 StoryZ
StoryZ
● Price
Free, with premium version available.
● OS
Android and iOS
● Key features
Programmed movement paths, overlays and color filters.
Saves images automatically as GIFs.
StoryZ is one of the best apps on this list and anyone who has used the app would agree with that. The app can seamlessly animate still photos.
A great thing about this app is that StoryZ enables users to remove the watermark from the image by simply watching a quick ad before saving the file.
06 VIMAGE 3D
VIMAGE 3D
● Price
Free, with premium version available.
● OS
Android and iOS
● Key features
AI enabled.
A range of filters and special effects.
Add sounds to your animated images and videos.
This one is an award winning app for animating pictures and the app won a Google Play award in 2018. The app is simply exceptional in terms of user experience as well as features.
Like most of these apps, you do need to pay to remove the watermark, get access to the full effects library, and the ability to export your images in up to 2560p resolution.
07 Photo Bender
Photo Bender
● Price
Free
● OS
Android
● Key features
A variety of editing tools and features including brushes.
Enables users to export images as MP4s, GIFs, JPEGs, and PNGs.
Photo Bender is an animated pictures app that is specific to the Android platform. The app is popular for its convenience of use and it enables users to digitally warp images and animate photos.
There are a variety of things that can be done to an image with the help of this app. From colouring an image, to bending it, stretching it, and a lot more, you can do it all. You also get a range of brushes to use on the image.
08 Zoetropic
Zoetropic
● Price
Free, with premium version available.
● OS
Android and iOS
● Key features
The app is really fast and efficient.
Simple UI.
Zoetropic helps you animate images in minutes,even if you are using the app for the first time. The app does not come with a lot of features but its simplicity, effectiveness and ease of use makes it a great option for animated pictures app.
09 Lumyer
Lumyer
● Price
Free, with premium version available.
● OS
Android and iOS
● Key features
Seasonal and occasional animation effects.
Easy to use.
This app is another great platform to edit pictures and animate them. It enables you to add a variety of effects to pictures and easily animate them.
From subtle weather effects to sparkle, seasonal animations and a lot more, the app offers a lot of options.
Part 2: The contrast of These 10 Animate Pictures Apps
| Name of The Animated Picture App | Advantages | Disadvantages |
|---|---|---|
| MotionLeap | No watermark+Variety of filters; | File saved in video format without pro version |
| GIPHY | Free to use+Simple UI | Not suitable for advanced editing |
| Movepic | Built-in overlays and filters | Saves final image as video file without pro version Watermark |
| ImgPlay | Easy to use and understand+Ready to go animated photos for the web | Watermark on image |
| StoryZ | Remove watermark by watching an ad+Variety of animation techniques | Boring interface |
| VIMAGE 3D | Neat UI+Endless features+AI enabled | Need to buy premium version to access majority of features |
| Photo Bender | A range of tasks can be executed | Not a very attractive UI |
| Zoetropic | Simple, effective and easy to use | Limited effects on free version |
| Lumyer | Fast and easy to use+Lot of features | Can be expensive due to several in-app purchases |
| Filmora | Easy to Use+fordable+ons of features+Seamless UI+rofessional video editing tools | Not available on mobile |
Key Takeaways from This Episode
● That brings us to the end of the article. Anyone looking for an animated pictures app to animate their images have found 10 of the best apps available in the market right now.
● With the list of these 10 apps, anyone can find the most suitable platform for their own purposes of animating an image.
● Last but not the least, if it comes to an all inclusive platform for video editing and animating pictures, Filmora Pro is definitely the winner on this list! So check out your options and make the best choice!
10 Creative Wallpaper Collage Ideas and Photos
10 Creative Wallpaper Collage Ideas and Photos for 2024
An easy yet powerful editor
Numerous effects to choose from
Detailed tutorials provided by the official channel
Photos are not only some captured moments, but memories for lifetime. So, why not relive these happy and special moments by creating a wallpaper of these photos in a collage format. You can choose from the huge collection of your photos and create wallpaper collages. Set a theme for different rooms and then create interesting wall picture collage. In this article we will help you to learn about some creative wallpaper collage ideas and photos for 2024.
In this article
01 [Top 10 wall collage ideas](#Part 1)
02 [How can wondershare filmora help you design your desired wall collage](#Part 2)
Part 1 Top 10 wall collage ideas
There is no dearth of ideas, themes, and designs when it comes to wall photo collages and wallpaper. To make your selection task a little easier, we have shortlisted some of the popular and creative wall collage ideas that can be used in 2024.
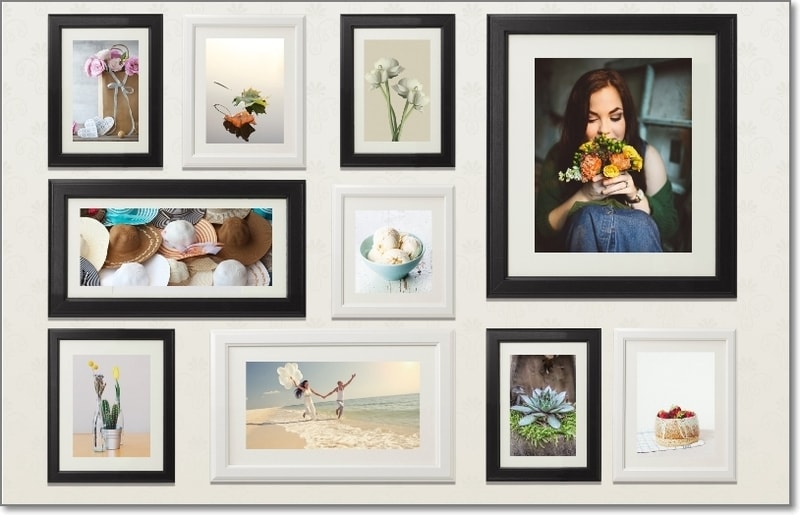
01A simple traditional collage
As it is said simplicity is the best, the same goes with the wall collages. A traditional collage having multiple images set in an order never goes out of fashion. Depending on the size of the wall, you can choose the shape and the number of the pictures to be added to the wallpaper.
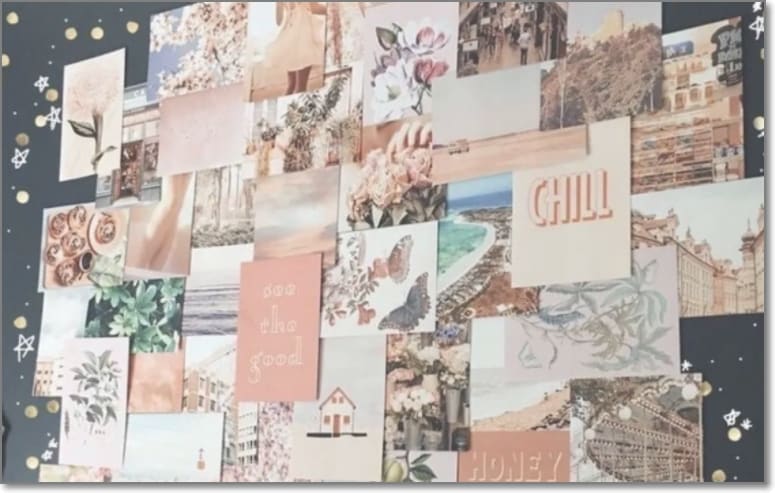
02Full wall collage
This is one of the easiest ways of creating a collage, where you can get all your favourite pics printed and framed and put up randomly on an entire wall. Besides the captured images, you can also choose some of the stock images available at several online sites like Filmora, Canva, and more.
03Creating a photo grid
Besides putting the photos on a wall directly, you can even place them on some rack to create a collage. Creating a wallpaper on a frame or a grid has multiple benefits like it will keep your walls clean, can be moved at any place of your choice and add to overall looks to the room.
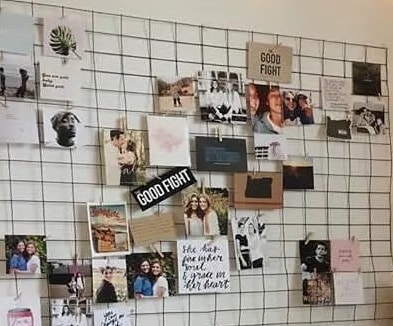
04Creating a collage using polaroid
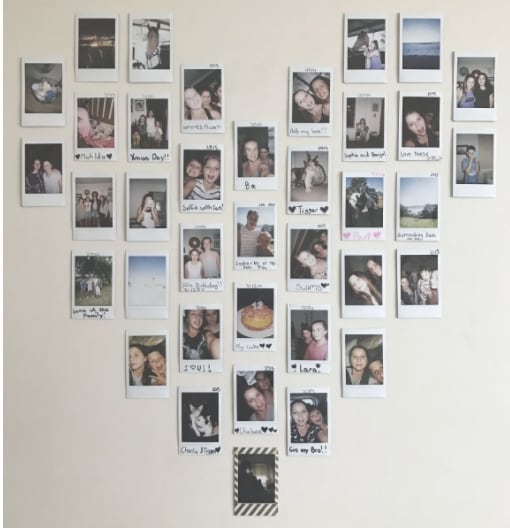
Instead of getting your images printed and framed, simply take polaroid prints and hang them on a fairy light. This is one of the pocket-friendly collage wall ideas that will also will add warmth and coziness to your room and living space.

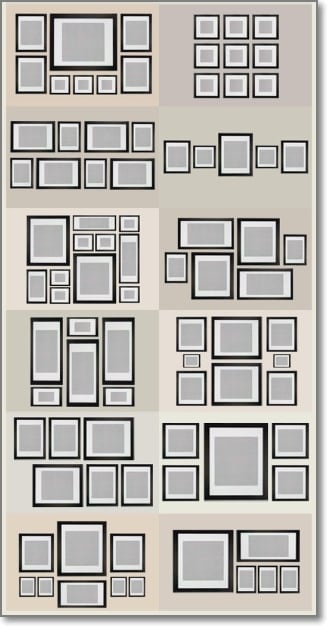
05Creating a collage in some shape
Choose a shape of your choice and then set all the desired pictures in that particular shape. This wall collage will look interesting and creative as well. While setting the images in a particular shape ensure that all the pictures are more or less of the same size to make it look symmetrical.
06Adding neon sign to collages
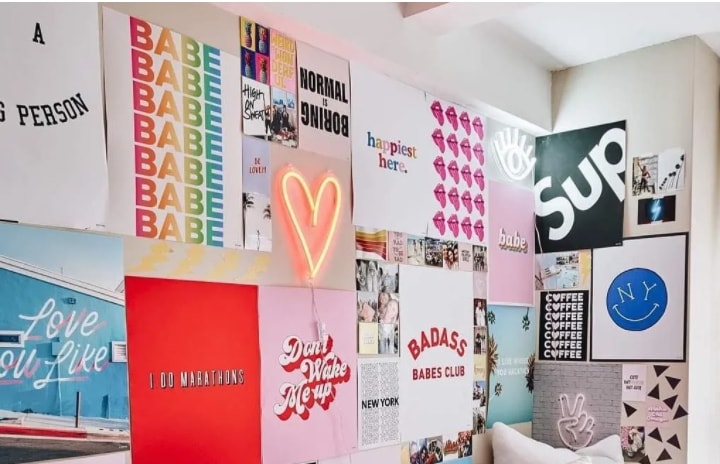
Another interesting way to pep up your wall collage is by adding a neon sign like a heart shape, cloud, or any other amidst your photos on the wall. Neon signs in different shapes, sizes, and colors are available online at pocket friendly prices. As per the theme of your photos, you can add one or more neon signs.
07Wall collage in a letter shape
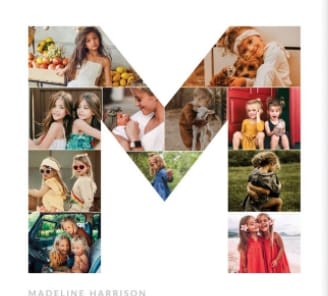
Create a photo collage in the shape of your name initial or an entire name. You can also create collages for each room in the initials of the name of the person staying in those room. These collages will give a personalised touch to your room.
08Caricature wall collage
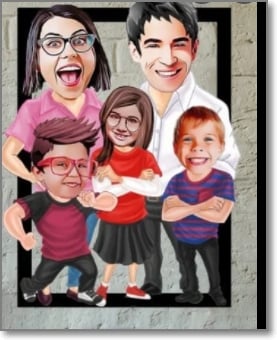
To add some fun elements to your wall, use caricature of your photos, instead of the simple pictures. There are several online sites that can help you convert your regular images into caricatures that can be used for creating wallpapers.
09Cartoon wall collage
If you want to decorate a kid’s room wall then nothing can be better than using pictures of their favorite cartoon characters for creating a collage. You can even create an interesting wall of your room if you too like cartoon characters. Stock images of these characters in high quality are available on several online sites.
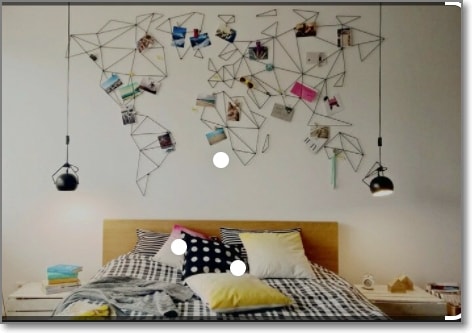
10World Map wall collage
This is one of the best collage ideas if you love to travel. You can create a world map on your wall and then add your own captured images to the places which you have visited.
Part 2 How can Wondershare Filmora help you design your desired wall collage
Using your own captured images for creating a wall collage is a good idea but to further enhance the wallpaper or use the pictures that would match the desired theme you could select the images from the stock library available at several sites.
One such excellent tool is Wondershare Filmora where you can get a huge collection of images in an array of themes and categories. The royalty free images at Wondershare can be used without any worries.
Additionally, the software also has a collection of music and sound effects that can be used for creating online presentations. Wondershare Filmora Video Editor is complete video editing software that can be used for creating professional looking videos. Some of the key features of the tool include adding filters, overlays, transitions, titles, and much more.

Wondershare Filmora - Best Video Editor for Mac/Windows
5,481,435 people have downloaded it.
Build unique custom animations without breaking a sweat.
Focus on creating epic stories and leave the details to Filmora’s auto features.
Start a creative adventure with drag & drop effects and endless possibilities.
Filmora simplifies advanced features to save you time and effort.
Filmora cuts out repetition so you can move on to your next creative breakthrough.
The software is available for download on Windows and Mac systems.
● Key Takeaways from This Episode →
● Wall collages using captured pictures and stock images is an interesting way to decorate your walls.
● There are several creative ideas for wall collage.
● Wondershare Filmora is an excellent tool to find a huge collection of stock images in an array of categories and for all video editing requirements.
Photos are not only some captured moments, but memories for lifetime. So, why not relive these happy and special moments by creating a wallpaper of these photos in a collage format. You can choose from the huge collection of your photos and create wallpaper collages. Set a theme for different rooms and then create interesting wall picture collage. In this article we will help you to learn about some creative wallpaper collage ideas and photos for 2024.
In this article
01 [Top 10 wall collage ideas](#Part 1)
02 [How can wondershare filmora help you design your desired wall collage](#Part 2)
Part 1 Top 10 wall collage ideas
There is no dearth of ideas, themes, and designs when it comes to wall photo collages and wallpaper. To make your selection task a little easier, we have shortlisted some of the popular and creative wall collage ideas that can be used in 2024.
01A simple traditional collage
As it is said simplicity is the best, the same goes with the wall collages. A traditional collage having multiple images set in an order never goes out of fashion. Depending on the size of the wall, you can choose the shape and the number of the pictures to be added to the wallpaper.
02Full wall collage
This is one of the easiest ways of creating a collage, where you can get all your favourite pics printed and framed and put up randomly on an entire wall. Besides the captured images, you can also choose some of the stock images available at several online sites like Filmora, Canva, and more.
03Creating a photo grid
Besides putting the photos on a wall directly, you can even place them on some rack to create a collage. Creating a wallpaper on a frame or a grid has multiple benefits like it will keep your walls clean, can be moved at any place of your choice and add to overall looks to the room.
04Creating a collage using polaroid
Instead of getting your images printed and framed, simply take polaroid prints and hang them on a fairy light. This is one of the pocket-friendly collage wall ideas that will also will add warmth and coziness to your room and living space.
05Creating a collage in some shape
Choose a shape of your choice and then set all the desired pictures in that particular shape. This wall collage will look interesting and creative as well. While setting the images in a particular shape ensure that all the pictures are more or less of the same size to make it look symmetrical.
06Adding neon sign to collages
Another interesting way to pep up your wall collage is by adding a neon sign like a heart shape, cloud, or any other amidst your photos on the wall. Neon signs in different shapes, sizes, and colors are available online at pocket friendly prices. As per the theme of your photos, you can add one or more neon signs.
07Wall collage in a letter shape
Create a photo collage in the shape of your name initial or an entire name. You can also create collages for each room in the initials of the name of the person staying in those room. These collages will give a personalised touch to your room.
08Caricature wall collage
To add some fun elements to your wall, use caricature of your photos, instead of the simple pictures. There are several online sites that can help you convert your regular images into caricatures that can be used for creating wallpapers.
09Cartoon wall collage
If you want to decorate a kid’s room wall then nothing can be better than using pictures of their favorite cartoon characters for creating a collage. You can even create an interesting wall of your room if you too like cartoon characters. Stock images of these characters in high quality are available on several online sites.
10World Map wall collage
This is one of the best collage ideas if you love to travel. You can create a world map on your wall and then add your own captured images to the places which you have visited.
Part 2 How can Wondershare Filmora help you design your desired wall collage
Using your own captured images for creating a wall collage is a good idea but to further enhance the wallpaper or use the pictures that would match the desired theme you could select the images from the stock library available at several sites.
One such excellent tool is Wondershare Filmora where you can get a huge collection of images in an array of themes and categories. The royalty free images at Wondershare can be used without any worries.
Additionally, the software also has a collection of music and sound effects that can be used for creating online presentations. Wondershare Filmora Video Editor is complete video editing software that can be used for creating professional looking videos. Some of the key features of the tool include adding filters, overlays, transitions, titles, and much more.
Wondershare Filmora - Best Video Editor for Mac/Windows
5,481,435 people have downloaded it.
Build unique custom animations without breaking a sweat.
Focus on creating epic stories and leave the details to Filmora’s auto features.
Start a creative adventure with drag & drop effects and endless possibilities.
Filmora simplifies advanced features to save you time and effort.
Filmora cuts out repetition so you can move on to your next creative breakthrough.
The software is available for download on Windows and Mac systems.
● Key Takeaways from This Episode →
● Wall collages using captured pictures and stock images is an interesting way to decorate your walls.
● There are several creative ideas for wall collage.
● Wondershare Filmora is an excellent tool to find a huge collection of stock images in an array of categories and for all video editing requirements.
Top 15 2D Animation Software Free That Worth to Try
Top 15 2D Animation Software Free That Worth to Try
An easy yet powerful editor
Numerous effects to choose from
Detailed tutorials provided by the official channel
When you are trying to create a funny cartoon, explainer videos, or other short informative content to post online, 2D animation software is a breeze to use.
With access to the best 2D animation software, you can create compelling and intricate stories that will help you sync with the audience.
01Wondershare Filmora
Price: Free, $99.99 (Perpetual); $59.99 (1-Year)
Pros
Numerous preset options
Both for beginners and professionals
Quick video trim/edits
Cons
Straightforward user interface
Lacks various shortcuts
May need high system requirements
What are users saying?
“I am solving the problem of getting an easy-to-use, all-in-one video editor. In addition, the editor gives you the ability to command over your audio files, whereas other editors just give you the basic audio editing capabilities. Lastly, the fully editable text effects and the vast numbers too.”
Key Features
Unlimited Video Tracks.
Audio Noise Reduction.
Automatic Audio Sync.
Motion Graphics animation support.
Auto color correction.
Available for Mac and Windows.
For Win 7 or later (64-bit)
For macOS 10.12 or later
02Opentoonz
Price: Free
Pros
Accessible plugin to automatically create animation effects
Unique Xsheets & Timelines features
Audio/Soundtrack Implementer
Cons
Somewhat Limited drawing capabilities
Intricate setup
A bit outdated UI design
What are users saying?
“Not a very self-explanatory 2D animation software. I had to look up some help, but it worked out in the end (youtube tutorials).”
Key Features
GTS scanning tool
Easy to modify picture styles
Add light and distortion effects
Works with black and white and colored scans
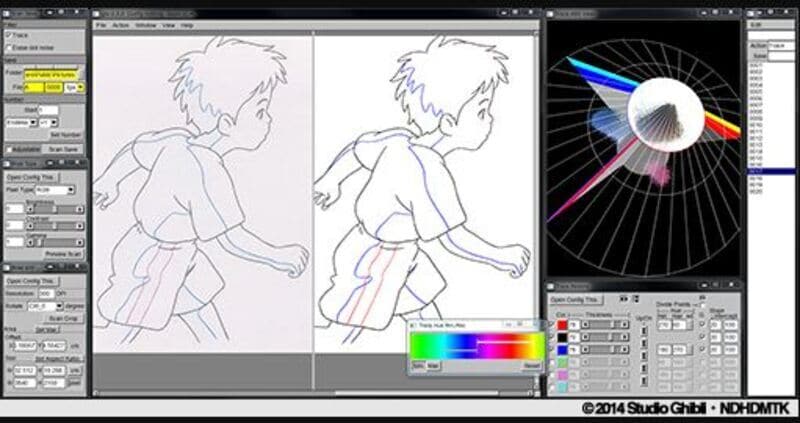
03Pencil 2D
Price: Free
Pros
Easy to use
Open sources
Supports multiple languages
Cons
It doesn’t support shape tools
Only for beginners
It doesn’t support 3D animation
What are users saying?
“The main thing against Pencil2d is the lack of complicated tools. Some tools are not there to bring better color effects, curves, drawing tools, etc. But honestly, this is not a big problem, the intention to be the most robust in the world but to be a tool that provides you a great introduction to animation with vector drawing.”
Key Features
Simplistic design to let you make animation easily
Raster and vector workflow switching
Cross-platform compatibility to free download
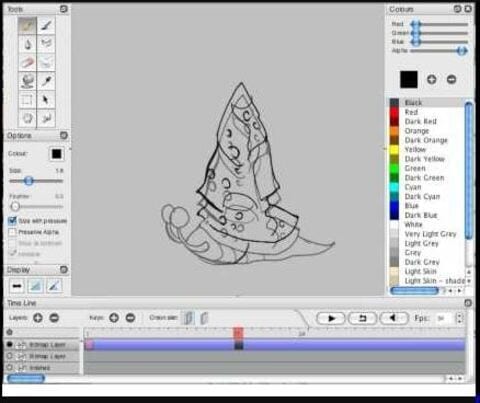
04Maefloresta/TupiTube
Price: Free
Pros
Great for beginners
Effective tools management
Friendly price plan
Cons
Differences in color correction
Certain confusing tools
Unable to erase unwanted frames
What are users saying?
“Honestly, I love the app, but I wish there were an eraser, but other than that, it is great for everything from experimental clips to my YT videos that will be coming out in a few months.”
Key Features
A free downloadable app that assists on tablets and smartphones
Simple software with tutorials
Interactive user interface that beginners can use with ease
05Synfig
Price: Free
Pros
Offers 50+ layers
Easy to use layout
Lots of technical tools and functions
Cons
Difficult layout
Hard learning curve
Only a few tutorials available
What are users saying?
“It is cumbersome. You will look for tutorials to understand it, even if you have the best 2D animation software Background. - Though, it’s not famous so you may not wander for information about it as easily. - You do need high PC requirements to operate it, it is heavy. - You have to Constantly save because there are a few operations that make it crash.”
Key Features
Compatible with multiple content layers
The bone system assists for the cutout animations creation from bitmap images
Consistent with sound support to allow for the addition and syncing of narration and music to the video
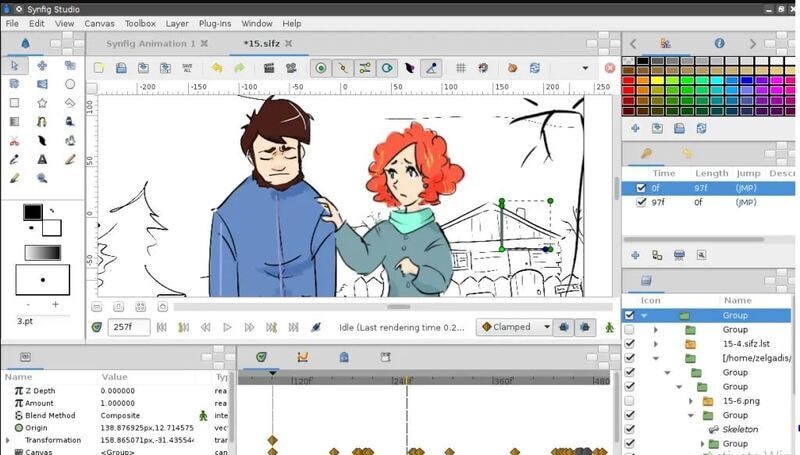
06CelAction 2D
Price: $1300 Studio Edition (Single License Use)
Pros
Fast to use
Low system requirements
Add-ons available
Cons
Less dynamic
Less in demand
Time-Consuming to learn
What are users saying?
**”**I found the software pretty responsive and may not be good for beginners. Being a beginner, I need easy-to-use free download 2D animation software with low learning, and it didn’t fit my needs entirely.”
Key Features
Quick and straightforward to use professionally
Features ergonomic controls
Simply manages complicated projects with different layers
Compatible with all modern Windows machines - 32 and 64-bit Also runs with Macs through Boot Camp
The multiplane camera helps you have more excellent controls
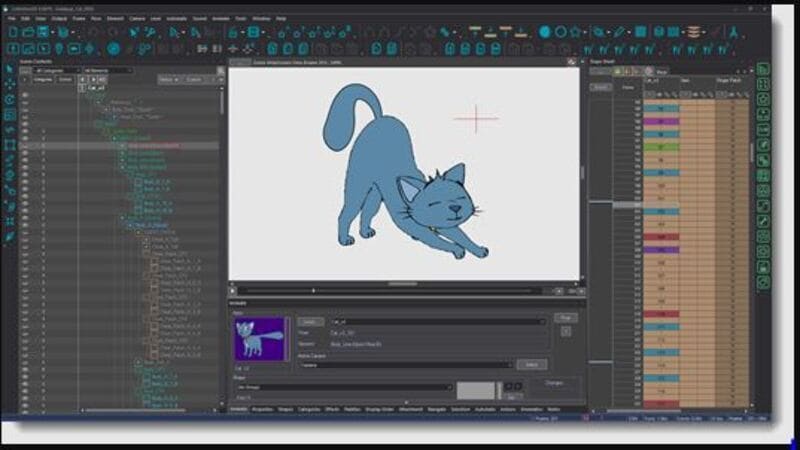
07Moho (Anime Studio) Pro
Price: $399 (Full Pack)
Pros
Regular updates available
Advanced features
Also good for beginners
Cons
Doesn’t automatically sync
Some functions are highly advanced
Lacks flexibility
What are users saying?
“I am freelance, and Moho12 has allowed me to give more character to animated characters that I can use for some clients. The compatibility that I get with Adobe Illustrator and the speed of the render makes it one of my central tools when it comes to working with character animations.”
Key Features
Improved freehand drawing tools
Beizer manages to make it simpler for you to design your videos
Brilliant warp feature assists in creating custom meshes to twist and bend your animations
Realistic motion blur
Best 2D Animation software for different layers at the same time
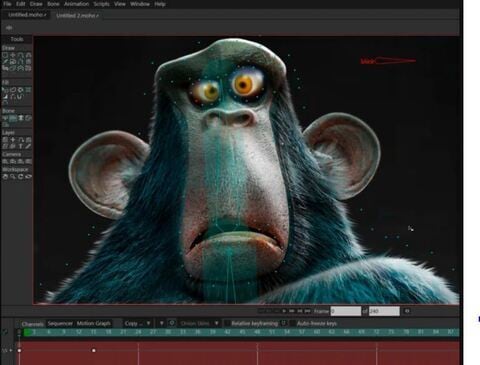
08FlipBook
Price: $19.99 (FlipBook Lite); $49.99 (FlipBook Studio); $149.99 (FlipBook Pro); $199.99 (FlipBook Pro HD)
Pros
Simple to draw
Easy to import from a scanner
Quick uploads
Cons
No free version
Challenging to make subtle changes
May not be user-friendly features
What are users saying?
“FlipBook does not contain a steep learning curve, and even first-time animators will be able to produce creative projects.”
Key Features
Modifications will be active while you draw the animation, so FlipBook is pretty quick
Easy to use the shift key to make speed painting
Ten animation layers for adding extra touches
Simple to use a scanner to import images

09Reallusion CrazyTalk Animator
Price: $199 (Pipeline); $99 (Pro)
Pros
Large library of appealing templates
Both for beginners and professionals
Easy to control characters
Cons
No drawing tools
A bit high learning curve
Hard to sync voice
What are users saying?
“This is a 2D animation maker online that makes sense. CTA makes sense in everything it does. One will find the tools exactly where they are supposed to be, and things work exactly the way one expects them to work.”
Key Features
Assists real-time facial expression with precise modification
Black magic to transform the image into a moving cartoon
You can make 2D visual effects for professionals
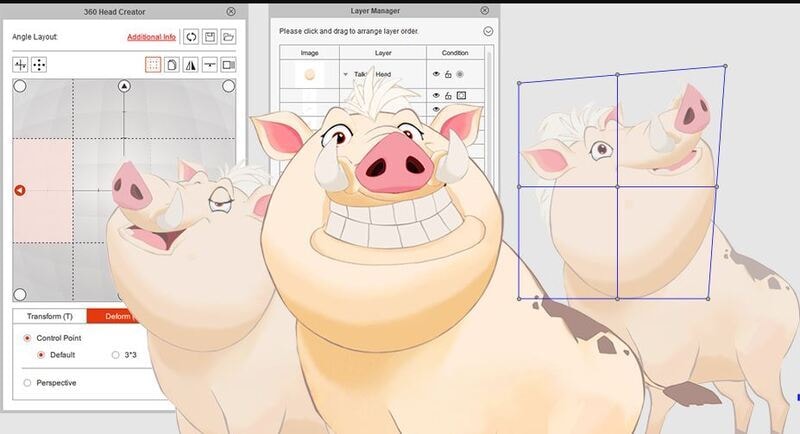
10Stop Motion Studio
Price: $59.99
Pros
Inbuilt sound editor
Easy to schedule
Not free
Cons
Certain hoops
No bone ringing tools or template designs
Only for 2D stop motion, 2D animation online
What are users saying?
“So I am in high school, Considering an animation class. Currently, we use this to make a claymation. I have noticed a few complexities with it. The camera does not aim well, which is a big hassle. It also Consists of a glitch where sometimes, if you hit the undo frame, it will delete all your other projects. When that happened to me, I was not happy. Now, this last part may just be nitpicking, but when I saw the official company’s animation, I saw their fingers in it, and the animation was not smooth.”
Key Features
Onionskin helps you to view previous frames via a transparent overlay
Audio recording and Chroma key and audio recording to better narrate and add voice effects
Simple
one-click upload to Facebook and YouTube
DSLR camera assistance for creating perfect 1080p recordings
11Harmony
Price: $25.50/month (Harmony Essentials); $64.50/month (Harmony Advanced); $117.50/month (Harmony Premium)
Pros
Lots of animation and drawing tools
Offers various color controls
Flexible 2D animation
Cons
Complicated to learn
High system requirements
Not free
What are users saying?
“I have created really powerful 2D animations with Harmony; it offers almost every tool to be precise and creative in the artworks and the advanced tools for paperless animations, which they helped me a lot.”
Key Features
Smooth lines
Stabilizer
It offers 3, 4, and 5-point guides for curved perspectives.
It helps create cut-out animation.
Easy integration with software available in the production pipeline.
It offers 2D or 3D integration.
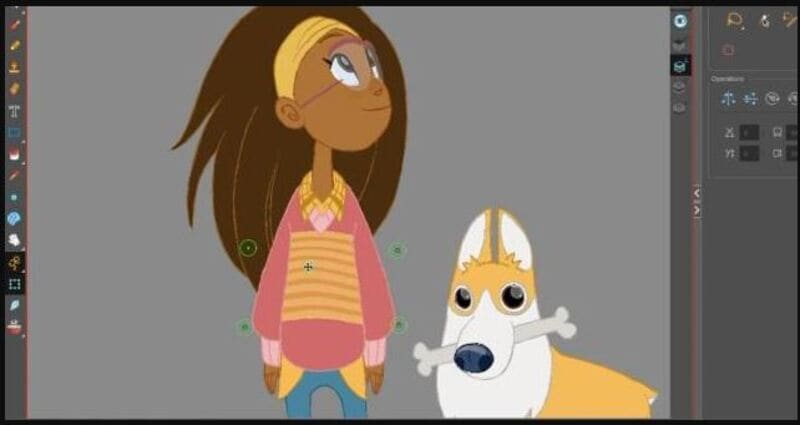
12Krita
Price: Free
Pros
Completely free
Easy to use
High compatibility
Cons
No dedicated support
Use only on desktop
Outdated UI
What are users saying?
“Krita helps me with my advertising videos as well as logos and other image editing use cases. I mainly use it to make thumbnails for my youtube channel and featured images for the articles on my website. I also use it to make some quick logos for my youtube channel and website.“
Key Features
This online 2D animation maker software allows you to add a stabilizer to the brush to smooth it.
Personalized brush with nine different brush engines.
Create comic panels with built-in vector drawing tools.
Create seamless patterns and textures by making image reference on the x and y-axis.
Import brush packs and texture from other artists.
You can flatten, combine, or order layers to organize your artwork.

13Animaker
Price: $10/mo (Basic); $19/mo (Starter); $49/mo (Pro); Custom Pricing (Enterprise)
Pros
Helpful app
Able to make beautiful videos
Tons of features
Cons
May not work on specific systems
Chunky UI
Time-Consuming
What are users saying?
“Firstly, it displays that you are limited to the materials that you can use. If you want it, you can go for its paid version, which I think is ideal for a company but still hard. Secondly, I am trying to execute a project for my science class, and so far, I’ve had three days to work on it.”
Key Features
Create animated videos in 6 unique video styles like 2D, handcraft, infographics, whiteboard, 2.5 D, and typography.
Beginners can create videos and use them as both animation and animated presentations.
Best free download 2D animation software has 200 sound effects to choose from.
It offers 100 background music tracks.
It helps you to record direct voice recordings.
Animaker allows the team to collaborate.
Export video in full HD quality.
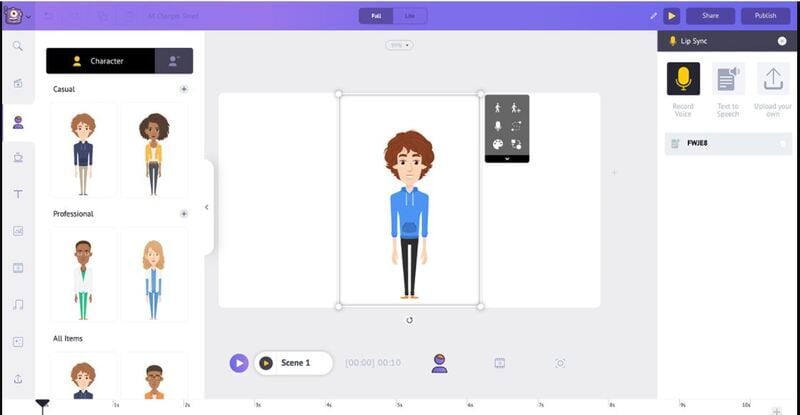
14SketchBook
Price: Free
Pros
Many options of pencils, brushes etc.
Various color options
Ideal for quick inspirations
Cons
It may be hard to enlarge projects
Lack of usability in some features
Some functions are confusing
What are users saying?
“Sketchbook has helped us in mobility. Since it is also available for tablets like iPad, it can be used to create quick artworks and concept arts and be used as a notebook to take notes. The different features also come in real handy, and the artwork created can be used to display professionally with a good amount of details.”
Key Features
It helps you draw basic shapes like circles, triangles, rectangles, etc.
Adjust the rules as per your desire.
Fill color into your artwork.
Also, import or export the layer as PSD.
15Animate CC
Price: $20.99/mo
Pros
Helpful user interface
Various essential modules
Extremely smooth
Cons
High battery utilization
Steep learning curve
Lack some tools for handling sound
What are users saying?
“We use Animate to make educational videos, but we also use some of the drawing tools to create vector-based illustrations, and we can export them out from Animate to use them in printed products.“
Key Features
Create new poses for vector images or figures.
It helps you to arrange your layers in a parent-child hierarchy.
● Automatically matches mouth poses to voice inflections.
● Easy to export 360 VR animations.
● Create ads directly with Animate.
● Export images with the correct resolution by bypassing the image optimization and using image settings.
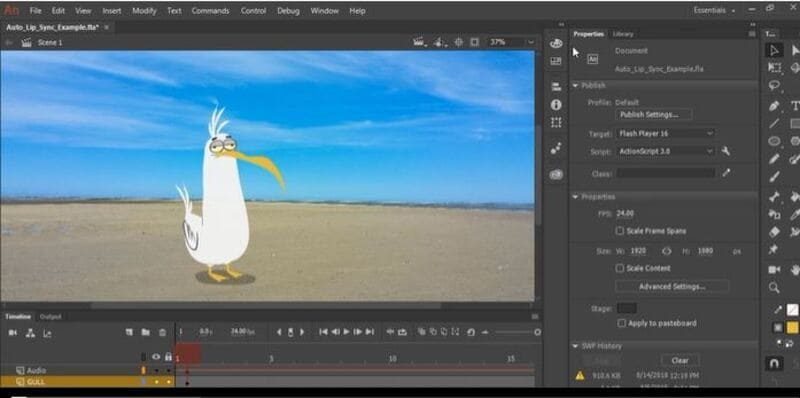
● Key Takeaways from This Episode →
● Using 2D animation software is simpler when you have the right software. You already have a storyboard and a script in mind, but now you can realize your vision in unique and intricate ways.
● So, if you want to make 3D animation, various 3D animation software options are also for you. If any of the products above will serve you well, you could use Filmora, which comes first in the series of 2D animation software.
When you are trying to create a funny cartoon, explainer videos, or other short informative content to post online, 2D animation software is a breeze to use.
With access to the best 2D animation software, you can create compelling and intricate stories that will help you sync with the audience.
01Wondershare Filmora
Price: Free, $99.99 (Perpetual); $59.99 (1-Year)
Pros
Numerous preset options
Both for beginners and professionals
Quick video trim/edits
Cons
Straightforward user interface
Lacks various shortcuts
May need high system requirements
What are users saying?
“I am solving the problem of getting an easy-to-use, all-in-one video editor. In addition, the editor gives you the ability to command over your audio files, whereas other editors just give you the basic audio editing capabilities. Lastly, the fully editable text effects and the vast numbers too.”
Key Features
Unlimited Video Tracks.
Audio Noise Reduction.
Automatic Audio Sync.
Motion Graphics animation support.
Auto color correction.
Available for Mac and Windows.
For Win 7 or later (64-bit)
For macOS 10.12 or later
02Opentoonz
Price: Free
Pros
Accessible plugin to automatically create animation effects
Unique Xsheets & Timelines features
Audio/Soundtrack Implementer
Cons
Somewhat Limited drawing capabilities
Intricate setup
A bit outdated UI design
What are users saying?
“Not a very self-explanatory 2D animation software. I had to look up some help, but it worked out in the end (youtube tutorials).”
Key Features
GTS scanning tool
Easy to modify picture styles
Add light and distortion effects
Works with black and white and colored scans
03Pencil 2D
Price: Free
Pros
Easy to use
Open sources
Supports multiple languages
Cons
It doesn’t support shape tools
Only for beginners
It doesn’t support 3D animation
What are users saying?
“The main thing against Pencil2d is the lack of complicated tools. Some tools are not there to bring better color effects, curves, drawing tools, etc. But honestly, this is not a big problem, the intention to be the most robust in the world but to be a tool that provides you a great introduction to animation with vector drawing.”
Key Features
Simplistic design to let you make animation easily
Raster and vector workflow switching
Cross-platform compatibility to free download
04Maefloresta/TupiTube
Price: Free
Pros
Great for beginners
Effective tools management
Friendly price plan
Cons
Differences in color correction
Certain confusing tools
Unable to erase unwanted frames
What are users saying?
“Honestly, I love the app, but I wish there were an eraser, but other than that, it is great for everything from experimental clips to my YT videos that will be coming out in a few months.”
Key Features
A free downloadable app that assists on tablets and smartphones
Simple software with tutorials
Interactive user interface that beginners can use with ease
05Synfig
Price: Free
Pros
Offers 50+ layers
Easy to use layout
Lots of technical tools and functions
Cons
Difficult layout
Hard learning curve
Only a few tutorials available
What are users saying?
“It is cumbersome. You will look for tutorials to understand it, even if you have the best 2D animation software Background. - Though, it’s not famous so you may not wander for information about it as easily. - You do need high PC requirements to operate it, it is heavy. - You have to Constantly save because there are a few operations that make it crash.”
Key Features
Compatible with multiple content layers
The bone system assists for the cutout animations creation from bitmap images
Consistent with sound support to allow for the addition and syncing of narration and music to the video
06CelAction 2D
Price: $1300 Studio Edition (Single License Use)
Pros
Fast to use
Low system requirements
Add-ons available
Cons
Less dynamic
Less in demand
Time-Consuming to learn
What are users saying?
**”**I found the software pretty responsive and may not be good for beginners. Being a beginner, I need easy-to-use free download 2D animation software with low learning, and it didn’t fit my needs entirely.”
Key Features
Quick and straightforward to use professionally
Features ergonomic controls
Simply manages complicated projects with different layers
Compatible with all modern Windows machines - 32 and 64-bit Also runs with Macs through Boot Camp
The multiplane camera helps you have more excellent controls
07Moho (Anime Studio) Pro
Price: $399 (Full Pack)
Pros
Regular updates available
Advanced features
Also good for beginners
Cons
Doesn’t automatically sync
Some functions are highly advanced
Lacks flexibility
What are users saying?
“I am freelance, and Moho12 has allowed me to give more character to animated characters that I can use for some clients. The compatibility that I get with Adobe Illustrator and the speed of the render makes it one of my central tools when it comes to working with character animations.”
Key Features
Improved freehand drawing tools
Beizer manages to make it simpler for you to design your videos
Brilliant warp feature assists in creating custom meshes to twist and bend your animations
Realistic motion blur
Best 2D Animation software for different layers at the same time
08FlipBook
Price: $19.99 (FlipBook Lite); $49.99 (FlipBook Studio); $149.99 (FlipBook Pro); $199.99 (FlipBook Pro HD)
Pros
Simple to draw
Easy to import from a scanner
Quick uploads
Cons
No free version
Challenging to make subtle changes
May not be user-friendly features
What are users saying?
“FlipBook does not contain a steep learning curve, and even first-time animators will be able to produce creative projects.”
Key Features
Modifications will be active while you draw the animation, so FlipBook is pretty quick
Easy to use the shift key to make speed painting
Ten animation layers for adding extra touches
Simple to use a scanner to import images
09Reallusion CrazyTalk Animator
Price: $199 (Pipeline); $99 (Pro)
Pros
Large library of appealing templates
Both for beginners and professionals
Easy to control characters
Cons
No drawing tools
A bit high learning curve
Hard to sync voice
What are users saying?
“This is a 2D animation maker online that makes sense. CTA makes sense in everything it does. One will find the tools exactly where they are supposed to be, and things work exactly the way one expects them to work.”
Key Features
Assists real-time facial expression with precise modification
Black magic to transform the image into a moving cartoon
You can make 2D visual effects for professionals
10Stop Motion Studio
Price: $59.99
Pros
Inbuilt sound editor
Easy to schedule
Not free
Cons
Certain hoops
No bone ringing tools or template designs
Only for 2D stop motion, 2D animation online
What are users saying?
“So I am in high school, Considering an animation class. Currently, we use this to make a claymation. I have noticed a few complexities with it. The camera does not aim well, which is a big hassle. It also Consists of a glitch where sometimes, if you hit the undo frame, it will delete all your other projects. When that happened to me, I was not happy. Now, this last part may just be nitpicking, but when I saw the official company’s animation, I saw their fingers in it, and the animation was not smooth.”
Key Features
Onionskin helps you to view previous frames via a transparent overlay
Audio recording and Chroma key and audio recording to better narrate and add voice effects
Simple
one-click upload to Facebook and YouTube
DSLR camera assistance for creating perfect 1080p recordings
11Harmony
Price: $25.50/month (Harmony Essentials); $64.50/month (Harmony Advanced); $117.50/month (Harmony Premium)
Pros
Lots of animation and drawing tools
Offers various color controls
Flexible 2D animation
Cons
Complicated to learn
High system requirements
Not free
What are users saying?
“I have created really powerful 2D animations with Harmony; it offers almost every tool to be precise and creative in the artworks and the advanced tools for paperless animations, which they helped me a lot.”
Key Features
Smooth lines
Stabilizer
It offers 3, 4, and 5-point guides for curved perspectives.
It helps create cut-out animation.
Easy integration with software available in the production pipeline.
It offers 2D or 3D integration.
12Krita
Price: Free
Pros
Completely free
Easy to use
High compatibility
Cons
No dedicated support
Use only on desktop
Outdated UI
What are users saying?
“Krita helps me with my advertising videos as well as logos and other image editing use cases. I mainly use it to make thumbnails for my youtube channel and featured images for the articles on my website. I also use it to make some quick logos for my youtube channel and website.“
Key Features
This online 2D animation maker software allows you to add a stabilizer to the brush to smooth it.
Personalized brush with nine different brush engines.
Create comic panels with built-in vector drawing tools.
Create seamless patterns and textures by making image reference on the x and y-axis.
Import brush packs and texture from other artists.
You can flatten, combine, or order layers to organize your artwork.
13Animaker
Price: $10/mo (Basic); $19/mo (Starter); $49/mo (Pro); Custom Pricing (Enterprise)
Pros
Helpful app
Able to make beautiful videos
Tons of features
Cons
May not work on specific systems
Chunky UI
Time-Consuming
What are users saying?
“Firstly, it displays that you are limited to the materials that you can use. If you want it, you can go for its paid version, which I think is ideal for a company but still hard. Secondly, I am trying to execute a project for my science class, and so far, I’ve had three days to work on it.”
Key Features
Create animated videos in 6 unique video styles like 2D, handcraft, infographics, whiteboard, 2.5 D, and typography.
Beginners can create videos and use them as both animation and animated presentations.
Best free download 2D animation software has 200 sound effects to choose from.
It offers 100 background music tracks.
It helps you to record direct voice recordings.
Animaker allows the team to collaborate.
Export video in full HD quality.
14SketchBook
Price: Free
Pros
Many options of pencils, brushes etc.
Various color options
Ideal for quick inspirations
Cons
It may be hard to enlarge projects
Lack of usability in some features
Some functions are confusing
What are users saying?
“Sketchbook has helped us in mobility. Since it is also available for tablets like iPad, it can be used to create quick artworks and concept arts and be used as a notebook to take notes. The different features also come in real handy, and the artwork created can be used to display professionally with a good amount of details.”
Key Features
It helps you draw basic shapes like circles, triangles, rectangles, etc.
Adjust the rules as per your desire.
Fill color into your artwork.
Also, import or export the layer as PSD.
15Animate CC
Price: $20.99/mo
Pros
Helpful user interface
Various essential modules
Extremely smooth
Cons
High battery utilization
Steep learning curve
Lack some tools for handling sound
What are users saying?
“We use Animate to make educational videos, but we also use some of the drawing tools to create vector-based illustrations, and we can export them out from Animate to use them in printed products.“
Key Features
Create new poses for vector images or figures.
It helps you to arrange your layers in a parent-child hierarchy.
● Automatically matches mouth poses to voice inflections.
● Easy to export 360 VR animations.
● Create ads directly with Animate.
● Export images with the correct resolution by bypassing the image optimization and using image settings.
● Key Takeaways from This Episode →
● Using 2D animation software is simpler when you have the right software. You already have a storyboard and a script in mind, but now you can realize your vision in unique and intricate ways.
● So, if you want to make 3D animation, various 3D animation software options are also for you. If any of the products above will serve you well, you could use Filmora, which comes first in the series of 2D animation software.
10 Awesome Moving Animation PowerPoint Techniques
10 Awesome Moving Animation PowerPoint Techniques
An easy yet powerful editor
Numerous effects to choose from
Detailed tutorials provided by the official channel
PowerPoints can be quite dull without anything to spice it up. So, this question is more than 100% warranted. Fortunately, we were able to pull together a tutorial on creating moving animation PowerPoint presentations.
Complete with some templates that you can start off with (if you’d prefer to make it as simple as possible for yourself.)
In this article
01 [6 Animated Powerpoint Templates with Interactive Features](#Part 1)
02 [How to Create a Moving Animation in Powerpoint](#Part 2)
03 [10 Moving Animation Powerpoint Techniques](#Part 3)
Part 1 6 Animated PowerPoint Templates with Interactive Features
The default people tend to-go-to when it comes to presentations are videos. As they tend to be more engaging on their own. For that, you’ll see people gravitating towards software like Filmora, which can create beautiful, eye-catching presentations that you can easily and quickly share. Not just to an immediate audience, but also on social media and the like.
However, of course, sometimes a personal touch is important in a presentation — important to have a ‘voice’ attached to the image on the screen. But just because this is the case, doesn’t mean that you shouldn’t go all out on your presentation. Hence, why moving animation PowerPoint templates are such a big deal:
01Company Presentation PowerPoint Template
For the first of the Moving Animation PowerPoint templates that we have to introduce, we chose the ‘Company Presentation PowerPoint Template.’ As you can perhaps guess from the name, it’s a very professional template. It comes with a total of 500 sample slides that you can choose from (50 of which are unique), and it’s set up with professional animations that can spice up your presentation without making it look gaudy or over-the-top.

02Move Animated PowerPoint Template
Next is the modern, minimalistic template called “Move Animated.” This one is a lot more versatile, with every single one of the 144 unique slides available suitably animated. The best part of it is definitely the easy way in which it can be used. With the modern, minimalistic style, it’s easy enough to remove the presets and replace them with suitable company or product images to promote your content, idea, or project.

0340 Animated Conceptual Slides for PowerPoint
Again, we have another modern and minimalistic kind of PowerPoint template with ‘40 Animated Conceptual Slides for PowerPoint.’ It comes with 40 modern slides, all of which come fully animated are easy enough to customize with your own branding or content.

04UNIGRAPH - Animated & Creative Template (PPTX)
For a bit more fun, our next template is “UNIGRAPH.” This still definitely fits the description ‘minimalistic’ but the pop of color and effects that it brings to the table gives it a different kind of vibe from all the others. No less professional, but certainly more fun. Of course, most importantly, perhaps, is the fact that each slide is smoothly animated.

05Graph & Charts PowerPoint Presentation
For this next one, we introduce a template set called “Graphs & Charts” for those who may want to present their products, projects, ideas, etc. in the shape of graphs and charts. It’s perfect for professionals, certainly. Especially with its clean look, brightened only by occasional pops of color that can be seen from the graphs and charts that it comes with.

06Laststyle - PowerPoint Template
This next PowerPoint template is most suited for businesses looking to promote their products. The creator of the template has provided five different colored versions of the template, each with 30 unique slides that were carefully sectioned with suitable animations.

Part 2 How to Create a Moving Animation in PowerPoint
Now we come to the point of the article where we speak directly to those who may want to experiment more by personally creating a moving animation PowerPoint. For this example, we’ll be teaching you how to create a path animation PowerPoint with the available tools that the software offers under ‘Animation.’ Stick around if you want to learn more.
01Step 1. Open Project.
First things first, of course. Start a new project. When you’ve started, move on to the Animation tab (which we’ve pointed out in the image below.)

02Step 2. Add Animation.
Then, make sure to select the object or model that you want to animate (in this case, we’ve inserted a 2D model of a businessman), and then click the ‘Add Animation’ button (shown in the image below.)

03Step 3. Choose Animation.
Under ‘Add Animation’ you’ll find several different options for animations that you can choose from. Of course, since our goal is to create a PowerPoint Motion Path Animation, we have selected one of the ‘Motion Path’ options.

04Step 4. Choose Motion Path Animation
In order to make motion animation in PowerPoint, you must select one of the offered ‘Motion Paths’ (i.e., Bounce, Line, Arcs, etc.) and then use the motion path tool that appears to control the direction you wish to make your character move.
In this example, we chose the ‘Lines’ motion path (1) and then used the line tool to create a path for our businessman model. To walk from the right side of the screen towards the left.

05Step 5. Adjust Animation.
With path animation PowerPoint complete, you can adjust as needed with the tools provided. For example, you can have the character start moving as soon as the slide opens, or wait until a minute has passed, you can extend the animation by changing duration, etc.

Part 3 10 Moving Animation PowerPoint Techniques
For this last step, we break down some important PowerPoint 3D Animation need-to-knows. Including the specifics provided by each of the options made available to you and why it’s important to explore every single one to create better and more professional-looking presentations.
01Transitions
When it comes to PowerPoint presentations, most people are no doubt the most familiar with ‘Transitions’ when talking in terms of adding animation into a presentation. This one decides whether you want to shift from one slide to another smoothly, or if you want the previous slide to break into splinters, or rotate into the next slide, and so on and so forth. It’s an ‘in-between’ animation that signals where one ends and the other begins.

02Animations
Now, for the ‘Animations’ tab, we focus on animations that occur in the slide (not in-between like transitions). This can include a wide array of things. Whether it be characters moving (like shown in the tutorial we provided), text boxes appearing and disappearing in short order, images bouncing into view in dramatic fashion, and so on and so forth. There’s lots of potential here.

03Animation - Start
We mentioned this previously in the tutorial, but PowerPoint (which does not offer the more advanced 3D customization options), does still give you the freedom to choose how you want certain animations to work.
In the case of the ‘Animations-Start’ option, the goal is to decide when an animation starts playing. Do you want it to start after a click? Or maybe you want it to start up immediately? Whatever the case may be, this function will let you choose the specifics.

044. Animation - Duration
Next, we decide how long you want the animation to last. For example, if you chose to add a PowerPoint 3D rotation animation into a character, how long do you want it to spin before it settles into place? Perhaps only a second? Perhaps more? Whatever you chose, this is the option that will let you finalize that.

05Animation - Delay
This one is self-explanatory as well. But suffice to say, the ‘Delay’ option is for deciding how much an animation is delayed before starting. For example, if you chose to start it ‘On Click’ you can increase the delay to keep it from playing immediately on click.

06Break Up Presentation into Sections
A lot of PowerPoint templates, you’ll find, are naturally broken into sections. This is because it is easier to consume it in that way. It’s also a good signal to your audience as to what point of the presentation you are on. Are you in the beginning? The middle? Near the end? Etc. In this case, the best option for showing it is transitions that separate the sections from one another.

07Add Animation - Entrance
As promised earlier, we’ll be going through each type of animation is available under the ‘Add Animation’ option. The first is “Entrance” animations. This one is pretty easy to guess. It makes up a variety of animations that serve as its entrance animation. Here are some examples:
● Appear: To have objects appear without any other effect.
● Fade: To have objects fade into view.
● Bounce: To have objects bounce into view.
● Swivel: To have objects swivel into view.

08Add Animation - Emphasis
This next animation style is to give emphasis to an already-present object. For example, at a click, you can have a text box ‘Pulse’ and become the center of attention. You can change ‘Object Color’ to make it stand out. And so on.

099. Add Animation - Exit
Opposite of the ‘Entrance’ animations are the ‘Exit’ animations. You’ll notice that the style of animations is the same here. The only difference is that the animations occur to exit the project out of the presentation. For example, an image exiting to reveal text. Or text flying out to be replaced with more text, etc.

10Add Animation - Motion Path
We’ve already mentioned the PowerPoint Motion Path animation style previously, but just to reiterate some things, this is the most customizable animation feature on PowerPoint. One that allows you to move objects across the slide in whatever way you wish. In our example, we created a motion path animation that took the character from the center of the screen to the left of the screen.

● Key Takeaways from This Episode →
● While videos are the most popular way to share information, there are some presentations that require a heavier guiding hand.
● In these situations, a PowerPoint presentation, carefully animated, can serve in place of an edited video.
● There are templates available that you can take advantage of if you’d prefer to start with something to work from. We introduced some in this article that we think were particularly notable.
● But, of course, more careful personalization is sometimes necessary. In that case, we hope that you find our tutorial and our list of PowerPoint techniques helpful.
PowerPoints can be quite dull without anything to spice it up. So, this question is more than 100% warranted. Fortunately, we were able to pull together a tutorial on creating moving animation PowerPoint presentations.
Complete with some templates that you can start off with (if you’d prefer to make it as simple as possible for yourself.)
In this article
01 [6 Animated Powerpoint Templates with Interactive Features](#Part 1)
02 [How to Create a Moving Animation in Powerpoint](#Part 2)
03 [10 Moving Animation Powerpoint Techniques](#Part 3)
Part 1 6 Animated PowerPoint Templates with Interactive Features
The default people tend to-go-to when it comes to presentations are videos. As they tend to be more engaging on their own. For that, you’ll see people gravitating towards software like Filmora, which can create beautiful, eye-catching presentations that you can easily and quickly share. Not just to an immediate audience, but also on social media and the like.
However, of course, sometimes a personal touch is important in a presentation — important to have a ‘voice’ attached to the image on the screen. But just because this is the case, doesn’t mean that you shouldn’t go all out on your presentation. Hence, why moving animation PowerPoint templates are such a big deal:
01Company Presentation PowerPoint Template
For the first of the Moving Animation PowerPoint templates that we have to introduce, we chose the ‘Company Presentation PowerPoint Template.’ As you can perhaps guess from the name, it’s a very professional template. It comes with a total of 500 sample slides that you can choose from (50 of which are unique), and it’s set up with professional animations that can spice up your presentation without making it look gaudy or over-the-top.
02Move Animated PowerPoint Template
Next is the modern, minimalistic template called “Move Animated.” This one is a lot more versatile, with every single one of the 144 unique slides available suitably animated. The best part of it is definitely the easy way in which it can be used. With the modern, minimalistic style, it’s easy enough to remove the presets and replace them with suitable company or product images to promote your content, idea, or project.
0340 Animated Conceptual Slides for PowerPoint
Again, we have another modern and minimalistic kind of PowerPoint template with ‘40 Animated Conceptual Slides for PowerPoint.’ It comes with 40 modern slides, all of which come fully animated are easy enough to customize with your own branding or content.
04UNIGRAPH - Animated & Creative Template (PPTX)
For a bit more fun, our next template is “UNIGRAPH.” This still definitely fits the description ‘minimalistic’ but the pop of color and effects that it brings to the table gives it a different kind of vibe from all the others. No less professional, but certainly more fun. Of course, most importantly, perhaps, is the fact that each slide is smoothly animated.
05Graph & Charts PowerPoint Presentation
For this next one, we introduce a template set called “Graphs & Charts” for those who may want to present their products, projects, ideas, etc. in the shape of graphs and charts. It’s perfect for professionals, certainly. Especially with its clean look, brightened only by occasional pops of color that can be seen from the graphs and charts that it comes with.
06Laststyle - PowerPoint Template
This next PowerPoint template is most suited for businesses looking to promote their products. The creator of the template has provided five different colored versions of the template, each with 30 unique slides that were carefully sectioned with suitable animations.
Part 2 How to Create a Moving Animation in PowerPoint
Now we come to the point of the article where we speak directly to those who may want to experiment more by personally creating a moving animation PowerPoint. For this example, we’ll be teaching you how to create a path animation PowerPoint with the available tools that the software offers under ‘Animation.’ Stick around if you want to learn more.
01Step 1. Open Project.
First things first, of course. Start a new project. When you’ve started, move on to the Animation tab (which we’ve pointed out in the image below.)
02Step 2. Add Animation.
Then, make sure to select the object or model that you want to animate (in this case, we’ve inserted a 2D model of a businessman), and then click the ‘Add Animation’ button (shown in the image below.)
03Step 3. Choose Animation.
Under ‘Add Animation’ you’ll find several different options for animations that you can choose from. Of course, since our goal is to create a PowerPoint Motion Path Animation, we have selected one of the ‘Motion Path’ options.
04Step 4. Choose Motion Path Animation
In order to make motion animation in PowerPoint, you must select one of the offered ‘Motion Paths’ (i.e., Bounce, Line, Arcs, etc.) and then use the motion path tool that appears to control the direction you wish to make your character move.
In this example, we chose the ‘Lines’ motion path (1) and then used the line tool to create a path for our businessman model. To walk from the right side of the screen towards the left.
05Step 5. Adjust Animation.
With path animation PowerPoint complete, you can adjust as needed with the tools provided. For example, you can have the character start moving as soon as the slide opens, or wait until a minute has passed, you can extend the animation by changing duration, etc.
Part 3 10 Moving Animation PowerPoint Techniques
For this last step, we break down some important PowerPoint 3D Animation need-to-knows. Including the specifics provided by each of the options made available to you and why it’s important to explore every single one to create better and more professional-looking presentations.
01Transitions
When it comes to PowerPoint presentations, most people are no doubt the most familiar with ‘Transitions’ when talking in terms of adding animation into a presentation. This one decides whether you want to shift from one slide to another smoothly, or if you want the previous slide to break into splinters, or rotate into the next slide, and so on and so forth. It’s an ‘in-between’ animation that signals where one ends and the other begins.
02Animations
Now, for the ‘Animations’ tab, we focus on animations that occur in the slide (not in-between like transitions). This can include a wide array of things. Whether it be characters moving (like shown in the tutorial we provided), text boxes appearing and disappearing in short order, images bouncing into view in dramatic fashion, and so on and so forth. There’s lots of potential here.
03Animation - Start
We mentioned this previously in the tutorial, but PowerPoint (which does not offer the more advanced 3D customization options), does still give you the freedom to choose how you want certain animations to work.
In the case of the ‘Animations-Start’ option, the goal is to decide when an animation starts playing. Do you want it to start after a click? Or maybe you want it to start up immediately? Whatever the case may be, this function will let you choose the specifics.
044. Animation - Duration
Next, we decide how long you want the animation to last. For example, if you chose to add a PowerPoint 3D rotation animation into a character, how long do you want it to spin before it settles into place? Perhaps only a second? Perhaps more? Whatever you chose, this is the option that will let you finalize that.
05Animation - Delay
This one is self-explanatory as well. But suffice to say, the ‘Delay’ option is for deciding how much an animation is delayed before starting. For example, if you chose to start it ‘On Click’ you can increase the delay to keep it from playing immediately on click.
06Break Up Presentation into Sections
A lot of PowerPoint templates, you’ll find, are naturally broken into sections. This is because it is easier to consume it in that way. It’s also a good signal to your audience as to what point of the presentation you are on. Are you in the beginning? The middle? Near the end? Etc. In this case, the best option for showing it is transitions that separate the sections from one another.
07Add Animation - Entrance
As promised earlier, we’ll be going through each type of animation is available under the ‘Add Animation’ option. The first is “Entrance” animations. This one is pretty easy to guess. It makes up a variety of animations that serve as its entrance animation. Here are some examples:
● Appear: To have objects appear without any other effect.
● Fade: To have objects fade into view.
● Bounce: To have objects bounce into view.
● Swivel: To have objects swivel into view.
08Add Animation - Emphasis
This next animation style is to give emphasis to an already-present object. For example, at a click, you can have a text box ‘Pulse’ and become the center of attention. You can change ‘Object Color’ to make it stand out. And so on.
099. Add Animation - Exit
Opposite of the ‘Entrance’ animations are the ‘Exit’ animations. You’ll notice that the style of animations is the same here. The only difference is that the animations occur to exit the project out of the presentation. For example, an image exiting to reveal text. Or text flying out to be replaced with more text, etc.
10Add Animation - Motion Path
We’ve already mentioned the PowerPoint Motion Path animation style previously, but just to reiterate some things, this is the most customizable animation feature on PowerPoint. One that allows you to move objects across the slide in whatever way you wish. In our example, we created a motion path animation that took the character from the center of the screen to the left of the screen.
● Key Takeaways from This Episode →
● While videos are the most popular way to share information, there are some presentations that require a heavier guiding hand.
● In these situations, a PowerPoint presentation, carefully animated, can serve in place of an edited video.
● There are templates available that you can take advantage of if you’d prefer to start with something to work from. We introduced some in this article that we think were particularly notable.
● But, of course, more careful personalization is sometimes necessary. In that case, we hope that you find our tutorial and our list of PowerPoint techniques helpful.
Ways to Make Sure You Get the Most up to Date Cartoon Character Design Tips
Ways to Make Sure You Get the Most up to Date Cartoon Character Design Tips
An easy yet powerful editor
Numerous effects to choose from
Detailed tutorials provided by the official channel
Making an overall excellent and unique character design cartoon art style is sometimes hard. The truth is that everyone has a favorite cartoon character, but the question is, how does this character come to life? While you are about to start copying other well-known cartoon or comic characters, you will eventually branch out and come with your own. In addition, there are several ways to come up with ideas for cartoon characters’ concept art to draw. Any of these ways can get you started on populating your world of cartoons.
More so, the process of tackling your character design is often full of hurdles. This process requires a lot of creative thinking to create one’s character from the beginning, although many well-known characters from films, advertising, and cartoons look straightforward. But need to exert a vast amount of skill and effort to make them effective.
In this article
01 [10 Tips for Brilliant Cartoon Character Design](#Part 1)
02 [How to Apply Cartoon Character Design to Filmora Video Editing?](#Part 2)
Part 1 Tips for Brilliant Cartoon Character Design
As a cartoon character designer, here are 10 tips you need to put in place to make a brilliant cartoon character design. They are;
● Do not lose the magic
Make sure you try not to polish all the charm from your characters. Many character designers usually begin their project with a sketch and agree that this is often where the essence of the character gets captured. Therefore, when you start working up a design, make sure you do not lose that magic.
The first thing is to decide what you are trying to communicate and then create loose sketches with flow, acting, and movement. As soon as you tighten up the drawing, some of the dynamics will automatically loosen, so it is crucial to have as much life in the early stages as possible. In addition, movement is all but impossible to add later. Thus, you need to ensure that it is in the initial sketch.
● Avoid reference material
Although inspiration needs to come from somewhere, the aim is to create something original, and you shouldn’t have the reference material right in front of you as you work.
Also, if you take a look at something and when you try and hazily remember it in your mind, that is when you can end up making something new, rather than making a pastiche of something.
● Make research on other characters
For guidance purposes, it can be much help when you try to deconstruct why certain character designs work and why some do not work. Also, there is no shortage of research material to be found, as illustrated characters are appearing everywhere like stickers on fruit, TV commercials, shop signs, cereal boxes, animations on mobile phones, etc. Make sure you study these character designs and think about what makes some successful and the particular thing you like about them.
● Also, take a look elsewhere
It is also a great idea to look beyond some character designs when hunting for inspiration because most times, when you begin a project, you might start with the feeling to evoke. The process usually starts with the designer taking a video of himself as a reference and capturing something of the character’s posture or idea’s movement.
● Try not to lose sight of the original idea
It is elementary to allow your favorite designs to influence you subconsciously. Sometimes when you look back at your initial artworks, it will bring back the feeling you had when you were creating them, and the project you are trying to develop will shift back on track.
● Exaggerate
When you exaggerate the defining features of your character design, it will help it appear larger than real life. Also, exaggerated features help viewers identify the characters’ essential qualities. Exaggeration is key in cartoon caricatures and also helps emphasize certain personality traits. In addition, if your character is strong, try not to give it normal-sized bulging arms, but soup them up so that they are five times as big as they should be. Note that the technique of exaggeration can also apply to characteristics.
● Decide the aim of your character design
When creating a character design, consider your audience as character designs mainly aim at young children, typically designed around bright colors and basic shapes. Also, commissioned character designs are no less creative but are usually more restrictive. Most clients usually have specific needs but want you to do your ‘thing.’ Usually, you need to break down the core features and personality. For example, if the eyes are essential, you will focus the whole design around the face, making this the key element that stands out.
● Make your character distinctive
Whether you are creating a monkey, monster, or robot, you can guarantee that there will be a hundred other similar creations out there. Therefore, your character design is required to be exciting and robust in a visual sense to captivate people’s attention.
● Create clear silhouettes
A silhouette is required to help you understand the character’s gesture which is another good way to differentiate your character and improve its pose. This lets you see how the character ‘reads’ and requires you to make the gesture clearer. It answers the question of; can things be simplified? Do you have a basic understanding of character, emotions, and how the line of action works? In addition, try not to overlap everything and keep the limbs separately.
● Consider line quality
Finally, curved and straight curved lines read by your eyes are at different speeds. The lines drawn are from which your character design is composed can go some way to describing it. Soft, thick, round, and even lines may suggest acute and approachable character, whereas sharp, uneven, scratchy lines may indicate an erratic and uneasy character.
Part 3 How to Apply Cartoon Character Design to Filmora Video Editing?
You can cartoon your character background design in your Video Editing turn a video into a cartoon depending on your device. If you are working on your mobile phone, then you can convert any number of your social media accounts that include film or photos to some degree. The detail or performance level will not be great most of the time.
But if you wish to do it professionally using your PC, then the best video to the cartoon software program for both Windows and Mac is Filmora. Filmora is the best software to convert video to a Cartoon background easily. It will enable you the requisite tools that will act as the right approach to create cartoon characters with appropriate locations and video.
The Wondershare Filmora Video Editor professional video editing software allows you to turn your videos into cartoons easily. The process by which videos get converted into cartoon style on Filmora is straightforward.
Step 1: Import the videos into Filmora
From the official website of Filmora, you will get the link to download, install and launch. Then from the main interface, import your video to it.
Step 2: Add the Cartoon effect under Stylize
You can add different effects or use the Stylize animation effects to your cartoon character.
Step 3: Adjust the cartoon settings and do some basic color corrections to perfect the cartoon result.
Go through different settings to provide the exemplary cartoon character, its background, and full-fledged video edited with Filmora.
For Win 7 or later (64-bit)
For macOS 10.12 or later
● Ending Thoughts →
● This article explained all you require to get the most up-to-date cartoon character design tips. A section of the report gave a list of the information you need to put in place to achieve this. Another area recommended the best video to cartoon editing tools used by cartoon character designers to get the most out of their character design.
● Also, Filmora acts as the right tool to cover up all the necessary editing you might need to create your cartoon character with related background and artistic pieces of equipment.
Best 15 Anime Fonts-Find Your Favorite One
Best 15 Anime Fonts-Find Your Favorite One

Shanoon Cox
Mar 27, 2024• Proven solutions
Anime is basically a fancy name for Japanese cartoons and is a trending genre for a long time. The popularity of these anime series has led fans to create characteristic font styles based on the logo or title of these series. A font such as this is commonly regarded as an anime font.
Since the anime font has a very distinct typeface and usually represents a theme, it is now widely used in video making, titles, posters, and also in games. The anime font can depict fun or thrill depending on which one you choose.
In this article, we have listed the best anime fonts of all time.
- Best 15 Anime Fonts You Can Choose
- Bonus Tip-Add Subtitle to an Anime Movie with Wondershare Filmora
Best 15 Anime Fonts You Can Choose
As anime is a trendy genre and you are likely to find a huge variety of anime font online. However, some of these fonts, based on the best-selling anime series, are sought after more than others. Therefore, we have rounded the ultimate anime font list for your ease.
1. Naruto Font
As we all know the popular Japanese Manga series Naruto, this anime font is based on the logo of that series. It is a very simple brush stroke anime font but is designed very artistically. This free anime font is perfect for adding elegant yet animated fonts to various kinds of videos or content.
2. Anime Ace Font
Anime Ace is a free anime font that is part of Blambot’s Dialogue Collection by Nate Piekos. It is a cartoonish font that is perfect for use in comic books. This is designed to be used as the font for the character’s speech bubbles. Using this anime font can give a very comic-esque vibe to your creations, making them very attractive.
3. Death Note Font
The famous thrilling action series Death Note has a very characteristic font used. This has come to be known as the Death Note Font. As its origin is from a thriller series, this anime font is best for complementing horror and scary themes. An anime font like this one has a hair-rising and dramatic appeal to it.
4. Evangelion Font
Another famed television series released back in the 90s, Neon Genesis Evangelion, has been trending, and so is the anime font used in its titles. This bold and tightly packed anime font is very conventional and artistic. It can be used to complement some serious themes with a stylish anime font like this one. This anime font also gives a dramatic outlook and hence can be used for engaging titles.
5. Sailor Moon Font
Sailor Moon is a best-selling Manga series, and its distinctive fonts are also quite loved. There are total 3 fonts used in this series. The unique feature of these fonts is that they are all very stylish with a visually attractive appeal. This particular anime font is thus best suited for brand titles, posters, shopping bags, etc. As a free anime font, you can use it for various purposes, including utilizing it for making beautiful invitation cards.
6. Haikyuu Font
This anime font from the sports-based Manga series resembles Japanese calligraphy. It has a dramatic vibe that is well-suited for short titles for serious shows and content. You can also use this free anime font to give your content a striking introduction. Plus, this anime font is available as Regular as well Shadowed. So, you can choose the style that best fits the theme of your content.
7. Danganronpa font
A captivating anime font is featured in the Japanese video game, Danganronpa. This anime font has gained popularity as it is stylishly distinct with a thriller vibe linked to it. Since it is a free anime font and is easily available, it can help you craft very engaging and stunning content. It will serve to give your content a unique touch as this anime font has a very characteristic style.
8. My Hero Academia Font
My Hero Academia is a highly acclaimed superhero Manga series, and its font has also been used extensively. It presents a very attractive anime font that can be utilized in banners and posters since it has a very clean and simple typeface. This anime font is also well-suited for use in logos.
9. Pet Fonts
As the name suggests, this anime font is based on different animals. Cats, dogs, bunnies, and many other animals are used creatively as fonts. Using this cute and creative anime font gives a very crafty and artful effect to the content it is utilized in. So, Pets font is great to create a light-hearted and cartoonish outlook.
10. Otaku Rant Anime Font Family
The Otaku Rant Anime Font Family consists of 3 types i.e., Regular, Italic, and Bold. All these comic fonts are very simple yet elegant. This anime font family can be perfectly used for designing posters and covers, owing to its stylish appeal. Thus, it is a great anime font for making interesting content that wows the viewers.

11. Squealer Anime Font
The Squealer Anime Font is very artistic. It has a gothic calligraphic appeal to it. This unique and riveting anime font can be employed in designing posters to impress the audience. As this free anime font is very stylish, it can also be used commercially in crafting cards or posters.

12. Porky’s Font Comic Font
As the name suggests, this anime font is based on the 1980’s Classic movie ‘Porky.’ It presents a very fancy and artistic style. Therefore, it is widely used for blogs or fashion magazines, giving an attractive outlook. It is a fusion of ancient and conventional typography. This free anime font can help you give a beautiful look to your content.

13. Anime Inept
Anime Inept gives the look of a handwritten font, which makes the text more personalized. Since this anime font gives a distinct look, it makes any text stand out of the ordinary. Given the simplicity of this font, it is an excellent choice for comic texts or titles.
14. Pokemon Anime Font
We all know the world-famous Pokemon that has been a popular game and animated series. Its even catchier anime font has also been extensively used for various purposes. Since the Pokemon anime font has a clear and fun typeface, it is perfect for creating attractive stickers, advertisements, and similar titles.
15. Saiyan Sans Anime Font
Dragon Ball Z or Saiyan Sans is a fan-favorite anime series. This anime font is based on the fancy logo used in the Dragon Ball Z title. It is a very catchy and curvy anime font that adds a stylish appeal to the text. Owing to its fancy style, it is also suitable for use as overlay text on an image.
Bonus Tip-Add Subtitle to an Anime Movie with Wondershare Filmora
Wondershare Filmora is a very intuitive and easy-to-use video editor. It has powerful one-click tools to enable users to craft professional-grade videos effortlessly. In Filmora, you will find a wide array of catchy text templates that can be customized and animated to add further effects.


Here is a guide to add anime font to your videos using Filmora.
1. Download and install Filmora on your PC. To import your anime video, go to File and select Import Media Files or drag and drop it to Filmora.
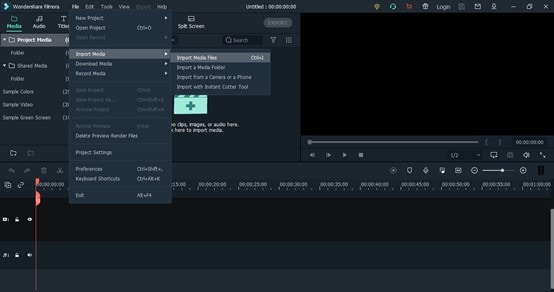
2. After importing, drag and drop the video to the timeline.
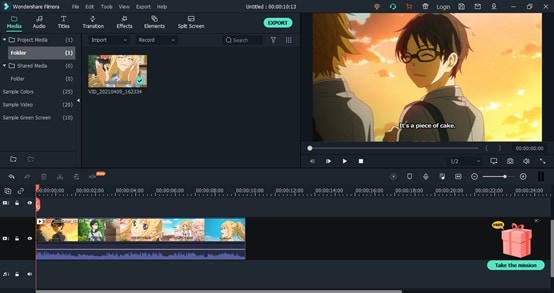
3. In the Titles tab, you can find a variety of text templates from different categories like Openers, Subtitles, Titles, etc. Double-click a title to it to the timeline. Drag and adjust the duration of the text. Double-click on the title in the timeline to customize it.
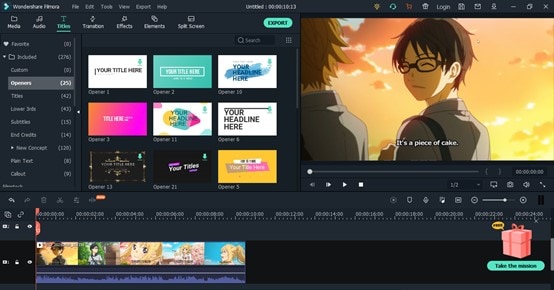
4. Here you can adjust the size, position, font, and other aspects of the text. Use the scale to change the size of the text.
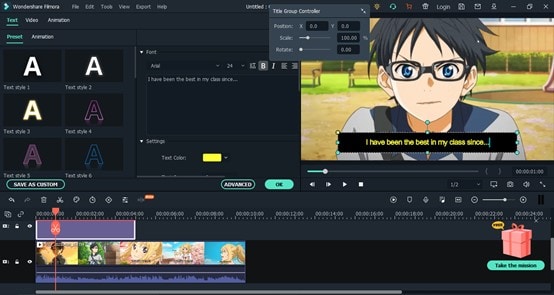
5. In the Animation tab, you can also add a special effect to the text, making it catchy and dynamic. Just double-click the animation to add it.
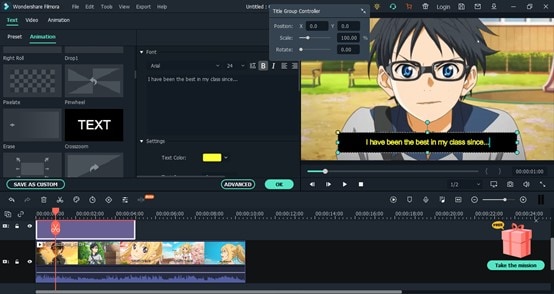
6. Click on Export. Select the resolution and export it to your device or share it to social media.

Conclusion
Now, you have the best 15 anime font list to help you craft exciting videos. Whether you wish to create a stylish fashion video with an elegant anime font, or a short horror clip with anime font from Death Note, you will find a free anime font for every theme here.
Since fonts play a significant role in any content, they must be chosen with care. So, give our list a read and find out which anime font complements your video the best. Don’t forget to try and add anime font subtitles to your video using the Filmora video editor.
Good luck!
Shanoon Cox
Shanoon Cox is a writer and a lover of all things video.
Follow @Shanoon Cox
Shanoon Cox
Mar 27, 2024• Proven solutions
Anime is basically a fancy name for Japanese cartoons and is a trending genre for a long time. The popularity of these anime series has led fans to create characteristic font styles based on the logo or title of these series. A font such as this is commonly regarded as an anime font.
Since the anime font has a very distinct typeface and usually represents a theme, it is now widely used in video making, titles, posters, and also in games. The anime font can depict fun or thrill depending on which one you choose.
In this article, we have listed the best anime fonts of all time.
- Best 15 Anime Fonts You Can Choose
- Bonus Tip-Add Subtitle to an Anime Movie with Wondershare Filmora
Best 15 Anime Fonts You Can Choose
As anime is a trendy genre and you are likely to find a huge variety of anime font online. However, some of these fonts, based on the best-selling anime series, are sought after more than others. Therefore, we have rounded the ultimate anime font list for your ease.
1. Naruto Font
As we all know the popular Japanese Manga series Naruto, this anime font is based on the logo of that series. It is a very simple brush stroke anime font but is designed very artistically. This free anime font is perfect for adding elegant yet animated fonts to various kinds of videos or content.
2. Anime Ace Font
Anime Ace is a free anime font that is part of Blambot’s Dialogue Collection by Nate Piekos. It is a cartoonish font that is perfect for use in comic books. This is designed to be used as the font for the character’s speech bubbles. Using this anime font can give a very comic-esque vibe to your creations, making them very attractive.
3. Death Note Font
The famous thrilling action series Death Note has a very characteristic font used. This has come to be known as the Death Note Font. As its origin is from a thriller series, this anime font is best for complementing horror and scary themes. An anime font like this one has a hair-rising and dramatic appeal to it.
4. Evangelion Font
Another famed television series released back in the 90s, Neon Genesis Evangelion, has been trending, and so is the anime font used in its titles. This bold and tightly packed anime font is very conventional and artistic. It can be used to complement some serious themes with a stylish anime font like this one. This anime font also gives a dramatic outlook and hence can be used for engaging titles.
5. Sailor Moon Font
Sailor Moon is a best-selling Manga series, and its distinctive fonts are also quite loved. There are total 3 fonts used in this series. The unique feature of these fonts is that they are all very stylish with a visually attractive appeal. This particular anime font is thus best suited for brand titles, posters, shopping bags, etc. As a free anime font, you can use it for various purposes, including utilizing it for making beautiful invitation cards.
6. Haikyuu Font
This anime font from the sports-based Manga series resembles Japanese calligraphy. It has a dramatic vibe that is well-suited for short titles for serious shows and content. You can also use this free anime font to give your content a striking introduction. Plus, this anime font is available as Regular as well Shadowed. So, you can choose the style that best fits the theme of your content.
7. Danganronpa font
A captivating anime font is featured in the Japanese video game, Danganronpa. This anime font has gained popularity as it is stylishly distinct with a thriller vibe linked to it. Since it is a free anime font and is easily available, it can help you craft very engaging and stunning content. It will serve to give your content a unique touch as this anime font has a very characteristic style.
8. My Hero Academia Font
My Hero Academia is a highly acclaimed superhero Manga series, and its font has also been used extensively. It presents a very attractive anime font that can be utilized in banners and posters since it has a very clean and simple typeface. This anime font is also well-suited for use in logos.
9. Pet Fonts
As the name suggests, this anime font is based on different animals. Cats, dogs, bunnies, and many other animals are used creatively as fonts. Using this cute and creative anime font gives a very crafty and artful effect to the content it is utilized in. So, Pets font is great to create a light-hearted and cartoonish outlook.
10. Otaku Rant Anime Font Family
The Otaku Rant Anime Font Family consists of 3 types i.e., Regular, Italic, and Bold. All these comic fonts are very simple yet elegant. This anime font family can be perfectly used for designing posters and covers, owing to its stylish appeal. Thus, it is a great anime font for making interesting content that wows the viewers.
11. Squealer Anime Font
The Squealer Anime Font is very artistic. It has a gothic calligraphic appeal to it. This unique and riveting anime font can be employed in designing posters to impress the audience. As this free anime font is very stylish, it can also be used commercially in crafting cards or posters.
12. Porky’s Font Comic Font
As the name suggests, this anime font is based on the 1980’s Classic movie ‘Porky.’ It presents a very fancy and artistic style. Therefore, it is widely used for blogs or fashion magazines, giving an attractive outlook. It is a fusion of ancient and conventional typography. This free anime font can help you give a beautiful look to your content.
13. Anime Inept
Anime Inept gives the look of a handwritten font, which makes the text more personalized. Since this anime font gives a distinct look, it makes any text stand out of the ordinary. Given the simplicity of this font, it is an excellent choice for comic texts or titles.
14. Pokemon Anime Font
We all know the world-famous Pokemon that has been a popular game and animated series. Its even catchier anime font has also been extensively used for various purposes. Since the Pokemon anime font has a clear and fun typeface, it is perfect for creating attractive stickers, advertisements, and similar titles.
15. Saiyan Sans Anime Font
Dragon Ball Z or Saiyan Sans is a fan-favorite anime series. This anime font is based on the fancy logo used in the Dragon Ball Z title. It is a very catchy and curvy anime font that adds a stylish appeal to the text. Owing to its fancy style, it is also suitable for use as overlay text on an image.
Bonus Tip-Add Subtitle to an Anime Movie with Wondershare Filmora
Wondershare Filmora is a very intuitive and easy-to-use video editor. It has powerful one-click tools to enable users to craft professional-grade videos effortlessly. In Filmora, you will find a wide array of catchy text templates that can be customized and animated to add further effects.
Here is a guide to add anime font to your videos using Filmora.
1. Download and install Filmora on your PC. To import your anime video, go to File and select Import Media Files or drag and drop it to Filmora.
2. After importing, drag and drop the video to the timeline.
3. In the Titles tab, you can find a variety of text templates from different categories like Openers, Subtitles, Titles, etc. Double-click a title to it to the timeline. Drag and adjust the duration of the text. Double-click on the title in the timeline to customize it.
4. Here you can adjust the size, position, font, and other aspects of the text. Use the scale to change the size of the text.
5. In the Animation tab, you can also add a special effect to the text, making it catchy and dynamic. Just double-click the animation to add it.
6. Click on Export. Select the resolution and export it to your device or share it to social media.
Conclusion
Now, you have the best 15 anime font list to help you craft exciting videos. Whether you wish to create a stylish fashion video with an elegant anime font, or a short horror clip with anime font from Death Note, you will find a free anime font for every theme here.
Since fonts play a significant role in any content, they must be chosen with care. So, give our list a read and find out which anime font complements your video the best. Don’t forget to try and add anime font subtitles to your video using the Filmora video editor.
Good luck!
Shanoon Cox
Shanoon Cox is a writer and a lover of all things video.
Follow @Shanoon Cox
Also read:
- How to Make GIF Stickers for WhatsApp 100 The Easy Way for 2024
- Best GIF Maker Software for Windows and Mac for 2024
- New In 2024, Tutorial on Making Unity 2D Animation
- New In 2024, Top 12 Video to GIF Converters High Quality to Check Out
- Updated Top 10 Websites to Download Anime Subtitles for Free
- New 2024 Approved Pencil2D Animation Tutorial Overview
- New 2024 Approved A Beginners Guide to Explain What 3D Animation Is
- 2024 Approved Popular Female & Male Disney Cartoon Characters
- Updated 2024 Approved Great Guide for Beginners on 2D Animation Making
- Updated Top 3 Ways to Create Gif Images with Great 3D Gif Maker
- In 2024, Best 15 Female Anime Characters-Who Is Your Favorite?
- Updated How to Insert a GIF Into Powerpoint for 2024
- A Beginners Guide for Learning 3D Animation
- 2024 Approved Make Creative Animation Videos
- 2024 Approved 5 Must Try Ways to Add and Send GIF in Text Message on Android
- New What Wikipedia Cant Tell You About the 10 Batman Cartoons
- 2024 Approved DP Animation Maker Tutorial for Finding The Best Animated Profile Picture Maker
- Updated Create Animated Video on Canva
- Convert Animated GIF From Video
- New In 2024, Tips for Animated Collage Maker
- New 10 Popular Cartoon Characters That You Wont Want to Miss for 2024
- New 12 Aesthetic GIF Instagram for Marketers and Creatives
- Updated Top 10 Best Photo to Animation Converters
- Tips for GIF to Animated PNG You Should Know
- Top 8 Anime Name Generators Online-Get Cool Anime Names for 2024
- New In 2024, 18 Best Tools and Services to Create Animated Videos for Your Business
- New Best 15 Greatest Claymation Movies of All Time
- New 2024 Approved Whats Your No. 1 Maker to Animate Your Logo Online Free
- How to Create Benime Whiteboard Animation on Android
- Ways to Get the Most up to Date Cartoon Character Design Tips for 2024
- 2024 Approved Little Known Techniques of Motion Graphics in Premiere Pro
- Updated Techniques for Creating Animated Logo That Few People Know About
- Updated Simple Guide to Create New and Exciting Blackboard Animation for 2024
- New In 2024, In-Depth Study of Cartoon Painting Starts
- iCloud Unlocker Download Unlock iCloud Lock for your iPhone 15 Plus
- Bricked Your Samsung Galaxy S23 Ultra? Heres A Full Solution | Dr.fone
- iPogo will be the new iSpoofer On Tecno Pova 6 Pro 5G? | Dr.fone
- In 2024, Top IMEI Unlokers for Your Motorola Razr 40 Phone
- How to Bypass Google FRP Lock on Tecno Spark 20 Pro Devices
- In 2024, Mastering Lock Screen Settings How to Enable and Disable on Infinix Note 30 VIP
- In 2024, Effective Ways To Fix Checkra1n Error 31 From iPhone 15 Pro Max
- In 2024, Top 4 Ways to Trace Vivo Y78+ Location | Dr.fone
- Android Call History Recovery - recover deleted call logs from Infinix Smart 8 Pro
- Full Guide to Hard Reset Your Oppo Reno 10 Pro+ 5G | Dr.fone
- How to Perform Hard Reset on Poco F5 Pro 5G? | Dr.fone
- How to Change Location on TikTok to See More Content On your Realme GT 5 | Dr.fone
- How to Unlock Apple iPhone 7 with a Mask On
- Top 10 Solutions for Movie Subtitle Translation Making Things Perfect for 2024
- 3 Effective Ways to Bypass Activation Lock on iPhone SE
- Can Life360 Track You When Your Oppo Reno 10 Pro 5G is off? | Dr.fone
- Top 4 Android System Repair Software for Asus ROG Phone 7 Ultimate Bricked Devices | Dr.fone
- 3 Things You Must Know about Fake Snapchat Location On Samsung Galaxy XCover 7 | Dr.fone
- Top 4 Ways to Trace Vivo X Fold 2 Location | Dr.fone
- How to Mirror Realme 11 Pro to Mac? | Dr.fone
- In 2024, How Can You Transfer Files From Infinix Zero 30 5G To iPhone 15/14/13? | Dr.fone
- In 2024, How to Unlock a Network Locked Realme 10T 5G Phone?
- Bricked Your Samsung Galaxy S23+? Heres A Full Solution | Dr.fone
- Unlock iPhone 14 Pro without Passcode or Face ID
- Camon 20 Music Recovery - Recover Deleted Music from Camon 20
- In 2024, How to Bypass Google FRP Lock on Tecno Camon 20 Premier 5G Devices
- In 2024, iPhone Is Disabled? Here Is The Way To Unlock Disabled iPhone 12 mini
- How to restore wiped videos on Galaxy M54 5G
- Reset iTunes Backup Password Of Apple iPhone 12 Pro Prevention & Solution
- In 2024, How Do You Remove Restricted Mode on Apple iPhone 12 Pro
- Title: Learn All About Lip-Syncing in Animation for 2024
- Author: Elon
- Created at : 2024-05-19 03:04:56
- Updated at : 2024-05-20 03:04:56
- Link: https://animation-videos.techidaily.com/learn-all-about-lip-syncing-in-animation-for-2024/
- License: This work is licensed under CC BY-NC-SA 4.0.
